Behavioral Optometrist/Developmental Optometrist

behavioral optometrist or developmental optometrist

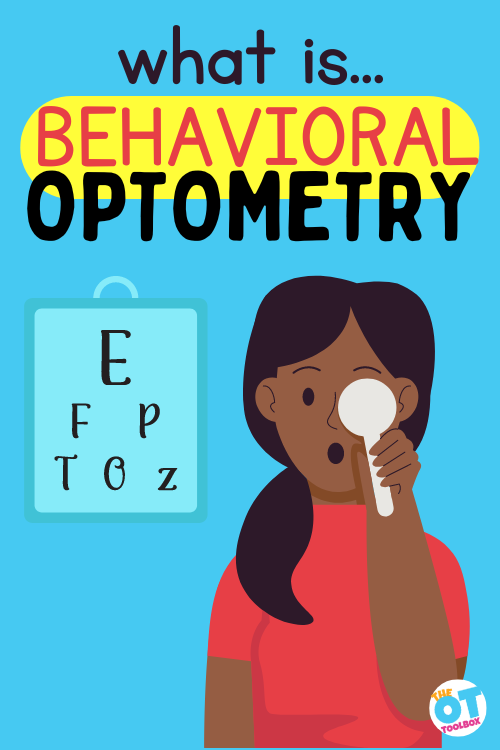
Do you ever refer your clients to a behavioral optometrist for an evaluation or vision therapy?  This post will explore what a behavioral optometrist, otherwise known as a developmental optometrist. We’ll also cover when individuals see behavioral or developmental optometry, and what the role of the occupational therapist in vision therapy is in working with this type of eye specialist.

behavioral optometrist or developmental optometrist

What is a Behavioral Optometrist?

A behavioral optometrist can also be called a developmental optometrist, or a functional optometrist.

Behavioral Optometry is a  growing subspecialty of optometry that uses vision therapy to go beyond the usual concerns of vision care. Strong vision is much more than being able to see 20/20.

Optometrists and ophthalmologists  provide eye exams that evaluate a patient’s overall eye health, visual acuity (20/20, 20/40 etc.), and the need for any corrective measures. They can diagnose various eye diseases, prescribe medication for treatment, and provide prescriptions for eyeglasses or contact lenses.  These tests don’t detect other visual disorders which can impact reading and learning, such as eye teaming (binocular vision), focusing, tracking and visual processing.

A behavioral optometrist uses a wide array of exams to study your vision. Many of the tests require you to answer verbally because they’re related to how you interpret your vision.  

Because of the connection between the brain and the eyes, behavioral optometrists do measure your sight, but also your brain’s response to what you see. 

Behavioral optometry acknowledges the brain’s connection to vision, and the impacts on behavior that poor vision can  have. 

They are concerned with how your eyes and visual system function, and are interested in how your behavior affects vision or how your vision influences your behavior. 

The behavioral optometrist, also known as a developmental optometrist, treats functional vision problems, including difficulties with binocular vision, eye movements and depth perception, as well as visual deficits following brain injuries. 

Developmental optometrists base their work on the principle that vision can be developed and improved, and done so by using prisms, lenses and vision therapy.

Behaviors Associated with Visual Difficulties

Behavioral optometrists notice the impact that poor vision is having on learning. They see the behavioral reactions, striving to uncover the reason and treatment.  They tackle getting the eyes and brain to work together. As a recent study noted, over 20 percent of children have vision problems that can impede their ability to reach their potential.

There are several maladaptive “behaviors”, or resulting actions, associated with visual difficulties:

  • Child gets frustrated with their vision
  • Maybe they struggle with sports and coordination, thus lose motivation to try
  • Your learner doesn’t like to work independently because it is more effective for them to rely on the vision of others
  • They have difficulty with visual tracking, often refusing to try and read
  • In writing/reading there are letter reversals, skipping words, 
  • They compensate for poor skills by using their finger to track words in a book
  • Tilt their head or lean very close to their work
  • Have difficulty with visual perception, especially finding objects and completing puzzles
  • Poor visual attention
  • Poor visual memory
  • Poor visual motor skills

Behavioral optometrists believe that these kinds of behaviors, as well as poor performance during visual tasks, are a sign of non-optimal visual skills.

Dr. Stanley Appelbaum, author of Eye Power: A Cutting-edge Report on Vision Therapy, studied the role of vision in children’s behavior. His unique approach to understanding the role of the eyes in learning involved “how eyes work together and move together and process information and store information and do something with the information.”

What do developmental optometrists work on

Developmental optometrists (behavioral optometrists) focus on specific areas of vision.  Some of the key vision skills include:

Many of these skills are targeted through vision therapy.

Vision therapy is a sequence of eye exercises that are used to improve the quality and visual efficiency. It is also called vision training. Vision therapy helps your eyes work more efficiently so that you can perform daily tasks, like reading and writing more efficiently.

Vision therapy is often carried out by optometrists, and vision therapists who work under the supervision of an optometrist.

When to Refer to a Behavioral Optometrist

As an occupational therapy practitioners, we see a host of vision and visual perceptual difficulties. 

It is always best to rule out visual acuity and vision difficulties either before beginning therapy interventions, or simultaneously. 

Imagine spending six months working on visual perception, eye hand coordination, and vision, only to find out your student can not see what is in front of them!

Below are some symptoms to watch for when considering referring to a specialist for an eye exam:

  • headache
  • eye strain/eye fatigue with close work (e.g. reading, writing, computer work)
  • fluctuating vision
  • blurry distance vision after prolonged close work
  • losing place while reading
  • re-reading lines and/or losing concentration when reading
  • words or letters seem to jump around

There is a big overlap between vision therapists, behavioral optometrists, and occupational therapists.  OT practitioners are trained to work on the 17 key vision skills outlined above.  It is within our scope of practice to address visual perception, visual tracking, eye movement, and visual motor skills.  

While OT practitioners can perform more basic visual exercises with children, only an optometrist experienced in vision therapy can prescribe therapeutic lenses, filters and prisms to significantly impact the functioning of their visual skills.

As a “seasoned therapist” I feel very comfortable addressing the key vision skills. I am quick to refer to an ophthalmologist or optometrist to rule out visual acuity differences, but dig through my OT Toolbox for a long while before jumping to a vision therapist or behavioral ophthalmologist. 

If after a few sessions I hit a roadblock, or my treatment strategies are not working, I will then consider reaching out to other specialties.  This is not a “rule” or “procedure”, but my own treatment strategy after 30 years of clinical practice. 

What is the Role of the Occupational Therapist in Vision Therapy

Occupational therapy practitioners can work in conjunction with vision therapists to provide a great team approach to learning.  

I have often incorporated the same exercises the vision therapists are using in my treatment sessions in order to have carryover of skills.  Members of the OT Toolbox can find all of the resources associated with vision and visual perception in one convenient location. Click here to sign up, or access this information.

Behavioral Optometry Exercises

As with any skill, practice makes things better. Your eyes require exercise like any other body part. The rest of the body gets a lot of work during the day, however the eyes are often open and staring ahead. 

It’s important to work on their flexibility and agility. This can be done with vision training exercises.

Here are some vision exercises that might be used by a developmental optometrist:

The 10-10-10 Rule

The 10-10-10 rule in behavioral vision therapy is a technique used to reduce eye strain and fatigue when performing near work activities, such as reading or using a computer.

The rule suggests that after every 10 minutes of near work, you take a 10-second break to look at an object 10 feet away. This technique helps to reduce the strain on the muscles responsible for focusing up close and can prevent the development of symptoms such as headaches, eye strain, and blurred vision.

By following the 10-10-10 rule, you give your eyes a chance to relax and adjust to a different distance, which can help to reduce the risk of developing vision problems associated with prolonged near work.

Eye-Finger Exercise

The eye finger exercise is a technique used in behavioral optometry to improve eye teaming skills, specifically convergence, which is the ability of the eyes to move inward to focus on near objects.

During the exercise, the patient holds a small object such as a pen or a pencil with both hands, positioning it between their eyes at arm’s length. The patient then slowly moves the object towards their nose, keeping their eyes fixed on it, until the object is about 5 cm away from their nose. They then move the object slowly back to arm’s length while still keeping their eyes focused on it.

This exercise helps to train the eye muscles responsible for convergence, which can improve eye teaming skills and reduce symptoms such as eye strain, headaches, and double vision.

Varying Focus Exercise

The varying focus exercise is a technique used in developmental optometry to improve the ability of the eyes to change focus, also known as accommodation.

During the exercise, the patient looks at a chart with different sized letters or shapes. The chart is placed at a distance that is comfortable for the patient. The patient then alternates their focus between two points on the chart, one closer and one farther away. This exercise can be done by gradually moving the chart closer or farther away, or by using lenses that change the focus of the chart.

The varying focus exercise helps to improve the flexibility and responsiveness of the eye’s focusing system, which can improve overall visual function.

Clock Face Exercise

The clock face exercise is a technique used in both behavioral and developmental optometry to improve eye movement skills, specifically saccades, which are quick, coordinated movements of the eyes from one point to another.

During the exercise, the patient is asked to imagine a clock face and to look at each number on the clock in a specific order, such as 12-6-3-9-1-7-2-8-4-10-5-11. The patient is instructed to move their eyes quickly and accurately from one number to the next without moving their head.

The clock face exercise helps to improve the speed, accuracy, and coordination of saccadic eye movements, which are essential for reading, tracking moving objects, and other daily visual activities.

Understanding Behavioral Optometry: A Holistic Approach to Visual Development

Behavioral optometry looks beyond 20/20 vision and focuses on how the eyes work together, process visual information, and support daily activities like reading, writing, and classroom learning. This holistic approach is especially important when working with school-aged children who may appear to have typical eyesight but struggle with tasks requiring sustained visual attention or accurate eye movements.

Unlike standard vision screenings that focus on visual acuity alone, behavioral optometrists assess visual functioning, including how a child’s eyes move (saccades), track a moving target, and shift focus from far to near objects. These skills are essential for learning, and deficits in these areas can affect reading fluency, handwriting, attention, and even behavior.

Vision Therapy vs OT: What’s the Difference?

One of the most common questions is about the difference between vision therapy and occupational therapy (OT). There is a lot of overlap between vision therapy and occupational therapy.

While both professionals support visual performance and development, their training and focus differ. Vision therapy is typically provided by eye care professionals and targets the visual system specifically, often using structured eye exercises to improve conditions like lazy eye, convergence insufficiency, or visual stress. Treatment may involve tracking a stationary target, practicing focus shifts, or retraining the eyes for better visual comfort. OT can do these things to, focusing on the function behind vision.

Occupational therapists focus on how vision impacts functional skills. They use visual processing strategies to help children participate in school tasks, play, and daily routines. While OTs don’t diagnose vision problems, they work alongside behavioral optometrists to support overall development through holistic, sensory-integrated interventions.

Eye Tracking and OT: Why It Matters

In occupational therapy, eye tracking is a foundational skill that influences reading, copying from the board, and catching a ball. Poor eye tracking can look like inattention, frustration, or difficulty with handwriting. OTs often use play-based activities and movement games to address eye functioning and support the visual development necessary for school success. For example, games that involve following a moving target, crossing midline, or scanning for hidden objects all strengthen this essential skill set.

When eye tracking and OT are paired with insights from behavioral optometry, the result is a stronger, more individualized intervention plan. OTs may also refer to physical therapy when postural stability impacts eye control, especially in children with sensory or motor delays.

Visual Processing Strategies That Work

For kids struggling with visual stress or processing delays, strategies like using high-contrast materials, breaking tasks into chunks, or limiting background clutter can make a big difference. Tools such as colored overlays, slant boards, and visual schedules are practical supports OTs often recommend. Additionally, targeting visual memory, visual discrimination, and visual-motor integration during therapy can enhance a child’s ability to function in the classroom and at home.

It’s important to remember that visual challenges may also be linked to medical conditions such as dry eyes, concussion, or developmental diagnoses. That’s why collaboration between therapists, teachers, and eye care professionals ensures that all treatment options are explored. A behavioral optometrist brings specialized expertise to the table, especially when standard eye exams haven’t identified a concern but symptoms persist.

When to Consider a Behavioral Optometry Referral

If a child shows signs of visual fatigue, rubs their eyes frequently, avoids reading, or complains of blurry vision or headaches, it may be time to consider a referral. Other red flags include skipping lines while reading, difficulty copying from the board, or inconsistent performance across tasks requiring visual attention. A behavioral optometrist can provide a comprehensive evaluation of visual performance, focusing not just on clarity but on how the eyes work together, and how this impacts learning.

Collaboration is key. By working together, occupational therapists and behavioral optometrists can bridge the gap between visual development and real-world function. Supporting a child’s visual comfort, academic performance, and confidence starts with understanding how vision therapy vs OT complement one another.

FAQ: Behavioral Optometry

What is behavioral optometry?
Behavioral optometry is a specialized field of eye care that focuses on how the eyes function together and how visual skills affect daily tasks such as reading, writing, and learning. Unlike traditional eye exams that primarily assess visual acuity (20/20 vision), a behavioral optometrist evaluates the full range of visual performance, including eye tracking, focusing, depth perception, and the ability to process visual information effectively. The goal is to support visual development and comfort, especially in school-aged children and those with visual stress or learning difficulties.

When should I see a behavioral optometrist?
A referral to a behavioral optometrist may be helpful if your child is showing signs of eye tracking issues, reading fatigue, difficulty copying from the board, or frequent headaches after near work.

Children who skip words while reading, lose their place on the page, or complain of visual discomfort may benefit from a comprehensive evaluation.

Other red flags include symptoms of convergence insufficiency, poor attention during visual tasks, or struggles with visual processing strategies despite normal vision screening results. Eye care professionals trained in behavioral optometry can help identify visual issues that impact function.

What does a behavioral optometrist do?
A behavioral optometrist performs in-depth assessments of a person’s visual functioning, looking at how the eyes work as a team and how well the brain interprets visual information. They may diagnose conditions like lazy eye, convergence insufficiency, or visual stress, and provide customized treatment options such as vision therapy. These treatments often involve exercises targeting eye movement, focusing, and tracking of stationary or moving targets. Behavioral optometrists also consider the child’s environment, learning needs, and collaborate with occupational therapists, physical therapy professionals, and educators for a holistic approach to care.

Want to Learn More?

Other vision activities:

Here is a post on the OT Toolbox reviewing books related to vision.  Another interesting post explores whether the problem is visual or attention

Behavioral optometrists, like chiropractors, operate outside the realm of established medicine and largely rely on their own alternative methods to achieve results.  For this reason, there are people who are resistant to referring to or hiring a behavioral optometrist.  As with any alternative treatment methods, do the research, then provide an unbiased option to inquiring parents, letting them decide their plan of care.  

Victoria Wood, OTR/L is a contributor to The OT Toolbox and has been providing Occupational Therapy treatment in pediatrics for more than 25 years. She has practiced in hospital settings (inpatient, outpatient, NICU, PICU), school systems, and outpatient clinics in several states. She has treated hundreds of children with various sensory processing dysfunction in the areas of behavior, gross/fine motor skills, social skills and self-care. Ms. Wood has also been a featured speaker at seminars, webinars, and school staff development training. She is the author of Seeing your Home and Community with Sensory Eyes.
Typing Programs for Kids

typing programs for kids

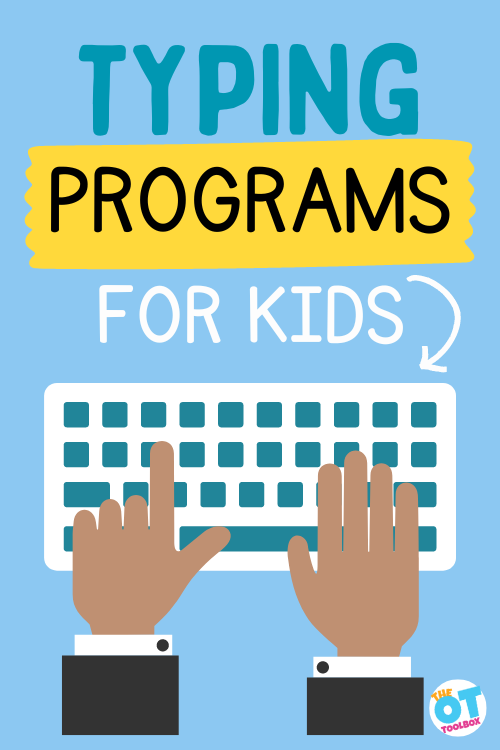
In this post we will explore typing programs for kids.  You will learn the benefits of learning to type, as well as which program might work for your specific students. “Back in my day” everyone took typing class, along with home economics, cooking, sewing, and engine repair.  Typing is one of the classes I can actually confirm has been invaluable throughout my adult years. There are tons of typing programs for kids out there.  Are some better than others?

Any of the kids’ typing programs listed below can be used and explored in a keyboarding club, which is a great after school program or a club occupational therapy can support for carryover of functional skills.

typing programs for kids

TYPING PROGRAMS FOR KIDS

There are tons of typing programs for kids and adults to learn this much needed skill.  A quick search brings up many different options. But, after browsing through them, it is difficult to determine which one might be best for your student.  There are some factors to take into consideration:

  • Price: many start with a free trial if they are not totally free
  • Entertainment value: kids are used to learning via games and entertainment. They are likely to stay engaged in something that keeps their interest
  • Teaching method: what are you hoping to learn from the program?

Additionally, occupational therapy professionals often seek out specific needs that can be addressed with a typing program as an alternative to handwriting. When a student needs to move from written work to alternative forms of expression through assistive technology, typing programs are often explored.

Things to consider with typing programs for children

Some of the factors that therapy professionals may need in a typing program for kids include:

  • typing program to work on typing goals
  • typing program that says the letter while the child is typing for auditory feedback
  • touch typing program to work on finger placement
  • typing games to work on typing speed
  • inexpensive typing programs that can be customized to meet specific needs
  • typing games
  • cheap or free typing programs
  • typing programs for special ed
  • typing programs that can be used in home exercise programs

There are other items to consider when exploring typing programs for children. This includes the cognitive level of the individual, motor skills, and more:

  • Is the typing program being used as the primary form of written expression or is this a suppliment?
  • Motor skills needed for typing: finger isolation, bilateral coordination, motor planning, mouse use, etc.
  • Is the individual able to use both hands or is single handed typing needed?
  • Will the individual use typical finger placement or is touch typing needed?
  • Impulse control related to computer use
  • What size of keyboard is needed for the individual? Consider physical abilities and motor skills such as range of motion and touch pressure
  • Is the individual able to recognize letters
  • Is auditory feedback needed?
  • Is a lower level or higher level program needed based on cognition and motor abilities?

I did some research in order to shed some light on some of these programs. Back in the 80s, we used plug in computers and typing drills.  While tedious, it was effective. However, young students are used to being constantly taught through games and interactive videos. 

These programs might be explored in middle school occupational therapy or high school occupational therapy.

Names of Typing programs for kids

Let’s take a look at the different typing programs out there. Each has different benefits, and the options can meet specific needs of the therapy client.

NOTE: The following typing programs for kids are suggestions. The OT Toolbox does not have affiliations with these platforms or endorse them in any way.  

  1. Typing.com– This typing curriculum has games, lessons, and customizable lessons, making it an option that can meet certain and specific needs. There are also video lessons for each aspect of typing, including mouse use and each set of letters. Kids love the different themes that make the typing lessons fun and engaging.

2. Typesy– This program has a free trial, then charges $9.00 a month for individuals.  There are homeschool and district school pricing options as well.  They teach common core based curriculum.

There are hundreds of different lessons and modules.  Typesy offers programs for different ages of students from very young through adult corporate typing skills.  

Typesy states, “You may be aware that there has been a recent push to teach keyboarding (typing) in most districts. The reason for this is three-fold. First, as most states move to computer-based tests, it’s essential that students can type quickly and efficiently – otherwise, test scores can be severely affected. Second, the common core standards specify keyboarding skills by grade, making keyboarding an essential inclusion in any state curriculum. Finally, districts are recognizing that keyboarding is closely tied to computer literacy, equality of access, and educational outcomes in all areas.

3. ABC Ya– I like that this is a recognizable platform that students and teachers are already familiar with.  There is a free version with limited game options and users.  The subscription program is ad free and provides all of their available content for $5-10 a month. 

There is a section that allows the user to search by core curriculum standards.  Two games that support typing skills include:

  • Typing Rocket Jr
  • Ghost Typing Jr.

As with any programs, I would caution that the students are really learning the material, not just playing the games.

4. Nessy Fingers- This program was developed for children aged seven to 12 with difficulties with spatial awareness and dyslexia.

The program reduces frustration for children with spatial difficulty, starting at a low level of four words per minute to allow more time to find the keys. Nessy Fingers introduces the letters alphabetically, helping children with dyslexia in occupational therapy services, (or not!) to learn the letters in a familiar sequence.

There are activities exploring five different islands, winning trophies and rewards as they learn.  Nessy Fingers offers a free trial, or costs $55 plus, for a yearly subscription.

5. Dance Mat Typing– This typing program for kids kept popping up in lists for the best typing programs.  I like that Dance Mat Typing teaches the classic home row finger placement, then builds upon that. 

They stress the importance of learning without looking at the fingers while typing.  There are 12 lessons with engaging songs and graphics.  It is free to use.

6. Typing Club– They have this cool keyboard cover to teach typing without looking at the fingers.  Typing club is simple and easy to use. The aim is to work your way up to 100 words a minute. There are instructional videos, challenging games and practice lessons that ensure students place their hands correctly on the keyboard.

This program trains students to never look down at the keyboard, while giving guidance on proper finger positioning. Can be used by individuals or schools. Available in 9 languages.  There is a free trial version, and a subscription option.

The nice thing about Typing Club is there are options for one handed typing, including lessons for one handed typing with the left hand and one handed typing with the right hand.

7. Type Racer– Gets typists racing each other, typing quotes from books, movies, and songs at speed.  Students can practice alone, or race other people who have approximately the same speed. If you are of a competitive nature this may be the typing program that will appeal to you.

This program looks simple and effective. It is available in 50 different languages and can be done individually, in schools, or competing against others across the world.

8. Typing Instructor for Kids– The Typing Instructor can be used by children who are as young as six years old. It is also appropriate for children with learning difficulties because of its special features and dozens of graduated typing lessons and games.

One of the most outstanding features of the Typing Instructor is the sound features and its unique curriculum that most similar programs do not have. 

9. Ratatype– This program offers several different courses for different types of learners.  It is free to use, and students can earn a typing certificate at the end.  It is available in tons of languages. 

There is a simple interface that does not distract the students from learning.

10. EnglishType–  This looks like a great program to include those with special needs.  There is a free trial, and a yearly subscription option.  It features:  

  • A strong multi-sensory approach
  • Unique key / finger color coding system
  • Highly structured content for easy skill acquisition
  • Carefully chosen vocabulary boosts spelling & literacy
  • Visually simple & uncluttered presentation style
  • Both spoken & written instructions
  • Choice of background screen colors
  • Short lessons aid concentration and focus
  • Fun arcade-style games keep motivation high
  • Large font option and lower case keyboard display
  • Special exercises and games to increase speed

11. Type to Learn– This program specifically mentions working for students with special needs.  It is a fee based program starting at 5.00 a year.

12. Typing Training– While the graphics might seem simple, this platform offers many benefits for students of different learning styles.  It has a platform for one handed typing, compatibility with alternate input systems, customizable difficulty levels, and helps determine the best hardware/software setup. 

It has a free trial, and different levels of paid programs.

13. Keyboarding Without Tears– This program has different versions for different groups of age levels, so exploring the different levels can be a good idea depending on the needs of the child. For example, the younger grade level versions offer more auditory feedback, so this might be a need for a particular individual.

This program also encourages 2 handed use however the license can only be used for one student for one year.

Tips for using Typing Programs with kids

Therapy providers often move to typing programs with students when handwriting is not a functional form of written expression which impacts learning. Knowing this, there are hints and suggestions that can support the individual learning to type. These suggestions apply to any typing program that might be used or trialed.

  • Cover the keyboard so learners do not look at their fingers.  This step is critical. Hunting and pecking is no way to go through life
  • Make sure your learners have the right equipment and setup.  Check their chair, keyboard, mouse, and monitor for fit
  • Add adaptations if learners need them to be successful
  • Be vigilant that students are actually learning the lessons, not just trying to beat the game or win the tokens. I have seen so many students advance in lessons, then end up too far ahead of their knowledge
  • Educate students and other professionals about the importance of touch typing.  Make this a priority in their education.

There are so many typing programs for kids out there!  It is really overwhelming when you start doing research.  The programs have come a long way from JumpStart Teaches Typing, which my daughters used in the early 2000’s.  Prioritize what is most important for your students in a program.  Price?  Graphics?  Adaptability for special needs?  Whichever you choose, no cheating!

Victoria Wood, OTR/L is a contributor to The OT Toolbox and has been providing Occupational Therapy treatment in pediatrics for more than 25 years. She has practiced in hospital settings (inpatient, outpatient, NICU, PICU), school systems, and outpatient clinics in several states. She has treated hundreds of children with various sensory processing dysfunction in the areas of behavior, gross/fine motor skills, social skills and self-care. Ms. Wood has also been a featured speaker at seminars, webinars, and school staff development training. She is the author of Seeing your Home and Community with Sensory Eyes.

Typing Activities for Occupational therapy

typing activities occupational therapy

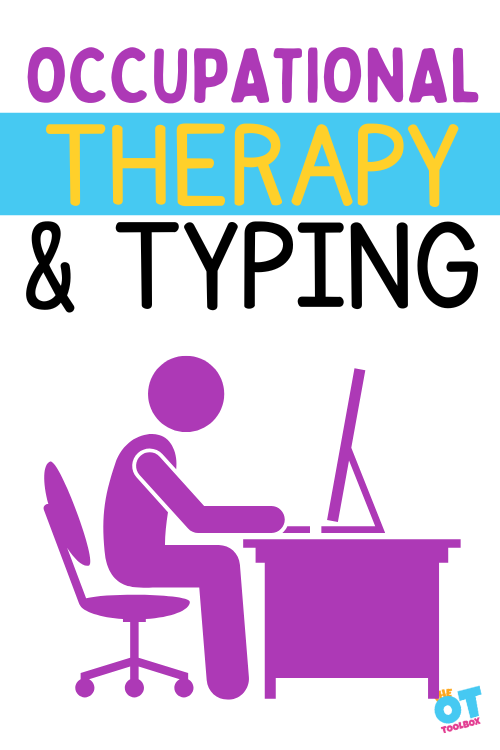
One way that occupational therapy providers support students is through assistive technology and using typing activities in occupational therapy is a tool for functional performance. In this blog post, you’ll find typing activities occupational therapy professionals use. You’ll also find a great printable booklet at the end to use to support typing in OT.

typing activities occupational therapy

Typing Activities Occupational Therapy

Children who struggle with handwriting may benefit from accommodations in the classroom including use of the computer and typing to complete written communication.  I’m also sharing strategies and tips on how to implement a keyboarding club to teach keyboarding and computer skills.  A keyboarding club can be used as an accommodation to written work, or a necessary functional skill.

 
How to Implement a Keyboarding club for kids


Occupational Therapy and Typing

Handwriting can be a difficult and stressful action for many children.  What happens when no matter what interventions are attempted, the child simply can not function with the details and cohesiveness of completing all of the “parts” of written work?  

There can be a point when kids would be better off just typing as an accommodation in school work.  With the use of keyboards and screens available in classrooms, homes, work places, and communities, there is more of a need for independence with keyboarding skills than perhaps in our past generations.  

The biggest point to recognize about typing and occupational therapy is that even when typing is used as an assistive technology tool, the OT practitioner is not the typing teacher. Working on typing in therapy sessions won’t lead to functional use. Rather, typing practice needs to occur daily at home and in functional tasks like assignments. Read about carryover of functional tasks for a better understanding of this point.

Children begin computer use when they enter Kindergarten.  Children are using computers in the classroom and at home at a very young age.  So, when the accommodation of using keyboard skills over handwriting is approached, it can be an easy flow into function.


With modern technologies, keyboarding is as common place as handwriting in the development and growth of a child.


One strategy that can help with improving speed and accuracy as a handwriting modification is the use of a Keyboarding Club or group.


How to Implement a Keyboarding club for kids


It is suggested by researchers that keyboarding instruction with correct finger placement begin in the third grade. Developmentally, this is an effective time for using finger dexterity skills, visual motor integration abilities, attention and focus, and visual perception needed to shift the vision from multiple planes.


Using keyboarding instruction curriculum can be a viable option for kids who struggle with handwriting.  When required to compose thoughts onto paper, underlying handwriting issues may prevent creativity, construction, and fluency of written composition as well as legibility when performing these types of tasks.


A keyboarding program can and should be an intervention to accommodate handwriting needs AND a strategy for development in typical and modern educational needs.  Keyboarding is an effective accommodation for struggles with the fine motor, visual perceptual, or sensory needs of handwriting that can be used in the classroom.


While there are many free keyboarding instruction programs available, it can be difficult for parents and teachers to find time within schedules to try and maintain participation in a keyboarding program.


With after school activities, graded homework, and other factors limiting time, participating in activities like a keyboarding program fall in priority.  A keyboarding club can be the intervention needed to allow kids to learn the skills needed as an accommodation to handwriting as well as learning keyboarding skills needed for classroom tasks.


Using a keyboarding program can be a helpful alternative to written work, allowing for efficient communication, legibility, and composition of thoughts.  Using computer work as an alternative to handwriting may be a necessary intervention in the classroom.


How to Implement a Keyboarding club for kids


Response to Intervention (RtI) and Keyboarding Skills 

As with other educational and functional skills performed in the classroom, Occupational Therapist practitioners may approach treatment with a Response to Intervention (RtI) approach.


Response to Intervention is an approach that addresses each individual student’s learning needs and adjusts education to meet the needs of the student.


Using RtI in a keyboarding program:

Children can first be identified as potential candidates to participate in a keyboarding program.  These might be students who would benefit from keyboarding as an accommodation to handwriting.  Students should show an interest in participating in a keyboarding program as well.


A keyboarding program using Response to Intervention in the school setting would involve screening, assessment of skills, small group instruction, and progress monitoring.  Following instruction and participation in a keyboarding program for a period of several sessions or weeks, students can be re-assessed to monitor progress.  When progress is limited, there are other keyboarding programs that can be of help.


As with any instructional program, keyboarding can be a novel and fun concept at first.  However, after repeated trials of practice and quizzes, it can become boring for children.  Without a drive to learn to type correctly, kids may quit, give up, or balk at participation.  Keeping that in mind, keyboarding programs should involve creative ways to practice skills such as speed, finger placement, and accuracy.


At the start of a keyboarding program and before beginning instruction, students should be assessed in speed of copying a sentence using handwriting, typing speed, and accuracy on a keyboard writing assignment. It has been found that students whose typing speed equaled or exceeded their handwriting speed showed greater competence in the content
of narrative writing when using a word processor than
when handwriting.


Related Read: Try these handwriting accommodation strategies to address a variety of handwriting challenges. 


Occupational Therapy Typing Activities

During OT sessions where the occupational therapy typing goals are addressed, there can be a schedule of activities that guide each activity.
 
Some ideas to use in OT when addressing typing include: 
 
Warm-Up Exercises
Warm up with bilateral coordination exercises, hand warm-up activities, finger isolation exercises, tendon gliding exercises, and opposition exercises. 
Organizing Activities
Proprioception tasks and core facilitation exercises including chair push ups, wall push ups, and heavy work tasks
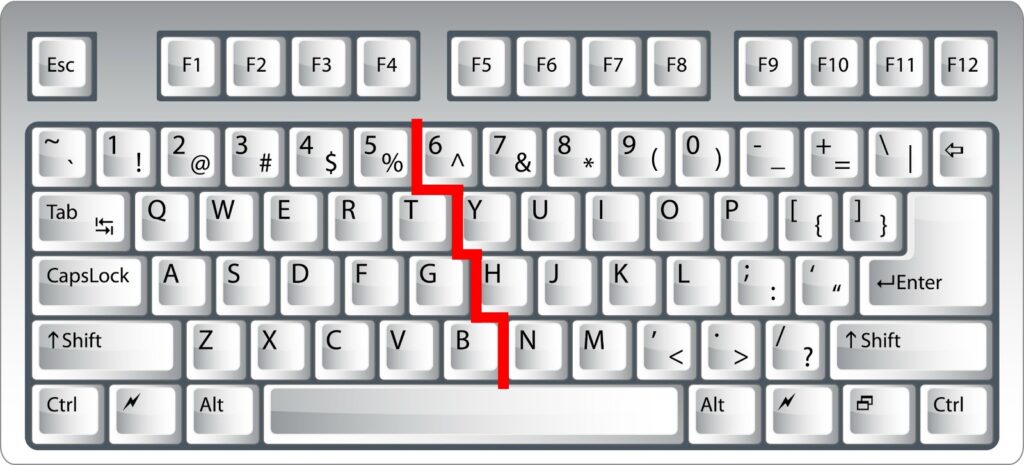
Letter Placement Instruction
Any new letters should be covered with proper finger placement. 
Review of any previous lessons should be covered. 
Use of multi sensory and motor instruction in letter placement including gross motor activities.
Posture Check and Self-Assessment
Use of a posture self-assessment checklist 
Skills to Monitor
Posture
Hand placement
Finger placement
Typing accuracy
Typing rhythm
Typing speed
Ease of bilateral coordination 
Typing Activity
Use of a keyboarding program should be implemented and maintained over a period of several weeks and sessions with progress monitored.
 

Other tasks that may be included in a keyboarding club include:

  • Computer component identification
  • Supply organization (including folder with practice sheets, etc)
  • Ability to turn on, re-boot, and access, start, and shut down software programs
  • Storing files on a computer
  • Accessing stored files on a computer
  • Composing emails, letters, and filling in forms
  • Proofreading and editing
  • Completing writing prompts without copying from a text
  • Assign a color to each finger. Color the blank keys according to the corresponding colors.

  • Fill in keys on a keyboarding worksheet in a timed test.
  • Working on typing speed
  • Working on accuracy of finger placement in a skilled manner- addressing needs impacting skills
  • Identifying a typing program that targets underlying areas that impact functional performance
  • Setting up a home program so the child gets adequate typing practice. 

A big part of typing is the underlying components and this is an area that the occupational therapy provider will address. The areas that impact typing include:

  • Finger isolation
  • Touch pressure
  • Eye-hand coordination
  • Cognition 
  • Executive Functioning Skills: Direction following, attention, impulse control
  • Motor skills
  • Sensory processing
  • Visual motor skills
  • Motor planning
  • Range of motion

Bilateral coordination in particular can impact typing. Some ways to address that in OT include: 

  • Both hands placed on the keyboard.
  • Right hand on right side of keyboard.
  • Left hand on left side of keyboard.
  • Does not use one hand predominantly over the other.
  • Noticeable attempt to use both hands appropriately on the keyboard sides.
  • Ability to motor plan appropriate finger placement to reach individual keys.
  • Ability to use a mouse or touch mouse.
  • Ability to manipulate paper, text, notes, or copy material and maintaining use of both hands in a coordinated manner.
 

How to Implement a Keyboarding club for kids


Details of a Keyboarding Club for Kids

A keyboarding club can operate on many different levels.  It can be a daily activity for a short term such as two weeks, Monday through Friday or it can operate 2 or 3 times a week for 4-6 weeks.  
 
Because of the tendency for repetition, it is beneficial to keep duration of the club to a limited time.  There is the potential for additional sessions of a keyboarding club.
 
Children who are participating in a keyboarding club should remain on the same lesson each session.  Sessions should be limited to 20-30 minutes at a time.
 
Involving several children into the act of learning new skills allows use of group dynamics in the learning process. 
How to Implement a Keyboarding club for kids


Keyboarding Club Typing Programs

We cover specifics about typing programs for kids in our recent blog post. There are many different curriculum out there and the one that works for the individual may not work for everyone.

  • The website Learn To Type is a great tool for practicing lessons that are broken down by row, upper case, and punctuation.  There are tips for practice and each test that account for accuracy and speed. 
  • Another online typing program is Sense-Lang.  This site provides interactive tutorials and games to engage students.
  • TypingClub– This free online typing curriculum moves kids through lessons.  Kids can master each level and receive badges of completion. This program seems more like a game than lessons.
  • Typing Club Google Chrome extension– This is a free program. Kids can learn touch typing and work toward increasing speeds of typing.

Try these typing games when kids seem to be board with the programming of your Keyboarding Club:

Resources:
Mahan, T.  (2002). Flying Fingers Keyboarding Club: Building Keyboarding Skills Through the Response to Intervention Approach. OT Practice, 17(3), 14-20. 

Rogers, J., & Case-Smith, J. (2002). Relationships Between Handwriting and Keyboarding Performance of Sixth-Grade Students. The American Journal of Occupational Therapy, 56(1), 34-39.

How to Start a Keyboarding Club

Enter your email to access a free guide to starting a keyboarding club for kids.

    We won’t send you spam. Unsubscribe at any time.

    Colleen Beck, OTR/L has been an occupational therapist since 2000, working in school-based, hand therapy, outpatient peds, EI, and SNF. Colleen created The OT Toolbox to inspire therapists, teachers, and parents with easy and fun tools to help children thrive. Read her story about going from an OT making $3/hour (after paying for kids’ childcare) to a full-time OT resource creator for millions of readers. Want to collaborate? Send an email to contact@theottoolbox.com.

    How to Write Cursive S

    This post is part of a series highlighting cursive handwriting.  While you might be of the opinion  that cursive is a dead language, there are many reasons it should continue to be taught and practiced.  I believe the reason cursive is not emphasized is; students are having so much difficulty mastering printed language, adding another method of writing proves to be too taxing for these learners.  In this post, How to Write a Cursive S, not only will letter formation be addressed, but the benefits of cursive handwriting will be explored, and resources provided.

    how to write cursive s

    Amazon affiliate links are included in this blog post. As an Amazon Influencer, I earn from qualifying purchases.

    Cursive S

    Before Tackling How to Write Cursive S, let’s Explore the Benefits of Cursive:

    1. Cursive provides a flow of words, not just letters.  The stopping and starting of manuscript disrupts the flow of thought, making it more difficult to write words.
    2. Cursive letters minimize the amount of reversals. Lowercase “b” is very different from “d”, as is “p” and “q”
    3. Increase writing speed – faster/smoother writing – rather than the stops and starts of printing, cursive flows
    4. Less mistakes in letter formation – there is a system for writing in cursive. Not as many opportunities to write backward, bottom to top, or right to left.
    5. More legible writing – often students who write in cursive have more legible writing
    6. It gets the entire brain working. Studies have shown that there are different neurological pathways used when writing in cursive versus manuscript.
    7. Helps retain information: when taking notes in cursive, people tend to chunk information or jot down relevant phrases. Focusing on key phrases helps learn and retain them.
    8. Improved motor skills – practicing cursive handwriting improves motor skills
    9. Become a better speller – the act of writing out words in chunks, rather than using a typing program that uses predictive text, can help the brain formulate words easier

    Did you know?

    • Writing and reading engages different parts of the brain?  Different neural pathways are created, therefore reading manuscript and writing in cursive does not slow down the learning process.
    • All lowercase cursive letters begin on the line
    • It is harder to forge a cursive signature than a printed one
    • The Declaration of Independence is written in cursive

    Another important item to note is that when teaching kids to write in cursive, there is a specific letter order to teach cursive. This is because of the pencil lines that form the letters. Many cursive letters have similar pencil strokes that are used to form the letter.

    We call these groups of cursive letters, Letter Families. This is because similar letters are grouped together.

    Slant letters are lowercase cursive letters that start from the baseline and slant at a 45 degree angle without a curved portion at the direction change. 

    Slant letters include: s and r.
    These two letters can be tagged on with the “spike start” letters: i, t, u, w, p, and j.

    The “Spike Letters”, or slant start letters are are lowercase cursive letters that curve up from the baseline with an inverted curve that follows the underside and right side of a circle. Then, the curve traces back on itself for the straight portion of the letter, but then pulls away to either continue with additional components of the letter or to connect to subsequent letters. However, when moving onto make the cursive s, the pencil would stop after the initial slanted line or inverted curve. The pencil would then pull down into a “J” shape.

    How to Write a Cursive S

    In Loops and Other Groups, there is a narrative to form each letter. The lowercase “s” is part of the Kite String group.  The letters in this group are; i,u,w,t,j,p,r,s,o.  Students will practice the letters in this order.  In the Handwriting Without Tears Program, the letter s is grouped with a slightly different letters due to a more simplified letter formation (letters omit loops to simplify the cursive letters). In this program, the letter order in the s group is: i, t, p, u, w, j, e, l, f, h, k, r, s.

    Notice that “s” is far down the kite strings group for Loops and Other Groups and in the Handwriting Without Tears (Learning Without Tears) methods. Both programs group letters by pencil stroke in sequentially more complicated motions. Learners will have a good sense of kite strings, or the movements needed to form the S by the time they reach “s”. The classic narrative might prove to be complicated, therefore additional lessons are available.

    Diana Hanbury King describes one method of learning to write as:  Trace, Copy, Cover, Closed.  Students should be standing using a chalk or white board. 

    Alternatively, large pieces of paper can be hung on the wall.  By using a large vertical surface, whole arm and body movements are used to learn the letters. 

    This four step process develops muscle memory, as well as a sensorimotor approach to learning. 

    1. Trace: the teacher makes a letter on the board at least eight inches tall while naming it aloud.  Students then trace the letter several times with their finger, or writing tool. Read here about tracing as a writing strategy.
    2. Copy: students copy the letter several times in large form while saying the letter out loud.
    3. Cover: the model is erased, then students write the letter several times while naming it.
    4. Closed: students are instructed to write the letters with their eyes closed.

    Diana also uses another method of writing called the Simultaneous Oral Spelling (SOS) approach.  As students write letters and words, they say the letters out loud.  Students are telling their hand what to do, which reinforces letter formation.

    Other programs, such as Loops and Other Groups, use verbal language while forming letters.  Cursive letters are grouped by their formation.  There are clock climbers, kite strings, hills and valleys, and loop groups.  Students say a script as they are writing their letters to remember how they are formed. 

    Some therapy providers tend to pull prompts from a variety of cursive writing programs and incorporate letter instruction with verbal and visual prompts that have worked in their experience. In almost every case, the therapy provider will utilize a variety of tools at their disposal and incorporate a letter formation strategy that works for the individual student or client, based on their needs.

    how to write the letter s in cursive

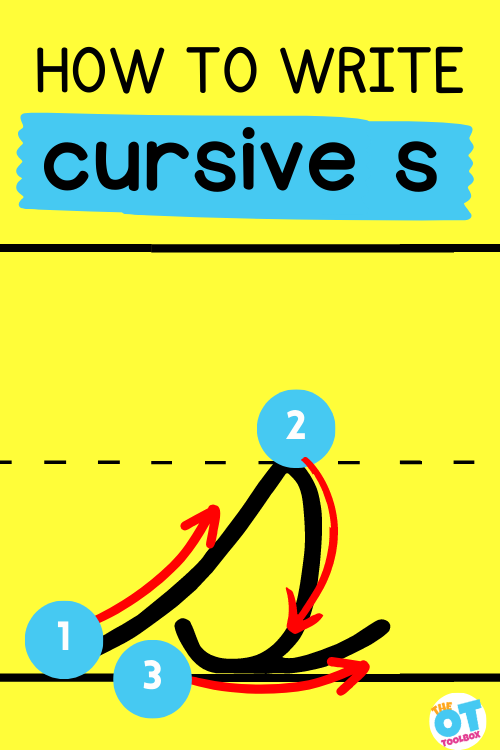
    Let’s work through the verbal prompts that could be used to write cursive letter s.

    1. Start at the writing line, make a kite string to the middle divider.
    2. Aim straight down to the writing line and make a big fat belly (at 5 o’clock).
    3. Continue the fat belly until 7 o’clock and join it with the kite string.
    4. Retrace from 7 o’clock to 5 o’clock and continue for release stroke.

    Handwriting without Tears (affiliate link) (also called Learning without Tears) has a printing and cursive program with specific verbal prompting.  They also use the whole body and narratives in teaching letter formation.  

    The Three P’s when Writing

    Don’t forget the three Ps outlined by the International Dyslexia Association, when doing writing tasks (important to know about as tools in which dyslexia occupational therapy can support):

    1. Posture: The student sits with back straight or tilted slightly forward and feet firmly on the floor. The desktop should be no more than two inches above the elbow when the arm is hanging down by the student’s side. If the desk cannot be adjusted, use a pillow and a box or stool so that the feet are not left to dangle. Both elbows should be on the table—we call this the “listening and learning position.” Read about writing posture for more tips and tools.
    2. Paper Position: The paper must be slanted at a forty-five degree angle that is parallel to the writing arm. The arm can pivot freely from the elbow as the writing moves across the page. The non-writing hand is used to secure and move the page. Correct positioning is especially important to avoid the left-handed hook. Anna Gillingham said that people who use this hooked position are “a monument to the ignorance or laziness of that child’s teacher.” Taping or painting a “V” at the bottom of the desk can serve as a reminder. Another method is to have parallel lines slanted according to the child’s handedness as a guide. If paper position is a problem, check out this blog post on paper position for cursive writing.
    3. Pencil Grip: the classic tripod grip is the most efficient for writing tasks. Read here about tips and tools to support pencil grasp. Different types of pencil grips may support various needs. Related to the grasp on the pencil is the ability to use pencil control to create smooth and effective lines of various types to create the cursive letters: curved lines, diagonal lines, slanted lines, etc.

    Fun Ways to Teach Cursive S

    There are several fun activities to use when practicing new skills.  These go beyond standard worksheet repetition, which can be very effective also.

    • Whole body movement –  practice making letters using the whole body.  See if you can make all of the cursive letters
    • Writing with chalk, a squirt bottle, fun markers, paint
    • painting with water on the sidewalk
    • Writing in shaving cream, rice on a cookie sheet, sand, salt, and more
    • Form letters using Play Dough or Theraputty exercises
    • Bake pretzels in cursive letter shapes
    • Use paper mache, tissue paper, buttons, sequins, or other art materials to make letters
    • Use large motor movements when starting out with cursive instruction. 
    • Teach each letter individually and for short periods of time each day.
    • Practice cursive letters in multiple sensory experiences, including shaving cream on desks, writing trays, in goop, with play dough or slime, etc.
    • Practice near copy work using a visual cue like these free cursive letter flashcards.
    • Practice each letter in a group focusing on one letter at a time. When a new letter is introduced, continue with previously learned letters. 

    When instructing students in forming these letters, start by outlining a cursive letter lesson plan of activities. You can read more about cursive letter lesson plans here.

    Resources for Writing a Cursive S

    There are tons of resources out there available for writing practice. It can be overwhelming starting a google search.  This is one of the reasons the OT Toolbox is highlighting cursive letters in more than one post, to create an organized resource space.

    Members of the OT Toolbox can find resources much easier, as they are bundled together by topics and categories. 

    Summer vacation is coming!  This is a great time to introduce cursive writing.  Create a summer long program, methodically teaching cursive letters, so your learners will be ready to go back to school with a brand new skill.

    Victoria Wood, OTR/L is a contributor to The OT Toolbox and has been providing Occupational Therapy treatment in pediatrics for more than 25 years. She has practiced in hospital settings (inpatient, outpatient, NICU, PICU), school systems, and outpatient clinics in several states. She has treated hundreds of children with various sensory processing dysfunction in the areas of behavior, gross/fine motor skills, social skills and self-care. Ms. Wood has also been a featured speaker at seminars, webinars, and school staff development training. She is the author of Seeing your Home and Community with Sensory Eyes.

    The Handwriting Book is a comprehensive resource created by experienced pediatric OTs and PTs.

    The Handwriting Book covers everything you need to know about handwriting, guided by development and focused on function. This digital resource is is the ultimate resource for tips, strategies, suggestions, and information to support handwriting development in kids.

    The Handwriting Book breaks down the functional skill of handwriting into developmental areas. These include developmental progression of pre-writing strokes, fine motor skills, gross motor development, sensory considerations, and visual perceptual skills. Each section includes strategies and tips to improve these underlying areas.

    • Strategies to address letter and number formation and reversals
    • Ideas for combining handwriting and play
    • Activities to practice handwriting skills at home
    • Tips and strategies for the reluctant writer
    • Tips to improve pencil grip
    • Tips for sizing, spacing, and alignment with overall improved legibility

    Click here to grab your copy of The Handwriting Book today.

    Fine Motor Home Exercise Program

    fine motor home exercise program

    One thing that therapy providers often come across is the the issue of needing a fine motor home exercise program to support the skills that are targeted in therapy sessions. The fact is that 30 minutes of therapy intervention, once a week, is not likely to improve dramatic changes. The need for a fine motor home exercise program is even more necessary for an area such as grasp strength and finger strength.

    Get your child’s fine motor skills moving with this easy, 6 month fine motor exercise program! All you need are common household items to get 6 months worth of daily fine motor activities. Your child will love seeing the progress they make each day and you’ll be in awe of the accomplishments they can make with just a few simple items.

    Fine motor home exercise program
    A fine motor home exercise program for kids is engaging and motivating!

    Fine Motor home Exercise Program for Kids Using Household Items

    For kids, fine motor skills are essential to everyday life. From tying shoelaces to writing neatly with a pencil, these activities require control and coordination of the small muscles in their hands and fingers.

    Unfortunately, many children struggle with developing their fine motor skills and can lag behind their peers. This resource on fine motor milestones has a list of ages aligned with fine motor developmental progression.

    To help your young ones develop these important skills, I’d like to share a 6 month fine motor exercise program for kids that can be completed with simple household items! This is a great exercise program for working on hand strength, pencil grasp, or carrying over therapy goals at home.

    So often the fine motor skills needed at school need extra work at home, and this home exercise plan will do the job, in a fun way. These ideas are fun and engaging each day…and aren’t your typical grasp exercises.

    Your children will need some basic supplies for this program:

    • Craft pom poms (or a bag of cotton balls)
    • Paper clips
    • Play Dough
    • Playing cards
    • Clothes pins
    • Pipe cleaners
    • Slime
    • Tweezers
    • Bottle caps
    • Yarn or string
    • Coins
    • Foil
    • Tissue paper
    • Paper cups
    • Rubber bands
    • Dry pasta
    • Mini erasers
    • Tape
    • Blocks
    • Golf tees
    • Chalk
    • Paint
    • Craft sticks
    • Googly eyes
    • Toothpicks (Also use them with our toothpick activity to build precision skills)
    • Squeeze glue
    • Spray bottle
    • Cardboard scraps

    We selected these items because most therapy providers have them in their therapy bag or available in a therapy clinic. For those working in teletherapy, they are common enough items that families will have them in the home and can pull them out for the child to use in their online therapy session.

    Of course, you could always substitute the materials with different supplies. Or, you could write in your own home program tasks on the blank page.

    And, when using our fine motor program for a home exercise program, it’s possible that the family will have these items available. Some therapy clinics or companies may even want to offer a small kit of these items along with the home program instructions for the children receiving therapy services.

    All of these items should be available in your home or from a local dollar store. With these items, you can provide your children with a variety of activities designed to enhance their fine motor development.

    The great thing about this 6-month program is that it’s easy to customize the activities to the age level and skill level of the child. For example, younger children may require more guidance and assistance with the activities while older children may be able to complete the activities independently.

    weekly fine motor plans for kids
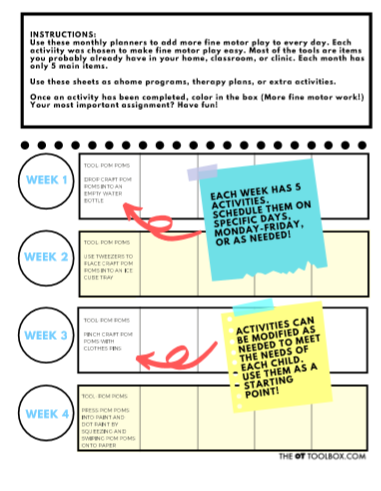
    The Weekly Fine Motor Home Exercise Program targets different skills every day of the month using the same 5 items.

    Here is a sample of the types of activities you can do with your child each day:

    • Drop craft pom poms into an empty water bottle- This skill targets open thumb web space, eye hand coordination, bilateral coordination, tripod grasp, pincer grasp, separation of the sides of the hand, finger isolation, and more.

    • Connect paper clips to make chains. Then use the chain lengths to create letters on a table top. This activity targets eye-hand coordination, separation of the sides of the hand, hand strength, finger dexterity, pinch strength, motor planning, visual motor skills, and more.

    • Make a play dough pie. Pinch the crust. Use scissors to cut the pie into slices. This activity targets several areas: hand strength, motor planning, pinch strength, bilateral coordination, motor planning, separation of the sides of the hand, and more.

    • Clip clothes pins onto a string hanging from under a table. This activity works on many areas: core strength and stability and upper arm strength, which are both necessary pre-requisites for fine motor control and precision. The activity also targets intrinsic muscle strengthening, motor planning, eye-hand coordination, grasp strength, and more.

    This is just five of the activities in the plan. Users can work through the activities (presented Monday-Friday) using a different fine motor tool each day. This is designed to keep the tasks fun and engaging while also targeting a variety of skills. Every child we’ve used this strategy with has looked forward to the day’s activity because it’s fun and new!

    Click here to get your copy of the Weekly Fine Motor Home Exercise Plan.

    Tips for Making Fine Motor Home Exercises More Fun

    To keep your child engaged in the activities, here are some tips to make them more fun and exciting! Read about hand strengthening for more insight.

    Create a competition – Create a game out of the activities by allowing your child to compete against you or another family member. For example, have a race to see who can thread the most straws onto the string in one minute.

    Add a timer – Adding a timer helps to ensure that the activities are still challenging. For example, give your child one minute to thread the straws or two minutes to pick up the cotton balls with the toothpick.

    Incorporate music – Music can help to make the activities more fun and enjoyable. For example, play a song while your child is picking up the cotton balls or cutting out shapes with the scissors.

    Involve the whole family – Invite the whole family to participate in the activities. You can have a contest to see who can thread the most straws onto the string or who can cut out the most shapes with the scissors. This is a great way to get everyone involved and keep the activities fun!

    Use the daily challenges in the Weekly Fine Motor Home Exercise Plan to create games, family events, and build those motor skills!

    Why Use a Fine Motor Home Exercise Program

    In addition to making the activities more fun, there are also many benefits to this 6-month fine motor exercise program for kids. When your child engages in the activities, they are developing important skills such as hand-eye coordination, manual dexterity, and visual-spatial awareness.

    These skills are essential for everyday tasks such as writing and tying shoelaces. The activities also help to strengthen their fine motor muscles which can help to improve their handwriting and drawing abilities.

    Another great benefit of this program is that it can be done anywhere! All you need are 6 household items and you can provide your child with 6 months worth of daily fine motor activities. This makes it easy to fit in time for practice no matter how busy your schedule is.

    With these activities, you can help your child develop their fine motor skills in a fun and engaging way. So, grab some cotton balls/craft pom poms, paper clips, play dough, deck of cards, and clothes pins, get your copy of the Weekly Fine Motor Plan, and start working on those fine motor skills today!
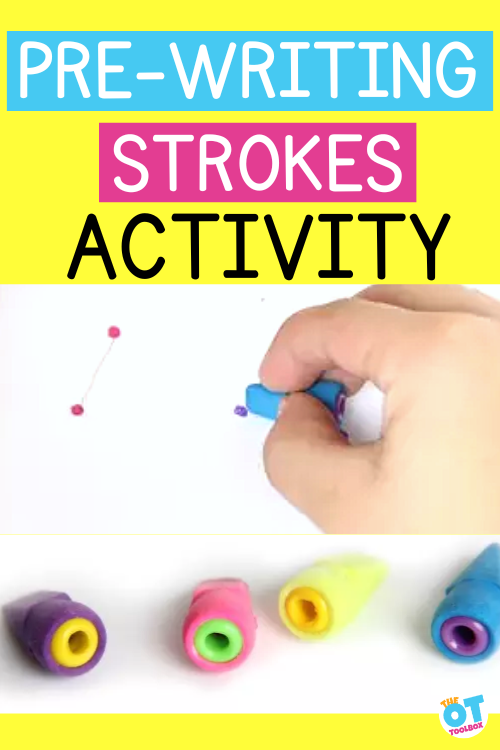
    With this easy 6 month fine motor program, you can give your child the opportunity to experience the world through movement, exploration and play. Plus, it’s an economical way to provide them with a creative outlet and help them to develop their physical abilities. Don’t wait another minute – get started today and unleash the potential of your child’s motor skills!

    NEW ITEMS ADDED. This purchase now includes:

    1. SIX MONTH Weekly Fine Motor Program
    2. Clothes Pin Exercise Cards- Use in games, home programs, brain breaks, fine motor challenges, and more.
    3. Clothes Pin and Paper Clip Activity Cards- Print off the activity cards and challenge eye-hand coordination, precision, dexterity, bilateral coordination, and hand strength.
    4. Play Dough Letter Match-Ups- These upper and lower case letter cards are mini play dough mats to challenge hand strength and coordination skills as well as hands-on, sensory-based letter formation skills.

    Grab your copy of the Weekly Fine Motor Plan (and get the extra motor activities included!)

    Grip Strength Exercises

    grasp exercises

    As an occupational therapy provider, you know how important it is to develop and improve grip strength and fine motor skills in children. Activities that focus on grip strength exercises can have a significant impact on a child’s ability to complete daily tasks, such as handwriting and coloring with a crayon. Hand strengthening activities includes many aspects of strong muscles and fine motor coordination, but focusing specifically on the grip, we can target overall strength and endurance.

    By incorporating grip activities, (and even targeting finger strength exercises) into your therapy sessions, you can help children build their hand muscles and coordination, which can lead to improved motor skills and greater independence in their daily lives. In this article, we will explore some fun and effective grip activities for kids that can help them strengthen their grip and develop their fine motor skills.

    Grasp exercises
    Grasp exercises can use hand grippers or they can include functional activities.

    Amazon affiliate links are included in this blog post. As an Amazon Influencer, I earn from qualifying purchases.

    As an occupational therapist and a rock climber, grip strength is pretty much always on my mind. The ability of one’s hands can determine so many outcomes throughout life, but today we are seeing more young people with weakened grip strength than ever before.

    There are a few different theories on why this may be, namely that the increase in screen time and engaging with touchscreens may be a culprit. Regardless of what may be causing a change in grip strength, there is hope! 

    Grip Strength Exercises

    Parents and teachers know that the strength of a child’s hands can be seen in how they hold a pencil, tie their shoes, and how legible their handwriting is. And luckily for the kids, there are really some fun ways to strengthen their grip.

    We’ll go into more details on these exercises below, but some ways to strengthen grasp includes:

    • Coloring challenge using resistive crayons or textured paper
    • Cutting heavier paper with increasing thickness or weight to the paper
    • Hand gripper
    • Theraputty exercises
    • Resistive band exercises
    • Strengthening toys
    • Play dough

    In this article, we’ll explore the signs of decreased grip strength, why grip strength is important for the occupations of childhood, and several grip strength exercises that are child-friendly.

    What is Grip Strength?

    Grip strength technically refers to the ability of the flexor muscles that are located in your forearm and travel down towards your fingertips – these are the muscles activated when you squeeze your hand into a fist. 

    Someone with adequate grip strength should be able to complete average grip-based activities, like holding a briefcase, shopping bag, dumbbell weight, glass of water, or watering can, without any issue.

    There is a range of strength that is considered average based on your demographic, and can be tested using a tool that you squeeze called a dynamometer. 

    Grip strength using a dynamometer requires specific positioning of the arm to acquire the most accurate testing results. The evaluating therapist will ensure the dynamometer is positioned correctly. They will take three measurements and then determine the grasp strength from those measurements.

    However, no one should really have to go out and use a dynamometer to figure out if you have weakened group strength. Just look at how the hands are functioning in daily activities, that’s what an OT would do, too! 

    Some functional observations indicating grasp strength is impacting performance include:

    • Switching colors (more than would be expected) when coloring
    • Re-positioning and dropping a pencil when writing
    • Trouble closing and opening food containers: sandwich baggies, small containers, yogurt pouches (when most peers can)
    • Hyper-flexion of the thumb IP joint when buckling a car seat, writing with a pencil, manipulating small objects- this occurs as a stabilization mechanism to compensate for weak intrinsic muscles. (Read more about  IP joint flexion here. )
    • Squashed thumb webspace when writing, coloring, or manipulating objects- This is also a positional mechanism to stabilize. (Read about  thumb webspace and weakness here.)
    • Completing fine motor tasks with gross motor movements of the upper arm
    • Complaining that it hurts to color or you’ll see very light coloring, especially in large spaces

    grip strength muscles

    Grip strength muscles include muscles which originate in the forearm and elbow (wrist muscles or extrinsic muscles), and muscles which originate at the wrist and within the hand (hand muscles or intrinsic muscles).

    Grip Strength Muscles over the wrist

    These muscles stabilize the wrist for an effective grip strength:

    • Extensor Carpi Radialis Longus
    • Estnesor Carpi Radialis Brevis
    • Extensor Carpi Ulnaris
    • Flexro Carpi Radialis
    • Palmaris Longus
    • Flexor Carpi Ulnaris

    When a tight fist is made with the hand and the wrist is held in a neutral position, we can see tendons in the wrist. Try pushing back on the fist into wrist extension while keeping the wrist in neutral to resist extension. When this motion occurs, you’ll see several visible tendons:

    • Flexor Carpi Ulnaris
    • Flexor Digitorum Superficialis
    • Prominent Palmaris Longus
    • Flexor Carpi Radialis

    Grip Strength Muscles in the Hand

    These muscles act on the digits to sustain a grasp pattern. We can break these hand muscles down into extrinsic muscles and intrinsic mucsles

    Extrinsic Muscles- These are muscles that have their proximal attachments, or origins, in the forearm or on the humerus bone. They impact the wrist as flexors or extensors in aiding the wrist muscles listed above.

    • Extensor Digitorum
    • Estensor Indicis Proprius
    • Extensor Digiti Minimi
    • Extensor Pollicis Longus
    • Extensor Pollicis Brevis
    • Extensor Poolicis Longus
    • Flexor Digitorum Superficialis
    • Flexor Digitorum Profundus

    Intrinsic Muscles- These muscles originate, or begin, within the hand. We have covered this muscle group, and included activity ideas to target grip and pinch strength in our article on intrinsic muscle activities with tongs, and intrinsic muscles play dough mat.

    • Four Lumbricals
    • 3 Palmar Interossei
    • 4 Dorsal Interossei
    • Palmaris Brevis
    • Thenar Muscles- Opponens Pollicis, Abductor Pollicis Brevis, Adductor Pollicis, Flexor Pollicis Brevis
    • Hypothenar Muscles- Opponens Digiti Minimi, Abductor Digiti Minimi, Flexor Digiti Minimi Brevis

    Signs of Reduced Grip Strength 

    Weak grip strength can be seen pretty clearly if you know what to look for. Here are some signs to check: 

    Difficulty holding onto objects: If your child has trouble holding onto pencils, toys, or utensils, it might indicate weak grip strength. They may drop things easily or use two hands when one should be adequate. 

    One way to assess grip weakness through a visual assessment is by looking at grasp with a flexed wrist.

    1. Ask the client to position their wrist in a fully flexed position.
    2. The fingers and thumb will drop into a relaxed position.
    3. Ask the client to close their fingers into a grasped position.

    Weakness of hand grasp is evident when it is difficult or impossible to close the wrist completely. This occurs because the finger extension tendons are positioned in passive insufficiency and also because of the attachments of the finger flexors which weakens their ability to contract into a grip pattern. This puts the flexors into a position where they are unable to use full and effective tension in a grip.

    Hand fatigue: If your child complains of hand fatigue after short periods of drawing, painting, or using small manipulatives like stringing beads, it might be a sign of weak grip strength. This can look like a child that can’t color in a whole picture or stops to take breaks during coloring tasks, and even switches hands when coloring.

    Reduced athletism: Children with weak grip strength may face challenges with sports activities that require hands like baseball, golf, or even climbing on the jungle gym. 

    Poor handwriting: Weak grip strength can also affect a child’s handwriting, making it difficult to read. Usually grip strength is involved when the child holds the pencil awkwardly and needs to take breaks during writing as their hand fatigues quickly. Studies have shown that grip and pinch strength are important components in developing pencil grasp, pencil control, handwriting legibility, and independence with functional fine motor tasks.

    If you are unsure of what is causing challenges, it may be worth looking into an occupational therapy evaluation. There, the OT will work to determine if the barrier is grip strength or something else, like fine motor coordination, visual motor skills, or sensory/tactile deficits.

    Grip Strength is Important for the Occupations of Childhood.

    Grip strength is essential for many occupations of childhood, including playing, learning, and self-care. Here are some ways that grip strength can affect a child’s life:

    School activities: Developing grip strength is crucial for the development of fine motor skills, which are necessary for school activities such as writing, drawing, math manipulatives, and using scissors. 

    Recreation activities: Good grip strength is necessary for more than just school-related activities. It is also a basic ability used for things like catching a ball, rowing a boat, creating pottery, knitting, or threading a needle.

    Self-care: Grip strength is necessary for self-care activities such as brushing teeth, tying shoelaces, and buttoning clothes. Getting ready for the day is easier with proper skills! 

    Play: The most important occupation also benefits from grip strength! Strong grip strength allows children to engage in a variety of play activities, such as climbing, swinging, building blocks, and arts and crafts.

    improve grip strength

    Now that we know the importance of grip strength for children, let’s explore some child-friendly exercises that can help improve grip strength:

    Play with Playdough: One of the main benefits of play dough is the fine motor strength workout and it’s a power tool for building hand strength. Squeezing, rolling, and shaping the dough can help improve grip strength. This goes for slime and floam, too! The tougher the substance, the harder the muscles have to work. 

    • A play dough snake is a great way to target grip strength and pinch strength.
    • Rolling balls of play dough targets intrinsic muscles.
    • Play dough mats are powerful to build grasp strength.
    • Freeze play dough and use it to build strength by adding resistance. Play dough will freeze and get more resistive, but it will not harden completely, making it a fantastic sensory motor activity. Use the frozen play dough to manipulate with the hands or cut into pieces with scissors.

    Hand Gripper– One way to target hand strength may be a home program that uses a hand gripper workout. While the most efficient and effective way to focus on grasp strength is through the functional participation, therapy providers working in a medical model or in hand therapy will see value in using a gripper to focus on grasp strength necessary for functional use of the hands.

    Our blog post on hand strengthening includes several kid-friendly hand gripper recommendations to support hand strength. Select one and make the exercises functional:

    • In a school setting, tap out letters to spell words, then write the words.
    • Roll a dice, complete that number of hand grip exercises, and then write the number, or include fine motor math tasks and add, subtract, or multiply.
    • Incorporate 10-15 repetitions of a hand gripper into a sensory diet or brain break.
    • Use our 6 Month Weekly Fine Motor program to target grip strength without using a hand gripper workout.

    Clothespins: Using clothespin activities to pick up small objects can help improve grip strength. You can make it a fun game by asking your child to pick up as many objects as possible within a certain time limit. Try clothespin crafts and activity cards too! 

    Finger Push-Ups: If your kiddo is on the more athletic or competitive side, finger push-ups are an excellent exercise for building grip strength. Have your child place their hands flat on a surface, with fingers spread apart. Then, have them lift the palm on the hand away from the surface and push hard with their finger tips. 

    Monkey Bars: Monkey bars are a great way to build grip strength and improve body awareness and coordination. Encourage your child to swing from bar to bar, using their hands to hold on. There may be some blisters after this one! 

    Squeeze Toys: Squeeze toys, such as stress balls or fidget items, can help improve grip strength. Have your child squeeze the toy as hard as they can for a set amount of time, and then rest before repeating. Squeezing spray bottles, sponges, or crumbling tin foil have the same effect and can be great fun. Wind up toys are another great tool for grip strength.

    Coloring- You can work on grasp strength by simply coloring! Using a crayon is a resistive tool but you can make this more challenging by using different brands of crayons, markers, or colored pencils. Challenge grasp strength by offering small spaces to color in with a wide border mark. Then increase the area with larger coloring prompts and a thinner border. Here is information on how to teach coloring skills. Use our three crayon challenge to target strengthening.

    Paper- Torn paper is a powerful hand strengthening activity. To tear paper into strips or small pieces, one will target both the extrinsic muscles of the wrist and hand in order to stabilize the wrist against resistance. Then, when gripping paper and pulling it against the other hand, the intrinsic muscles are activated, particularly the lumbricals due to the positioning of the hand with MCP joint flexion, and PIP and DIP joint extension. Adding resistance by tearing more resistive paper (card stock, index cards, cardboard) is a great way to grade this task.

    Building fine motor skills through play is a goal of the OT practitioner, and there are many fun ways to do just that!

    You can also check out a variety of excellent crafts and activities aimed at fine motor strengthening for year-round fun! Winter, Spring, Summer, Fall and more!

    weekly fine motor plans for kids
    Grab the 6 Month Weekly Fine Motor Plan to add grasp strengthening workout to a daily home exercise routine!

    Our 6 Month Weekly Fine Motor Plan includes six months of strengthening exercises using everyday household items. We created this plan to make OT home exercise programs super simple. The exercise program requires a total of only six items that are used in a variety of ways to make grip strengthening exercises both motivating and fun.

    Grip Strength Exercises

    These exercises can vary, depending on the needs of the individual. Select the exercises that target specific functional skills and work on the number of repetitions that meet the needs and abilities of the individual.

    Grip strength exercises may include:

    • Make a fist
    • Go through tendon glides
    • Touch the tip of the thumb to the tip of each finger
    • Touch the tip of the thumb to the base of each finger
    • Make a “cup” in the palm of the hand
    • Roll the thumb over toward the palm of the hand
    • Theraputty exercises
    • Wrist weights for wrist flexion and extension- Hold a light dumbbell weight in the hand. Place the forearm on the edge of a table with the hand palm up and hanging over the table. Lift the weight moving the hand and weight into flexion. Repeat by turning the forearm over to a palm down position on the table. Lift the wrist and weight into extension.
    • Radial flexion and extension- Improve grip strength by strengthening the wrist abductors and adductors as a stabilizing force. Hold a hammer or small dumbbell in the palm of the hand. Place the forearm on a table surface with the wrist over the edge of the table. Slowly drop down the weight or hammer over the edge of the table and bring it back up to neutral.
    • Gripping tools (Amazon affiliate links):
    • Theraputty exercises- Theraputty comes in different colors and the colors mean different resistances. Theraputty can be pinched, pulled, rolled, spread apart, and squeezed.

    We hope you have learned that grip strength is an important skill that can affect a child’s development in various ways. A weak grip can affect a child’s ability to engage in activities of daily living, but it can usually be easily remedied through structured play. How will you improve your grip strength today?

    Sydney Thorson, OTR/L, is a new occupational therapist working in school-based therapy. Her
    background is in Human Development and Family Studies, and she is passionate about
    providing individualized and meaningful treatment for each child and their family. Sydney is also
    a children’s author and illustrator and is always working on new and exciting projects.

    Working on fine motor skills, visual perception, visual motor skills, sensory tolerance, handwriting, or scissor skills? Our Fine Motor Kits cover all of these areas and more.

    Check out the seasonal Fine Motor Kits that kids love:

    Or, grab one of our themed Fine Motor Kits to target skills with fun themes:

    Want access to all of these kits…and more being added each month? Join The OT Toolbox Member’s Club!

    Pre-Writing Lines Fine Motor Activity

    Child's hand holding a pencil top eraser with beads inside. Text reads pre-writing strokes activity

    This prewriting strokes activity targets the motor plan needed for forming prewriting lines. In this blog post, you’ll find a creative way to target pre-writing strokes using a hands-on activity. Creative ways to practice handwriting can be the trick for helping kids write with better legibility.  But what if you are starting at the very beginning?  Preschool kids who are working on pre-writing lines can use creative techniques, too!  Be sure to check out this resource on pre-writing skills that need to be developed before handwriting and using a pencil is possible.

    Amazon affiliate links are included in this blog post. As an Amazon Influencer, I earn from qualifying purchases.

    Pre-writing strokes activity

    Pre-Writing Strokes

    We have covered pre-writing strokes in detail in our blog posts covering this developmental progression, so adding this particular activity idea to your toolbox just adds an additional way to work on the pre-writing strokes that young children need prior to writing skills are established.

    This pre-writing lines activity is a winner because it’s a novel way to target strength and motor planning without using worksheets.


    Copying the straight lines, crosses, and circles over and over again can become a little boring for preschoolers.  Try this creative way to practice pre-writing lines while working on fine motor skills with preschoolers.

    By targeting the motor plan to create pre-writing strokes, we can support young children in the visual motor integration needed for more precision, crossing midline, and then the more complex pencil control needed for letter formation.

    What are pre-writing Strokes?

    We cover pre-writing lines in more detail here in this pre writing strokes PDF. 

    Pre-writing strokes include:

    • Horizontal line
    • Vertical line
    • Circle
    • Cross
    • Square
    • Diagonal Lines
    • “X” Shape
    • Triangle

    Pre-writing lines are an important step for preschool-aged kids and for developing a basis for proper letter formation.  Establishing pre-writing lines allow kids to strengthen hand muscles, promote pencil strokes needed for letters, and improve pencil control.  


    Try this pre-writing lines fine motor activity with preschoolers.
     

    Pre-Writing Lines Activity 

     
    This post contains affiliate links. 


    You’ll need just three items for this activity:
     
     
    This pre-writing lines fine motor activity can help kids improve hand strength while promoting a tripod grasp.  I pulled out our stash of pencil eraser toppers (affiliate link) and a handful of pony beads (affiliate link). 


    Try this pre-writing lines fine motor activity with preschoolers.
     
    1. Kids can start the activity by pushing the pony beads (affiliate link) into the eraser toppers (affiliate link). This is a strengthening activity in itself, allowing children to strengthen their intrinsic muscles which help with arch development.  
     
    This is important for proper pencil grasp and for smaller controlled pencil motions when writing letters. 
     
    2. You will need to add the pony beads (affiliate link) to the erasers to provide a stable eraser (affiliate link) when pinching.  Without the pony beads (affiliate link), kids will pinch the eraser too much and it will squash closed.
     
    3. Next, with a pencil, draw pre-writing strokes on a piece of paper.  For younger children, you can form the lines more lightly.  For older kids, or those who need to address strengthening issues, draw the lines a little darker. 
     
    Here is another pre-writing lines activity kids will love as well.
     
     
    4. Use a marker to draw a starting dot and ending dot.  Form the pencil line between the dots.  The dots provide a starting and ending point for the child to trace the pencil line.  


    5. While the child is erasing the pre-writing lines, be sure to provide verbal and visual cues to ensure proper direction formation.

    Try this pre-writing lines fine motor activity with preschoolers.
     
     
    Try this pre-writing lines fine motor activity with preschoolers.

    Looking for more ways to address handwriting needs? Try these:

    Try this pre-writing lines fine motor activity with preschoolers.


    http://www.sugaraunts.com/2015/10/visual-tracking-tips-and-tools-for.html 


    Try this pre-writing lines fine motor activity with preschoolers.


    The handwriting Book

    The Handwriting Book   

    Want to know more about The Handwriting Book?  Click on the image above to find out how to address every underlying area related to handwriting skills.     Click here to BUY NOW.

    What is Visual Memory?

    what is visual memory

    Have you seen visual perceptual terms like Visual Memory and wondered, exactly What Is Visual Memory?  Today we’re sharing how to use our dyed lollipop sticks in a few eye-hand coordination activities including visual memory, and explaining what this term means to development of handwriting, reading, and functional tasks.

    This post contains affiliate links.

    Amazon affiliate links are included in this blog post. As an Amazon Influencer, I earn from qualifying purchases.

    What is visual memory


    What is Visual Memory?

    Visual Memory is one part of a large arena known as visual perceptual skills. Visual memory focuses on one’s ability to recall visual information that has been seen.  Visual memory is a critical factor in reading and writing.  

    When a child is writing a word, he must recall the formation of parts of the letter from memory.  It can be terribly frustrating for one with a visual memory deficit to perform a handwriting, spelling, or word copying exercise.  

    Children with difficulty in visual memory will have trouble copying letters, words, and sentences from a chalkboard or book.  They may present with very slow handwriting, trouble forming letters, and mixing up letters or words within sentences.  

    Producing written work on worksheets and tests may be difficult.  Recalling sight words in reading exercises can be hard as well as following along in a reading activity during stop and start tasks, due to comprehension and difficulty recalling what was read.  Kids with visual memory deficits can demonstrate difficulty with formation of letters and numbers and appear “lazy” in their written work.

    what is visual memory
    visual memory activity with shape building


    Visual Memory Shape Building Activity

    We used our dyed lollipop sticks to build shapes.  Make a shape example and have your child copy the form.  You can grade the activity as more difficult by removing the example and having the child build the shape using their “mind’s eye”.  

    Assistance can be provided by giving visual or verbal prompts to assist with building simple shapes.  Further extend this visual memory activity by engaging colors and building the shapes with all one color.  

    Then introduce shape forms with patterning or random colors.  Once the child demonstrates succeeds with shape copying, encourage letter and number building using the lollipop sticks.  

    This simple activity can be extended in so many ways to help work on visual memory!
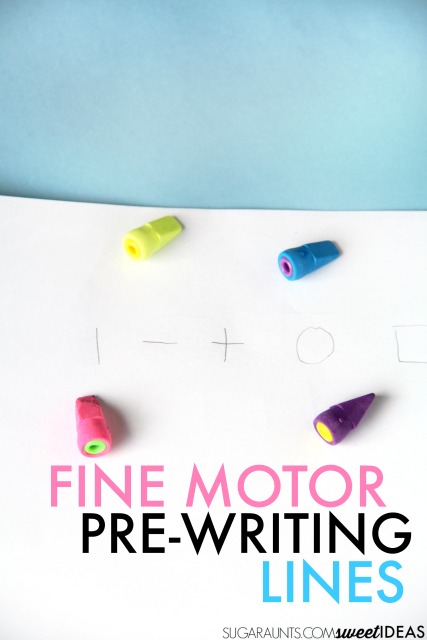
    We did a few shape copying activities as well.  Little Sister had fun creating a neighborhood of houses using our colored lollipop sticks.  

    Visual Memory Activities to help with Visual Memory Deficits:

    • Memory Games (affiliate link)
      games or Concentration games (affiliate link)
    • I Spy games and books (affiliate links)
    • Encourage the child to recall the items to be found using visual memory.
    • Form copying games, such as Pixy Cubes (affiliate link)
      Shape sequencing games, like Mental Blox (affiliate link)
    • Place a tray of items in front of the child.  Allow them 30 seconds to memorize all of the items.  Cover the tray with a piece of paper.  Ask the child to recall as many items as they can.  Another version to this game is removing one or more items and asking the child to recall the missing items.

     As always, use your best judgement with your kids.  All activities that we document on this blog are supervised.  The information on this website should not be used as medical advise.  Please contact a therapist for an individualized evaluation if therapeutic advise is needed.

    Visual Memory Definition

    Visual memory can be defined as the ability to both store and recall visual information, and then retrieve that information for later use.

    Visual input such as images, shapes, colors, designs, and patterns contain attributes that allow us to discriminate differences between items in the world around us.

    This is important because we can utilize those visual attributes to identify objects and understand information during functional tasks that we complete day in and day out.

    Visual memory also refers to the ability to remember what you have seen in the past and to use that information in the present or future. This involves working memory, which is an executive functioning skill and involves more advanced cognitive processes in order to pull information from the “files” in the brain to utilize visual information in a different setting or at another time.

    For example, if a child is shown a picture of a pencil, they use their visual memory to remember what a pencil looks like, so they can recognize a pencil the next time they see one.

    This is a remedial example, but can be expanded on for practically every aspect of daily activities.

    Consider the role that recalling previously seen and understood visual information plays in the following areas:

    • Learning- Visual recall of information, seeing previously learned information, visual reasoning and problem solving, etc.
    • Safety- Seeing how the dials on the stove are placed to cook and turned off ater finishing the cooking task, seeing the door knob of the house is locked, visualizing steps to walk up or down, etc.
    • Driving- recognizing roads, traffic patterns, and even the buttons that operate the vehicle
    • Community access- Getting around in the neighborhood, recognizing traffic patterns and safety signals to cross the road, going to appointments, etc.
    • Daily self-care tasks- Recognizing clothing, seeing patterns and colors to match clothing, visualizing items needed to get dressed or bathe, etc.
    • Taking medicine- Visualizing and recalling medicine bottles, seeing colors of pills, or knowing if one medicine was taken but not the other, etc.
    • Taking care of others- Visual memory implications might include safety, care, and every aspect of caring for others
    • Reading- Knowing where you stopped reading, not re-reading a passage over and over again, identifying letters, words, etc.
    • Writing- Visual memory plays a role in writing including letter formation, number formation, and placement of letters and words on a page.
    • Math- Visual information includes understanding and knowing numbers, symbols, patterns, equations, math facts, etc. by sight.
    • Every other aspect of functional performance!
    Playing a role in the visual memory and specifically the input, storage, and retrieval of visual information, includes many aspects, or attributes of vision, including:

    • Color: The hue, saturation, and brightness of an object or image.
    • Shape: The form or outline of an object or image.
    • Size: The physical dimensions of an object or image.
    • Texture: The surface quality of an object or image, such as smooth, rough, or bumpy.
    • Contrast: The difference between light and dark areas in an image.
    • Position: The location of an object or image relative to other objects or images.
    • Motion: The movement of an object or image over time.
    • Depth: The perception of three-dimensional space in an image.
    • Pattern: The repetition of visual elements in an image.
    • Context: The surrounding environment or situation in which an object or image is viewed.

    These visual attributes are important for processing and interpreting visual information and are used by the brain to create a coherent and meaningful visual experience. Playing a major role in visual memory is the visual perceptual skill of visual discrimination.

    Think of it this way: When you build a 1000 piece puzzle, you dump the puzzle pieces out on a table. Visual memory enables you to:

    • Sort through the pieces to find all of the straight edge pieces.
    • Select pieces that have similar colors or patterns.
    • Notice the shape of pieces.
    • Build the puzzle while holding visual information in the mind to search for a particular color, shape, or pattern on the piece. For example: you might look for a piece with white background and texture, with a straight edge and a round connecting piece.
    • Hold information in the mind to look for another particular piece of the puzzle such as another straight edge piece that is red, but when you come across the white piece with a straight edge and the round connecting piece, you recall where to place that puzzle piece.

    As you can see there are many factors playing into visual memory, but this visual processing skill is an important part of functional tasks.

    visual memory tests
    Visual memory tests include both a functional aspect and a standardized visual memory assessment.

    Testing Visual Memory

    When it comes to testing visual memory, occupational therapists evaluate using several standardized tests as well as non-standardized screenings.

    Essential to testing visual memory skills is the functional aspect: Can the individual utilize short and long term memory in the retrieval of visual information in order to accomplish functional tasks? Answering this question can provide both opportunities to challenge deficits, as well as target key areas of functional performance that need to be addressed.

    Visual memory tests are part of a wider assessment of visual perception or tests of visual motor integration. The occupational therapy provider completes these standardized vision tests during an OT eval. However, there is more to it that the standardized testing.

    Using functional performance to assess visual memory is a key part of the occupational therapy assessment. One role of the OT provider is completing a visual motor test during functional tasks, using skilled interventions.

    For example, the OT can ask the client to remember items that are needed in a particular activity. They can select and/or identify several items to brush teeth: toothbrush, toothpaste, cup, dental floss, water.

    The therapist could assess to see if the client can remember all four words or items after a 10 minute delay, and then a 30 minute delay. At least 3/4 of the items should be recalled. This test can assess visual memory skills in combination with a functional task.

    To further analyze the visual memory aspect, the therapist could point to objects in the room and ask the client to recall them immediately, after 5 minutes, and at the end of the therapy session.

    Visual Memory Tests

    Some of the standardized tests that assess visual memory skills include:

    • Motor Free Visual Perception Test (MVPT)– overall visual perception screening tool
    • Test of Visual Perceptual Skills – breaks down skills into categories
    • The Developmental Test of Visual Perception – thorough test of skills
    • Test of Visual Motor Skills/Perception – a general screener to assess basic skills. Not a great test of different sub categories.
    • The Visual Memory Span Test- This test measures visual memory capacity by presenting a series of pictures to the participant and asking them to recall them in a specific order.
    • Rey-Osterrieth Complex Figure Test- This test requires the person to draw a complex figure from memory after seeing it for a short period of time. The test assesses visual memory, perceptual organization, and constructional ability.
    • Visual Patterns Test- This test requires the person to reproduce complex patterns after seeing them for a short period of time. The test assesses visual memory and visual processing ability.
    • Benton Visual Retention Test- This test requires the person to look at a series of geometric figures for a short period of time and then draw them from memory. The test assesses visual memory and visual perceptual skills.
    • Wide Range Assessment of Memory and Learning- This is a comprehensive memory assessment that includes tests for visual memory, verbal memory, and other memory domains. The visual memory tests include tasks such as recalling pictures and designs.
    • Wechsler Memory Scale- This is another comprehensive memory assessment that includes tests for visual memory, verbal memory, and other memory domains. The visual memory tests include tasks such as recognizing and recalling visual stimuli.


    What is visual memory and why is it necessary for development of functional skills like handwriting and reading? Tips and activities from to work on visual memory in kids and adults.


    Use dyed lollipop sticks to work on visual memory by copying and building shapes, forms, letters, numbers, and pictures. Visual Memory  is an important skill needed for reading and writing.


    Looking for more vision activities?  Try these: 


    Colleen Beck, OTR/L has been an occupational therapist since 2000, working in school-based, hand therapy, outpatient peds, EI, and SNF. Colleen created The OT Toolbox to inspire therapists, teachers, and parents with easy and fun tools to help children thrive. Read her story about going from an OT making $3/hour (after paying for kids’ childcare) to a full-time OT resource creator for millions of readers. Want to collaborate? Send an email to contact@theottoolbox.com.

    The Visual Processing Bundle has everything you need to work on underlying visual processing skills so you can help students with classroom tasks like copying written work, letter reversals, and messy handwriting in fun and engaging ways!

    • Over 235 pages of workbooks, worksheets, e-books, handouts, activity cards, tracking tools
    • Classroom accommodation ideas
    • Checklists
    • Multi-level visual-motor integration workbooks
    • Pencil control worksheets
    • Classroom and therapy activities
    • Activity cards
    • Specific and open-ended activity cards
    • Visual tracking guide

    Target visual memory skills and many other aspects of visual perception and visual motor integration at a special price of just $18 (Regularly $45). Get your copy here.

    Posture Exercises for Kids

    posture exercises for kids

    In this article, we’ll cover posture exercises for kids, for several important reasons. Good posture for children is a fundamental aspect of gross motor coordination skills, physical health, and wellness, yet it is often overlooked in childhood. Developing good posture habits early on can have numerous benefits for children, including improved breathing, reduced strain on muscles and joints, and increased self-confidence. In this post, we’ll explore why good posture should be a priority for parents, as well as some fun exercises to try at home.

    Posture exercises for kids

    Posture Exercises for Kids

    There’s more to posture than standing up straight. Beyond writing posture and supporting visual motor needs, there are many benefits to musculoskeletal alignment. There are also many underlying contributions to good posture to consider.

    One of those aspects that is often overlooked is the relationship to primitive reflexes. Components of childhood development at a young age, including retained primitive reflexes such as the tonic labyrinthine reflex (TLR) can impact posture and result in a slouched position. When typical postural prompts, verbal and visual cues, and physical exercises don’t work, it can be helpful to look in greater detail at the possibility of a retained reflex.

    Another consideration is core strength and stability. Tummy time, crawling, including various types of crawling at different stages, and the visual motor integration that develops at a young age impact posture later in development, as well.

    Before we explore postural exercises in detail, let’s cover why postural support is necessary.

    Then, we’ll cover kid-friendly posture exercises to support these areas.

    Why do Kids need good posture?

    Did you know that everyone, including children need to use good postural mechanics?

    There are many reasons why it’s important to encourage children to maintain good posture from a young age.

    Some of the key benefits of using good posture include:

    Reduced strain on muscles and joints: Poor posture puts unnecessary strain on the muscles and joints, leading to discomfort and even injury over time. By developing good posture habits, children can reduce their risk of these issues in the present and future. 

    Visual motor implications: Upright positioning enables functional reach, alignment for upper body use in manipulating objects. The kinesiology implications in function are huge! When we look at the impact of copying skills in particular, posture impacts the visual motor skills needed for both near point copying as well as far point copying.

    Better sports outcomes: If you child is a wannabe athlete, strengthening their stabilizing posture muscles first will allow them to develop their other muscles for their sport of choice. 

    Coordination- Motor planning is different depending on positioning. An upright posture to throw and catch a ball will have different results than a throw or catch made from a bent over or slouched posture. Similarly, the motor plan to form letters and numbers in written work can be altered by posturing at the desk. Similar differences in motor plans exist for all aspects of motor tasks.

    Increased self-confidence: Good posture can also improve children’s self-confidence, as they feel more confident and in control of their body. Posture changes have been studied to show a boost in confidence overall. 

    Improved breathing: When you are hunched over, the lungs are not able to expand fully. Upright posture, especially with a neutral neck alignment, helps ensure that the lungs can expand fully, making it easier for children to breathe deeply and effectively.

    There are several components involved with improved breathing as a result of posture:

    • With improved breathing, we also get a plethora of benefits like reduced stress, better sleep, and more energy.
    • Additionally, the relaxation breathing benefits supported by postural alignment are a self-regulation coping tool for all ages.
    • As a result of musculoskeletal alignment, breath control is improved. This includes room for the lungs to expand to offer greater lung capacity.


    Learning good posture early in life is a fool-proof way to have good posture later in life; the earlier we build a habit, the easier it will be to maintain long term! 

    Kid-Friendly Posture Exercises 

    There are many ways to work the posture muscles, but we only included the ones that we find work well to motivate children. After all, motivation is key! 

    Try these exercises along with your children – making it a family affair will increase overall well-being and model good habits for all. 

    Play: As occupational therapy professionals, we have to include play as the number one tool in supporting posture and good sitting posture in kids. Why? Because play is the number one occupation or role of children! It’s through play that children develop strength, coordination, motor planning, body awareness, visual motor skills, and more. All of these areas contribute to functional performance. Consider these strategies to use play as a tool to support good standing posture, good sitting posture, and postural alignment within movement tasks:

    Wall Angel: This posture exercise for kids can be done as part of a therapy regimen, or added to a daily routine. Stand with your back against a wall, then raise and lower your arms, keeping them in line with your shoulders.

    • Make it extra fun: pass a toy or a cup of water (outside water play, anyone?) in between your hands as you go. 

    Butterfly Wings: Stand or sit tall, then squeeze your shoulder blades together by moving your arms towards your back, then towards your front, like a butterfly flaps it’s wings. Sit still or fly around! 

    Animal Exercises: This one is a bigge. They all work on core and or shoulder strengthening, as well as some whole-body exercise! Here we have:

    • Crab Walks
    • Bear Crawls
    • Inchworm on the floor
    • Flamingo pose- Stand on one leg. Bend the other leg to touch the foot to the inside of the knee. Stand tall and maintain balance
    • Giraffe Reach & Twist- Stand up tall with your arms stretched straight up overhead and your legs spread apart wide. Push your palms together, then bend over to the side to touch the ground. Then stretch back up to the middle overhead and bend to touch the ground on the other side. Bring your arms back up overhead. Walk around the room like a giraffe without bending your knees.
    • Animal walk games– These can be modified to meet any need and level of skill ability.

    Heavy Work Activities– The input of proprioceptive sensory system offered through heavy work activities offer organizing awareness of the body’s position in space through the joints and muscles. Activities can be used with any theme and offer support for making posture more of a conscious effort. Try these heavy work tools:

    Core Strength ExercisesCore strength supports not only balance and coordination, but postural alignment and positioning in activities. Some ideas to try include:

    • sit-ups
    • planks
    • push-ups
    • wall-kicks
    • pulling self on a scooter board
    • donkey kicks
    • crab walks
    • yoga poses
    • wheelbarrow walking
    • therapy band exercises

    Make Posture Exercises Fun for Kids

    The key to encouraging children to develop good posture habits is to make the exercises fun and engaging. Here are a few ways to do this:

    Play games: Incorporate posture exercises into games, such as having a contest to see who can hold a yoga pose the longest or who can crab walk the farthest without collapsing. 

    Use props: Use props, such as yoga mats, exercise balls, or even play equipment to make posture exercises more fun and interactive.

    Make it a routine: Incorporate posture exercises into your daily routine, such as before bed or after breakfast.

    Posture Exercises for Teens

    For older children, teenagers, or even adults, it’s never too late to incorporate exercise into daily life. Teenagers and adults are likely to have increased time sitting throughout their day – at the desk at school, computer doing homework, or on the couch to watch TV. 

    You may have noticed in the older ages that that teens slouch in their seats while learning or writing at desks. Some of this may have to do with fatigue and sleep hygiene, but other aspect may be posture, and when this is the case, we can see the contribution to learning.

    Usually the most natural way to work exercise into their daily lives is to join a sports team, yoga class, or similar to commit to a scheduled work out. Routine exercise plus some simple reminders at their desk to stretch periodically will be a great place to start. 

    All in all, good posture is an important aspect of physical health and wellness, and it’s never too early to start promoting these habits in children. By encouraging children to maintain good posture and making the exercises fun, parents can help ensure that their children grow up healthy and confident. 

    Sydney Thorson, OTR/L, is a new occupational therapist working in school-based therapy. Her
    background is in Human Development and Family Studies, and she is passionate about
    providing individualized and meaningful treatment for each child and their family. Sydney is also
    a children’s author and illustrator and is always working on new and exciting projects.

    SPECIAL SALE PRICE AT 50% OFF!

    These cards are normally $6.00 Need to add heavy work to help kids regulate emotions, or to use as a coping tool for sensory needs? Heavy work is a valuable strategy to add calming proprioceptive input for whole body awareness, regulation, and stress relief too. Help kids re-group or add movement into learning with these themed brain break cards. 11 pages of themed heavy work activity cards, with 8 activities for each theme. Click here for this special price for readers of The OT Toolbox.