Colleen Beck, OTR/L is a pediatric occupational therapist and the owner and author of The OT Toolbox website. She manages all of The OT Toolbox social media accounts and runs the popular newsletter.
Read about Colleen's experience and career as an occupational therapist, including how The OT Toolbox began on our About The OT Toolbox page: https://www.theottoolbox.com/about-us/
Colleen created The OT Toolbox in 2011 and since then has written thousands of blog posts designed to support therapy providers, educators, parents, counselors, admin, and caregivers in promoting the healthy development of kids.
Check out Colleen's blog posts below:
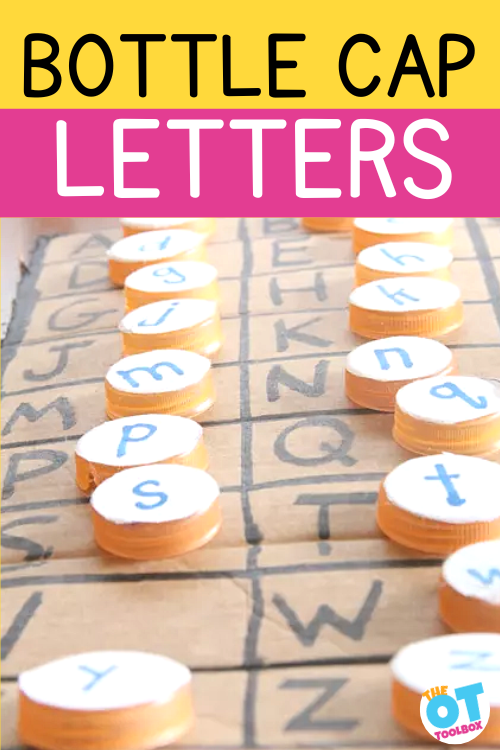
In this older blog post, we shared how to make your own bottle cap letters for multisensory learning and fine motor play. Creating DIY instructional materials can be both educational and fun. One creative idea is to make bottle cap alphabet letters.
Bottle Cap Letters
By collecting various bottle caps and adding individual letters to them, you can create a unique set of bottle cap letters. This homemade alphabet set can be used for matching big and small letters, helping children learn the alphabet in an engaging way. Kids can enjoy the tactile experience of sorting and matching the big and small bottle cap letters, making it a hands-on learning activity that enhances their letter recognition skills!
This Letter Learning game was something I made for Big Sister a couple of years ago. We have played with the letter bottle caps so many times and in a ton of ways.
How to make bottle cap letters
You’ll need just a few materials:
26 bottle caps (one for each letter of the alphabet)
Label paper
Marker
Cardboard for a play mat
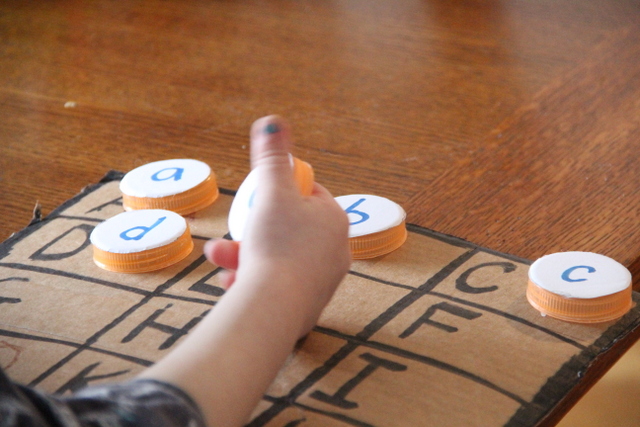
The cardboard has upper case letters and the bottle caps are used to match the letters.
It doesn’t matter what size bottle caps you use because you cut the label paper to fit the caps. If you use a lot of milk in your home, or have access to a bunch of bottle caps in the same size, use those.
In our case, we had a case or two of Gatorade bottles and used those bottle caps to make our letters.
I used a sheet of label paper to make the lower case letters.
Trace a bunch of circles in the correct size.
Cut out the circles.
Write the letters.
Stick them to the bottle caps. Easy!
How to use alphabet bottle caps
Our homemade bottle cap letters are a great DIY instructional material to use in learning and play.
We’ve also played with the bottle caps in play dough,
Use them to spell names and words.
Move the bottle cap alphabet to label objects with it’s starting letter.
Work on learning which direction the “p”, “b”, and “d” should go. This is a great hands-on activity to target letter reversals!
They are so great to manipulate and play with in a sensory bin filled with corn, too.
Or, pair the letter bottle caps with our alphabet exercises to target fine motor and gross motor skills.
How else can we play with these bottle caps??
Working on fine motor skills, visual perception, visual motor skills, sensory tolerance, handwriting, or scissor skills? Our Fine Motor Kits cover all of these areas and more.
Check out the seasonal Fine Motor Kits that kids love:
Colleen Beck, OTR/L has been an occupational therapist since 2000, working in school-based, hand therapy, outpatient peds, EI, and SNF. Colleen created The OT Toolbox to inspire therapists, teachers, and parents with easy and fun tools to help children thrive. Read her story about going from an OT making $3/hour (after paying for kids’ childcare) to a full-time OT resource creator for millions of readers. Want to collaborate? Send an email to contact@theottoolbox.com.
We all want our kids to eat a healthy and balanced diet. However, getting children to try new foods can often be a challenge. Many kids are picky eaters and may refuse to try anything new. But introducing new foods is essential for their nutritional development and helps them develop a more diverse palate. So, how can we help our kids to try new foods and expand their food choices? In this blog post, we’ll share some tips and strategies that you can use to help your kids try new foods and enjoy the benefits of a more varied diet.
Some people love food. They love the way it tastes, makes them feel, the smell, or the memories it evokes. These folks live to eat. A great meal is much better than a new pair of shoes for the “foodie.” The other side eats to live. Food is a necessity, not an enjoyment. That new pair of shoes over a fancy restaurant? Heck yeah! While the title says kids, people of all ages and stages (author raises hand), struggle to try new foods. This post will address how to support kids in trying new foods. It will describe the “why” first, then the “how”.
Related to trying new foods is utilizing a just right challenge with targeting needs while not pushing kids in trying foods that are too far from their preferred food range.
Trying New Foods
For some, trying new foods is a huge step. There may be many reasons why trying different foods is a struggle. Before we can help kids in trying various foods for nutritional purposes, we need to determine the reason why there is avoidance.
Start with why your learner might be picky
Why do some people love food, while others have a limited diet? There are several factors that can influence eating choices.
Once the “why” is determined, it is easier to work on the “how”. Medical issues can be solved first. There will likely be some residual anxiety that needs to be worked through, but often the problem resolves with correct medical treatment. Sensory sensitivities, social, emotional, and eating disorders will be more difficult to resolve.
EATING DISORDERS – these can be very complex, involving the right type of treatment to make headway. There is more to recovery than mind over matter. Some treatments such as inpatient forced feeding, avoiding scales and mirrors, scare tactics, or shaming the learner, are not effective for many cases. If you or your loved one has an eating disorder, do research to find the correct type of treatment.
SOCIAL/EMOTIONAL
Amazon affiliate links are included in this blog post. As an Amazon Influencer, I earn from qualifying purchases.
create a welcoming environment for eating.
discuss what might be negative triggers, working to alleviate these.
start slowly by allowing your learner to try new foods alone, or eating in a quiet pair.
avoid large restaurant gatherings at first.
discuss ahead of time what food might be available at a birthday party or restaurant.
bring a snack in case there is nothing your learner will eat.
decide sometimes not to battle. Your learner will survive a seven-day cruise on bread and ice cream (true story) for the sake of a nice vacation for everyone.
talk about the nutritional benefits of food, the importance of certain foods, and discuss what foods your learner might be willing to try. Scurvy and rickets come from nutritional imbalances. Decide if this information will be effective, scare your learner, or have no effect at all.
have an exit clause. Teach learners to discreetly remove an unwanted food from their mouth with a napkin. Reassure them that they will be able to take the bite out if it does not feel or taste right. Having an “out” often puts learners at ease, making it less risky to try.
employ the “no thankyou bite”. Teach your learner about social etiquette and the importance of trying. It is impossible to say you do not like a food without trying it. One bite (with good effort), is more socially acceptable than just refusing grandma’s casserole. That one bite, may surprise your learner, turning into a new favored food.
systematic desensitization is a long fancy word for teaching your learner to slowly get used to something. The Sensory Oral Sequential SOS method of eating involves slowly desensitizing the brain/body to a new food. It starts with being in the same room as the food, and 27 steps later the food is swallowed. Getting a better understanding on whether food avoidance is oral motor or sensory is a great start.
Make a game of eating. Have the family rate foods they have tasted. One means I will never go near that food again. Five means I like it and will eat it again. Challenge learners to gather points by eating/trying new foods. 10 new foods lead to a prize. Take turns selecting foods to try.This dinner plate (affiliate link)can be motivating.
Take the list of foods your learner currently eats, and make SMALL changes. It may be as small as breaking the crackers into pieces. Try different shapes of pasta, a new flavor of yogurt, a different jelly on the bread, toasting the bread, different kinds of French fries, or a different brand of waffle. Small changes to preferred foods can feel like a big deal.
Hiding food may be a good idea, may backfire, or not make any difference. Sneaking carrots into brownies is a good idea to add nutritional value. It will not teach your child to love carrots, but will add vitamins. Stuffing something weird into their sandwich may backfire, causing your learner to avoid one of the few foods they will actually eat.
Involve your learner in the process. Have them help select the items to buy, prepare the foods, and cook the meals. This can give back some control and motivate your learner to try.
Take a breath and relax. Oftentimes caregivers add more stress by pressing their child to eat more. Responding with anxiety, frustration, or anger is not going to elicit an eating response. Walk away if you can not sit there and pretend it does not matter that your child is living on bread.
Sensory Strategies to support kids learning to eat new foods
Desensitizing the oversensitive sensory system is the first step in taming the picky eater who struggles with sensory based food aversion.
Systematic desensitization as stated above in the emotional section, works just as well for sensory struggles. The Sensory Oral Sequential SOS method of eating involves slowly desensitizing the brain/body to a new food. It starts with being in the same room as the food, and 27 steps later the food is swallowed. Making small changes to foods, having your learner engage with food, giving them control over food choices is a good start.
Tactile – work in and around the hands and mouth. Provide safe choices for touching with the hands such as dry rice, dry beans, sand, play dough, birdseed, shaving cream, or slime. Start with dry textures, moving toward wet and sticky. “Safe choices” refers to something that is not threatening. Playing in birdseed is not threatening to your learner because they know they are not expected to eat it. When comfortable, you can move your learner to engaging with actual food such as whipped cream, pudding, fruits, or a bowl of dry cereal. Decrease tactile sensitivity in the mouth. Use a vibrating toothbrush, an icy washcloth, Twizzlers left out to harden overnight, sour spray, or popsicles to get the mouth used to different temperatures and textures. Our post on food texture issues will offer many more strategies.
Auditory – practice listening to different types of sounds and music. There are videos of people eating and chewing to desensitize your learner. These are difficult to listen to, so wade in slowly. As an alternative, provide noise canceling headphones for a while to help your learner tune out sounds.
Visual – check out videos of people eating, food preparation, presentation of foods, cooking channel, kids cooking shows. The idea is to desensitize the learner to reduce triggers.
Olfactory – work on smell aversion by providing more smells to balance the sensory system in the nose. These can start out pleasant like lemon or peppermint. Open the spice cabinet for sniffing. See if your learner can identify items by their smell. Coffee beans are great to have around as they cancel out smells in the nasal passageways. Once someone is triggered, have them smell the beans to reset their system.
Taste – practice tasting and identifying. Make a conscious effort to teach your learner to describe the food. Try very different tastes. Some people love spicy foods, others can’t get enough of sour (try Warheads sour spray, or lemon juice). Different dipping sauces can help. Ketchup seems to help immensely. Other dippers could be honey, ranch dressing, mustard, sugar, salt, peanut butter, butter, barbeque sauce, honey mustard, etc. Many picky eaters do not like spices or anything extra at all. Be mindful of this. If this is the case, serve very plain foods for a while. Mixed textures are more difficult to tolerate as they have several different tastes in one. The temperature of food can have different effects. Some picky eaters like everything at room temperature. Not too hot or cold for these folks.
Tips for Trying New Foods
Good structured mealtimes are important for successful feeding. Eating at the table for a set amount of time (usually 20-30 minutes), with other people encourages good eating habits
Limit external stimuli during eating if there is a sensory or behavioral issue eating. This not only causes a distraction that limits food intake, it also pairs eating with electronics or tv, and the child cannot eat without it. This is not just a bad habit
Sitting in a proper chair for the child’s size improves chewing and swallowing
There will be setbacks. Keep calm and carry on
Present all foods on the plate in small portions. Or provide two options with small bites of each. Divided plates help ease anxiety, as do small portions
The patterns are not always clear
Things do not always work as we expect
Children will often eat in the clinic, but then refuse to eat at home. This can be related to emotional stress or something environmental going on at home.
Eating is very difficult, so trust and calm are very important
It is ok to let a child have dessert while eating. A bite of carrot and then a bite of cookie.This keeps the child motivated
A complete feeding program takes up to a year to improve the amount of foods that the child will tolerate. Take it slow and be patient
The best advice I ever gave myself when supporting my kids learning to try new foods, was to back off. I took the parent hat off and replaced it with the therapist one. This made all of the difference. Once I looked at my girls clinically, I was able to step back and look at the “why” first. I realized they were not going to starve to death on bread and orange wrapped cheese.
I will leave you with a funny story. I took my picky eater (age 3) to the doctor for her check-up. We discussed food aversion of course. At that stage her only meat was bologna. The doctor looked straight at me and said, “she really should be eating salmon and fresh tuna”. I laughed. The idea of making a huge jump from bologna to salmon is preposterous. Everyone knows you jump to trying hotdog next!
Victoria Wood, OTR/L is a contributor to The OT Toolbox and has been providing Occupational Therapy treatment in pediatrics for more than 25 years. She has practiced in hospital settings (inpatient, outpatient, NICU, PICU), school systems, and outpatient clinics in several states. She has treated hundreds of children with various sensory processing dysfunction in the areas of behavior, gross/fine motor skills, social skills and self-care. Ms. Wood has also been a featured speaker at seminars, webinars, and school staff development training. She is the author of Seeing your Home and Community with Sensory Eyes.
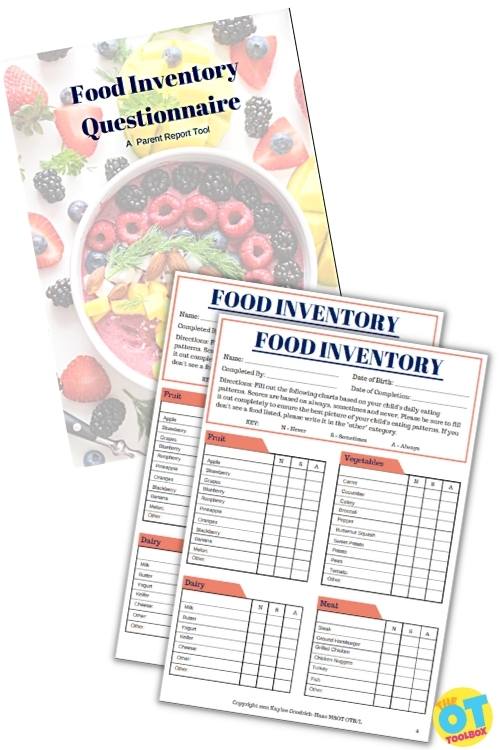
The Food Inventory Questionnaire is provides the therapist with a data sheet for a child’s repertoire allowing for consistent data collection over the course of feeding treatment. It also provides the therapist with a professional looking tool and talking point during the initial feeding evaluation to ensure that a comprehensive list of foods the child eats is gathered to support successful feeding therapy. Get your copy here.
This time of year, a fun therapy theme is in order for building skills, and strawberry activities meet the mark! As the warm summer days draw near, it’s time to start thinking of ways to enjoy the season! What better way to do that than with some strawberry-themed activities? Whether you’re a kid, an adult, or somewhere in between, there’s something fun and inspiring that you can do with these juicy little red berries. Keep reading to find out more about all the strawberry activities you can try.
Strawberry Activities
Strawberry picking is a great springtime activity here in the south. We go every spring and fill our baskets to overflowing. But, what if you could use a few strawberry crafts and activities to build skills?
One of the most remarkable benefits of strawberry activities is the opportunity to get outdoors. When we get outside and explore, we can discover new things, breathe in the fresh air, and get active in ways that aren’t available indoors. We can observe nature in all its glory and appreciate the natural beauty of the world around us.
Below, you’ll find fun strawberry crafts, strawberry writing prompts, and fine motor ideas to use in therapy sessions, in the classroom or at home.
Strawberry picking is a great event to add to your strawberry themed activities. This post includes a free download of Strawberry Themed Activities to fill those endless summer days.
What do do with all of those strawberries?
strawberry snacks
There are so many benefits to cooking with kids, and washing and cutting strawberries to make strawberry snacks has double the benefits for children! Especially if kids are involved in the picking and washing process, they are gaining fine motor and sensory motor benefits.
Just like shrimp in Forrest Gump, there are some great things to do with strawberries. You can eat them whole, dip them in chocolate, there is strawberry ice cream, cheesecake, muffins, pancakes, freeze them for later, make popsicles, smoothies, milkshakes, or fruit salsa.
Making fruit pizzais always fun for kids and has strawberries as a main ingredient.
Frozen Fruit Kabobs has many sensory benefits including the alerting sensory input of frozen fruit.
Strawberry smoothie- Freeze strawberries to make delicious popsicles, smoothies, and other frozen treats! Smoothies are a great form of heavy work for oral motor input.
Another is Fruit Salsa Recipe
Fruit salsa is another strawberry themed activity you can do with your learners. It is an excellent treat to take for potluck dishes, packed lunches, or serve at a summer birthday party.
7 strawberries
1 granny smith apple
1 kiwi
Chop the apple first into small pieces. I use the Pampered Chef chopper. Don’t use a blender, it will be soupy (I made that mistake once). Then peel, chop, and add the kiwi. Lastly, chop and add the strawberries. Once it is all chopped tiny it will resemble salsa.
Serve with dipping sticks of graham crackers, cinnamon pita chips, or spread over ice cream.
Strawberry Crafts
Building fine motor skills, scissor skills, hand-eye coordination, and more happens in occupational therapy crafts. Here are some fun strawberry crafts to get you started:
Strawberry stamps: Cut a strawberry in half and use it as a stamp to create fun strawberry-themed art.
Strawberry paper plate craft: Use paper plates, paint, and green construction paper to make a strawberry paper plate craft. Here are more paper plate activities.
Strawberry pom-pom craft: Use red and green pom-poms to create a cute strawberry craft.
Strawberry thumbprint art: Use your thumb to make strawberry shapes on paper and decorate them with green paint for the stem and leaves. Here are all the benefits of fingerprint art.
Strawberry sun catcher: Use tissue paper and contact paper to create a strawberry sun catcher.
Strawberry paper lantern: Create a strawberry paper lantern with red paper, green pipe cleaners, and a battery-operated tea light.
Strawberry painted rocks: Paint rocks to look like strawberries and decorate with green felt or paper for the leaves.
Strawberry paper chain: Create a strawberry paper chain with red and green construction paper.
Strawberry wreath: Use foam wreath forms, red and green ribbon, and faux strawberries to create a strawberry wreath.
Strawberry paper bag puppet: Use a paper bag and construction paper to make a strawberry puppet.
Strawberry party hats: Use red paper cups and green construction paper to create strawberry-themed party hats.
Strawberry keychains: Create strawberry-shaped keychains with polymer clay.
Strawberry t-shirts: Use fabric paint to create strawberry designs on t-shirts.
Strawberry bookmarks: Create strawberry bookmarks with red and green cardstock.
Strawberry bunting: Create a strawberry bunting with red and green fabric or paper.
Strawberry garland: Use red and green felt to create a strawberry garland.
Strawberry mobile: Create a strawberry mobile with felt or paper strawberries.
Strawberry picture frames: Use foam frames and faux strawberries to create strawberry picture frames.
Strawberry tote bag: Use fabric paint or iron-on transfer paper to create a strawberry design on a tote bag.
Strawberry cupcake liner craft: Use a red cupcake liner and green paper to cut out a strawberry shape. Glue the green paper on top for a stem. Then add seeds using a black marker.
Fine motor Strawberry Themed Activities
Looking for ways to build fine motor skills with strawberries? Try these ideas…
Strawberry picking: Take your kids to a local strawberry farm and let them pick their own strawberries. This is a great way to teach them about where their food comes from and to enjoy the outdoors.
Strawberry art: Use strawberries as a stamp to create fun and colorful artwork. Simply cut a strawberry in half and use it to stamp onto paper or fabric.
Strawberry science: Conduct a science experiment with strawberries to learn about acid and bases. Dip a strawberry in baking soda and watch it fizz, then dip it in vinegar and observe the reaction.
Strawberry math: Use strawberries as a fun way to teach math skills, such as counting, sorting, and measuring. Have your kids count how many strawberries they picked, sort them by size or color, or measure them with a ruler.
As promised, this post includes several PDF files of strawberry worksheets. They are versatile, and can be used in different ways, to meet several goals and objectives. Traditionally, learners will color and cut the strawberries, roll a dice to count the number of berries to add into their basket. They can write some sentences about strawberries, or their berry picking adventure.
Other ways to use this strawberry activity pack:
Lowest level learners can dictate what they would like written
Middle level learners can write one or two words about strawberries, or copy from a model
Higher level learners can write a journal entry about strawberry picking, or search for recipes to make with their berries, creating a recipe page. This turns into a multilevel activity to use during many sessions. They can also draw about their ideas.
Laminate the page for reusability. This saves on resources, and many learners love to write with markers! Note: some children love to use dry erase markers, while others become upset if they can not take their work with them.
Make this part of a larger lesson plan including gross motor, sensory, social, executive function, or other fine motor skills
Pre-cut the shapes for entry level learners to glue onto their basket
Talk about the strawberries, name other berries, make the fruit salsa recipe
Project this page onto a smart board for students to come to the board and drag the strawberries into the basket or write in large letters.
More or less prompting may be needed to grade the activity to make it easier or harder.
Drippy wet glue is messy, and not as convenient as glue stick, however it is superior for different reasons. The added benefit is the sensory input from touching the wet glue, as well as fine motor strengthening from squeezing the bottle
Pre-cut and laminate all of the pieces ahead of time, if your emphasis is on playing the game
More advanced learners can work on social skills by teaching beginners to play
Work in pairs or in a small group to address problem solving, turn taking, and negotiation skills.
Velcro the back of the pieces for a fine motor resistance task
Add glitter! Glitter makes everything wonderful
The strawberry worksheets target several skill areas:
Hand strength and dexterity – staying on the lines builds hand muscles and develops muscle control
Visual motor skills –Combining what is seen visually and what is written motorically. This takes coordination to be able to translate information from visual input to motor output. Coloring, drawing, counting, cutting, and tracing are some visual motor skills.
Scissor skills – Cutting on the lines can be challenging. You may need to highlight the lines or make them thicker for beginning learners
Proprioception – pressure on paper, grip on pencil
Counting/Learning Numbers – Count the strawberries to understand number concepts in addition to coloring and cutting
Social/Executive Function – Following directions, turn taking, task completion, orienting to details, neatness, multi-tasking, attending to task, and impulse control can be addressed using this Strawberry Themed Activity Pack
Handwriting: Letter formation – correctly forming the letters top to bottom. Letter sizing – correctly fitting the letters into the size boxes. Spacing, line placement, directionality, and spelling are also addressed
Copying – copying words from a model, transferring the letters from one place to another
Strength – core strength, shoulder and wrist stability, head control, balance, and hand strength are all needed for upright sitting posture and writing tasks
During the summer, learners have more unstructured time. While it may not be necessary to document the “how” and “why” they are working on these strawberry themed activities, it is important to understand the benefits.
Summer reading list
For some reason, young learners do not like reading. Finding a way to tie reading into fun activities, or your summer theme, will help motivate even the most stubborn learners.
In this classic, The Little Mouse, the Big Red Ripe Strawberry, and the Hungry Bear, (affiliate link) Little Mouse loves strawberries, but so does the big hungry bear. . . How will Little Mouse stop the bear from eating his freshly picked, red ripe strawberry? This classic story is beloved for its humor, expressive illustrations, and surprise ending.
Searching Amazon for Strawberry Themed books (affiliate link) returned over 9,000 options! Remember Strawberry Shortcake? She is still around. There are literary award winners, chapter books, and fun read aloud choices.
Are you hungry for strawberries yet?
Me too. Luckily we filled our basket to overflow capacity this year. Here comes fruit salsa, smoothies, homemade ice cream (don’t forget to add chocolate chips), and strawberry pancakes. Creating thematic activities may take work up front, but the rewards will be worth it.
Amazon affiliate links are included in this blog post. As an Amazon Influencer, I earn from qualifying purchases.
Today, we have a fun blog post for you, especially if you are looking to plan a family fun day! A fun day with the family is the perfect opportunity for spending quality time with your loved ones, away from the stresses of daily life. It’s a time to create memories and bond with one another while participating in activities that everyone can enjoy. Whether you’re looking for family night ideas, outdoor adventures or indoor entertainment, there are plenty of fun and exciting activities that families can engage in. In this blog post, we’ll explore some family fun day ideas and activities that are sure to bring a smile to everyone’s face. So, let’s get started!
Family Fun Day
Ever feel board of the usual day to day monotony? Sound familiar? Many families are over scheduled, shuttling their kids from school or daycare to baseball, scouts, soccer, friend’s houses, and appointments. Sometimes all in one day!
Children learn by watching but also by engaging and doing. They learn by example.
In addition to providing an opportunity for family bonding, research has shown that engaging in fun and stimulating activities with loved ones can have positive impacts on social-emotional development and overall wellbeing, making family fun day a valuable investment in the health and happiness of your family.
Pledge this year to spend less time on electronics. and more time making memories and doing fun family activities. You just might have some fun in the process!
If you have seen the movie, Yes Day, you understand the need for family activities. Spoiler alert: I am not sure if I could go through the carwash with the windows down, but I am definitely down for an ice cream challenge and amusement park. The premise of the movie is, the parents have fallen into a routine of saying no, and are going through the motions of their life, without enjoying any of it.
Why have a family fun day?
Development happens at home and there is opportunity for connection and family collaboration during the day to day activities. However, sometimes all of the stressors of daily life mean that we forget to have fun.
When we take time to focus on fun, whether it’s for an afternoon or an evening activity, or a full day of connection, we have the opportunity to build stronger relationships within the family.
One study showed that families who engage in more frequent leisure activities together reported higher levels of family functioning, including better communication and problem-solving skills.
There are so many beneficial reasons to experience a family day every once in a while:
“The greatest gifts you can give your children are the roots of responsibility and the wings of independence” -Denis Waitley
Setting aside time for family time allows for meaningful interactions. The whole family can work together on a project, create something, do a service project together, or just have fun together doing something different than the usual routine.
Excuses to not have a family fun day
Before I offer up suggestions, hit me with all of your excuses for not doing family activities first:
We are too busy
Anyone can carve out ten minutes for a family game of cards, a race around the house, a walk with the dog, or a game of Simon Says.
We have no money
Most likely this is not true. Your money and funds need to be allocated to include family time. Family fun day and activities do not need to cost ANY money. A board game, obstacle course, game of charades, game of tag, walk along the beach cost nothing.
Our kids hate X, Y, Z
Your kids have to learn the value of family time. It is going to be hard to please everyone at the same time, so start a rotation list of who gets to pick the activity. Chances are, once they get started they will enjoy spending time together. Save the lectures and griping during family time. Savor some purely fun moments together.
We don’t know what to do
Start with what you know. If your kids play sports, throw the ball out in the yard. If you have pets, incorporate them in a fun activity. Google local events in your area for ideas of low cost or free activities near you. There is usually a festival, park, activity, or event coming up. Make a list as a family of all the things you already do, and the things you would like to try.
We don’t know where to start
Start by making a little time. Getting started is the hardest part. Moving out of your routine and comfort zone takes a lot of effort. You can do it! Or start at your favorite place for resources; the OT Toolbox! It is packed with gross motor fun and games.
Now that we’ve worked through the reasons to have a family fun day…let’s get to the actual fun!
Family Fun Day Activities
Here are some family activities whether you are looking for a family fun day or just a ten minute game. Many of these family activities are free and low cost. They are perfect for a family get together or just a weekend of family fun.
Family Olympics is a favorite: pull out the corn hole, croquet, golf clubs, balls, or whatever outdoor games you have and start the competition
Day at the beach- we live near the beach so this is a simple one. You may have to tweak this to meet the needs of everyone in the family, so be prepared.
Arts and crafts – go to a pottery painting place, family painting night, make slime together, paint a mural on a wall, create with chalk, finger paint. The possibilities are endless and you do not have to have talent to spend time together
Game night marathon – Dig out all of the board games and start playing! Candy Land marathon if you have littles, and the sky’s the limit for older children.
Learn something new – learn a new language together. How about sign language?
Cook together – Making pretzels, cookies, pizza, or homemade ice cream are always fun. These cooking with kids recipes will get you started.
Make a fort – Get out the blankets, pillows, rope, or whatever it takes to make an awesome living room fort. Break out the books and snacks!
Tent camp – throw up a tent in the backyard for a night with smores, card games, and telling stories.
Local tourist spots – check out the local tourist spots in your area. An aquarium, museum, carriage ride, walking tour, factory tour, river boat cruise are a fun way to spend a day together
Geocaching – This is the world’s largest treasure hunt! If you have never tried this, you are in for a treat
Jigsaw puzzle – Dust off that puzzle and lay it out on the dining room table
Volunteer – There are a lot of local opportunities to spend a day helping others through various service ideas.
Day trip – Pack a lunch and get out there. My parents used to take us for a Sunday Drive, and while I hated being trapped in the car, we did spend the day together singing, playing Ispy, and having a picnic lunch.
Day out – cast your net a little wider. How far is the next city? How about a state park or lake?
Make a sensory dough recipe and cook up some homemade play dough, slime, oobleck, or moon dough!
Make a scavenger hunt for the family to follow
Run – Do a 5k or marathon together. There are fun themes like the Hot Chocolate 5k, The Cupcake Run, and the Santa Race.
Car wash – Washing the cars can turn into a fun activity on a hot day with a hose and sprinkler. An added bonus of an ice cream trip at the end is always a hit.
Bike ride – get out there in your neighborhood, on the greenway, or go to a park.
Movie Night – While movie night is super fun once in a while, it is not really a family activity. You can make it more interactive by lying on a big blanket together on the floor, talking about the movie, making and eating a fun snack, taking short breaks for activity during the movie, or watching an interactive sing along movie. We love the drive-in movie theater. We fill the back of the car with blankets and open up the back door to pile in and watch together. This often includes snacks, pizza, a frisbee or football, and a whole lot of fun.
Family fun time does not need to be extravagant. This list of family activities could be endless. However, just select one thing from the list and go with that.
Make family activities a habit. Plan on one night or one afternoon and plan to have fun together.
Put them on the calendar and make a commitment. You might have to start with one a month, or one a quarter, but start somewhere.
Our next adventures (with and without our grown kids) include SeaWorld, pottery creating, a night at the theater, a visit to the boat show, a mystery dinner activity, date night fun boxes, and a spring camping trip. Our calendar is booked! How about yours?
Victoria Wood, OTR/L is a contributor to The OT Toolbox and has been providing Occupational Therapy treatment in pediatrics for more than 25 years. She has practiced in hospital settings (inpatient, outpatient, NICU, PICU), school systems, and outpatient clinics in several states. She has treated hundreds of children with various sensory processing dysfunction in the areas of behavior, gross/fine motor skills, social skills and self-care. Ms. Wood has also been a featured speaker at seminars, webinars, and school staff development training. She is the author of Seeing your Home and Community with Sensory Eyes.
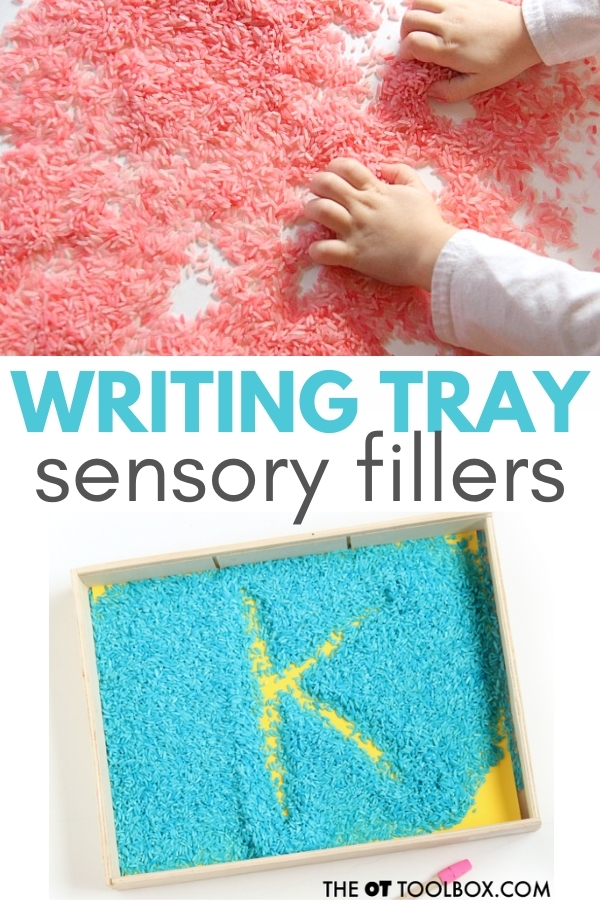
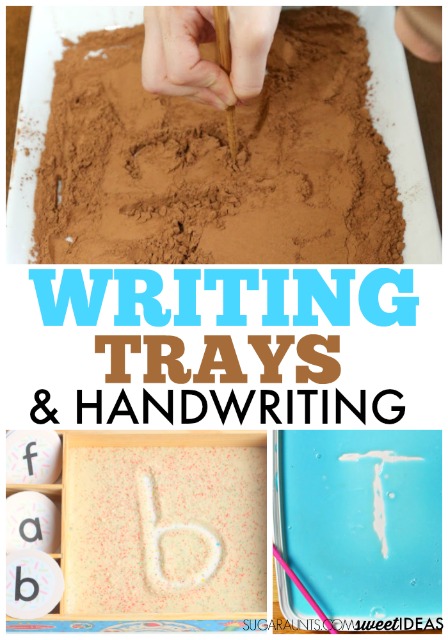
Writing trays are a fantastic way to help kids work on handwriting, letter formation, and pre-writing skills. There are so many benefits to a sand tray (or other sensory writing materials) in helping with letter formation and handwriting. There is a reason that writing trays are a popular way to encourage fine motor skills and an introduction to handwriting; They use a tactile sensory strategy to encourage movement in learning in a multi-sensory way. Writing Trays make letter formation fun and meaningful in a play-based manner.
Amazon affiliate links are included in this blog post. As an Amazon Influencer, I earn from qualifying purchases.
What is a writing tray?
I’ve used writing trays in my occupational therapy interventions and with my own kids for years. Writing trays are such a powerful tool to add a multi-sensory component and moveemnt to learning to write.
Writing trays are a dry or wet sensory material in a low tray or bin type of container. Children can use their finger or a tool such as a pencil, paint brush, or other item to draw, write letters, or form numbers into the sensory material.
Writing Trays are a creative way to help kids learn to write letters, numbers, shapes, and pre-writing strokes. There are a ton of different ways that writing trays can be set up and used in letter formation. Essentially, a writing tray uses a low container (or TRAY) and a medium that can be moved and shifted for writing.
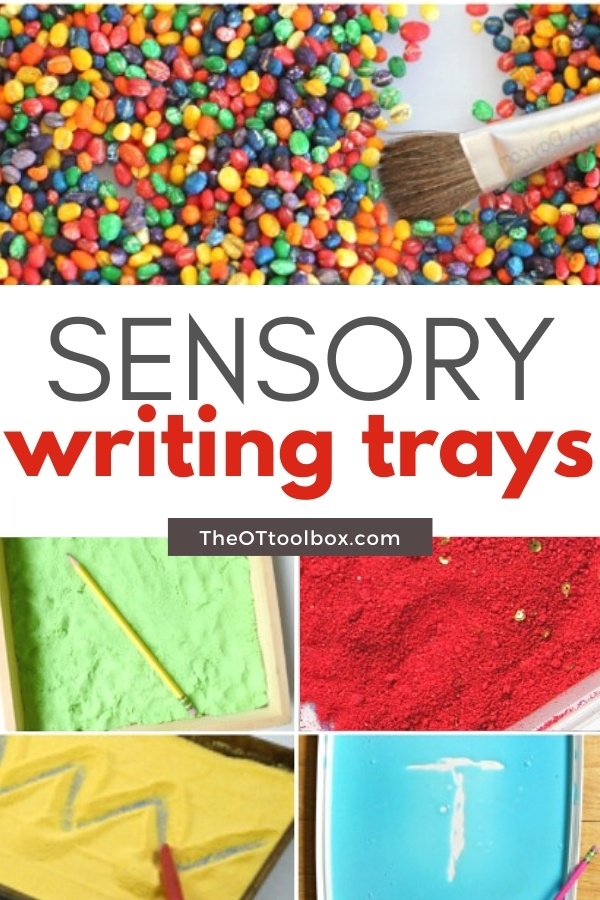
Sensory writing trays can contain sensory fillers of any type. If you are able to move the material in a way that letters can be drawn in the tray, then the sensory writing tray is a success. With a sensory writing tray, children can write letters independently or copy letters from a visual letter card.
You can find them used in schools, clinics, preschools, early learning centers, and homeschool dinging rooms.
Writing Trays are filled with a filler that us manipulated and shifted so that letters or writing lines are visible. Some ideas for filling a writing tray include the sensory materials listed below.
Sand (affiliate link) Colored Sand Rice Dyed Rice Salt Dyed Rice Play Dough (affiliate link) Other Doughs Sugar Flour Cornmeal Slime (Check out the fun we had with slime in a writing tray!) Spices (affiliate link) Crushed Chalk (affiliate link)
While sometimes, a child can use their finger to form the lines in their writing tray, a writing tool is typically recommended. (More on that below.)
Sensory Writing Tray Benefits
Kids can use writing trays to practice letter formation, or pencil control and stroke sequence in writing letters.
Typically, they will be provided with a visual cue or cue card for copying the letters/numbers/shapes.
Other times, kids can form the letter/number/shape independently when prompted to make a specific letter. This is a great way to work on visual memory and independent letter formation.
Be sure to verbally prompt children to form letters or build letters with correct stroke sequence. This is essential for carryover of accuracy with letter formation in handwriting.
Otherwise, the child is simply playing in the sensory tray and not effectively using the writing tray as a tool for improved handwriting.
Encouraging the child who is learning pre-writing strokes and beginning letter formation can use a writing tray as a base for forming letters independently. Try using visual and verbal cues to promote correct letter construction.
A few more must-dos when using a writing tray for addressing letter formation:
Make sure letters are not formed in parts. In other words, don’t allow kids to make a circle and then a line to form an “a”.
Make sure letters are formed from top to bottom.
Realize that the motor plan to form letters with your finger is different than the motor plan to form letters with a pencil or other pencil-like writing tool.
The nice thing about writing trays is that they are very versatile. Students of all ages can use writing trays to work on different levels of handwriting. Some ways to work on handwriting include:
A writing tray can be an effective tool in boosting fine motor skills. Kids can use their finger to form lines and letters while strengthening finger isolation and separation of the two sides of the hand, including an opportunity for the ulnar side fingers to tuck into the palm for a more effective pencil grasp when writing.
Children can also use a tool to form letters in a writing tray. This can be an opportunity to develop pencil grasp.
However. There are a few items that should be mentioned about using a writing tray to address pencil grasp and appropriate motor plan for letter formation.
Writing Trays are a common tool. But if you just place a writing tray in front of a child, you will likely see an inefficient writing activity. You will probably see most kids forming letters with an awkward grasp on the writing tool, a flexed and deviated wrist, an abducted shoulder, and generally ineffective positioning.
Positioning absolutely carries over to letter formation and handwriting.
A writing tray can be used to address pencil grasp and handwriting needs. However, it is essential to use the tray in a proper manner. There are a few ways to do this:
Place the writing tray on a slight slant. Try using a DIY slant board.
Use a low edged tray.
Use verbal, physical, and visual cues for appropriate positioning.
Position the writing tool in your child’s hand with an appropriate tripod or modified tripod grasp.
Show the child how to hold the tool at the end of the tool as if they were holding a pencil.
Once you’ve got your writing tray set up and positioning taken care of, it’s on to the fun stuff…making a writing tray!
How to make a Writing Tray
Making a writing tray to gain benefits of teaching sensory handwriting is easy. You can use materials found around the home.
The options are limitless when it comes to writing tray combinations! You can create a writing tray in any theme or to meet any need. You’ll need just a few items: a container, a filler, a tool, and letter cards.
Writing Tray Ideas
First, you’ll need a low tray, basket, bin, or other container. We’ve used a variety of containers in our sensory writing trays. You’ll want a container that will hold the sensory writing material within its edges.
In some cases, you can even scatter the sensory material on a flat surface like a table or a plastic table cloth on the floor. For example, we used dyed rice right on the kiddie picnic table for a pre-writing and hand strengthening activity.
Kids will be using a tool or their hands to write letters and the sensory material can scatter. Some specific ideas include:
Kitchen baking trays (jelly roll pan or cookie sheet with edges)
Food storage containers
Melissa and Doug wooden puzzle boxes
Cardboard boxes cut low on the sides
9×11 cake pan
Shirt box
Tray
Low basket
Writing Tray Tools
Next, you’ll need a tool to use to write the letters. This can be items found in the home as well. Some writing tray tools include:
Next, an important part of a writing tray is the letter model. As mentioned above, writing trays are great for copying pre-writing lines, shapes, letters, numbers, and words.
Cards can be used as a visual model for forming letters or words. Some cards include direction arrows. Others might include a sight word or spelling word for the child to copy. These cards can be positioned in different positions to address different needs.
Position the letter cards right in the tray for near-point copying.
Position the writing tray cards in a vertical position near the writing tray to challenge vision shift.
Hang the writing cards on a wall for far point copying to work on visual shift, visual attention, visual memory, and copying from a distance.
Writing Tray Fillers
You’ll also need a sensory material to act as a filler. This is the material that the child will actually “write” in. When we say “write”, they are using the tool to form letters as the sensory filler moves in the tray. They will not actually write a letter with a pencil or other marking device. Sensory filler material can be as creative as you let it. Some writing tray fillers include these materials:
Click each link for ideas on how to set up these creative writing trays.
As you can see, the ideas are limitless when it comes to sensory handwriting! Use a theme or materials that meet the needs of your child or client and are motivating and fun!
Colleen Beck, OTR/L has been an occupational therapist since 2000, working in school-based, hand therapy, outpatient peds, EI, and SNF. Colleen created The OT Toolbox to inspire therapists, teachers, and parents with easy and fun tools to help children thrive. Read her story about going from an OT making $3/hour (after paying for kids’ childcare) to a full-time OT resource creator for millions of readers. Want to collaborate? Send an email to contact@theottoolbox.com.
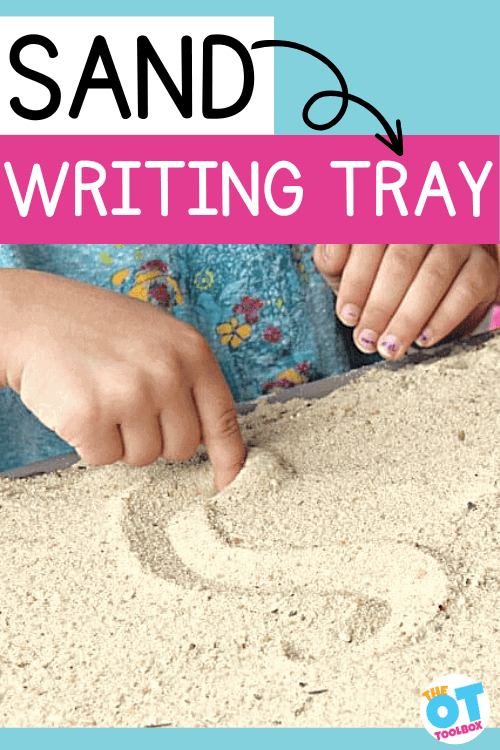
Sand Writing Tray
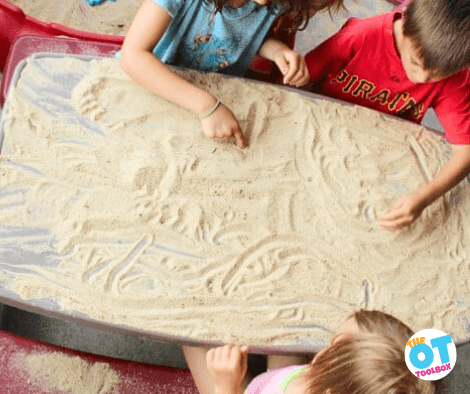
One very easy way to create a sand writing tray is to use a child’s picnic table placed either outside in a sandbox or over a tarp (or outdoor space where it’s ok that sand goes into the ground and lawn).
We loved using our kid’s picnic table in this way to make a sand writing tray.
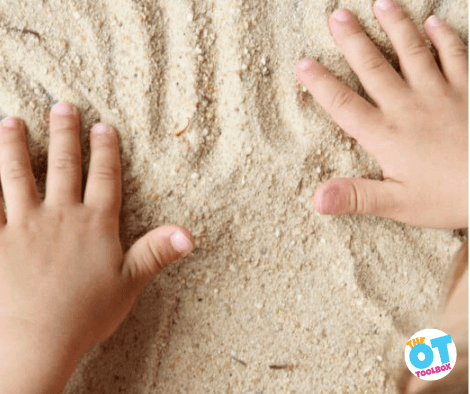
For this sand writing tray, we made it super simple and just dumped a thin layer of sand onto our (Amazon link) Little Tykes picnic table. Then, I invited the kids to all sit down and draw in the sand using their fingertips. This is a great exercise in finger isolation.
Practicing letters in a sensory surface like writing and drawing in sand on a picnic table surface is a motivating and fun activity for kids because it’s not something they typically do.
Kids learn new skills well with a multisensory learning experience and a sand writing tray is a great, inexpensive way to do just that.
To encourage vocabulary and verbal expression, tell stories on the table surface and ask questions that extend the story further. Then, while practicing lines and drawing shapes and figures, gently smooth the sand with the palm of your hand and start over again!
Preschoolers can practice pre-handwriting lines, while older kids can form letters and numbers in the sand. They can also copy and trace letters to improve their penmanship skills.
In today’s blog post, we’re talking all about social emotional activities for preschoolers…and for good reason! We love these emotions activities for preschoolers. Emotional skills have become one of the most discussed milestone checklists as children learn how to respond to their feelings at home and at school. Having a set of emotion activities preschoolers love is a key component to developing awareness about feelings and empathy during the preschool years. Another great resource is our stages of empathy development.
Social Emotional Activities for Preschoolers
When a child experiences a BIG feeling, they don’t always have the words to express those feelings with others, sometimes resulting in a tantrum.
There are many reasons that children become frustrated, including wanting attention, being annoyed with peers, and the desire to do something they are unable to do (just to name a few.) We’ve talk before about self regulation in preschoolers, and how to foster regulation needs, however, it’s worth breaking down the social emotional component into further detail.
As children learn how to communicate with both gestures and words, tantrums tend to dissipate and children start to learn about collaboration, discussions and compromise. In this blog, we will discuss how to support children’s emotions during the toddler and preschool years.
Have you heard of the “terrible twos” or the “threenager?” These words are commonly used for young children as adults discover that they show their feelings with their body (not necessarily with words.) As they grow into four and five year olds, they learn more language and negotiating skills. But what about when they are two and three?
In order for a child to understand what they are feeling and how to communicate those feelings in a productive way, they must first learn the words to express those feelings.
According to this article, “A typical 2-year-old can say about 50 words and speak in two- and three-word sentences. By age 3, their vocabulary increases to about 1,000 words, and they’re speaking in three- and four-word sentences.”
Dr. Robert Plutchnick, psychologist, discovered over 25000 emotions in his famous emotions wheel. As children become more aware of their feelings and gain new ways to communicate them, their response to frustration improves.
Why Use Play to Foster social emotional skills in preschoolers?
All children learn the best through play, and that includes learning social and emotional skills.
Whether learning at home or at school, preschoolers respond best to positive reinforcement and consistency. Using meaningful and motivating books, games, and toys, as well as social emotional play opportunities support preschool-aged children in developing these essential skills.
Through play, preschoolers learn to use their sensory systems to calm down when they are feeling overwhelmed. They learn the words to communicate their feelings.
One of my favorite parts of using social emotional play activities is they also foster problem solving and confidence. When children learn how to problem solve, they can use what they learn in the future if they start to become frustrated about the same situation again.
As children start learning more about their feelings, and their emotions, their social skills start to blossom. This social skills checklist is an amazing resource that describes, in detail, the following social skills that children learn in their preschool years:
Conversational Skills
Interpersonal Skills
Emotional Skills
Social Play
Emotional Development
Emotional Regulation
Peer Interactions
Self-Awareness Skills
Self-Confidence
When in the classroom, it is important that we give children ample opportunities to practice emotional skills through large group, small group and free play activities.
Every child learns new skills differently, and when we use multisensory emotion activities to teach emotional concepts to preschoolers toddlers and preschoolers are able to remember these skills quickly.
One tool that can support preschoolers (and those of all ages, as well) are social stories to support social and emotional considerations in any given task.
preschool Social Emotional Activities
If children have the opportunity to play with emotions and talk about feelings on a daily basis, they are able to respond to their feelings much easier when they are feeling upset or overwhelmed.
emotions activities for preschoolers
Here are my 5 favorite playful activities to teach social and emotional skills to preschoolers:
Feelings FREEZE-
Kids LOVE to move. What better way to teach them new emotion words then with a “FREEZE” game? Turn on some music and have kids dance or run around. When you pause the music, say an emotion and the kids must freeze and make the face that goes along with that emotion. You can expand this game into beginning reading activities by writing the feeling on a piece of paper and holding it up (for older children.)
2. Paper Plate Emotions Faces-
You can use items like paper plates, cupcake liners, or even pieces of construction paper to pretend and identify with emotions. Emotion faces are a wonderful activity for preschool circle time or small group time. You can make them as elaborate as you like or you can keep it simple by having the children draw their own faces! These feeling faces can be used as part of a pretend play scenario in the future. These pumpkin emotion faces are one idea. Or, you can use this emotion faces worksheet for older children.
Chalk Emotions-
I love bringing in sensory components to all lessons I teach in preschool, and water and chalk is one of my favorite was to do so. Chalk activities are just one of those fun and creative ways to learn through play. For this activity, draw some feeling faces on the concrete with chalk. Fill up a bucket of water and add some paint brushes to the water. Have children trace t he chalk faces with the wet paint brushes and watch the faces “disappear!” This is a fun way for children to name the emotion while making that emotion “disappear.” Extend this activity with children by asking them what they can do when they feel the way the chalk face does.
Fine Motor Emotion Eggs-
Fine motor strengthening is incorporated into this super fun plastic egg activity where the top part and bottom part of faces can be mixed and matched. As children pull apart and put together the eggs, have them name the feeling they “made.” To expand on this, ask them what recently made them feel that way and what did they do to feel better. The more conversations we have about how to respond to feelings, the more likely children will remember what to do when they feel that way.
5. Using Your Voice (Puppet Shows): When children are learning how respond to other children’s behaviors, a lot of times they result to hitting, grabbing, or other means of communication. Creating a puppet show area of the classroom, to do as a center time or even during large group time, can encourage children test out different social situations and practice (with puppets) how to respond. Including a teacher puppet show during large group is often a great way to model these “shows” and encourage children to come up with their own (such as what to do when you want a toy.)
5. Friendship Activities: Preparing some small and large group activities that highlight friendships, such as books, art activities, and more, can support children in understanding why creating friendships at school is important. You can find lots of friendship activity ideas in our blog.
6. Story time-There are many preschool book activities that describe feelings in a fun way for preschoolers. The following list of books are developmentally appropriate for young children and are great ways to talk about different feelings throughout the day.
F Is for Feelings by Goldie Millar
Feelings to Share from A to Z by Todd Snow
Llama Llama Mad at Mama by Anna Dewdney
Lots of Feelings by Shelley Rotner
My Many Colored Days by Dr. Seuss
The Great Big Book of Feelings by Mary Hoffman
Today I Feel Silly, & Other MOODS That Make My Day by Jamie Lee Curtis
Emotional development is an important skill that preschoolers learn through experiences. With ample opportunities to practice and the right supports, children will learn how to manage their feelings in a positive way.
When emotion activities are included regularly throughout a child’s day, discussing and talking about how they feel and how others feel becomes familiar and natural. When they have the words and the practice to communicate feelings and emotions with adults and peers, they will be able to use these skills when they are overwhelmed.
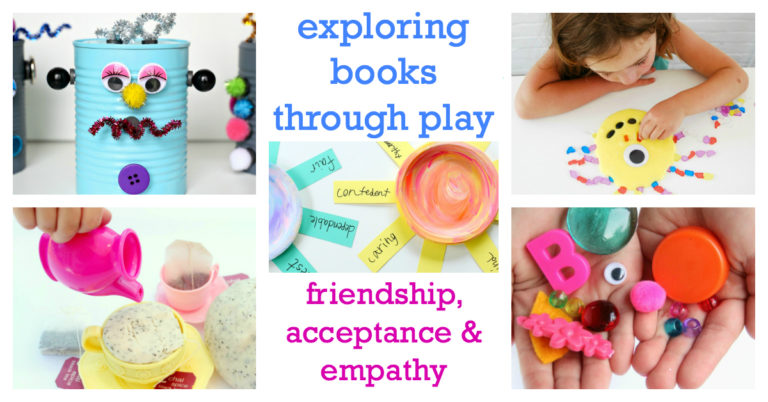
Exploring Books Through Play is a digital, e-book designed to foster social emotional skills like friendship, acceptance, and empathy with play activities. Grab your copy today.
7. Use any of the activities above along with a feelings check in activity. This can be a great way to start the process of understanding emotions and how to support needs for regulation.
pre-k social emotional activities
Early childhood educators need to consider the social and emotional development of young children in the preschool or pre-K environment. These developmental skills drastically impact learning and skill achievement in the classroom setting.
When in the classroom, typical developmental milestones are considered and lesson plans are based around child developmental stages. However, being able to manage emotions and feelings with minimal supports and redirection empowers children.
As they start attending preschool, all of the classroom and peer situations may be new. They are now around friends who are also delayed in social and emotional learning. A large focus of curriculum has shifted from pre-academic to a strong social/emotional foundation, in order to support our most youngest learners in self-care, self-soothing, turn taking, and basic play skills with peers.
In addition to the social and emotional activities for preschoolers listed above, some more advanced ideas can be used including:
Group Discussions Lead by Children: One of my favorite ways to support children listening to each other and taking turns, is to incorporate group discussions within circle time. This could be in a question/answer format, or in a story creation activity. To create a story with your preschoolers, the teacher would start by saying “Once upon a time there was a ______.)” Then the child to the right of the teacher would say the next sentence. The child to the right of that would continue the story with the next sentence, and so on! Once it gets back to the teacher, the story is completed. Not only is this a great activity for literacy and language development, but every child is listening to each other to find out what happens next.
Calm Down Corner: Visual and tactile supports help people of all ages, but it is essential to have a visual space in the classroom for preschoolers to retreat to when they need time to calm down. A calm down cornermakes creating this area simple and makes it a positive experience for children. A variety of self-led choices can be made in the classroom space, with items that help children calm down using their sensory system. As they calm down, they can use the visuals included in the kit to explain to other children and adults how they are feeling and what they need support with.
Classroom Jobs: When children take care of the classroom environment together, they take responsibility and care about the classroom and what is inside. As a team, children learn to work together to keep their classroom and the children in the class safe and functioning.
Classroom Safety Rule Creation: Having rules that every child understands and acknowledges allows children to be reminded of and help other children remember basic rules throughout the school day. Always phrase your rules in the “do” instead of the “don’t.” For example “Use Walking Feed” instead of “Don’t Run.” This tells children what they should be doing.
Block Creations: Have you noticed that a lot of the daily frustrations occur in the block area, where children are all wanting to use the same blocks (whether that be Magnatiles, large wooden blocks or the cars?) When children are supported in sharing space and materials in a highly sought after area, they are able to generalize those skills into other areas of the classroom. In the morning, have children work together to create a block creation that they are all a part of. That could be building their town, a local zoo, the space station, etc. Block play supports collaborative play in one of the most creative ways.
Some more resources for social and emotional learning:
Jeana Kinne is a veteran preschool teacher and director. She has over 20 years of experience in the Early Childhood Education field. Her Bachelors Degree is in Child Development and her Masters Degree is in Early Childhood Education. She has spent over 10 years as a coach, working with Parents and Preschool Teachers, and another 10 years working with infants and toddlers with special needs. She is also the author of the “Sammy the Golden Dog” series, teaching children important skills through play.
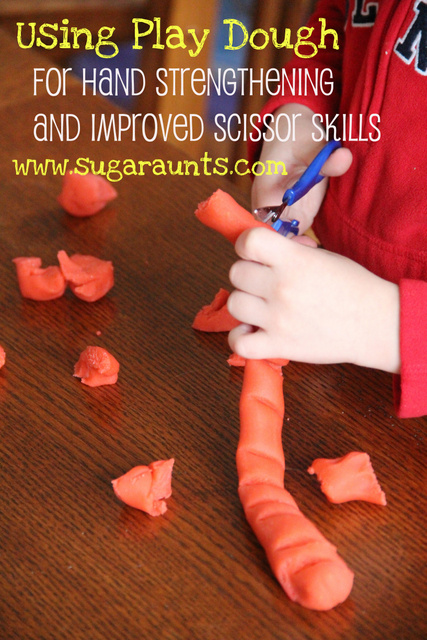
This cutting playdough activity is a fine motor hand strengthening activity that builds scissor skills, bilateral coordination, and more! We love using play dough snakes to target these skills, but in this blog post, we’re talking all things cutting playdough with scissors!
Cutting play Dough
By cutting playdough with scissors, you can quickly target several areas:
Little Guy is just learning how to hold the scissors, how to coordinate both hands together when cutting, how to open and shut the blades of the scissors to cut smooth lines, and how to stay on a line when cutting.
This little activity is perfect to work on all of those things.
Plus, he thought it was a ton of fun to Cut. Play Dough. With. Scissors.
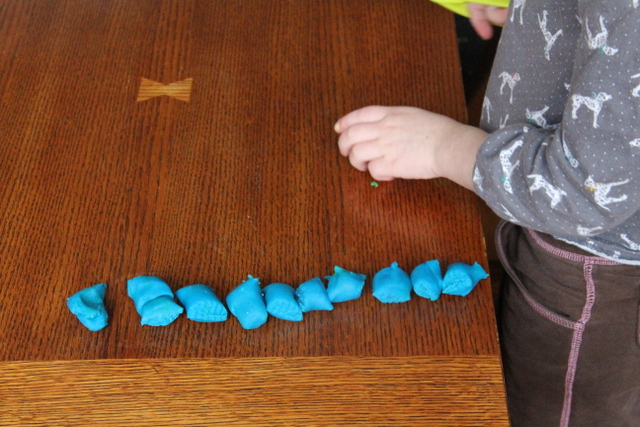
First, roll out the play dough into a “play dough snake“…this is a perfect fine motor strengthening activity for little hands.
Mom, You then use the blades of the scissors to press lines into the “snake”.
Why cutting play dough?
The child will hold the play dough snake with his assisting (non-dominant hand). Using the helper hand in a coordinated manner can be tricky for the new cutter. A fun way to practice (like this activity) is a real confidence booster.
Holding the scissors in a vertical position is sometimes, a big part of the problem with accuracy of cutting paper along lines. Cutting the play dough snake usually will automatically correct a horizontal or diagonal position of the scissors. Practice will help to carry-over the positioning when cutting paper.
The nice wide and short lines in the play dough snake are great for practicing line awareness and the “open/shut” motion of the scissors when cutting. Plus, the slight resistance of the play dough really provides feedback to the child. We cover this in our post on graded precision.
Just be sure to do this activity with your child. This shouldn’t be an unsupervised activity…a little finger can get caught in the scissors easily.
This one looked like so much fun that Big Sister had to join in too 🙂
Expand the activity to cut play dough with scissors
One way to make this activity more difficult, or to add resistance to the playdough for greater hand strengthening is to freeze the play dough. Popping it in the freezer makes the dough more resistant, adding greater feedback through the hands.
More fine motor activities:
Working on fine motor skills, visual perception, visual motor skills, sensory tolerance, handwriting, or scissor skills? Our Fine Motor Kits cover all of these areas and more.
Check out the seasonal Fine Motor Kits that kids love:
Colleen Beck, OTR/L has been an occupational therapist since 2000, working in school-based, hand therapy, outpatient peds, EI, and SNF. Colleen created The OT Toolbox to inspire therapists, teachers, and parents with easy and fun tools to help children thrive. Read her story about going from an OT making $3/hour (after paying for kids’ childcare) to a full-time OT resource creator for millions of readers. Want to collaborate? Send an email to contact@theottoolbox.com.
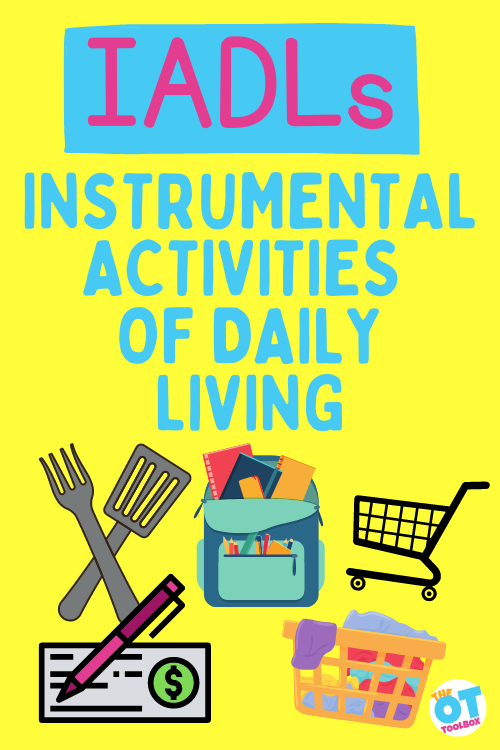
This post is all about exploring Instrumental Activities of Daily Living, or IADLs which are addressed in occupational therapy interventions. What are IADLs? What are examples of IADLs? What is the difference between ADL (activity of daily living) and IADL? And, how to explain all of the above in layman’s terms for caregivers/parents/teachers…We’ll cover all of that here!
Instrumental Activities of Daily Living
As a “seasoned” therapist, I used the term ADLs (activities of daily living) for all tasks regarding self care. The term IADLs is newer to me. Perhaps it is because I work with young children, who do not do a lot of instrumental activities of daily living.
However, IADLs are an important part of occupational therapy, especially when considering the goals of the person. One individual receiving OT services may have a goal to work on cooking so they can make meals for their family. Another may have a personal goal to balance a checkbook so they can manage their own finances.
iadl medical abbreviation
IADL is a medical abbreviation for Instrumental Activities of Daily Living. Related, but different than ADLS, which stands for activities of daily living.
These two areas are primary focus of the occupational therapy practitioner, as together, they represent all functional occupations, or the daily tasks that make up an individual’s day.
IADLs are different for every individual and also vary depending on the age of the individual. A middle school student or high school student will have different instrumental activities of daily tasks that make up their day.
This leads to the question….
What are IADLs?
Instrumental activities of daily living are more complex activities or tasks that a person does to maintain independence in the home and community. IADLs are not necessary for fundamental functioning, but allow an individual to live independently in their community. This includes tasks beyond activities of daily living that involvement with physical and social environment.
The definition of “instrumental” is; very important in helping or causing something to happen or be done. It is something that is useful or helpful. It is used as an aid.
A simple way to remember what IADLs are, is to use the mnemonic SHAFT.
S – shopping
H – housekeeping or housework
A – accounting or managing money
F – food preparation
T – telephone/transportation
The SHAFT mnemonic can help you distinguish the difference between ADLs and IADLs and help you identify what an IADL is without having to remember a whole list of IADLs.
IADLs, while physical in nature, involve a certain amount of cognitive thinking (executive functioning skills). This is the reason young children are not able to do these tasks yet, and the elderly population loses this ability first, as their cognitive abilities decline. An interesting statistic is the fact that 50% of persons over the age of 85 need assistance with at least one IADL activity.
It’s important to realize that one thing that contributes to the ability to complete more complex daily tasks is mental dexterity which enables quickness of thought in IADLs.
Examples of Instrumental Activities of Daily Living
So, what are some examples of IADLs?
Managing a budget, including using the ATM, counting and using money, managing bank accounts, writing checks, and remembering bills.
Remembering to go to doctors appointments and taking medications as prescribed. Medication management includes taking medications as prescribed, learning which medications treat which conditions, learning about possible side effects, and discussing medications with health care providers
Planning and preparing meals, including hot and cold items. This could also pose significant safety and health risk if done incorrectly
Being able to do housework, sweeping, dusting, vacuuming, washing dishes, cleaning bathrooms. This can include arranging for help if desired
Doing your own shopping – groceries, clothing, or anything else you need. This includes identifying which stores sell specific goods, making shopping lists, and planning routes for shopping trips.
Using the telephone and computer, including landline, cellphone, internet, and/or medical alert device as a means of communication
Managing transportation – driving, hiring cabs, arranging for rides, navigating the community, or taking public transportation
Yard work – includes mowing grass, raking leaves, pruning shrubs, and other tasks.
Clothing care/Laundry – includes washing, drying, folding and putting away clothing
Time management – includes telling time, reading a calendar, following a schedule and making appointments
Managing your household in its entirety – including pet care, arranging for help, childcare
Any and all extracurricular activities – maintaining a hobby or socializing with friends, family, and peers
List of IADLs
We put together a list of IADLs to give you a better idea of that this looks like.
A list of Instrumental Activities of Daily Living includes aspects that can apply to pediatrics, including school-based OT as well as life skills addressed in OT sessions:
Retrieving things or putting things away which are needed for ADLs
Getting objects out of cupboards, drawers, closets, etc.
Using a telephone or computer
Handling mail
Using money
Writing checks and balancing a bank account
Using vending machines
Using equipment
Using public transportation
Purchasing items from stores
Caring for devices like ambulatory aides
Laundry tasks
Home management tasks
Meal preparation
Shopping
Purchasing food or needed items
Following emergency procedures
Emergency preparedness such as knowing how to call 911 or what to do in the case of an emergency
Home maintenance tasks
Leisure activities (hobbies, playing games, etc.)
Many other components of daily tasks
Serving others through community service- These service ideas are practical ways to help others.
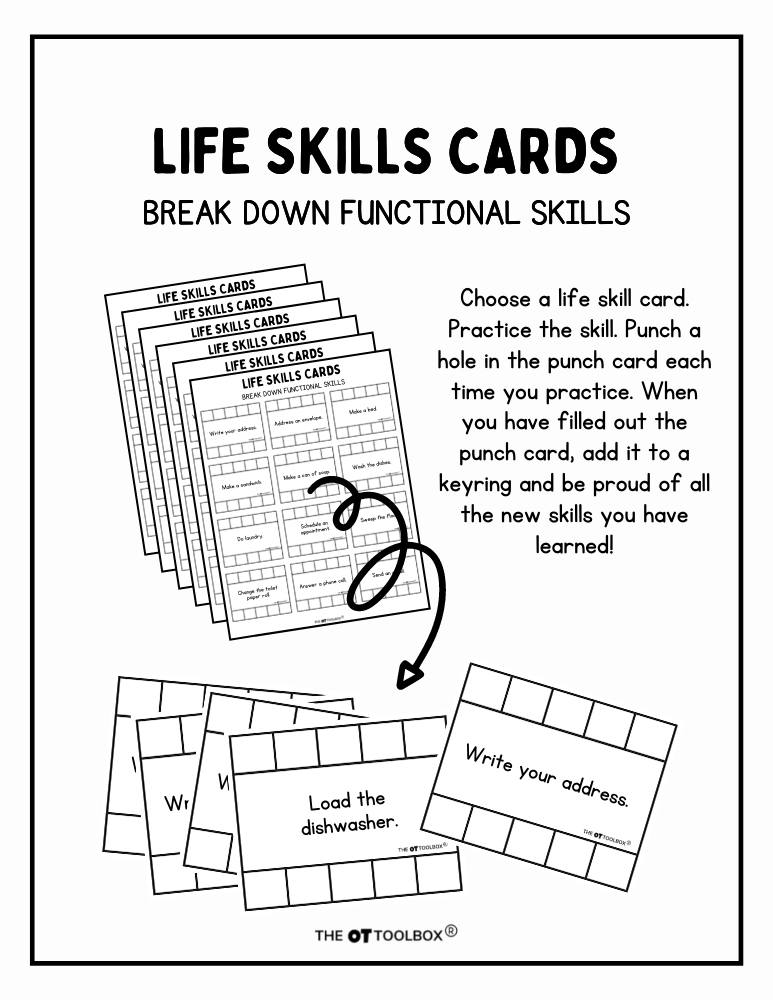
These life skills cards target many aspects of IADLs and are a great tool for practicing daily tasks.
What is the difference between ADL and IADL?
ADLs are the basic things you need to do to survive and be well. IADLs are the things you can do to enhance your personal interactions and/or environment.
ADLs are essential to unassisted survival. If a person can not do these things independently, their ability to live unassisted diminishes greatly. As the name suggests, these are activities done on a daily basis, needed for basic living or survival. A mnemonic that can be used to remember these is DEATH:
D – dressing: including wearing clothes in an acceptable fashion
E – Eating: feeding self (not including meal prep)
A – ambulation: walking, sit to stand, getting in/out of cars/tub/bed/chairs
T – toileting: including using the facilities, then wiping/washing self without help
H – hygiene: bathing, grooming, brushing teeth
A person who can perform basic self care but not IADLs can live independently with some assistance from family or others in the community. For example, they can hire a housekeeper, Meals on Wheels, accountant, lawn care professionals, and a transportation service. This type of person can have help come in daily, or weekly as needed but can do basic self help skills.
In contrast, a person who can not perform basic ADLs is likely to need around the clock care in order to survive. This would include young children, elderly, and people with disabilities.
IADL Assessments
Some common evaluation tools for measuring functional performance levels include the following IADL assessments:
Lawton Instrumental Activities of Daily Living Scale – The scale addresses ability to use the telephone, shopping, food preparation, housekeeping, laundry, mode of transportation, responsibility for own medications, and ability to handle finances.
Independent Living Scales – A standardized, performance-based test that requires the patient to complete tasks in 5 IADL areas: memory/orientation, managing money, managing home and transportation, health and safety, and social adjustment. Norms are included for adults ages 65 and older
Evaluation of Living Skills 4th Edition – requires the patient to complete tasks in the following areas: self care, safety and health, money management, transportation and telephone, work and leisure. The 4th edition has been revised to include modern pictures and communication devices, i.e. cell phones.
Assessment of Motor Process Skills – The assessment evaluates performance during both ADL and IADL skills. The IADL tasks included are meal preparation, home maintenance, and laundry.
A final thought
As you can see from the description of IADL above, you can understand why this has not been a foundation of my work with 2-5 year old children. They are focusing efforts on basic living and self help skills, not laundry, money management, or housekeeping.
Toddlers and young children do not have the cognitive skills for these higher level tasks. As children move into late elementary/early middle school, these skills become paramount in shaping their ability to live independently in their community, and should be addressed frequently.
Victoria Wood, OTR/L is a contributor to The OT Toolbox and has been providing Occupational Therapy treatment in pediatrics for more than 25 years. She has practiced in hospital settings (inpatient, outpatient, NICU, PICU), school systems, and outpatient clinics in several states. She has treated hundreds of children with various sensory processing dysfunction in the areas of behavior, gross/fine motor skills, social skills and self-care. Ms. Wood has also been a featured speaker at seminars, webinars, and school staff development training. She is the author of Seeing your Home and Community with Sensory Eyes.
Target many IADLs using our Life Skills Activity cards. Choose one or more cards to work on at a time. Learners will practice each task ten times, using a hole punch or other marking tool to measure their attempts. Once they have completed the card, learners can display them on a keyring to track their progress. Cards may need to be completed more than once in order to master a skill, however there are some skills that may be mastered after only ten trials. Get your copy here.
In this blog post, we’re covering the components of handwriting in a list with tools and resources to cover each element. Click on each link to find all of the information you are looking for. Be sure to check them all out for a complete understanding of developmental and physiological components to handwriting, creative activities to improve your child’s writing skills, and everything you need to know!
Components of Handwriting
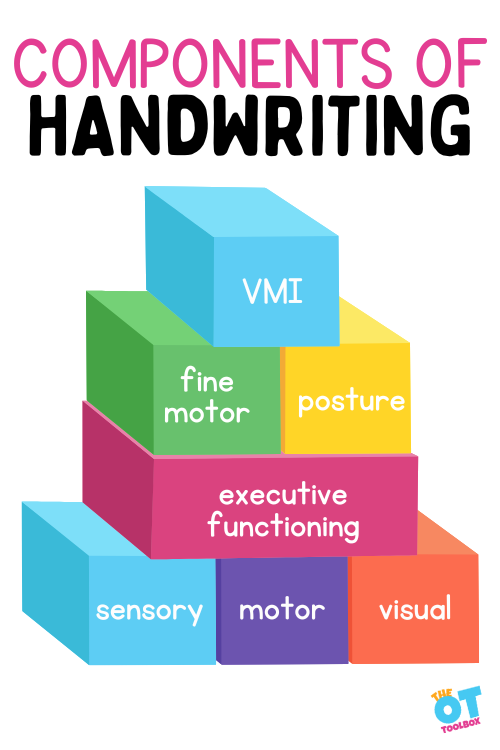
The components of handwriting can be broken down into categories: motor, visual perceptual, executive functioning, and sensory. Each of the building blocks of writing can contribute to handwriting problems when there is a delay in development or issues with building the underlying skills upon the other skill components.
Motor Skills Components- Motor components of handwriting refer to the physical act of writing, which includes the movements made by the hand, arm, and fingers to form letters and words.
Some of the motor components of handwriting include:
Form: The shape and structure of individual letters and words. Read about letter formation.
Size: The overall size of the letters and the spacing between them. Read about size awareness.
Slant: The angle at which the letters are written. This is more applicable to the cursive form. Read about slant in cursive writing.
Pressure: The amount of force used to write each letter. Read about pencil pressure.
Speed: The rate at which the writer produces the handwriting. Read about writing speed.
Writing Posture: The ability to assume and maintain upright sitting posture when writing, using core strength and stability. Read about writing posture.
Rhythm: How smoothly and fluidly the writing flows across the page. Read about writing rhythm.
Visual Perception- Visual Perceptual components involve the visual, motor, and cognitive processes that go into recognizing and interpreting written text.
This includes the visual and spatial aspects of handwriting, such as:
Legibility: How easy the writing is to read and understand.
Alignment: How well the letters and words are placed on the page. Read about margin alignment.
Discrimination of letters: knowing the difference between upper and lower case letters and making the connection between different forms of a letter. read about visual discrimination.
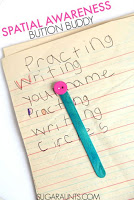
Spacing: How evenly spaced the letters and words are from one another. Read about spatial awareness.
Legibility- A related handwriting component is legibility. This is the ability to read written work, and the ability for others to read the written material. Many of these areas refer to the combination of visual and motor elements, or visual motor skills. Legibility refers to several aspects of handwriting:
Executive functioning components- Finally, a critical piece of the handwriting puzzle is executive functioning skills. We can break handwriting and executive functioning skills down into sub-areas:
I’m sharing each of the Handwriting posts here so you can easily find each topic. If bad handwriting is an issue, check out the fundamental ingredients to handwriting!
From fine motor skills to gross motor skills, and sensory considerations to posture: This is a complete guide to Handwriting for Kids from pediatric Occupational and Physical Therapists.
You’ll find many resources here on The OT Toolbox to support skill development impacting the elements of handwriting that make a difference in overall legibility. Here are some of our favorites:
Even MORE great pages you where you will find tons of Occupational Therapy treatment ideas and info that can be incorporated into simple play at home, using frugal (mostly free) items that you already have:
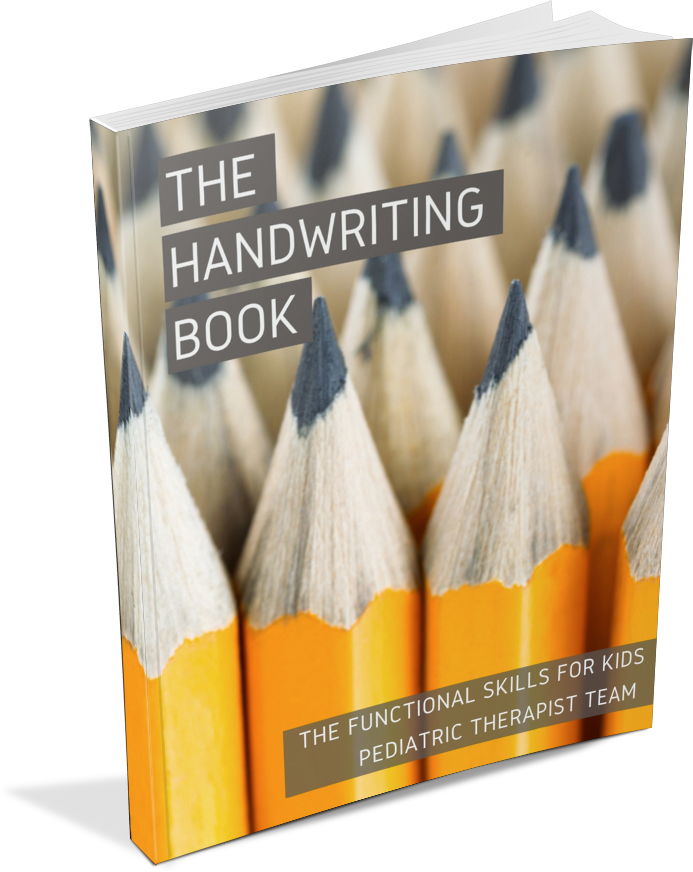
For a comprehensive resource that breaks down each component of writing, grab a copy of The Handwriting Book:
The Handwriting Book is a comprehensive resource created by experienced pediatric OTs and PTs.
The Handwriting Book covers everything you need to know about handwriting, guided by development and focused on function. This digital resource is is the ultimate resource for tips, strategies, suggestions, and information to support handwriting development in kids.
The Handwriting Book breaks down the functional skill of handwriting into developmental areas. These include developmental progression of pre-writing strokes, fine motor skills, gross motor development, sensory considerations, and visual perceptual skills. Each section includes strategies and tips to improve these underlying areas.
Strategies to address letter and number formation and reversals
Ideas for combining handwriting and play
Activities to practice handwriting skills at home
Tips and strategies for the reluctant writer
Tips to improve pencil grip
Tips for sizing, spacing, and alignment with overall improved legibility