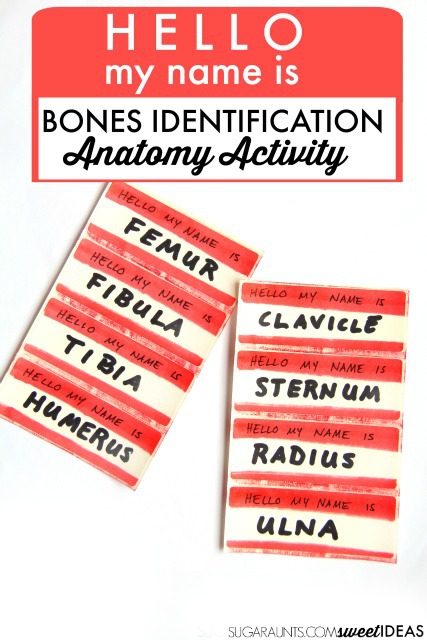
As occupational therapy students, we had to learn bone names and all about anatomy and physiology. Naming bones comes in very handy as an occupational therapist! But, if you are working in pediatrics, kids need to learn names of bones, too! For one thing, kids learn bone names in school. But did you consider the interoception aspect to teaching bone names? When it comes to internal feelings or anatomical states that impact sensory processing and internal body actions, learning names of bones supports this awareness of self. Add this fun way to learn names of bones to your anatomy and physiology games!
Bone Names Activity
Learning human anatomy has a special place in my heart. I mean, those semesters in Human Anatomy, Anatomy lab, and clinical kinesiology bring back fond memories.
So, when my kids ask questions like how their arm can pick up a sandwich, I have a little fun telling them about bones, joints, and muscles. This bone naming activity is just one fun way to teach bone names and teach kids about anatomy.
(Moving a sandwich is a big deal in our house!)
We’ve done a body part identification activity before, using band-aides, but these labels were a big hit with my kids. We used them to practice for a test for my big kids.
My Kindergartner and Second grader had a bones theme in their gym class, we had fun talking about the bones in our body, and made this Bone Identification and movement activity. (It would be great as a skeleton activities for preschoolers, too.
Bones Activity
This bone activity for kids is one they won’t forget…and when teaching human anatomy to kids, it’s one that will stick! The fun stickers help! 🙂
This post contains affiliate links.
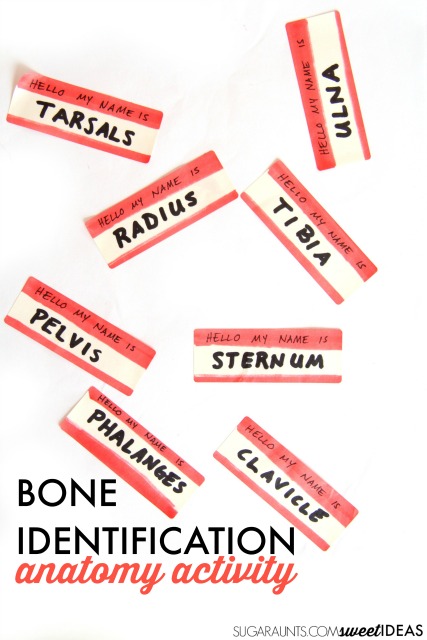
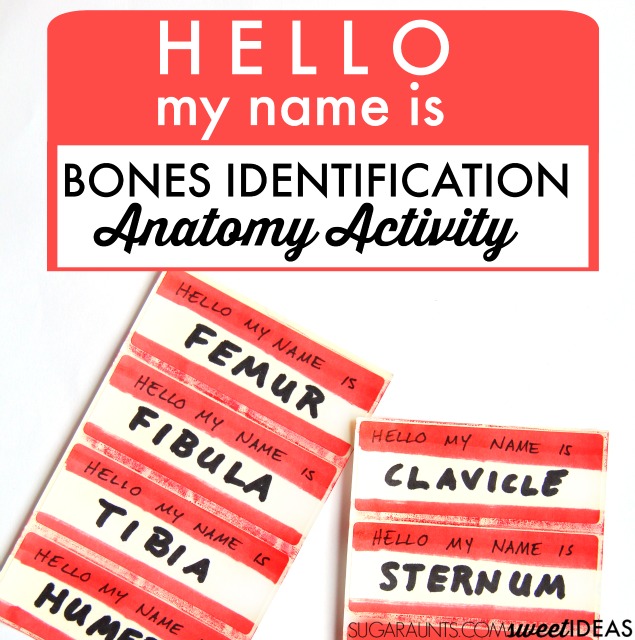
I threw this activity together really quickly. We had a few sheets of blank address labels, and I grabbed a red permanent marker (affiliate link). I made a quick strip across the top and bottom of the address labels and then wrote in black marker (affiliate link), “Hello my name is” with the bone names below.
While we used this bone identification activity with kids, it would be a great way to learn bones as part of an anatomy and physiology lesson for OT or PT students, too!
list of bones in human body
After I wrote out the names of the bones, I tested my kids on what they knew. They recalled most of the bones from gym class lessons, but we had a few that needed practicing.
For the second grade and kindergarten physical education curriculum, they had to know this list of bones in the human body:
skull
humerus
radius
ulna
carpals
phalanges
clavicle
sternum
ribs
pelvis
femur
tibia
fibula
tarsals
Complete List of Bone Names
Above is just a simplified list of bone names, which can be used for teaching kids about the skeletal system. A more complete list is as follows. The bone identification activity shown below can definitely be used for this complete list of bone names and bone types. Classifying and naming the entire skeletal system requires much practice, and as occupational therapists we know the power of multi-sensory learning!
Bones in the skull (includes bones in the head and face):
Cranial bones:
frontal bones
Parietal bone
temporal bones
occipital bone
sphenoid bone
ethmoid bone
Facial bones:
mandible
maxilla
palatine bone
zygomatic bone
nasal bone
lacrimal bone
vomer bone
inferior nasal conchae
Bones in the thorax:
sternum
ribs
Bones in the throat:
hyoid bone
Bones in the vertebral column, or spine:
cervical vertebrae
thoracic vertebrae
lumbar vertebrae
Bones in the pelvis:
coccyx
sacrum
ossa coxae (hip bones)
Bones in the legs :
femur
patella
tibia
fibula
Bones in the feet:
Ankle (tarsal) bones:
calcaneus (heel bone)
talus
navicular bone
medial cuneiform bone
intermediate cuneiform bone
lateral cuneiform bone
cuboid bone
Instep bones:
metatarsal bone
Toe bones:
proximal phalanges
intermediate phalanges
distal phalanges
Bones in the middle ears:
malleus
incus
stapes
Bones in the shoulder girdle:
scapula or shoulder blade
clavicle or collarbone
Bones in the arms:
humerus
radius
ulna
Bones in the hands:
Wrist (carpal) bones:
scaphoid bone
lunate bone
triquetral bone
pisiform bone
trapezium
trapezoid bone
capitate bone
hamate bone
Palm or metacarpal bones:
metacarpal bones
Finger bones or phalanges:
proximal phalanges
intermediate phalanges
distal phalanges
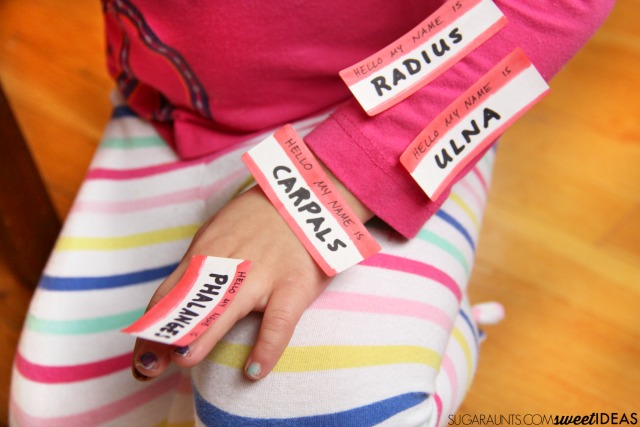
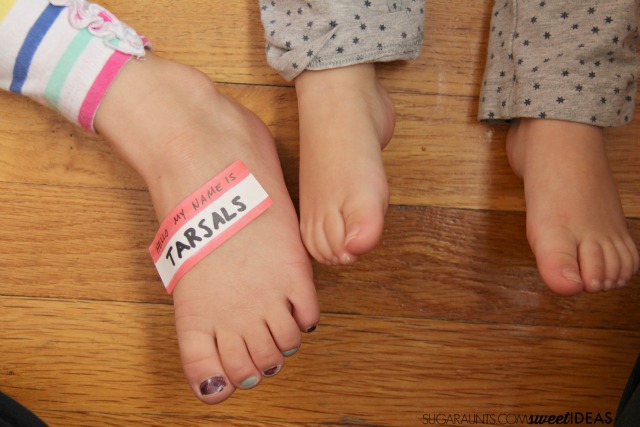
We had a blast sticking the labels all over ourselves while saying “Hello my name is humerus!” in funny voices.
While we had the labels on our body parts, we practiced the motions of that bone. We talked about how that bone could move and what it could do.
Yes, your humerus has a job in picking up a sandwich! (This is a very important fact when teaching bone names to preschoolers!)
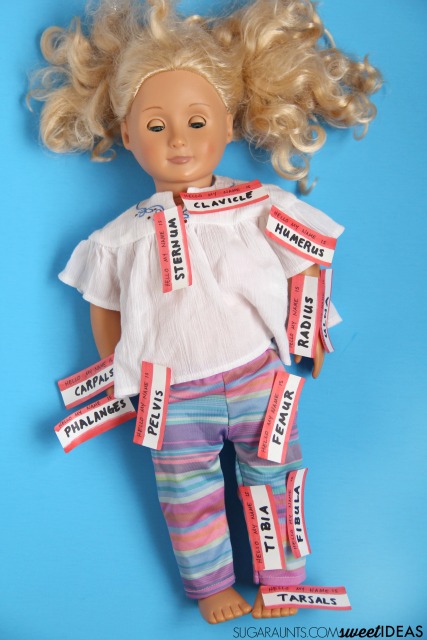
Bone identification activity with a doll.
Even the baby doll got in on the bone labeling action.
How cute are those tarsals??
Colleen Beck, OTR/L has been an occupational therapist since 2000, working in school-based, hand therapy, outpatient peds, EI, and SNF. Colleen created The OT Toolbox to inspire therapists, teachers, and parents with easy and fun tools to help children thrive. Read her story about going from an OT making $3/hour (after paying for kids’ childcare) to a full-time OT resource creator for millions of readers. Want to collaborate? Send an email to contact@theottoolbox.com.
In this post, you will find calming bedtime relaxation stretches for kids and families, based on the popular children’s book, Time for Bed. These activities are perfect for helping kids calm down before bed. We know the power of sleep hygiene in child development, but let’s consider the powerful impact of stretches before bed have on children.
Relaxation Stretches for Kids Sleep
An important thing to cover when it comes to helping children fall asleep and stay asleep at night is the concept of pre-bedtime yoga. When kids participate in bedtime stretches as part of their bedtime routine, it’s a sensory diet that supports sleep.
Use animal theme yoga poses to support relaxation at bedtime.
Related is our resource on the role occupational therapy professionals can play in sleep for the whole family, when it comes to supporting a baby or newborn not sleeping.
Relaxation Stretches for Kids Sleep
An important thing to cover when it comes to helping children fall asleep and stay asleep at night is the concept of pre-bedtime yoga. When kids participate in bedtime stretches as part of their bedtime routine, it’s a sensory diet that supports sleep.
I love to bring this concept together for kids by first talking about how everyone needs sleep. Kids, adults, and even pets and animals. Sleep supports growth, learning, and allows our brains to rest. You can even use a few of our hibernation activities to take this concept further with kids, depending on the interest level.
Children can get a little wound up before bed. All it takes is one rouge energy burst and you’ve got giggling kids bouncing from every surface imaginable.
Couch cushions? check. They are jumping up and down.
Running from room to room? Check. There’s two of them chasing one another back and forth will the occasional knee slide across the hardwoods.
Practicing the living room tumbling skills? Yep and check. There’s one more doing somersaults across the room.
Why must they gang up on me with their endless energy during those exhausting pre-bedtime hours?
Having a set of bedtime relaxation stretches in the nightly routine can support sensory needs and promote a sense of calm before bedtime, just when children are wound up and excitable.
benefits of stretching before bed
We know that sleep is a necessary occupation for all of us, but for children sleep patterns and healthy sleep cycles support so many aspects of development.
Cognition
Learning
Behavior
Nutrition
Emotional development
Social development
When children don’t get enough hours of sleep, or if they don’t get quality sleep on a consistent basis, there are several things that can occur:
Poor focus
Trouble concentrating
Attention and behavior problems
Poor academic performance in school
Excess weight or increased food intake
Problems paying attention
Health problems: obesity, type 2 diabetes, poor mental health, and injuries
Decreased physical activity
Poor mental health
Unhealthy risky behaviors related to decision-making
Risk-taking behaviors, bullying,school violence-related behaviors, and physical fighting
Higher risk of unintentional injury
There are several studies describing the benefits of stretching before bed. Kids can benefit from a pre-bedtime stretching sessions to integrate sensory processing systems and the calming benefits of slow movement, heavy work as a regulation tool. This calms the body and helps with relaxation before bed.
Stretching before bed supports sleep quality. One review of multiple studies found that mindfulness meditation practices that incorporate gentle stretching, such as yoga and tai chi, generally improve sleep quality.
Another study found that older adults reported improved sleep quality after performing low level physical and cognitive activity. The researchers found that gentle stretching resulted in better sleep than when the participants performed more strenuous exercises, such as aerobics.
Bedtime stretches help kids stay asleep. A study into resistance exercise training and stretching found that exercises could improve symptoms of insomnia. In the study, the participants performed stretching in 60-minute sessions three times per week for a period of 4 months. The results showed improved sleep quality when stretching in the evening.
Better sleep supports learning and executive functioning skills. Other studies tell us that better sleep hygiene in children support development of executive functioning skills.
yoga poses for stress relief
Today, I’m sharing a great way to calm kids down before bed so that quality sleep is possible. These yoga poses for stress relief and bedtime relaxation promote organizing heavy work through the proprioceptive sensory system and gentle movement through the vestibular sensory system.
Another contributing factor is the interoceptive system which connects our internal systems such as digestion, heart rate, circadian rhythms, and muscle tension. All of these factors play a vital role in impacting sleep, with both the ability to fall asleep, and the ability to stay asleep throughout the night. This study shares more on the interoceptive system’s role in sleep.
These organizing and calming yoga poses stretch the muscles and joints to offer feedback to regulate an overactive system.
If you’ve ever participated in a yoga session, you know the benefits of certain yoga poses in reducing stress and anxiety.
It’s important to make the connection between stress responses, anxiety, over-active thoughts, and a hyper-response to stimulation and emotional responses. The difficulty in identifying and describing emotions in self (a huge part of social emotional learning and development) is referred to as Alexithymia.
Specifically, alexithymia is defined as difficulty identifying and describing emotions in self. We know that noticing and understanding internal body signals (aka interoception) is crucial to a bodily systems, so it makes sense that if interoception is affected, using or showing emotions, and identifying emotions in self will be affected.
Interoception influences emotions by it’s control and underlying influence on internal processes of the body: toileting, hunger, thirst, and sleep!
When interoception impacts sleep, it then further impacts emotions:
stress
getting angry or frustrated easily
anxiety
fear
worry
overly emotional responses
sadness
over-excitability
hyperactive responses
All of these emotional responses are normal and good feelings to experience. However, when sleep is reduced, they can move into an area of impacting other functional tasks or everyday occupations.
You’ll also find information and resources in this article on the limbic system including the stress response. You can see how all of these concepts fit together to impact daily functioning.
How to use yoga poses for stress relief with children
Using yoga to support relaxation at bedtime is not a new concept. Yoga naturally supports relaxation through the heavy work input of the proprioceptive sense.
However, yoga also adds the benefit of deep breathing exercises to calm and center the body as an organization tool.
When it comes to bedtime, adding anything to the nightly routine can mean a delayed bedtime, so making the relaxation stretches part of the routine that is already in place is important. If you read a book together each night, incorporate stretches into that. If brushing teeth and going to the bathroom are the only tasks that happen each night, use the time just after those jobs to do a few stretches.
Adding bedtime stretches for the purpose of relaxation doesn’t need to be difficult. The most important thing here is to make it work for your situation and home. down the somersaults and hardwood floor stunts into relaxing bedtime.
Here are some tips to support relaxation at bedtime:
Use bedtime relaxation stretches in a nightly routine. A visual schedule can be helpful with some kids.
Dim the lights and turn on soothing music
Read a book before bed
Drink a warm drink as a calming food/sensory tool.
Set the mood for sleep with a calming bedroom or sleep space: snuggly blankets, cozy pillows, or cool temperature, depending on the individual’s preferences.
Use the relaxation stretches listed below.
One way that helps to get kids relaxed before bed is reading a great book. When kids can listen to an engaging story that is read aloud, their bodies can’t help but slow down.
Bedtime Relaxation Stretches for Kids
These bedtime relaxation stretches are a combination of relaxing yoga moves and heavy work that helps to ground the body through proprioceptive input to the body’s sensory receptors in the muscles.
Performing these relaxing stretches can help transition kids to a calmed state that allows for a better sleep.
Below are forms of yoga poses for children.
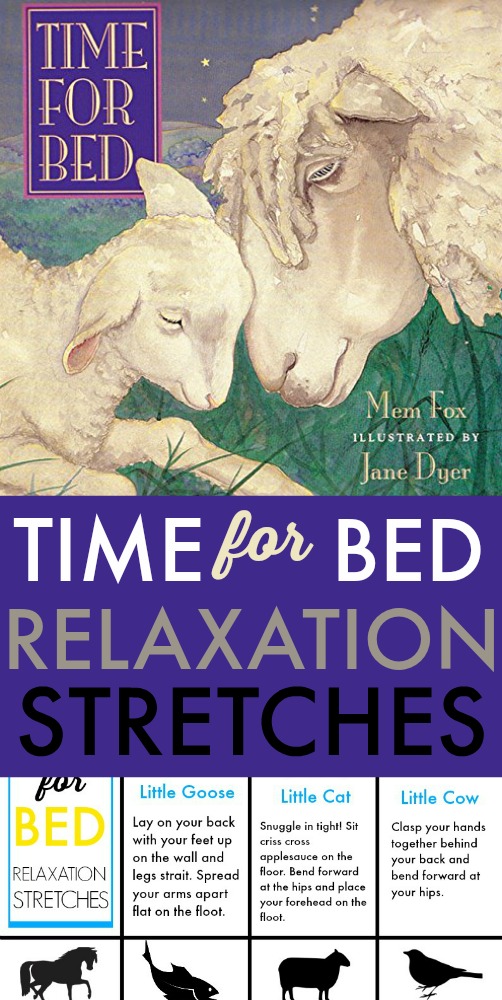
We decided to use one of our favorite going to bed books, (Amazon affiliate link) Mem Fox’s Time for Bed.
In the book, we hear a rhyming verse about each animal’s transition to sleep. It’s such a beautiful book to snuggle up with kids during night time routines. In fact, Time for Bed can easily become one of those books that you read over and over again.
We loved looking at the watercolor pictures in Time for Bed and picturing each animal as it got ready for sleep.
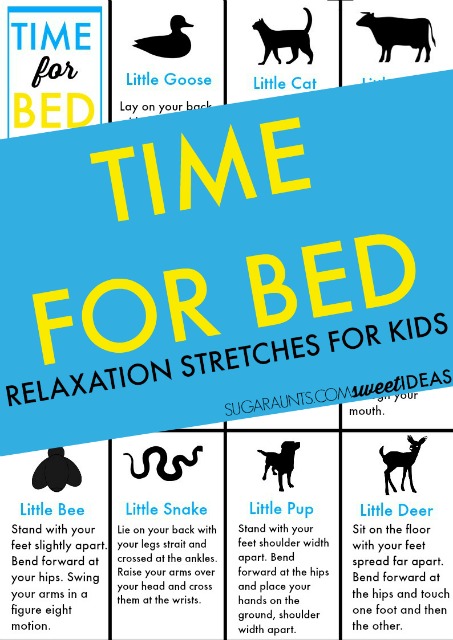
To go along with the book, we tried some of these bedtime relaxation stretches.
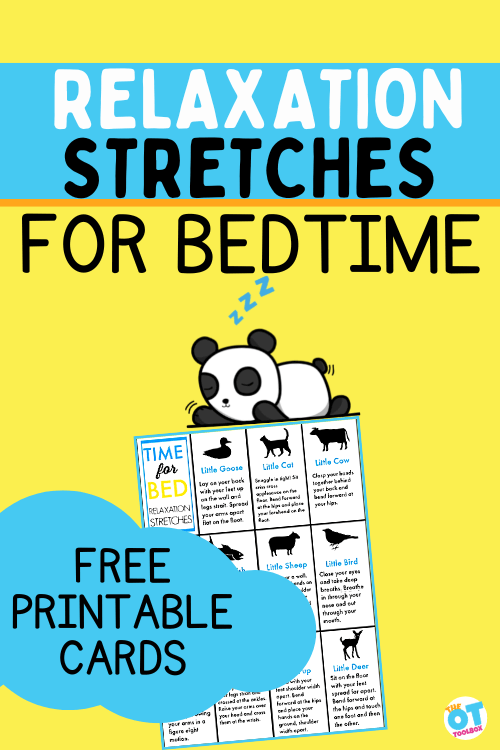
Grab your copy of the free printable below by entering your email address into the form, or going to The OT Toolbox Member’s Club and heading to the Mindfulness Toolbox.
To do these exercises, simply cut out the printable on the lines, and create a small stack of stretches. Kids can do one or more of these relaxation stretches to calm down before settling in with the Time for Bed book. (affiliate link)
Simply pull out a couple of the stretches and join your child on the floor to perform each stretch. The stretches are designed based on the animals in the book.
When doing the stretches, hold the stretch for 2-3 minutes while maintaining deep breathing.
Print off these relaxation stretches for a bedtime calm down session for kids.
As we all know, kids will be kids. If your child is getting too wound up from the stretches (because sometimes the sleepy sillies take over and make concentrating on stretches and relaxing deep breaths nearly impossible!) simply put the stretches away and try them another day.
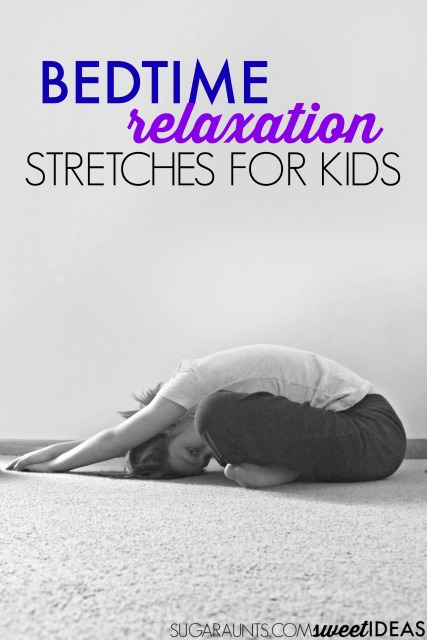
Relaxation stretch for kids, incorporating yoga poses for stress, anxiety, or to calm down before bed.
Your child will love doing these bedtime relaxation stretches with you and the whole family!
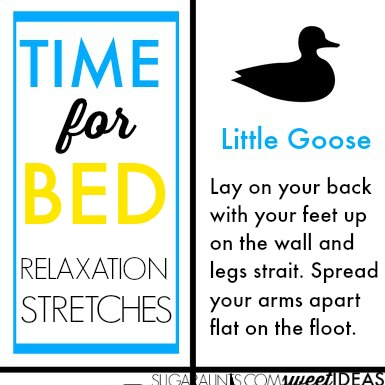
Little Goose Stretch– Lie on the floor on your back, with your feet raised up on the wall. Keep your knees straight. Spread your arms out on the floor like a goose. Bend and point your toes slowly.
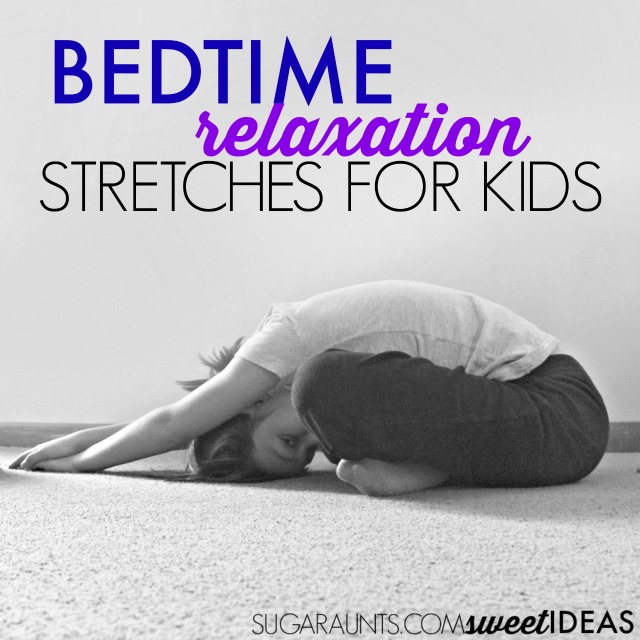
Little Cat Stretch– Snuggle in tight! Sit criss cross applesauce on the floor. Bend forward at the hips and place your head on the ground. Stretch your arms out on the floor over your head.
Little Calf Stretch– Grasp both hands together behind your back. Bend forward at the hips and raise your arms up behind you.
Little Foal Stretch– Lie on your back and pull your knees in with your arms. Hold the position and whisper about your day.
Little Fish Stretch– Take a deep breath. Hold your breath in your cheeks and puff out those cheeks. Slowly let out your breath with pursed lips.
Little Sheep Stretch– Stand facing a wall and place your feet shoulder width apart. Place your hands flat on the wall, shoulder width apart. Push against the wall by bending and straightening your elbows.
Little Bird Stretch– Close your eyes. Think about your day and take deep breaths. Breathe in through your nose and out through your mouth. Add a “wing” component by raising your arms up high as you breathe in and lowering them as you slowly breathe out.
Little Snake Stretch– Lie on your back on the floor. Keep your legs straight and cross them at the ankles. Place your arms over your head on the floor. Cross them at the wrists.
Little Pup Stretch– Get into a downward dog yoga position.
Little Deer Stretch– Sit on the floor with your legs straight. Spread them far apart and bend at the hips to touch one foot. Hold it and then stretch to touch the other foot.
Try this tonight! Do a few stretches and then snuggle up while reading Time for Bed! (affiliate link)
MORE relaxing bedtime books for kids
These relaxing bedtime books for kids are other ideas to use to support calming sensory input in a relaxation bedtime routine:
Free Printable set of relaxation stretches for bedtime
Use the Time For Bed book and relaxation stretches we used above in a bedtime routine of your own. Get a printable PDF of these stretches by entering your email address into the form below. Or, members in The OT Toolbox membership club can grab this PDF by logging in and heading to Brain Break Tools.
One more thing! If you are into creative ways to extend and learn based on books, you will LOVE this resource! 50 activities based on books that address friendship, acceptance, emotions…This ebook is amazing for covering all things emotional development through play!
Bilateral Integration is an area that kids need for so many tasks…but it’s not a developmental milestone that stands out unless a problem is necessarily noticed unless there is a problem. What we do notice in as our kids grow and develop are the motor skills that impact functioning. We notice use of both hands, fluid and efficient movements in tasks like playing, getting dressed, and interacting with peers. Let’s take a look at bilateral integration and dissect how to support this essential sensory motor skill.
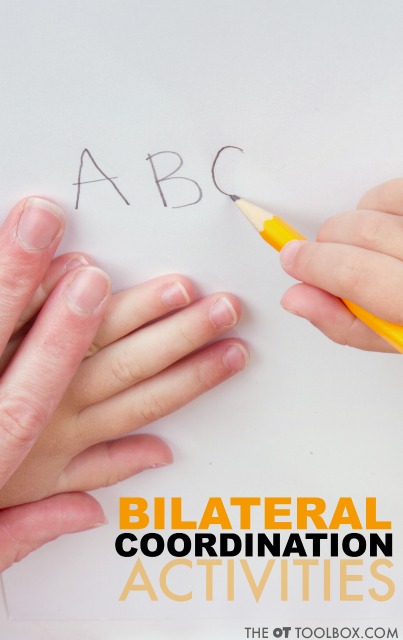
Another resource that supports this information is our blog post on bilateral coordination. You’ll find many bilateral integration activities in that blog post.
Bilateral Integration
From writing and holding the paper, to holding a art project and cutting with scissors, to zippering a jacket, coordinating both sides of the body in an efficient manner is a skill that is necessary for almost everything we do.
Bilateral coordination develops from a very young age. When babies begin to bring both hands together at their mouth, you are seeing coordinated efforts begin. When the infant pushes up on both arms while lying in a tummy time position, the integrated movements of both hands and legs occurs along with strength and control.
Research tells us that motor tasks like jumping, jumping jacks, riding a bike, hopping, etc. become easier and more fluid with age as children develop. It’s through play, sensory input, motor skill experience, and activities that these skills are developed.
Below, you will find bilateral integration activities that can be incorporated at various ages. Use these bilateral coordination activities to promote coordinated and efficient movements in meaningful activities.
What is Bilateral integration?
Bilateral integration refers to the ability of both sides of the brain to work together in a coordinated manner. We see this ability when the skills associated with the left side of the brain are done in conjunction with skills associated with the right side of the brain.
Skills associated with the left side of the brain:
Speech and language- Understanding using language (listening, reading, speaking and writing)
Comprehension
Math problems and facts
Handwriting
Linear thinking
Memory for spoken and written messages
Logic
Verbal language
Sequencing
Skills associated with the right side of the brain:
Creativity and imagination
Creative thinking
Spatial skills
Intuition
Art, drawing, and creative artistic skills
Musical skills
Then, when other aspects of functional performance are added to the mix and the individual is still able to complete the task, this is bilateral integration in action.
Those other considerations include:
Attention and focus
Proprioceptive input
Vestibular input
Visual information
Motor targets achieved, or motor control shown by fluid movements
Praxis- movements thought about and completed in coordinated manner
When both sides of the body work together in a coordinated manner so that the individual can manipulate objects such as cutlery with various amounts of force modulation, taking in sensory stimuli such as sights, sounds, tastes, and proprioceptive and vestibular input, and managing posture, coordination, and body awareness, bilateral integration is visible.
When bilateral coordination or bilateral integration is intact and progressing appropriately through development, it is an indicator that both sides of the brain are communicating effectively and sharing information during functional tasks.
Tasks that require bilateral integration
Knowing what we covered above, it is easy to see how some daily tasks are impacted by coordinated and integrated motor skills requiring both sides of the body. Each of these skills requires and has input from other sensory systems and cognitive systems as well, such as proprioceptive input, executive functioning, attention, and even creative thinking and problem solving.
Writing and holding the paper in a stable position
Cutting and holding the paper steady and at an appropriate height
Putting on a coat while holding a backpack (or other item)
Tying shoes
Pulling up pants and not losing balance
Putting socks on
Jumping jacks with coordinated movements
Turning a page and writing or copying work
Typing
Squeezing toothpaste and brushing teeth
Flossing teeth
Playing an instrument
Using a knife and fork
Pouring water from a pitcher into a cup
Cooking skills: chopping, cutting, slicing, peeling, taking food out of packages, putting food into the microwave or stove, taking food out of the fridge
Reaching for objects
Stabilizing an object with one hand while manipulating another object with the other
Jumping rope
Catching a ball
Riding a bike
Swimming
Many more tasks!
Bilateral Integration Activities
Amazon affiliate links are included in this post.
First, let’s talk about some ways that coordinated use of the arms and legs are needed for coordinated movements. These are skills and tasks that can easily be performed by some children. Others, who struggle with motor planning, core strength, posture needs, left-right discrimination, visual motor skills, or many other areas can struggle. It’s easy to see that simply addressing some areas won’t fix the issue when an underlying concern is present.
To promote the skills needed for these tasks, try some of the activities listed below to promote bilateral integration:
Bilateral movements are part of everyday life for baby! From turning, creeping on the floor, rolling, sitting, crawling, cruising on furniture, and taking first steps, babies are developing bilateral integration skills from birth.
Read here about the types of crawling, all of which integrate bilateral coordination and motor planning.
Encourage these bilateral integration activities with babies:
There are ways to support child development at this stage through age-appropriate play that will support the child’s progression at later stages, too.
Provide various toys and objects appropriate for young babies. Include bold colored objects including black, white, and red items or contrasting colors, toys, or pictures on a blanket or play mat during tummy time. This black and white board book (affiliate link) can be propped up or used while on an adult’s lap.
Provide gentle infant massage during and after bath time, and on all extremities. Here is a resource book on infant massage. (affiliate link)
Provide toys and age-appropriate objects for reach and grasp. This banana toothbrush teether (affiliate link) has molded handles that make it a great teething item for little ones.
Provide teething toys as baby brings hands together at their mouth.
Provide toys that are appropriate for mouthing that can be held in both hands.
Provide hand-held toys while the child is seated in a high chair. This one (affiliate link) has a suction cup base to keep it stable, but has a black and white ring at the base that babies can grasp with one hand while manipulating with the other hand.
Provide toys of various weights when seated upright to provide resistance against gravity and to promote strengthening of the upper extremities. Blocks, rings, sorting toys, or something like this quality teething toy (affiliate link) made of heavier materials can be useful to provide variances in weight, while still allowing the baby to manipulate the item.
Provide toys available on a high chair or table surface at various distances to provide opportunities for depth of perception when reaching for toys and bringing them to the mouth.
Continue tummy time while playing in prone to promote strength and stability in upper extremities.
Use the ideas in our baby play library for more ideas.
Bilateral Integration Activities for Toddlers
Provide toys requiring one hand to stabilize a base while the other hands manipulates an object. Shape sorters are great for this.
Use these crayons for toddlers to support bilateral coordination skills during coloring.
Bilateral Integration Activities for Preschool
Preschool is a time for building hand strength, coordination, eye-hand coordination, and improving motor skills needed for the upcoming years. You can find many preschool activities here on our website, but some specific ways to support bilateral integration include:
Encourage kids to participate in cooking activities.
Use play dough to cut with scissors and roll out play dough snakes or balls of play dough.
Age-appropriate crafts and craft sets are great for this age.
Play with stickers of various sizes.
Make “snow angels” on a carpet or fluffy blanket
Simon Says is a great game for encouraging novel and varied motor combinations. Use these Simon Says Commands to get started.
Play various song and movement games such as the Hokey Pokey, Farmer in the Dell, etc. Here are movement and song activities that can be used in circle time, warm-ups, centers, or in group activities. All of these move and dance songs promote core strength and stability.
Climb on outdoor play areas at playgrounds and in low trees.
Draw with both hands! This four leaf clover activity is a powerful one as it covers a variety of skills.
Bilateral Coordination Activities for School-Aged Kids
In schools, development of bilateral integration is important for tasks like putting on a coat or jacket and backpack, holding a paper with the supporting hand and writing, and using scissors. There are many other bilateral integration tasks that happen throughout the day.
Some ways you can support development of these skills include:
Folding origami or other paper crafts are great at this age.
Last thoughts on encouraging bilateral integration
The best way to encourage and promote integration of both sides of the body? Movement and play! Get the kids active, moving, and experiencing various planes against resistance and with exposure to all types of sensory experiences.
The combination of proprioceptive input into a play experience that promotes strengthening in a fun way provides all of the benefits kids need to improve bilateral coordination skills. Add personal interests as the child grows. And finally, have fun!
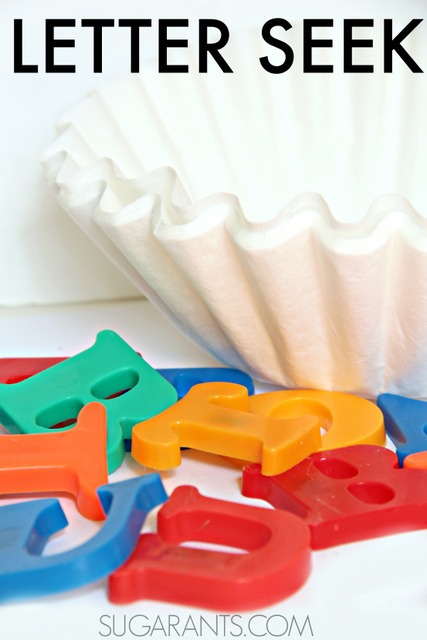
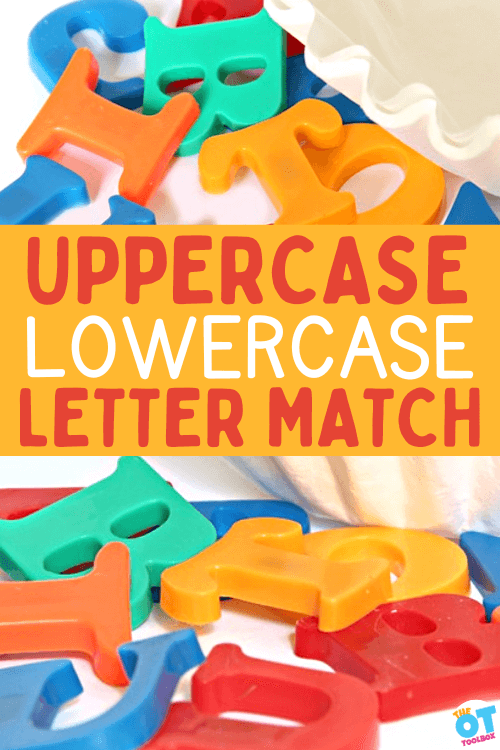
This interactive and hands on game to teach matching uppercase and lowercase letters is a fun gross motor game for preschool and kindergarten. Use this interactive letter activity along as an alphabet matching with objects and a sensory-motor learning activity!
Matching uppercase letters to lowercase letters is a literacy task that supports reading skills, but also challenges visual discrimination skills, form constancy, and visual scanning, all of which are visual processing skills needed for handwriting and reading comprehension. What’s fun about this activity is that it builds these skills in a fun way!
Be sure to grab our color by letter worksheet to work on letter matching, visual discrimination skills.
Matching Uppercase and Lowercase Letters
Learning letters and matching upper and lower case letters is a Kindergarten skill that can be tricky for some kids. We made this easy prep letter identification activity using items you probably already have in the house. If you’ve seen our blog posts over the last few days, you’ve noticed we’re on a learning theme using free (or mostly free) items you probably already have.
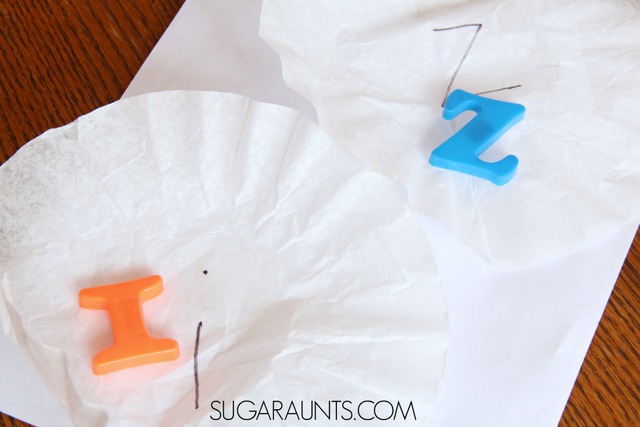
Use a permanent marker to write one lower case letter of the alphabet on each coffee filter.
With your child, match the magnetic letters to the lowercase letters on the coffee filters.
Ask the child to help you crumble each letter inside the coffee filter that has its matching lowercase letter.
Continue the play!
More ways to match uppercase and lowercase letters
By matching the magnetic uppercase letter to the lowercase letter on the coffee filter, kids get a chance to incorporate whole body movements and gross motor activity while looking for matching letters.
With your child, first match up each lower case coffee filter letter to the upper case magnetic letter.
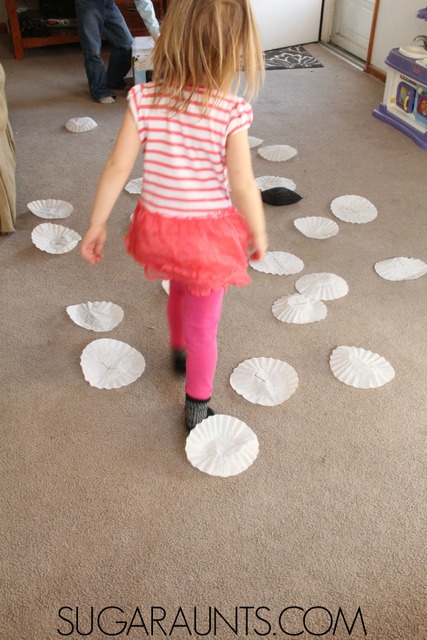
You can spread the filters out to encourage visual scanning and involve movement in the activity, OR you can stack the coffee filters in a pile and one by one match up the letters. This technique requires the child to visually scan for the upper case magnet letters.
Try both ways for more upper/lower case letter practice!
We then wrapped the coffee filters around the magnets in a little bundle. There are so many games you can play with these upper and lower case letters:
Match the same letter– match uppercase letters to uppercase letters and lowercase letters to lowercase letters.
Alphabet matching with objects– Match an object that starts with the letter of the alphabet. Use small objects inside the coffee filter and match it to lowercase letters written in the coffee filter with uppercase magnet letters.
Match the picture with the letter– Print off pictures of words that start with each letter of the alphabet. Then match the picture with letters of the alphabet using lowercase letters written on the filter and uppercase letters in magnetic letter form.
Play a letter memory game– Hide letters around the room and challenge kids to find the letters in order to match the uppercase letter to the lowercase letters.
Letter sound matching– Make a letter sound and challenge kids to find the letter that makes that sound.
Letter Hide and Seek- Hide the bundled up letters around the room while your child hides his eyes. Send him off to find the letters and ask him to open the bundle and identify the letter.
Letter Toss Activity- Toss the coffee filter bundles into a bucket or bin. Any letters that make it into the bin are winners!
Name the letters- Unwrap the bundles and name the letters. Spread the coffee filters out around the room. Toss magnetic letters onto the matching lower case letter.
Letter toss game- Toss a bean bag onto the coffee filters. The child can identify the lower case letter, then go to the pile of magnetic letters and find the matching upper case letter.
Can you think of any more ways to work on upper and lower case letter matching with coffee filters and magnetic letters?
Matching Big and Small Letters
The nice thing about this activity is that you can teach the concepts of big and small letters. When we say “big letters” and “small letters”, we are showing the concept of letters that touch the top and bottom lines, or the upper case letters.
And teaching children the difference between those big letters and the small letters which touch just the middle point are part of the visual discrimination process that is needed for handwriting on the lines, or line awareness skills.
You will enjoy more alphabet posts from our archives:
If you are a new parent, then you have probably heard that tummy time is important for your baby, but it’s so important to process the concept of container baby syndrome. In this blog post, we are covering container syndrome, what this means, and what you can do to support your most precious little one.
What is Container syndrome?
Container Syndrome is a term used to describe the lack of skill in infants who are not allowed ample movement opportunities. Container Baby Syndrome is the result of an infant being placed in a container for an excessive amount of time during the day.
Importantly, this is not to shame use of baby containers…or to say that use of these items is to be omitted at all costs. It’s important for the wellbeing of the caretaker to put the baby down sometimes! Things need done around the home. Parents need a shower, or some time to themselves. Other children need cared for.
The important thing to know here is that we are talking about constant use of baby holders all the time, during the day and night. Moving the baby from one container to another is the issue.
Constant use of positioners, or devices is what leads to the syndrome known as baby container syndrome, not using some of these items sporadically.
This extended time leads to structural, movement, and behavioral challenges as a result.
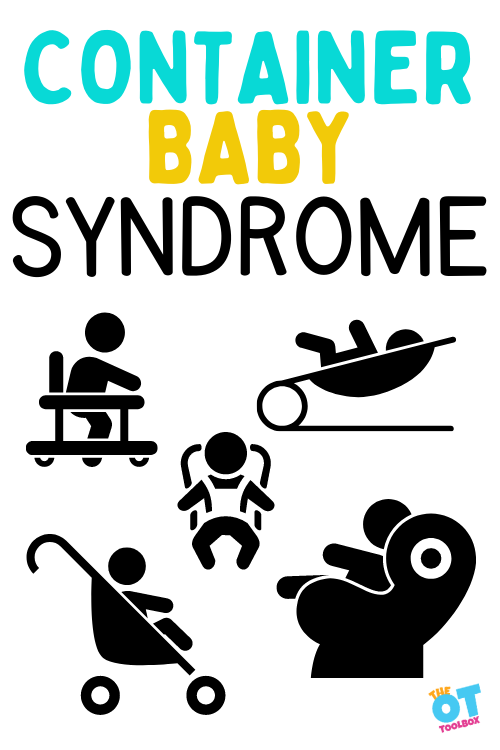
Baby containers include baby equipment and items such as:
Restrictive playpen that does not allow for movement
Crib
Car seats
Strollers
Bumbo seats
Bouncy seats and swings
Rockers
Nursing cushions
Vibrating chairs
Jumpers
Exersaucers
positioning pillows
Slings
Floor seats
Infant swings
Walkers
Jumpers
The other issue is when the devices are used for nighttime and daytime sleep.
It’s easy to fall into that trap of the newborn sleeping in the rocker chair or bouncy seat because the reclined position puts the upper body into a reclined position, which can help with reflux that a baby might have. The warmth and close sides allow the baby to fall asleep easily. But when the newborn is sleeping in this positioner all night and then wakes for a short period and then goes back to sleep in the same device, is when we see the issues with constant pressure on one side of the head and neck positioning that can lead to issues.
For support and help with newborns not sleeping through the night, be sure to check out our blog post on this topic. Occupational therapy professionals can help with sleep during the newborn stage which impacts so many aspects of functional development and family dynamics.
All of the time spent in these baby containers adds up! When in a positioning device such as the ones listed above, little ones are limited in the motor development that results from stretching, wiggling, turning, reaching, and otherwise moving.
Why Worry About Container Syndrome?
As a new parent, you might be wondering “why can’t I just use the wonderful bouncers, baby rockers, and other entertainment devices for infants and toddlers? After all, I got all of these amazing baby chairs, rockers, and positioners for my baby shower…can’t wait to use them!“
Why should I put my baby on the floor? The biggest reason has to do with the benefits to development. Putting a baby in a container such as a jumper, positioning seat, bouncy seat lead to something called container baby syndrome.
It’s understandable why the baby seat or jumper seems like a better option than the floor for a baby. Parents and caregivers have shown a great deal of support for baby “containers” like bouncy seats, Bumbo seats, and activity centers. In fact, these baby holders have become so popular over the years, that a term has been coined; “container baby syndrome”.
When babies are constantly keep in a space where they cannot freely move, how can they be expected to roll, crawl, or walk, when it is the developmentally appropriate timeframe?
Furthermore, babies need experiences where they can learn from their world in a physical way.
They need to discover “what happens when I move my arm and head like this”?’ Babies may fall over, and have some stumbles along the way, but this is how young children learn about gravity and develop postural stability.
Without those learning opportunities, children will only learn that their seat will catch them from falling, no matter how much they wiggle.
With fewer movement opportunities, a delay may be seen in typical development and reflex integration. More serious issues may occur when we keep babies still, like a flattened head from lying down (positional plagiocephaly) or a tight neck that reduces head movement (torticollis).
There is the visual component too. When babies are in a positioner such as a bouncy seat, they are positioned on their back with little to no neck movement. The neck, back, spine don’t receive the time (even minutes) to stretch, turn, and move. But the eyes are limited as well.
When placed on the back in a reclined position, the eyes are not strengthened to look and gaze based on head and neck movements. The eyes may stay in one place and are not challenged to focus on different depths and peripheral stimuli.
Neck movements are limited to turning from side to side, and they eyes tend to follow the neck. This limited eye movement can later impact other areas of development.
Where did container syndrome come from?
In 1992 the “back to sleep” campaign was introduced to lessen the likelihood of sudden infant death syndrome (SIDS). While the rate of SIDS went down 50%, (yay!) container syndrome rose 600%, to one in seven babies!
This is astounding.
Parents are so nervous about SIDS, they place their babies in various containers most of the day. While this seems a safe, convenient, and supportive option, the use of too many “containers” can lead to container baby syndrome.
Babies who have not had enough tummy time may resist this at first, giving the false impression that the container is the best place for them.
Facial asymmetry. The sides of the baby’s face may appear unequal as a result of skull deformity and flatness
Torticollis. The baby has difficulty turning the head to one side, or keeping the neck and head straight due to muscle tightness on one side of the neck
Decreased movement, strength, and coordination -the baby may not be able to roll, sit up, crawl, lift the head or reach with their arms while on their tummy.
Delayed milestone achievement
Speech, sight, hearing, and cognitive problems – Visual skills can be affected such as following moving objects with the eyes and seeing toys from different distances. Hearing can be disordered, as baby does not hear from all angles. Delayed cognitive skills may arise because the infant is not able to problem solve, explore their environment, or develop language skills
Attention deficit hyperactivity disorder (ADHD)
Increased weight/obesity
How to prevent container syndrome in babies
Container baby syndrome is 100% preventable. If you suspect your baby or a client of yours has symptoms of this syndrome, speak with their pediatrician, get a referral to a physical therapist, and begin working on exercises.
Allow baby plenty of supervised free time on a blanket on the floor, or in a large play yard. Encourage tummy time, reaching for toys, exploration. Some caregivers feel unsure about putting their baby on the floor. A blanket, sheet, or other floor covering can be placed and washed after usage. Or, use toys such as a baby gym to encourage belly play.
Limit baby’s exposure to containers. Use only when transporting the baby, or there is truly no other safe option
Increase supervised tummy time during the day. Your baby may cry and resist at first, as this may be difficult or uncomfortable. Start slowly and persevere. Colleen from the OT Toolbox has a great article on Tummy Time Myths.
Hold your infant in your arms, or in a sling for short periods during the day. This will encourage movement, increased head control, and socialization
Rotate baby through various stations and positions during the day. Holding a baby all of the time is not healthy for a growing child either.
Use gates and other borders to secure a safe place for baby to play, away from wandering pets, or siblings who may step on them
EDUCATE caregivers and other people about the danger of container baby syndrome. Encourage caregivers to provide opportunities for the baby to explore their environment freely. Demonstrate tummy time and other appropriate movement experiences
Activities to Prevent Container Syndrome
Now that it is understood that playing on the floor is important, let’s get into the many different ways you can do it! One of the easiest ways to encourage floortime with your baby is to lay a blanket on the floor, preferably with a carpet underneath for comfort, and place a toy or two near the baby.
Depending on their age and abilities, the baby may be totally independent, rolling and playing happily. If the children are younger, or less comfortable playing by themselves, this is a great opportunity for a caregiver to step in. A fair amount of babies do not like being on their tummy for various reasons, including medical or sensory.
Babies who have gastrointestinal issues may be hesitant to engage in tummy time, as it is uncomfortable. Work through these difficulties while encouraging floor play.
How do I keep them safe down there? Prepare a safe and clean environment for movement. This may involve baby gates, barriers, or a large corral to allow freedom of movement, without risking baby falling down the stairs. Lie on the floor yourself and see what is down there at child level. You may be surprised to notice extension cords, small objects, or other unsafe objects while you are down there.
2 months or younger: Talk with your baby, showing them toys, describing them, and giving them to their hand to feel and explore. Sing songs – whatever songs you know! Encourage them to wiggle their arms and kick their legs along with songs, tickles, or kisses.
3-4 months: Your baby will be able to hold tummy time for a bit longer by now. If they have trouble staying there, lay down with them! Be a part of the team, showing them how fun being on their tummy can be. Babies around this age can reach and bring toys to their mouths, so give them safe opportunities to do so.
5-6 months: Rolling should be part of the baby’s physical development around this time. Encourage this movement by enticing them with something they love. Maybe it’s you, a special toy, the TV remote, or their next bottle. Try singing Five in the Bed. When the song says “Roll over!” show your baby how to roll. During this time of development, your baby may be moving more than ever. They may even be crawling! Encourage even more floor play with these new skills. As long as the area surrounding them is safe, and you are close by, tons of fun (and important development) can be had! Read here about the types of crawling you might start to see at this age.
7-8 months: Just like rolling, encourage crawling by giving the baby lots of space on the floor (that may mean moving aside some furniture) and placing toys or books in various places. There are so many fun games to be played! Playing “Peek-a-boo” where the baby pulls a blanket or towel off to show what’s underneath, is a classic game and critical to development. This teaches baby object permanence. Scatter toys near and far to encourage looking, stretching, and moving.
9-10 months: Around this age, your baby will really be on the go. Maybe a baby obstacle course is up their alley…crawl over mom’s legs, under the coffee table, around the dog, and up the step into the kitchen! Creative barriers and safety gates will likely come into play around this stage to keep young children safe.
11-12 months: Almost one-year-olds may be walking, which means they will likely not tolerate being in a “container” very well anymore. Now that they are cruising on furniture, squatting to pick up toys, and participating more in play, they may likely lead the way! See what your child’s interests are during floor playtime and follow their lead.
Need more tummy time information? The OT Toolbox has several articles on baby play that support the development of balance and coordination through play.
Baby Brain Building with Balls– Encourage eye-hand coordination, visual tracking, visual scanning, bilateral coordination, crossing midline, motor planning, and more.
Another great resource to read more on how to promote development through play is DIR Floortime as it covers strategies to support development through interest-based play.
Victoria Wood, OTR/L is a contributor to The OT Toolbox and has been providing Occupational Therapy treatment in pediatrics for more than 25 years. She has practiced in hospital settings (inpatient, outpatient, NICU, PICU), school systems, and outpatient clinics in several states. She has treated hundreds of children with various sensory processing dysfunction in the areas of behavior, gross/fine motor skills, social skills and self-care. Ms. Wood has also been a featured speaker at seminars, webinars, and school staff development training. She is the author of Seeing your Home and Community with Sensory Eyes.
A final note on container syndrome
While the “back to sleep” campaign has certainly been successful, it is not without pitfalls. The rule of thumb for parenting is; everything in moderation. Not too much screen time, sweets, or containers. Parents do not need to be laden with guilt over container baby syndrome. Most caregivers are doing the best they can with what knowledge they have. As they learn more, they will do more.
NOTE* The term “they” is used instead of he/she to be inclusive.
These Apple Brain breaks are a resource that has been popular on the site for many years. During the fall months, all things apple theme is the way to go, so when it comes to adding themed resources into a Fall, harvest, farm, or back-to-school theme, apple themed exercises and movement activities are the way to go!
These apple brain breaks would be a nice addition to a Fall activity like our apple sensory bin or any of the items in our Apple Therapy Kit.
Apple brain Breaks
Many of you have used the brain break activities that we have here on the OT Toolbox help kids focus and pay attention in the classroom environment. Movement in the classroom is helpful for learning and helping kids with movement needs such as fidgeting or attention. The brain break activities listed below can go along really nicely with an apple theme. Try adding the Apple themed brain breaks in between activities, lessons, and other classroom tasks.
Apple themed brain breaks can be a great way for kids to extend on an Apple theme activity while adding movement into the classroom.
Related read: These visual perception apple theme shape stamps are a perfect way to work on visual perceptual skills and fine motor skills with DIY stampers.
How to Use Apple Brain Breaks
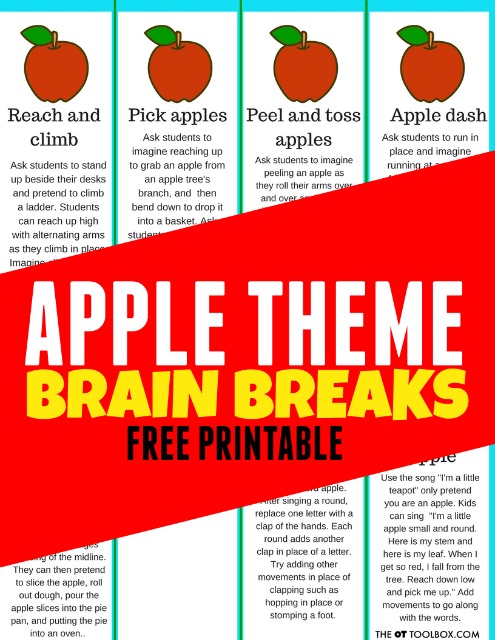
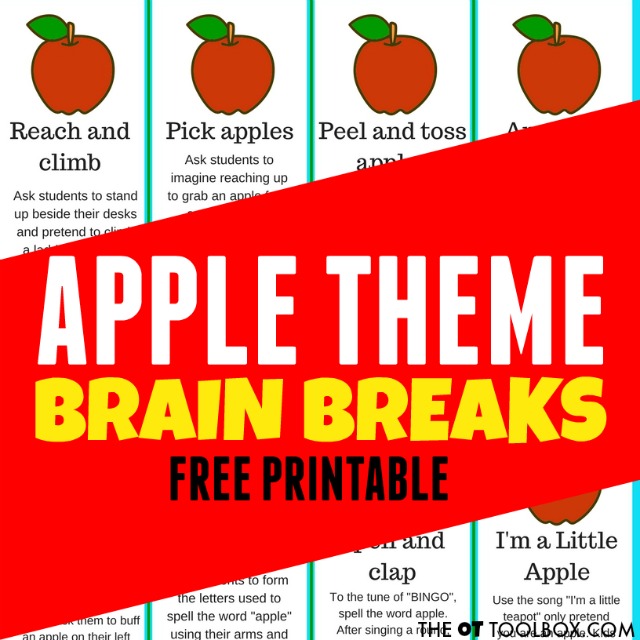
Get this list of apple theme activities as a printable sheet to use in the classroom. Print them off, glue them to cardstock or index cards and laminate for durability. Kids can complete apple brain breaks as a group or individually.
In the PDF below, you’ll find printable cards that you can cut out and use over and over again as a movement break for kids. Other ways to use these fall brain breaks?
Incorporate into an apple tree life cycle curriculum or any apple lesson plan
Use with talking about Johnny Appleseed during the Fall months
Use as a Johnny Appleseed game
Add to a harvest theme or visiting the Farm during the Fall
Use as a transition activity between classroom activities
Great for waiting activities or transitions in an apple themed classroom!
Use when waiting periods during classroom breaks
Add as sensory motor activities to promote attention, focus, re-direction, or needed heavy work input
These apple theme exercises can be added to a weekly therapy theme when planning occupational therapy lesson plans, and then individualized based on the child’s needs and interests.
Apple Exercises
The brain break cards include activities like these ones. These apple theme exercises can be adapted or modified as needed to meet specific needs.
Here are some apple think brain break activities that can be used at movement into the classroom using an Apple theme:
1.) Reach and climb- Ask students to stand up beside their desks and pretend to climb a ladder. Students can reach up high with alternating arms as they climb in place. Imagine climbing up a ladder to reach the top of an apple tree.
2.) Pick apples- Ask students to imagine reaching up to grab an apple from an apple tree’s branch, and then bend down to drop it into a basket. Ask students to repeat this motion repetitively reaching up high and then bending down low to the ground.
3.) Peel and toss apples- Ask students to imagine peeling an apple as they roll their arms over and over again at the elbows. Then ask them to toss an imaginary apple into a bucket. They can imagine the buckets are at different levels and distances as they pretend tossing apples. Continue this exercise for one minute.
4.) Apple dash – Ask students to run in place and imagine running at an apple farm. Students can pretend they are delivering bushels of apple from a tree to a barn as they run in place while carrying an imaginary bucket. Ask them to imagine hopping over logs or running faster or slower.
5.) Make a pie- Ask students to imagine picking an apple and buffing it with their sleeve. Ask them to buff an apple on their left sleeve and then their right sleeve. Doing this activity encourages crossing of the midline. They can then pretend to slice the apple, roll out dough, pour the apple slices into the pie pan, and putting the pie into an oven.
6.) Apple spell- Ask students to form the letters used to spell the word “apple” using their arms and legs. To make an “A”, the student can reach up over their head putting their hands in the middle and stretching their legs wide next. Next, make a “P” by standing with feet together and arms curved toward the side to create the bump of the letter. Complete the same movement again for the second P in the word apple. Next, form a letter L using by sitting on the floor and bending at the waist stretching legs out straight. Finally, create a letter E by sitting on the floor bent at the waist with leg s extended straight and feet together. Put one arm out at the waist and reach the other arm out overhead bent at the elbow.
7.) Spell and clap- To the tune of “BINGO”, spell the word apple. After singing a round, replace one letter with a clap of the hands. Each round adds another clap in place of a letter. Try adding other movements in place of clapping such as hopping in place or stomping a foot.
8.) I’m a Little Apple- Use the song “I’m a little teapot” only pretend you are an apple. Kids can sing “I’m a little apple small and round. Here is my stem and here is my leaf. When I get so red, I fall from the tree. Reach down low and pick me up.” Add movements to go along with the words.
Can you think of any other apple themed brain breaks?
Want a copy of these apple brain break cards to add to your toolbox? Enter your email address into the form below to access these printable tools.
This freebie is also available inside our Members Club! Members have easy access to all downloads on the site, in one place, without the need to enter your email address for each item.
Want to add this resource to your therapy toolbox so you can help kids thrive? Enter your email into the form below to access this printable tool.
This resource is just one of the many tools available in The OT Toolbox Member’s Club. Each month, members get instant access to downloadable activities, handouts, worksheets, and printable tools to support development. Members can log into their dashboard and access all of our free downloads in one place. Plus, you’ll find exclusive materials and premium level materials.
Level 1 members gain instant access to all of the downloads available on the site, without enter your email each time PLUS exclusive new resources each month.
Level 2 members get access to all of our downloads, exclusive new resources each month, PLUS additional, premium content each month: therapy kits, screening tools, games, therapy packets, and much more. AND, level 2 members get ad-free content across the entire OT Toolbox website.
Member’s Club not for you? No worries. You can still access this free resource. Enter your email address into the form and the apple brain breaks will be delivered to your inbox.
More Apple Theme Activities for Kids:
You will love these apple activities to go along with an apple theme.
Colleen Beck, OTR/L has been an occupational therapist since 2000, working in school-based, hand therapy, outpatient peds, EI, and SNF. Colleen created The OT Toolbox to inspire therapists, teachers, and parents with easy and fun tools to help children thrive. Read her story about going from an OT making $3/hour (after paying for kids’ childcare) to a full-time OT resource creator for millions of readers. Want to collaborate? Send an email to contact@theottoolbox.com.
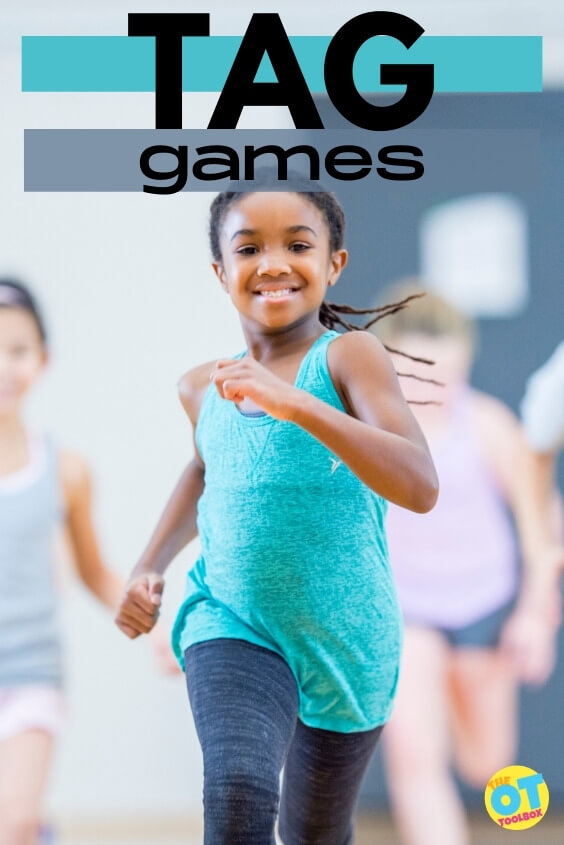
The thing about playing tag games is that you can take a classic lawn game and make rules to change the game a thousand different ways and never play the same game twice! Chase games are a fun way to get kids moving and outside with movement, balance challenges, development of the visual system, and heavy work. Best of all? Tag activities can support developmental needs on all levels and abilities. Add these tag games to our massive list of outdoor lawn games to get kids moving, running, jumping, and building motor skills!
Tag games
There are so many reasons why tag games are a must for summer time fun. Let’s break it down:
Tag games are great ways to add motor movement to kids, to get them off the screens, and outside. Running and playing tag supports gross motor coordination.
Tag also is a powerful way to play together as a family, adding a chance for connection and creating memories. What better way to spend some time together as a family than playing a game of tag that offers heavy work, sensory input, in the great outdoors?
Tag games are also great running games for physical education.
Tag is a fun way to support therapy goals with a small group. Use the tag games in a group therapy setting, in PE planning, or in summer camp activities.
Playing tag at summer camp offers a break between activities, adds heavy work, and can get kids moving and building skills. Best of all- you can modify the tag game to meet any theme or topic!
The options are limitless! Here are more summer camp ideas that tag can fit well into with therapeutic and team-building benefits.
Therapeutics benefits of playing tag
When kids are running, stopping, turning course, running around obstacles, there are many developmental benefits.
Let’s break down games of tags for their therapeutic benefits:
Running- running in short bursts offers cardio input that gets the blood pumping. When kids run and stop in short bursts, they are gaining heavy work input through their legs and core.
The short intervals involved in tag games build muscle strength, and allow for running at various speeds. As opposed to longer distance running, kids can be successful in running in short bursts.
This is also a great way to “reset” after being indoors for a while, on a long car ride, in the classroom all day, or on screen devices for a long period of time. We talked here about the benefits of treadmills and wellbeing, but for shorter bursts of running, the mindfulness benefits definitely exist!
Stopping and Starting- When we run and then stop abruptly or stop and turn, there are so many motor components occurring at one time.
The muscles that are actively engaged need to stop abruptly, adding heavy work input through those muscles and joints. Then the opposing muscles and core need to activate to maintain posture. The whole body is engaged in this action. Kids often play tag in a yard or park where there are trees or other stationary structures.
These provide a need to move around targets and slow running speed. This requires the visual processing system to interact with the motor tasks. When kids are running around other tag players, they are running around moving targets, which further engages muscles and visual processing system.
Stopping and starting motor skills are a challenge for:
Proprioception
Vestibular input
Motor planning
Body awareness
Depth perception
Balance
Coordination
Postural control
Tagging others- Tag is such a great way to interact with others in an appropriate way. You may have had a school yard experience where you were pushed down in a game of tag. When others tag you and it occurs unexpectedly or with too much force, a fall can happen!
However, by playing tag, kids get that experience with proprioceptive input, vestibular input, and visual motor skills.
How much force must they exert to tag without pushing over a playmate?
How far do they need to reach out to tag a friend without hitting their face?
All of this experience in movement is powerful! It helps kids learn about how their body moves in space, body awareness skills, visual perceptual skills, spatial awareness, and eye-hand coordination skills.
Spatial awareness- Expanding further on the spatial awareness skills, or spatial relations, body awareness, posture exercises for kids, and position in space, all of these body concepts are able to be carried over to other functional tasks.
This experience allows kids to use this knowledge when walking in crowded hallways without bumping into others, spatial awareness in handwriting on a page, moving while carrying plates or heavy items. All of these experiences can be integrated for functional movement.
Executive functioning skills- Playing a simple game of tag can build executive functioning skills, too! Think about it: when you play tag, there is working memory to recall movements that allowed you to escape in a previous game or trial.
If you’re playing a fun tag game version, you need to recall specific words or phrases that were already used. Other executive functioning skills that are used in tag include planning, prioritization of movements, impulse control, task completion, initiation, processing speed, self-monitoring, foresight, mindset, and cognitive shift. What a powerful game tag is in building cognitive skills!
Motor planning- Moving, making motor plans, running around obstacles and other children…what a great game tag is to build motor planning skills.
There’s more: tag is a fast-paced game. So those motor planning sequences and movements need to happen quickly. The good news is that a game of tag offers many trials and repetitions to build motor plans and muscle memory.
Visual Processing Skills- Visual processing skills is an umbrella of visual skills and tag addresses many of these areas through play. And playing tag requires many visual processing skills under that umbrella!
Take a look at all of the visual skills needed for tag:
So, now that we know the massive therapeutic benefits of tag, let’s take a look at some fun tag games for kids.
Fun Tag Games
Classic tag–
Someone is it and chases the others in the group. When they touch someone else, that person is now “it”. The game continues.
TV Tag
One person is “it”. When they approach another person, the player yells the name of a TV show and drops to the ground. They are then safe and the person that is “it” needs to run and tag another person. This type of tag can be adjusted to call out music, songs, YouTube shows, games, sports, favorite foods, animals, etc.
Flashlight Tag–
Play tag in the early evening hours with flashlights. When you shine your flashlight on a fellow tag player, that player is tagged and they are now “it”. This is a great activity for challenging visual scanning skills, visual discrimination, visual figure ground, and visual tracking skills.
Sharks and Minnows Tag–
One person is the shark and the others are the minnows. When the shark touches another player, that person then turns into a shark. Now there are two sharks. Play until all of the minnows turn into sharks.
Freeze Tag-
When a person is tagged, they need to freeze in place until another player touches them to “unfreeze” them.
Cops and Robbers Tag-
A group splits into either “cops” or “robbers”. The cops chase the robbers and once tagged, they need to sit in “jail” until another robber tags them and releases them.
Pizza Tag-
One person is “it” and chases the others. Players run from “it” and can stay safe from being tagged by naming pizza toppings and touching the ground.
Animal Walk Tag-
Players can assume an animal walk (crab walks, hop like a bunny, waddle like a penguin, sway like an elephant, etc.) and play tag!
Social Distance Tag Games
No-Touch Tag Games-
Tag games can be modified to any theme which is great for social distancing. One person is “it”. When they near another child, that person yells out a word or phrase, or completes an action like hopping, squatting, acting like an animal, touching the ground, dabbing, or completing any physical action. Tag could take any action or theme in this way.
Shadow Tag-
Play classic tag but tag one another by stepping on the shadow of others. This is a great social distancing version of tag, as well.
Social Distancing Tag-
This tag game is another way to play with others, gain the benefits of tag, and play in a socially distanced form. Simply play tag in the classic version (or use any of the fun tag versions described here) and when “it” is within 6 feet of another person, they have tagged the other player. This is a nice way to work on spatial awareness and scanning at a distance, too.
Tag Games for Different Themes
The cool thing about a classic game of tag…or any of the versions listed above, is that you can adjust the theme to fit a weekly therapy theme, a summer camp theme, or a learning theme at school. Different types of tag games can be played using all one theme to add different movement opportunities and motor planning challenges.
Have an ocean summer camp? Play ocean animals tag (kids call out ocean animals and drop to the ground to stay safe.)
Planning a space camp? Play space tag. Kids can call out planets when the “it” person is near and stay safe.
Creating a Pirates theme summer camp? Modify sharks and minnows tag to meet your theme.
Coming up with a handwriting camp to work on handwriting skills? Encourage heavy work through the arms by adding crawling, hopping, or heavy work animal walks.
What do you think? Have you played any of these tag games before? Let’s get those kids moving!
Colleen Beck, OTR/L has been an occupational therapist since 2000, working in school-based, hand therapy, outpatient peds, EI, and SNF. Colleen created The OT Toolbox to inspire therapists, teachers, and parents with easy and fun tools to help children thrive. Read her story about going from an OT making $3/hour (after paying for kids’ childcare) to a full-time OT resource creator for millions of readers. Want to collaborate? Send an email to contact@theottoolbox.com.
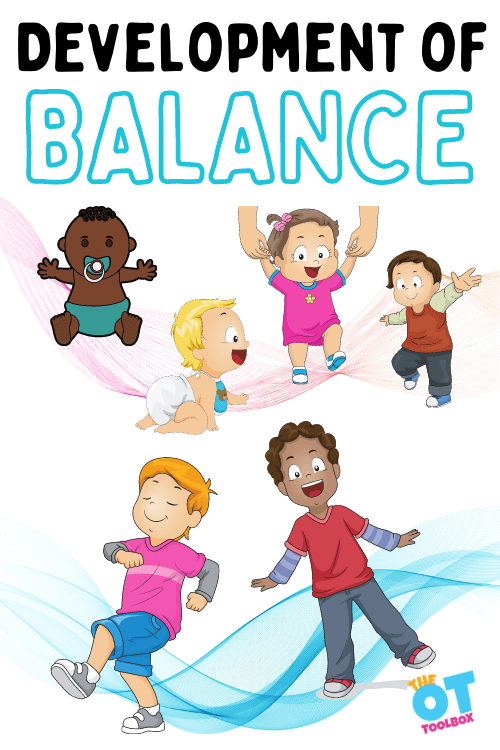
Balance development is a pivotal part of child development. Gross motor coordination, balance and motor planning are all part of the processes of acquiring these skills. Here, we cover balance development, strategies to support this skill, and specific balance activities.
Balance Development
Acquiring or practicing balance can be seen in a toddler swaying step by step, a child pretending the sidewalk curb is an Olympic balance beam, or a teenager managing their new crutches.
Strong standing and walking balance equal safe mobility, which opens the door to so many wonderful new things; running, jumping, cartwheels, backflips…you get the picture.
Achieving physical balance plays an important role in the development of many different skills, some of which may surprise you!
WHAT IS BALANCE?
Before officially diving into the development of balance, we first need to define and understand it.
Balance – According to the Harvard Medical School, balance is the ability to distribute your weight in a way that lets you stand or move without falling, or recover if you trip. Good balance requires the coordination of several parts of the body: the central nervous system, inner ear, eyes, muscles, bones (Check out this list of bone names), and joints
Static Balance – maintaining body position during an unmoving task, such as sitting or standing
Dynamic Balance – the ability to remain standing and stable while performing movements or actions that require displacing or moving oneself
The various muscles of the body contract or relax in order to maintain the proper balance for our daily activities, as controlled by our balance center in the brain; the cerebellum.
In addition to the cerebellum, the inner ear also sends signals to the brain, to give a status report on the environmental changes that affect balance. The inner ear is where the vestibular system is located.
Its’ fluid picks up on the motion and position of the head, constantly sending information back to the brain via the eighth cranial nerve. When there is a medical issue within the ear, such as an ear infection or torticollis, it may affect balance. This is generally in the form of dizziness or unsteadiness.
The primary source of information for the following list of balance developmental milestones was primarily sourced here.
Information from different sources may vary slightly, largely due to the fact that developmental patterns fall into different ranges. For a general list of developmental milestones, refer to the CDC resource here.
The vestibular system is developed at five months pregnancy
0-3 MONTHS
Primitive reflexes (uncontrolled movement) lay the groundwork for future motor development
Tummy time develops vision and postural control required for optimal balance later on
4-6 MONTHS
Rolling prone to supine (front to back), then supine to prone (back to front)
Supported sitting, then unsupported sitting
7-9 MONTHS
Picks up a dropped toy, may fall while reaching
Begins to army crawl, cruise crawl, or scoot
Holds majority of their own weight while standing supported
May squat up and down while standing
10-12 MONTHS
Pulls self up to stand, then stands unsupported
Manipulation of toys/ movement of arms while sitting unsupported
Moves in and out of laying and seated positions with control
Cruises along furniture or walks supported
Development of Balance in Toddlers
13-16 MONTHS
Walking unsupported, but may tumble easily
Crawls up and down furniture and stairs with support for safety
Begins to learn how to walk faster/run
17-19 MONTHS
Is able to get onto small chairs without help
Walks up stairs while holding on with one hand
Runs stiffly and falls often
Can pick up objects while standing, without losing balance
2 YEARS
Pulls off socks without losing balance
Runs with improved coordination
Can kick a ball without losing balance
Development of Balance in PReschoolers
3 YEARS
Can briefly balance and hop on one foot
May walk upstairs with alternating feet (without holding the rail)
Able to pedal a tricycle
4 YEARS
Hops on one foot without losing balance
Throws a ball overhand with coordination
5 YEARS:
Skips, jumps, gallops, and hops with good balance
Stays balanced while standing on one foot with eyes closed
The majority of our balance skills have developed by age 5, but will continue to fine-tune up until around age 12. Remember to keep in mind, these are averages for the typically developing child.
Balance is required to do just about anything in daily life.
Balance is needed to stand at the mirror while brushing teeth, get out of the car, and put on socks, to name just a few. Without the development of this balance skill, support aids (walkers, crutches, braces) may be necessary for safety and function.
Static Balance
Did you know that balance is also related to non-physical, or static tasks?
Research suggests that when balance is improved, so are attention and learning skills. Good balance helps children develop better reading, writing, and language skills, as well as improved concentration.
One way balance is theorized to improve academic skills, is through increased body control, and knowing where the body is in space (proprioception). Having better body control and knowing how to coordinate movement in various environments is important.
Correct body awareness makes it easier to have a comfortable seated posture. Good balance also makes activities such as sitting still while moving the head to look up at the chalkboard, and then back down to write easier.
Without proper body control, it is just that much more difficult to perform the tasks of a student: copying from the board, holding and reading long textbooks, carrying materials from space to space, and supporting an upright seated posture for many hours a day.
How to Support Balance Development
Knowing the huge impact that balance has on the body, what can you do to improve it?
If you love all of the great resources found above, consider becoming a member.
Want to add this resource to your therapy toolbox so you can help kids thrive? Enter your email into the form below to access this printable tool.
This resource is just one of the many tools available in The OT Toolbox Member’s Club. Each month, members get instant access to downloadable activities, handouts, worksheets, and printable tools to support development. Members can log into their dashboard and access all of our free downloads in one place. Plus, you’ll find exclusive materials and premium level materials.
Level 1 members gain instant access to all of the downloads available on the site, without enter your email each time PLUS exclusive new resources each month.
Level 2 members get access to all of our downloads, exclusive new resources each month, PLUS additional, premium content each month: therapy kits, screening tools, games, therapy packets, and much more. AND, level 2 members get ad-free content across the entire OT Toolbox website.
Sydney Thorson, OTR/L, is a new occupational therapist working in school-based therapy. Her background is in Human Development and Family Studies, and she is passionate about providing individualized and meaningful treatment for each child and their family. Sydney is also a children’s author and illustrator and is always working on new and exciting projects.
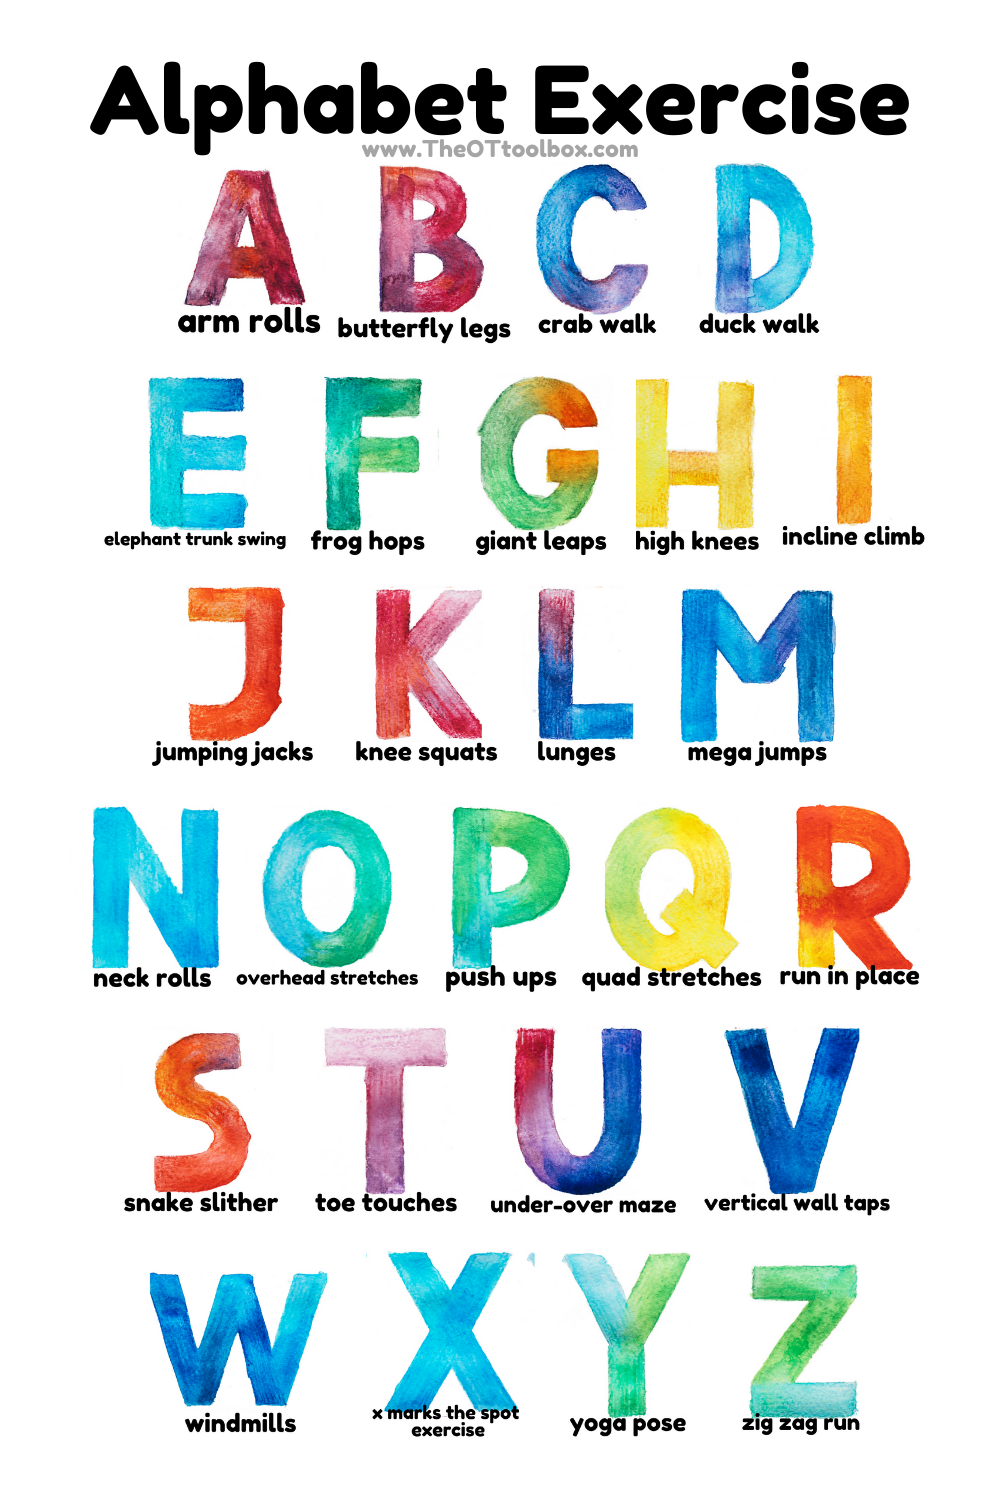
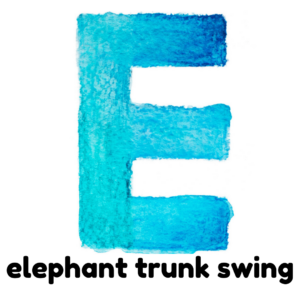
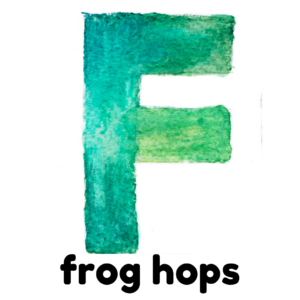
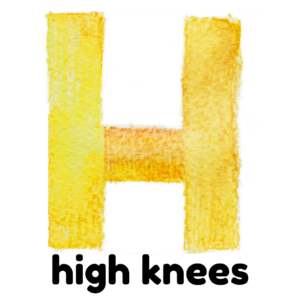
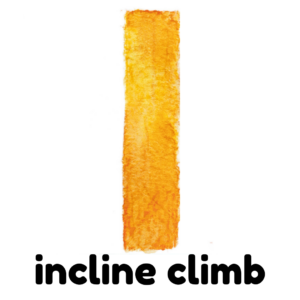
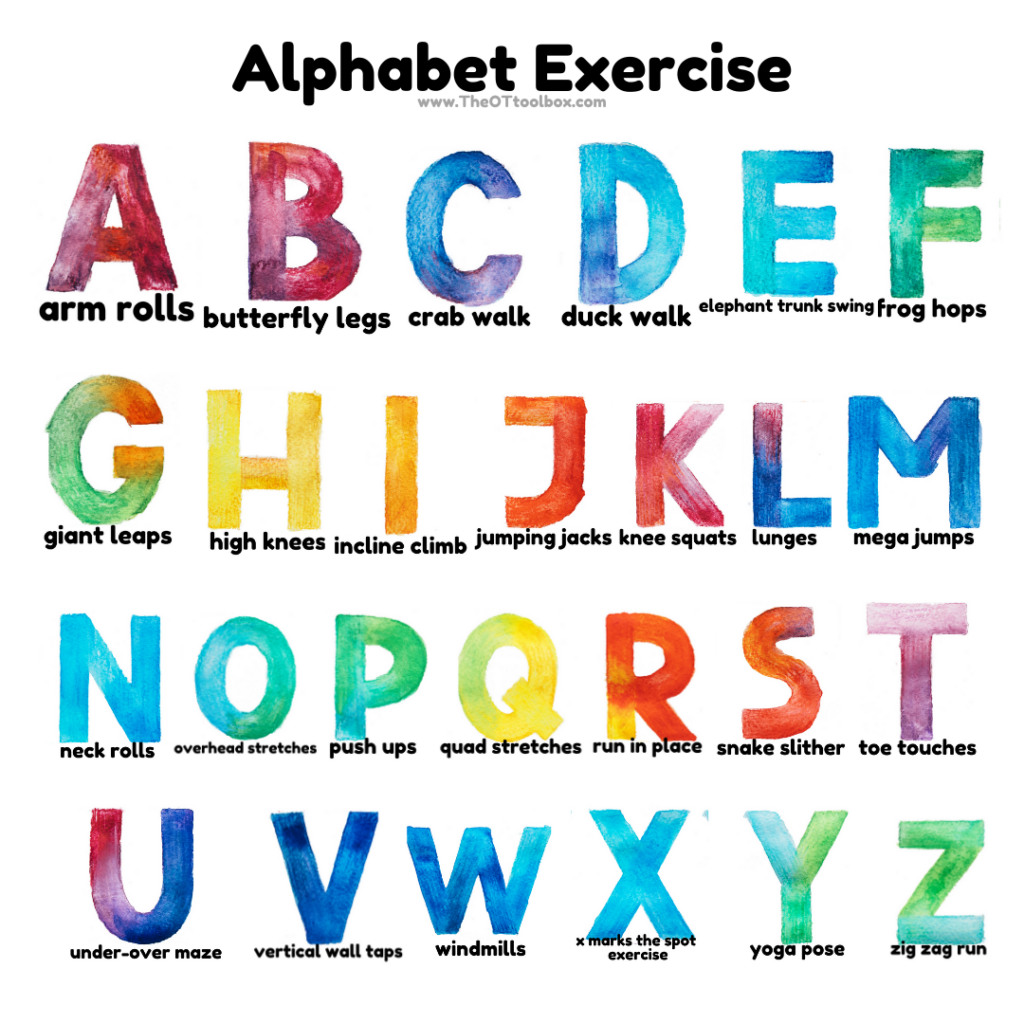
Exercise for kids is so important on many levels. Use these alphabet exercises to help build skills, and get the kids moving with an alphabet theme. Add this alphabet for kids activity to your list of gross motor coordination activities.
Why Use these Alphabet Exercises?
In therapy, we look to help children build their gross motor skills, core strength and endurance, body awareness, motor planning, and self-regulation skills. It is recognized that regular exercise can help defend against childhood mental health and behavioral disorders, such as anxiety and depression.
The consistent engagement in physical activity promotes overall health and wellness and provides a more grounded mindset for daily living and participation in life activities.
These alphabet exercises were actually created as a resource in 2020, when many children were working remotely. With all of the time that children spent completing school work as part of teletherapy activities, or even their increased time engaging with electronics at home, they needed encouragement to exercise or simply participate in physical activity during the day.
However, there is even more of a need for these alphabet exercise even though most students are back to traditional learning environments. Students are on screens more than ever before. The symptoms of too much screen time is evident. Additionally, therapists are seeing more of a need to address self-regulation challenges in schools and in homes.
That’s where this movement-based alphabet for kids comes in as a support activity.
Research tells us that outdoor play is essential. However, even going outside to play or engage in motor skills is a challenge for some children!
Making exercise a fun playtime activity is the best way to help a child build skills while benefiting their health and wellness and keeping weight in check.
Exercise can build confidence and self-esteem, helping a child to feel better about themselves and increasing their overall happiness.
For a printable PDF version of this alphabet exercise page, scroll to the bottom of this page and enter your email address.
These letter exercises are also available in an interactive Google slide deck where students can move parts of the slide as they complete each letter activity. Click here to access that ABC exercises slide deck.
Alphabet Gross Motor ACTIVITIES
Would you like a playful way to engage a child or children in therapy exercises or in a home exercise program?
How about trying this fun ABC’s of Exercise activity page? There are many ways to use these alphabet exercise letters in learning and occupational therapy activities guided by individual goals.
Children can either spell words or even their names to engage in the physical activity which accompanies each letter.
Use some homework spelling words and perform the exercises related to them! Wow…homework AND exercise!
Another easier way to play is by placing either A through Z foam letters, Bananagrams, or Scrabble tiles into a bag or basket and then have the child pull one letter out at a time and match it to the corresponding letter on the ABC’s of Exercise chart to perform the exercise listed.
Work through the child’s name for an individualized exercise program.
Add the letter gross motor activities to a letter of the week learning program.
Don’t have foam letters or board game letter tiles? No worries, just grab some puzzle pieces, folded pieces of paper, beans or craft sticks and write the letters on them!
Toss any of these into a bag or basket and pick one…easy and cheap! You can also incorporate some handwriting with this activity too by having them write each exercise letter or a word beginning with that letter after they complete the exercise.
The best part about this activity page is that it is open-ended so you (or they) get to determine how many to perform of each exercise and how many exercise letters to perform.
In addition to being open-ended, this activity page provides a wonderful opportunity for teaching students exercises which can later be used when the child is feeling heightened and needing some self-regulation intervention tools.
Use the activity sheet as an inclusion tool for a whole class activity, small group or individual therapy session, or even as a supplement to a motor pathway in the school building! Have the child do the activity that spells their name when using it as part of a motor pathway in school!
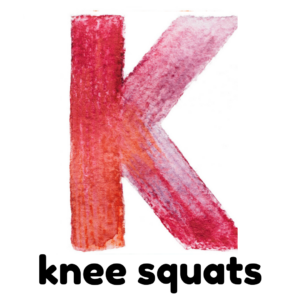
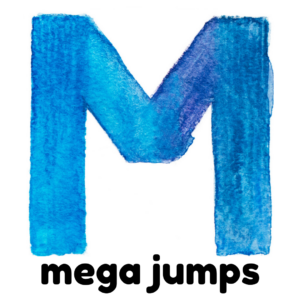
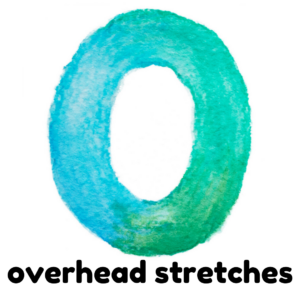
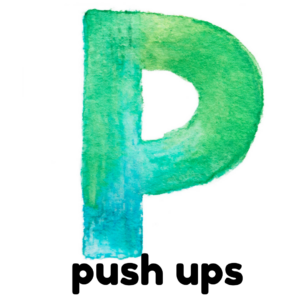
The following list are the exercises and their descriptions which are utilized in the ABC’s of Exercise resource:
ABC Exercises:
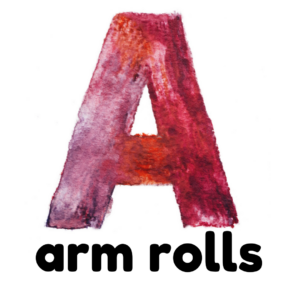
Arm rolls – Have child lift arms out from their sides and rotate arms in small circular patterns, first forward and then backward.
Butterfly legs– Have child sit on the floor with legs flexed and bottom of feet touching. Then have them flap their legs up and down to resemble the wings of a butterfly.
Crab walk – Have child sit on the floor, lean back on their arms and lift their body up with their legs and arms to walk along the floor resembling the walk of a crab.
Duck walk – Have child squat down and walk on the floor while squatted resembling the walk of a duck. Add having them bend their arms up to make them look like duck wings.
Elephant trunk swing – Have child stand up and lean forward with arms extended and fingers linked together. Once this position is achieved, have child sway their arms left and right resembling an elephant’s trunk.
Frog hops – Have child squat down on the floor with their arms in front of them and have them leap forward as far as possible resembling a jumping frog. Do this repeatedly.
Giant tape lines – Place tape lines on the floor to work on jumping from line to line or complete giant jumps by attempting to jump as far as possible from a standing position.
High knees – Have child lift alternating knees up to hands for tapping and while marching around the room. Have them lift knees as high as possible.
Incline climb – Have child climb up a slide, long wedge or hillside or toss the couch cushion or even the bed mattress in the floor and make a ramp. If all else fails, just use the stairs!
Jumping jacks – Have child start by standing with arms out to their sides and legs together then have them jump while spreading their legs and feet apart and arms up and over their head. Follow with bringing arms back to sides and legs and feet back together.
Knee squats – Have child start with standing up and then squatting to floor and back up again, repeatedly.
Lunges – Have child step forward with one leg and lower their hips until both knees are bent, then push back up to starting position. Alternate legs.
Mega jumps – Have child jump from a higher level to the floor, either from a chair, sofa, steps, etc. or they could also simply try to jump as far as possible forward and then try to jump farther each time to beat their last distance.
Neck rolls – Have child stand or sit to roll their neck and head in a circular pattern from left to right and from right to left.
Overhead stretches – Have child reach up overhead, link fingers together (a great finger strength exercise) and stretch arms up as high as possible. Add standing on tiptoes to make it really high.
Push-ups – Have child lie on the floor and push their body up with their hands and arms. If a regular push-up is too difficult, complete knee push-ups by simply weight bearing on flexed knees while completing push-ups rather than trying to weight bear on toes.
Quad stretches – Have child perform, sit to stands and stand to sits, while sitting in a chair. Do this repeatedly.
Run in place – Have child run in place for a specific amount of time such as while counting to 20.
Snake slither – Have child lie on their stomach and move their body forward trying to keep as much of their body in contact with the floor as possible, similar to an army crawl.
Toe touches – Have child stand and bend over to touch their toes with their fingers and back up to standing. Do this repeatedly.
Under/over laser maze – Create a laser maze with use of tape, string, or streamers in the hallway and have child go under and over to move through it. Or have them crawl under tables and over furniture to achieve under/over.
Vertical wall taps – Have child stand beside a wall and jump to tap the wall attempting to beat their last height touched with each jump.
Windmills – Have child stand with arms and legs out to the sides. Have them bend over to touch right fingertips to left toes and back up to standing and then bend to touch left fingertips to right toes and back up to standing.
X-marks the spot exercise – Have child cross over legs and feet and cross over arms and hands while jumping to create X patterns with extremities. Or complete ‘X’ cross crawls to work on cross-lateral activity of extremities.
Yoga poses – Have child pick a yoga pose to complete, such as cat pose, cobra pose, or shark pose.
Zig-zag run – Use small obstacles to create a zig zag course or simply attempt to run a zig zag pattern.
With home learning, indoor activities, and social distancing upon us, this exercise activity page will help meet the needs of your child so they can get in their daily exercise while also releasing some extra “cooped up” energy!
FREE Alphabet Exercise PDF
Enter your email address below to access this free ABC PDF to add heavy work, core strength, movement, and gross motor skills with an alphabet theme. Use the printable alphabet exercise PDF as a poster for learning letters through movement.
Best of all this alphabet for kids activity supports learning through play!
Resources:
Educating the Student Body: Taking Physical Activity and Physical Education to School. Editors: Harold W. Kohl, III and Heather D. Cook. Authors: Committee on Physical Activity and Physical Education in the School Environment; Food and Nutrition Board; Institute of Medicine. Washington (DC): National Academies Press (US); 2013 Oct 30.