Bat Template Fine Motor Activity

Bat stencil template

This bat template is a fine motor activity, perfect for building motor skills with a Halloween twist. Use the bat printable as a stencil to cut out, trace, and then use in fine motor work. Add this to your Halloween occupational therapy activities!

Bat Template

Fall is here and that means it’s time to pull out the Halloween crafts! This bat Halloween craft is a favorite in our house, and it’s actually a fun way to celebrate Halloween with kids without spooky decorations.

We also used this bat template in a Stellaluna activity that also challenged visual processing skills. Be sure to check that activity out for another way to use this printable bat stencil.

The nice thing about using our bat template is that it becomes an open-ended Halloween craft idea is one that doesn’t need a lot of materials. In fact, it’s a simple craft idea that is big on the fine motor skill development! When kids make this bat craft, they will be boosting skills such as fine motor strength and dexterity in a big way.

For more Halloween craft ideas, check out some of the ideas at the bottom of this post…it’s the perfect addition if you’re looking for Halloween crafts for toddlers or Halloween crafts for preschool parties.

Related, check out these spider activities for more spooky but fun ideas.

Printable bat stencil to use in fine motor crafts for Halloween


Bat Template Craft

We made this bat craft with a fun sensory twist.  And, since we have a certain second grader that is cursive handwriting obsessed, we decided to add a cursive handwriting twist to this activity.  This activity could work to help kids with letter formation of upper case letters, lowercase letters, or numbers too. The possibilities are endless. 

We arranged the bat template so you can print out one bat printable page and then get 3 bats from the one page.

Or, if you are using the bat templates with a group of kids like in a classroom Halloween party activity, you can easily cut the bat template page into three sections with one bat stencil for each child.

This post contains affiliate links.

Cut out bat template and trace onto black paper with yarn

Bat Printable

To make your bat craft, you’ll need just a few materials.

Amazon Affiliate links are included.

  • Bat printable (get your copy below)
  • black cardstock 
  • black yarn 
  • Glue 
  • Scissors (THIS is my favorite brand and the ones that I always recommended as an Occupational Therapist!)
  • Pencil or marker

This is a great Halloween craft for preschoolers because it’s a fantastic way to work on scissor skills with a Halloween activity.

Make the Bat Template

  1. First print out the Pat printable onto printer paper.
  2. Cut out the bat templates on the page. Each template has three bats. Students can cut out the bat printable or the adult can do this as preparation work.
  3. Trace the bat template onto cardstock or black construction paper. This is another good task for students to do as tracing the bat template supports development of bilateral coordination skills, eye-hand coordination, crossing midline, and pencil control skills.  
  4. Cut out the bat template.

Kids can cut out the shape using their Scissors for great scissor skill work.  The bat shape is a complex cutting shape and can be done by Elementary aged students.  

Cutting the angled wings and curves can be difficult, but by using the cardstock, kids will get a bit fore proprioceptive feedback from the thicker resistance of the paper material.  

To make the task easier, cut wings without the jagged lines or use thicker cutting lines when you draw the bat shape.  

Decorate the Bat Cutout

Once you have the bat, you’ll need to cut pieces of the black yarn.  Have your child cut long or short pieces, it doesn’t really matter what length they wish to cut for their bat’s texture.  

  1. Cut black yarn for the bat cutout.

Cutting the yarn is a great material to practice appropriate scissor positioning and bilateral hand coordination.  

If a child is holding the scissors on an angle, cutting the yarn will be more difficult.  (You may see them trying to “saw” at the yarn!) Encourage them to hold the scissors straight up and down and the blades of the scissors at a 90 degree angle to the yarn.  You can find more of our Scissor Skills activities.

Child dipping black yarn into glue to stick to the bat printable

2. Next, pour some glue into a shallow dish or plate.  Show your child how to drag the yarn through the glue and get it nice and saturated with the glue.  Use both hands to pinch and “scrape” off excess glue from the piece of yarn.  

3. Next, drape the black yarn on the bat shape.  You can let your child get as creative as they wish with this part.  Some might like to outline the bat shape and others, just pile it up on the bat.  

4. Let the glue and yarn harden and you’ll have a textured bat craft to use in Halloween decorations this Fall.  You will have to wait for the glue to dry, probably overnight.

Use the Bat Printable in Handwriting Practice

Occupational therapy practitioners know the value of using a single activity or material to develop a variety of skill areas. That is the case with this bat printable…use it to work on handwriting skills too!

We used those saturated yarn pieces to build cursive letters, but you could build printed letters as well, using our letter construction method.

This would be an excellent way to practice cursive letter formation in our Creative Cursive handwriting journal activity.

Make letters with yarn and decorate the bat printable.

Use this Bat Craft for kids to work on letter formation of any kind. It’s a creative writing activity that they will be sure to remember. Work on forming individual letters, spelling sight words, or making Halloween words.

Bat template and letters made with black yarn.

Use the Bat Printable in Learning

This would work as a very fun…and very sensory…classroom Halloween party idea or learning activity for this time of year, while working on team work skills, and learning components.

  1. Split kids up into teams. Give each team a collection of cut black yarn and a bowl of glue.
  2. Write a spelling word, or a Halloween word on the board or hold up a sign with a Halloween word.
  3. Each team has to work together to use the cut yarn and glue to spell the Halloween word on a piece of paper or cardboard.
  4. Once a team has completed the word, they have to hold up their paper or cardboard. The first team to spell the word with the letters sticking wins! (Too much glue or not enough glue will make this a fun race for Halloween parties for kids of all ages.)
Use black yarn to decorate the bat printable template and then write words with black yarn.

Build printed letters with the glue yarn, too.  We had a lot of fun with this Halloween craft and it was a hit with all of my kids…from preschool on up to grade school.

Check out some of these other Halloween activities and crafts:

Free Bat Template

Want a copy of this free bat template printable? Enter your email address into the form below to get a copy of this Halloween printable. This activity is also available inside The OT Toolbox Member’s Club under our Bat Therapy Theme. Members can log in and get the bat template there without entering an email address. Not a member yet? Join us today.

Free Bat Stencil

    Are you interested in resources on (check all that apply):
    We respect your privacy. Unsubscribe at anytime.

    Colleen Beck, OTR/L has been an occupational therapist since 2000, working in school-based, hand therapy, outpatient peds, EI, and SNF. Colleen created The OT Toolbox to inspire therapists, teachers, and parents with easy and fun tools to help children thrive. Read her story about going from an OT making $3/hour (after paying for kids’ childcare) to a full-time OT resource creator for millions of readers. Want to collaborate? Send an email to contact@theottoolbox.com.

    Doubles and Near Doubles

    doubles and near doubles craft

    If you have a second grader, than you may be familiar with doubles and near doubles. This form of math facts with doubles numbers (adding two numbers that are the same) and near doubles (adding two numbers that are almost the same), can help kids quickly learn math facts with a brain trick. We created a spider activity that was a fun way to practice doubles and near doubles!

    Adding Doubles and Near Doubles in Second Grade Math up to 20, with a hands-on math, spider theme.

    What are Doubles and Near Doubles?

    We explained this a bit, but let’s expand on these math definitions.

    You might be thinking, “What!?” I have to admit, adding near doubles is a concept that I learned along with my oldest when she went through second grade.

    What is Doubles and Near Doubles in Second grade math?  

    Doubles are the addends that are exactly the same.  These are addition facts that second graders need to know to add within 20.

    Near Doubles are those addends that are almost a double fact. So, 4+5 is very close to 4+4.  Students can easily recall that the double fact for 4+4=8 and by adding one more, they quickly know that 4+5=9.  These are math fact tools that can help second graders add within 20.

    Doubles Math Facts

    Doubles math facts include:

    • 0+0=0
    • 1+1=2
    • 2=2+4
    • 3+3=6
    • 4+4=8
    • 5+5=10
    • 6+6=12
    • 7+7=14
    • 8+8=16
    • 9+9=18
    • 10+10=20

    Near Doubles Facts

    Near doubles facts depend on the doubles that the numbers are near.

    • 0+0=0
      • 1+0=1
      • 0+1=1
    • 1+1=2
      • 2+1=3
      • 1+2=3
      • 0+1=1
      • 1+0=1
    • 2+2=4
      • 3+2=5
      • 2+3=5
      • 1+2=3
      • 2+1=3
    • 3+3=6
      • 4+3=7
      • 3+4=7
      • 2+3=5
      • 3+2=5
    • 4+4=8
      • 5+4=9
      • 4+5=9
      • 3+4=7
      • 4+3=7
    • 5+5=10
      • 6+5=11
      • 5+6=11
      • 4+5=9
      • 5+4=9
    • 6+6=12
      • 7+6=13
      • 6+7=13
      • 5+6=11
      • 6+5=11
    • 7+7=14
      • 8+7=15
      • 7+8=15
      • 6+7=13
      • 7+6=13
    • 8+8=16
      • 9+8=17
      • 8+9=17
      • 7+8=15
      • 8+7=15
    • 9+9=18
      • 10+9=19
      • 9+10=19
      • 8+9=17
      • 9+8=17
    • 10+10=20
      • 11+10=21
      • 10+11=21
      • 9+10=19
      • 10+9=19

    You can see how learning just a handful of doubles facts builds a bigger repertoire of math facts. This is a particularly good path strategy for learning tricky addition facts that kids often struggle with, especially with adding the higher 6’s, 7’s, 8’s, and 9’s.

    Adding Doubles and Near Doubles 

    Adding doubles is a math fact memorization technique.  It is easier for kids to remember that 2+2=4, 6+6=12, 7+7=14, 9+9=18, etc.  

    Kids can first memorize the doubles facts. Once they’ve got those addition facts down pat, recognizing that the near doubles facts are just one off from the double makes learning a whole new set of numbers easy.

    For example:

    First the student would memorize the near double of 6+6=12.

    Then, when that becomes a math fact they know by sight, they can look at the math problem 6+5 and recognize that the addend 5 is just one less than the doubles fact for 6. They can know the number sense that the problem 6+5 is one less than 6+6 and easily identify the answer of 11.

    Similarly, if the student is presented with the near doubles problem of 6+7, they can recognize that the addend 7 is one more than the doubles fact for 6. They can identify by number sense that the answer for 6+7 is one more than 6+6 and that the answer is 13.

    Near doubles assist students with adding one more or one less than the doubles facts.

    By this, we mean that once a student knows the doubles fact of 6+6=12, they then also know:

    • 6+5=11
    • 5+6=11
    • 6+7=13
    • 7+6=13

    You can see how the doubles and near doubles concept builds number sense and allows students to become much more fluent and efficient at math problems.


    Doubles and Near Doubles Activity

    We made this near doubles activity to help with second grade math concepts, specifically in adding Doubles and adding Near Doubles., using a fun spider craft. The OT in me loves that it works on quite a few fine motor skills and scissor skills too!

    I wanted to create a hands-on math activity using the doubles and Near Doubles addition facts with a spider theme.  

    It’s an easy and quick activity to set up, that will help second graders realize how to quickly figure out more addition facts quite easily.  This is a math skill appropriate for Common Core Standards CCSS 2.0A.1 and CCSS 2.0A.2.  You can see those Common Core standards here.

    To make your Near Doubles Spider Activity

    Cut out paper strips to write doubles and near doubles addition facts.

    You’ll need just a few materials for this doubles and near doubles practice activity:

    • Black construction paper
    • White colored pencil
    • Scissors
    • Glue
    • Googly eyes

    To make this doubles and near doubles craft, complete these steps:

    1. Cut out 8 strips of black construction paper.  These will become the spider’s legs.
    2. Using a white colored pencil, write out doubles facts on one side of the black paper strips. You’ll need to write the following doubles facts on the paper strips:
      • 2+2=__
      • 3+3=__
      • 4+4=__
      • 5+5=__
      • 6+6=__
      • 7+7=__
      • 8+8=__
      • 9+9=__
    3. On the other side of each spider leg paper strip, write with your white colored pencil:
      • 2+3=__
      • 3+4=__
      • 4+5=__
      • 5+6=__
      • 6+7=__
      • 7+8=__
      • 8+9=__
      • 9+8=__
    4. Cut out a circle out of the black paper for the head.
    5. Glue googly eyes onto the spider’s head.  
    6. Glue the legs to the spider head so the Doubles are all on one side and the Near Doubles are all on the other side.  

    Kids can flip the legs over to see how closely the doubles are to the Near Doubles and how knowing the Doubles facts can quickly help them figure out the Near Double facts.

    You can make multiple versions of these numbers, using the commutative property of addition

    Spider craft to work on doubles and near doubles facts.

    Adding Doubles and Near Doubles in Second Grade Math up to 20, with a hands-on math, spider theme.

    More Hands-On Math Activities you will love:

     
     Commutative Property of Addition  How to Add with Regrouping  Use play dough in math  Bottle caps in first grade math

    Colleen Beck, OTR/L has been an occupational therapist since 2000, working in school-based, hand therapy, outpatient peds, EI, and SNF. Colleen created The OT Toolbox to inspire therapists, teachers, and parents with easy and fun tools to help children thrive. Read her story about going from an OT making $3/hour (after paying for kids’ childcare) to a full-time OT resource creator for millions of readers. Want to collaborate? Send an email to contact@theottoolbox.com.

    How to Use Graph Paper

    graph paper uses

    Do you know how to use graph paper to meet specific OT goal areas? We can use grid paper in occupational therapy sessions to develop many goal areas. Did you ever see a student using graphed paper in occupational therapy and wonder about the pre-gridded paper purpose in supporting goals? Not only is graph paper a type of adapted paper for some, it can be a tool too! There are so many different reasons to use this type of paper to support specific handwriting or visual perception needs. Here we are discussing using graph paper and why this type of therapy tool can be helpful.

    Graph paper uses in occupational therapy for handwriting and other areas.

    Graph Paper Purpose in OT

    Graph paper comes in many sizes!  Specific activities can be easily graded in difficulty just by making it easier when boxes are large and of course more challenging as boxes become smaller in size. 

    Graph paper can be used as a tool to support many areas of development:

    How to Use Graph Paper

    Try these paper activities in occupational therapy sessions or at home. Here are ideas on using graph paper to meet specific goal areas in OT or at home:

    Graph Paper for Visual Perception

    Tasks like forming letters the correct size, using margins, aligning lists or columns are all visual perceptual areas of handwriting. You can use grid paper to support these needs.

    Graph paper is great to use for math problems! Simply place one number in each box and line them up so numbers are easily read and there’s a spot for each number in your answer. Your math work just might be easier to do and it will for sure be easier to read.

    Graph paper for visual motor skills

    Related to the visual perception aspect is the contribution of motor skills. In order to copy shapes, copy and write words, recreate graphs, plot lines, etc. one needs visual motor skills.

    Graph paper can be used to address visual motor skills with these activities:

    • Create a plot diagram. Use a ruler to connect lines.
    • Copy shapes and designs using the grid blocks on the paper.
    • Form block letters with or without a model.
    • Cut shapes and trace the shape using the graph paper template.
    • Create symmetry drawings by folding the graph paper in half.
    • Create pencil control exercises to work on precision with pencil use.


    I love to use graph paper for imitating drawings. I will draw an odd shape or maybe even a specific item and ask a student to copy my drawing by counting and using the boxes to replicate my shape. Students can also draw their own shape and try to “stump” the therapist or other player.


    If the adult/other player is creative, s/he can label the boxes with letters and numbers across the top and side edges (kind of like a BINGO board) and the student is asked to fill in box A-1, or C-3, etc. to create a picture that will mysteriously become visible at the end. The one helping here must do a little homework on their own first to make sure the colored in boxes will actually create a picture.

    Draw shapes

    The student can also be instructed (verbally or with written cues) to draw shapes, lines, letters, etc. in certain boxes or at the intersection of certain lines (e.g. put a yellow circle in box A-1, or draw a tree at line F-7 or similar). 

    This helps to follow written instructions, draw a specific shape, and locate the correct space on the graph paper.  Be creative and make it fun!

    Graph paper Letter Size Activity-

    Finally, it would be an injustice to graph paper if I didn’t mention the use it can play in creating letter boxes for a box and dot handwriting task.  Your student may already be familiar with this through OT sessions. 

    Graph lines can be used to outline the space in which a letter sits, using one single box for lower case letters.  Upper case letters and lower case tall letters: (t, d, f, h, k, l, b) will need to include the box ON TOP to make it a one wide by a 2 tall defined space. 

    Lower case letters that are descending below the line, or tail letters (q, y, p, g, j) must include the box BELOW, making it also a one wide by 2 space, but the box on bottom goes below the line on which the letters are written. 

    Missing letter activities-

    Making up a “key” of words, or a game, have the student place the letters in the proper defined word space that has letter boxes outlined or maybe even just the word outlined.  This may be a fun way to practice spelling words. 

    Cutting activity-

    If nothing else, you can always use graph paper to practice cutting on the lines, creating a colored picture, making paper air planes, or crumpling into a ball to play a game.  Graph paper is one style of cutting paper with a graded resistance we talk about in our scissor skills crash course.

    I’m sure your student can think of many non-traditional things to do with it on his/her own!

    If you don’t have graph paper on hand, below are resources I have found which may be helpful.

    More handwriting tips

    The Handwriting Book is a comprehensive resource created by experienced pediatric OTs and PTs.

    The Handwriting Book covers everything you need to know about handwriting, guided by development and focused on function. This digital resource is is the ultimate resource for tips, strategies, suggestions, and information to support handwriting development in kids.

    The Handwriting Book breaks down the functional skill of handwriting into developmental areas. These include developmental progression of pre-writing strokes, fine motor skills, gross motor development, sensory considerations, and visual perceptual skills. Each section includes strategies and tips to improve these underlying areas.

    • Strategies to address letter and number formation and reversals
    • Ideas for combining handwriting and play
    • Activities to practice handwriting skills at home
    • Tips and strategies for the reluctant writer
    • Tips to improve pencil grip
    • Tips for sizing, spacing, and alignment with overall improved legibility

    Click here to grab your copy of The Handwriting Book today.

    Colleen Beck, OTR/L has been an occupational therapist since 2000, working in school-based, hand therapy, outpatient peds, EI, and SNF. Colleen created The OT Toolbox to inspire therapists, teachers, and parents with easy and fun tools to help children thrive. Read her story about going from an OT making $3/hour (after paying for kids’ childcare) to a full-time OT resource creator for millions of readers. Want to collaborate? Send an email to contact@theottoolbox.com.

    Robin Craft Fine Motor Activity

    Robin craft with egg cartons

    This robin craft is a fun activity for Spring that develops fine motor skills, bilateral coordination, eye-hand coordination, and precision skills. This is the perfect addition to the occupational therapist’s Spring fine motor activities and a great tool for kids to make that they also use to work on skills in occupational therapy. Plus, the worm activity is just fun for kids! Use this egg carton craft to work on so many fine motor skills

    This egg carton robin craft is a fine motor activity kids can make.

    Robin Craft with an Egg Carton

    Spring and Robins go hand in hand.  We made this Robin craft as a Spring Fine Motor activity one day and the kids were giddy with excitement to play!      

    Robin craft for counting worms is a fine motor activity busy bag

    This robin craft is a busy bag type of activity will keep the kids busy and little fingers moving as they count worms to feed the Spring robins.  

    This egg carton family of robins was fun to make with the kids and even more fun to watch them play.


    This post contains affiliate links.

    Paint an egg carton to make a robin craft

    Robin Craft Fine MOtor Activity

      This Spring craft for occupational therapy actually uses a recycled cardboard egg carton. There are many ways to use recycled materials in crafts and activities that develop skills. This is just one fun idea.

    Time needed: 20 minutes

    How to make a robin craft with an egg carton

    1. Start with an egg carton.

      We used a cardboard carton so the paint would stick. You’ll need a clean and dry egg carton. Cut off the lid off the egg carton. You’ll want to keep the egg sections for this robin craft.

    2. Paint the egg carton.

      Paint a red belly on each egg compartment.  Paint the sides and back of each robin with brown paint. You can paint the whole egg section or you can leave a space at the top to add a number, depending on if you are making a family of robins, or each student is making a single robin.Paint egg cartons to make a robin craft

    3. Punch a hole in each egg carton compartment.

      Use a hole punch to punch a hole towards the top of the robin. This will be the beak of the robin, and where students will “feed” pipe cleaner worms to feed the birds. Little Guy (age 5) got a big kick with this part.  He wasn’t able to squeeze the hole puncher to make the holes, but he really liked watching!  

    4. Make paper beaks for the robin craft.

      Cut small triangles from yellow cardstock.  Drag the wide end of the triangles in glue and press into the holes.  These will be the beaks for the robins.  Let the glue dry.  Punch holes in egg cartons and make paper beaks for a robin craft

    5. Make pipe cleaner worms!

      Cut brown pipe cleaners into small sections. The worms can be as small as an inch or two or much longer. Show the student how to bend the pipe cleaner slightly to create wiggly worms. This is a simple worm craft of it’s own! This is also a great bilateral coordination and scissor skill activity for Spring. Kids love making pipe cleaner worms!Cut brown pipe cleaners to make worms for a robin craft

    6. Draw Eyes on the Egg carton robins.

      Use a permanent marker to make two small dots for eyes for the robins. You can also add a number on the top of each robin.  Now it’s time to count and play!  Robin craft made from egg cartons

       Now it’s time to play and feed the robins!

    Pipe Cleaner Worm Craft

    Three is just something about those pipe cleaner worms. Kids love making them and using them to feed the robins. Let’s take a look at skills that are being developed with this fine motor task.

    Little Guy enjoyed cutting pipe cleaners and bending them into little bendy worms. Cutting and bending the pipe cleaners is a bilateral coordination task that requires using both sides of the body with different motor plans and degrees of strengthening. This task is a great one for building motor plans and focusing on graded strength.

    Cutting the pipe cleaners is a scissor skills task that requires and develops hand strength. What a great hand strengthening activity this is!  Squeezing the scissors requires a lot of hand strength to snip the pipe cleaners.  

    Robin egg carton craft and fine motor activity for Spring.

      Make a bunch of worms; You will need them!  

    Feed the robin egg carton craft

      Feed the Robins Craft

    If you draw numbers on the top of each robin, you can feed each bird the correct number of worms. But, if you are working with a whole caseload or class of students, collecting many egg cartons can be difficult. You could always use just one egg carton section for each student so they have their own individual bird craft to make and feed.

    In that case, skip adding a number to the top of the egg carton. Users can roll a dice and feed the bird that number of pipe cleaner worms.

    Fine motor activity with egg carton robins

    This activity builds several fine motor skill areas:

    • Eye-hand coordination
    • Bilateral coordination
    • Separation of the sides of the hand
    • Pincer grasp to pick up the pipe cleaner
    • Tripod grasp, or a refined tip to tip grasp to thread the pipe cleaner into the bird
    • In-hand manipulation- Pick up several pipe cleaners at once and hold them in the palm of the hand. Then, feed one worm pipe cleaner at a time to “feed the robin”!


    Robin Math Activity

    To expand on the eye-hand coordination skill work, and to make this a great multisensory learning activity, use this as a one-to-one correspondence task for preschoolers. Young children can count the number of pipe cleaner worms, match the number to the works, and build pre-writing skills through play.

    Little Sister (age 3.5) counted out the number of worms for each bird (She needed help with one-to-one correspondence).  She was able to press the worms into the robin mouths using a tripod grasp.  

    It was fun to watch her play and count for a long time.  I overheard a little dramatic play happening as she talked to the robins and pretended they were a family eating their lunch.    

    Use the Robin Craft to Build Skills Over and Over Again

    This egg carton robin was a tool we made once and then used over and over again, making it a great fine motor activity for the occupational therapy toolbox.

    Use it in a robin sensory bin! Add the pipe cleaner worms to a sensory bin and kids can find the worms and then feed them into the robin. There are so many ways to build skills with this one craft.


    Spring Fine Motor Kit

    Score Fine Motor Tools and resources and help kids build the skills they need to thrive!

    Developing hand strength, dexterity, dexterity, precision skills, and eye-hand coordination skills that kids need for holding and writing with a pencil, coloring, and manipulating small objects in every day task doesn’t need to be difficult. The Spring Fine Motor Kit includes 100 pages of fine motor activities, worksheets, crafts, and more:

    Spring fine motor kit set of printable fine motor skills worksheets for kids.
    • Lacing cards
    • Sensory bin cards
    • Hole punch activities
    • Pencil control worksheets
    • Play dough mats
    • Write the Room cards
    • Modified paper
    • Sticker activities
    • MUCH MORE

    Click here to add this resource set to your therapy toolbox.

    Spring Fine Motor Kit
    Spring Fine Motor Kit: TONS of resources and tools to build stronger hands.

    Grab your copy of the Spring Fine Motor Kit and build coordination, strength, and endurance in fun and creative activities. Click here to add this resource set to your therapy toolbox.

    Colleen Beck, OTR/L has been an occupational therapist since 2000, working in school-based, hand therapy, outpatient peds, EI, and SNF. Colleen created The OT Toolbox to inspire therapists, teachers, and parents with easy and fun tools to help children thrive. Read her story about going from an OT making $3/hour (after paying for kids’ childcare) to a full-time OT resource creator for millions of readers. Want to collaborate? Send an email to contact@theottoolbox.com.

    Valentine’s Day Hat Craft

    Valentines day hat craft

    Ready for a fun valentines day hat craft? This paper craft is a great color, cut, and glue craft for kids that builds fine motor skills, coloring skills, and tool uses! Print off enough for your whole caseload or classroom because this printable party hat is great for a Valentine’s Day party activity or to use in the weeks leading up to Valentine’s Day. Add this paper hat craft to your toolbox of occupational therapy activities for Valentine’s day!

    You’ll also want to grab these printable Valentine’s Day cards, too!
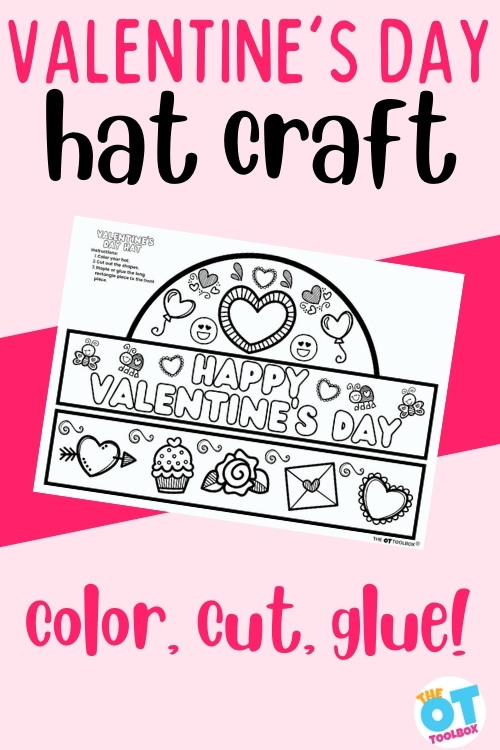
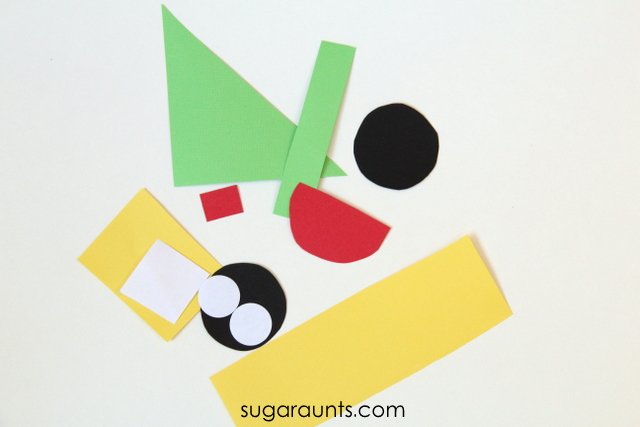
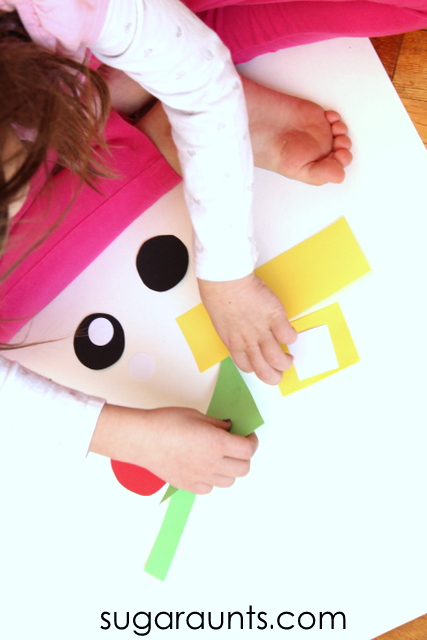
    Valentines day hat craft

    valentine hat craft

    This Valentine’s day hat (I like to think of it as a crown), is an excellent catalyst not only for working on visual motor skills, but giving learners a chance to get much desired positive attention.  Of course not all people want attention, some shy away from being noticed.  That is a much deeper issue and can be addressed in another post. 

    Today we are celebrating Valentine’s Day and feeling special.

    What is it about hats and crowns that make children feel so special?  For that matter, adults who wear a crown feel mighty fine also!  Just look at the royal family.  I would gladly don a crown daily to be a princess or queen.

    For children, it seems the added attention and smiles brought on by a lovely crown is all the draw they need.  Without going into the psychology of attention, extrinsic motivation, or whatever children are lacking, it is nice to be noticed for something positive.

    While this is a Valentines day hat/crown activity, it could easily be about so much more. When asked what their favorite holiday is, most people love Christmas. Probably for the sheer joy and magnitude of it all.  For myself, my birthday ranks number one.  In my daily life I am  a therapist, mother, wife, chef, dog mom, daughter, friend, and all around giver.  But one day a year, it is all about me.  It is not about being showered with gifts,  but just a little special attention and notice for one day a year.

    Valentine’s day can feel the same for many.  One day a year, to feel special by your “person”, can rejuvenate stagnant relationships.  Even though Valentine’s day is another obligation of sorts, it is just the motivation some people need to express their feelings to a loved one. While there are true givers who express gratitude and love on a daily basis, there are others who need a little nudge now and again.

    Kennedy Worth wrote a blog for the Seattle Times about why she loves Valentine’s Day. And, Alex Alvarez came up with 17 reasons to love valentines day!

    My favorites are:

    • Valentine’s day is a great excuse to douse everything in sparkles!
    • You can eat an entire heart shaped pizza because you are worth it.
    • Buy yourself some chocolates
    • Love isn’t always easy, so it’s nice to have a day dedicated to the fun, sweet, lovely parts of love.

    Valentine’s day is more than romantic love.  It is the love for anyone, including your dog!

    Show your love for the younger learners by making this adorable Valentine’s crown.  

    Now, to the serious side of treatment planning; the why, what, and how of using this, or any other activity you choose to share with your learners.  

    Why Use this Valentine’s Day Hat Craft in OT?

    There are many reasons why this printable hat craft are a perfect tool to support skill development:

    • It’s fun, that is number one.  Fun things are motivating
    • It can put a smile on other people’s faces
    • It can make the wearer feel special
    • Kinesthetic awareness – This means learning by doing.
    • Hand strength and dexterity – staying inside the lines builds hand muscles and develops muscle control. 
    • Visual motor skills –Combining what is seen visually and what is written motorically.  This takes coordination to be able to translate information from visual input to motor output. Coloring, drawing, counting, cutting, and tracing are some visual motor skills.
    • Visual Perception – Developing figure ground to see where the borders to each item are, scanning to find all items to color, and visual closure to understand this flat paper will create something.
    • Strength – Core strength needed for sitting, shoulder/elbow/wrist stability, finger strength, and head control all play their role in writing.
    • Bilateral Coordination – Be sure your learner uses their helper hand for stabilizing the paper while using their dominant hand for writing.
    • Social/Executive Function – Following directions, turn taking, task completion, orienting to details, neatness, multi-tasking, attending to task, and impulse control can be addressed

    Extend the Activity using this Paper Hat Printable

    Print off a few copies and get ready to build skills! This printable party hat can be used in so many ways:

    • Laminate the page. This can be useful for reusability, if using wipe of markers, or sturdiness when coloring first.
    • Different colored paper may make it more or less challenging for your learner
    • Cardstock will be easier to handle than copier paper
    • Enlarging the font may be necessary to beginning writing students who need bigger space to write and color.
    • Create another page with all of the alphabet letters for copying or reference
    • Make changes to the type of writing utensil, paper used, or level of difficulty
    • Bingo markers are a fun tool for younger learners who can not color yet
    • Have students write on a slant board, lying prone on the floor with the page in front to build shoulder stability, or supine with the page taped under the table
    • More or less prompting may be needed depending on the level of the task and learner
    • Make this part of a larger lesson plan including gross motor, sensory, social, executive function, or other fine motor skills
    • GLITTER!  Don’t forget that everything is better with glitter!

    The printable hat template is great to use as a valentine hats for preschoolers, but also older learners, too. So many skill areas can be covered with this one activity.

    How? How do I document or write about this session or activity?

    • Determine what goals and skills you are addressing. Are you looking strictly at visual motor skills?  Or something else entirely such as executive function and behavior?
    • Focus your observations on the skills you are addressing.  It is alright to address one or ten skills at once, just be sure to watch for those skills during the activity.  This can take practice to watch everything all at once. Newer clinicians often videotape sessions to go back and review clinical observations they may have missed.
    • Use data to back up your documentation. Avoid or limit phrases such as min assist, fair, good, some, many, etc.  They are vague and do not contain the numbers and data critical to proficient documentation.  Instead use percentage of area colored, number of trials, number of errors, exact sizing, how many errors outside of the lines, number of reversals, number of prompts, minutes of attention.  You get the idea.
    • This type of documentation may feel foreign at first if this is not what you are used to, however insurance and governing agencies are becoming more strict on accurate documentation.

    If you are a frequent reader of my posts, you may notice some patterns to my writing, or recurring lists.  This is done for two reasons.  One, so this post stands alone and does not need to be part of a larger workbook; and  two, this may be your first glimpse at the OT Toolbox, and you will be looking for information you can use right away.

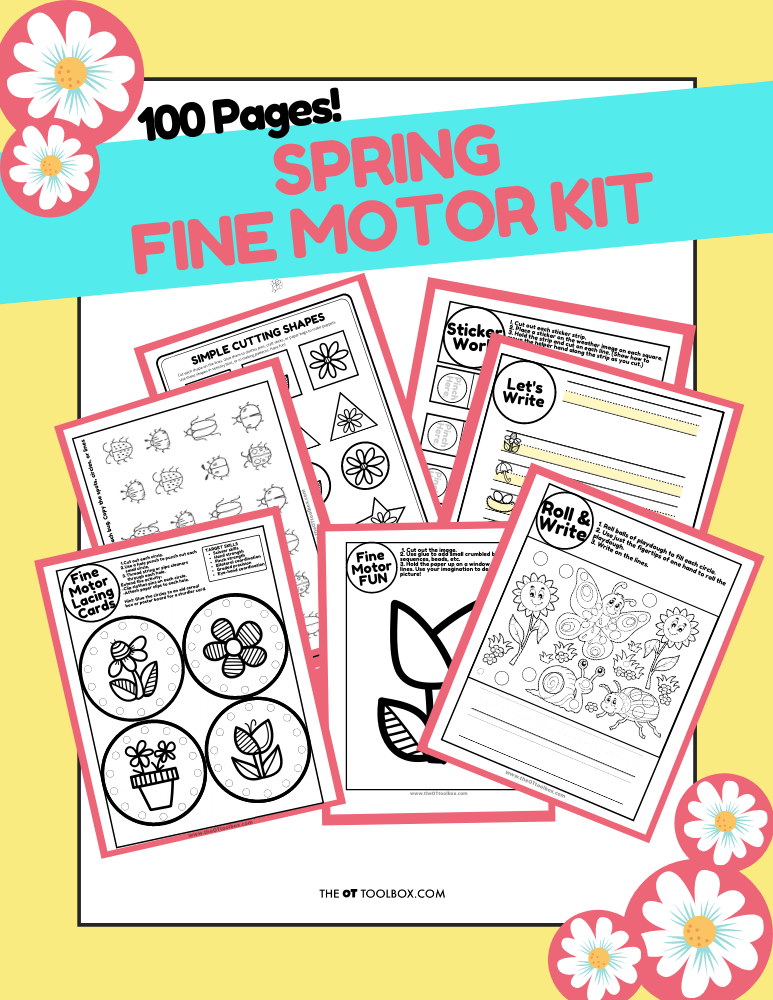
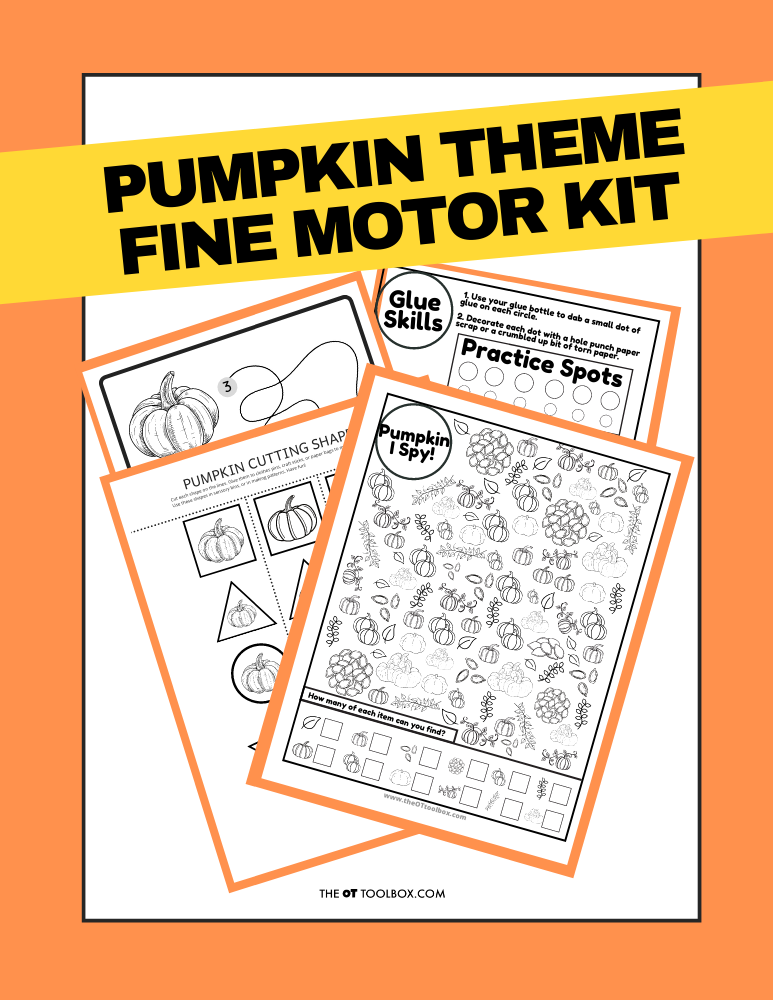
    If you are totally jazzed about Valentine’s Day, the OT Toolbox has a cool fine motor bundle for you! The Valentine’s Day Fine Motor Kit has resource and activities to support handwriting, scissor skills, fine motor development, coloring, and much more.

    I encourage you to scroll through the archives if you are looking for a certain theme, skill, goal, or just to read my witty prose.  There are several contributing writers on the OT Toolbox with a wealth of knowledge to share.  Stick around a while and browse…..

    Don’t be shy, make yourself a crown to don proudly with your young learners. If you can not have fun at work, then it is just work.  Don’t forget the glitter!

    Free valentine paper hat craft

    FREE Valentine’s Day Hat Craft

      We respect your privacy. Unsubscribe at anytime.

      Designing my crown now…

      Victoria Wood, OTR/L

      Victoria Wood, OTR/L is a contributor to The OT Toolbox and has been providing Occupational Therapy treatment in pediatrics for more than 25 years. She has practiced in hospital settings (inpatient, outpatient, NICU, PICU), school systems, and outpatient clinics in several states. She has treated hundreds of children with various sensory processing dysfunction in the areas of behavior, gross/fine motor skills, social skills and self-care. Ms. Wood has also been a featured speaker at seminars, webinars, and school staff development training. She is the author of Seeing your Home and Community with Sensory Eyes.

      Icicle Winter Scissor Skills Activity

      Paper icicle craft

      This paper icicle craft is a fun one for wintertime occupational therapy activities. If you are working on Scissor skills, cutting icicles into paper is a great fine motor task that builds eye-hand coordination, crossing midline, and visual motor skills to cut basic shapes. Be sure to add this paper icicle template for more tools for your winter occupational therapy toolbox.

      Take fine motor work a step further by grabbing our new winter crossword puzzle to incorporate a whole winter theme.

      Paper icicle craft that helps kids develop scissor skills, a great preschool craft for winter.

      Paper Icicle Craft

      Do you have a little one who is just learning to master scissors?  Scissor Skills for children who have never picked up a pair of scissors before can be very daunting.  Frustrations can build and the next thing you know, your little sweetheart is spiking the scissors across the table!  

      Kids learn all things at different paces.  Every developmental milestone and functional activity are achieved at different paces. 

      Scissor use is no different.  Kids as young as two can start to snip paper (and probably with an awkward-two handed grasp on the scissors!)  And as their fine motor skills develop, will achieve more and more accuracy with scissor use.   

      This winter themed Icicle cutting activity is a great beginner project for new scissor users.  The strait cuts, bold lines, and even paper type are good modifications for a new little scissor-hands!  

      Icicle Craft Beginner Scissor Skills Activity

      Winter Icicle Craft

      Preschoolers are just beginning to gain more control over scissors.  Preschool activities like this icicle craft at the way to go when it comes to building motor skills.

      Strait lines are the perfect way to gain confidence when they are learning to cut…and ensure that they’ll want to pick up the scissors and try another craft again soon!  We started out with nice strait lines on these icicles.  Little Guy could cut the whole way across the page without needing to rotate the page to cut a curve or angle.

      Draw icicles on paper to work on cutting with scissors. Great for winter occupational therapy activities.


      Note: This post contains affiliate links.

      How to Modify this Icicle Craft

      The smallest icicle could have been a harder task for him to cut, if he turned the whole page around like he started out doing. 

      We used a few different strategies to scaffold this paper icicle craft:

      • Cut through the page instead of turning around corners
      • Adjust the paper weight to a thicker resistance
      • Thicker cutting lines
      • Trials with thinner lines to carryover the task with practice
      • Verbal and visual cues

      I prompted him to start one line from the edge of the paper and then instead of rotating the whole page (which would have probably given him a big chopped off icicle point), I showed him how to start the other side from the edge as well.  He was much more accurate with the lines and wanted to keep going!

      We had two different types of paper for our icicles.  The first set was drawn on a sheet of white cardstock

      Cutting from this thicker paper is a great beginning step for new scissor users and a modification often used for kids with fine motor difficulties. 

      The thicker paper requires slower snips and allows for more accuracy.  I also drew the icicles on the cardstock with nice thick lines.  This gave Little Guy more room to cut within the lines and allowed for less line deviation. 

      The second set of icicles were drawn with thinner lines on printer paper.  After practicing on the first set, he was game to cut more  icicles.  The thinner paper and lines requires more control of the scissors and better line awareness, and bilateral hand coordination.

      Work on preschool scissor skills using aa paper icicle craft.

        This looked like so much fun, that even Big Sister wanted to get in on the icicle-making action!


      Paper icicle craft for the window
       
      We hung our icicles in the window to match the icy conditions outside.
       
      Looking for more ways to practice beginning cutting? Check out this guide to scissor skills.

      More paper crafts for winter

      You’ll love these other cut and paste crafts for winter. Use them in winter fine motor ideas for occupational therapy activities

      • Winter crafts using paper and a variety of textures for sensory play, motor planning, and motor skills.
      • Paper Icicle Craft is an actual printable template that you can print off and use to work on the scissor skills we covered in this post. It’s a great way to make an icicle craft.
      • Build a Snowman Craft– Work on scissor skills and fine motor strength to build a paper snowman
      • Use these paper snowflake ideas from our list of snow and ice ideas.
      • Use activities in our Winter Fine Motor Kit.
      • Use the printable ideas in the Penguin Fine Motor Kit for building scissor skills and hand strength.
      • Incorporate snowman crafts and scissor activities using our latest Snowman Therapy Kit.

      Done-for-you motor tasks to help kids form stronger bodies that are ready to learn.

      Use fun, themed, fine motor activities so you can help children develop fine and gross motor skills in a digital world.

      Themed NO-PREP printable pages include tasks to address fine motor skills such as:

      • Endurance Activities
      • Dexterity Activities
      • Graded Precision Activities
      • Pinch and Grip Strength Activities
      • Arch Development Activities
      • Finger Isolation Activities
      • Separation of the Sides of the Hand Activities
      • Open Thumb Web-Space Activities
      • Wrist Extension
      • Bilateral Coordination Activities
      • Eye-Hand Coordination Activities
      • Crossing Midline Activities

      Click here to read more about the Winter Fine Motor Kit.

      Colleen Beck, OTR/L has been an occupational therapist since 2000, working in school-based, hand therapy, outpatient peds, EI, and SNF. Colleen created The OT Toolbox to inspire therapists, teachers, and parents with easy and fun tools to help children thrive. Read her story about going from an OT making $3/hour (after paying for kids’ childcare) to a full-time OT resource creator for millions of readers. Want to collaborate? Send an email to contact@theottoolbox.com.

      Paper Icicle Template for Scissor Skills

      paper Icicle craft template

      Looking for quick winter craft that builds skills? This paper icicle template is an icicle craft that kids will love! Use it to hang and decorate a window alongside some paper snowflakes for a wintery scene. Inspired by our icicle activity, this template is easy to use for visual motor skill development. Whether you are working on scissor skills or just want an activity to keep the kids busy, this icicle craft is the way to go!

      Paper icicle craft template

      Looking for a consistent way to support fine motor skills all year?
      This yearlong fine motor system includes seasonal activity kits and monthly data collection tools to support planning and progress monitoring.

      If fine motor planning and data collection feel overwhelming, you’re not alone.
      This done-for-you yearlong bundle organizes seasonal activities and monthly screening tools in one system.

      Get the Yearlong Fine Motor and Data Collection Bundle today!

      Free Paper Icicle Craft Template

        We respect your privacy. Unsubscribe at anytime.

        Paper icicle template

        Ice Ice Baby!

        If you live where it is cold, winter seems here to stay. If you live in one of these frozen territories by choice, fate, obligation, finances, or bad luck, you might as well make the most of it.  Use this cold and blustery weather to create another winter themed lesson plan. Let’s talk icicles!

        When working with kids, it can be fun to pull out some interesting facts. These make great talking points, but for the students working on handwriting, they can spark a writing prompt idea too.

        Icicles can grow at the rate of .39 inches (1 cm)  per minute.  Once the base is formed, each water droplet drips to the bottom of the cone where it freezes. Icicles can be lovely to look at, or be dangerous.  From a homeowner perspective, the icicle can form because of a blockage in the gutter preventing water runoff. Did you see that scene in National Lampoon’s Christmas where the icicle rockets off the roof into the neighbor’s house?  Funny/not funny. 

        The icicle gurus have created and entire Atlas cataloging icicles, saving images, and gathering all of the fun facts surrounding them:

        Lucky for you, the OT Toolbox has designed a safe alternative to live icicles falling off of a building impaling someone or something. How about this icicle craft activity printable template for creating a multitude of fantastic activities for learners of all ages?

        Add this paper icicle activity to your line up of winter occupational therapy crafts.

        While there are endless possibilities for using this icicle template, the best one of course is GLITTER!!  This project screams for glitter.  Who doesn’t love glitter? (custodians, that’s who).  

        Beyond just using fabulous glitter, there are many skills that can be engaged using this icicle template:

        • Scissor skills: this can be graded up or down depending on the level of your learners.
        • Small toddler scissors are just right for tiny hands. 
        • Thicker lines are easier to cut on than thinner ones
        • Larger shapes are easier than their smaller counterparts
        • Stiff paper is easier for cutting and holding than regular copy paper
        • Self opening or loop scissors are another way to make cutting easier for those learning to cut, or lacking the intrinsic hand muscles to open and close scissors.  
        • Did you know left handed people cut in a clockwise direction while their right handed friends cut counter-clockwise?  This allows the helper hand to support the paper adequately while cutting.
        • See this article on developing scissor skills.
        •  Kinesthetic awareness – This means learning by doing.
        •  Hand strength and dexterity – staying on the lines builds hand muscles and develops muscle control. 
        • Coloring and decorating: can incorporate copying from a model, creating an original design, following a pattern, creating a sensory experience, accuracy, neatness, and following directions
        • Visual motor skills –Combining what is seen visually and what is written motorically.  This takes coordination to be able to translate information from visual input to motor output. Coloring, drawing, counting, cutting, and tracing are some visual motor skills.
        •  Visual Perception – Developing figure ground to see where the lines are for drawing and/or cutting.  Many young learners do not notice the black line as a border for cutting and coloring. Try highlighting this in different colors to help it stand out from the background.
        • Strength – Core strength needed for sitting, shoulder/elbow/wrist stability, finger strength, and head control all play their role in visual motor tasks.
        • Bilateral Coordination – Be sure your learner uses their helper hand for stabilizing the paper while using their dominant hand for writing/coloring/cutting.
        • Social/Executive Function – Following directions, turn taking, task completion, orienting to details, neatness, multi-tasking, attending to task, and impulse control can be addressed using this paper icicle template

        The beauty of being able to modify and adapt this and all activities, is they can be made appropriate for many levels of learners from basic to more advanced. You do not have to reinvent the wheel for every learner on your caseload.  With its adaptability, you can quickly make changes if your learner is functioning at a different level than you expected. This is critical as many treatment plans do not go as expected.

        Other ideas for modifying this icicle template craft printable:

        • Cut the items out ahead of time for younger learners who are focusing on coloring and gluing
        • Laminate a few triangles to use as tracing patterns. Tracing around an object builds bilateral coordination.
        • Create patterns for your learners to follow
        • String together to make an icicle garland, working on lacing/hole punching/sequencing, and following directions
        • Make into a matching activity once several icicles are made.  They can be matched by size, color, or design
        • Pin onto a bulletin board or wall to work on coloring on a vertical surface. 
        • Work on the floor while learners are lying in prone
        • Add a gross motor element of having to find all of the triangles and bring them to the table
        • Make this a social activity by having learners share materials
        • Add large pom poms or scrunched up paper on the top of the icicles for a 3d effect
        • Add glitter and sparkles to the icicles for added sparkle and sensory experience
        • Paint the icicles with brushes, water colors, or finger paints
        • Drippy wet glue is preferred as it will stick better.  The added benefit is the sensory input from white glue, as well as the fine motor strengthening from squeezing the bottle
        • The possibilities are virtually endless

        When documenting any of these activities, the activity does not matter as much as the skills being addressed.  Therefore the focus of documenting this icicle template craft will be on the skills such as cutting, coloring, executive function, behavior, strength, etc. rather than giving a lot of specifics about the craft itself.

        Clinical observations during the icicle printable craft:

        • How well does your learner sit at the table?  Are they stable, wiggly, do they fall or get out of the chair?
        • Does your learner use both hands for creating this icicle craft? Do they have a dominant and a helper hand, or switch back and forth?
        • How close to the line does your learner cut?
        • How much physical and verbal assistance does your learner need?
        • What is their grasping pattern on the scissors, crayons, markers?
        • What is their sensory response to glue, glitter, noise in the room, visual distractions?
        • What social and executive skills is your learner using and lacking? Cooperation, turn taking, following directions, attention to detail?
        • What behavior reactions are you noticing? Crying, poor frustration tolerance, seeking, avoiding behaviors?

        In order to be well rounded in any treatment plans, it will be important to use more than one task to measure objectives and goals.  Here is a great article on fine motor skills written by Colleen Beck, that includes background information on fine motor skills, activities, and resources.

        Free Paper Icicle Template

        Free Paper Icicle Craft Template

          We respect your privacy. Unsubscribe at anytime.

          It is no secret, I am not a fan of winter, however I do remember the wonder of looking up at the icicles formed on buildings, street signs, and monuments. I remember munching on an icicle or two as if it was a candy cane.  We did not worry about acid rain, runoff, and other germs back in the 70s. Try and take a moment, slow down, and breathe in the wonder of nature.

          I ate dirty icicles!

          Victoria Wood, OTR/L

          Victoria Wood, OTR/L is a contributor to The OT Toolbox and has been providing Occupational Therapy treatment in pediatrics for more than 25 years. She has practiced in hospital settings (inpatient, outpatient, NICU, PICU), school systems, and outpatient clinics in several states. She has treated hundreds of children with various sensory processing dysfunction in the areas of behavior, gross/fine motor skills, social skills and self-care. Ms. Wood has also been a featured speaker at seminars, webinars, and school staff development training. She is the author of Seeing your Home and Community with Sensory Eyes.

          Forest Animals Worksheets for Skills

          free forest animal worksheets

          In this blog post, you can grab a fee set of forest animals worksheets for building skills in several fine motor and visual motor areas. Develop cutting, coloring, and visual perceptual skills all in one task! The forest animal activities include bear, fox, and even a forest mushroom to work on scissor skills, coloring, and visual perception.

          Free forest animal worksheets to address coloring, scissor skills, and visual perception with a woodland animal theme.

          Forest Animals Worksheets for Therapy

          Children have the attention span roughly equal to their age x 3-4 minutes. According to this site, a five year old can hold his/her attention for about 15 minutes before wanting to change tasks.

          As a practicing therapist, working with non-typical students, I find this is a stretch. In my experience, children can attend for about ONE minute for every year they age. This being said, finding activities that build multiple skills at once, such as cutting and coloring in one task is key. 

          The free download below, is just such an activity. When kids complete the forest animals coloring and cutting pages, they develop many skill areas:

          • Hand strength (coloring and cutting)
          • Scissor skills
          • Bilateral coordination
          • Pencil control
          • Line awareness
          • Spatial awareness
          • Visual perceptual skills
          • Attention
          • Visual memory

          With electronics taking over classrooms, it is especially important to take time to work on building foundation skills such as cutting, coloring, pasting, and visual perception using hands-on activities such as these Scissor Skills Puzzles.

          Too many young children do not have the right fine motor skill development, creating maladaptive pencil grasp, poor handwriting, or inability to manipulate fasteners. 

          It is often difficult to motivate children to work on cutting and coloring. Because it is a challenging task with many opportunities for failure, it is often avoided by children. Math, while presenting many challenges itself, is predictable and steady, thus a more preferred task for those who struggle with visual motor development.

          Free Forest Animals Worksheets

          The Forest Friends Scissor Skills Puzzles are great worksheets to build fine motor skills such as cutting and coloring, while also developing visual perceptual skills. 

          You will find ways to make tasks such as Forest Friends Scissor Skills Puzzles engaging, interesting, and motivating to each individual learner. A few colored markers, some glitter, and a theme your child enjoys, can make the difference between a positive and negative task.

          These worksheets can be adapted and modified to meet the needs of several types of learners. Consider these ideas to grade this activity: 

          Change the Scissors to address various skill areas: 

          ● Change the scissor size or tool: small toddler scissors are just right for tiny hands. 

          ● Self opening or loop scissors are another way to make cutting easier for those learning to cut, or lacking the intrinsic hand muscles to open and close scissors. 

          ● Did you know left handed people cut in a clockwise direction while their right handed friends cut counter-clockwise? This allows the helper hand to support the paper adequately while cutting. 

          ● See this article on developing scissor skills for more ways to develop cutting skills using this free download.

          Change the Paper to address various skill areas:

          ● lightweight paper is much more difficult to stabilize than heavy weight construction or cardstock paper. 

          ● Colored paper may be easier or more difficult for children to work with because of color contrasts. 

          ● The page can be laminated first, using wipe off markers to color in the design. This is a great way to make this page reusable. Cutting the pieces before coloring it may be necessary. Although this takes away the cutting task, it may be a great adaptation for children who are not able to cut yet. 

          Use various Writing utensils with these forest animal worksheets:

          ● There are endless possibilities for coloring. Markers, crayons, colored pencils, paints, watercolor, chalk, or dry erase pens all provide different input, and require different levels of fine motor skill to manipulate. 

          ● Small one inch crayons are excellent for developing those tiny hand muscles. 

          ● Chalk, with its grainy texture, provides sensory feedback and can be a positive (or negative) experience 

          ● Markers glide easily, requiring less precision and grip strength ● Change writing utensils to appeal to different students and improve their level of motivation. 

          Use the Forest animal worksheets to address Visual perception: 

          ● Puzzles are a great way to work on visual perception.

          ● Figure ground, parts to whole, and visual closure are important to academic development. 

          ● Many adults are unable to complete puzzles or find missing objects because they can not perceive parts to a whole. They only see the forest, not the individual trees. 

          For more cut, paste and color activities, check out this Animal Alphabet workbook

          To improve cutting skills, this scissor skills workbook is also available.

          With children’s limited attention span, and increasing demands on therapy time, an all in one activity that develops cutting, coloring and visual perceptual skills at the same time is an efficient and fun way to build the fine motor foundation.

          Download the free forest animals worksheets

          To use these forest animal color and cut puzzles, enter your email address into the form below. Start working on fine motor and visual perceptual skills in man different ways!

          Free Forest Animals Worksheets

            We respect your privacy. Unsubscribe at anytime.

            Victoria Wood, OTR/L is a contributor to The OT Toolbox and has been providing Occupational Therapy treatment in pediatrics for more than 25 years. She has practiced in hospital settings (inpatient, outpatient, NICU, PICU), school systems, and outpatient clinics in several states. She has treated hundreds of children with various sensory processing dysfunction in the areas of behavior, gross/fine motor skills, social skills and self-care. Ms. Wood has also been a featured speaker at seminars, webinars, and school staff development training. She is the author of Seeing your Home and Community with Sensory Eyes.

            Fall Pumpkin Cutting Activities

            pumpkin cutting activities

            If you’ve been following along with our Fall fine motor activities, then you will love adding these Fall pumpkin cutting activities! I love these pumpkin scissor skill worksheets for cutting practice with a fun Fall theme. The pumpkin images have simple cutting lines, making them a great pumpkin activity for preschool, or any child that is working on early scissor skills. Also check out our pumpkin activities for ways to extend this activity in therapy sessions.

            Add this activity to our pumpkin sensory bin activity for a full therapy session of fun this Fall.

            Pumpkin Cutting Activities for Fall themed occupational therapy activities.

            Get a copy of these pumpkin printables by entering your email address into the form at the bottom of this blog post.

            Fall Pumpkin Cutting Activity

            Print out the pumpkin worksheets and then use them to work on scissor skills with kids. I wanted to create a simple shape (square) to hold the pumpkin shapes. This way, kids can work up to cutting the square as a “next step” in developing scissor skills after cutting strait lines, curved lines, and jagged lines.

            This resource is a great read on cutting skills progression for kids.

            • Each pumpkin image includes a cutting line. You’ll find strait lines, diagonal lines, angled lines, jagged lines, and curved lines.
            • Kids can “cut the pumpkin” to slice through the pumpkin pictures!
            • The lines on each shape start at different sides, so kids can work on placement with their non-dominant hand.

            Extend the Pumpkin Cutting Activities

            There is more than one way to use these pumpkin shapes this Fall. Try these pumpkin cutting activities to address a variety of skills and abilities:

            • Start with the large pumpkin cutting pieces and work toward using the smaller pumpkins.
            • Color in the pumpkins to work on coloring skills, line awareness, and hand strength.
            • Trace the dotted line with a fingertip to work on finger isolation.
            • Trace the dotted line with a marker, crayon, or even a bottle of squeeze glue to work on line awareness and visual motor skills.
            • Cut out the pumpkin images. Cut the dotted lines. Then, these can be used as mini pumpkin puzzles to work on visual perceptual skills.
            • Place the separated pumpkin images around the room. Kids can complete gross motor actions like donkey kicks, balance beams, lunges, or hops to reach different pieces of the pumpkins. They can try to piece all of the pumpkins together.
            • After cutting the lines on the large shapes and the smaller pumpkins, then ask kids to work on cutting the square to work on turning the paper to cut around corners.
            • Use these worksheets as a pumpkin craft ideas for toddlers. If given the cut out pumpkin pieces (start with the strait lines and diagonal lines), toddlers can place the pumpkin halves together like a puzzle. Use glue to glue the pumpkin back together onto construction paper to make a pumpkin patch craft! This would be a great pumpkin craft for preschool, too.

            Free Pumpkin Cutting Practice Worksheets

            Want to grab these free pumpkin cutting practice sheets? Enter your email into the form below. Have fun this Fall!

            Pumpkin Scissor Skills Worksheets

              We respect your privacy. Unsubscribe at anytime.

              Colleen Beck, OTR/L has been an occupational therapist since 2000, working in school-based, hand therapy, outpatient peds, EI, and SNF. Colleen created The OT Toolbox to inspire therapists, teachers, and parents with easy and fun tools to help children thrive. Read her story about going from an OT making $3/hour (after paying for kids’ childcare) to a full-time OT resource creator for millions of readers. Want to collaborate? Send an email to contact@theottoolbox.com.

              For more pumpkin and Fall activities, check out these tools:

              1. Free Pumpkin Deep Breathing Exercise
              2. Halloween Occupational Therapy Activities
              3. Pumpkin Activity Kit
              4. Fall Fine Motor Activities
              5. Fall Fine Motor Kit