Sensory Bin Base Ideas

Child playing in sensory bin with tongs to pick up shredded paper. Text reads "sensory bin base materials"

In this blog post, we are covering a very important sensory materials: sensory bin base ideas, or sensory bin fillers. You have probably seen a sensory bin activity here or there and thought nothing of it. But, did you know that the sensory material that is used to create the sensory bin is very much a part of the tactile sensory experience? Include these fillers in our easy sensory bin ideas to include themes or motivating activities.

Let’s explore various sensory bases as a tactile therapy tool.

Sensory bin base materials

Sensory Bin Materials

If you read our blog, you’ll see that we are both huge fans of sensory play.  Sensory bins are such a fun way for kids to explore textures and the senses while learning about the world and themselves. 

Sensory bins can be tailored to any learning theme and are just fun for exploration. 

We wanted to put together a collection of sensory bin base ideas.  These are the materials that you start your sensory bin with.  Add letters, numbers, animals, sight words…the possibilities for sensory play is endless!

Usually, a sensory bin has several materials:

  • sensory base container (bin, basket, tub, baby pool, etc.)
  • sensory bin filler or sensory base material
  • sensory bin items to explore- these might be manipulatives or small objects
  • scoops, cups, funnels, tongs, spoons, or tools to pick up and move objects

Each component can be used to develop various motor skills. In this blog post, we’re covering the base material or the sensory bin filler that you first place in the sensory base container.

Why Use Different Sensory Bin Fillers

Children learn about the world through touch, and exploring different textures fosters their understanding of the differences between soft, rough, smooth, bumpy, wet, dry, and other tactile sensations.

Using different textures in sensory play, especially in a therapeutic context like pediatric occupational therapy, serves specific developmental and therapeutic purposes that can greatly benefit children’s growth and well-being.

As an occupational therapy provider, it’s important to know why we are using the therapy tools that we select for therapy interventions. Here are some reasons why different textures are important in sensory play, particularly from a therapeutic perspective:

  1. Tactile Exploration and Confidence: Introducing a variety of textures allows children to explore and interact with different sensory experiences. This sensory touch exploration helps them become more comfortable with and confident in touching, feeling, and interacting with different materials.
  2. Tactile Discrimination: Different textures challenge children’s tactile discrimination skills, enabling them to differentiate between various sensory stimuli. This enhances their ability to identify and understand the subtleties of touch.
  3. Sensory Challenges and Desensitization: For children with tactile defensiveness, incorporating textures that might be initially challenging for children helps them gradually become accustomed to those sensations. Therapists can use this approach to address sensory sensitivities and aversions, gradually desensitizing children to certain textures.

Sensory Bin Fillers

  1. Rice
  2. Kinetic Sand
  3. Shaving Cream (Here is a shaving cream sensory bin).
  4. Play Dough
  5. Dry Pasta
  6. Oats
  7. Beans/Lentils
  8. Cloud Dough
  9. Sandbox sand or play sand
  10. Cornmeal
  11. Pom-Poms
  12. Corn Kernels
  13. Ice Cubes
  14. Cotton Balls
  15. Jello
  16. Foam Shapes
  17. Buttons
  18. Shredded Paper (Try this shredded paper sensory bin)
  19. Fabric Scraps
  20. Beads
  21. Colored Salt
  22. Cereal
  23. Pom-Pom Balls
  24. Slime/Goo
  25. Old or stale cereal

Nature Sensory Bin Fillers

Other sensory bin base materials can be found in nature. These are materials that you could find in your own backyard.

  1. Sand
  2. Water
  3. Rocks and Pebbles (check out this rock sensory bin)
  4. Leaves
  5. Pine Cones
  6. Grass Clippings
  7. Bark
  8. Mud
  9. Seashells
  10. Acorns
  11. Tree Branches
  12. Flowers
  13. Pine Needles
  14. River Stones
  15. Moss
  16. Seaweed
  17. Dirt/Soil
  18. Feathers
  19. Seeds
  20. Coconut Husk
  21. Feathers
  22. Pine cones

Water-Based Sensory Bin Fillers

Then, there are water-based sensory bin fillers. These include things like water, colored water, and soap. We have done many water bead sensory bins, too. Here are some more ideas:

  1. Water
  2. Colored Water
  3. Soap Water (This foam soap sensory bin is a fine motor workout, too.)
  4. Ice Water
  5. Water Beads
  6. Gelatin Water
  7. Lemon or Orange Water
  8. Scented Water
  9. Watercolor Paper
  10. Sand and Water (for a combination sensory bin)


Add to these base materials for sensory bin play.


Sensory Bin Base Ideas


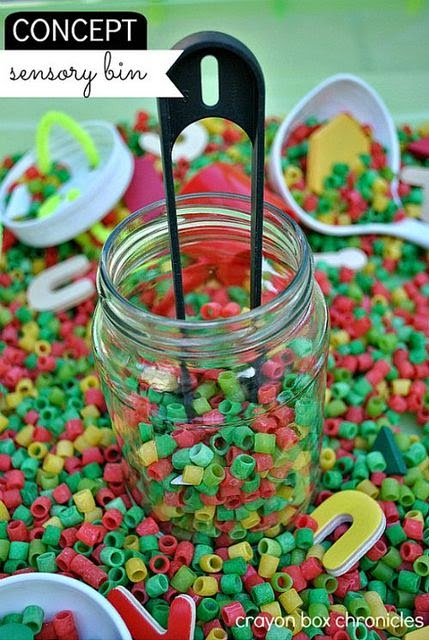
Add colored noodles to a bin and add cups, spoons, funnels, and more for fine motor play.  Crayon Box Chronicles made this concept sensory bin in their dyed noodles sensory bin.


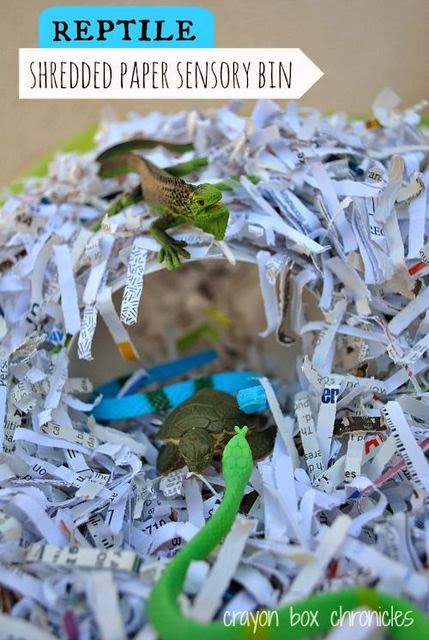
Shredded paper makes a great sensory base.  Save the junk mail and send it through the shredder to make a shredded paper reptile sensory bin from Crayon Box Chronicles.

 
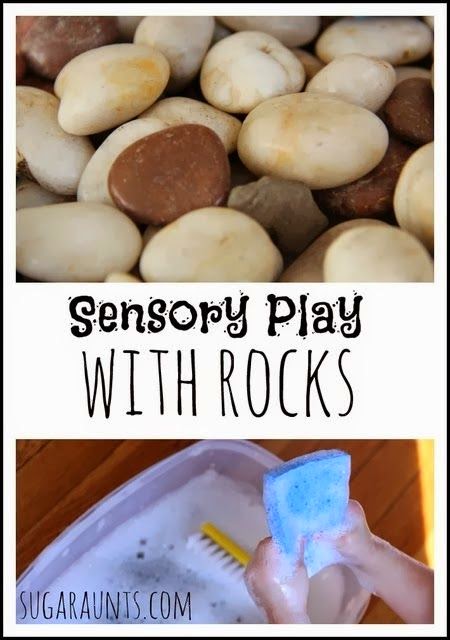
Something as simple as rocks can make a great base for a sensory bin.  We make this rock sensory bin and explored the senses.
 
 
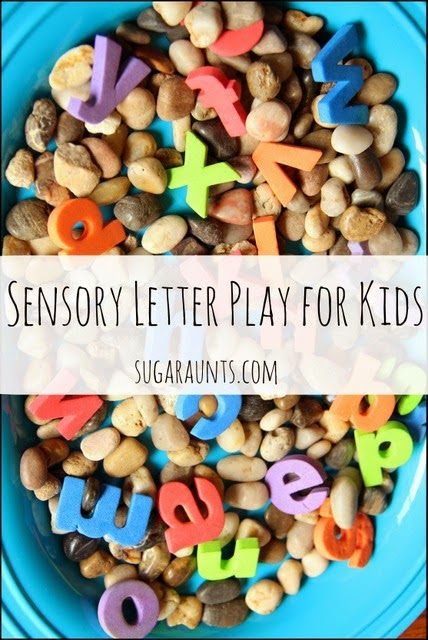
Explore letters in like in this rock letter sensory bin.


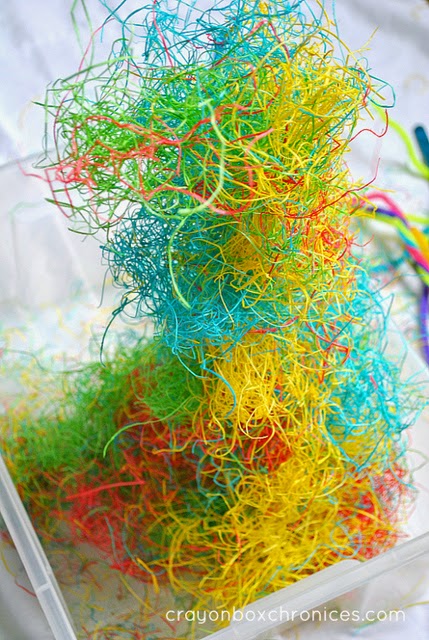
The dollar store has a vast amount of ways to incorporate learning into sensory bins.  Crayon Box Chronicles made this colored hay sensory bin.  How fun!

 
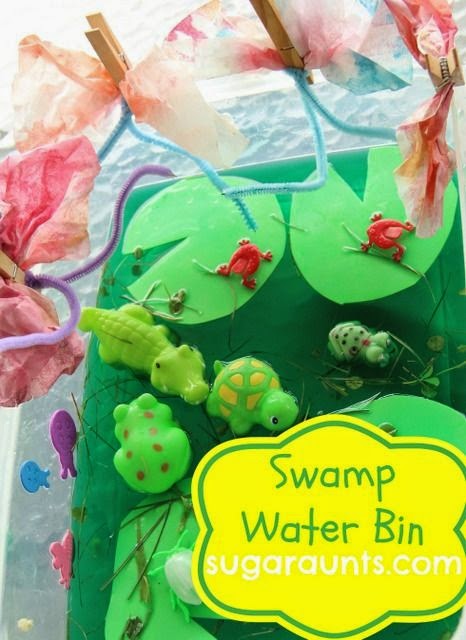
Colored water is an easy way to create a sensory bin.  We made this dyed water swamp sensory bin and explored colors, animals, and more in a swamp theme.


Have you ever made snow dough?  Seriously the coolest stuff!  This snow dough Arctic Circle sensory bin is one of my favorites from Crayon Box Chronicles .

 
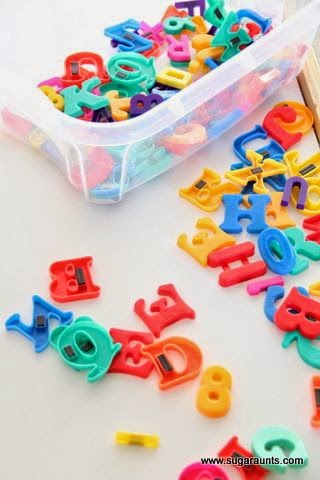
It doesn’t take much to make a sensory bin.  This letter sensory bin required nothing other than the letters for learning and play.


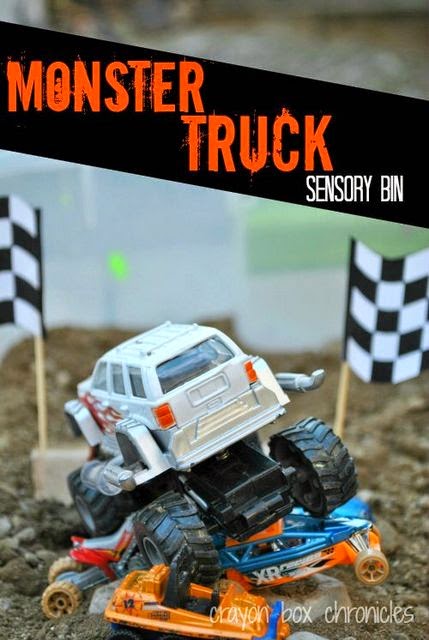
Dirt makes a great sensory bin base.  How many ways can you think of to play?  I love what Crayon Box Chronicles did with their dirt monster truck sensory bin.


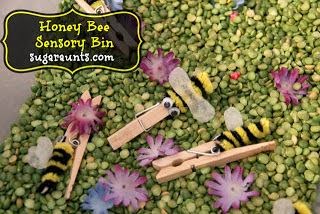
Many sensory bin bases can be found in your pantry.  We used split peas as the base in our split pea sensory bin.


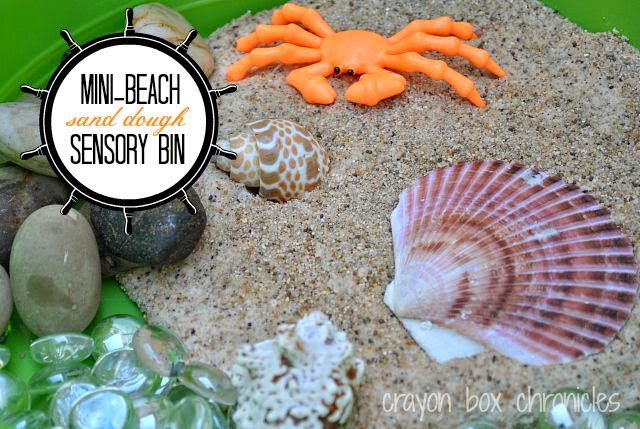
Sand is one way to create a simple sensory bin.  A few ingredients is all it takes to make the sand into sand dough link in this sand dough beach sensory bin from Crayon Box Chronicles.


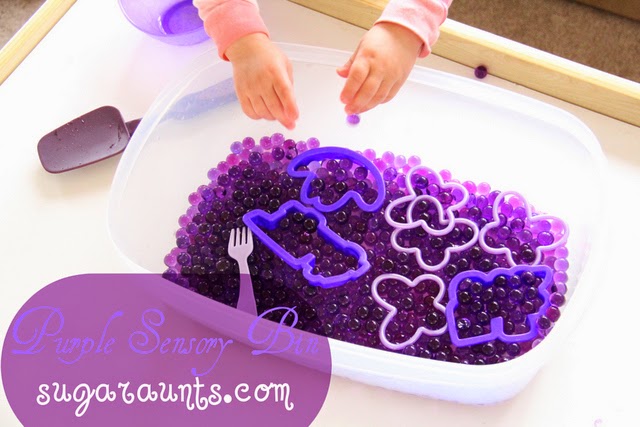
Water Beads can be found in the floral section of many stores.  The non-toxic material makes a great base for sensory play.  We had a blast with our purple sensory bin.


Jello is such an interesting material to eat…and to play with!  The texture is perfect for sensory exploration.  Crayon Box Chronicles used it to create this jello iceberg sensory bin.

What are your favorite sensory bin fillers?


Colleen Beck, OTR/L has been an occupational therapist since 2000, working in school-based, hand therapy, outpatient peds, EI, and SNF. Colleen created The OT Toolbox to inspire therapists, teachers, and parents with easy and fun tools to help children thrive. Read her story about going from an OT making $3/hour (after paying for kids’ childcare) to a full-time OT resource creator for millions of readers. Want to collaborate? Send an email to contact@theottoolbox.com.

Back to School Sensory Activities

back to school sensory activities

It’s that time of year and having a few back to school sensory activities up your sleeve can make all the difference in a stuffy, hot classroom when kids need self-regulation tools after a long summer break. Whether you are looking for classroom sensory diet strategies, or sensory strategies for the school-based OT, putting a back-to-school spin on “sensory” is a hit during the Fall months.

back to school sensory activities

Back-to-School Sensory Activities

The back-to-school season is a prime time to dust off those sensory cobwebs and consider how sensory motor input supports students.

In this blog post, you’ll find a list of ways to support sensory needs using a back-to-school theme. The ideas are great for this time of year when welcoming a new roster of students into the classroom.

  • Our free sensory strategy toolkit is another great resource that supports school-based OTs, educators, and parents of students with sensory needs.
  • You’ll also find many resources, including a printable sensory activity sheet here on this article about calm down strategies for school.
  • These ideas for sensory seekers can be adapted to meet school-based needs (or used in the home for homework time, the after-school period, or homeschooling)

Why Use Back-to-School Sensory Activities?

Heading back into the school year can throw some kids for a spin.  The first few weeks can be a change in routine from the safety of home. For kids who are starting up on a homeschool routine, it can be difficult to pay attention when sensory needs and distractions are in the next room. This can lead to self-regulation needs that support the student’s ability to concentrate and learn after a summer off from the routines of school.

Other reasons for using sensory strategies during the back-to-school season include:

  • Earlier wake-up times after a summer of staying up late and sleeping in. A quick sensory motor brain break can make all the difference.
  • A new routine may throw some students for a loop.
  • The transition period can be a real challenge for some children. It might be the early alarm clock or using time management in the morning that is a challenge. For other kids, moving to a new school, or even just going back to the classroom in general can be a challenge. Try these transition strategies to support these needs.
  • Distractions and Technology: With the prevalence of screen time in kids, and the use of technology/devices, students may find it difficult to focus on schoolwork without being distracted by social media, video games, or other online activities. A quick sensory break can help with attention and distractions.
  • Social-emotional needs: Social emotional dynamics can change over the summer, and students may feel pressure to fit in or establish their social identity when school resumes. This pressure can affect their self-esteem and confidence. The ability to regulate emotions might lead to challenges with learning due to the emotional regulation and executive function connection.

You may have a child of your own that “crashes” after a week of school during this time of year. There is a lot happening that is just exhausting during the return to school. Sometimes, all it takes for an easy transition into the back to school days is a sensory strategy that meets the needs of the sensory child. Let’s explore these ideas below…

  Classroom sensory activities and sensory strategies for back to school or throughout the school year.


back to school sensory ideas and strategies for the classroom that teachers can use with sensory kids.


Back-to-School Sensory Ideas

These sensory activities are ones that can easily be used in the classroom or homeschool room.  They are strategies that can be incorporated into the student’s daily routine within the school environment.  

These school sensory activities are presented in list form for ease and planning, but they can be used in a classroom sensory diet or in various strategies.  

The ideas below are ones that easily allow the child to meet their sensory needs in a natural way, so that it is not an interruption to the classroom or other students.  

Rather, some of these sensory strategies are movement and heavy work-based ideas that can easily be adapted for the whole classroom for brain break type of activities. 

As always, these sensory ideas are ONLY ideas and should be regarded as a reference.  Every child is different and has different sensory needs.

The ideas presented below are not regarded as Occupational Therapy treatment and should only be used in addition to and along with an individualized Occupational Therapy plan made following assessment. 

Sensory Activities for Back to School

This post contains affiliate links. As an Amazon Influencer, I earn from qualifying purchases.

1. Wall Push-Ups- Show the student how to push against the wall while doing “push-ups” from a standing position.  This is a great heavy work activity, or a quick “brain break” activity that provides proprioceptive input for heavy work for improved focus, calming, and self-regulation.

2. Desk Fidget- Use a DIY fidget or a store bought hand fidget toy (affiliate link) to allow the child tactile sensory or proprioceptive input to the hands for improved attention and focus while sitting and performing desk work.

3. Chair Push-Ups- Allow the child to push up from the seat with his arms, keeping the elbows strait.  Pushing up through the arms provides proprioceptive heavy work through the upper body.

4. Move desk/furniture.

5. Erase the chalkboard or dry erase board.

6. Sensory errand- Carry milk crates or plastic bins full of books or supplies from center to center around the classroom or from room to room in the building. Some schools have an “important message” to other classrooms or the office in the form of a folder. Just moving, taking a quick walk through the hallway, to deliver a note or other message can offer a much-needed sensory break. For more heavy work input, add a tote bag filled with books or ask the student to push a cart with materials.

7. Shoe laces fidget-  Add a couple of beads to the child’s shoe laces for a fidget toy that can be used discretely while sitting in floor circle time or during desk work.

8. Manual Pencil Sharpener-  Turning and sharpening pencils with a manual pencil sharpener provides proprioception to bilateral upper extremities.  This can be a good task prior to writing tasks.

9. Backpack for carrying supplies from room to room-  Students can carry supplies to other classrooms in a backpack for heavy input.  This can be a calming strategy while walking the hallways to other areas in the school as well, such as while walking to the lunch room or special classes. The hallway can be an overwhelming and high-sensory environment so deep pressure to center the child can be helpful.

10. Stapler heavy work- Staple paper or remove staples from a bulletin board for upper body proprioceptive input.


11. Sensory seat- Air cushion seating such as a wiggle seat cushion (affiliate link) or a frugal, DIY version using a $1 wiggle seat cushion option. Here are more ideas for alternative seating options and even some DIY flexible seating ideas.

12. Place chairs on rugs.  Sliding chairs on classroom floors can lead to auditory overload for some sensory kids.  Try using carpet squares under each individual chair.  When the child pushes his chair out, he can slide the chair right on the carpet square out from the desk.  

13. Hallway March-  Get the whole class involved in a “walk this way” activity.  They can march from the classroom to specials or the lunchroom.  Try other brain break and whole body movements while walking in the line down the hallway, too: Try high knee lifts, toe walking, heel walking, elbows to knees, and patting the knees while walking.

14. Sports bottles for drinking- Sipping water through a long straw or sports bottle (affiliate link) can allow the students to focus and attend given proprioceptive input through the mouth. This is a great whole classroom strategy for helping with attention and self-regulation. Read more about using a water bottle as a sensory tool.

15. Movement breaks in the gym or classroom- A quick brain break can help kids focus during periods of desk work.

16. Push mats in the gym- Moving those big gym mats is a great whole body proprioception activity. Or, ask students to move desks or other equipment that uses the whole body.

17. Auditory support- Headphones for limiting auditory stimulation during center work or times when there is a lot of chatter in the classroom. Here are more tips for auditory sensitivity in the classroom.

18. Visual picture list- Knowing what to expect is a non-traditional sensory strategy. But when you think about it, the visual input is a support when it comes to knowing what is next, how much time is left until lunch, and how much longer the day will last. A visual schedule can be a benefit for the whole classroom.  Try this daily pocket chart schedule. (affiliate link)

19. Simon Says Spelling-  Try practicing spelling words with a movement and vestibular sensory input Simon Says version. Try these Simon Says commands if there are a few extra minutes to use up during the school day or between transitions.

20. Play dough math for proprioceptive input through the hands.  Try a math smash type of activity and use a heavy resistive dough like this DIY proprioception dough. There are many benefits of play dough and sensory input is just one of them!

21. Kneaded eraser for sensory input through the hands- Use a kneaded pencil eraser (affiliate link) for a hand-held fidget that doubles as an eraser with proprioceptive input.

22. Crunchy snack break- Try snacks like pretzels, crackers, kale chips, popcorn, or roasted chickpeas for an alerting snack. Oral motor exercises offer calming or alerting input and using a crunchy (or chewy) snack can support these needs.

23.  Sensory bin for math or sight words-  Create a sight word sensory bin or even use a sensory bin for math or spelling words. This can be a fun and unexpected way to dive back into spelling after the summer break! Add tactile sensory input to learning using a variety of sensory bin fillers.  Ideas include shaving cream, shredded paper, crafting pom poms, among many other ideas.

24. Vibrating pen rainbow writing for sight word or spelling practice-  Proprioceptive input to the hands can be very helpful for many kids, especially if they are writing with too much pencil pressure.

25. Jump/move/hop in hallway- Take a movement and brain break with a hallway movement activity.  Add learning aspect with spelling, facts, or math.

26. Roll a ball on the legs-  Add a vestibular aspect to vocabulary or themed learning, including history, English language arts, or science.  Kids can answer questions and when they answer the question, they roll the ball along their legs by bending down to roll the ball on their thighs.

27. Hopscotch Math-  Add a hopping proprioception activity to the classroom with a hopscotch board created right in the classroom using masking tape.

28.  Graph Paper Writing-  Add a visual sensory twist to handwriting, math, spelling, or any written work by using graph paper.  The added lines can be just the visual spatial prompt needed for kids with visual sensory processing concerns. Here are more sensory based reasons to use graph paper.

29. Make a desk sensory diet box-  Use a dollar store pencil case to create customized sensory diet bins that can fit right into the desk. Items would be used specific to the child’s needs, but might include resistive putty, paper clips for fidgeting, or movable toys (affiliate link). Use these occupational therapy kits for more ideas.

30. Wash desks with spray bottles. Squeezing a spray bottle to wash desks or water plants offers heavy work through the hands.

31. Cut classroom decorations from oaktag. Heavy input through the hands by cutting thicker paper is a great way to add a quick and functional movement break. Students will love to see their handiwork on the walls, too.

32. Create a calm down corner in the classroom This can include fidgets, mindfulness centers, books, and many more sensory tools. Plus try these other calm down strategies for school.

33. Try a sensory swing- Sensory swings for modulation can be used when applicable and recommended by an occupational therapy provider. Sometimes, you’ll see these in a sensory room or in a therapy room in the school. Here is more information on types of sensory swings.

34. Use the playground! Getting those students outside can make a great sensory movement break. Check out how to use the playground for sensory input and read this resource on sensory diets at the playground.

All of these ideas support sensory needs and are great activities to use during the back-to-school time. We love that they are fun, functional, and the whole classroom can benefit!

Want more ideas to support sensory needs at school? Grab a free copy of our Classroom Sensory Strategy Packet.

Free Classroom Sensory Strategies Toolkit

    Are you interested in resources on (check all that apply):
    We respect your privacy. Unsubscribe at anytime.

    Related resources include our blog post on Ayres Sensory Integration. This is a great place to start with gathering information on the sensory processing systems and the related behavioral, emotional, physical, and cognitive responses that we see.

    Colleen Beck, OTR/L has been an occupational therapist since 2000, working in school-based, hand therapy, outpatient peds, EI, and SNF. Colleen created The OT Toolbox to inspire therapists, teachers, and parents with easy and fun tools to help children thrive. Read her story about going from an OT making $3/hour (after paying for kids’ childcare) to a full-time OT resource creator for millions of readers. Want to collaborate? Send an email to contact@theottoolbox.com.

    The Sensory Lifestyle Handbook walks you through sensory processing information, each step of creating a meaningful and motivating sensory diet, that is guided by the individual’s personal interests and preferences.

    The Sensory Lifestyle Handbook is not just about creating a sensory diet to meet sensory processing needs. This handbook is your key to creating an active and thriving lifestyle based on a deep understanding of sensory processing.

    Back to School Writing Prompts

    Back to school writing prompts

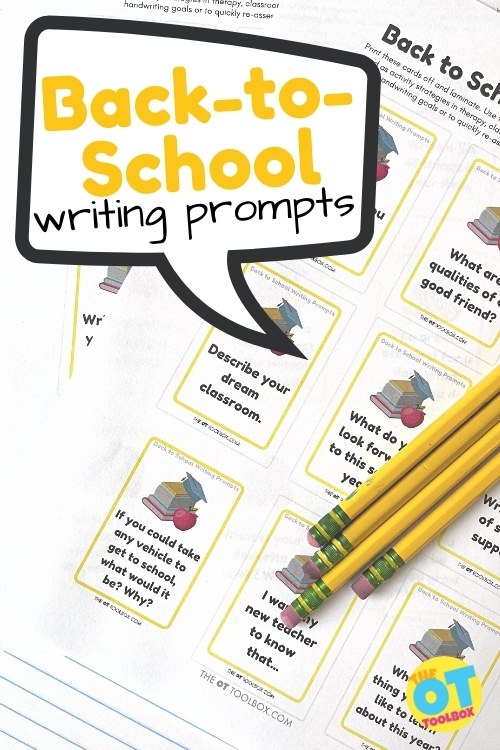
    Looking for first day of school writing prompts? The free back to school writing prompts in this blog post is a great addition to your back-to-school occupational therapy ideas. Grab the printables below and let’s head into the new school year with tools to support students!

    First Day of School Writing Prompts

    It’s that time of year! Getting back into the classroom means switching from summer fun mode to handwriting, reading, writing, and learning. These Back to School Writing Prompts are a fun way to get to know new students and get those pencils moving.

    Handwriting can be an overwhelming topic to dive into at the start of the school year, so let’s make it easy and low-stress. Print off these free back to school writing ideas and start the school year off right (or write)!

    Free back to school writing prompts for first day of school writing ideas

    Back to School Writing Prompts

    Sometimes you need some back to school activities and specifically, ideas for back to school writing that are “no brainer” for the student. In other words, kids can struggle with getting back into routines of the classroom. They might not have picked up a pencil all summer long, in some cases! That’s where these back to school writing activities come into play.

    There are several ways you can use these free writing prompts with kids this school year:

    First day of school writing Prompts

    The first day of school is all about learning the classroom, setting up expectations, getting to know the building, the schedule, and getting to know the teacher and peers. But what about easing into handwriting and writing tasks?

    Setting up a first day of school writing activity that is low-key, fun, and all about the student is the way to go. Use these first day of school writing prompts to get kids back into the routine of a daily writing prompt.

    First day of school writing prompts may include:

    • Favorite things
    • All about me info (Use these All About Me PDFs)
    • Things done over the summer months
    • Favorite vacation
    • Goals for the new school year

    Another resource for first day of school writing are these middle school journal prompts for older kids.

    Writing prompt of the day

    Continuing with the thought that returning to school after a summer break means a few days of getting used to classroom rules and schedules, you can use these writing cards for the first week or more.

    Print off the cards and randomly select a card each day of the first week of school. This is a great way to get to know students and incorporate handwriting into each day of the first week of school.

    Give the student a choice

    Handwriting can be like pulling teeth for some kids. It’s just hard. Whether their hand hurts when they hold the pencil, or handwriting is hard to read, it can be a real challenge for some kids. Offering a choice can give the student some say in the matter. Allow them to select a card randomly and then they can write out their response to the writing prompt. Or, give them a choice between two writing prompts.

    Play a writing game

    Use these printable writing prompts in a game! Print off the writing prompt cards and then allow the students to pick one card. They can use that card as their back to school writing topic. It’s a great way to get to know the students in the classroom or on your therapy caseload while getting an idea of their current handwriting levels and abilities.

    So, how will you use these back to school writing prompts?

    Print off these back to school writing prompts for a writing prompt of the day the first week of school.

    To grab your copy of this free resource, just enter your email address into the form below. Print them off and get ready to start the school year off on the right foot!

    FREE Back-to-School Writing Prompts

      We respect your privacy. Unsubscribe at anytime.

      More Back to School Writing ideas

      Add these writing prompt cards to your back-to-school line up of activities:

      First, be sure to check out our back to school sensory activities for meeting self-regulation needs in the classroom.

      Colleen Beck, OTR/L has been an occupational therapist since 2000, working in school-based, hand therapy, outpatient peds, EI, and SNF. Colleen created The OT Toolbox to inspire therapists, teachers, and parents with easy and fun tools to help children thrive. Read her story about going from an OT making $3/hour (after paying for kids’ childcare) to a full-time OT resource creator for millions of readers. Want to collaborate? Send an email to contact@theottoolbox.com.
      Activities to Improve Smooth Visual Pursuits

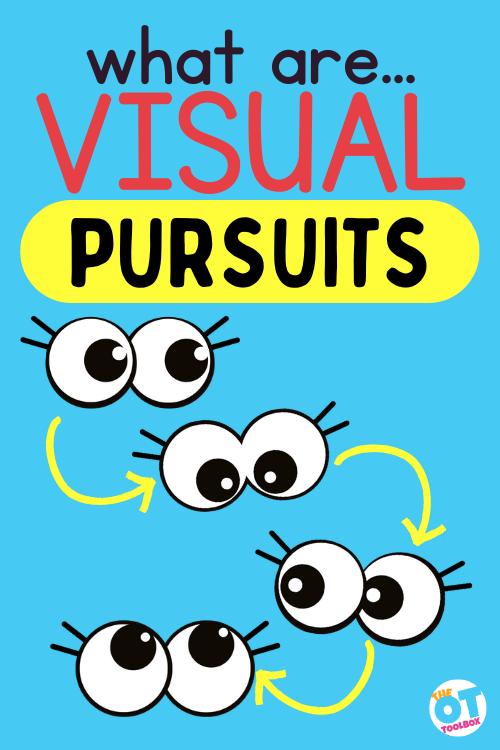
      Eyes looking in different directions with arrows from each set of eyes. Text reads "what are visual pursuits"

      For our kids who are challenged to visually observe their environment, or who struggle to demonstrate visual tracking in reading or other learning experiences, activities designed to promote smooth pursuits and eye movement can be helpful. The visual activities listed here can be helpful in addressing the smooth pursuits of visual input. Visual pursuits or tacking is an oculomotor skill that is necessary part of visual processing. Read on for various eye exercise that can be done in fun ways as a part of occupational therapy geared toward visual processing skills.

      Activities to improve smooth visual pursuits

      There are several activities to improve smooth visual pursuits that are used in occupational therapy to target smooth pursuits of the eyes. These smooth pursuit exercises are typically fostered through play, especially in occupational therapy interventions. 

      Below, you’ll find ocular pursuit activities, but first, let’s cover what visual pursuits are and how they impact a child’s learning.

       
      These activities to improve smooth visual pursuits are needed to improve visual tracking needed for reading and visual processing.


      Visual skills like visual tracking, or smooth visual pursuits are a visual processing skill that allow us to perceive and retrieve visual information. This is an essential part of reading and learning.


      What are visual pursuits?

      Visual pursuits are another term for visual tracking. Visual tracking is an oculomotor skill that is essential for learning, reading, and so many tasks we perform.

      Smooth visual pursuits refer to the eye movements that enable us to track moving objects smoothly and accurately with our gaze. It’s the eye following a moving target through coordinated motion of the eye muscles.

      When we watch a moving object, follow a moving object with our eyes, or follow a moving ball, our eyes move smoothly to follow the visual input. This allows us to maintain visual focus on the object as it moves. We can use that visual information to understand how fast and far the item is moving based on the object’s trajectory, speed, and direction.

      Here are more information about visual tracking activities. You will also love checking out these activities to improve visual tracking.

      Visual processing skills have a huge impact on learning. In fact, it is one of the visual skills that can impact learning in a way that isn’t always directly observable.

      Visual skills like visual tracking, or smooth visual pursuits are a visual processing skill that allow us to perceive and retrieve visual information. This is an essential part of reading and learning.

      These skills may be covered by a behavioral optometrist or developmental optometrist.

      Want to learn more about HOW visual pursuits and other aspects of visual processing impact learning (in a really big way)? Scroll below to join our free visual processing lab. It’s a 3 day email series where you will learn SO much about visual processing and how it impacts everything, but especially learning and cognitive skills.

      Visual tracking activites are needed for learning and everything we do! These activities to improve visual pursuits can be used in occupational therapy treatment sessions or part of vision therapy activities.


      Activities to improve visual pursuits

      These visual tracking activities are easy and creative ways to work on eye movement and smooth eye movements. Kids can perform these activities as part of a therapy program and while working on functional skills within an occupation.

      1. Relaxing breathing eye stretches- This visual tracking activity is a way to work on smooth pursuits in a very mindful way. Just like yoga brings awareness to the body and a sense of being present, this eye stretch activity is a great way to calm a class during a busy school day.

      Combine slow and deep breathing with deliberate eye movements. Kids can watch and follow directions to take deep breaths combined with slowly looking in a single direction. As they look up and breath or look to the left and breath, kids can even use this activity as a coping strategy.

      Try these yoga activities: 

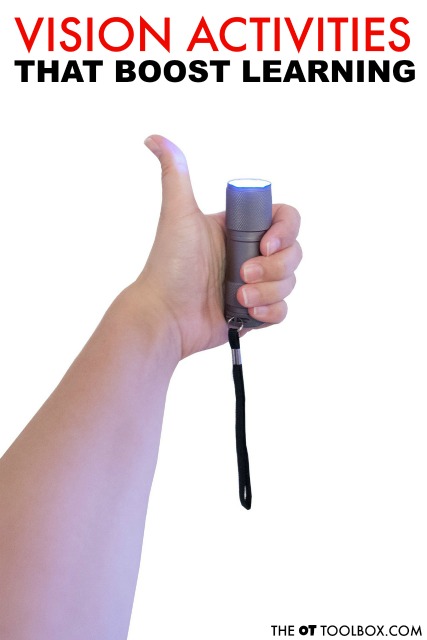
      2. Flashlight Tag- Use a flashlight to help kids follow a target in various directions. Try a circle, uppercase letter “H”, triangle, straight/diagonal lines, etc. To make this activity more fun, try adding a deflated balloon to the top of the flashlight. Encourage kids to keep their face steady as they use just the eyes to follow the light.

      3. Craft Stick Puppets- Create small craft stick characters puppets to make a visual cue as a visual prompt for follow movement patterns. These barnyard animal puppets make a great DIY puppet tool for a visual pursuit and tracking activity.

      This pirate puppet is one idea that builds fine motor skills, too.

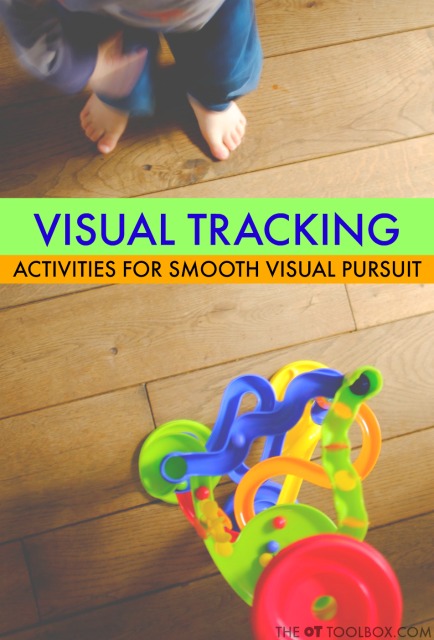
      4. Marble run activities- There are many marble run products on the market that provide an opportunity for improving smooth pursuit of the eyes. Here are DIY marble run activities that make a great activity in themselves for kids.

      We love to add slow moving items to marble run games too, to provide a slower object for visually tracking, encouraging smooth pursuits of the eyes. Encourage kids to keep their face steady while using their eyes only to watch the item fall through the marble run.

      Try these marble run ideas:

      5. Roll a ball- Roll a ball up a slanted surface and ask the child to keep their eyes on the ball! Some ideas include creating a sloped surface with a poster board and books.

      Simply roll a small ball slowly up the ramp and kids can watch the ball as it rolls. Also try having the child to sit in front of the ramp and be in charge of rolling the ball. Mark off where the ball should reach and stop so the child works on graded movement at the same time.

      Sitting in front of the ramp encourages visual convergence and binocular fusion as well. This activity works well with a large ball such as a kick ball and a sidewalk ramp, too.

      This baby brain building activity list has more ideas, too.

      6. Double Light Eye Tag- Use two different colored lights (light-topped pens work well). Flash one color on and then the other. Kids can move their eyes from color to color or follow directions to look at the two lights when they change.

      Hopefully, these activities to improve visual pursuits is a helpful addition to your therapy toolbox. Use these strategies to work on various visual processing skills and oculomotor skills.

      7. Hands-on visual tracking therapy activities- Use the ideas below to target visual tracking skills through play:


      More visual processing activities

      For even MORE visual tracking and pursuit activities to use in your occupational therapy practice, you will want to join our free visual processing lab email series. It’s a 3-day series of emails that covers EVERYthing about visual processing. We take a closer look at visual skills and break things down, as well as covering the big picture of visual needs.

      In the visual processing lab, you will discover how oculomotor skills like smooth pursuits make a big difference in higher level skills like learning and executive function. The best thing about this lab (besides all of the awesome info) is that it has a fun “lab” theme. I might have had too much fun with this one 🙂

      Join us in visual processing Lab! Where you won’t need Bunsen burners or safety goggles!

      Click here to learn more about Visual Processing Lab and to sign up.

      Free visual processing email lab to learn about visual skills needed in learning and reading.


      Visual pursuits visual tracking activities to help kids with the visual skills needed for learning, reading, and everything they do!

      Colleen Beck, OTR/L has been an occupational therapist since 2000, working in school-based, hand therapy, outpatient peds, EI, and SNF. Colleen created The OT Toolbox to inspire therapists, teachers, and parents with easy and fun tools to help children thrive. Read her story about going from an OT making $3/hour (after paying for kids’ childcare) to a full-time OT resource creator for millions of readers. Want to collaborate? Send an email to contact@theottoolbox.com.
      oculomotor tools

      In The OT Toolbox Membership, you’ll find oculomotor tools that support visual tracking, smooth pursuits, and much more.

      Development of Eye-Hand Coordination

      hand eye coordination

      Hand eye coordination plays a powerful role in daily activities. Through the integration of fine motor skills and visual processing, we see intentional and controlled motor skills. But there’s more to catching and throwing a ball at a target than the coordinated use of the hands and eyes. Let’s break down hand eye coordination development skills as well as the other underlying skills needed.

      hand eye coordination

      We have included affiliate links to resources in this blog post on hand eye coordination milestones. As an Amazon Influencer, I earn from qualifying purchases.

      Hand Eye Coordination

      Hand eye coordination refers to the coordination, or integration, of visual input and the processing of that visual information for coordinated movement of the hands. These skills impact fine motor dexterity and motor movements in functional tasks for so many tasks while manipulating movements and objects.

      Eye-hand coordination is essential in handwriting, scissor use, threading beads, reading, throwing a ball, placing a cup on a shelf, coloring in lines, feeding, self-care, and much, much more.

      The phrases “Hand-eye coordination” and “eye-hand coordination” are used interchangeably, however, we tend to use the phrase eye-hand coordination more appropriately, because input comes through the eyes first and the hand responds in motor tasks. However, the general population may primarily use the phrase “hand-eye coordination”.

      In this blog post, we will use both phrases interchangeably, in order to reach the populations seeking information on either phrase.

      In essence, hand-eye coordination, or eye-hand coordination, are the  Visual motor skills used in motor tasks.

      Part of this development is the refined motor skills led by arch development in the hands. Paired with dexterity and precision skills, along with visual motor components, we see hand-eye coordination.


      Eye hand coordination develops from a very young age! Here is information about the development of visual motor skills, specifically eye hand coordination in babies, toddlers, and preschoolers.


      Eye Hand Coordination Development

      Eye-hand coordination development typically occurs through movement, beginning at a very young age. The visual components of oculomotor skills (how the eyes move) include visual fixation, visual tracking (or smooth pursuits), and visual scanning. These beginning stages of child development play a big part down the road in taking in visual information and using it to perform motor tasks. 

      These hand-eye coordination developmental guidelines listed below are general guidelines of development based on approximate development of the visual motor skills needed for play, motor skills, and visual motor development.

      Holding and talking to baby in the very young ages plays such an important part in the puzzle of visual motor skills. 


      Additionally, tummy time and as the baby gains head strength and control, they eyes become stronger in their ability to fixate, track, and scan from the prone position. This is why we place toys around a baby on a baby blanket and encourage reach.

      That pivotal stage when baby begins to roll is a social media-worthy time in the parent’s life. But there is more to celebrate than baby’s new rolling skills. Control of the eyes with movement is a big accomplishment and something that baby strengthens with movement. 

      Hand Eye Coordination

      These skill areas are broken down by months, all the way up through the preschool years. 


      Disclaimer: Amazon affiliate links are included in this post.

      ONE MONTH:
           Tracking a rattle while lying on back                                    
           Tracking a rattle to the side                
         
      TWO MONTHS:
           Infant regards their own hands
           Tracks a ball side to side as it rolls across a table left to right and right to left.
           Tracks a rattle while lying on back side to side
         
      THREE MONTHS:
           Extends hands to reach for a rattle/toy while lying on back
         
      FOUR MONTHS:
           Reaches to midline for a rattle/toy while lying on back
           While lying on back, the infant touches both hands together.

      hand Eye coordination and Crawling

      Crawling on the hands and knees plays a vital role in hand eye coordination, too. When baby positions themselves up on all fours, they are gaining awesome proprioceptive input, strength in the shoulder girdle, core, and neck.

      When crawling, baby is gaining mobility, but also using targeted movement toward a goal they visually process.

      Research shows that hands-and-knees and walker-assisted locomotor experience facilitate spatial search performance. Spatial awareness, or visual spatial relations, and visual skill development is needed for coordinated use of the hands in motor tasks.


      In fact, crawling improves so many areas needed for refined eye-hand coordination, including the fine motor skills, gross motor skills, gross motor coordination, balance, and strength needed for tasks like precision of in-hand manipulation, positioning in activities, and sustained endurance. We cover more on this topic in our blog post on spatial awareness for baby.

      Eye hand coordination develops from infancy! Playing with baby in tummy time is a crucial element to eye hand coordination development.


      SIX MONTHS:
           Brings hands together to grasp a block/toy while sitting supported on an adult’s lap
           Extends arm to reach up for a toy while laying on back
         
      SEVEN MONTHS:
           Transfers a block/toy from one hand to the other while sitting supported on an adult’s lap.
           Touches a cereal piece with index finger
           Bangs a toy on a table surface while sitting supported on an adult’s lap

      NINE MONTHS:
           Claps hands together

      TEN MONTHS:
           Removes loose pegs from a Peg Board (affiliate link) 

      ELEVEN MONTHS:
           Removes socks
           Releases a cereal bit onto table surface
           Places blocks (affiliate link) into a cup

      A lot of eye hand coordination development occurs in the toddler years. Here are developmental milestones for eye hand coordination from 1-3 years.


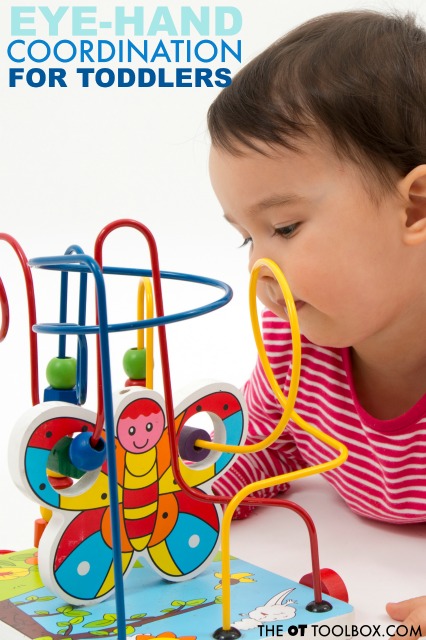
      Development of Eye Hand Coordination for Toddlers

      Development of hand eye coordination accelerates during the toddler years because motor skills develop at an increasing pace during the years of 1-3. 

      TWELVE MONTHS/ ONE YEAR:
           Turns pages in a board book
           Imitates stirring a spoon (affiliate link) in a cup

      THIRTEEN MONTHS:
           Imitates tapping a spoon on a cup
           Begins to places large puzzle pieces in a beginner puzzle (affiliate link) 

      FOURTEEN MONTHS:
           Scribbles on paper

      SIXTEEN MONTHS:
           Imitates building a tower of 2-3 blocks (affiliate link) 

      NINETEEN-TWENTY MONTHS:
           Builds a block tower, stacking 4-5 blocks (affiliate link) 

      TWENTY THREE-TWENTY FOUR MONTHS:
           Imitates copying vertical lines


      TWENTY FIVE-TWENTY SIX MONTHS:
           Removes a screw top lid on a bottle
           Stacks 8 blocks (affiliate link) 
           Begins to snip with scissors

      TWENTY SEVEN-TWENTY EIGHT MONTHS:
           Imitates horizontal strokes with a marker
           Strings 2 Beads (affiliate link) 
           Imitates folding a piece of paper (bending the paper and making a crease, not aligning the edges)

      TWENTY NINE MONTHS:
           Imitates building a train with blocks
           Strings 3-4 Beads (affiliate link) 
           Stacks 10 blocks (affiliate link) 

      THIRTY ONE MONTHS:
           Builds a “bridge” with three blocks (affiliate link) 

      THIRTY THREE MONTHS:
           Copies a circle

      THIRTY FIVE MONTHS:
           Builds a “wall” with four blocks (affiliate link) 

      Eye hand development continues in the preschool years. Here are ways that eye hand coordination develops in preschool and how to improve these visual motor skills.


      hand Eye Coordination in Preschoolers

      During the preschool years, we see even more fine motor and gross motor development. These refined skills, along with more coordinated efforts enable precision and dexterity with hand-eye coordination. Check out some of the preschool activities that we love to use to support this development.

      Additional information and resources are covered in our blog post on crossing midline activities for preschoolers, as the eye-hand coordination at this age develops quickly and the sensory motor skills needed for play is an important part of development.

      Preschoolers are beginning to use tools such as crayons, scissors, markers, glue sticks, and more. You’ll see greater control in using these materials. 

      Preschoolers are also playing with more pretend play, and are able to use different toys with more refinement. While the preschool age may be able to use a pencil to create forms, occupational therapy practitioners prefer that handwriting is not encouraged at this age.

      Read about the detrimental impact that handwriting has when pushed before preschoolers build the visual motor experience in this stage.

      THIRTY SEVEN MONTHS:
           Cuts a paper in half with scissors

      FORTY MONTHS:
           Lace 2-3 holes with string on Lacing Shapes (affiliate link) 
           Copies a cross

      FORTY TWO MONTHS:
           Cuts within 1/2 inch of a strait line.
           Traces a horizontal line

      FIFTY MONTHS:
           Copies a square
           Cuts a circle within 1/2 inch of the line
           Build “steps” with blocks (affiliate link) 

      FIFTY FOUR MONTHS:
           Connects two dots to make a horizontal line.
           Cuts a square within 1/2 inch of the line
           Builds a “pyramid” with blocks (affiliate link) 

      FIFTY FIVE MONTHS:
           Folds a piece of paper in half with the edges parallel
           Colors within lines


      There is so much happening through regular play, interaction with babies and toddlers at each stage. What’s important to know is that the development doesn’t stop there! 


      Studies have shown that eye-hand coordination impacts learning, communication, social-emotional skills, attention, and focus. Wow! 

      Coordination Skills

      Here are some ideas to work on eye-hand coordination for preschooler kids and older: 
      This Letter Eye Hand Coordination Activity helps with bilateral coordination and the visual processing skills needed for reading and so many other skills. 

      Try this scooping and pouring eye-hand coordination activity that can be adjusted to meet the needs of many ages and abilities.

      More visual processing activities

      For even MORE information on eye-hand coordination and activities to use in your occupational therapy practice, you will want to join our free visual processing lab email series. It’s a 3-day series of emails that covers EVERYthing about visual processing. We take a closer look at visual skills and break things down, as well as covering the big picture of visual needs.

      In the visual processing lab, you will discover how oculomotor skills like smooth pursuits make a big difference in higher level skills like learning and executive function. The best thing about this lab (besides all of the awesome info) is that it has a fun “lab” theme. I might have had too much fun with this one 🙂

      Join us in visual processing Lab! Where you won’t need Bunsen burners or safety goggles!

      Click here to learn more about Visual Processing Lab and to sign up.


      Free visual processing email lab to learn about visual skills needed in learning and reading.
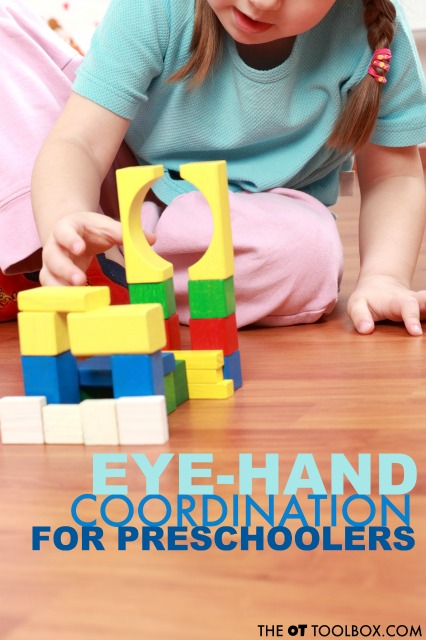
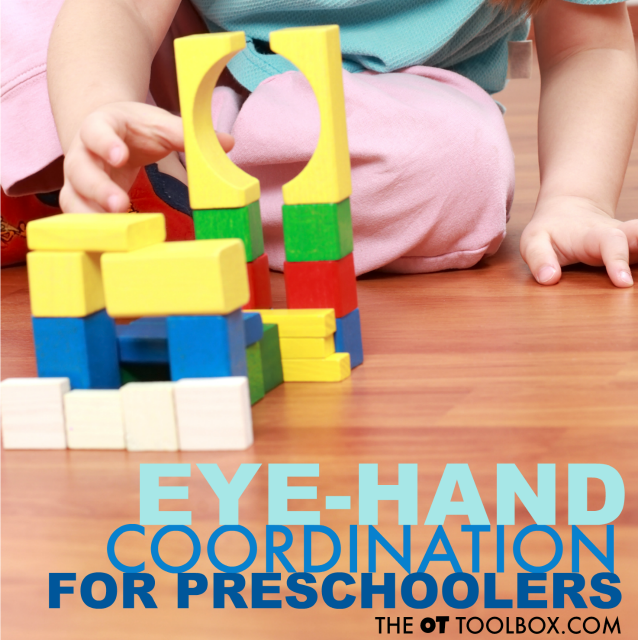
      Work on eye-hand coordination with preschoolers by building with blocks!
       
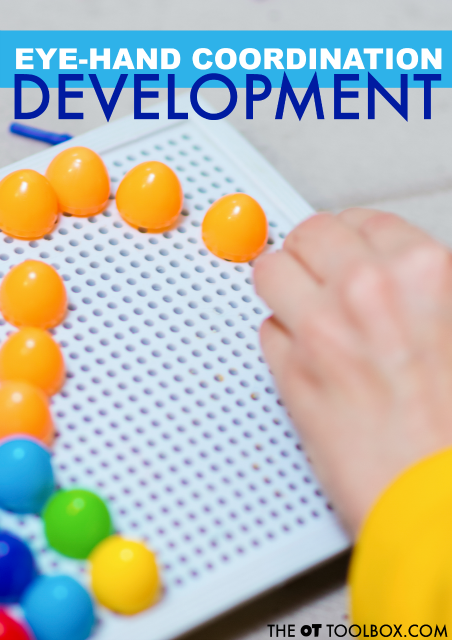
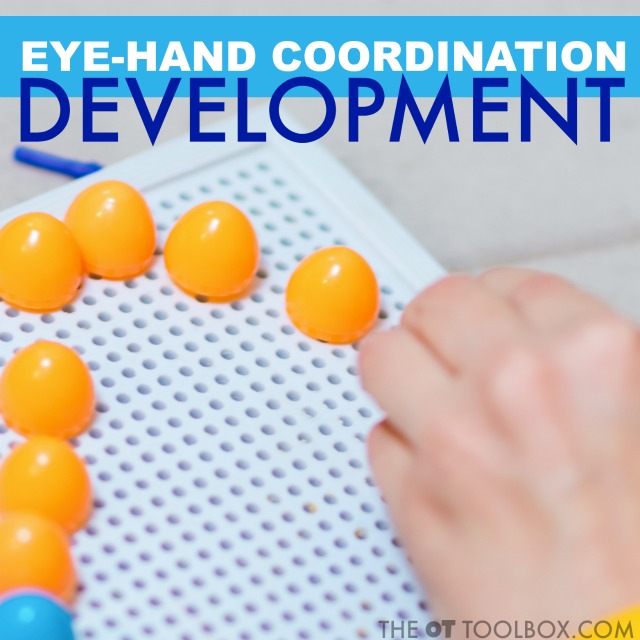
      Try activities like geoboards, pegboards, and lacing beads to improve eye hand coordination development in kids.

      References:
      Kermoian, Rosanne & Campos, Joseph. (1988). Locomotor Experience: A Facilitator of Spatial Cognitive Development. Child development. 59. 908-17. 10.2307/1130258. 

      Colleen Beck, OTR/L has been an occupational therapist since 2000, working in school-based, hand therapy, outpatient peds, EI, and SNF. Colleen created The OT Toolbox to inspire therapists, teachers, and parents with easy and fun tools to help children thrive. Read her story about going from an OT making $3/hour (after paying for kids’ childcare) to a full-time OT resource creator for millions of readers. Want to collaborate? Send an email to contact@theottoolbox.com.
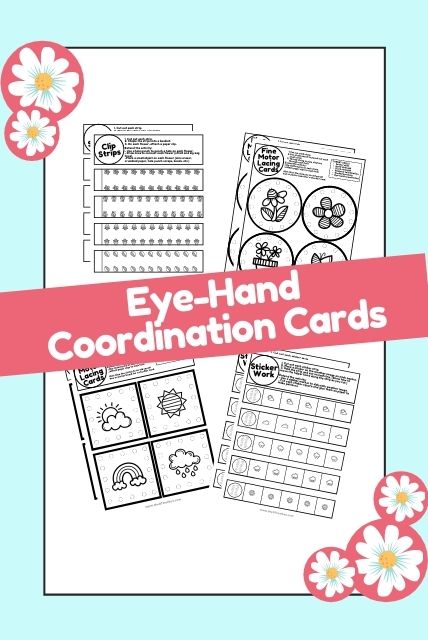
      Spring hand eye coordination fine motor worksheets

      Hand eye coordination activities can be as simple as lacing cards, hole punching activities, and paperclip tasks using printable OT activities. The ones in the image above are found in our Spring Fine Motor Kit, but there are many others in our other Fine Motor and Therapy Kits:

      Working on fine motor skills, visual perception, visual motor skills, sensory tolerance, handwriting, or scissor skills? Our Fine Motor Kits cover all of these areas and more.

      Check out the seasonal Fine Motor Kits that kids love:

      Or, grab one of our themed Fine Motor Kits to target skills with fun themes:

      Want access to all of these kits…and more being added each month? Join The OT Toolbox Member’s Club!

      Types of Temperament

      types of temperament

      Did you know there are different types of temperament and that various temperament types impact all aspects of daily living, from learning in the classroom, interacting with peers, social and emotional development, self-regulation, and more? Consider how two different types of temperament would respond to a challenge or learning a new concept. One temperament type might respond to challenges with growth mindset and adaptation to changes in what they know and believe. Another type might respond with negative mindset and sensitivity or withdrawal.

      types of temperament

      Types of Temperament

      There are various types of temperament that you may have heard explained over the years. This is personality at work. Temperament is something to consider when evaluating a person in occupational therapy and it might be part of a parent interview or a teacher interview during the occupational therapy screening or eval.

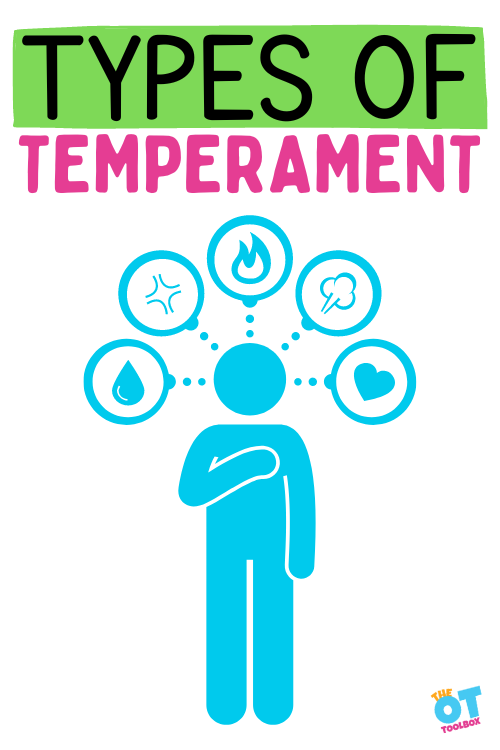
      Types of temperament might be defined as (other names or phrases may be interchanged for these types as well):

      1. Easy Temperament- also defined as flexible, stable, happy-go-lucky, cheerful, take on challenges, etc.
      2. Difficult Temperament- Also defined as inflexible, unstable, doesn’t do well with challenges, unresponsive to others, pessimistic, etc.
      3. Slow-to-Warm-Up Temperament– This temperament type might look like a cautious personality around others. The individual might take their time to warm up to new people and situations. They might have lower activity levels, higher sensitivity, and may be more hesitant when faced with change. However, once they feel comfortable, they can engage more freely.
      4. Sensitive Temperament– People with a sensitive temperament are highly attuned to their environment and emotions. They often react strongly to sensory stimuli and emotions, both positive and negative. They may require more time to process experiences and may benefit from strategies to manage their emotional responses.
      5. Active Temperament– Individuals with an active temperament are characterized by high excitement and energy levels and a preference for physical movement and engagement. They may be easily excited and have a need for constant stimulation and activity. Such individuals might struggle with activities that demand prolonged focus.
      6. Slow Temperament- On the contrary is a slower response. These individuals might have low energy.
      7. Shy or Inhibited Temperament– People with a shy or inhibited temperament tend to be more reserved and cautious in new situations. They might be more hesitant to approach unfamiliar people or experiences. This temperament type can affect social interactions and require supportive environments to help individuals feel at ease.
      8. Feisty or Spirited Temperament: Individuals with a feisty temperament are known for their strong-willed nature and intense emotional reactions. They often express their feelings and opinions strongly and may resist directions they perceive as limiting. Managing their strong emotions and channeling their energy constructively is key.
      9. Adaptive or Flexible Temperament: This temperament type refers to individuals who are adaptable and can easily adjust to different situations. They often display a balanced approach to emotions, are open to new experiences, and tend to have moderate activity levels.

      All of these variances in human personality can impact goal achievement. It’s considerations that need to be in mind when creating goals and working toward goal progression.

      Occupational therapy providers are trained in the cognitive realm and so this impact of personality on functional performance and daily occupations is ingrained into OT in every therapy session!

      Understanding Temperament and Its Early Signs

      From birth, a person’s temperament becomes evident in various ways. We hear infants described as “easy babies” or difficult babies”. While this is not always the best way to describe ease or difficulty of daily tasks during the infant years, it definitely is common verbiage that we hear as therapy providers.

      Development of temperament has many factors. Take a look at this article which examines temperament development from infancy to toddlerhood.

      The study also discusses the genetic and environmental influences on child temperament.

      Components of Temperament:

      Several components define temperament, including activity level, regularity of routines, sensitivity to surroundings, mood qualities and intensity, as well as tendencies towards persistence and distraction. These are the qualities that make us who we are. It’s how we perceive and respond to daily tasks and challenges.

      When we think about all of the components that impact how we respond to daily life situations, there are many! A lot of this has to do with metacognition!

      How Temperament Types Shapes Behavior

      Thinking about the various influences that temperament has on our response to situations and the descriptions we shared above, you might start to see how temperament types can impact behavior, or the way to behave in daily tasks.

      Things like our activity level, interoception, sensory thresholds, mood, intensity of mood, distractibility, persistence, the ability to adapt to change, withdrawal tendencies, and attention are just some of the ways that temperament type can impact daily activities.

      Activity Level: Temperament plays a pivotal role in determining an individual’s activity level. Some people are naturally more energetic and dynamic, while others tend to be more laid-back and relaxed. This variance in activity level affects how individuals engage with their surroundings, interact with others, and approach tasks.

      Interoception: The regularity of biological functions, such as sleep patterns and meal times, is influenced by temperament. Certain individuals have a consistent and predictable rhythm in these functions, while others exhibit more variability. This can impact their daily routines and how well they adapt to schedules and changes.

      Sensory Thresholds: Sensory thresholds, or how sensitive individuals are to sensory stimuli, are intricately tied to temperament. Some people are highly sensitive and notice even subtle changes in their environment, while others have a higher threshold and require more intense stimuli to elicit a response. This sensitivity level affects how they experience and interact with the world around them.

      Quality of Moods: Temperament greatly affects the emotional landscape of an individual. Some individuals tend to experience predominantly positive moods, while others may be more prone to experiencing negative emotions. This can influence their overall outlook on life, interactions with others, and how they handle challenges.

      Intensity of Mood Expression: The intensity with which individuals express their emotions is a facet of temperament. Some people are more expressive, openly showing their emotions, while others are more reserved and exhibit emotions in a more subdued manner. This impacts how others perceive and respond to their emotional cues.

      Distractibility: Distractibility, or the degree to which individuals are easily diverted from tasks or activities, is a temperament trait. Some individuals find it challenging to maintain focus, becoming easily sidetracked by external stimuli. Others have a higher ability to concentrate and remain engaged in tasks.

      Persistence: Persistence refers to an individual’s ability to initiate tasks and then stick with a task or activity despite challenges or obstacles. Temperament influences this trait, with some individuals being naturally tenacious and determined, while others may be more inclined to give up more easily. This trait affects how individuals approach goals and overcome difficulties.

      Adapting to Change: The way individuals respond to change is influenced by temperament. Some people embrace change and adapt quickly, while others may struggle with transitions and prefer stability. This adaptability trait can impact how individuals cope with new situations and unexpected events.

      Approach/Withdrawal Tendencies for New Situations: Temperament shapes an individual’s approach or withdrawal tendencies when facing new situations. Some people eagerly approach novel experiences, showing curiosity and enthusiasm. Others may be more cautious or hesitant, preferring to withdraw initially before engaging.

      Attention Span: The length of time individuals can focus their attention on a specific task or activity is impacted by temperament. Some individuals have a longer attention span and can sustain focus for extended periods, while others may have a shorter attention span and require more frequent shifts in activities. There is a lot related to executive functioning skills.

      Adaptation to Change: The ability to adapt to changes varies among individuals, with some children finding it challenging while others adjust more easily.

      Approach and Withdrawal: Temperament shapes how individuals approach new situations and their attention span in such scenarios, thus influencing their learning about emotions and social interactions.

      Things to consider about temperament type

      Temperaments can change: People exhibit different levels of activity, routine regularity, and sensitivity to their environment, leading to varying temperaments.

      Extremes in Traits: Some individuals experience mood swings, intense moods, and show extreme persistence or distractibility. This is ok!

      Slower Rhythms: Some individuals have irregular routines, changing moods, and difficulty maintaining focus. They usually possess moderate activity levels and sensitivity. This might look like a slower response, destructibility, inattention, but it can also just be a slower temperament response. It’s ok to have a slower response!

      Balanced “Flexible” Temperament: Others have a balanced temperament or flexibility when it comes to their response to activity, routines, and sensitivity. They adapt well, maintain positive moods, and tend to avoid extremes. It’s ok to have a balanced temperament, or to not!

      Temperament’s Impact on Learning

      When you think about it, there is a close relationship to self-regulation, coping skills, social emotional skills, impulse control, persistence, and temperament. This is the connection of self-regulation and executive functioning skills in action.

      • Influence on Self-Regulation: Temperament significantly shapes how individuals exhibit self-regulatory behaviors and manage their impulses.
      • Understanding Effortful Control: The final developmental step is “effortful control,” where individuals learn to resist impulsive actions and choose more socially acceptable responses. Children grasp this concept quickly.

      Whatever temperament type you are working with as a therapy provider, educator, or even parent, remember that every individual is unique. And, we all have variations in our mood and reactions to life events, and that sometimes these variances change in a single day. Just like differences in regulation is ok, and it’s perfectly ok to feel or respond to situations in different ways, temperament changes are ok as well.

      Colleen Beck, OTR/L has been an occupational therapist since 2000, working in school-based, hand therapy, outpatient peds, EI, and SNF. Colleen created The OT Toolbox to inspire therapists, teachers, and parents with easy and fun tools to help children thrive. Read her story about going from an OT making $3/hour (after paying for kids’ childcare) to a full-time OT resource creator for millions of readers. Want to collaborate? Send an email to contact@theottoolbox.com.

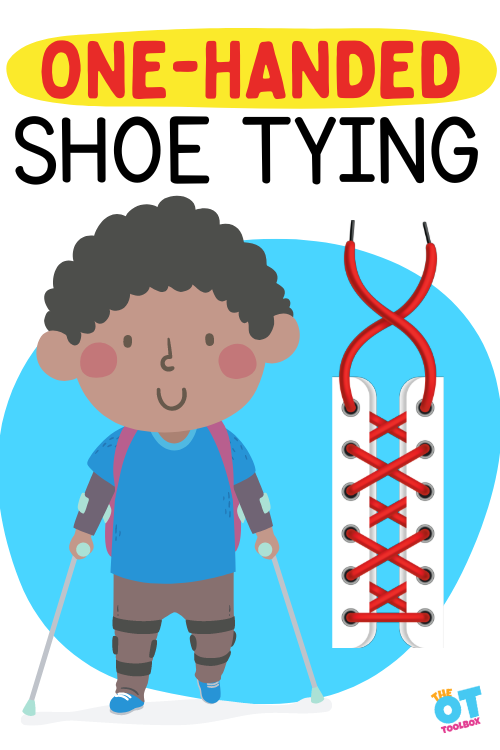
      One Handed Shoe Tying

      Special needs child with braces and shoe laces. Text reads "One handed shoe tying"

      With the modern era of velcro, laceless, and stretchy lace shoes of every size and color, one might wonder why bother learning one handed shoe tying (or shoe tying at all). However, for some individuals, tying shoes with one hand is a necessary component of function. This post will not only teach you how to learn one handed shoe tying and teach it to others, but understand the why behind one (or two) handed shoe tying.

      One handed shoe tying

      One Handed Shoe Tying

      Let’s break down several things here…

      • Why bother to learn one handed shoe tying methods
      • Helpful tips for one handed shoe tying
      • One handed shoe tying videos
      • Step-by-step directions for one handed shoe tying with two bows
      • Step-by-step directions for one handed shoe tying with one bow

      The fact is that one handed shoe tying requires skills. While going with slip on shoes or loafer style of shoes might be ideal for some to don and doff shoes quickly and independently, sometimes a laced shoe is necessary. (See below.)

      One handed shoe tying does require some skills:

      To develop these skills, try some of these activities:

      Why Learn One Handed Shoe Tying?

      There are times when one handed shoe tying comes in “handy”.  Stroke patients, people with only one hand/arm, learners who only have one functioning hand, or a time when you only have one hand free to do the job. 

      There are tons of adaptations out there that are easier than struggling to learn one handed shoe tying. Alternate closure shoes are very popular and stylish, not to mention convenient and easy to use.  Young children are not being taught shoe tying because it is easier to offer laceless shoes.  Non lace-up shoes are easier for kids to be more independent, and easier for teachers who have to re-tie 20 pairs of laces a day. 

      If there are so many cool alternatives to lace up shoes,  why learn?

      There are several reasons to learn to tie laces

      • Physical Disabilities or Injuries: People with certain physical disabilities, such as limb amputations, strokes, cerebral palsy, or conditions affecting their hand dexterity, may need to learn one-handed shoe tying in order to independently manage their footwear. Some of these individuals need to learn to tie their shoes with one hand from a very young age, while others learn this skill at an older age following a CVA or injury.
      • AFO support- Individuals who require an ankle foot orthosis, brace, or more stability in the foot for other reasons will require shoes that hold these devices while offering stability.
      • Temporary Hand Injuries: Other individuals recovering from hand injuries or surgeries may have limited use of one hand temporarily, making one-handed shoe tying a practical skill for maintaining their daily routines.
      • Increased Independence: Being able to tie shoes with one hand can boost self-confidence and overall self-sufficiency.
      • OT School- I still remember learning to tie my shoes in OT school many moons ago, as a strategy to have in my toolbox to teach individuals to tie their own shoes with just one hand! While there are always adaptations for things, it is better to know the basics when faced with something that is not adaptable (those darned velcro shoes)
      • Types of shoes- There are velcro shoes but for many of our clients and patients, they are just not trendy enough! Have you ever seen velcro prom or tuxedo shoes? Nowadays they might make some more trendy versions of them, but the ones I found look like they belong on my grandfather. Try and get those on a teenager!
      • There are more things that require tying than just shoes: boat ropes, string, balloons, a corset, ice skates, roller skates, work boots, wilderness survival skills, a bonnet, hair bows, arts and crafts, and so much more
      • If you are working on skill building, learning to tie laces helps builds fine motor skills, balance, executive functioning skills, and independence with the ADL of self-dressing.

      Before working on teaching one handed shoe tying, check out this blog post on the OT Toolbox for the basics of shoe tying, tips and strategies, benefits, and activities.

      Helpful Tips for Teaching One-Handed Shoe Tying

      When learning a new skill, there are helpful strategies to employ in order to have a better outcome when it comes to shoe tying skills in general:

      • PRACTICE – every new skill takes practice. Take time to practice over and over again
      • Timing – choose a time of day when people are not in a rush, or stressed out.  On the way to the school bus is not the best time to start teaching
      • Break it down – break any task down into steps to make it more manageable
      • Backward chaining – do all of the steps for your learner except the last one. Have your learner finish the task, feeling that sense of accomplishment.  Work backward from there
      • Forward chaining – have your learner do the first step, then finish for them.  Teach them one step at a time
      • Model – wear tie shoes as much as possible and model this task
      • Practice not on the foot first – it is helpful to start with a shoe tying board or a pair of shoes not on the learner.  The added step of bending over, is just one more hurdle
      • Use long laces that are easy to manage when practicing
      • Work side by side tying shoes together one step at a time
      • Environment – choose a quiet non distracting space for learning. Remove television and other media unless you are following along with a video tutorial
      • Work on the underlying skills needed for shoe tying
      • Make the task fun!  Choose games related to tying, buy awesome fun shoes with laces, or have a competition
      • Incentivize – it is not a bad idea to offer an incentive to a reluctant learner.  New shoes when shoe tying is learned, a trip to the park to try out the new shoes, a call to grandma or a video message, or good old ice cream often helps.

      One Handed Shoe Tying Videos

      The following are steps to complete one handed shoe tying.  Decide what the best method for teaching your particular learner is going to be (backward/ forward chaining, modeling, side by side training, video tutorial).

      Here is a tutorial on one handed shoe tying with two bows:

      This video has another strategy for tying shoes with one hand toward the end of the video:

      Professor Shoelace has his own “Ian Knot” technique for teaching shoe tying. This strategy requires more finger dexterity, but has less steps:

      This strategy is used by an individual born with cerebral palsy and uses high top shoes, which may be a required form of stability for some:

      Step-By-Step One Handed Shoe Tying Directions (one bow)

      For those learners, a method for traditional shoe tying will be described below

      1. Begin by anchoring one end near the toe then run straight across and into the opposite eyelet
      2. Snake the loose end through all of the eyelets, running straight across on the outside and straight up on the inside, until the end is fed into the last eyelet near the top of the shoe
      3. The loose end is now fed straight across and back out through the opposite eyelet. This second pass of shoelace through the eyelet keeps this knot nice and tight
      4. TIP: When loosening the lacing to remove the shoe, don’t pull this lace all the way out, as it’s difficult to feed through each time.
      5. Create a loop with the loose end sitting across the final straight section of shoelace. This is easy to do by holding the loose end between the right thumb and forefinger, then forming the loop around the right thumb.
      6. Feed a new loop of shoelace underneath the straight section (blue) and out through the previous loop. The lace is fed underneath with the right forefinger, meeting up with the thumb – which should still be inside the previous loop
      7. Grab the emerging loop and pull downwards and to the right. Take care not to pull the loose end all the way out!
      8. Continue pulling the loop until it sits snug and close to the eyelet.

      One handed Shoe Tying with Two Bows

      It is probably best to watch a few video tutorials or have someone demonstrate before trying to follow these directions.

      1. Hold one shoelace down with your opposite foot while crossing the other over and pulling it tight
      2. Make a loop while still holding the lace under your opposite shoe
      3. Bring the loop behind and under the straight lace
      4. While holding the loop with your thumb and first finger, release the other side from under your shoe
      5. Use your fingers to wrap the free lace around the first loop
      6. Use your thumb to push the lace through the newly formed loop
      7. Holding one loop in place with your free foot, pull the loops tight

      One Handed Knot Shoe Tying Technique

      Then there is this One handed knot with pictures of each step of one-handed shoe tying. This seems to be the most straight forward type of one handed shoe tying technique.  Some learners do not like it  because it looks “different” than traditional laces.  Use these steps for a one handed knot:

      1. Tie a knot at one end of the shoelace.
      2. Thread the unknotted end into the one of the holes nearest to the toe of the shoe.
      3. Take the shoelace and lace it across the tongue of the shoe and then diagonally to the next hole. Lace up all of the holes using the single shoe lace.
      4. Continue to lace across the tongue of the shoe and up to the opposite side until you reach the top of the shoe.
      5. Circle the lace toward the toe of the shoe and under the lace that is the last straight part of the lace going across the tongue of the shoe.
      6. Circle around toward the top of the shoe. Pull the lace through the loop toward the ankle and out to the left side.
      7. Pull the loop tight.

      One Handed Shoe Tying Adaptations

      When the shoe tying techniques listed above don’t work, there are still alternatives! Even when using the adaptations listed below, one-handed shoe tying can be achieved, enabling functional independence.

      Try these shoe tying tools and special laces: (Amazon affiliate links included. As an Amazon Influencer, I earn from qualifying purchases.

      When Teaching One Handed Shoe Tying

      Remember to practice, add incentives, and talk about the reasons for learning to tie shoes.  I can’t tell you how many students I have asked if their mom is coming to prom to help them tie their shoes!

      Victoria Wood, OTR/L is a contributor to The OT Toolbox and has been providing Occupational Therapy treatment in pediatrics for more than 25 years. She has practiced in hospital settings (inpatient, outpatient, NICU, PICU), school systems, and outpatient clinics in several states. She has treated hundreds of children with various sensory processing dysfunction in the areas of behavior, gross/fine motor skills, social skills and self-care. Ms. Wood has also been a featured speaker at seminars, webinars, and school staff development training. She is the author of Seeing your Home and Community with Sensory Eyes.

      Middle School Journal Prompts

      middle school journal prompts

      It’s no secret that middle schoolers are difficult so for the school-based OT, having middle school journal prompts on hand is key.  Middle school occupational therapy has more of a challenge when it comes to accomplishing goals. Their hormones are changing, and they are struggling to find their place. Journaling is a great way not only to express themselves, but for introspection and self reflection. These middle school journaling prompts provide a framework for self expression. Check out our resource on occupational therapy for teens for more insight.

      middle school journal prompts

      These Middle School Journal prompts include references to Amazon affiliate links included. As an Amazon Influencer, I earn from qualifying purchases.

      Middle School Journal Prompts

      Our middle school students have a lot going on. In addition to a more regimented course curriculum, mid terms, final exams, and stricter schedules, there are complex social and emotional considerations.

      When it comes to handwriting and writing assignments, we can consider all of these middle school complexities while developing skills at this higher level of education.

      Whether you are working on written expression through handwriting or by targeting typing skills, you can use these journal prompts to foster skill-building in middle schoolers.

      Given all that is going on inside the mind and body of a middle school student, there needs to be an outlet to begin to process this information. Teenagers are especially reluctant to take the advice of a parent or teacher at this time. 

      Middle school journal prompts are a great way to foster this emotional development.

      Journaling and self reflection is a guided way for them to make sense of their world without being handed advice (that they don’t want to hear anyway). 

      The middle school journaling prompts below can help kickstart the ideas.

      What are the Struggles of a Middle Schooler?

      • The first major struggle we see is impulsivity.  The prefrontal cortex that controls executive function is not developed until age 25!  Check out this post on Tips for Impulsivity for more hints and resources for taming impulsivity. 
      • Social function – middle school students are trying to find their way. Children develop at different rates, so some students are more mature than others.  While some middle schoolers are interested in romantic relationships, others still want to play with dolls and action figures.  Neither is wrong, it just makes for a complicated social life. 
      • Identity – middle schoolers are trying to figure out who they are.  They need a group to belong in. If they do not fit in with the crowd, they look for alternative groups, or begin to question their own identity. 
      • Questioning authority – this is the age of struggling to be independent but still needing some parental guidance. Teens question and push back against authority in an effort to become more independent.  They are not mature enough for all of the independence they seek.  
      • Hormones – as the hormones are developing, there are a lot of ups and down. Surges in testosterone can lead to aggression, outbursts, inappropriate sexual behavior, and risk taking behaviors. Uneven estrogen causes mood swings, emotional dyregulation, confusion, and inappropriate sexual behavior.
      • Anxiety – there is an increasing number of young people who struggle with anxiety.  Given all of the changes happening within their body, the social and academic pressures, and difficulties with communication, anxiety or depression can begin to develop.

      Now you understand the need for journaling prompts!

      Ideas for Middle School Journaling Prompts

      Start with our giant list of writing prompts, or even our back-to-school writing prompts. Then, try using some of these journaling ideas.

      • Stress diary – this kind of journal has guided prompts to notice problem behavior, investigate the triggers, and find a workable solution
      • Bullet Journal (Amazon affiliate link)- this is the latest craze in journaling. It involves bullet points and lists.  These can be to do lists, worries, anxiety triggers, or whatever the journaler wants to catalog
      • Impulsivity journal – log impulsive decisions, the consequences, and a better response for the next time. Check out the OT Toolbox’s Impulsivity Journal for ideas
      • Message to my future self – write down goals and aspirations for who you want to become five or ten years from now. This gives the learner a chance to look forward and think beyond their current struggles
      • Unsent letter – write letters to someone and don’t send them. Sometimes just the outlet to vent frustration or desires is helpful without ever sending the letters
      • Daily journal prompt – this might be the same or different each day. It can include phrases like: the worst part of my day, the best part of my day, what I would do different next time, conversations I had today
      • Classic journal prompt – write ten things about today in random order
      • Questions without answers – unanswered questions the middle schooler just wants to put out there. If they find an answer, they can go back and fill it in
      • Regrets/mistakes – what mistakes have you made that you wish you could go back and change?  What would you do differently
      • Gratitude Journal (affiliate link)- name three things per day that you are thankful for, or that went well. These can be placed in a gratitude jar also
      • Pros/cons – describe a decision that needs to be made. Write a list of all of the pros and cons to help with the decision or problem solving
      • Make a Collage – perhaps the journal is not even written. Maybe it is clippings from a magazine that reflect wishes, feelings, or meaningful events
      • Things you wish you had or could do – this is not just a shopping list. Maybe it is better food, a different body, more confidence. Work through the list to see which are plausible and how to go about attaining them
      • Would you rather – offer up different “would you rather” questions and journal your opinion on the matter and why.  My favorite is “would you rather eat a bunch of ear wax or toenail clippings?”  These have to be off the wall in order to get middle schoolers engaged
      • What you would like to say – are you filled with unsaid things?  Similar to the unsent letter, write down things that come to mind after the fact.  Example: someone makes a rude remark and an hour later you think of what you could have said
      • Dream journal (Amazon affiliate link)- write down dreams you have. This can be an indicator of subconscious stress
      • Unpopular opinions – what is something you don’t agree with?  Maybe it is something political or a social media post everyone is raving about.  Don’t you wish sometimes you could just say how you feel without consequences?
      • Things I can control – what are some things in your realm of control? What are things that are not in your own control?  Can you shift any of these things, or learn to accept them?
      • What is something you love about yourself?  It can be a physical attribute or a character trait
      • What is something you would change about yourself? This gives a chance to determine if these dislikes are actual problems, or perceived ones. If they are problems that can be solved, develop a plan to change them.  BDD or body dysmorphia disorder is a condition where a person perceives something is wrong with them. They are consumed by this flaw. Even corrective measures don’t solve the problem. They go from one obsession to another. Some things are so minor that only they notice them.  In journaling about dislikes, watch for signs of obsession over perceived flaws and work on healthy coping strategies
      • SMART goals – these goals are specific, measurable, attainable, relevant, and timebound.  Write some goals for yourself for the next six months.  Make sure they are SMART. Track progress toward these goals.
      • Make it silly or fun. Something like an ice cream writing activity can be all it takes for this age!

      This list of Middle School Journal Prompts could go on forever

      Once you start thinking outside the box about journaling styles and prompts, the lists are endless. Notice many of these prompts are controversial, may uncover something shocking, or might reveal things that truly need intervention.  Middle schoolers are already struggling to be accepted, to communicate their wants and needs, and to navigate the changes in their bodies. Giving them a creative outlet to journal about things that are usually suppressed can be a step in the right direction for communication and problem solving.  

      These prompts are not just for middle school students.

      Obviously many of the topics are for more mature students, therefore some middle school preteens might not be ready for them. High schoolers, young adults, and even more “mature” adults can benefit from a creative outlet to share their inner struggles and triumphs.  

      I kind of like the unpopular opinion prompt myself.  I am sure I mutter my unpopular opinions to myself or my spouse. Maybe by writing them down, I can work to see the other side, or just put it out there in the universe, without being judged, or ending up on social media.

      What creative sparks did you find while reading through the list of Middle School Journaling Prompts?

      Victoria Wood, OTR/L is a contributor to The OT Toolbox and has been providing Occupational Therapy treatment in pediatrics for more than 25 years. She has practiced in hospital settings (inpatient, outpatient, NICU, PICU), school systems, and outpatient clinics in several states. She has treated hundreds of children with various sensory processing dysfunction in the areas of behavior, gross/fine motor skills, social skills and self-care. Ms. Wood has also been a featured speaker at seminars, webinars, and school staff development training. She is the author of Seeing your Home and Community with Sensory Eyes.

      Personal Bubble

      Happy child in a bubble, reaching their arms out. Text reads "what is a personal bubble"

      Personal Bubble

      Don’t you wish sometimes you were surrounded by an actual personal bubble?  Maybe you need an imaginary boundary to offer a comfortable distance from others. If you’ve ever needed personal space, then you know the feeling! Kind of like those (affiliate link) inflatable orbs that people roll around in. If you are a mom, a pediatric therapist, caregiver to tiny humans, or work with anyone under the age of 18, you get this.  In this post you will learn what a personal bubble is, why you need one, why you don’t have one, and how to get one.

      personal bubble

      This blog post on personal bubbles includes Amazon affiliate links. As an Amazon Influencer, I earn from qualifying purchases.

      What is a Personal Bubble?

      A personal bubble is another phrase to help us visualize the personal space needed to feel comfortable among other individuals or other objects. A personal bubble space is just that: an space that is needed to feel comfortable. If another person invades your personal bubble, they get too close for comfort. If you are in a crowded space, your bubble may be smaller and you may feel the effects of claustrophobia (at some level).

      This imaginary bubble space is the “safe space”.

      Other names for a personal bubble include:

      • safe space
      • personal space
      • comfort zone
      • social distance
      • safe zone
      • bubble of privacy
      • invisible fence
      • area of personal discretion
      • zone of personal boundaries

      How big is a personal bubble?

      Your personal bubble space is often dependent on where you are and who you are interacting with.

      There are four zones of personal space people in the United States use:

      1. Intimate space 0-18 inches for hugging or whispering
      2. Personal space 18 inches to four feet – used for interactions with family and good friends
      3. Social space four to ten feet for interactions between acquaintances
      4. Public space 10 or more feet. Used for public speaking

      These zones will differ depending on cultural norms.

      Coronavirus and the Personal Bubble

      COVID was a wake up call for people’s lack of a personal bubble. Staying six feet apart was challenging in many circumstances.  Standing six feet apart in lines made for huge lines of people. 

      Sitting six feet apart in restaurants meant a lot of reconfiguring. Airplanes, Taxi’s, doctor’s offices, waiting areas, buses, and many other locations either had to be shut down or modified. 

      For the sensory avoiders such as myself, this was a welcomed change.  No more pushing and shoving.  No one sitting right next to me.  At last, a six foot bubble around me! 

      Unfortunately this did not last forever.  We are back to being crowded into lines, concert stadiums, theaters, classrooms, shops, and many other places you choose to visit. 

      Choose is the optimal word, as you never actually have to leave your home, thanks to working from home, meal deliveries, internet shopping, virtual doctor visits, and virtual reality travel. 

      Some people have embraced this new lifestyle of staying home, while others could not wait to get out and mingle again.

      Why is a personal bubble important?

      We all have some level of comfort when it comes to personal space between other individuals.

      • Personal space is important for interpersonal relations and communication.  Young children and puppies have no idea about personal space!
      • A personal bubble is also important for safety and comfort.  If someone invades your personal space, it can feel uncomfortable. Children need to learn about stranger danger, by understanding if someone gets in their personal bubble it should make them feel uncomfortable. 
      • Your personal space is your right to privacy, and certain parts of your body should not be touched unsolicited. My girls learned a rhyme in elementary school: “Don’t touch me there, that is my no no square”.  This was a demonstration in teaching students about where it is appropriate (or not) to be touched. The fact that I remember it 20 years later shows how powerful this imagery was.
      • Children learn when and how to touch people in their personal bubble.  Do you grab someone by the arm, or gently tap them to get their attention?  Do you wave to, or bear hug a stranger?
      • People with sensory processing disorder can have difficulty with this personal bubble.  Sensory avoiders might have a very small bubble, feeling very uncomfortable when touched unexpectedly or spoken to at close range.  Sensory seekers have a larger bubble with very little borders

      Why do some people struggle with their personal bubble?

      Some people struggle in crowded hallways, busy city streets, or in full elevators. For others, these crowded spaces don’t seem to matter. Everyone’s level of personal comfort may be different.

      People who have deficits in proprioception, body awareness, and interpreting social cues may have difficulty developing and maintaining their personal bubble.

      You might see these in the classroom, other other places people gather:

      • Lack of social skills
      • Not keeping their hands to themselves
      • Sitting too close to others
      • Bumping into people
      • The close talker
      • Hugging others who do not want to be hugged, or without asking first
      • Standing too close in line. This resource on standing in line and waiting in line offers support for kids that struggle with this.
      • Not reading the non verbal cues of others (discomfort, backing away, not wanting to be around this person)
      • Have difficulty making and/or keeping friends

      People with difficulty with body awareness literally do not know where their body is in space. They might feel like there is a six foot gap between them and their peers, when it is really six inches.

      Proprioceptive difficulties can mean a person does not have the right feedback to their muscles and joints.  They honestly believe they were just giving a light hug, or petting gently.

      Learners with social difficulties may not understand why they are not picked for a group, can’t make friends, or are not invited to the parties. 

      Young children learn about their personal space through instruction, watching others, experimentation, and practice.  Adults who do not have a personal bubble might not have someone to give them this feedback, or might not have been taught this as a young child. 

      They likely struggle with sensory processing difficulties, have not been made aware of this, or have not worked on developing these skills.

      How to teach personal bubble space

      Now that you know why this personal bubble is important, how do you get one, or teach others to get their own?

      The first step is to investigate and gather data about your learner’s personal bubble.

      Do they lack respect for others’ personal space during free time but not during academic time? Perhaps they have trouble mostly during physical education and recess? Do they have extreme emotional responses when someone does not respect their personal space?  By clearly identifying when, where and how the problem occurs can help to determine what interventions to try.

      • Use concrete examples – the “no no” square was very concrete.  There was a defined area that was not to be touched by others
      • Make things black and white (at least for a while) – you might have to use phrases such as “never” or “always” until a little understanding is developed.  We never hug anyone who is not family.  Never talk to strangers. Always leave an arm’s length between you and the person around you.
      • Use these personal space activities.
      • Try flexible seating in the classroom
      • My Body Belongs to Me – social situation booklet
      • Hula hoop activities – use a hula hoop around each student to clearly define their space. Use this visual to demonstrate how close to be to their peers
      • Wearing a box – have students wear a box around their middle while participating in a group activity.  Remind them that if their box touches another box, they are too close
      • Create borders – often young learners do not understand space. Giving each student their own carpet square, taped off area, or spot to sit on, creates a visual boundary for them to adhere to
      • Give alternatives – instead of saying “we don’t touch strangers or our friends” teach alternate ways to greet people.  How about a wave for a stranger or a fist bump for a peer? Of course, children with proprioceptive difficulties may give a fist bump too hard at first, so this will require practice
      • Use aspects of a classroom sensory diet.
      • Movement breaks – give learners a chance to move their body, so they are less apt to touch other people or invade their personal bubble
      • Explore IEP or 504 options to facilitate learning and participation in the educational environment. IEP goals for self-regulation can specifically be addressed.
      • Demonstrate – instead of using words, demonstrate what a light touch looks and feels like.  Show your learners the correct way to pet an animal, greet a friend, give a high five, stand in line, sit in a group, or socialize with peers
      • Honesty and time for reflection – sometimes learners need a little tough love and honesty in order to self reflect. This does not equate to being mean.  A conversation might start, “why do you think you were not picked for the group?” or “what made your friend move away from you just now”.   “I noticed, when you sat in the cafeteria you were touching your peers”.  “Do you notice you are talking very close to my face?”  Sometimes when I encounter the adult close talker, I wonder why no one had this honest conversation with them.

      All of these needs can help the student that struggles with overwhelming sensory needs, especially sensory challenges in the cafeteria at school or during a fire drill. Having a personal bubble as a coping tool makes the overstimulation anxiety somewhat lesson knowing that those tools are available.

      What personal bubble space strategies will you try?

      While it might not be ok to tell your grandmother she is a close talker, preschool is a great time to start this process because of the natural close positioning during circle time.  Most of my IEP accommodations include alternate seating options. This small adaptation might make a huge difference in classroom productivity. 

      Victoria Wood, OTR/L is a contributor to The OT Toolbox and has been providing Occupational Therapy treatment in pediatrics for more than 25 years. She has practiced in hospital settings (inpatient, outpatient, NICU, PICU), school systems, and outpatient clinics in several states. She has treated hundreds of children with various sensory processing dysfunction in the areas of behavior, gross/fine motor skills, social skills and self-care. Ms. Wood has also been a featured speaker at seminars, webinars, and school staff development training. She is the author of Seeing your Home and Community with Sensory Eyes.