Colleen Beck, OTR/L is a pediatric occupational therapist and the owner and author of The OT Toolbox website. She manages all of The OT Toolbox social media accounts and runs the popular newsletter.
Read about Colleen's experience and career as an occupational therapist, including how The OT Toolbox began on our About The OT Toolbox page: https://www.theottoolbox.com/about-us/
Colleen created The OT Toolbox in 2011 and since then has written thousands of blog posts designed to support therapy providers, educators, parents, counselors, admin, and caregivers in promoting the healthy development of kids.
Check out Colleen's blog posts below:
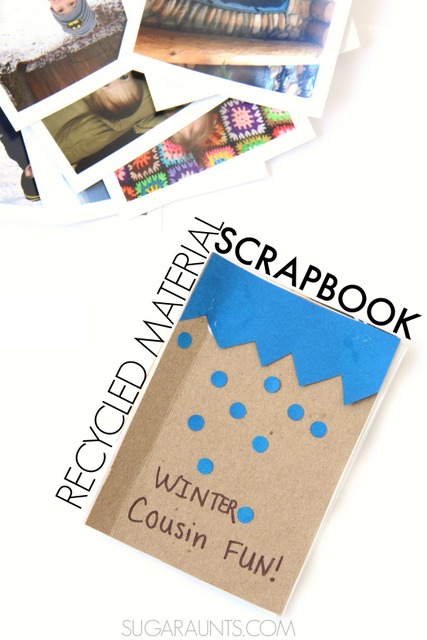
This blog post sharing how we made a scrapbook with recycled materials is an old one on the site, but we still love looking back at our kid-made scrapbook! The best thing about a scrapbook using recycled materials is that you can use what you have on hand…even incorporating recycled art or other items. This is a kids craft that you’ll love to hold onto forever! Let’s get started with a recycling bin project that kids will love.
DIY Scrapbook for Kids
A DIY scrapbook made with recycled materials is a fun and creative way for kids to turn everyday items into meaningful keepsakes. Instead of throwing away paper scraps, cardboard packaging, or old magazines, children can repurpose these materials into colorful scrapbook pages filled with memories, drawings, and photos. Recycled crafts like this help children see that ordinary materials can become something new and useful.
Creating a scrapbook also encourages creativity and problem-solving. Kids can experiment with textures, colors, and shapes as they arrange recycled materials onto each page. Using items like ticket stubs, greeting cards, or magazine pictures allows children to personalize their scrapbook and tell their own story. It’s also a simple way to introduce kids to sustainable crafting and environmental awareness.
Scrapbook Using Recycled Materials
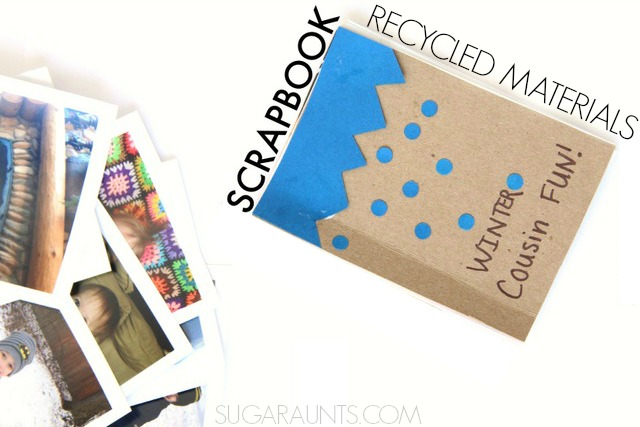
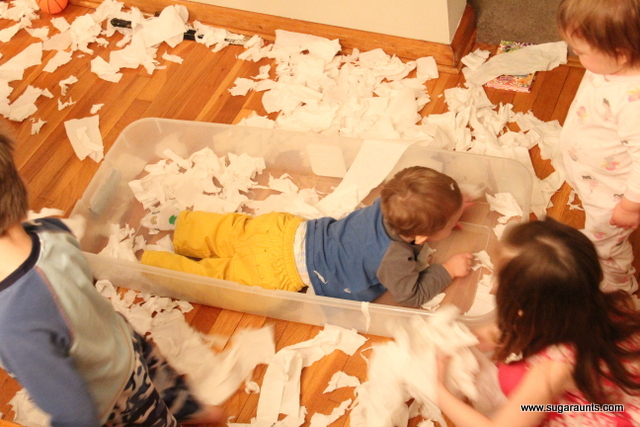
We love using recycled materials in crafts and activities. There’s nothing like grabbing craft supplies from the recycle bin and creating, learning, and playing! We made our own phone picture scrapbook together with the kids using recycled materials and now have a great keepsake of a season of fun with cousins!
The best news is that these are pictures from my phone that I never would have printed off let alone scrap booked into a memory keeper.
There are so many items in your recycle bin (or heading for the trash) that can be used as embellishments in a recycled scrapbook design. Look around the house and see what you can come up with!
Here are some ideas for decorating a scrapbook with recycled items:
Scrap paper
Kids art
Old papers from school
Old school folders
Fabric from clothing that no longer fits
Strips of colored paper- try junk mail!
Paper bags
Old magazines
Envelopes that come in the mail
Refrigerator magnets
Stickers
Old jewelry
Decorative paper from greeting cards
Various types of paper texture: cardboard, egg cartons, fabrics, etc.
Old magazines and catalogs
Junk mail envelopes
Greeting cards
Cereal boxes or food packaging cardboard
Scrap paper from school projects
Newspaper pages
Paper bags
Wrapping paper scraps
Ticket stubs or event programs
Fabric scraps or ribbon pieces
These items can be used as a photo mat for holding photos on the scrapbook page, or you can use the items as accents on the page. The sky is the limit!
Children can cut pictures, letters, and patterns from these materials to decorate scrapbook pages. Even small pieces of cardboard or packaging can become borders, frames, or pockets within the scrapbook. I like using old wrapping paper for background layers of the scrapbook because they hold memories and it’s a great medium for kids to cut. Read about cutting wrapping paper as a developmental tool for kids.
Add a few scrapbooking tools to work with the materials and you are good to go:
Scissors
Glue
Brads
Pens
Markers
Staples
Hole punches to punch holes in paper and use the paper holes as accents
These lists should give you some inspiration to get started!
How to make scrapbook using recycled materials
If you are like me, you always have your phone in your back pocket. A mom has got to capture those cutie pie moments and lugging a big camera around just isn’t an option sometimes. I love having a phone camera always on me a the slightest indication of a gummy baby smile.
How to Make a DIY Scrapbook
Making a recycled scrapbook can be simple and flexible depending on the materials you have available.
Start by creating the base of the scrapbook. Pages can be made from cardboard cut from cereal boxes, construction paper, or thick paper bag material. Punch holes along one side and tie the pages together using yarn, ribbon, or string. Another option is to staple the pages together or glue them inside a folded cardboard cover.
Next, let kids decorate each page using recycled materials. They can glue magazine pictures, add drawings, or attach photos. Small envelopes or folded paper pieces can be glued onto pages to create pockets for storing notes or small keepsakes.
Encourage kids to add titles, captions, or short sentences that describe the memories on each page.
One of the best ways to do this is to just grab some paper shopping bags and staple them together to make pages. Then start laying on the creative scrapbook add-ons.
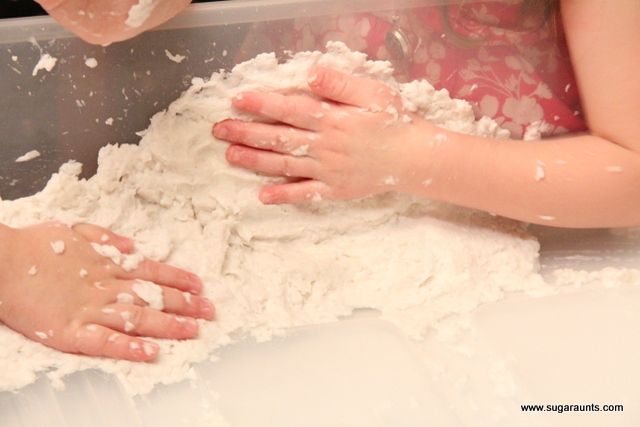
With such access to capturing images, most of us have hundreds or thousands of pictures stored on our phones. Those images usually never get printed! All of those real-life, caught in the moment pictures that tell the story of our lives just get stored away and never to be printed or scrap booked.
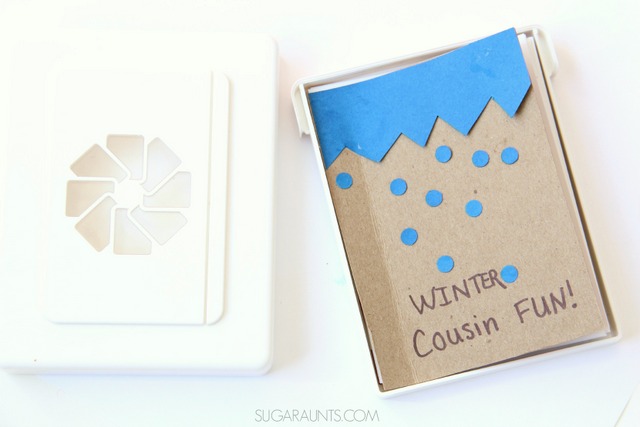
When they arrived in the mail, my kids loved looking at the “story” of our winter. And, these pictures were clear and bright! We decided to make a scrapbook with our high quality pictures using recycled materials.
Here are the directions to make a scrapbook from recycled items:
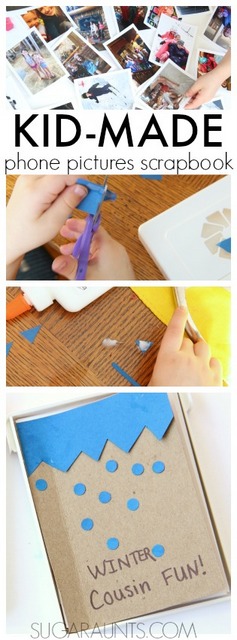
Cut out 2 pieces of cardboard to create a front cover and back cover. Cut the cardboard to the size of the book you want to create. We used a cardboard box to create a front and back cover for our scrapbook. A thin cardboard like a cracker box or cereal box will work best.
Cut paper the same size as the cardboard. This will be pages in your recycled scrapbook. Thicker paper like cardstock or an old folder works best for the pages.
Cut paper, fabric, or cardboard larger than the size of the images. This will be photo mat for each image.
Use double sided tape to attach images to the photo mats.
Add accents or embellishments onto each page: pieces of fabric, old stickers, layering various textured paper, adding strips of cardboard, etc.
Use a hole punch to punch holes in each photo page and in the front cover and back cover.
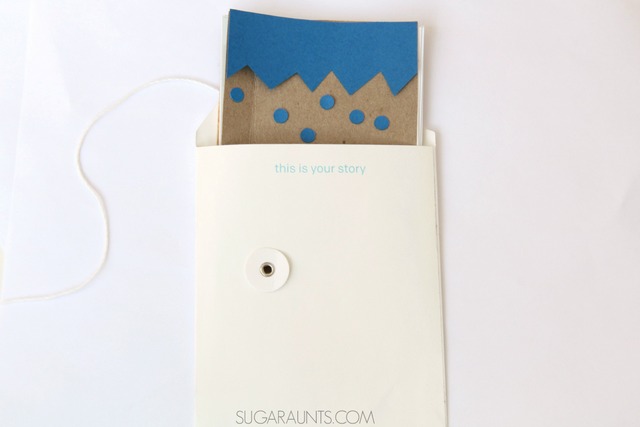
Thread the book together using a strip of recycled fabric, a piece of string, or twine. Tie each hole with the material.
Use recycled paper, ribbon, or scraps from magazines to decorate the front cover. We used scraps of paper to make a top border and falling dots on our scrapbook. You can add decorations to the back side of images as well, even adding written descriptions for each picture in the scrapbook.
Fine Motor Benefits of Scrapbook Making
Creating a scrapbook supports many important fine motor skills that children need for school tasks like writing and cutting. Cutting pictures from magazines helps strengthen the small muscles in the hands while also improving scissor skills.
Tearing paper, gluing small pieces, and placing decorations onto pages all encourage finger coordination and hand control.
Children also practice bilateral coordination when they hold paper with one hand while cutting with the other. When kids write captions or labels for their scrapbook pages, they are practicing handwriting and visual motor skills in a meaningful and motivating way.
Because scrapbook projects combine art, writing, and organization, they provide a rich opportunity to build multiple developmental skills through creative play.
Fun Scrapbook Theme Ideas
Scrapbooks can be created around almost any theme. Giving kids a topic often helps them stay engaged and excited about the project.
Some fun scrapbook themes include:
My Favorite Things
Family Memories
Vacation or Travel Scrapbook
Nature Walk Discoveries
School Year Memories
Favorite Books or Characters
Seasonal Scrapbooks (Fall, Winter, Summer)
Kids can collect pictures, drawings, and small items related to their theme and arrange them creatively across the pages.
Scrapbook Prompts for Kids
Sometimes children need a little inspiration for what to include in their scrapbook. Simple prompts can help guide their ideas.
Try prompts like:
My favorite food is…
My best memory this week…
My favorite place to visit…
Something that makes me happy…
My favorite animal…
My favorite game to play…
Kids can draw pictures, glue images, or write short sentences in response to these prompts.
Colleen Beck, OTR/L has been an occupational therapist since 2000, working in school-based, hand therapy, outpatient peds, EI, and SNF. Colleen created The OT Toolbox to inspire therapists, teachers, and parents with easy and fun tools to help children thrive. Read her story about going from an OT making $3/hour (after paying for kids’ childcare) to a full-time OT resource creator for millions of readers. Want to collaborate? Send an email to contact@theottoolbox.com.
For many adults and children with executive functioning challenges, getting started can feel like the hardest part of any task. Even when a person knows what needs to be done, the brain may struggle with the mental shift required to begin. Trouble getting started is not simply procrastination or lack of motivation; it is often related to the executive functioning skill of task initiation. Individuals may experience trouble starting homework, work projects, daily routines, or even simple tasks around the home. Understanding why task initiation is difficult and learning practical strategies to support the starting process can help reduce overwhelm and build momentum toward completing tasks.
Task initiation is one of the many executive functioning skills that can be a big problem for kids. It happens to all of us. We procrastinate. From the youngest toddler to the oldest among us, we all procrastinate in one way or another. Hey, that stack of bills mixed with junk mail over there on the counter has been calling my name for a couple of weeks now. But procrastination can be a real issue when it gets out of hand or affects every part of life. One of the essential skills that make up executive functioning skills is task initiation.
Task Initiation Challenges
This skill is apparent when you just can’t start a task. Nothing feels urgent and getting started feels impossible!
Task initiation is the executive functioning skill that allows a person to begin a task without excessive procrastination or avoidance. For many adults with executive functioning challenges, starting is often the hardest part of completing anything.
The difficulty is not always motivation. In many cases, the brain simply struggles to shift from thinking about a task to actually doing it.
We’ve all been there, though. Haven’t you felt some of these experiences before:
Feeling mentally “stuck”
Knowing what needs to be done but not starting
Waiting until a deadline creates urgency
Feeling sluggish or unmotivated even when the task is important
This experience is sometimes called activation difficulty or task inertia. Maybe it’s a sink full of dirty dishes or a MESSY car that has you stalled. The problem though, is when every task feels impossible. It’s when nothing feels urgent. You have home tasks and other ADLs and IADLs stacking up, homework consistently undone, bills unpaid, and you are actually not functioning. It’s then that task initiation is a real problem.
Executive functioning research suggests that initiation requires coordination between several cognitive processes including:
Task initiation for non-preferred activities might show up with your child when they are told to clean their room or put on their shoes. As parents, we know the struggle that is getting kids to get moving! However, there is a point when procrastination is normal for kids and when it becomes a problem that influences functional skills.
Task Initiation is one Executive Functioning Skill
Initiating a task, whether it be a preferred activity or one that isn’t so preferred (Hellllllo, math homework!), requires several OTHER executive functioning skills: planning, prioritizing, time management, organization, impulse control, attention, and working memory. Despite all of these potential areas of task completion breakdown, the biggest issue is often just getting started.
These easy strategies are tips and tricks that can help kids get started on a task. Either a big job or a small task can seem overwhelming at times. Try using these strategies to help with task initiation.
Signs of Task Initiation Difficulties
Those who struggle with task initiation skills may experience:
Procrastinating until the last possible moment
Difficulty starting large or complex projects
Feeling overwhelmed before beginning a task
Waiting for pressure or urgency to create motivation
Getting stuck in “thinking about doing the task”
Starting multiple small activities instead of the needed task
Feeling mentally drained before beginning work
Many of us know when we feel stalled or stuck. When this happens we report that once we begin a task, we can continue working. The challenge lies in the transition from intention to action.
What to Do when you have trouble getting started
This is one strategy that can help kids with task initiation. Sometimes, the strategies that you see outlined for procrastination are aimed at older children or high school aged students up through adults.
But what about the kids who struggle with procrastination at a younger age? The kids who are beyond age-appropriate levels of not wanting to initiate tasks can be too young developmentally for the procrastination tips that are typically recommended.
Use a timer to help kids with task initiation
This post contains affiliate links.
This easy trick can help kids with task initiation needed to get started on activities. You’ll need a game timer that can be found in many board games. With your child, identify the task that needs to be done. This may be a big project like cleaning a bedroom or a smaller job like tackling the homework folder.
Next, break down the tasks. You can write them out in list form or write them on post-it notes that can be pulled off and crumbled up as each job is completed.
Once you’ve identified the list of tasks, make a mini-goal to get started.
This might be as simple as just reading through the instructions or starting to clean up toys on the floor.
For this mini-goal, your child can work with the game timer until the sand has all fallen to the bottom. By working until the intended time has passed, your child has started the job and tackled the biggest issue with procrastination: getting started!
There are many game timers on the market that are perfect for addressing task initiation:
This set comes in a combo set with 30-second, 1-minute, 2-minute, 3-minute, 5-minute, and 10-minute increments.
Try this visual timer with a warning light and optional auditory timer.
More tips to help kids get started and overcome procrastination
This is a menu of strategies to help when you have trouble getting started on a task. I like to pair these with the framework I use below (lower in the post).
Break down tasks
Identify the task
Make mini goals
Create a habit tracker
Make a goal journal
Tell someone else what you’ll accomplish
Use a picture schedule for younger kids
Create a contract
Use a timer for the whole task
Reward systems
Visual schedules
Designated time slot to do specific tasks (like a set homework time)
Looking for more information on executive functioning skills? Like my new Facebook page, Executive Functioning Toolbox for informative posts and resources from around the web.
You can check out our Attention page and Organization page here on the site for more executive functioning skill activities.
Executive functions are heavily dependent on attention. Read about the attention and executive functioning skill connection and the impact of attention on each of the executive functioning skills that children require and use every day.
The key to helping with task initiation is using a framework for getting started…not just picking random strategies.
Task initiation framework
When nothing feels urgent, it’s easy to look at the list above and think, “Ok, I’ll set a timer.” But then that doesn’t really help if you can’t actually get started and move from inactivity to completing a multi-step task. That’s where I like to add a strategy. These are concepts viewed through a neuroscience lens, that we can apply to support children or adults to get started with any task where they feel stuck.
You will notice that these concepts build on each other, and that is intentional. This is not a list of disconnected strategies like the list above. That is an important list to have in your therapy toolbox for sure! However, sometimes the menu of strategy ideas need a little more of a framework. Then, you can pick through the strategy list above to find actions tasks that fit in with the individual’s needs.
Helping the Brain Move From “Stuck” to “Started”
Task initiation is not simply a productivity problem. It is a brain-body process involving the prefrontal cortex, motivation systems, and nervous system regulation. When a task feels overwhelming or unclear, the brain may interpret it as a stressor. The nervous system can shift into a protective state that delays action, even when the person wants to begin.
Supporting task initiation means helping the brain move from inertia to activation in a way that feels manageable. Repeating supportive strategies helps the brain form new neural pathways for starting tasks more efficiently over time.
Let’s walk through this framework…
Step 1: Regulate the Nervous System First
If you’re stuck and can’t get started, ramping up to activity is the first step, and the key is letting your nervous system know that it’s safe and able to do the task.
When we can’t start a task, there is most likely some aspect of the “fawn” state happening.
When the brain perceives a task as stressful or overwhelming, the nervous system may shift into a protective state, reducing motivation and mental flexibility. The prefrontal cortex, which is responsible for planning and initiating tasks, works best when the nervous system is in a regulated and alert state.
Strategies that regulate the nervous system help restore access to the brain’s executive systems. Activities such as movement, deep breathing, sensory input, or rhythmic activities can increase alertness and readiness for action.
When the body feels safe and regulated, the brain is better able to engage the networks needed for planning and prioritizing steps, attention, and actually making the first step to initiate the task.
Repeated experiences of regulating before starting tasks help build neural associations between calm activation and productive engagement, supporting long-term neuroplastic change.
Step 2: Create Activation Through Movement
Many adults describe feeling mentally “frozen” or sluggish before starting tasks. Movement can help activate the brain’s arousal systems and increase alertness.
Physical movement stimulates neural pathways involved in dopamine production, which plays a key role in motivation, attention, and task engagement. Even brief bursts of activity such as stretching, walking, heavy work, or rhythmic vestibular movement can increase blood flow to the prefrontal cortex.
Other ideas:
quick walk
stretching or jumping jacks
cold water on the face or hands
breathing exercises
rhythmic music
Movement also helps the nervous system shift from a passive state into a ready-to-act state, making it easier to transition into cognitive work.
When movement becomes a consistent part of the process before beginning tasks, the brain begins to associate activation with action, strengthening pathways involved in initiation.
Step 3: Reduce Cognitive Load
One of the most common reasons people struggle with starting tasks is cognitive overload. When a task feels too large or complex, the brain must hold many pieces of information in working memory at once.
The prefrontal cortex can only manage a limited amount of information at one time. When that capacity is exceeded, the brain may delay action as a protective response.
Breaking tasks into smaller steps reduces the mental load required to begin. Writing down the first step or simplifying the task helps the brain shift from overwhelm to clarity.
This can be as simple as making a list, or a brain dump. Get all of the thoughts swirling in your mind out and onto paper (or your notes app).
Some of our kids prefer using a mind map sheet to get everything out of their thoughts and onto paper.
Repeated experiences of breaking down tasks strengthen neural pathways that support problem solving, planning, and goal-directed behavior.
Step 4: lower activation energy
The brain naturally prefers tasks that require the least effort to begin. When the starting point of a task feels too demanding, the brain may delay initiation.
Definition: lower activation energy- Lowering the energy means making the first step extremely small and accessible. In simplest terms, this means breaking the task into steps. Instead of thinking about completing an entire project, the focus becomes opening a document, gathering materials, or writing one sentence.
Small actions help the brain move from intention to do a task to actually DOING, which activates reward pathways associated with progress. (Love this pathway in neuroplasticity as an OT!)
To do this in a task that needs done, you can try:
Each small step provides feedback to the brain that starting is possible, strengthening neural circuits that support task initiation over time.
Step 5: Create Artificial Urgency
Many people find that they are able to begin tasks when a deadline creates pressure. This is where the timer idea we have above comes into play. This is such a helpful tool because urgency activates the brain’s alertness and motivation systems.
Creating artificial urgency can replicate this effect in a healthy way. Setting a timer for a short work period signals to the brain that the task has a clear beginning and end.
There are executive functioning apps to help with this. We have some listed on our resource on occupational therapy apps.
Timers help shift attention away from the perceived size of the task and toward immediate action.
Other ideas for urgency include:
Set a 10 minute timer to “just start”
Use a visible countdown timer
Tell someone you will check in with them after beginning
Schedule a short work sprint
When individuals repeatedly start tasks during short timed intervals, the brain begins to associate starting with manageable effort rather than overwhelming demand.
Step 6: Pair the Task With a reward
One of the main ideas that help with neuroplasticity in creating positive routines is habit stacking. When we try to get something done that is not as enjoyable to us, we can “stack the habit” with something we DO enjoy.
Motivation systems in the brain are strongly influenced by dopamine, which increases when we engage with things that feel interesting, rewarding, or enjoyable.
Pairing a task with a positive stimulus can increase engagement. Listening to music, working in a pleasant environment, or having a preferred drink nearby can make the starting process feel less demanding.
These small rewards help shift the brain’s perception of the task from threat to opportunity, making it easier to begin.
This will be unique to everyone, but some ideas include:
Play music you enjoy while starting the task
Work near a window or comfortable space
Drink a favorite beverage while beginning
Listen to a podcast during simple tasks
Over time, this pairing can create new associations where the brain connects starting tasks with positive emotional experiences, supporting neuroplastic learning.
Step 7: Build Momentum Through Repetition
Task initiation improves through repeated practice. Each time a person successfully moves from intention to action, neural pathways supporting initiation become stronger.
Momentum is a powerful neurological driver. Once the brain begins a task, it often becomes easier to continue because attention networks and motivation systems are already activated.
The key to building momentum is consistency. When the brain repeatedly experiences the sequence of regulate → activate → start → continue, it begins to automate the process.
Through repetition, the brain gradually becomes more efficient at initiating tasks, supporting long-term changes in executive functioning.
The “Unstuck Loop”
Over time, these strategies create a repeatable pattern:
Regulate → Activate → Simplify → Start → Sustain
This sequence helps the nervous system move from inertia to action, strengthening the neural pathways involved in task initiation and completion.
With repeated practice, the brain becomes more comfortable with starting tasks, making it easier to move from thinking about a task to actually doing it.
A Helpful Perspective
Many adults with executive functioning challenges are not lacking motivation. Instead, the brain may require structure, cues, and activation strategies to initiate tasks.
Once momentum begins, productivity often follows.
Task initiation is a skill that can be supported through environmental design, behavioral strategies, and awareness of how the nervous system influences motivation.
The Impulse Control Journal…a printable resource for helping kids strategize executive functioning skill development. When saying “calm down” just isn’t enough…
When a child is easily “triggered” and seems to melt down at any sign of loud noises or excitement…
When you need help or a starting point to teach kids self-regulation strategies…
When you are struggling to motivate or redirect a child without causing a meltdown…
When you’re struggling to help kids explore their emotions, develop self-regulation and coping skills, manage and reflect on their emotions, identify their emotions, and more as they grow…
Grab the Impulse Control Journal to build organizational strategies, planning, prioritization, habits, and mindset in kids.
Colleen Beck, OTR/L has been an occupational therapist since 2000, working in school-based, hand therapy, outpatient peds, EI, and SNF. Colleen created The OT Toolbox to inspire therapists, teachers, and parents with easy and fun tools to help children thrive. Read her story about going from an OT making $3/hour (after paying for kids’ childcare) to a full-time OT resource creator for millions of readers. Want to collaborate? Send an email to contact@theottoolbox.com.
This blog post on handwriting tricks from November 2016 has been updated to include more handwriting tips and tricks that school based OT professionals use every day. You’ll also have a handwriting email series and free handwriting handouts available in this blog post that you’ll want to grab.
Handwriting Tips Handouts
Handwriting is a struggle for many kids. There are many handwriting tips and tips that can work for kids when they are completing written work. The thing is that some strategies work for some children and something totally different is a success for other children. Handwriting difficulties can be a result of many different issues. From visual perceptual difficulties to pencil grasp concerns, to visual motor integration problems…handwriting is a complex task with many skills working together.
Today, I have an exciting freebie for you.
I have compiled strategies, tips, and tricks for common handwriting concerns.
These free handwriting printables are perfect for trying different strategies to help kids with handwriting needs.
Each printable page can be copied and presented to teachers, parents, colleagues, and any one in the classroom or therapy setting who works with the kids with handwriting needs.
Try using these printable strategies to help with many different handwriting concerns.
Handwriting Help in your Inbox
The printables will arrive in your inbox over a 6 day period. Each day, I will share specific tips related to common handwriting challenges. There will be lins to address these problems in creative ways and Quick Tips for the targeted handwriting issue and Fine Motor Development.
This is Handwriting Help for anyone who works with kids!
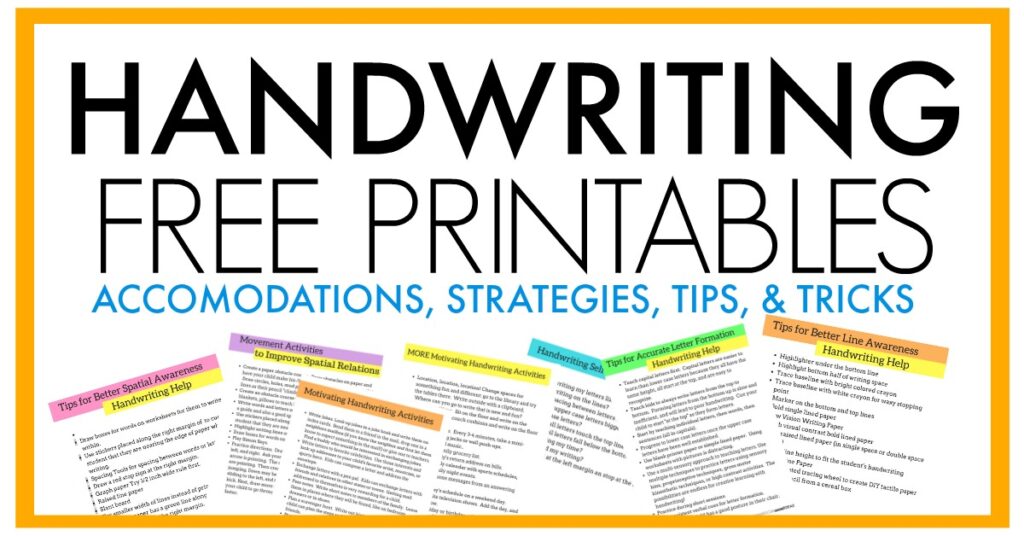
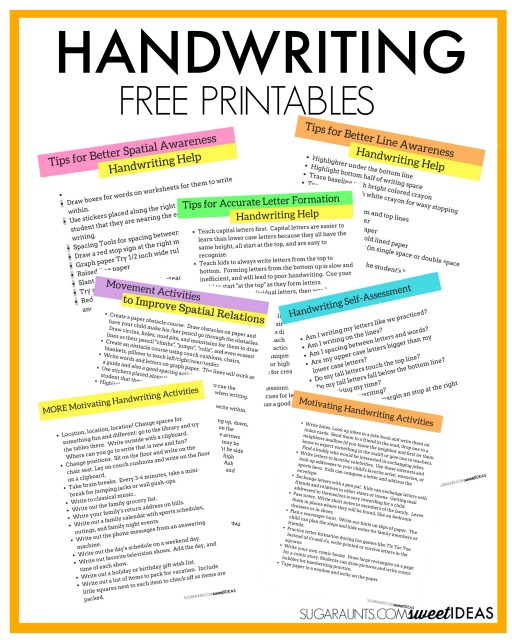
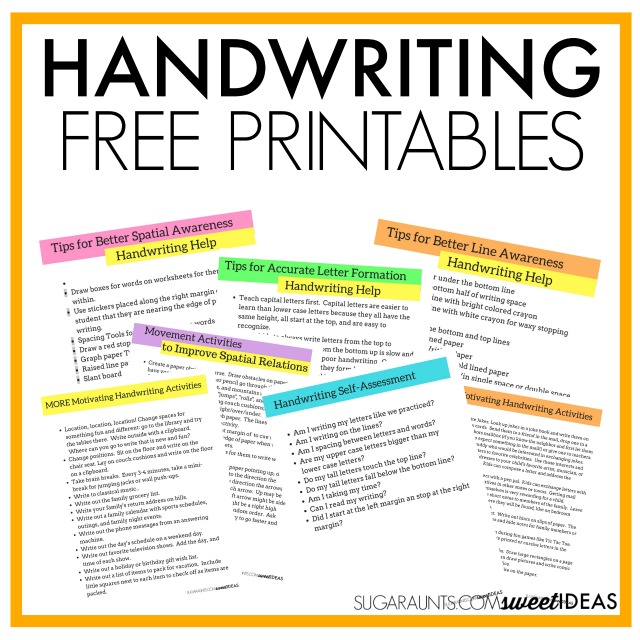
In the FREE printable pack, you will get:
Tips for Better Line Awareness
Tips for Better Spatial Awareness
Tips for Accurate Letter Formation
Movement Activities to Help with Spatial Relations
I hope you join us for 6 days of handwriting help, delivered right to your inbox!
You can use some occupational therapy handwriting tricks to help with common messy writing issues.
100 Handwriting Tips and Tricks
I wanted to put together a few handwriting tricks that we pediatric occupational therapists (and by that I mean OTs AND OTAs!) use day in and day out to support kids with handwriting challenges. These writing tips are some of the tricks you’ll see a school based OT pull out of “thin air”. Meanwhile, this is just the beginning of the OT tips and tricks we have up our therapy sleeves! I hope these help!
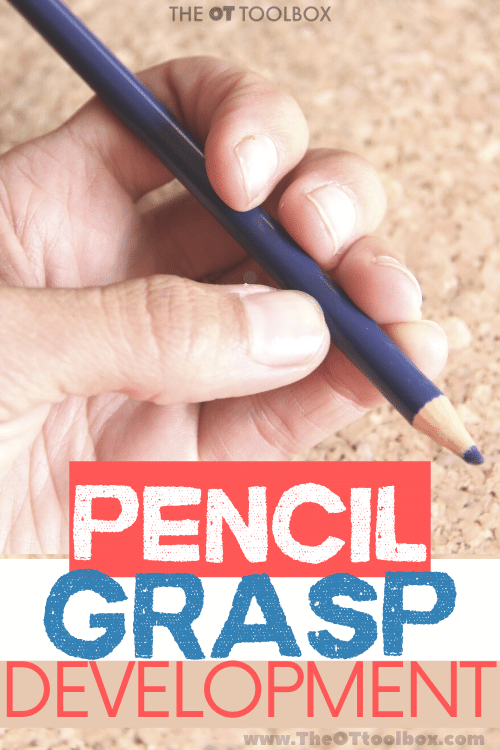
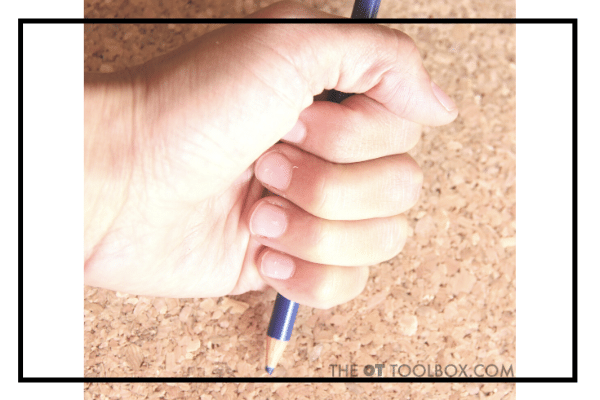
Hand Position and Pencil Grasp
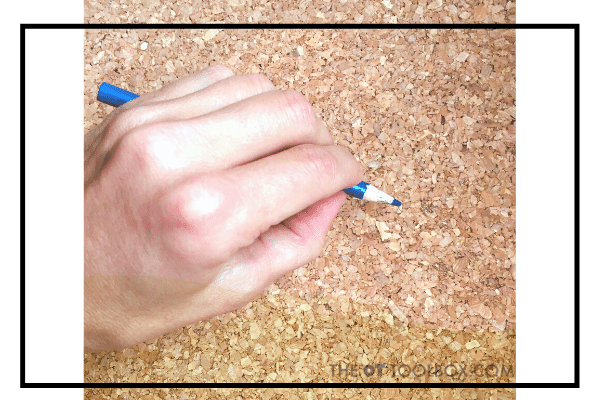
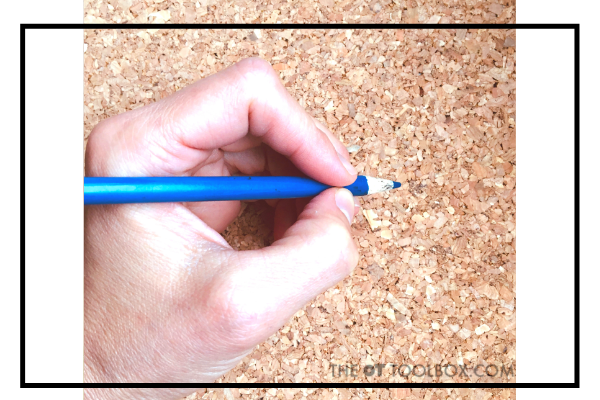
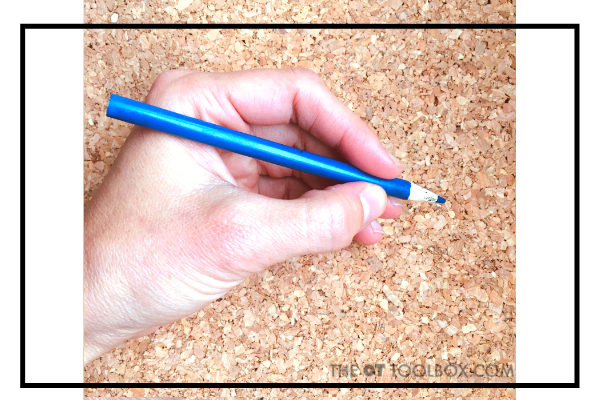
Use short pencils or broken crayons to encourage a tripod grasp.
Place a small pom-pom under the ring and pinky fingers to promote hand separation.
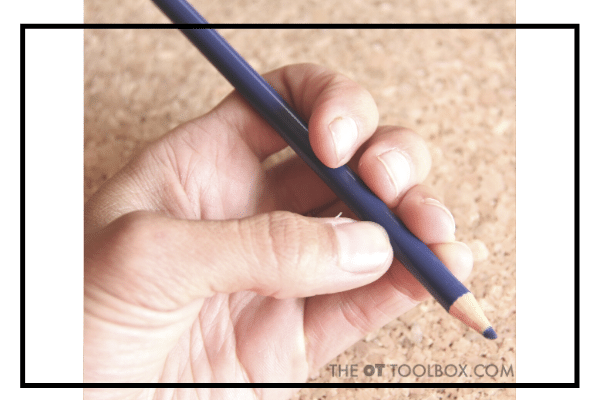
Try triangular pencils to support proper finger placement.
Use pencil grips if a child fatigues quickly while writing.
Encourage holding the pencil closer to the tip for better control.
Practice picking up small beads to strengthen finger grasp.
Use tweezers to build finger strength for handwriting.
Draw small circles with fingertips to warm up writing muscles.
Practice rolling small balls of play dough between fingers.
Use clothespins to strengthen finger muscles.
Posture and Positioning
Sit with feet flat on the floor for stability.
Keep hips all the way back in the chair.
Maintain a straight back while writing.
Adjust chair height so elbows rest comfortably on the table.
Use a slant board to support wrist positioning.
Try writing on a vertical surface like a wall or easel.
Encourage forearms to rest lightly on the table.
Use a foot stool if feet don’t reach the floor.
Practice writing on a clipboard while standing.
Ensure the paper is placed slightly tilted.
Paper Position
Tilt paper slightly left for right-handed writers.
Tilt paper slightly right for left-handed writers.
Stabilize paper with the helper hand.
Use tape to keep paper from sliding.
Use clipboards for stability.
Draw margins to support spacing.
Add highlighting to the writing line.
Use raised line paper for tactile feedback.
Practice writing inside boxes before writing on lines.
Use checklists or desk letter strips for letter formation and self-correction.
Encourage editing after writing.
Reduce copying demands when needed.
Provide alternative writing tools when appropriate.
Independence and Practice
Encourage journaling daily.
Practice writing grocery lists.
Write notes to family members.
Label drawings with words.
Write directions for games.
Practice writing menus for pretend restaurants.
Write short thank-you notes.
Copy favorite song lyrics.
Write captions for photos.
Practice handwriting during fun activities, not just schoolwork.
Even MORE handwriting tips and tricks that we share in OT consultations include:
Teach letters in groups, or families of similar letters. We talk all about letter families in another blog post. It makes total sense to teach letters this way because of the handwriting motor plan that is established in pencil movements.
Use consistent verbal and visual cues.
Use consistent patterns to form letters. By this I mean you should promote the automaticity and fluidity that kids establish when they are using the same models for letter formation.
Use progressive steps of handwriting instruction. This means that you will want to follow a predictable teaching pattern in handwriting. This will look like modeling the letter, tracing, fading of cues, copying, dictating letter formation, composing letters, and self monitoring the formation of letters.
Speaking of tracing, it has it’s time and place. Don’t just plop down a handwriting worksheet and expect kids to trace the letters correctly and then establish good handwriting skills. There’s more to it than that!
Match the size of lined paper with the student’s handwriting abilities. Here is a list of free handwriting paper to browse.
Use pictures or images as a visual cue on the writing lines. This gives a prompt for letter placement and letter size. Some examples are drawing a house in the double rule writing space. You might also see a cloud on the top line of writing paper and grass on the baseline. Or another example is a worm below the ground or baseline for tail letters.
Another example of a writing trick that offers a visual cue is to use a highlighter for the writing space for letter size and spacing. Or, you might see a school based OT practitioner use a highlighter to draw a rectangle for the word.
Position a visual cue like a letter strip, or the material the student is copying right above the writing paper so the student needs to shift their eyes up and down, and not their eyes and whole head. This is a near point copying trick.
For more tips and tricks, check out our book, The Handwriting Book. We tried to cover all aspects of handwriting by addressing the underlying skills that play into writing.
The Handwriting Book is a comprehensive resource created by experienced pediatric OTs and PTs.
The Handwriting Book covers everything you need to know about handwriting, guided by development and focused on function. This digital resource is is the ultimate resource for tips, strategies, suggestions, and information to support handwriting development in kids.
The Handwriting Book breaks down the functional skill of handwriting into developmental areas. These include developmental progression of pre-writing strokes, fine motor skills, gross motor development, sensory considerations, and visual perceptual skills. Each section includes strategies and tips to improve these underlying areas.
Strategies to address letter and number formation and reversals
Ideas for combining handwriting and play
Activities to practice handwriting skills at home
Tips and strategies for the reluctant writer
Tips to improve pencil grip
Tips for sizing, spacing, and alignment with overall improved legibility
Colleen Beck, OTR/L has been an occupational therapist since 2000, working in school-based, hand therapy, outpatient peds, EI, and SNF. Colleen created The OT Toolbox to inspire therapists, teachers, and parents with easy and fun tools to help children thrive. Read her story about going from an OT making $3/hour (after paying for kids’ childcare) to a full-time OT resource creator for millions of readers. Want to collaborate? Send an email to contact@theottoolbox.com.
After a long day at school, many children come home and seem to fall apart. You might see them come home and begin crying, yelling, shutting down, or refusing to do anything. This after-school meltdown (or sensory breakdown) isn’t just about being tired or hungry.
For many kids, especially those with sensory processing challenges or executive functioning difficulties, school requires an enormous amount of self-regulation. It all becomes a fight or flight response at a certain point.
Why do After School Meltdowns Happen?
After-school meltdowns are often connected to nervous system dysregulation after a long day of managing expectations, sensory input, and social demands at school.
Many children spend the school day using a great deal of energy to stay focused, follow routines, and regulate their behavior. By the time they arrive home, their nervous system may be fatigued and less able to manage stress. From a nervous system perspective, this can mean the child shifts out of a calm, regulated state and into a more reactive state where emotions feel harder to control.
Polyvagal Theory helps explain why this happens. Throughout the day, a child’s nervous system is constantly scanning for cues of safety or stress. When a child feels safe and regulated, they are able to engage, learn, and interact with others.
However, after a long day of demands, their nervous system may move into a fight-or-flight response. This can show up as irritability, frustration, crying, or emotional outbursts when they finally reach the safety of home.
What is after school restraint collapse?
After-school restraint collapse is another term you may have heard of. This is another way to describe after school meltdowns.
It’s a pattern many families notice when children come home from school and suddenly seem overwhelmed, emotional, or exhausted. During the school day, children often work very hard to follow rules, manage sensory input, stay focused, and control their behavior in a structured environment.
This effort requires a great deal of self-regulation and energy. When the school day ends and the child returns to a safe and familiar space, the nervous system may finally release that built-up tension.
As a result, children may cry, become irritable, argue, or appear unusually tired. This response is not intentional misbehavior; rather, it reflects the body and brain decompressing after a long period of maintaining control and meeting expectations.
sensory overload after school
What’s happening here? Kids spend hours sitting still, following directions, managing transitions, and trying to fit in. By the time they get home, their emotional and sensory “cup” is empty. The meltdowns you see are often the result of holding it all together all day long. Understanding why this happens is the first step in helping kids decompress, reset, and build the tools they need to self-regulate at home.
After a long day at school, some kids come home dysregulated (in a state where regulation isn’t happening) and it can be easy to miss the signs. It might look like the child that crashes and takes a nap as soon as they walk in the door (hello, teenagers!) or the child that is clingy/whiny/jumping off the walls during the after school hours. These actions aren’t them having a “bad day” or “acting out.” It’s actually clues that the child’s nervous system is overwhelmed during daily tasks and the tasks of the day. (What we call occupations…like learning, playing, socializing, riding the bus, and managing new routines).
In today’s YouTube video and visual guide, we break down signs of dysregulation during occupation, including:
Trouble with organization, attention, or executive function
Sensory overload from sound, light, touch, or smell
Irrational, impulsive, or aggressive behaviors
Working memory difficulties
Panic attacks, sleep troubles, or toileting challenges
Poor fine motor skills or handwriting
A tendency to shut down, give up, or resist tasks
They might not hear you
Here’s the full list in our short video:
Next, let’s talk about some questions that come up from parents regarding sensory overload after school.
FAQ: After-School Meltdowns and Emotional Regulation in Kids
Why does my child melt down after school?
Many kids “hold it together” during the school day. They are working hard to suppress big emotions, masking sensory sensitivities, and meeting expectations. When they get home to their safe space, that built-up stress is released in the form of a meltdown. It’s a release of emotional pressure, not a sign of defiance or misbehavior.
How can I help my child decompress after school?
Create a predictable after-school routine with calming options: quiet time, a snack, deep pressure activities like a weighted blanket, or movement like swinging or jumping. Let your child have a choice in how they unwind. This gives them some control and supports regulation. Try these after-school calming strategies.
What are the signs of emotional dysregulation in kids after school?
Some common signs include irritability, withdrawal, meltdowns, trouble transitioning, refusal to talk, or physical symptoms like headaches. These behaviors are often a sign that your child is overstimulated or emotionally drained. Explore signs of dysregulation
Why does my child seem fine at school but fall apart at home?
This is known as “masking.” Many children, especially those who are neurodivergent, work hard to appear regulated in public. At home, where they feel safe, they release the emotions they’ve been suppressing. This isn’t manipulation. They are actually showing signs of emotional exhaustion. Read more about masking and meltdowns
What calming strategies help with after-school meltdowns?
Try a sensory bin, a body sock, drawing/coloring, swinging, or deep breathing. Some children benefit from heavy work (proprioceptive) activities like wall pushes or carrying a backpack. Check out these heavy work activities
What are after-school sensory needs and how can I support them?
Sensory needs after school may involve a need for quiet, movement, oral input (like chewing), or touch. Pay attention to your child’s behavior and give sensory-rich but calming input after school. Use our calm down corner ideas
How can I prevent after-school meltdowns in my child?
Build in time for transition after school. Avoid rushing into homework or structured activities. Let your child decompress and refuel. Create a consistent routine, and reduce extra demands during that time. Use a sensory-friendly visual schedule.
Why do ADHD kids hold it together at school and then crash at home?
ADHD brains are working extra hard to stay organized, focused, and quiet at school. That effort can be exhausting, and home becomes the place they release the stress. Support them with empathy and structure, not punishment.
What are some after-school routines that help neurodivergent kids?
Routines that include sensory breaks, low-demand time, a calming activity, and predictable structure help reduce meltdowns. Use visual schedules or simple picture cards to help kids know what’s next.
How do I support emotional regulation at home after school?
Normalize big feelings and teach self-regulation strategies. Use visual supports, sensory tools, and lots of co-regulation. Focus on connection before correction. Browse self-regulation activities
How to help after school meltdowns
After-school meltdowns are common in kids who hold it together all day at school, only to release their emotions the moment they get home. If you’re wondering how to help a child who melts down after school, it starts with understanding that this behavior is a result of exhaustion from managing expectations, transitions, and sensory input throughout the day.
These after-school meltdowns in kids often happen because children are finally in a safe space where they can decompress.
One effective after-school meltdown strategy is to create a calming after-school routine with quiet time, a healthy snack, and sensory activities.
Parents searching for ways to help kids decompress after school can try setting up a predictable transition period with activities like deep breathing, stretching, or time in a sensory corner.
Knowing how to calm a child after school begins with giving them space, avoiding questions right away, and using consistent strategies that meet their unique sensory or emotional needs.
These calming techniques are not only effective in managing meltdowns after school, but also support emotional regulation in the long term.
Having a set strategy list is key. For developing kids, emotional regulation and executive functioning skills impact not just learning but function. When it comes to emotions, regulating behaviors, and the mental skills of executive functioning, you can see how all of these areas play a role in everything we do on a day to day basis.
Some other ideas for educators include being proactive in the classroom. This actually helps the student during the day because short movement breaks support learning. Educators: Set up simple brain breaks or sensory corners.
The therapist on the team can help to share supportive strategies and tools with families to help them carry over regulation strategies at home.
And finally, the parent can bring it all together by creating a transition routine to help kids shift from school to home without becoming overwhelmed. A huge component is the impact of screens too. This screentime checklist can help.
This is where co-regulation becomes important. Children often need the support of a calm adult to help their nervous system return to a regulated state.
Instead of immediately asking questions about the day or moving into homework routines, it can help to first create a transition period that allows the child’s body to reset. Quiet connection, predictable routines, and a calm presence can help signal safety to the nervous system.
Short brain breaks after school can also support regulation. Movement activities, deep breathing, outdoor play, or sensory-based activities help the body release tension and organize sensory input from the day.
Basically, I tell my parents that they need to first focus on arousal level. They are coming from a highly stimulating environment. If they are bombarded with questions about their day, expectations for homework, and rushing into the after school activities, they don’t have a chance to reset.
We can help the child by offering different types of stimulation that typically decrease arousal (slow, rhythmic, and gentle sensations, heavy work, removal of excess sensory stimulation, and deep touch pressure and proprioception).
Then, after the child is out of this fight or flight state, you can offer opportunities for safe participation. This is things that make them feel safe to allow participation.
These breaks give the nervous system an opportunity to shift out of survival mode and back toward a calmer, more regulated state where conversation, homework, and family activities become easier to manage.
Self Regulation Support Packed with visuals, charts, and strategies kids can use throughout the day, perfect for home or school. Get it in the shop. Members: get it here.
Sensory Diet Cards + Sensory Activity Lists Build a sensory strategy system that helps meet individual needs, even in busy classrooms. Get it in the shop. Members: get it here.
Classroom + Home Connection Many students hold it together all day… until they don’t. When kids walk through the door after school and instantly melt down, it’s often because of underlying sensory or regulation challenges that built up throughout the day.
P.S. All of these resources (plus more) are included in your OT Toolbox Membership. It’s your one-stop spot for back-to-school therapy tools!
The Sensory Lifestyle Handbook walks you through sensory processing information, each step of creating a meaningful and motivating sensory diet, that is guided by the individual’s personal interests and preferences.
The Sensory Lifestyle Handbook is not just about creating a sensory diet to meet sensory processing needs. This handbook is your key to creating an active and thriving lifestyle based on a deep understanding of sensory processing.
Colleen Beck, OTR/L has been an occupational therapist since 2000, working in school-based, hand therapy, outpatient peds, EI, and SNF. Colleen created The OT Toolbox to inspire therapists, teachers, and parents with easy and fun tools to help children thrive. Read her story about going from an OT making $3/hour (after paying for kids’ childcare) to a full-time OT resource creator for millions of readers. Want to collaborate? Send an email to contact@theottoolbox.com.
Read below to learn about visual saccades and learning in kids, including how saccades affect learning, more about what are visual saccades, or visual scanning, and what saccadic movement looks like. You’ll also find information on saccades and smooth eye movements and the visual processing needs that impact learning. This information on vision can be helpful for the occupational therapist working with a child or student with vision related learning challenges as a result of visual saccades.
What Are Saccadic Eye Movements?
Saccades are quick, precise eye movements that allow the eyes to jump from one target to another. These movements help the brain rapidly shift visual attention so we can scan words while reading, move between objects in the environment, or look back and forth between items during daily activities.
Instead of moving smoothly across the visual field, the eyes make these rapid jumps to bring new information into focus. Saccades work together with other visual skills like visual tracking, visual attention, and visual perception to help the brain process visual information efficiently.
Children rely heavily on saccadic eye movements during school tasks. Reading lines of text, copying from the board, solving math problems, and scanning worksheets all require accurate and well-controlled saccades.
What Is the Function of a Saccade?
The primary function of a saccade is to quickly shift the eyes from one visual target to another so the brain can gather new visual information. This ability allows a person to scan the environment, locate objects, and move their visual attention efficiently.
In children, this skill supports many important tasks, including:
Reading across a line of text
Copying information from the board to paper
Scanning worksheets for answers
Tracking moving objects during play
Shifting attention between visual targets
Efficient saccadic movements allow children to move their eyes quickly while maintaining accuracy and visual focus.
What Do Saccades Indicate?
Saccadic eye movements provide information about how well the visual system and brain are coordinating eye movement control. When saccades are accurate and well timed, they support efficient reading, visual attention, and learning.
However, when saccadic movements are poorly controlled, children may show signs such as:
Losing their place while reading
Skipping words or lines
Difficulty copying from the board
Slow visual scanning
Eye fatigue during schoolwork
These signs can sometimes be mistaken for attention problems when the underlying challenge may involve visual processing or oculomotor control.
As therapists, we are often asked to provide consultation services to a child who cannot copy from the board, from one paper to another, frequently loses their place while reading, and has frequent errors in spelling and writing tasks, along with sloppy handwriting. These children are typically in first or second grade, maybe even third. They are good students who appear to be struggling for some unknown reason. An underlying vision concern may be the culprit of these student’s difficulties, with the underlying concern being impaired saccades, or visual saccadic movements.
What are Saccades?
Have you heard the term, visual saccades before? Maybe not! Let’s break this down into an explanation…
Saccades Definition:
Saccadic movement, or more commonly known as saccades, is the ability of the eyes to move in synchrony from point A to point B rapidly WITHOUT deviating from the path.
Typically, we look for these patterns to be established in left/right and top/bottom patterns as they are the easiest to identify.
However, if the saccadic movement is not impaired, the eyes should be able to move in all directions in synchrony between two or more given points.
Difference between Saccades and Pursuits
Before moving on, I want to clear up the difference between saccades and smooth pursuits.
These two are often confused, but are really very difference. Saccades and smooth pursuits are the two parts of eye teaming.
Smooth pursuits allow visual tracking of a moving item while saccades allow synchronized, rapid eye movement between two or more given points such as in visual scanning.
What are Impaired Saccades?
Impaired saccadic movement is when the eyes do not move in synchrony in a designated pattern such as left/right and top/bottom.
They may jump randomly or move in uncoordinated patterns that can lead to confusion of where the child was previously in reading and written work.
What Does it mean to have Problems with Saccades
Below is a simple passage that we would expect a first grader to be able to read and what they might read with an impairment of saccadic eye movement.
The black cat sat next to the pumpkin. The black cat liked the pumpkin. The black cat meowed at the pumpkin.
This is what a child with impaired saccadic eye movement may have read:
The cat sat to pumpkin. The black cat liked pumpkin. The cat meowed the pumpkin.
This example is a demonstration of the “jumping” that may occur when reading or copying a sentence. While the child was reading, they may have stumbled and corrected themselves realizing they were not in the right spot and missing words along the way.
Children who present with impaired saccades ofen times are shy when reading out loud to peers and adults because of this.
Identifying Saccadic Impairments
Impaired saccadic movements are very difficult to see in screenings. The most common presentation of impaired saccadic movement is slight jerks, or jumps at the midline or outer edges of field of vision. They are so small, that they can be missed or mistaken for a twitch. Despite their small outward appearance, impaired saccadic movement can have significant impacts on the child’s learning.
In therapy or a classroom setting, having a child read the letters of a simple word search from left to right and top to bottom can provide an indication if they are unable to follow structured patterns with supports such as pointing with a finger, or covering up the lines under the one the child is looking at.
It is unclear what causes saccadic movement impairments in children. It is clear however, that the child’s eyes have not learned to move in structured patterns between two points rapidly, which can significantly inhibit the learning process.
Why Visual Attention Matters for Learning
Visual attention is the ability to focus your eyes and brain on what matters while filtering out distractions. It plays a key role in how kids learn and function in the classroom. From reading across a line of text to copying from the board or tracking moving objects, visual attention is essential for school success.
This skill overlaps closely with saccadic eye movements. The quick jumps our eyes make from one visual point to another. When visual attention is weak, a child may lose their place while reading, skip lines, or struggle to copy from a distance. These issues often present as trouble with reading fluency, handwriting, or task completion, especially in fast-paced classroom settings.
The Impact of Shortform Video on Visual Skills
Many children today spend hours watching shortform video content like YouTube Shorts, Instagram Reels, and TikToks. These videos shift scenes rapidly, are designed to grab attention instantly, and rarely require sustained focus. While entertaining, they don’t promote the kind of prolonged visual engagement kids need for schoolwork.
Instead of training the brain to hold attention on a steady visual target, this kind of content encourages constant scanning and shallow focus. Over time, this can affect a child’s ability to engage in tasks that require visual endurance…needed for tasks like reading, writing, or completing a worksheet. The visual system becomes wired for quick novelty rather than sustained attention, which is a skill required for academic success.
What Parents and Teachers Can Do to Help
Parents, educators, and therapists can help by being intentional about building visual attention through meaningful activities. Set limits around passive screen time, especially shortform video content. Encourage games and play that involve scanning, searching, and visual tracking. Some ideas include:
“I Spy,” memory games
Word searches
Flashlight tag
Scanning a wall for alphabet letters or shapes
In therapy sessions, focus on saccadic exercises that also build visual endurance. This can be activities like:
Tracking a moving object with the eyes
Scanning for items in a cluttered scene
Using printable worksheets that require visual jumps between targets.
Simple adjustments like minimizing background clutter and increasing contrast in materials can also support attention and reduce fatigue
Finally, communicate with families about what you observe in therapy and how they can support visual attention at home. Offering structured breaks, reading together without distractions, and incorporating movement-based eye activities can help balance screen exposure and support the development of strong visual systems.
Signs of Saccadic Movement Impairments in the Classroom
Like many underlying vision concerns, screenings alone cannot determine impairments.
Some supporting signs that a child may have a saccadic movement impairment can be found below:
• Difficulties copying work from the board to a paper without errors or omission of words • Difficulties copying work between two papers without errors or omission of words • Difficulties reading passages of work, specifically 2 or more lines of text • Losing place when reading frequently • Utilizing a finger to track when reading • Frequent errors when spelling • Poor spacing and orientation to the line when writing
Final Note on Impaired Saccadic Movements
Saccades plays a crucial part in eye teaming, reading and writing. When it is impaired, the child may experience high levels of frustration, embarrassment and difficulties with their daily reading and writing tasks. Like many underlying vision deficits, impaired saccadic movements has many variations in presentation, and should be monitored closely by therapists and educators to ensure referrals to the developmental optometrist are made when necessary.
Looking for more information on vision? Check out my OT Vision Screening Packet for helpful handouts and a screening tool.
Occupational Therapy Vision Screening Tool
Occupational Therapists screen for visual problems in order to determine how they may impact functional tasks. Visual screening can occur in the classroom setting, in inpatient settings, in outpatient therapy, and in early intervention or home care.
This visual screening tool was created by an occupational therapist and provides information on visual terms, frequently asked questions regarding visual problems, a variety of visual screening techniques, and other tools that therapists will find valuable in visual screenings.
This is a digital file. Upon purchase, you will be able to access the 10 page file and print off to use over and over again in vision screenings and in educating therapists, teachers, parents, and other child advocates or caregivers.
More Visual Processing Posts you will love:
Learn how the eyes work together with this explanation of what visual convergence is and why it matters for reading and learning.
Some visual challenges aren’t always obvious. Read about the visual problems you cannot “see” that impact classroom performance.
For even MORE on visual saccades and the impact visual skills play in learning, you will want to join our free visual processing lab email series. It’s a 3-day series of emails that covers EVERYthing about visual processing. We take a closer look at visual skills and break things down, as well as covering the big picture of visual needs.
In the visual processing lab, you will discover how oculomotor skills like smooth pursuits make a big difference in higher level skills like learning and executive function. The best thing about this lab (besides all of the awesome info) is that it has a fun “lab” theme. I might have had too much fun with this one 🙂
Join us in visual processing Lab! Where you won’t need Bunsen burners or safety goggles!
Saccades are a normal and essential part of vision. They allow the eyes to gather visual information quickly and efficiently.
Problems arise only when the movements are inaccurate, slow, or poorly coordinated. When this occurs, children may struggle with tasks that require visual scanning, reading, or shifting visual attention.
With practice and targeted activities, saccadic eye movement skills can often improve, helping children become more efficient in school tasks.
What Is the Difference Between Saccades and Nystagmus?
Saccades and nystagmus are both eye movements, but they serve very different purposes.
Saccades are intentional, rapid eye movements that shift visual focus from one object to another. These movements are controlled and purposeful.
Nystagmus, on the other hand, involves involuntary eye movements that occur repeatedly and rhythmically. These movements are not under voluntary control and are often associated with neurological or vestibular conditions.
While saccades are necessary for everyday visual tasks like reading and scanning, nystagmus can interfere with visual stability and clarity.
What Causes Abnormal Saccades?
Several factors can contribute to difficulty with saccadic eye movements. In children, these challenges may be related to:
Immature visual motor development
Oculomotor control difficulties
Visual processing challenges
Neurological conditions
Vision disorders that affect eye coordination
Sometimes children develop compensatory strategies, such as moving their head instead of their eyes or using their finger to track words.
Symptoms of Saccadic Eye Movement Difficulties
Children with saccadic eye movement challenges may show signs such as:
Losing place while reading
Skipping words or lines
Difficulty copying from the board
Slow reading speed
Head movements instead of eye movements
Poor visual scanning in worksheets or games
Teachers may notice that the child appears inattentive during reading tasks or struggles to keep up with written work.
Saccadic Eye Movement Activities
Occupational therapists often use playful activities to help children strengthen visual scanning and eye movement control.
Here are some effective saccadic eye movement activities:
Letter Jump Activity
Write letters on two sides of a page or wall. Ask the child to quickly look from one letter to the next without moving their head.
Sticker Target Game
Place small stickers on a wall or paper. The child shifts their eyes quickly between targets as you call them out.
Flashlight Tag
In a dim room, shine a flashlight on different objects and have the child move their eyes quickly to locate each target.
Word Search Activities
Word searches encourage visual scanning and fast eye movements between letters.
Craft Stick Tracking
Write letters or numbers on craft sticks and hold two up at a time. The child looks quickly between them to identify each symbol.
A Pediatric Occupational Therapist’s Perspective
When I work with a child who has difficulty with saccadic eye movements, I often explain to parents and teachers that the child’s eyes and brain are simply having trouble coordinating quick visual jumps between targets.
For example, a child who struggles with saccades may lose their place when reading or have difficulty copying from the board because their eyes cannot efficiently move back and forth between visual targets. This can make school tasks feel slow, frustrating, and exhausting.
During therapy sessions, I use playful activities that strengthen the connection between the eyes and the brain. Games that involve scanning, searching, or quickly shifting visual attention help the child practice these eye movements in a fun and motivating way.
I also reassure parents and teachers that these challenges are not related to intelligence or effort. Instead, they reflect how the visual system is developing. With practice and the right supports, many children can improve their eye movement control and become more confident with reading and classroom tasks.
Colleen Beck, OTR/L has been an occupational therapist since 2000, working in school-based, hand therapy, outpatient peds, EI, and SNF. Colleen created The OT Toolbox to inspire therapists, teachers, and parents with easy and fun tools to help children thrive. Read her story about going from an OT making $3/hour (after paying for kids’ childcare) to a full-time OT resource creator for millions of readers. Want to collaborate? Send an email to contact@theottoolbox.com.
Looking for a consistent way to support fine motor skills all year? This yearlong fine motor system includes seasonal activity kits and monthly data collection tools to support planning and progress monitoring.
If fine motor planning and data collection feel overwhelming, you’re not alone. This done-for-you yearlong bundle organizes seasonal activities and monthly screening tools in one system.
If you’re looking for a playful way to support fine motor skills, these jungle finger puppet printables are a fun activity for kids. Finger puppets are a favorite in occupational therapy because they encourage finger isolation, hand strength, and coordination while also promoting imaginative play. Simply print the free finger puppet pages, cut them out, and let kids bring jungle animals to life through storytelling, pretend play, or group activities. This simple jungle animal activity works well in therapy sessions, classrooms, or at home and is an easy way to combine creativity with skill-building.
jungle finger puppet printables
Today, we have a free printable set of paper finger puppets you can print off and start using in play activities to support fine motor skills. Finger puppets are a simple yet powerful tool for supporting fine motor development, especially in the areas of finger isolationand separation of the sides of the hand, two foundational skills needed for tasks like writing, buttoning, and manipulating small objects.
How Finger Puppets help with Finger Isolation
Using finger puppets encourages finger isolation, which is the ability to move one finger at a time while keeping the others still. When children animate each puppet with a different finger, they must consciously engage and control that finger’s movement. This is especially beneficial for improving dexterity and coordination, which are critical for functional tasks like pressing keys on a keyboard or forming legible letters.
How finger puppets help with Separation of the Sides of the Hand
Finger puppets also promote separation of the sides of the hand, which refers to the functional division between the thumb/index/middle fingers (used for precision tasks) and the ring/little fingers (used for stability). When kids wear puppets on their thumb, index, and middle fingers while the ring and pinky remain curled into the palm for support, they’re naturally strengthening this motor pattern. It mirrors the hand positioning needed for tasks like holding a pencil or tying shoes.
Use these jungle animal finger puppets to help kids develop fine motor skills through play! Finger puppets are a common tool in occupational therapy toolboxes and working on isolation skills is key to helping kids with dexterity. So, using these jungle animal finger puppets is a no-brainer when it comes to developing fine motor skills. Add these printable finger puppets to a jungle theme in therapy or learning.
As always, if the information on finger puppets and finger isolation helps you, or you create similar activities please link to this page and tag The OT Toolbox on social media.
Improve Finger Isolation with Finger Puppets
Today, I’m sharing jungle animal puppets designed to promote finger isolation and dexterity. Finger puppets are a great way to develop and refine the skill of finger isolation.
Finger isolation refers to the ability to move one finger at a time. Within the action of isolating a finger from the rest of the hand, there are precise motor actions. This dexterous movement allows the finger to move on it’s own, separate from the rest of the hand. This refined motor skill is needed for functional tasks like typing, pointing, holding up one finger, and many other functional tasks.
It can be difficult for children to develop finger isolation and use refined motor movements during functional tasks such as pencil grasp, typing, or shoe tying. In fact, when these tasks are difficult, we often times don’t see a combined motor effort including separation of the sides of the hand, refined arch development, or finger isolation.
That’s where these printable Finger Puppets come into play!
When children use finger puppets, they are incorporating many motor skill areas into one activity:
Finger isolation (One finger moving in separation from the rest of the hand)
Distal joint flexion (bending the DIP and PIP joints in isolation from the MP joint)
Separation of the sides of the hand (Moving the thumb, pointer fingers while the middle, ring, and pinky fingers stabilize)
Arch refinement (Development of the arches of the hand, which are strengthened by individual finger use and hand side separation)
Eye-hand coordination (moving the fingers in coordination with visual input)
Visual convergence (Moving the eyes as a team from a far point to a near point)
Visual Tracking (Moving the eyes to follow a moving target)
Finger puppets help in so many ways that transfers not just to precise motor tasks, but the bigger picture, too: Reading, handwriting, learning, sports, tool manipulation (scissors, utensils, etc.) and much more!
I actually have created many versions of these finger puppets (you’ll see more here soon on the site), but they originated in our Fine Motor Kits, which work on many areas of fine motor development.
If you’ve grabbed one of our Fine Motor Kits, then you may have seen a version of these finger puppets in different themes. Check out the Fine Motor Kits to find tons of resources and activities to develop fine motor skills:
Today’s resource is a jungle themed activity. These jungle finger puppets go really well when using a jungle theme in preschool, kindergarten, or older grades. I love offering free occupational therapy resources, and these jungle animal finger puppets are just that!
You can grab these free finger puppet templates by entering your email address into the form below. They are print-and-go OT resources where each step builds skills:
Color the small images on the animals. This is a great colored pencil activity that also builds skills. Talk about precision with pencil control!
Cut out the jungle animal finger puppets. These finger puppets are designed to have simple shapes. You’ll find the squared shapes makes it a great scissor skills for little hands.
Tape the finger puppets into a loop. Size the puppets to fit fingers of any size. If the loops are too large, just trim them with scissors.
Slide the jungle animals onto fingers, and start playing! Get ready to build many different skills.
Ways to use these Jungle Animal Finger Puppets
There are several ways to use these jungle animal finger puppets. From fine motor mazes, to letter formation activities, to sensory play…the ways to improve finger isolation (and the other skill areas described above) are endless!
Jungle Animal Fine Motor Maze– These printable finger puppets include two printable jungle themed fine motor mazes. Use the finger puppets to walk, crawl, creep, or fly through the jungle as fine motor skills are developed in finger isolation. Trace the line and work on eye-hand coordination, separation of the sides of the hand, and more.
Make a Jungle Sensory Bin– Use the jungle finger puppet animals to trace and for letters or numbers in a sensory tray. Fill a low tray with salt, flour, rice, or sand. Use the finger puppets to form letters and numbers.
Air Write Letters and Numbers– Put one of the jungle finger puppets on the pointer finger. Then, use big arm movements to “write” letters and numbers in the air.
Want to grab this free printable set? Enter your email address into the form below!
Colleen Beck, OTR/L has been an occupational therapist since 2000, working in school-based, hand therapy, outpatient peds, EI, and SNF. Colleen created The OT Toolbox to inspire therapists, teachers, and parents with easy and fun tools to help children thrive. Read her story about going from an OT making $3/hour (after paying for kids’ childcare) to a full-time OT resource creator for millions of readers. Want to collaborate? Send an email to contact@theottoolbox.com.
This is actually a post from our email newsletter Lunch & Learn series. If you are not already a newsletter subscriber, be sure to do that.
How to help kids manage big feelings
hildren experience strong emotions every day, but they do not always have the skills to understand or manage those feelings on their own. Helping kids navigate big feelings means teaching them how to recognize emotions, understand what their body is telling them, and learn strategies to respond in safe and productive ways. Whether a child is feeling frustrated, overwhelmed, excited, or anxious, these moments are opportunities for learning and growth.
When parents, teachers, and therapists provide support and guidance, children can begin to build the emotional awareness and regulation skills they need to handle challenging situations at home, in school, and with peers.
We work with kids in homes, classrooms, the community and can sometimes see big emotions during the day to day tasks. For kids navigating social situations with peers, this might mean breakdowns that impact participation and learning.
I wanted to bring you some ideas and resources to support kids in these opportunities for teaching social emotional skills.
The interesting thing about running The OT Toolbox is that we get a lot of questions from parents and caregivers needing support ideas…and we get similar questions from therapy providers on how to support kids and parents!
Understanding Big Feelings Through the Nervous System
When children experience big emotions, it can help to look beyond behavior and consider what is happening in the nervous system. Emotions are closely connected to how the body detects safety or threat in the environment. One framework that helps explain this is Polyvagal Theory, developed by neuroscientist Dr. Stephen Porges. This perspective helps caregivers understand that children’s reactions are often reflections of their physiological state rather than intentional misbehavior.
From this viewpoint, a child’s nervous system is constantly scanning the environment for cues of safety or danger. When the body senses safety, children are more likely to feel calm, curious, and connected to the people around them. In this state, they are able to explore, learn new skills, and participate in daily activities. This is the state where growth, learning, and emotional regulation develop most effectively.
However, when the nervous system detects a signal of danger, the body may move into a fight-or-flight response. The heart rate increases, breathing becomes faster, and the body prepares to protect itself. In this state, children may appear restless, argumentative, impulsive, or emotionally reactive. They may have difficulty listening, thinking clearly, or solving problems because their nervous system is focused on safety rather than learning.
There is also a third possible response. When a child feels overwhelmed and the nervous system cannot resolve the threat through action, the body may shift into a shutdown state. In this state, children may appear withdrawn, quiet, or emotionally disconnected. Some children become limp, avoid interaction, or seem to “zone out.” This response is not defiance or stubbornness—it is the nervous system trying to protect itself by conserving energy.
These physiological states are not rigid categories. Instead, they exist along a continuum. A child might show subtle signs of nervous system activation, such as muscle tension, irritability, or increased sensitivity to touch or sound. Learning to notice these cues helps adults understand when a child may be moving out of a regulated state.
Why Regulation Comes Before Problem Solving
When children are in a heightened fight-or-flight state, the parts of the brain responsible for reasoning, planning, and learning do not work as efficiently. The brain’s survival systems take priority. This means that teaching, correcting behavior, or expecting logical thinking may not be effective in the moment.
For children to learn how to manage emotions, their nervous system must first feel safe. When the body is calm enough to move out of survival mode, higher brain regions involved in thinking, sensory processing, and emotional understanding can function more effectively. This is why helping children regulate their nervous system is often the first step in supporting emotional development.
The Role of Co-Regulation
Children do not learn to regulate emotions entirely on their own. They develop these skills through co-regulation with supportive adults. Co-regulation occurs when a calm adult helps a child move from a heightened emotional state back toward a regulated state.
This may involve using a soothing voice, offering predictable routines, providing physical comfort, or creating a calm environment. Through repeated experiences of being supported during emotional moments, children begin to internalize these strategies and gradually develop their own self-regulation skills.
Building Modulation Skills Through Meaningful Participation
One of the most effective ways to support emotional regulation is through meaningful daily activities. Participating in routines such as play, movement, creative activities, and everyday tasks provides opportunities for children to practice managing their emotions in real contexts.
Activities that involve movement, sensory exploration, and social interaction help children learn how their bodies respond to different situations. Over time, these experiences support the development of modulation skills, which allow children to adjust their emotional and physiological responses to meet the demands of a task.
Rather than focusing only on behavior, this approach emphasizes helping the child’s nervous system feel safe enough to engage, explore, and learn.
How Neuroplasticity Supports Emotional Growth
The brain has the remarkable ability to change and adapt through experience, a process known as neuroplasticity. Each time a child successfully moves from a state of overwhelm back toward calm with the help of a supportive adult, new neural pathways are strengthened.
These repeated experiences gradually build the brain’s capacity for emotional resilience. Over time, children become better able to recognize their own feelings, regulate their responses, and navigate big emotions with increasing independence.
Helping kids navigate big feelings is not about eliminating emotions. It is about supporting the nervous system so children can experience emotions safely, understand them, and learn how to move through them in healthy ways.
Here are four common questions we hear from parents, teachers, and therapists, and answers that incorporate Social Emotional Learning (SEL) principles:
Q1: What do I do when a toddler grabs a toy from a sibling and says, “It’s mine!”, even if they weren’t playing with it?
SEL Response: This is a teachable moment! Narrate what’s happening in a calm tone:
“I see you wanted that toy because your brother was using it. It’s hard to wait, isn’t it?”
Help them name the emotion (jealousy, frustration) and guide them to use respectful language:
“Let’s ask your brother for a turn when he’s done. We can play with something else while we wait.”
This helps build empathy, impulse control, and communication. These are core SEL skills.
Responding to the moods of others and reaching out to others as a support system (both an aspect of co-regulation skills)
Q2: How can we manage sharing in a classroom where toys are used in groups or in close parallel play?
SEL Response: Group settings are rich with opportunities to teach cooperation and problem-solving. Set expectations early (“We take turns,” “We use kind words”) and use visual supports when possible.
When conflicts arise, help children brainstorm:
“It looks like you both want that toy. What can we do? Take turns? Play together? Find a similar toy?”
Praise positive social interactions, reinforcing that collaboration is part of the play process. Help the child come up with ideas to problem solve the situation.
Q3: How can I help kids learn the words to use when sharing?
SEL Response: Model simple sharing phrases and practice during play or storytime:
“Can I have a turn when you’re done?”
“You go first, and then I’ll go.”
“Let’s play together!”
Role-play these situations with puppets or toys to help the language stick. When kids use these phrases, offer encouragement:
“That was such a kind way to ask!”
This supports self-expression, empathy, and emotional confidence.
Q4: How do I help kids redirect their attention while waiting for a toy?
SEL Response: Help kids build flexible thinking and patience by giving them choices:
“You’re waiting for the truck. What else can your hands do right now? Want to build with blocks or color while you wait?”
Try using a “waiting box” (coping tools or a sensory toolbox) or visual chart of alternate activities. You can also introduce simple waiting games or set a timer. Over time, kids will learn that they can handle waiting, an essential regulation skill!
Looking for support? We’ve got resources for you!
The OT Toolbox is filled with hands-on strategies, free printables, and creative activities that support SEL every step of the way.
You can also search for these items by name using the ORANGE search bar found on the Level 2 page.
For Younger Learners (Preschool – Early Elementary):
Emoji Emotions
Turkey Emotions
Color By Emotion Sets (Snowman, Winter Hat, Unicorn, Christmas, etc.)
Emotion Matching Cards (Popsicles, Hearts, Bugs)
I Spy Emotion Games (Pumpkins, Penguins, Santa, Elf)
Star Feelings Poster & Journal Prompts
For Skill Building and Regulation:
Self Regulation Bundle
Zones of Regulation Activities (Cootie Catchers, Calm Down Toolbox Craft, Mood Monster)
Emotional Regulation Toolbox
Feelings Sorting Cards
Write About Feelings Worksheets
Emotions Play Dough Mats
Emotions Motor Skills Wheel
For Educators and Parents:
Emotional Intelligence Guide for Parents
Social Emotional Skills Observation Notes
Social Emotional Learning Activities Handout
Exploring Books Through Play: 50 Activities Based on Books About Friendship & Empathy
Action Step: Start small. Choose one resource or strategy above to use this week. Whether it’s modeling turn-taking language or trying a feelings check-in during transitions, every small step supports big SEL growth.
Want full access to the tools listed above? Join The OT Toolbox Membership for instant access to hundreds of therapy tools and SEL resources.
Colleen Beck, OTR/L has been an occupational therapist since 2000, working in school-based, hand therapy, outpatient peds, EI, and SNF. Colleen created The OT Toolbox to inspire therapists, teachers, and parents with easy and fun tools to help children thrive. Read her story about going from an OT making $3/hour (after paying for kids’ childcare) to a full-time OT resource creator for millions of readers. Want to collaborate? Send an email to contact@theottoolbox.com.
Today, I have an update on a very old blog post for a specific reason. This fake snow messy sensory play activity is a valuable tool in addressing tactile defensiveness, or tactile sensitivity. In general descriptions, this simply means an over-sensitivity to touch, or over-responsiveness to touch sensations. For kids with sensory issues, this can be a very big deal. Tactile defensiveness can mean poor tolerance to certain clothing, textures, food sensitivities, closeness of others, wearing socks or the feel of seams or clothing. Sensitivity to these touch sensations can look like many different things! Today we are discussing all about tactile sensitivity, what that looks like in children, and a sensory challenge that can be used for tactile sensitivity.
I briefly explained the meaning of tactile defensiveness above, but let’s break this down further.
The tactile system is one of our 8 sensory systems: touch, taste, smell, sight, hearing, proprioception, vestibular, and interoception. The sense of touch is a very big piece of the whole picture.
The Tactile Sensory System is one of the earliest developed senses of the body, with studies telling us this sensory system begins to develop at around 8 weeks in utero. The sense of touch completes its development at around 30 weeks in utero when pain, temperature, and pressure sensations are developed.
Understanding Tactile Defensiveness
Tactile defensiveness is often discussed within the broader concept of sensory modulation, which refers to how the nervous system organizes and responds to sensory information.
In some individuals, the nervous system reacts more intensely to everyday sensations than expected. This pattern is often described in the research literature as sensory over-responsivity, a type of sensory modulation difficulty in which reactions to sensory input may be stronger, last longer, or feel overwhelming compared to what the situation typically requires.
It is important to understand that this is not simply a matter of a child noticing sensations more easily than others. Current understanding suggests that the nervous system itself is responding with a heightened emotional, physiological, and behavioral reaction to certain stimuli.
In other words, the child is not choosing to overreact; their nervous system is reacting in a way that signals discomfort or threat.
Some clinicians and organizations have begun using the term heightened sensory responsivity when discussing these patterns. This language reflects a shift toward more respectful and person-centered terminology. While the research base still frequently uses the term sensory over-responsivity, both phrases are generally referring to the same nervous system pattern, an amplified response to sensory input.
What Is Tactile Defensiveness?
When this heightened response occurs specifically in reaction to touch, it is commonly referred to as tactile defensiveness. Children who experience tactile defensiveness may react strongly to everyday sensations that others barely notice. Clothing seams, tags, certain fabrics, unexpected touch, or messy textures may trigger discomfort or distress.
The word “defensiveness” is helpful because it reflects what the child’s nervous system is doing. Instead of interpreting touch as neutral or pleasant information, the brain may interpret it as something that needs to be protected against. The body then moves into a defensive response, which can look like pulling away, avoiding certain clothing, refusing messy play, or becoming upset when touched unexpectedly.
How the Nervous System Contributes
The tactile system plays an important role in helping the brain determine whether touch is safe, alerting, or potentially threatening. For some children, this system sends signals that lead the brain to respond quickly and intensely to certain types of touch. As a result, everyday sensory experiences, such as getting dressed, standing in line, or participating in art activities, can become challenging.
When the nervous system reacts in this way, children may appear sensitive to textures, avoid certain fabrics, dislike grooming routines, or become distressed when their skin is touched unexpectedly. These responses are not simply behavioral choices; they reflect how the child’s nervous system is processing sensory input.
Types of touch
The skin performs unique duties for the body, based on different types of touch input, and tactile sensitivity can be considered to occur in the various aspects of touch. These types of touch include: light touch, pressure, discrimitive touch, pain, temperature.
Most importantly for our ancient ancestors, especially, the skin protects and alerts us to danger and discriminates sensation with regard to location and identification. This is important because touch sensations alerts us to both discrimination and danger. These two levels of sensation work together yet are distinctively important. And furthermore, the skin is the largest and the most prevalent organ.
Touch discrimination- Discrimination of touch allows us to sense where on our body and what is touching us. With discrimination, we are able to discern a fly that lands on our arm. We are able to sense and use our fingertips in fine motor tasks. We are able to touch and discern temperatures, vibrations, mount of pressure, and textures and shapes of objects.
Danger perception– The second level of the tactile system alerts us to danger. It allows us to jump in response to the “fight or flight” response when we perceive a spider crawling on our arm. With this aspect of touch, we are able to discern temperature to ensure skin isn’t too hot or cold. We can quickly identify this temperature or sharpness of an object and quickly move away to avoid burning, freezing, or sharp objects.
When either of these levels of sensation are disrupted, tactile dysfunction can result. This presents in many ways, including hypersensitivity to tags in clothing, a dislike of messy play, difficulty with fine motor tasks, a fear of being touched by someone without seeing that touch, a high tolerance of pain, or a need to touch everything and everyone.
Sensitivity to touch can mean over responding to touch input in the form of textures, temperatures, or pressure. Touch sensitivities mean that the body perceives input as “too much” in a dangerous way. The touch receptors that perceive input are prioritized because the brain believes we are in danger. The body moves into a state of defensiveness, or safe-mode in order to stay safe from this perceived danger. This is tactile defensiveness.
What does Tactile Defensiveness looks like?
Hyper-responsiveness of the tactile sense may include a variety of things:
Overly sensitivity to temperature including air, food, water, or
objects
Withdrawing when touched
Avoids certain food clothing textures or fabrics
Dislikes wearing pants or restrictive clothing around the legs
Avoidance to messy play or getting one’s hands dirty
Avoidance of finger painting, dirt, sand, bare feet on grass, etc.
Avoids touching certain textures
Clothing preferences and avoidances such as resisting shoes
Resistance to nail clipping, face washing
Resists haircuts, hair brushing
Dislikes or resists teeth brushing
Overreacts to accidental or surprising light touches from
others
Avoids affectionate touch such as hugs
Dislikes closeness of other people
As a result of this avoidance, development in certain areas can be delayed, in a way that functional performance of daily tasks is impacted. What you see in as a result of a poorly integrated tactile sensory system:
Delayed fine motor skills
Rigid clothing preferences
Behavioral responses to tasks such as putting on shoes or coat
More information on sensory processing of each of the sensory systems and how that impacts daily life can be found in The Sensory Lifestyle Handbook. You’ll also find practical strategies for integrating sensory diets into each part of every day life, in motivating and meaningful ways. Check out The Sensory Lifestyle Handbook for moving from sensory dysfunction to sensory function!
Supporting Children with Tactile Sensitivities
Understanding tactile defensiveness as a nervous system response helps shift the focus from correcting behavior to supporting regulation. When adults recognize that a child’s reaction is rooted in sensory processing, they can begin to create supportive strategies that gradually build tolerance and comfort with different tactile experiences.
Occupational therapy approaches often include providing predictable sensory experiences, respecting the child’s comfort level, and introducing new textures in ways that feel safe and controlled. Over time, this supportive approach helps the nervous system learn that touch can be experienced without triggering a defensive response.
Recognizing tactile defensiveness through this lens helps parents, educators, and therapists respond with understanding, empathy, and effective support strategies that promote participation in daily activities.
How to help with tactile sensitivity
There are ways to help address these areas, so that the child is safe and can function and perform tasks in their daily life. While addressing tactile sensitivities doesn’t mean changing the child’s preferences, it can mean understanding what is going on, what the child does and does not prefer in the way of sensory processing, and it can mean providing tools and resources to help the child.
This should involve an occupational therapist who can take a look at sensory processing and integration and make specific recommendations.
Some strategies that can impact tactile sensitivity include:
Understanding the child’s sensory systems, and integration in the daily life of the child. Grab the Sensory Lifestyle Handbook to read more on sensory diets that are meaningful and motivating. These are sensory activities that can be integrated right into tasks like baths, tooth brushing, hair brushing, dentist visits, clothing changes, etc.
Take a look at clothing sensitivity red flags for areas of sensitivity to clothing that stand out for the individual child.
Read more on proprioception and the connection of heavy work input as a calming and regulatory tool for sensitivities.
Work on touch discrimination with activities at the level of the child.
Provide verbal input to warn the child prior to light touch
Provide visual cues and schedules for tasks that must be completed such as tooth brushing or hair brushing.
Trial tactile experiences at a graded level, introducing various sensory experiences in a “safe space” at a just right level for the child.
Tactile Defensiveness Sensory Activity
That’s where this messy sensory play activity comes in. By taking out the “messy” part of this sensory experience, children who dislike messy play or touching certain textures can explore the sensory activity and challenge tactile exposure. In this way, they are experiencing a new and novel texture (temperature and squishy, messy experiences), but at a safe level, or “just right” level for them.
This snow sensory play activity has the opportunity for tactile challenges, but it uses a plastic bag to contain the actual mess, allowing for a mess-free sensory experience, at different grades of texture exposure.
Fake Snow Recipe
We made fake snow one recent weekend, when we had a big cousin sleep over. There were six kids aged five and under staying overnight at our house. I had this activity planned for us to do together, (because I procrastinated ) and had to get it together to take to a Winter Festival at our church the next day. It was a fun messy play idea for indoor snow.
We’ve made this fake snow before and I have the recipe listed on our Messy Play Day post.
This fake snow is easy, because it includes only 2 ingredients:
Toilet paper
Ivory soap
With these two ingredients, there are many opportunities for tactile sensitivity challenges, and each child can experience sensory exploration at a level that suits their preferences. Some children may enjoy experiencing the dry texture of the toilet paper. (See the kids below…they sure enjoyed this texture.)
Other children may prefer (or avoid) the tactile experience of touching and manipulating the squishy, warm soap texture.
Others may tolerate mixing the two textures together.
Still others, may prefer none of these textures. In this case, move to the last level of this tactile experience, which is placing the fake snow into the plastic baggie. Then, they can squeeze and touch the sensory fake snow with a barrier in place. they will still experience the warm temperature and firm, heavy work of squeezing through their hands, but they will experience this sensory input in a “safe” level with that plastic bag barrier.
Fake Snow Dry sensory Bin
Step 1: Tear the toilet paper into shreds. Keep this in a bin or large container. We used an under-the bed storage bin because I was making a large quantity of fake snow for our Winter Festival.
We shredded the toilet paper and the kids had a BLAST! It started out so neat and kind. Tearing the toilet paper is a fantastic fine motor activity for those hands, too. It offers heavy work input through the hands which can have a regulating, calming impact on the joints of the hands. This can be a nice “warm up” exercise for the tactile challenge of exploring and manipulating the dry toilet paper texture.
For kids with tactile sensitivities, this might be “too much” for them to handle. Try using tongs and ask them to explore the toilet paper shredding sensory bin to find hidden items. Some of the paper cards and winter words in our Winter Fine Motor Kit are great additions to this sensory bin.
And then turned in to this.
And this.
Slightly off-course in our sensory bin, but of course it did. Why wouldn’t it when you have 6 cousins together? ((Ok, that part of this post was NOT mess-free…the end result is mess-free. I promise.)) So, then we popped the Ivory soap into the microwave…
Fake Snow Wet Sensory Experience
Step 2 in the tactile sensory experience is the wet fake snow portion. Following the fake snow recipe, we popped a bar of ivory soap into the microwave and ended up with a cloud of sensory material.
Children can touch and explore this sensory material for a warm, sensory experience.
Step 3 in the tactile challenge is mixing the dry material with the wet material. This can definitely be a challenge for those with tactile defensiveness or touch sensitivities.
If it is too much of a sensory challenge, invite the child to mix with a large spoon or to touch with a finger tip.
Other children may enjoy this part of making fake snow. The melted soap can be mixed with the toilet paper…to make fake snow!
Fake Snow Sensory Play for Tactile Sensitivities
THIS is the mess-free part that many children with tactile defensiveness may enjoy. 🙂
Simply place some of the fake snow material into a zip top plastic bag. You can tape the top shut to keep the material in the bag.
By manipulating the fake snow in a safe sensory manner, kids get exposure to a calming warm temperature. This is one low-level challenge to the tactile system. The warm temperature is a calming, regulating aspect that can be powerful in self-regulation.
Children can also squeeze, manipulate, pound, and spread the fake snow within the plastic baggie. This offers heavy work input through the hands and upper body in a way that is calming and regulating.
By placing the fake snow into a bag for sensory play, kids are exposed to tactile experinces in a way that may help with tactile discrimination by incorporating the proprioceptive sense.
Challenge motor skills further by adding items such as foam snowflake stickers, glass gems, and glitter. This was so much fun for my crew of kids and nieces and nephews and I hope it’s a tactile experience you get to play with as well!
Products mentioned in this post:
The Sensory Lifestyle Handbook– The Sensory Lifestyle Handbook is your strategy guide for turning sensory diets and sensory activities into a sensory lifestyle.
A Sensory Diet Strategy Guide The Sensory Lifestyle Handbook is a strategy guide for sensory processing needs. With valuable insight to the sensory system and the whole child, the book details how sensory diets can be incorporated into a lifestyle of sensory success. The thoughtful tools in this book provide intervention strategies to support and challenge the sensory systems through meaningful and authentic sensory diet tactics based on the environment, interests, and sensory needs of each individual child.
This print-and-go winter fine motor kit includes no-prep fine motor activities to help kids develop functional grasp, dexterity, strength, and endurance. This 100 page no-prep packet includes everything you need to guide fine motor skills in face-to-face AND virtual learning. Includes winter themed activities for hand strength, pinch and grip, dexterity, eye-hand coordination, bilateral coordination, endurance, finger isolation, and more.
Colleen Beck, OTR/L has been an occupational therapist since 2000, working in school-based, hand therapy, outpatient peds, EI, and SNF. Colleen created The OT Toolbox to inspire therapists, teachers, and parents with easy and fun tools to help children thrive. Read her story about going from an OT making $3/hour (after paying for kids’ childcare) to a full-time OT resource creator for millions of readers. Want to collaborate? Send an email to contact@theottoolbox.com.
Pencil grasp development is a common concern for many parents, teachers, and therapists. So often, we see children holding a pencil with all of their fingers wrapped around the pencil, or very awkward pencil grips and wonder what is a typical pencil grasp. But, did you know that children typically progress through pencil grasp development in a predictable pattern? It’s true! Let’s talk pencil grasp.
Secondly, it’s important to note that grasp development, while it can be predictable, can also vary in timing. And when grasp doesn’t follow the progression listed below…it can be ok! In fact, a functional pencil grasp is perfectly fine for children.
Pencil Grasp Development
Grasp development follows three main categories: primitive grasps, transitional grasps, and mature grasps.
Primitive Pencil Grasps
In this beginning pencil grasp, the whole arm moves the pencil. These grasps include two specific grips which are described below:
Palmer Supinate Grasp (a whole hand grasp)
Digital Pronate Grasp
1. Whole Hand Grasp/Palmer Supinate Grasp- (Typically seen between 12 months-1.5 years) Child holds the crayon with their whole hand, with the writing end of the crayon sticking out near their pinkie side of the hand. It looks like they are holding a paint stirrer or potato masher.
2. Digital Pronate Grasp/ Pronated Wrist Grasp- (2-3 years) Crayon is held in the hand so the tip of the crayon (or the drawing end) is held on the thumb side of the hand.
Transitional Pencil Grasps
In the transitional pencil grasp stage, the child’s forearm and/or wrist moves the pencil.
1. Quadrupod Grasp, or Four Fingered Grasp- (3-4 years)- Crayon is held between their thumb, and tips of the pointer finger, middle finger, and ring finger. As the child progresses, these four fingers may pull down to the tip of the finger into a quadrupod grasp.
2. Static Tripod Grasp- (3.5-4 years)- Child holds the writing utensil with the thumb, pointer finger, and rests the utensil on the last joint of the middle finger. The ring finger and pinkie fingers are tucked into the palm of the hand.
3. Other grasp patterns- There can be many variations of grasp patterns that occur in the transitional stage, marked by the use of the wrist or forearm to move the pencil.
Mature Pencil Grasps
In the mature pencil grasp stage, the child holds and maneuvers the pencil using mobility in the fingers or the hand.
Mature grasp patterns include:
Dynamic Tripod Grasp
Lateral Tripod Grasp
Dynamic Quadrupod Grasp
Lateral Quadrupod Grasp
1. Dynamic Tripod Grasp- (4-6/7 years) Thumb and pointer finger hold the pencil as it rests on the last joint of the middle finger. Pencil movements occur via manipulation of the fingers and hand. Note that a true dynamic tripod grasp may not be established up until around 14 years of age.
2. Lateral Tripod Grasp- Thumb is pressed in against the pencil (or adducted) to hold the pencil against the side of the pointer finger. The tip of the thumb may bend over (or flex) over the pencil in a “wrapped” position. This grasp is sometimes called a thumb wrap grasp because the thumb is not involved with the distal movement of the pencil. Distal mobility occurs, but it is the index and middle fingers manipulating the pencil.
3. Dynamic Quadrupod Grasp- Grasp is similar to the dynamic tripod grasp, but opposition includes the thumb, pointer finger, middle finger on the pencil shaft.
4. Lateral Quadrupod Grasp- Grasp is similar to the lateral tripod grasp, with its thumb wrapped positioning of the thumb, but uses the pointer, middle, and ring fingers are on the pencil shaft and manipulate the pencil.
Quadrupod Grasp
One thing that is important to mention is the quadrupod grasp. You might have noticed this term was mentioned a few times above, and in difference areas of development through the progression of pencil grasp development.
The quadrupod grasp is considered a four finger grasp, in which four fingers (thumb, pointer finger, middle finger, ring finger) are used to hold the pencil. Quadrupod grasp progresses from a static form to a dynamic form where there is fluid motion and repositioning in the joints of the hands.
Quadrupod Grasp- If the thumb opposes the pointer finger, middle finger, and ring finger this may be called a quadrupod grasp. A quadrupod grasp can also occur with the pencil resting on the side of the ring finger.
The quadrupod stage is an important part of grasp development as the fingers move into a dynamic position with pronation and extension of the wrist. However, don’t get stuck on a quadropod grasp if this type of grip is used with older children or if students are established with their quadrupod grasp!
Quadrupod grasp or Tripod Grasp?
Research tells us that the quadrupod grasp is a very functional grip and the use of one extra finger (as opposed to the traditional sense of a tripod grasp) is actually very functional in written work.
Some may say that the quadrupod grasp is more restrictive than the tripod grasp, however that extra stability can actually promote more mobility in the pencil and be used in very efficient and effective handwriting.
When the child that the uses a quadrupod grp on the pencil is forced to use a tripod grasp, you may see a decrease in written work legibility due to decreased stability. The arches of the hands may need to compensate for strength and dexterity in the fingers and that precise placement that the ring finger adds to the shaft of the pencil just isn’t as targeted with the arches of the hand and the stability offered through the ulnar side of the hand. For those who have the stability in the ulnar side and within the arches or intrinsic muscles, a tripod grasp can be more precise and lead to more refined pencil motions.
So you can see that it all is up to each individual when it comes to forcing a student to move from quadrupod to tripod. It just may not make sense to do so for some…and that’s ok and very functional!
Other Functional Pencil Grasps
There are other grasps that can be considered “functional” in which the child holds the pencil differently than described here, but can also write in an efficient manner.
These can include (but not be limited to) a thumb wrap grasp, thumb tuck grasp, inter-digital brace grasp, or a finger-wrap grasp.
Pencil Grasp Development and Fine Motor Skills
Pencil grasp develops gradually as part of overall fine motor development. In the earliest stages of pencil grasp development, a toddler typically uses a palmar grasp, wrapping the whole hand around a crayon or marker.
At this stage, movement comes mostly from the shoulder and elbow, and the child’s hands are focused on exploring rather than precision. When a toddler begins to scribble, the goal is not neatness but sensory feedback and control of large movements. These early scribbles lay the foundation for later fine motor skills.
As children gain strength and coordination, finger dexterity and distal coordination progresses. Instead of relying primarily on the elbow and shoulder, the child starts to move the tool using the wrist and eventually the fingertips. In occupational therapy, we like to say proximal stability before distal mobility.
This shift allows greater control over lines and shapes.
This is where we see grasp patterns really start to emerge.
During this stage, you may see variations such as a quadruped grasp, where four fingers help stabilize the marker or pen. The child’s hands are learning to coordinate small muscles, and core strength also plays a role in providing a stable base for refined hand control.
Over time, children typically progress toward a 3-finger grasp, sometimes referred to as a tripod grasp. In this more mature pattern, the writing tool is held between the thumb and index fingers, resting on the middle finger. The tips of their fingers guide the movement rather than the whole arm. This allows for precise control, endurance, and efficient letter formation. The fingertips become responsible for controlled, isolated movements rather than broad arm swings.
When Should Kids Use a Pencil?
Here’s how I respond to that question. Try to hold off on pencil and paper activities (worksheets) until kindergarten. When kids are handed a pencil or pen too soon, that’s when we see primitive grasps become “stuck”.
This happens in preschools where kids are tracing and writing on worksheets. Instead, use PLAY! We have a bunch ideas for fine motor activities using play that should come before pencils.
Children begin holding crayons or markers as toddlers, but how they hold them changes over time. Around age 2 to 3, children typically use a whole-hand or palmar grasp. By age 4 to 5, many children are developing more refined finger-based grasps. A functional 3-finger grasp often emerges between 5 and 6 years of age. Development is gradual, and there is a wide range of typical. It’s much better to use crayons in coloring to progress through these stages rather than a pencil. The crayon provides a heavier, more resistive feedback and strengthens the fingers, hands, and arches of the hands. Arch development is HUGE in a functional pencil grasp!
At what age should a child use a pencil grip?
One question we get a lot as pediatric OTs is when kids should add a pencil grip to their pencil.
Most children do not need a pencil grip in the preschool years. Pencil grips are typically considered when a child is school-aged, usually around 5 to 7 years old, and showing signs of fatigue, discomfort, or inefficient grasp patterns during writing tasks. Before that age, hands are still developing strength, coordination, and control. For younger children, it is more important to build fine motor skills than to add adaptive tools too early. It’s most important to work on the fine motor skills needed for strength and coordination to manage and manipulate the pencil. Try play dough, coloring, playing with beads, puzzles, tearing paper…SO many fun fine motor activities help with manipulating a pencil.
Tips to Help with Pencil Grasp Development
Providing opportunities for practice on a vertical surface, such as at an easel, can support this development. Writing or drawing on a vertical surface encourages wrist extension and strengthens the muscles needed for refined finger movements.
Using tools like a marker or pen in short, engaging tasks helps children build coordination and confidence. Activities that promote fine motor skills, along with attention to posture and core strength, support the natural progression through the stages of pencil grasp development.
Ultimately, pencil grasp is not just about how a child holds a pen. It reflects the integration of fine motor development, hand strength, coordination, and stability.
Supporting the child’s hands through purposeful play and developmentally appropriate expectations allows grasp patterns to mature in a way that promotes comfort, endurance, and functional writing skills.
One tool we love is the Pencil Grasp Bundle.
How to help with pencil Grasp
Want to know more about pencil grasp progression, development, and strategies to use to help children build a strong, efficient, and functional pencil grasp? It’s all in the Pencil Grasp Bundle!
The Pencil Grasp Bundle is for those struggling to help students with carryover of skills. It’s designed to make pencil grasp practice meaningful and motivating. The Pencil Grasp Bundle is 16 pencil grasp resources, guides, worksheet sets, and tools.
Pencil Grasp Success Was Never Easier.
It can be a real struggle to help kids address tricky pencil grasps. It is frustrating and difficult to weed through all of the information and pull out what will work for a child.
You struggle with kids who work on skills but can’t carryover handwriting and pencil grasp into the classroom.
Therapists may search for fresh ideas to address pencil grasp needs and wonder whether a grasp is considered functional or needs changing.
Therapists need pencil grasp screening and educational materials to address a huge influx of therapy referrals.
Parents wonder about development and skills.
Teachers will love the Centers activities to incorporate into learning to impact carryover of handwriting skills.
The Pencil Grasp Bundle includes 16 products and is valued at over $73. It’s bundled together and offered at just $24.
More pencil grasp help
Want to know how to fix a problem with pencil grasps? Need help knowing where to start when it comes to immature pencil grasps or a child hating to write because their hand hurts? The Pencil Grasp Challenge in open for you! In this free, 5 day email series, you’ll gain information, resources, specific activities designed to promote a functional, efficient pencil grasp.
The pencil grasp challenge is a free, 5 day mini course and challenge. During the course of five days, I’ll be teaching everything you need to know about the skills that make up a functional pencil grasp. You’ll learn what’s going on behind the inefficient and just plain terrible pencil grasps you see everyday in the classroom, clinic, or home. Along with loads of information, you’ll gain quick, daily activities that you can do today with a kiddo you know and love. These are easy activities that use items you probably already have in your home right now.
Besides learning and gaining a handful (pun intended) of fun ideas to make quick wins in pencil grasp work, you’ll gain:
5 days of information related to pencil grasp, so you know how to help kids fix an immature pencil grasp.
Specific activities designed to build a functional pencil grasp.
Free printable handouts that you can use to share with your team or with a parent/fellow teachers.
You’ll get access to printable challenge sheets, and a few other fun surprises.
And, possibly the best of all, you’ll get access to a secret challengers Facebook group, where you can share wins, chat about all things pencil grasp, and join a community of other therapists, parents and teachers working on pencil grasp issues.
Colleen Beck, OTR/L has been an occupational therapist since 2000, working in school-based, hand therapy, outpatient peds, EI, and SNF. Colleen created The OT Toolbox to inspire therapists, teachers, and parents with easy and fun tools to help children thrive. Read her story about going from an OT making $3/hour (after paying for kids’ childcare) to a full-time OT resource creator for millions of readers. Want to collaborate? Send an email to contact@theottoolbox.com.