Colleen Beck, OTR/L is a pediatric occupational therapist and the owner and author of The OT Toolbox website. She manages all of The OT Toolbox social media accounts and runs the popular newsletter.
Read about Colleen's experience and career as an occupational therapist, including how The OT Toolbox began on our About The OT Toolbox page: https://www.theottoolbox.com/about-us/
Colleen created The OT Toolbox in 2011 and since then has written thousands of blog posts designed to support therapy providers, educators, parents, counselors, admin, and caregivers in promoting the healthy development of kids.
Check out Colleen's blog posts below:
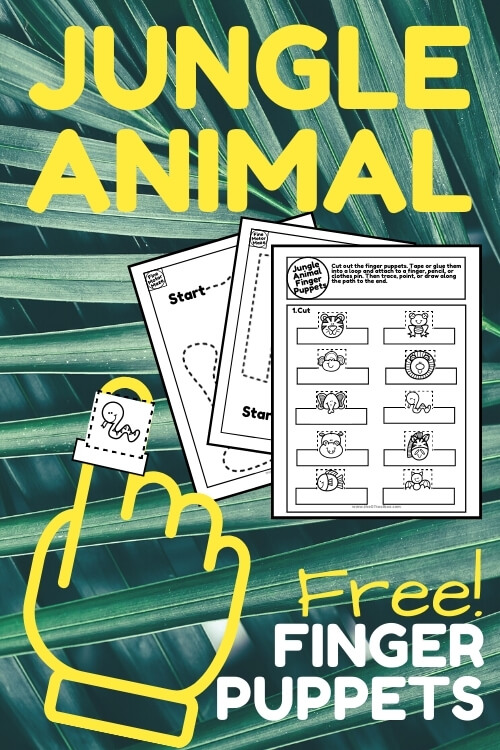
If you’re looking for a playful way to support fine motor skills, these jungle finger puppet printables are a fun activity for kids. Finger puppets are a favorite in occupational therapy because they encourage finger isolation, hand strength, and coordination while also promoting imaginative play. Simply print the free finger puppet pages, cut them out, and let kids bring jungle animals to life through storytelling, pretend play, or group activities. This simple jungle animal activity works well in therapy sessions, classrooms, or at home and is an easy way to combine creativity with skill-building.
jungle finger puppet printables
Today, we have a free printable set of paper finger puppets you can print off and start using in play activities to support fine motor skills. Finger puppets are a simple yet powerful tool for supporting fine motor development, especially in the areas of finger isolationand separation of the sides of the hand, two foundational skills needed for tasks like writing, buttoning, and manipulating small objects.
How Finger Puppets help with Finger Isolation
Using finger puppets encourages finger isolation, which is the ability to move one finger at a time while keeping the others still. When children animate each puppet with a different finger, they must consciously engage and control that finger’s movement. This is especially beneficial for improving dexterity and coordination, which are critical for functional tasks like pressing keys on a keyboard or forming legible letters.
How finger puppets help with Separation of the Sides of the Hand
Finger puppets also promote separation of the sides of the hand, which refers to the functional division between the thumb/index/middle fingers (used for precision tasks) and the ring/little fingers (used for stability). When kids wear puppets on their thumb, index, and middle fingers while the ring and pinky remain curled into the palm for support, they’re naturally strengthening this motor pattern. It mirrors the hand positioning needed for tasks like holding a pencil or tying shoes.
Use these jungle animal finger puppets to help kids develop fine motor skills through play! Finger puppets are a common tool in occupational therapy toolboxes and working on isolation skills is key to helping kids with dexterity. So, using these jungle animal finger puppets is a no-brainer when it comes to developing fine motor skills. Add these printable finger puppets to a jungle theme in therapy or learning.
As always, if the information on finger puppets and finger isolation helps you, or you create similar activities please link to this page and tag The OT Toolbox on social media.
Improve Finger Isolation with Finger Puppets
Today, I’m sharing jungle animal puppets designed to promote finger isolation and dexterity. Finger puppets are a great way to develop and refine the skill of finger isolation.
Finger isolation refers to the ability to move one finger at a time. Within the action of isolating a finger from the rest of the hand, there are precise motor actions. This dexterous movement allows the finger to move on it’s own, separate from the rest of the hand. This refined motor skill is needed for functional tasks like typing, pointing, holding up one finger, and many other functional tasks.
It can be difficult for children to develop finger isolation and use refined motor movements during functional tasks such as pencil grasp, typing, or shoe tying. In fact, when these tasks are difficult, we often times don’t see a combined motor effort including separation of the sides of the hand, refined arch development, or finger isolation.
That’s where these printable Finger Puppets come into play!
When children use finger puppets, they are incorporating many motor skill areas into one activity:
Finger isolation (One finger moving in separation from the rest of the hand)
Distal joint flexion (bending the DIP and PIP joints in isolation from the MP joint)
Separation of the sides of the hand (Moving the thumb, pointer fingers while the middle, ring, and pinky fingers stabilize)
Arch refinement (Development of the arches of the hand, which are strengthened by individual finger use and hand side separation)
Eye-hand coordination (moving the fingers in coordination with visual input)
Visual convergence (Moving the eyes as a team from a far point to a near point)
Visual Tracking (Moving the eyes to follow a moving target)
Finger puppets help in so many ways that transfers not just to precise motor tasks, but the bigger picture, too: Reading, handwriting, learning, sports, tool manipulation (scissors, utensils, etc.) and much more!
I actually have created many versions of these finger puppets (you’ll see more here soon on the site), but they originated in our Fine Motor Kits, which work on many areas of fine motor development.
If you’ve grabbed one of our Fine Motor Kits, then you may have seen a version of these finger puppets in different themes. Check out the Fine Motor Kits to find tons of resources and activities to develop fine motor skills:
Today’s resource is a jungle themed activity. These jungle finger puppets go really well when using a jungle theme in preschool, kindergarten, or older grades. I love offering free occupational therapy resources, and these jungle animal finger puppets are just that!
You can grab these free finger puppet templates by entering your email address into the form below. They are print-and-go OT resources where each step builds skills:
Color the small images on the animals. This is a great colored pencil activity that also builds skills. Talk about precision with pencil control!
Cut out the jungle animal finger puppets. These finger puppets are designed to have simple shapes. You’ll find the squared shapes makes it a great scissor skills for little hands.
Tape the finger puppets into a loop. Size the puppets to fit fingers of any size. If the loops are too large, just trim them with scissors.
Slide the jungle animals onto fingers, and start playing! Get ready to build many different skills.
Ways to use these Jungle Animal Finger Puppets
There are several ways to use these jungle animal finger puppets. From fine motor mazes, to letter formation activities, to sensory play…the ways to improve finger isolation (and the other skill areas described above) are endless!
Jungle Animal Fine Motor Maze– These printable finger puppets include two printable jungle themed fine motor mazes. Use the finger puppets to walk, crawl, creep, or fly through the jungle as fine motor skills are developed in finger isolation. Trace the line and work on eye-hand coordination, separation of the sides of the hand, and more.
Make a Jungle Sensory Bin– Use the jungle finger puppet animals to trace and for letters or numbers in a sensory tray. Fill a low tray with salt, flour, rice, or sand. Use the finger puppets to form letters and numbers.
Air Write Letters and Numbers– Put one of the jungle finger puppets on the pointer finger. Then, use big arm movements to “write” letters and numbers in the air.
Want to grab this free printable set? Enter your email address into the form below!
Colleen Beck, OTR/L has been an occupational therapist since 2000, working in school-based, hand therapy, outpatient peds, EI, and SNF. Colleen created The OT Toolbox to inspire therapists, teachers, and parents with easy and fun tools to help children thrive. Read her story about going from an OT making $3/hour (after paying for kids’ childcare) to a full-time OT resource creator for millions of readers. Want to collaborate? Send an email to contact@theottoolbox.com.
This is actually a post from our email newsletter Lunch & Learn series. If you are not already a newsletter subscriber, be sure to do that.
How to help kids manage big feelings
hildren experience strong emotions every day, but they do not always have the skills to understand or manage those feelings on their own. Helping kids navigate big feelings means teaching them how to recognize emotions, understand what their body is telling them, and learn strategies to respond in safe and productive ways. Whether a child is feeling frustrated, overwhelmed, excited, or anxious, these moments are opportunities for learning and growth.
When parents, teachers, and therapists provide support and guidance, children can begin to build the emotional awareness and regulation skills they need to handle challenging situations at home, in school, and with peers.
We work with kids in homes, classrooms, the community and can sometimes see big emotions during the day to day tasks. For kids navigating social situations with peers, this might mean breakdowns that impact participation and learning.
I wanted to bring you some ideas and resources to support kids in these opportunities for teaching social emotional skills.
The interesting thing about running The OT Toolbox is that we get a lot of questions from parents and caregivers needing support ideas…and we get similar questions from therapy providers on how to support kids and parents!
Understanding Big Feelings Through the Nervous System
When children experience big emotions, it can help to look beyond behavior and consider what is happening in the nervous system. Emotions are closely connected to how the body detects safety or threat in the environment. One framework that helps explain this is Polyvagal Theory, developed by neuroscientist Dr. Stephen Porges. This perspective helps caregivers understand that children’s reactions are often reflections of their physiological state rather than intentional misbehavior.
From this viewpoint, a child’s nervous system is constantly scanning the environment for cues of safety or danger. When the body senses safety, children are more likely to feel calm, curious, and connected to the people around them. In this state, they are able to explore, learn new skills, and participate in daily activities. This is the state where growth, learning, and emotional regulation develop most effectively.
However, when the nervous system detects a signal of danger, the body may move into a fight-or-flight response. The heart rate increases, breathing becomes faster, and the body prepares to protect itself. In this state, children may appear restless, argumentative, impulsive, or emotionally reactive. They may have difficulty listening, thinking clearly, or solving problems because their nervous system is focused on safety rather than learning.
There is also a third possible response. When a child feels overwhelmed and the nervous system cannot resolve the threat through action, the body may shift into a shutdown state. In this state, children may appear withdrawn, quiet, or emotionally disconnected. Some children become limp, avoid interaction, or seem to “zone out.” This response is not defiance or stubbornness—it is the nervous system trying to protect itself by conserving energy.
These physiological states are not rigid categories. Instead, they exist along a continuum. A child might show subtle signs of nervous system activation, such as muscle tension, irritability, or increased sensitivity to touch or sound. Learning to notice these cues helps adults understand when a child may be moving out of a regulated state.
Why Regulation Comes Before Problem Solving
When children are in a heightened fight-or-flight state, the parts of the brain responsible for reasoning, planning, and learning do not work as efficiently. The brain’s survival systems take priority. This means that teaching, correcting behavior, or expecting logical thinking may not be effective in the moment.
For children to learn how to manage emotions, their nervous system must first feel safe. When the body is calm enough to move out of survival mode, higher brain regions involved in thinking, sensory processing, and emotional understanding can function more effectively. This is why helping children regulate their nervous system is often the first step in supporting emotional development.
The Role of Co-Regulation
Children do not learn to regulate emotions entirely on their own. They develop these skills through co-regulation with supportive adults. Co-regulation occurs when a calm adult helps a child move from a heightened emotional state back toward a regulated state.
This may involve using a soothing voice, offering predictable routines, providing physical comfort, or creating a calm environment. Through repeated experiences of being supported during emotional moments, children begin to internalize these strategies and gradually develop their own self-regulation skills.
Building Modulation Skills Through Meaningful Participation
One of the most effective ways to support emotional regulation is through meaningful daily activities. Participating in routines such as play, movement, creative activities, and everyday tasks provides opportunities for children to practice managing their emotions in real contexts.
Activities that involve movement, sensory exploration, and social interaction help children learn how their bodies respond to different situations. Over time, these experiences support the development of modulation skills, which allow children to adjust their emotional and physiological responses to meet the demands of a task.
Rather than focusing only on behavior, this approach emphasizes helping the child’s nervous system feel safe enough to engage, explore, and learn.
How Neuroplasticity Supports Emotional Growth
The brain has the remarkable ability to change and adapt through experience, a process known as neuroplasticity. Each time a child successfully moves from a state of overwhelm back toward calm with the help of a supportive adult, new neural pathways are strengthened.
These repeated experiences gradually build the brain’s capacity for emotional resilience. Over time, children become better able to recognize their own feelings, regulate their responses, and navigate big emotions with increasing independence.
Helping kids navigate big feelings is not about eliminating emotions. It is about supporting the nervous system so children can experience emotions safely, understand them, and learn how to move through them in healthy ways.
Here are four common questions we hear from parents, teachers, and therapists, and answers that incorporate Social Emotional Learning (SEL) principles:
Q1: What do I do when a toddler grabs a toy from a sibling and says, “It’s mine!”, even if they weren’t playing with it?
SEL Response: This is a teachable moment! Narrate what’s happening in a calm tone:
“I see you wanted that toy because your brother was using it. It’s hard to wait, isn’t it?”
Help them name the emotion (jealousy, frustration) and guide them to use respectful language:
“Let’s ask your brother for a turn when he’s done. We can play with something else while we wait.”
This helps build empathy, impulse control, and communication. These are core SEL skills.
Responding to the moods of others and reaching out to others as a support system (both an aspect of co-regulation skills)
Q2: How can we manage sharing in a classroom where toys are used in groups or in close parallel play?
SEL Response: Group settings are rich with opportunities to teach cooperation and problem-solving. Set expectations early (“We take turns,” “We use kind words”) and use visual supports when possible.
When conflicts arise, help children brainstorm:
“It looks like you both want that toy. What can we do? Take turns? Play together? Find a similar toy?”
Praise positive social interactions, reinforcing that collaboration is part of the play process. Help the child come up with ideas to problem solve the situation.
Q3: How can I help kids learn the words to use when sharing?
SEL Response: Model simple sharing phrases and practice during play or storytime:
“Can I have a turn when you’re done?”
“You go first, and then I’ll go.”
“Let’s play together!”
Role-play these situations with puppets or toys to help the language stick. When kids use these phrases, offer encouragement:
“That was such a kind way to ask!”
This supports self-expression, empathy, and emotional confidence.
Q4: How do I help kids redirect their attention while waiting for a toy?
SEL Response: Help kids build flexible thinking and patience by giving them choices:
“You’re waiting for the truck. What else can your hands do right now? Want to build with blocks or color while you wait?”
Try using a “waiting box” (coping tools or a sensory toolbox) or visual chart of alternate activities. You can also introduce simple waiting games or set a timer. Over time, kids will learn that they can handle waiting, an essential regulation skill!
Looking for support? We’ve got resources for you!
The OT Toolbox is filled with hands-on strategies, free printables, and creative activities that support SEL every step of the way.
You can also search for these items by name using the ORANGE search bar found on the Level 2 page.
For Younger Learners (Preschool – Early Elementary):
Emoji Emotions
Turkey Emotions
Color By Emotion Sets (Snowman, Winter Hat, Unicorn, Christmas, etc.)
Emotion Matching Cards (Popsicles, Hearts, Bugs)
I Spy Emotion Games (Pumpkins, Penguins, Santa, Elf)
Star Feelings Poster & Journal Prompts
For Skill Building and Regulation:
Self Regulation Bundle
Zones of Regulation Activities (Cootie Catchers, Calm Down Toolbox Craft, Mood Monster)
Emotional Regulation Toolbox
Feelings Sorting Cards
Write About Feelings Worksheets
Emotions Play Dough Mats
Emotions Motor Skills Wheel
For Educators and Parents:
Emotional Intelligence Guide for Parents
Social Emotional Skills Observation Notes
Social Emotional Learning Activities Handout
Exploring Books Through Play: 50 Activities Based on Books About Friendship & Empathy
Action Step: Start small. Choose one resource or strategy above to use this week. Whether it’s modeling turn-taking language or trying a feelings check-in during transitions, every small step supports big SEL growth.
Want full access to the tools listed above? Join The OT Toolbox Membership for instant access to hundreds of therapy tools and SEL resources.
Colleen Beck, OTR/L has been an occupational therapist since 2000, working in school-based, hand therapy, outpatient peds, EI, and SNF. Colleen created The OT Toolbox to inspire therapists, teachers, and parents with easy and fun tools to help children thrive. Read her story about going from an OT making $3/hour (after paying for kids’ childcare) to a full-time OT resource creator for millions of readers. Want to collaborate? Send an email to contact@theottoolbox.com.
Today, I have an update on a very old blog post for a specific reason. This fake snow messy sensory play activity is a valuable tool in addressing tactile defensiveness, or tactile sensitivity. In general descriptions, this simply means an over-sensitivity to touch, or over-responsiveness to touch sensations. For kids with sensory issues, this can be a very big deal. Tactile defensiveness can mean poor tolerance to certain clothing, textures, food sensitivities, closeness of others, wearing socks or the feel of seams or clothing. Sensitivity to these touch sensations can look like many different things! Today we are discussing all about tactile sensitivity, what that looks like in children, and a sensory challenge that can be used for tactile sensitivity.
I briefly explained the meaning of tactile defensiveness above, but let’s break this down further.
The tactile system is one of our 8 sensory systems: touch, taste, smell, sight, hearing, proprioception, vestibular, and interoception. The sense of touch is a very big piece of the whole picture.
The Tactile Sensory System is one of the earliest developed senses of the body, with studies telling us this sensory system begins to develop at around 8 weeks in utero. The sense of touch completes its development at around 30 weeks in utero when pain, temperature, and pressure sensations are developed.
Understanding Tactile Defensiveness
Tactile defensiveness is often discussed within the broader concept of sensory modulation, which refers to how the nervous system organizes and responds to sensory information.
In some individuals, the nervous system reacts more intensely to everyday sensations than expected. This pattern is often described in the research literature as sensory over-responsivity, a type of sensory modulation difficulty in which reactions to sensory input may be stronger, last longer, or feel overwhelming compared to what the situation typically requires.
It is important to understand that this is not simply a matter of a child noticing sensations more easily than others. Current understanding suggests that the nervous system itself is responding with a heightened emotional, physiological, and behavioral reaction to certain stimuli.
In other words, the child is not choosing to overreact; their nervous system is reacting in a way that signals discomfort or threat.
Some clinicians and organizations have begun using the term heightened sensory responsivity when discussing these patterns. This language reflects a shift toward more respectful and person-centered terminology. While the research base still frequently uses the term sensory over-responsivity, both phrases are generally referring to the same nervous system pattern, an amplified response to sensory input.
What Is Tactile Defensiveness?
When this heightened response occurs specifically in reaction to touch, it is commonly referred to as tactile defensiveness. Children who experience tactile defensiveness may react strongly to everyday sensations that others barely notice. Clothing seams, tags, certain fabrics, unexpected touch, or messy textures may trigger discomfort or distress.
The word “defensiveness” is helpful because it reflects what the child’s nervous system is doing. Instead of interpreting touch as neutral or pleasant information, the brain may interpret it as something that needs to be protected against. The body then moves into a defensive response, which can look like pulling away, avoiding certain clothing, refusing messy play, or becoming upset when touched unexpectedly.
How the Nervous System Contributes
The tactile system plays an important role in helping the brain determine whether touch is safe, alerting, or potentially threatening. For some children, this system sends signals that lead the brain to respond quickly and intensely to certain types of touch. As a result, everyday sensory experiences, such as getting dressed, standing in line, or participating in art activities, can become challenging.
When the nervous system reacts in this way, children may appear sensitive to textures, avoid certain fabrics, dislike grooming routines, or become distressed when their skin is touched unexpectedly. These responses are not simply behavioral choices; they reflect how the child’s nervous system is processing sensory input.
Types of touch
The skin performs unique duties for the body, based on different types of touch input, and tactile sensitivity can be considered to occur in the various aspects of touch. These types of touch include: light touch, pressure, discrimitive touch, pain, temperature.
Most importantly for our ancient ancestors, especially, the skin protects and alerts us to danger and discriminates sensation with regard to location and identification. This is important because touch sensations alerts us to both discrimination and danger. These two levels of sensation work together yet are distinctively important. And furthermore, the skin is the largest and the most prevalent organ.
Touch discrimination- Discrimination of touch allows us to sense where on our body and what is touching us. With discrimination, we are able to discern a fly that lands on our arm. We are able to sense and use our fingertips in fine motor tasks. We are able to touch and discern temperatures, vibrations, mount of pressure, and textures and shapes of objects.
Danger perception– The second level of the tactile system alerts us to danger. It allows us to jump in response to the “fight or flight” response when we perceive a spider crawling on our arm. With this aspect of touch, we are able to discern temperature to ensure skin isn’t too hot or cold. We can quickly identify this temperature or sharpness of an object and quickly move away to avoid burning, freezing, or sharp objects.
When either of these levels of sensation are disrupted, tactile dysfunction can result. This presents in many ways, including hypersensitivity to tags in clothing, a dislike of messy play, difficulty with fine motor tasks, a fear of being touched by someone without seeing that touch, a high tolerance of pain, or a need to touch everything and everyone.
Sensitivity to touch can mean over responding to touch input in the form of textures, temperatures, or pressure. Touch sensitivities mean that the body perceives input as “too much” in a dangerous way. The touch receptors that perceive input are prioritized because the brain believes we are in danger. The body moves into a state of defensiveness, or safe-mode in order to stay safe from this perceived danger. This is tactile defensiveness.
What does Tactile Defensiveness looks like?
Hyper-responsiveness of the tactile sense may include a variety of things:
Overly sensitivity to temperature including air, food, water, or
objects
Withdrawing when touched
Avoids certain food clothing textures or fabrics
Dislikes wearing pants or restrictive clothing around the legs
Avoidance to messy play or getting one’s hands dirty
Avoidance of finger painting, dirt, sand, bare feet on grass, etc.
Avoids touching certain textures
Clothing preferences and avoidances such as resisting shoes
Resistance to nail clipping, face washing
Resists haircuts, hair brushing
Dislikes or resists teeth brushing
Overreacts to accidental or surprising light touches from
others
Avoids affectionate touch such as hugs
Dislikes closeness of other people
As a result of this avoidance, development in certain areas can be delayed, in a way that functional performance of daily tasks is impacted. What you see in as a result of a poorly integrated tactile sensory system:
Delayed fine motor skills
Rigid clothing preferences
Behavioral responses to tasks such as putting on shoes or coat
More information on sensory processing of each of the sensory systems and how that impacts daily life can be found in The Sensory Lifestyle Handbook. You’ll also find practical strategies for integrating sensory diets into each part of every day life, in motivating and meaningful ways. Check out The Sensory Lifestyle Handbook for moving from sensory dysfunction to sensory function!
Supporting Children with Tactile Sensitivities
Understanding tactile defensiveness as a nervous system response helps shift the focus from correcting behavior to supporting regulation. When adults recognize that a child’s reaction is rooted in sensory processing, they can begin to create supportive strategies that gradually build tolerance and comfort with different tactile experiences.
Occupational therapy approaches often include providing predictable sensory experiences, respecting the child’s comfort level, and introducing new textures in ways that feel safe and controlled. Over time, this supportive approach helps the nervous system learn that touch can be experienced without triggering a defensive response.
Recognizing tactile defensiveness through this lens helps parents, educators, and therapists respond with understanding, empathy, and effective support strategies that promote participation in daily activities.
How to help with tactile sensitivity
There are ways to help address these areas, so that the child is safe and can function and perform tasks in their daily life. While addressing tactile sensitivities doesn’t mean changing the child’s preferences, it can mean understanding what is going on, what the child does and does not prefer in the way of sensory processing, and it can mean providing tools and resources to help the child.
This should involve an occupational therapist who can take a look at sensory processing and integration and make specific recommendations.
Some strategies that can impact tactile sensitivity include:
Understanding the child’s sensory systems, and integration in the daily life of the child. Grab the Sensory Lifestyle Handbook to read more on sensory diets that are meaningful and motivating. These are sensory activities that can be integrated right into tasks like baths, tooth brushing, hair brushing, dentist visits, clothing changes, etc.
Take a look at clothing sensitivity red flags for areas of sensitivity to clothing that stand out for the individual child.
Read more on proprioception and the connection of heavy work input as a calming and regulatory tool for sensitivities.
Work on touch discrimination with activities at the level of the child.
Provide verbal input to warn the child prior to light touch
Provide visual cues and schedules for tasks that must be completed such as tooth brushing or hair brushing.
Trial tactile experiences at a graded level, introducing various sensory experiences in a “safe space” at a just right level for the child.
Tactile Defensiveness Sensory Activity
That’s where this messy sensory play activity comes in. By taking out the “messy” part of this sensory experience, children who dislike messy play or touching certain textures can explore the sensory activity and challenge tactile exposure. In this way, they are experiencing a new and novel texture (temperature and squishy, messy experiences), but at a safe level, or “just right” level for them.
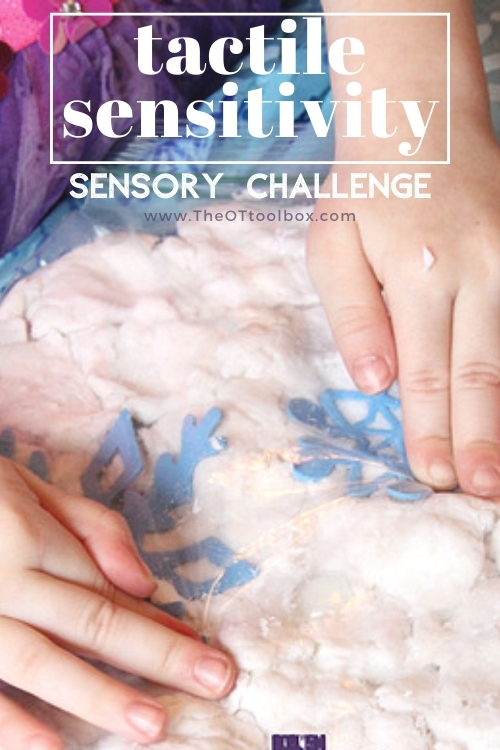
This snow sensory play activity has the opportunity for tactile challenges, but it uses a plastic bag to contain the actual mess, allowing for a mess-free sensory experience, at different grades of texture exposure.
Fake Snow Recipe
We made fake snow one recent weekend, when we had a big cousin sleep over. There were six kids aged five and under staying overnight at our house. I had this activity planned for us to do together, (because I procrastinated ) and had to get it together to take to a Winter Festival at our church the next day. It was a fun messy play idea for indoor snow.
We’ve made this fake snow before and I have the recipe listed on our Messy Play Day post.
This fake snow is easy, because it includes only 2 ingredients:
Toilet paper
Ivory soap
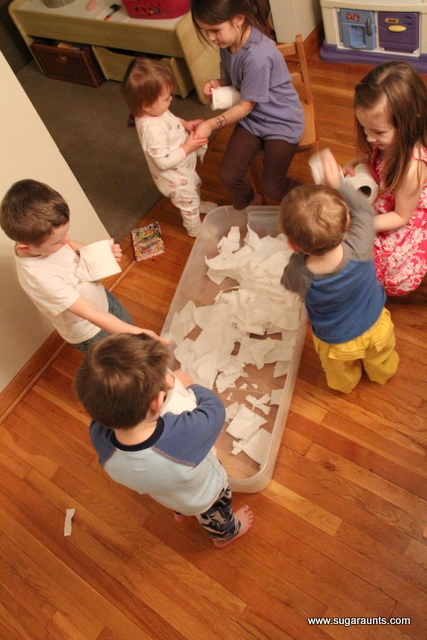
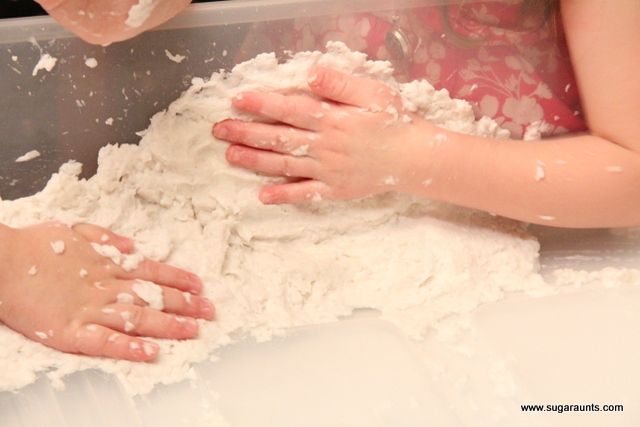
With these two ingredients, there are many opportunities for tactile sensitivity challenges, and each child can experience sensory exploration at a level that suits their preferences. Some children may enjoy experiencing the dry texture of the toilet paper. (See the kids below…they sure enjoyed this texture.)
Other children may prefer (or avoid) the tactile experience of touching and manipulating the squishy, warm soap texture.
Others may tolerate mixing the two textures together.
Still others, may prefer none of these textures. In this case, move to the last level of this tactile experience, which is placing the fake snow into the plastic baggie. Then, they can squeeze and touch the sensory fake snow with a barrier in place. they will still experience the warm temperature and firm, heavy work of squeezing through their hands, but they will experience this sensory input in a “safe” level with that plastic bag barrier.
Fake Snow Dry sensory Bin
Step 1: Tear the toilet paper into shreds. Keep this in a bin or large container. We used an under-the bed storage bin because I was making a large quantity of fake snow for our Winter Festival.
We shredded the toilet paper and the kids had a BLAST! It started out so neat and kind. Tearing the toilet paper is a fantastic fine motor activity for those hands, too. It offers heavy work input through the hands which can have a regulating, calming impact on the joints of the hands. This can be a nice “warm up” exercise for the tactile challenge of exploring and manipulating the dry toilet paper texture.
For kids with tactile sensitivities, this might be “too much” for them to handle. Try using tongs and ask them to explore the toilet paper shredding sensory bin to find hidden items. Some of the paper cards and winter words in our Winter Fine Motor Kit are great additions to this sensory bin.
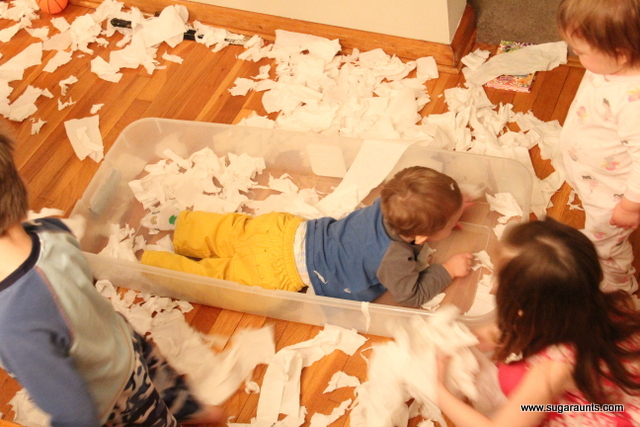
And then turned in to this.
And this.
Slightly off-course in our sensory bin, but of course it did. Why wouldn’t it when you have 6 cousins together? ((Ok, that part of this post was NOT mess-free…the end result is mess-free. I promise.)) So, then we popped the Ivory soap into the microwave…
Fake Snow Wet Sensory Experience
Step 2 in the tactile sensory experience is the wet fake snow portion. Following the fake snow recipe, we popped a bar of ivory soap into the microwave and ended up with a cloud of sensory material.
Children can touch and explore this sensory material for a warm, sensory experience.
Step 3 in the tactile challenge is mixing the dry material with the wet material. This can definitely be a challenge for those with tactile defensiveness or touch sensitivities.
If it is too much of a sensory challenge, invite the child to mix with a large spoon or to touch with a finger tip.
Other children may enjoy this part of making fake snow. The melted soap can be mixed with the toilet paper…to make fake snow!
Fake Snow Sensory Play for Tactile Sensitivities
THIS is the mess-free part that many children with tactile defensiveness may enjoy. 🙂
Simply place some of the fake snow material into a zip top plastic bag. You can tape the top shut to keep the material in the bag.
By manipulating the fake snow in a safe sensory manner, kids get exposure to a calming warm temperature. This is one low-level challenge to the tactile system. The warm temperature is a calming, regulating aspect that can be powerful in self-regulation.
Children can also squeeze, manipulate, pound, and spread the fake snow within the plastic baggie. This offers heavy work input through the hands and upper body in a way that is calming and regulating.
By placing the fake snow into a bag for sensory play, kids are exposed to tactile experinces in a way that may help with tactile discrimination by incorporating the proprioceptive sense.
Challenge motor skills further by adding items such as foam snowflake stickers, glass gems, and glitter. This was so much fun for my crew of kids and nieces and nephews and I hope it’s a tactile experience you get to play with as well!
Products mentioned in this post:
The Sensory Lifestyle Handbook– The Sensory Lifestyle Handbook is your strategy guide for turning sensory diets and sensory activities into a sensory lifestyle.
A Sensory Diet Strategy Guide The Sensory Lifestyle Handbook is a strategy guide for sensory processing needs. With valuable insight to the sensory system and the whole child, the book details how sensory diets can be incorporated into a lifestyle of sensory success. The thoughtful tools in this book provide intervention strategies to support and challenge the sensory systems through meaningful and authentic sensory diet tactics based on the environment, interests, and sensory needs of each individual child.
This print-and-go winter fine motor kit includes no-prep fine motor activities to help kids develop functional grasp, dexterity, strength, and endurance. This 100 page no-prep packet includes everything you need to guide fine motor skills in face-to-face AND virtual learning. Includes winter themed activities for hand strength, pinch and grip, dexterity, eye-hand coordination, bilateral coordination, endurance, finger isolation, and more.
Colleen Beck, OTR/L has been an occupational therapist since 2000, working in school-based, hand therapy, outpatient peds, EI, and SNF. Colleen created The OT Toolbox to inspire therapists, teachers, and parents with easy and fun tools to help children thrive. Read her story about going from an OT making $3/hour (after paying for kids’ childcare) to a full-time OT resource creator for millions of readers. Want to collaborate? Send an email to contact@theottoolbox.com.
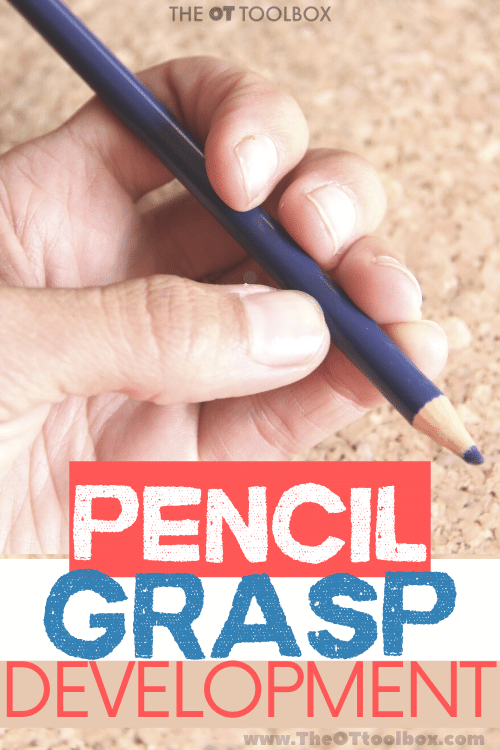
Pencil grasp development is a common concern for many parents, teachers, and therapists. So often, we see children holding a pencil with all of their fingers wrapped around the pencil, or very awkward pencil grips and wonder what is a typical pencil grasp. But, did you know that children typically progress through pencil grasp development in a predictable pattern? It’s true! Let’s talk pencil grasp.
Secondly, it’s important to note that grasp development, while it can be predictable, can also vary in timing. And when grasp doesn’t follow the progression listed below…it can be ok! In fact, a functional pencil grasp is perfectly fine for children.
Pencil Grasp Development
Grasp development follows three main categories: primitive grasps, transitional grasps, and mature grasps.
Primitive Pencil Grasps
In this beginning pencil grasp, the whole arm moves the pencil. These grasps include two specific grips which are described below:
Palmer Supinate Grasp (a whole hand grasp)
Digital Pronate Grasp
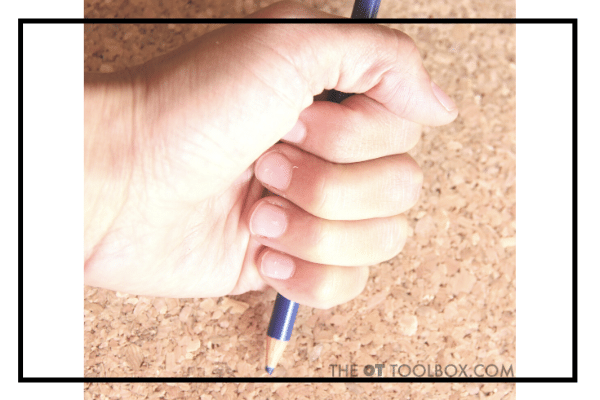
1. Whole Hand Grasp/Palmer Supinate Grasp- (Typically seen between 12 months-1.5 years) Child holds the crayon with their whole hand, with the writing end of the crayon sticking out near their pinkie side of the hand. It looks like they are holding a paint stirrer or potato masher.
2. Digital Pronate Grasp/ Pronated Wrist Grasp- (2-3 years) Crayon is held in the hand so the tip of the crayon (or the drawing end) is held on the thumb side of the hand.
Transitional Pencil Grasps
In the transitional pencil grasp stage, the child’s forearm and/or wrist moves the pencil.
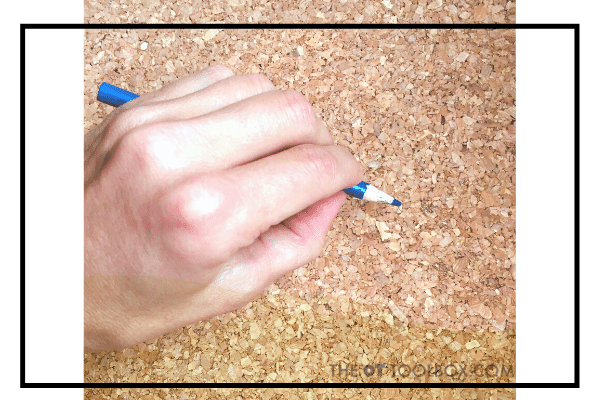
1. Quadrupod Grasp, or Four Fingered Grasp- (3-4 years)- Crayon is held between their thumb, and tips of the pointer finger, middle finger, and ring finger. As the child progresses, these four fingers may pull down to the tip of the finger into a quadrupod grasp.
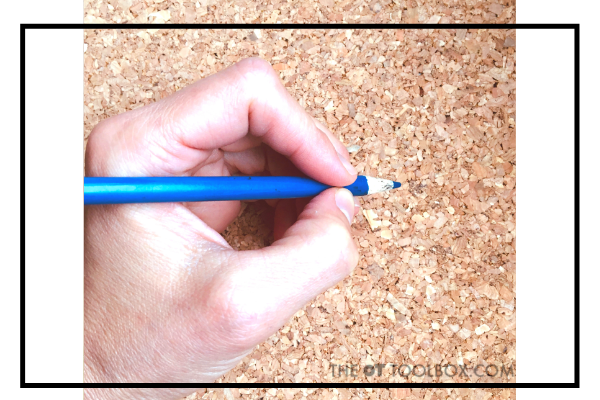
2. Static Tripod Grasp- (3.5-4 years)- Child holds the writing utensil with the thumb, pointer finger, and rests the utensil on the last joint of the middle finger. The ring finger and pinkie fingers are tucked into the palm of the hand.
3. Other grasp patterns- There can be many variations of grasp patterns that occur in the transitional stage, marked by the use of the wrist or forearm to move the pencil.
Mature Pencil Grasps
In the mature pencil grasp stage, the child holds and maneuvers the pencil using mobility in the fingers or the hand.
Mature grasp patterns include:
Dynamic Tripod Grasp
Lateral Tripod Grasp
Dynamic Quadrupod Grasp
Lateral Quadrupod Grasp
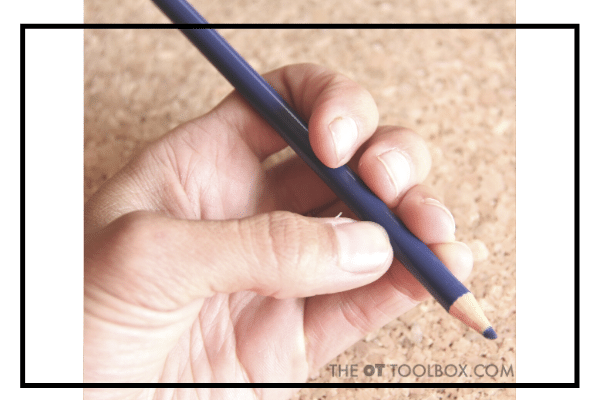
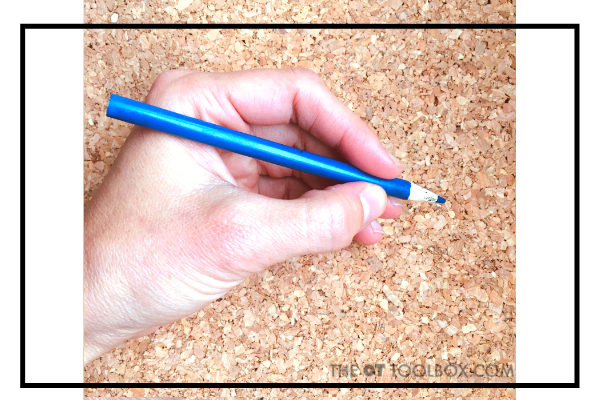
1. Dynamic Tripod Grasp- (4-6/7 years) Thumb and pointer finger hold the pencil as it rests on the last joint of the middle finger. Pencil movements occur via manipulation of the fingers and hand. Note that a true dynamic tripod grasp may not be established up until around 14 years of age.
2. Lateral Tripod Grasp- Thumb is pressed in against the pencil (or adducted) to hold the pencil against the side of the pointer finger. The tip of the thumb may bend over (or flex) over the pencil in a “wrapped” position. This grasp is sometimes called a thumb wrap grasp because the thumb is not involved with the distal movement of the pencil. Distal mobility occurs, but it is the index and middle fingers manipulating the pencil.
3. Dynamic Quadrupod Grasp- Grasp is similar to the dynamic tripod grasp, but opposition includes the thumb, pointer finger, middle finger on the pencil shaft.
4. Lateral Quadrupod Grasp- Grasp is similar to the lateral tripod grasp, with its thumb wrapped positioning of the thumb, but uses the pointer, middle, and ring fingers are on the pencil shaft and manipulate the pencil.
Quadrupod Grasp
One thing that is important to mention is the quadrupod grasp. You might have noticed this term was mentioned a few times above, and in difference areas of development through the progression of pencil grasp development.
The quadrupod grasp is considered a four finger grasp, in which four fingers (thumb, pointer finger, middle finger, ring finger) are used to hold the pencil. Quadrupod grasp progresses from a static form to a dynamic form where there is fluid motion and repositioning in the joints of the hands.
Quadrupod Grasp- If the thumb opposes the pointer finger, middle finger, and ring finger this may be called a quadrupod grasp. A quadrupod grasp can also occur with the pencil resting on the side of the ring finger.
The quadrupod stage is an important part of grasp development as the fingers move into a dynamic position with pronation and extension of the wrist. However, don’t get stuck on a quadropod grasp if this type of grip is used with older children or if students are established with their quadrupod grasp!
Quadrupod grasp or Tripod Grasp?
Research tells us that the quadrupod grasp is a very functional grip and the use of one extra finger (as opposed to the traditional sense of a tripod grasp) is actually very functional in written work.
Some may say that the quadrupod grasp is more restrictive than the tripod grasp, however that extra stability can actually promote more mobility in the pencil and be used in very efficient and effective handwriting.
When the child that the uses a quadrupod grp on the pencil is forced to use a tripod grasp, you may see a decrease in written work legibility due to decreased stability. The arches of the hands may need to compensate for strength and dexterity in the fingers and that precise placement that the ring finger adds to the shaft of the pencil just isn’t as targeted with the arches of the hand and the stability offered through the ulnar side of the hand. For those who have the stability in the ulnar side and within the arches or intrinsic muscles, a tripod grasp can be more precise and lead to more refined pencil motions.
So you can see that it all is up to each individual when it comes to forcing a student to move from quadrupod to tripod. It just may not make sense to do so for some…and that’s ok and very functional!
Other Functional Pencil Grasps
There are other grasps that can be considered “functional” in which the child holds the pencil differently than described here, but can also write in an efficient manner.
These can include (but not be limited to) a thumb wrap grasp, thumb tuck grasp, inter-digital brace grasp, or a finger-wrap grasp.
Pencil Grasp Development and Fine Motor Skills
Pencil grasp develops gradually as part of overall fine motor development. In the earliest stages of pencil grasp development, a toddler typically uses a palmar grasp, wrapping the whole hand around a crayon or marker.
At this stage, movement comes mostly from the shoulder and elbow, and the child’s hands are focused on exploring rather than precision. When a toddler begins to scribble, the goal is not neatness but sensory feedback and control of large movements. These early scribbles lay the foundation for later fine motor skills.
As children gain strength and coordination, finger dexterity and distal coordination progresses. Instead of relying primarily on the elbow and shoulder, the child starts to move the tool using the wrist and eventually the fingertips. In occupational therapy, we like to say proximal stability before distal mobility.
This shift allows greater control over lines and shapes.
This is where we see grasp patterns really start to emerge.
During this stage, you may see variations such as a quadruped grasp, where four fingers help stabilize the marker or pen. The child’s hands are learning to coordinate small muscles, and core strength also plays a role in providing a stable base for refined hand control.
Over time, children typically progress toward a 3-finger grasp, sometimes referred to as a tripod grasp. In this more mature pattern, the writing tool is held between the thumb and index fingers, resting on the middle finger. The tips of their fingers guide the movement rather than the whole arm. This allows for precise control, endurance, and efficient letter formation. The fingertips become responsible for controlled, isolated movements rather than broad arm swings.
When Should Kids Use a Pencil?
Here’s how I respond to that question. Try to hold off on pencil and paper activities (worksheets) until kindergarten. When kids are handed a pencil or pen too soon, that’s when we see primitive grasps become “stuck”.
This happens in preschools where kids are tracing and writing on worksheets. Instead, use PLAY! We have a bunch ideas for fine motor activities using play that should come before pencils.
Children begin holding crayons or markers as toddlers, but how they hold them changes over time. Around age 2 to 3, children typically use a whole-hand or palmar grasp. By age 4 to 5, many children are developing more refined finger-based grasps. A functional 3-finger grasp often emerges between 5 and 6 years of age. Development is gradual, and there is a wide range of typical. It’s much better to use crayons in coloring to progress through these stages rather than a pencil. The crayon provides a heavier, more resistive feedback and strengthens the fingers, hands, and arches of the hands. Arch development is HUGE in a functional pencil grasp!
At what age should a child use a pencil grip?
One question we get a lot as pediatric OTs is when kids should add a pencil grip to their pencil.
Most children do not need a pencil grip in the preschool years. Pencil grips are typically considered when a child is school-aged, usually around 5 to 7 years old, and showing signs of fatigue, discomfort, or inefficient grasp patterns during writing tasks. Before that age, hands are still developing strength, coordination, and control. For younger children, it is more important to build fine motor skills than to add adaptive tools too early. It’s most important to work on the fine motor skills needed for strength and coordination to manage and manipulate the pencil. Try play dough, coloring, playing with beads, puzzles, tearing paper…SO many fun fine motor activities help with manipulating a pencil.
Tips to Help with Pencil Grasp Development
Providing opportunities for practice on a vertical surface, such as at an easel, can support this development. Writing or drawing on a vertical surface encourages wrist extension and strengthens the muscles needed for refined finger movements.
Using tools like a marker or pen in short, engaging tasks helps children build coordination and confidence. Activities that promote fine motor skills, along with attention to posture and core strength, support the natural progression through the stages of pencil grasp development.
Ultimately, pencil grasp is not just about how a child holds a pen. It reflects the integration of fine motor development, hand strength, coordination, and stability.
Supporting the child’s hands through purposeful play and developmentally appropriate expectations allows grasp patterns to mature in a way that promotes comfort, endurance, and functional writing skills.
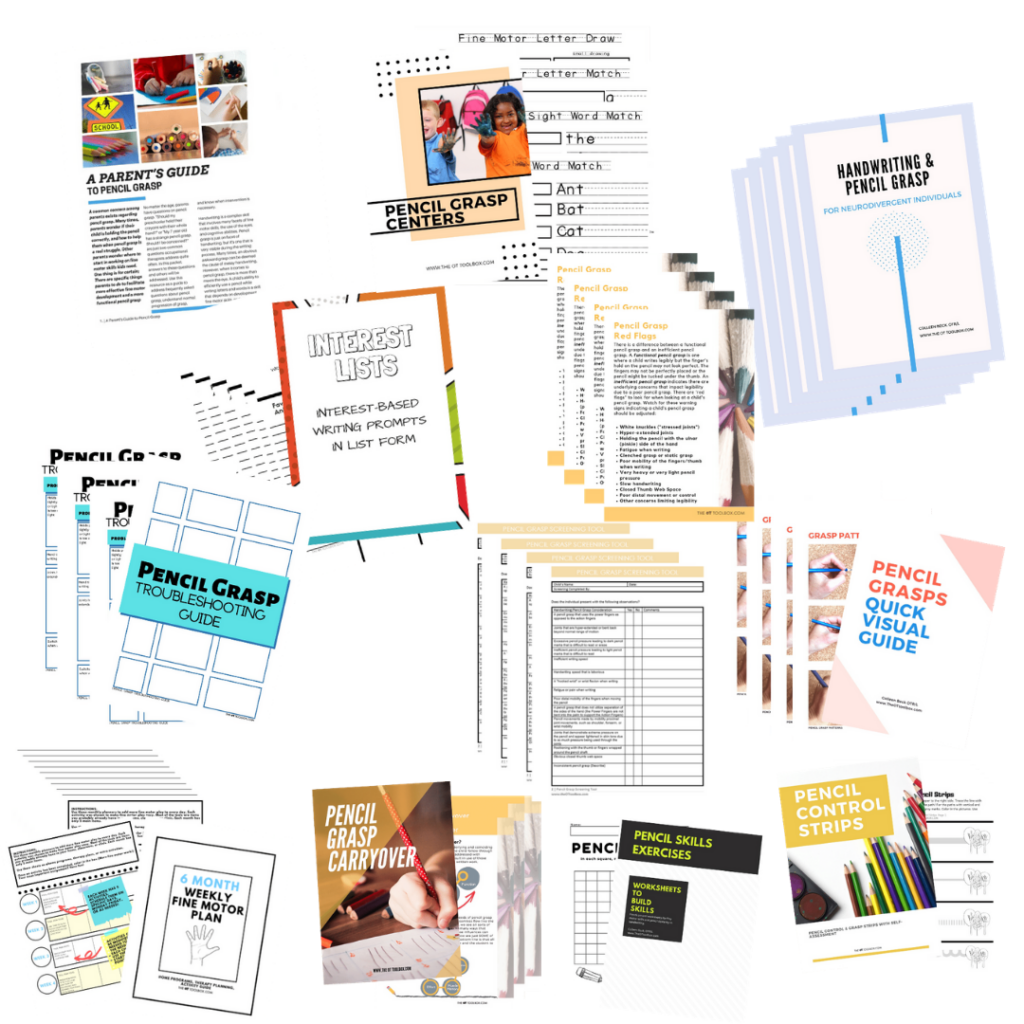
One tool we love is the Pencil Grasp Bundle.
How to help with pencil Grasp
Want to know more about pencil grasp progression, development, and strategies to use to help children build a strong, efficient, and functional pencil grasp? It’s all in the Pencil Grasp Bundle!
The Pencil Grasp Bundle is for those struggling to help students with carryover of skills. It’s designed to make pencil grasp practice meaningful and motivating. The Pencil Grasp Bundle is 16 pencil grasp resources, guides, worksheet sets, and tools.
Pencil Grasp Success Was Never Easier.
It can be a real struggle to help kids address tricky pencil grasps. It is frustrating and difficult to weed through all of the information and pull out what will work for a child.
You struggle with kids who work on skills but can’t carryover handwriting and pencil grasp into the classroom.
Therapists may search for fresh ideas to address pencil grasp needs and wonder whether a grasp is considered functional or needs changing.
Therapists need pencil grasp screening and educational materials to address a huge influx of therapy referrals.
Parents wonder about development and skills.
Teachers will love the Centers activities to incorporate into learning to impact carryover of handwriting skills.
The Pencil Grasp Bundle includes 16 products and is valued at over $73. It’s bundled together and offered at just $24.
More pencil grasp help
Want to know how to fix a problem with pencil grasps? Need help knowing where to start when it comes to immature pencil grasps or a child hating to write because their hand hurts? The Pencil Grasp Challenge in open for you! In this free, 5 day email series, you’ll gain information, resources, specific activities designed to promote a functional, efficient pencil grasp.
The pencil grasp challenge is a free, 5 day mini course and challenge. During the course of five days, I’ll be teaching everything you need to know about the skills that make up a functional pencil grasp. You’ll learn what’s going on behind the inefficient and just plain terrible pencil grasps you see everyday in the classroom, clinic, or home. Along with loads of information, you’ll gain quick, daily activities that you can do today with a kiddo you know and love. These are easy activities that use items you probably already have in your home right now.
Besides learning and gaining a handful (pun intended) of fun ideas to make quick wins in pencil grasp work, you’ll gain:
5 days of information related to pencil grasp, so you know how to help kids fix an immature pencil grasp.
Specific activities designed to build a functional pencil grasp.
Free printable handouts that you can use to share with your team or with a parent/fellow teachers.
You’ll get access to printable challenge sheets, and a few other fun surprises.
And, possibly the best of all, you’ll get access to a secret challengers Facebook group, where you can share wins, chat about all things pencil grasp, and join a community of other therapists, parents and teachers working on pencil grasp issues.
Colleen Beck, OTR/L has been an occupational therapist since 2000, working in school-based, hand therapy, outpatient peds, EI, and SNF. Colleen created The OT Toolbox to inspire therapists, teachers, and parents with easy and fun tools to help children thrive. Read her story about going from an OT making $3/hour (after paying for kids’ childcare) to a full-time OT resource creator for millions of readers. Want to collaborate? Send an email to contact@theottoolbox.com.
Inhibitory control is one of the foundational building blocks of executive function. Executive functions are the higher-level cognitive processes that allow a person to plan, organize, problem-solve, regulate emotions, and engage in goal-directed behavior. Among these processes, inhibitory control acts as the mental “brake system” that makes all the others possible.
At its core, executive function requires three primary components: (1) working memory, (2) cognitive flexibility, and (3) inhibitory control.
Inhibitory control allows an individual to pause before acting, resist distractions, and suppress automatic responses. Without this pause, the brain cannot effectively use working memory to hold instructions in mind or apply cognitive flexibility to adjust strategies. In other words, inhibition creates the space for thoughtful decision-making.
In everyday life, inhibitory control supports the ability to ignore irrelevant stimuli, delay gratification, regulate emotional reactions, and choose behavior that aligns with expectations.
For a child in school, this may look like raising a hand instead of blurting out, completing an assignment carefully rather than rushing, or staying seated during instruction. These behaviors are not separate from executive function; they are visible outcomes of it.
From a developmental perspective, inhibitory control often emerges as one of the earliest executive function challenges observed in young children. Difficulties may initially appear as impulsivity or hyperactivity.
As children grow, the outward behaviors may decrease, but the executive demand remains. Adolescents and adults with inhibition challenges may struggle more internally, with racing thoughts, distractibility, or impulsive decision-making.
In occupational therapy, understanding inhibitory control as part of executive function shifts the focus from managing behavior to strengthening cognitive processes.
When we support inhibition, we are strengthening the broader executive system that enables purposeful participation in learning, social interaction, and daily routines.
What is inhibitory control?
Inhibitory control in occupational therapy refers to the ability to suppress an automatic, impulsive, or dominant response in order to engage in purposeful, goal-directed activity. It is a core component of executive functioning and supports participation in daily occupations across home, school, and community environments.
From an occupational therapy perspective, inhibitory control is not simply about behavior management. It is a cognitive process that allows an individual to pause, filter distractions, regulate emotional responses, and choose actions that align with task demands and social expectations. This skill underlies successful performance in occupations such as classroom learning, self-care routines, social interaction, and play.
In practice, inhibitory control supports:
Waiting before acting or speaking
Ignoring irrelevant stimuli
Following multi-step directions without rushing
Managing emotional reactions during challenging tasks
Regulating motor output, such as controlling force and movement speed
When inhibitory control is impaired, children may demonstrate difficulty with impulse control, task persistence, attention, and social participation. These challenges can interfere with fine motor tasks, classroom routines, peer interactions, and independence in daily living skills.
Occupational therapy intervention targets inhibitory control through structured routines, environmental modifications, movement-based strategies, cognitive scaffolding (such as “stop and think” cues), and activities that promote self-regulation and flexible thinking. The goal is to strengthen the child’s ability to pause, evaluate, and respond intentionally in meaningful occupations.
Inhibition is one of the most important, and most misunderstood, executive functioning skills in children and teens.
It is the brain’s ability to pause before acting, speaking, or reacting. In young children, difficulties with inhibition often look like constant movement, blurting out answers, grabbing toys, or acting without thinking about consequences.
As kids grow into adolescence, the outward hyperactivity may decrease, but the challenge does not disappear. Instead, it often shifts inward, showing up as racing thoughts, impulsive decision-making, difficulty filtering distractions, or reacting emotionally before considering the bigger picture.
Understanding inhibition across development helps parents, educators, and therapists recognize that these behaviors are not simply willful misbehavior, but reflect a maturing executive functioning system that supports purposeful activity, learning, and relationships.
What Does Inhibitory Control Look Like?
Inhibition is a core executive functioning process. It refers to the brain’s ability to suppress or delay an automatic response. It is the mental “brake system” that allows a person to pause before acting, speaking, or reacting.
Emotional inhibition – moderating an emotional reaction
Inhibition is the internal neurological mechanism that allows regulation to happen.
Is Inhibition the same as Impulse Control?
Impulse control is the observable behavior that results from effective inhibition.
When someone demonstrates impulse control, we see that they:
Wait their turn
Think before speaking
Resist grabbing something they want
Pause before reacting emotionally
Impulse control is what we see on the outside. Inhibition is the brain process that makes it possible.
One way we explain this from the OT perspective…
Inhibition is the internal skill. Impulse control is the external outcome.
You could think of inhibition as the brake pedal in a car. Impulse control is the car actually slowing down when the brake is pressed.
If the braking system (inhibition) is weak or immature, the car (behavior) does not slow down effectively.
Why the Difference Matters for Parents and Therapists
When we say a child “has poor impulse control,” we are describing behavior. When we talk about “inhibition deficits,” we are describing executive function development.
This distinction matters because:
Punishment alone does not strengthen inhibition.
Skill-building strategies can improve inhibition over time.
Movement, structure, visual supports, and scaffolding help build the internal pause.
They are connected but not identical.
In younger children, inhibition challenges may look like hyperactivity, blurting, or grabbing. In adolescents or adults, it may show up as difficulty filtering thoughts, interrupting others, or making quick decisions without considering long-term consequences.
Inhibition is the brain-based executive function. Impulse control is the behavioral expression of that function.
Understanding this helps shift the focus from “Why won’t they stop?” to “How can we strengthen their ability to pause?”
Inhibition and Executive Functioning: Why It Matters
Inhibition is the ability to pause before acting, speaking, or reacting. It allows a child to stop, think, and then choose a response that fits the situation.
This skill is foundational for purposeful activity at home, in school, and in social settings. When inhibition is weak, children often act before thinking, respond impulsively, or struggle to manage their physical and verbal behavior.
For parents and occupational therapists, inhibition is often one of the earliest executive functioning challenges noticed in preschool or kindergarten.
How Inhibition Challenges Show Up in Young Children
In early childhood, difficulty with inhibition may look like constant motion or exaggerated energy. A child may move quickly from one activity to the next, rush through fine motor tasks, or handle materials with excessive force. Their grasp may appear immature or inefficient because they are moving too fast to refine their motor control.
Verbal inhibition may also be affected. Some children interrupt frequently, call out answers, yell, or make noises during quiet activities. They may struggle to wait their turn, maintain personal space, or respond appropriately in group settings. Socially, this can lead to grabbing toys, acting without considering consequences, or reacting physically during frustration.
These behaviors are not intentional misbehavior. They reflect difficulty slowing down long enough to evaluate what is happening and what response is most appropriate.
The Impact on Purposeful Activity and Participation
Inhibition supports successful engagement in daily tasks. When this skill is underdeveloped, it can interfere with:
Completing schoolwork carefully
Participating in group learning
Following classroom routines
Managing peer interactions
Making thoughtful choices
For example, a child may take something they want without considering the outcome. They may begin a task before listening to directions fully. They may rush through assignments and make avoidable mistakes. Each of these challenges affects participation and learning.
Occupational therapy intervention often includes strategies to build body awareness, incorporate movement before seated work, and teach structured “stop and think” routines to support impulse control.
Restlessness and the Need for Movement
Some children with inhibition challenges appear constantly in motion. They may fidget, tap their feet, shift in their seats, or seek movement opportunities. Even when seated, their bodies may appear busy.
Movement-based strategies can be helpful. Activities that involve heavy work or structured physical effort before academic tasks may improve focus and engagement.
While supports such as lap weights or movement breaks can reduce visible restlessness, the need for internal regulation may still be present. Research has shown that structured physical activity can improve attention and learning outcomes for students with attention and inhibition challenges.
How Inhibition Changes Over Time
As children grow, overt hyperactive behaviors often decrease. By adolescence, many are no longer climbing furniture or running through rooms impulsively. However, the difficulty with inhibition may shift internally.
Instead of constant physical motion, older students and adults may experience racing thoughts, difficulty filtering distractions, or trouble prioritizing what deserves attention. This internal distractibility can affect academic performance, work productivity, and relationships.
Understanding this developmental shift helps parents and therapists recognize that inhibition challenges do not simply disappear. They evolve.
What Does Lack of Inhibitory Control Look Like?
Because impulse control and inhibitory control are so similar, we want to reiterate that this executive function skill is the piece that lets us suppress automatic or dominant responses to stimuli.
This helps us to manage those impulsive actions and maintain focus, so we CAN do daily functional and purposeful tasks.
Impulse control refers to the ability to resist an immediate urge or temptation. Inhibitory control, on the other hand, is the broader executive skill that allows a person to regulate attention, thoughts, and actions in order to pause and prevent an automatic or inappropriate response.
Here is a developmentally organized list of examples showing how difficulty with inhibition may present at different ages. These examples focus on functional participation at home, school, and in social situations.
Preschool (Ages 3–5)
Grabs toys from peers without waiting
Runs in indoor spaces despite reminders
Has difficulty stopping when told “freeze” or “wait”
Blurts out unrelated comments during group time
Touches everything within reach
Struggles to keep hands to self
Moves quickly between activities without completing tasks
Hits or pushes when frustrated
Climbs on furniture impulsively
Has trouble sitting for short structured activities
Early Elementary (Ages 6–8)
Calls out answers without raising a hand
Interrupts conversations frequently
Rushes through schoolwork and makes careless errors
Leaves seat repeatedly during class
Difficulty waiting in line
Invades personal space of peers
Acts before fully listening to directions
Reacts emotionally before thinking
Difficulty stopping preferred activities
Grabs materials without asking
Upper Elementary (Ages 9–11)
Talks excessively in class
Struggles to filter comments that may be socially inappropriate
Begins assignments before reading all instructions
Difficulty delaying gratification
Acts on dares without thinking through consequences
Interrupts group discussions
Trouble managing frustration during games or competition
Makes impulsive online comments or messages
Difficulty resisting distractions during independent work
Overreacts quickly to peer conflict
Middle School (Ages 12–14)
Interrupts teachers or peers during discussions
Reacts emotionally before considering social impact
Makes snap decisions in friendships
Difficulty prioritizing important tasks over immediate interests
Engages in risky behavior without fully weighing consequences
Struggles to ignore phone notifications
Has trouble regulating tone or volume in social situations
Blurting sarcastic or inappropriate remarks
Difficulty pausing during disagreements
Rushes through homework to get it done quickly
High School (Ages 15–18)
Impulsive decision-making in social or academic situations
Difficulty filtering thoughts before speaking
Reacts strongly in arguments without reflection
Trouble managing digital communication appropriately
Difficulty prioritizing long-term goals over short-term rewards
Acts before evaluating risks
Struggles with emotional restraint in relationships
Makes quick commitments without planning
Difficulty resisting distractions during studying
Feels mentally restless with racing thoughts
young Adulthood
Interrupts colleagues or dominates conversations
Impulsive spending decisions
Difficulty filtering thoughts during meetings
Reacts quickly to stress without reflection
Trouble distinguishing important from unimportant information
Difficulty waiting before responding to emails or texts
Struggles with emotional restraint in workplace settings
Makes snap career or relationship decisions
Experiences constant mental chatter that interferes with focus
Occupational therapy Interventions for Inhibitory Control
Supporting Inhibition Through Occupational Therapy
Intervention focuses on helping children build the ability to pause, reflect, and respond intentionally. Strategies may include:
Structured movement before seated work
Visual reminders to stop and think
Clear, consistent consequences paired with teaching moments
Explicit teaching of problem-solving steps
Practice waiting, turn-taking, and flexible thinking
Inhibition is not about forcing compliance. It is about strengthening the mental pause that allows a child to choose purposeful action over impulsive reaction.
When children learn to pause, they gain greater independence, stronger relationships, and improved participation in the meaningful occupations of daily life.
Next, let’s go over some ideas to support this executive functioning skill.
Preschool (Ages 3–5)
At this age, inhibitory control is emerging. Therapy should focus on playful, movement-based activities that require stopping, waiting, and shifting.
Session ideas:
Freeze dance or “stop and go” games
Red light, green light
Simon Says
Turn-taking board games
Obstacle courses with built-in pause points
“Wait hands” practice during snack prep
OT focus:
Teaching the concept of pause
Practicing waiting for a cue
Supporting motor inhibition
Using visual signals (stop signs, colored cards)
Short, repetitive practice builds the brain’s braking system in a fun and structured way.
Early Elementary (Ages 6–8)
Children at this stage can begin connecting inhibition to school performance and social participation.
Session ideas:
Games requiring impulse control (Uno, Spot It, Jenga)
Timed tasks where the goal is accuracy over speed
“Think it or say it?” social scenarios
Writing tasks that require slowing down and self-checking
Movement breaks followed by structured seated work
OT focus:
Teaching “stop–think–do” strategies
Increasing awareness of rushing
Practicing waiting before answering
Building emotional pause skills
This is the age to introduce simple metacognitive language: “What does your brain need to do before your body moves?”
Upper Elementary (Ages 9–11)
Students can now reflect on behavior and connect inhibition to consequences.
Sessions may include brief discussion about how pausing improves performance in school, sports, and friendships.
Middle School (Ages 12–14)
Inhibition shifts more toward emotional and cognitive control.
Session ideas:
Goal-setting and reflection activities
Social problem-solving tasks
Structured debates with pause rules
Mindfulness exercises
Executive functioning planners
OT focus:
Teaching cognitive filtering (Is this helpful? Is this important?)
Managing emotional reactions
Practicing response delay in conversations
Using self-talk strategies
Movement may still be necessary, but discussion and insight become more central.
High School (Ages 15–18)
Inhibitory control at this age often involves decision-making and long-term planning.
Session ideas:
Scenario-based decision mapping
Time management planning
Risk vs reward analysis tasks
Stress-management routines
Study strategies that reduce distraction
OT focus:
Strengthening delay of gratification
Improving digital impulse control
Developing internal pause strategies
Building independence in executive functioning
This stage emphasizes applying inhibition to real-life responsibilities.
Across All Ages: Sensory and Regulation Supports
Because inhibition is closely tied to regulation, sessions should include:
Heavy work before seated tasks
Deep pressure activities
Structured movement breaks
Visual cues for pausing
Calm-down strategies
Supporting the nervous system strengthens the brain’s ability to inhibit impulses.
Inhibitory Control: The Big Picture in Occupational Therapy
Working on inhibitory control is not about telling a child to “try harder.” It involves:
Teaching the pause
Practicing it in meaningful occupations
Strengthening regulation
Embedding support into real tasks
When inhibition improves, participation improves. Children can think before acting, manage frustration, and engage more successfully in school, play, and home routines.
The Impulse Control Journal…a printable resource for helping kids strategize executive functioning skill development. When saying “calm down” just isn’t enough…
When a child is easily “triggered” and seems to melt down at any sign of loud noises or excitement…
When you need help or a starting point to teach kids self-regulation strategies…
When you are struggling to motivate or redirect a child without causing a meltdown…
When you’re struggling to help kids explore their emotions, develop self-regulation and coping skills, manage and reflect on their emotions, identify their emotions, and more as they grow…
Grab the Impulse Control Journal to build organizational strategies, planning, prioritization, habits, and mindset in kids.
Colleen Beck, OTR/L has been an occupational therapist since 2000, working in school-based, hand therapy, outpatient peds, EI, and SNF. Colleen created The OT Toolbox to inspire therapists, teachers, and parents with easy and fun tools to help children thrive. Read her story about going from an OT making $3/hour (after paying for kids’ childcare) to a full-time OT resource creator for millions of readers. Want to collaborate? Send an email to contact@theottoolbox.com.
Coming up with fun occupational therapy activities for the winter months can be tricky, but this winter paper contains a whole winter theme making activity planning easy. This can be a dark and dreary time for many. Take this time to create amazing lesson plans for your learners! Add this activity to your winter occupational therapy ideas.
Today’s free downloadable PDF, Mitten Paper – Color and Find Modified Paper, will be a great addition to your winter themed lesson plan.
Looking for a consistent way to support fine motor skills all year? This yearlong fine motor system includes seasonal activity kits and monthly data collection tools to support planning and progress monitoring.
If fine motor planning and data collection feel overwhelming, you’re not alone. This done-for-you yearlong bundle organizes seasonal activities and monthly screening tools in one system.
The Mitten Paper printable packet is simple in design, yet provides countless activities and skill building opportunities. Did you get a chance to read (Amazon affiliate link) The Mitten by Jan Brett? This story, featuring one amazing mitten, and a forest full of animals, is a great starting point to a great treatment plan.
“When Nicki drops his white mitten in the snow, he goes on without realizing that it is missing.
One by one, woodland animals find it and crawl in; first, a curious mole, then a rabbit, a badger and others, each one larger than the last. Finally, a big brown bear is followed in by a tiny brown mouse and what happens next makes for a wonderfully funny finish.”
Many students, who already dread writing, have difficulty coming up with stories from their imagination. Writing prompts can help students start their stories. Add a story like The Mitten to this writing activity and hopefully the ideas will come easier. What kind of prompts could you write from this story?
Upcoming posts to the OT Toolbox are going to be featuring writing prompt ideas for each month and season. Keep following social media, and check your inbox to keep track of these posts.
How does this support differentiated instruction?
Differentiation means adjusting the content, the process, the learning environment according to the student. OT professionals are really good at using one craft or activity to do this and meeting the needs of their whole caseload.
Adjusting line size and structure
Modifying task expectations
Allowing multiple entry points into the activity
Targeting one or two goals at a time rather than everything at once
Some students may focus primarily on scanning and counting. Others may focus on spacing and letter placement. Advanced learners may write paragraphs or create graphs.
You are meeting students where they are, while moving them forward.
HOW TO USE THE MITTEN PAPER WORKSHEETS
Writing prompts and handwriting are not the only ways to use these cute Mitten Paper Color and Find Worksheets.
Test your learner’s visual perceptual skills by having them find all of the matching items, and circle or color them. Learners can scan for multiple items at once, or one at a time. Dot markers would be a great tool for young learners to stamp as they find the hidden mittens.
Learners can count how many mittens they find of each variety, or the total number of mittens, then write the number and key words on the lined paper (example: 4 snowflake mittens).
Create a graph of all the mittens found. A pie chart, bar graph, or line graph would be a great way to add STEM to this activity. Learners can cut out mittens to glue onto their graph, or use numbers.
Use the pages to practice sight or spelling words
Create a winter journal using the writing pages
Three different types of paper to use with levels of learners
Make this part of a larger lesson plan including gross motor, sensory, social, executive function, or other fine motor skills
Write a report about mittens, types of mittens, the history of mittens, different memories or stories about mittens
Make a gross motor game of running around collecting matching pairs of mittens
Practice sorting with real mittens
Work on self help skills by practicing donning mittens
Do challenges while wearing mittens
The list of possibilities is virtually endless. Build onto your lesson plan each year, fine tuning what works and what was not as fun as you had imagined
SKILLS ADDRESSED USING THE MITTEN PAPER ACTIVITY WORKSHEETS
Kinesthetic awareness – learning by doing
Hand strength and dexterity – staying on the lines builds hand muscles and develops muscle control
Visual motor skills –Combining what is seen visually and what is written motorically. This takes coordination to be able to translate information from visual input to motor output. Coloring, drawing, counting, cutting, and tracing are some visual motor skills.
Pasting using glue stick or drippy glue with accuracy
Visual Perception – Developing figure ground to see where one item starts and finishes, discrimination to pick out slight differences, scanning to find all answers, and form constancy to determine an object is the same if it is smaller or turned.
Sequencing – Will your learner scan in a haphazard pattern all over the page, or be more methodical?
Proprioception – pressure on paper, grip on pencil
Social/Executive Function – Following directions, turn taking, task completion, orienting to details, neatness, multi-tasking, attending to task, and impulse control can be addressed using this Warm Winter Clothing Printable PDF.
Handwriting: Letter formation – correctly forming the letters top to bottom. Letter sizing – correctly fitting the letters into the size boxes. Spacing, line placement, directionality, and spelling are also addressed
Bilateral coordination – remembering to use their “helper hand” to hold the paper while writing. Using one hand for a dominant hand instead of switching back and forth is encouraged once a child is in grade school or demonstrates a significant strength in one or the other
Executive function, following directions, attention, attention to detail, focus, sequencing, planning, task completion, compliance, behavior, and work tolerance are all important skills to learn
Remember, you can address all of these skills at once, or focus on one or two. Some of the skills above will be addressed without your conscious knowledge, while other skills will be directly attended to.
What skills are addressed beyond handwriting?
Differentiated paper activities like this support far more than letter formation.
Visual Motor & Visual Perception
Eye-hand coordination
Figure ground discrimination
Visual scanning
Form constancy
Visual discrimination
Fine Motor & Strength
Hand strength and dexterity
Proprioceptive input through writing pressure
Arch development
Bilateral coordination (using the helper hand)
Executive Function
Following directions
Task completion
Sequencing
Attention to detail
Work tolerance
Handwriting Skills
Letter formation
Letter sizing
Spacing
Line placement
Directionality
Spelling
The beauty of differentiated materials is that some skills are addressed naturally, while others can be intentionally targeted.
How can one worksheet address multiple developmental levels?
The Mitten Paper Color and Find Worksheets include three different types of writing lines, making it easy to differentiate based on student needs.
But writing prompts are only one way to use them.
You can:
Have students scan and find matching mittens to work on visual perception
Use dot markers for younger learners to stamp hidden items
Count and record how many mittens were found (example: “4 snowflake mittens”)
Create a bar graph, pie chart, or line graph to incorporate STEM
Practice sight words or spelling
Build a winter journal
Write a report about mittens or winter clothing
Integrate gross motor by collecting matching mitten pairs around the room
Practice donning mittens for self-help skill development
One printable becomes a full differentiated lesson plan.
Why does modified paper matter in handwriting instruction?
Modified paper supports visual boundaries, spatial organization, and motor planning. For many learners, standard lined paper provides too little structure. When lines are unclear or spacing is inconsistent, letter size, alignment, and placement are affected.
Modified paper can help with:
Letter sizing
Line placement
Spacing between words
Directionality
Visual organization
Providing differentiated paper options allows students to build foundational handwriting skills with appropriate supports.
MORE WINTER RESOURCES
If winter has you in a slump, and it takes all you have just to get out of bed, the OT Toolbox has you covered with premade lesson plans and activities. The hard part is executing and documenting your treatment, let the OT Toolbox resources make planning a snap.
While it is no secret that I hate winter, I do like fun lesson plans to get me through it.
Victoria Wood, OTR/L is a contributor to The OT Toolbox and has been providing Occupational Therapy treatment in pediatrics for more than 25 years. She has practiced in hospital settings (inpatient, outpatient, NICU, PICU), school systems, and outpatient clinics in several states. She has treated hundreds of children with various sensory processing dysfunction in the areas of behavior, gross/fine motor skills, social skills and self-care. Ms. Wood has also been a featured speaker at seminars, webinars, and school staff development training. She is the author of Seeing your Home and Community with Sensory Eyes.
Our sensory system is very complicated. A lot of times when we hear about sensory, we think about our 5 senses (taste, touch, sight, smell and hearing.) This blog will take us into a deep dive of early intervention for sensory differences and the definition of different sensory processing areas. Early Intervention services provide supports for children birth through age three who demonstrate developmental delays.
These delays could be caused by a variety of reasons, from autism, chromosome abnormalities, drug exposure, prematurity, motor impairments, language delays and more.
Early Intervention for Sensory Differences
One of the areas that is always assessed when determining if a child is eligible for Early Intervention services is the area of sensory processing. These areas include Low Registration, Sensation Seeking, Sensation Sensitivity, and Sensation Avoidance. Also addressed are the areas of Sensory and behavioral including general, auditory, visual, touch, movement, oral and behavioral differences.
We will explore these areas in more detail throughout this blog post. Sensory diets are one of the most common and impactful ways to support children with sensory differences.
This article describes sensory diets as “A sensory diet is a set of activities that make up a sensory strategy and are appropriate for an individual’s needs. These are specific and individualized activities that are scheduled into a child’s day and are used to assist with regulation of activity levels, attention, and adaptive responses. Sensory diet activities are prescribed based on the individual’s specific sensory needs.”
There are four quadrants in a sensory profile. This visual clearly defines the similarities and differences between seeking, sensitivity, registration and avoidance.
The infant/toddler sensory profile is a common assessment used to determine the needs of a child in the following areas If a child is over-responsive to sensory input, they would fall in the sensory seek or slow to register sensory input sections. If a child is under responsive to sensory input, they would fall in the sensory sensitive or sensory avoider sections.
What are sensory differences?
These areas of sensory diversity make up the term sensory differences. Beyond the four quadrants, however, there are other sensory differences to consider. These are described below.
All of these sensory differences described are part of the neurodiversity of human life. We all are different when it comes to sensory, and we are all sensory. Just like the diversity of physical attributes, personal preferences, characteristics, sensory differences are just one more difference that makes us who we are.
Sensory Seeking
This area determines if a child seeks out sensory input. If a child is scored higher than most in this area, you may see them move around more, look at items that spin (such as fans or toys with wheels) be attracted to fast paced and brightly colored television shows.
Sensory Seeking Patterns
Children with sensory seeking patterns often appear highly active, impulsive, or constantly in motion. These children are not simply “busy.” Their nervous systems may require stronger or more frequent sensory input to feel regulated and organized. As the quote reminds us, “Some children need more input to feel organized.” When sensory input is insufficient, children may increase their movement or intensity to meet that internal need. In early intervention, the goal is not to suppress movement but to structure it in ways that promote regulation and participation.
A child who seeks sensory input may:
Move constantly or have difficulty sitting still
Jump, crash, spin, or climb frequently
Touch objects and people often
Use excessive force during play or writing
Early intervention may include:
Planned heavy work activities (carrying, pushing, pulling)
This area determines a child’s ability to notice different senses. If a child scores higher than most in this area, you may see a child always needing a routine to stay calm, startle to certain sounds, become upset during routine hygiene activities (such as getting hair brushed or nails trimmed) and significant preferences on types and textures of foods.
Here are some ways to support children in a controlled way, who show needs in the sensitivity area.
Sensory Registration
This area determines how a child responds to sensory input from others or their environment. This article by the pediatric development center explains how important registration is for a child’s functioning and learning.
It describes registration as: “Sensory registration is the process by which children respond or attend to sensory input in their environments. The nervous system must first notice the sensory information, once registered the memory compares it to things they have heard or seen, and thus gives new information meaning. Children who fail to respond or have delayed responses to sensory information have diminished sensory registration. Diminished sensory registration is often associated with one or two weaker sensory systems, such as the auditory or vestibular system. Without sensory registration, no other learning can take place.”
If a child scores higher than most in this area, you may see a child miss sensory input more than others do. A child in this section may miss eye contact, pay attention to only specific tones, and ignore most sounds. These children are harder to engage or seem uninterested in activities. They may need tactile, auditory and visual cues to initiate engagement in conversation or an activity.
Low Sensory Registration
Children with low sensory registration may not consistently notice or respond to sensory input in their environment. They are not ignoring directions; they may not be fully perceiving them. As the quote states, “Sometimes the world needs to be turned up.” These children often benefit from clearer, stronger, or repeated input to support engagement and responsiveness. Early intervention focuses on increasing the salience of sensory information to improve participation.
A child with low registration may:
Not respond when their name is called
Seem unaware of food or dirt on hands and face
Appear slow to respond to instructions
Seem lethargic or difficult to engage
Here are some ways to support children with low registration:
Early intervention may include:
Gaining eye contact before giving directions
Pairing verbal cues with visual supports
Increasing movement before seated learning
Using clear contrast and structured materials
Sensory Avoidance
This area determines how a child’s need to control the amount and type of sensations at any given time. If a child scores higher than most in this area, you may see a child resist playing with other children due to overwhelm, resist being cuddled when it’s not on their terms, frequently become upset if their hands are messy, have a hard time calming down in new settings and isn’t interested in trying new foods.
Sensory Avoiding Patterns
Children with sensory avoiding patterns may experience ordinary sensory input as overwhelming or unpredictable. Avoidance behaviors are protective responses, not oppositional behaviors. As reflected in the quote, “What feels small to us can feel overwhelming to them.” Their nervous systems may quickly shift into fight, flight, or freeze in response to certain sounds, textures, or busy environments. Early intervention focuses on creating safety and predictability while gradually increasing tolerance.
A child who avoids sensory input may:
Cover ears in noisy environments
Refuse messy play or certain foods
Resist specific clothing textures
Withdraw in crowded or stimulating settings
Early intervention may include:
Environmental modifications to reduce sensory load
Predictable routines and visual schedules
Gradual, supported exposure to new sensory experiences
General Processing items measure the child’s responses related to routines and schedules. This could include daily schedules, routine schedules or task related routines including how children respond to questions, others actions, busy situations, sleeping routines, eating patterns and hygiene needs, daily transitions and other schedule related activities.
Tactile and auditory sensitivities are common in early childhood and can significantly impact emotional regulation and participation. The nervous system may interpret certain textures or sounds as threatening rather than neutral. As emphasized in the quote, “Regulation begins with feeling safe.” When a child feels safe, learning and social engagement become more accessible. Early intervention prioritizes environmental adjustments, gradual desensitization, and parent education to support comfort and resilience.
A child with tactile or auditory sensitivities may:
Refuse specific clothing fabrics
Gag or refuse foods due to texture
Cover ears in loud environments
Cry or startle easily with sudden sounds
Early intervention may include:
Providing softer clothing options
Using noise-reducing headphones when appropriate
Gradual introduction to new textures
Teaching calming and coping strategies
Auditory Sensitivity
This area addresses how children respond to things they hear. Auditory input includes responding to their name, how easily it is for someone to get their attention and how distracted they become in noisy settings. The brain processes the sounds in our environment and according to this article, sensitivity to sound could be a reaction to a part of our brain that pays more attention to sounds then it needs to. One article explains it this way:
When there is no medical reason to explain the auditory sensitivity, researchers think that the brain is not processing sounds adequately. Researchers suggest that the part of the brain that receives and filters noise and sound, the amygdala, is working differently. The amygdala decides on how important noises are. It decides and which sounds we should attend to and which ones to ignore. When someone experiences sensitivity to sounds, it is thought the amygdala pays more attention to sounds than it needs to.
Visual Sensitivity
This area addresses how children respond to things they see, including bright objects, such as lights and toys. It describes how they respond to reflections in mirrors and their responses to objects that spin or move suddenly. According to this article our brains interpret the light we see through our eyes, and:
“The visual system uses light to detect information through our eyes and then interprets or makes sense of that information in the brain. It works closely with our vestibular and auditory systems to help us safely navigate our environment by orienting us to where we are in relation to other objects. The ability to cognitively process information we take in through our eyes can be broken down into several categories, called visual perceptual skills. Those with trouble in one area of visual perception may present with strong skills in another area, meaning that deficits in processing of visual information can take on many forms.”
Tactile/Touch Sensitivity
This area addresses how children respond items that touch their skin. This includes bath/water play, getting their nails trimmed and hair brushed, touching different sensory rich objects, being messy and receiving hugs. When children have a tactile sensitivity, their skin reactors are feeling the object more intensely. According to this article:
The tactile system, or sense of touch, refers to the information we receive though the receptors in our skin. It alerts us to pain and temperature and helps us discriminate the properties of things we come in contact with, i.e. texture, shape, size, and weight. From very early on in development this sense plays a crucial role in helping us gain awareness of our own bodies and understand everything we come in contact with. And how frustrating it must be to learn new skills when you can’t adequately feel the objects you’re using!”
Movement Seeker
This area describes how children move within their environment, including if they enjoy movement activities, seem accident prone or clumsy, seek out spinning and/or preferring to walking on their tip toes. Movement is how our bodies know where we are in space and how we respond to a variety of movement activities. This article explains movement seekers as “someone who has a high threshold for vestibular input. The vestibular system is housed in our inner ear, and is responsible for sending messages to our brain about the position and movement of our head. The vestibular system is activated anytime our head is tilted, upside-down, inverted, if we spin, if we run fast or run slow, when we’re on a swing or going down a slide.
We need vestibular activation and an efficient vestibular processing system in order to maintain an upright position, feel balanced, have a full sense of our body in space and focus. Some people have low thresholds, in which they perceive vestibular activation at much higher rates (e.g. hypersensitive to movement). Others have high thresholds, which means that they need more intense, more frequent and longer duration of movement in order to register it and activate their vestibular system.”
Oral
This are addresses how children respond to new foods and different textures, if they tend to overstuff their mouths, how they control chewing/swallowing foods and liquids and if they tolerate their teeth being brushed. Our oral system is based on how our sensory receptors in our mouth recognize what is in our mouth. Some people have increased sensitivities for foods while others have decreased sensitivities to food. There are differences and optional interventions explained in this article:
“We have sensory receptors in our mouths that allow us to recognize information about temperature, texture (e.g. smooth like yogurt, hard like chips/pretzels, or a mixture of textures like cereal with milk), and taste (e.g. sweet, salty, bitter, sour). They may be over responsive or have increased sensitivity to oral input, causing them to be resistant to oral sensory experiences like trying new foods or brushing their teeth.
Other children may have decreased sensitivity to oral sensory input and therefore seek more oral input in order to help them organize their behavior and pay attention. Our brains receive further proprioceptive input from the joint of the jaw as we bite and chew on foods with different types of resistance (e.g. a crunchy carrot or a chewy sweet/gum). Oral sensory processing also contributes to the way we move our mouths, control our saliva, and produce sounds for clear speech.”
Behavioral Differences
This area describes children’s behaviors such as how frequently they have meltdowns, if they are clingy, how hard it is to redirect them, if they are upset in new surrounds and how hard it is to help them calm down. Teaching children how to calm down using a variety of sensory input, will benefit every child. Soothing Sammy provides opportunity for a child to create their own behavior support tool that is tailored to their specific needs. Weather they respond better to auditory, visual, tactile or others, Sammy the Golden Dog can make redirection to a calm down corner a positive experience for the child and the adult.
Creating a sensory diet is one of the most important ways to support children with any type of sensory difference. These sensory diet cards is a must have resource if you are working with or have a child with a sensory need.
If you are concerned about your child, you can contact an Early Intervention provider to complete an evaluation from the day they are born all the way until they turn three years old.
Early intervention occupational therapy services support children in all areas of sensory needs, and can help caregivers create sensory diets that will help children in a variety of situations. Visual, tactile, auditory, oral and movement interventions that are supported in a controlled environment, can help every child learn how to adapt and respond to different situations and environments.
Jeana Kinne is a veteran preschool teacher and director. She has over 20 years of experience in the Early Childhood Education field. Her Bachelors Degree is in Child Development and her Masters Degree is in Early Childhood Education. She has spent over 10 years as a coach, working with Parents and Preschool Teachers, and another 10 years working with infants and toddlers with special needs. She is also the author of the “Sammy the Golden Dog” series, teaching children important skills through play.
Lemon STEM is such a fun way to explore concepts and this lemon battery science fair project is a winner! By using a lemon and a few other materials, you can discover the chemical process of moving electric current through a lemon to create a lemon battery. This lemon battery is a discovery activity that makes a great science fair project because the experiment is a powerful tool for discussing science and exploration in kids. Plus, this lemon science experiment is easy to do (and clean up)!
Lemon Battery Science Fair Project
One of the best benefits to making this lemon battery science fair project is that it’s an easy way to learn about electrodes, electrons, and the chemical reaction required to fire up a battery. As an occupational therapist and mom, I love the other skill-building opportunities with this project too:
When kids build the lemon battery, they are building so many skills!
Introduce them to creativity through STEM? Sounds great! Encourage my children to get excited about science and math? YES! Unleash natural potential in my girls by experiencing science projects? I like it.
And the best for me, was watching my girls do this together. The baby saw her big sister in safety goggles as she learned about cathodes and electrolytes…and has been wearing the goggles every day since. Seeing them inspire each other was just awesome.
We were making lemon powered batteries!
What is a lemon battery?
A lemon battery is a simple science experiment kids can do to explore concepts of conduction and reaction.
In the lemon-powered battery experiment, kids can see how electrolytes are conducted through the lemon and wires in order to power a light or clock.
The experiment is simple set up, easy, and a fun way to explore science!
Lemon Battery Light Bulb Science Experiment
The lemon lightbulb experiment is a classic hands-on activity that demonstrates how citrus fruits can generate electricity. This lemon and light bulb science project is a powerful way to engage kids in STEM learning by transforming a simple lemon into a working fruit battery.
By inserting zinc and copper electrodes (such as a galvanized nail and a penny) into a lemon and connecting them with wires, you create a small electric current. Connect enough lemons in series, and you can even power a small LED light bulb, showing how chemical energy is converted to electrical energy in a tangible, visual way.
How the Lemon Electricity Experiment Works
In this lemon electricity experiment light bulb setup, the lemon juice acts as an electrolyte. When the copper and zinc electrodes are inserted into the lemon, a chemical reaction occurs that releases electrons.
This flow of electrons is electricity, and when wired correctly, it can power a low-voltage light source. This process demonstrates core concepts in physical science, including circuits, voltage, current, and chemical energy.
It’s a great introduction to alternative energy and an excellent lemon battery science fair project idea for elementary or middle school students.
Using the Lemon Battery for STEM Learning
This lemon STEM activity supports multiple domains of science, technology, engineering, and math.
Students can experiment with variables like the number of lemons, the size of the electrodes, or the type of fruit used to observe changes in voltage output. Try comparing a lemon battery to other fruit battery options such as potatoes, limes, or oranges to expand learning through data collection and hypothesis testing.
This type of lemon science experiment is engaging, messy, and memorable.
Making the Lemon Science Project Work for You
To get the most out of this lemon electricity project, document your steps with photos and a results chart. Use a multimeter to measure voltage between lemons in series versus parallel configurations.
This makes your lemon battery science fair project more advanced and competitive for older students. Encourage kids to write a conclusion reflecting on why the light bulb did or didn’t light up, and how changing variables influenced the outcome.
This critical thinking component strengthens understanding of cause-and-effect and scientific inquiry.
Food Battery Experiment
When I first showed the girls the items and explained what we were doing, they were very excited about lemon electricity!
I was surprised to read that only 1 in 1,000 girls pursue STEM careers, especially considering that out us us three sisters, two of us are in the health/science field.
Encouraging my girls to explore interests in science is important to me and I was super pumped to get my girls excited about our science experiment…and the enthusiasm was catchy!
We used a lemon in our fruit battery, but you could use any citrus fruit to make a citrus battery…oranges, grapefruit, lemons, and limes all work equally well in this kid-made battery experiment.
More Lemon Science Experiments to Try
Beyond lighting a bulb, try creating a lemon clock, powering a digital watch, or exploring how long your lemon battery will last. These lemon science experiments promote engineering design skills, allowing students to improve upon their models and test new solutions. Whether you’re creating a lemon and light bulb science project or just doing a fun weekend activity, this is a great entry point into electricity and circuitry.
Other fruits and vegetables can be used in this experiment too. It might be fun to explore which food is the best conductor for passing electrical energy. Try these fruits and veggies:
Lemons
Oranges
Grapefruit
Limes
Potatoes
Tomatoes
Cucumbers
Apples
Bananas
Which food battery works fastest? Which is the strongest conductor? Which food battery will work the quickest? These are all fun science fair experiments to try!
Lemon Battery Science Experiment
We created the lemon-powered battery, but then used the battery in a STEM activity by adding engineering and math to the mix.
Lemon Battery Materials List
To get started with your lemon battery experiment, you’ll need a few simple materials:
LED Bulb or a small clock, light bulb, etc.
4 Lemons
Knife to cut the lemon
Alligator Clips on Lead wires
Zinc Nails
Copper Wire (or a penny)
Goggles
Gloves
Alcohol wipes
Recording sheet
You can also try different metals instead of the copper penny. Try a galvanized nail, copper electrodes, Aluminum foil, metal strip, or other types of metal material.
Also note that you should have adult supervision for this activity because cutting the food with a knife can be tricky!
And we got started on our STEM project. The instructions are easy to follow images below.
How to make a lemon battery:
Start with a clean surface.
Use the knife to make a small cut in the lemon’s surface. This will be used to push the nail and copper penny into the lemon more easily.
Use an alcohol wipe to clean off the lemon or other food item used for the battery.
Press the nail and copper item (penny, copper wire, etc.) into the lemon. Make sure the metal goes all the way past the peel if using a citrus fruit. You can use more than one lemon too: Push a nail into one lemon and the copper into the other lemon.
Attach the alligator clips to the nail and to the copper item. Connect the ends of one alligator clip wire to a galvanized nail in one lemon and then the other end of the alligator clip wire to a piece of copper in another lemon. When you are finished you should have one nail and one piece of copper unattached.
Finally, connect the unattached piece of copper to the unattached nail to the positive and negative connections of your light. The lemon will act as the battery.
Following the instructions, my eight year old build a lemon powered battery that lit up a light bulb. We tried a few more experiments, like the mini fruit clock that came in the kit. We used it to make a lemon clock with the circuits!
Lemon Stem
This Lemon STEM activity is a great fine motor STEM idea. By pushing the nails and pennies into the lemon, cutting with a knife, and clipping alligator clips, you are building fine motor strength in a functional task.
Add a few other ways to support lemon stem too: Use wooden skewers to build an elevated lemon battery.
Provide a handful of wooden skewers and ask the children to build a contraption that is strong enough to hold a lemon up off the ground. This can take a bit of creativity and trial and error, so be sure use plenty of paper towels or a wash cloth to wipe off lemon juice.
We pulled out some bamboo skewers and created a sky high lemon battery and lit up the light bulbs using engineering in our STEM activity.
Try building a clock tower with the skewers and a lemon. Explore how to make electricity run the clock even when it’s elevated or in different weather conditions like rain or freezing temperatures.
With all of the zinc nail-punctured holes in our lemons, we HAD to squeeze the juice. We tried to see if we could create a lemon clock using just the lemon juice in a cup. It worked!
After the lemons were juiced, we tried to make another light bulb glow using the rinds. This time the lights did not brighten and we decided it was because the electrolytes were squeezed away into our lemon juice and the current stopped at the rind.
Next, we used wooden skewers to create a clock tower. Press the skewers into the lemons and create a tower. You’ll need to figure out how to get the clock tower to stand without toppling, and using lemons as the base or at the connecting points. These lemons can also be connected to one another with the alligator clips, wires, and pennies or nails to conduct through the whole tower.
After all of these experiments, we were feeling a little thirsty. Non-lemon powered light bulbs went off and so my four year old had a bright idea to make lemonade. We added water and sugar and drank away the electrolytes!
It was so much fun to see my girls working together, encouraging each other, (not fighting), and being inspired in science. Someday they might look back at our experiment day and laugh at drinking their science experiment, but I’ll remember the sticky crumbs on the table, the goggles on the one year old, and the fun we all had learning together.
Colleen Beck, OTR/L has been an occupational therapist since 2000, working in school-based, hand therapy, outpatient peds, EI, and SNF. Colleen created The OT Toolbox to inspire therapists, teachers, and parents with easy and fun tools to help children thrive. Read her story about going from an OT making $3/hour (after paying for kids’ childcare) to a full-time OT resource creator for millions of readers. Want to collaborate? Send an email to contact@theottoolbox.com.
Here, you’ll find Valentine’s Day Occupational Therapy Activities that you can use this time of year to help kids develop skills. This is the time of year that red and pink hearts are everywhere, so why not use the theme of love and friendship in therapy interventions with fun Valentines day activities? Add these heart crafts, and love ideas to your therapy toolbox to work on things like fine motor skills, regulation, scissor skills, and more, all with a Valentine’s Day theme!
There are so many love and heart themed activities here on The OT Toolbox. Over the years, we’ve done a lot of fun activities that double as a skill building strategy. Check out these ideas and pick a few to add to your therapy line up and plans over the next few weeks. Some of these hear crafts and sensory ideas or games would make great additions to a Valentine’s Day party that builds skills, too!
One great tool is our Valentines Day I Spy activity for visual motor and fine motor skill-building.
Valentine’s Day Occupational Therapy Activities for Kids
Valentine’s Day is the perfect time to weave meaningful sensory and motor activities into classroom lessons or therapy sessions.
These Valentine’s Day occupational therapy ideas can build skills like fine motor precision, emotional regulation, sensory processing, and more, all while celebrating the season of love and connection. I like these ideas for school based OT, or outpatient clinical services. You can use them with early intervention or older ages, as well. We tried to pull together ideas that blend fun with functional development.
Valentine Sensory Bin Ideas for Therapy and Play
A well-designed Valentine’s Day sensory bin is a classic tool that supports tactile exploration, calming sensory input, and fine motor development.
Try filling a bin with red and pink rice or shredded paper, then add small heart-shaped erasers, mini clothespins, plastic rings, or paper hearts for sorting and tweezing.
For a valentines sensory bin that encourages self-regulation, include soft textures like felt hearts, fuzzy pom-poms, and scented items like lavender sachets.
These are good ideas for valentine activities for preschoolers are great for early learners working on grasping skills and visual scanning. Add clues or tiny hidden objects for a scavenger hunt twist.
Creative Valentine Crafts for Skill Building
February crafts offer so many ways to support motor planning, bilateral coordination, and visual motor integration.
For kindergarten valentine crafts, try a torn-paper heart collage using tissue or construction paper to strengthen hand muscles.
Another fun project: use lacing cards shaped like hearts to practice bilateral coordination and dexterity.
Add a twist by turning the craft into a personalized scavenger hunt, kids find materials based on color, texture, or size, then use them in their final creation.
Valentine STEM Activities for All Ages
We love the multisensory learning that happens with STEM activities and incorporating this into the holiday with Valentine STEM activities will spark curiosity and coordination.
Use candy hearts to build towers or bridges, count and graph colors, or create heart-themed mazes with magnets and paperclips.
These activities challenge executive functioning, planning, and sequencing while offering a creative way to integrate academic concepts.
Add ingredients like baking soda and vinegar to explore fizzy heart experiments. These hands-on activities are ideal for preschoolers through early elementary ages.
Valentine Party Games with a Therapeutic Twist
Turn typical valentine party games into skill-building opportunities. Try a heart bean bag toss to target gross motor coordination and core strength.
Play musical hearts with a playlist of songs to practice motor timing and auditory processing.
Use card games like memory matching with heart symbols or emotion faces to build cognitive and social-emotional skills.
Add a blanket fort in the living room for calming play or a personalized scavenger hunt with heart-shaped paper clues to encourage movement and direction-following.
Creating Meaningful Valentine Experiences at Home or School
Valentine’s Day is a chance to create memorable valentine’s day experiences that foster connection.
A cozy picnic on the floor with heart-shaped snacks, pizza, and dessert can turn into a fun bonding moment.
Use fairy lights, soft blankets, and candles (battery-operated for safety) to set the tone for a movie night that feels like a special event.
These ideas provide quality time, encourage emotional bonding, and offer calming sensory input.
For mom or caregivers, setting aside space for self-care, even five minutes of deep breathing or stretching, can be a powerful model for children learning to regulate themselves.
Free Valentine’s Day Printables
We love to create multi-purpose free worksheets and printable activities that support development. Worksheets can get a bad rap, but we at The OT Toolbox attempt to create occupational therapy worksheets that focus on play as a function.
When we can use a printable founded in play, the user is performing a daily occupation that is important to them, and the play is both the tool and the skill that is being developed. That’s why these Valentine’s Day worksheets are so loveable!
Conversation Heart Sort– Print off this sorting worksheet for a fine motor activity with conversation hearts.
Valentine’s Day Hat Craft– Print off this hat template and work on coloring skills, scissor skills, and executive functioning to build and create the Valentine craft.
Valentine Hole Punch Cards– These free pintables are perfect for occupational therapy Valentine parties. Use the printable activity to build skills in eye-hand coordination, hand strength, bilateral coordination, arch development, visual scanning, and more.
Heart Deep Breathing Exercise– Print off this heart poster and use it to develop skills in mindfulness, self-regulation, and even proprioception through the chest and upper body. It’s a very calming activity that can be a great addition to the sometimes chaos and unexpected situations in a classroom Valentine’s Day party. use it to support sensory needs at a Valentine’s Day party!
Valentine’s Day Activity Sheet– This printable tool is a great activity that can be used to develop many different skills depending on the needs of the individual. Use a single activity sheet to target: visual scanning, visual memory, visual peripheral skills, form constancy, fine motor skills, eye-hand coordination, dexterity, pencil control, motor planning, coloring and more.
Valentine Matching Alphabet Cards– Cut out these love letter cards and match uppercase to lowercase letters. These cards are used for cursive letters to build skills in letter recognition, visual discrimination, and more.
Valentines Fine Motor Worksheet– Print off this Valentine worksheet and build motor skills in many ways. have fine motor races with small objects like beads or mini erasers. Use tweezers to move items along the path. Work on pre-writing lines by using the paths on a vertical or diagonal. Work on a vertical plane to build core strength and shoulder stability. Use the sheets to practice letter formation by writing in the circles. There are so many ways to play and develop skills with a heart theme!
More Valentine’s Day Activities
That’s not all! Use the activity ideas below in planning OT sessions, or in Valentine’s day parties that also build skills.
One thing I love about holiday events this time of year is that kids are excited about Valentine’s Day activities. It’s fun, friendly, and full of kindness and empathy. However, there are so many ways to develop skills with the old-fashioned Valentine fun:
Cut out paper hearts- Cut hearts from cardstock or construction paper for more resistance
Fold paper hearts in half- This is great for bilateral coordination, hand strength, pinch strength, eye-hand coordination, motor planning, and visual perception.
Stick heart stickers on paper- Add small targets by drawing dots and placing the heart stickers on the dots. This is great for fine motor precision and eye-hand coordination. Place the paper on a vertical surface and further develop core strength and balance.
Write on Valentine’s Day cards- what a functional and fun way to work on handwriting and to teach kids to write their name.
Make a Valentine’s Day box- Don’t worry about the fancy Pinterest V-Day boxes! Some of those require way too much parent help. Help a child wrap the box in wrapping paper (anther great functional life skill!) and then cut out hearts or draw right on the box.
Make a Valentine’s Day snack– Work on executive functioning skills, direction following, fine motor skills, and more.
Valentine’s Day Therapy Slide Decks
Working virtually? Use a done-for-you therapy slide deck. These are therapist-created and designed to meet the needs of a variety of levels of users. Adjust the slides and therapy activities to meet your needs and the needs of the learners you are working with.
If you are needing occupational therapy teletherapy resources, check out the hands-on Valentine’s Day activities below. They are great for February parties and therapy at home activities for this time of year, too.
Valentine’s Day Sensory Activities
From sensory bottles, to discovery activities, to heart painting and more, these sensory play activities can be a fun way to help kids develop skills through the senses. How can you use these Valentine’s Day occupational therapy activities in sessions or at home?
Valentine’s Day Sensory Bottle– Use this sensory bottle activity as a way to build fine motor skills while kids help to create the sensory bottle and add materials. Then use it in self-regulation, sensory processing needs as a calm down bottle. Sensory bottles are fantastic to work on visual processing skills like visual discrimination, figure-ground, and other visual perceptual skills.
Olive You Thumbprint Craft– Fingerprint art is a great way to work on finger isolation, an essential fine motor skill that kids need to manipulate items and improve pencil grasp. Here is more information on how fingerprint art improves fine motor skills. Add this artwork to a card or Valentine’s Day craft for fine motor fun.
Valentine’s Day Play Dough Activity– Use a recycled chocolates box in a play dough activity that builds skills like strengthening of the intrinsic muscles and arches of the hands. This is a fun Valentine’s Day activity that can be used in classroom parties or in the therapy room to build skills.
Bilateral Coordination Heart Sensory Tray– Use sand, rice, or other sensory bin material to create a bilateral coordination and visual motor activity for kids. They can work on eye-hand coordination, motor planning, and other skills. The point of the activity is to establish direction and orientation relative to the child’s body. The movement activity addresses hand-eye coordination in different visual fields, promotes spatial awareness and visual discrimination, addresses left and right awareness, improves peripheral vision, promotes body awareness and coordination with specialization of the hands and eyes, and works on gross motor movement skills.
Valentine’s Day Fine Motor Activities
Try these Valentine’s Day fine motor activities in your occupational therapy interventions or home programs. The activities here are fun ways to help kids develop hand strength, dexterity, precision, grasp development, and motor control.
Be sure to check out the Valentine’s Day Fine Motor Kit. In the 25 activity printable kit, you’ll fine hands-on activities to build fine motor skills. Activities include coloring and cutting cards, pencil control sheets, heart crafts, Valentine’s Day write the room activities, hole punching exercises, and so much more. Grab the Valentine’s Day Fine Motor Kit here.
DIY Heart Maze- Look out visual motor skills…this heart maze is one you can make and print off for your whole caseload. Adjust the use according to your kiddos. Children can place objects like paper hearts, mini erasers, etc. on the hearts in the maze to double down on fine motor work, or color in the hearts to work on pencil control. This maze is a visual processing powerhouse. Find more information on visual processing here.
Teeny Tiny Sprinkle Heart Activity– This is a fine motor activity that builds precision and dexterity in the hands. It’s a fine motor workout kids can use to build hand strength and endurance for fine motor tasks. Use it in math centers to work on one-to-one correspondence and counting or sorting.
Heart Eye-Hand Coordination Activity– Work on eye-hand coordination and fine motor skills tongs and heart s cut from cardboard. If you are like me, you have a ton of delivery boxes coming to the house. Use those boxes in a fine motor skills building activity. Write numbers or letters on the hearts to make it a sorting, math, or spelling activity.
Salt Dough Keychain– This is a fun heart craft that goes along with the children’s book, “The Kissing Hand”. Use it to help kids work on fine motor skills, and hand strengthening. This keychain craft makes a great Valentine’s Day gift idea too!
One Zillion Valentines Book and Craft– Pairing a book with therapy or when working on skills with kids is a fun way to open up conversation, problem solving, and strategizing to create a project or activity based on the book. This Valentine’s Day book for kids is just that. One Zillion Valentines is one children’s book that pairs nicely with a fine motor craft for kids. Kids can work on fine motor skills, motor lanning, direction following, and executive functioning skills while folding and making paper airplanes, and the cotton clouds in this fun craft idea.
I Love Ewe Handprint Craft– Use a handprint art activity as a tactile sensory experience. Pair scissor skills, pencil control, direction following, and copying skills to work on various areas needed for handwriting and school tasks. Pls, this makes a great Valentine’s Day craft or addition to a card!
Valentines Day Color Sorting Fine Motor Activity– Grab a couple of cookie cutters and some beads. This is a fine motor activity that kids can use to build skills like in-hand manipulation, separation of the sides of the hand, finger isolation, open thumb webspace, and more.
Love Bugs Crafts– Work on fine motor skills, scissor skills, direction-following, eye-hand coordination, bilateral coordination, and more with these cute bug crafts for kids.
Valentine’s Day Sensory Bin– There are so many benefits to using a sensory bin in building fine motor skills. Pour, scoop, and stir with the hands for a tactile sensory experience. Using a sensory bin can be a great way to work on visual perceptual skills like figure-ground, visual discrimination, and other essential visual processing areas. Find and ovate objects or add a learning component by writing sight words or math problems on hearts. This is an open-ended activity that can be used in so many ways.
I Love You Books for Kids– These Valentine’s Day books for kids are a fun way to combine books with crafts or love themed activities. Use them to work on copying words or sentences for handwriting practice. The options are limitless. What love and heart themed books would you add to this list?
Valentine’s Day Crayon Play Dough– Use play dough to work on so many areas: hand strength, arch development, separation of the sides of the hand, endurance, eye-hand coordination…But have you ever had trouble getting a a really vivid red play dough when using food coloring? The answer to the red play dough problem is using vivid crayons! Here is our crayon play dough recipe that gives you the brightest colors, perfect for using in Valentine’s Day play dough activities!
Heart Bookmark Craft– This is such a fun and easy Valentine’s Day craft to use when working on scissor skills with kids. The strait lines of the bookmark and curved lines of the heart make it a great activity for kids just working on the basics of scissor skills.
Heart Butterfly Craft- Work on scissor skills, handwriting, and fine motor skills to make this fun card. The directions to make this Valentine’s Day craft are over here on a guest post we did for Hands On as We Grow. Use this fun craft with a group. It’s a great Valentine’s Day party idea!
Valentine’s Day Tea Craft– This Valentine’s Day craft is a fun way to work on scissor skills, handwriting, and fine motor skills. Kids can make this craft as a gift for friends or parents and work on skill development, too.
So, what are your favorite ways to work on skills with a holiday theme? Try some of these heart activities at Valentine’s Day parties, at home when making cards for loved ones, or in therapy planning! Have fun!
Want to add more Valentine’s Day activities and movement tools to your skill-building?
he Valentine’s Day Fine Motor Kit is here! This printable kit is 25 pages of hands-on activity sheets designed to build skills in pinch and grasp strength, endurance, eye-hand coordination, precision, dexterity, pencil control, handwriting, scissor skills, coloring, and more.
When you grab the Valentine’s Day Fine Motor Kit now, you’ll get a free BONUS activity: 1-10 clip cards so you can challenge hand strength and endurance with a counting eye-hand coordination activity.
Colleen Beck, OTR/L has been an occupational therapist since 2000, working in school-based, hand therapy, outpatient peds, EI, and SNF. Colleen created The OT Toolbox to inspire therapists, teachers, and parents with easy and fun tools to help children thrive. Read her story about going from an OT making $3/hour (after paying for kids’ childcare) to a full-time OT resource creator for millions of readers. Want to collaborate? Send an email to contact@theottoolbox.com.