Colleen Beck, OTR/L is a pediatric occupational therapist and the owner and author of The OT Toolbox website. She manages all of The OT Toolbox social media accounts and runs the popular newsletter.
Read about Colleen's experience and career as an occupational therapist, including how The OT Toolbox began on our About The OT Toolbox page: https://www.theottoolbox.com/about-us/
Colleen created The OT Toolbox in 2011 and since then has written thousands of blog posts designed to support therapy providers, educators, parents, counselors, admin, and caregivers in promoting the healthy development of kids.
Check out Colleen's blog posts below:
Ready to get your little athletes moving in therapy with some Olympics activities for therapy goals? Here, you’ll find fun Olympic crafts, games, and ideas to support development through play. Start my making an Olympic Rings craft to develop fine motor skills, and then move onto gross motor ideas, medal activities, and more!
Olympic Activities for Therapy
I’ve tried to sort the Olympics activities below into skill area, so if you are looking for ideas to promote fine motor skills, check out the craft ideas. If you need gross motor activities, check out the Olympic games ideas. All of these ideas can be great for ceremony in your own therapy clinic! These are great to add to lesson plans this time of year.
Fine Motor Olympic Crafts for Kids
Are you looking for a few fun ideas for the kids to celebrate the Olympic Games?
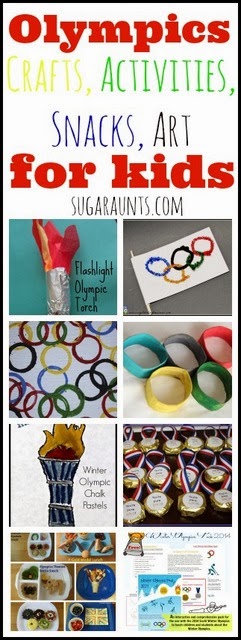
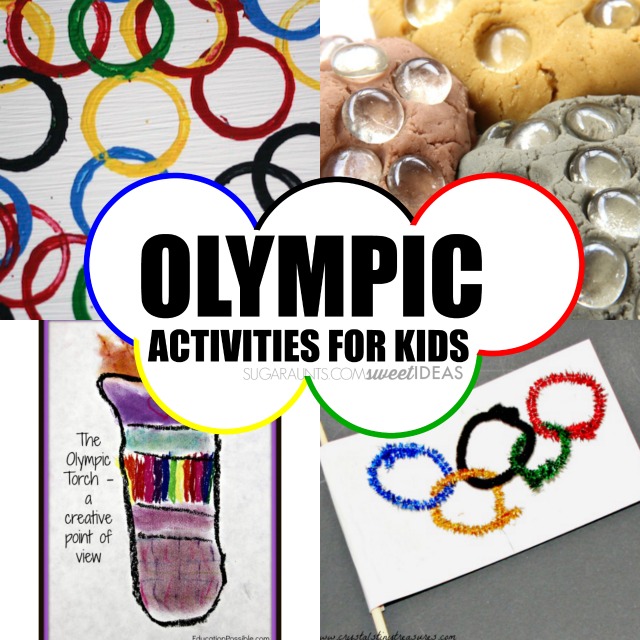
Try making gold, silver, and bronze play dough with crayons for a bold color and smooth, glittery texture to the metallic play dough that will last for the length of the Olympic games. Be sure to store the play dough in a plastic bag and you will be able to create play dough medals for weeks.
You could make an Olympic torch, olive leaf crown, and read a few Olympic books like Teach Beside Me did: Greek Olympics Lesson.
Cut foil to make medals. Use a craft stick to write names or numbers right onto the foil to work on pencil pressure.
Use foil to wrap around a plastic lid or cardboard circle.
Draw a soccer field on a large piece of paper. Use clothes pins to move a cotton ball or craft pom pom to different points on the field. Or, use a straw to blow the craft pom pom across the field to work on oral motor skills.
Or, you could make an Olympic Flag Craft using construction paper and a paper tube.
Olympic Art for Kids
If Olympic Art is more your style, use paints, stamps, or craft materials to make rings.
Use a tissue box to make ice skates.
Use a toilet paper tube or paper towel tube to make an Olympic torch (just add tissue paper for the flame). This is a great tool to use in an obstacle course too!
Make a discus using a paper plate. Staple two plates together around the edges.
Create Olympic rings by tracing a cup, cookie cutter, paper bowl and creating the rings.
Stamp rings using a paper towel tube.
We love this Olympic Rings Art. made from a re-purposed canvas from Happy Hooligans.
Gross Motor Olympic Games for therapy
The Olympics are a great theme to use in therapy sessions. Try these movement activities for gross motor skills, coordination, balance, endurance, and sensory input:
Ask your therapy attendees to write a list of Olympic sports. Work on handwriting skills such as letter formation, margin use, line awareness, and legibility.
You can also follow the highlights reel online and keep track of the number of medals accumulated by each country, or write down the top countries according to medal count.
To work on number formation, use graph paper as a medal tracker. This is a motivating activity for learners!
Another fun therapy activity to use during the Olympics is to create a large venn diagram on paper, a wall chalkboard, or dry erase board. The learners can write out the similarities and differences between the Winter Games and the Summer Games. This handwriting task focuses on organizational skills, spatial awareness, and margin use.
Write a list of winter sports being played during the Winter Olympic Games:
Bobsled
Skiing
Figure skating
Speed skating
Snowboarding
Ice hockey
Curling
Luge
Skeleton
Olympic Visual Motor Activities
Support visual motor skills by asking kids to copy the Olympic rings. Include colors to engage visual perceptual skills.
Olympic Food for Kids
Getting the kids involved in a cooking activity is a great executive functioning activity. Try these Olympic themed foods: Make these rainbow snacks using colors of the Olympic rings. These Olympic foods for Kids has some great ideas.
Colleen Beck, OTR/L has been an occupational therapist since 2000, working in school-based, hand therapy, outpatient peds, EI, and SNF. Colleen created The OT Toolbox to inspire therapists, teachers, and parents with easy and fun tools to help children thrive. Read her story about going from an OT making $3/hour (after paying for kids’ childcare) to a full-time OT resource creator for millions of readers. Want to collaborate? Send an email to contact@theottoolbox.com.
This post is a comprehensive resource on cursive handwriting letter families. Did you know that teaching cursive letters in a series of similar letters can be helpful for kids who are just learning letter formation? Using groups of letters that are formed similarly makes them a letter family. So, when we use the motor plan required to form a cursive letter, we can help learners retain and use that cursive formation appropriately for legible handwriting when completing cursive writing. Let’s break down cursive letter families!
What are Letter Families
Letter families are related letters. Just like a family, letter families contain similar traits. These similarities might include the same starting point when forming a letter, similar lines that make up the letter, or other traits that make the letters easy to group. Letter families might include these traits:
Same starting point
Same initial pencil movement
Same connecting lines or ending pencil strokes
Similar movements within the letter, like bumps, slants, re-trace, etc.
When it comes to cursive letter families, this is a powerful teaching technique because we can break down the task of learning all uppercase and lower case cursive letters as we break down the task into chunks.
Teaching cursive letters in chunks can be helpful because many cursive letters are similar in formation either in starting lines or with components. Consider a lower case cursive letter “i”. The way the beginning line curves up and stops is similar to the start of a lower case cursive letter “t”.
Letters like m, n, v, x, y, and z all start with a bump curve that starts from the baseline and curves up in an arch toward the middle line.
Letters like e, l, h, b, f, and k all start with a loop.
There are similarities in upper and lowercase cursive letters that indicate a need to teach letters in an order that takes cursive letter families into account.
Why use letter families to teach cursive
Cursive families and grouping letters by lines is an occupational therapy strategy that uses motor planning, muscle memory, and fine motor development to impact legible cursive writing.
Tricks to help with teaching cursive handwriting can make all the difference when it comes to carryover and legibility. Below, you will find information about teaching cursive handwriting and letters that are similar and should be taught together in groups for ease of learning.
You’ll discover more about cursive letter families below as well as more cursive writing strategies and tools here and in the How to Teach Cursive Writing series.
We explain more information on grouping letters according to their pencil strokes in our post on Handwriting Without Tears letter order because the HWT program sorts letters into teaching groups like we are talking about here.
You can find all of the tips and strategies for teaching cursive handwriting under the handwriting tab up above.
Lowercase Cursive Letter Families
Lowercase cursive handwriting letter families are broken down by the writing strokes that start the letter. We’ve broken these letter groups into these types of starting strokes:
Wave Letters
Spike Letters
Loop Letters
Bump Letters
Slant Letters
Tow Truck Letters (based on the ending strokes or connecting strokes)
You can see that when we break cursive letters down into groups, it makes it easier for learners to learn and carryover the motor plan to form the letter because the letters that start similarly use the same small muscle movements.
Wave Letter Family
Wave letters are lowercase cursive letters that curve up from the baseline with a curve that follows the outside and left side of a circle. The curve traces back on itself to create a curve shape. Read here about specific strategies to teach Wave Letters.
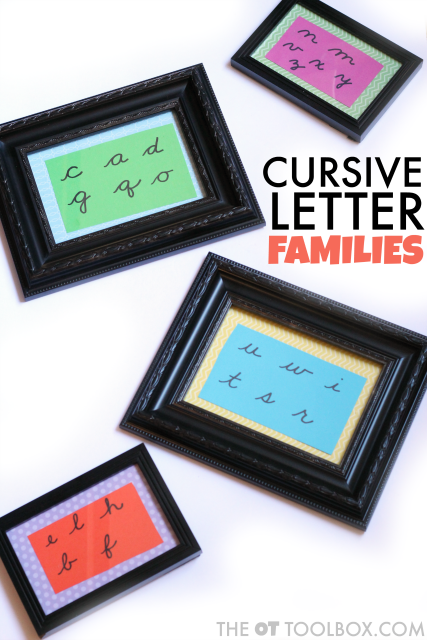
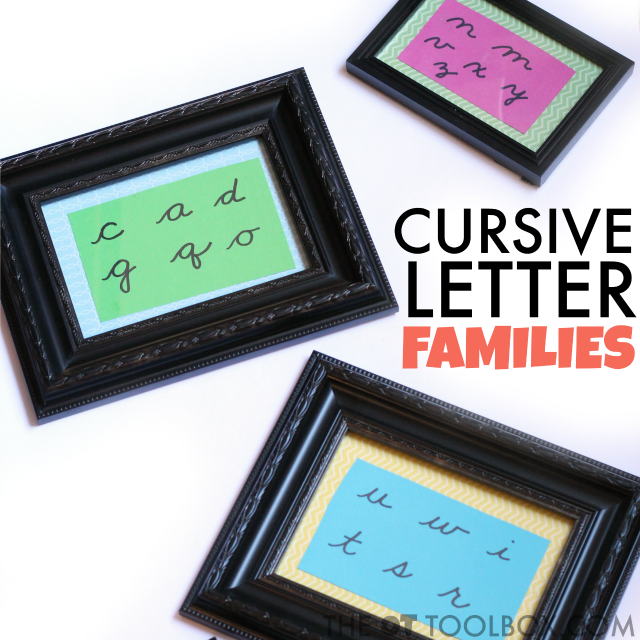
Wave letters include lowercase cursive: c, a, d, g, q, and o.
Spike Letter Family
Spike Letters are are lowercase cursive letters that curve up from the baseline with an inverted curve that follows the underside and right side of a circle. The curve traces back on itself for the strait portion of the letter, but then pulls away to either continue with additional components of the letter or to connect to subsequent letters.
Spike letters include lowercase cursive: i, t, u, w, p, and j.
Loop Letter Family
Loop letters are lowercase cursive letters that begin with a loop from the baseline. These can be easy to learn at first : cursive e and cursive f are simple motor plans. But, the remaining loop letters contain re-traced lines, inverted lines that move back toward the middle line and then in the opposite direction (cursive k), and multi-loops (cursive f).
Loop letters include: e, l, h b, k, and f.
Bump Letter Family
Bump letters are lowercase cursive letters that start from the baseline with a low curve on a 45 degree angle that peaks with a curved “bump” at the middle line.
Bump letters include: n, m, v, x, y, and z.
Slant Letter Family
Slant letters are lowercase cursive letters that start from the baseline and slant at a 45 degree angle without a curved portion at the direction change.
Tow truck letters use terminology from the Handwriting Without Tears program and refers to the way the letter connects to another letter.
Another way to distinguish cursive letters even further is to identify tow truck letters. This term uses a verbal prompt from the Learning Without Tears handwriting program which identifies letters with a high connection point. The “tow truck letters” connect to subsequent letters in a word with a connector at the middle line rather than the baseline.
Tow Truck Letters include: o, v, w, and b.
Uppercase Cursive Letter Families
Upper case cursive letters can be hard to learn. Why? Because uppercase letters are not often used, especially as often as their lowercase relatives. An uppercase K may not be used often and it is easy to forget which way to make the starting lines or the mid-loops.
We’ll break down uppercase cursive letters into groups, just like we did with the lowercase letters.
Uppercase cursive letter families are broken down by starting point.
Right Curve Start Upper Case Cursive Letters
Right-Start Letters are uppercase cursive letters that start at the top line with a counter clockwise (or right curve) motion from the top line down to the baseline.
Right Curve Start Letters include: A, C, O, Q, and E (Uppercase cursive letter E starts with a right curve to the middle line.)
Rocker Start Upper Case Cursive Letters
Rocker-Start uppercase cursive letters are those upper case letters that start with a small rocker motion to the top line.
Rocker start letters include: B, R, P, and L.
Down Stroke Start Letters
Down-Stroke upper case cursive letters are uppercase cursive letters that start at the top line and move down.
Down stroke start letters include: D, T, F, U, Y, V, and W.
Left Loop Start Letters
Left-Loop start letters are uppercase cursive letters that begin with a small loop start at the top left side of the letter.
Left loop start letters include: H, K, M, N, X, and W.
Slant Start Upper Case Cursive Letters
Slant start cursive are uppercase cursive letters that start at the baseline and slant up to the top line at a 45 degree angle.
Slant start letters include: G and S.
Left Curve Up Start Cursive Upper Case
Left Curve Up start letters are uppercase cursive letters start at the baseline and curve up to the left side. They start of the opposite side than the rest of the upper case cursives. This can be a difficult start for some learners, especially if these letters are not used often.
Left curve up start letters include: I and J.
Other Upper Case Cursive
Uppercase cursive letter Z doesn’t seem to fit into any of these categories! That is to say: all of these cursive letter starts depend on the font. Occupational therapy practitioners tend to teach simple writing strokes to reduce the motor plan and to improve carryover. So, it is possible to group Z into another group, including the Slant Start Letters or Left Loop Start Letters.
What order to teach cursive Letter families?
When it comes down to it, having a specific order of uppercase and lowercase cursive letters doesn’t matter hugely. It is much more important to teach letters in their family chunks for ease. That being said, you do need to start somewhere when it comes to starting to teach cursive letters. So where to begin?
It’s also a great idea to teach letters that are similar in look or formation to their printed counterpart.
There are so many different cursive letter curriculum out there without a clear letter sequence so it’s truly up to the instructor. Consider the benefits of teaching cursive letters in their letter family clusters. Here is one list of recommended cursive letter order for ease of instruction.
For explicit instruction, use the suggested order to teach cursive letters listed on this handout.
How to Teach Cursive Families
Teach Cursive Letter Families with Picture Frames!
This post contains affiliate links.
Use the cursive letter order descriptions to create family photos like we did. Use these in the classroom to teach kids about how the letters are related in formation. We used just a few items to create family photos for cursive letters:
A picture frame set worked great for making a full set of cursive letter families.
To make teaching cursive with a cursive letter family fun and “stick” try this memorable activity.
Cut the cardstock to fit the frames. Add a small piece of tape to keep the cardstock in place. Write the groups of cursive letters on the cardstock. Fit the paper into the frames.
Use these frames to teach common cursive letter families. Place them on desks or tables in the classroom or home and refer to cursive families during instruction.
Need help with the underlying skills needed for handwriting? Start here on our Handwriting resources page.
The Handwriting Book is a comprehensive resource created by experienced pediatric OTs and PTs.
The Handwriting Book covers everything you need to know about handwriting, guided by development and focused on function. This digital resource is is the ultimate resource for tips, strategies, suggestions, and information to support handwriting development in kids.
The Handwriting Book breaks down the functional skill of handwriting into developmental areas. These include developmental progression of pre-writing strokes, fine motor skills, gross motor development, sensory considerations, and visual perceptual skills. Each section includes strategies and tips to improve these underlying areas.
Strategies to address letter and number formation and reversals
Ideas for combining handwriting and play
Activities to practice handwriting skills at home
Tips and strategies for the reluctant writer
Tips to improve pencil grip
Tips for sizing, spacing, and alignment with overall improved legibility
Colleen Beck, OTR/L has been an occupational therapist since 2000, working in school-based, hand therapy, outpatient peds, EI, and SNF. Colleen created The OT Toolbox to inspire therapists, teachers, and parents with easy and fun tools to help children thrive. Read her story about going from an OT making $3/hour (after paying for kids’ childcare) to a full-time OT resource creator for millions of readers. Want to collaborate? Send an email to contact@theottoolbox.com.
This post is highlighting Fingerplay Songs as an excellent developmental tool. An important skill in child development, is the ability to use the fingers individually and together, and finger games are one way to just that! When holding a pencil, pick up cheerios, button, zip, or cut with scissors, you are using two or three fingers, and tucking the rest away! When typing on a keyboard, all of your fingers and thumbs must move individually, but at the same time, in order to type efficiently. Pay attention to what your hands and fingers do in a day, and you may be surprised!
FINGERPLAY SONGS
Finger skills development is essential to the preschool age, however play starts with babies! Check out this article on The OT Toolbox about Baby Play.
There are many ways to encourage this fine motor development, but one of my favorites that doesn’t get enough attention (in my opinion, of course) is fingerplay songs! I do these silly finger plays all the time with my preschoolers during their OT time, or with any of my other students who wants to have fun.
They won’t even know they are developing important motor skills while doing these finger play rhymes. Let’s break down the skills used in the most popular finger play song: Pat-A-Cake.
Fingerplay Songs and Fine Motor Skills
This is a classic finger play rhyming activity for thumb and index finger isolation! The term “finger isolation” will come up a few times in this article, so why is it important?
When babies are born, their fingers all move together as one unit, and one hand tends to copy each other! The body of an infant can be seen as one moving piece, in comparison the movement as we develop, which is a complex system of moving pieces. In order to develop skills as we age, it is important to learn to isolate the movements of our hands and fingers from each other.
Activities that use the hands to complete motor tasks, sequencing of movements, and dexterous games include other fine motor skills too, including:
You can see why fingerplay songs support child development!
Pat-a-cake fingerplay song
First, motor plan a pattern of movement. Add motor planning and bilateral coordination skills by alternating movements of patting hands on lap and clapping hands while chanting the words:
Pat-a-cake pat-a-cake baker’s man,
Bake me a cake as fast as you can.
Roll it. (rolling hands one over the other)
And pat it. (patting hands to lap)
And mark it with a B. (Index finger isolation to draw a B with your finger)
Put it in the oven for Baby and me! (reaching forwards with both arms)
There are many ways to develop fine motor skills through play in addition to these fingerplay activity songs. Check out this post on Hands on Preschool Activities
WHERE IS THUMBKIN Fingerplay song for preschoolers
This video does a great job of explaining the motions to this simple, easy to learn fingerplay rhyming song. The song starts at about marker one minute and thirty (1:30) seconds.
Fingerplay songs for fine motor
Of course fine motor development comes from more than just fingerplay songs and rhymes, here is an article on developing Fine Motor Skills.
FIVE LITTLE DUCKS interactive finger play song
Here is a fingerplay song where the individual and cohesive movement of fingers really get to shine. This video demonstrates the hand, finger, and arm movements to be used while singing. I find it best to sing to your child once you know the song, instead of playing the video for them. Make sure to show your child how it’s done by doing it with them! This is true for all of the preschool songs and fingerplays we share.
While you watch the video and learn the movements, notice:
Finger isolation while counting,
Cohesive movement for the “quack, quack, quack”
Wiggling of the fingers as the ducks waddle away
There are many books written to correspond to this song. Here is one I tend to reach for: Five Little Ducks. This one is “interactive” with little doors on the page that require a pincer grasp to pull open. This is another way to encourage important fine motor skills!
More fine motor resources for preschool
If you are looking for more interactive books, to develop fine motor skill development, the OT Toolbox has you covered!
Exploring Books Through Play: 50 Activities for developing finger and hand development
ITSY-BITSY SPIDER silly fingerplay for preschoolers
This is preschool fingerplay activity is by-far my favorite way to increase finger isolation and motor patterns in reluctant kids. In the video below, check out the wrist movements, wiggling fingers, and more, while interacting with a well recognized song!
Many young children, especially those with delayed fine motor control, are not able to motor plan the spider moving up the spout as shown in the video. However, they will adapt and create their own way, using the movement of only two or three fingers, while the rest are tucked away. This pattern is the building block for mature grasps. Sometimes, I teach the spider as the index fingers and thumbs touching in a circular pattern, instead of the L shape in the video. This adaptation may be less confusing for some. See what makes your child most successful!
boosting childhood development with action rhymes:
Boosting Child Development with Action Rhymes and Fingerplay Songs
OPEN AND SHUT THEM fingerplay chanting rhyme
“Open and Shut Them” is a song I have used for years to keep babies occupied while I change their diapers. I knew a kindergarten teacher who used it to help transition her students to carpet time. This fingerplay song is useful for many different purposes, not just fine motor development and rhyming. It is a perfect addition to this list. There are many different versions of this song you can find online, but here is a video that clearly demonstrates the many different actions the hands and fingers can do!
Did you notice the pinky finger isolation? What about the movement of two fingers, with the rest tucked away? These are advanced movements that are motivating and fun!
You may have noticed all of these fingerplay preschool songs are repetitive. This is perfect for increasing opportunities to practice and learn a new skill. They integrate movement of both hands and fingers in a particular sequence, which teaches and enhances motor planning. Additionally, singing songs such as these familiar preschool finger play rhymes in a group, or one-on-one develops social skills, and can build rapport with one another. It’s a win-win method to teaching important skills.
If you are interested in teaching more fine motor skills, check out these resources from the OT Toolbox:
Working on fine motor skills, visual perception, visual motor skills, sensory tolerance, handwriting, or scissor skills? Our Fine Motor Kits cover all of these areas and more.
Check out the seasonal Fine Motor Kits that kids love:
Sydney Thorson, OTR/L, is a new occupational therapist working in school-based therapy. Her background is in Human Development and Family Studies, and she is passionate about providing individualized and meaningful treatment for each child and their family. Sydney is also a children’s author and illustrator and is always working on new and exciting projects.
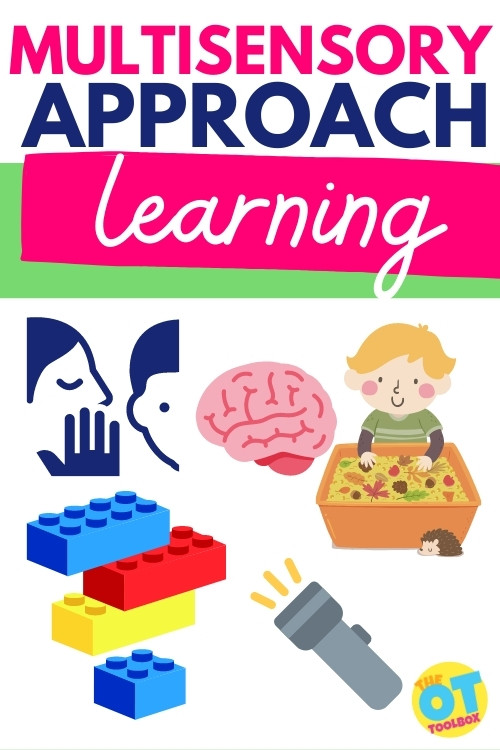
Here we are covering easy ways to take a multisensory approach to academics. Occupational therapy and multisensory learning go hand in hand. And, when using the fundamental benefits of a several sensory areas in academics, the learner benefits. Let’s go a bit deeper, and then share 10 Fun Sensory Academic Activities.
A multisensory Approach to academics
Sensory rich activities can teach children academic skills, even if they don’t like to sit down and do worksheets. This blog includes 10 exciting ways to teach preschoolers new skills using sensory rich components such as tactile, visual, auditory and movement based components.
As a preschool teacher, I am always looking for new ways to teach academic skills to the children who aren’t interested in sitting and attending to small group activities. Tracing letters, taking turns with manipulatives and completing teacher directed tasks aren’t easy for some children. But I want to make sure they are learning the skills they need for Kindergarten readiness.
Read our resource on tracing sheets for a multisensory approach to learning letters.
When teachers use a multisensory teaching approach, there are many benefits that can be covered.
This blog explains the benefits of sensory play. “Sensory play offers many benefits. It expands children’s vocabulary as they learn about descriptors or attributes, like warm, rough, smooth, and slimy. It’s a great way to teach your children how to describe the world around them.
This type of exploration also supports development of fine and gross motor skills. When children are squeezing dough or holding a paint brush, they’re engaging the small muscles in their fingers and hands. During puddle jumping, they’re using their larger muscle groups.
Because sensory play is open-ended, it naturally fosters independence. They can explore the world and get creative with objects they are playing with. There’s no right or wrong way to play.”
As we work with these children becoming interested in group and social foundations (such as turn taking and participating in adult led activities) there are some other ways to teach foundational academic skills to these children using sensory rich components.
When children use multiple senses to learn new skills, they are not only able to remember the new skill more easily, they are able to attend to the activity longer. This article explains how sensory and attention are connected.
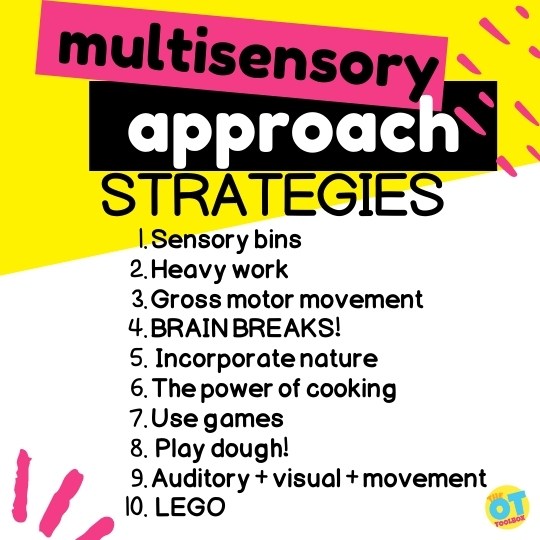
10 ways to take a multisensory approach to learning
Now that we’ve covered why a varied sensory offerings impact learning, let’s cover various ways to integrate the senses into a learning environment. Here are ten ways to impact learning through a multi-sensory approach.
1. Offer multisensory instruction with a sensory bin
Sensory bins are a novel environment for students to explore a new concepts. With a sneosy bin includes textures, movement, changes in body positioning, there are manu senses that are used at once while discovering a theme, concept, or idea. Learners can challenge the tactile sense, visual sense, proprioceptive sense, vestibular sense, and even olfactory sense in a sensory bin.
For preschoolers and older kids, try these ideas for multisensory learning using sensory bins:
Visual cues are such an important sensory component that we often forget about. When we see items, we learn how to differentiate them from others. A quick way to incorporate multisensory approach to learning colors, for example, can involve using colored sand or colored rice, to enhance the visual sense, tactile sense, and proprioceptive sense. Not only will children enjoy sorting the objects by color, they will be able to explore the items using their hands. They can scoop, stir, and pour the heavy medium while incorporating colored letters, different colored scoops, colored sensory bin cards, and other materials. Add some scoops to the bins to encourage fine motor development.
2. Add Nature for a multisensory approach to math
A favorite nature game, this activity uses the tactile sense to encourage movement, motor planning and number sense. Have the child use a bucket gather items they see while outside on a nature walk. They can gather rocks, pinecones, leaves, sticks, flower petals, etc. When you make it to the end of the walk, sort the items out into piles. Now, count how many of each item you have. Which one do they have the most of? The least of?
A nature-based sensory approach to adding, subtracting, sorting, patterning, shapes, etc. involves several sensory systems: auditory, tactile, visual, proprioceptive, vestibular, and olfactory.
A nature sensory walk can be applied to other learning concepts too, like in this nature rainbow hunt idea.
3. Use a movement-based approach in learning
One way to incorpoate the proprieoceptive and vestibular senses into learning (or kinesthetic learning, as some may consider this approach), is with a game-based learning experience. This can be accomplished with tossing bean bags, throwing a beach ball, balancing, or kicking a ball.
For example, Kick and Count is a game that teaches one to one correspondence to those kids that love to move! All you need are 5 balls and an outdoor area. Line of the 5 balls in a row and ask the child to count each ball before they kick it as hard as they can! You can even add in description words:
“Kick the ball hard, soft, slow, fast, up, straight, to the left, to the right, backwards… etc)
With any movement approach, add spelling words, facts, sight words, colors, names, etc. to the movement task.
4. Gross Motor Learning
Similar to the specific movement-based approaches listed above, a gross motor obstacle course type of learning activity can be used with learning concepts. The difference? This multisensory approach gets those heart rates up, integrating the interoceptive sense into learning.
For example, students can move around the room to find information cards, letters, spelling word cards, or other visual. More specifically, for kids that are learning to identify letters, match upper and lowercase letters, or write letters, you could use this alphabet bundle. In Alphabet Chase: Sammy Chases the Alphabet, kids can run, donkey kick, crab walk, or hop around the room to locate letter visuals.
After reading the story “Sammy Chases the Alphabet” place letter stickers onto ball pit balls and through them around the room. Have children find them, naming the letters that they find. This game is so much fun every child will enjoy learning their letters. Once children have identified the uppercase letters, switch out the alphabet on the ball pit balls to lowercase letters. Chasing after the alphabet is so much fun!
5. Take a multisensory approach to learning using games
There are so many great games that can be used in learning. Whether you are addressing math, phonetics, handwriting, reading fluency, science, or other area, games can be integrated into learning in some way. Take a look at these various ways to use games in learning. Coming from an OT’s perspective, we’ve been sure to include how these games complement functional skill areas and the senses.
Try to think of ways to use games like Simon Says, Head Bandz, Twister, Seven Up, Checkers, Connect 4 in learning. There are SO many ways to adapt a single game to meet the curriculum needs. Use these printable Simon Says commands.
6. Use cooking as a multisensory learning experience
Using cooking tasks for learning is a motivating and meaningful strategy for learning through the senses. Getting kids involved with cooking tasks is a must. Cooking offers not only a multisensory approach…there are SO many senses involved with cooking! But, cooking is a powerful learning tool, too.
When kids are active in the kitchen, they can look at math, reading, fractions, executive functioning skills, problem solving, eye-hand coordination, visual motor skills, fine motor skills and more. All of these cognitive skills and motor skills impact overall functioning.
7. Use Play Dough mats as a multisensory learning approach
For kids working on handwriting, fluency, comprehension, a quick way to add heavy work input is with a play dough warm-up. In therapy sessions, a handwriting play dough mat can be used for writing prompts. Work on letter formation, line use, spacing and other handwriting needs after heavy work input through the hands.
This play dough mat deal is a steal with printable handouts for working out the hands and then working on handwriting.
Address letter formation with these letter play dough mats that include a “sky line” and “dirt line” for line and size awareness in teaching letter formation.
8.Incorporate visual and auditory cues into learning
With the Soothing Sammy curriculum, you can address emotional regulation within learning experiences to help kids calm down using visual and auditory cues.
A learning experience that adds visual cues using a flashlight or pointer light plus auditory prompts adds to a typical classroom experience. Consider these tactics:
Use a highlighter and black light for a fun visual twist
Incorporate music
Add low lights to learning for a change in the classroom environment
Use the game “telephone” to pass on information
Use whisper phones for reading
9. Utilize heavy work input using LEGO in multisensory learning strategies
Novel experiences like bringing in a bin of LEGO offers a fun and engaging learning experience. But when you stop to consider different ways to use one material, you get the wheels turning. Better yet, building with LEGO offers sensory input in many ways: proprioceptive input through the hands to click LEGO together and take them apart, visual processing, tactile input, and auditory processing as the bricks click together.
Use these learning with LEGO ideas for math, literacy, letter formation, pre-writing lines, and more.
How many ways can you think of to incorporate LEGO blocks into a multisensory approach to learning?
10. Use recycled containers in a multisensory approach to learning
One of the easiest ways to incorporate a variety of textures (tactile sense), weights (proprioceptive sense), colors (visual sense), and movement (vestibular sense) is by using a variety of materials. And, one trip to the recycle bin can fill your toolbox with the materials you need for learning at a no-brainer cost (FREE!).
These sensory-rich activities will engage any child and teach new skills through play. We all know how important it is for children to attend to tasks in circle time, group time and other important instances throughout the day.
As teachers, our goal is for all of our students to succeed. This list of 10 sensory rich academic activities can be used at home, at school or in therapy settings. With these ideas as a starting point, how can you adjust the multisensory themes to meet the needs of your classroom, educational curriculum, and students? Plus, don’t forget the power of brain breaks in learning. With many ideas out there, you can usually find a themed brain break that fits in with educational topics.
As children start to love learning, they will become more interested in participating in more adult directed tasks, preparing them for Kindergarten and Beyond. What is your favorite sensory-rich academic game?
Jeana Kinne is a veteran preschool teacher and director. She has over 20 years of experience in the Early Childhood Education field. Her Bachelors Degree is in Child Development and her Masters Degree is in Early Childhood Education. She has spent over 10 years as a coach, working with Parents and Preschool Teachers, and another 10 years working with infants and toddlers with special needs. She is also the author of the “Sammy the Golden Dog” series, teaching children important skills through play.
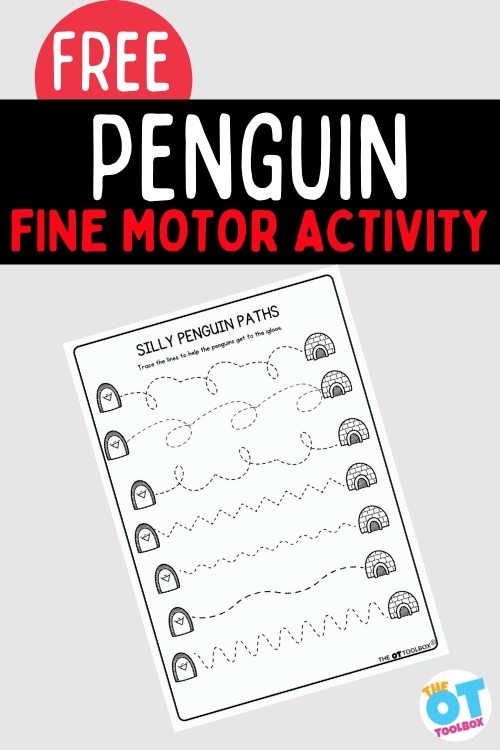
This time of year is perfect for a penguin theme and the fine motor penguin worksheet below is a perfect addition to a penguin lesson plan. This penguin worksheet works on a variety of fine motor skills and can be adjusted to meet educational needs as well, making it a functional worksheet for kids. Use it along with a Tacky The Penguin book and theme, and fun facts about penguins (great for writing prompts while working on handwriting!)
When planning a penguin theme, be sure to add activities from our new Penguin Therapy Kit. It’s got fine motor, gross motor, self-regulation, sensory materials, scissor skill activities, handwriting tasks, and more.
Let’s get on with this free penguin worksheet!
Penguin Worksheet for Fine Motor Skills
As occupational therapists, we love all things function, so functional handwriting beats out on rote copying any day. We can help kids with handwriting skills using a motivating topic like penguins, or we can use discussion of facts that go with an educational theme when working on handwriting skills. The fine motor worksheet here is a perfect addition to that functional and educational topic because it can be used as a hand-warm-up while staying on a theme that is being discussed in the classroom. For OTs pushing into the classroom, this will be a fine motor warm-up that the whole class might want to join in on!
First start with the fine motor work out using the penguin worksheet and then move onto penguin writing prompts.
When thinking about penguins, the movie, March of the Penguins comes to mind.
March of the Penguins Writing Prompts- Use the movie, March of the Penguins as a writing prompt idea to work on handwriting skills after you do a fine motor warm up with our free penguin fine motor worksheet.
I imagine everyone has a different take away from the film March of the Penguins. For me, it was seeing how cold it was in Antarctica in the winter, and watching that poor Dad penguin who has to sit on that egg all winter, while the Mom goes out and gets a few snacks. There was that one scene where the penguin BECOMES the snack, but let’s gloss over that part.
Other people watching the film might take away the fact that the Dad was really stepping up to do his part in the family. These types of Emperor penguins mate for life, and start this ritual every march.
Depending on your audience, this movie leads to opportunities for some deep discussion. Use those discussions as writing prompts.
Penguin facts
Facts about Antarctica
Facts about Emperor penguins
Tacky the Penguin Writing Prompts- If your learners are preschoolers or young children, reading Tacky the Penguin, by Helen Lester might be more their speed.
Write out the story in a comic strip type of writing prompt
List out penguin names from Tacky the Penguin
List out features of Tacky that describe: loud, distracting, funny, is himself
Incorporate interoception concepts from the Tacky the Penguin that kids can relate to.
Penguin Facts Writing Prompts- Use other penguin facts as writing prompts no matter the age of the learner.
Facts about penguin species
Penguin features
Penguin eggs
Penguin habitats
Create an entire treatment plan around this penguin winter theme. Whatever direction you decide to take your penguin writing theme, the OT Toolbox has you covered with penguin worksheets and printables.
Before rushing out to watch March of the Penguins (I may be scarred for life), perhaps take in a viewing of Happy Feat for a lighter film. Also consider purchasing this winter fine motor set as an add on to your treatment theme:
In the Penguin Therapy Kit, you’ll find penguin writing pages to use with these handwriting tasks. There are also penguin-themed sensory bin materials, letter formation cards with a penguin theme.
Penguin Worksheet
Along with the writing prompt ideas, use the free penguin printable below to address fine motor skill work. It’s appropriate for many ages and skill needs. From tracing, to cutting the penguin paths, to working on in-hand manipulation, pencil control, and more.
Beyond a cute tracing activity, this penguin worksheet targets many different skills:
Tracing for dexterity works on staying on the lines, fine motor control, building hand muscles, scanning and a whole host of other important skills as defined below.
Visual motor skills –Combining what is seen visually and what is written motorically. This takes coordination to be able to translate information from visual input to motor output. Coloring, drawing, counting, cutting, and tracing are some visual motor skills.
Kinesthetic awareness – This means learning by doing.
Hand strength and dexterity – staying on the lines builds hand muscles and develops muscle control.
Visual Perception – Developing figure ground to see where the lines start and end, being able to follow the path with the eye and hand, seeing the dotted lines creating a path rather than just dots.
Strength – Core strength needed for sitting, shoulder/elbow/wrist stability, finger strength, and head control all play their role in writing.
Bilateral Coordination – Be sure your learner uses their helper hand for stabilizing the paper while using their dominant hand for writing.
Social/Executive Function – Following directions, task completion, orienting to details, neatness, multi-tasking, attending to task, and impulse control can be addressed using this Penguin worksheet.
There are many different variables that can be modified while using this activity:
Paper:
lightweight paper is much more difficult to stabilize than heavy weight construction or cardstock paper.
Colored paper may be easier or more difficult for children to work with because of color contrasts.
The page can be laminated first, using wipe off markers to trace the penguin paths. This is a great way to make this page reusable.
Writing utensils:
There are endless possibilities for written expression. Markers, crayons, colored pencils, paints, watercolor, chalk, or dry erase pens all provide different input, and require different levels of fine motor skill to manipulate.
Small one inch crayons are excellent for developing those tiny hand muscles.
Chalk, with its grainy texture, provides sensory feedback and can be a positive (or negative) experience
Markers glide easily, requiring less precision and grip strength
Change writing utensils to appeal to different students and improve their level of motivation.
Other ways to change this task:
Have learners write on a slant board to build wrist control and shoulder stability
Try having learners lying prone on the floor with the page in front to build shoulder stability
Lying supine with the page taped above the child, under the table builds shoulder and wrist stability
Project this page onto a smart board for students to come to the board and write in big letters.
Enlarge or shrink this page to make it easier/harder
Place mini erasers or beads along the path
Different levels of prompting may be needed to grade the activity to make it easier or harder
Make this part of a larger lesson plan including gross motor, sensory, social, executive function, or other fine motor skills
Press a fingertip into paint and dot along the lines to work on finger isolation and separation of the sides of the hand
Use the penguin worksheet for sensory play
Use sugar cubes to move along the worksheet path and to make igloos
Make fake snow to get hands into for more fine motor play. Slide the worksheet into a page protector. Use the fake snow to mold a snowy path along the penguin’s path.
Shredded paper in a pool would make a great snow activity. Spread it along the penguin path, adding glue to create a textured, snowy path.
Trace the lines with squeeze glue and add craft materials.
Use glue and feathers to make a feathery walk to the penguin.
Use the penguin path in a preschool penguin theme in a sensory bin using penguin figures, dry beans, scoops, and tongs.
Free Fine Motor Penguin Worksheet
Want to get your hands on this free printable so the kids you serve can develop stronger hands? Enter your email address into the form below for access through your email inbox. This resource is also available in our Member’s Club…you’ve asked for it: A one-stop space to access all of our free downloads in one place. Members can log into their dashboard and download every freebie we have on the website in one place. You’ll also find exclusive Member’s Only materials. Level 2 members get immediate access to the Penguin Therapy Kit mentioned in this post.
Victoria Wood, OTR/L is a contributor to The OT Toolbox and has been providing Occupational Therapy treatment in pediatrics for more than 25 years. She has practiced in hospital settings (inpatient, outpatient, NICU, PICU), school systems, and outpatient clinics in several states. She has treated hundreds of children with various sensory processing dysfunction in the areas of behavior, gross/fine motor skills, social skills and self-care. Ms. Wood has also been a featured speaker at seminars, webinars, and school staff development training. She is the author of Seeing your Home and Community with Sensory Eyes.
Victoria Wood, OTR/L
*The term, “learner” is used throughout this post for readability, however this information is relevant for students, patients, clients, children of all ages, etc. The term “they” is used instead of he/she to be inclusive.
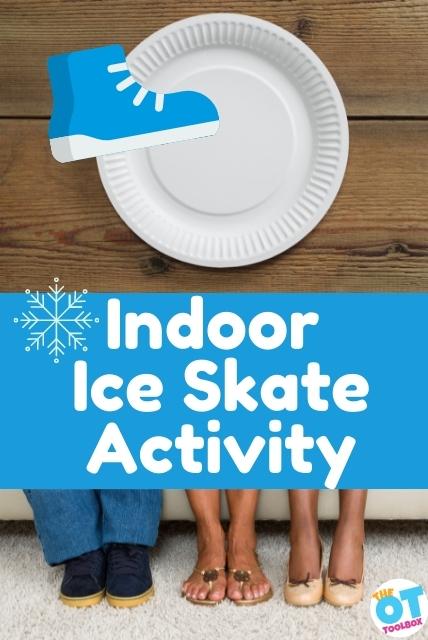
This indoor ice skating activity is an older blog post on The OT Toolbox, but the gross motor benefits are perfect for today! Did you know you can use an indoor balance and coordination activity like paper plate ice skating (and the inside skating task below) to challenge and integrate proprioceptive input, vestibular sensory input, and work on various gross motor skills. This is a fun indoor gross motor activity kids love.
Indoor Ice Skating Activity
Sometimes, you come across a play activity that provides many skill areas and is just plain old fun. These indoor ice skates proprioception and vestibular activity is one of those.
A few years ago, we shared a bunch of winter sensory integration activities. This is on of those movement sensory ideas (that we’re just getting around to sharing this year!)
With this indoor ice skating activity, you can play indoors AND incorporate proprioceptive input, vestibular input, crossing midline, visual scanning, motor planning, among other therapy areas…all with play.
Use the indoor skates to move in circles, curved lines, and move as a real ice skater.
Ask the skater to carry objects from one point to another.
In this skating activity, kids are really challenging strength and balance. The carpeted surface is a slick and slippery surface when sliding with a non-resistant surface when sliding on a paper plate, wax paper, or cardboard. TO slide, you need to move the legs along without lifting along the carpet, using core strength to maintain balance.
To move the feet, kids need to engage muscles of the core help maintain balance without falling or sliding.
Tissue Box Ice Skates
This is an activity that I remember doing as a kid. When the weather is too cold or icy to get outdoors, adding any vestibular or proprioception input can be just what the child with sensory needs craves.
To make your own indoor ice skating activity, all you need is a couple of cardboard tissue boxes and a carpeted floor.
If you don’t have tissue boxes, you can use other materials to make indoor ice skates. Or, try some of these ideas. The options are limitless:
Depending on the material and the user’s motor skills, you may need to strap the cardboard pieces onto shoes with pieces of tape. Other users can slide their feet to move the materials along carpeted surface by sliding their feet.
There are many skills that are developed with this indoor ice skating activity. Let’s cover those therapy skill areas:
Use cardboard boxes to make a pair of indoor “ice skates” that work on a carpet.
Indoor Ice Skating and proprioception
Use empty tissue boxes to create ice skate “boots”. Moving the feet along the carpet requires heavy work, coordination, balance, and awareness of position in space.
Incorporate proprioceptive input by using a blanket and pull your child around a carpeted area. Ask them to squat down to a skater’s ready position as you pull them, too.
Try skating with the tissue boxes as an adult pulls the child along with a blanket or towel. Play tug of war with the blanket, too.
A child can work on vestibular input by skating fast from one target to another. Encourage them to position themselves in different ways as they skate around a carpeted room.
This activity works on crossing midline as the child “skis”. Sometimes you might see children with vestibular difficulties who have difficulty determining proper motor planning in activities. They might have trouble crossing midline in functional tasks as well as difficulties with reading and writing.
A movement activity that challenges the body’s position in space like this one can help with these problem areas.
Incorporate the ice and snow activities in our Penguin Therapy Kit to work on fine motor skills, handwriting, gross motor skills, self-regulation, sensory input, pencil control, and much more.
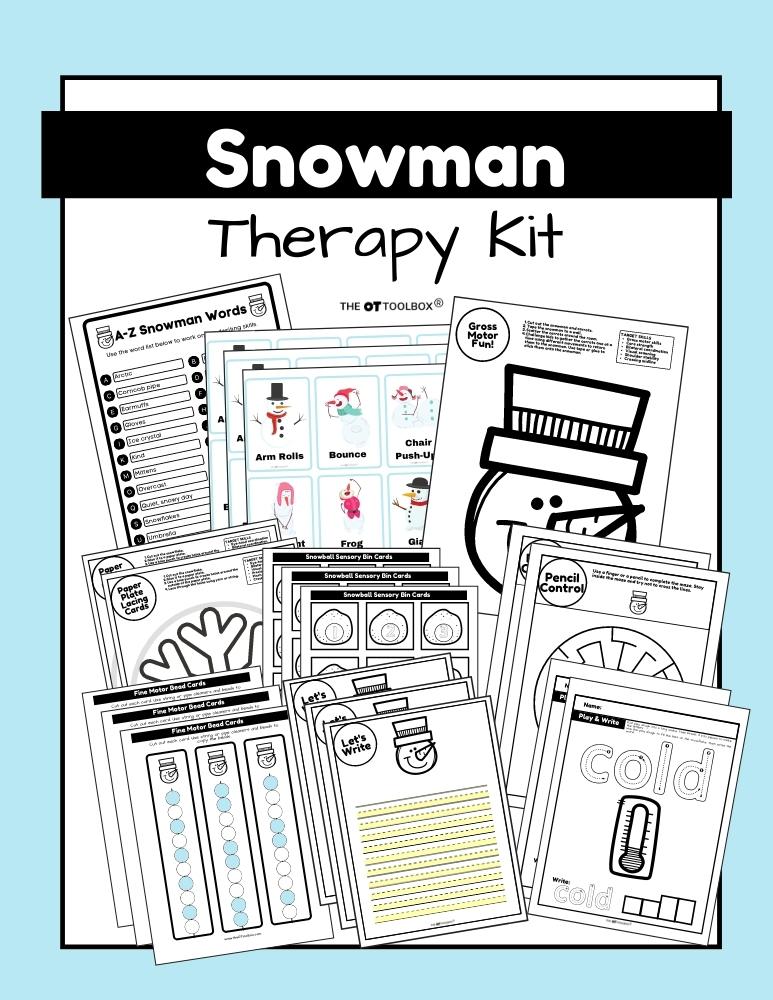
Use the ice and snow themes in our Snowman Therapy Kit with gross motor, fine motor, self-regulation tasks, sensory diet activities, crafts, and much more.
Snowman Therapy Kit
This print-and-go snowman-themed therapy kit includes no-prep fine motor, gross motor, sensory, visual processing, handwriting, self-regulation, and scissor skill activities to help kids develop essential skills. Includes everything you need for therapy tasks, home therapy sessions, and movement-based learning.
Colleen Beck, OTR/L has been an occupational therapist since 2000, working in school-based, hand therapy, outpatient peds, EI, and SNF. Colleen created The OT Toolbox to inspire therapists, teachers, and parents with easy and fun tools to help children thrive. Read her story about going from an OT making $3/hour (after paying for kids’ childcare) to a full-time OT resource creator for millions of readers. Want to collaborate? Send an email to contact@theottoolbox.com.
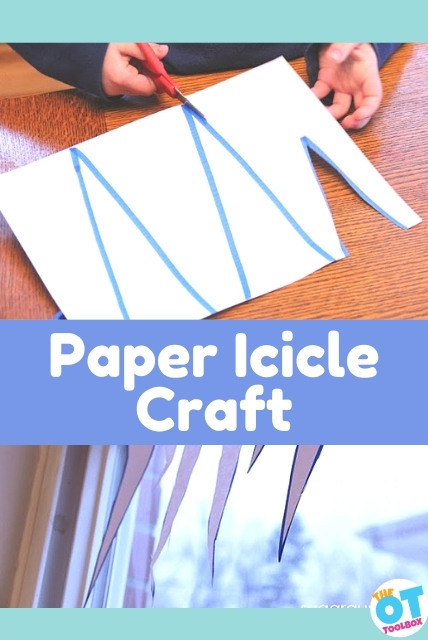
This paper icicle craft is a fun one for wintertime occupational therapy activities. If you are working on Scissor skills, cutting icicles into paper is a great fine motor task that builds eye-hand coordination, crossing midline, and visual motor skills to cut basic shapes. Be sure to add this paper icicle template for more tools for your winter occupational therapy toolbox.
Take fine motor work a step further by grabbing our new winter crossword puzzle to incorporate a whole winter theme.
Paper Icicle Craft
Do you have a little one who is just learning to master scissors? Scissor Skills for children who have never picked up a pair of scissors before can be very daunting. Frustrations can build and the next thing you know, your little sweetheart is spiking the scissors across the table!
Kids learn all things at different paces. Every developmental milestone and functional activity are achieved at different paces.
Scissor use is no different. Kids as young as two can start to snip paper (and probably with an awkward-two handed grasp on the scissors!) And as their fine motor skills develop, will achieve more and more accuracy with scissor use.
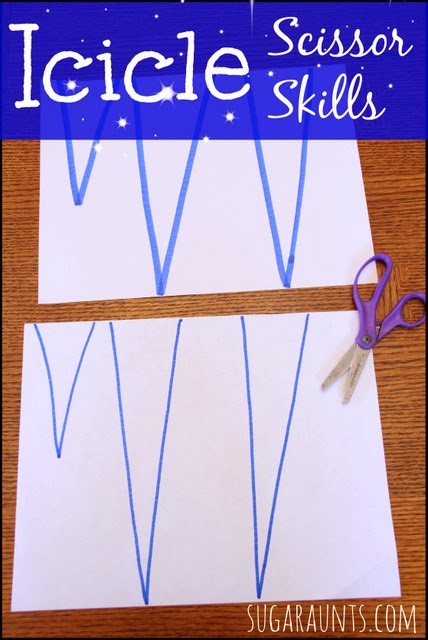
This winter themed Icicle cutting activity is a great beginner project for new scissor users. The strait cuts, bold lines, and even paper type are good modifications for a new little scissor-hands!
Winter Icicle Craft
Preschoolers are just beginning to gain more control over scissors. Preschool activities like this icicle craft at the way to go when it comes to building motor skills.
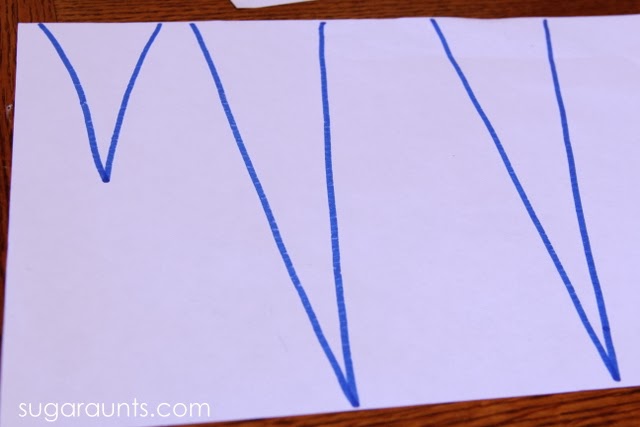
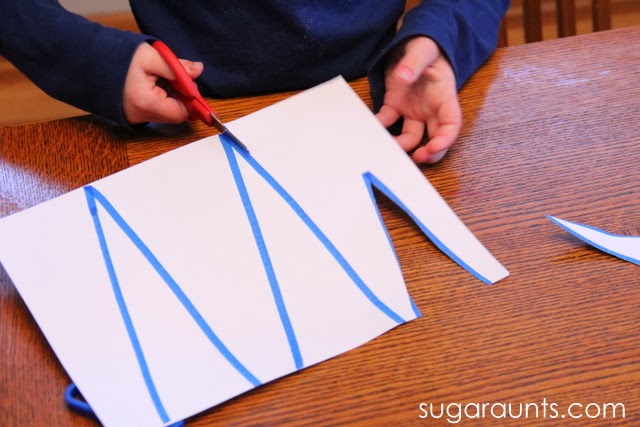
Strait lines are the perfect way to gain confidence when they are learning to cut…and ensure that they’ll want to pick up the scissors and try another craft again soon! We started out with nice strait lines on these icicles. Little Guy could cut the whole way across the page without needing to rotate the page to cut a curve or angle.
Note: This post contains affiliate links.
How to Modify this Icicle Craft
The smallest icicle could have been a harder task for him to cut, if he turned the whole page around like he started out doing.
We used a few different strategies to scaffold this paper icicle craft:
Cut through the page instead of turning around corners
Adjust the paper weight to a thicker resistance
Thicker cutting lines
Trials with thinner lines to carryover the task with practice
Verbal and visual cues
I prompted him to start one line from the edge of the paper and then instead of rotating the whole page (which would have probably given him a big chopped off icicle point), I showed him how to start the other side from the edge as well. He was much more accurate with the lines and wanted to keep going!
We had two different types of paper for our icicles. The first set was drawn on a sheet of white cardstock.
Cutting from this thicker paper is a great beginning step for new scissor users and a modification often used for kids with fine motor difficulties.
The thicker paper requires slower snips and allows for more accuracy. I also drew the icicles on the cardstock with nice thick lines. This gave Little Guy more room to cut within the lines and allowed for less line deviation.
The second set of icicles were drawn with thinner lines on printer paper. After practicing on the first set, he was game to cut more icicles. The thinner paper and lines requires more control of the scissors and better line awareness, and bilateral hand coordination.
This looked like so much fun, that even Big Sister wanted to get in on the icicle-making action!
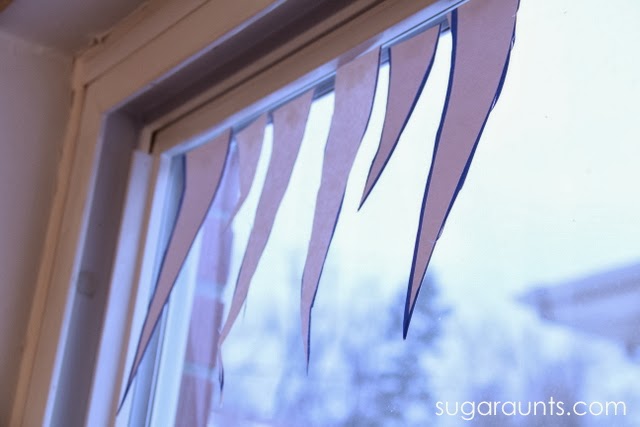
We hung our icicles in the window to match the icy conditions outside.
You’ll love these other cut and paste crafts for winter. Use them in winter fine motor ideas for occupational therapy activities
Winter crafts using paper and a variety of textures for sensory play, motor planning, and motor skills.
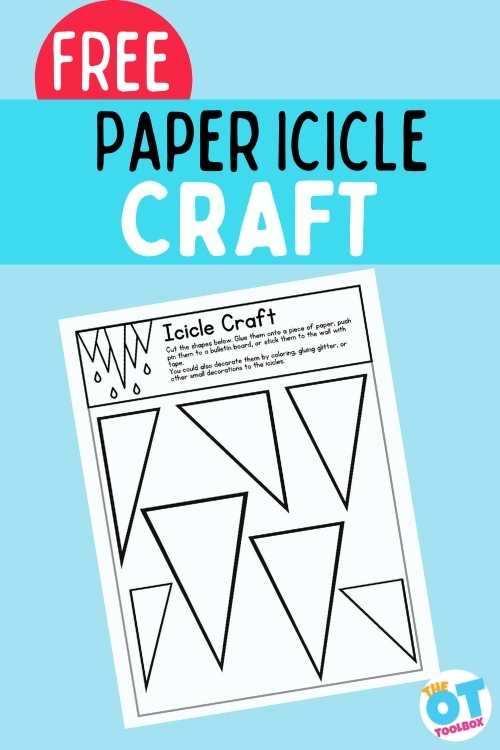
Paper Icicle Craft is an actual printable template that you can print off and use to work on the scissor skills we covered in this post. It’s a great way to make an icicle craft.
Build a Snowman Craft– Work on scissor skills and fine motor strength to build a paper snowman
Colleen Beck, OTR/L has been an occupational therapist since 2000, working in school-based, hand therapy, outpatient peds, EI, and SNF. Colleen created The OT Toolbox to inspire therapists, teachers, and parents with easy and fun tools to help children thrive. Read her story about going from an OT making $3/hour (after paying for kids’ childcare) to a full-time OT resource creator for millions of readers. Want to collaborate? Send an email to contact@theottoolbox.com.
Looking for quick winter craft that builds skills? This paper icicle template is an icicle craft that kids will love! Use it to hang and decorate a window alongside some paper snowflakes for a wintery scene. Inspired by our icicle activity, this template is easy to use for visual motor skill development. Whether you are working on scissor skills or just want an activity to keep the kids busy, this icicle craft is the way to go!
Looking for a consistent way to support fine motor skills all year? This yearlong fine motor system includes seasonal activity kits and monthly data collection tools to support planning and progress monitoring.
If fine motor planning and data collection feel overwhelming, you’re not alone. This done-for-you yearlong bundle organizes seasonal activities and monthly screening tools in one system.
If you live where it is cold, winter seems here to stay. If you live in one of these frozen territories by choice, fate, obligation, finances, or bad luck, you might as well make the most of it. Use this cold and blustery weather to create another winter themed lesson plan. Let’s talk icicles!
When working with kids, it can be fun to pull out some interesting facts. These make great talking points, but for the students working on handwriting, they can spark a writing prompt idea too.
Icicles can grow at the rate of .39 inches (1 cm) per minute. Once the base is formed, each water droplet drips to the bottom of the cone where it freezes. Icicles can be lovely to look at, or be dangerous. From a homeowner perspective, the icicle can form because of a blockage in the gutter preventing water runoff. Did you see that scene in National Lampoon’s Christmas where the icicle rockets off the roof into the neighbor’s house? Funny/not funny.
The icicle gurus have created and entire Atlas cataloging icicles, saving images, and gathering all of the fun facts surrounding them:
Lucky for you, the OT Toolbox has designed a safe alternative to live icicles falling off of a building impaling someone or something. How about this icicle craft activity printable template for creating a multitude of fantastic activities for learners of all ages?
While there are endless possibilities for using this icicle template, the best one of course is GLITTER!! This project screams for glitter. Who doesn’t love glitter? (custodians, that’s who).
Beyond just using fabulous glitter, there are many skills that can be engaged using this icicle template:
Scissor skills: this can be graded up or down depending on the level of your learners.
Small toddler scissors are just right for tiny hands.
Thicker lines are easier to cut on than thinner ones
Larger shapes are easier than their smaller counterparts
Stiff paper is easier for cutting and holding than regular copy paper
Self opening or loop scissors are another way to make cutting easier for those learning to cut, or lacking the intrinsic hand muscles to open and close scissors.
Did you know left handed people cut in a clockwise direction while their right handed friends cut counter-clockwise? This allows the helper hand to support the paper adequately while cutting.
Kinesthetic awareness – This means learning by doing.
Hand strength and dexterity – staying on the lines builds hand muscles and develops muscle control.
Coloring and decorating: can incorporate copying from a model, creating an original design, following a pattern, creating a sensory experience, accuracy, neatness, and following directions
Visual motor skills –Combining what is seen visually and what is written motorically. This takes coordination to be able to translate information from visual input to motor output. Coloring, drawing, counting, cutting, and tracing are some visual motor skills.
Visual Perception – Developing figure ground to see where the lines are for drawing and/or cutting. Many young learners do not notice the black line as a border for cutting and coloring. Try highlighting this in different colors to help it stand out from the background.
Strength – Core strength needed for sitting, shoulder/elbow/wrist stability, finger strength, and head control all play their role in visual motor tasks.
Bilateral Coordination – Be sure your learner uses their helper hand for stabilizing the paper while using their dominant hand for writing/coloring/cutting.
Social/Executive Function – Following directions, turn taking, task completion, orienting to details, neatness, multi-tasking, attending to task, and impulse control can be addressed using this paper icicle template
The beauty of being able to modify and adapt this and all activities, is they can be made appropriate for many levels of learners from basic to more advanced. You do not have to reinvent the wheel for every learner on your caseload. With its adaptability, you can quickly make changes if your learner is functioning at a different level than you expected. This is critical as many treatment plans do not go as expected.
Other ideas for modifying this icicle template craft printable:
Cut the items out ahead of time for younger learners who are focusing on coloring and gluing
Laminate a few triangles to use as tracing patterns. Tracing around an object builds bilateral coordination.
Create patterns for your learners to follow
String together to make an icicle garland, working on lacing/hole punching/sequencing, and following directions
Make into a matching activity once several icicles are made. They can be matched by size, color, or design
Pin onto a bulletin board or wall to work on coloring on a vertical surface.
Work on the floor while learners are lying in prone
Add a gross motor element of having to find all of the triangles and bring them to the table
Make this a social activity by having learners share materials
Add large pom poms or scrunched up paper on the top of the icicles for a 3d effect
Add glitter and sparkles to the icicles for added sparkle and sensory experience
Paint the icicles with brushes, water colors, or finger paints
Drippy wet glue is preferred as it will stick better. The added benefit is the sensory input from white glue, as well as the fine motor strengthening from squeezing the bottle
The possibilities are virtually endless
When documenting any of these activities, the activity does not matter as much as the skills being addressed. Therefore the focus of documenting this icicle template craft will be on the skills such as cutting, coloring, executive function, behavior, strength, etc. rather than giving a lot of specifics about the craft itself.
Clinical observations during the icicle printable craft:
How well does your learner sit at the table? Are they stable, wiggly, do they fall or get out of the chair?
Does your learner use both hands for creating this icicle craft? Do they have a dominant and a helper hand, or switch back and forth?
How close to the line does your learner cut?
How much physical and verbal assistance does your learner need?
What is their grasping pattern on the scissors, crayons, markers?
What is their sensory response to glue, glitter, noise in the room, visual distractions?
What social and executive skills is your learner using and lacking? Cooperation, turn taking, following directions, attention to detail?
What behavior reactions are you noticing? Crying, poor frustration tolerance, seeking, avoiding behaviors?
In order to be well rounded in any treatment plans, it will be important to use more than one task to measure objectives and goals. Here is a great article on fine motor skills written by Colleen Beck, that includes background information on fine motor skills, activities, and resources.
Free Paper Icicle Template
It is no secret, I am not a fan of winter, however I do remember the wonder of looking up at the icicles formed on buildings, street signs, and monuments. I remember munching on an icicle or two as if it was a candy cane. We did not worry about acid rain, runoff, and other germs back in the 70s. Try and take a moment, slow down, and breathe in the wonder of nature.
I ate dirty icicles!
Victoria Wood, OTR/L
Victoria Wood, OTR/L is a contributor to The OT Toolbox and has been providing Occupational Therapy treatment in pediatrics for more than 25 years. She has practiced in hospital settings (inpatient, outpatient, NICU, PICU), school systems, and outpatient clinics in several states. She has treated hundreds of children with various sensory processing dysfunction in the areas of behavior, gross/fine motor skills, social skills and self-care. Ms. Wood has also been a featured speaker at seminars, webinars, and school staff development training. She is the author of Seeing your Home and Community with Sensory Eyes.
Today we have a fun fine motor paper snowman craft. It’s a “build a snowman printable” that you can print out and use to work on so many therapy skills. There is just something about making a snowman during the winter months, right? Today’s free fine motor snowman activity that kids will LOVE. So, do you want to build a snowman?
Build a Snowman Printable
Heck yes! Wait, not if I have to go outside. With this great fine motor snowman printable activity, you can build a paper snowman from the comfort of your own house, in your pajamas, with a cup of cocoa if you like…and work on fine motor skills, scissor skills, sequencing, bilateral coordination, and more!
It’s no secret I love crafts. You could pretend for half a second to like the cold and wet winter outside your door, or make this adorable snowman inside where it is warm. Build this into a lesson plan about winter by talking about what winter is like in different parts of the world, For learners who have never experienced snow, provide pictures or videos for reference. Talk about what they think snow feels like.
Snow comes in many different varieties. While it is all cold (except the plastic snow variety), some snow is wet and soggy, while other is dry and fluffy. There is also icy snow that creates this lovely sheen across it, and is very fun to smash and crash through! Each type of snow has its uses and benefits. Wet snow is better for building and packing. Dry and fluffy is better to keep you from getting soaked. Icy snow is just pretty to admire. For those with tactile defensiveness that impact touching wet, mushy snow this can be a good discussion.
Use this snowman printable as a jumping off point to the rest of your treatment sessions.
As always I love the versatility of this printable paper snowman craft. With one snowman printable, you can address skills like fine motor, visual motor, turn taking, finger strengthening, and following instructions all wrapped up into one cute snowman.
It would be a great interactive snowman activity for kindergarten, preschool, and all ages, depending on how you adjust the activity.
How to Use this Build a Snowman Printable
What you will need for this task:
Snowman printable
Ruler or laminated strip of cardstock
Clothespins
Glue (drippy glue is best)
Dice
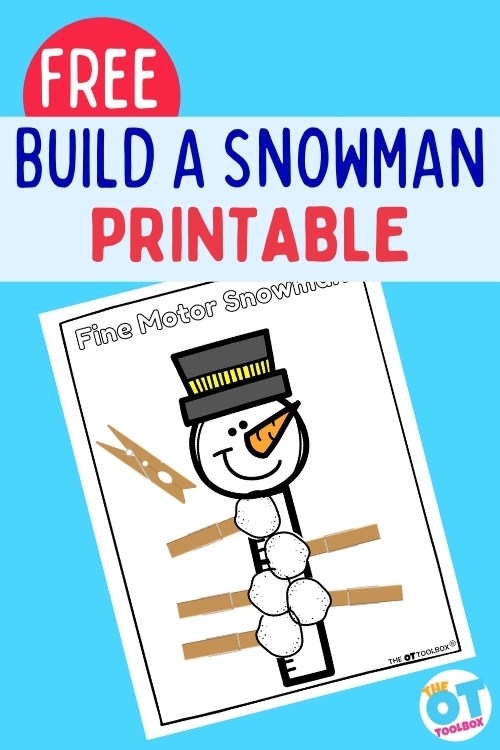
Instructions: Color the snowman or print out the pre-colored sheet. Have students cut out snowballs and glue to the clothespins. Roll the dice and clip the corresponding number of clothespins to your ruler or strip of cardstock.
Explore all of the ways to use adapt and modify this free snowman printable:
Laminate the snowballs to make them more durable
Laminate the snowman head to make it reusable and durable
Change the ruler for a stiff piece of cardstock or cardboard
Print the snowman in color, or black and white so your learners can personalize theirs
Add large pom poms or scrunched up paper on the top of the snowballs for a 3d effect
Add glitter and sparkles to the snowballs for added sparkle and sensory experience
Paint the clothespins or dip in glitter to make them fancier
Drippy wet glue is preferred as it will stick better. The added benefit is the sensory input from white glue, as well as the fine motor strengthening from squeezing the bottle
Pre-cut and glue all of the pieces ahead of time if the emphasis is on playing the game
Split this into two sessions, the first being the craft, the second working on the game
Incorporate gross motor work: Scatter the snowball clips around the room and ask the user to gather the snowballs to build their snowman. Add hops, kicks, jumps, and animal walks to gather the snowballs.
What is your focus? What goals do you want to focus on while using this activity? You can use on or all of them:
Fine motor strengthening, hand development, and grasping pattern
Following directions, attention to detail, turn taking, waiting, social skills, compliance, behavior, and work tolerance
Cutting on the line ( if you choose to add this step), within half inch of lines, in the direction of lines
Pasting using glue stick or drippy glue with accuracy
Bilateral coordination – remembering to use their “helper hand” to hold the paper while cutting. Using one hand for a dominant hand instead of switching back and forth is encouraged once a child is in grade school or demonstrates a significant strength in one or the other.
Strength – core strength, shoulder and wrist stability, head control, balance, and hand strength are all needed for upright sitting posture and fine motor tasks.
If you have not totally burned out on the movie Frozen and all of the theme work that goes with it…like this Frozen sensory dough, this will be a great addition. This build a snowman activity can be creating Olaf from the movie. If you are super creative, you could switch out the head of the snowman for an Olaf printable.
What else can I add to this paper snowman craft?
Have learners write the stages to building a snowman
Higher level learners can write down the directions to the game
More advanced learners can work on social skills by teaching beginners to play
Learners can explore other games they could make using this snowman (perhaps hiding the snowballs around the room and having learners run around collecting them)
Write a report about snowmen, types of snow, the history of snowmen, different snow celebrations or activities
Turn it into a gross motor task, sensory activity, following directions, or combination of all of these
Add glitter! Glitter makes everything wonderful
More snowman activities
Incorporate more snowman themed activities along with this build a snowman printable for a full snowman theme.
Snowman crafts (tons of great snowman crafts and activities listed here)
And you can always head outdoors! Use this how to paint snow activity for more skill-building.
What creative ways have you made snowmen? I believe there was a little spray paint used instead of coal last winter, and I think the dog snatched the carrot before we had time to use it. We have had snowmen families, lady snowmen, and grass covered snowmen when there really wasn’t enough snow to make one.
If there is a dusting of snow in Charleston this winter, you better believe we will be out there rolling whatever snow falls down, creating our snowman. Until then, I will just have to enjoy the sand instead.
Free Build a Snowman Printable
Want to add this paper snowman printable to your therapy toolbox? Enter your email address into the form below. This resource is also available in The OT Toolbox Member’s Club. Members can head to the dashboard and download the resources right there.
Keep those snowballs rolling!
Victoria Wood, OTR/L
Victoria Wood, OTR/L is a contributor to The OT Toolbox and has been providing Occupational Therapy treatment in pediatrics for more than 25 years. She has practiced in hospital settings (inpatient, outpatient, NICU, PICU), school systems, and outpatient clinics in several states. She has treated hundreds of children with various sensory processing dysfunction in the areas of behavior, gross/fine motor skills, social skills and self-care. Ms. Wood has also been a featured speaker at seminars, webinars, and school staff development training. She is the author of Seeing your Home and Community with Sensory Eyes.
The Snowman Therapy Kit is a winter-themed therapy kit designed to develop motor skills, self-regulation, handwriting, and scissor skills. Over 75 pages of therapy activities to develop fine motor strength, dexterity, core strength, regulation, functional grasp, and endurance.