Colleen Beck, OTR/L is a pediatric occupational therapist and the owner and author of The OT Toolbox website. She manages all of The OT Toolbox social media accounts and runs the popular newsletter.
Read about Colleen's experience and career as an occupational therapist, including how The OT Toolbox began on our About The OT Toolbox page: https://www.theottoolbox.com/about-us/
Colleen created The OT Toolbox in 2011 and since then has written thousands of blog posts designed to support therapy providers, educators, parents, counselors, admin, and caregivers in promoting the healthy development of kids.
Check out Colleen's blog posts below:
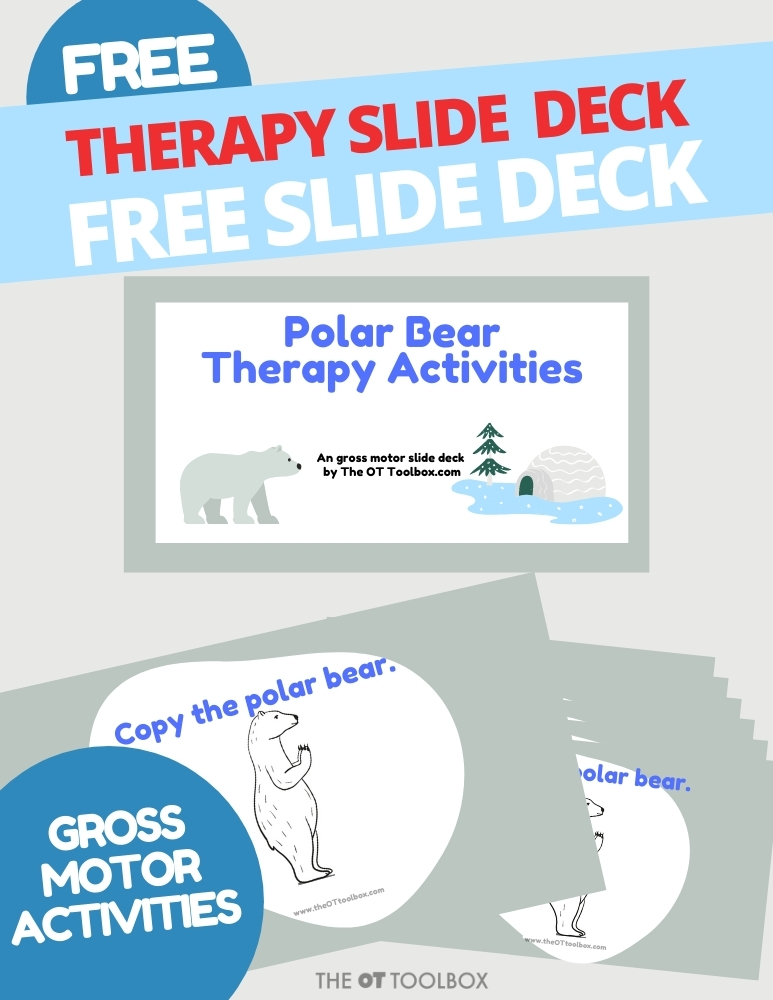
This week, we’re all about the polar bears. You’re going to love this polar bear therapy slide deck, and actually, my kids are loving it, too! The polar bear gross motor activities go well with an arctic animal theme. We’ve been using the gross motor activities as a warm-up for the Winter Fine Motor Kit and all of the winter activities in that resource. You’ll want to grab this therapy slide deck to get your new year off to a great start and get the kids moving with whole-body movements.
Why Use Polar Bear Gross Motor Activities in Therapy or the Classroom?
Polar bear–themed gross motor activities are a fun and motivating way to target developmental skills like balance, postural control, coordination, and core strength. These types of movement-based exercises engage the whole body while also fostering attention and focus.
Because the activities are winter-themed and playful, they are ideal for use during the colder months when outdoor movement breaks may not be possible. This makes the slide deck perfect for indoor recess, brain breaks, and OT sessions that need a high-engagement activity for younger learners.
Supports Direction Following and Body Awareness
This movement-based slide deck also encourages direction following, body awareness, and spatial orientation. These are key components of self-regulation and classroom participation. Children are challenged to move like a polar bear, crawl, stomp, or balance in ways that require them to think about where their body is in space.
These foundational skills are part of a child’s proprioceptive system, which plays an important role in coordination and calm behavior. Adding themed visuals and verbal prompts can help children improve motor planning while making learning fun.
Integrating the Slide Deck into the Daily Routine The polar bear gross motor activity slides can easily be incorporated into daily routines in the classroom, therapy clinic, or at home. Use the slides as a warm-up before handwriting or seated work, as a structured movement break between transitions, or as a full gross motor circuit during group therapy. These fun exercises promote active learning and help reset the nervous system after long periods of sitting. They also support core strength, which is critical for seated posture, attention, and fine motor control.
Winter-Themed Movement to Support Learning A winter-themed movement activity like this polar bear deck is a targeted tool to promote gross motor development in a way that’s engaging and meaningful. With classroom demands rising and kids sitting for longer stretches of time, intentional movement breaks are more important than ever. Movement with purpose, especially when tied to visual supports and themed play, can boost learning outcomes, reduce sensory overload, and improve participation.
Be sure to grab the free polar bear deep self-regulation activity. It’s a wintery breathing exercise that went up earlier today. You’ll find a bunch of other polar bear activities listed in that blog post, so that your therapy theme for the week is full of movement-based activities that help kids develop skills.
Included are some slides to incorporate propriocepetion and vestibular input as well.
Because incorporating gross motor skills in teletherapy is sometimes a challenge, this gross motor slide deck was designed for teletherapy in a way that instructs kids to copy various positions as they balance and strengthen their core. All of these skills can be addressed with this gross motor slide deck in teletherapy sessions:
Core strength
Stability
Balance and equilibrium skills
Coordination
Range of motion
Flexibility
Motor planning
Crossing midline
Movement patterns
Posture and postural control
Muscle tone
Proprioceptive input
Vestibular input
Polar Bear Resource: DON’T MISS IT:
Grab the Winter Fine Motor Kit, with 100 pages of done-for-you therapy activities, including polar bear themes. Grab it now before January 9th and you get a bonus of 3 fine motor slide deck activities.
Use this polar bear theme therapy slide deck in virtual therapy sessions or as a brain break.
Be sure to make a copy of this slide deck and not change the url to indicate “edit” at the end. When you make a copy of the slide deck onto your Google drive, you will end up with your own version that you are free to adjust in order to meet your student’s needs. By changing the url to “edit”, you can potentially mess up the original version that many other therapists and The OT Toolbox users are given.
You can grab a copy of this Google slide deck and use it to work on specific skills.
Enter your email address below and you will receive a PDF containing a link to copy the slide deck onto your Google drive. Save that PDF file, because you can come back to it again and again and send it to the kids on your caseload (or classroom) so they can make their own copy on their Google drive.
Please use the copy of the slide deck and do not change the url.
Colleen Beck, OTR/L has been an occupational therapist since 2000, working in school-based, hand therapy, outpatient peds, EI, and SNF. Colleen created The OT Toolbox to inspire therapists, teachers, and parents with easy and fun tools to help children thrive. Read her story about going from an OT making $3/hour (after paying for kids’ childcare) to a full-time OT resource creator for millions of readers. Want to collaborate? Send an email to contact@theottoolbox.com.
Today, I have another fun deep breathing exercise to share with you! This time of year, it’s all about the snowmen. Now, you can use a snowman theme in a sensory coping strategy with deep breathing exercises with a snowman deep breathing exercise. It’s a free mindfulness printable that you can print and use all winter long.
A Winter-Themed Calming Strategy for Kids Snowman deep breathing is a playful, effective tool for supporting self-regulation in young children. This printable activity combines the charm of a snowman with simple deep breathing exercises, helping kids calm their bodies and refocus their minds.
With winter themes already present in many classrooms and therapy settings, this seasonal approach adds novelty to a familiar strategy. Incorporating sensory winter activities like this one into your therapy toolkit makes calming strategies more fun and engaging.
Breathing exercises offer powerful sensory input that impacts the autonomic nervous system to help with sensory dysregulation. When children breathe in deeply and exhale slowly, the parasympathetic nervous system is activated, sending cues of safety and calm to the brain and body.
Using a visual guide like a snowman breathing path supports visual processing and motor planning as children track along the snowman’s form while coordinating their breathing. This provides both proprioceptive input and a visual cue to reinforce regulation.
Support Self-Regulation in a Fun, Seasonal Way
Self-regulation is a foundation for functional performance in school, home, and community settings. When children experience big emotions, transitions, or sensory overload, they need strategies that are accessible and meaningful.
The snowman breathing activity provides a concrete tool they can refer back to again and again. Whether it’s used as part of a winter sensory diet, a classroom calm-down corner, or during therapy, this printable promotes independence and emotional awareness (an important part of emotional intelligence).
Use Across Settings: OT, Classroom, or Home
This free snowman deep breathing printable is versatile enough for a variety of environments. Occupational therapists can use it in sessions to build routines around winter self-regulation tools.
Educators might use it during morning meetings or after recess to support transitions. Parents can print it out and keep it on the fridge or in a sensory kit for use at home. By teaching children how to pause and breathe using a fun and familiar visual, we help them internalize tools for self-control.
Expand the Strategy with Multi-Sensory Input
Want to go beyond the printable? Combine the snowman breathing visual with real-world sensory strategies.
Add a winter-scented lotion (peppermint or vanilla) for a calming olfactory input
Pair the activity with a movement break using snowman-themed yoga or stretches.
You can even laminate the page and trace it with a finger or dry-erase marker to bring in tactile feedback.
These simple additions amplify the impact of deep breathing while keeping it engaging and developmentally appropriate.
Snowman theme deep breathing exercise
A snowman image makes a great image for slow and mindful breathing. Use this as a guide to show children how to take a deep breath and then slowly breathe out.
The visual prompts on this image includes a white dot where kids can pause and hold their breath for calming benefits.
Grab the Winter Fine Motor Kit, with 100 pages of done-for-you therapy activities, including penguin themes. There are lacing cards, crafts, pencil control strips, scissor skills activities, and much more. Grab it now before January 9th and you get a bonus of 3 fine motor slide deck activities.
Want to grab this free printable? Enter your email in the form below. You’ll receive the deep breathing worksheet immediately in your email inbox.
Enter your email address in the form below to access the snowman deep breathing exercise.
Colleen Beck, OTR/L has been an occupational therapist since 2000, working in school-based, hand therapy, outpatient peds, EI, and SNF. Colleen created The OT Toolbox to inspire therapists, teachers, and parents with easy and fun tools to help children thrive. Read her story about going from an OT making $3/hour (after paying for kids’ childcare) to a full-time OT resource creator for millions of readers. Want to collaborate? Send an email to contact@theottoolbox.com.
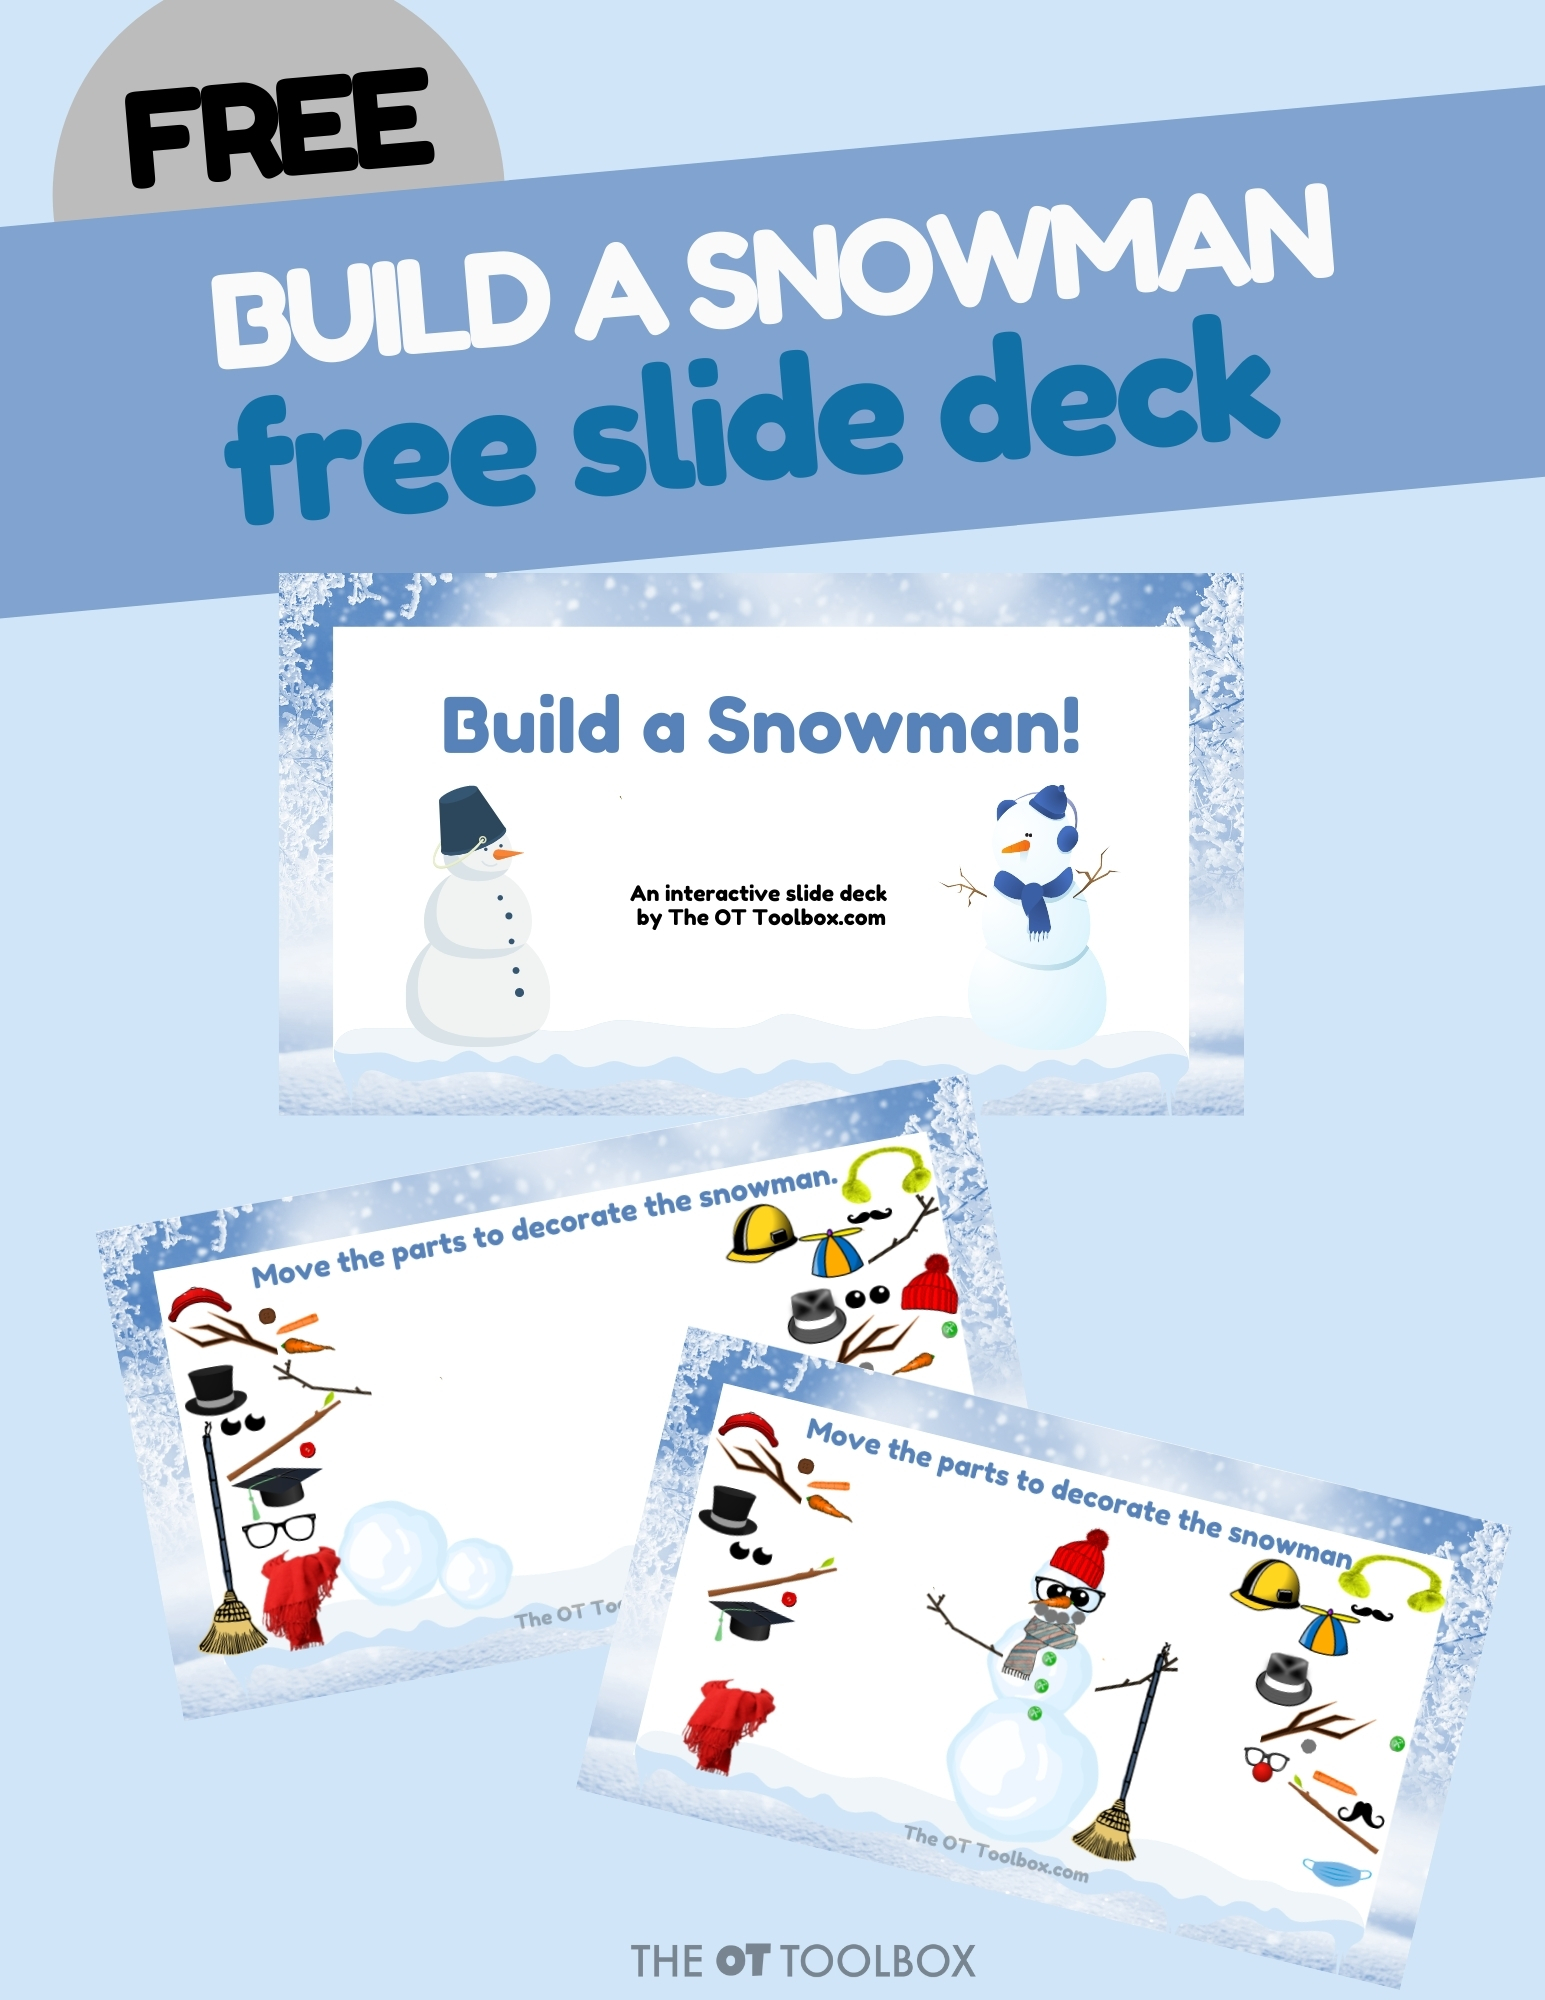
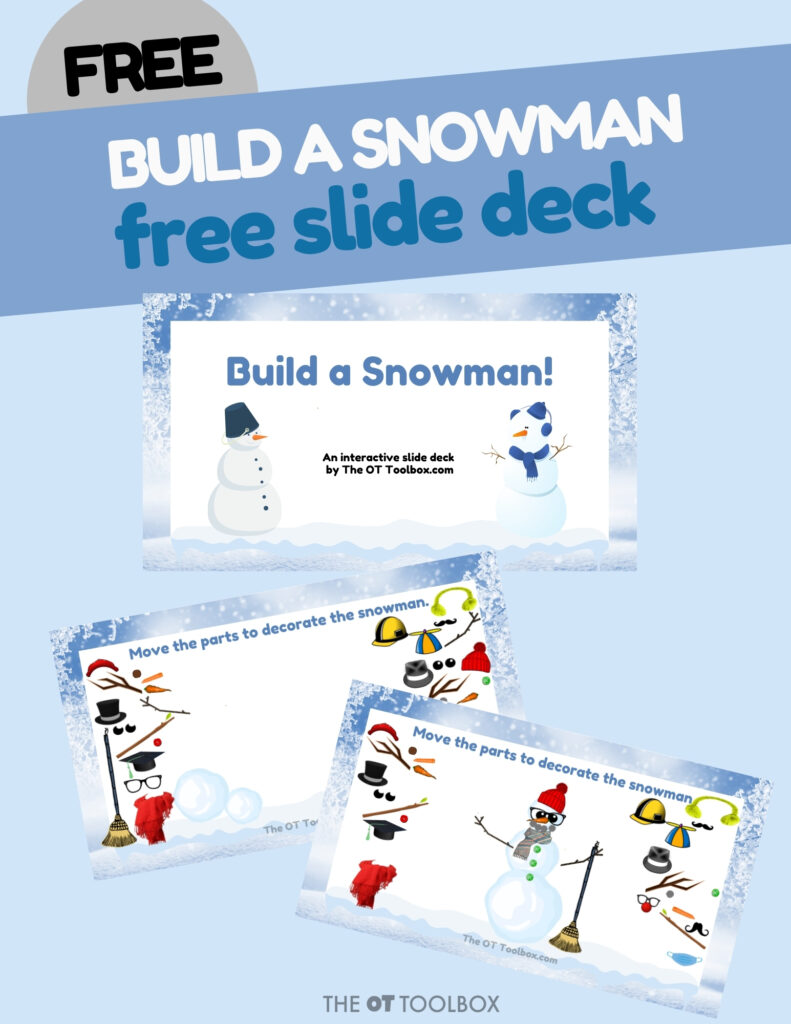
I have another free therapy slide deck to share today. This build a snowman activity is an interactive Google slide deck that kids can use to work on eye-hand coordination, spatial awareness concepts, visual scanning, and handwriting (or typing) skills. This snowman activity is based off our popular disguise a turkey slide deck and our decorate a gingerbread house slide decks from earlier this year. If these slide decks are helpful for your virtual occupational therapy interventions, grab this free resource at the bottom of this post and browse the other free slides there.
Build a Snowman Virtually!
Looking for a creative winter-themed activity that builds essential skills while keeping kids engaged? This interactive virtual snowman activity allows kids to make a snowman right on the screen using a Google Slides deck.
No mittens required! Whether you’re using it in a therapy session, classroom, or at home, this snowman building activity makes screen time meaningful. Children can drag and drop pieces to assemble their own snowperson, building a frosty friend AND they’re also strengthening developmental skills.
Why a Snowman Building Kit Supports Development
This digital snowman building kit includes a variety of hats, eyes, noses, arms, scarves, and accessories, allowing endless combinations for children to customize their snowman to make.
As they move items across the screen, kids practice mouse control, keyboard navigation, and visual-motor coordination. These are all essential components of classroom readiness. It’s a playful way to incorporate fine motor skills and eye-hand coordination into a virtual setting, especially when trying to target specific skills.
These perceptual skills are essential for handwriting, reading, and self-care tasks. For occupational therapy practitioners, educators, or caregivers, this snowperson activity can be used intentionally to target specific developmental goals in a motivating way.
Use in Virtual Therapy or In-Person Sessions
This interactive snowman deck is ideal for virtual therapy sessions, making it easier for OT providers to deliver engaging and goal-based treatment even through a screen. But it’s just as powerful for in-person use to let kids take turns to build a snowman as part of a winter-themed group activity or 1:1 skill-based intervention. Use it as a warm-up before handwriting practice or as a fun reward for task completion.
Adapt the Activity Across Ages and Skill Levels
Younger children in preschool or kindergarten can use the snowman slide deck to learn basic directional concepts (left, right, above, below), while older students can use it for more advanced visual memory or spatial planning tasks. Therapists and teachers can modify the directions: ask the child to copy a model, remember a sequence, or write a short story about their snowperson after building.
Make a Snowman That’s Uniquely Theirs
Kids love expressing creativity, and giving them the chance to create a snowperson that’s silly, fancy, sporty, or magical is a great way to build confidence. Add accessories like earmuffs, snowflakes, or pets to increase the challenge or fun factor. Use this snowman making activity in your next therapy plan, snow day learning schedule, or as part of your winter fine motor activities. It’s a no-prep, no-mess way to bring the magic of winter indoors while building essential skills.
Build a snowman activity
I love this slide deck for many reasons. One is that it’s a cute building a snowman activity that kids will love doing. It’s fun to move the pieces on the slide deck and can be a break from the normal virtual lessons or teletherapy.
Therapeutically, this snowman activity can help kids with several skill areas:
Eye-hand coordination
Visual scanning
Spatial relations
Size awareness
Handwriting
Typing
Visual memory
Kids can visually scan the slide to actually build the snowman using different sized snowballs. They can arrange the snowballs to make the snowman.
Then, users can scan the slide to find various pieces for the snowman. Depending on your goals for the child, they can independently build the snowman and decorate their snowman. Other students can be given verbal directions for scanning for eyes, carrot noses, arms, or other individual pieces. The items are scattered around the slide to challenge visual perceptual skills such as visual memory and visual attention.
NOTE– When you access the slide, you are prompted to make a copy onto your Google drive. Once you make that copy, it is yours to edit to meet the needs of your students. You can remove some of the items or make duplicates of some snowman decorations, depending on the needs of your client or student.
Once students are happy with their snowman creation, they can go to the next slide. There, they can type or write details about their snowman. This can challenge visual memory skills and be a great practice for handwriting or typing skills.
Get the Build a Snowman Slide Deck
Enter your email into the form below to access this free slide deck.
A term you may have heard when it comes to sensory processing is sensory dysregulation. What does this mean? Are there clues for dysregulation? We all have differing sensory needs, and dysregulation can look like different things for everyone. Have you ever wondered about specific sensory strategies for regulation to support a dysregulated sensory system? We’ll cover all of this in this post.
Sensory Dysregulation
Remember your last temper tantrum? Do you remember what it felt like to be suddenly so sad, mad, and completely out of control? Most of us probably had our last true temper tantrum more recently than we care to admit.
A majority of those emotional outbursts were probably exacerbated due to a number of reasons; lack of sleep, poor diet, undesirable environment, discomfort, or pain. Deciphering the difference between a tantrum and sensory meltdown is a must.
One ongoing debate in the pediatric therapy world is discussing what behaviors are due to sensory-related reactions, and what behaviors are due to something else. How many toddlers (or teenagers!) temper tantrums may actually be related to their sensory experience? If it really is sensory-based, then what are the solutions?
The OT Toolbox is here to do our best to answer your sensory-related questions. A great first step in determining whether unwanted behaviors are based on sensory experiences, is to learn about what sensory dysregulation is. To get started, here is an article about sensory processing red flags.
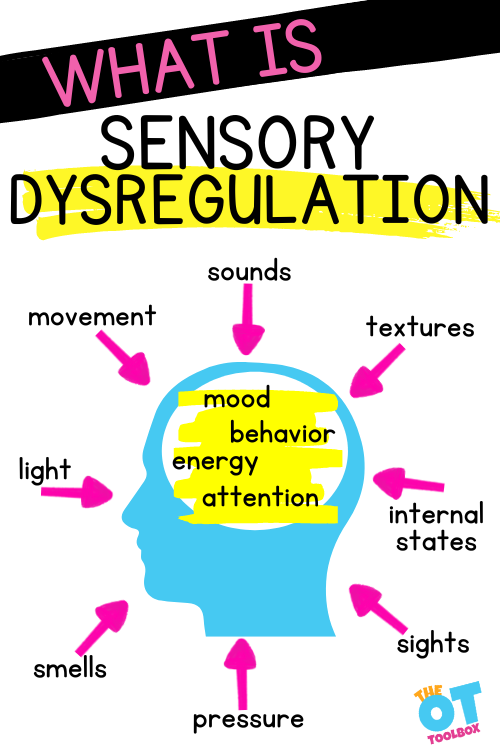
Sensory dysregulation refers to a mind or body state which occurs when the body is out of balance due to experiences in the sensory environment. Think about how sounds, textures, exercise, movement, smells, light, and other input can affect your mood. Sensory dysregulation is the result of either too much or too little stimulation for best functioning or self-regulation.
For example, overstimulation anxiety can be a result of too much sensory stimulation that results in overwhelming worries or anxiety. This is just one way that the overload of sensory input can impact us.
Read more about mood and affect and how these terms are connected to sensory dysregulation.
It’s more than sensory touch and the input we receive through our skin. It’s the inability to regulate sensory input from ALL the sensory systems.
A key component outcome of sensory dysregulation is self-regulation. There are many ways to define self-regulation, but generally, it is one’s ability to remain at an acceptable level of emotion, energy, behavior, and attention – given the demands of their environment.
In order to achieve self-regulation, one must also have good sensory regulation.
Sensory dysregulation is something that anyone can experience, and most people probably have experienced a level of sensory dysregulation to some degree.
Everyone has sensory preferences, like how loud they listen to music, or if they enjoy lots of hugs. If your preference is to have less, your systems would become out of balance with the music too loud or people getting too touchy.
Each of us has our own limits given any situation – but once you are in tune with your body’s needs, you know when it has become too much. When the system is unbalanced, maladaptive behaviors (tantrums) occur, if no coping strategies are implemented. We covered this individualized preferences and nuances of neurodiversity in greater detail in our post on Sensory Diets for Adults.
People with sensory processing disorder, which is an issue on a larger scale that affects a much smaller portion of the population, feel dysregulated more often and have far less ability to self-regulate. While sensory processing disorders can exist in isolation, they may be most prevalent in those with Autism or ADHD.
One example of dysregulation is the individual with sensory needs dealing with a fire drill. There are a lot of sensory inputs all at once, and navigating that stressor is distressing!
Check out our resources at the end of this article for great coping tools!
WHAT DOES DYSREGULATION LOOK LIKE?
Sensory dysregulation, much like emotional dysregulation, feels uncontrollable. Something is “wrong” and a person may not know what is causing them to feel “off”, or how to solve the problem. Sensory dysregulation may look and feel similar to emotional or behavioral dysregulation, that can cause temper tantrums.
The main difference is that sensory experiences are the root cause of the behavioral responses – not social disagreements or the like. It is complicated to tease out whether the issue is behavior or sensory. Look first at the triggers.
A simpler way to understand of sensory dysregulation, is by breaking it down into two categories: over-responsiveness or under-responsiveness to the environmental stimuli.
Over-responsiveness may look like: sensory avoidant behaviors such as excessive covering of the ears, hiding, avoiding touch, or extreme picky eating. The body may be responding too muchto the incoming information. One reaction is to avoided it to, remain at baseline.
Under-responsiveness may look like: sensory seekingbehaviors such as excessive or repetitive body movements, touching everything, making sounds, or licking/chewing on non-food items. Pushing other students while waiting in line. The body may be responding too little to typical input, to the point that the seeker looks for more of it to remain at baseline.
It is important to begin to recognize sensory over-and-under responsiveness and the role it plays in sensory regulation. Understanding what kind of behaviors a child has, will allow you to choose the right remedy.
Over-responsive → Sensory Avoider → Need for less
Solution – calming activities, breathing exercises, variety of activities to slowly increase comfort level
Under-responsive → Sensory Seeker → Need for more
Solution: heavy work, brain breaks, fidget tools, variety of sensory experiences
Sensory dysregulation is NOT the same as behavioral or emotional dysregulation, which may look like:
Not sensory dysregulation:
Crying at the store after they were told “no”
Pushing their brother after he took their toy
Eating all foods but never what the family is eating
Dumping/throwing toys after being told it’s time to clean up
Covering their ears during a fire alarm
Screaming after a sibling teased them
You may be thinking, wait a minute…some of those actions are sensory-based behaviors!
You are correct! However, just because something is related to the sensory experience, does not always mean that sensory dysregulation is occurring.
As an example; the sound of a fire alarm is loud auditory input, however, covering your ears during a loud sound is a normal response. If there is more of a reaction than that, for instance, if a child is inconsolable or unable to move on after the fire alarm, that may be considered sensory dysregulation.
Sensory Dysregulation Symptoms
When symptoms of sensory dysregulation is in question, you should be asking:
What does the environment look like? Feel like?
What is the child communicating with their actions?
When and where does this behavior typically occur? In what similar situations does it not occur?
Some behaviors, like pushing, can be tricky to determine if it is sensory or behavior; Look at the trigger. The proprioceptive system can be dysregulated. Is the child pushing for sensory reasons?
Bumping into things during play, crashing often, seemingly unaware of their body? Then they may have some sensory dysregulation going on that is increasing their need for input. Pushing people who get too close, hugging too hard, or bumping into people, may also be signs of sensory dysregulation.
If a child pushes a friend after they did something mean, that is just poor social skills.
WHAT ARE THE SYMPTOMS OF DYSREGULATION
Usually we notice the symptoms of dysregulation first. It manifests in behavioral reactions, health consequences, stress, and cognitive difficulty.
You are constantly on edge – you feel nervous, stressed out, overwhelmed, and have the sense that you can not keep up
Frequently irritable, snappy, and disagreeable. You might overreact, feel tense, get frustrated easily, and have mood swings like going from happy to sad quickly
Chronic pain and illness – aches and pains that do not go away, easily getting colds and other illnesses, see several specialists without relief
Highly sensitive to stimuli. You might identify as a highly sensitive person. Things that people may not even notice bother you. Smells, the sound of people snapping gum, fabrics, clutter, or being in crowds may feel overwhelming. You might be anxious, depressed, or stressed by the amount of information coming in.
Sleep problems and daytime fatigue – your nervous system has a hard time relaxing to go to sleep, or is hypervigilant during the night. You wake with your gas tank half full, so by mid morning you are fatigued. It may be difficult for you to regulate your temperature and heart rate during the night, leading to additional fatigue.
Chronic attention and concentration problems – because your system is on high alert, signaling danger, it might be hard to concentrate and pay attention to important information. You may find it difficult to tune out non important stimuli.
Cravings and extreme appetite changes
Immune and hormonal symptoms
Gut and skin conditions like rosacea and IBS. These can be aggravated by stress and dysregulation
You are highly sensitive to other people’s emotional states – you might be considered an empath. This may seem like a great trait, except it is draining. You take on the emotions of those around you and are constantly trying to help people. No matter how much you do, it never seems enough.
You do not have to have all of these symptoms to be considered dysregulated. Even if you have a couple of these symptoms, it can feel overwhelming and draining.
HOW CAN YOU support Sensory Dysregulation?
If a child’s sensory system is dysregulated, there is good news: there are many ways to help! There is a catch though – there is no “one size fits all”. Trial and error is the name of the game with sensory interventions.
Once you and your child find out what works for them and their changing environments, they will have a deeper understanding of themselves, and display improved behaviors in no time!
Check out these resources for sensory integration, calming exercises, self-regulation activities, and more! Also be sure to read our blog post on Ayres Sensory Integration for information on the theory behind this process, and how it all works together. It’s fascinating!
If you have tried everything, and are feeling a bit lost, you are not alone! Sensory dysregulation is tricky. It should be considered alongside many other aspects of why a child reacts a certain way. In addition to behavior, emotions, and self-regulation; history, habits, trauma, and mental status can have a powerful influence on actions, too.
Keep trying – some things may feel like a roadblocks but there are specific action strategies you can use!
The Sensory Lifestyle Handbook walks you through sensory processing information, each step of creating a meaningful and motivating sensory diet, that is guided by the individual’s personal interests and preferences.
The Sensory Lifestyle Handbook is not just about creating a sensory diet to meet sensory processing needs. This handbook is your key to creating an active and thriving lifestyle based on a deep understanding of sensory processing.
dysregulated nervous system
After reading all of the above about dysregulation, and what a dysregulated nervous system looks like, let’s take a step back. In order to understand the symptoms and signs of dysregulation, we need to understand the basics of the nervous system. That’s a really important piece of the puzzle to help parents that we are supporting as the pediatric occupational therapy provider on a child’s team.
The dysregulated nervous system impacts practically everything that we do and what we see in the form of behaviors, sensory needs, emotions…it’s at the base of it all.
But when we hear from our clients’ families or the parent, the school counselor, the teacher of a child with issues impacting day to day life and learning, the nervous system isn’t’ the first thing to come to mind.
NERVOUS SYSTEM BASICS
The nervous system is made up of two parts; the central and peripheral systems. Together these systems regulate our consciousness, movement, response to the environment, and bodily functions such as digestion, heart rate, and breathing.
The central nervous system is made up of the brain and spinal cord. It interprets incoming signals, formulates responses, and plays a big role in memory and cognition.
The peripheral nervous system extends out from the central nervous system out to the limbs. It communicates with the CNS to respond to information coming from the environment and inside our bodies.
Under the peripheral nervous system is the autonomic nervous system. This can be thought of as the “automatic” nervous system. This system works without conscious thought, controlling the heart rate, digestion, respiratory rate, and fight or flight response.
The stress we feel impacts social emotional skills, behaviors, functioning, learning, and more.
Understanding the stress response
The fight or flight response is important to our survival. It alerts us to dangerous situations to protect us from harm. This is a great system, until it over-responds.
A chronically over-reacted fight or flight response leads to dysregulation. There are times when our nervous system, including the fight or flight response, becomes dysregulated.
This can be caused by stress, genetic predisposition, or trauma. When the system is dysregulated, it can cause more stress, burnout, anxiety, and various types of chronic pain and illness.
Dysregulation and Trauma
Understanding the impact on a dysregulated nervous system trauma has is important because we as pediatric occupational therapy providers see a huge variety of trauma responses in our therapy clients. There can be so many levels to this but one thing is for certain: there will be some level of a dysregulated nervous system when trauma exists.
One thing that comes up from parents or educators who see the results of regulation troubles is the “why”. We need to explain, as occupational therapy providers, the causes of dysregulation so that the child’s team can better understand why they are seeing the resulting behaviors, social emotional challenges, learning struggles and functional task issues.
An over-response of the fight or flight system is often the cause of dysregulation. Where does this come from?
Chronic stress – when the nervous system suffers from chronic stress, it remains in a state of high alert. Over time, this state of high alert can lead to hypervigilance and overwhelm.
Trauma can lead to dysregulation. This might come from witnessing traumatic events, abuse, accidents, or surgeries.
Adverse childhood experiences – negative childhood experiences such as emotional or physical abuse, neglect, living with caregivers who abuse substances, or have mental health issues.
Genetic factors – certain gene variations make people prone to anxiety and stress.
Lifestyle factors – poor diet, lack of exercise, and inadequate sleep can contribute to nervous system dysregulation. Stimulants like caffeine, alcohol, and certain medications can lead to dysregulation
Underlying health conditions – fibromyalgia, chronic fatigue, hormonal imbalance, and some autoimmune disorders can lead to dysregulation of the nervous system. Deficiencies in certain vitamins such as magnesium, B, and omega fatty acids can also lead to dysregulation.
Environmental factors – heavy metals, pesticides, chemicals, mold, noise pollution.
When you think about the people in your life, especially the young ones, can you see some of these factors in their life? Children chronically have lack of exercise, poor diet, not enough sleep, exposure to chemicals, additives in their food, and often some sort of trauma.
With this type of lifestyle becoming the norm, it is no wonder so many littles are dysregulated.
EMOTIONAL/BEHAVIORAL DYSREGULATION CHANGES
We often notice behavior before other symptoms of dysregulation. This is a classic sign in regulation disorders such as ADHD, ADD, Autism, and bipolar disorder. The behaviors are caused by dysregulation, that usually has an underlying factor. You might feel overly intense emotions, impulsive behavior, lack of emotional awareness, trouble making decisions, inability to manage behavior, and avoiding difficult decisions.
People with emotional/behavioral changes struggle to make and keep friends, difficulty with compliance, can be defiant, and have difficulty completing tasks.
TREATMENT FOR DYSREGULATION
If your dysregulation is part of a larger disorder such as ADD, medication can help with the symptoms.
Therapy – both talk, play, and occupational therapy to help with regulation and identifying triggers. Dialectical behavioral therapy helps you with mindfulness, identifying your emotions, and separating emotions from facts.
Be consistent and organized – kids thrive on routine. Give your child/partner a heads up if you plan on changing the plans
Adjust accordingly – sometimes you need to make accommodations and adaptations to be successful
Reward positive behavior
Journal – writing down feelings and thoughts can help you process them. Also looking back at journal entries can give you clarity
Heavy work helps organize the central nervous system. Chores, exercise, physical activity or taking a walk can help
Reverse or reduce some of the triggering factors such as sensory overload, overeating, environmental toxins, processed foods, toxic people, drugs, caffeine, technology, and stress
Add things that are missing such as critical vitamins, healthy food, exercise, communication, and fresh air
Take care of yourself physically. Seek medical attention for chronic or undiagnosed illnesses. Some illnesses like IBS can go away once stressors are reduced
What to Do When a Child is Dysregulated: Support Strategies That Work
When a child is melting down, shutting down, or acting out, it can feel overwhelming for both the child and the adult supporting them. In these moments, logic, reasoning, and consequences simply don’t work. Why? Because a dysregulated brain can’t access higher-level thinking skills like problem-solving or impulse control.
But the good news? There are ways to help, and they start with understanding what dysregulation is, why it happens, and how to respond in the moment using evidence-based sensory and regulation tools.
What Does It Mean When a Child Is Dysregulated?
Dysregulation refers to a state where the child’s nervous system is overwhelmed. Their body and brain are no longer in a calm, alert state, they may be overly aroused (hyperactive, emotional, aggressive) or under-aroused (shut down, frozen, withdrawn).
In these moments, the prefrontal cortex (responsible for thinking and reasoning) essentially goes offline. They are in a fight or flight response.
Why Can’t They Just Listen or Calm Down?
This is a question many parents, educators, and therapists ask. The answer lies in brain science: when a child is dysregulated, they can’t process rewards, consequences, or reason. Asking them to “make a better choice” or “use their words” won’t be effective until they feel regulated and safe again.
So What Should I Do Instead?
Here’s how to help when a child is dysregulated:
1. Focus on Regulation First, Not Correction
Before offering consequences or even explanations, help the child feel physically and emotionally safe.
Stay calm and grounded yourself. Children borrow regulation from the adults around them.
Speak slowly, softly, and clearly.
Use phrases like: “You’re having a hard time. I’m here with you.” “Let’s help your body feel calm first.”
2. Use Sensory Strategies to Regulate the Body
Support the child’s sensory needs to calm their nervous system. Heavy work activities are especially effective because they engage the proprioceptive system, which promotes a calming, organizing effect on the body.
Get Ongoing Support Inside The OT Toolbox Membership
Inside our Membership, you’ll find hundreds of downloadable tools that help support regulation every day, including:
Heavy work printable packs
Brain break visuals
Sensory check-ins
Calm down tools
Zones of Regulation supports
Social emotional learning printables
And so much more
Join today to get instant access to tools that help you prepare for dysregulation before it happens, and support kids in the moments they need it most.
Sometimes just thinking about all the things wrong in this world can make you feel stressed. Trying to fix everything and everyone is overwhelming. Focus on one thing or one person at a time. Take care of one part of your lifestyle, rather than making radical changes all of a sudden.
Colleen Beck, OTR/L has been an occupational therapist since 2000, working in school-based, hand therapy, outpatient peds, EI, and SNF. Colleen created The OT Toolbox to inspire therapists, teachers, and parents with easy and fun tools to help children thrive. Read her story about going from an OT making $3/hour (after paying for kids’ childcare) to a full-time OT resource creator for millions of readers. Want to collaborate? Send an email to contact@theottoolbox.com.
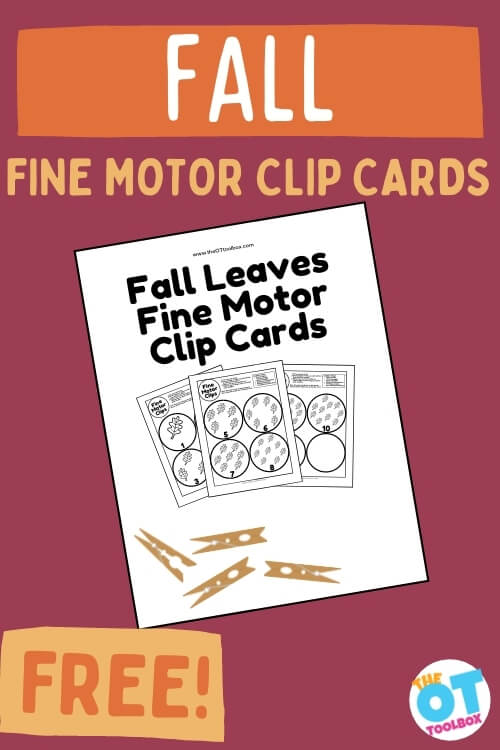
If working on developing fine motor skills this Fall is something you’re focusing on, these Fall fine motor worksheets are the way to go. Add these printable clip cards use clothes pins or paper clips to develop hand and finger dexterity and grip and pinch strength to a Fall theme. Use these Fall leaves clip cards to several of our favorite Fall fine motor activities for developing hand strength, pinch, grip, and dexterity in the hands.
These fall fine motor worksheets are clip cards that combine a print and play activity.
It’s easy to set up this Fall fine motor worksheet into an interactive, and hands-on fine motor activity:
Just print out the Fall leaves worksheets.
Then laminate or use as a paper form. Cut out each circle.
Then, kids can clip clothes pins or paper clips onto each circle as they count and match clips to the Fall leaves on the cards.
Fall Clip Cards for Fine Motor Development
Fall clip cards are a seasonal and engaging way to build essential fine motor skills in young children. These hands-on tools typically feature colorful autumn-themed images—like pumpkins, leaves, or acorns—and require children to clip a clothespin to the correct answer or matching image. This simple action offers big benefits, especially for developing the small muscles of the hands that are needed for tasks like handwriting, buttoning, and using scissors.
Using clip cards targets pincer grasp, which strengthens the muscles between the thumb and index finger. This grasp is essential for pencil control and other precision-based movements. In addition to hand strength, clip cards promote hand-eye coordination, bilateral coordination (using both hands together), and visual scanning, all of which are important foundational skills for classroom success.
The fall theme adds an extra layer of excitement and relevance, especially for preschoolers and early elementary students. Kids can work on matching letters, numbers, shapes, or even simple math problems, all while building motor skills in a fun, low-prep way. Clip cards can be used in centers, therapy sessions, or at home, making them a versatile tool for both educators and therapists during the autumn season.
Why Use Fall Fine Motor Tasks Like this one?
This activity is a powerful hands-on activity because it builds skills in many areas. Clipping clothes pins to paper or cards like this Fall themed activity develops several skill areas:
address hand separation into a fine motor side and a power side
Separation of the two sides of the hand allow for more precise use of the thumb. Hand separation starts when a baby bears weight through their arm and ulnar side of the hand while carrying a toy in the radial side. This simple activity developmentally lengthens the muscles of the ulnar side.
Intrinsic strength-The intrinsic muscles are the muscles in the hand that define the arches of the hands, bend the knuckles, and oppose with the thumbs.
Arch development: Arch support in the hand is related closely to the separation of the sides of the hand. Refinement of fine motor skills in the hand (the radial side) happens when the power half (the ulnar side) is stabilized.
When kids hold the circle card, they use their non-dominant hand to hold the card, and can use their dominant hand to clip clothes pins onto the cards. Kids can count the number of leaves on each card and attach the same number of clothes pins.
A functional fine motor grasp and manipulation of objects is more accurate when the ring and pinky fingers are flexed (bent) into the palm. This positioning stabilizes the MCP arch and allows for control of the pointer and middle fingers.
This repeated clipping task combines heavy work proprioceptive input through the hands and develops refined strengthening of the arches of the hands. All of this occurs while children count and combine fine motor skills with math.
It’s a great Fall preschool activity or a Fall kindergarten math center where kids are combining math with fine motor skills…and a Fall theme!
Be sure to find out more information on development and when this type of activity is appropriate by reading about fine motor milestones.
Free Fall Worksheets
Want to add these Fall fine motor worksheet clip cards to your therapy toolbox? Enter your email address into the form below. You’ll receive these fine motor math worksheets in your inbox!
Colleen Beck, OTR/L has been an occupational therapist since 2000, working in school-based, hand therapy, outpatient peds, EI, and SNF. Colleen created The OT Toolbox to inspire therapists, teachers, and parents with easy and fun tools to help children thrive. Read her story about going from an OT making $3/hour (after paying for kids’ childcare) to a full-time OT resource creator for millions of readers. Want to collaborate? Send an email to contact@theottoolbox.com.
When kids really struggle with handwriting, it is difficult to improve because sometimes doing hard things is just too hard. In this blog post we have strategies and support ideas to help kids become more motivated to practice handwriting.
How to Make Handwriting Practice Motivating
Handwriting practice doesn’t have to be boring, especially for kids who struggle with motivation. When we shift away from rote repetition and worksheets and instead tap into children’s interests, handwriting becomes more meaningful and enjoyable. Kids are more likely to engage when writing is connected to things they care about or when it feels like a game instead of a chore.
Instead of copying random sentences, try embedding writing into creative play, movement, or sensory-based activities. Write secret codes, make lists of favorite foods, or create silly stories together. By giving kids a purpose for their writing—like labeling an art project or writing a card to someone they love—they naturally become more invested in the process.
As pediatric occupational therapists, we know that motivation is key to building functional skills. The goal isn’t constantly using neat handwriting in every situation, but rather function. You want to see developing confidence, independence, and a positive relationship with written communication. Through fun, intentional activities, kids can build endurance, pencil control, and letter formation in ways that actually stick.
3 Quick and Fun Handwriting Activities That Motivate Kids
Write a menu for a pretend cafe– Kids can create and decorate their own menus with silly foods or themed snacks (great for working on spacing and letter alignment).
Design and write a card– Have them write a short message to a grandparent, sibling, or teacher, then decorate the card with drawings or stickers.
Handwriting target game– Tape paper targets with writing prompts to a wall. Kids throw a soft ball or beanbag to hit a prompt, then copy it onto a clipboard or whiteboard nearby.
Here, we’re talking all about reluctant writers. We’ll cover WHY kids hate to write, and we’ll discuss strategies to engage kids that are reluctant to write. You’ll also find TOYS and TOOLS to engage and motivate children that hate writing.
We’ve already covered fine motor toy ideas and pencil grasp toys, which can be a resource for reluctant writers. Today is all about play–based strategies to support reluctant writers.Our related blog post on name practice in kindergarten offers more strategies to support the child who is reluctant to write, particularly for beginners struggling with underlying skills needed for handwriting.
Amazon affiliate links are included in this blog post. As an Amazon Influencer, I earn from qualifying purchases.
Reluctant Writers
It’s very common for kids of all ages to be a reluctant to write. Challenges such as not knowing letter formation, struggles with dysgraphia, or difficulties with visual perceptual skills or visual motor skills that impact legibility can mean that kids just hate to write.
They hate to practice handwriting.
Motivating struggling writers to actually practice the underlying areas in which they struggle can be a challenge. For kids that HATE to write, meaningful and motivating is key! These writing activities for reluctant writes will make handwriting fun so that kids can work on the skills they need to work on.
Practice writing? “But Mom! I don’t like to write!” Sound familiar? Many kids (Many, many!) just aren’t into practicing their handwriting at home. School and homeschooling can be exhausting for kids when they have to do certain topics that they just aren’t interested in. And handwriting is often one of those topics.
Hopefully, you’ll find some motivating handwriting activities in today’s post that will help your reluctant writer pick up that pencil and start writing!
Handwriting Ideas for Reluctant Writers
Many kids just aren’t into practicing their handwriting at home. School and homeschooling can be exhausting for kids when they have to do certain topics that they just aren’t interested in. And handwriting is often one of those topics.
Often times, kids balk at having to do repetitive writing. I mean, would you want to write a word or sentence 10 times in a row? Sometimes a functional activity that is meaningful and helpful can motivate a child to want to pick up a pencil. In the end, emphasize handwriting quality over quantity and functional handwriting over perfection.
Here are a few easy hands-on strategies to help with “non-handwriting” ways to work on handwriting:
Motivating Handwriting Activities Quick Tip: Try using “handwriting toys” to sneak in the handwriting practice in fun ways that seem more like play than writing practice.
Try a fun activity like our ice cream writing activity! Kids love it.
Fine Motor Quick Tip: Using a neutral or extended wrist is so important for pencil grasp, endurance in handwriting, and small motor movements of the fingers in isolation of the wrist. If your student is using a flexed (or bent) wrist, try paper position and placement. Encourage fine motor activities performed on a vertical surface or slanted surface.
.
How to engage reluctant writers
{{This post contains affiliate links.}}
You can throw in the fun colored ink pen for extra smiles from your reluctant writer, but we wanted to share ideas to work on functional skills like handwriting using mainly items you can find around the home.
Try a few of these fun ideas with your student or child:
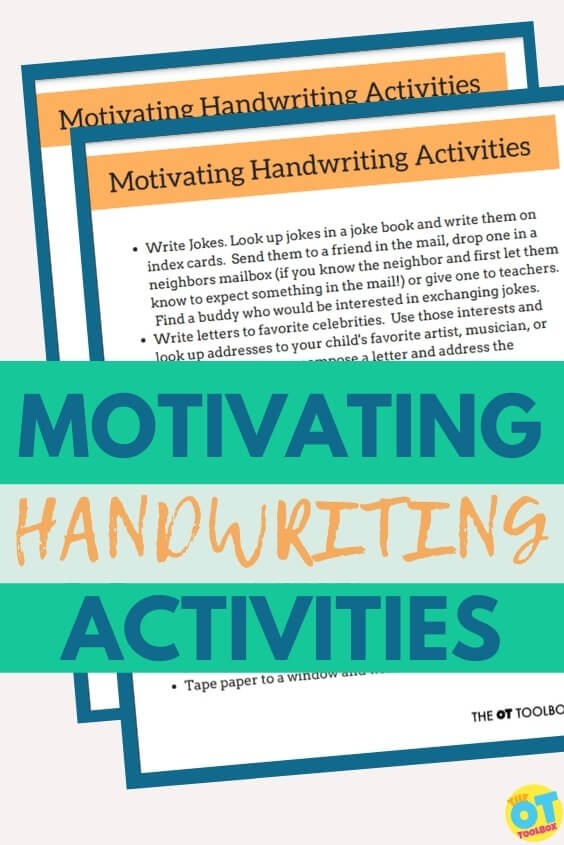
Write Jokes. Look up jokes in a joke book and write them on index cards. Send them to a friend in the mail, drop one in a neighbors mailbox (if you know the neighbor and first let them know to expect something in the mail!) or give one to teachers. Find a buddy who would be interested in exchanging jokes.
Write letters to favorite celebrities. Use those interests and look up addresses to your child’s favorite artist, musician, or sports hero. Kids can compose a letter and address the envelope.
Exchange letters with a pen pal. Kids can exchange letters with friends and relatives in other states or towns. Getting mail addressed to themselves is very rewarding for a child.
Pass notes. Write short notes to members of the family. Leave them in places where they will be found, like on bedroom dressers or in shoes. Notes might be simple things like, “Don’t forget about soccer practice today.” or fun things like, “Do you want to play checkers?”
Plan a scavenger hunt. Write out hints on slips of paper. The child can plan the steps and hide notes for family members or friends.
Practice letter formation during fun games like Tic Tac Toe. Instead of x’s and o’s, write printed or cursive letters in the squares.
Write your own comic books. Draw large rectangles on a page for a comic story. Students can draw pictures and write comic bubbles for handwriting practice.
Make a creative journal full of creative handwriting ideas. We did ours with a cursive handwriting, but you could use these ideas for printed handwriting, too.
Tape paper to a window and write on the paper.
Location, location, location! Change spaces for something fun and different: go to the library and try the tables there. Write outside with a clipboard. Where can you go to write that is new and fun?
Change positions. Sit on the floor and write on the chair seat. Lay on couch cushions and write on the floor on a clipboard.
Take brain breaks. Every 3-4 minutes, take a mini-break for jumping jacks or wall push-ups.
Write to classical music.
Functional Handwriting for reluctant writers
Often times, kids balk at having to do repetitive writing. I mean, would you want to write a word or sentence 10 times in a row? Sometimes a functional activity that is meaningful and helpful can motivate a child to want to pick up a pencil, especially when they are hesitant to try a writing task. Try some of these functional handwriting tasks:
Write out the family grocery list.
Write your family’s return address on bills.
Write out a family calendar with sports schedules, outings, and family night events.
Write out the phone messages from an answering machine.
Write out the day’s schedule on a weekend day.
Write out favorite television shows. Add the day, and time of each show.
Write out a holiday or birthday gift wish list.
Write out a list of items to pack for vacation. Include little squares next to each item to check off as items are packed.
Practice forming letters and words in shaving cream.
Want to print off a list of handwriting ideas for reluctant writers to send home with your therapy caseload? Now you can add this list to your therapy toolbox! Join us in the free, 5 day email series where you’ll get this free 2 page list of writing ideas for reluctant writers. You’ll also access other handwriting handouts to cover areas of handwriting issues.
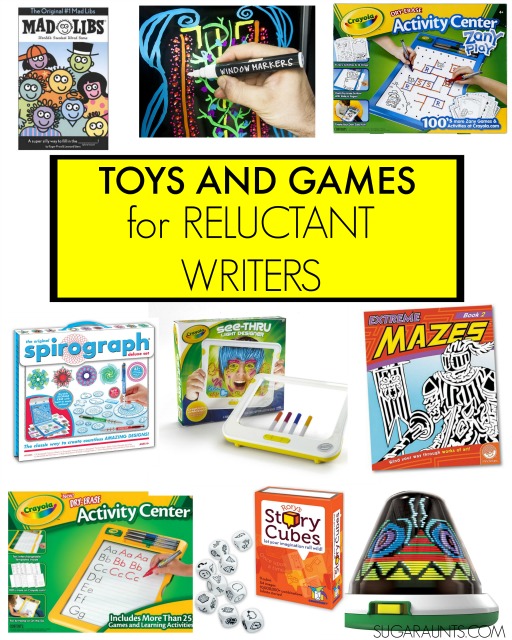
Looking for more ways to help your reluctant writer get more “into” writing? These toys, tools, and games will inspire and encourage your child to want to pick up the writing tool and play.
The best thing is, they won’t even realize they are practicing handwriting and doing “work”! While these tools and toys are not free, they are ideas to try. If you have family asking for gift ideas, you might want to pass a few of these ideas along. Here’s to writing and loving it!
Amazon affiliate links included below.
Kids love a dry erase board and this Crayola Dry Erase Activity Center (affiliate link) will be fun for them to practice letter formation and writing.
The Crayola Dry-Erase Activity Center Zany Play (affiliate link) can be a fun way to practice individual letter formation. Ask your child to practice letters in each box. Kids can also work on starting/stopping the writing tool on the dots, which is great pencil control practice and needed for handwriting legibility.
Writing on this Crayola See Thru Light Designer (affiliate link) is bright and colorful and a great way to really work on letters while your child is captivated by the light animations and color effects.
For students who love to draw (or have a slight interest in drawing), this Crayola Light Designer (affiliate link) will be a huge hit. Even though they will not be writing letters and words, kids can draw with the writing tool to create 3D images of their drawings. This is a motivating tool for reluctant writers, and beneficial for pencil control and dexterity, helpful in handwriting.
For kids who say “I can’t think of anything to write!” (sound familiar?) This creative storytelling game, Rory’s Story Cubes (affiliate link), will be a fun way to inspire. Play the game and write out stories as a family. This sounds like a great Family Night activity!
Completing mazes are a great way to practice pencil control, line awareness in handwriting.
Try a maze book like this Extreme Mazes (affiliate link) with your reluctant writer.
Mad Libs Game (affiliate link) is a great way to practice handwriting on lines and in smaller spaces. For kids who can not write as small as needed to write in the book, use a piece of paper for filling in the answers.
The handwriting practice that kids get with a Spirograph (affiliate link) is big: Pen control, bilateral hand coordination, and proprioceptive feedback. Creating these fun art pieces are motivating and fun!
Toys for Letter Formation
Helping kids to work on letter formation can help them to become more confident in their handwriting. Try these engaging toys to support written work:
Chuchik Magnetic Drawing Board-(affiliate link) Use the magnetic pen to “write” letters and then erase them, adding repetitions in letter formation.
Coogam Wooden Letters Practicing Board– (affiliate link) Use the wooden board to trace and form letters. Then place a paper over the board and use a crayon to form the letters using the textured letters.
Want a printable copy of our therapist-recommended toys to support reluctant writers?
As therapy professionals, we LOVE to recommend therapy toys that build skills! This toy list is done for you so you don’t need to recreate the wheel.
Your therapy caseload will love these handwriting toy recommendations. (There’s space on this handout for you to write in your own toy suggestions, to meet the client’s individual needs, too!)
Colleen Beck, OTR/L has been an occupational therapist since 2000, working in school-based, hand therapy, outpatient peds, EI, and SNF. Colleen created The OT Toolbox to inspire therapists, teachers, and parents with easy and fun tools to help children thrive. Read her story about going from an OT making $3/hour (after paying for kids’ childcare) to a full-time OT resource creator for millions of readers. Want to collaborate? Send an email to contact@theottoolbox.com.
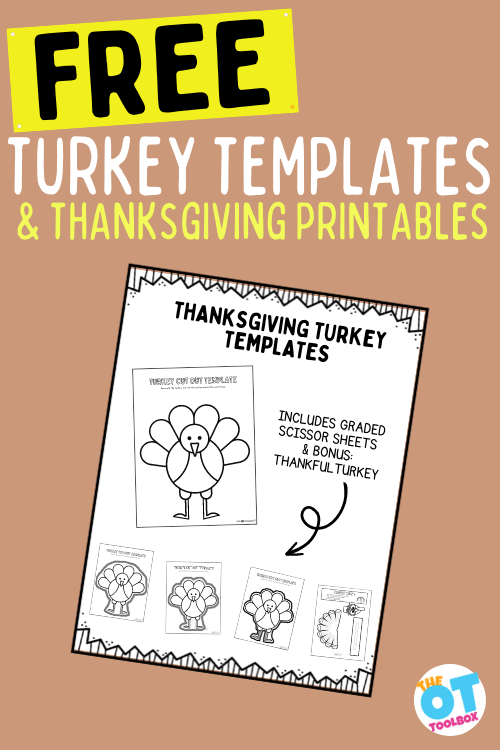
One very fun Thanksgiving activity that supports development in occupational therapy is using Thanksgiving printables to work on specific skill areas and these free turkey templates are just one more. Not only are printable sheets perfect for using at the Thanksgiving dinner table, but kids can have fun working on turkey puzzles, turkey coloring pages, and even using as Thanksgiving decorations. Below, you’ll find some free Thanksgiving printables to build skills!
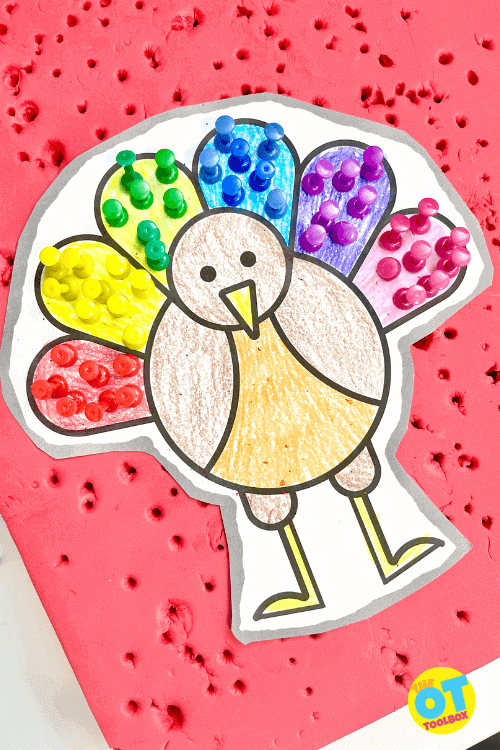
This is one version of our free printable turkey templates. Cut out on the bold lines. It’s a simple cutting shape for kids working on scissor skills. Then, we colored the turkey. Finally, we used push pins to press the turkey into our foam board.
Thanksgiving Printables
These printable Thanksgiving worksheets are awesome tools to encourage gratitude and foster learning…and with a Thanksgiving theme! What better way to bring in the season of giving and counting blessings than starting at home?
Occupational therapy crafts are crafts that support skill development through the functional task of crafting. We love to use items like the turkey templates shown below, because you can adapt and modify the craft template to meet the needs of each individual. You can find other Fall crafts here on the site that support these goals.
Fire up those printers, because this round-up has you covered for Gratitude and Learning everyday up to Thanksgiving!
Some of our favorite printable Thanksgiving activities include:
Be sure to add these printable resources to your therapy toolbox and learning fun!
Print off these Thanksgiving turkey templates!
turkey cut out template
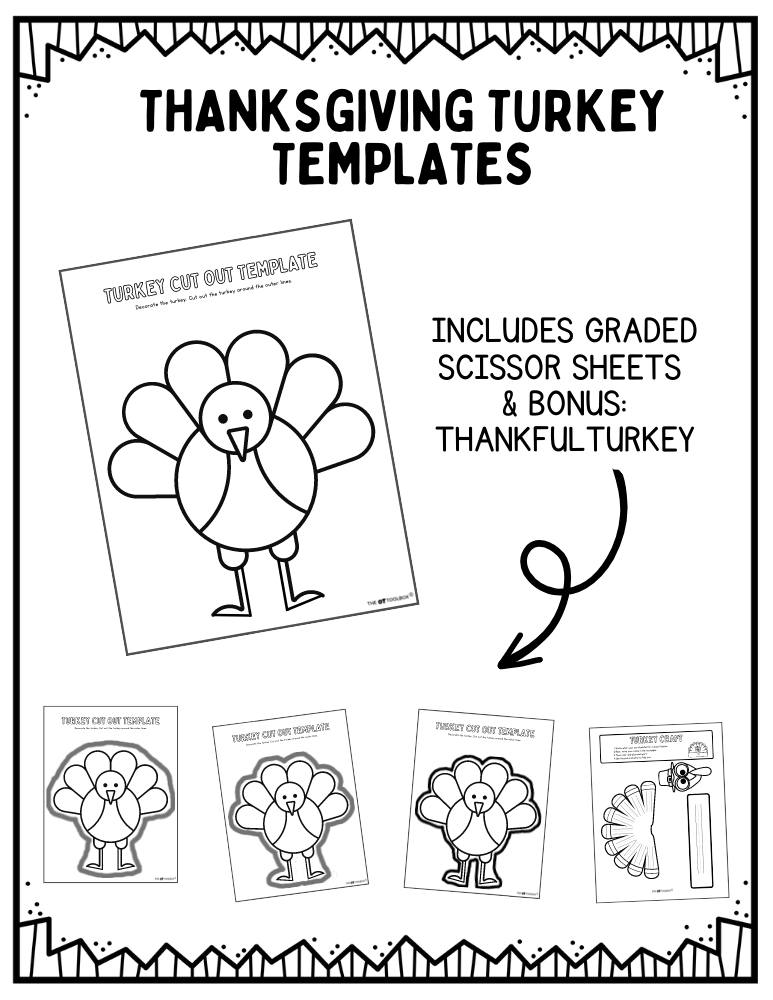
We wanted to make a turkey cut out template that you could use with a variety of ages and skill levels. This free Thanksgiving activity includes several turkey printables:
Several color and cut turkey templates with guided lines for scissor skills. You can use the turkey with the cutting lines that meet the needs of each student on your caseload or in your classroom. Focus on line awareness and visual motor skills to cut along the graded lines.
Thankful Turkey Craft- Color and cut out the turkey craft template. Then work on handwriting skills to write in something that the student is thankful for. This would go well with our Thanksgiving tree or our gratitude leaves.
How to use a Printable Turkey Template
Not only are they a fun way to support development, you can use these printable turkey templates for many areas of skill development:
Once you’ve printed out your turkey templates, you can use them in a variety of ways to extend the skill-building:
Disguise the turkey printable- Glue a variety of small objects on the turkey (like covering them in glitter!) or make the turkey a costume to disguise him into something or someone else. You can also use our disguise the turkey digital activity.
2. Decorate the turkey printable with tissue paper art- Crumble up bits of tissue paper and cover the turkey. This is a great finger strength activity.
3. Dot painting turkey- Use bingo dabbers or the end of an eraser dipped in paint and paint the turkey with dot art. This is a great activity for eye-hand coordination skills, and if you use a pencil to paint the turkey, or cut a cotton swab into half, you can work on developing pencil grasp.
There are more ways to extend this turkey template activity, too:
Hang the free turkey printable on the wall and use it for coloring or placing stickers on the turkey (pin the feathers on the turkey, anyone?). This is a nice way to work on shoulder stability and wrist extension, which are needed for fine motor control and finger dexterity.
Use the turkey printables in scavenger hunts and obstacle courses.
Glue real feathers to the turkey templates to incorporate various textures.
One activity that we did was to work on a variety of fine motor skills using the turkey printable. I selected one of the turkey cut outs that had a thick cutting line.
Then, we cut out the turkey and colored in the sections of the turkey’s feathers and body. Some of the crayons were broken to encourage a tripod grasp.
You can see the final activity in the image and a video showing how to do this craft below.
There are so many ways to use these Thanksgiving printables!
Free Thanksgiving Printables
This free turkey printable is just one of the many free Thanksgiving printables we have here on the site. You’ll also want to grab these other Thanksgiving printable sheets:
Below we have a set of free Thanksgiving printables created into a printable pack that you can use this time of year. To grab the set, enter your email address into the form. You’ll receive an email where you can download the free activities and go from there.
These PDF resources are included in our OT Toolbox Member’s Club. Inside the club, you’ll find a Thanksgiving Therapy Theme with many other turkey and gratitude themed Thanksgiving printable materials. You’ll also find inspiration for Thanksgiving themed, hands-on activities to incorporate fine motor skills and hand strengthening this time of year.
Thanksgiving Printables for Learning and Gratitude!
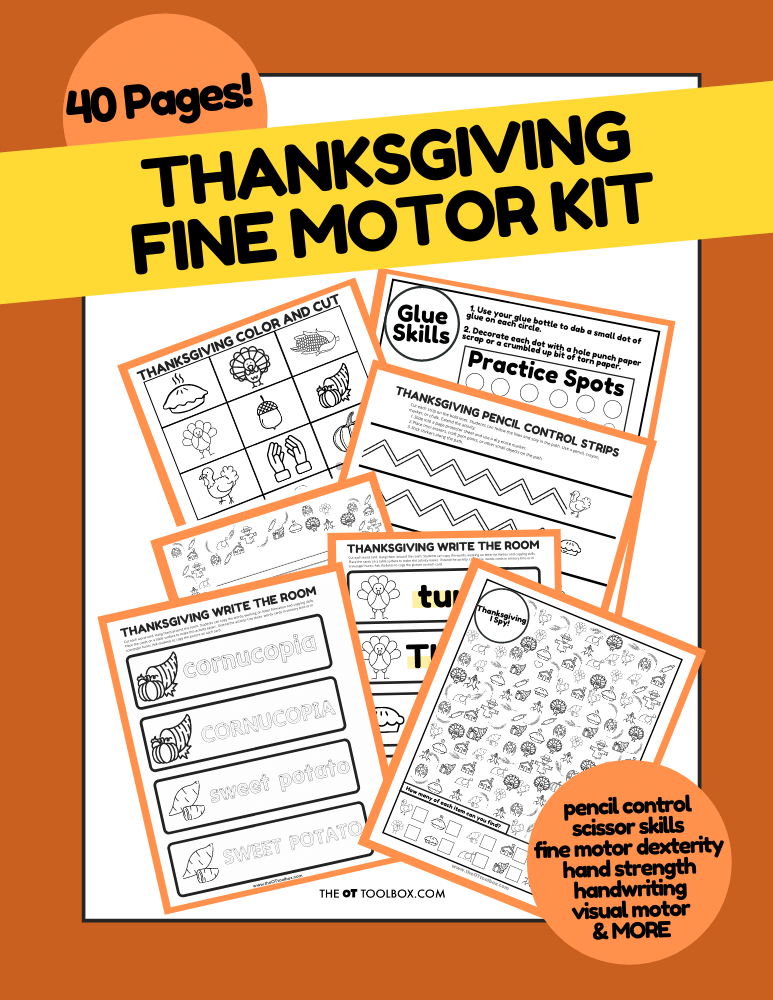
Grab the Thanksgiving Fine Motor Kit for printable, hands-on activities to support development this time of year.
Colleen Beck, OTR/L has been an occupational therapist since 2000, working in school-based, hand therapy, outpatient peds, EI, and SNF. Colleen created The OT Toolbox to inspire therapists, teachers, and parents with easy and fun tools to help children thrive. Read her story about going from an OT making $3/hour (after paying for kids’ childcare) to a full-time OT resource creator for millions of readers. Want to collaborate? Send an email to contact@theottoolbox.com.
Fall is the perfect season to incorporate scissor skills and fine motor activities into fun, themed crafts, and this scarecrow project checks every box. Whether you’re working on cutting practice, pencil grasp development, or visual motor integration, this craft combines it all with a seasonal twist. Plus, it’s a great way to tie in academic skills like math facts or handwriting practice. Be sure to explore our collection of scissor skills activities, fine motor tasks, fall fine motor activities.
If you need a math craft idea that is perfect for this time of year, this is a good one because you can target the skills or areas that you need to based on the child’s needs.
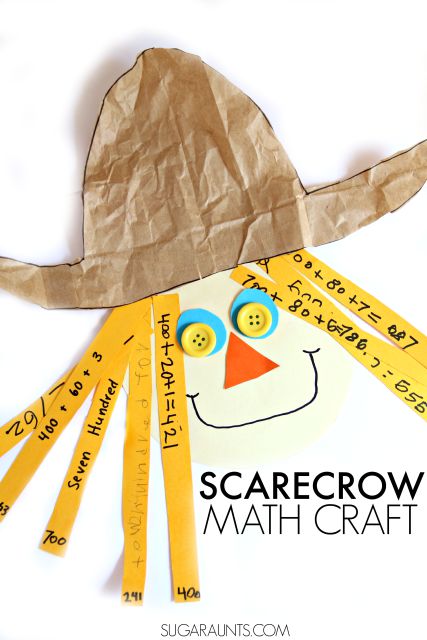
This scarecrow craft can be used for any grade or age. Kids can be resistant to practicing extra math facts and practicing skills that they’ve learned in school or homeschool. But often times, math skills like adding and composing numbers up to 1000 in this second grade math activity NEED additional practicing at home. So how do you get that extra practice in without pulling teeth (or pulling out your own hair!)?? Playful Math activities make learning and practicing skills fun. We made this Math Scarecrow Craft to practice second grade math, including place value and composing numbers…but you can make it age-appropriate for preschool on up through elementary-aged kids.
Scarecrow Craft
This post contains affiliate links.
To make this scarecrow craft, you’ll need a few materials:
To make the scarecrow craft (and totally sneak math into this Fall craft):
Scarecrow Craft for Kids
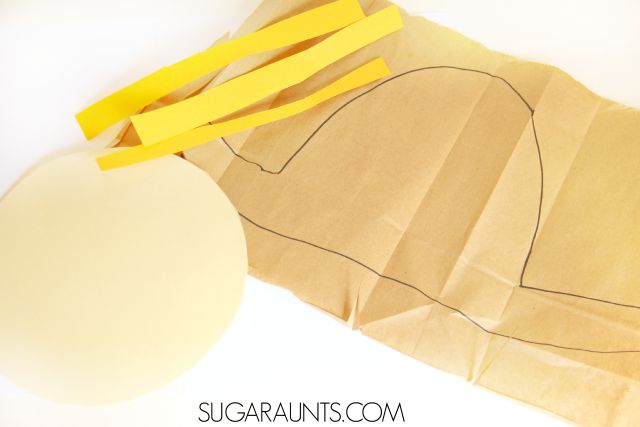
First, snip the Goldenrod cardstock into long strips about 1/2 inch wide. Cutting the cardstock in long cutting lines is an excellent exercise in scissor skills. The cardstock provides a thicker resistance than construction or printer paper. This added resistance provides feedback to kids who are working on line awareness and smooth cutting lines.
You can draw lines on the cardstock with a pencil/pen, or if the child needs more assistance with scissor skills, make the lines with a thick marker. Cutting the long strips of cardstock require the child to open/shut the scissors with smooth cutting strokes as they cut along the lines. Cutting all of the hair straw strands for the scarecrow craft is quite an exercise in scissor skills!
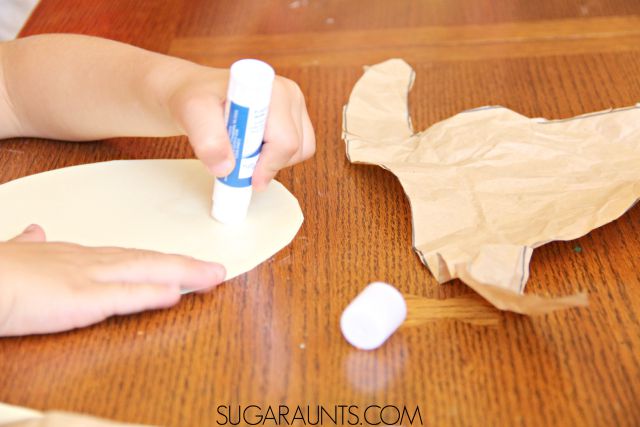
Next, you’ll have the child cut a large circle from the Ivory Cardstock. We used a bowl and traced a circle, but you could also have the child draw their own circle. This will become the face of the scarecrow. Cutting a circle with smooth cutting strokes is a more difficult task for children than cutting strait lines. Kids may need verbal and physical prompts to cut along the curved line with accuracy.
You can draw a hat-ish shape from the brown paper bag. I say hat-ISH because a scarecrow often has a floppy and battered hat on his head, so a hat shape that looks mostly like a hat is just about perfect for this scarecrow craft!
Kids can cut the hat shape and may require more assistance with this part. Cutting a material like a brown paper bag is more difficult than cutting regular printer paper, so the flimsy-ness of the paper requires more skill and accuracy with scissor control and line awareness.
Jagged lines make this scarecrow look authentic, though, so feel free to add more snips and cuts into the hat, too!
Next, you will crumble up the paper hat shape. My daughter really got into this part. “Crumble up this paper?? Awwww Yeah!”
Crumbling paper is a great fine motor strengthening exercise for children. They really strengthen the intrinsic muscles of their hands with paper crumpling. What a workout this scarecrow craft is!
Glue the hat in place on the scarecrow’s head.
Scarecrow Math Craft
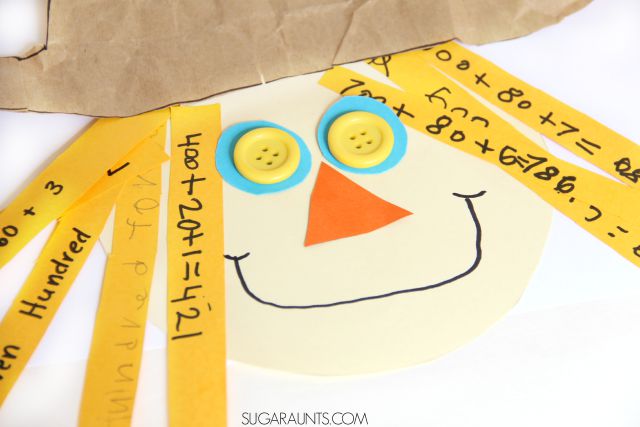
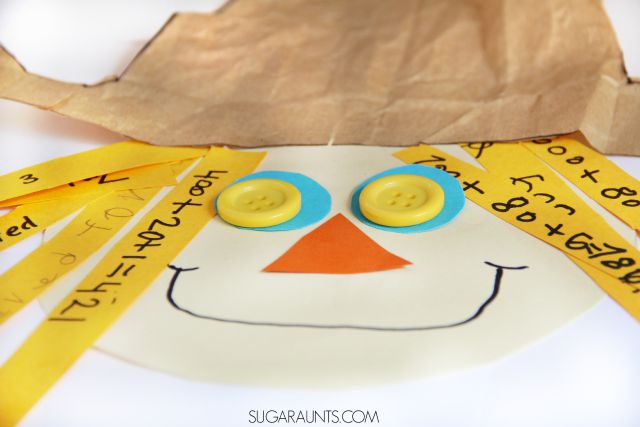
To make the hair of the scarecrow, glue the goldenrod strips on the head and along the hat. Cut a triangle from the orange cardstock for the scarecrow’s nose. Use buttons, paper scraps, and ribbons to dress up your scarecrow, adding eyes, mouth, and any other decorations. We received the buttons we used to make the eyes from our pals at www.craftprojectideas.com. Add a smile and your scarecrow is ready to decorate walls and doorways this Fall!
But wait! Make this cute scarecrow into a Math activity that the kids will Fall in love with. Yep, I went there.
Place Value Craft
To incorporate math into this scarecrow craft, use those paper strips. We made this activity perfect for practicing second grade addition skills.
My second grader has been working on building numbers up to 1000. On the strips, I wrote a three digit number on the end of many of the paper strips. She then chose different ways to describe that number. She wrote out the number in words on some strips.
On other strips, she built the three digit number using Common Core strategies. For example, I wrote the number 421 on one strip. She demonstrated how to “build” that number by writing “400 + 20 + 1”. This technique helped her practice skills she’s learned at school while understanding what makes up a three digit number. She was able to identify the hundreds, tens, and ones in a three digit number. Work on and discuss place value and number order with this activity.
The nice thing about this scarecrow craft is that you can adjust the math to fit any age…or just make the craft without the math facts for a super cute Fall Scarecrow!
Scarecrow Math Tips
How can you make this Math Scarecrow Craft work for your child’s needs? Try these ideas:
Adjust the activity slightly by working on math facts. Write a number on the end of the strip and ask your child to write the addition or subtraction problem on the length of the hair.
Write the SAME number on the end of each strip. Ask your child to write each strip with different math addition problems that make up different ways to reach the number. For example, write the number 16 on each strip. Your child can write 8+8 on one strip, and other strips with 10+6, 12+4, 20-4, etc.
More Scarecrow Activities
Looking for more scarecrow activities? Below are scarecrow activities for kids that cover a variety of areas: math, language arts, art, and more.
Stop by and see what our friends have come up with using this week’s Scarecrow theme:
Scarecrow Syllables for Second Grade – Use a scarecrow activity to help with early literacy skills in this creative scarecrow activity from Look! We’re Learning!
Scarecrow Measures – Another scarecrow math activity, this one from Crafty Kids at Home is a fun addition to a Fall themed learning plan.
Scarecrow Silhouette Art Project – A Scarecrow craft that the kids will love is fun to add to your therapy plan. Use this idea from School Time Snippets.
Colleen Beck, OTR/L has been an occupational therapist since 2000, working in school-based, hand therapy, outpatient peds, EI, and SNF. Colleen created The OT Toolbox to inspire therapists, teachers, and parents with easy and fun tools to help children thrive. Read her story about going from an OT making $3/hour (after paying for kids’ childcare) to a full-time OT resource creator for millions of readers. Want to collaborate? Send an email to contact@theottoolbox.com.
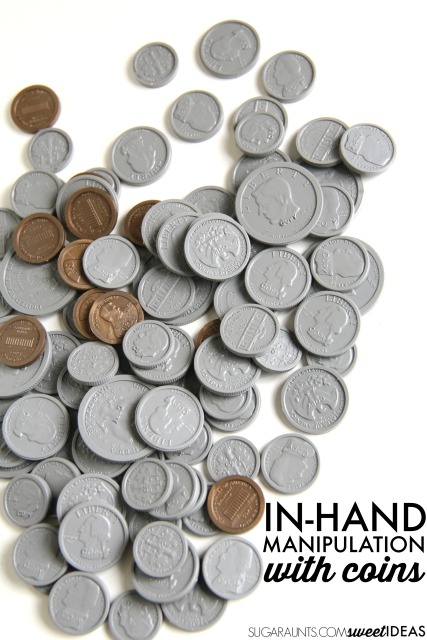
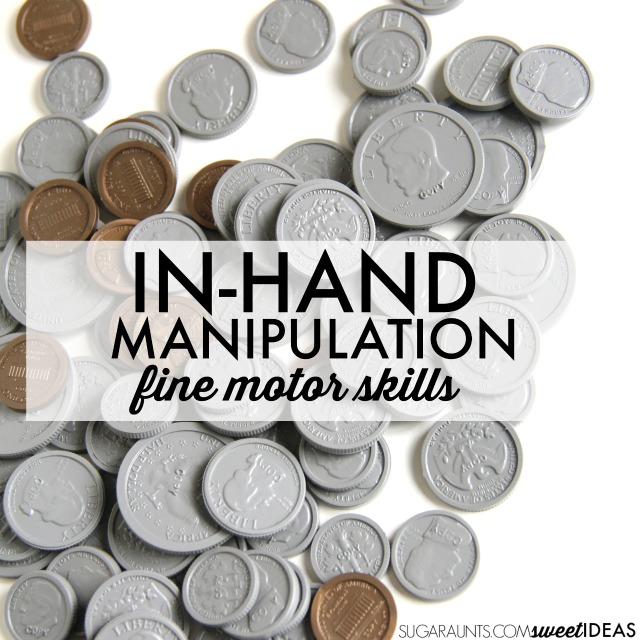
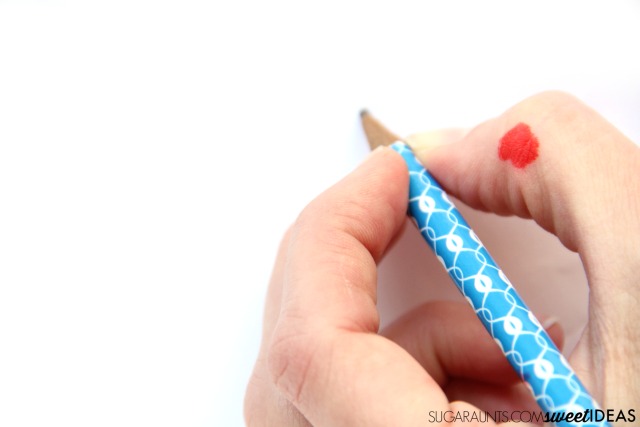
Moving the pencil within the tips of the fingers to switch from writing to erasing. Passing small beads from the palm of the hand to the finger tips. Holding a stack of coins in the palm while counting out the amount needed to pay for an item.
These are all in-hand manipulation tasks, and can be a problem when it comes to performing functional tasks related to these fine motor tasks. Sometimes a child appears clumsy with their small motor movements. They use two hands for tasks that normally require just one. Today, I’ve got a fun way to help with these difficulties by working on in-hand manipulation skills using coins.
The Three types on In-hand Manipulation
There are different types of movements which allow us to manipulate objects within the hand. Every task that we do within the hand uses a combination of these movements. These are the three different types or components of in-hand manipulation:
Translation
Shift
Rotation
Translation is using your fingers to moving a little item from your palm to your finger tips (or your fingertips to squirrel the item into the palm). When you hold a coin in your palm and manipulate it to your finger tips to push it into a piggy bank or vending machine, you are demonstrating palm-to-finger translation.
Shift is moving an object using the pads of your fingers…adjusting the pencil grip is demonstrating finger shift. Another example might be manipulating a button or a zipper with the finger tips.
Rotation is rolling an object using the fingertips. Examples of rotation are rolling a pencil in your fingertips, turning a pencil over to use the eraser, or opening a bottle top by rotating the lid on your finger tips.
These fine motor skills are needed for functional tasks like managing a pencil or crayon during handwriting, opening containers, managing coins or small items, manipulating a spoon/knife/fork, adjusting the paper when cutting with scissors, and fastening buttons or shoe laces.
In-Hand Manipulation Activity with Coins
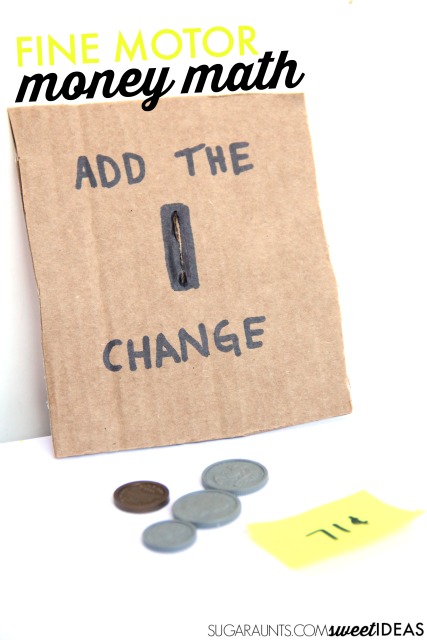
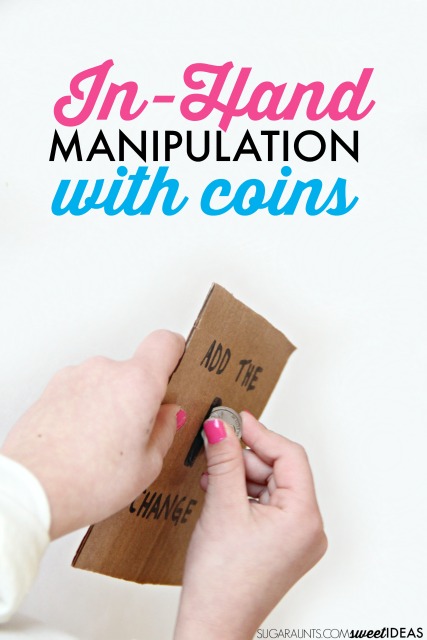
I grabbed a piece of cardboard from a pizza box lid. Cut the cardboard into a manageable sized rectangle and use a sharp knife to cut a slit. Make sure the slit is vertical as this is similar to a coin machine and encourages efficient positioning of the wrist and fingers for functional use.
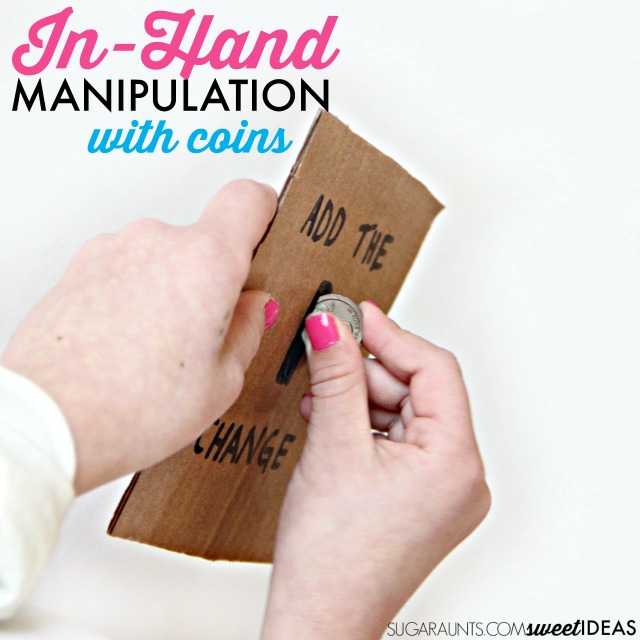
To work on in-hand manipulation needed for functional tasks, use play money to press the money through the slot. Ask your child to grab up a handful of the coins and push them through the slot one at a time. Using the non-dominant hand to hold the cardboard is an exercise in bilateral hand coordination, making this a great pre-handwriting exercise. (Use this activity as a writing warm-up exercise!)
How to use coins to work on in-hand manipulation:
Rotate the coins between the pads of the thumb and pointer finger/middle finger.
Grab a handful of coins and place them into a slotted container.
Pick up coins one at a time and “squirrel away” into the palm.
Push coins into a piggy bank or slotted lid (Slice a hole in a recycled plastic container like a yogurt container)
Slice a slit in a piece of cardboard like we did below. Using a small piece of cardboard allows you to hold the cardboard when pushing the coin through the slot. Read on:
When a person writes, they need to hold the paper steady with their non-dominant hand while manipulating the pencil with only their dominant hand. They need to adjust the pencil motions, twirl it around to erase, pinch and “crawl” up the pencil to adjust small movements in the hand as they write on the paper. Holding the cardboard in the non-dominant hand prevents the child from managing the money with both hands.
While pressing the coins into the cardboard, work on money and change making skills like we shared here.
This post contains affiliate links.
More Fine Motor activities you will LOVE for working on handwriting, pencil grasp, and manipulating small items:
3 Fun & Practical Coin-Based Fine Motor Exercises
All you need is a handful of coins to start working on fine motor skills, including in-hand manipulation. Here are some ideas:
1. Coin Flip and Store– Place a pile of coins on the table. Have the child pick up one coin at a time, flip it from palm to fingertips (translation), and place it into a small container.
Challenge upgrade: Use smaller coins or require the child to sort coins by size after flipping.
2. Coin Stack Race– Give the child a handful of coins to hold in their palm. Using just one hand, have them move each coin to their fingertips (one by one) and stack them into a tower without dropping any.
Skills targeted: In-hand manipulation, precision control, fine motor endurance.
Therapist tip: Time the child or challenge them to beat their own record.
3. Coin Slot Shoebox Game– Cut narrow slots into the lid of a shoebox labeled with coin values. Have the child sort and insert coins using only one hand, pulling them from their palm to fingertips before dropping into the correct slot.
Skills targeted: Translation and rotation, finger strength, visual-motor integration.
Home version: Use piggy banks or DIY coin banks made with containers and lids (a yogurt container or small butter container works well.
Here are more ideas to work on in-hand manipulation skills:
Besides using just coins, you can add other fine motor ideas to improve the coordination and dexterity needed for the three types of movements of in-hand manipulation. In our Yearlong Fine Motor and Data Collection Bundle, we have a full year of activities.
Looking for a consistent way to support fine motor skills all year? This yearlong fine motor system includes seasonal activity kits and monthly data collection tools to support planning and progress monitoring.
If fine motor planning and data collection feel overwhelming, you’re not alone. This done-for-you yearlong bundle organizes seasonal activities and monthly screening tools in one system.
Colleen Beck, OTR/L has been an occupational therapist since 2000, working in school-based, hand therapy, outpatient peds, EI, and SNF. Colleen created The OT Toolbox to inspire therapists, teachers, and parents with easy and fun tools to help children thrive. Read her story about going from an OT making $3/hour (after paying for kids’ childcare) to a full-time OT resource creator for millions of readers. Want to collaborate? Send an email to contact@theottoolbox.com.










 (THESE are my favorite brand and what I always recommended as a school-based OT!)