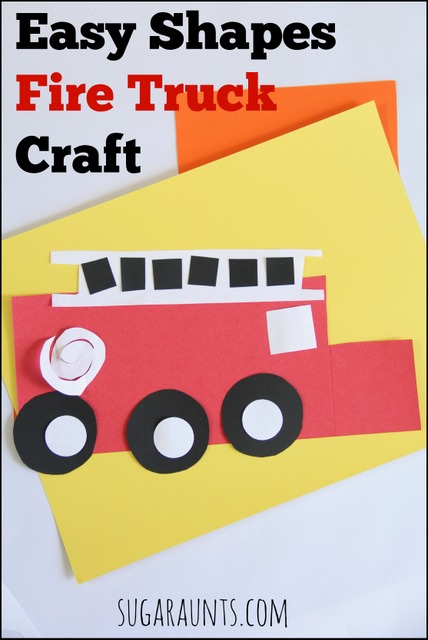
Fire Truck Craft Easy Shapes

Fire truck crafts are a favorite for young children, especially preschoolers who love vehicles, helpers, and hands-on art projects. This easy fire truck craft for preschoolers uses simple shapes to create a bold, recognizable fire engine while quietly building foundational fine motor skills. With cutting, grasping, and bilateral coordination built right into the activity, this fire truck shapes craft is more than just a fun art project – it’s a purposeful way to support early scissor skills through play.

fire truck craft

Whether you’re a parent looking for a preschool fire truck craft, a teacher planning a themed activity, or a therapist targeting cutting accuracy, this fire truck craft can be easily adapted to meet different skill levels.

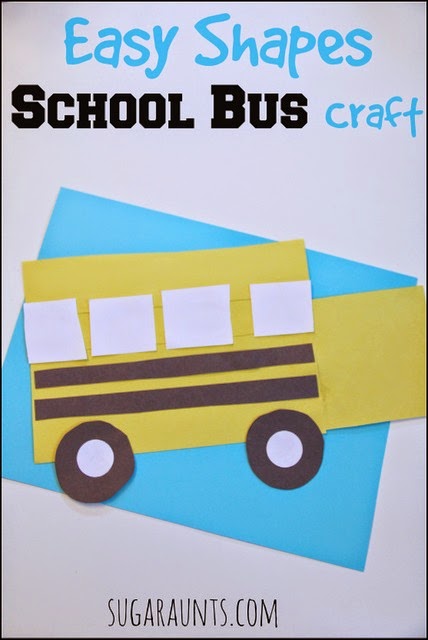
This fire truck craft was a given after we made our easy shapes school bus craft.  We love looking for trucks when we are out and about (what Toddler or Preschooler doesn’t??) This fire truck craft was easy to do and perfect for little fingers to build, like a lot of our kids crafts. We love the puzzle-like craftiness of this truck idea.  Fire safety week would be a great time to make this craft…but if you’ve got kids like mine, it’s fun any time of year!
 
This fire truck craft would be fun to make with students when navigating sensory needs and fire drills.
 

Fire Truck Craft

I love this fire truck craft because so many kids love fire trucks! But they don’t realize that they are developing skills by cutting the simple shapes when making this craft.

 
Easy shapes fire truck craft. This is fun for toddlers and preschoolers during fire safety week.


This post contains affiliate links.
 

Why Fire Truck Crafts Are Great for Preschoolers

fire truck craft for preschool works especially well because it combines motivation with structure. Young children are often more willing to practice challenging skills like cutting when the end result is something exciting and familiar, such as a fire engine. This is a great preschool occupational therapy activity.

This fire truck art and craft activity supports:

Using basic shapes also helps children begin to recognize how shapes come together to form a larger image, an important pre-writing and early math concept.

This fun craft invites children to explore the role of a firefighter (or fireman) through hands-on creativity while learning about community helpers and rescue work in an age-appropriate way. Designed for preschool and kindergarten, this fire truck craftivity uses simple templates that make cutting and assembling approachable and much fun for young learners. Children can add details like flames, a siren, or even use straws for added texture and engagement, encouraging imagination and fine motor development. This activity works well as part of a larger set of classroom or therapy resources, and many families and educators enjoy sharing finished projects on Instagram and Facebook to celebrate progress and inspire others.

Fire Truck Shapes Craft Using Simple Paper Materials

We like paper plate crafts for many reasons, one being that you can increase the resistance of the cutting surface to add proprioceptive input as a heavy work task. This slows down the scissors when cutting.

We like to make this firetruck craft on a paper plate for that reason.

This paper craft fire truck is created using basic shapes such as rectangles, circles, and squares. Each shape provides a different cutting challenge, allowing you to observe and support a child’s scissor skill development.

You can use:

  • Construction paper

  • Cardstock

  • Or even recycled paper for a lower-prep option

As children cut each piece, they practice opening and closing scissors with purpose while learning to rotate paper with their helper hand.


Items needed to make a fire truck craft:

 
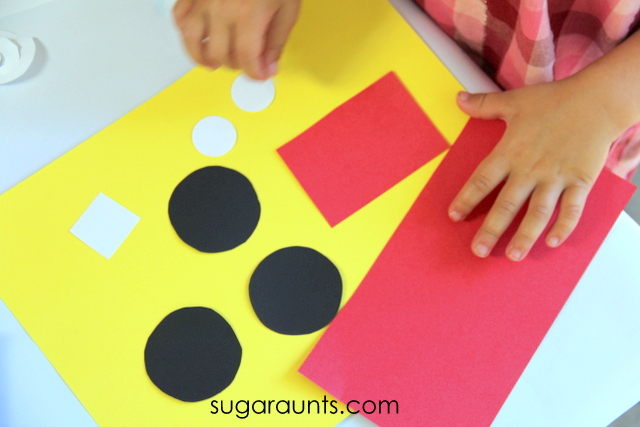
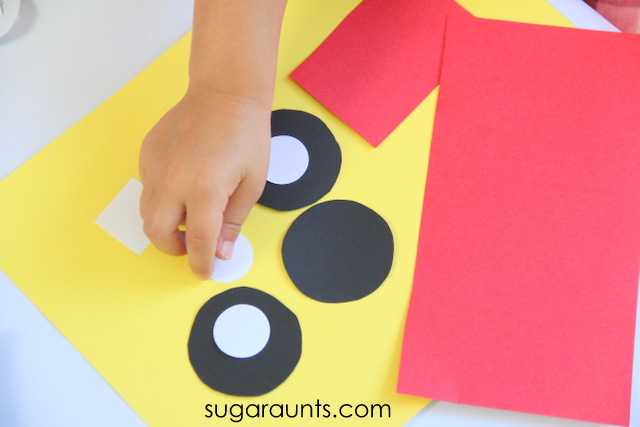
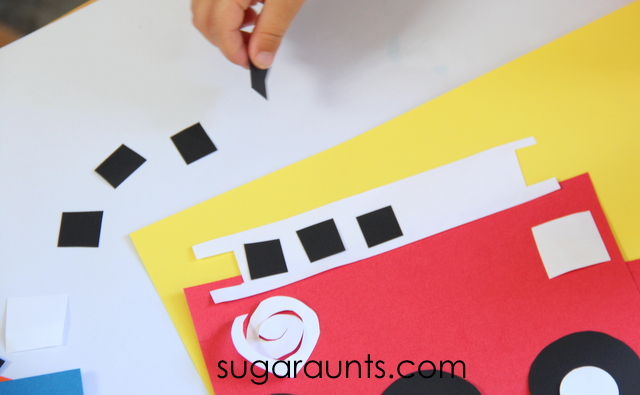
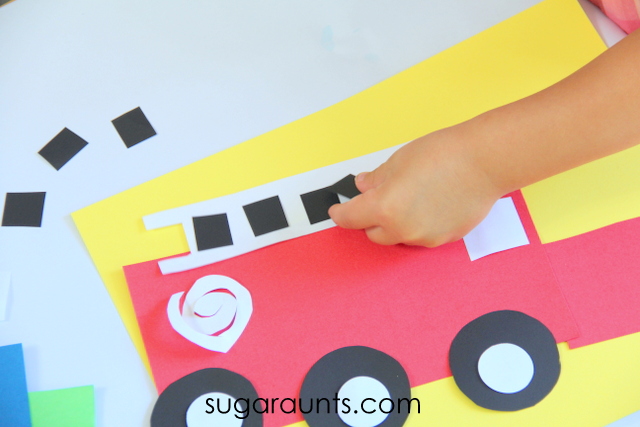
We started with basic shapes to make our fire truck: large rectangle, square, 3 black circles (trace a bottle cap), three smaller white circles, white square, 8-10 black squares, long white rectangle for the ladder.  
 
Older children can work on cutting these shapes.  Cutting from card stock is a great way to work on scissor skills, as it’s a bit more sturdy than printer paper or construction paper.  The increased resistance provides more input when making snips with scissors. 
 
For the Toddlers and preschoolers, be sure to work on shape identification.  Point out the different shapes, the way that we know what they are (circles are one line and curve all around; rectangles have two long lines and two short lines with four corners).
 

These little fingers couldn’t wait to get started!


We started building our fire truck.

Fire truck craft for Preschool and Toddlers
 
Count the squares as you build the fire truck ladder. 
 

I cut a swirly curved shape for a fire hose.  Our fire truck turned out looking pretty cute and a great way to start talking about fire safety during Fire Safety Month in October.  Happy crafting!


Love this craft?  Check out our easy shapes bus craft.


Paper Plate Fire Truck Craft for Added Resistance

For children who are just learning to cut or who need more control, a paper plate fire truck craft is an excellent option. Paper plates offer a more resistive texture than standard paper, which can naturally slow down cutting snips and improve accuracy.

This added resistance can:

  • Encourage better hand positioning
  • Reduce fast, choppy cutting
  • Support smoother scissor movements

Simply trace the fire truck shapes onto a paper plate and allow the child to cut along the lines at their own pace.

Easy Fire Truck Craft for Preschoolers at Different Skill Levels

One of the benefits of this easy fire truck craft is how easily it can be graded up or down.

To make it easier:

  • Use thicker lines
  • Cut shapes into smaller sections
  • Pre-cut some pieces for assembly practice

To make it more challenging:

  • Use thinner cutting lines
  • Add smaller details
  • Encourage cutting curves and corners independently

This flexibility makes it a great craft fire engine activity for mixed-ability groups.

Supporting Scissor Skill Development Beyond One Craft

If a child struggles with cutting accuracy, endurance, or hand positioning, it often helps to practice with consistent, structured scissor skill activities rather than one-off crafts.

This fire truck activity can be a great starting point, especially when paired with a broader set of cutting activities that progress from simple to more complex skills.

MORE fine motor and scissor skills tasks in our many Fine Motor Kits (also available inside The OT Toolbox Membership):

Working on fine motor skills, visual perception, visual motor skills, sensory tolerance, handwriting, or scissor skills? Our Fine Motor Kits cover all of these areas and more.

Check out the seasonal Fine Motor Kits that kids love:

Or, grab one of our themed Fine Motor Kits to target skills with fun themes:

Want access to all of these kits…and more being added each month? Join The OT Toolbox Member’s Club!

Colleen Beck, OTR/L has been an occupational therapist since 2000, working in school-based, hand therapy, outpatient peds, EI, and SNF. Colleen created The OT Toolbox to inspire therapists, teachers, and parents with easy and fun tools to help children thrive. Read her story about going from an OT making $3/hour (after paying for kids’ childcare) to a full-time OT resource creator for millions of readers. Want to collaborate? Send an email to contact@theottoolbox.com.
Olympic Rings Craft for Kids

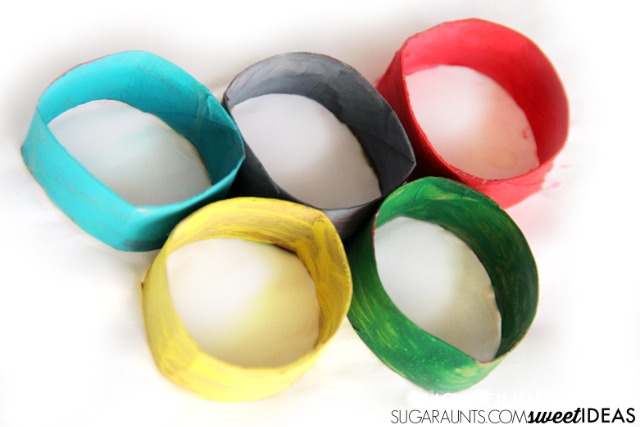
Olympic rings craft

Celebrate the Olympics with a Fine Motor Craft Get into the Olympic spirit with this engaging, low-prep activity that’s perfect for therapy sessions, classrooms, and at-home fun. This Olympic Rings Craft for Kids encourages fine motor skill development, creativity, and cultural learning, all while using simple recycled materials. Whether you’re preparing for an Olympic-themed unit or just looking for a meaningful craft to build motor skills, this activity is a winner!

If you’re looking for ways to get the kids excited about the Olympics or are incorporating Olympics activities into learning and play this year, try these Olympic Games Activities for a bunch of creative ideas.

Why Make an Olympic Rings Craft? Creating Olympic rings is a great way to connect kids to global themes of teamwork, perseverance, and cultural unity. Incorporating movement and creativity through crafting helps reinforce learning and builds a sense of accomplishment. Best of all, this activity can be adapted for many ages and skill levels, making it a versatile addition to any therapy toolkit.

Skills Developed Through cardboard tube Crafts

This craft supports a wide range of developmental goals:

  • Fine motor skills: cutting, gluing, painting, and squeezing tools
  • Hand strength and bilateral coordination: using both hands to hold and paint tubes or paper
  • Visual motor integration: aligning and arranging rings to mimic the Olympic logo
  • Sensory input: tactile exploration with recycled materials, paint, glue
  • Color recognition and sequencing: matching the colors of the Olympic rings in the correct order

How to make an Olympics Craft

Materials Needed Gather these common supplies:

  • 5 empty toilet paper rolls or 2 paper towel rolls cut in half
  • Paint (blue, yellow, black, green, red)
  • Paintbrushes or sponges
  • Glue or stapler
  • Optional: colored construction paper for an alternative craft version

Craft Option 1: Recycled Cardboard Tube Olympic Rings

  1. Cut the cardboard tubes into rings of equal width.
  2. Paint each ring one of the Olympic colors: blue, yellow, black, green, and red.
  3. Allow the rings to dry completely.
  4. Arrange and glue the rings into the Olympic pattern: 3 on top (blue, black, red), 2 underneath (yellow, green).
  5. Display the finished craft or hang as a banner.

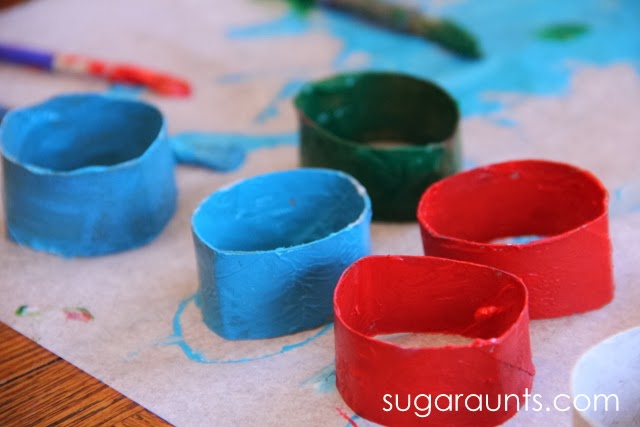
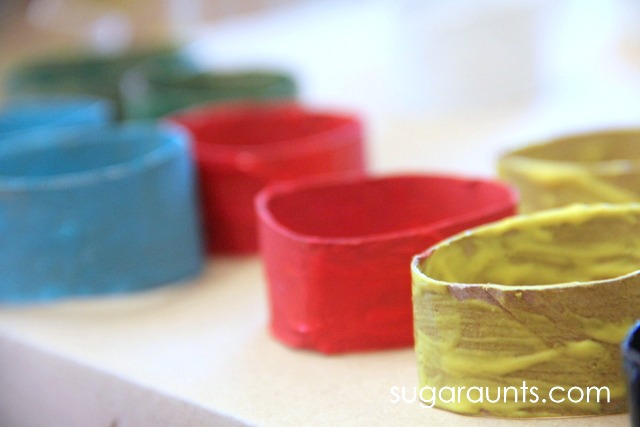
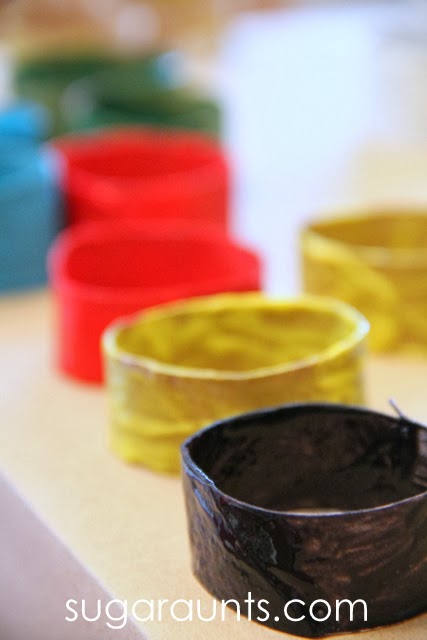
We started with our collection of paper tube rings (You may have just seen these used in a totally different way on our last post where we used the paper rings for Learning Sight Words.  We pulled them out again for our Olympic rings.

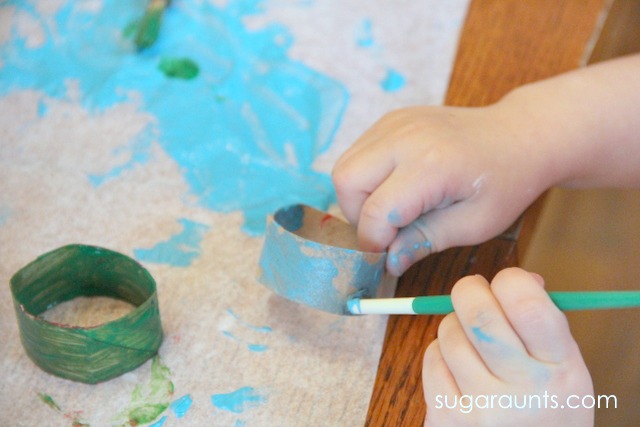
Olympic ring craft- paint cardboard tube rings

Next came the fun part.  We used our paint set (and pulled out a container of black paint because our set doesn’t have it).  The rings were very messy to paint, but a great sensory and fine motor activity.

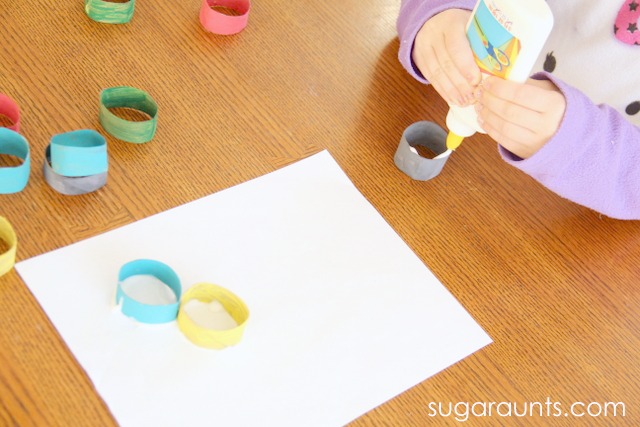
Once our rings dried, we glued them onto a piece of paper.  This part got a little messy with the glue, but only because Big Sister wanted to pour the glue onto the rings.  If you put the glue on the paper and then stick the rings into the glue, it will be a lot less sloppy than ours was.  But, the glue dries clear, so no harm done!

Craft Option 2: Construction Paper Ring Chain

  1. Cut strips of colored construction paper (about 1″ x 6″).
  2. Create a ring by looping one strip into a circle and stapling or gluing the ends together.
  3. Loop the next strip through the previous ring and attach.
  4. Continue until all five Olympic-colored rings are connected.
  5. This version supports cutting practice, sequencing, and bilateral hand use.

Therapy Ideas Using the Olympic Rings Craft

As a pediatric OT, I love crafts I can use with my whole caseload, no matter what level or grade the students are at. That means I can have my whole caseload do the same craft or activity and we just switch up the goals we are targeting. we can modify the activity to meet the level of the individual in a just right manner.

I can also adapt the activity and use the parts of the craft in different ways. This makes therapy activities fun and motivating, not just a rinse and repeat strategy.

Use this craft as part of a themed therapy session:

  • Add a gross motor obstacle course and let kids earn a ring for completing each section.
  • Practice handwriting by labeling each ring with Olympic values (e.g., Respect, Excellence).
  • Use tongs to pick up and sort the rings by color to boost hand strength and coordination.

Classroom Extensions and Olympic Learning

Occupational therapists that work in the school setting know all about pushing into the classroom or pulling the child out for 1:1 work. When we need to push into the classroom, this craft can be a great tool to build skills.

Teachers can incorporate this craft into social studies or physical education lessons by:

  • Exploring the meaning behind the Olympic rings and what each color represents.
  • Hosting a mini “Olympics” event and using the rings as decorations or awards.
  • Practicing math by counting rings, measuring lengths, or sequencing colors.

Related Posts You Might Like:

Kids Craft for the Olympics

My kids are very excited to watch the Olympics this year.  They can’t wait to watch their favorite sports next month.  I’m excited for the opening ceremony and watching that with the kids. 
 
We made this Olympics ring craft to get in the mood and to talk about the rings and create a little Olympic art. 
 
Anytime we pull out the paint, Baby Girl gets excited to make a craft and paint away.  This girl loooooves to paint.  These Olympic Rings were fun (and messy) to paint…just the way she likes her crafts! 


Kids will love to make these Olympic Rings craft while watching the Olympic Summer Games this year! Perfect for the winter games, too! Uses recycled toilet paper tubes for a 3D craft.


Olympic Rings Craft for Kids

 
This post contains affiliate links.


Kids will love to make these Olympic Rings craft while watching the Olympic Summer Games this year! Perfect for the winter games, too! Uses recycled toilet paper tubes for a 3D craft.


Olympic Ring Paint Craft


These colorful Olympic rings dried on a piece of wax paper (and looked so pretty!) 

Kids will love to make these Olympic Rings craft while watching the Olympic Summer Games this year! Perfect for the winter games, too! Uses recycled toilet paper tubes for a 3D craft.
 
We’ve got all of the colors in there!
 
Kids will love to make these Olympic Rings craft while watching the Olympic Summer Games this year! Perfect for the winter games, too! Uses recycled toilet paper tubes for a 3D craft.


Kids will love to make these Olympic Rings craft while watching the Olympic Summer Games this year! Perfect for the winter games, too! Uses recycled toilet paper tubes for a 3D craft.
 
Kids will love to make these Olympic Rings craft while watching the Olympic Summer Games this year! Perfect for the winter games, too! Uses recycled toilet paper tubes for a 3D craft.
 
The three dimensional Olympic Rings looked pretty neat when hanging from our dining room wall.  They remind us how excited we are for the games to begin!
 
 
Kids will love to make these Olympic Rings craft while watching the Olympic Summer Games this year! Perfect for the winter games, too! Uses recycled toilet paper tubes for a 3D craft.
 

Looking for more fun kid’s crafts?  Follow along on our “kid’s crafts” Pinterest board for loads of fun ideas:


Olympic Rings Craft for Kids
 
You can also follow us on Facebook, Google+ Twitter, Pinterest, and Instagram!

Kids will love to make these Olympic Rings craft while watching the Olympic Summer Games this year! Perfect for the winter games, too! Uses recycled toilet paper tubes for a 3D craft.


What are your favorite ways to get your kids excited about the Olympics and learn through play with an Olympics games theme? You’ll also love our Olympic playdough: gold, silver, and bronze play dough you can make for fine motor work!

Download the Printable Instruction Sheet!

This is a Level 2 Membership tool. Members can log into their account and find a printable activity handout for this craft with more information on how to use this activity in OT sessions for building hand strength and other goal areas. Click on Olympic theme under the Themes section.

Our Olympic Rings Craft printable is perfect for therapists, teachers, or parents. It includes:

  • Step-by-step illustrated instructions
  • Materials checklist
  • Therapy goals supported
  • Tips for adapting for different age groups
  • A visual model of the Olympic ring layout

Want to add this resource to your therapy toolbox so you can help kids thrive? Enter your email into the form below to access this printable tool.

This resource is just one of the many tools available in The OT Toolbox Member’s Club. Each month, members get instant access to downloadable activities, handouts, worksheets, and printable tools to support development. Members can log into their dashboard and access all of our free downloads in one place. Plus, you’ll find exclusive materials and premium level materials.

Level 1 members gain instant access to all of the downloads available on the site, without enter your email each time PLUS exclusive new resources each month.

Level 2 members get access to all of our downloads, exclusive new resources each month, PLUS additional, premium content each month: therapy kits, screening tools, games, therapy packets, and much more. AND, level 2 members get ad-free content across the entire OT Toolbox website.

Join the Member’s Club today!

Colleen Beck, OTR/L has been an occupational therapist since 2000, working in school-based, hand therapy, outpatient peds, EI, and SNF. Colleen created The OT Toolbox to inspire therapists, teachers, and parents with easy and fun tools to help children thrive. Read her story about going from an OT making $3/hour (after paying for kids’ childcare) to a full-time OT resource creator for millions of readers. Want to collaborate? Send an email to contact@theottoolbox.com.
Hand Dominance Activities 3 Simple Tips

what is hand dominance

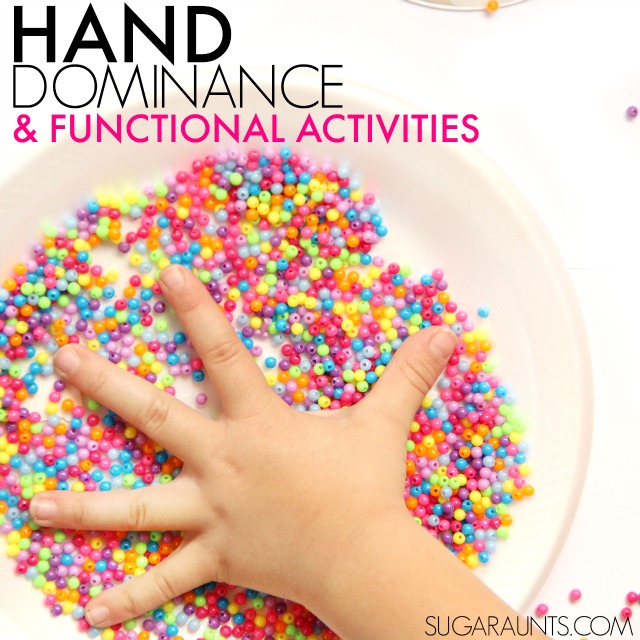
Kids develop hand skills through play as they discover what they can do with their hands in their environment. Hand dominance occurs naturally through this discovery and play. You may have heard the terms Crossdominance or hand confusion in a therapy report. This mixed dominance may present in a child’s motor actions when they favors one hand for some tasks and the other hand for others. Hand dominance activities and establishment of a preferred hand in activities refines motor skills and allows for more skilled movements.

Understanding Hand Dominance in Child Development

Hand dominance, also known as hand preference, plays a critical role in a child’s ability to develop fine motor skills and perform daily tasks efficiently. As children grow, the brain establishes a dominant hemisphere that controls skilled hand movements.

Occupational therapy practitioners often observe handedness as a developmental milestone linked to overall motor coordination, sensory integration, and academic skills like handwriting.

Understanding when and how hand dominance emerges can help caregivers and educators support motor development in meaningful ways.

Hand dominance


But what happens when those two-handed activities do not transition to preferred use of one hand over the other?  At a certain point, kids begin to show hand dominance in functional tasks as their motor skills develop.  

A child begins to show laterality of their hands in functional tasks as one side of their brain gains dominance and allows the child to prefer use of one hand over the other.

Other kids show a mixed dominance and use both of their hands in activities. Wondering where to begin or how to know what is typical in development? Read on for hand dominance activities that will help!

What is laterality

Laterality and left right discrimination are closely related.

Laterality is a preference, or a dominance for one side of the body over the other. This is shown with a stronger arm, more precision in one hand over the other, or a more dominant eye in visual tasks and a more dominant foot or stronger leg in balance and kicking tasks. Laterality is shown in then hands with handwriting, scissor tasks, knife and fork tasks, etc. Laterality is a brain skill. It’s a preference of one side of the brain in controlling the arm/leg/eye which is stronger on one side of the body over the other in activities or functional tasks. 

Lateralization refers to the brain’s ability to control the two sides of the body.  Each hemisphere of the brain controls different tasks and functions.  When a child shows difficulties with laterality, they might switch objects between the two hands in functional tasks.  As a child grows, they are challenged to become more efficient with tools in school.

What is left right discrimination

Left/right discrimination “on the other hand” is  a complex neuropsychologic process that calls upon several higher functions, including visuospatial processing, memory, language and integration of sensory information to allow identification of one side of the body as distinct from the other, no matter the direction the body is facing.  Many kids have trouble knowing which hand is their left or right. They might switch hands in tasks, or have difficulty with following spatial relation directions… Sound familiar?

Left Right Discrimination is a skill that impacts spatial awareness and spatial concepts in functional tasks such as dressing, handwriting, using a knife and fork, scissors/paper, and other tasks that require a dominant hand or direction-following. Difficulties with left/right discrimination display themselves during holding a pencil, writing, forming letters, copying words, math, auditory directions, safety, direction-following, games like baseball, Simon Says, hokey pokey, etc. 

More information on these concepts and activities to improve directionality are in these blog posts:

  1. Ambidexterity or mixed dominance, which one? This blog post helps to explain what you are seeing when kids mix their hands in activities.
  2. What are visual spatial relations? This is a good starting point to work on the spatial concepts and integrating left/right in activities.
Left right discrimination in kids

Next, let’s talk about what hand dominance is and how we can support the development of this skill.

what is hand dominance

Understand what hand dominance means and why it matters for functional skills like writing, dressing, and tool use. This post explains the concept of laterality and provides tips for observing and encouraging dominant hand use in children.

What Is Hand Dominance

Hand dominance refers to the consistent use of one hand over the other for skilled tasks. It reflects brain lateralization, when one hemisphere becomes more active in guiding movement patterns. This process supports efficiency in daily living tasks, such as writing, feeding, and dressing. Children with unclear dominance may experience fatigue, poor coordination, or difficulty learning new fine motor skills.

Why It Matters:

  • Dominant hand performs refined motor tasks (e.g., writing, cutting)
  • Non-dominant hand plays a supporting or stabilizing role
  • Promotes motor efficiency and reduces cognitive load
  • Influences handwriting fluency and endurance
  • Helps develop spatial awareness and tool control


These hand dominance activities help kids establish a preferred hand in functional activities like cutting with scissors or handwriting.


Hand dominance and laterality in kids.  Easy and fun tips to work on an established hand dominance in kids for functional use of tools like scissors, pencils, hair brushes, and toothbrushes.


Development of Hand Dominance

Kids switching hands in an activity? Maybe you are seeing a child use one hand for some activities and their other hand for other activities. Still other children may use both hands interchangeably. Development of hand dominance can be established at different rates. 


True hand dominance can develop as late as 8 or 9 years of age, but typically children begin to demonstrate preferred use of one hand over the other at 2.5 to 3 years.  


Sometimes, however, kids switch hands. They might use one hand for some tasks, and the other for other tasks.  They might equally use hands in activities like handwriting, scissor skills, brushing teeth, or swinging a bat. 


Why does this mixed dominance occur and why is it important for kids to establish a preferred hand?
What is mixed handedness

Mixed Handed

Mixed handedness, or using different hands for different tasks, can sometimes be part of a child’s natural development or an indicator of challenges with motor planning or body awareness.

Unlike true ambidexterity, which is rare, mixed handedness often leads to functional difficulties due to inconsistent motor skill development and inefficient task completion. Occupational therapists observe task patterns and assess whether mixed handedness is developmentally appropriate or requires intervention.

Signs of Mixed Handedness:

  • Child writes with one hand but throws with the other

  • Uses whichever hand is closer rather than crossing midline

  • Shows fatigue or frustration with fine motor tasks

  • May switch hands frequently during writing or cutting

  • Difficulty establishing dominant support and working hand roles

When is hand dominance established?

When Is Hand Dominance Established

Most children begin to show signs of hand preference between the ages of 2 and 4, but true hand dominance is typically established by age 5 to 6. It’s important to recognize that variability is normal, and some children may continue to switch hands before settling into consistent use. Factors such as motor planning, body awareness, and even posture can influence this timeline.

Key Considerations:

  • Hand preference often becomes noticeable during preschool years

  • Consistent dominance usually solidifies by kindergarten

  • Early switching between hands can be developmentally appropriate

  • Watch for posture, trunk rotation, and bilateral coordination during tasks

  • Occupational therapy can guide strategies for children showing delayed or inconsistent hand use

Why is hand dominance important? For so many reasons! Using an established hand preference in tasks promotes fine motor skill development.


Why is hand dominance important?

Hand preference has been associated with various difficulties. When using an established hand in activities is a problem (or kids swap hands), there can be other issues occurring. These may include trouble with bilateral coordination, using both hands together at the midline, and crossing midline.

Other concerns related to using both hands interchangeably can include: 


Fine Motor Skills- Think about it this way: when a child cuts with scissors, they use one hand to hold the paper and the other hand to manipulate and move the scissors. As they develop in this skill, they are able to cut paper and shapes with more precision. They can cut progressively more detailed and more complex shapes. The child that switches hands when cutting with scissors may struggle to progress with refine and precise motor actions. 


Similarly, the nondominant hand becomes more reliable in its ability to be a stable and sturdy assist in tasks like cutting with scissors, holding a ruler, or writing with a pencil. 


Mixed handedness can impact handwriting too. In the same manner, any functional task can be impacted by mixed dominance.

3 Quick Hand Dominance activities 


These are easy hand dominance activities and easy ways to work on a hand preference in kids who switch hands during tool use.  They might have trouble identifying left or right on themselves, which makes direction following difficult.  Try these activities to work on hand dominance:

1. Play the “Show Me” game– Ask the child to “show me how you brush your hair.”  The child can demonstrate with an imaginary brush how they would brush their hair.  By using imaginary brush, the child does not have to worry about picking up the tool.  They will automatically brush without thinking about it.  As the child pretends to brush their hair, the adult can point out which hand they are using.  Putting a name to the hand alerts the child to which hand they are using.  You can then use this information to help the child remember which hand they use in functional tasks.  (“Hold the pencil with the hand you brush your hair with.”)

Continue this hand dominance game with other “Show Me” tasks:

  • Show me how you brush your teeth.
  • Show me how you hold a pencil.
  • Show me how you paint a picture.
  • Show me how you hold scissors.

2. Play Simon Says– Encourage a lot of handedness activities during the game:

  • Simon Says put your right hand in your pocket.
  • Simon Says scratch your leg with your left hand.
  • Simon Says stomp your right leg.
  • Simon Says take two steps to the left.


When playing, you can add a rubber band to the child’s right hand. Tell them and show them that the rubber band is on their RIGHT hand. After playing with successful lateralization, remove the rubber band.


3. Using masking tape, create floor maps. Make a large square shape on the floor and as the child walks through the maze, have the child stop at the corners and tell you if they have to turn right or left. 

Continue this activity with movement tasks that ingrain the motor planning. As you say left, stomp the left foot. When you say right stomp the right foot. Model this task by standing in front of and slightly to the side of the child (not facing the child, as this can cause confusion). Stomping and marching games are helpful to integrate the motor planning and muscle memory of knowing left and right. Continue this activity over the course of days and weeks.

Continue practicing these games and activities with less verbal and visual prompts.  Let me know if you try these ideas at home.


Hand dominance and laterality in kids.  Easy and fun tips to work on an established hand dominance in kids for functional use of tools like scissors, pencils, hair brushes, and toothbrushes.

More ways to practice hand dominance with kids:

hand dominance for preschoolers

Hand Dominance Activities for Preschoolers

Preschool-aged children benefit from engaging, bilateral play that allows them to explore and strengthen their hand preference. Through playful, hands-on activities, children begin to show a preference for one hand when completing fine motor tasks.

These activities also build the foundational skills required for future handwriting and self-care routines. Occupational therapy strategies for preschoolers often focus on incorporating these movements naturally into the child’s day to promote confidence and consistency in hand use.

Activity Ideas to Support Hand Dominance:

  • Stringing beads on a pipe cleaner
  • Using tongs or tweezers to pick up small objects
  • Scooping and pouring during sensory bin play
  • Drawing vertical, horizontal, and circular lines
  • Using stamps, stickers, or push pins
  • Cutting simple shapes with scissors
  • Posting coins into a slot with one hand stabilizing

We have many hands-on activities inside The OT Toolbox Membership which cover hand dominance and laterality through play. Think about cutting tasks, sensory bin materials, fine motor activities…the list goes on and on! Join The OT Toolbox Membership today to grab some items for your therapy toolbox.

Want to add this resource to your therapy toolbox so you can help kids thrive? Enter your email into the form below to access this printable tool.

This resource is just one of the many tools available in The OT Toolbox Member’s Club. Each month, members get instant access to downloadable activities, handouts, worksheets, and printable tools to support development. Members can log into their dashboard and access all of our free downloads in one place. Plus, you’ll find exclusive materials and premium level materials.

Level 1 members gain instant access to all of the downloads available on the site, without enter your email each time PLUS exclusive new resources each month.

Level 2 members get access to all of our downloads, exclusive new resources each month, PLUS additional, premium content each month: therapy kits, screening tools, games, therapy packets, and much more. AND, level 2 members get ad-free content across the entire OT Toolbox website.

Join the Member’s Club today!

Colleen Beck, OTR/L has been an occupational therapist since 2000, working in school-based, hand therapy, outpatient peds, EI, and SNF. Colleen created The OT Toolbox to inspire therapists, teachers, and parents with easy and fun tools to help children thrive. Read her story about going from an OT making $3/hour (after paying for kids’ childcare) to a full-time OT resource creator for millions of readers. Want to collaborate? Send an email to contact@theottoolbox.com.

Snowman Craft for Occupational Therapy

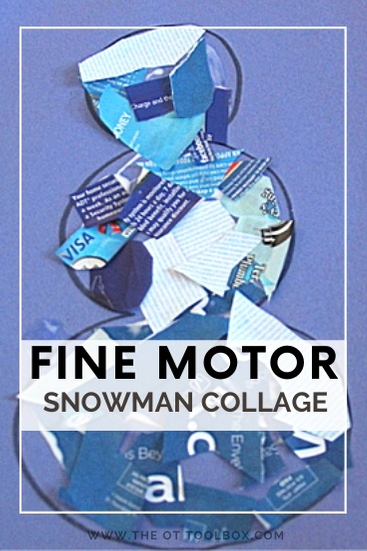
snowman collage using junk mail

Helping kids develop fine motor skills doesn’t require a bunch of fancy therapy equipment or carefully selected developmental toys. Here, I’ll show you how to use junk mail to help kids improve motor skills. This snowman collage is a winter craft that kids can use to work on areas like scissor skills, eye-hand coordination, visual motor skills, and hand strength!

You’ll also want to check out our other snowman crafts too. It’s a fun indoor activity for winter when the kids need something different to do. Grab that junk mail, we’re going to build a snowman!

A Fun and Easy Snowman Craft for Preschoolers and Toddlers

This snowman craft is as simple as it gets! It’s packed with developmental benefits. Using junk mail, old magazines, or recycled paper to rip and glue inside a snowman outline makes it the perfect easy snowman craft for young children.

I love using this snowman craft in occupational therapy. It’s a great Winter activity for kids because you can target several skill areas.

Whether you’re in a classroom, therapy session, or at home with toddlers, this no-prep activity can be adapted for various ages and skill levels. Just draw or print a snowman outline and let the tearing and gluing begin!

Supports Fine Motor Skills Through Paper Tearing and Gluing

Tearing paper works on small hand muscles, particularly the intrinsic muscles of the hands and fingers, which are essential for pencil grasp, cutting, and functional hand use. This snowman fine motor craft also promotes bilateral coordination. Kids use one hand to hold the paper and the other to rip it. The gluing portion supports hand-eye coordination and precision. These are foundational skills for writing, buttoning, and scissor use.

Why This is a Great Snowman Craft for Preschoolers and Toddlers

Preschoolers benefit from activities that are both simple and meaningful. This snowman craft for preschoolers offers a tactile, sensory-rich experience using familiar materials.

The tearing action is developmentally appropriate for toddlers, too, who may not yet have the skills for cutting but can participate in a creative process. For toddlers, you can provide pre-ripped paper chunks, while preschoolers can tear independently. It’s also a great way to reinforce body part vocabulary (“Let’s glue paper onto the snowman’s belly!”), introduce sequencing (first tear, then glue), and encourage attention span.

Snowman Crafts That Build School Readiness

Crafts like this are more than just cute, they support kindergarten readiness. The fine motor development, attention to task, visual-motor integration, and sequencing involved in completing this snowman all build the skills kids need for success in early childhood education.

For therapists, it’s an ideal winter-themed craft that supports multiple goal areas while still being fun and seasonal.

Extend the Snowman Craft idea

For added engagement, you can turn this into a math or handwriting activity by adding a number to each snowman and having kids glue that many pieces of paper.

Or, use a black marker to have kids write their names, a winter word, or a letter of the week on the snowman’s hat. Encourage creativity by offering different paper textures, colors, or even letting kids add googly eyes, cotton ball “snow,” or stickers to decorate their snowman.

Fine motor snowman collage using junk mail to help kids with motor skills and visual motor skills.

Snowman Collage Craft

We got a bunch of junk mail today with random neighborhood coupons inside… When my kids were younger, they loved to use scissors to practice cutting. And, actually, using the coupons found in junk mail to practice scissor skills, is actually a very functional and easy way to practice cutting along lines.

Junk mail is easily accessible and a material found in most homes. So, why not use it to help kids develop fine motor skills?

Junk Mail Craft

While we used junk mail to create a snowman collage, this craft technique can be used for any shape or theme.

Kids can use junk mail to work on snipping paper with scissors, eye-hand coordination, and visual motor skills. Try these strategies using junk mail:

  • Work on snipping along the edges of paper to create a fringe- This is a great bilateral coordination activity for preschool aged children and new scissor users.
  • Work on cutting along lines or coupons for early scissor skills- Cutting coupons or basic shapes is an early scissor skill activity. Junk mail often times includes flyers that are made from cardstock or heavy materials, as well as thinner materials, so it’s easy to progress through a graded activity to meet the needs of all levels of kids.
  • Cut out pictures- Use junk mail to cut out pictures or shapes. This is a nice way to work on simple to complex cutting skills. Progress from easy or basic shapes to more complex shapes.

For more scissor skills activities and how to progress along various grades, check out these Scissor Skills Crash Course.

To further along from basic scissor skills, use the junk mail materials to create a collage craft. You could use the steps below to make any shape or theme, making it a great addition to weekly therapy themes or preschool themes.

Snowman Collage

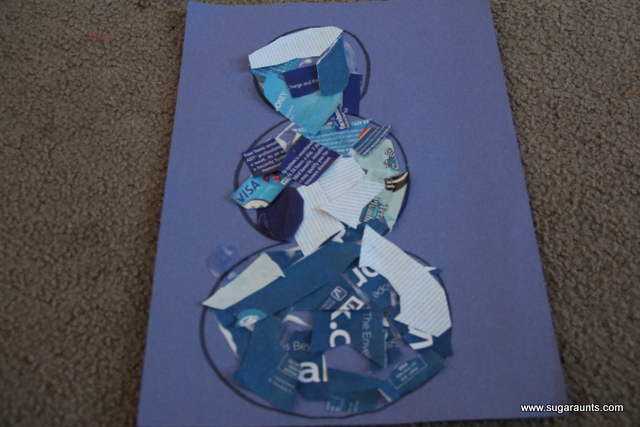
For our snowman craft, I first drew a snowman shape onto blue paper. This part could be graded as well. Use a larger shape for younger children or make a smaller shape for addressing more refined skills and precision.

Next, ask your child to cut out blue and white pieces of junk mail. This is where the craft gets open-ended. You can let kids snip random shapes, or you could request that they cut all squares. I love that this scissor skills craft fits with all levels and needs.

When kids are sorting through a stack of junk mail for specific colors, they are developing a variety of skill areas:

  • Eye-hand coordination
  • Visual scanning
  • Finger isolation (page turning)
  • Precision and refined grasp (manipulating one page at a time)
  • Visual attention and visual memory

Next, you will need squeeze glue from a bottle. As a pediatric occupational therapist, I love the use of a squeeze glue bottle over a glue stick for so many reasons. By using a squeeze glue bottle, kids are building refined use of skill areas:

  • Refined grasp
  • Hand strength
  • Eye-hand coordination
  • Arch strength
  • Open thumb web-space
  • Visual motor skills

You can focus on certain areas with use of a squeeze glue bottle by asking kids to place glue onto specific spots. Just use a marker to dot throughout the shape. Kids can then place glue dots on those specific spots.

If working with glue bottles is a helpful activity for the children you serve, you will love the Glue Spots Exercises in the Winter Fine Motor Kit.

Next, kids can place their junk mail pieces onto the glue and within the collage area to create the snowman.

Snowman collage craft using junk mail is a nice way to help kids work on fine motor skills using materials found in the home.
Use junk mail and squeeze glue bottle to help kids with fine motor skills using junk mail.

Ask kids to line up strait and curved edges along the curved lines of the snowman. This is a great way to work on visual motor skills.

To grade this activity to make it easier, make the lines of the snowman thicker with a black marker.

Cute junk mail collage snowman for preschoolers

You can see that we completed this craft on the floor, making it a shoulder strengthening activity as well.

Make a junk mail snowman craft to help kids with scissor skills and fine motor skills.

  That’s a pretty cute snowman…and great for practicing those snipping skills!

Want more ways to boost fine motor skills with a snowman theme or winter theme? The Winter Fine Motor Kit is on sale now!

winter fine motor kit

This print-and-go winter fine motor kit includes no-prep fine motor activities to help kids develop functional grasp, dexterity, strength, and endurance. Use fun, winter-themed, fine motor activities so you can help children develop strong fine motor skills in a digital world.

More than ever, kids need the tools to help them build essential fine motor skills so they develop strong and dexterous hands so they can learn, hold & write with a pencil, and play.

This 100 page no-prep packet includes everything you need to guide fine motor skills in face-to-face AND virtual learning. Includes winter themed activities for hand strength, pinch and grip, dexterity, eye-hand coordination, bilateral coordination, endurance, finger isolation, and more. 

Click here to grab the Winter Fine Motor Kit!

Colleen Beck, OTR/L has been an occupational therapist since 2000, working in school-based, hand therapy, outpatient peds, EI, and SNF. Colleen created The OT Toolbox to inspire therapists, teachers, and parents with easy and fun tools to help children thrive. Read her story about going from an OT making $3/hour (after paying for kids’ childcare) to a full-time OT resource creator for millions of readers. Want to collaborate? Send an email to contact@theottoolbox.com.


Exercises for Focus and Attention

exercises for focus and attention

Studies have shown that the average attention span has declined over the past two decades. If you work with kids, you probably know that they are on short form video content more than ever. Do you notice your own attention span when watching things like TikTok, YouTube shorts, etc.?

When children engage with this type of media for extended periods, their brains become accustomed to fast-paced content, making it more difficult to sustain attention during slower-paced activities like reading, listening to a lesson, or completing written work in school. So, for those of us working in schools, this is huge.

focus and attention in kids

Impact on Learning and Academic Performance

Sustained attention is crucial for classroom learning. It’s directly linked to working memory, executive function, and the ability to retain and apply new information. Students with reduced attention spans may struggle to follow multi-step directions, complete assignments, or remain engaged during instruction. They are also more likely to miss important details, make careless errors, and require repeated instructions, all of which can impact academic achievement.

What Can Educators and Parents Do?

Understanding the neuroscience of attention helps educators and caregivers design more supportive environments. The brain’s attentional systems are trainable, children can learn to regulate their focus with intentional strategies and consistent practice. This includes embedding movement breaks, visual schedules, and multi-sensory learning into daily routines. Strategies like mindfulness, physical activity, visual scanning games, and timed task intervals can improve attention regulation.

Parents and educators can also help by limiting screen time, especially fast-paced media, and by encouraging structured downtime, free play, and activities that require sustained engagement, such as puzzles, crafts, or outdoor exploration. Supporting executive functioning and self-regulation through occupational therapy and educational interventions can also make a significant difference. attention.

Exercises for focus and attention depend on the individual’s unique needs, but there are underlying areas that can support the cognitive skills needed for learning, safety, and behaviors.

Occupational therapy providers may use toys for attention because of the primary role that play has in the occupations of a child. Therapy providers can also offer their expertise in the role sensory motor development plays in daily tasks like learning and occupational performance.

While these exercises for focus and attention are not a cure-all (in fact, the tools you’ll find here are simply a therapy support), there should be a plan in place to support unique needs. Going through a few sensory motor exercises likely won’t result in improved attention and focus on their own.

Saying that, it’s important to recognize the whole-body component that impact focus and attention. There are many factors at play here…Ask any occupational therapy provider about how occupational therapy supports the whole being, not just the physical components or the cognitive components of function. It all goes together…

What Impacts Focus and attention in kids?

Some of the factors at play include:

Certainly, let’s delve deeper into each area and discuss how they impact children’s learning and behaviors. Critical thinking skills is another resource to check out on this topic.

  1. Neurological Factors:
  • Brain Structure and Function: The prefrontal cortex, responsible for executive functions, undergoes significant development during childhood. Immature executive functions may lead to difficulties in sustaining attention.
  • Neurotransmitters: Imbalances in neurotransmitters like dopamine can affect a child’s ability to stay focused. For example, lower dopamine levels may contribute to attention deficits.
  1. Developmental Factors:
  • Child Development: Attention evolves as children grow. Younger children may have shorter attention spans, gradually improving with age.
  • Executive Functions: Developing executive functions, such as working memory and inhibitory control, directly impact a child’s ability to pay attention and control impulses.
  1. Environmental Factors:
  • Stimuli: A stimulating environment with age-appropriate learning materials can enhance attention. Conversely, an overly distracting environment may hinder focus.
  • Noise Levels: Excessive noise, common in busy classrooms, can be a significant distraction for some children.
  1. Psychological Factors:
  • Emotional State: Emotional well-being is closely tied to attention. Children experiencing stress or anxiety may struggle with concentration, while positive emotions can enhance focus. An individual’s emotional state refers to their ability to notice and adjust for emotions, or the ability to self-regulate. This is a huge component in attention. We can’t focus or attend on a task or conversation when our emotions are in control.
  • Motivation: Intrinsically motivated children are more likely to engage and sustain attention during learning activities.
  1. Individual Differences:
  • Learning Style: Recognizing and accommodating diverse learning styles can optimize attention. For instance, visual learners may benefit from visual aids.
  • Attentional Control: Children with better attentional control can transition between tasks more efficiently, positively impacting learning.
  1. Health Factors:
  • Sleep: Inadequate sleep affects cognitive performance. Children who don’t get sufficient sleep may exhibit difficulties in attention, memory, and behavior.
  • Nutrition: Proper nutrition, including omega-3 fatty acids found in fish, has been linked to better cognitive function in children.
  1. Technology Use:
  • Screen Time: Excessive use of screens, particularly in younger children, may contribute to shorter attention spans. Monitoring and regulating screen time are crucial for healthy cognitive development.

Understanding these factors is vital for educators, parents, and healthcare professionals working with children. Interventions should be tailored to address the specific needs of each child, considering their unique combination of factors.

It’s important to note that these factors often interact, and a holistic approach considering multiple aspects is crucial in interventions related to attention and focus.

One tool in our therapy toolbelt is exercises to improve attention and focus.

Why use exercises for focus and attention?

Now that we’ve explored what all goes into focus and attention in kids, let’s take a look at one support strategy.

Using physical exercises to improve focus and attention links the sensory, motor, and cognitive components. Think about it this way: after a big lunch, you might feel sluggish and unmotivated. That’s interoception at work.

We all experience this feeling, and our kids are no different. The fullness feeling after a big meal is just one example, though. There can be many things that lead to inattention or difficulty focusing.

Paying attention is hard for some kids.  There are a few different reasons for inattention during school work or homework, or when just participating in listening activities like conversations or reading.  

Learning disabilities, distractibility, poor core body strength, an overload of visual stimulation, poor working memory, ineffective executive functioning skills,  and even temperament can contribute to poor attention (among other reasons).


Numerous diagnoses like ADHD, Autism, sensory processing disorders, and more also have symptoms aligned with inattention.  

But sometimes, attention problems can be confused with diagnoses typically associated with poor attention.  Sometimes, the reason for trouble paying attention is something else.

Whatever the reason, there are easy ways to help your child pay attention. Today, I’ve got a simple way to play and work on core muscle strength and proprioceptive input through a sensory movement activity.  This super easy movement activity is so much fun that your kids will want to play again every day.  And, that’s a good thing, because the movement, proprioceptive input, and core strengthening involved will help them work toward improved attention.

Do you know a little one who can’t focus on school work?  Someone who is always distracted or forgets details of a task?  A little one who starts a project but easily gives up, never to return to the activity?  A student who is always daydreaming or wiggling in their seat and misses key information?

The DIY fidget toy is one type of “exercise” that supports attention.


Many children have trouble with paying attention and it can seem like it is only getting worse.

Attention and the Pyramid of Learning

If you take a look at the Pyramid of Learning, by Williams and Shellenberger, you will see that the base of the pyramid is the sensory systems.

Sensory Systems:

The next level of the Pyramid, which is labeled Sensory Motor Development is some of the components of attention and focus.

Sensory Motor Development:

  • Postural Security (Posture and control)
  • Bilateral Body Awareness (dominant side, coordination)
  • Motor Planning (complex and new activities)
  • Body Scheme (body structre and awareness)
  • Reflex Maturity (elimination of primitive reflexes)
  • Ability to Screen Input (selectively take in stimuli)

This last bullet point is extremely relevant when it comes to filtering out information and identifying relevant and important information. This is the essence of attention and focus. It’s neat to see that all of the motor skills in this level are at the same consideration as this screening skill, which is a cognitive ability. There is true connection between the motor and the cognitive.

The next level of the pyramid also has a huge role in attention and focus and again includes motor skill areas. This level is labelled as Perceptual Motor Development.

Perceptual Motor Development components include:

  • Eye-hand coordination
  • Ocular Motion Control
  • Postural Adjustment
  • Auditory Language Skills
  • Visual Spatial Perception
  • Attention Center Functions

Again, the last component is a huge red flag because it’s labelled as the very skill that we’re covering in this article: Attention. The motor and physical skills in this level are again related to the jobs of the attention focus center.

At the very top of the pyramid is the cognition and intellect.

Cognition and intellect includes:

  • Daily Living Activities
  • Behavior
  • Academic Learning at the very pinnacle of the pyramid

It’s interesting to note at this point that the sensory base supports the sensory motor skills (attention screening), which supports the perceptual motor skills (attention functions). The cognitive skills are supported by all of these other areas. In other words, you can’t have learning, daily functioning, and behaviors without all of the rest of the underlying skills. Powerful stuff!

Sensory and Attention in Learning

We talked about how sensory is an underlying skill of motor, perceptual skills, cognition, and function. So, we can see that sensory integration challenges negatively impact learning, including attention and focus.

Sensory integration interventions, especially in relation to the vestibular sensation, improves academic scores in children with learning disorders. Additionally, there is a relationship between academic performance and sensory seeking/low energy behaviors. (Ayres, 1972; Bar-Shalita, Vatine, & Parush, 2008; Chien et al., 2106; Polatajko, Law, Miller, Schaffer, & Macnab, 1991).

Other research has determined that physical activity and learning have improvements in attention, executive function, information processing speed, academic scores, and on-task behavior.

For individuals in a learning environment, a sensory ball, or stability ball (therapy ball) is a flexible seating option that provides physical activity (CDC, 2010; Erwin, Fedewa, Ahn, & Thorton, 2016; Mead, Scibora, Gardner, & Dunn, 2016; Kahn & Hillman, 2014; Tomporowski, Davis, Miller, & Naglieri, 2008).

One research review on the use of therapy balls as a flexible seating option found that some populations, including ADHD, found that there was increased engagement and in-seat behavior when a therapy ball was used as a seating option. And, this review found that improved attention, on-task behavior, in-seat behaviors, and improved reaction time occurred when a stability ball seating option was used. (Fedewa & Erwin, 2011; Messinger, 2014; Schilling & Schwartz, 2004; Schilling, Washington, Billingsley, & Deitz, 2003).

exercises for focus and attention

Next, we’re listing out some of our favorite exercises for focus and attention that we use in occupational therapy. The main goal of these exercises is more than focus or paying attention. What we’re actually doing is regulating the nervous system, helping with sensory dysregulation, or offering a calming proprioceptive or vestibular input. Basically, we want to get the body out of a fight or flight state and into a calm, organized, and ready state.

Here’s why that is important: calm and ready means the child is experiencing a meaningful task (occupation) and vice versa.

When I explain this to the child’s parents or teacher, I tell them that when a child is not genuinely engaged, the brain shows only modest activation. That means they aren’t actively participating in a task…and it’s highly likely that little to no learning occurs!

Basically, I explain polyvagal theory and relate it to focus on an activity or a learning task.

But when the child is consciously engaged and paying attention, you could hypothetically look inside their brain at that moment and see brain activity happening.

Proprioception and Attention


Proprioceptive input adds deep pressure to the body’s muscles and joints for a calming and organizing input.  Using a large ball like this one can help some children with inattention issues by promoting a postural reaction to a moving surface and heavy work input.

A calming corner can be a space to use these types of exercises.

Attention and Focus Exercise

Attentional Flexibility, also known as Flexible Thinking, refers to the capacity to shift focus during a task, contemplate things from a novel or diverse perspective, adapt to alterations, adjust in problem-solving scenarios, and integrate fresh information into plans or ideas. This cognitive skill involves various aspects of executive function (EF) such as working memory, attention, shift, praxis, metacognition, and more.

Here’s one example of a mental flexibility exercise:

  1. Copy or repeat a series of letters: tspjkl.
  2. Add these sets of numbers: 3 and 1, 6 and 2, 8 and 4.
  3. Subtract the paired numbers.
  4. Arrange playing cards facing up on the surface: Flip over all the cards with even numbers.
  5. Next, flip over all the cards with odd numbers.

Observe for seamless transitions between tasks. Keep a record of the number of errors. Document instances of verbal prompts (e.g., “Have you completed the task?”) and physical prompts (e.g., pointing gestures).

This task is designed to assess and enhance attentional flexibility, a crucial component in cognitive functioning.

stability ball exercises for focus and attention

Sensory Ball Exercises for Focus and Attention

One technique that is often recommended by Occupational Therapists for some children is the use of a large therapy ball for sitting and movement.  The therapist can guide the child in specific activities and exercises.  For our activity, we used a large and partially deflated Playground Ball similar to this one
for a simple sensory movement.

We’ll go through a few different exercises to improve focus and attention below. Some of these are sensory motor exercises, designed to get the individual to a calm and regulated state.

Others are cognitive exercises that support attention and focus.

Sensory Ball Activity for Attention

You can use the proprioceptive and vestibular input of a sensory ball or therapy ball in core body strengthening.

A sensory ball is also known as a stability ball, a therapy ball, or a yoga ball. Essentially, we are talking about a large ball that you can sit on or use in movement activities.

When it comes to theory, a stability ball or a sensory ball is used as a tool in offering sensory input. Sensory input means there is nourishment for the brain, according to Ayres sensory integration theory. This occurs through the sensory systems: tactile, proprioceptive, vestibular.

A tool like a stability ball can provide input. Ayres goes on to say that sensory integration is the “organization of sensation for use”. In our case, the use we’re talking about is attention during learning or functional participation.

Inattention can be a result of core weakness of the body.  The core is the child’s trunk and midsection and is needed for support and ongoing positioning in functional tasks.  

With a weak core, a child may slump in their seat, or have trouble maintaining and changing positions.  Exercises like these with a ball can help work on the core muscle strength to help the child focus and attend while writing, cutting, and learning.

Incorporating stability ball exercises that leverage both vestibular and proprioceptive input can be beneficial for promoting balance, gross motor coordination, and overall stability.

Here are some therapy ball exercises that integrate these sensory systems of proprioception and vestibular input:

  1. Seated Bouncing:
    • Sit on the stability ball with feet flat on the ground.
    • Gently bounce up and down while maintaining a stable posture.
    • This activity provides both vestibular and proprioceptive input.
  2. Ball Rolls:
    • Lie on your stomach over the stability ball.
    • Place your hands on the floor and use them to roll the ball forward and backward.
    • The rolling motion engages both vestibular and proprioceptive systems.
  3. Balance Challenge:
    • Stand with one foot on the stability ball.
    • Try to maintain balance for a set duration.
    • This exercise combines proprioceptive and vestibular challenges.
  4. Sitting and Reaching:
    • Sit on the stability ball and reach for objects placed at different heights.
    • This engages both proprioception and vestibular input as you shift your body position.
  5. Stability Ball Squats:
    • Stand with the stability ball between your lower back and a wall.
    • Perform squats by bending your knees and lowering your body.
    • This exercise provides proprioceptive input while enhancing stability.
  6. Rolling Planks:
    • Assume a plank position with your hands on the stability ball.
    • Roll the ball in different directions while maintaining a stable plank.
    • This challenges both vestibular and proprioceptive systems.
  7. Stability Ball Circles:
    • Sit on the ball and make circular movements with your hips.
    • This activity engages the vestibular system while promoting core stability.
  8. Knee Tucks:
    • Start in a plank position with your shins resting on the stability ball.
    • Pull your knees toward your chest, engaging both core muscles and proprioceptive input.

Super Easy and Fun Movement Exercises

All you need for this activity is a large ball. You could use a Balance Ball
or just grab a bouncy playground ball like this one from your child’s outdoor play equipment.  

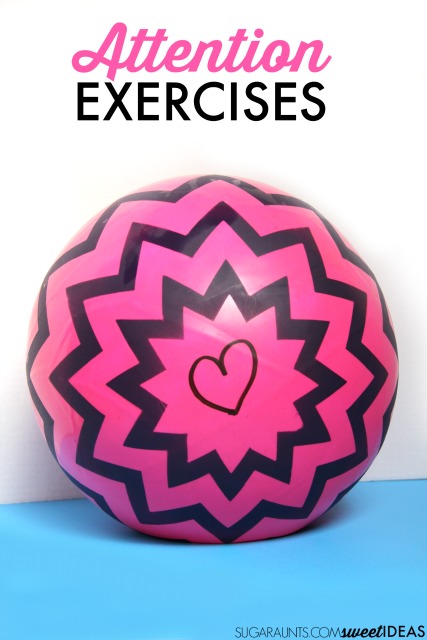
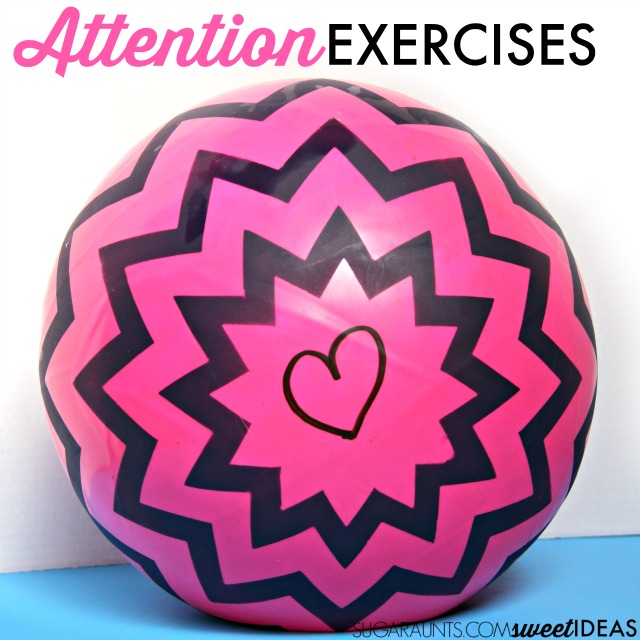
We partially deflated our ball and drew a heart on one side using a dry erase marker.  The heart provided a visual prompt for where to sit or push.  It made a fun activity even better as we tried to squish the heart!

Use the ball to sit, bounce, and squash for proprioceptive input and strengthening.

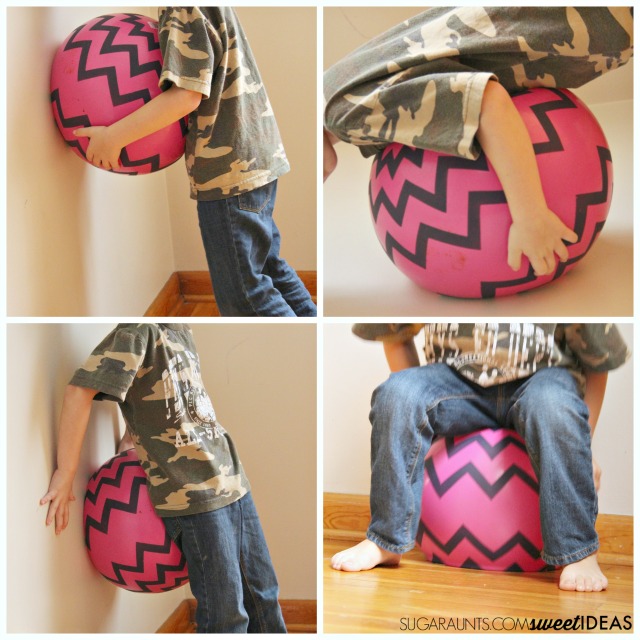
A few core exercises that you can try:

  • Sit on the ball and bounce.
  • Sit on the ball near a wall and have your child pick up their feet.  Use the wall to stabilize.
  • Lay belly down and roll side to side.
  • Lay belly down and roll the ball front to back.
  • Lay belly down on the ball and bounce.
  • Squash the ball against the wall with the child’s chest.
  • Squash the ball against the wall with the child’s back.
  • Stand on the ball against a wall, using the wall for support (use close adult supervision and contact for this one.)

Exercises for Self-Awareness Skills

Another type of exercise for focus and attention are those that offer self-awareness skills. This includes body awareness but also the ability to be aware of listening skills (auditory processing) and speaking skills. This includes the ability to attend to receptive language and carry that attention and focus over to expressive language.

These self-awareness skills include exercises that include crossing the midline. There are many self awareness games as well that support development of this area.

When we are involved in a conversation or other back and forth communication that uses both external and internal feedback, we have active listening. This means we don’t “drift off” during a conversation or learning experience where we need to listen and take in information, and then respond.

You probably can remember a time when you were supposed to be listening to an in-service or a lesson and you’ve felt your eyes and mind glaze over. This happens when we lose attention and drift off in focus. However for students that have this happen on a common basis, we have learning and comprehension issues.

The part of attention that allows us to listen, comprehend, and respond (either with actions or words) is a feedback-feedforward loop. It involves internal thoughts and responses as well as external motor responses. This involves self-talk as well.

Active Listening Exercises

While these exercises are more of an auditory processing activity, you can incorporate movement too. This involves whole body learning.

Auditory attention is a sub-component of attention.

These active listening exercises can be graded up or down, depending on the needs of the individual.

  1. Sound Discrimination Games:
    • Play games that involve distinguishing between different sounds. For example, you can use everyday objects that make distinct sounds and ask the child to identify them.
  2. Auditory Memory Challenges:
    • Create listening challenges that require the child to remember sequences of sounds or words. Start with short sequences and gradually increase the complexity.
  3. Musical Activities:
    • Engage in musical activities like rhythm games, clapping to a beat, or playing simple instruments. These activities can enhance auditory processing and attention.
  4. Listening to Instructions:
    • Provide verbal instructions for various tasks and ask the child to follow them. This can be done through games or daily activities, reinforcing both listening skills and attention. This can include games like Simon Says.
  5. Storytelling with a Twist:
    • Tell a story with pauses and ask the child to fill in the missing parts. This not only improves auditory processing but also encourages active listening. You can also do this with nursery rhymes or fill in the blank song lyrics.
  6. Echo Games:
    • Create echo games where the child repeats patterns of sounds or words. This helps in honing auditory discrimination skills.
  7. Listening Walks:
    • Take the child on a listening walk outdoors. Encourage them to focus on and identify different sounds in their environment. This supports auditory discrimination skills.

 
Try these sensory movement activites and exercises for helping kids learn to pay attention.  Easy ball therapy exercises using proprioception and core muscle strengthening with a frugal and easy alternative to a therapy ball.  Occupational Therapy tips for kids.


Full disclosure: This post contains affiliate links.


Try these sensory movement activites and exercises for helping kids learn to pay attention.  Easy ball therapy exercises using proprioception and core muscle strengthening with a frugal and easy alternative to a therapy ball.  Occupational Therapy tips for kids.


Try these sensory movement activites and exercises for helping kids learn to pay attention.  Easy ball therapy exercises using proprioception and core muscle strengthening with a frugal and easy alternative to a therapy ball.  Occupational Therapy tips for kids.
 
Other exercises for focus and attention can be specifically play-based. Here are some ideas: 
 
 
Coke bottle water xylophone Teach kids to tie their shoes the fun way egg carton craft Creative Pencil Grasp Activities Organization, Attention, and Sensory Processing

Colleen Beck, OTR/L has been an occupational therapist since 2000, working in school-based, hand therapy, outpatient peds, EI, and SNF. Colleen created The OT Toolbox to inspire therapists, teachers, and parents with easy and fun tools to help children thrive. Read her story about going from an OT making $3/hour (after paying for kids’ childcare) to a full-time OT resource creator for millions of readers. Want to collaborate? Send an email to contact@theottoolbox.com.

What is a Sensory Diet?

what is a sensory diet

Many times, parents are told that their child with sensory needs would benefit from a sensory diet. Most of the time, they respond with “what is a sensory diet?!” In this article, we’ll be talking a bit about what a sensory diet is and how it can be beneficial to kids with sensory needs. You may have seen some of our recent posts here on The OT Toolbox about Sensory diet activities for the classroom or sensory diet activities for outdoors that may give you a better understanding of some of the sensory activities that can be used within a sensory diet. 

A sensory diet is not just for kids! A sensory diet for adults is just as powerful in supporting regulation needs for individuals of all ages.

Inside The OT Toolbox Membership (Level 2), we have a page dedicated to sensory diet materials. This includes things like gross motor cards, sensory bin materials, self-regulation tools like brain breaks and emotional regulation strategy activities. You’ll also find materials like Yoga cards and handouts to help with making the home or classroom more sensory friendly.

The reason we have such a wide variety of sensory diet materials in the membership is because there really is an endless list of ways to support an individual with a “sensory diet”. I actually like to call it a sensory lifestyle as we explain in our book, The Sensory Lifestyle Handbook. This book is also inside The OT Toolbox Membership (Level 2).

what is a sensory diet

What is a sensory diet?

Often times, when you mention the term “sensory diet”, individuals respond with a comment about food or a eating healthier. A sensory diet has nothing to do with food or restricting foods, or eating healthier!  

A sensory diet can be described this way: 

A sensory diet is a set of activities that make up a sensory strategy and are appropriate for an individual’s needs.  These are specific and individualized activities that are scheduled into a child’s day and are used to assist with regulation of activity levels, attention, and adaptive responses. 

These are organizing activities or sensory input that helps to regulate the nervous system. Our resource on the limbic system and fight and flight of the nervous system explain this more.

You’ll also want to read more about emotional regulation and function.

Sensory diet activities are prescribed based on the individual’s specific sensory needs.  

Just as there are no two people that are alike, there are no two sensory diets that are alike. 

Sensory diets are a commonly known strategy for addressing sensory needs. We’ve seen sensory diets implemented in sensory spaces in the school environment. Read our blog posts about creating a sensory diet on a budget and calm down corners for more information.

The term “sensory diet” was coined by Patricia Wilbarger in 1984 to
explain how certain sensory experiences can improve occupational performance and help to remediate disruption of the sensory processing systems. 

A sensory diet is a means to adjust sensory input in relation to an individual’s needs. A sensory diet is a meaningful set of strategies for developing sensory programs that are practical, carefully scheduled, and controlled in order to affect functioning. 

Sensory diet activities provide appropriate sensory input based on the needs of an individual. 

Just as a healthy diet consists of a variety of foods, a sensory diet is a balanced set of sensory information that allows an individual to function.  A person cannot survive on broccoli alone. Similarly, a child cannot function with only one type of sensory
activities.

Sensory diets are not just for kids with identified sensory issues.  We all
need a diet of sensory input.  Most people naturally participate in conscious or subconscious acts that meet their specific needs.  

Think about the student who taps their pen against the desk while struggling on an exam.  That’s a sensory strategy.

You might pace the floor while on the phone with your child’s pediatrician.  That’s a sensory strategy.

You might see a teenager who jiggles her leg while watching a movie.  That’s a sensory strategy. 

We all have a big yawn every once in a while. That’s a sensory strategy. 

Our bodies and minds instinctively know that varying sensory input allows us to function appropriately.  Neurotypical children naturally seek out a variety of proprioceptive, vestibular, and tactile sensory input.  As a result, they are able to accept and regulate other sensory input such as a seam in their shirt, a lawnmower running outside their classroom, or the scent of chicken cooking in the kitchen.

Some individuals lack the ability or support to perform these sensory strategies without interventions. 

We’ve talked about the goals of a sensory diet before here on The OT Toolbox. The goals of a sensory diet are very important. 

Equally important is the development of sensory diets. A sensory diet needs to be specific with thoughtful regard to timing, frequency, intensity, and duration of sensory input.

Sensory diets should be created by an occupational therapist who evaluates the child or individual and ensures carryover, and response to sensory input.

These vestibular sensory diet activities can give you an idea of the type of activities typically found in a sensory diet…remembering that each child’s sensory diet is specific to their needs. 

what is a sensory diet

Why use a sensory diet?

Sensory diets can be used to address the following challenges, using specific sensory input:

  • Emotional overreaction
  • Meltdowns
  • Aggression
  • Hyper-attention
  • Difficulty with transitions
  • Inattention
  • Sleep issues
  • Impulsivity
  • Sensory-seeking behaviors
  • Sensory-resisting behaviors
  • Resistance to textures/food/clothing

Poor social Interactions 

If you are interested in learning more about sensory diets and how they can be used to create a sensory-enriched life in all aspects of a child and family’s day, you will want to watch for The Sensory Lifestyle Handbook.

Sensory diets and specific sensory input or sensory challenges are a big part of addressing sensory needs of children who struggle with sensory processing issues. Incorporating a schedule of sensory input (sensory diet) into a lifestyle of naturally occurring and meaningful activities is so very valuable for the child with sensory needs. 

That’s why I’ve worked to create a book on creating an authentic and meaningful sensory lifestyle that addresses sensory needs. The book is now released as a digital e-book or softcover print book, available on Amazon. 

The Sensory Lifestyle Handbook walks you through sensory diet creation, set-up, and carry through. Not only that, but the book helps you take a sensory diet and weave it into a sensory lifestyle that supports the needs of a child with sensory processing challenges and the whole family.

Get The Sensory Lifestyle Handbook here.

Here are more sensory activities that may help with sensory needs or for a sensory play idea.

Snowball Shot Put Vestibular Activit

Vestibular Activity Indoor Winter Frisbee 

Backyard Vestibular Activities for Sensory Play

Ice Wobble Disc Vestibular Activity


Wondering what a sensory diet is? This article explains what exactly a sensory diet looks like and how a sensory diet is used to help kids with a variety of sensory-related challenges, using sensory diet activities.

Colleen Beck, OTR/L has been an occupational therapist since 2000, working in school-based, hand therapy, outpatient peds, EI, and SNF. Colleen created The OT Toolbox to inspire therapists, teachers, and parents with easy and fun tools to help children thrive. Read her story about going from an OT making $3/hour (after paying for kids’ childcare) to a full-time OT resource creator for millions of readers. Want to collaborate? Send an email to contact@theottoolbox.com.

What to Document and Observe When Fine Motor Progress Stalls

Occupational therapy practitioners focus on fine motor skills in some aspect in almost every therapy session. Sometimes fine motor development stalls or slows down. But we as therapists have to know what to observe when fine motor development is slow, and how to help the child progress in their goals. This is one reason we put together the resource: Yearlong Fine Motor Development and Data Collection Bundle.

We’re also going to cover a documentation tip for how to document a therapy session when fine motor skill development seemingly stalls. This is a huge question that comes up for therapists! Scroll further to the bottom for that information or click here.

Parents often reach out with similar concerns:

“My child’s pencil grasp looks better one week and worse the next.”
“We’ve been working on hand strength, but progress feels inconsistent.”
“Why does my child seem to regress when tasks get harder?”

These questions are common, and they are understandable. Fine motor development is not always linear. Skills such as grasp, hand strength, and tool use often change based on task demands, fatigue, motivation, and underlying developmental factors.

When progress appears to stall or fluctuate, it does not necessarily mean something is “wrong.” More often, it means the task, environment, or expectations need closer observation. Understanding what to look for can help caregivers and professionals support fine motor development in a way that is more effective, age-appropriate, and meaningful.

This post breaks down common reasons fine motor progress can feel inconsistent and outlines key things to observe when skills like pencil grasp or scissor use seem stuck, so support can be adjusted with confidence and clarity.

Fine motor progress does not usually “stop” without a reason. When skills such as pencil grasp, scissor grasp, or tool use appear stuck, it is often a signal that something underlying the task needs closer observation.

Common Reasons Fine Motor Progress Stalls

Let’s talk about some of the reasons why fine motor progress might stall or stop developing at a constant and consistent rate.

1. The Task Demand Is Mismatched

Progress often stalls when the task is:

  • Too difficult for the child’s current skill level
  • Too repetitive without variation
  • Focused on the end product rather than the movement process

For example:

  • Expecting a functional tripod grasp before adequate hand strength or separation of the sides of the hand is present
  • Introducing scissors that are too large or too stiff

2. Foundational Skills Are Still Developing

Pencil and scissor skills rely on multiple underlying components, including:

If these foundations are still emerging, grasp patterns may fluctuate or regress.

3. Fatigue or Endurance Is Limiting Performance

A child may demonstrate an appropriate grasp briefly but lose it as the task continues.

As an occupational therapist, you’ll want to watch for signs of fine motor fatigue. You can document these things if you see them. Signs to watch for:

  • Frequent hand switching
  • Increased pressure or excessive force
  • Slower task completion
  • Avoidance behaviors

This often indicates endurance challenges rather than a lack of skill.

4. Sensory or Motor Planning Factors Are Interfering

So that means that we might see difficulties with tasks that can impact how tools are held and manipulated, especially during novel or multi-step tasks. This might show up in an activity in different ways for each child. You’ll want to take note of areas like:

  • Tactile discrimination
  • Proprioceptive feedback
  • Motor planning

5. The Task Lacks Meaning or Engagement

Fine motor practice that feels repetitive or disconnected from play can reduce motivation and limit carryover.

Engagement matters. Children often show better skill use when activities feel purposeful or playful.

What to Observe When Progress Stalls

Instead of focusing only on what the grasp looks like, observe how the child interacts with the task.

So, in therapy sessions, you’ll want to make note of specific things that are happening in the activity. Key observation areas include:

During Pencil or Tool Use

  • Wrist position (neutral, flexed, extended)
  • Stability versus movement at the shoulder and elbow
  • Use of helper hand
  • Pressure control
  • Ability to adjust grip mid-task

During Cutting Tasks

  • Scissor orientation
  • Use of both hands together
  • Ability to follow lines without rushing
  • Hand fatigue or frequent pauses

Across Tasks

  • Consistency across different activities
  • Changes over time or with fatigue
  • Differences between structured and play-based tasks

How to Document When Fine Motor Progress Stalls

Next, let’s talk about how to document fine motor skills, especially when we are seeing a stop in fine motor progression of skill development.

When progress feels unclear, consistency in documentation becomes critical.

Rather than constantly changing tasks, using the same or similar task formats across time allows you to observe subtle changes that might otherwise be missed.

Effective Documentation Includes:

  • Observing the same skill across multiple sessions
  • Noting changes in endurance, control, and efficiency
  • Tracking performance under similar task demands

How the Yearlong Fine Motor & Data Collection Bundle Supports This

The monthly data collection task sets allow therapists to:

  • Screen and observe skills using seasonally themed but consistent tasks
  • Track handwriting, scissor use, letter and number formation, pre-writing lines, and self-care skills across time
  • Reduce variability in data caused by constantly changing materials

This supports clearer clinical reasoning and easier progress monitoring.

Using Progressive Tasks to Support Development Through Play

Progression of skills does not always mean making the task harder or more detailed (like a cutting shape for example). Rather, we would grade up or grade down the task because each child is different. So we can take the same activity and present it to each child in a slightly different way, and that is appropriate for the individual because you’re targeting their specific needs. This is what we mean by using the just right challenge.

The seasonal fine motor kits are intentionally structured so similar activity types appear across themes, allowing for natural progression.

Examples of Grading Down

  • Use larger cutting shapes before smaller or curved lines
  • Shorten pencil control strips
  • Use thicker tools or adaptive scissors
  • Reduce visual complexity

Examples of Grading Up

  • Increase cutting precision or complexity
  • Add speed or endurance expectations
  • Introduce smaller writing spaces
  • Combine fine motor tasks with cognitive or visual demands

Incorporating Play in an Age-Appropriate Way

Play-based fine motor development does not mean unstructured or random.

So that means we might try things like:

  • Using engaging materials (seasonal crafts, games, manipulatives)
  • Embedding repetition within variety
  • Allowing choice while maintaining skill targets

The seasonal kits support this by offering:

  • Familiar activity formats
  • New visuals and themes
  • Opportunities to repeat skills without boredom

Putting It All Together

When fine motor progress stalls:

  1. Look beyond the grasp itself
  2. Observe endurance, stability, and coordination
  3. Use consistent tasks to track change
  4. Adjust task demands rather than pushing repetition
  5. Embed skill practice within meaningful, playful activities

Progress often resumes when the task, environment, and expectations align with the child’s current abilities.

If you’re looking for a way to support both fine motor intervention and consistent data collection across the year, the Yearlong Fine Motor Planning & Data Collection Bundle was designed to help streamline this process.

how to document fine motor skills when progress stalls

How to Document Therapy Sessions When Fine Motor Progress Is Slow

A Clinical Perspective for New Practitioners: This information below on how to document progression stalls is available as a therapy resource in a printable PDF format. The printable has additional information, along with examples, and is available as a practitioner handout resource inside The OT Toolbox Membership.

As a new practitioner, it can feel uncomfortable to document sessions when fine motor skills are not progressing as quickly as expected. It is common to worry that documentation must show measurable gains at every session. In reality, fine motor development is rarely linear, and periods of slow progress are both expected and clinically meaningful.

Your role during these times is not to force progress, but to observe carefully, document honestly, and use that information to guide next steps.

Shift Your Focus From Outcomes to Skill Components

When a child is not meeting a fine motor goal, step back and document the components of the skill, rather than the final outcome.

For example:

  • Instead of focusing on whether a child achieved a functional pencil grasp, document wrist position, finger movement, and ability to maintain grasp during the task.
  • Instead of whether cutting was “successful,” document how the child stabilized the paper, oriented the scissors, and managed bilateral coordination.

These observations often reveal emerging skills that are not yet visible in the final product.

Look for Small, Meaningful Changes

Progress may show up as:

  • Increased tolerance for fine motor tasks before fatigue
  • Improved postural stability during seated work
  • Fewer verbal cues needed to initiate or continue a task
  • Improved consistency, even if the grasp still changes
  • Better recovery when a task becomes challenging

These changes matter. They indicate that the child is developing the foundational skills required for future progress.

Document them clearly.

Use Consistent Task Formats to Identify Patterns

When progress feels unclear, avoid changing activities every session. Using consistent task formats across time allows you to see patterns related to endurance, attention, and motor control.

This is especially important for new therapists, as it:

  • Reduces uncertainty in clinical reasoning
  • Makes documentation more objective
  • Helps you justify grading decisions

Consistent tasks make it easier to compare performance week to week, even when growth is subtle.

Be Specific About Supports and Adaptations

Always document:

  • The level of assistance provided
  • The type of cues used (verbal, visual, tactile)
  • Materials or adaptations that improved performance
  • Environmental factors such as seating, table height, or task setup

This information helps differentiate between a skill deficit and a task demand mismatch. It also supports continuity of care if another provider works with the child.

Use Strength-Based, Developmentally Appropriate Language

Avoid framing slow progress as failure.

Instead of:

  • “No improvement noted”

Consider:

  • “Demonstrates emerging skills with…”
  • “Benefits from continued support for…”
  • “Shows increased consistency when tasks are graded…”

This language reflects developmental progression and supports collaborative communication with caregivers and team members.

Document Areas of Need With Clinical Intent

It is appropriate—and necessary—to document ongoing challenges. The key is to connect them to clinical reasoning.

For example:

  • “Continues to require support for intrinsic hand strength, impacting endurance during fine motor tasks.”
  • “Difficulty maintaining grasp noted during longer tasks, indicating a need for continued endurance-building activities.”

This approach shows that you are using observation to inform intervention, not simply reporting limitations.

Use Structured Data to Support Your Clinical Judgment

Structured data collection tools can be especially helpful when progress is slow. They allow you to:

  • Track the same skills over time
  • Reduce variability caused by changing activities
  • Support your observations with consistent task performance

Monthly fine motor screening and data collection tasks provide a reliable way to capture subtle improvements in control, efficiency, and endurance.

Remember: Your Documentation Reflects Clinical Reasoning

Documentation is not a report card. It is a reflection of your clinical thinking.

When fine motor progress is slow, strong documentation:

  • Shows that you are observing intentionally
  • Demonstrates skilled analysis of performance
  • Guides next intervention decisions
  • Communicates clearly with caregivers and team members

Learning to document these moments confidently is part of becoming a strong occupational therapist.

Looking for a consistent way to support fine motor skills all year?
This yearlong fine motor system includes seasonal activity kits and monthly data collection tools to support planning and progress monitoring.

If fine motor planning and data collection feel overwhelming, you’re not alone.
This done-for-you yearlong bundle organizes seasonal activities and monthly screening tools in one system.

Get the Yearlong Fine Motor and Data Collection Bundle today!

Colleen Beck, OTR/L has been an occupational therapist since 2000, working in school-based, hand therapy, outpatient peds, EI, and SNF. Colleen created The OT Toolbox to inspire therapists, teachers, and parents with easy and fun tools to help children thrive. Read her story about going from an OT making $3/hour (after paying for kids’ childcare) to a full-time OT resource creator for millions of readers. Want to collaborate? Send an email to contact@theottoolbox.com.

Polar Bear Therapy Slide Deck

Polar bear therapy activities

This week, we’re all about the polar bears. You’re going to love this polar bear therapy slide deck, and actually, my kids are loving it, too! The polar bear gross motor activities go well with an arctic animal theme. We’ve been using the gross motor activities as a warm-up for the Winter Fine Motor Kit and all of the winter activities in that resource. You’ll want to grab this therapy slide deck to get your new year off to a great start and get the kids moving with whole-body movements.

Why Use Polar Bear Gross Motor Activities in Therapy or the Classroom?

Polar bear–themed gross motor activities are a fun and motivating way to target developmental skills like balance, postural control, coordination, and core strength. These types of movement-based exercises engage the whole body while also fostering attention and focus.

Because the activities are winter-themed and playful, they are ideal for use during the colder months when outdoor movement breaks may not be possible. This makes the slide deck perfect for indoor recess, brain breaks, and OT sessions that need a high-engagement activity for younger learners.

Supports Direction Following and Body Awareness

This movement-based slide deck also encourages direction following, body awareness, and spatial orientation. These are key components of self-regulation and classroom participation. Children are challenged to move like a polar bear, crawl, stomp, or balance in ways that require them to think about where their body is in space.

These foundational skills are part of a child’s proprioceptive system, which plays an important role in coordination and calm behavior. Adding themed visuals and verbal prompts can help children improve motor planning while making learning fun.

Integrating the Slide Deck into the Daily Routine
The polar bear gross motor activity slides can easily be incorporated into daily routines in the classroom, therapy clinic, or at home. Use the slides as a warm-up before handwriting or seated work, as a structured movement break between transitions, or as a full gross motor circuit during group therapy. These fun exercises promote active learning and help reset the nervous system after long periods of sitting. They also support core strength, which is critical for seated posture, attention, and fine motor control.

Winter-Themed Movement to Support Learning
A winter-themed movement activity like this polar bear deck is a targeted tool to promote gross motor development in a way that’s engaging and meaningful. With classroom demands rising and kids sitting for longer stretches of time, intentional movement breaks are more important than ever. Movement with purpose, especially when tied to visual supports and themed play, can boost learning outcomes, reduce sensory overload, and improve participation.

Free gross motor therapy slide deck with a polar bear theme. Use in virtual therapy sessions or as a polar bear brain break.

Be sure to grab the free polar bear deep self-regulation activity. It’s a wintery breathing exercise that went up earlier today. You’ll find a bunch of other polar bear activities listed in that blog post, so that your therapy theme for the week is full of movement-based activities that help kids develop skills.

Included are some slides to incorporate propriocepetion and vestibular input as well.

Because incorporating gross motor skills in teletherapy is sometimes a challenge, this gross motor slide deck was designed for teletherapy in a way that instructs kids to copy various positions as they balance and strengthen their core. All of these skills can be addressed with this gross motor slide deck in teletherapy sessions:

  • Core strength
  • Stability
  • Balance and equilibrium skills
  • Coordination
  • Range of motion
  • Flexibility
  • Motor planning
  • Crossing midline
  • Movement patterns
  • Posture and postural control
  • Muscle tone
  • Proprioceptive input
  • Vestibular input

Polar Bear Resource: DON’T MISS IT:

Grab the Winter Fine Motor Kit, with 100 pages of done-for-you therapy activities, including polar bear themes. Grab it now before January 9th and you get a bonus of 3 fine motor slide deck activities.

CLICK HERE TO GET THE WINTER FINE MOTOR KIT.

winter fine motor kit

More therapy slide decks


Be sure to check out these other slide decks to use in OT teletherapy sessions, distance learning, or homeschooling:

Try this Alphabet Gross Motor Slide Deck.

Here is a Space Theme Therapy Slide Deck.

Here is a Strait Line Letters Slide Deck.

Try this self-awareness slide deck with an animal theme.

Kids love this football theme slide deck.

There are gross motor activities in this outer space slide deck, too.

Polar Bear Therapy Slide Deck

Use this polar bear theme therapy slide deck in virtual therapy sessions or as a brain break.

Be sure to make a copy of this slide deck and not change the url to indicate “edit” at the end. When you make a copy of the slide deck onto your Google drive, you will end up with your own version that you are free to adjust in order to meet your student’s needs. By changing the url to “edit”, you can potentially mess up the original version that many other therapists and The OT Toolbox users are given.

You can grab a copy of this Google slide deck and use it to work on specific skills.

Enter your email address below and you will receive a PDF containing a link to copy the slide deck onto your Google drive. Save that PDF file, because you can come back to it again and again and send it to the kids on your caseload (or classroom) so they can make their own copy on their Google drive.

Please use the copy of the slide deck and do not change the url.

FREE Polar Bear Gross Motor Therapy Activities!

    We respect your privacy. Unsubscribe at anytime.

    Colleen Beck, OTR/L has been an occupational therapist since 2000, working in school-based, hand therapy, outpatient peds, EI, and SNF. Colleen created The OT Toolbox to inspire therapists, teachers, and parents with easy and fun tools to help children thrive. Read her story about going from an OT making $3/hour (after paying for kids’ childcare) to a full-time OT resource creator for millions of readers. Want to collaborate? Send an email to contact@theottoolbox.com.

    Snowman Deep Breathing Exercise

    winter deep breathing snowman

    Today, I have another fun deep breathing exercise to share with you! This time of year, it’s all about the snowmen. Now, you can use a snowman theme in a sensory coping strategy with deep breathing exercises with a snowman deep breathing exercise. It’s a free mindfulness printable that you can print and use all winter long.

    This is a great Winter activity to use along with our Winter occupational therapy crafts and our Winter fine motor activities. We also have a large variety of Winter Brain Break Ideas for supporting mobility and gross motor needs, Winter Bilateral Coordination Activities to hit on bilateral coordination and crossing midline needs, and Winter Mindfulness Activities. Put together, you have a winter theme for occupational therapy set up and ready to go.

    Deep breathing snowman winter sensory poster

    A Winter-Themed Calming Strategy for Kids
    Snowman deep breathing is a playful, effective tool for supporting self-regulation in young children. This printable activity combines the charm of a snowman with simple deep breathing exercises, helping kids calm their bodies and refocus their minds.

    With winter themes already present in many classrooms and therapy settings, this seasonal approach adds novelty to a familiar strategy. Incorporating sensory winter activities like this one into your therapy toolkit makes calming strategies more fun and engaging.

    This printable tool supports self-regulation needs. Using the power of relaxation breathing as coping strategies, kids can use this calming tool all Winter long.

    I like to use this printable along with our Winter Sensory Stations.

    The Sensory Component of Deep Breathing

    Breathing exercises offer powerful sensory input that impacts the autonomic nervous system to help with sensory dysregulation. When children breathe in deeply and exhale slowly, the parasympathetic nervous system is activated, sending cues of safety and calm to the brain and body.

    Using a visual guide like a snowman breathing path supports visual processing and motor planning as children track along the snowman’s form while coordinating their breathing. This provides both proprioceptive input and a visual cue to reinforce regulation.

    Support Self-Regulation in a Fun, Seasonal Way

    Self-regulation is a foundation for functional performance in school, home, and community settings. When children experience big emotions, transitions, or sensory overload, they need strategies that are accessible and meaningful.

    The snowman breathing activity provides a concrete tool they can refer back to again and again. Whether it’s used as part of a winter sensory diet, a classroom calm-down corner, or during therapy, this printable promotes independence and emotional awareness (an important part of emotional intelligence).

    Use Across Settings: OT, Classroom, or Home


    This free snowman deep breathing printable is versatile enough for a variety of environments. Occupational therapists can use it in sessions to build routines around winter self-regulation tools.

    Educators might use it during morning meetings or after recess to support transitions. Parents can print it out and keep it on the fridge or in a sensory kit for use at home. By teaching children how to pause and breathe using a fun and familiar visual, we help them internalize tools for self-control.

    Expand the Strategy with Multi-Sensory Input

    Want to go beyond the printable? Combine the snowman breathing visual with real-world sensory strategies.

    • Add a winter-scented lotion (peppermint or vanilla) for a calming olfactory input
    • Pair the activity with a movement break using snowman-themed yoga or stretches.
    • You can even laminate the page and trace it with a finger or dry-erase marker to bring in tactile feedback.

    These simple additions amplify the impact of deep breathing while keeping it engaging and developmentally appropriate.

    Snowman theme deep breathing exercise

    A snowman image makes a great image for slow and mindful breathing. Use this as a guide to show children how to take a deep breath and then slowly breathe out.

    The visual prompts on this image includes a white dot where kids can pause and hold their breath for calming benefits.

    Use this deep breathing activity as a mindfulness activity for winter.

    You can print this off by entering your email address below. The printable will then be delivered to your email inbox.

    More winter deep breathing exercises

    You’ll love this polar bear self-regulation activity. Print and go!

    This penguin deep breathing exercise is fun, too.

    Grab the Winter Fine Motor Kit, with 100 pages of done-for-you therapy activities, including penguin themes. There are lacing cards, crafts, pencil control strips, scissor skills activities, and much more. Grab it now before January 9th and you get a bonus of 3 fine motor slide deck activities.

    CLICK HERE TO GET THE WINTER FINE MOTOR KIT.

    Want to grab this free printable? Enter your email in the form below. You’ll receive the deep breathing worksheet immediately in your email inbox.

    winter fine motor kit

    Enter your email address in the form below to access the snowman deep breathing exercise.

    Free Snowman Theme Deep Breathing Exercise

      We respect your privacy. Unsubscribe at anytime.

      Colleen Beck, OTR/L has been an occupational therapist since 2000, working in school-based, hand therapy, outpatient peds, EI, and SNF. Colleen created The OT Toolbox to inspire therapists, teachers, and parents with easy and fun tools to help children thrive. Read her story about going from an OT making $3/hour (after paying for kids’ childcare) to a full-time OT resource creator for millions of readers. Want to collaborate? Send an email to contact@theottoolbox.com.