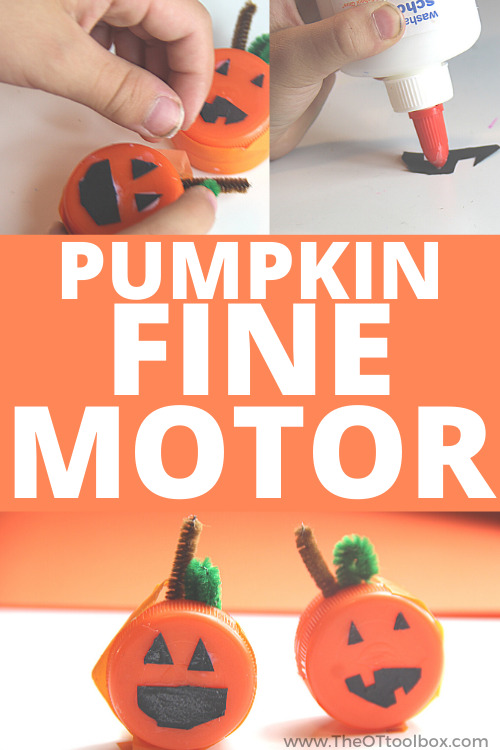
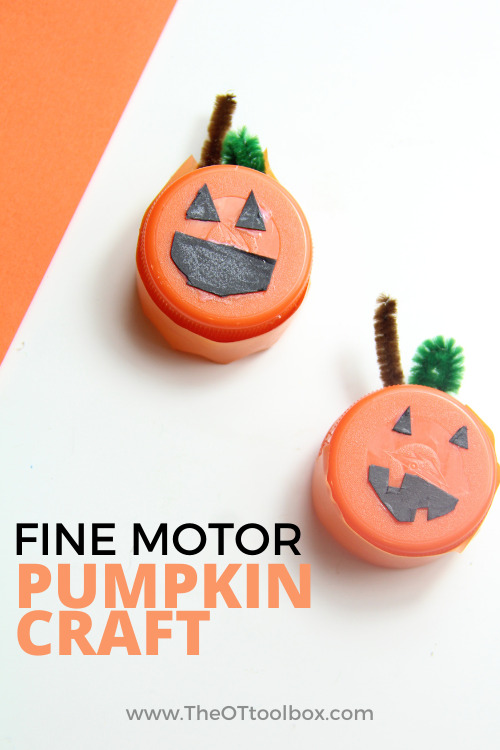
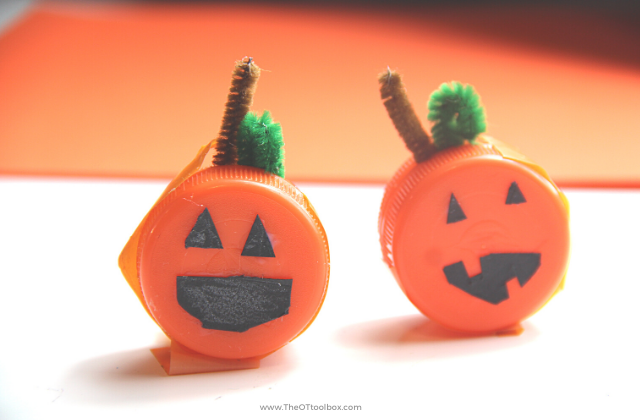
This pumpkin craft is a fun way to build fine motor skills and to use recycled materials at the same time. This cute pumpkin craft was actually designed, created, and photographed by my daughters! I love to see them doing what they love: creating homemade crafts while fostering occupational balance and helping others build skills by sharing such a fun Fall craft.
Pumpkin Fine Motor Activity
By making this mini pumpkin craft, kids can build many fine motor skills. It’s a pumpkin fine motor activity without the goopy mess of pumpkin guts and seeds!
This is a great Halloween occupational therapy activity to add to your toolbox…Just by making this Halloween craft, kids can build dexterity, refined grasp, and precision. Let’s break down how this craft builds fine motor skills:
Precision– The pumpkin craft is a miniature pumpkin, just sized right for a bottle cap. Working on a small scale, kids can work on precision of grasp as they pick up and manipulate the materials.
Pincer grasp- In fact, that tip to tip grasp that uses the pads of the pointer finger and they thumb, pincer grasp is used. This refined grasp is needed to pick up the googly eyes, pinch and place tape, maneuver the pipe cleaner piece.
Neat pincer grasp– When that pincer grasp requires even more precision and the tips of the pointer finger and the thumb bend at the last joint, a neat pincer grasp is used. This grasp is needed to pick up very small items such as a mini-jack-o-lantern eyes and cutouts.
Separation of the sides of the hand– Manipulating tape, picking up small items, and cutting with scissors fosters the fine motor skill of separation of the sides of the hand. This skill is essential for a functional pencil grasp.
Bilateral coordination– Pulling and ripping tape is a great bilateral coordination task. Kids can use coordinated use of both hands throughout this pumpkin craft activity. Working on a small scale in a craft like this one pulls concentrated near-point work at the midline, making it a nice pre-cursor activity to refine skills needed for reading, writing, and other tasks requiring fine motor coordination skills.
Gross grasp– Hand strength is built through the power side of the hand, or the ulnar side. When the power side is strengthened through gross grasp activities like squeezing a glue bottle, kids can gain more stability in the hand as they complete fine motor tasks. Squeezing the glue bottle in a small space requires a refined grasp, so glue is stopped when appropriate and there isn’t a giant pool of glue all over the table. This ability to squeeze a glue bottle in a small spot with accuracy isn’t easy for some kiddos! Here is more information on gross grasp.
Scissor skills– This fine motor Halloween activity has very small scissor work, making it a nice way to work on precision and graded scissor skills.
Let’s make a Cute Pumpkin Craft for Kids!
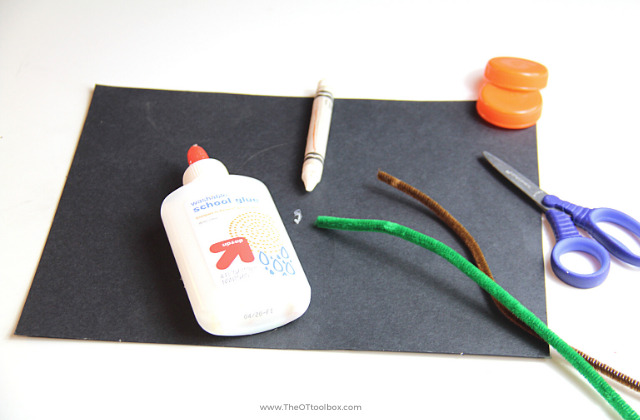
First step is to gather all of your materials. Your materials for this pumpkin craft are: (Amazon affiliate links included below)
Let’s get started with making this cutie mini pumpkin craft.
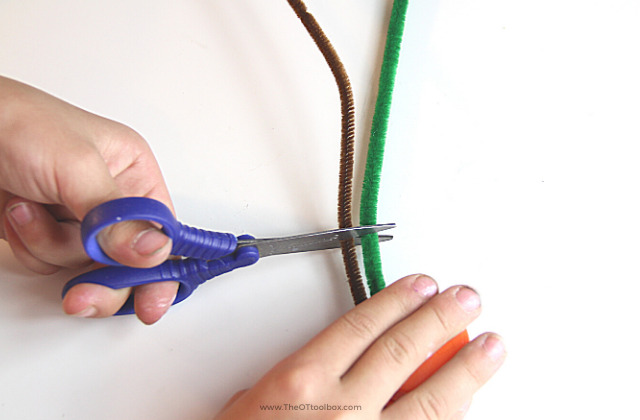
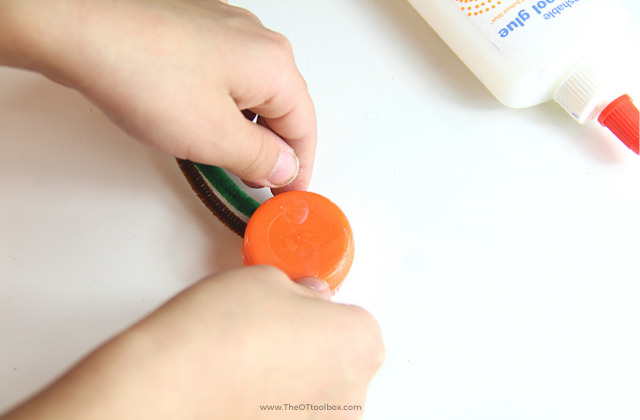
First, cut the pipe cleaners to a length of about one inch. Put the pipe cleaners on the edge of one bottlecap. When you have it in a good spot add orange tape on the sides so it will stick.
2. Place the second bottle cap on the edge of the first bottle cap so the rims are touching and sandwiching the pipe cleaners. Add a strip of orange tape around the outside of both bottle caps for a 3D pumpkin craft!
3. Cut a small piece of the green pipe cleaner and bend it into a leaf shape.
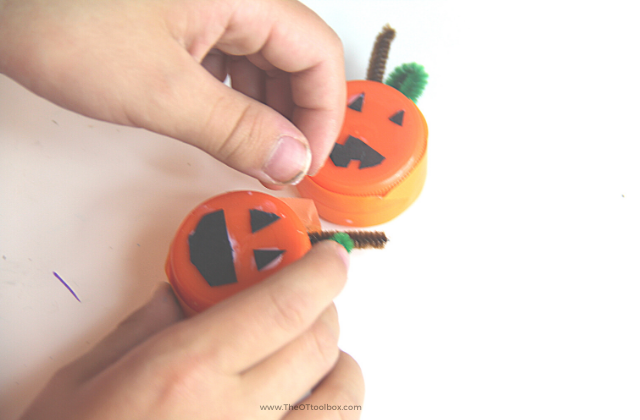
4. Then cut out your black construction paper to make a small jack-o-lantern face.
5. Next, glue the small construction paper pieces in the position you would like it to be on one of the bottle caps.
Have fun building fine motor skills with this mini pumpkin craft!
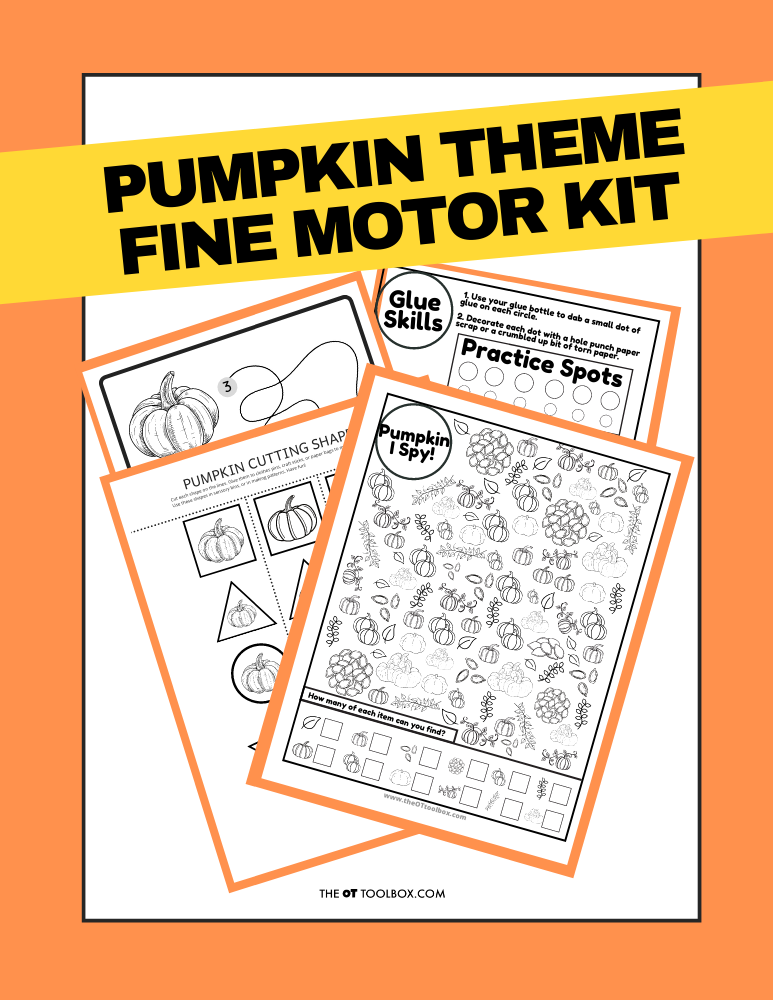
Grab the Pumpkin Fine Motor Kit for more coloring, cutting, and eye-hand coordination activities with a Pumpkin theme! It includes:
7 digital products that can be used any time of year- has a “pumpkins” theme
5 pumpkin scissor skills cutting strips
Pumpkin scissor skills shapes- use in sensory bins, math, sorting, pattern activities
2 pumpkin visual perception mazes with writing activity
Pumpkin “I Spy” sheet – color in the outline shapes to build pencil control and fine motor strength
Pumpkin Lacing cards – print, color, and hole punch to build bilateral coordination skills
2 Pumpkin theme handwriting pages – single and double rule bold lined paper for handwriting practice
Work on underlying fine motor and visual motor integration skills so you can help students excel in handwriting, learning, and motor skill development.
We loved making this mini pumpkin craft for building precision and neat pincer grasp. By cutting the mini pumpkin faces from paper, you really work on refined motor skills.
You can expand this activity by pairing it with our pumpkin emotions activity. Ask the child/student to identify emotions and then make that pumpkin face with the tiny pumpkins.
Or, include more self-regulation concepts by using the tiny pumpkins along with our free pumpkin deep breathing exercise. Trace the deep breathing arrows with the tiny pumpkins! You can even discuss how small changes (and mini pumpkins!) make a big difference.
Colleen Beck, OTR/L has been an occupational therapist since 2000, working in school-based, hand therapy, outpatient peds, EI, and SNF. Colleen created The OT Toolbox to inspire therapists, teachers, and parents with easy and fun tools to help children thrive. Read her story about going from an OT making $3/hour (after paying for kids’ childcare) to a full-time OT resource creator for millions of readers. Want to collaborate? Send an email to contact@theottoolbox.com.
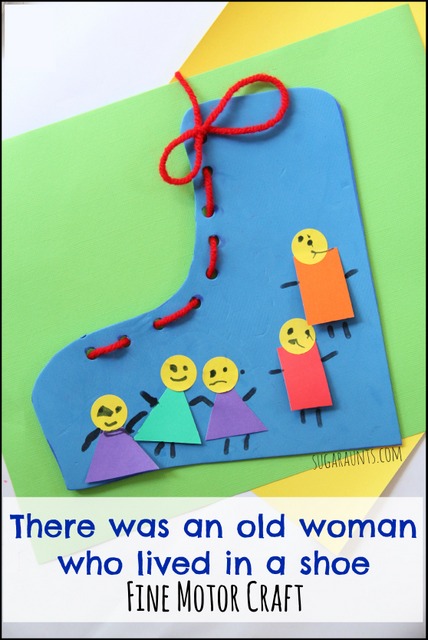
This nursery rhyme craft is based on the classic nursery rhyme, “There was and Old Woman Who Lived in a Shoe”. We had a blast building fine motor skills with this kids craft. It’s a great way to work on shoe tying, too!
Shoe tying craft for kids
We are starting off the nursery rhyme craft and activity series with a timeless nursery rhyme…There was an old woman who lived in a shoe. This is one of our favorite nursery rhymes to recite, although to be honest, in our house we love them all! When we visit the library, we usually hit up the nursery rhyme shelf and come home with a book or two about nursery rhymes.
Nursery Rhyme Craft
There is just something wonderful about reciting nursery rhymes. The repetition of rhythm and rhyme teach kids about language, memory, and literacy. They are fun to say over and over again. And with this repetition, comes self-confidence in the child. The timeless quality of nursery rhymes brings together generations of storytelling. There is much to discover about how nursery rhymes help with learning, including pitch, imagination, sequencing, and phonics.
We recited “There was an Old Woman who lived in a shoe” and made a boot craft to explore the rhyme. There was an old woman Who lived in a shoe. She had so many children She didn’t know what to do. She gave them some broth And a big slice of bread, Kissed them all soundly And sent them to bed. (We went with the Mother Goose version)
This post contains affiliate links. Thank you for your support of this blog.
Shoe Tying Craft
This craft doubles as a shoe tying craft, too. Kids can build so many skills by making this craft, that are so important for shoe tying, including:
Bilateral Coordination
Lacing a shoe
Pincer Grasp
Eye-hand coordination
Tying a bow
The best thing about this shoe tying craft is that kids will leave with a sense of accomplishment, allowing them to feel self-confidence with shoe tying.
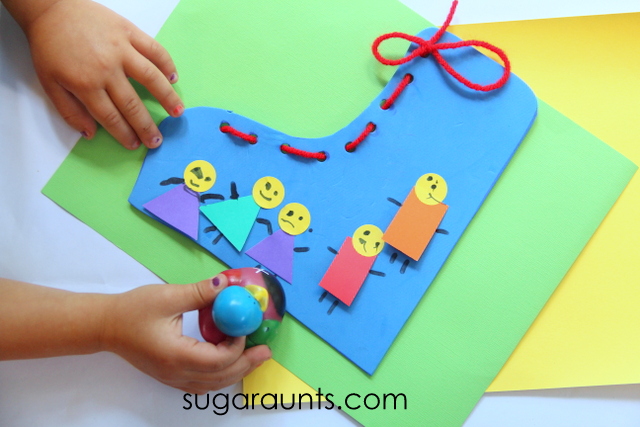
There was an old woman who lived in a shoe craft
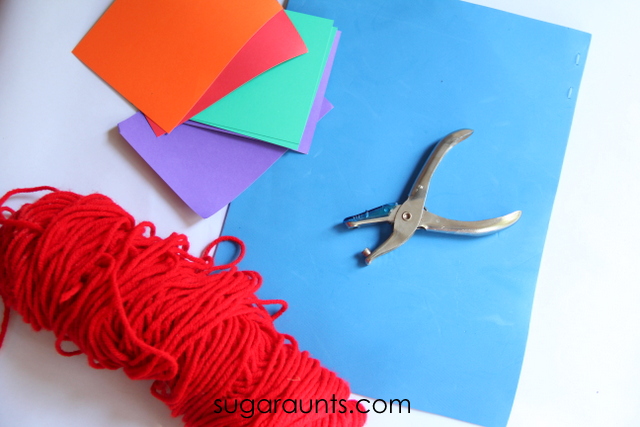
We started with a few supplies to make our nursery rhyme craft:
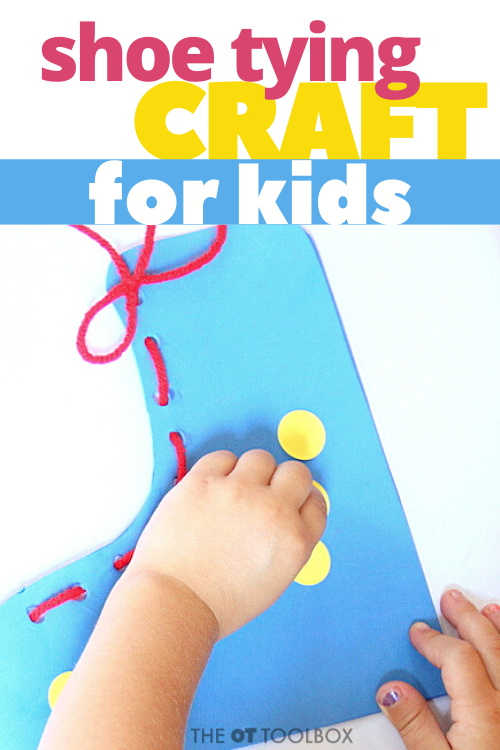
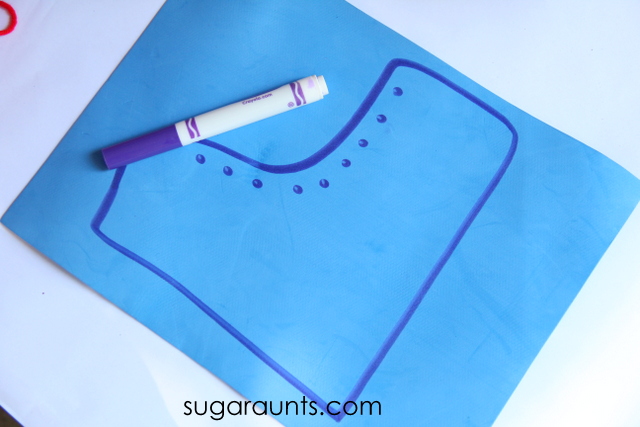
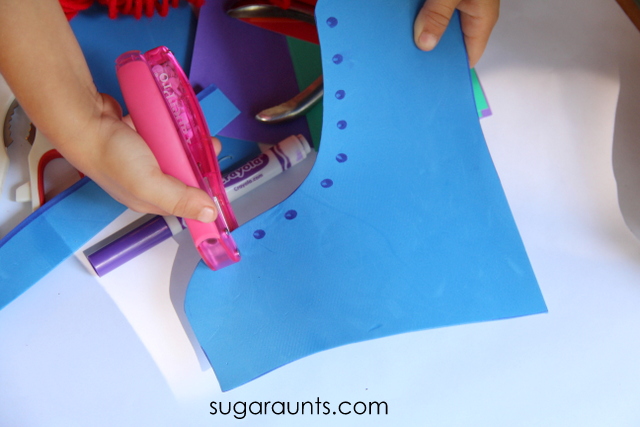
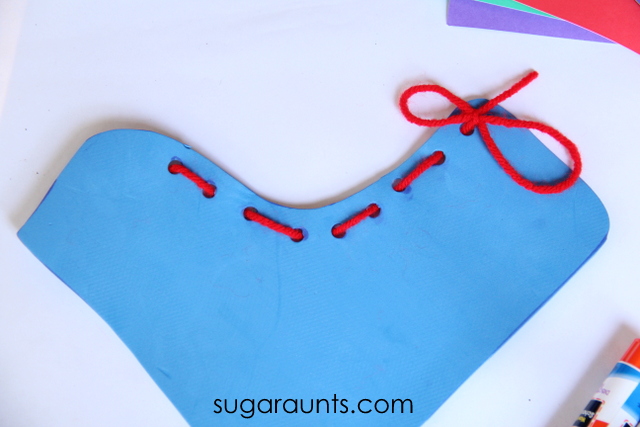
Start by drawing a large boot shape on the craft foam sheet. Draw dots with the marker for the lacing holes.
Older kids can cut out the boot shape. Crafting foam is a great material to snip with scissors and provides a different resistance when cutting.
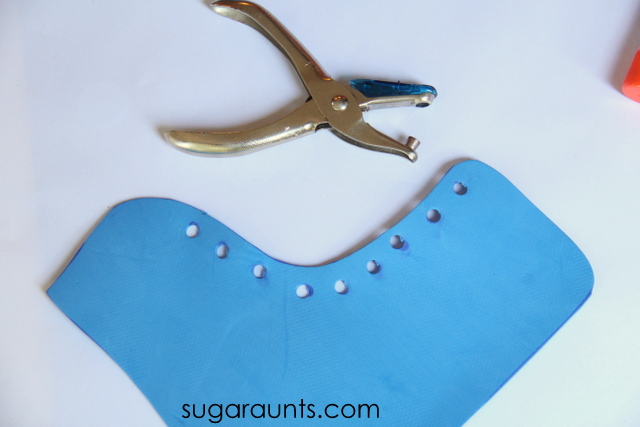
Use the hole punch to punch the lacing holes. We started with a kid friendly hole punch, but it didn’t work very well on the craft foam material. The old fashioned hole punch worked better.
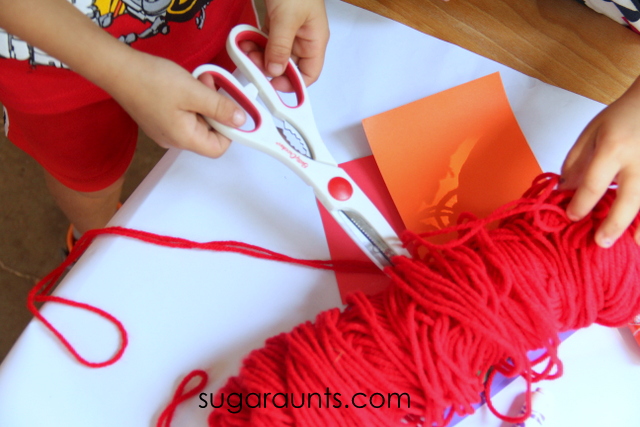
Snip a long length of yarn. Clearly Little Guy needs a little work on his scissor grasp. 😉 He was being silly with cutting the yarn.
Here is a guide to scissor skills, including the bilateral coordination needed for shoe tying AND cutting with scissors.
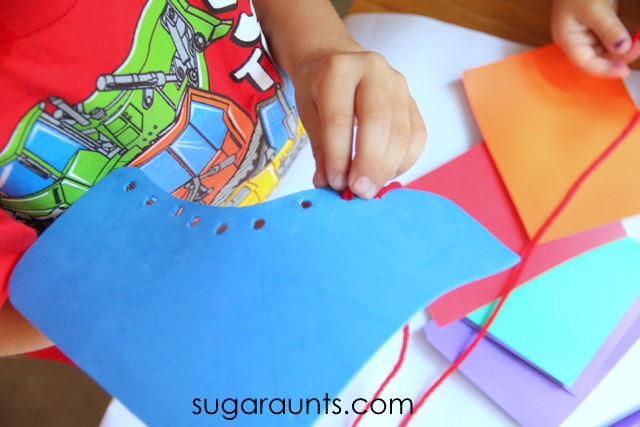
Tape one end of the red yarn to the back side of the boot. Get the kids lacing away on the boot. This is a fantastic fine motor task for little fingers. Tripod grasp, bilateral hand coordination, motor planning, eye-hand coordination…lacing is great for preschoolers!
This boot alone would make a very cute fine motor craft. But it needs a little something extra for our nursery rhyme.
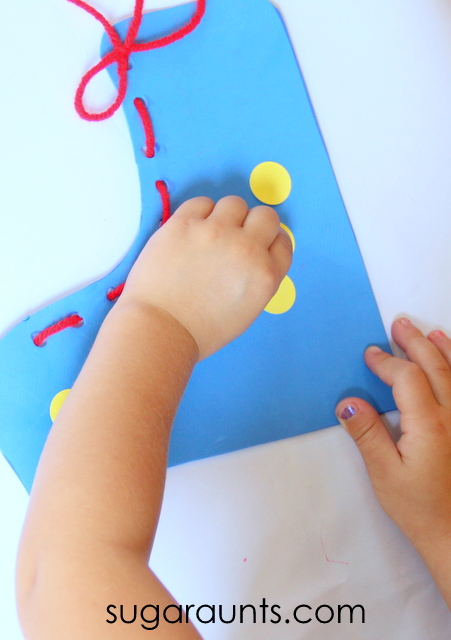
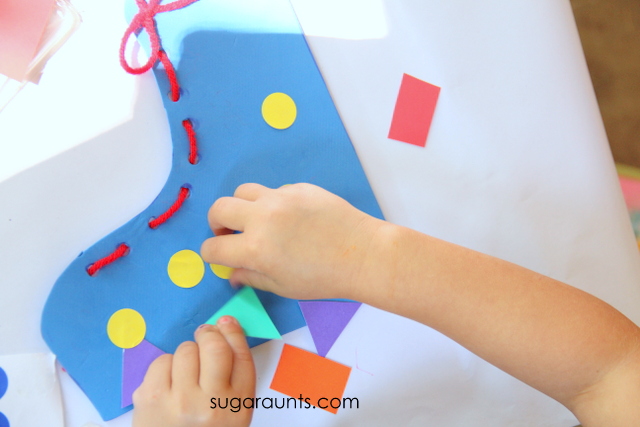
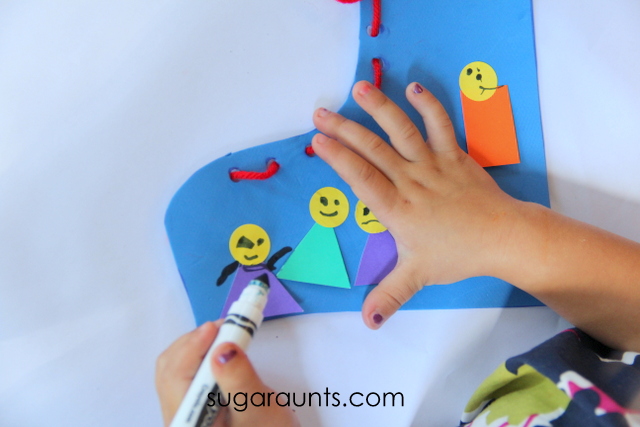
We made a little old woman and many children on the boot. Baby Girl loved sticking the yellow circle label stickers onto the boot. These would be the faces.
Next, we cut our colored card stock into triangles and rectangles for the bodies. More fine motor work with the snipping card stock. A bit of glue holds these shapes in place. Be sure to talk about shapes and colors with your preschooler while doing this part.
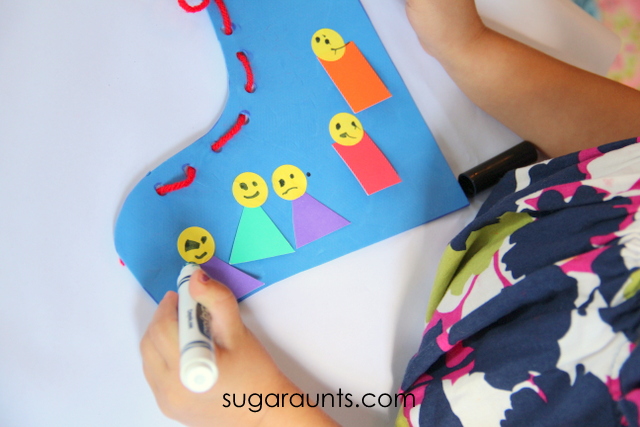
Baby Girl used a marker and drew faces on each person. Working in a small defined area is a great way to further develop pre-handwriting skills drawing and pencil control.
She then drew arms and legs for the old woman and children.
How cute is this nursery rhyme craft? It brings the rhyme to life with imagination and creativity. Baby Girl wanted to introduce a duck to the woman and children.
Be sure to stop back tomorrow and the rest of this week and next week for the rest of the nursery rhyme series. You can find them all of our nursery rhyme crafts here.
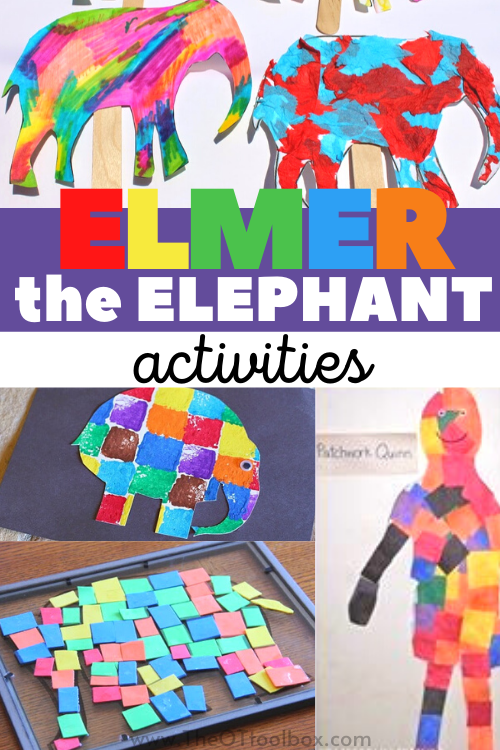
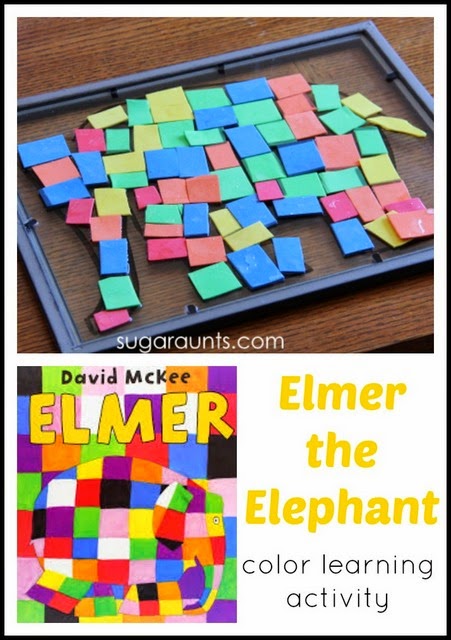
Elmer the patchwork elephant looks different than his friends. Through stories and colorful pictures that depict everyday elephant life, Elmer the elephant teaches us about diversity and differences. Elmer teaches us about acceptance, friendship, and empathy. Check out the Elmer the Elephant activity below that builds a baseline for these important skills, but also helps kids with fine motor skills, visual perceptual skills, and visual motor skills.
If you love the Elmer books as much as we do, then you will adore this Elmer the Elephant activity. We LOVE Elmer the Elephant…and all of the Elmer books. Every time we go to the library, we are sure to check the shelf for a new Elmer book that we may have missed. This week’s book activity was so much fun to do with the kids, because it involved one of our favorite books (ever) and a great visual perception activity. Add this book activity to your list of crafts based on children’s books that build skills through reading.
Elmer the Elephant Activity
This fine motor craft is a powerful one because it not only builds essential visual perceptual, visual motor, and fine motor skills, but it teaches as well. This Elmer the elephant activity can be used to illustrate differences, empathy, and friendship. Here are more books that teach empathy and friendship that can be used in therapy sessions or in the classroom or home.
They loved creating and building our very own Elmer craft. Elmer’s colors made for a great way to help kids build fine motor skills and visual motor skills, too. I loved throwing in the scissor work portion of the activity and working on a few important skills. My youngest daughter worked on her color identification and sorting. The colors in Elmer’s patchwork skin are perfect for Toddlers to practice naming colors. Little Guy was loving the puzzle-building portion of our activity. The lines were a great way to work on a few visual perceptual skills needed for handwriting.
Elmer the Patchwork Elephant Activity
This post contains affiliate links.
If you haven’t read Elmer by David McKee, this is definitely a book you need to check out. Elmer is a patchwork elephant with many colors. He sticks out from the crowd of gray elephants. By exploring and interacting with his community of elephants, Elmer and the other elephants learn to accept and value his unique characteristics. Elmer is not only a colorful patchwork elephant. He is funny, smart, caring, and an individual. The book teaches us to accept differences because those differences are what make us who we are.
Elmer teaches us about diversity. He teaches us about identity and tolerance. We all have different colors, shapes, interests, abilities, talents, and ideas. Those differences are what make us special. Let’s see those differences, accept them, and celebrate them!
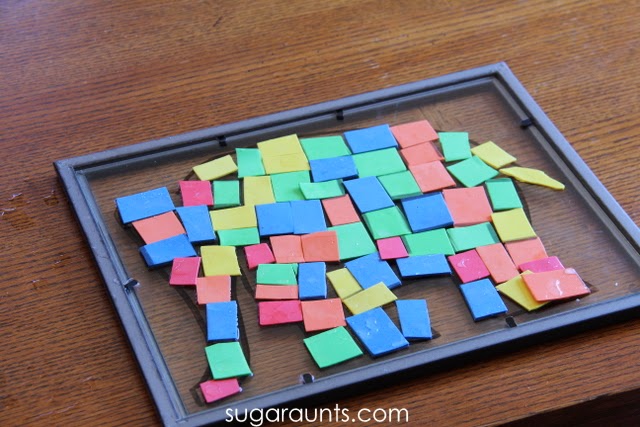
We made our own patchwork elephant with lots of colors and had a great time building and creating while talking about color names. This was such a great activity for both Little Guy and Baby Girl.
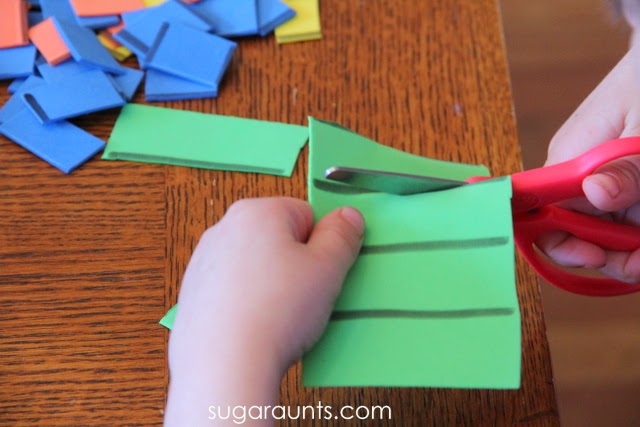
We started with Foam Sheets in lots of different colors. You might have seen our color sorting scissor activity post where we practiced our scissor skills. These squares came in handy for this Elmer activity.
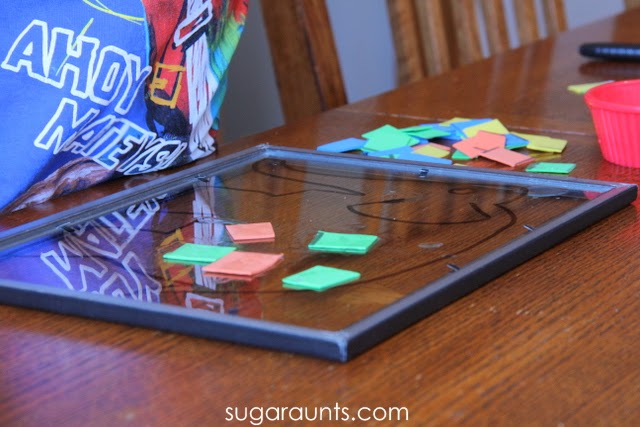
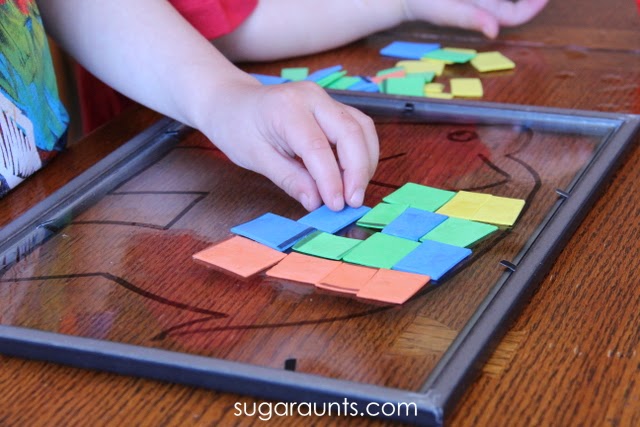
I found a picture frame at the Dollar Store that has an acrylic front, instead of glass. This is a great writing surface using a white board marker. I drew an outline of Elmer with the marker. We had a little bowl of water and started sticking the foam squares onto the surface to build our Elmer. When the foam pieces are dunked into water, they stick really well to the picture frame surface. We did a version of this way back when our blog began with our rainbow building activity.
Visual Perception Activity for Kids
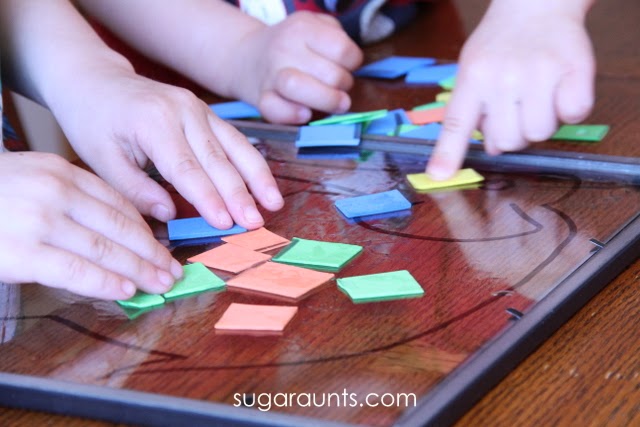
There were fingers everywhere, adding patchwork squares! Little Guy and I quizzed Baby Girl on her colors as we worked. It was a fun puzzle to get the squares fitting into the outline. What a great way to work on visual perceptual skills, fine motor precision, dexterity, and line awareness!
Visual perceptual skills in kids are necessary for so many things…from self-care to fine motor skills, to gross motor skills…all parts of a child’s development require visual perception. There are many pieces to the giant term of “visual perception”. This Elmer building activity works on quite a few of these areas:
Visual Discrimination is determining differences in color, form, size, shape…Finding different sized squares to fit into the outline of our Elmer, discriminating the different colors, and shapes are a great way to work on this area.
Visual Closure is the ability to fill in parts of a form in the mind’s eye to determine shape or a whole object. Filling in the missing parts of our Elmer works on this area.
Visual Spatial Relations is organizing the body in relation to objects or spatial awareness. This is an important part of handwriting. Spacing those pieces amongst the others and in relation to the lines is one way to work on this skill.
Visual Figure Ground is the ability to locate objects within a cluttered area (think “I Spy”). Finding a red square among the pile of foam pieces is one fun way to work on this area of visual perception.
Little Guy was really into this activity. He loved lining up the squares to make our Elmer.
We loved how our Elmer turned out! We’ll be using our frame again, soon. I can think of so many fun ways to learn and play with this dollar store frame and a marker!
More Elmer the Elephant Activities
Check out some of these Elmer the Elephant activities for kids. They are powerful ways to build awareness, acceptance, and friendship through the book and activity.
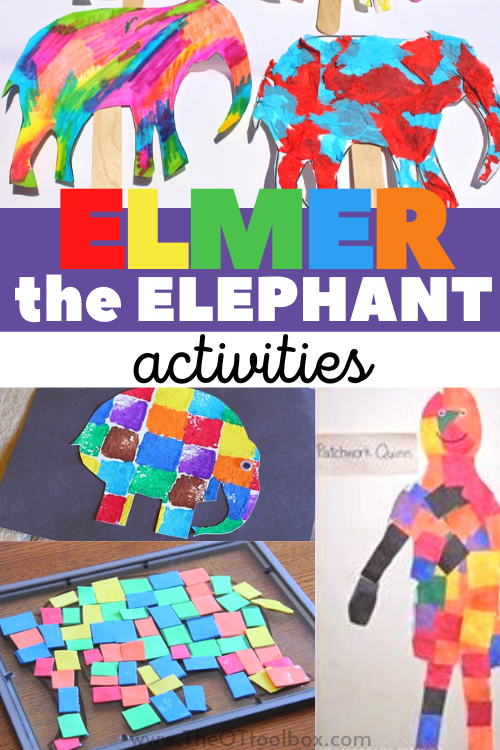
Use face paint to celebrate friendship with a face painting party based on the Elmer the Elephant book.
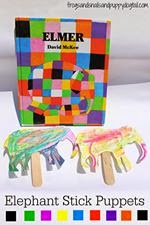
Make an Elmer craft using puppets to celebrate differences, diversity, and uniqueness in a great lesson for kids, while building fine motor skills.
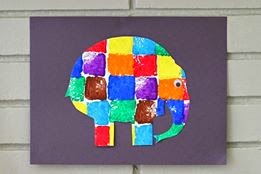
Create an Elmer the patchwork elephant craft using paint to make a paint stamped elephant craft. What a great way to build fine motor skills!
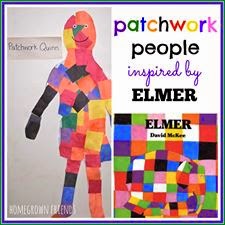
Kids can trace their bodies with large pieces of paper and then fill the space with colorful paper squares to celebrate uniqueness in this Elmer the Elephant preschool activity.
Teach Acceptance, Differences, and Diversity
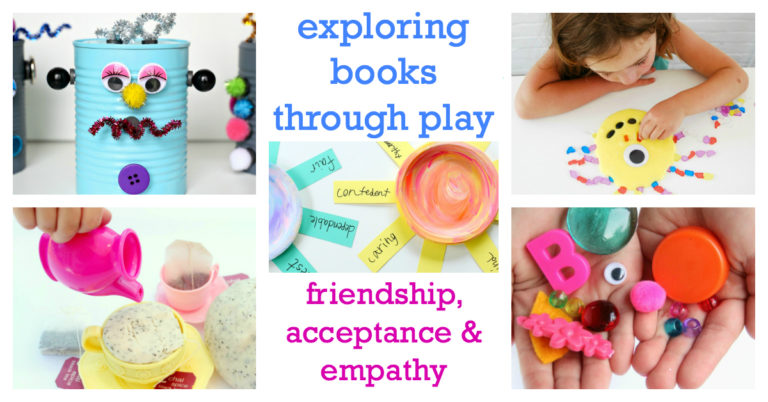
Want to take complex and abstract concepts like empathy, acceptance, uniqueness, and diversity to the next level with kids? This digital, E-BOOK, Exploring Books Through Play: 50 Activities Based on Books About Friendship, Acceptance and Empathyis filled with hands-on activities rooted in interactive, hands-on, sensory play that focus on creating a well-rounded early childhood education supporting growth in literacy, mathematics, science, emotional and social development, artistic expression, sensory exploration, gross motor development and fine motor skills.
Kids can explore books while building specific skills in therapy sessions, as part of home programs, or in the home. is an amazing resource for anyone helping kids learn about acceptance, empathy, compassion, and friendship.
In this book, you’ll find therapist-approved resources, activities, crafts, projects, and play ideas based on 10 popular children’s books. Each book covered contains activities designed to develop fine motor skills, gross motor skills, sensory exploration, handwriting, and more. Help kids understand complex topics of social/emotional skills, empathy, compassion, and friendship through books and hands-on play.
Click here to get the book and add children’s books based on social emotional learning to your therapy practice, home activities, or classroom.
More books to teach social emotional skills
Check out our other posts in the Preschool Book Club Series for activities based on favorite books:
Colleen Beck, OTR/L has been an occupational therapist since 2000, working in school-based, hand therapy, outpatient peds, EI, and SNF. Colleen created The OT Toolbox to inspire therapists, teachers, and parents with easy and fun tools to help children thrive. Read her story about going from an OT making $3/hour (after paying for kids’ childcare) to a full-time OT resource creator for millions of readers. Want to collaborate? Send an email to contact@theottoolbox.com.
Sensory activities for babies is a tool to help little ones grow and develop life-long essential skills. Baby sensory experiences and sensory play go hand in hand. A baby has so much exposure to sensory stimulation each day. From sounds, to sights, to textures and temperatures, a baby’s sensory system is rapidly developing and filing away information. In our house, when child number four was a baby, she was exposed to A LOT of auditory and visual stimulation from older siblings!
Sensory ACTIVITIES for Infants
Here, you will find sensory activities for infants and babies that can be used to help you connect and play with your little one. These baby sensory play ideas will encourage exploration of colors, textures, and properties.
First, I wanted to share this resource for parents of new babies and also therapists that work with families.
Resource for New Parents
First, I wanted to let you know about an exciting new resource for new parents. Many people think new parents are the only ones that need baby advice. Maybe you found yourself as a new mother who suddenly had a lot of questions on sleep patterns, eating and childhood milestones. But, if there is one thing that therapists wish they could tell new parents, it’s that parents could have a better understanding of how movement plays into development.
Therapists are many times, seeking resources to share with parents to support a family through the first year of baby’s development so they can thrive.
Remarkable Infants is a great opportunity for parents and professionals alike to educate more people on how to support a baby’s first-year development for future learning development.
Yes, this course does provide information on helping a baby sleep and eat, but this course is the other more comprehensive sections. The pieces most other baby trainings don’t provide.
It’s a 5-step, all-inclusive online training for new moms focusing on the development of the whole child from birth through 12 months of age. It includes the following:
Language Development (Talking with your baby)
Healthy Sleep Habits (Understanding baby sleep)
Cognitive Development and Motor Development (Playing with your Baby)
Reading with your Baby (Vocabulary, visual-motor, speech and language)
Infant Nutrition (Feeding your baby)
Even though this course is geared to moms, it’s also great for professionals. It can be a HUGE help to clients, expecting moms you work with and those that have kids with learning challenges. The more we can help educate parents on the necessity of building a baby’s cognition, speech and language and motor movements in their first year, the further ahead that child will be later in life.
The 2 best parts are:
1. Each section is taught by a specific professional (Occupational Therapist, Speech and Language Pathologist, Pediatric Sleep Sleep Specialists and Registered Dietitian) with evidence-based research. So you know you’re getting advice from the pros!
2. If you are a professional, you can get CEU credits/Certificate of Completion for taking this course.
You can also get an additional 10% discount when you use our coupon code “COLLEEN10.” To join the Mommy Academy, click here. Don’t forget to enter the discount code!
Our Mission at the Mommy Academy is to provide new mamas with easily accessible, organized, evidence based information and practical skills. Our resources strive to remove overwhelm and exhaustion and allow new moms to spend less time on Google and more time connecting with their baby and taking care of themselves. Our mission is to make new mamas feel less alone through heartfelt encouragement, a mama community and expert support.
Sensory Play Ideas for Babies
Child development begins in the womb. As that baby develops and grows in utero, they are already stretching and moving, practicing reach and grasp, and stretching against the walls of their mother’s uterus. That push and pull that you felt as an expecting mom was your little one gaining strength and sensory input! That motor development continues after birth, and that’s when the fun begins because as mom or dad, we get to snuggle that little one, engage with them, and watch their every move!
Sensory Activities for newborns
Let’s talk specifics. During the newborn and infant stages (0-3 months), you’ll see so many physical and sensory milestones. These are developments that impact movement, communication, and feeding. Sensory developmental milestones during the first three months include:
Following a person with their eyes
Lifting their head to observe and listen
Pushing up to their arms while lying in tummy time, now baby can REALLY start to take in the world around them
Holding the head up while laying on their belly
Opening their fist into stretched fingers- Little one can grasp and begin to explore textures
Bringing hands to the mouth for sensory input, calming, and soothing
Reaching for toys to explore
Turns toward sounds or voices
Makes eye contact
Moving legs and arms- They are figuring out how their body moves in space and how much effort needs to be exerted to move
From the first weeks when baby doesn’t focus their eyes on anything, they strengthen eye movements and focus to visually track a toy or person by the end of the three months of age. During this stage, it’s important to allow that little one to move, stretch, kick, and strengthen their core, neck, arms, and legs, and eye muscles. Sensory activities for newborns can include:
Songs and Nursery Rhymes- For our littlest newborns, this is a wonderful first play activity. Singing softly or reciting nursery rhymes to infants gets your little one used to the sound of your voice. Make eye contact up close as you recite rhymes and songs. Baby’s vision is capable of focusing on objects at about 8 inches from their face. Using exaggerated mouth movements and wide eyes when you speak to your little one provides a high-contrast point that they can focus on.
Follow the noise- Use a rattle, squeaky toy, or other toy that makes noise as you move the toy in front of your little one’s field of vision. You want your baby to visually track the noise and follow the toy with their eyes. While baby won’t be able to really follow moving objects with their eyes until about three months of age, this activity boosts so many areas and creates the building blocks of auditory processing and visual processing. This activity can be accomplished at various stages, and in various positions. Baby can be swaddled up and laying on their back while following the toy with their eyes. Try it when baby is in tummy time. Soon, you will see reaching for that fun toy. It’s a great way to encourage reach, grasp, and even gross motor skills like lifting the head and neck while in tummy time, and rolling.
Tummy Time Back Rub- Tummy Time can be hard for babies! That little cry is so sad and makes you want to pick your little one up and snuggle them until they feel safe. But, remember the benefits of tummy time and help them to feel safe and comforted on their belly. Get down on the floor with your little one and lightly rub their back while you sing, speak, or hum. Put your face right next to your little one so they feel the warmth of your body. Make eye contact and engage with that sweet nugget!
Chest to chest- We talked before about how tummy time doesn’t need to happen on the floor. Place baby on your chest as you lean back on a couch. Your baby’s face will be close to yours and at a great position to speak softly. Depth perception of the eyes doesn’t develop until about 5 months of age, so until then, your little one is building the eye strength to better see the world. This positioning is helpful to help your little one build upper body strength.
Blanket time- A colorful play blanket is a great space to stretch, kick, and move those arms and legs. Positioning toys around baby encourages them to engage while strengthening their core, neck, arms, legs, and eye muscles. Position toys in a semi-circle around baby and get down on the floor to get in on the play action. This is a great way to build the skills needed for rolling and manipulating objects.
Leg Kick- While baby is on the floor on their back or belly, provide some bicycle action to their legs. You can slowly “bike” their legs to get them moving and then tap the bottoms of their feet. This tactile input “wakes up” the feet and can get them kicking and moving. Place a toy or object that makes noise at their feet and they will see and hear a response to moving their legs.
Sensory Activities for 3-6 months
Purposeful movement drives development and development occurs through purposeful movement. This is a fun series of months. You’ll see sensory development that drives motor skills and communication milestones:
Rolls from back to belly and belly to back- baby is starting to really explore proprioception and vestibular input as they move and figure out how their body moves
Holds the head and neck steady in sitting- They can focus vision on moving targets when the neck and head are steady
Investigates textures, size, shapes, and details of objects
During 3-6 months, the baby is starting to gain some control of their body. They will start to use purposeful movement, influenced by toys and faces on the people around them in order to explore. Try these sensory activities for 3-6 month age range:
Foot Rattles- There are socks out there that have built-in noise makers. These little foot rattles encourage baby to move and shake those legs. While lying on their back, they can see how intentional movement works.
Peek-a-Boo- This is an age-old favorite…and there’s a good reason why we love this classic game! When mom or dad hides their face and then suddenly takes their hands away, baby is learning some valuable skills. They learn that objects don’t go away just because they can’t see them. Object permanence, cause and effect, and problem solving begin at this young age, and while it can take a while to master, it’s an essential skill down the road! Try playing peek-a-book with faces, objects and a blanket, and by gently swiping a blanket over baby. (Always use super close supervision with this activity!)
Crinkly Soft Toys- One of my favorite ways to develop those early fine motor skills is with a simple crinkly soft blanket. You know the kind…it’s soft material on the outside, but crinkly fabric sewn into the middle. So, when baby squeezes and grabs the soft toy, they hear a crinkly noise. The best kind are small fabric swatches because they are light enough for baby to manipulate and pick up. The OT in me loves to see that little grip grab and pull the material. You can see those motor skills develop right in front of your eyes! Use the crinkly toy in tummy time to encourage reaching and rolling, or while laying on the floor as baby brings both hands together and gives the toy a taste. They can work both hands together in a coordinated manner with feedback from the mouth. It’s a great toy for building cause and effect, too!
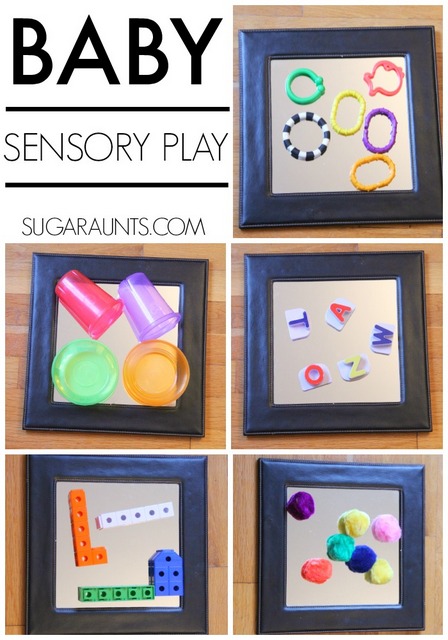
Mirror Play- Find a baby-safe mirror and use it in tummy time. Place a few baby items on the mirror and they can begin to push up onto their arms by putting weight through their shoulders and upper body. Another way to use a baby safe mirror is to place it in front of baby while they are in supported sitting. Baby will begin to babble and “talk” to the baby they see in the mirror.
Hula-Hoop Reach- Your little one is still building those motor skills and someday down the road they will be doing big kid things! For now, use a hula hoop to attach rattles and baby toys in a circle around them as they are in tummy time in the center. The circular positioning of toys encourages reach (and eye-hand coordination), visual scanning, rolling, and pivoting on the upper body as they move and stretch for different toys.
Sensory ACTIVITIES for 6-9 months
The months between 6-9 months are a big one for little ones’ development. Senses prevail and as your baby starts to gain more physical control, they are exploring more sensory input. Little one will begin solid foods for the first time and what a sensory experience that is!
Movement and gains in gross motor skills allow baby will move from tummy time with weight through their arms to pushing up on their arms. They will begin to lift their belly off the floor to all fours. They will move from supported sitting to unsupported sitting with reaching for toys. You’ll see that little bundle move from tummy time to rolling, crawling, and reaching. Let them move, kick, and stretch!
Moves from supported sitting to independent sitting- Exploring the world around them
Bears weight through hands in crawling position
Reaches for toys while lying in the belly
Moves toys from one hand to the other
Uses both hands to manipulate and explore toys
Reacts to sudden sounds
Listen and responds to sounds or voices
Begins to babble
Shows an interest in foods
Tries baby food for the first time and will move to explore more tastes and varieties of soft foods
Imitates others in play
Focuses on near and far objects
This is a fun age! Purposeful movement occurs and you will see baby learning so much. Here are some baby play ideas that boost the sensory development and motor skills babies need to move, manipulate toys, feed themselves, and get from place to place:
Sitting Games- Place pillows around your little one to create a soft crash mat. As baby gains the skills to sit up with balance, they can reach for toys around them. Offer a basket of washcloths, a bowl of nesting toys, hand-sized balls (ones that can’t be placed into the mouth), or other novel items. This is a great opportunity to practice reaching, placing objects into containers, and getting stronger at balance!
Living Room Obstacle Course- Along the same lines as the previous activity, use living room pillows and couch cushions to create obstacles on the floor. This is a great way to encourage movement in a variety of patterns and gain skills in crawling. As baby grows, they will become more confident in their movement and this is great to see! Be sure to stay close by and ensure the space is baby-proofed!
Bubbles- Blowing bubbles with baby is a wonderful way to encourage visual tracking, eye-hand coordination, core strength, sitting balance, neck control, and even fine motor skills! Encourage your little one to watch the bubbles as they float away and visual processing skills develop. Ask them to get the bubble and they can work on controlled reach and grasp. Bubbles are a great activity throughout the toddle years too as baby learns to gain control in standing and walking. Grab a container of bubbles and have fun!
Roll a Ball- A partially blown up beach ball is a wonderful tool for helping your little one gain balance and strength in sitting. The ball when not blown up entirely provides a great opportunity for grasp. Just be sure to keep a close watch on your little ball player. This activity should only be done under very close supervision and always trust your gut. You know that the ball is going straight to the mouth once your little one has a hold of it, so stay close by. Rolling a beach ball toward baby is wonderful for developing visual processing skills, eye-hand coordination, grasp and release, strengthening, and more. Adding more air to the ball makes it harder to grasp and harder to catch as the ball will roll more quickly and smoothly. Older kiddos can use that ball to kick, throw, and even pat-pat-pat!
Box of Toys- Have an Amazon delivery box or a shoebox sitting around? It’s a novel toy for your little one! Fill it with baby-safe objects or toys and get ready to have fun. Pulling items out and dropping them back in teaches baby so much about weight, grasp, eye-hand coordination, and even gravity. They will love to see how things fall and how they hit off other toys. Dumping a box of toys is fun of its own and is another experiment of it’s own. Baby, as they start to move and crawl can push or pull a box and gain the feedback of pushing the object along the floor. Babies that are standing at a coffee table or couch can explore and drop items into the box while they learn to hold on the safety of the couch and use one arm to hold an object. SO much development can happen with a simple cardboard box!
Put in and Take Out- Take that box play even further by using a smaller opening. An empty tissue box is another awesome tool for building skills in fine motor work, eye-hand coordination, and visual processing skills. By placing items in a container, little ones can work on things like visual discrimination and visual memory, all through play and not aware that those basic skills will carryover far into their educational years as they learn to read, write, and complete math. Amazing, right??!
Sensory Activities for 10-12 months
The next phase is a big one! During the tail end of the first year, you see big strides in free movement. You see stronger eye-hand coordination, and intentional movement. You see refined fine motor skills, improved mobility, and a stronger baby. Here are more specifics about this stage:
Pulls up to stand at furniture
Takes first steps holding onto furniture to “cruise”
Moves in various positions from laying to sitting, sitting to pulling up to stand, etc.
Drops toys into containers and grabs them to manipulate
Uses a pincer grasp (holds small items like cereal between the pads of the thumb and pointer finger)
Explores toys with mouth, hands, and visually
Says first words
Feeds self with finger foods
Takes first steps without support
During this stage of development, babies are moving and grooving! They are building on the skills they’ve achieved and refining those motor skills. Babies are using what they’ve got in the way of grasp, reach, and gross movement to really develop their vestibular sense. By moving in different planes to crawl, swing, turn, and roll, there is movement of the fluid in the inner ear which stimulates the vestibular sense. The vestibular sense allows us to know where our body is in space. With the vestibular sense, we are able to sit without falling over, move from one point to another safely, and track objects with our eyes (which is needed in reading and writing). Try these sensory activities for 10-12 months:
Tunnels- Set ups a floor obstacle course like we talked about a few slides ago, but add some more challenging experiences. Use a baby tunnel or a large cardboard box. What a fun space to add baby toys, bins, baskets, and soft blankets for crawling over and playing with!
Kitchen Play- At this stage, baby will be much sturdier in their sitting. Set ups a scattering of kitchen bowls and wooden spoons or scoops. They can bang, stack, and drop to see how items work and move. Recycled items such as egg cartons, cereal boxes, and plastic container are fun to explore too. Be sure to make the space baby safe. This is a great way to engage your little one while cooking and preparing meals.
Sensory Play- This stage is fun because as the fine motor skills develop, you will see more refined use of the hands from a raking grasp” where all of the fingers rake items in order to pick them up in the palm of the hand into a “pincer grasp” where the pointer finger and the thumb are able to pick up a small item. Encourage sensory play by providing cooked spaghetti cut up into small lengths. Scatter the cooked spaghetti on a black placemat or tray. The high visual contrast and interesting sensory experience will engage your little one and build fine motor skills they will need down the road.
Fine Motor Play- Around 10 months, you will see more refined fine motor skills as baby uses their pointer finger and thumb to pick up small items with the pincer grasp we just talked about in our last slide. Suddenly, you will notice every speck of dirt and fuzz ball on the carpet…and so will your little one! Encourage those fine motor skills by providing baby cereal and a container for them to drop pieces into.
Stacking Activities- Use stacking cups, blocks, or small boxes (empty tissue boxes work great!) to stack and knock over! Baby will begin to gain more refined motor skills and the excitement of knocking those towers over again and again will not end!
Rolling Toys- Use balls of various sizes, toy cars, and even recycled paper towel tubes to explore how things move and roll. Take the excitement level up a notch by adding a ramp using a large cardboard piece to make a ramp. Watching items as they roll down and grabbing them to push them down all over again is big fun! It’s a great way to encourage fine and gross motor skills, visual motor skills, eye-hand coordination, and balance.
This post contains affiliate links.
We shared recently our Visual Motor Integration developmental milestones post with general timelines of baby’s hand-eye coordination. It’s important to note that all children develop differently and some of these activities may not be appropriate until they are developmentally able to participate.
Tummy Time and Sensory ACTIVITIES
Really important pieces of advice like placing your baby in tummy time, limiting time spent in baby positioners, encouraging a variety of sensory stimulation, allowing movement, and connecting with your baby through play aren’t just tips. They are really important. They are strategies for success. The next few slides I’m sharing are tools to give your baby a motor and sensory baseline that will impact them down the road with things like visual motor skills, attention, reading and writing, frustration tolerance, emotional regulation, and more. It’s the skills that kids today are really lacking in
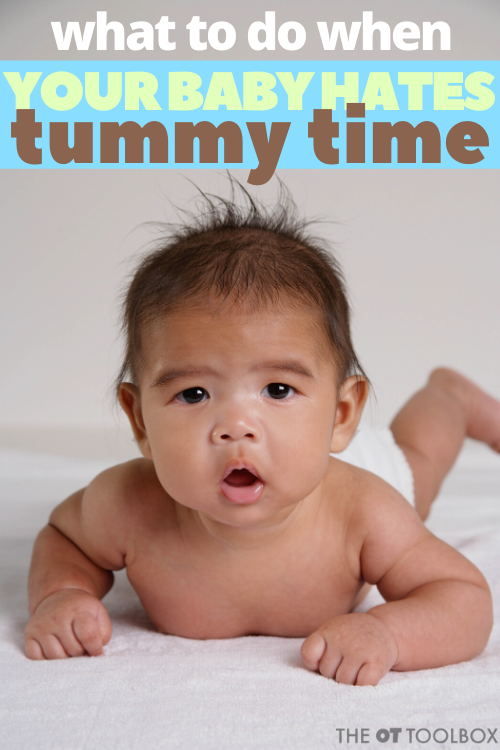
When Baby Hates Tummy Time
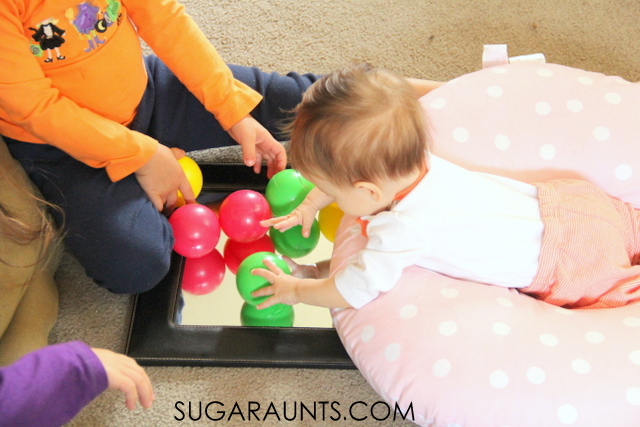
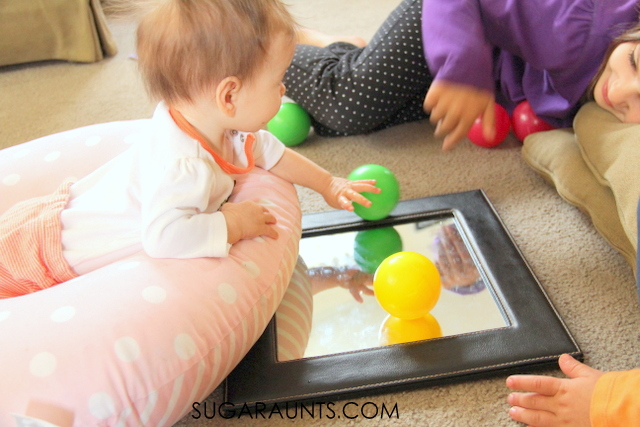
We shared this mirror play idea on Instagram. At the time, Baby Girl was five months old an able to do tummy time in a Boppy pillow. Having a better understand of tummy time myths is important for new parents to understand what to do when baby hates tummy time.
The thing is that floor play for babies is essential for developing skills in infants and toddlers. And, that floor time play is important to building visual motor skills, strength, and coordination even throughout the first year (and beyond)!
The baby positioning floor pillow provided extra support and elevated my little one’s upper body to encourage reach during tummy time. As with any piece of baby equipment, this pillow and others should be used under supervision by an adult and for short periods of time. We used a small mirror and a few colorful ball pit balls to encourage reach and exploration. Of course the big sisters had to help! Here are more ball pit activities that young children love.
How to help baby enjoy tummy time
Helping to encourage lots of tummy time in your little one doesn’t need to be stressful. But many times, it may seem like your baby hates tummy time! They scream, they cry, and they place their face right on the floor. Scary, right? Don’t worry, we’ve all been there as new moms.
Tips to help with tummy time:
Get down on the floor with your baby and encourage reaching for enticing toys or towards your face/hands as you are right out of reach.
Try some of the tummy time ideas in the Mommy Academy course.
Add tummy time in throughout the day. Try a few minutes after diaper changes or when baby is in a pleasant mood. All of that tummy time adds up to build the strength needed for pushing over to the side.
Try chest to chest tummy time as the adult holding the baby lies back on couch cushions.
Try a football hold.
While sitting on a couch, try tummy time on your lap while rubbing baby’s back.
Also, is your little one pushing up on their arms when in tummy time? The weight of the head tends to pull them over into a side position/laying on belly from tummy time, so that is another benefit.
Babies get so much exposure to different textures naturally through play. This is just a simple way to encourage functional reach and tummy time play. Some other items that work well with this baby sensory play activity that we love:
Find many more baby play ideas here to drive sensory input through play based on each stage through the first year.
Colleen Beck, OTR/L has been an occupational therapist since 2000, working in school-based, hand therapy, outpatient peds, EI, and SNF. Colleen created The OT Toolbox to inspire therapists, teachers, and parents with easy and fun tools to help children thrive. Read her story about going from an OT making $3/hour (after paying for kids’ childcare) to a full-time OT resource creator for millions of readers. Want to collaborate? Send an email to contact@theottoolbox.com.
If you are looking for a fun Easter egg game that the kids will love, then you are in luck. Add this activity to your Easter activities and use up a few of those plastic eggs. This color scavenger hunt uses plastic Easter eggs, and it’s a very fun way to play and learn!
Use those plastic eggs to encourage gross motor skills, visual perception, and color learning in a way that kids won’t forget. While the kiddos are playing this Easter game, they are building cognitive skills AND underlying skill areas like visual scanning and other visual perceptual skills.
Easter Egg game
We set this Easter activity up years and years ago. (2013 to be exact!) However, it’s one of those activities that stands the test of time. If you’ve got plastic Easter eggs on hand, use them to build skills like the ones we worked on here!
COLOR SCAVENGER HUNT
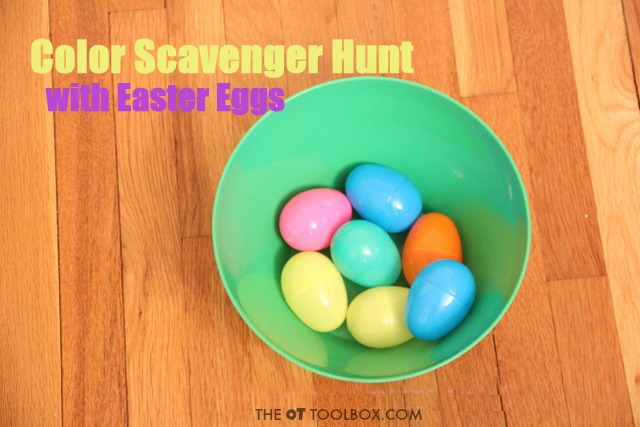
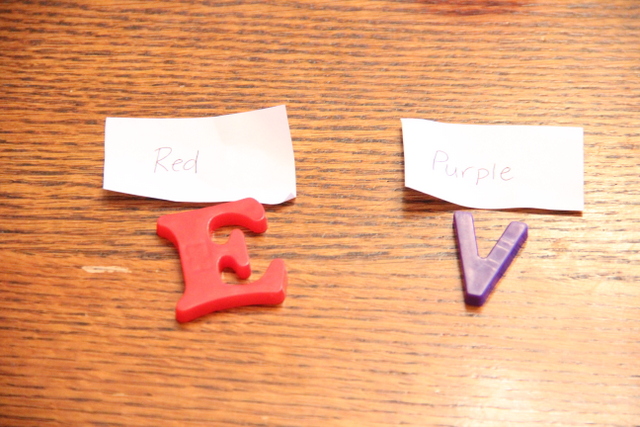
This color scavenger hunt is so easy to set up…and so much fun. Kids can work on identifying color names, and color matching. I wrote different colors on slips of paper and put them into plastic eggs. The kids got to pick an egg from the bowl and “sound out” the color on the slip of paper. Ok, my 5 year old sounded out the color with help. The other two said the first letter of the word and guessed the color. They were pretty excited to “read” the color on their slip of paper!
Another idea to expand this activity is to write words and do an Easter egg version of our word scavenger hunt.
An Easter Game Kids will Love
Now for the egg game…So then, they had to run off and find something that was the color of the written word on their slip of paper…and it had to FIT inside the egg. I sat and waited for them to run back and show me what they found while they tried to fit it in their egg. (completely genius way for this mom to finish a cup of coffee!)
They had a little trouble with some things, but this was a fun and different way to work on visual perceptual skills. Will that little doll fit in the egg? We weren’t sure by looking at it, but with a little fiddling, she did! Fitting the eggs together with the little objects inside was a great fine motor exercise.
Color Identification for Kids
They found something for each color!
Putting items into the eggs and then matching colors was a great way to work on color identification skills.
Matching colors requires visual motor skills to match colors and use that recognition in identifying the name of the color. It’s a skill that requires visual memory as well as working memory. This skill then carries over to so many other areas like letter recognition, and so much more.
This Easter themed play activity could be modified in so many ways for learning words, colors…have fun with it 🙂
Want more ways to play and learn this time of year?
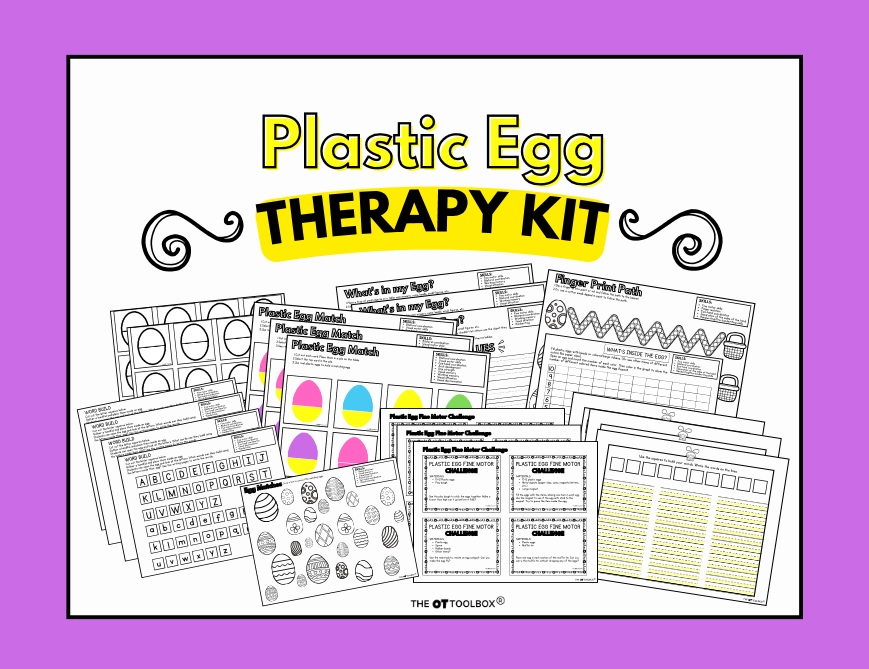
One resource we love is our $5 therapy kit…the Plastic Egg Therapy Kit! It has 27 printable pages of activities with an Easter egg theme. In the kit, you’ll find fine motor activities, handwriting prompts, letter formation pages, pencil control sheets, plastic egg activities, matching cards, graphing activities, STEM fine motor task cards, and more. There are several pages of differentiated lines to meet a variety of needs. This therapy kit has everything done for you.
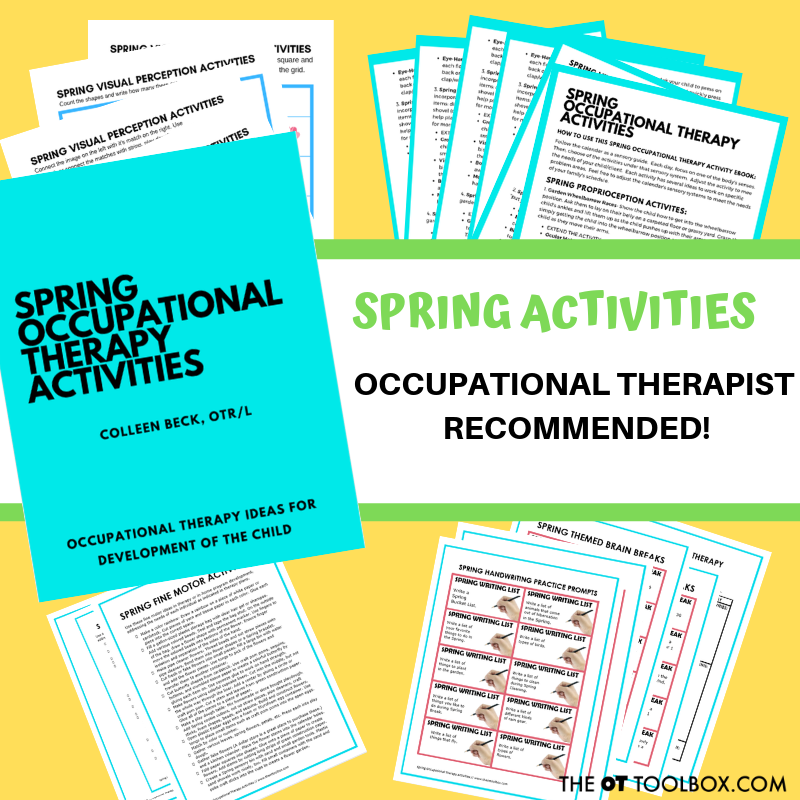
This time of year, one of our more popular products here on The OT Toolbox is our Spring Occupational Therapy packet. The best news is that, this packet has had a major upgrade from it’s previous collection of spring sensory activities.
Another great tool for supporting skills is the Spring OT packet…
In the Spring OT packet, you’ll now find:
Spring Proprioceptive Activities
Spring Vestibular Activities
Spring Visual Processing Activities
Spring Tactile Processing Activities
Spring Olfactory Activities
Spring Auditory Processing Activities
Spring Oral Motor Activities
Spring Fine Motor Activities
Spring Gross Motor Activities
Spring Handwriting Practice Prompts
Spring Themed Brain Breaks
Occupational Therapy Homework Page
Client-Centered Worksheet
5 pages of Visual Perceptual Skill Activities
All of the Spring activities include ideas to promote the various areas of sensory processing with a Spring-theme. There are ways to upgrade and downgrade the activities and each activities includes strategies to incorporate eye-hand coordination, bilateral coordination, body scheme, oculomotor control, visual perception, fine and gross motor skills, and more.
THE BEST THING ABOUT THE SPRING ACTIVITY PACKET:
One of my favorite parts of the Spring Occupational Therapy Packet is the therapist tool section:
Occupational Therapy Homework Page
Client-Centered Worksheet
These two sheets are perfect for the therapist looking to incorporate carryover of skills. Use the homework page to provide specific OT recommended activities to be completed at home. This is great for those sills that parents strive to see success in but need more practice time for achieving certain skill levels. This activity packet is 26 pages long and has everything you need to work on the skills kids are struggling with…with a Spring theme!
Colleen Beck, OTR/L has been an occupational therapist since 2000, working in school-based, hand therapy, outpatient peds, EI, and SNF. Colleen created The OT Toolbox to inspire therapists, teachers, and parents with easy and fun tools to help children thrive. Read her story about going from an OT making $3/hour (after paying for kids’ childcare) to a full-time OT resource creator for millions of readers. Want to collaborate? Send an email to contact@theottoolbox.com.
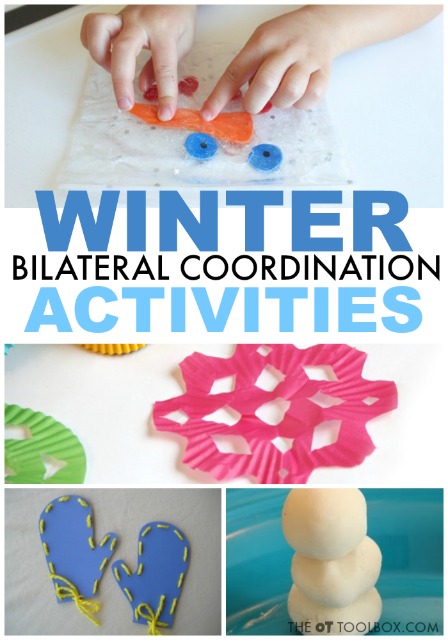
Bilateral coordination is a big topic in child development. The fact is that the coordinated use of the hands is a tricky skill for many kids. Using the hands together in tasks is necessary for hand dominance and tasks like handwriting, managing clothing fasteners, catching and throwing a ball, fine motor tasks, and so many other skills. Below you will find winter bilateral coordination activities. These are winter themed activities that improve bilateral integration and can be used in occupational therapy activities in the winter months. Scroll through the activities below and add them to your therapy toolbox this winter!
Related: If you are looking for a resource for developing bilateral coordination in kids, try the Winter Fine Motor Kit. It’s loaded with fine motor strengthening activities designed to promote and develop bilateral coordination, all in no-prep materials.
Winter Bilateral Coordination Activities
This post is part of our Winter Week series here on The OT Toolbox. Each day this week, we are sharing activities, ideas, and tips for getting the kids active and moving…and working on occupational therapy goals in the winter months.
For example, these snow globe letter puzzles incorporate bilateral integration using both hands along with visual scanning, crossing midline to find and reach for a matching letter card. The winter-themed activity can be modified to meet the needs of the individual: using less or more cards, incorporating fine or gross motor input, and positioning the cards in different planes or surfaces to work on various levels of bilateral coordination. It’s just one more way to make therapy skills like bilateral coordination fun with a winter theme!
This time of year can be tough on therapists; It’s right after the holidays. If in a cold weather environment, it can be a glum and gloomy time of year with cold temps and shorter days. It can be hard to come up with fresh ideas! That’s why I decided a Winter Week was in order.
Each day this week, you’ll find winter themed activities designed to meet occupational therapy goal areas in fun ways. Here’s what’s going on this week:
On to the Winter Bilateral Coordination Activities! Have fun in OT these winter months!
First, What is Bilateral Coordination?
In short, bilateral coordination is the use of both hands together in a coordinated manner. Development of bilateral coordination begins early in infancy and continues through childhood.
There are three components of bilateral coordination, which include Symmetrical movements, Reciprocal movements, and Dominant hand/supporting hand movements.
These movements require both sides of the body. Also called bilateral integration, the movements of both hands together in activities requires processing and integration of both hemispheres of the brain to enable both hands working together at the same time.
Bilateral coordination is needed for skills like: eating, writing, coloring, drawing, self-dressing, brushing one’s teeth, playing, tying shoes, and so much more!
The winter themed bilateral coordination activities below are ideas for activities that can help to work on coordinated use of both hands in fun activities!
Winter Themed Bilateral Coordination Activities
1. Cutting Paper Snowflakes- Folding and cutting are bilateral coordination activities that require both hands being used together. Make paper snowflakes with different textures or types of papers to put a fun spin on this winter activity. Try making paper snowflakes with cupcake liners, paper bags, tissue paper, or large construction paper sheets!
2. Paper Snowmen- Remember making strands of paper dolls? Try making a strand of paper snowmen while working on bilateral coordination while folding and cutting the snowmen.
3. Lacing Mittens- Make a cardboard set of mittens and poke holes around the edges. Then lace with cord, yarn, or string like Fun Family Crafts did with their mitten lacing activity. Lacing is a bilateral coordination activity that boost the skills kids need for tasks like handwriting. Read more about how lacing is such a great activity for kids here. There are several winter-themed lacing cards in the Winter Fine Motor Kit.
4. Play Dough Snowmen- Mixing and rolling dough is a fantastic bilateral coordination activity. Here’s why: By mixing dough, both hands are working together against resistance of the dough, providing a sensory component in the form of proprioception. This feedback can provide a powerful muscle memory to the hands as they work. Kids can mix, stir, and knead while strengthening the hands and arms. This Baking soda dough is perfect for creating snowmen, which require rolling and building…and more bilateral coordination! There are 6 different winter themed play dough mats in the Winter Fine Motor Kit that you can print off and use over and over again.
5. Snowman Sensory Bag- This is such a fun sensory activity that allows kids to work both hands together to move parts of a snowman face while working on finger isolation and dexterity. This snowman sensory bag version from Mama Papa Bubba is very cute!
6. Winter Crossword Puzzle– A writing activity like a crossword puzzle is a great tool to build bilateral coordination skills. When writing, you need to support the paper with the nondominant hand while writing in the small spaces to fill in the crossword. Take the functional task up a notch by challenging users: Work on a vertical surface. Tape the BOTTOM of the page to a wall. Young learners can hold the paper up while filling in the crossword. If they lift up their non-dominant hand from the edge of the page, the paper will fall down.
Looking for more bilateral coordination ideas? Try these:
To end out the Winter Week here on The OT Toolbox, I wanted to create a fine motor worksheets that are a true resource during the winter months. These fine motor worksheets that cover a variety of different fine motor abilities:
These reproducible activity pages include: pencil control strips, scissor skills strips, simple and complex cutting shapes, lacing cards, toothpick precision art, crumble hand strengthening crafts, memory cards, coloring activities, and so much more.
Play Dough Roll Mats- We’ve shared some free play dough mats before. They are perfect for developing bilateral coordination as well as fine motor skills and hand strength needed for tasks like coloring with endurance, manipulating small items, and holding a pencil. Kids can roll small balls of play dough with just their fingertips to strengthen the intrinsic muscles. The Winter Fine Motor Kit contains 6 winter play dough mats that can be used all winter long!
Pinch and Grip Strength Activities- Use these bilateral coordination worksheets to target functional tasks and bilateral coordination. Kids will be challenged to use both hands together in a coordinated matter in addressing glue skills page, tong/tweezer activities, lacing cards, finger puppets, 1-10 counting clip cards, 10 toothpick art pages, find & color page, 5 crumble art pages.
Pencil Control Worksheets- Kids can develop bilateral coordination with a helper hand and their dominant hand while working on pencil control and accuracy. Some of the lines are small and are a great way to strengthen the hands, too.
Cutting Strips and Scissor Skills Sheets- Cutting with scissors is a functional bilateral coordination skill that requires accuracy and precision of a dominant hand and coordination of the helper hand. These winter themed scissor skills worksheets are great ways to strengthen the motor and visual skills needed for cutting with scissors. Also included are 7 scissor skills strips with graded precision designed for data collection and accuracy development, 2 color & cut memory cards, 4 pages simple cutting shapes in small/med/large sizes, 3 pages complex cutting shapes in small/med/large sizes, 2 small and 2 large cutting skills puzzles.
Handwriting Sensory Bin Materials- Help kids with bilateral coordination using the winter-themed A-Z uppercase and lowercase tracing cards with directional arrows, 1-10 tracing cards with directional arrows, 1-10 counting cards. Using the sensory bin materials can develop tactile handwriting, letter and number formation, finger isolation, crossing midline, sensory challenges with both hands as they scoop, pour, trace, and explore sensory bins.
Fine Motor Handwriting Sheets AND “I Spy” Modified Paper–Try the 4 Find/Color/Copy pages in different styles of modified paper, rainbow writing pages in 3 styles of modified paper. These handwriting worksheets use the winter theme to help with using a helper hand in handwriting activities and coloring tasks.
Write the Room Activities- Using a winter theme, these Write the Room cards includes: 5 lowercase copy cards, 5 uppercase copy cards, 5 lowercase tracing cards, 5 uppercase copy cards, 6 cursive writing copy cards, 2 styles of writing pages. TARGET SKILLS: Letter formation, pencil control, visual motor skills, visual attention, visual memory, line placement, functional handwriting at all levels and stages.
Looking for a consistent way to support fine motor skills all year? This yearlong fine motor system includes seasonal activity kits and monthly data collection tools to support planning and progress monitoring.
If fine motor planning and data collection feel overwhelming, you’re not alone. This done-for-you yearlong bundle organizes seasonal activities and monthly screening tools in one system.
Colleen Beck, OTR/L has been an occupational therapist since 2000, working in school-based, hand therapy, outpatient peds, EI, and SNF. Colleen created The OT Toolbox to inspire therapists, teachers, and parents with easy and fun tools to help children thrive. Read her story about going from an OT making $3/hour (after paying for kids’ childcare) to a full-time OT resource creator for millions of readers. Want to collaborate? Send an email to contact@theottoolbox.com.
This hand-eye coordination activity is one that uses an item we had in the house (and you may too!) We love to use recycled and upcycled materials in occupational therapy activities and this eye hand coordination activity is no different! Working on the coordination skills needed for tasks like handwriting, self-dressing, managing clothing fasteners, and other skills.
This hand-eye coordination activity doubles as a learning activity while matching letters and working on visual motor skills needed for tasks like handwriting, management of fasteners, coordination, and many functional tasks. Looking for more eye-hand coordination activities?
For younger kids, this hand eye coordination activities for toddlers is a great resource, because skills like coloring or picking out a crayon from the crayon box is just one way to help them with color recognition and functional eye hand coordination skills.
Hand-Eye Coordination
First, let’s define hand-eye coordination. Coordination between the visual input our eyes perceive and process and the coordinated motor movements are an integration of the visual and motor systems. This is eye-hand coordination as it is used in functional tasks. Eye hand coordination is necessary for every functional skill.
Hand-eye coordination activity
Amazon affiliate links are included below.
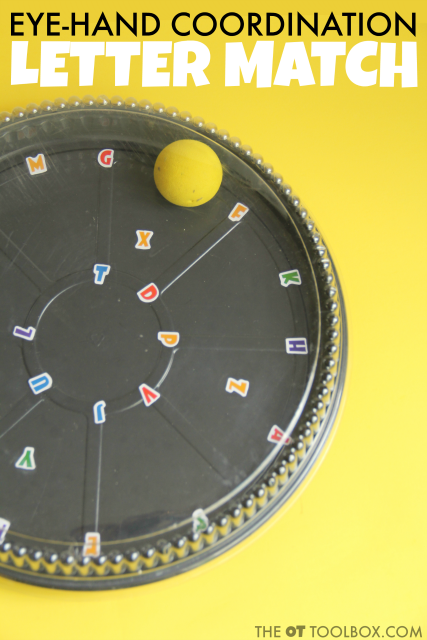
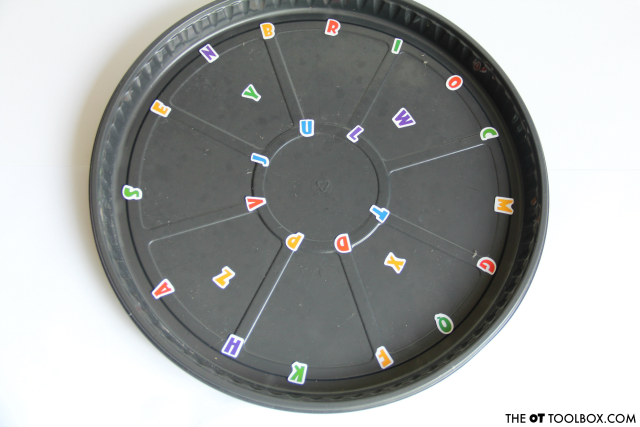
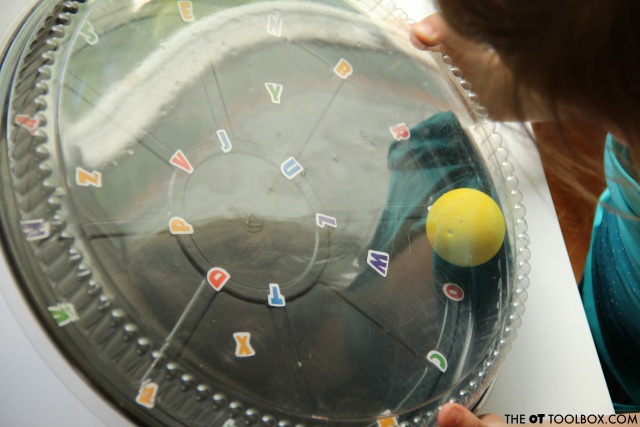
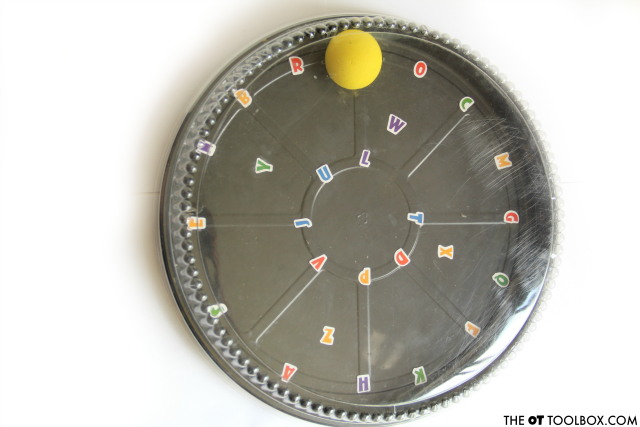
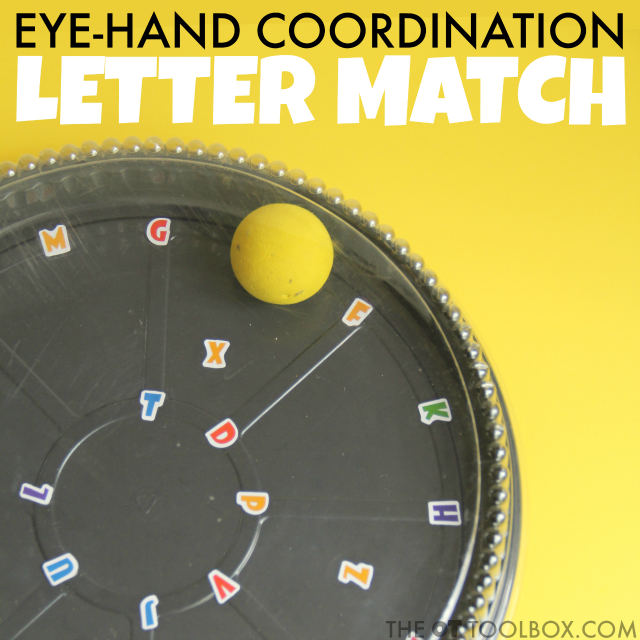
This activity used a recycled cookie cake pan that we washed out and used in a bilateral coordination eye-hand coordination activity. Besides the cake pan (save that lid, too!), we used just two other items:
1. Peel the stickers from the sticker sheet and randomly place them around the cake pan.
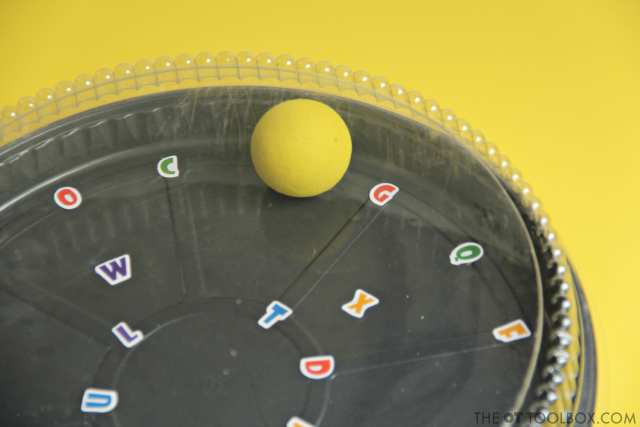
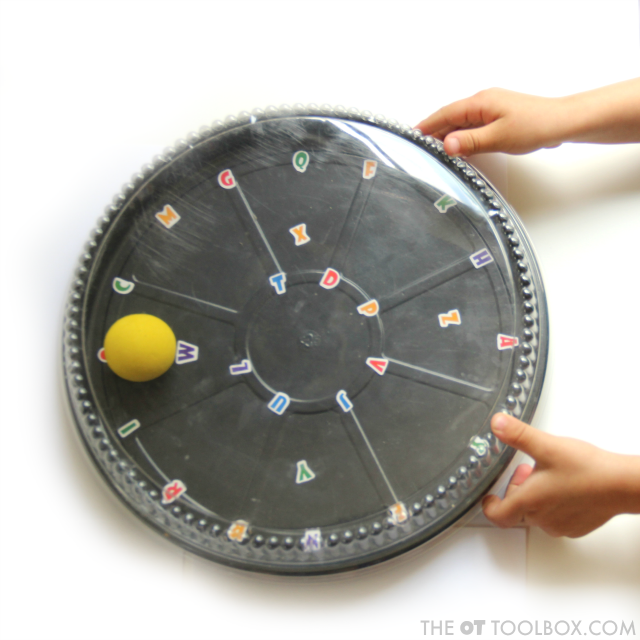
2. Place the foam ball in the cake pan and pop the lid into place.
That’s it! This is a super quick set-up and an activity that can be used by so many clients or students to work on a variety of areas.
Hand-Eye Coordination Activity with Letters
Ask students to roll the ball from letter to letter as they look for specific letters.
Roll the ball to letters in alphabetical order or ask he child to spell out spelling words.
Older students can spell words in sentences.
Call out random letters as students roll the ball as they visually can for each letter.
Roll the ball from one letter to another to match letters.
Incorporate handwriting by asking the child to roll the ball for 4 seconds. When a timer goes off, they child can write a list of words starting with that letter.
Hand-Eye Coordination Activity for Kids
This eye hand coordination activity addresses so many other areas as well:
Looking to work on the visual skills that play into motor output, motor planning, and eye-hand coordination activities? Our Visual Screening Tool may help.
More on eye-hand coordination skills:
For even MORE information on eye-hand coordination and the visual skills needed to complete visual motor and eye-hand coordination, or to better understand visual processing, you will want to join our free visual processing lab email series. It’s a 3-day series of emails that covers EVERYthing about visual processing. We take a closer look at visual skills and break things down, as well as covering the big picture of visual needs.
In the visual processing lab, you will discover how oculomotor skills like smooth pursuits make a big difference in higher level skills like learning and executive function. The best thing about this lab (besides all of the awesome info) is that it has a fun “lab” theme. I might have had too much fun with this one 🙂
Join us in visual processing Lab! Where you won’t need Bunsen burners or safety goggles!
If you are unsure when to refer or having a hard time getting a parent on board, check out my OT Vision Screening Packet for more information. It contains a screener for therapists and useful handouts for parents on why addressing vision is important to their child’s success.
This is a digital file. Upon purchase, you will be able to access the 10 page file and print off to use over and over again in vision screenings and in educating therapists, teachers, parents, and other child advocates or caregivers.
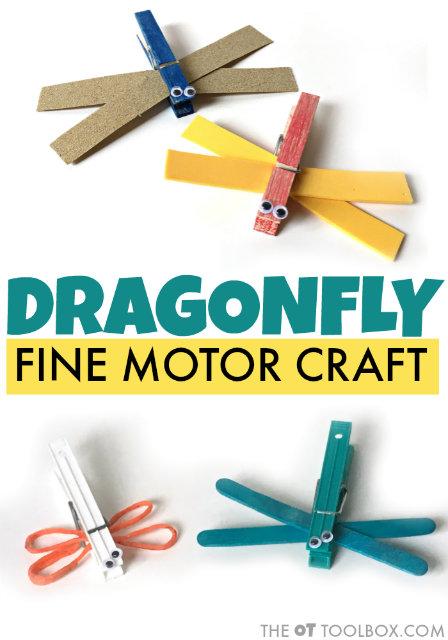
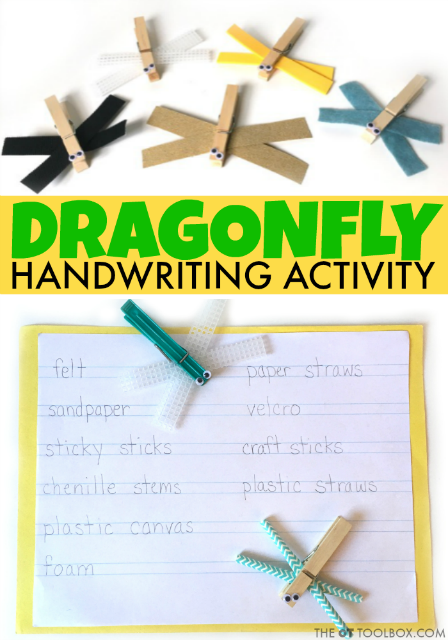
This blog post describes a cute dragonfly craft that can be used to address a variety of occupational therapy activity areas including: fine motor skills, visual motor skills, crossing midline, bilateral coordination, dexterity, and more.
Dragonfly Craft
Looking for a creative and crafty occupational therapy activity that is easy to prepare and packs big punch in addressing a variety of skills? This dragonfly occupational therapy activity and craft creation may be just what you need!
It’s fun, versatile, easy to implement, and addresses a large variety of skills and multiple skill levels while also being cheap!!
It’s a great activity that can be easily upgraded or downgraded to provide the “just right” challenge. While this dragonfly craft is perfect for the pediatric and school-based occupational therapy practitioner, but would make a great classroom center or take home activity too.
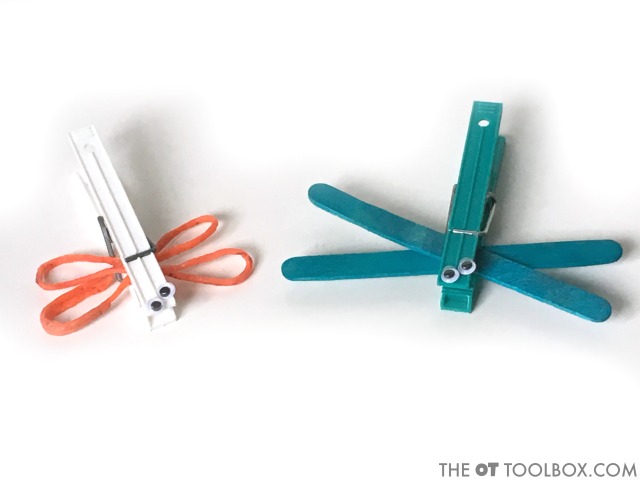
Dragonfly Craft Ideas
These dragonfly crafts are so versatile they could be used as a simple occupational therapy craft activity, an assembly activity, a game-like activity, or any combination.
For occupational therapy professionals looking for a quick craft and easy set up activity, this one is it…plus it supports a variety of skill areas.
For example, you can adapt the craft to support different skills, depending on the goals you’re addressing with kids:
Have students cut out paper strips to work on scissor skills
Add eyes with different small items or draw the eye features.
Take a look at all of the crafty fun that can be had with these fun flying creations.
Dragonfly Craft – A Fun Occupational Therapy Activity
Using the dragonfly as a take home occupational therapy craft encourages skill development during the making process with the end product being used for play or display.
The child could make one dragonfly or a group of dragonflies with the focus of the activity being on coloring and cutting which addresses a child’s fine motor coordination, manipulation and grasp, distal control, bilateral coordination and visual motor skills.
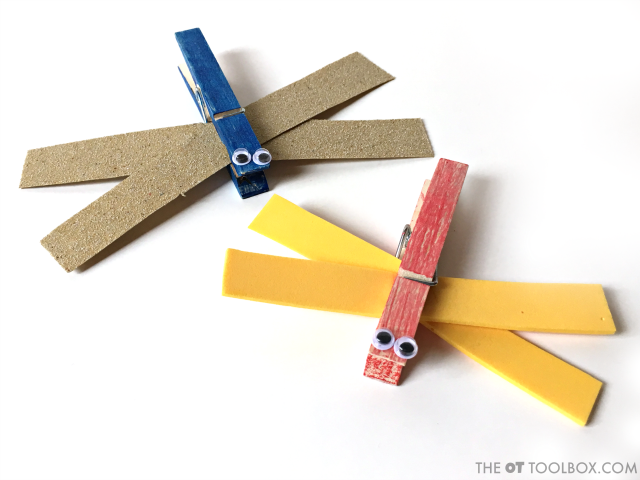
Affiliate links are included below: Color the clothespins with either a marker, crayon, or a colored pencil working on grasp patterns and distal control.
Cut the wings from selected tactile material working on scissor skills, including scissor grasp, bilateral coordination, and eye-hand coordination.
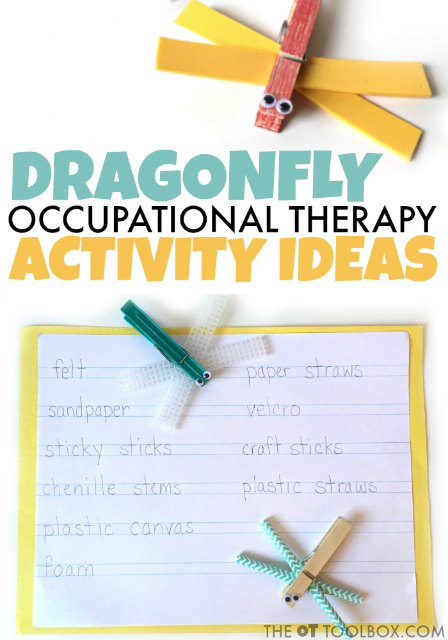
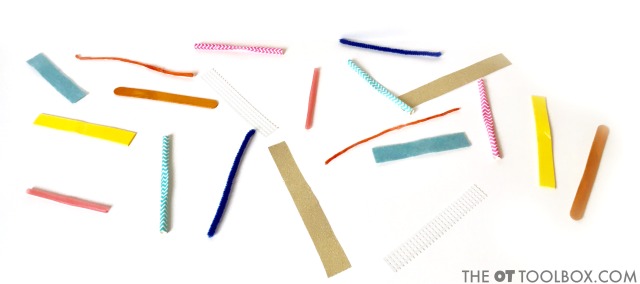
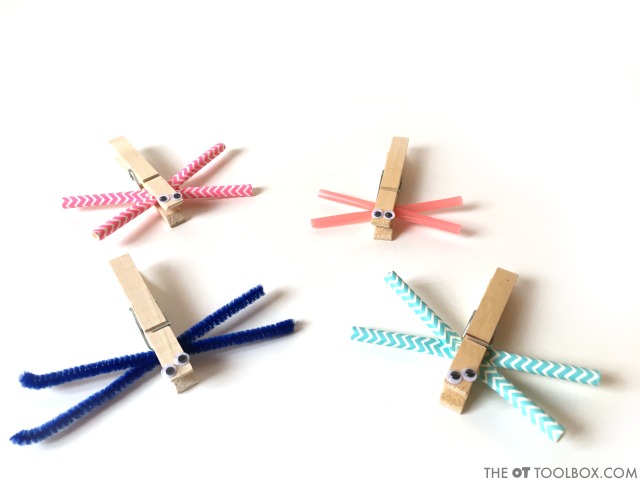
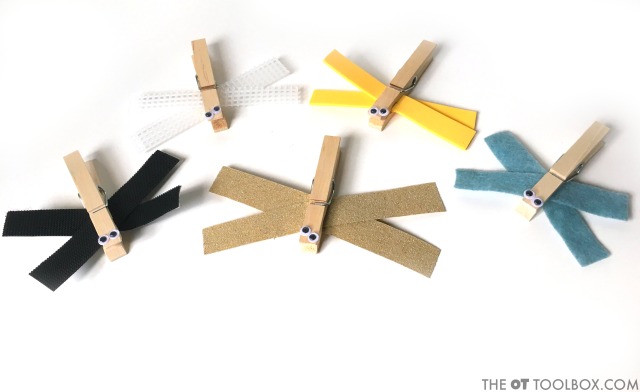
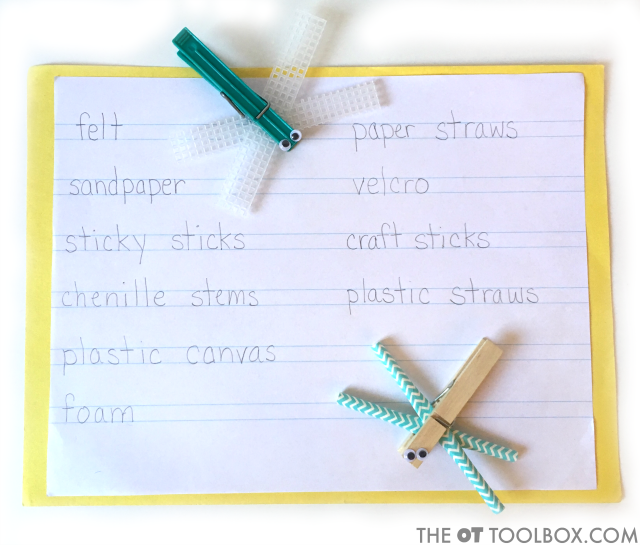
Possible materials that can be used for dragonfly designs could include felt, sandpaper, sticky sticks, chenille stems, paper straws, plastic straws, foam, Velcro, craft sticks, and plastic canvas.
Place the wings that are cut into an X pattern and pinch the clothespin to insert the wings. This process addresses fine motor strength, manipulation, pinch, and visual perceptual skills.
Dragonfly Occupational Therapy Activity
To use the dragonflies as an assembly activity requires the dragonfly materials to be prepared prior to the session.
The therapist pre-assembles the clothespins, having the googly eyes glued on and the wing materials are already cut.
Having these pieces ready prior to the session allows the focus of the session to be on targeted skill development directed by the therapist addressing individual goals.
Activity focus areas might include fine motor skills, bilateral coordination, tactile tolerance, isolated or intersecting diagonal line practice, visual scanning, motor planning and problem solving.
To set up the dragonfly craft as an occupational therapy assembly activity:
· 1. Place the wing materials scattered on the tabletop and have the child visually scan the table top for matching pieces.
· 2. Have the child take the matches and create an X pattern for wing assembly.
· 3. Have the child pinch clothespins open to insert the wings.
· 4. Continue this process until all dragonflies are assembled with matching wings.
Dragonfly Game
To use the dragonflies for fun game-like activities, the dragonfly materials would be prepared prior to the session with one set of wing materials inside of a bag.
Dragonfly Matching Game 1: Have the child reach into the bag, feel for only one wing, pull it out and locate its match on the table top for dragonfly assembly.
Dragonfly Texture Game 2: Have child reach into the bag and feel the texture of one wing inside of the bag and while keeping their hand in of the bag, use their other hand to locate its match on the table top and assemble the dragonfly.
Activity focus areas might include the same as simple assembly, but with this game-like approach tactile perception is more actively targeted.
Dragonfly Handwriting Activity
A bonus would be to couple this activity with some handwriting practice. Take a look below at how easy it is to toss in some quick handwriting work.
Dragonfly designs is a fun, cheap summertime activity that is easy to implement during therapy sessions and packs a big therapeutic punch. What therapist doesn’t enjoy those elements for a therapy activity?
Regina Parsons-Allen is a school-based certified occupational therapy assistant. She has a pediatrics practice area of emphasis from the NBCOT. She graduated from the OTA program at Caldwell Community College and Technical Institute in Hudson, North Carolina with an A.A.S degree in occupational therapy assistant. She has been practicing occupational therapy in the same school district for 20 years. She loves her children, husband, OT, working with children and teaching Sunday school. She is passionate about engaging, empowering, and enabling children to reach their maximum potential in ALL of their occupations as well assuring them that God loves them!
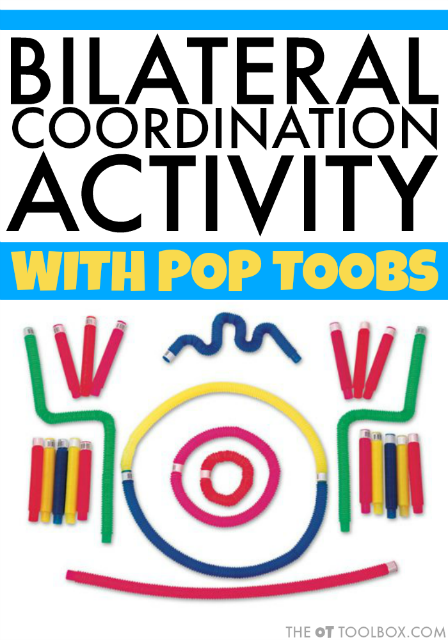
Below, you will find a blog post on a bilateral coordination activity using Pop Toobs. This fine motor bilateral coordination activity can address a variety of fine motor skills in kids including those bilateral coordination skills needed for tasks like handwriting, scissor use, shoe tying, and much more. This article was written by The OT Toolbox contributor author, Christina Komaniecki, OTR.
Bilateral Coordination Activity
This post contains affiliate links.
Sometimes when I am working with the students at school I have limited resources and have to be creative with what I have (as most OT’s are really good at). One really fun simple activity that I have used with students of all ages includes using tongs, a pop toob and small objects (pom poms, little erasers, tiny plastic animals etc.). Since using tongs can get boring for children fast, there is always ways to make it more enjoyable. Check out these other fun Occupational Therapy Activities Using Tongs.
Being able to perform bilateral coordination tasks is important in everything we do! Think about a child writing, cutting with scissors, completing fasteners, washing their hair, even making cookies requires bilateral coordination.
Components of Bilateral Coordination
There are three components to bilateral coordination which include reciprocal movements, symmetrical movements and using a dominant hand and a helper/supporting hand to complete tasks.
Bilateral Coordination Activity Using Pop Toobs
Working in the school lots of children I work with have a difficult time using their helper/supporting hand to stabilize paper when handwriting. Or when using scissors to cut with they won’t bring their other hand to hold the paper. This is why this activity is great to work on
to target a variety of skills, eye hand coordination, bilateral coordination and fine motor skills.
This activity works on using a helper/supporting hand to hold the pop toob while the other hand holds the tongs. This is great for children who have a hard time with stabilizing paper when cutting or handwriting, because it has them use both hands for the activity and it cannot be done with just one.
Materials needed for bilateral coordination activity with Pop Toobs
Tongs-varying sizes depending on the size the child’s hand and size of object being picked up
Here are some tongs that vary in size:
Wooden tongs- works on finger position and grasp
Jumbo tweezers-facilitate an open web space and proper grasp
Mini alligator tongs and Teeny weenie tongs-perfect for little hands, to help build intrinsic muscles and proper grasp.
Small objects
Tiny plastic animals
Pom poms
Coins
Beans
Small erasers
Noodles
Directions for Bilateral Coordination Activity
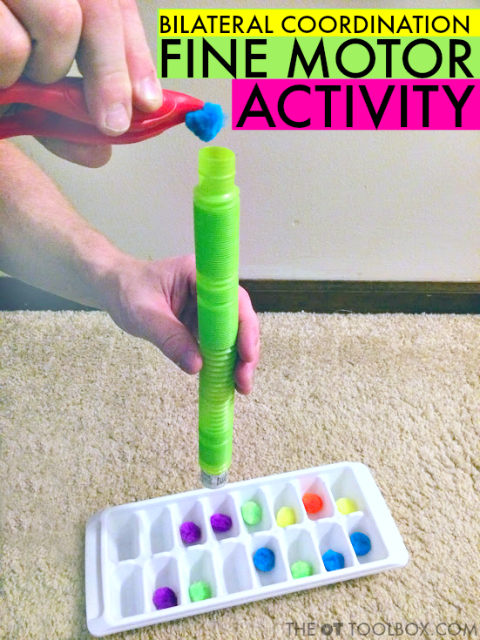
Start by having the child hold the pop toob in one hand. Then using tongs, they will pick up an item with the other hand and have to place it over the top on the tube, open the tong and let the item travel down the tube. This activity is great to also work on the fine motor development of the hand.
More bilateral coordination activities using a Pop Toob
An ice tray- use pom poms and have the child move the tube so that the pomp om can fall into a designated space.
A bucket of water- use small erasers or small plastic toys and let them travel down the tube into the water and make a splash!
A container of beans- a fun way to have noodles travel down the tube fall into the beans and then shake up the container and let the child find the items in the hidden noodles.
How to grade this bilateral coordination activity:
To make this activity more difficult use a smaller tube, smaller tongs and smaller objects.
To decrease the activity, use a bigger tube, large tongs and bigger objects.
You can also have the child sit or stand when participating in this activity. From what I have seen children really like to stand when doing this.
About Christina:
Christina Komaniecki is a school based Occupational
Therapist. I graduated from Governors State University with a master’s in
occupational therapy. I have been
working in the pediatric setting for almost 6 years and have worked in early
intervention, outpatient pediatrics, inpatient pediatrics, day rehab, private
clinic and schools. My passion is working with children and I love to see them
learn new things and grow. I love my two little girls, family, yoga and going
on long walks.
Love this activity? Here are more bilateral coordination activities that you will enjoy:




.jpg)