Oral Motor Exercises

Image of mouth with occupational therapy items for oral motor skills- chew necklace, straws, mirror. Text reads "oral motor exercises for occupational therapy".

There are many reasons to incorporate oral motor exercises into your therapy plan. Here, we are covering the reasoning behind several oral motor exercises and strategies to work on mobility and functioning in the mouth, tongue, lips, and jaw.

Image of mouth with occupational therapy items for oral motor skills- chew necklace, straws, mirror. Text reads "oral motor exercises for occupational therapy".

Eating is a functional skill we all do. When there are oral motor issues, occupational therapists will address this area.

Why Oral motor Exercises?

When we talk about oral motor exercises, it’s important to know why we are considering specific exercises. When it comes to oral motor exercises, we are striving to improve the functioning of the mouth, jaw, lips, cheeks, and tongue so that the child can demonstrate coordination needed for sound production and articulation. Other issues can arise in manipulation (chewing, movement of foods and liquids, tolerance of various textures, and swallowing food and liquids).

When it comes to feeding issues, there can be a question of whether the feeding problems are a result of sensory processing challenges and/or oral motor considerations. Check out this resource for more information on pediatric feeding and oral motor issues or sensory issues that impact feeding abilities.

Kids who struggle with feeding may be impacted by oral awareness and oral discrimination. These skills enable us to both be aware of the motions of the muscles and joints of the mouth to enable positioning for oral sound creation as well as movements to control and mobilize the chewing and manipulation of foods and drinks of various textures.

Oral discrimination is essential for safety, efficiency, and function when eating.  When oral discrimination is a challenge, children can have resulting food aversions, be unaware of food in their mouth, or not be able to tolerate certain types of foods because of food texture issues, tastes, or temperatures.  They may have difficulty with managing various textures and end up with messy eating during meals. Oral discrimination also effects skills like speech and tooth brushing.

Start here by reading more about the development of oral motor skills. Typical development of oral motor skills is an important consideration when it comes to self-feeding and movements of the mouth, tongue, and lips in tolerating new foods or textures in feeding.

Specific reasons for incorporating oral motor exercises into a therapy program may include issues with the following movements:

The oral motor exercises listed below can offer additional opportunities for strength and coordination of oral motor skills, as well as heavy work proprioception through the mouth as calming input to organize the body.
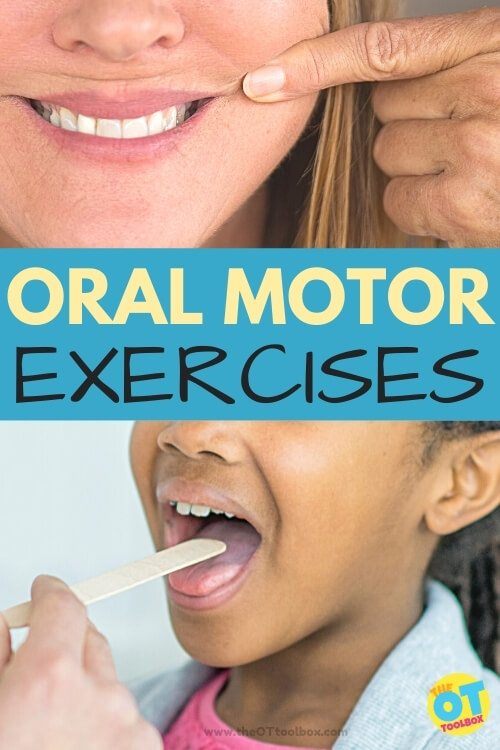
These oral motor exercises are kid-friendly and improve coordination, strength, and mobility of the mouth to facilitate feeding, oral discrimination, or sensory needs.

Let’s take a look at some of the oral motor exercises that we might use with kids…

Oral Motor Exercises

These activities are not the only ones that can be done to address oral discrimination issues.  Additionally, it’s important to know that therapists understand that oral discrimination is just one piece of the feeding puzzle.  Considerations such as tone, sensory processing, and oral-sensory exploration as well as many other components make up feeding.

Tips for Oral Motor Exercises

  1. These specific oral motor exercises can be selected based on the specific needs of the child. Each exercise many not work for all individuals. And, the exercises should be modified as needed to grade up or down (make them easier or harder) based on the needs of the individual.
  2. For each exercise listed below, add a repetition to complete the task. Add in a specific number of repetitions.
  3. Add the number of days these exercises should be completed each week.
  4. Incorporate function whenever possible. Working on feeding? Add real foods of interest. Use utensils or cups when possible. Incorporate the occupation of play to make the exercises motivating and fun.
  5. Consult with a pediatric occupational therapist!

Oral Motor Exercise Ideas

Remember that not all of these exercises are needed for every child’s specific needs. Pick and choose the exercises that meet the needs of the child you are working with.

  • Bring their hands and fingers to his or her mouth and lips.
  • Play tongue Simon Says with a mirror. We have many oral motor Simon Says commands that can be printed off to target specific motor skills with the lips, jaw, cheeks, and tongue.
  • Play the “hokey pokey” with your tongue and cheeks.
  • Try messy play with food.
  • Encourage tolerance of a spoon or other feeding utensil in different parts of the mouth.
  • Open and close your mouth.
  • Move your tongue from side to side.
  • Press your lips together and then smack your lips apart.
  • Explore different types of utensil textures (plastic, metal, plastic covered, etc.)
  • Hold and play with a toothbrush, bringing the brush to their mouth and face.
  • Encourage mirror play, identifying parts of the mouth.
  • Add rhythmical, whole- body play with therapy balls, uneven surfaces such as trampolines or crash pads to improve proprioceptive input. (Great for core strengthening and stability needed for feeding, teeth brushing, etc.)
  • Explore mouth play with teething toys and tools.
  • Explore use of teething toys and tools in different positioning (prone, supine, side lying, etc.)
  • Use rhythmical music along with tapping the cheeks or lips.
  • Offer frozen fruit on a tongue depressor. Try this recipe for frozen fruit skewers.
  • Chew a straw.
  • Pucker your lips in a pretend kiss.
  • Blow a party noise maker.
  • Blow a kazoo.
  • Use a straw to pick up squares of paper and drop them into a bowl.
  • Make fish lips.
  • Apply Chapstick (scented or unscented) and press your lips together as you move your lips from side to side.
  • Puff up your cheeks.
  • Smack your lips.
  • Whisper the sounds the letters of the alphabet make from A-Z. Notice how your mouth moves. Or, spell out your name or other words by whispering the sounds the letters make.
  • Blow bubbles
  • Blow through a straw to move a cotton ball or small craft pom pom along a line. Can you move it through a maze?
  • Freeze water to a popsicle stick and lick or suck until the ice melts.
  • Try making these Shirley Temple popsicles. They are a tasty oral motor exercise tool.
  • Pour water into an ice cube tray. Add popsicle sticks to create a cube pop. Lick and suck until the ice melts.
  • Scoop peanut butter onto a spoon. Lick it off with the tip of your tongue.
  • Point your tongue to the end of your nose. Hold it there as long as you can.
  • Point your tongue to your chin. Hold it there as long as you can.
  • Push your tongue into your right cheek. Hold it there and then press the end of your tongue into your left cheek.
  • Count your teeth using your tongue. Touch each tooth with the tip of your tongue.
  • Chew gum. Can you blow a bubble?
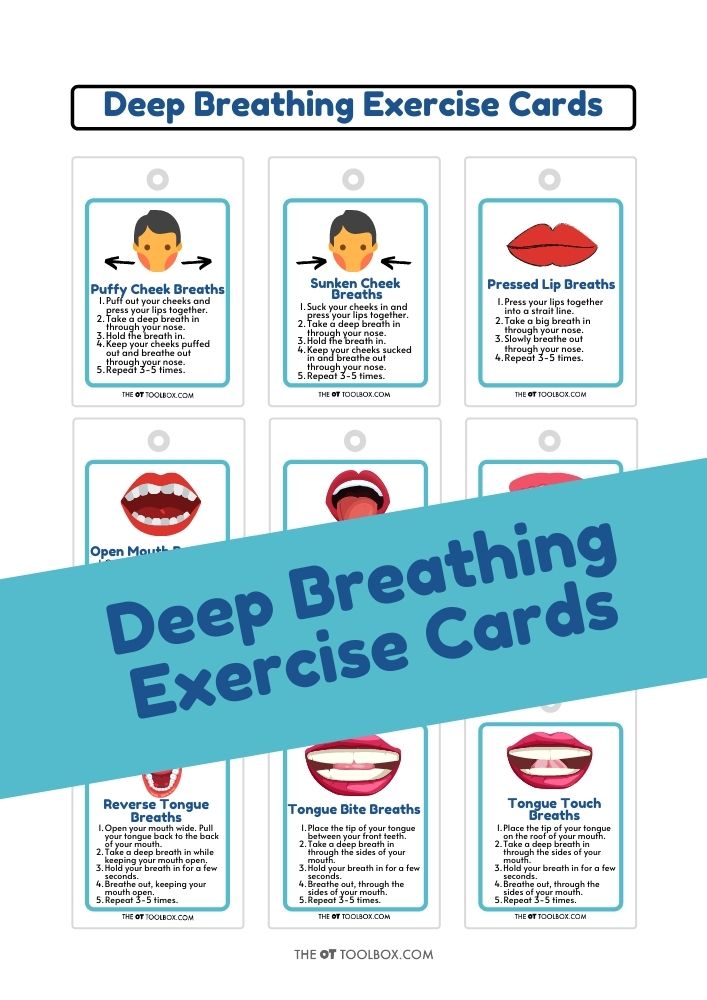
  • Deep breathing mouth exercises. Use these printable deep breathing cards.

Themed Oral Motor Exercises

You may want to check out these themed oral motor exercises for development of motor skills in various points throughout the year. These themed exercise can be added to weekly therapy themes to increase motivation and carry through. Here are several themed oral motor exercises for kids:

Deep breathing exercise cards for oral motor skills and proprioceptive input through the mouth and lips

Want printable oral motor exercises? Grab the Deep Breathing Exercise Cards. The pack of deep breathing cards includes oral motor exercises for heavy proprioceptive input through the mouth, tongue, and lips, and oral motor activities using different themes, totaling 113 different exercises.

The Oral Motor Exercises can be done anytime, using just the mouth. These strategies offer exceptional proprioceptive input through the lips, tongue, and cheeks, making a calming heavy work activity that can be used in sensory diets to help children achieve a calm and ready state of regulation.

Click here to get your copy of the Deep Breathing Exercise Cards.

ORAL MOTOR EXERCISES in Occupational Therapy

Today, like many other days, I evaluated the cutest little boy.  When I asked the mother her main concern, she replied that he does not eat anything.  While he definitely had other difficulties, the core of her worries was eating.  Why?  In the hierarchy of needs, basic ones like food and sleep build the foundation of higher learning. Not only this, these are the worry triggers every parent feels on a daily basis! 

Feeding and eating are an important part of our lives. Not only for survival, but there is a social component relating to food. Think of all the major celebrations each year; birthdays, Christmas, Thanksgiving, Easter.  What is one of the things families gather for?  A meal. Meal times come around at least three times a day.

Imagine the stress on the child and their caregivers each and every meal involving a problem feeder.  When I say “problem feeder” I am not talking about your average picky eater who does not like vegetables.  I am speaking of the children like the one I evaluated today.  The only foods he will eat by mouth are corn chips and Doritos. He will drink water and juice from a bottle. This is it.  He now has a g-tube for supplemental feedings to take some of the stress off of nutrition for the moment. 

There are a lot of components involved in eating.  Did you know there are 27 steps between having the food in the room with you, and eating a regular meal?  This is a ton of stages to navigate each and every new food that is added, especially to a picky eater or problem feeder. Add to this the oral motor difficulties that may be interfering with good eating skills. 

Try and imagine what it can feel like to have sensory or oral motor difficulties. 

Oral Motor Challenges That we work on in OT Sessions

As pediatric occupational therapists, we focus on function, right? This means we assess the areas of daily living skills that are a challenge. Then we can work on those areas by addressing the underlying skills and development. So, when it comes to oral motor challenges, these are some of the things we hear parents relay to us in the OT evals.

With oral motor struggles your child might experience the food:

  • sliding down their throat before they are ready to swallow
  • getting stuck in their mouth and they can not move it to the back
  • falling apart in their mouth, with bits of food in different spaces rather than creating a bolus. 
  • Causing their mouth to be so tired after just a few chews
  • Taking forever to chew and swallow
  • Falling out of their mouth in the front or sides
  • Getting all over their lips and not being able to clean it

After a few trials of this, either your child accepts that they are a messy eater, or they become selective about what passes through their lips. 

Tongue Exercises

My step-son has significant fatigue when eating. The first few bites go down quite easily.  After a few bites, he slows down significantly.  I see him chewing and chewing the same bite for several minutes. I counted his chews once and he was chomping up to 50 times for one bite!  This means meal times last forever, or he gives up before getting adequate intake. 

In this situation, it might be appropriate to use some tongue exercises. This can help with clearing food from the cheeks or the mouth in order to swallow food. Of course, you’ll want to have a full evaluation completed to make sure this is the most appropriate step.

Tongue exercises to try:

Tongue Push-Ups- Press their tongue against the roof of their mouth as if trying to push it upwards. Hold for a few seconds and release. This helps with awareness of how their tongue moves in their mouth.

Tongue Lateralization– Have them move their tongue from side to side, touching the corners of their mouth. This helps with moving food from the cheek pockets.

Tongue Circles: Have them move their tongue in a circular motion inside their mouth, touching the roof, sides, and bottom of the mouth. This helps with clearing food as it’s being chewed and helps with clearing the teeth when eating.

You can work on these tongue exercises while trying different foods. Offer different consistencies like chewy licorice or bagels.

Another chewing exercise to try is using gum to work on the chewing ability while managing saliva and holding the gum in the mouth (not allowing it to fall out when chewing). This is a fun exercise because kids may not get a chance to chew gum that often.

Oral Motor Exercises for Gagging

Now imagine having sensory issues in and around your mouth. If you have low awareness in your mouth, you may not notice the food in there.  You may tend to stuff your mouth in order to feel the food in there.

This can lead to gagging and choking, a major safety concern. If you have high sensitivity or awareness in your mouth, the smallest bite can feel like a mouthful. You take teeny tiny bites, making meal time last forever. 

When it comes to gagging, the first step would be to monitor and address the food consistency. Because we don’t want to see any risk of aspiration, you want to address this first when there is gagging happening.

Try these things:

Food consistency– Make sure you’re using the best consistency and start with soft foods. Do they gag with easy-to-manage textures, like purees or mashed foods? Gradually introduce more challenging textures as tolerance improves.

Encourage small bites- Offer smaller bites of food to reduce the chance of triggering the gag reflex. Small, manageable portions are less likely to overwhelm the individual.

Temperature– Sometimes gagging has to do with the food temperature because of sensory considerations. Try different food temperatures. Some individuals might tolerate warm or cold foods better, which can reduce gagging.

Other ways your mouth can be sensitive can be texture, temperature, and taste. This does not take into account the smell of food either. There have been children I work with who know how hot they like their food, down to the second in the microwave.  Two seconds too much, and it gets rejected. If this does not sound that bad, imagine this same child liked her food to stay at the same temperature.  Once the food cooled down, she needed it reheated a few more seconds, otherwise she would not continue.  This is exhausting!  

If food feels, tastes, or smells noxious, how many times are you going to keep trying?  If you feel as if you are choking each time you eat certain foods, how often are you going to eat them? Every meal time feels like an attack. Eventually the brain stops responding to calls for hunger.

Luckily there are treatments for both oral motor and sensory processing difficulties regarding eating. The first step is to take a step back. I can almost guarantee there has been some stress felt by either you or your child around meal times. Breathe and take a second to realize your child is not likely starving.  They are likely getting something by mouth (or tube).  It may not be adequate calories or nutrition, but that will come. 

Start with the expectation that your child will join you at meal times.  They may not eat, but just sit and see/smell the food.  This is a big step.  If your child truly has oral motor or problem feeding issues, you will benefit from  help by a trained therapist.  Not all occupational and speech therapists deal with feeding disorders.  The wrong training CAN make things worse.  

Below are some tricks and techniques to begin working on easing some of the stress around mealtimes and eating.

  • have a supportive approach.
  • Have a routine in place. Establish a predictable mealtime routine with regular times and familiar settings.
  • Praise even small efforts.
  • Introduce new foods slowly.
  • Involve the child in meal preparation, such as washing vegetables, stirring ingredients. Here are ideas for getting kids involved in cooking tasks.
  • Use small portions so the child isn’t overwhelmed or stressed out by what’s on their plate.
  • Give the child choices about what they eat.
  • Before meals, engage the child in oral motor exercises, such as blowing bubbles or chewing on a chewy tube, or use our oral motor exercise cards.

Colleen Beck, OTR/L has been an occupational therapist since 2000, working in school-based, hand therapy, outpatient peds, EI, and SNF. Colleen created The OT Toolbox to inspire therapists, teachers, and parents with easy and fun tools to help children thrive. Read her story about going from an OT making $3/hour (after paying for kids’ childcare) to a full-time OT resource creator for millions of readers. Want to collaborate? Send an email to contact@theottoolbox.com.

Halloween Sensory Bin

Picture of hands playing in a sensory bin with dyed pumpkin seeds, and pictures of a Feed the pumpkin and Feed the Monster. Text reads: Halloween sensory bins.

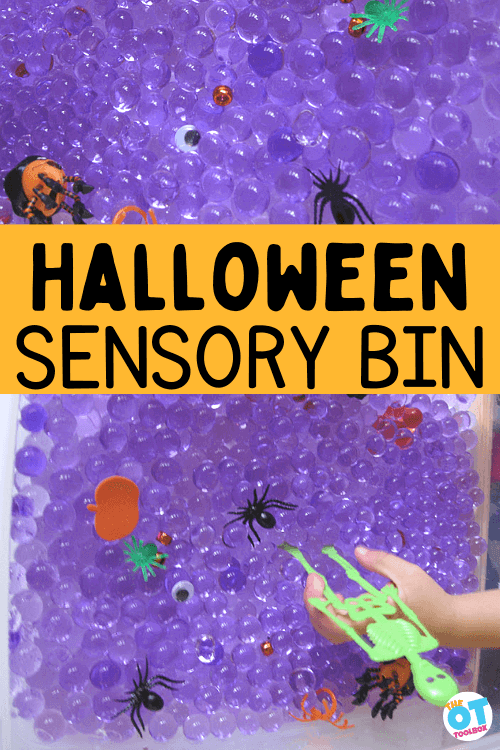
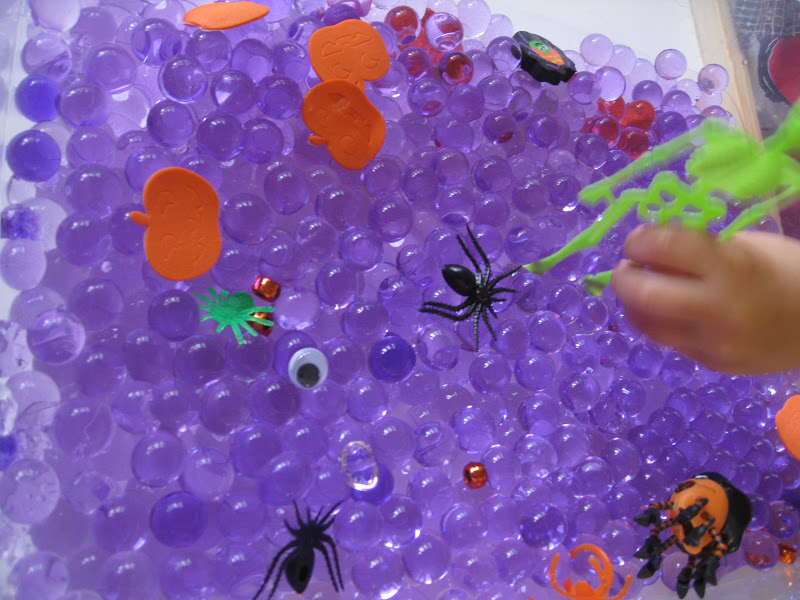
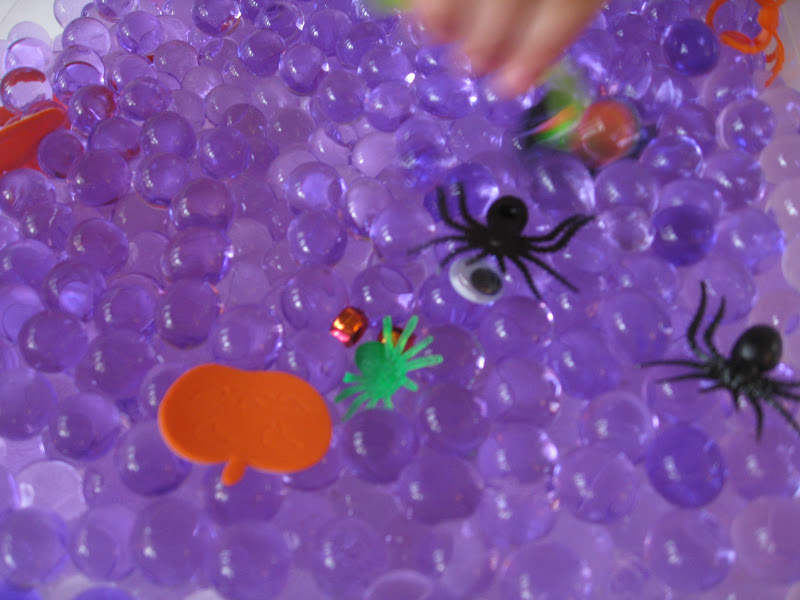
Looking for a Halloween sensory bin that inspires mess, sensory tactile play? This spooky sensory bin has purple water beads, plastic spiders, Halloween toys, and is a fun fine motor and sensory activity for developing skills this time of year. Add this idea to your Halloween occupational therapy ideas. Sensory bins are such a fun way to learn and play!

Picture of hands playing in a sensory bin with dyed pumpkin seeds, and pictures of a Feed the pumpkin and Feed the Monster. Text reads: Halloween sensory bins.

As a pediatric occupational therapist, I’ve found that creating easy Halloween sensory bin ideas for toddlers and preschoolers can celebrate the holiday and sneak in therapy interventions that support development.

I love putting together non-spooky sensory bins for preschoolers because it’s a fantastic way to introduce them to Halloween themes in a playful, non-scary way. You can use materials that are fun to explore like tongs and plastic spider rings, and you can use sensory bin fillers like orange and green shredded paper.

It’s especially easy to make Halloween sensory bins using materials you have on hand, with just one added material like googly eyes.

Halloween sensory bin

Halloween Sensory Bin

We made this Halloween sensory bin many years ago, and it was a huge hit. We used purple water beads, however if water beads aren’t appropriate for the clients on your therapy caseload, that’s ok.

Use the spooky (or not spooky) sensory bin activity to target specific skills:

  • Fine motor skills– pincer grasp, separation of the sides of the hand, thumb opposition
  • Tool use- tongs, tweezers, scoops
  • Eye-hand coordination
  • Tactile sensory exploration
  • Benefits of playing with a sensory bin: self-confidence, problem solving, creativity, etc.
  • Visual motor skills- great for pouring and scooping
  • Learning opportunities
  • Scissor skills by cutting paper in the sensory bin

There are many items that you can use as a sensory base in a Halloween sensory bin.

Over the years, I’ve shared many DIY Halloween sensory activities for kids using simple items I already had at home. When working with children who have special needs, I’ve tailored Halloween sensory bins to provide just the right amount of sensory input, ensuring that every child can enjoy the experience.

For example, you can work on sensory motor skills like bilateral coordination, motor planning, fine motor work, heavy work, vestibular input, and gross motor strengthening with this giant spider web activity. An activity like this one can include a Halloween sensory bin…add picture cards or an example of the things students should find in the sensory bin within the spider web. They can climb through the strings and then go to the sensory bin, where they need to look for the matching item.

You can use the Halloween sensory bin cards that we have inside The OT Toolbox Membership Club in your sensory bin and in the gross motor spider web task.

Halloween Sensory Bin Fillers

We have many sensory bin ideas here on The OT Toolbox, but to make this one pumpkin, ghosts, or spider themed, you can pull out any Halloween decoration or party supply.

I often look for ways to save money, so I’ve put together some cheap Halloween sensory bins with household items that I can repurpose.

This is nice because I love to re-use those materials, when possible, to make other holiday sensory bins. If you use a tool like tweezers or tongs, you can definitely reuse the sensory bin materials.

Some of the small items you can use to fill a Halloween sensory bin include (a lot of these items can be found at the dollar store):

  1. Googly eyes
  2. Black and orange dyed rice
  3. Plastic spiders and bugs
  4. Eyeball bouncy balls
  5. Plastic bats
  6. Miniature pumpkins- these are good for sorting items into
  7. Foam ghost shapes
  8. Halloween-themed mini-erasers
  9. Plastic witch’s cauldrons- also use these to sort different small objects into
  10. Plastic vampire teeth- I like to use these like mini-tongs. Kids can put them on their fingers to pick items up.
  11. Glow-in-the-dark stars and moons
  12. Black and orange craft pom-poms
  13. Plastic candy corn shapes
  14. Orange and black feathers
  15. Miniature witch hats
  16. Plastic skulls
  17. Plastic snakes
  18. Black and orange beads

Many of these Halloween sensory bin ideas would be a great addition to a Halloween party.

One tip is to save party favors that kids get from Halloween parties at school. Because most schools don’t allow edible party treats, some parents will purchase small items like the plastic spider rings. I like to save these and add them to my sensory bin stash! Then you can make a Halloween toy I Spy game with those same items.

When I create these bins, I like to use things like rice, pasta, or homemade playdough, which makes these activities accessible for everyone. Here is how we used colored rice in a sensory writing table.

Another good idea is to use cooked pasta like we did in our messy sensory play activity. This is especially “spooky” for a Halloween bin.

How to use a Halloween sensory bin

Once you fill your bin with sensory play materials, there is more to it than just playing. The occupational therapy provider will probably think about all of the skills being targeted.

You can support learning and skills like executive functioning using a sensory bin, too.

  1. Textures: Add materials with different textures to encourage tactile exploration. Consider including items like sand, kinetic sand, rice, dry beans, cotton balls, or foam pieces. Or, add wet and dry ingredients to mix things up. For kids with tactile defensiveness, this can be a real challenge.
  2. STEM and Math Skills: Incorporate items that promote Halloween math skills. Use small toys or objects that children can count, sort, or group. You can also add numbers or counting cards for math-related activities. In The OT Toolbox Members Club, we have counting cards with pumpkin numbers that are perfect for this.
  3. Sensory Words: I like to work on self confidence in kids when playing in sensory bins. You can introduce themed books, flashcards, or word cards related to the sensory bin theme. Encourage children to describe what they see, hear, and feel in the bin, which enhances vocabulary and language development. This is important for self-regulation skills.
  4. Fine Motor Skills: Include tools like tweezers, tongs, or small scoops for activities that develop fine motor skills. Children can use these tools to pick up, transfer, or manipulate items within the sensory bin.
  5. Creativity: Add materials that inspire creativity, such as colored paper, markers, or crayons. Children can use these supplies to draw, write, or create art based on the sensory bin’s theme.
  6. Science Exploration: Incorporate items related to the scientific aspects of the theme. For example, if it’s an ocean-themed bin, include shells, plastic marine animals, and magnifying glasses for observing and learning about sea life.
  7. Problem-Solving: Include puzzles, mazes, or objects that require problem-solving skills. These can be used to create challenges or games within the sensory bin.
  8. Social Skills: Encourage group play and social interaction by providing enough materials for multiple children. Promote sharing, cooperation, and communication during sensory play.
  9. Music and Sounds: Play background music or use sound-making objects to stimulate the auditory sense. This can enhance the sensory experience and create a multisensory environment.
  10. Sensory Storytelling: Use the sensory bin as a storytelling tool. Create or find a story related to the theme and use items in the bin to act out the narrative. This combines sensory play with imaginative storytelling.
  11. Color Recognition: Choose items in different colors to promote color recognition. Have children sort or group items by color.
  12. Seasonal Themes: Align your sensory bin with seasonal or holiday themes. This keeps the sensory experience fresh and engaging throughout the year.
  13. Emotion Exploration: Introduce items that represent emotions or facial expressions. Use this opportunity to discuss and explore feelings and emotions.

Using a Halloween Sensory Bin in Occupational Therapy

In my practice as a pediatric OT, I often focus on using Halloween sensory bins to develop fine motor skills. Activities like scooping, pouring, and sorting small items are perfect for helping kids strengthen these skills in a fun way. You can use tweezers, tongs, scoops, or just fingers to work on fine motor coordination and strength.

You can also use image cards like the ones in The OT Toolbox Membership to work on visual memory, visual attention, and visual motor skills.

I’ve also seen how Halloween sensory play ideas like a themed bin are beneficial for children who need help with sensory processing.

Budget-Friendly Halloween Sensory Bins with Everyday Items

We made a simple sensory bin with just snips of orange and green paper. This was an easy way to incorporate skills like bilateral coordination to hold and cut the paper, and then refined motor skills like neat pincer grasp and intrinsic strength to peel and place stickers. I had this little one work on scissor skills and cut strips of paper into squares.

They then peeled stickers (there are SO many reasons to play with stickers!) and placed on on each piece. We added another paper square to match so that it was a DIY memory game type of activity. Memory card games are a powerful too, too, so this is another reason to add this game to the sensory bin.

We then scattered the cut paper squares into the sensory bin and hid the stickers.

I had this kiddo seek and find the stickers to match the pictures on the squares. It was such a great way to work on so many skill areas!

Then, after we did that activity, we hid Halloween mini erasers like bats and spiders. The child used fingers and then tongs to pick up erasers.

Feed Me Sensory Bins

One activity that I really love is using a “Feed Me” sensory bin. You might have seen this before…it’s usually a large face with a hole cut in the mouth area. I like to tape the face cut out to a container like an empty tissue box or a container of some type. You put small objects like mini erasers or letter cards into the mouth.

This is nice because it encourages eye hand coordination and wrist extension when working on a vertical plane to feed the creature or face.

We have several “feed me” activities in The OT Toolbox Membership Club. Plus, letter cards to go along with the theme to add in handwriting and letter identification.

Another Halloween Sensory Bin


With Our Trick Or treating postponed until this weekend (due to Hurricane Sandy weather), we have been continuing with the Halloween activities for a few extra days.
 
This Halloween Sensory bin was very much needed this morning! 
 
Sometimes, you can tell that all-out chaos is about to let loose in the house, unless Mom comes in to rescue the littlest (babies who can not-quite run) from out of harms way…flying couch cushions anyone??
 
I brought out this sensory bin and the couches were saved from three bouncing (catapulting?) children.


It’s a great addition to a spider web obstacle course, too!


Halloween Sensory Bin


This skeleton guy had a lot of fun too 😉 For more fun with bones, check out this bone identification activity. It’s a great learning activity to use with a Halloween sensory bin.


All it took were googly eyes, plastic spiders, orange beads, rings, and other random Halloween stuff all mixed in with the (still squishy-hydrated-awesome) water beads! 
 
Pumpkin activity kit
Pumpkin Fine Motor Kit

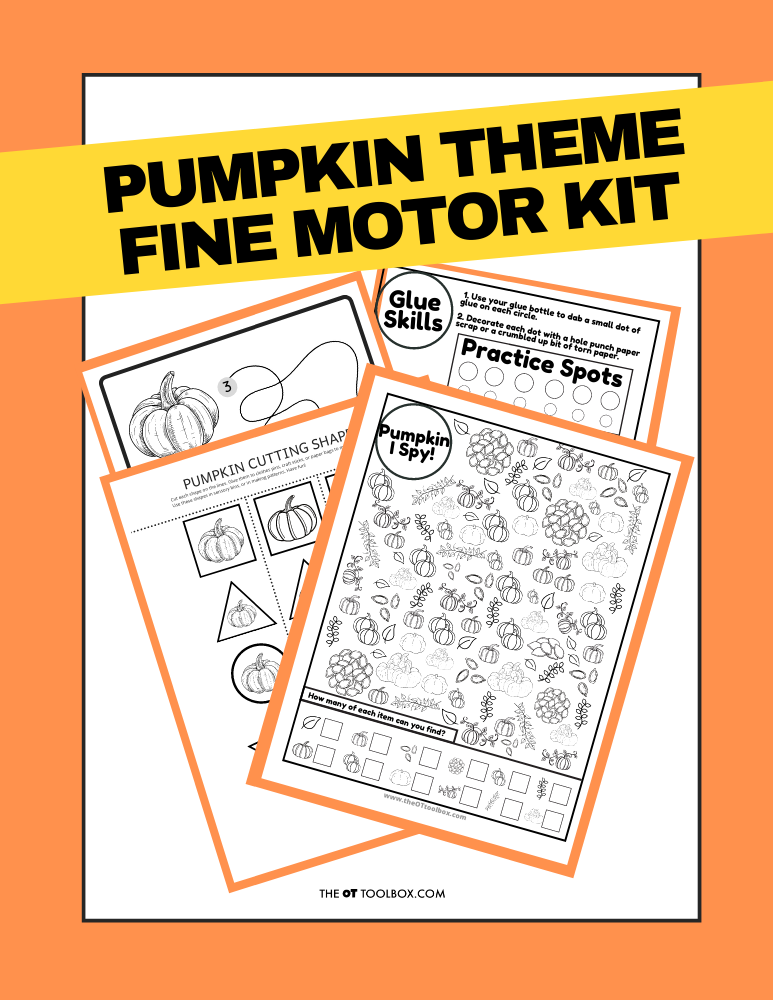
Grab the Pumpkin Fine Motor Kit for more coloring, cutting, and eye-hand coordination activities with a Pumpkin theme! It includes:

  • 7 digital products that can be used any time of year- has a “pumpkins” theme
  • 5 pumpkin scissor skills cutting strips
  • Pumpkin scissor skills shapes- use in sensory bins, math, sorting, pattern activities
  • 2 pumpkin visual perception mazes with writing activity
  • Pumpkin “I Spy” sheet – color in the outline shapes to build pencil control and fine motor strength
  • Pumpkin Lacing cards – print, color, and hole punch to build bilateral coordination skills
  • 2 Pumpkin theme handwriting pages – single and double rule bold lined paper for handwriting practice

Work on underlying fine motor and visual motor integration skills so you can help students excel in handwriting, learning, and motor skill development.

You can grab this Pumpkin Fine Motor kit for just $6!

Colleen Beck, OTR/L has been an occupational therapist since 2000, working in school-based, hand therapy, outpatient peds, EI, and SNF. Colleen created The OT Toolbox to inspire therapists, teachers, and parents with easy and fun tools to help children thrive. Read her story about going from an OT making $3/hour (after paying for kids’ childcare) to a full-time OT resource creator for millions of readers. Want to collaborate? Send an email to contact@theottoolbox.com.

Ghost Craft to Work on Scissor Skills

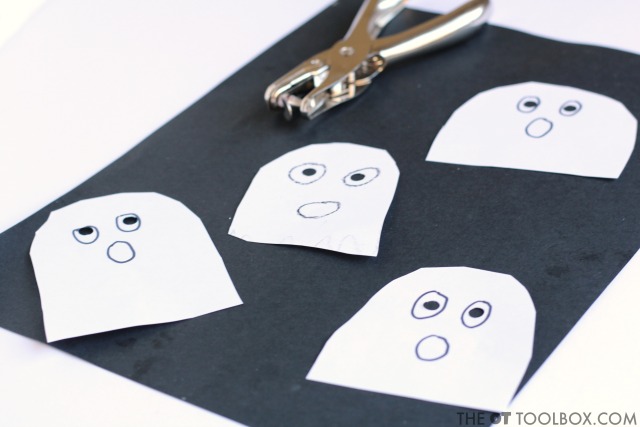
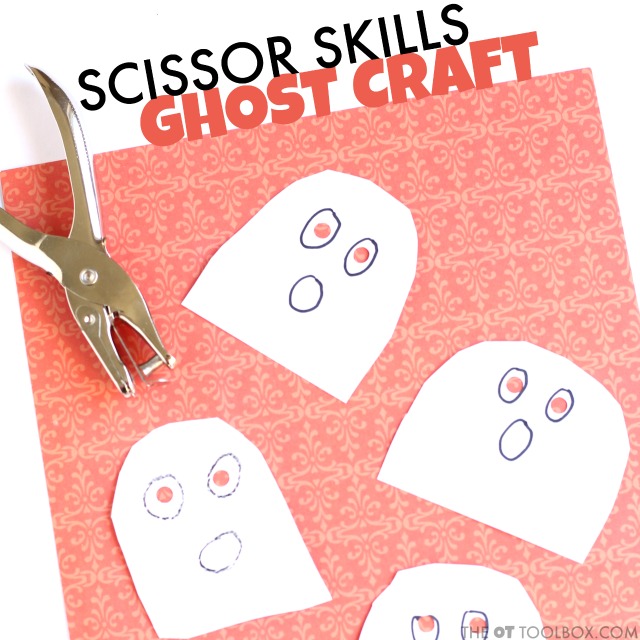
Ghosts cut from white paper on a black background and paper ghosts on orange paper on the top. Words in the middle read "fine motor ghost craft"

This Halloween cutting craft is an old one that’s been on our site since October, 2018. We love this activity for so many reasons, and wanted to share it again. The ghost cutting activity that we did all those years ago supports development of hand and grip strength, bilateral coordination, eye hand coordination, and more. This is a Halloween occupational therapy activity you’ll want to add to your therapy plan this Fall! Check out all of our hole punch activities for more fine motor fun.

Ghosts cut from white paper on a black background and paper ghosts on orange paper on the top. Words in the middle read "fine motor ghost craft"

We made these fine motor ghosts years ago, but still love to use them to work on fine motor and visual motor skills.

Halloween Cutting Craft

Looking for ideas to work on scissor skills? Do you need a quick craft idea to add to your therapy line up to address skills like scissor use, bilateral coordination, hand strength, or visual motor skills?

This Ghost Craft is a fun Halloween cutting craft idea that kids can do while boosting the skills they need for scissor skills and other fine motor skills. Use this ghost craft idea to work on occupational therapy activities and OT goal areas in a fun and festive way, perfect for Fall activities and ghost theme therapy ideas!

For more ways to build skills, try our other quick and fun ghost craft that will boost those fine motor skills. 

 
Use this ghost craft to work on scissor skills with kids, the perfect halloween craft for a ghost theme occupational therapy activity that boosts fine motor skills and scissor use including bilateral coordination and the visual motor skills needed for cutting with scissors.
This ghost cutting craft can be modified to meet the levels of various student skills.


Ghost Craft to Work on Scissor Skills

This scissor skills craft is an easy craft to set up and one that you can pull together in in no time, making it a nice craft for on-the-go school based OTs looking for a ghost themed craft that addresses OT goal areas.
 
Kiddos will love this ghost craft as it’s a cute craft idea that is motivating. In fact, kids won’t even realize they are working on skills like hand strength, separation of the sides of the hand, arch development, scissor use, or bilateral coordination. 
 
Here are more bilateral coordination activities that you can try.
 
Kids will love this ghost craft for a halloween craft that works on scissor skills in kids.

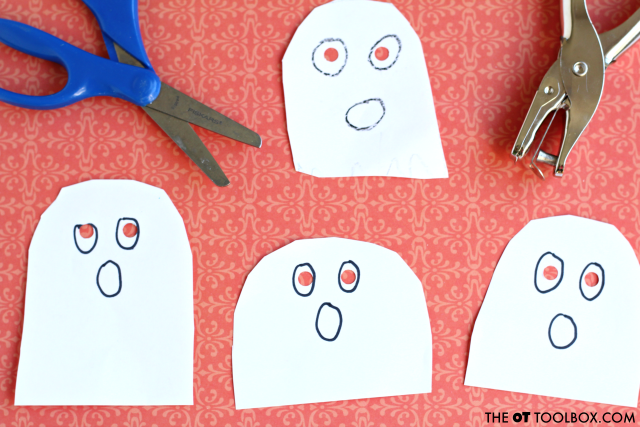
Kids love this ghost cutting craft because you can add different facial expressions.

Ghost Craft for Kids

To create this ghost craft and work on scissor skills as well as fine motor skills, you will need only a few materials (affiliate links are included below):
 
Kids can make this ghost craft to work on scissor skills and hand strength with a ghost theme this halloween, the fun ghost craft that helps kids cut with scissors.
 
First, it’s important to talk about where to start with know what a child can benefit from when it comes to paper type (construction paper, printer paper, cardstock, and other paper types all play important parts in addressing needs in scissor skills. Read about the various paper choices in addressing scissor skills in our scissor skills crash course. 
 
In that crash course, you’ll also find information related to line thickness when it comes to teaching kids to move through the stages of scissor skills. 
 
Use this ghost craft to work on scissor skills and other fine motor skills, perfect for a halloween craft or ghost theme in occupational therapy activities.


Steps to Make a Ghost Craft and Work on Scissor Skills

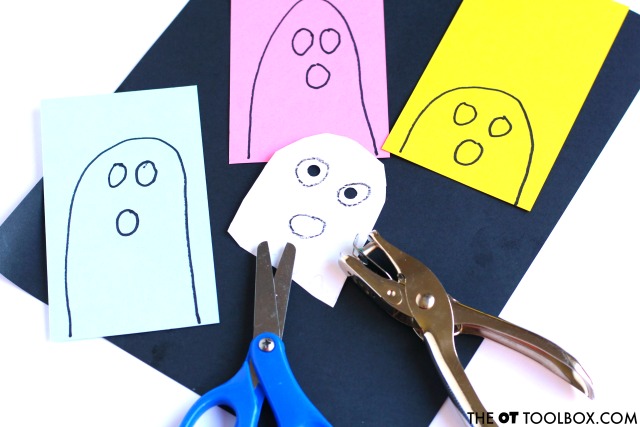
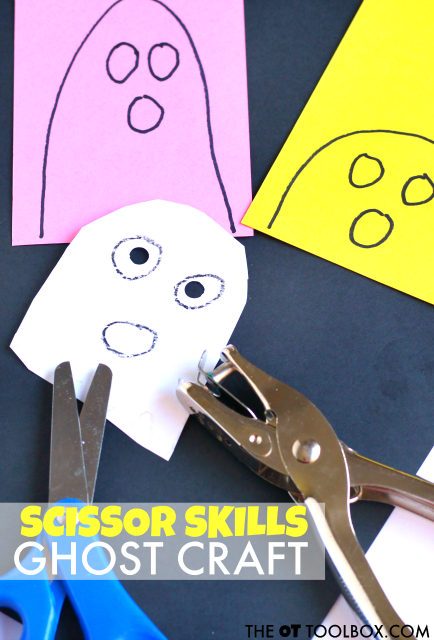
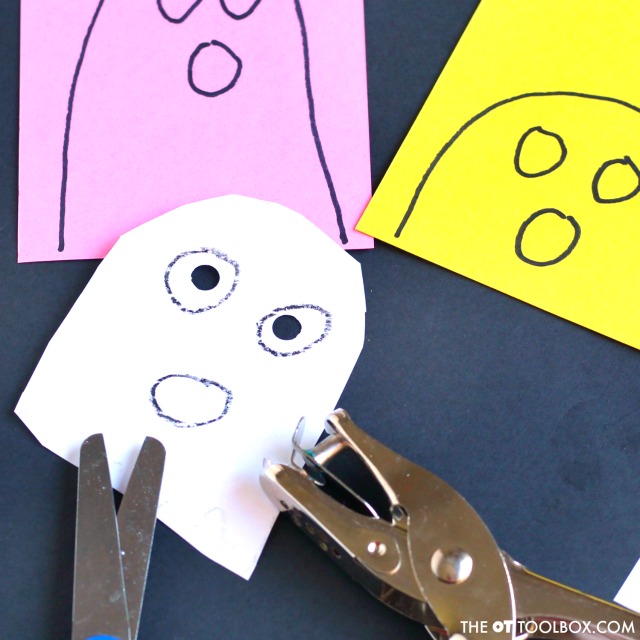
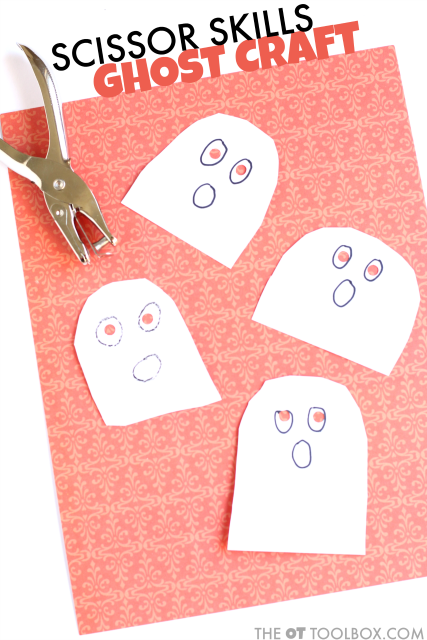
To make this ghost craft (and boost those scissor skills), simply draw a semi circle on the edge of a piece of paper. 
 
Ask kids to cut out out the ghost craft along the curved line. You can draw visual cues on the paper to cue kids on where to hold the paper as they turn the paper while cutting.
 
Next, draw or ask the child to draw circles for the mouth and two eyes. They can then use the hole punch to punch holes inside the circles of the eyes and mouth. 
 
This ghost craft works on scissor skills and fine motor skills needed for cutting with scissors, using a ghost theme for halloween craft ideas in occupational therapy activities.


Graded Scissor Skills Craft

 
There are several ways to grade this ghost craft to make the craft easier or more difficult depending on the child’s needs:
 
  • Use lighter or heavier paper grades. Some ideas are tissue paper, newspaper, wrapping paper, paper towels, or coffee filters to make the craft more difficult. Some ideas to make the ghost craft easier include cardstock, manilla folders, poster board, or thin cardboard.
  • Add more details to the ghost craft such as a bottom that the child needs to cut along a 90 degree angle to cut the bottom of the ghost. 
  • Add a wavy line to the bottom to require more details and scissor movement. 
  • Make larger or smaller ghosts.
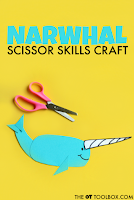
Looking for more scissor skills crafts? Try these: 


Kids will love this fun ghost craft in occupational therapy activities this fall, use this ghost craft idea to work on scissor skills and other fine motor skills in occupational therapy activities.


Use scissors and a hole punch to work on the fine motor skills and scissor skills with this ghost craft.

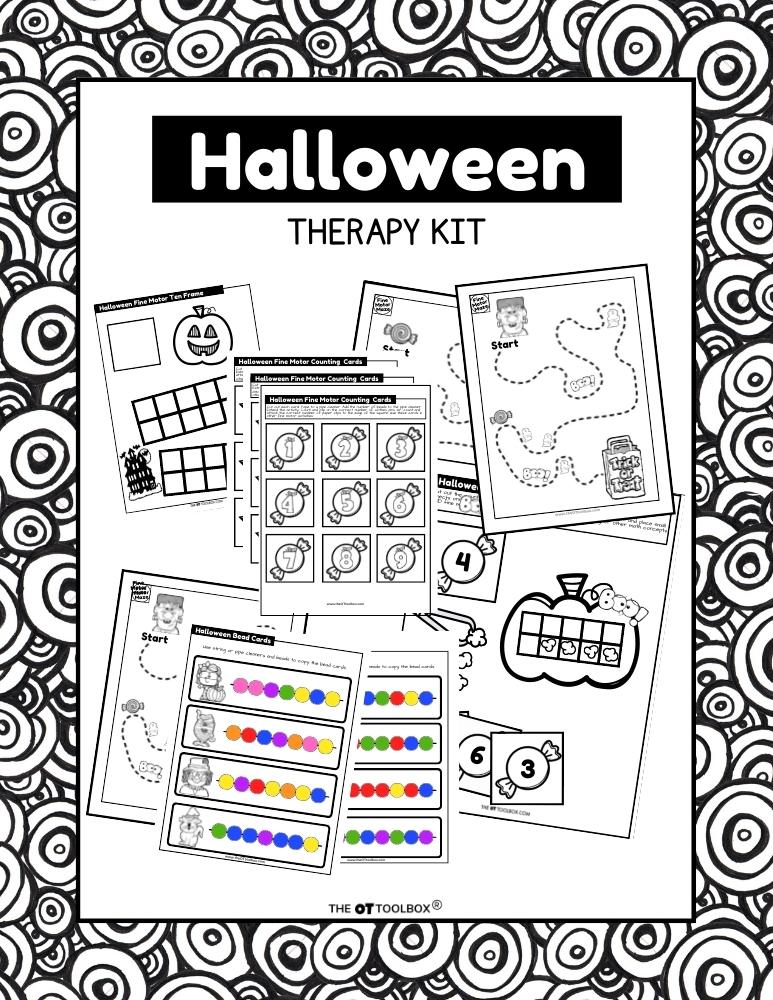
Want more Halloween fine motor, visual motor, and fine motor activities? Grab our Halloween Therapy Kit!

Get your copy of the Halloween Therapy Kit here.

Colleen Beck, OTR/L has been an occupational therapist since 2000, working in school-based, hand therapy, outpatient peds, EI, and SNF. Colleen created The OT Toolbox to inspire therapists, teachers, and parents with easy and fun tools to help children thrive. Read her story about going from an OT making $3/hour (after paying for kids’ childcare) to a full-time OT resource creator for millions of readers. Want to collaborate? Send an email to contact@theottoolbox.com.
Leaf Cutting Activity for Scissor Skills

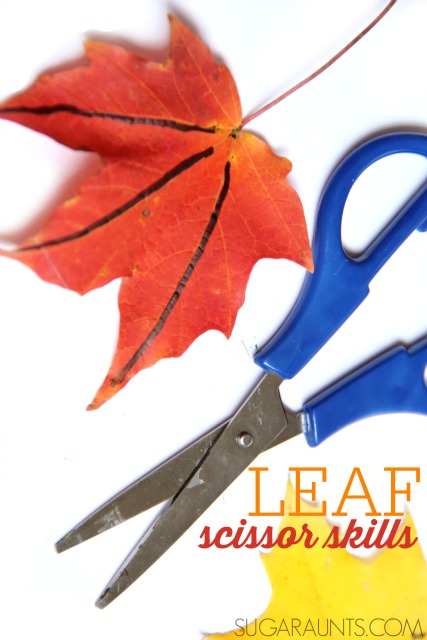
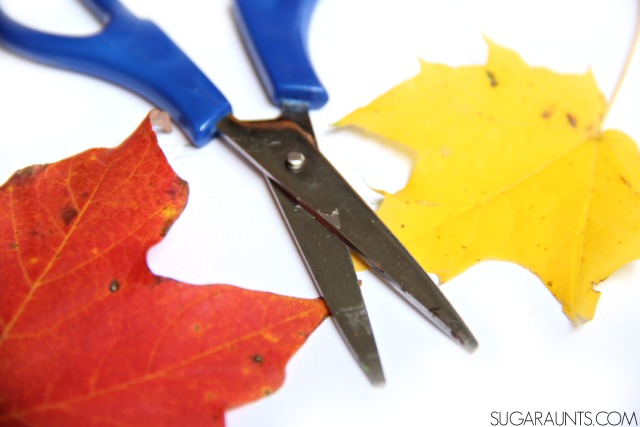
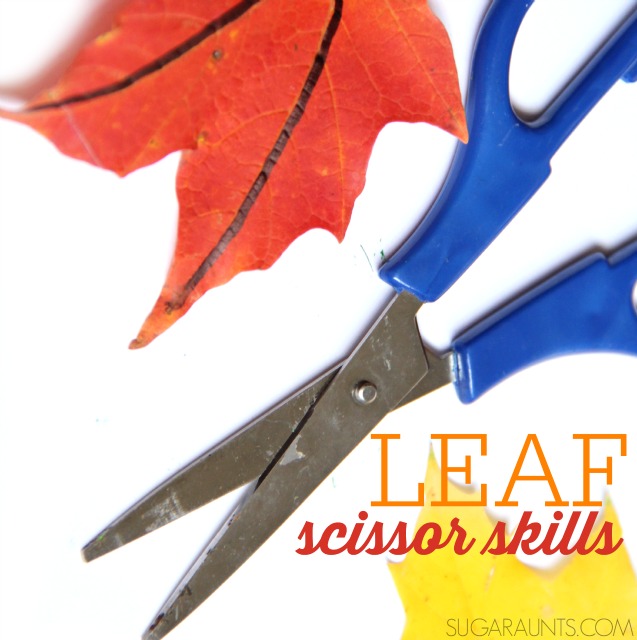
colorful fall maple leaf with black lines drawn on it and scissors with a white background. Text reads ""Fall leaves scissor skills"

This Fall leaf activity is a fine motor task that supports development of so many skill areas. I love that you can gather a handful of colorful leaves from your lawn and work on areas like scissor skills, fine motor skills, line awareness, and bilateral coordination. Then, you can use the snippings as leaf mulch in a compost bin or right back in the lawn. This is a fun activity that kids love! It would be a great addition to a Fall sensory bin, too. This is a powerful hole punch activity for kids.

colorful fall maple leaf with black lines drawn on it and scissors with a white background. Text reads ""Fall leaves scissor skills"

Use colorful fall leaves to work on scissor skills with kids this Fall.

Leaf Cutting Activity

This simple leaf cutting activity can be modified to meet a variety of skill needs. You can make the lines thicker or thinner, or make curved lines or angled lines. You can cut smaller leaves or bigger leaves. It’s easy to adapt to the needs of the student.

I have a small obsession with helping kids learn how to use scissors.  It was one of my favorite areas to work on in the school-based Occupational Therapy setting.  (And I’ve got a few scissor skills activities to show for it!)  

Add this leaf cutting activity to our other Fall leaves activities:

Leaf Handwriting– These Fall writing prompts include leaf writing prompts, among other fall themed prompts. Includes sentence prompts and single words, all with a Fall and leaf theme.

Pre-Writing Lines Activity- Work on Pre-writing activity with real leaves. Use real leaves to work on eye-hand coordination, visual motor skills, and pre-writing lines with hands on fine motor work.

Bilateral Coordination Activity: Use this Leaf Craft to address bilateral coordination skills. Use real leaves to make a craft that builds bilateral coordination, heavy work proprioceptive input, and scissor skills.

Cut Real Leaves for Scissor Skills

Let’s get on with the Fall leaves cutting activity…

Today’s activity is all about scissors, cutting on lines, and leaves.  This Fall, use those pretty leaves before they are covered with snow and practice cutting on lines.

Practice scissor skills with Fall leaves to work on line awareness and scissor control.


This scissor skills activity is completely easy.  

Go outside and gather some pretty fall leaves.  Like our leaf hole punch activity (also very good for working on scissor skills), you want leaves that are not crunchy and are freshly fallen.  

You might want to gather leaves that are still on the tree for easier cutting of lines.  If you are working simply on the snipping of scissors, totally go for those crunchy leaves.  They provide a fun auditory feedback to the snipping of scissors and fun Fall confetti!


Cutting the leaves gets you whiffs of the leaves, too.  What a great way to incorporate the sense of smell into a scissor activity.


Practice scissor skills with Fall leaves to work on line awareness and scissor control.

All you need are colorful leaves for this activity!

Practice line awareness with scissors using Fall leaves

Use the leaf veins to practice line awareness.  
 
I drew lines on the leaves for the kids to practice cutting along, but you can use just the lines of the leaves for older kids.  Holding the small leaf and snipping along the veins is a fantastic bilateral hand coordination activity for kids.  When cutting with scissors, bilateral hand coordination is essential for the assisting hand to move the paper accordingly as the dominant hand snips with scissors. 
 
Cutting along lines in simple and complex shapes is an issue when visual perceptual skills are difficult for a child.  
 
They might demonstrate difficulties with cutting within a line.  Cutting choppy lines is apparent when a child has poor scissor control or visual motor skills with tools like scissors. 
 
Cutting leaves is a creative scissor activity (Find a ton more creative scissor activities here!) and will be a hit with your kids this Fall.  Save it for spring and cut those green leaves, too! 


Use this scented scissor skills activity to help kids learn graded scissor use in a fun way! 

Practice scissor skills with Fall leaves to work on line awareness and scissor control.


Try these scissor activities:


Colleen Beck, OTR/L has been an occupational therapist since 2000, working in school-based, hand therapy, outpatient peds, EI, and SNF. Colleen created The OT Toolbox to inspire therapists, teachers, and parents with easy and fun tools to help children thrive. Read her story about going from an OT making $3/hour (after paying for kids’ childcare) to a full-time OT resource creator for millions of readers. Want to collaborate? Send an email to contact@theottoolbox.com.

Fine Motor Leaft Craft

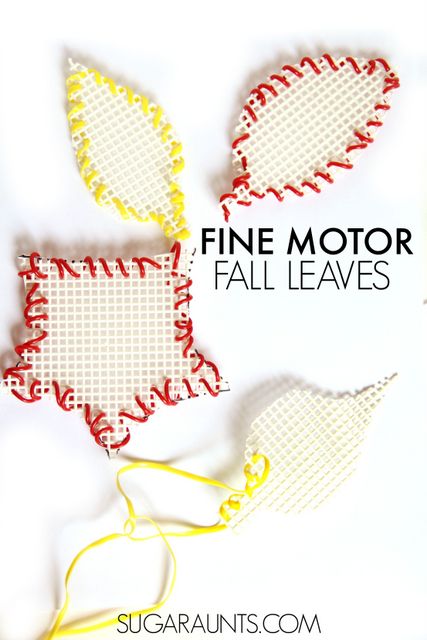
plastic canvas sewing craft to make fall leaves

I love this fine motor leaf craft and activity that we did back in September, 2015. It was a fun Fall occupational therapy activity that targets several areas of development: bilateral coordination, wrist stability, fine motor dexterity, and visual motor skills.

plastic canvas sewing craft to make fall leaves

This plastic canvas leaf is a fine motor sewing craft for kids.

Fine Motor Leaf Craft

This week in our second grade learning activities, we’re sharing this Fall Fine Motor Leaf craft that is perfect for second graders.  We love fine motor crafts and activities and this creative fall art was no exception.  Kids of all ages will love crafting up these Fall leaves (my three year old and 8 year old both had a blast!) It’s great because these leaves can get creative and as unique as the crafty kids like!


Fall Leaf Art for second grade (or any age!). Kids can create this fine motor fall leaf craft and work on many skills like math, patterns, symmetry, homemaking/life skills, and more.


Fall Fine Motor Leaves Craft

 
(This post contains affiliate links.)You’ll need just a few materials for this easy Fall craft:
 
 To make the plastic canvas leaves: 
 
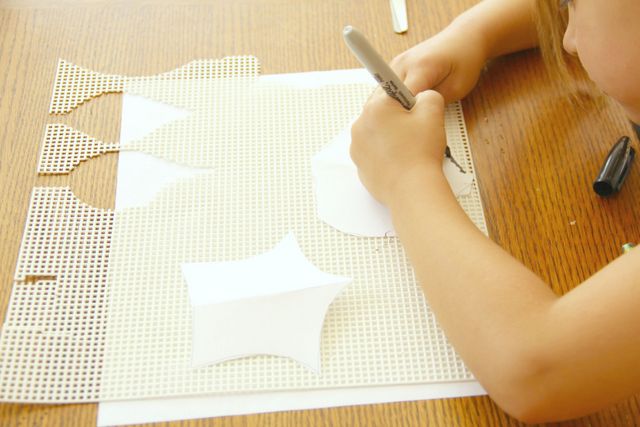
  1. We started by making a leaf shape on paper.  
  2. Fold a small square of paper in half and show your child how to draw half of a leaf.  

Now is a good time to discuss symmetry and that leaves are symmetrical.  Second graders can discuss and learn about mirror symmetry by creating leaves on the halved paper.  

 
Fall Leaf Art for second grade (or any age!). Kids can create this fine motor fall leaf craft and work on many skills like math, patterns, symmetry, homemaking/life skills, and more.
 
Draw leaves on plastic canvas:
 
  1. Next, trace the leaf shapes onto the Plastic Canvas.  Tracing with a marker onto the bumpy textured surface of the canvas is great fine motor work as the child holds the paper in place with their assisting hand and maintains control of the marker while tracing.  
  2. You’ll want the child to manage the paper in place with bilateral coordination as they use both hands together in a coordinated manner. 
 
 
Fall Leaf Art for second grade (or any age!). Kids can create this fine motor fall leaf craft and work on many skills like math, patterns, symmetry, homemaking/life skills, and more.
 
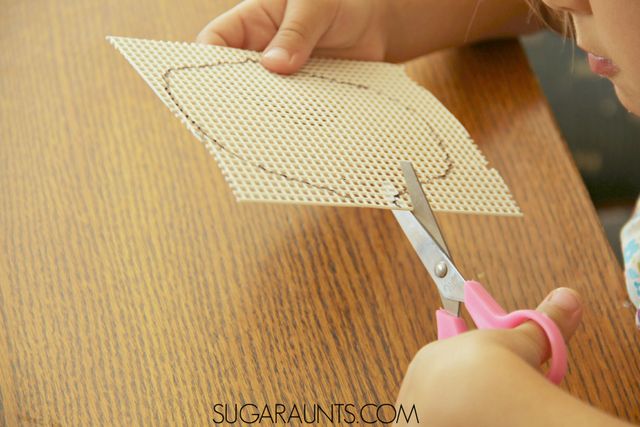
Cut out the plastic canvas shapes.
 
After tracing the leaf shape onto the canvas, have your child cut out the shape with scissors.  What a great scissor activity for older students like second graders!  
 
The holes of the canvas really provides feedback to the child as they cut the curved lines of their leaves.
 
Fall Leaf Art for second grade (or any age!). Kids can create this fine motor fall leaf craft and work on many skills like math, patterns, symmetry, homemaking/life skills, and more.


Lacing plastic canvas shapes

We’ve previously covered why I love lacing activities as an occupational therapist. There are just so many visual motor benefits to lacing tasks that support the areas that we are working on in OT sessions. 
 
The plastic canvas craft is a great way to gain all of the benefits of lacing tasks! 
 
After cutting out the leaves, start lacing!  Discuss the colors of the plastic cording and identify warm colors (red, yellow, orange) that might be seen on Fall leaves.  
 
Explore the look of cool colors too (blue, green, purple) through discussion.  
 

Sewing Activity for Kids

This craft is a practical life skill activity, too. Besides the craft aspect, you can support the IADL of sewing with this activity. 

 
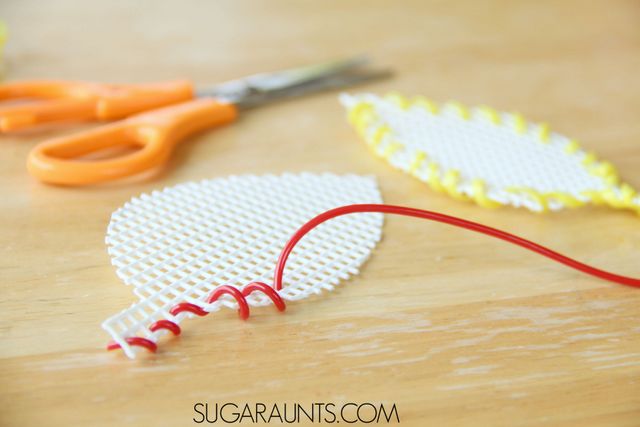
Show the child how to thread the plastic cording though the holes of the canvas.  Show the students a running stitch and use terms “pull, over, and under”.  
 
Try a whipstitch where the cording goes down through the plastic canvas and around the edge with parallel stitches over the edge of the shape.  
 
These are all great terms to introduce to kids as a pre-sewing skill.


Fall Leaf Art for second grade (or any age!). Kids can create this fine motor fall leaf craft and work on many skills like math, patterns, symmetry, homemaking/life skills, and more.

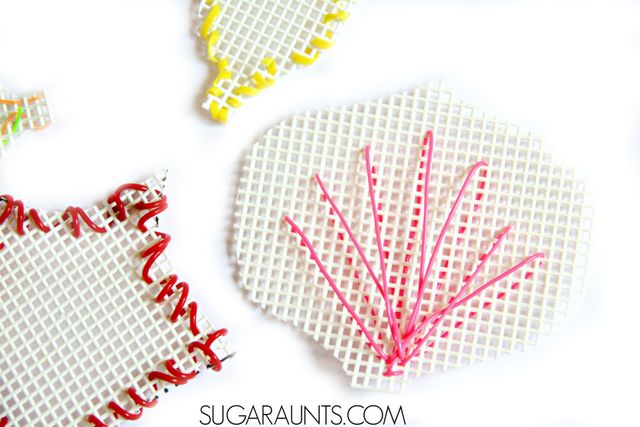
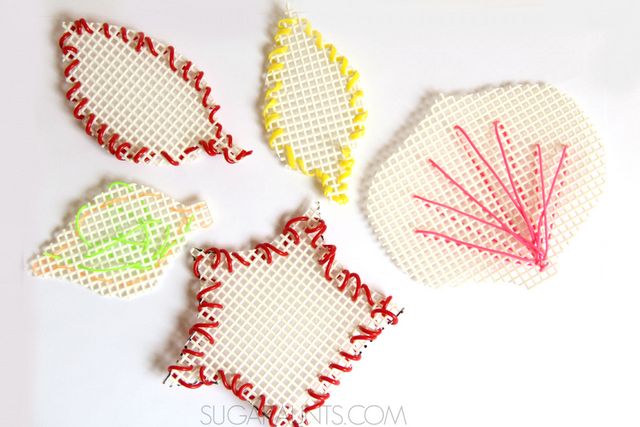
 Practice different sewing techniques using the plastic cord to make designs and trim around the plastic canvas leaves. 
 
Allow the child to create as they like on their leaves.  Some of our leaves had long stitches that resembled the veins of the leaves (More symmetry!) and others were very creative with their colors and zig zagging lines.
 
Fall Leaf Art for second grade (or any age!). Kids can create this fine motor fall leaf craft and work on many skills like math, patterns, symmetry, homemaking/life skills, and more.
 
This Fall craft is sure to get the creativity and fine motor skills going!
 
More skill areas covered in this activity:
 
  • Science: Discuss leaf types, tree names, and shapes.
  • Math:  Count out squares and patterns with the stitches.
  • Crafting:  Create a decorative garland with the leaves by hanging all of the leaves together.
  • Creative Expression:  Each leaf can be as unique as your child and the leaves of the trees this Fall.
  • Functional Skills/Homemaking:  Practice types of stitches on the plastic canvas.
  • Sewing:  Encourage more homemaking skills by introducing a plastic needle and thread.
  • Fine Motor:  Many fine motor skills are addressed in this activity-tripod grasp, bilateral hand coordination, scissor skills, 


More Fine Motor Fall Art you will love:


Fall leaves therapy kit

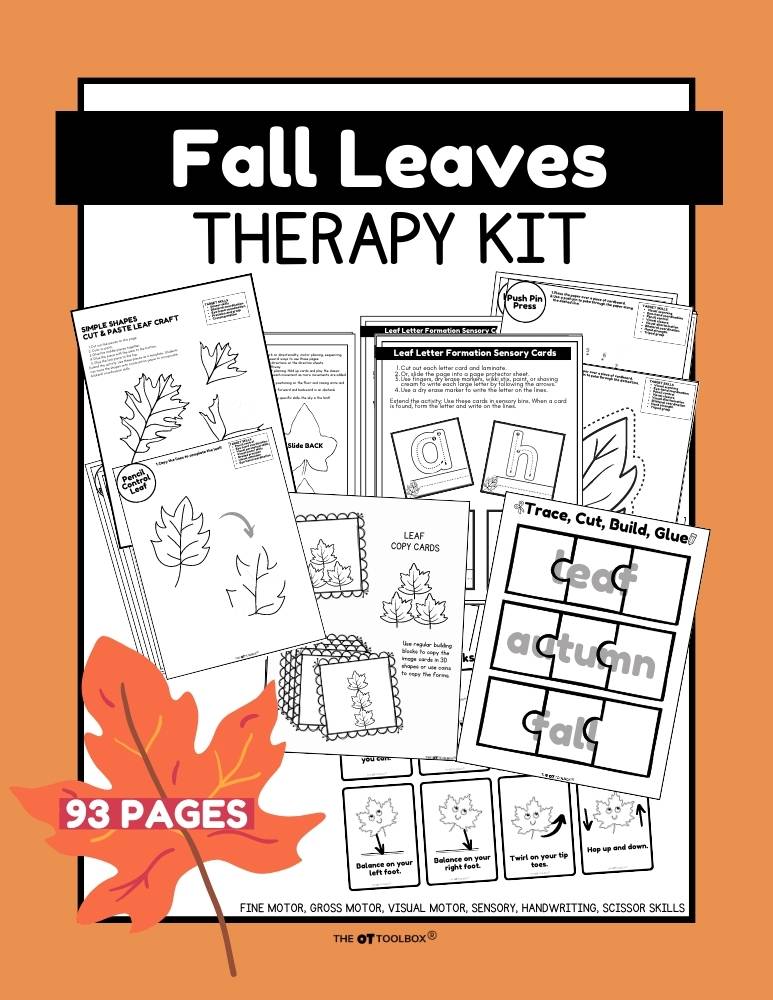
You can continue the Fall leaves theme by using our Fall Leaves Therapy Kit. It’s available inside The OT Toolbox Membership, or you can find it in our Therapy Kit bundle.

Colleen Beck, OTR/L has been an occupational therapist since 2000, working in school-based, hand therapy, outpatient peds, EI, and SNF. Colleen created The OT Toolbox to inspire therapists, teachers, and parents with easy and fun tools to help children thrive. Read her story about going from an OT making $3/hour (after paying for kids’ childcare) to a full-time OT resource creator for millions of readers. Want to collaborate? Send an email to contact@theottoolbox.com.
Dyed Rainbow Lollipop Sticks

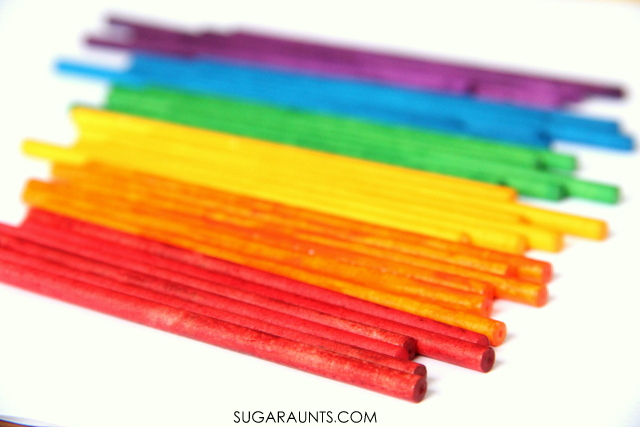
dyed lollipop sticks

We made these dyed lollipop sticks many moons ago, (2015!) as a fine motor and visual motor tool to use in color sorting and other fine motor activities. The colorful sticks are fun and provide countless opportunities in your OT sessions for creative exploration, problem-solving, and hands-on learning.

dyed lollipop sticks

 We made these dyed lollipop sticks last month and have been playing with them a lot.  Counting, patterns, fine motor play, art, visual perceptual work, and imagination are fun with these colorful rainbow sticks.  They are so easy to dye with just a little food coloring, and very fun.  We’ve used these rainbow sticks in a few different ways recently and will be sharing soon on the blog!


Rainbow lollipop sticks dyed with coloring for play, counting, busy bags, math with kids


This post contains affiliate links.


Dyed Lollipop Sticks for play and learning

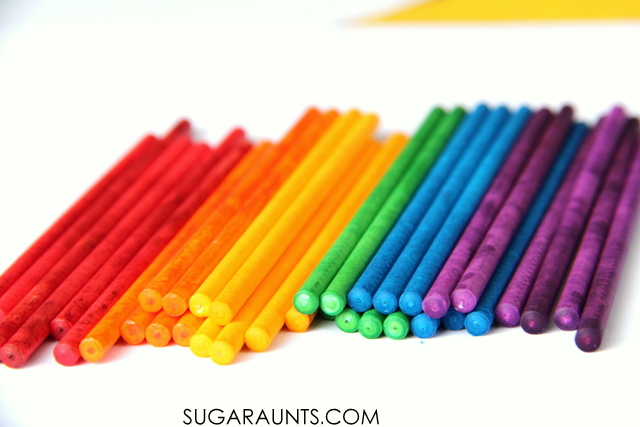
Rainbow lollipop sticks
 
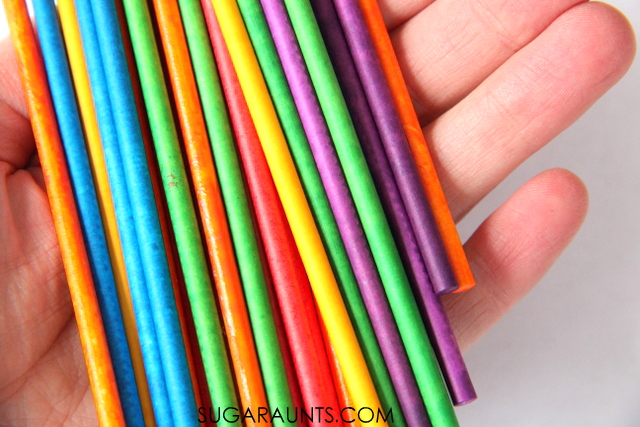
How gorgeous are rainbow lollipop sticks?  Don’t you want to play with them?  
 

How to dye lollipop sticks


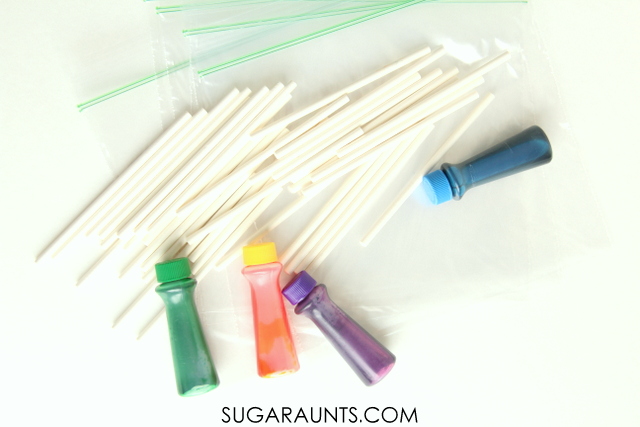
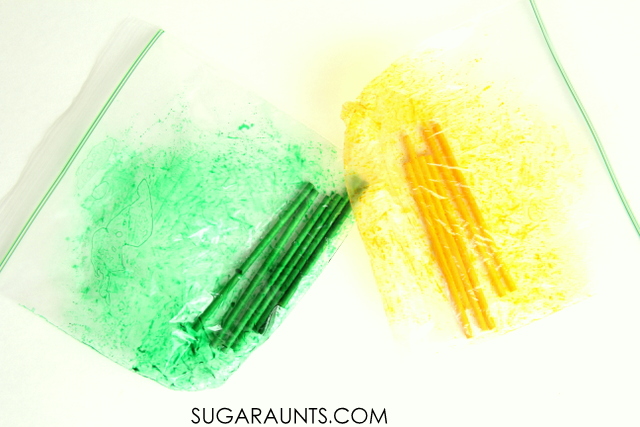
We had a ton of extra lollipop sticks left over from various parties.  The idea to color them in rainbow shades came to me after seeing them in the baking bin next to food coloring.  A rainbow of manipulatives would be fun for all kinds of play.  I put a handful of sticks into small plastic baggies and added a few drops of liquid food coloring.  More food coloring will bring out brighter colors.  
 
 
Shake the baggies around to coat the sticks.


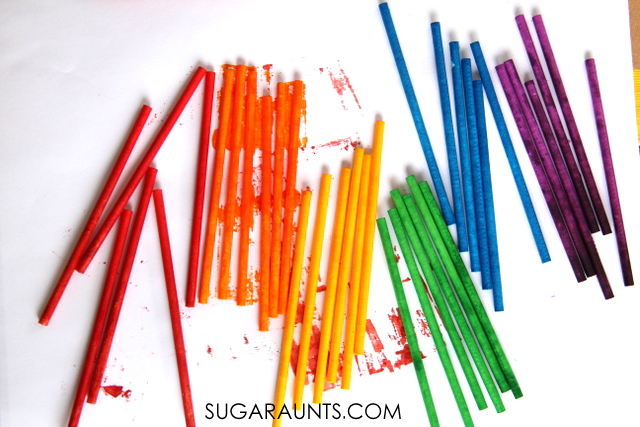
Spread the lollipop sticks out on wax paper and allow them to dry.
 
Use rainbow lollipop sticks for play, math, patterns and colorful learning with kids!

Once dry, you are ready to play!  These things are completely gorgeous and we had fun just naming all of the colors, rolling them back and forth, and sorting.

Dye lollipop sticks with food coloring for colorful play!


Practice fine motor skills with kids using DIY dyed lollipop sticks


Fine Motor Skills with Dyed Rainbow Lollipop Sticks

We pulled a plastic bottle from the recycle bin and practiced fine motor skills by dropping the rainbow sticks into the plastic bottle one by one.  Drop by colors and work on color identification.  Practice beginner math skills by counting one-to-one correspondence as the child names the number of each color.  Practice a tripod grasp on the lollipop sticks and pre-handwriting skills.


Fine motor rainbow play was never so much fun!


More rainbow activities that you will love:


Other Ways to Use Dyed Lollipop Sticks

We shared just a couple of ways to use dyed lollipop sticks in developing sensory motor skills. Here are more ideas:

  1. Color Sorting: Have children sort the dyed lollipop sticks by color into matching containers or on a color mat.
  2. Pattern Making: Create and replicate patterns with the sticks, such as alternating colors or building sequences.
  3. Counting and Number Matching: Use the sticks for counting activities or to match with numbers written on paper or cards.
  4. Stick Building: Encourage children to build simple structures or shapes by gluing the sticks together.
  5. Letter and Shape Formation: Have kids use the sticks to form letters, numbers, or shapes on a flat surface.
  6. Tactile Tracing: Glue the sticks to create raised lines on paper for children to trace with their fingers, enhancing tactile feedback.
  7. Matching Games: Write letters or numbers on the sticks and have children match them to corresponding cards or objects.
  8. Sensory Bins: Add the dyed sticks to a sensory bin filled with rice, beans, or sand for children to find and sort.
  9. Stick Weaving: Weave yarn or string around and between sticks placed in a grid pattern, working on fine motor skills.
  10. Craft Projects: Incorporate the sticks into art and craft projects, such as making frames, collages, or decorations.
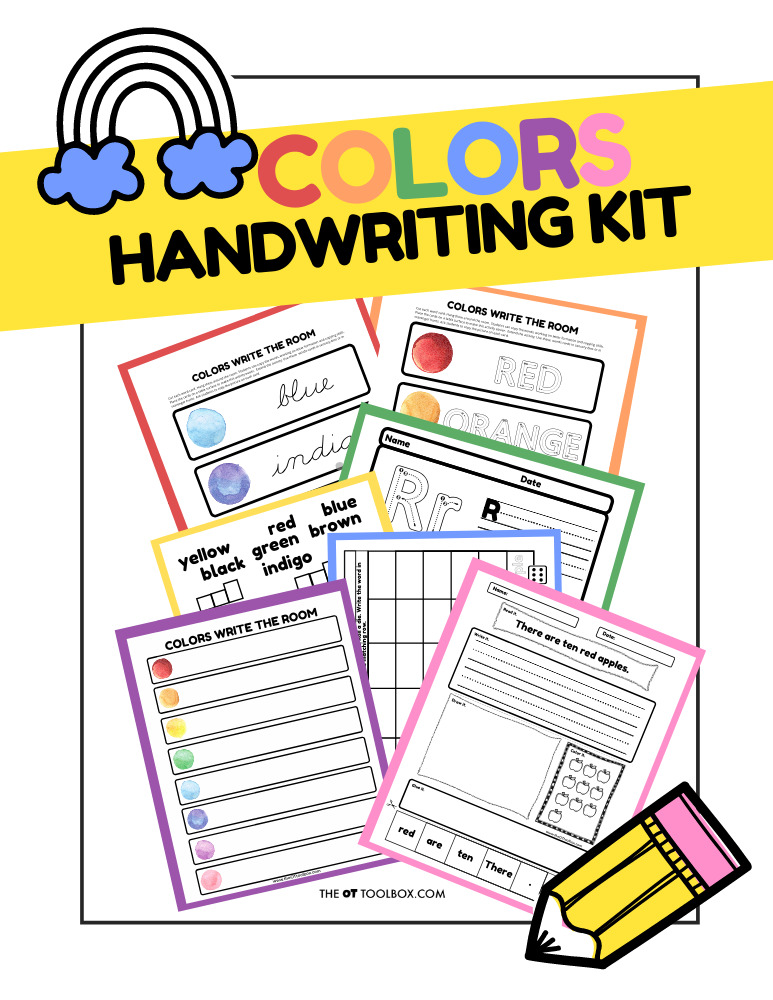
Colors Handwriting Kit

Rainbow Handwriting Kit– This resource pack includes handwriting sheets, write the room cards, color worksheets, visual motor activities, and so much more. The handwriting kit includes:

  • Write the Room, Color Names: Lowercase Letters
  • Write the Room, Color Names: Uppercase Letters
  • Write the Room, Color Names: Cursive Writing
  • Copy/Draw/Color/Cut Color Worksheets
  • Colors Roll & Write Page
  • Color Names Letter Size Puzzle Pages
  • Flip and Fill A-Z Letter Pages
  • Colors Pre-Writing Lines Pencil Control Mazes
  • This handwriting kit now includes a bonus pack of pencil control worksheets, 1-10 fine motor clip cards, visual discrimination maze for directionality, handwriting sheets, and working memory/direction following sheet! Valued at $5, this bonus kit triples the goal areas you can work on in each therapy session or home program.

Click here to get your copy of the Colors Handwriting Kit.

Colleen Beck, OTR/L has been an occupational therapist since 2000, working in school-based, hand therapy, outpatient peds, EI, and SNF. Colleen created The OT Toolbox to inspire therapists, teachers, and parents with easy and fun tools to help children thrive. Read her story about going from an OT making $3/hour (after paying for kids’ childcare) to a full-time OT resource creator for millions of readers. Want to collaborate? Send an email to contact@theottoolbox.com.
Contact Paper Leaf Collection

Contact paper leaf collection

Did you ever go on a nature walk and collect colorful leaves but have no where to put them? This contact paper leaf collection is a Fall leaf collage and all you need is a sheet of contact paper. This is a fun way to expand on a family nature walk during the Fall months! Add this to your outdoor occupational therapy sessions or Fall OT planning.

Contact paper leaf collection

Here’s why you should make a leaf collection with kids this Fall…

Contact Paper leaf Collection

 
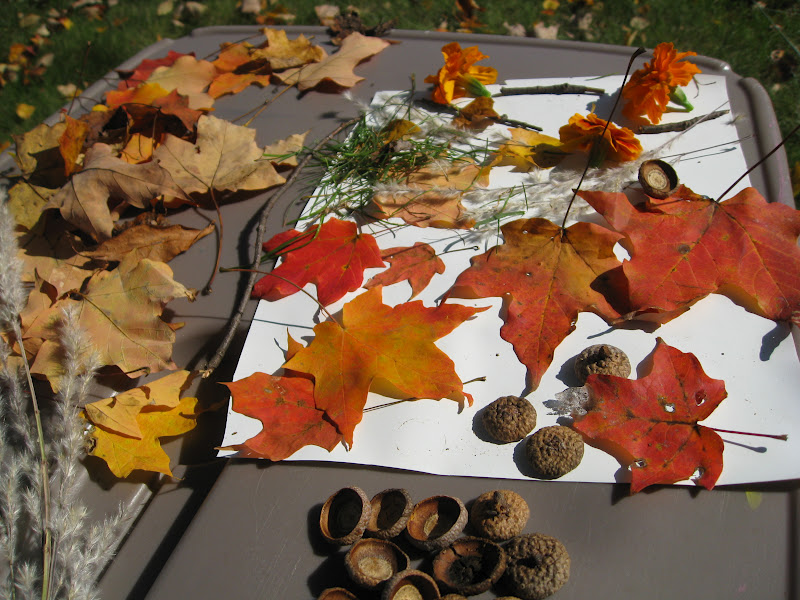
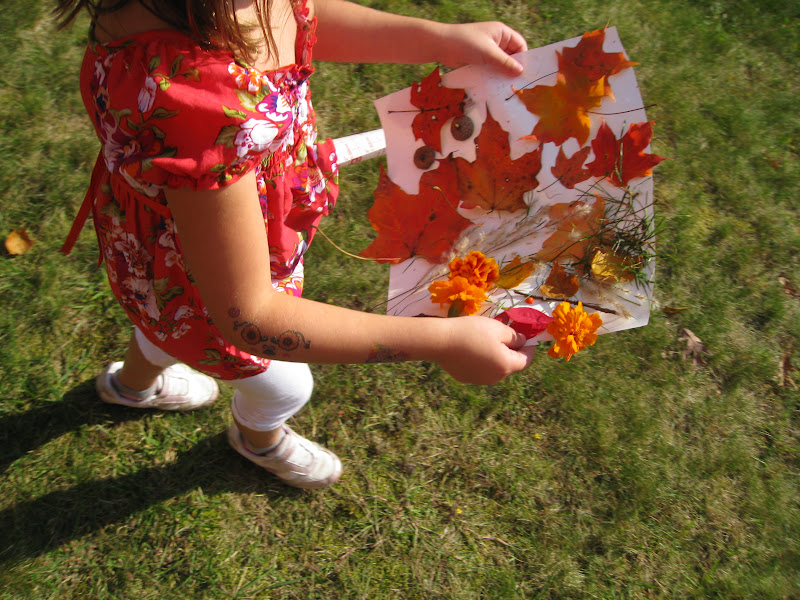
My kids wanted to go for a Nature Hike one beautiful, sunny, fall day.  I pulled out some squares of contact paper and we went around the yard, gathering leaves, acorn tops, flowers, grasses, pine needles…all kinds of fun, fall things. 
 
When you are collecting items to add to your contact paper leaf collection, you’ll want a variety of leaf shapes, sizes, and colors. 
 
 There are other things you can add to the contact paper, too:
  • Acorn tops
  • Grass
  • Seeds
  • Pine needles
  • Maple seeds (“helicopters”)
  • Thin tree bark
  • Small twigs
  • Flower petals
  • Seed pods
  • Feathers
  • Pinecone scales
  • Dandelion fluff
  • Moss
  • Fern fronds

Looking for all of those items really works on the visual scanning skills and the fine motor dexterity!


Big Sister is learning about the senses in her Pre-K Science class.  We talked about the 5 senses a little bit, but mostly just enjoyed the warm sun and crunchy leaves.
 
 
Big Sister came up with the idea to use this as their “map”.  I thought this was a pretty cool idea, and it coming all from her is so exciting.  I love the imagination at this age!
 
Big Sister and Little Guy are really into Jake and the Neverland Pirates right now.  Everything is a pirate adventure with pixie dust and gold doubloons!
 
We went off on our adventure around the yard to visit Acorn Island, Leaf Land, Flower Isle, and Pine Needle Island.


Such a fun day!  
 
Looking for more ideas to play this time of year? Grab our Fall OT kit:


Colleen Beck, OTR/L has been an occupational therapist since 2000, working in school-based, hand therapy, outpatient peds, EI, and SNF. Colleen created The OT Toolbox to inspire therapists, teachers, and parents with easy and fun tools to help children thrive. Read her story about going from an OT making $3/hour (after paying for kids’ childcare) to a full-time OT resource creator for millions of readers. Want to collaborate? Send an email to contact@theottoolbox.com.

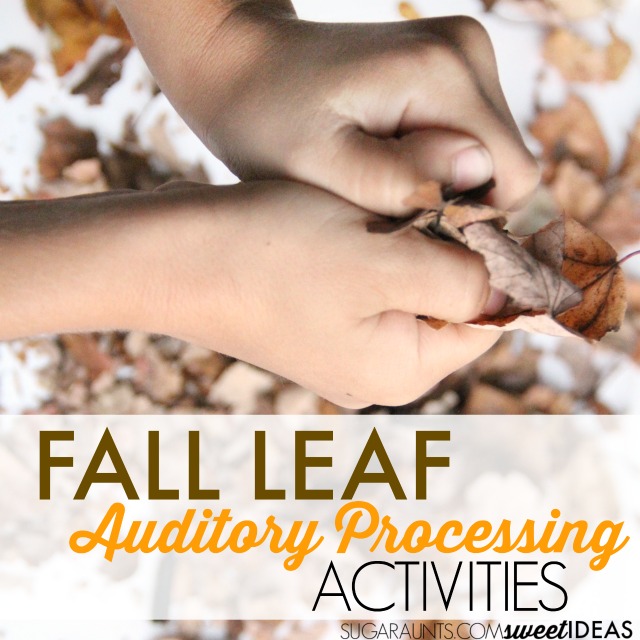
Fall Leaf Auditory Processing Activities

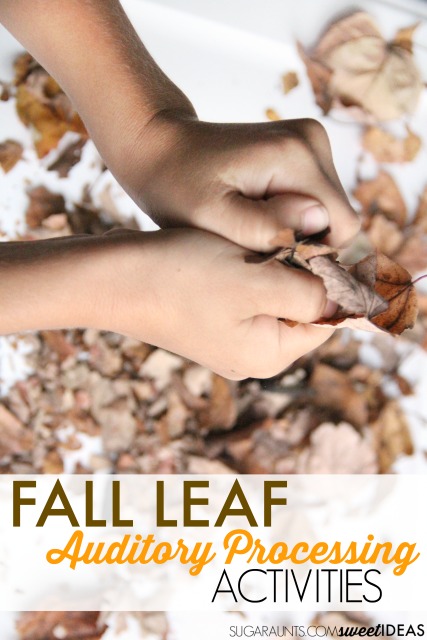
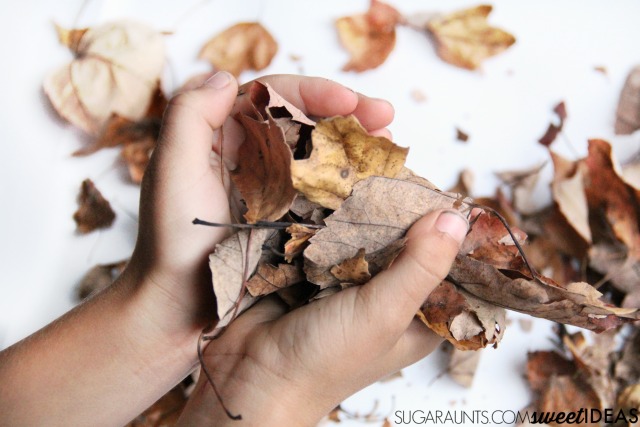
Sensory Motor Leaf Activity. Image has hands crumbling fall leaves

These Fall Leaf Auditory Processing Activities are great for addressing listening skills in kids with or without auditory processing difficulties.  Try this creative leaf idea at home or in the school yard to easily strengthen auditory abilities for better learning. Perfect for children of all ages and developmental levels, it’s a Fall themed activity that will help kids learn to listen to details!

For example, we love cutting Fall leaves to practice scissor skills. Another fun (and free) ideas is doing our leaf hole punch activity (also very good for working on scissor skills). Here are more hole punch activities to try.

And, don’t forget to download our Fall Leaf deep breathing activity for self regulation needs.

Sensory Motor Leaf activity. Image has hands crumbling Fall leaves

Let’s get started with the auditory processing info and how we can support this area of development with a handful of leaves…

Fall Auditory Processing Activities


Listening isn’t easy for everyone.  For children with auditory processing disorders, learning is difficult. Imagine identifying and localizing sounds in a classroom that is filled with chattering children, scooting chair legs, pencils scratching on paper, and moving, sound-making children.  The process of localizing sounds, recognizing sound patterns, discriminating between different letter sounds, and interpreting auditory information can be less than optimal for the child with difficulty processing the sound information that is coming in. 


Try these listening activities using Fall’s leaves in a backyard auditory processing activity!

Try these activities to help kids who are auditory learners. 

Finally, be sure to check out this resource on auditory sensitivities that impact learning.

Fall Leaf themed auditory processing activities for sensory needs in kids.


Auditory Processing Activities Using Fall Leaves

This post contains affiliate links.

When there are auditory processing difficulties present, a child may tend to have the following problems that interfere with learning:


  • Poor direction following
  • Appear confused
  • Distractibility
  • Short attention spans
  • Sensitive to loud sounds
  • Inconsistently aware of sounds
  • Poor listeners


To build and strengthen auditory skills, try using leaves this Fall.  The crunchy, dry leaves that cover the ground are nature’s sensory tool when it comes to auditory processing needs.  


We first talked about the fall leaves that are covering our lawn and read through this month’s Virtual Book Club for Kids book, (affiliate link) Leaf Man by Lois Ehlert.  We talked about how the leaves of fall are all different colors, shapes, and sizes but have one thing in common: a great crunch when they are dry!


To do these sensory Fall Leaf Auditory Processing activity, you’ll need a bunch of leaves that have fallen from trees.  Dry leaves will work best, so if the leaves are newly fallen, you will want to gather leaves up in advance.  Let them dry indoors for several hours or overnight to get a great “crunch”.


Next, spread out the leaves in a big bin.  An under the bed storage bin works great for this activity.


Show your child how to squeeze and crumble the leaves using their hands.  Ask them to listen to the crunch of the leaves.  Notice how the leaves crumble and give off a satisfying noise as they are shifted around in the bin.  

Fall Leaf themed auditory processing activities for sensory needs in kids.


Use the dry leaves to address auditory sensory needs:


  1. Where is that leaf? Ask the child to sit in front of the bin (or if you are outside, sit in front of the adult.  Ask the child to close their eyes.  Using one hand to crunch leaves, ask the child to say or point to the side that the leaf crunch is coming from.  Add a high/low and front/back component by moving around to crumble the leaves, too.
  2. Leaf Pattern- Ask your child to gather a bunch of dry leaves.  Using a pile of leaves of your own, complete a crunching pattern as you crumble leaves at different speeds and in each hand.  The child can then repeat the pattern.
  3. Sound Stop- Crumble and crunch the leaves.  At intervals, stop crunching leaves and wait for a moment. Ask the child to say “Now!” when the leaves stop crumbling.
  4. Falling Leaf Sounds- With the child’s eyes closed, crumble leaves high and low above and below the child.  Ask the child to determine if the leaves are above them or below them as they determine the location of the sound.
  5. Lots of Sound Leaves- Add other sounds to the background noise: talking, music, rattle toys, birds chirping, etc.  Ask the child to determine when the sound of crunching leaves stop.  You can also add a localization dimension to this activity to work on auditory figure ground awareness.
Kids can complete these activities on a one-on-one basis or in a group setting.  For kids with sensory issues, or those that are sensitive to crumbling leaves, try using gardening gloves while crumbling.
 

How would you use Fall’s leaves in a sensory or auditory processing activity?

Fall Leaf themed auditory processing activities for sensory needs in kids.


Add this Fall leaves breathing exercise to these Fall themed activities in therapy:

Visit our auditory processing activities page for more creative ways to address auditory needs.

Address sensory needs while experiencing all that the Fall season has to offer! Grab your free copy of the Fall Sensory Experiences Booklet to create sensory diet activities that meet the needs of individuals in a Fall-themed way!

Get our Fall Sensory Activities Guide

    We respect your privacy. Unsubscribe at anytime.
    Powered By ConvertKit

    Looking for more sensory motor fun with a leaf theme? Get a copy of our free Fall Leaves slide deck AND printable Fall leaves visual motor skill worksheets. Get those Fall Leaves worksheets here.

    Fall leaves therapy kit

    You can also grab a copy of our Fall Leaves Therapy Kit inside The OT Toolbox Membership, or by purchasing our Therapy Kit Bundle.

    Colleen Beck, OTR/L has been an occupational therapist since 2000, working in school-based, hand therapy, outpatient peds, EI, and SNF. Colleen created The OT Toolbox to inspire therapists, teachers, and parents with easy and fun tools to help children thrive. Read her story about going from an OT making $3/hour (after paying for kids’ childcare) to a full-time OT resource creator for millions of readers. Want to collaborate? Send an email to contact@theottoolbox.com.
    Apple Seeds Fine Motor Activity

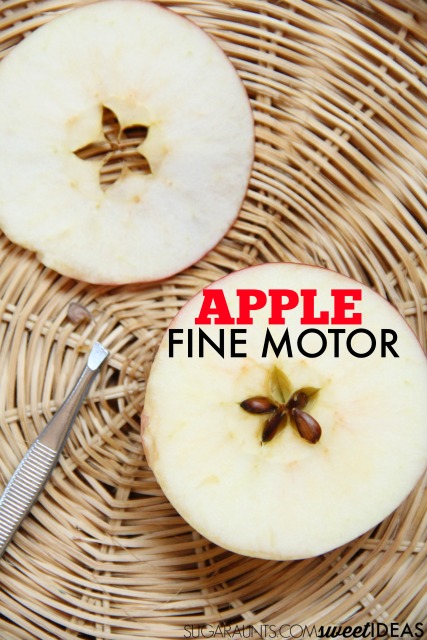
    fine motor activity: Dissect apple seeds

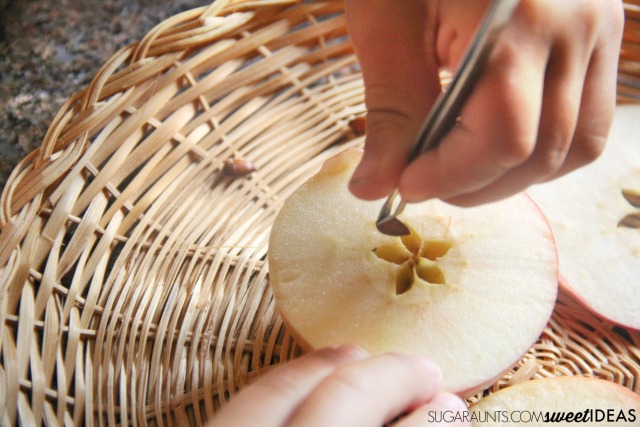
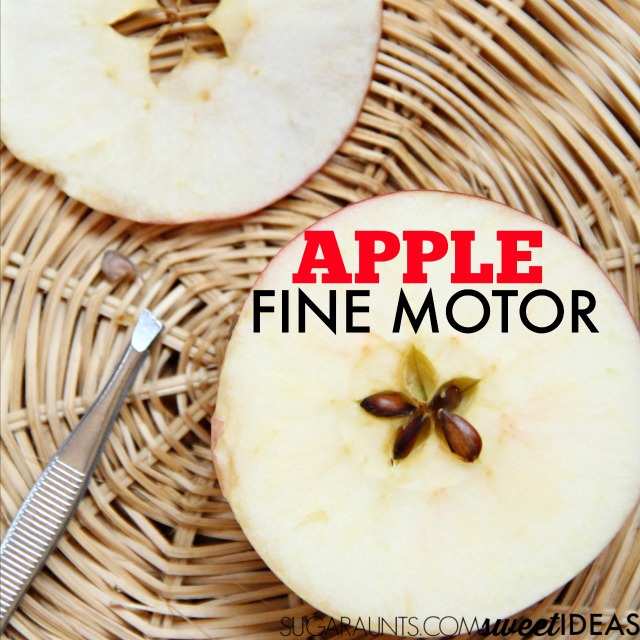
    This fine motor apple seeds activity was a hit when we first did it back in 2016. My kids loved dissecting apple seeds from a sliced apple…and then eating the apple slices. Little did they know, but they were also working on quite a few fine motor skills with this little apple activity! We decided to explore an apple’s seeds noticing it’s details and talking about how every little thing that we do can be inspiring.  We cut an apple in half and practiced a little fine motor skills (something we LOVE adding to creative play and learning activities!) and used tweezers to pull the seeds from the apple.
    dissect apple seeds activity for kids

    Here’s what we did to build hand strength with apple seeds…

    Fine Motor Apple Seeds Activity

    Using tweezers to pull out the seeds is a great way to practice tripod grasp that is needed for proper grip on a pencil.  The action of squeezing and holding tweezers requires use of the intrinsic muscles of the hands, which are needed for endurance in coloring, writing, and manipulating clothing fasteners (all school-based activities that our kids will be doing this school year!)

    This activity supports intrinsic hand strength to manipulate the tweezers with precision. Work on an open thumb web space and distal thump IP joint flexion when manipulating the tweezers. This activity also supports bilateral coordination, eye-hand coordination, and life skills: washing hands, cutting with a knife, slicing, etc.
     

                                        Apple fine motor activity


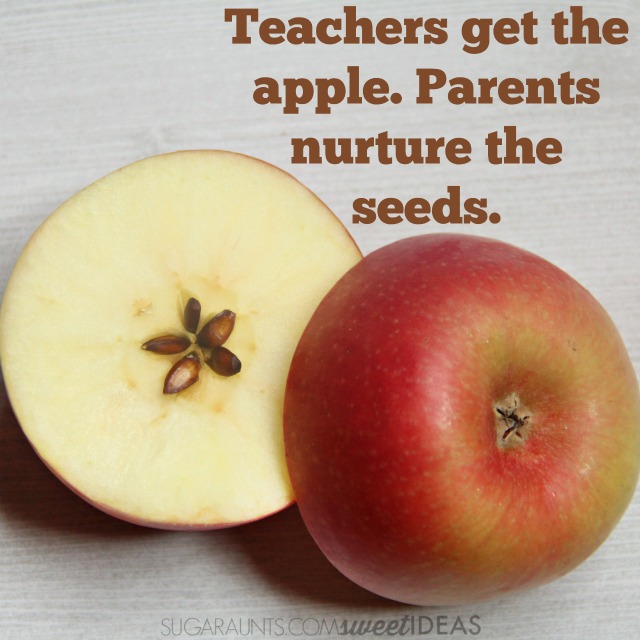
    Parenting and all of the details that goes into it is kind of like an apple and it’s seeds.  They are so small but they are very much there.  They are something small that grows into that huge and productive apple tree.


    Fall and back-to-school seem to bring with it an apple theme.  There isn’t a classroom out there that probably doesn’t have an apple in it somewhere, whether on a bulletin board, a desktop pencil holder, or a door decoration.  Fall means back-to-school and back-to-school means an apple for the teacher!


    Apple Fine Motor Seed Activity


    Apple fine motor activity with tweezers


    While manipulating the tweezers to pick up and position the seeds from the apple, kids can develop and build their eye-hand coordination skills which are needed for reading, writing, performing hands-on learning activities, and performing tasks like turning the pages in a book or manipulating papers and books in a desk.


    What a great Fall themed occupational therapy activity for back-to-school  this apple activity is!


    While my daughter and I worked on this fine motor apple activity, we chatted about the seeds and how they grow from tiny little things into big apple trees. Here’s another apple tree activity that kids this age will love.


    We talked about our family and how it’s grown and how each of us in the family continues to grow.  We even talked about the jobs and responsibilities that each of us has in our family.  I asked her about what she thought about how we do those jobs.  There were some funny responses: “Moms work hard. You do a lot of laundry”, and “She does a lot of making messes” (referring to her two year old sister)!


    They notice every little thing.  It’s those little details of life that don’t go unnoticed. They pick up on words, facial expressions, phrases, feelings, and social interactions.  Then there are the routines.  If one little detail of a typical daily routine is omitted, they notice. When day to day household jobs and activities happen, they notice.

    Our kids are perceptive. They see all and they are learning.  They are watching us and they are learning from us. It can be overwhelming as a parent to have these little people who are growing and learning based on what they see us do.  It can be a hard job to raise children who are kind, truthful, and generous. Being a parent is a big responsibility.

    It can also be amazing and beautiful to know that our littlest actions are inspiring our kids to be great.


    Knowing that back-to-school means a change in routine from the lazy days of summer to even more “jobs” for parents (Helloooo, packing lunches, washing school clothes, preparing school supplies, signing 235 school forms, and helping with homework!), it can be even MORE overwhelming to head back into the school year.

    Apple fine motor activity for Fall

    More Apple Fine Motor

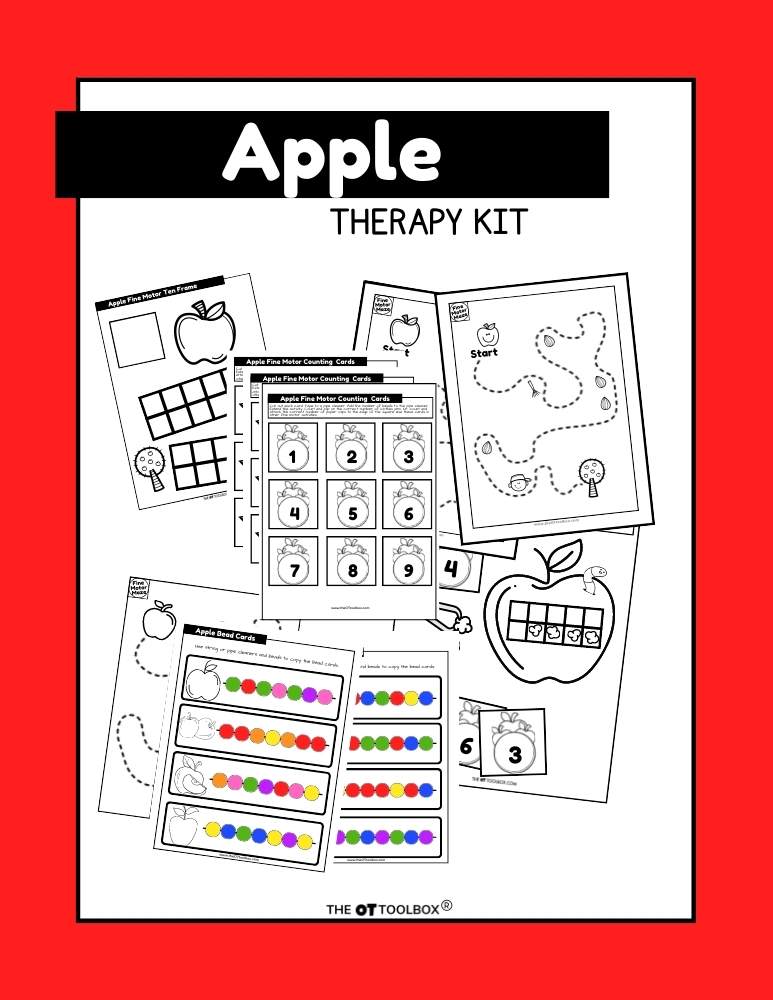
    After you’ve dissected your apple seeds, why not extend the fun? Use our Apple Therapy Kit to work on fine motor dexterity, coordination skills motor planning, patterns, coloring skills and much more.

    Grab a copy of the Apple Therapy Kit here.

    Colleen Beck, OTR/L has been an occupational therapist since 2000, working in school-based, hand therapy, outpatient peds, EI, and SNF. Colleen created The OT Toolbox to inspire therapists, teachers, and parents with easy and fun tools to help children thrive. Read her story about going from an OT making $3/hour (after paying for kids’ childcare) to a full-time OT resource creator for millions of readers. Want to collaborate? Send an email to contact@theottoolbox.com.