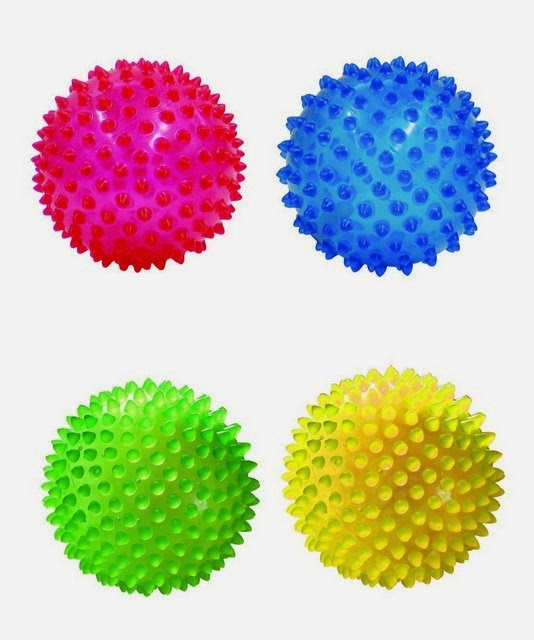
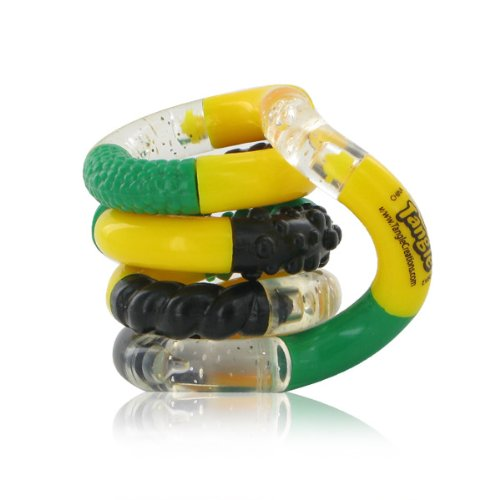
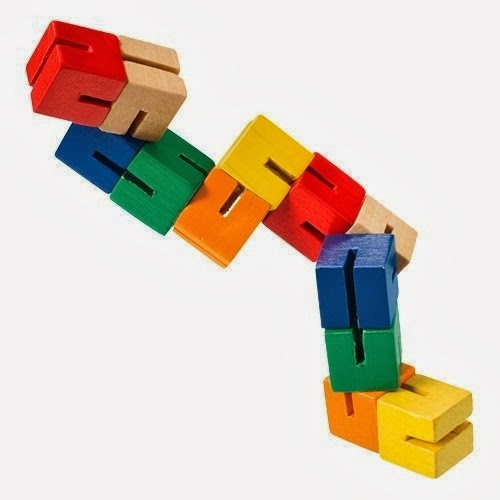
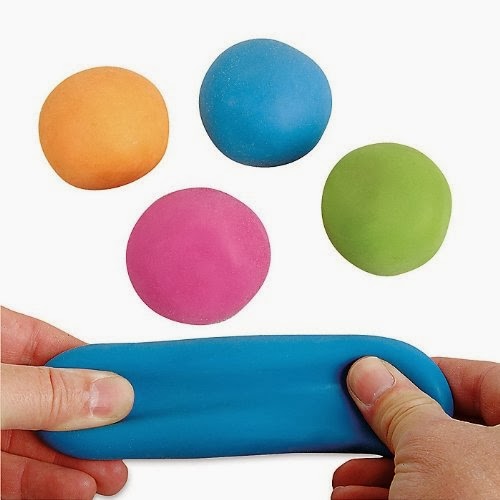
Fine Motor Toys

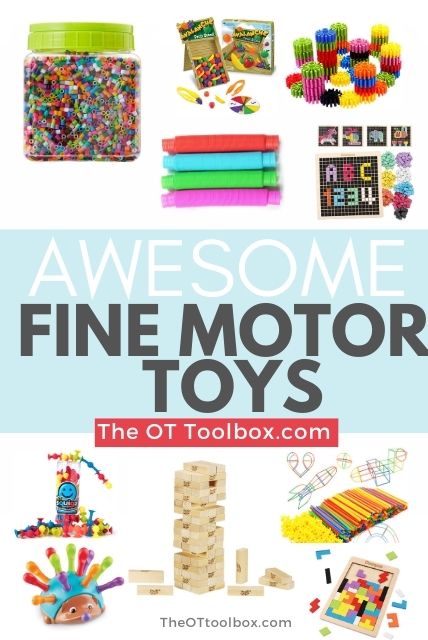
Awesome fine motor toys for kids

Working on fine motor skills through play is natural. Here, you’ll find the very best fine motor toys designed to promote and support a variety of therapy skills. These occupational therapy toys support the development of precision, dexterity, hand strength, and coordination, through play. Let’s talk Fine Motor Toys!

Amazon affiliate links are included in this blog post. As an Amazon Influencer, I earn from qualifying purchases.

Fine Motor Toy Ideas

Today is going to be FUN! I am beyond excited to share the very best fine motor toys that support development of hand strength, dexterity, precision. We’ll also cover why these occupational therapy toys support fine motor development, and cover a little about an occupational therapist’s perspective on what makes them such amazing tools for building hand strength, dexterity, motor control, and fine motor coordination.

Here’s why: I love to share my OT perspective on helping kids develop skills, using fun and engaging therapy toys that kids are excited about.

Check out the items below, and add one of these fine motor toys to your therapy toolbox!

These fine motor toys are therapy toys that help kids build motor skills like hand strength, coordination, and more.

Fine Motor Toys

So often, therapists and teachers purchase items to use in their work using their own money. This giveaway offers a chance for you to win an item that will be useful in helping kids thrive.

And, given that kids are on screens more than ever before with all of the virtual learning and hybrid learning models being incorporated all over the world, therapists are seeing more need for active, physical play.

Because of that, I’m excited to share with these fine motor toys that help kids develop the motor skills they need!

One type of toy that is easy to start with when it comes to supporting fine motor skills is buckle toys. These soft toys with straps, buckles, and connectors are great for all ages.

Fine Motor Skills Toys

Here on The OT Toolbox, I’ve shared a lot of different toy suggestions, that are perfectly suited to meet specific needs, like fine motor strength, grasp, pincer grip, and dexterity. Toys like Tinker Toys and a Lite Brite toy are classic ideas to build skills. But, there are many ideas out there!

Some of these specifics can be found here:

Today, I wanted to go through some specific toys that develop fine motor skills. AND…as part of the Therapy Tools and Toys Giveaway, you can enter to win these items!

Therapy Toys for Fine Motor Skills

These are fine motor toys that you will find in therapy clinics. There is a reason why…because they are fine motor powerhouses! So, if you are looking for toy recommendations that build motor skills, this is it!

Amazon affiliate links are included below. You can read more about these items by checking out the links.

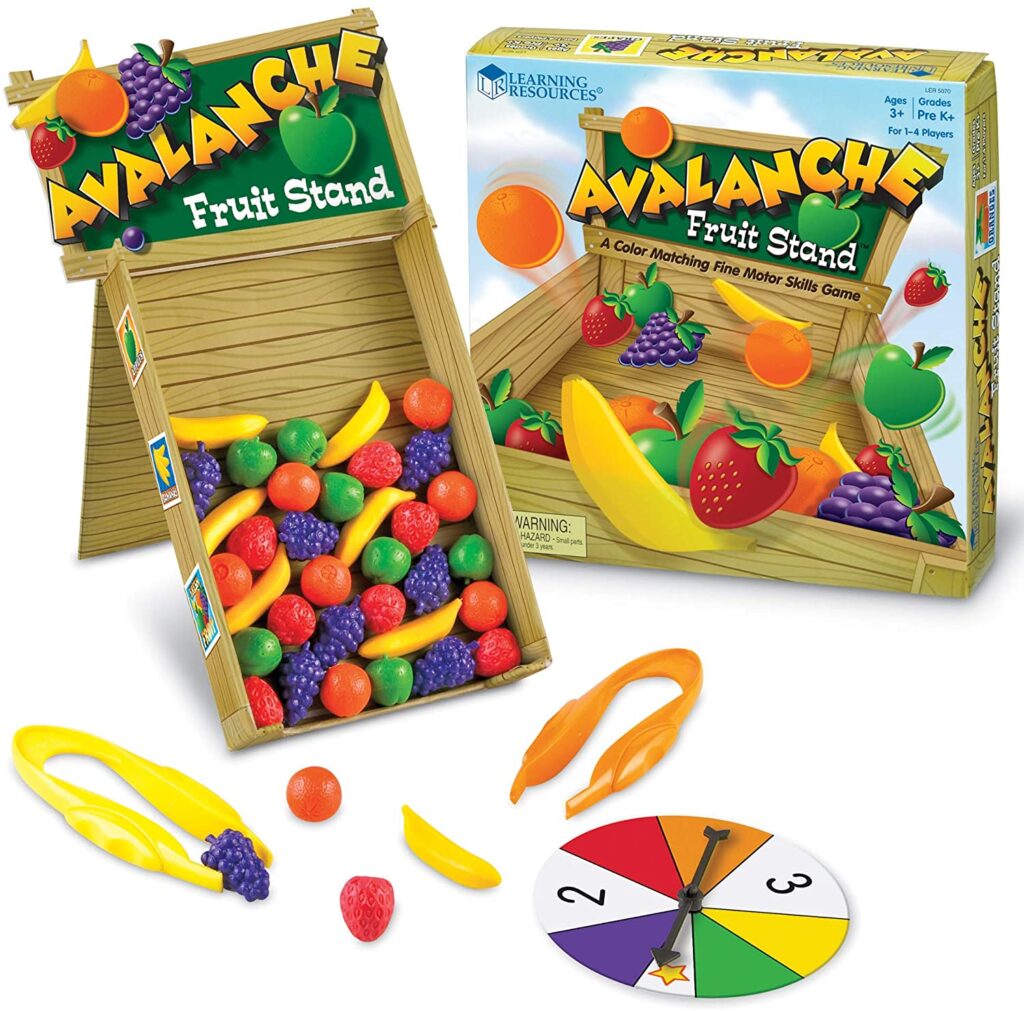
Learning Resources Avalanche Fruit Stand (affiliate link)- This toy is one of my FAVORITE ways to develop fine motor skills in kids. Kids use tweezers to manipulate fruit pieces and can work on colors, counting, matching, and other learning skills. The fine motor components are impressive! Address skills such as:

  • Pincer and Tripod grasp development
  • Hand strength
  • Arch development
  • Separation of the sides of the hand
  • Wrist stability
  • Wrist extension
  • Eye-hand coordination
  • Motor control
Build fine motor skills with this Avalanche Fruit Stand game that helps with fine motor skills.

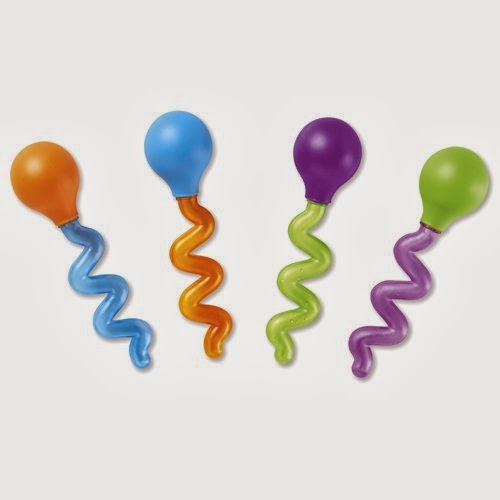
Pop Tubes– (affiliate link) There are so many ways that these fine motor tools build skills in kids. You can read about using Pop Tubes for bilateral coordination skills in this previous blog post, but beyond bilateral coordination, these bendable tubes can be used to help kids develop body awareness through tactile stimulation, fine motor skills auditory feedback, AND fine motor skills such as:

Pop Tubes are a fine motor toy that helps kids build hand strength.

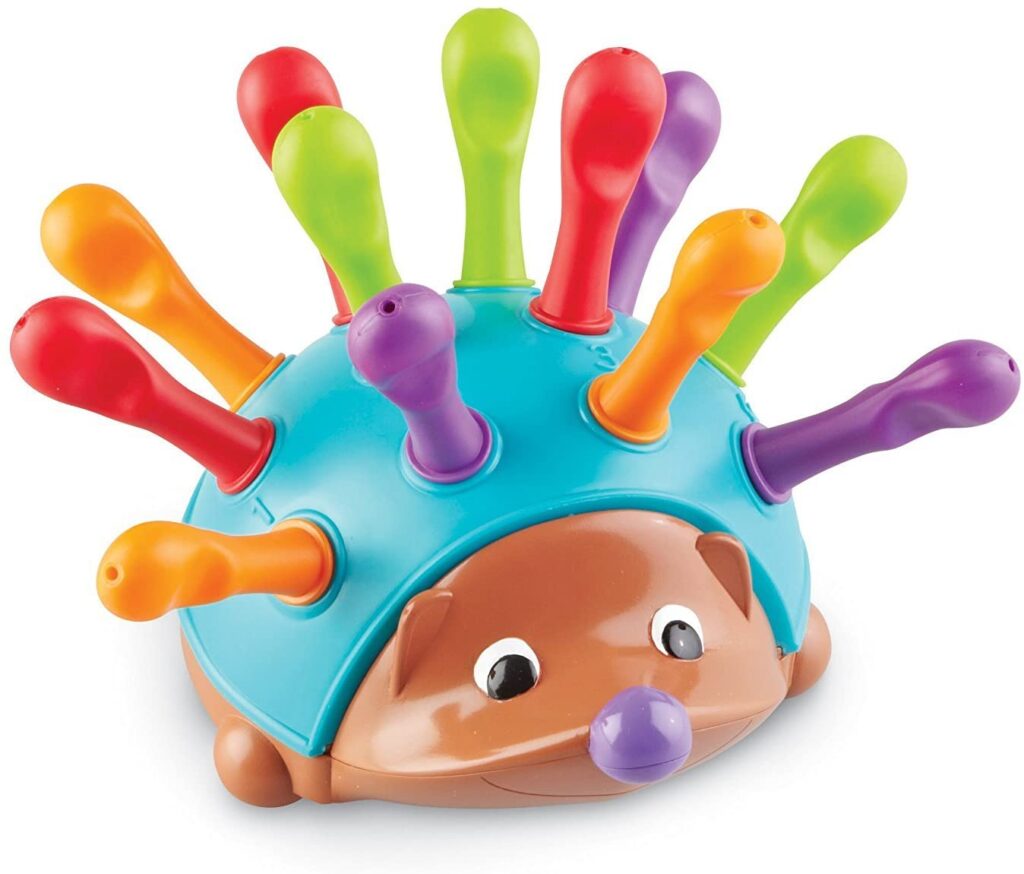
Spike the Fine Motor Hedgehog(affiliate link) Have you seen this cute hedgehog toy? It’s a great way to help kids develop fine motor skills in a fun way. The bright colors are a nice way to work on matching, sorting, math skills, and color recognition, too. The chunky pegs make this fine motor tool a great toy for toddlers, but the hedgehog’s cute factor makes it a great fine motor activity for older children as well. These fine motor skills are addressed with this toy:

  • Eye-hand coordination
  • Pincer grasp
  • Grasp development
  • Hand strength
  • Motor planning
The fine motor hedgehog toy helps kids with fine motor skills.

Bucket of Perler Fuse Beads– (affiliate link) This bucket of beads is the perfect way to build so many fine motor skills. I love working with perler beads with children because you can target many skills, and it’s a great fine motor activity for older children that may benefit from fine motor work. This bucket of perler beads makes my recommendation list for it’s fine motor benefits:

  • Pincer grasp
  • In-hand manipulation
  • Separation of the sides of the hand
  • Open thumb web-space
  • Dexterity
  • Precision
  • Wrist stability
  • Eye-hand coordination
Perler beads are a great fine motor toy for kids.

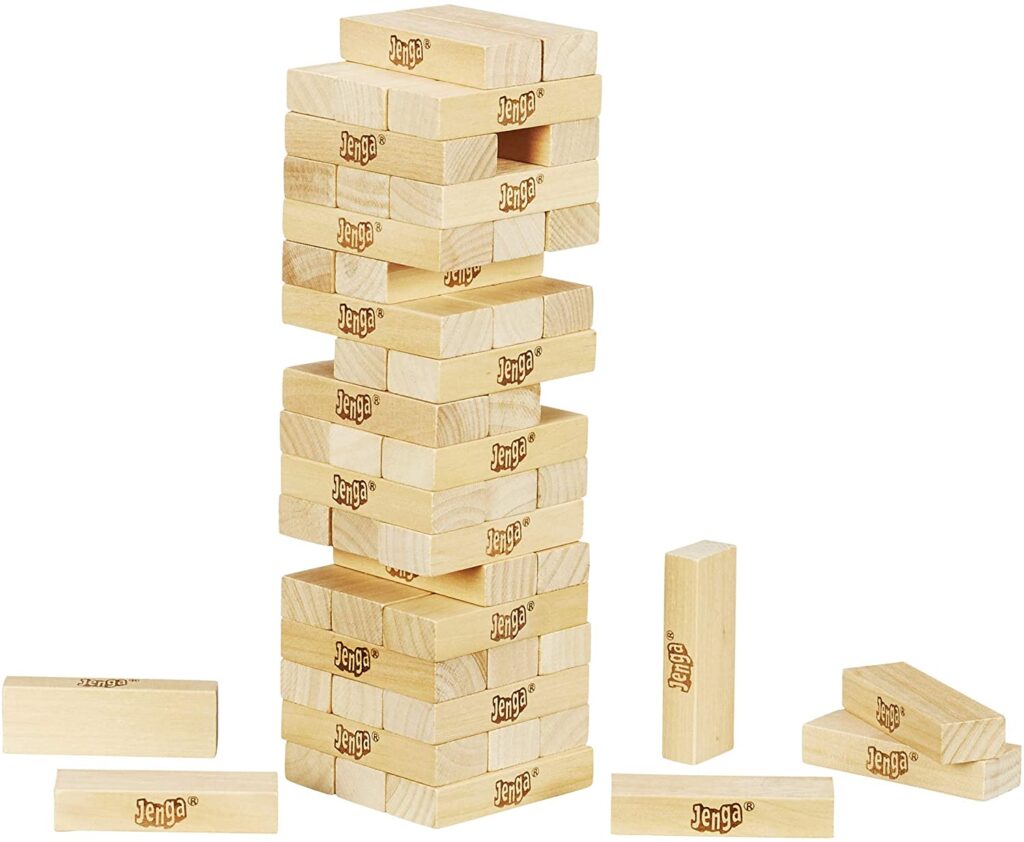
Jenga Game-(affiliate link) This classic game is a fine motor powerhouse that kids love. As a therapist, I love to use this game to build fine motor skills, because it’s such an open-ended activity. You can play the Jenga game, but you can use the blocks in building activities and pretend play activities, too. Consider the fine motor benefits of this game:

  • Precision
  • Dexterity
  • Separation of the sides of the hand
  • Eye-hand coordination
  • Motor planning
  • Motor control
Use Jenga to help kids develop fine motor skills and coordination

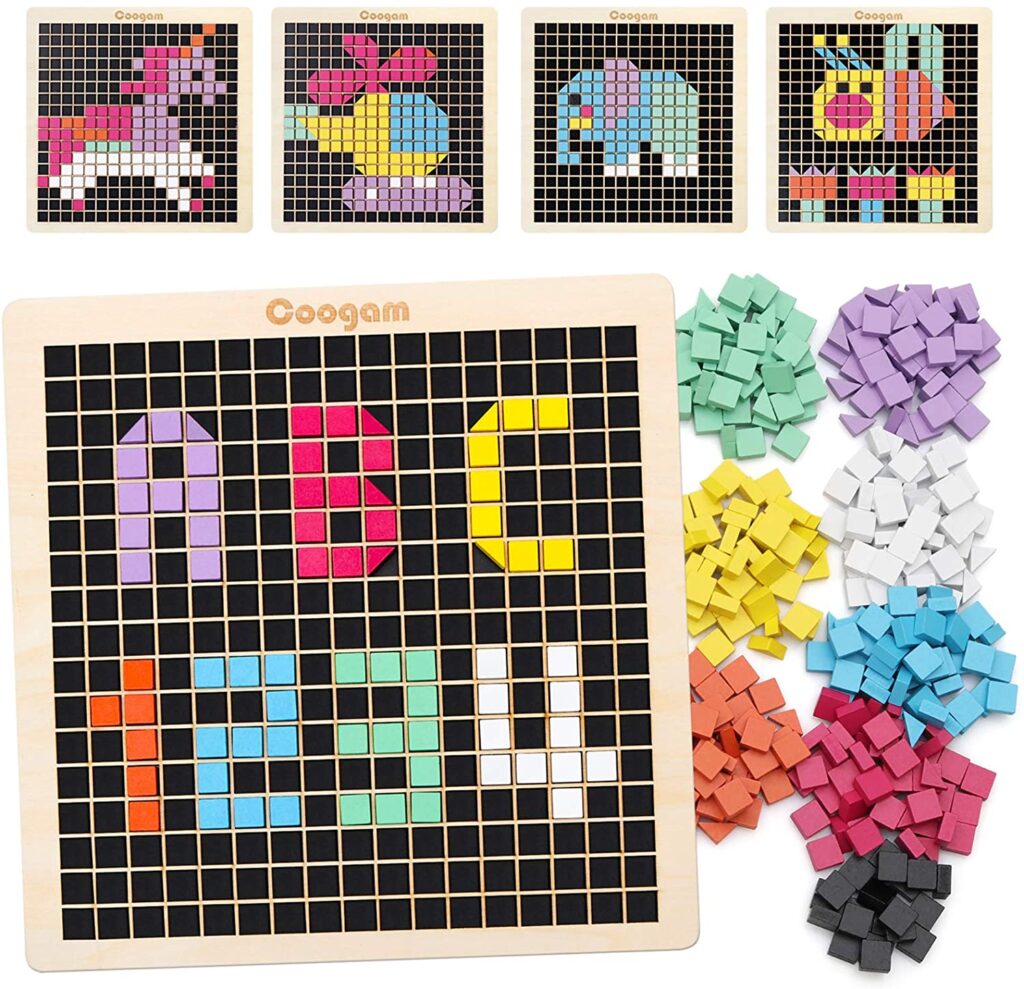
Coogam Wooden Mosaic Puzzle– (affiliate link) This pixel puzzle comes with a wooden board, a puzzle booklet, and 370 small block pieces in 8 different colors. Children can use this fine motor toy to develop so many fine motor and visual motor skills. Use it to copy and build letters and numbers, shapes, and pictures. This toy is great for math concepts, too. This is a powerful toy!

  • Precision
  • Eye-hand coordination
  • Visual motor skills
  • Pincer grasp
  • In-hand manipulation
  • Open thumb web-space
Use this shapes puzzle to help kids develop fine motor skills, coordination, and motor control.

Interlocking Building Snowflakes-(affiliate link) This building toy is a fine motor goldmine. Kids can construct 3D shapes or they can copy figures and work on visual motor skills. Use this fine motor toy to work on skills such as:

  • Hand strength
  • Arch development
  • Separation of the sides of the hand
  • Bilateral coordination
  • Pinch and grip strength
  • Wrist stability

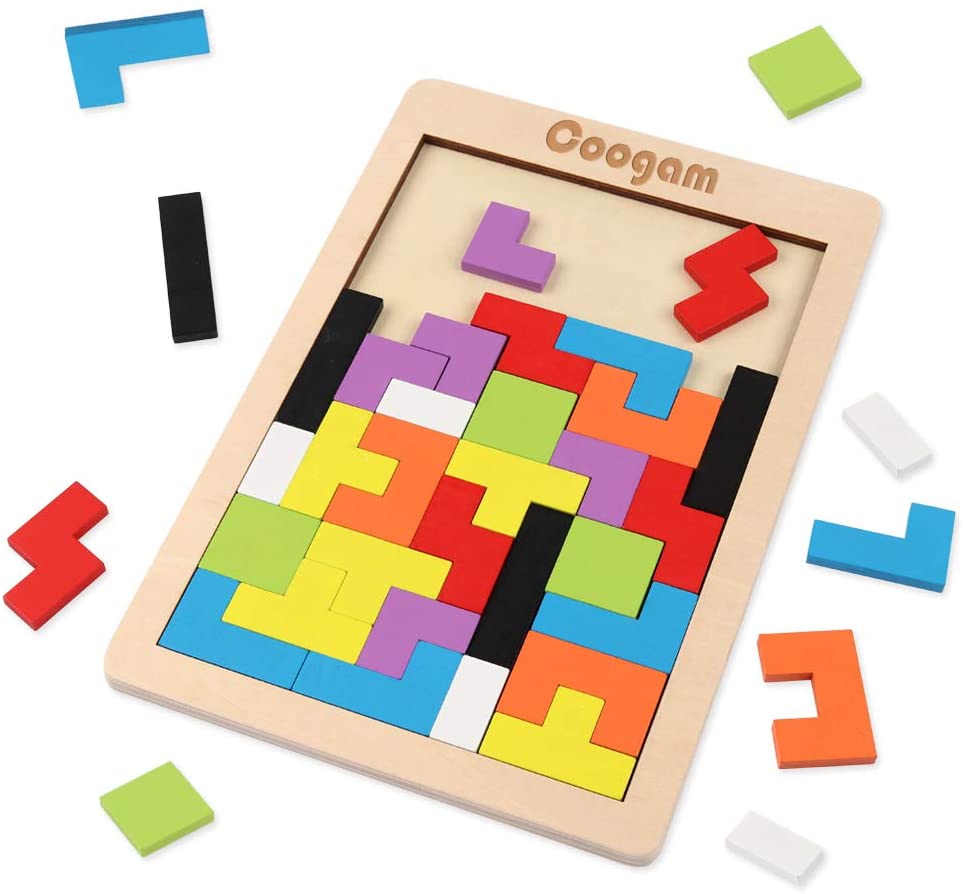
Coogam Wooden Blocks Puzzle Brain Teasers Toy Tangram– (affiliate link) This puzzle toy is a fantastic addition to have in your therapy bag, classroom, or home. Kids can complete the fine motor puzzles and use it as a brain break to learning. Plus, there are so many visual motor benefits to this toy:

  • Visual motor integration
  • Eye-hand coordination
  • Precision
  • Wrist stability
  • Wrist extension
  • Separation of the sides of the hand
  • In-hand manipulation
  • Open thumb web-space
Children can develop precision and dexterity with this tangram activity.

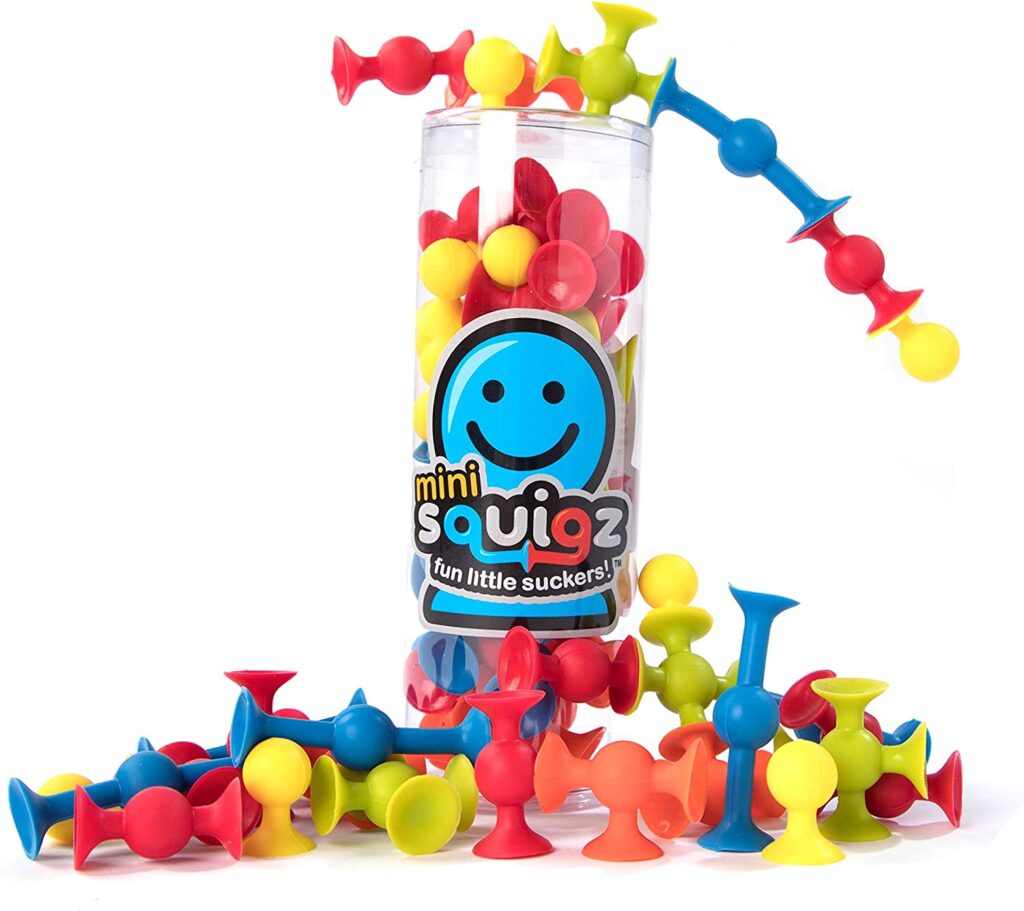
Mini Squigz– (affiliate link) Squigz are such a great fine motor toy for kids. Use them to build on one another or to stick to a wall or protective plexiglass surface. The sticking suction cap toys provide resistive feedback that not only strengthens little hands, but offers a proprioceptive sensory feedback, too. Here are more fine motor benefits to this toy:

  • Hand strength
  • Arch development
  • Separation of the sides of the hand
  • Eye-hand coordination
  • In-hand manipulation
  • Precision and dexterity
Use squigz to help kids build hand strength.

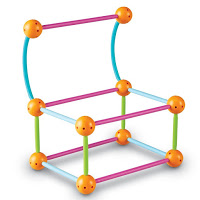
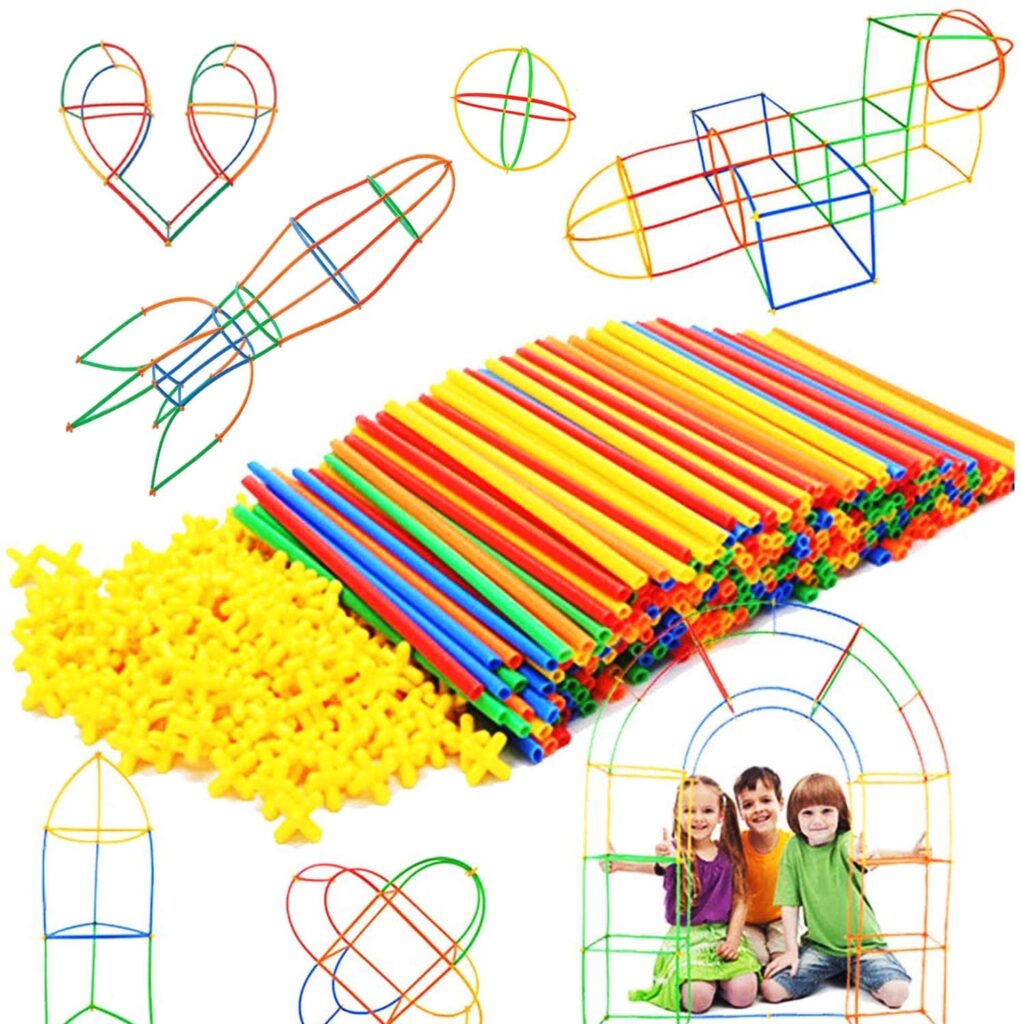
Straw Constructor STEM Building Toy– (affiliate link) Using STEM toys to support fine motor skills is a powerful strategy. Read more about STEM fine motor activities.

This fine motor toy is such a fun way to help kids develop and strengthen motor skills. Even better, is that this building toy can become a gross motor toy, too. Containing 300 pieces of plastic straws and connecting pieces, this construction toy helps kids develop so many areas:

  • Bilateral coordination
  • Visual motor skills
  • Eye-hand coordination
  • Pincer grasp
  • Tripod grasp
  • Hand strength
  • Arch development
  • Separation of the sides of the hand
  • In-hand manipulation
A straw construction toy is great for fine motor skill development.

Pincer Grasp Toys

Toys to improve pincer grasp include:

Affiliate links are included below.

Hand Strength Toys

Affiliate links are included below.

Fine Motor Games

Affiliate links are included below.

More Therapy Toys

Check out the therapy toy ideas listed in the blog posts below. Each article covers a different area of child development.

  1. Fine Motor Toys 
  2. Gross Motor Toys
  3. Pencil Grasp Toys
  4. Toys for Reluctant Writers
  5. Toys for Spatial Awareness
  6. Toys for Visual Tracking
  7. Toys for Sensory Play
  8. Bilateral Coordination Toys
  9. Games for Executive Functioning Skills 
  10. Toys and Tools to Improve Visual Perception 
  11. Toys to Help with Scissors Skills 
  12. Toys for Attention and Focus 

PRINTABLE LIST OF TOYS FOR Fine Motor Skills

Want a printable copy of our therapist-recommended toys to support fine motor skills?

As therapy professionals, we LOVE to recommend therapy toys that build skills! This toy list is done for you so you don’t need to recreate the wheel.

Your therapy caseload will love these FINE MOTOR toy recommendations. (There’s space on this handout for you to write in your own toy suggestions, to meet the client’s individual needs, too!)

Enter your email address into the form below. The OT Toolbox Member’s Club Members can access this handout inside the dashboard, when you search “toys” in the search bar inside the membership. Just be sure to log into your account, first!

Therapist-Recommended
FINE MOTOR TOYS HANDOUT

    We won’t send you spam. Unsubscribe at any time.

    Looking for a consistent way to support fine motor skills all year?
    This yearlong fine motor system includes seasonal activity kits and monthly data collection tools to support planning and progress monitoring.

    If fine motor planning and data collection feel overwhelming, you’re not alone.
    This done-for-you yearlong bundle organizes seasonal activities and monthly screening tools in one system.

    Get the Yearlong Fine Motor and Data Collection Bundle today!

    Colleen Beck, OTR/L has been an occupational therapist since 2000, working in school-based, hand therapy, outpatient peds, EI, and SNF. Colleen created The OT Toolbox to inspire therapists, teachers, and parents with easy and fun tools to help children thrive. Read her story about going from an OT making $3/hour (after paying for kids’ childcare) to a full-time OT resource creator for millions of readers. Want to collaborate? Send an email to contact@theottoolbox.com.
    Thanksgiving Activities for Kids

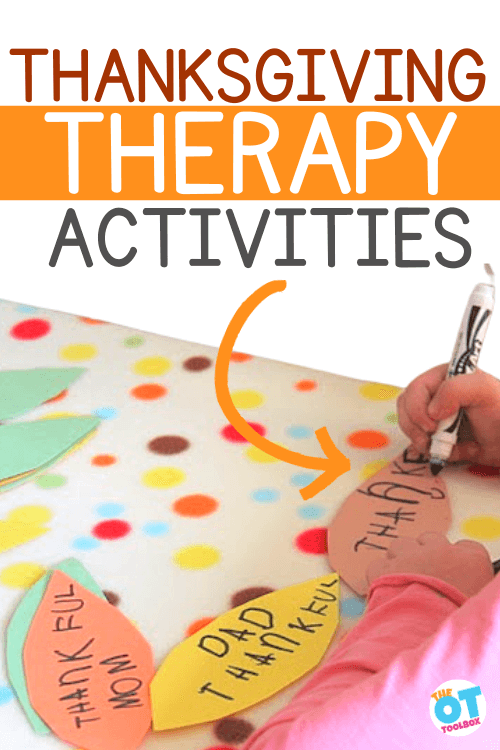
    Thanksgiving therapy activities

    Thanksgiving is right around the corner. There are so many reasons to be thankful. The leaves are falling, families and friends will be gathering. Here, you will find Thanksgiving activities for kids that help to build skills, develop motor skills, enhance sensory challenges, and help children thrive through play. There are so many thanksgiving activities that can be used in occupational therapy.

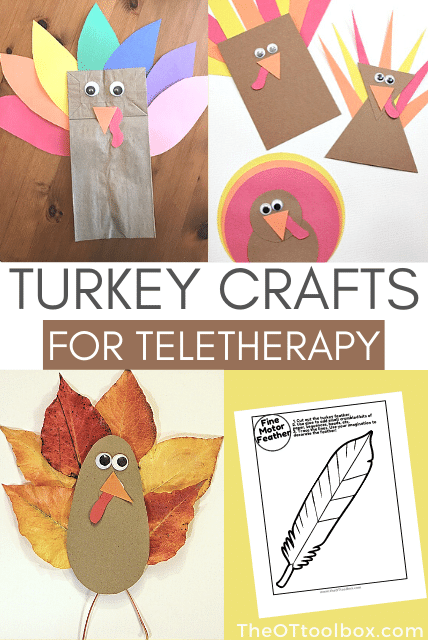
    Thanksgiving OT activities are here in all ways…Turkey crafts are always so cute and are a great way to get your kids working on following directions, fine motor skills, visual motor skills. Get your kids up and moving after Thanksgiving dinner by having them participate in a gross motor turkey themed activity.

    Thanksgiving therapy activities

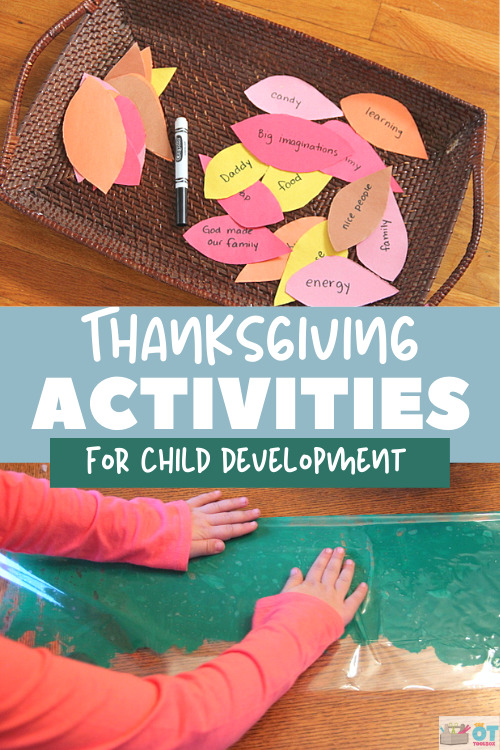
    Thanksgiving Activities for Kids

    I have broken down these Thanksgiving activities for kids into different categories based on occupational therapy areas and OT Thanksgiving activities that may be needed to work on certain goal areas or functional areas.

    Thanksgiving activities for kids

    These Thanksgiving therapy activities cover a variety of skill areas and OT goals.

    Thanksgiving OT Activities for Sensory

    The Thanksgiving occupational therapy activities in this list are sensory motor activities that support sensory input through movement and play based activities.

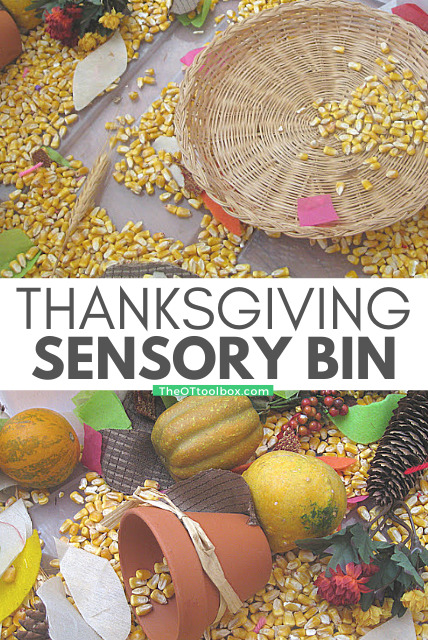
    Thanksgiving sensory bin

    Thanksgiving sensory bin-grab some dry corn, shredded paper, acorns and fall leaves to make this Thanksgiving sensory bin.  

    Thanksgiving mindfulness activity-take a deep breath and help your child wind down from a busy load and cope with sensory overload with this, deep breathing turkey visual prompt.

    Fall vestibular sensory-moving, jumping, rolling, hopping and swinging all are vestibular activities. Why not do these activities in the leaves? Rake up a pile and leaves and have your child roll in the leaves, create a leaf swing or jump in the leaves.  Here are more Fall vestibular activities that prompt movement.

    Disguise the Turkey OT Teletherapy Activity– This digital disguise the turkey activity is a free slide deck that you can use for occupational therapy teletherapy sessions or as a brain break activity in the classroom or home. Kids can disguise the turkey and then work on typing, handwriting, and creative writing skills.

    Thanksgiving OT Activities for Fine motor 

    Thanksgiving OT activities support fine motor skills like precision, hand strength, finger strength, coordination, finger dexterity, and more. Thanksgiving crafts and activities do just that!

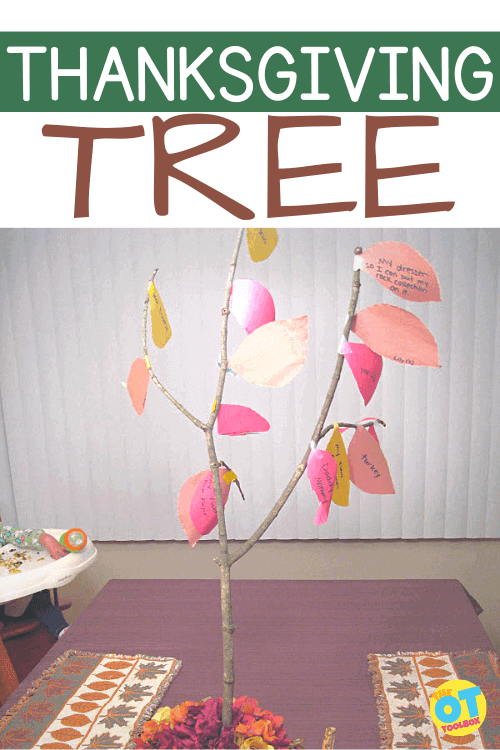
    Thanksgiving tree

    Thanksgiving tree– What are your kids thankful for? Find out with this thanksgiving gratitude tree made from sticks and paper leaves. Kids can make the Thanksgiving Tree and express gratitude while working on scissor skills and handwriting.

    Gratitude Leaf Garland– gather some construction paper, markers and yarn and make a festive decoration. Have your child write on the leaves and they can even help to cut them out.  Hang the gratitude leaf garland with the kids.

    Thanksgiving suncatcher craft

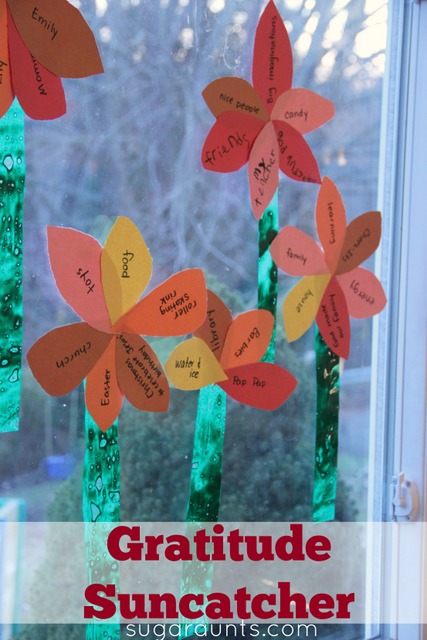
    Gratitude sun catcher-make a beautiful window decoration this Thanksgiving with a fine motor suncatcher craft. Grab some construction paper, black marker and clear cellophane wrap. This activity focuses on writing, scissor skills and counting your blessings.  

    Cooking with Kids- Make these turkey pretzel rod snacks with kids to work on fine motor skills, problem solving, executive functioning, and direction following.

    manualidades con pavo para niños que son excelentes para la teleterapia

    Turkey crafts and activities-follow this link to lead you to 19 turkey crafts that are sure to keep your child busy! If you need quick last minute turkey crafts, we have those, too.

    Thanksgiving felt board pattern– work on direction following, patterns and fine motor skills with this turkey felt board project 

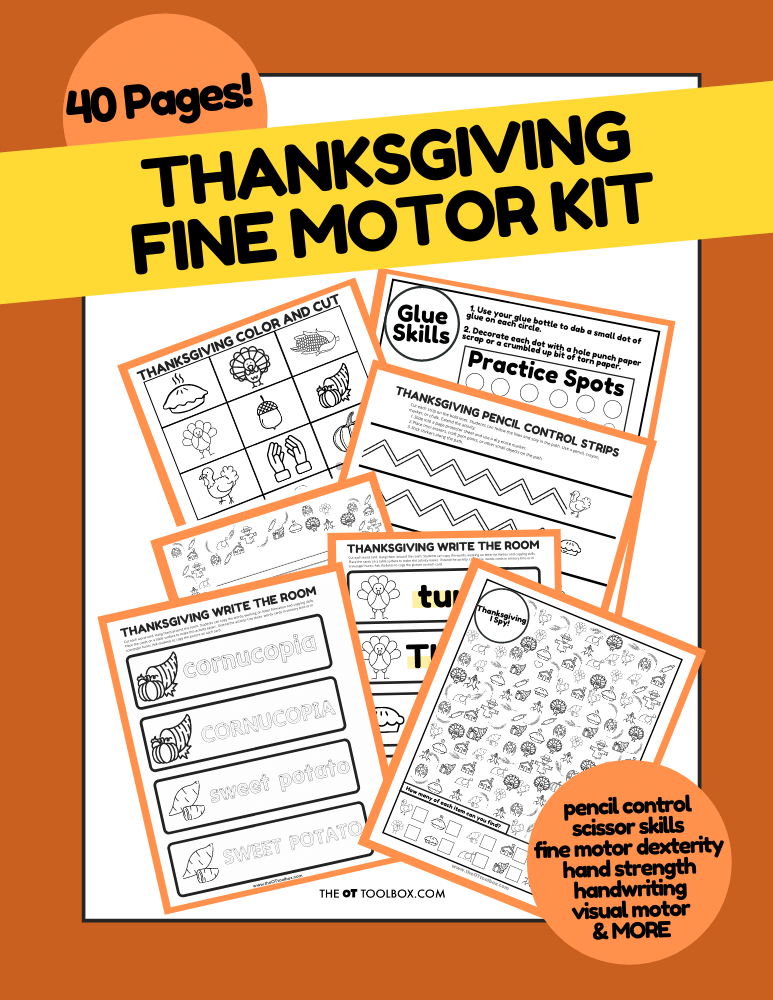
    Fine Motor Thanksgiving Activities- Use our Thanksgiving Fine Motor Kit to build fine motor skills with lacing cards, crafts, handwriting activities, scissor cards, pre-writing cards, cursive writing cards, and so much more.

    This cute turkey lantern craft from JDaniels Mom is a fun way to work on fine motor skills.

    Thanksgiving fine motor kit

    Thanksgiving OT Activities for Gross motor 

    Thanksgiving therapy activities are great balance and coordination activities for balance beams, OT obstacle courses, scavenger hunts, and more. These play-based activities are driven by games and play and support the development of balance, coordination, and sensory motor skills that are needed for daily functional tasks.

    Turkey theme gross motor activity-no equipment needed to have your child participate in this gross motor activity where they will waddle like a turkey, working on body coordination, core strength and bilateral coordination with this free Thanksgiving Turkey Slide Deck. Use it in virtual therapy or as a Thanksgiving brain break activity.

    Thanksgiving walk– grab your family and friend and go on a thanksgiving morning walk. Get out there and enjoy the fresh air and get some exercise in. Make it a scavenger hunt for your kids look for acorns, leaves, sticks, birds, squirrels, pumpkins.  

    Thanksgiving is such a great time of year to do some really fun fine motor, gross motor and sensory turkey themed and fall themed ideas. Hopefully this list is a quick and easy way to fine activities your kids will love and can use in OT Thanksgiving activities!

    Be sure to grab the Thanksgiving Fine Motor Kit while it’s on sale!

    Thanksgiving Fine Motor Kit

    Colleen Beck, OTR/L has been an occupational therapist since 2000, working in school-based, hand therapy, outpatient peds, EI, and SNF. Colleen created The OT Toolbox to inspire therapists, teachers, and parents with easy and fun tools to help children thrive. Read her story about going from an OT making $3/hour (after paying for kids’ childcare) to a full-time OT resource creator for millions of readers. Want to collaborate? Send an email to contact@theottoolbox.com.
    Skipping Activities for Kids

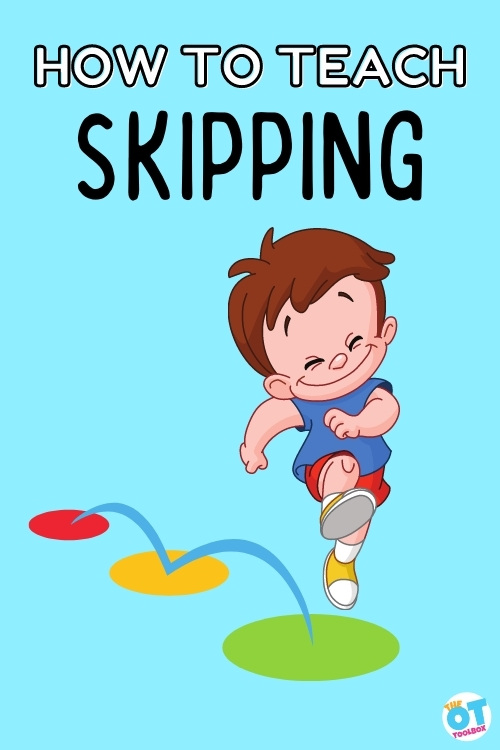
    text reads "how I taught a child to skip in occupational therapy" image shows dots with arrows for skipping.

    Young children often ask to learn to skip. Here, you’ll discover skipping activities for kids, as well as specific strategies to teach children how to skip. Skipping is an important gross motor target. For some children, learning to skip is a real challenge! 

    I wanted to update this resource on teaching kids to skip with additional skipping activities I’ve personally used in therapy sessions. You can find that information at the bottom of this page.

    These skipping activities are fun ways to teach kids to skip.

    Learn to Skip with Skipping Activities

    If you have ever spent time in an elementary school, you may have noticed that the youngest members of the school community, specifically kindergarteners, hardly ever walk from place to place… they skip (and hop, jump, twirl, and gallop, too)!

    Skipping is a developmental milestone or marker that generally emerges around age 5, with a range of age 4-6 years.  For many kids, skipping emerges without intervention, just the way reaching, crawling, or walking develops. 

    For kids who struggle with gross motor skills and bilateral coordination, direct teaching may be necessary to develop this critical skill.  Once the basics are learned, skipping activities are a great way to practice.

    learning to skip requires motor planning and sensory integration

    Skipping is such a perfect example of motor planning and sensory integration.  It requires ideation (having the idea about how to move), planning (sequencing the movement), and execution (carrying out the movement).  

    For a person to execute the motor plan of skipping, the coordinated effort of sensory systems and the brain is required. 

    Skipping also provides excellent sensory input. No wonder kindergarteners like to skip from place to place… the vestibular and proprioceptive input they receive is a natural reward for all their hard work in mastering the skill!

    what about bilateral coordination?

    The ability to coordinate the two sides of the body involved in learning how to skip requires balance, strength, motor planning, and bilateral coordination. Bilateral coordination refers to the ability of the brain and body to process and integrate information from both sides of the brain to respond with movements in a coordinated manner. 

    Many functional tasks and daily activities, such as feeding, dressing, and writing rely on bilateral coordination. 

    Being able to coordinate both sides of the body is also a foundation skill for gross motor coordination activities such as walking, running, galloping and skipping.

    Wondering how to teach skipping? This blog post breaks down the steps of skipping.

    How to Teach Skipping

    When you have a goal for a child to learn to skip, it is important to make sure that you address all of the components of skipping.  Teaching kids to skip starts with seeing what skills the individual is able to do. There are skills that are required to skip. Can the child balance on one foot and hop? Does the child have a dominant leg? Can they gallop or perform a different version of skipping? These are all good questions to ask when teaching skipping skills.

    First, evaluate and observe the following gross motor skills needed for skipping:

    • Balance – check to make sure they can balance on either foot
    • Hopping – are they able to hop in place on each foot?  Are they able to hop forward on one foot?  Have them try to take 5 hops forward on either foot
    • Leg dominance – it may be helpful to know if they have a preferred leg for activities like hopping or kicking
    • Galloping – are they able to gallop? Can they gallop on either side?  This is more of a unilateral skill, which is often easier for kids who demonstrate difficulty with bilateral coordination skills.

    If any of the above skills are weak, start with developing balance and hopping.  Then progress to galloping, followed by skipping. 

    Then, use these strategies to teach skipping:

    1. To teach skipping, start by breaking down the steps for the child.  Provide a demonstration and simple verbal cues like “Step, hop, switch”.  You may need to provide a visual cue as well, using colored dots or markers on the floor, such as these (Amazon affiliate link) Little Polly Markers.

    2. Once the child is able to complete the “step, hop, switch” sequence. This can be a very slow process at first. Some kids will need to think through the motor plan of each step. That’s ok! Use visual and verbal cues to work on the step with one foot, the hop, and the switch to the other foot.

    3. Work to improve their fluency and speed of the step, hop switch sequence. Use these steps in an obstacle course or a relay activity to work on speed and gross motor coordination to improve fluent motor skills.

    3. As they master the skill of skipping, you can encourage them to incorporate their upper body into the movement as well. Show them how to swing their arms in coordination with the legs. This will become more fluent and integrated with practice.  

    Working on the coordination and motor planning to master learning to skip involves more than just a hop and a skip. Skipping is a complex task, but once you break it down and address underlying skill areas, it becomes easier. 

    Skipping Activities

    Here are some gross motor coordination games and skipping activities that address bilateral coordination and motor skills:

    • Obstacle courses – set up a simple hopping and jumping obstacle course inside or outside.  Use pool noodles to jump over with two feet, hop in and out of hula hoops, jump over cardboard bricks, etc.  Here is a post about Outdoor Lawn Games with lots of ideas for using backyard toys and equipment to address gross motor coordination skills.
    • This Ultra Dash Game (affiliate link) is fun for kids of all ages!  You can set up an obstacle course in various ways and then the kids have to race to match the colors from the wand to the colored base.  You could incorporate skipping, jumping, and hopping into this game to work on those skills in a new way.
    • Use gross motor toys to work on balance, coordination, motor planning, and core strength.
    • Use a long jump rope to hop over on one foot. 
    • Stand like a flamingo. Try freeze dance games with a flamingo theme. When the music stops, players have to hold one leg up like a flamingo!
    • Simon says- Incorporate the hop and jump tasks needed in the task of skipping. Use these Simon Says commands in therapy sessions.
    • Yoga is a great activity to build body awareness, gross motor skills, and bilateral coordination.  Here are several different kids yoga resources:
    • Skip ball (affiliate link)- this toy is a fun tool to practice skipping skills
    • Chinese Jump Rope (affiliate link) – who remembers this classic toy? Relive your childhood while passing on this great game
    • Mini Trampoline (affiliate link)- these are great to work on jumping, hopping, coordination, following directions, all great skills to teach skipping
    • Musical Hippity Hop Stick – this rotating stick encourages children to jump over the stick as it rotates by. If the stick touches them, the game is over. Practice this with two feet first, then try hopping over the stick
    • Hopscotch!  Don’t forget about this one!  All you need is some chalk and a sunny day to get outside and practice hopping and jumping.  This would be a great activity to set up on the playground for kids to work on skipping skills during recess. Not ready for outside play? Use painter’s tape down the hallway.

    Teach Skipping in Occupational Therapy

    One thing I love about occupational therapy is that we can help kids with the skills they want to do. I’ve had a few kids that request things like learning to pump a swing so they can play on the swings at recess, or how to do a cartwheel even when body awareness and crossing midline is a problem.

    I’ve had a child or two that wanted to learn how to skip. They wanted to skip because their peers do this at recess and they found themselves missing out. The fact is that skipping is a childhood classic! One student in particular wanted to learn to skip so they could skip down their road after getting off the school bus at the end of the school day.

    Isn’t occupational therapy cool?! We get to help our clients do the things that matter the most to them, and if that’s skipping, hey, that’s what we are going to work on in OT sessions!


    text reads "how I taught a child to skip in occupational therapy" image shows dots with arrows for skipping.

    Here’s how I taught one child to skip in our occupational therapy sessions…

    Skipping Goals in OT

    Some physical therapists might argue that skipping is PT’s domain. But when we are talking about the function and the actual skill that is involved and the child’s motivation to do this task as part of play or functional tasks, we’ve got a great OT goal.

    For my kiddo that wanted to skip at recess, this is exactly what I’m talking about. This particular student wanted to participate in her school day with her peers, and the function was play.

    The skills we need to assess are:

    Another area that’s not often considered when it comes to breaking down the task of skipping is Related, are the concepts of dominance and mixed dominance vs. ambidexterity. This is where occupational therapy can help because we do think of all of these components!

    I helped this student to work on skipping by segmenting the movements into steps. We came up with a routine of sorts. This really helped this particular child because they were really interested in dance and movement. So putting the steps of skipping into a routine with step by step movements really helped her.

    I had her step on a colored dot on the floor with one foot. Then I had her pick up her opposite knee by pulling it up to her trunk section. This step took a little practice because of balance and coordination of the movements. We added some animal poses into the therapy sessions to work on the core strength, balance, and coordination. It also was a great regulation activity for her.

    Then, once she had that step down pat, I had her hop on one foot to another colored dot. We used different colors to add a visual cue to the steps.

    Then, once she was able to do the hop we repeated the process with the other foot.

    Then we put it all together into repeated movements.

    She was able to move really slowly through the steps of skipping by using a pattern of colored dots on the floor. I started with big therapy dots and then we moved onto small round stickers.

    It worked really well! She was very motivated to complete this task so that helped, but by using this process over and over again, she really got the steps and motor planning down to learn the steps of skipping. It became an automatic motion.

    Then, we added in the component of peers and a busy environment by doing the activity outside in the actual space, the playground. Success!

    Colleen Beck, OTR/L has been an occupational therapist since 2000, working in school-based, hand therapy, outpatient peds, EI, and SNF. Colleen created The OT Toolbox to inspire therapists, teachers, and parents with easy and fun tools to help children thrive. Read her story about going from an OT making $3/hour (after paying for kids’ childcare) to a full-time OT resource creator for millions of readers. Want to collaborate? Send an email to contact@theottoolbox.com.
    How to Create a Sensory Diet

    steps to create a sensory diet

    Here you’ll discover how to create a sensory diet through information on sensory diets as well as a powerful resource to set up and establish an effective sensory diet lifestyle that works for kids. We’ve shared a lot of information about creating a sensory diet. There is a valid reason. Besides the growing need for sensory support for kids with sensory processing disorder or sensory challenges, there is a real need for parents and teachers to understand exactly what a sensory diet is and how it can help address sensory needs.  

    steps to create a sensory diet

    We’ll get into the steps to create a sensory diet below. Let’s first talk about how and why we need to make sensory diets.

    The tips below are strategies for creating a sensory diet that can be effective and helpful in enabling a successful sensory lifestyle. Understanding how does a sensory diet help is many times, the first step in addressing sensory related needs!

    Sensory diets can change the self regulation level that one is at, whether that be overstimulated and overwhelmed by the environment and internal state, or needing to become more alert. Sensory diet strategies can support these needs in any environment.

    How to Create a Sensory Diet

    Whether you are wondering exactly what a sensory diet entails or why a sensory diet can be effective in addressing underlying sensory needs, knowing how to create a sensory diet using the tools a child needs is essential. 

    Below, you’ll find answers to questions about how to create a sensory diet and what exactly a sensory diet is. If you are wondering how does a sensory diet work, then read on! 

    You can make a sensory diet in any space. Read our blog posts about creating a sensory diet on a budget and calm down corners for more information on creating a sensory diet in a specific space in the school environment.


    Wondering how to create a sensory diet? Use these steps to create a sensory diet for children with sensory needs that result in meltdowns, attention challenges, struggles with regulation, and other sensory processing related difficulties. Perfect for the occupational therapist who works with kids with sensory needs.

    The Sensory Lifestyle Handbook is a resource for creating sensory diets and turning them into a lifestyle of sensory success through meaningful and motivating sensory enrichment.

    What is a sensory diet? 

    First, it can be helpful to explain exactly what a sensory diet is. A sensory diet is a specific set of sensory activities designed to meet specific needs of the individual. Creation of a sensory diet requires assessment and trial followed by analysis and continued monitoring of strategies and their effectiveness. 

    An occupational therapist named Patricia Wilbarger came up with the term sensory diet to describe the brain’s need for more sensory-motor input from the various sensory systems. Just like our body requires a nutritional diet of healthy foods, the sensory diet is designed to support a person’s sensory needs.

    One thing that is important to remember is that without adequate and appropriate sensory input, or sensory input that isn’t registered correctly, we can have sensory deprivation or we can feel out of sorts. It’s hard to be alert and attentive when this happens! That means that learning, participating in social situations, and functioning in everyday tasks can be difficult.

    Studies support the use of active participation in multi-sensory activities for at least 90 minutes per week to improve occupational performance and autism symptoms and behaviors (Fazlioglu & Baran, 2008; Thompson, 2011; Woo & Leon, 2013; Wuang, Wang, Huang, & Su 2010).

    Children who have a toolbox of sensory activities available to them for daily use may benefit from prescribed sensory activities. A sensory-based strategy guide can help.

    Sensory diets are a commonly known strategy for addressing sensory needs. The term “sensory diet” was coined by Patricia Wilbarger in 1984 to explain how certain sensory experiences can improve occupational performance and help to remediate disruption of the sensory processing systems. A sensory diet is a means to adjust sensory input in relation to an individual’s needs.

    Remember that each and every person has their own specific needs. Some of us like a heavy blanket laying on us when we sleep. Others prefer a light and airy sheet as a bed covering. This sensory preference is just one example in one part of the day, and one specific daily occupation that describes different sensory preferences. Another way to put it is to call these preferences a sensory need. We each have different needs when it comes to the tactile, motor, tastes, smells, etc. that allow us to function.

    Similarly, a sensory diet designed to support regulation and sensory processing will be different for every individual. It can be considered a formula that allows each individual to process input and function during their day.

    Sensory diets can include various sensory strategies and supports that help the individual to regulate. Some additional movements, or activities can include:

    A sensory diet is a meaningful set of strategies for developing sensory programs that are practical, carefully scheduled, and controlled in order to affect functioning. Sensory diet activities provide appropriate sensory input based on the needs of an individual.

    Just as a healthy diet consists of a variety of foods, a sensory diet is a balanced set of sensory information that allows an individual to function. A person cannot survive on broccoli alone. Similarly, a child cannot function with only one type of sensory activities.

    Wondering how to create a sensory diet? Use these steps to create a sensory diet for children with sensory needs that result in meltdowns, attention challenges, struggles with regulation, and other sensory processing related difficulties. Perfect for the occupational therapist who works with kids with sensory needs.

    Why Create a sensory diet?


    There are many reasons why a sensory diet should be used to support specific needs. This resource covers the goals of a sensory diet.

    Sensory diets are effective for addressing many sensory-related behaviors. Just a few reasons for using a sensory diet may include:

    • Emotional overreaction
    • Meltdowns
    • Aggression
    • Hyper-attention
    • Difficulty with transitions
    • Inattention
    • Sleep issues
    • Impulsivity
    • Sensory-seeking behaviors
    • Sensory-resisting behaviors
    • Resistance to textures/food/clothing
    • Poor social Interactions

    This blog post on sensory processing includes a sensory processing disorder checklist that covers many reasons and reactions that can be impacted by sensory needs.

    Wondering how to create a sensory diet? Use these steps to create a sensory diet for children with sensory needs that result in meltdowns, attention challenges, struggles with regulation, and other sensory processing related difficulties. Perfect for the occupational therapist who works with kids with sensory needs.

    Make a Sensory Diet Template

    This next section of this article covers a sensory diet template, which is a helpful tool for creating sensory diets. However, remember that we discussed above how everyone’s needs are different and that each sensory diet will be unique to the individual.

    A sensory diet template is helpful in strategizing and getting started with sensory diet creation. But it should be used as just that, a tool!

    Every one of us will have a unique sensory diet formula depending on preferences, processing, needs, and environment.
    One important piece of the sensory diet puzzle is the successful implementation of strategies. This is the part of actually using sensory activities, brain break, movement activities, calm down corners, sensory tools, etc.

    We’ll go into how this looks in more detail below, but it’s important to remember that the sensory diet template plays a big role. Actually scheduling strategies and implementing them into day to day tasks is part of the sensory lifestyle.

    There is more to a sensory diet than applying sensory input or encouraging a child to participate in sensory play activities. Knowing how and why a sensory diet should be created is essential to success, safety, and carryover of sensory strategies.

    As individuals, we tend to choose activities and experiences that are pleasurable. We enjoy snuggling up under a thick blanket at the end of the day. We tend to shy away from unpleasant sensations such as a static shock that happens every time we use that certain blanket.

    Likewise, some of us are thrill seekers and enjoy experiences like jumping from airplanes or bungee jumping. Others like to stay firmly on the ground and play it safe when it comes to leisure activities.

    Similarly, our clients or children who struggle with sensory processing can present with different preferences, as discussed in The Sensory Lifestyle Handbook.

    Steps to Create a Sensory Diet

    The biggest thing I can say when making a sensory diet for a client or individual is to observe, observe, observe! Occupational therapy practitioners are very skilled at this observation piece. And the observation will make all the difference in whether a sensory diet actually serves its purpose or not.

    When we make a sensory diet, especially for the pediatric population, we need to observe what works for that individual, what doesn’t work, and what kind of supports support or compromise functioning. Then there is the environment, the others involved in a functional task, and many other considerations. All of this requires observation.


    The key to successful integration of a sensory diet is ensuring the clinical strategizing and application are fit into the specific needs of the individual. However, combining the needs of an individual with interests and preference along with application of specific steps ensures successful creation of a sensory diet.

    There are specific steps to creating a sensory diet. Let’s go through the process:

    1. Analyze/Identify
    2. Strategize
    3. Sensory Diet Template/ Apply Sensory Strategies
    4. Monitor

    Step 1: Analyze/Identify- The first level in creation of a sensory diet requires identification of sensory related behaviors, attention issues related to impaired sensory input, challenges with focus or emotional regulation as a result of sensory needs, or meltdowns that impair functioning.

    This level of sensory diet creation requires assessment and identification of each challenging issue. Sensory behaviors should be identified and charted. This includes jotting down when specific behaviors occur, the setting where meltdowns occur, and antecedent to the behavior.

    Make detailed notes that describe the action, the environment, the disabilities, and the impact on function, safety, learning, social participation, etc. When taking the time to analyze sensory impact on function, it’s important to look for issues that may be impacting the individual’s functional performance.

    Make notes on things such as:

    • Actions/behaviors- how is the individual responding in situations?
    • Environment- where is the situation occurring
    • Timing- when does the behavior occurring? What happens just before the behavior or actions?
    • Co-existing considerations- what else is occurring during the behavior or action?

    Sensory related issues can be charted in a methodological manner or they can simply be written down on a scrap paper. The point is to identify the issues through analyzation and to record them.

    Identifying sensory needs when beginning the sensory diet process is much like keeping track of a food diary or sleep diary. In these situations, you’ll also want to mark down every detail including how one is feeling emotionally, physically, and other considerations. Just like these types of diaries help to identify what is really going on in a food diet, a sensory diary can help to support and identify needs for creating a sensory diet.

    The Sensory Lifestyle Handbook contains printable data collection forms that can be used to analyze and identify sensory-related actions, behaviors, and resulting issues.

    After sensory-related differences that impact function is identified, the reason behind the behaviors should be described.

    Step 2: Strategize/Reasoning- The next level in creating a sensory diet involves identifying the “why” behind the behaviors. Think about why the individual may be responding, or reacting to sensory input or environmental input in the way that they are. Can you come up with rationale that describes actions?

    Ask yourself questions to strategize on the “why” behind sensory-related behaviors:

    • Is it an unmet sensory need that causes a child to bolt down the hallway?
    • Is the reason the child chews on all of their clothes because they need more proprioceptive input?
    • Did the child not get enough sleep?
    • Is the routine off?
    • Was a transition done without warning or preparation?
    • Was the individual at a level of stress?

    Use this information to come up with predictions and opportunities to support the individual with specific accommodations or modifications to the environment.

    In The Sensory Lifestyle Handbook, you will find printable sensory-based behavior screening tools that can be used to identify the underlying sensory needs leading to a behavior or action.

    Additionally, resources in the book allow for strategizing to address existing sensory challenges for an individual. The best part is that the pages can be printed off and used over and over again for a single individual or for many individuals. 

    Step 3: Create a Sensory Diet Template and Apply/Trial Various Sensory Strategies- In this stage of sensory diet development, strategies need to be trialed for effectiveness within the lifestyle of the child and family. Sensory strategies need to be incorporated as indicated across a variety of settings, based on various sensory needs as they change throughout the day.

    Scheduling sensory diet strategies is an important step. If a box of sensory supplies is offered, but no schedule put into place, the sensory diet immediately is set up for failure.

    Each strategy should be assessed for effectiveness. A simple checklist can be completed in the classroom or at home. When a sensory strategy is determined to work, that activity can be added to the child’s sensory diet.

    If a particular sensory activity is determined to be ineffective, return to level one.

    Remember that this part of the sensory diet creation process is very fluid! There will be trials, adjustments, periods of re-trialing, and monitoring. It can seem like this stage goes on and on! The thing to remember is to persist and don’t give up!

    As adults who work with or raise children, we know the fluidity of childhood. Needs, strengths, interests, environment, and other areas can change as a child develops and grows. In the same manner, a sensory diet needs fluidity. Applying various strategies at different levels of growth in a child is a must. It must be said that a sensory diet for adults is just as powerful for the teen or adult with sensory needs.

    Readers of The Sensory Lifestyle Handbook will find the Sensory Diet Schedule in the Addendum of the book to be a useful tool in creating a checklist for sensory diet activities. This is another series of printable pages that can be utilized over and over again as needed.

    Step 4: Monitor- At this stage in development of a sensory diet, strategies should be monitored for effectiveness. Strategies should be monitored on a frequent basis with regard to effectiveness. As part of the monitoring process, a subjective assessment can be completed by adults who oversee the child’s sensory diet strategies.

    Additionally, carryover of sensory strategies must be monitored. A list of prescribed activities that are not completed because they require exhaustive effort are not an effective strategy within the life of a family.

    Carryover of sensory strategies is extremely important in both the home and in the classroom. If activities are not able to be carried out, then a different sensory strategy should be incorporated into the child’s sensory diet.

    When using The Sensory Lifestyle Handbook to create and monitor sensory diets, users will find the Daily Sensory Diet Sheet and the Sensory Diet Schedule to be effective tools for carryover and monitoring strategies.

    Use the Sensory Diet Effectiveness Tool, found in the Addendum of this book, to monitor sensory diet results and strategies. This form should be completed after a sensory diet has been in effect for two weeks. 


    If creating a sensory diet and turning it into a sensory lifestyle sounds like a strategy that is needed in your home, classroom, or clinic, then The Sensory Lifestyle Handbook is a tool that you may need to get there! Check out more on The Sensory Lifestyle Handbook HERE. 

    Wondering how to create a sensory diet? Use these steps to create a sensory diet for children with sensory needs that result in meltdowns, attention challenges, struggles with regulation, and other sensory processing related difficulties. Perfect for the occupational therapist who works with kids with sensory needs.


    The Sensory Lifestyle Handbook is a strategy guide for sensory processing needs. With valuable insight into the sensory system and the whole child, the book details how sensory diets can be incorporated into a lifestyle of sensory success. 

    The tools in this book provide intervention strategies to support and challenge the sensory systems through meaningful and authentic sensory diet tactics based on the environment, interests, and sensory needs of each individual child.   

    Wondering how to create a sensory diet? Use these steps to create a sensory diet for children with sensory needs that result in meltdowns, attention challenges, struggles with regulation, and other sensory processing related difficulties. Perfect for the occupational therapist who works with kids with sensory needs.


    So often, we hear that sensory recommendations are not carried over into the home or classroom. The tips and tools in The Sensory Lifestyle Handbook uses child-led interests and daily life interactions so kids WANT to participate in sensory diet activities their bodies need…because it’s part of play!

    Get The Sensory Lifestyle Handbook here.

    Using a sensory diet in various environments

    A sensory diet is an important strategy and tool to support learning needs in the classroom environment. Here is a resource on creating sensory diets for the classroom.

    Occupational therapists can be a great resource for sensory diets that flow from the home to the school environment.

    In fact, using a set of sensory diet cards as a resource where the student pulls various sensory supports to use at specific times or during transitions in the classroom can be very helpful.

    The best type of sensory diet utilizes sensory aspects of everyday functional tasks within the activity as it occurs. This is covered specifically in the Sensory Lifestyle Handbook. But consider this: if one is outside or in the home and needs to address regulation needs, using activities and everyday objects is ideal. These backyard sensory diet strategies is one way to incorporate the outdoors into sensory needs.

    Related, a sensory diet can include recess activities as a tool to support emotional or sensory regulation needs. This resource on recess sensory diets covers this concept in more detail. Running on a blacktop surface at recess, playing with hula hoops, balls, or building blocks at a key part of the day is scheduled into the students’ schedules every day they are at school. When you think about it, each student has a sensory diet of their own in the way of recess!

    At home, recess isn’t an option, but heading outside is! The outdoor sensory diet strategies can really impact self-regulation, emotional needs, attention, and sensory processing needs.

    Another environmental consideration is the playground. A park or playground area offers sensory diet equipment and tools that can be used on a scheduled basis. Consider adding a trip to the playground to the schedule on specific days of the week. Maybe a visit to the playground is in order for Friday afternoons after the student’s spelling test and the end of the school week. Or, a playground visit can occur every Sunday afternoon as a way to wrap up the weekend. Perhaps a walk to a local park can occur each evening after dinner. It’s all about what the individual needs and what works for the family’s lifestyle.

    Another location for sensory diets can be the woods or a wooded outdoor area. This is a great way to incorporate nature into sensory needs, and should be scheduled according to availability, time available, and family lifestyle.

    Another related resource on this site is the concept of sensory diets at the beach. When we travel, there can be a lot of different or novel sensory experiences. When hot weather, wind, and scratchy sand impact sensory needs at the beach, these are all important considerations.

    Another support for travel is the sensory diet on the go! This easy to create sensory support is individualized and includes the materials and strategies that support the individual’s needs. Read how to create a travel sensory diet toolbox.

    Left Right Discrimination

    Picture of hands tying a pink shoe. Text reads "left-right confusion and functional tasks"

    This is an older blog post on left-right discrimination, and includes left right discrimination activities, information, and even a free, hands-on slide deck activity you can use in right left discrimination occupational therapy activities to support these areas.

    Picture of hands tying a pink shoe. Text reads "left-right confusion and functional tasks"

    Working on left right discrimination with kids? It can be difficult to teach left right awareness because there’s so many areas of development that play into this awareness.

    We’ve talked before about mixed dominance vs. ambidexterity, which is a concern that comes up when kids don’t use one hand or one side for motor tasks. You’ll want to start there to read more about this issue.

    The thing is that the confusion between left and right becomes an issue in play or learning tasks, especially when children are asked to follow directions that require a knowledge of left and right. When children don’t have a strong awareness of left and right, you’ll see confusion and even embarrassment in a group setting.

    This other post on hand dominance offers 3 activities to work on left right awareness, and can be a great way to expand this left right discrimination activity to hands-on activities that build motor skills.

    Left Right Discrimination Activity

    In left right discrimination activities, kids can gain more awareness of their body and how it moves during functional tasks.

    As pediatric OTs we might try a variety of activities to support development of right left discrimination.

    These strategies might be accommodations or modifications to functional tasks or it might be occupational therapy activities to help with these discrimination skills needed for handwriting or establishing a dominant side.

    First, let’s talk about why an awareness of left and right is important.

    Picture of hands cutting with scissors. Text reads "left/right confusion"

    Left right confusion can make functional tasks very challenging.

    Why Worry about Left Right Awareness with Hands?

    Left-right discrimination can be memory, attention, or visual perceptual.  If left/right confusion is a memory problem, it is probably the easiest to remedy with a visual prompt like a sticker on the hand. A lot of the OT practitioners I know simply use pictures, labels, games, or the trick with the “L” in the left hand. What are some easy tricks you can think of to send reminders of left and right?

    Often left-right discrimination difficulty is more than just attention or memory. It is a perceptual issue.

    Visual perception is the way we “perceive” information that our eyes see.  People with visual perceptual difficulties might perceive items backward, or different each time.  The “L in the left hand” technique is not reliable for these people, because they can never be sure they have the L in the correct direction.

    While you are working on improving visual perceptual skills, use the labels, or tricks listed above. These labels and hints may need to be used long term, because not all visual perceptual deficits will be remediated.

    Once you have learned to identify which is the left and right side of the body, it gets trickier. What if you have discrimination issues and someone says to move your right arm forward, or your left leg to the right?  Directionality is even more confusing than left/right discrimination. 

    Another difficulty with directionality is, it changes. If you are facing forward, the left might be toward the front of the class, but as soon as you turn around, the left is at the back of the class. 

    There’s a body awareness and motor planning component at play here, too.

    This translates into map reading and directionality, or following directions through space during movements. If you are facing north, east is to your right. But if you are facing south?  I love when the car says “head west on elm street” What?  West is left if I am facing north, but what if I am facing east?  Is it behind me?  Usually I pick one direction, and if it says “rerouting”, or “proceed to the route”, I know I guessed wrong. 

    Left/right is not always clear either. Is the left side of the stage when I am standing on it, or facing it. I am thinking the left side of the car is the one I am driving on, but if I look at it from the front, that is the right side. 

    We have an RV that usually requires me to help with the parking.  My job is to tell my husband which way to turn. If I say left, is that my left or his? Should he move the RV to the right or left? Or the car?  Which needs to go left, the front of the camper or the back? Do not get me started on trying to think which way he needs to turn the wheel to get the camper to go in reverse to the right. I end up pointing, but even that is not clear. Luckily, we find humor at these times in our lives, and are still married. 

    Left Right Confusion and Shoe Tying

    Another example of left right confusion shows up during daily self care tasks like Tying shoes. You see the left right confusion as struggling to follow the motor directions when you are not clear which side is which. “Am I using my left hand, or my right hand?”

    Not only are you trying to keep left/right straight, but then use this information to complete a challenging task. 

    Think of shoe tying for example. To teach a child to tie their shoes, we use one step directions all based on left or right. We might say, “Take the left lace and put it over the right. Now slip the left lace under the X that was formed by crossing the laces. Once you get that part sorted, you need to find one to make a bow (left for lefties, and right for righties).” Then, there are the nuances of shoe tying where right-handed kids loop the shoe lace counterclockwise, while lefties go clockwise around the loop. 

    Because shoe tying is such a struggle with directionality, we often provide visual examples such as colored laces, visual diagrams, or songs that do not use left/right. 

    Left Right Confusion and Cutting with Scissors

    As if left/right discrimination was not hard enough, directions are often reversed for lefties.

    For the student with left right confusion, this is a real challenge in the classroom, when things move quickly. The teacher might hand out papers, tell students to cut out sections of a worksheet and glue them onto the page in the right spaces. The rest of the class might be done with the activity by the time our student with left right confusion has even figured out which hand to use to hold their scissors.

    Cutting with scissors requires an automatic awareness of how to hold the scissors and how to cut around shapes.

    Did you realize that “righties” cut counterclockwise, while “lefties” cut clockwise?

    The differences continue with reading. While we lefties scan left to right and read books from front to back, it is not natural. I prefer to flip through magazines from the back.  It makes some articles confusing, but feels more natural. 

    I am on a line dance team, and as I am new to the team, there are some struggles I experience with body awareness and directions. Directionality and discrimination have been a challenge, even though I am sure of my left and right. We go one direction facing one wall, then another direction facing the next wall.  I have to depend on my body direction, rather than using visual cues for help.  When we are facing the front wall, I tend to center myself thinking about heading toward the door, or the mirror.  Once we turn around, I am lost all over again. If I feel lost, I tend to look at my peers to see what they are doing. Sometimes we end up facing different directions, and I can not figure out who is wrong. 

    The good news for shoe tying, dancing, driving, parking an RV, and 100 other things we learn is muscle memory. We talked a bit about the muscle memory in tasks in our blog post on handwriting, because there is an automaticity piece to this puzzle.

    After a while you no longer think of the left and right lace or stomping the right foot, your body takes over.  As I was describing the shoe tying above, did you have to take your shoes out to figure out which side you make the loop on, or close your eyes and picture the movements?  Me too.  Fortunately, we do things so naturally after we learn them, we do not have to keep thinking of each direction as we do each task.

    Our muscles build a plan with our brain to create a pattern. Imagine how tough touch typing would be if you never remembered where the keys were. How much of a challenge would it be to write a sentence if we needed to stop and think about which direction the lines in each letter go. It’s a motor plan that’s been established and marked into our brains. 

    People with sensory processing difficulties have difficulty with motor planning or creating muscle memory. They need to rely on directions for much longer. This can be especially difficult for the child with sensory processing difficulties, AND directionality struggles. 

    Just thinking about all these directions makes my brain hurt. I am realizing how much of a struggle this is in our lives every day. So much of our day includes some sort of direction.  Next time you think someone is “cheating” doing an activity, take a moment to see if they are compensating rather than cheating. This may be their effort to get the task done and fit in. It is actually very clever to check the people around you for guidance. Use this as a clue to see where the struggle lies.

    Picture of hand. Text reads "left/right discrimination activities"

    So what are some activities to support left right awareness?

    left right discrimination Activities

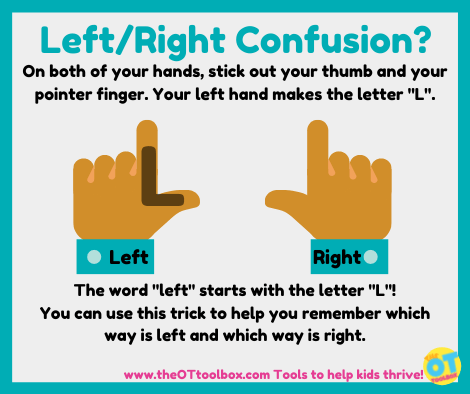
    First up is a visual graphic that helps kids to understand their left and right hands using their left hand as a visual reminder.

    On the slide deck (below), kids can look at the visual and follow the directions:

    1. On both of your hands, stick out your thumb and your pointer finger.
    2. Now look at what shape that made on each hand! One hand looks like the letter “L” and the other is a backwards “L.”
    3. The word “left” starts with the letter “L!” This means that the hand with the “L” shape is your left hand!

    Kids can use this trick to help them remember which way is left and which way is right.

    Want to know the quickest way to determine who does not know their left from right?  Play a group game of Simon Says or dance the Hokey Pokey.  You can quickly see who not only knows their left and right, but who does it with confidence, versus following along. 

    Circling back to Simon Says. Be especially mindful of who is “cheating” or depending on others for information. Are they unsure which is the answer, or just relying on their peers? It is natural to check those around you to see what your peers are doing, but how can you be sure your peer is correct?  What if you are the one that is correct? Or are both wrong?

    • You do not need to remember left and right, just one.  If you know which left is, you will know the other one is automatically right
    • If your child knows what left/right means, but can not remember, start labeling things.  Put an L inside of the left shoe for example. Check out these cute stickers (amazon link)!  I like that these stickers do not specify left/right, but have puzzle pieces that fit together correctly to show which shoes go on which feet.
    • Wear a bracelet or watch on the same side each time. Memorize which side it is on. The watch is always on the left, this is my left side. 
    • Learn which hand you write with. I write with my left hand, and I can easily raise that one. 
    • Make a mark or label on your child’s arm/hand daily to give a visual reminder
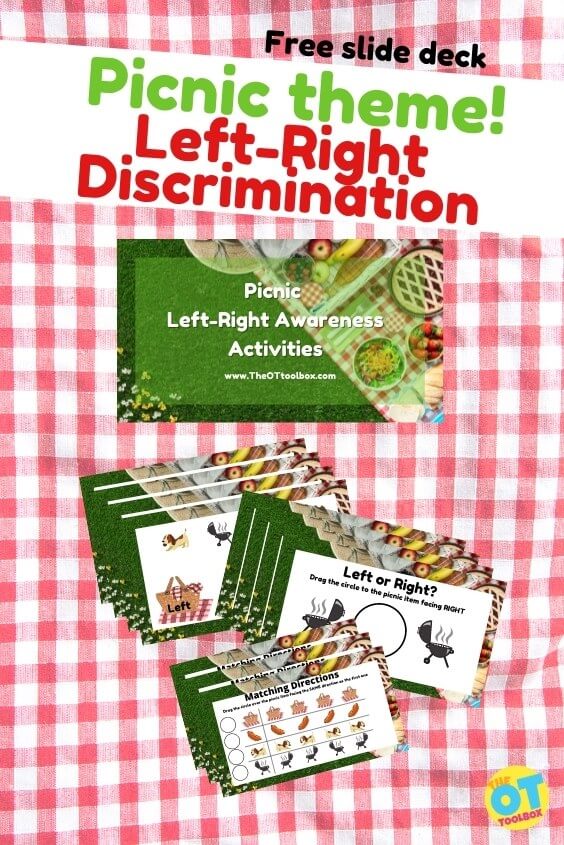
    Left right discrimination with a picnic theme to help kids with left right awareness in functional tasks.

    We have put together a slide deck of activities to help with left right confusion.

    Left Right Direction Activity

    The slide deck is an interactive tool that allows children to sort items that are directionally pointing to either the left or right sides on the screen. There are several left right discrimination activities to work through on this picnic themed slide deck

    Today’s free therapy slide deck is a left right discrimination activity with a picnic theme, going perfectly with our virtual picnic therapy activities slide deck.

    The slide decks in this post not only give practice to picking the item on the left or right, but ask which way the item is facing. The item may be on the right but facing left, or visa versa.  Woah!  That became tricky very quickly. 

    When using these slide decks, be sure your child has the basics before trying the more challenging cards. You may need to start at the beginning, labeling items left and right for a while before moving on to determining which item is on the left or facing that way. 

    After kids have a kinesthetic and visual approach to remembering left and right, there are slides that work on sorting images into categories of left vs. right.

    This interactive portion allows kids to click on the images and sort them into left or right.

    If the user needs prompts, remind them to use their hands to make the L with their fingers to recall which side is their left side. This can help to establish memory by using several sensory methods: visual, auditory, and kinesthetic within several repetitions.

    Left Right Sorting Activity

    Next, you’ll see several slide decks that ask the user to move a circle to cover the item facing either the left or the right. The directions are written at the top of each slide deck and changes on each slide. You can again remind users to use their hands to remember which side of the screen is their left and which is their right.

    This can be helpful for teaching left right discrimination because through a screen like in teletherapy services, it can be difficult to address the left or right awareness (especially if there is a screen flipping issue that comes up with teletherapy services).

    The picnic themed visuals are fun for a picnic theme and includes things like a grill, hot dog, picnic kids, backpackers, etc.

    Left Right Discrimination Matching Activity

    Finally, there are several slides that ask the user to move the circle to cover a matching image across the slide. This visual perception activity addresses several areas typically developed through therapy activities:

    The user can also address eye-hand coordination as they move the mouse or click and drag to move the circles to cover each matching item.

    Again, work on left right discrimination by asking the child to name the direction that the item is facing: Is it facing the left or is it facing the right?

    All of these left right discrimination activities are powerful ways to help kids with directionality that is needed for functional tasks.

    Free left right discrimination slide deck

    Want this picnic themed therapy slide deck to work on left right discrimination? Enter your email address into the form below to grab this teletherapy activity.

    When kids go through the slides, you can reset the movable items to their original state by clicking the history link at the top navigation bar. Simply click the “last edit” link and then go to the right side bar. You’ll see a link that says “reset slides”. Click this link and then go to the top navigation bar again and click the button that says “Restore this version”. Then, all of those movable pieces on the whole deck will reset to their original spots and you can restart the therapy activities.

    Don’t forget to also grab the virtual picnic therapy activities slide deck, too!

    Left Right Discrimination Picnic Theme Activities

      We respect your privacy. Unsubscribe at anytime.

      Colleen Beck, OTR/L has been an occupational therapist since 2000, working in school-based, hand therapy, outpatient peds, EI, and SNF. Colleen created The OT Toolbox to inspire therapists, teachers, and parents with easy and fun tools to help children thrive. Read her story about going from an OT making $3/hour (after paying for kids’ childcare) to a full-time OT resource creator for millions of readers. Want to collaborate? Send an email to contact@theottoolbox.com.
      Clothing Sensitivity Red Flags

      Image reads "sensory issues and clothing" with picture of a turtleneck sweater, scarf, wool socks, and jeans

      This blog post on clothing sensitivities in sensory processing is an older blog post that we’ve had on the site for a long time. We’ve updated this with some considerations that we as the occupational therapist might have when supporting the individual with sensory needs.

      Image reads "sensory issues and clothing" with picture of a turtleneck sweater, scarf, wool socks, and jeans

      Sensory Issues with Clothing

      You might know a child who HATES that tag in the back of their shirt. Maybe the seam of socks need to be lined up “just right”.  Maybe you know a student who only wears shorts no matter the weather. All of these clothing preferences might be a red flag related to a clothing sensitivity and sensory processing issues.

      We might all have a sensory issue with clothing at one time or another…

      Do you hate certain fabrics? Or do turtleneck sweaters itch and scratch? Maybe the tightness of yoga pants around your waist is aggravating. All of us, at one time or another, have probably experienced some preference or sensory issue with clothing, whether it’s the tightness, the fabric, or something else. All of those tactile defensiveness tendencies and proprioceptive sensations are technically “sensory”.

      Clothing sensitivity can mean we need to take a closer look at sensory issues with clothes and they specifics about the clothing: textures, fabrics, tag location, etc.

      Sensory friendly clothing can make all the difference in the world to the kiddo that struggles with these intricacies that you or I may not even notice! Even taking a moment to consider how clothing fasteners impact the sensory system can have a huge impact.

      A clothing sensitivity related to specific clothing preferences is a common red flag related to sensory processing disorder.

      Clothing Sensitivity Disorder

      We all prefer certain textures of clothing, however, when clothing sensitivities or the touch discrimination (sensory touch) prevents one from wearing clothing or an extremely strict preference in clothing, there may be more to look at. Tactile defensiveness can impact daily self-care and functional performance in wearing weather-appropriate clothing. Take a look at the clothing sensitivity list below.

      Because sensory processing challenges present differently in each child, there will be no list of clothing preferences that is the same for every child. There will also be no completely exhaustive list of red flags related to sensory processing issues or one that can indicate specific sensory issues.

      However, it is possible to notice sensory needs related to clothing preferences and clothing sensitivity. The red flags listed below don’t necessarily mean that a child has a sensory processing disorder, only that a more intense look at the child might be needed. If a child seems to have a number of clothing sensitivities, a full evaluation by an occupational therapist may be needed.

      Here are tips for getting sensory kids to wear winter clothing.


      Does any of this sound familiar? 


      Clothing sensitivity red flags

      Below are some examples of clothing sensitivities. These sensory issues with clothes may impact children, adults, or anyone in between.

      An individual who prefers to wear only one type of texture is not something to be concerned with. Similarly, the student who wears shorts all winter long can get by with learning in the classroom without interference. The main consideration is when clothing sensory issues interfere with daily tasks and safety, including personal hygiene considerations.

      Consider these sensory clothing red flags:

      • Prefers a specific clothing material (e.g. only cotton or only lightweight fabrics)
      • Child is bothered by seams
      • Is bothered by tags
      • Dislikes sleeves hitting wrists
      • Dislikes hems of pants hitting ankles
      • Wears only shorts even in very cold weather
      • Wears only pants even in very hot weather
      • Prefers clothing without buttons/snaps/zippers/ties
      • Sensitive to collars hitting neck
      • Unable to tolerate shoes
      • Prefers only certain socks or shoes
      • Dislikes when socks slide down in shoes
      • Prefers feet to be totally uncovered or totally covered
      • Unable to tolerate a belt or tight waistband
      • Dislikes underwear or prefers only a certain type of underwear
      • Bothered by seams in underwear
      • Bothered by length of underwear
      • Prefers tight clothing
      • Unable to tolerate jeans
      • Hates coats
      • Prefers heavy layers of clothing
      • Complains of “itching skin” with certain materials or types of clothing
      • Complains of clothing tickling the skin
      • Has meltdowns when it’s time to get dressed in the morning

      Need more information on all things sensory?  Grab this free sensory processing disorder information booklet. Its’ perfect for those new to sensory processing or for passing on to parents, grandparents, teachers, and caregivers of children with sensory struggles. 

      What clothing sensitivities have you seen?  This list could go on and on. As we all know…kids like to keep us on our toes! 

      For the individual with clothing sensitivities, using preferred textures and cut of clothing is a means to support the individual’s preferences. Check out our resource on sensory clothing for specific ideas.

      One other thing to consider is the impact a tool like a weighted vest or compression garment can have on meeting sensory needs. It’s something to consider.

      Clothing Sensory Issues

      Depending on preferences, there can be various textures that one tries to avoid. Certain textures can feel uncomfortable, itchy, scratchy, or even painful. These are the most common sensory textures:

      • Rough or scratchy textures, such as coarse fabrics or rough surfaces
      • Fuzzy or hairy textures on sweaters
      • Textures that hold in body heat: flannel materials, thermal materials, or polyester
      • Textures that are tight or constricting
      • Shirts with tight necks or turtlenecks
      • Clothing with course seams
      • Clothing with scratchy or long tags

      Sensory Issues with Clothes List

      Want a printable list of our sensory issues with clothes (listed above)? The printer-friendly list is ready to go! Enter your email address into the form below and the resource will be delivered to your inbox. This sensory issues with clothing printable is also found inside our Member’s Club. Head to the free printables toolbox and then select sensory.

      Clothing Sensitivity List

        We respect your privacy. Unsubscribe at anytime.

        Do we all have sensory problems with clothing?

        After reading this article and gathering information, I realize that my clothing struggles check all the boxes listed as red flags.  See if you can relate to my list of do’s and don’ts:

        • I don’t like jeans. I have owned hundreds of pairs trying to find the right pair (which means that jeans day at work is not a celebration, but a chore). Sometimes I put on a pair of jeans in the changing room, and they feel ok.  Until I get them home, or worse, arrive at my office wearing the new pair. 
        • I can wear something ten times and find it ok.  The 11th time, it feels awful. I have no idea why.  Once it feels awful, there is no going back and trying again.  Into the give away box it goes.
        • There have been days that I am so uncomfortable that I run out at lunch to buy something better to wear.
        • When I was on my teaching circuit I left several dresses in hotels with “free” signs on them.  After class I ducked into the local Marshalls or TJMaxx to restock.
        • When I find something I like, I tend to buy several of them. This works well until I decide I can not wear them anymore. Then I have nine pairs of shorts in different colors to dispose of. 
        • Pants have to be just the right length, no ankle pants for me.  Same with shirts.  Those ¾ length sleeves?  Definite no. 
        • No wool, puffy jackets, microfiber, tight sleeves, v-neck shirts, lace that touches the skin, tight neck shirts (turtlenecks??)…  This is just the start of the list.
        • Accessories? Headbands, hair ties, necklaces, bracelets, watches, hats, scarves, and other accessories can become bothersome as the day wears on, if it is not aggravating when you first put it on. 

        How have I survived?  Luckily I have a voice and a choice. I am old enough to pick what I want and get rid of it when it “does not feel right.”  Fortunately I have the money to do this. I do not tend to buy expensive things in case they don’t work out.  I try to bring extra clothing options when I travel, and keep an extra set of clothes in the car. The voice I have helps me describe how I feel, or why I need to change clothes in the middle of the day. Luckily my spouse has become accustomed to my quirks and understands when I say something does not “feel right”.

        Sensory Issues and Clothing Tags

        When you think about clothing red flags, do you focus only on tags?  That is the common misconception. Clothing sensitivity is so much more than pesky tags.  To make it worse, there is a ton of trial and error that goes on before the right combination of clothes is found. 

        Sensory Clothing Recommendations

        Recently I have made some great additions to my sensory clothing line up: (Amazon affiliate links below)

        • Bombas makes great socks. Make sure you size up so the toes are not too tight
        • New Balance sneakers have a wide toe box. Again size up so there is room to move
        • Woxers make soft boxer shorts for women. No tags, seams, pinching, or exposure. The only issue is trying to wear these with jeans as they tend to bunch up.
        • Land’s End makes the most comfortable pajamas (again size up)
        • Triblend cotton is the right amount of stretch
        • Soft leggings go well under dresses to minimize potentially scratchy fabric touching

        “Sensory”, like everything else, is on a spectrum. Having sensory sensitivities or quirks is only a problem when there is something you have to wear or do, that you can not.

        Students who have to wear certain uniforms, and adults that have difficulty wearing specific work clothes, can struggle if they have clothing sensitivity. Many students in private schools (and their parents) face a daily struggle to wear the designated outfit. I have been fortunate enough to have a flexible dress code during my career. 

        How to help my child with sensory clothing sensitivities?

        Our job as therapists is to support the child or client with clothing sensitivities. We can support those needs when it’s a request. Maybe the individual wants to start to wear a certain type of material.

        Maybe there are behavioral issues at play.

        Clothing sensitivity becomes an issue when someone can not wear anything, takes their clothes off in public, refuses to put anything on, or has undue stress when selecting or wearing clothing. Pickiness like mine is aggravating at times (and expensive), but it is not debilitating. 

        Maybe a student needs to wear a uniform to school.

        As sensory sensitivities come to light, certain companies are making strides to design clothing that feels right. These range from affordable brands at Target to high end designers.  Of course this does not mean that everything from these brands is going to feel right.

        There will be some trial and error to find the right size and fit.  French Toast and other clothing designers have adapted school uniforms.  A search for sensory friendly clothing can help you get started.

        Maybe it’s weather related. I think as therapists, we’ve all seen the kids that wear shorts to school all winter long, even when you live in a colder or northern climate.

        Here are some ways to support individuals with sensory clothing sensitivites:

        Change the texture- Wearing soft, familiar clothing underneath less comfortable fabrics can minimize direct contact with the skin.

        Layer clothes- For example, a cotton undershirt can be worn beneath a sweater or other uncomfortable fabric​.

        Sensory and itchy tags- As a mom, I’ve removed hundreds of “itchy” tags from my own kids’ shirts and sweatshirts. All it takes is a pair of scissors. Cut off the tags right above the seam. You can also use a seam ripper to totally remove the tag, if some kids still can’t stand the feel of the remaining tag. I’ve noticed that in recent years, many shirts have a dotted line on the tag to help you cut it out from the shirt.

        Alter seams- Another common issue with clothing sensitivities is the feel of seams. You can iron the seam down and that can help. Or, I’ve seen this work before; use fabric glue and glue the edges of the seam down. You can also cut excess fabric from the edges of the seams. One last thing to try is sewing a thin strip of satin or soft fabric along the seam.

        Fabric softener- Another trick that can work is to use fabric softener. This helps with tougher materials like jeans. You can also run the clothing through multiple wash cycles can soften clothing fibers, making them less abrasive against the skin. Clothes that are washed multiple times tend to feel softer, which can reduce discomfort.

        Trouble with elastic bands- If you’ve worn a pair of tight pants before, then you know this issue. it can help to snip a few threads and adjust or remove tight bands around wrists, ankles, or waistbands that might feel restrictive.

        As you struggle with your child to get them dressed in the mornings, consider all the variables about clothing. It is so much more than tags and seams. Start a dialogue using sensory language to help your child describe their likes and dislikes. Try to understand what is going on and make changes where you can. Anxiety and being out of sync will make the symptoms worse.  Be sure to address self regulation as a whole.


        Clothing sensitivity red flags related to sensory processing disorder or sensory struggles in kids


        Kids may experience preferences or a clothing sensitivity when they have sensory processing disorder or sensory issues.
         
        These red flags are related to clothing sensitivities that may be an indication of sensory challenges in kids.
         

        Colleen Beck, OTR/L has been an occupational therapist since 2000, working in school-based, hand therapy, outpatient peds, EI, and SNF. Colleen created The OT Toolbox to inspire therapists, teachers, and parents with easy and fun tools to help children thrive. Read her story about going from an OT making $3/hour (after paying for kids’ childcare) to a full-time OT resource creator for millions of readers. Want to collaborate? Send an email to contact@theottoolbox.com.
        Heavy Work in the Classroom

        Image with pie chart that says heavy Work in the classroom. On the pie chart it reads integrated in learning, sensory diets, classroom jobs, class wide brain breaks, and transition periods.

        I wanted to put together a resource that lists our heavy work opportunities in classroom jobs. So often, we as school-based occupational therapy providers, are the go-to resource in the school to support teachers with heavy work needs of the students. We have a large article on heavy work that explains more about this proprioceptive input, and we have several articles on sensory needs in the classroom environment. But one thing that I’m seeing come up more and more is the request from teachers and school administrators for heavy work opportunities in the classroom.

        Image with pie chart that says heavy Work in the classroom. On the pie chart it reads integrated in learning, sensory diets, classroom jobs, class wide brain breaks, and transition periods.

        You’ll also want to check out our resource on calm down strategies for school because we cover a lot of good information there, too.

        Ways to Use Classroom Heavy Work

        I thought I would break this down by area because you can use these heavy work classroom ideas in different ways.

        • Classroom heavy work for individual students
        • A whole-classroom brain break
        • Heavy work during learning
        • Heavy work classroom jobs
        • Sensory diets

        Let’s start with a list of heavy work options for individual students because we can pull from this list to find ways to incorporate learning or to add a classroom-wide heavy work strategy if that is needed.

        List of Heavy Work Ideas for the Classroom

        1. Carrying library books
        2. Using moldable wall putty to hang artwork
        3. Using a moldable eraser
        4. Putting chairs on desks
        5. Taking down chairs from desks
        6. Folding large construction paper into sections for math graphs or charts
        7. Pressing down firmly on stamps to create patterns for art or math-related activities
        8. Carrying the lunch, milk, or snack crate
        9. Pushing the breakfast cart
        10. Rearranging desks/chairs
        11. Wiping down tables
        12. Erasing marker boards
        13. Punching paper with a 3-hole punch
        14. Putting paper into binders
        15. Sharpening pencils
        16. Helping in the cafeteria
        17. Cutting cardboard for project displays or model making
        18. Carrying books or a stack of worksheets to other students as part of a classroom reading circle
        19. Rolling out large pieces of paper for group projects or murals
        20. Tearing paper or cardboard for collages and art projects
        21. Using hole punchers to prepare materials for binders or classroom displays
        22. Rolling or kneading dough for classroom science experiments or cooking lessons
        23. Holding the door open
        24. Hanging up backpacks and coats
        25. Making deliveries in the school
        26. Stapling packets
        27. Pushing or pulling a library cart
        28. Carrying a tote bag with materials for music or art class
        29. Carrying and moving gym equipment like mats or totes of balls
        30. Moving reams of paper from shelves
        31. Watering plants with a squirt bottle
        32. Tearing old papers to put into the recycle bin
        33. Removing staples from bulletin boards
        34. Using a handheld pencil sharpener
        35. Working at a center where paper is taped to the wall for vertical plane work
        36. Classroom messenger: delivering messages/books from the teacher to the office or other teachers
        37. Taking attendance or lunch count on a paper with a hole punch (or other hole punch activities for tallying)
        38. Desk push-ups
        39. Chair squats
        40. Wall push-ups
        41. Carrying materials for a new lesson
        42. Organizing and stacking books
        43. Rolling and unrolling floor mats or rugs
        44. Cleaning windows or mirrors
        45. Rearranging floor mats
        46. Cross-lateral body exercises (touching opposite toes)
        47. Marching in place
        48. Jumping jacks
        49. Chair sit-and-stands
        50. Morning check-in with movement like a classroom handshake
        51. Yoga poses like tree pose or downward dog
        52. Brain break videos (e.g., GoNoodle)
        53. Carrying supplies to other classrooms
        54. Tearing and crumbling paper for math manipulatives
        55. Sorting classroom supplies (e.g., art materials, books)
        56. Carrying bins of supplies for a project
        57. Passing out or collecting clipboards or papers
        58. Filling or moving water bottles for the class
        59. Moving crates of musical instruments to the music room
        60. Rolling playdough or clay
        61. Carrying books between school libraries
        62. Stacking and unstacking chairs for activities
        63. Cleaning paint brushes after an art class
        64. Rearranging classroom decorations
        65. Cleaning chalkboards or desks with a squirt bottle
        66. Wiping down classroom surfaces after snacks or lunch
        67. Moving and organizing gym balls or equipment
        68. Helping load or unload materials for special projects
        69. Shredding old papers with a supervised paper shredder
        70. Rolling up posters or large materials
        71. Sweeping the classroom or outdoor areas
        72. Carrying recycling bins to the collection area
        73. Walking laps around the schoolyard as a class
        74. Rearranging manipulatives or toys
        75. Carrying heavy bags of sports equipment
        76. Sorting and stacking lunch trays or utensils
        77. Wiping down whiteboards
        78. Placing chairs back on the floor after cleaning
        79. Unpacking supplies from boxes
        80. Sorting papers into folders or bins
        81. Playing tug-of-war games during recess
        82. Folding and organizing towels or materials for crafts
        83. Walking with a weighted backpack for a short time
        84. Putting away or stacking exercise mats
        85. Carrying a bucket of water for a cleaning task
        86. Collecting supplies from different parts of the school
        87. Stretching with resistance bands
        88. Sweeping the floor
        89. Running in place with high knees for movement breaks
        90. Sorting through classroom craft supplies like beads or blocks
        91. Use different types of flexible seating options

        Many of the activities that we do in OT sessions can easily be transferred into the classroom in a way that’s not intrusive to learning and is either incorporated into classroom tasks or it’s even used as a whole classroom activity. Would you add anything to this list?

        Use Heavy Work Activities in Classroom Transitions

        Now, let’s take that list of heavy work ideas and break id down into types of activities. First, we’ll talk about transition activities.

        Anyone that works in the school settings knows what I mean when I say that sometimes the whole classroom needs a transition activity.

        Basically, this means that the group is “wound up” and needs to calm down as a collective group in order to get back to a learning task or the next lesson.

        This might happen after the class comes back from lunch or gym. Or, it might be that the chaos of walking down a hallway and back to the classroom just gets everyone in a certain state. All of the sensory input from that hallway was overstimulating with the sights, sounds, and movement.

        This might look like a transition activity or a brain break that the whole classroom does together. For example, I like to give teachers the option to use a calming brain break as a transition activity when the students come back into the classroom after lunch or recess.

        Sometimes, they might be really wound up and excited and moving their chairs to another spot under their desk can really help to add heavy work that calms them and centers them a little bit.

        Here are five activities that can be done as transition activities. These are heavy work tasks that you might want to use as a whole class brain break and it’s part of the transition.

        Moving Chairs- My favorite idea for the whole class to do together is rearranging their desk or the chairs. You can do this as a group because you want to set up centers or small groups for the next lesson. Or, you can just have them move their chairs so that their desk is ready to go for the next learning task.

        Passing out materials- Another idea for a whole class brain break is movement activities. You can have one small group of students work together to pass out papers or supplies for the next lesson. This lets them get up and move around a little bit. The repetitive motion of walking around the classroom moving around desk and handing out materials and that can add proprioceptive input. Give each small group of students different jobs. One row can pass out books. Another row can pass out papers. Another row can hand out other materials. And so on.

        Classroom Callback Chant or Clap- Another way to get the whole class involved is using a classroom callback, in the form of a chant or a clap. This can look like having the students come back to the classroom and then they start the next lesson or the next part of the day with a classroom clap with their hands. Or maybe the teacher calls out certain phrase and the class has a response routine. For example, the teacher claps out of rhythm and then the students respond back by clapping it in response or they had movement like standing up and sitting back down in a rhythm. This really builds a sense of community for the whole classroom, but the real benefit is that it provides gross motor movement.

        Circle Time Movements- Another trick up my OT sleeve is to use circle time and transitions as heavy work input. This is something that the students can do and they don’t really even realize that they are doing as a self regulation strategy. If you have your class come to one location in the room like a carpet, you can incorporate a routine where they need to get down on the floor and then back up again, and you can even add specific motions, like pushing off the floor with their arms for extra proprioceptive input. Or you can have them sit cross legged, and then transition into a knee position, and then back to a standing position. That really allows them to do a variety of motions and engage the body in movement while adding heavy work.

        Desk Push-Ups or Chair Push-Ups- For this one, you might have them come into the classroom select one of those options and then do it for 30 seconds. This really helps the whole classroom to re-set after lunch or recess when they’re wound up. It can be just part of the classroom routine.

        Brain breaks- We can also use a brain break in the form of an exercise routine where you have arm circles and deep breathing exercises, or shoulder shrugs. When the whole class does it together, it’s part of routine and it’s a nice activity to transition between task or when the kids just seem to need a little break. We have a lot of brain break ideas in The OT Toolbox Membership.

        Yoga- Some teachers that I know also like to use yoga or stretching activities as a simple break. You can do yoga poses that are smaller motions so that you don’t have to run into desks or move furniture around. Or, if you want to involve tasks like tree pose or child pose and you need more room, then you can have the students put their chairs on their desktop. That actually adds more heavy work so it’s another way to make space in the room, but also you’re adding that extra heavy work input. Here are some partner yoga exercises that you can do with small groups.

        Sensory Stations- My personal favorite is using movement pathways or sensory stations. We have so many sensory pathway options with different themes here on the website and we love to see these used in the classroom or in the hallways. We also have teachers that use them in sensory calm down corners or a sensory cubby area. You can hang it right on the wall and then the sensory station printable have different activities. You can set it up in a line so that the student has to go down the line one by one and do the whole routine, or you can have them select just one option out of the packet. We have:

        We also have this nice woodland animal sensory stations that you can incorporate movement into learning too.

        Heavy Work Classroom Jobs

        A nice way to add heavy work in the classroom is by using classroom jobs. This can really add movement and proprioceptive input while doing the jobs that need done in the classroom. This takes the benefit of chores and incorporates it into the classroom.

        Examples of heavy work classroom jobs include:

        • holding the door open
        • hanging up backpacks carrying library books
        • carrying the lunch or milk
        • crate to the cafeteria and then to the recess area and then back to the classroom stapling packets of papers
        • tearing paper to add it to a recycling bin
        • pushing totes with materials to art class or gym class
        • helping in the cafeteria
        • delivering items to the other areas in the class in the school
        • taking attendance with the hole punch
        • removing staples from bulletin board
        • passing out papers or supplies
        • cleaning dry erase boards or windows
        • clean desks with spray bottles and rag
        • stacking and organizing books
        • opening curtains or blinds in the morning
        • wash art supplies
        • sharpen pencils with a handheld pencil sharpener
        • there’s just so many ideas!

        Heavy work learning activities

        It’s also important to offer ideas to teachers that they can do while learning is happening. These heavy work learning activities or ideas that you can implement while the students are doing lessons. I really like this because it encourages integration of heavy work movement into the functional task of the school day.

        This is what it’s all about- teaching kids how to use these strategies when they need them and during the actual tasks.

        Some ideas for heavy work strategies while learning include:

        Using materials- You can have students carry materials for the next lesson. They might go to a cupboard and grab a bin or grab stacks of books and use those in the next lesson. This helps with proprioceptive input and it also helps with self regulation and focus and it gives students a physical outlet too. You could have every student do this or you can have one student or a small group of students that are in charge of getting these materials for the next activity or lesson.

        Writing on the vertical plane- Another idea for learning is using the vertical plane as a writing activity. I really like this idea. You can hang a paper on the wall with tape or with wall putty and the student can write right on the paper hanging on the wall with their paper on the vertical plane. Another idea is to use a slanted surface like a slant board writing area. Or you can use a bulletin board or dry erase board.

        If you’re using a bulletin board, students can staple the paper into the bulletin board and then when they’re done using a staple remover to take the paper off. That adds an extra heavy work input strategy.

        If you’re using a dry erase board, you can have students use magnets to hang their paper.

        If you are using just a wall, you might want to use paper putty because students can manipulate that and get heavy work through their fingers. Or you can use tape and have students peel off pieces of tape and that adds heavy work input through the fingers and hands.

        When you have students writing on the vertical plane you are supporting core strength and stability, core control, shoulder strength/stability and wrist stability. All of this adds heavy work through the joints and muscles and is a benefit. It helps with handwriting because it helps with pencil grasp and motor control in the writing tasks.

        Heavy Work in the Classroom Coloring Page

        So I hope this list of heavy work activities for the classroom has been helpful. We do have strategies inside of the OT toolbox membership. We have a principal coloring page which has options for all some of these ideas for heavy work and I like to use this hand out in a calm down corner or in therapy lessons where we’re talking about heavy work strategies.

        It has a bunch of different options where students can color in the different activities and you can have them actually pick activities as part of a calm down strategy, or you can have them organize the activity ideas by lesson using them in learning activity lessons or as whole body brain break sessions or strategies that are part of the routine in the classroom. You can get that inside the membership club, along with other heavy work activities and cards. If you’re not a member, find out more information by clicking this link, or if you are a member login and then head to self regulation strategies and you’ll find it there.

        Colleen Beck, OTR/L has been an occupational therapist since 2000, working in school-based, hand therapy, outpatient peds, EI, and SNF. Colleen created The OT Toolbox to inspire therapists, teachers, and parents with easy and fun tools to help children thrive. Read her story about going from an OT making $3/hour (after paying for kids’ childcare) to a full-time OT resource creator for millions of readers. Want to collaborate? Send an email to contact@theottoolbox.com.
        Fine Motor Paper Clip Math

        fine motor paper clip math with paper clips scattered on white background.

        This Fine Motor Paper Clip Math idea is a fine motor math activity that makes for a great busy bag or calm down time activity. We actually have several paper clip activities here on The OT Toolbox because you can target so many fine motor skills with this simple item. It’s perfect for indoor playtime and hands-on learning.  Not only that, but it is a great way to work on fine motor skills like finger and thumb opposition. Plus, manipulating paper clips helps with a neat pincer grasp, which is needed for the dexterity of manipulating small objects.

        fine motor paper clip math with paper clips scattered on white background.

        Fine Motor Paper Clip Math

        I also love to use paperclips in math activities because you are targeting the fine motor skills needed for a functional pencil grasp and other tasks like stringing beads, zip/unzip, button/unbutton, and various in-hand manipulation skills. 

        An open thumb web space is a skill is needed for manipulating items like a pencil or crayon, shoe laces, zippers, buttons, and small objects with an open web space.  

        Often times, we see kids who have their thumb squashed up against their fingers and the side of their palm when they are writing or manipulating items.  This opposition fine motor activity is a fun way to work on opening up the web space for improved dexterity. 

        Add this activity to our list of games with paper clips that support skill building!

        Thumb opposition activity for fine motor skills needed in pencil grasp, buttoning, shoe tying, and zippers.

        Full disclosure: Affiliate links are included in this post.  

        You’ll need just a two items for this activity: 


        I love how the two sets linked above (both affiliate links) are all colors of the rainbow.  Even better for color matching and color recognition for preschoolers!

        Paper clip math and learning activity for kids

        So, this activity is completely simple to do;  Spread out the paper clips and ask your child to match them up to the craft sticks. 

        We worked on a few learning activities with this:

        • Add the number of paper clips.
        • Add the total number of paper clips on two craft sticks.
        • Subtract the difference of the number of paper clips on two craft sticks.
        • One to one correspondence
        • More than/less than
        • Work on color matching and color recognition
        • Work on fine motor skills.
        • Teach base ten concepts by stringing paper clips together.
        Use paper clips and foam craft sticks to work on counting, addition, and subtraction as well as color recognition and color matching.


        Thumb Opposition Fine Motor Activity 

        Using the Foam Craft Sticks makes this activity a real workout for the fingers.  You could use wooden craft sticks that provide more support and are easier to manage.  

        But, to really challenge the fine motor skills, the foam craft sticks are the thing to use!  They are a little wiggly and require stability of the thenar muscles (muscles of the thumb) to hold the thumb in place as the fingers and the tip of the thumb place the paper clip on the craft stick.  

        When opposing, the thumb’s thenar muscles work to oppose the pointer finger during functional tasks.  This is needed for advancing and positioning a pencil when writing, managing a button with ease, and pulling a zipper.  With a closed thumb web space and lateral pinch of the thumb versus true opposition, a child will fumble.

        When doing this opposition activity with your child, be sure to verbally prompt them to attend to the bend thumb IP joint.

        Thumb opposition activity for fine motor skills needed in pencil grasp, buttoning, shoe tying, and zippers.

        This is such an easy way to learn and play indoors.  Looking for more indoor play ideas?

        Fine motor color matching and math activity using paper clips and foam craft sticks.

        Thumb opposition activity for fine motor skills needed in pencil grasp, buttoning, shoe tying, and zippers.

        More fine motor activities you will love:

        Working on fine motor skills, visual perception, visual motor skills, sensory tolerance, handwriting, or scissor skills? Our Fine Motor Kits cover all of these areas and more.

        Check out the seasonal Fine Motor Kits that kids love:

        Or, grab one of our themed Fine Motor Kits to target skills with fun themes:

        Want access to all of these kits…and more being added each month? Join The OT Toolbox Member’s Club!

        Colleen Beck, OTR/L has been an occupational therapist since 2000, working in school-based, hand therapy, outpatient peds, EI, and SNF. Colleen created The OT Toolbox to inspire therapists, teachers, and parents with easy and fun tools to help children thrive. Read her story about going from an OT making $3/hour (after paying for kids’ childcare) to a full-time OT resource creator for millions of readers. Want to collaborate? Send an email to contact@theottoolbox.com.
        Pumpkin Sensory Bin

        Fall sensory bin with oats sensory bin filler, plastic mini pumpkins, orange craft pom poms, cinnamon sticks, acrylic pumpkins, tongs. Child's hand picking up felt strips. Text reads: Pumpkin Sensory Bin
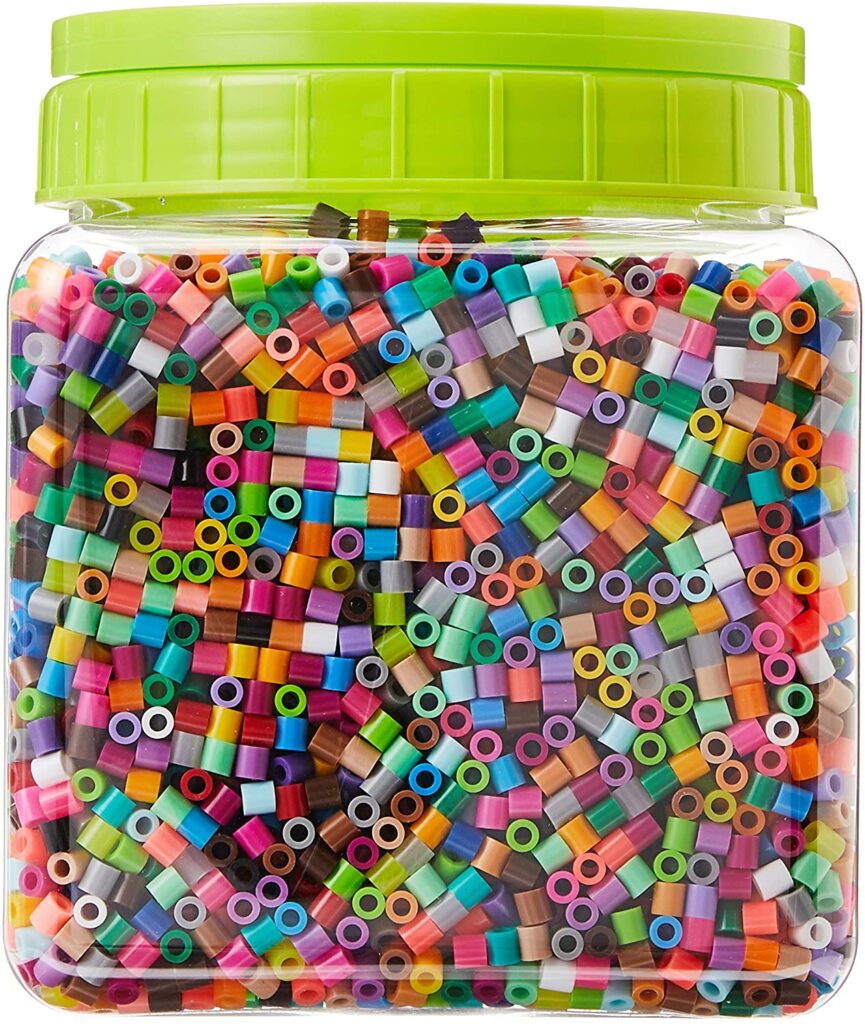
        I have a really cute and fun sensory bin idea to use during the Fall months or for Halloween occupational therapy sessions. This pumpkin sensory bin is one that is not just cute, it’s a great tool for supporting fine motor and visual motor skills, too. I love that the items are things you can find in most homes, but if not, you can definitely substitute some of the items in the sensory bin for other materials you do have on hand. We also have other pumpkin sensory activities to check out here on the site, too.

        Let’s talk about all of the reasons why we are using this Fall sensory bin this year…

        Sensory bin with oats sensory bin filler, plastic mini pumpkins, orange craft pom poms, cinnamon sticks, acrylic pumpkins, tongs. Child's hand playing in sensory bin. Text reads: Pumpkin Sensory Bin

        How fun does this Fall sensory bin look? Do you want to dig in and play, too? Add a few other pumpkin activities to this sensory play, like our pumpkin deep breathing exercise is just one idea!

        Also be sure to check out our Apple Sensory bin. It’s an easy way to use many of the same materials.

        Pumpkin Sensory Bin

        If you work with kids, then you might be aware of the power of a sensory bin. They are so much fun to explore and play with, and a pumpkin sensory bin is even better.

        Also, be sure to check out the many pumpkin activities are to be found here on The OT Toolbox! Use these fall ideas all season long from Halloween through Thanksgiving!

        Another one of our favorite fall sensory bins is a pumpkin egg carton sensory bin. You could add those egg carton pumpkins to the sensory bin we have below. It would be a good way to add more fine motor development with a pumpkin theme.

        What is a Pumpkin Sensory Bin?

        A pumpkin pie sensory bin is a fun Fall sensory activity for kids. You can basically use the sensory bin as a pretend play activity where kids can explore and pretend to make a pumpkin pie.

        Our pumpkin pie sensory bin has a pretend pumpkin pie and the scents of pumpkin.

        It’s a fun way to play this Fall season!

        Fall sensory bin with oats sensory bin filler, plastic mini pumpkins, orange craft pom poms, cinnamon sticks, acrylic pumpkins, tongs. Child's hand picking up felt strips. Text reads: Pumpkin Sensory Bin

        Benefits of Using a Pumpkin Pie Sensory Bin in OT Sessions

        This is one sensory bin that is fun for the Fall months because you can incorporate different scents, objects, and containers. Plus, when you use the pie crust (felt pieces), you can add a visual perception and visual motor skills aspect. This is a fun Fall sensory bin idea that can actually last from September through November, which is another benefit!

        I love using sensory bins in occupational therapy sessions because you can target specific skills. You can use one sensory bin with several kids on your therapy caseload, and the materials are often inexpensive so you can use a simple sensory bin base like the one we used in this pumpkin pie sensory bin, oats!

        It’s easy to select a few scoops and containers, and then add sensory bin details to explore with a whole caseload. Then, just replace the base after a few students. In occupational therapy sessions, we love to focus on the function, so really working on washing and drying the hands before therapy sessions and then at the end of therapy sessions is great. You can add that task to the therapy interventions, and it helps to use the sensory bin with a small group of kids.

        We use sensory bins for many reasons-

        fine motor tool use like tongs and tweezers, to work on hand strength and eye hand coordination to pick up small objects. You can use scoops and spoons to work on life skills of using and holding utensils.

        You can sort colors to target visual motor skills. You can hide items in the sensory bin to target visual closure and visual figure ground.

        Then there is the tactile sensory component. We used a dry sensory base here, and that can be alerting or calming to some students.

        This means as they play, they can use the sensory bin as a sensory tool to support sensory needs. Read about fine motor skills in play.

        One other way that a sensory bin supports fine motor skills is by inviting kids to scoop and pour the sensory materials. I like using oats like in this pumpkin pie sensory bin because you can see the material as you scoop it into a container. Oats are a good medium to use because it’s easier to scoop and pour than a material like corn meal or flour. I like to use this activity when working on the eye hand coordination skills needed to pour water from a pitcher into a cup, or pouring cereal from a box into a bowl. There are so many functional skills that you can work on with a simple sensory bin like this pumpkin pie bin!

        I also love the calming and mindfulness piece of sensory bins. When you play in a sensory bin with interesting features, you’ll see kids that really focus on finding items. I love to see the kids that are so focused on exploring the sensory bin, that you can see their whole body calm down as they play. It’s a great self regulation tool that you can use with your students.

        For kids that are sensitive to tactile input, especially the dry texture of the oats, this can be a way to get more comfortable with the texture. Some kids will grab handfuls of the oats and others wont’ even touch them with a spoon. You can help kids to touch or explore a  little bit at a time. It’s a great tactile discrimination exercise for these kids.

        Fall sensory bin with oats sensory bin filler, plastic mini pumpkins, orange craft pom poms, cinnamon sticks, acrylic pumpkins, tongs. Child's hand picking up felt strips. Text reads: Pumpkin Sensory Bin

        So, if you are looking for an Autumn sensory play idea, this pumpkin pie sensory activity is a great one to try!

        pumpkin sensory bin materials- oats, orange craft pom poms, plastic pumpkins, cinnamon sticks, and mini pumpkins

        Pumpkin Pie Sensory Bin Materials

        You can see in the picture, the items that we used in this sensory bin. The items that we used are things we already had (the scoops/tongs/and low tray) along with some items found at the dollar store (beige felt and manipulatives).

        The pumpkin pie sensory bin ingredients in our sensory bin include: Amazon affiliate links included.

        • Oats
        • Resin Pumpkins (Found at Dollar Tree)
        • Cinnamon Sticks
        • Felt strips Cut these into small strips.
        • Foam Pumpkins (Found at Dollar Tree)
        • Orange Pom Poms
        • Pumpkin pie tin or silicone cupcake liner (affiliate link)
        • Scoop
        • Tray I love these trays on Amazon (affiliate link) because you can use them for many different sensory bins and writing trays.
        • Mini Rolling Pins (affiliate link)- These would also be great for working on fine motor skills with play dough.

        You could also add other components, to vary the sensory bin and change it up a little bit. For kids that struggle with doing an activity one and then don’t want to use the activyt any other way, we can add or change just a part of it, like adding scents in the way of pumpkin pie spice, a fake pie tin or silicone cupcake liner (affiliate link), and other items.

        Pumpkin sensory bin in an orange tray with mini pumpkins and tongs

        How to Set up the Pumpkin Pie Sensory Bin

        This is such an easy sensory bin to set up. Prepare your tray. Pour in oats. Add the manipulatives. Add tongs or scoops.

        If you are using felt like we did, you will want to cut a small circle to fit the size of your pie tin or silicone cupcake liner (affiliate link). Then Cut another square that can cover the pie tin. Cut the square into strips. These felt pieces can be used to overlap one another to weave a topping for the pumpkin pie. This is a great visual perception activity!

        This step-by-step sensory bin set up is pretty easy! And the benefits of the sensory bin are big!

        Pumpkin sensory bin in orange tray with oats sensory bin filler, plastic mini pumpkins, orange craft pom poms, cinnamon sticks, acrylic pumpkins, tongs. Text reads: Pumpkin Sensory Bin

        Tips to Support Fine Motor Needs with the Pumpkin Pie Sensory Bin

        Because one of the main goals with our sensory bin is probably improving fine motor skills and coordination, you can vary the materials and presentation of your sensory bin to target specific needs.

        This is a good thing to keep in mind as an occupational therapist using the pumpkin pie sensory bin in therapy sessions.

        Pumpkin sensory bin with child's hand placing felt strips into a pretend pumpkin pie

        Variations to the Pumpkin Pie Sensory Bin

        You can use different textures or scents to make this different too. You can adapt the activity for different ages, like using this with toddlers, preschoolers, or school aged kids.

        • Tweezers/tongs- These can be graded up or down depending on the needs and abilities of the child. You can use larger tongs or smaller tongs. You can use small tweezers or large tweezers.
        • Scoops- You can use different sized scoops to pick up and pour or manipulate the materials.
        • Manipulatives- Use larger or smaller manipulates to pick up and hold or sort.
        • Add letters like the pumpkin letters or the pumpkin number cards we have inside The OT Toolbox membership. This way you can have kids draw the letter or the number in the oats. You could also hide the sensory bin cards in the oats and when the child finds a card, they can write the letter or number onto paper.
        pumpkin sensory bin with orange craft pom poms and child's hand playing with plastic pumpkins

        Safety Tips for a Pumpkin Pie Sensory Bin

        Whenever you use a sensory bin as a therapy tool in occupational therapy sessions, it’s really important to be aware of the safety considerations. You’ll always want to remember what the child’s skills and abilities are, including safety awareness and sensory needs or challenges.

        Some kids might put everything into their mouth. Other kids might through everything in the sensory bin onto the floor. These are things to consider. And, maybe the sensory bin activity isn’t used with those students. It depends on what their goals are and why you would want to use this activity as a play activity to develop their goal areas.

        Of course, one of the biggest considerations is to always supervise the play. This is ture or any sensory interventions, but when you are using scoops, spoons, and scented items like the pumpkin pie spice or the cinnamon sticks, this can be especially true.

        You can definitely try to come up with some child-safe sensory bin ideas that meet the needs of younger kids or those that might not be able to use this pumpkin pie sensory bin completely. Maybe you use larger manipulatives or omit the spoons. It really depends on the child.

        Pumpkin Pie Sensory Bin FAQ

        What age is this sensory bin appropriate for? One of the common sensory play questions that come up involve age level that the sensory bin is appropriate for. We tried to include ideas above about how to make this pumpkin pie sensory bin for toddlers and preschoolers. You can definitely change the materials to meet the needs and ages.

        Want to make this sensory bin? Have fun! Be sure to grab our pumpkin therapy kit because you can use the materials in the kit to use a pumpkin theme in therapy. You’ll also want to check out all of the printable materials we have in The OT Toolbox Membership because we have a lot of pumpkin themed materials that can be used in a sensory bin!

        Pumpkin activity kit
        Pumpkin Fine Motor Kit

        Grab the Pumpkin Fine Motor Kit for more coloring, cutting, and eye-hand coordination activities with a Pumpkin theme! It includes:

        • 7 digital products that can be used any time of year- has a “pumpkins” theme
        • 5 pumpkin scissor skills cutting strips
        • Pumpkin scissor skills shapes- use in sensory bins, math, sorting, pattern activities
        • 2 pumpkin visual perception mazes with writing activity
        • Pumpkin “I Spy” sheet – color in the outline shapes to build pencil control and fine motor strength
        • Pumpkin Lacing cards – print, color, and hole punch to build bilateral coordination skills
        • 2 Pumpkin theme handwriting pages – single and double rule bold lined paper for handwriting practice

        Work on underlying fine motor and visual motor integration skills so you can help students excel in handwriting, learning, and motor skill development.

        You can grab this Pumpkin Fine Motor kit for just $6!

        Colleen Beck, OTR/L has been an occupational therapist since 2000, working in school-based, hand therapy, outpatient peds, EI, and SNF. Colleen created The OT Toolbox to inspire therapists, teachers, and parents with easy and fun tools to help children thrive. Read her story about going from an OT making $3/hour (after paying for kids’ childcare) to a full-time OT resource creator for millions of readers. Want to collaborate? Send an email to contact@theottoolbox.com.