Light-Bright Toy Fun!

lite brite toy in occupational therapy

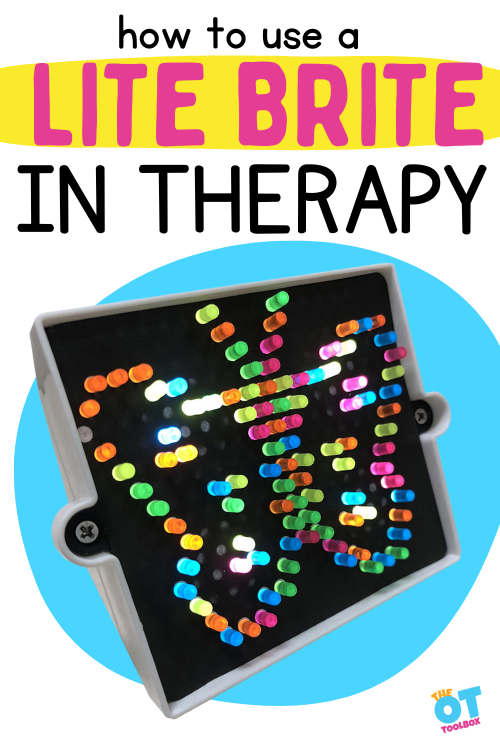
In occupational therapy, we target the occupation of play in kids, making toys one of the main tools like a Lite Brite toy to support and drive development. Pediatric OTs love to foster development through innovative and meaningful activities in therapy interventions, and the Light Bright toy is one fun toy that sparks creativity and sensory motor skills.

Today, we shine a spotlight on an iconic toy that has captured the imagination of generations: the (Amazon affiliate link) Light Brite. Known for its mesmerizing glow and colorful pegs, this beloved occupational therapy toy has found a special place in occupational therapy practices as an effective tool for enhancing fine motor skills, visual motor skills, and finger dexterity in individuals of all ages.

Amazon affiliate links are included in this blog post. As an Amazon Influencer, I earn from qualifying purchases.
lite brite toy for occupational therapy

Using a Lite Brite Toy in Therapy

In this blog post, we will explore the Light Brite toy and unveil how its simple yet engaging design can be leveraged by occupational therapists to promote development and foster therapeutic progress. We will explore the unique qualities of Light Brite (affiliate link) that make it a valuable asset in the pursuit of improved motor skills and coordination.

From the manipulation of the pegs to the coordination of visual input and fine motor control, Light Brite offers a multifaceted approach to therapeutic intervention.

Many therapy providers have a Lite Brite (affiliate link) in the therapy closet, but did you ever consider all of the ways to use this toy to foster development?

Light Bright Activities

There are many ways to use a Lite Brite toy to target specific skills.

  1. Free Design Play: Encourage creativity by letting individuals create their own unique designs using the pegs and create vibrant, personalized artwork.
  2. Shape Recognition: Use templates or stencils to guide individuals in creating specific shapes, helping them develop shape recognition skills. This is an actiity that fosters visual discrimination.
  3. Sort the pegs: Sort the pegs by color and practice grouping them together on the Lite Brite board, enhancing color recognition abilities. This is a great sorting colors activity for preschoolers and toddlers.
  4. Fine Motor Skill Development: Manipulating the small pegs and inserting them into the board helps develop and refine fine motor skills. You can foster fine motor milestone achievement by targeting various levels of fine motor development by grading activities with the pegs.
  5. Hand-Eye Coordination: Practicing precise peg placement on the Lite Brite board enhances hand-eye coordination as individuals align their movements with visual targets.
  6. Pattern Replication: Introduce patterns or designs for individuals to replicate on the Lite Brite board, fostering pattern recognition and visual-motor coordination.
  7. Letter and Number Formation: Create educational activities by using Lite Brite templates to guide individuals in forming letters and numbers. Integrate the activities into other letter formation strategies.
  8. Spatial Skills: Explore spatial awareness concepts by creating designs with varying levels of complexity, promoting spatial understanding and manipulation skills.
  9. Counting and Math Skills: Use Lite Brite templates with numerical symbols or dots to engage individuals in counting, basic math operations, and number recognition. Fine motor and math are connected skills.
  10. Storytelling Tool: Use the Lite Brite board as a visual aid to accompany creative storytelling activities, allowing individuals to bring their stories to life through illuminated scenes.
  11. Graded precision: Utilize the pegs as a tool for various occupational therapy exercises, such as picking up and placing pegs to improve dexterity and finger strength. The pegs are a powerful tool in supporting graded grasp and release in dexterity.
  12. Sensory Exploration: Engage individuals with sensory processing needs by incorporating different textured materials onto the Lite Brite board, providing tactile stimulation.
  13. Pre-Writing Skills: Practice tracing shapes or letters on the Lite Brite board to promote pre-writing skills and hand control. One of the main pre-writing skills many kids don’t achieve is the fine motor aspect.
  14. Collaborative Projects: Foster teamwork and social interaction by engaging multiple individuals in creating a larger-scale Lite Brite design together, promoting cooperation and communication. This can be a fun activity for group OT sessions or across a whole caseload.

using pegs for fine motor skills

One of the main ways to support fine motor skills with a Lite Brite is by using the pegs.

Picking up and manipulating the pegs offers strategies for skill development:

  • Eye-hand coordination- picking up the desired colored peg
  • Graded grasp and release- Aiming the hand and fingers to select a peg and placing it into a hole with the correct aim and force
  • In-hand manipulation- Moving pegs from the fingertips to the palm to hold the pegs. Then, moving one peg at a time to the fingertips to place the pegs into the holes of the Lite Brite board
  • Separation of the sides of the hand- Using the fingers on the thumb side of the hand (radial side) while using the fingers on the pinky finger side of the hand (ulnar side) to stabilize the hand for precision
  • Finger isolation- Moving use one finger to isolate a single peg in picking up the peg or placing it into the board.

fine motor peg activities

Some fine motor peg activities that use the Lite Brite pegs include:

  1. Counting Game: Use three different colored pegs to play a counting game. Assign a specific number to each color, for example, red for one, blue for two, and yellow for three. Ask individuals to insert the pegs into the Lite Brite board, counting aloud as they go. They can create patterns or designs while practicing their counting skills.
  2. Force Modulation- work on the amount of pressure needed to press the peg into the Lite Brite board by using different grades of paper. Consider tissue paper or construction paper. Each type of paper requires more force to push the peg through the paper. Or, you can add more resistance by laying an additional piece of paper on the Lite Brite board.
  3. Color Patterns: Create a simple color pattern activity using three pegs. Start a pattern sequence using the three colors, such as red, blue, yellow, red, blue, yellow. Individuals can continue the pattern by inserting the corresponding colored pegs into the Lite Brite board. This activity helps develop pattern recognition and sequencing skills.

LIGHT BRIGHT FOR TODDLERS

While the small pegs of a Lite Brite toy might not be a great way to use this toy with toddlers, you can use the toy to foster development with young children.

We AGAIN used the dishwasher box that has been sitting in our living room.

(One cardboard box is so much better than a whole storage bin of toys! Consider DIY cardboard bricks!)

This box has been everything from a rocket ship to a barn in their imaginary play.  It has been a corn cardboard sensory box, to a light tunnel for a Twinkle Twinkle little star party.  

We’ve covered it with blankets to make a bear cave, and put it on it’s end, cutting a door and window into one side for a house.  

After we cut the door into it, Baby Girl loved opening and shutting the door over and over and over again!

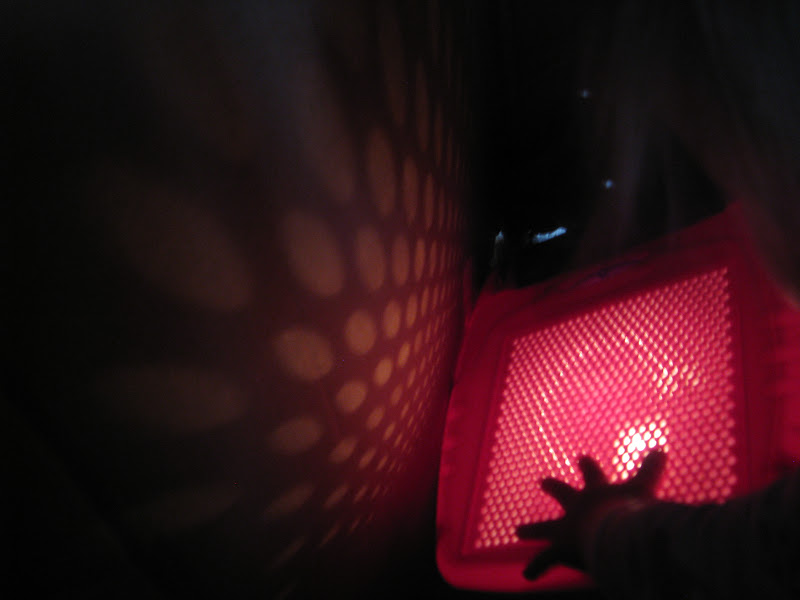
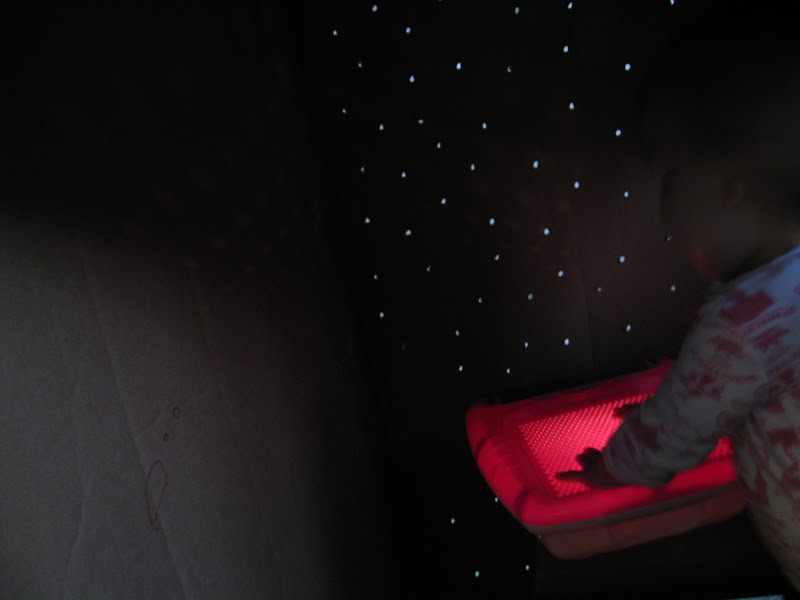
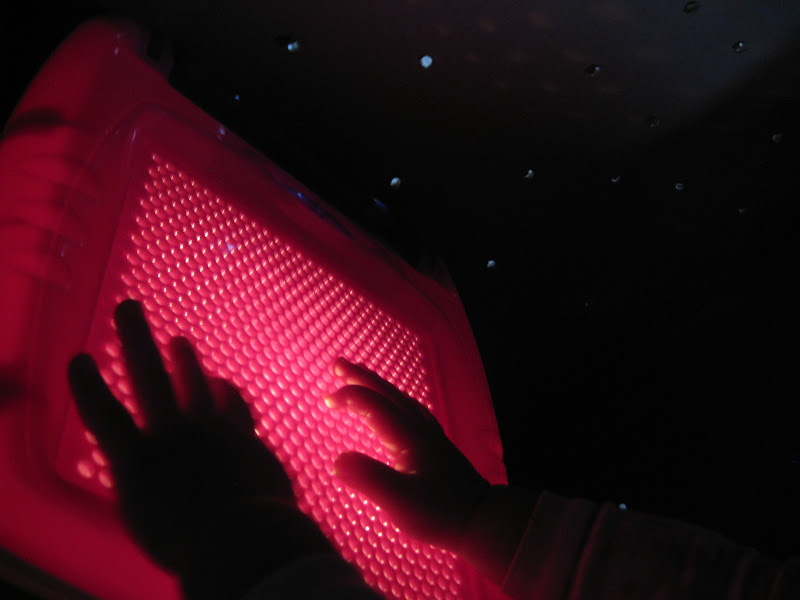
We used the Lite Brite in the cardboard box (without adding the pegs). It was a great sensory light that fostered many skills:

  • Crawling
  • Reach
  • Visual scanning
  • Intended reach (aiming)
  • Fine motor skills- making shadow puppets
  • Gross motor skills
  • Crossing midline
  • Tactile sensory play
  • Visual processing sensory play

This was one of Baby Girl‘s favorite games to play in the box.  We took the Light Bright toy inside and had a blast checking out the lights, putting her hand over the light screen, touching the circle lights on the wall…

What a great sensory experience!


We’ll definitely be using the light bright again for sensory play.  Poor box has seen the end of it’s time in our living room…There was a liiiiittttle rough play that destroyed it.  Don’t worry, though. It will be used for some great art projects before it makes its way into the recycle bin!
 
~Colleen  

Working on fine motor skills, visual perception, visual motor skills, sensory tolerance, handwriting, or scissor skills? Our Fine Motor Kits cover all of these areas and more.

Check out the seasonal Fine Motor Kits that kids love:

Or, grab one of our themed Fine Motor Kits to target skills with fun themes:

Want access to all of these kits…and more being added each month? Join The OT Toolbox Member’s Club!

Colleen Beck, OTR/L has been an occupational therapist since 2000, working in school-based, hand therapy, outpatient peds, EI, and SNF. Colleen created The OT Toolbox to inspire therapists, teachers, and parents with easy and fun tools to help children thrive. Read her story about going from an OT making $3/hour (after paying for kids’ childcare) to a full-time OT resource creator for millions of readers. Want to collaborate? Send an email to contact@theottoolbox.com.
Ambidexterity or Mixed Dominance

What is ambidexterity

Many parents see their child switch hands during tasks, or show refined use of both hands and wonder if their child is ambidextrous. Maybe a child uses their left hand to throw a ball, but bats with their right hand. Maybe they kick a ball with their right foot, but hold a pencil with their left hand. Ambidexterity is a common question among parents of kids who switch hands in activities or don’t use one hand consistently.

In this blog post, you’ll find information on

Ambidextrous Or Mixed Dominance?

Here, we are covering several aspects of ambidexterity. We’ll go over the difference between being ambidextrous and having mixed dominance. We’ll cover what it means when a child uses both hands to write or color. And, we’ll go over some activities to support a dominant hand.

How do you know if your child is ambidextrous or if they are showing signs of mixed dominance? This post will explain a little more about ambidexterity as well as mixed dominance and what it means in motor skills.

Ambidextrous refers to use of both sides of the body in equal ability and refined finger dexterity. This can refer to a bilateral refined movement and skill in the hands, feet, and eyes. Ambidexterity is the ability to use both hands equally well. It means that a person can perform tasks with either hand without any noticeable preference.

Cross dominance refers to a situation where a person’s dominance does not favor one side over the other. In simpler terms, it means that your child hasn’t developed a clear preference for using either their right or left hand for tasks.

Mixed dominance is an other name for cross dominance. It can extend beyond just hand preference and also involve other body parts like the eyes or feet. For example, a child with mixed dominance may have a dominant hand different from their dominant eye or foot. This means that their dominance is spread across different sides of their body.

In other words, cross dominance or mixed dominance is different than ambidextrous in that an individual with cross dominance might switch between dominant sides depending on the task they’re performing. For instance, they may write with their right hand but prefer to eat with their left hand.

Let’s break this down further to explore ambidexterity.

What is ambidexterity? Is my child ambidextrous?

What does Ambidextrous Mean?

The definition of ambidextrous is use of both hands with equal refined precision and motor skill. This means that each side of the body is equally able to write with natural motor planning, fine motor control, strength, and refined motor movements.

According to the definition of ambidexterous, there is equal refinement and precision. You might think this means just the hands and fingers are involved with equal use of both sides. However, that’s not exactly the case.

Those who are truly ambidextrous may have equal use of hands, as well as feet, eyes, and even toungue motor skills.

An ambidextrous child will play naturally with toys using both hands. You might notice equal use of the hands and feet, or switching left to right or right to left during play, sports, school work, and other tasks.

When it comes to someone being ambidextrous and fine motor involvement, this can refer to:

  • Writing
  • Scissor use
  • Clothing fasteners
  • Play
  • Hand strength
  • Brushing teeth and hair
  • Many other every day tasks

Ambidextrous also refers to the feet too.

An ambidextrous person will be able to kick equally strong and with the same amount of force with both feet. They are able to “take off” from a running stance with equal feet placement, whether they start out running on their left foot or their right foot. Gross motor ambidexterity can be seen in:

  • Jumping
  • Running
  • Skipping
  • Hopping
  • Balance
  • Kicking a ball
  • Throwing a ball
  • Catching a ball
  • Among many other every day tasks

Ambidexterity can be observed in the eyes, too. Typically, all of us have one eye that is stronger, or a naturally dominant eye. We can complete a visual screening to identify this, or a visual exam may be in order.

Finally, an ambidextrous individual may show motor overflow movements with the tongue to both sides of the body.

Are you wondering about a child who uses both hands to write or perform tasks? Maybe you know a child who uses both hands equally and with equal skill. Perhaps your child uses one hand for specific tasks and their other hand for other tasks.

Mixed Dominance or Ambidexterous?

Just yesterday on The OT Toolbox, we discussed mixed dominance. In this post, we will cover more about true ambidexterity and what that means.

A child with mixed dominance demonstrates clear, stronger patterns based on the side of the body they are utilizing to complete the task.

For example, a child who is left hand dominant will develop a stronger fine motor pattern then a child who is not left side dominant but compensating for fatigue and is moderately adept at utilizing the left hand as a coping skill.

Is my child ambidextrous

A child who is truly ambidextrous will be equally as skilled at utilizing both sides of the body and it will look and feel natural to the child. Statistically, only 1% of the population is truly ambidextrous—it’s really very rare, and it is more likely that your child is experiencing mixed dominance patterns.

True ambidexterity requires both hands to be used with equal precision and there is no true preference in either the right or left hand for either both fine or gross motor tasks.

Can you make yourself ambidextrous?

This is an interesting question. Many times there is a perceived benefit to being ambidextrous, or switching hand or foot use during a task. Some perceived benefits might be:

  • Switching hands when one is fatigued from use during a task
  • Switching dominant sides during a sport such as baseball or softball to pitch with the other arm, batting from another side, dribbling to the other side when bringing up the ball during basketball, or kicking a ball with the other foot during soccer.
  • Writing equal legibility with both hands

Actually being ambidextrous is different than teaching yourself to become ambidextrous.

To use both sides of the hand as a learned concept takes cognitive attention whereas natural ambidexterity occurs without thought. Because of the neuroplasticity of the brain, humans have the ability to teach themselves to use their non-dominant hand or side to complete tasks. It takes practice, practice, and more practice.

Read here on motor planning where we cover this concept.

Ambidexterity or Mixed Dominance?

Is my child ambidextrous? Isn’t that what mixed dominance is? These are two questions that therapists get asked frequently when evaluating a child for the first time for mixed dominance and other concerns. The answer is no, they are not the same thing.

This is a tricky area. Therapists recognize mixed dominance as a miscommunication or poor integration of the left and right sides of the brain and that’s how it’s explained to parents. However, there is a lot of information out there on this topic that may or may not be relevant to your child and her struggles— keep this in mind when Googling information.

It is more likely, that your child’s brain is utilizing the left and right sides for very specific motor skills such as writing, eating and throwing a ball. This can lead to motor confusion—this is where the poor integration and lack of communication between the left and right sides of the brain comes into play.

When the child is not utilizing one side of the brain more dominantly for motor patterns, confusion and poor motor learning occur leading to delays and deficits in motor skills.

how to tell if your child is ambidextrous

It is unclear why the brain develops this way, but it does happen, and it is okay. In fact, it is easily addressed by an occupational therapist.

Determining if your child is ambidextrous, meaning they have equal proficiency and comfort using both hands, can require some observation. Here are a few signs that may indicate ambidexterity in your child:

  • Equal use of hands
  • Kicks a ball with either foot with equal distance and force
  • Balances on each leg equally
  • Equal tongue movements laterally
  • Proficient functional performance with either side of the body
  • Efficient use of tools with assistance of the other hand: scissor use, pencil use, feeding utensils, and other functional tools

In addition to these abilities, you can take a look at areas of functional performance. These include the underlying skills that impact function.

  • Frequent hand-switching: Observe if your child regularly switches hands during activities such as writing, drawing, eating, or playing sports. Ambidextrous individuals often demonstrate fluidity in using either hand without a clear preference.
  • Equal proficiency: Notice if your child shows similar levels of skill and coordination when using both hands for various tasks. They may exhibit no significant difference in handwriting quality, drawing ability, or manipulating objects with either hand.
  • Ease in learning new skills: Ambidextrous children tend to adapt quickly when asked to perform tasks with either hand. They may show little to no difficulty when switching hands for activities.
  • Mirror-like movements: Pay attention to your child’s movements. Ambidextrous individuals may display symmetrical movements, where actions performed with one hand can be mirrored almost identically by the other hand.
  • Lack of hand dominance: Ambidexterity implies the absence of a clear hand dominance. If your child does not consistently favor one hand over the other for a majority of tasks, it suggests a potential ambidextrous inclination.

Ambidexterous Motor Development

I already touched on this a little, but a child with mixed dominance may switch sides for task completion when experiencing fatigue. Due to this, their motor development and precision is typically delayed.

The most common area that this is noted in is in fine motor development for handwriting. This is because the child is equally, but poorly skilled with both hands, and will switch hands to compensate for fatigue.

Motor delays may also be noticed later on when it comes to the reciprocal movements needed to throw/catch or kick a ball and when skipping. A child with mixed dominance may attempt to catch and throw with the same hand, hold a bat with a backwards grip, or stand on the opposite side of the plate when hitting.

They may also experience a moderate level of confusion, and frustration as they are unsure of how to make the two sides of their body work together leading to overall poor hand/foot-eye coordination skills.Ambidexterity or mixed dominance and what this means for kids who use both hands to complete tasks like handwriting.

For a few fun hand dominance activities, try these ideas to help kids establish a

Ambidextrous hands and eyes

If you have more questions and want to learn more on a dominant eyes and understanding how the eyes and hands work together during activities, you’ll want to check out our Visual Processing Lab.

It’s a 3-day series of emails that covers everything about visual processing, visual motor skills, and eye-hand coordination. We take a closer look at visual skills and break things down, as well as covering the big picture of visual needs and how the hands and eyes work together.  

In the visual processing lab, you will discover how oculomotor skills like smooth pursuits make a big difference in higher level skills like learning and executive function. The best thing about this lab (besides all of the awesome info) is that it has a fun “lab” theme. I might have had too much fun with this one 🙂  

Join us in visual processing Lab! Where you won’t need Bunsen burners or safety goggles!  

Click here to learn more about Visual Processing Lab and to sign up.

ambidextrous eye dominance

Hand preference is something we are often aware of, whether we are right-handed or left-handed. However, many parents may not realize that we also have a preferred or dominant eye. This aspect of eye dominance is often overlooked because we typically use both eyes together for most activities.

So, how can you determine which eye is dominant?

Observing monocular tasks: When using a camera, telescope, microscope, or squinting with one eye. Pay attention to which eye you naturally prefer to use. This eye is typically your dominant eye. In most cases, eye dominance aligns with handedness, meaning that if you are right-handed, you are more likely to be right-eye dominant. However, there are instances where the dominant eye may differ from handedness.

Knowing about eye dominance is important because it can help to gain insights about a child’s visual processing and to identify any variations in eye-hand coordination. This knowledge can be particularly helpful when engaging in activities that require controlled motor planning, speed and timing of movement, and accuracy.

 
Free visual processing email lab to learn about visual skills needed in learning and reading.

Colleen Beck, OTR/L has been an occupational therapist since 2000, working in school-based, hand therapy, outpatient peds, EI, and SNF. Colleen created The OT Toolbox to inspire therapists, teachers, and parents with easy and fun tools to help children thrive. Read her story about going from an OT making $3/hour (after paying for kids’ childcare) to a full-time OT resource creator for millions of readers. Want to collaborate? Send an email to contact@theottoolbox.com.

Growth Mindset Sorting Activity

growth mindset sorting activity

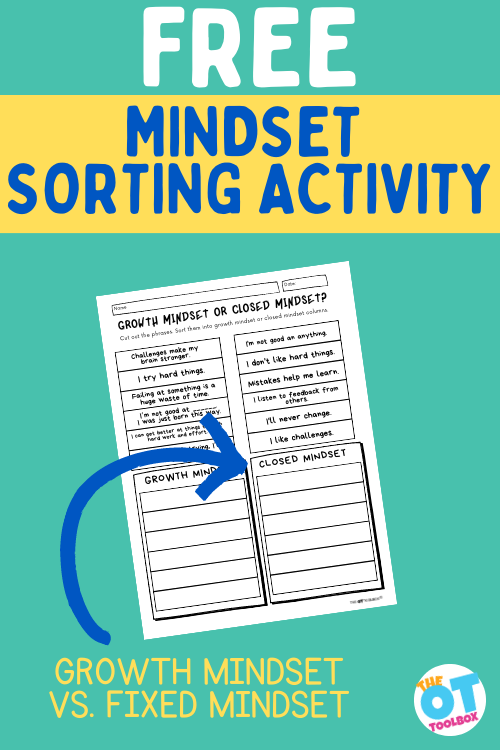
The freebie for today, the Growth Mindset/Closed Mindset Sorting Activity is a great tool to begin to teach learners the difference between growth and closed mindset.

Today, we have a great resource for you: a worksheet on growth mindset sorting. Do you have a growth or closed mindset (also called a fixed mindset)?  Are you a glass half full or half empty kind of person?  Understanding growth mindset versus closed mindset and an awareness of mindset in general is the beginning of self reflection. A lot of this has to do with metacognition!

growth mindset sorting activity

Not everyone is going to be the best athlete, a top winner on Jeopardy, or a world renowned musician, but they can get better. When you have an understanding on the difference between a fixed mindset and a growth mindset, one can use that internal knowledge to foster better skills to succeed no matter what the outcome of a particular situation might be.

It can be hard to deal with some of life’s situations. But, with a growth mindset frame of mind, perhaps we can foster a “realistic growth mindset”. Knowing what is a fixed mindset and what is an open mindset (or the ability to grow and develop), can help!

Having he ability to stop and think to use a growth mindset response, before responding to a given situation can mean the difference in functional performance.

CLOSED MINDSET

While, a growth mindset means that you believe your intelligence can be changed over time. With a fixed or closed mindset you believe your skills are stuck. If you are not good at something, you will never be. 

Researchers have been studying neuroplasticity, learning that the brain can grow and change over an entire lifetime, not just in childhood.  So you CAN teach an old dog new tricks! Even that old saying has moved into a growth mindset mode!

Fixed Mindset Examples

These examples of a fixed mindset come from a place of not seeing a potential for change or an opportunity to grow and develop. Have you heard things like…

  • Failing at something is a huge waste of time.
  • I’m not good at ______. I was just born this way.
  • It’s not worth trying, I’m not good at it.
  • I’m not good an anything.
  • I don’t like hard things.
  • I’ll never change.

Growth mindset

People with a growth mindset understand that their skills and talents can be developed through teaching, effort, and persistence. Mindset, or attitude, shapes the way people view themselves. 

There is a big difference between, “I am not good at sports” and “I am not good at sports yet”. Read our blog on the power of yet for more information on this concept.

With enough practice and time, most people can improve their skills.  One way to support this skill acquisition is through fostering an awareness of growth mindset mistakes.

Having the ability to utilize information in the moment and apply a growth mindset is a form of mental dexterity, which develops over time.

growth mindset examples

Some examples of a growth mindset include:

  • Challenges make my brain stronger.
  • I try hard things.
  • I can get better at things through hard work and effort.
  • Mistakes help me learn.
  • I listen to feedback from others.
  • I like challenges.

Growth Mindset Vs. Fixed Mindset Sorting Activity

The freebie for today, the Growth Mindset/Closed Mindset Sorting Activity is a great tool to begin to teach learners the difference between growth and closed mindset.

Understanding and adopting this point of view, is the starting point of learning to develop realistic goals. Learners will cut the worksheet into sections, read the phrases, then sort them into their respective categories. 

This growth mindset vs. closed mindset sorting activity can be more than a cognitive task. The following skills can be addressed in addition to the brain work sorting out mindset phrases:

  • Hand strength and dexterity – staying on the lines during cutting builds hand muscles and develops muscle control
  • Visual motor skills –Combining what is seen visually and what is written motorically.  This takes coordination to be able to translate information from visual input to motor output. Coloring, drawing, counting, cutting, and tracing are some visual motor skills
  • Cutting on the line within half inch of lines, in the direction of lines
  • Pasting using glue stick or drippy glue with accuracy
  • Visual Perception – scanning to determine which is the correct column, visual memory to remember what was read long enough to find the correct row, and visual attention to filter out relevant information. 
  • Sequencing – will your learner do the phrases in order?  Do they look for the easy and/or obvious answers first, or go in a haphazard pattern all over the page?  
  • Proprioception – pressure on paper/glue/scissors
  • Social/Executive Function – Following directions, turn taking, task completion, orienting to details, neatness, multi-tasking, attending to task, and impulse control can be addressed using this Growth Mindset/Closed Mindset Sorting Task. This is a great tool for self-regulation too.
  • Bilateral coordination – remembering to use their “helper hand” to hold the paper while cutting/pasting/writing.  Using one hand for a dominant hand instead of switching back and forth is encouraged once a child is in grade school, or demonstrates a significant strength in one or the other
  • Strength – core strength, shoulder and wrist stability, head control, balance, and hand strength are all needed for upright sitting posture and writing tasks

This growth mindset/closed mindset sorting worksheet can be modified to make it easier or harder to accomplish

  • Pair this mindset sorting activity with our growth mindset posters for a visual that can be hung in a classroom, bedroom, therapy clinic, etc.
  • Learners can write sentences to explore their own growth or closed mindset ways of thinking.
  • Using our resource on breaking down goals is another tool to support this skill.
  • Working independently, in pairs, or as a group changes the dynamics of the task
  • Read aloud to your learners or have them read and process independently
  • Make this part of a larger lesson plan including gross motor, sensory, social, executive function, or other fine motor skills
  • Cut the shapes and make a matching game instead of having students cut their own shapes
  • Enlarge the page, darken the lines, use highlighter for the cutting borders
  • Project this page onto a smart board for students to come to the board and move the pieces around
  • More or less prompting may be needed to grade the activity to make it easier or harder
  • Drippy wet glue is messy, and not as convenient as glue stick, however it is superior for different reasons.  The added benefit is the sensory input from touching the wet glue, as well as fine motor strengthening from squeezing the bottle
  • Add a gross motor task, sensory activity, or counseling session
  • Laminating this task makes it eco friendly and reusable
  • Combine several growth mindset tasks to make more of an impact, or treatment plan. The OT Toolbox has several resources on growth mindset.
  • Here is an Amazon affiliate link to several books and resources to help children develop a positive mindset (affiliate link).

Amazon affiliate links are included in this blog post. As an Amazon Influencer, I earn from qualifying purchases.

NATURE VERSUS NURTURE

Is this growth mindset/closed mindset something you are born with, or does it develop over time?  This is the age-old question. Why do some people have a great attitude, while others feel their glass is half empty? 

Mindset could be genetic, based on past experiences, environmental influences, parenting, a chemical imbalance, socioeconomic status, or a combination of all of these. 

Whatever the cause or influence, the brain is constantly developing, and can be rewired over and over again.

People who wonder if the glass is half empty or half full miss the point that the glass is refillable. Empower your learners to adopt a healthy realistic mindset.

Free Mindset Sorting Worksheet

Want to get your hands on this free mindset sorting worksheet to start developing growth strategies to support learning even when things don’t turn out as planned? Grab your copy below!

Growth Mindset Sorting Activity

    We respect your privacy. Unsubscribe at anytime.

    This activity is also inside The Member’s Club, along with hundreds of other resources and tools. You’ll love the toolbox full of growth mindset resources, but there are many other skills and therapy themes available, too!

    Victoria Wood, OTR/L is a contributor to The OT Toolbox and has been providing Occupational Therapy treatment in pediatrics for more than 25 years. She has practiced in hospital settings (inpatient, outpatient, NICU, PICU), school systems, and outpatient clinics in several states. She has treated hundreds of children with various sensory processing dysfunction in the areas of behavior, gross/fine motor skills, social skills and self-care. Ms. Wood has also been a featured speaker at seminars, webinars, and school staff development training. She is the author of Seeing your Home and Community with Sensory Eyes.

    Hand Gripper Workout

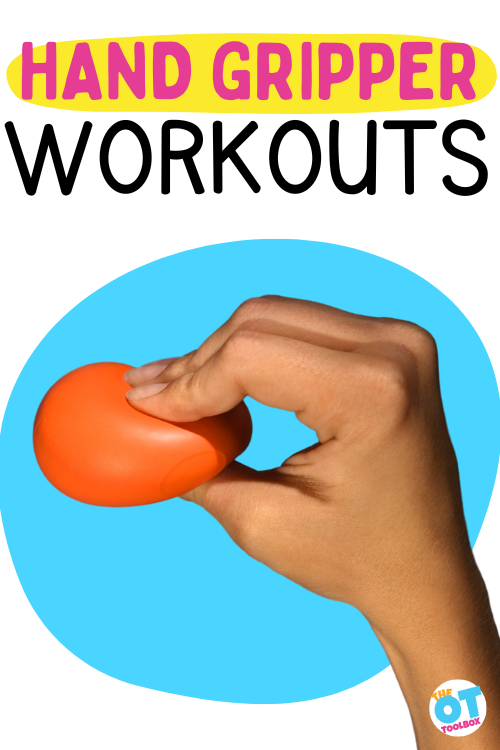
    Hand squeezing a stress ball. Text reads hand gripper workouts

    Today, we have a great addition to our hand strengthening exercises: several hand gripper workouts to support stronger grip strength and pinch strength. Occupational therapy practitioners working in a hand therapy clinic know the value of a hand gripper, to support functional performance with data. Who knows what hand fitness is all about?  Well, it includes many factors such as hand and finger strength and endurance, but the most important conclusion is that hand fitness boils down to the grip and use of the hands for functional tasks and activities without difficulty. So, what better way to address the need for hand fitness than a good, old-fashioned hand gripper workout.

    hand gripper workouts

    Amazon affiliate links are included in this blog post. As an Amazon Influencer, I earn from qualifying purchases.

    Hand Gripper Workout

    Now you may ask, what is a hand gripper workout? It is the use of any gripping tool that is designed for strengthening the hands and fingers. Hand grippers include:

    • Resistance bars
    • Strength trainers
    • Forearm grip exerciser
    • Finger extensor gripper
    • Digiflex
    • Finger stretcher
    • Exercise rings
    • Power web
    • Theraputty exercises
    • Rubber band gripper

    Gripper Workouts for Kids

    Below, we are highlighting a few gripper tools that can easily be used with kiddos during therapy sessions or even as part of a home exercise program. These exercises can be incorporated into therapy sessions in several ways to encourage meaning and motivation:

    • Use in an obstacle course
    • Incorporate into a sensory path
    • Add as a brain break option
    • Use as a transition activity
    • Include in a visual schedule of therapy tasks
    • Add as a “warm up” activity or ending activity

    Let’s dive into the use of these fun tools that can be used right away and help build the necessary hand fitness that kiddos need to access their environment and perform their daily life functions. 

    Amazon affiliate links are included below.

    CanDo Twist-n’ Bend Flexible Resistance Bars (affiliate link)– This is a simple resistive bar that works on grip, forearm, and wrist strength. There are various levels of resistive bars to include: extra soft, soft, medium, firm, and extra firm.

    This bar is used simply by grasping and twisting or grasping and bending to strengthen the muscles of the hands and arms. Think grip strength by grasping the bottom and twisting the top with each hand.

    Resistance Bar Workout – Twist the resistance bar one way 10 times and then switch to twist the bar the opposite way. Consider positioning the bar in different planes.

    Digiflex (affiliate link)– The digiflex is used for whole hand and individual finger strengthening.  That’s right, it can do both!  All you have to do is flip the rubber hand gripper from one side of the device to the other and you’ve got a new tool! 

    They come in easy to more difficult strengths to include: 1.5 lbs., 3 lbs., 5 lbs., 7 lbs., and 9 lbs. My older kiddos love this tool as it provides them a visible measurement in their progress of hand and finger strengthening. 

    Digiflex Workout – Squeeze each finger 5-10 times. Consider combining with learning or other therapy goals: place a sticker on each digiflex button or use the gripper to spell words.

    Basic Ergonomic Hand Gripper (affiliate link)– The basic hand gripper is a tool that is designed for whole hand strengthening or you can adapt it for just strengthening fingers and thumbs. It comes with graded exercise bands: four pairs of rubber bands, two of each resistance level to include: extra light (yellow), light (red), medium (green), and heavy (blue).  

    It can be used prior to handwriting tasks as a warm-up tool or simply to provide whole or partial hand exercises as a child works to build overall hand and finger strength.

    This one is easy to adapt for many children and can make their wrist, palm, and fingers stronger while building endurance and increasing overall hand power. Older kiddos like using this gripper as they enjoy feeling like an adult while using it, so they have said.

    Ergonomic Hand Gripper Workout- Squeeze the gripper 10 times. Try adding other movements or complete in different planes.

    Simple Hand Gripper (affiliate link)– This is a simple gross grasp hand exerciser that can be purchased at a local retail store. It is simply just for squeezing and exercising the hand and finger muscles, but be careful and make sure it is the correct grip strength for the children who are using it.

    It is a great tool for simplicity and easy travel.

    Simple Hand Gripper Exercise- Squeeze the gripper with either the elbow in almost full flexion or in an almost full extended position. Repeat 10 times.

    Finger Stretcher (affiliate link)– This is an isolated finger stretcher that helps to build hand and finger strength as well as build individual finger awareness. 

    It can serve as a hand and finger warm-up tool prior to fine motor activities, keyboarding, or handwriting. If you are looking for a more grown-up hand fidget tool, it can serve as that too!

    There are 3 different resistance levels and can be used for a variety of ages. This one focuses on finger extension rather than flexion as we do not need to forget this muscle grouping as we help kiddos build their strength and endurance. 

    Finger Stretcher Workout- This is a great tool to use as a fidget or as a “reward” in therapy that also strengthens the hands. Repeat each finger 5-10 times. Repeat 2-3 times.

    Exercise rings (affiliate link)– These are silicone rings that are used as hand grip exercisers that comes in 20-, 30-, 40-, and 50-pound resistance levels.

    It can be used as a fun whole hand exerciser that is easy to grasp and use. Simply grasp the ring within the palm to squeeze, hold, and release! That is it!

    Exercise Rings Hand Workout- This is another great tool to include as a reward or a fidget activity. Squeeze the hand rings 10 times and then repeat 2-3 times.

    Power web(affiliate link) – This is by far the most unique and intriguing hand and finger exerciser.  Children wonder what it is and are instantly into trying it out no matter what.

    The power web comes in combination resistance levels as well as singular resistance levels. The levels include extra, extra light to extra heavy.

    Power web gripper workout- Use the finger holes to strengthen gross grasp or individual finger strength. Squeeze each finger individually and count 5-10 grips each finger. It’s easy to adjust the intensity of the workout by simply shifting the position of the hand or the depth of the fingers within the cutout holes. 

    Therapy Putty (affiliate link)– This is an oldie, but a goodie as children love this putty and have no idea that they are building hand and finger strength and endurance while using it!  BONUS! 

    Most therapists use it with younger kiddos by hiding small objects inside the putty for the child to find. However, older kiddos can benefit by actually performing the hand exercises the putty was intended for…it comes in extra soft to extra firm resistance levels, but the younger kiddos just like the fun colors! 

    Soft stress ball workout- Some individuals can’t tolerate or use the required strength to squeeze the grippers included above. One item to strengthen hands with less resistance is a stress ball. These can include any type of squeeze toy, fidget, or soft ball. The goal with using a stress ball in a gripper workout would be to increase tolerance to grip the therapy tool, but also increase strength.

    Hand therapy protocols for strengthening grip strength may vary depending on the individual’s needs and goals, but generally involve a combination of exercises to improve grip strength, endurance, and dexterity.

    Tennis ball hand exercises– Have you seen the occupational therapy tennis ball with a mouth cut into the ball? Therapy providers will cut a slice into a tennis ball and draw eyes and a nose onto the ball. When you squeeze the ball, the mouth opens and the child can “feed” the tennis ball face small objects like mini-erasers, craft pom poms, paper clips, etc.

    The tennis ball gripper is a great exercise because it’s play-based and kids love it! You can extend the activity by squeezing the tennis ball face in an isometric exercise to hold the mouth open while using tweezers, tongs, or a pickle picker to place the small objects into the tennis ball.

    Hand Gripper Workout for Hand Therapy

    If working in an outpatient setting, hand therapy, rehab, or other medial model of therapy, using hand grippers in rehabilitation occurs more frequently. Grippers are a great tool to improve grip strength.

    Below, we’ll cover repetitions and frequency to use a hand gripper for strengthening grip strength. Know that every case can be different, depending on the diagnosis, doctor’s orders and protocol, baseline of the patient, and therapy interventions.

    Hand gripper exercises can include repetitions to improve both initial grasp and endurance:

    Isometric exercises: Isometric exercises involve contracting your muscles without actually moving your joints. To perform an isometric grip exercise, hold a soft ball or gripper in your hand and squeeze it as hard as you can for 10 seconds. Repeat for 3-5 sets with each hand.

    Dynamic exercises: Dynamic grip exercises involve moving your hand and fingers through a range of motion while holding an object. Some examples include using a gripper to perform repetitions of squeezing and releasing, or using a therapy putty to perform hand exercises. Repeat the gripper exercise 10 repetitions and then repeat 2-3 times.

    It is important to note that hand therapy protocols should be individualized and performed under the guidance of a qualified hand therapist to ensure safety and effectiveness.

    Using a Hand Gripper Workout in Therapy

    One last thought on the use of grippers for children, think about naming the exercises fun names rather than the classic OT exercise names. Think fun names such as power pinch, flutter fingers, finger fling, thumbkin thump, curl crunch, or peppy power. Go ahead, be inspired to make up your own fun gripper exercise names, but do not forget that kiddos are creative too, so let them come up a few! 

    Now, go ahead and explore the fun hand and finger grippers available out there and build the strength and endurance that children need to function successfully in their daily life activities. They will be happy you did – and so will you!

    Regina Allen

    Regina Parsons-Allen is a school-based certified occupational therapy assistant. She has a pediatrics practice area of emphasis from the NBCOT. She graduated from the OTA program at Caldwell Community College and Technical Institute in Hudson, North Carolina with an A.A.S degree in occupational therapy assistant. She has been practicing occupational therapy in the same school district for 20 years. She loves her children, husband, OT, working with children and teaching Sunday school. She is passionate about engaging, empowering, and enabling children to reach their maximum potential in ALL of their occupations as well assuring them that God loves them!

    Zoom Ball Games for Occupational Therapy

    zoom ball

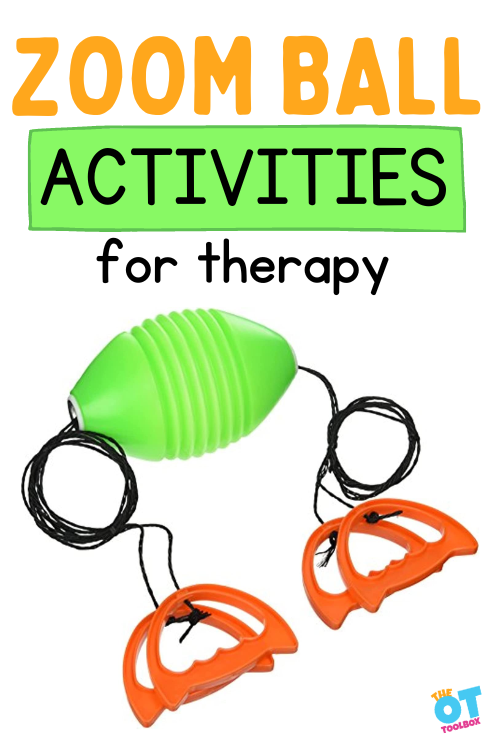
    Have you heard of the Zoom Ball?  Is zoom ball games and activities part of your OT Toolbox? This classic activity is a must for elementary school aged children and above.  In this post we will explore ways to play with a zoom ball in occupational therapy, and how a zoom ball supports the development of gross motor coordination, visual convergence, wrist range of motion, and other skills.

    zoom ball games and activities for therapy

    Amazon affiliate links are included in this blog post. As an Amazon Influencer, I earn from qualifying purchases.

    Zoom Ball in OT

    With the daily onslaught of new products and technology available for play, it can be challenging to select the best activities for your learners.  My advice?  Stick to the classics.  They are tried and true methods, incorporating multiple skills, for a fraction of the price of high tech options. (Amazon affiliate link) Zoom ball is no exception. For younger learners, Zoom ball will be a novelty and instant winner.  Older learners can take comfort in the familiar activity.

    What is Zoom Ball?

    Zoomball (affiliate link) (or Zoom Ball, Zip-it, Rip-it) is a great two player game. It is best played outdoors or in a large space.  Players pull the handles to send the ball flying to the player on the opposite end.

    Tug of war: the harder you pull out, the faster the ball zooms to your opponent. 

    Variation – Hydro Zoom ball (affiliate link) filled with water balloons that splash, making it a great tool for outdoor sensory play and backyard lawn games.

    What skills are addressed using Zoom Ball?

    Therapy time is limited. There are a ton of goals to cover in a short amount of time. Picking activities that address multiple skills are an efficient use of therapy time. Zoom Ball is no exception. 

    • Bilateral coordination – both hands, shoulders, sides of the body need to be working at the same time, in order for the ball to shoot correctly.  This may prove challenging for learners with definite one sided weakness.  Hand over hand assist can be provided to compensate, until the learner builds strength or is able to compensate on their own. in this activity, both arms are doing the same thing, in opposite directions.  Coordinating both arms to work at the same time is key to getting the ball all the way down to the partner. The OT Toolbox has an informative post on Bilateral Coordination here.
    • Eye-hand coordination – the eyes must follow the ball in order to prepare for the upcoming turn. This is a fast paced game. If the learner does not send the ball back quickly, it will start to retreat back down the rope.  At this point it will need to be retrieved by one of the learners or a helper.  This is also critical to thwart the element of surprise at being smacked in the hands with an incoming ball. Read more about hand-eye coordination.
    • Visual skills- Visual scanning, tracking, and convergence, play a critical role in this Zoomball game. not only are learners required to watch the ball, there is an amount of depth perception needed to determine how close or far away the ball is to the player.  Convergence and divergence are developed while playing Zoom Ball.
    • Motor planning – Zoomball takes coordination of several muscle groups to be able to make the ball move to the other end. Timing, strength, and coordination need to be planned for smooth movement.  At first, this will be a cognitive effort while the brain and the muscles communicate this intricate dance.  After some practice, the muscles understand what to do, working in sync.  A definite motor plan is developed while navigating all of the movements and steps it takes to coordinate getting the ball down the line and receiving it. For learners with motor planning difficulty, this will be a lengthy process with several stops and starts. Read about motor planning.
    • Strength – it takes a fair amount of shoulder and grip strength to launch the ball the full distance.  core strength, shoulder and wrist stability, head control, balance, and hand strength are all needed for being successful at the Zoom Ball game. You can try shortening the ropes if your learner does not have enough strength.
    • Social function – communicating with a partner, turn taking, problem solving, compliance, attention to detail, patience, and frustration tolerance can all be addressed using a Zoom ball. working together in a group, problem solving, sharing materials and space, turn taking, and cooperation are great social skills developed using the Zoom Ball in therapy.
    • Executive function – following directions, attention, focus, sequencing, planning, task completion are key to success. Executive function, following directions, attention, attention to detail, focus, sequencing, planning, task completion, impulse control, compliance, behavior, and work tolerance are all important skills to learn while doing any activity.
    • Kinesthetic awareness – This means learning by doing. No amount of verbally explaining how the Zoom Ball works can replace getting in there and experiencing it
    • Proprioception – heavy work, bumping and crashing, pulling/pulling/lifting/carrying are all strategies to build proprioceptive skills and awareness. Zoom ball definitely involves bumping and crashing, heavy work, and pulling!
    • Hand strength – it takes a fair amount of grip strength to hang onto the handles while the ball is moving back and forth down the ropes
    • Timing- this goes hand in hand with impulse control. Timing when to pull your arms out to zoom the ball, when to close your arms and hold on tight, how long to hold your arms out, and when to brace for impact.

    How to use the Zoom Ball in Occupational Therapy

    Not only do occupational therapy providers like to have fun in therapy, it is important that the activities support the development of new skills.  Play is the function of a child, therefore play based therapy is important in teaching learners new skills. 

    The Zoom Ball, while used to develop and practice skills, is definitely a fun game, once both participants get the hang of it.  The Zoom Ball game is of course not limited to occupational therapy providers…  It is great for physical therapists, speech language pathologists, caregivers, teachers, PE teachers, and more. 

    Therapists love activities that address multiple skills at once.  It makes our job easier and much more efficient than planning 47 activities for an hour-long session.

    • Traditional method – two people stand opposite each other with the rope taught between them.  The first person spreads their arms wide enough to launch the ball at their partner.  Once it reaches their partner, they repeat the motion of opening their arms wide.  The wider, faster, and more forceful the movement, the better the ball will move.  There is a big learning curve to get the ball to go far enough to reach the other end.  Usually it ends up stuck in the middle somewhere until your learners get the hang of it
    • Ramp – play Zoom Ball on an incline.  The stronger player will be launching uphill, while the less strong/younger/poorly coordinated learner will be at the top, flowing downhill. This is a great challenge for targeting balance activities.
    • Experiment – talk about problem solving and demonstrate what happens if your learner goes too slow, uses one arm more than another, does not pay attention, pulls their arms fast and hard, etc.
    • Use the Zoom Ball in a Single Direction – If there are only two of you, and your learner needs significant help, tie one end onto a tree or post.  Provide hand over hand assistance to launch the Zoom Ball, then manually retrieve and reset it.
    • Add a communication/cognitive element – have learners count while launching the ball, say a letter of the alphabet each time they launch, play categories yelling out a word in the category until someone is not fast enough to name something, do math facts, listen to a set of numbers/letters/items and repeat them while playing.

    How to Play with a Zoom Ball

    Directions for use: 

    • Players pull the handles to send the ball hurling toward the other player
    • For 2 players
    • The line between the players must be taut in order for the ball to zoom across 
    • The harder the players pull while spreading their arms apart, the faster and harder the ball will go
    • There is definitely a learning curve to this activity, with a lot of fetching the ball  stuck in the middle along the way

    If your learner is fearful of the ball crashing into their hands, you can add “bumpers” using clay, polymer, or pieces of foam that is attached to the string.

    Zoom Ball Games

    In addition to changing the type of Zoom Ball as highlighted above, changing the way it is played can also add to the challenge.  There are some great ways to make the task more challenging.

    Try these variations of zoom ball games:

    • Kneel while doing the Zoom Ball – kneeling on both knees or on one knee at a time changes the element of balance and increases the need for core strength
    • Standing on a foam cushion – standing on an uneven surface such as a wiggle cushion, foam block, or Bosu ball can increase the level of challenge
    • Stand on one foot – now there is an added challenge of balance while playing
    • Change arm movements – what about chomping up and down like an alligator while moving the ball
    • Categories – yell out an item in a category each time the ball touches the player’s hands
    • Math facts – yell out a math fact for students to answer when it is their turn
    • Counting – count the number of passes between students before they make a mistake
    • Spelling – shout out spelling words as the ball zooms back and forth

    More Resources:

    The OT Toolbox has an Outdoor Lawn Games  post to add to your outdoor fun.

    How about some more information on Upper Body Strength?

    Types of Zoom Balls

    There are several different variations of the classic Zoom Ball. While the classic stands the test of time, there may be reasons to mix it up once in a while.

    Check out some of the variations below (Amazon affiliate links):

    Classic Zoom Ball (affiliate link) is made of a plastic hollow football, with two sets of handles on each end of a long cord.  The slogan is “zip it to rip it”.  There are several variations on this classic model:

    Hydro Zoom Ball (affiliate link) – fill the ball with a water balloon that explodes when it reaches one of the ends.  This adds the element of surprise, as you never know when the balloon will pop!

    Foam Zip Ball (affiliate link) – this features a softer ball and shorter ropes for use with children ages five and up or those with lower range of motion or strength.

    Homemade Zoom Ball – Make your own Zoom Ball!  All you need is string/cord, a two liter bottle, and some duct tape. Cut the bottoms off two plastic water bottles and duct tape the open bottoms together. Thread the string through the tops of both water bottles and then play.

    Other Great Resources from the OT Toolbox to Develop Coordination Skills:

    While there is a push out there to include electronics, technology, and gaming to everything children do, don’t forget to teach classic activities and games like Zoom Ball that their parents and grandparents grew up playing.  There is a good reason these activities have withstood the test of time to become classic games. 

    Victoria Wood, OTR/L is a contributor to The OT Toolbox and has been providing Occupational Therapy treatment in pediatrics for more than 25 years. She has practiced in hospital settings (inpatient, outpatient, NICU, PICU), school systems, and outpatient clinics in several states. She has treated hundreds of children with various sensory processing dysfunction in the areas of behavior, gross/fine motor skills, social skills and self-care. Ms. Wood has also been a featured speaker at seminars, webinars, and school staff development training. She is the author of Seeing your Home and Community with Sensory Eyes.

    Just Right Challenge

    just right challenge

    In the field of occupational therapy, there is an intervention concept known as the “just right challenge”. In this blog post, we’ll cover what this challenge means and how we can best support clients and patients by meeting their needs and abilities at just the right level of intervention. Occupational therapy interventions cover a vast variety of levels of care, client needs, daily occupations, and environments. With a level of support and challenge that fosters growth, development, and self-sufficiency, therapy providers can support all of these differences.

    just right challenge

    Amazon affiliate links are included in this blog post. As an Amazon Influencer, I earn from qualifying purchases.

    The Just Right Challenge

    How often do you feel “just right”?  Not too hot, not too cold, not too hungry or full, comfy clothes, hair just right. 

    It is not often that everything is in sync, but when it is, that feeling of ease is delightful. It is called the just right “challenge”, because it is just that. 

    It is difficult to find balance.  This post will explore the just right challenge, its importance, and how to better achieve it.

    What is the “Just Right Challenge”?

    Occupational therapy providers have a lot of terms, medical definitions, theories, and interventions in their toolbox. One of those therapeutic tools is the “just right challenge”.

    The Just Right Challenge is a phrase that describes a therapeutic activity at a level that is challenging enough to help an individual develop their skills, but not so challenging that it becomes frustrating or overwhelming.

    The idea is to find an activity that is at the appropriate level of difficulty for the child, so they can experience success while still being challenged to improve their skills.

    The “just right challenge” can be adapted to suit a child’s individual needs and abilities, and can be used in a variety of therapeutic activities, such as play, sports, and self-care tasks.

    This concept is a key component of Ayres Sensory Integration intervention as a way to support sensory needs that meet the individual needs of the child.

    Examples of the Just Right Challenge for Kids

    To understand the struggle finding this balance can pose, we can offer examples.

    One simple example of the just right challenge is that of Goldilocks and the 3 bears. It’s likely we all know the story: Goldilocks tries out the chair, bed, and porridge of three bears. She finds Papa Bear’s items too hard or too big, or too hot. She finds Mama bear’s items too soft, too small, or too cold. She tries and finds Baby bear’s items just right.

    Another example is in the Berenstain Bears book, (Amazon affiliate link) Old Hat, New Hat. In this cute children’s book, Papa Berenstain is shopping for a new hat.  He spends all day in the shop trying on different hats.  Despite all of his efforts, none of them feel just right. They are too beady, too bumpy, too leafy, too lumpy, too twisty, too twirly, too checkered, too curly.  Eventually Papa decides on a hat that feels “just right”.  It turns out to be his old comfy hat, but that works for him. 

    Still another way to illustrate this, is by taking a look at this classic Ernie and Bert video from Sesame Street. Ernie is trying to split a piece of Licorice to share with Bert.  He splits them unevenly at first, so he takes a bite of one to make them even.  They are still not even, so he takes a bite of the other.  This continues until guess what, there is no candy left. Of course, this is silly because everyone knows, one divides, the other decides.  Or how about a ruler to measure, if it is critical these pieces are the same size. The bigger takeaway is that no matter what Ernie does, he can not find the just right challenge.  Too big, too small, too uneven, just not right.

    You have probably experienced the just right level of input in your daily tasks, too. If you are trying to learn a new skill, it is very possible to get “burned out” by too many repetitions, too much effort, or by too much thinking about the problem at hand. What needs to happen? Taking a break, trying less or different efforts, and returning to the task at another time with a different level of intensity.

    I am sure many of you have experienced this when trying on new shoes or bathing suits. 

    Clothing, food, a new couch, or even a book can be just not right. It’s too loose, too tight, too scratchy, too bright, too hard, too soft, too weird, too long, too short, too wrong. 

    The big deal about finding the just right challenge, is one choice has an effect on many other things.  Not having new shoes can hurt your feet.  Having the wrong shoes can put you off balance, rub blisters, affect your mood and concentration, as you shift focus to the shoes, instead of where you are going.

    Have you ever felt this way?  No matter what you do, you don’t feel just right? Something feels off, but it is hard to describe what it is, or how to fix it.  These are the non-concrete examples.  Much of it has to do with arousal level.

    How to use the Just Right Challenge

    It is definitely a challenge to find just right. Unfortunately, there is no magic formula. What works for one learner, may not work for the next.  The treatment that works one day, backfires the next day, for the very same learner.  This is very frustrating for caregivers and therapists. 

    Evaluate- The first step is determining the child’s current levels. Use appropriate evaluation tools and screening tools to determine present levels.

    Establish goals- Work with the child, the parent/guardian, and the team to establish SMART goals based on environment. Take into consideration any accommodations and modifications in place.

    Set the child up for success- The goal is to create mini challenges for the individual that allows them to achieve small successes. You can break down goals to support skill achievement. This allows the child to gradually improve on their goals, while seeing the benefits of continual work on targets.

    Trial and error – There will likely be efforts that are too hard or too easy. Keep the lines of communication open and get feedback from the individual. Try least restrictive to most restrictive. Use body feedback as a tool before adding external modifications like more easier or difficult tasks, heavier weights, compression garments, or headphones, distant copying/near point copying, etc.

    Change what you can – Make incremental changes to the environment, supports, all while offering feedback and encouragement:

    1. Offering positive reinforcement: Provide positive feedback and reinforcement to encourage the child’s progress and motivate them to continue working towards their goals. Levels of feedback can change over the course of the challenge.
    2. Change the activity: Modify or adapt the activity or the environment to make it more accessible for the child or to provide additional challenges.

    Try playing with different levels of challenge until your learner gets the input they are looking for. Experiment while cooking to get the perfect taste.

    Backward chaining is a teaching strategy that can be used to help children learn new skills, such as dressing, grooming, or completing a task. It involves breaking down the task into small steps and teaching the child to complete the last step first. Then, the child is gradually taught to complete the steps that come before it until they can complete the entire task independently.

    This approach can help children feel more successful as they are able to accomplish the final step, and it also helps to build confidence and motivation to learn the preceding steps. By gradually working backward, children are more likely to learn the entire sequence of steps and feel a sense of accomplishment as they achieve success in completing the task independently.

    A final note on the just right challenge for kids…

    When we seek to find the right level of challenge for the kids we serve, we can offer a level of difficulty that creates a goal for the child, while not pushing the child too far that they feel overwhelmed. We always want to offer strategies and tools to support the individual while ensuring that the activity’s demands match the child’s ability level.

    Victoria Wood, OTR/L is a contributor to The OT Toolbox and has been providing Occupational Therapy treatment in pediatrics for more than 25 years. She has practiced in hospital settings (inpatient, outpatient, NICU, PICU), school systems, and outpatient clinics in several states. She has treated hundreds of children with various sensory processing dysfunction in the areas of behavior, gross/fine motor skills, social skills and self-care. Ms. Wood has also been a featured speaker at seminars, webinars, and school staff development training. She is the author of Seeing your Home and Community with Sensory Eyes.

    Sensory Needs

    sensory needs

    When it comes to sensory arousal level, we all have different sensory needs. In this blog post, we’ll cover what sensory needs look like for different individuals and how to support these various levels of sensory requirements. “Sensory” can mean many things to different people, and we are all different!

    sensory needs

    What are sensory needs?

    All of us have sensory preferences. We might prefer a cozy sweater because it’s thick and keeps us warm, but another person can’t stand how scratchy it feels to them. Some people enjoy feeling the breeze flowing in a window on a Spring day, but to others, the cool air is annoying and they can’t help but focus on the sounds of the outdoors.

    Each of us has sensory needs in which we can and can not function.

    When our sensory needs are not met, we are distracted, unorganized, and can’t focus on the task at hand. The various input takes precedence in our minds and to all of our senses.

    For the individual who is hyper aware of sensory input, or is unable to adjust or accommodate for the aggravating types of input, we might see challenges in function.

    Understanding different sensory needs via a sensory checklist can be a helpful first step.

    When sensory needs are not met

    When sensory needs are not met, dysfunction can result. We may see issues with self-regulation, including behaviors and emotional considerations.

    One way to look at it is this way:

    Shoes and hats are concrete examples.  So are temperature regulation, tactile experiences, sounds, smells, sights, and tastes.  It is fairly easy to identify these challenges and make adjustments.  If you are too cold, add a sweater.  Too hot?  Take it off.  When the music is too loud, you turn it down, add headphones, or move away from the sound.  If something is too sticky, you might wash your hands, avoid that experience, or wear gloves.

    Of course, life is not that easy. 

    Sometimes you can not get away from the incoming toxic information, or find a way to regulate it.  This affects the just right challenge, as this offending data changes mood, focus, attention, and overall feeling of calm.

    Sensory input is an acceptable strategy for many responses related to sensory needs.  Sometimes undesirable behaviors impact an individual’s ability to function or safely participate in a daily lifestyle. Some behaviors impact a family or classroom in a non-functional manner. These are behaviors that should be addressed in a manner that allows the individual to get the sensory input they need. Behaviors that can progress toward unhealthy or unfunctional manners may include:

    • Emotional overreaction
    • Meltdowns
    • Aggression
    • Hyper-attention
    • Difficulty with transitions
    • Inattention
    • Sleep issues
    • Impulsivity
    • Sensory-seeking behaviors
    • Sensory-resisting behaviors
    • Resistance to textures/food/clothing
    • Poor social Interactions

    A note about meltdowns: Meltdowns (in a way that becomes unsafe or dysfunctional for the family or classroom on a consistent basis. Dysfunctional classroom or family life indicates a sensory need that is unmet. Meltdowns are a common result of those with sensory processing difficulties, those who may be unable to communicate needs, or those with emotional/social challenges. Consider meeting the need that creates the meltdown by analyzing needs and preferences.

    When sensory needs are not met, we might see

    • Avoidance – one technique includes avoiding the offending item or experience. Move away from a terrible smell, turn off the scary movie, say no to a dip in the freezing pool.  This is a good strategy but not foolproof. In individuals that can not regulate sensory needs, you’ll see meltdowns, outbursts, etc.
    • Accommodate – made adjustments to the sensory experience.  Change clothes to find comfortable ones. Wear headphones or earplugs during loud events. Cover your nose if something smells offensive. Wear gloves when touching sticky foods. Add ketchup to gross vegetables. Again, this is not 100% foolproof either.
    • Grin and bear it – sometimes input can not be avoided or accommodated.  One example: the fire alarm is going off.  You are unable to avoid it because it is an alert.  You are holding two kids’ hands, so you cannot plug your ears. Just remind yourself it will be over soon, take some deep breaths, and plan to self-regulate after the event is over. We know that grinning and bearing it is not always an option for everyone, especially the neurodiverse. This is when we may see breakdowns, meltdowns, avoidance, and other responses.

    (Amazon affiliate link): The Highly Sensitive person is a great resource for helping understand these sensory challenges and work through them.

    Amazon affiliate links are included in this blog post. As an Amazon Influencer, I earn from qualifying purchases.

    AROUSAL LEVEL

    Sensory arousal level is similar to a mood regulator.  The just right challenge to balance these feelings is difficult. It is hard to regulate ones level of fatigue, happiness, frustration tolerance, focus, calm, or anxiety, to name a few.

    Arousal level is similar to a wave. We move through this wave up and down all day long.  The key is to be in the middle of the wave, but this does not always happen. 

    For some people, it rarely happens. Some people find their arousal level is generally low.  They are sluggish, despondent, depressed, lacking motivation, and unable to complete tasks. 

    The other side of the wave are those folks who are always up.  They are in constant motion, on the go, fidgety, unable to stay on task, talk too much, get too close to other people, overexcited, and restless.  Either end of the wave is not as productive as the middle.

    You can’t always set up the optimal environment

    Sometimes there are events that are out of our control. Imagine an airplane ride. There are several accommodations that can be made for comfort.  Layered clothing for temperature regulation.  A blanket and pillow for temperature and comfort. Headphones or earplugs to regulate noise. Cover your nose while the person next to you eats tuna salad.

    You cannot change the vestibular input from the movement of the plane, and perhaps the proximity of the person next to you.  By changing a few things, the rest of the offensive stimuli is more tolerable. Coping strategies can support this need.

    How to support sensory needs

    The just right challenge involves finding the middle of the wave. This is not easy. There are times when we add too much calming input to an overstimulated learner, only to find they went way past the middle, leaving them in a virtual coma. Or treatment included alerting activities to wake the sensory system. This overshot “normal” and now your learner is bouncing off of the walls.

    With Evidenced Based Practice, practitioners are searching for research and hypotheses about the just right challenge. Rely on practice, observation, gathering data to that specific learner, and a lot of trial and error.

    Heavy work – When it comes to sensory needs, heavy work is an option for the just right challenge in meeting differing needs. The proprioceptive system sends messages about our muscles and joints, and position in space.  It lets the brain know where the body is at that exact moment. 

    Arousal level is regulated by proprioceptive input.  Proprioceptive input is gained through heavy work. 

    Pushing, pulling, carrying, lifting, and exercising are examples of input.

    Activities that provide input through the joints and receptors in the muscles/joints have a calming effect on sensory needs. Activities can be exercise-based (therapy bands, animal walks, jumping jacks, etc.) or they can be functional in nature (removing wet laundry from the washing machine, helping in the garden, vacuuming, etc.)

    Activities can also be easily incorporated into environments and schedules such as utilizing a sports bottle with a straw or adding proprioceptive input into writing tasks with a weighted pencil. Activities below can be incorporated into an individual’s day to address needs of the proprioceptive sense.

    Adaptations/Accommodations to offer heavy work input may include:

    • Traditional exercise
    • Weight lifting
    • Chores
    • Playing on playground equipment
    • Bicyling
    • Swimming
    • Yoga
    • Heavy work input through push and pull activities such as tug-of-war
    • Pulling a full wagon
    • Pushing a wheelbarrow
    • Pushing heavy chairs on a carpeted floor
    • Moving furniture
    • picking up and carrying a full laundry basket
    • Shoveling snow or dirt
    • Wearing a heavy backpack
    • Mopping floors
    • Carrying a stack of books
    • Wall push-ups
    • Chair push-ups
    • Wall sits (“sit” with the back against the wall as if on an imaginary chair)
    • Roll up in a blanket
    • Massage
    • Weighted blanket

    These strategies can be part of a sensory diet that meets specific and individual sensory based needs.

    Modification – adding external input to improve the sensory arousal level. A weighted or compression vest can add great input to help with regulation. 

    There is controversy about the effectiveness of these vests, however they work well for many learners. Ankle weights can be added for input, regulation, and body awareness.

    Take a sensory break – Sometimes less is more. There are times when the body needs a break from it all.  Curl up on the couch with a book, under a blanket, with the lights dimmed. Sit on the porch in a rocking chair feeling the breeze.  Young learners can benefit from afternoon quiet time to rest and reflect.  Slowing down takes practice.

    Coping strategies– Using a variety of coping strategies can support sensory needs.

    Focus on the good– Turning the focus onto student strengths is a great tactic! When we focus on the individual strengths, we can come up with meaningful and motivating strategies that meet differing needs. This is a huge component in creating a sensory lifestyle.

    Regulation and finding the various levels of requirements that support function isn’t always easy.  This is the reason so many practitioners lean toward evidenced based practice.  A=B. 

    The data shows adding eye glasses improves vision.  A cast works well to heal a broken leg.  Unfortunately, sensory integration involves trial and error, luck, practice, and a large toolbox.

    For more information on this theory and and understanding of what is happening when we see behavioral outputs, or actions as a result of sensory perception from sensory input, please check out our resource on Ayres Sensory Integration.

    Accommodation, avoidance, regulation, heavy work, modification, and a treasure chest of ideas, are the keys to finding the perfect level of sensory needs.

    Colleen Beck, OTR/L has been an occupational therapist since 2000, working in school-based, hand therapy, outpatient peds, EI, and SNF. Colleen created The OT Toolbox to inspire therapists, teachers, and parents with easy and fun tools to help children thrive. Read her story about going from an OT making $3/hour (after paying for kids’ childcare) to a full-time OT resource creator for millions of readers. Want to collaborate? Send an email to contact@theottoolbox.com.

    The Sensory Lifestyle Handbook walks you through sensory processing information, each step of creating a meaningful and motivating sensory diet, that is guided by the individual’s personal interests and preferences.

    The Sensory Lifestyle Handbook is not just about creating a sensory diet to meet sensory processing needs. This handbook is your key to creating an active and thriving lifestyle based on a deep understanding of sensory processing.

    Letter Learning with Bottle Caps

    Bottle caps with lowercase letters on them sitting on each letter of the uppercase alphabet Text reads bottle cap letters

    In this older blog post, we shared how to make your own bottle cap letters for multisensory learning and fine motor play. Creating DIY instructional materials can be both educational and fun. One creative idea is to make bottle cap alphabet letters.

    Bottle Cap Letters

    By collecting various bottle caps and adding individual letters to them, you can create a unique set of bottle cap letters. This homemade alphabet set can be used for matching big and small letters, helping children learn the alphabet in an engaging way. Kids can enjoy the tactile experience of sorting and matching the big and small bottle cap letters, making it a hands-on learning activity that enhances their letter recognition skills!


    This Letter Learning game was something I made for Big Sister a couple of years ago.  We have played with the letter bottle caps so many times and in a ton of ways.


    How to make bottle cap letters

    You’ll need just a few materials:

    • 26 bottle caps (one for each letter of the alphabet)
    • Label paper
    • Marker
    • Cardboard for a play mat
     
    The cardboard has upper case letters and the bottle caps are used to match the letters. 
     
    It doesn’t matter what size bottle caps you use because you cut the label paper to fit the caps. If you use a lot of milk in your home, or have access to a bunch of bottle caps in the same size, use those.
     
    In our case, we had a case or two of Gatorade bottles and used those bottle caps to make our letters.
     
     
    1. I used a sheet of label paper to make the lower case letters.
    2. Trace a bunch of circles in the correct size.
    3. Cut out the circles.
    4. Write the letters.
    5. Stick them to the bottle caps.  Easy!


    How to use alphabet bottle caps

    Our homemade bottle cap letters are a great DIY instructional material to use in learning and play. 
     
    • We’ve also played with the bottle caps in play dough,
    • Use them to spell names and words.
    • Move the bottle cap alphabet to label objects with it’s starting letter.
    • Work on learning which direction the “p”, “b”, and “d” should go. This is a great hands-on activity to target letter reversals!
    • They are so great to manipulate and play with in a sensory bin filled with corn, too.
    • Or, pair the letter bottle caps with our alphabet exercises to target fine motor and gross motor skills. 
     
    How else can we play with these bottle caps??
     
    bottle cap letters


    Working on fine motor skills, visual perception, visual motor skills, sensory tolerance, handwriting, or scissor skills? Our Fine Motor Kits cover all of these areas and more.

    Check out the seasonal Fine Motor Kits that kids love:

    Or, grab one of our themed Fine Motor Kits to target skills with fun themes:

    Want access to all of these kits…and more being added each month? Join The OT Toolbox Member’s Club!

    Colleen Beck, OTR/L has been an occupational therapist since 2000, working in school-based, hand therapy, outpatient peds, EI, and SNF. Colleen created The OT Toolbox to inspire therapists, teachers, and parents with easy and fun tools to help children thrive. Read her story about going from an OT making $3/hour (after paying for kids’ childcare) to a full-time OT resource creator for millions of readers. Want to collaborate? Send an email to contact@theottoolbox.com.

    Trying New Foods

    trying new foods

    We all want our kids to eat a healthy and balanced diet. However, getting children to try new foods can often be a challenge. Many kids are picky eaters and may refuse to try anything new. But introducing new foods is essential for their nutritional development and helps them develop a more diverse palate. So, how can we help our kids to try new foods and expand their food choices? In this blog post, we’ll share some tips and strategies that you can use to help your kids try new foods and enjoy the benefits of a more varied diet.

    trying new foods

    Some people love food.  They love the way it tastes, makes them feel, the smell, or the memories it evokes. These folks live to eat.  A great meal is much better than a new pair of shoes for the “foodie.”  The other side eats to live.  Food is a necessity, not an enjoyment.  That new pair of shoes over a fancy restaurant?  Heck yeah! While the title says kids, people of all ages and stages (author raises hand), struggle to try new foods. This post will address how to support kids in trying new foods. It will describe the “why” first, then the “how”. 

    Related to trying new foods is utilizing a just right challenge with targeting needs while not pushing kids in trying foods that are too far from their preferred food range.

    Trying New Foods

    For some, trying new foods is a huge step. There may be many reasons why trying different foods is a struggle. Before we can help kids in trying various foods for nutritional purposes, we need to determine the reason why there is avoidance.

    Start with why your learner might be picky 

    Why do some people love food, while others have a limited diet?  There are several factors that can influence eating choices.  

    Our resource on Therapy for Picky Eaters offers more information as well. we cover more information on the medical and psychological reasons for avoiding new food trials in our resource on What you need to know about sensory food issues.

    How to support kids in trying new foods

    Once the “why” is determined, it is easier to work on the “how”.  Medical issues can be solved first.  There will likely be some residual anxiety that needs to be worked through, but often the problem resolves with correct medical treatment.  Sensory sensitivities, social, emotional, and eating disorders will be more difficult to resolve.

    EATING DISORDERS – these can be very complex, involving the right type of treatment to make headway. There is more to recovery than mind over matter. Some treatments such as inpatient forced feeding, avoiding scales and mirrors, scare tactics, or shaming the learner, are not effective for many cases. If you or your loved one has an eating disorder, do research to find the correct type of treatment.

    SOCIAL/EMOTIONAL

    Amazon affiliate links are included in this blog post. As an Amazon Influencer, I earn from qualifying purchases.

    • create a welcoming environment for eating.
    • discuss what might be negative triggers, working to alleviate these.
    • start slowly by allowing your learner to try new foods alone, or eating in a quiet pair.
    • avoid large restaurant gatherings at first.
    • discuss ahead of time what food might be available at a birthday party or restaurant.
    • bring a snack in case there is nothing your learner will eat. 
    • decide sometimes not to battle.  Your learner will survive a seven-day cruise on bread and ice cream (true story) for the sake of a nice vacation for everyone.
    • talk about the nutritional benefits of food, the importance of certain foods, and discuss what foods your learner might be willing to try.  Scurvy and rickets come from nutritional imbalances.  Decide if this information will be effective, scare your learner, or have no effect at all.
    • have an exit clause. Teach learners to discreetly remove an unwanted food from their mouth with a napkin.  Reassure them that they will be able to take the bite out if it does not feel or taste right.  Having an “out” often puts learners at ease, making it less risky to try.
    • employ the “no thankyou bite”.  Teach your learner about social etiquette and the importance of trying. It is impossible to say you do not like a food without trying it.  One bite (with good effort), is more socially acceptable than just refusing grandma’s casserole.  That one bite, may surprise your learner, turning into a new favored food.
    • systematic desensitization is a long fancy word for teaching your learner to slowly get used to something.  The Sensory Oral Sequential SOS  method of eating involves slowly desensitizing the brain/body to a new food. It starts with being in the same room as the food, and 27 steps later the food is swallowed. Getting a better understanding on whether food avoidance is oral motor or sensory is a great start.
    • Make a game of eating. Have the family rate foods they have tasted. One means I will never go near that food again. Five means I like it and will eat it again. Challenge learners to gather points by eating/trying new foods. 10 new foods lead to a prize.  Take turns selecting foods to try. This dinner plate (affiliate link)can be motivating.
    •  Check out Food Chaining strategy (affiliate link)
    • Food tasting game
    • Take the list of foods your learner currently eats, and make SMALL changes. It may be as small as breaking the crackers into pieces. Try different shapes of pasta, a new flavor of yogurt, a different jelly on the bread, toasting the bread, different kinds of French fries, or a different brand of waffle. Small changes to preferred foods can feel like a big deal.
    • Check out these lunch box ideas for picky eaters
    • Hiding food may be a good idea, may backfire, or not make any difference.  Sneaking carrots into brownies is a good idea to add nutritional value.  It will not teach your child to love carrots, but will add vitamins. Stuffing something weird into their sandwich may backfire, causing your learner to avoid one of the few foods they will actually eat.
    • Involve your learner in the process. Have them help select the items to buy, prepare the foods, and cook the meals. This can give back some control and motivate your learner to try.
    • Take a breath and relax.  Oftentimes caregivers add more stress by pressing their child to eat more. Responding with anxiety, frustration, or anger is not going to elicit an eating response.  Walk away if you can not sit there and pretend it does not matter that your child is living on bread.

    Sensory Strategies to support kids learning to eat new foods

    Desensitizing the oversensitive sensory system is the first step in taming the picky eater who struggles with sensory based food aversion.

    • Systematic desensitization as stated above in the emotional section, works just as well for sensory struggles. The Sensory Oral Sequential SOS method of eating involves slowly desensitizing the brain/body to a new food. It starts with being in the same room as the food, and 27 steps later the food is swallowed.  Making small changes to foods, having your learner engage with food, giving them control over food choices is a good start.
    • Tactile – work in and around the hands and mouth. Provide safe choices for touching with the hands such as dry rice, dry beans, sand, play dough, birdseed, shaving cream, or slime. Start with dry textures, moving toward wet and sticky. “Safe choices” refers to something that is not threatening. Playing in birdseed is not threatening to your learner because they know they are not expected to eat it. When comfortable, you can move your learner to engaging with actual food such as whipped cream, pudding, fruits, or a bowl of dry cereal. Decrease tactile sensitivity in the mouth. Use a vibrating toothbrush, an icy washcloth, Twizzlers left out to harden overnight, sour spray, or popsicles to get the mouth used to different temperatures and textures. Our post on food texture issues will offer many more strategies.
    • Auditory – practice listening to different types of sounds and music. There are videos of people eating and chewing to desensitize your learner.  These are difficult to listen to, so wade in slowly. As an alternative, provide noise canceling headphones for a while to help your learner tune out sounds.
    • Visual – check out videos of people eating, food preparation, presentation of foods, cooking channel, kids cooking shows. The idea is to desensitize the learner to reduce triggers.
    • Olfactory – work on smell aversion by providing more smells to balance the sensory system in the nose. These can start out pleasant like lemon or peppermint.  Open the spice cabinet for sniffing. See if your learner can identify items by their smell. Coffee beans are great to have around as they cancel out smells in the nasal passageways.  Once someone is triggered, have them smell the beans to reset their system.
    • Taste – practice tasting and identifying. Make a conscious effort to teach your learner to describe the food.  Try very different tastes.  Some people love spicy foods, others can’t get enough of sour (try Warheads sour spray, or lemon juice).  Different dipping sauces can help.  Ketchup seems to help immensely.  Other dippers could be honey, ranch dressing, mustard, sugar, salt, peanut butter, butter, barbeque sauce, honey mustard, etc.  Many picky eaters do not like spices or anything extra at all.  Be mindful of this. If this is the case, serve very plain foods for a while.  Mixed textures are more difficult to tolerate as they have several different tastes in one. The temperature of food can have different effects.  Some picky eaters like everything at room temperature.  Not too hot or cold for these folks.

    Tips for Trying New Foods

    • Good structured mealtimes are important for successful feeding. Eating at the table for a set amount of time (usually 20-30 minutes), with other people encourages good eating habits
    • Limit external stimuli during eating if there is a sensory or behavioral issue eating. This not only causes a distraction that limits food intake, it also pairs eating with electronics or tv, and the child cannot eat without it. This is not just a bad habit
    • Sitting in a proper chair for the child’s size improves chewing and swallowing
    • There will be setbacks. Keep calm and carry on
    • Present all foods on the plate in small portions. Or provide two options with small bites of each. Divided plates help ease anxiety, as do small portions
    • The patterns are not always clear
    • Things do not always work as we expect
    • Children will often eat in the clinic, but then refuse to eat at home. This can be related to emotional stress or something environmental going on at home.
    • Eating is very difficult, so trust and calm are very important
    • It is ok to let a child have dessert while eating. A bite of carrot and then a bite of cookie.This keeps the  child motivated
    • A complete feeding program takes up to a year to improve the amount of foods that the child will tolerate. Take it slow and be patient

    The best advice I ever gave myself when supporting my kids learning to try new foods, was to back off.  I took the parent hat off and replaced it with the therapist one.  This made all of the difference.  Once I looked at my girls clinically, I was able to step back and look at the “why” first.  I realized they were not going to starve to death on bread and orange wrapped cheese.

    I will leave you with a funny story.  I took my picky eater (age 3) to the doctor for her check-up.  We discussed food aversion of course.  At that stage her only meat was bologna.  The doctor looked straight at me and said, “she really should be eating salmon and fresh tuna”.  I laughed.  The idea of making a huge jump from bologna to salmon is preposterous. Everyone knows you jump to trying hotdog next!

    Victoria Wood, OTR/L is a contributor to The OT Toolbox and has been providing Occupational Therapy treatment in pediatrics for more than 25 years. She has practiced in hospital settings (inpatient, outpatient, NICU, PICU), school systems, and outpatient clinics in several states. She has treated hundreds of children with various sensory processing dysfunction in the areas of behavior, gross/fine motor skills, social skills and self-care. Ms. Wood has also been a featured speaker at seminars, webinars, and school staff development training. She is the author of Seeing your Home and Community with Sensory Eyes.

    The Food Inventory Questionnaire is provides the therapist with a data sheet for a child’s repertoire allowing for consistent data collection over the course of feeding treatment. It also provides the therapist with a professional looking tool and talking point during the initial feeding evaluation to ensure that a comprehensive list of foods the child eats is gathered to support successful feeding therapy. Get your copy here.