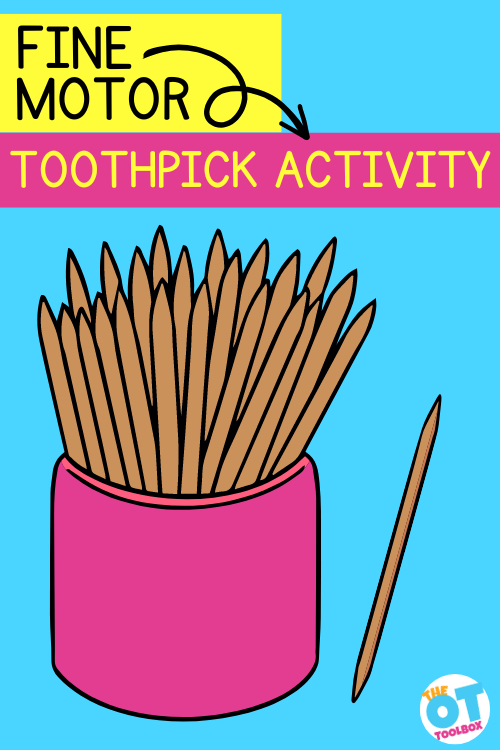
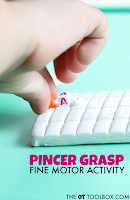
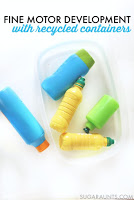
This toothpick activity requires only one item: a toothpick container found at the local dollar store. Typically a toothpick container is filled with toothpicks and has a few holes in the removable lid, making it a great fine motor tool for children. This occupational therapy activity is used because you can target many precision skills and finger dexterity in kids. Let’s check it out…
Amazon affiliate links are included in this blog post. As an Amazon Influencer, I earn from qualifying purchases.
Toothpick Container Activity
I’ve had a toothpick container in my therapy bag for many, many years. While we don’t actually use the toothpicks in their traditional use, we do, use the toothpicks in a fine motor activity that kids seem to love!
First, look for a holder that has small holes in a removeable lid. Amazon (affiliate link) has a three pack with color coded lids which would be great for sorting colored toothpicks.
Next, place toothpicks on the table and show the child how to pick up one at a time and drop them into the holes of the lid.
Use this basic activity in many ways:
Play pick up sticks
Roll a dice and pick up that many toothpicks. Drop them in the holes of the container.
Set a timer and place as many toothpicks in the holes as possible
Hide toothpicks in a sensory bin. Pull out a toothpick and drop them into the holes as they are found.
What other ways to use this toothpick container activity can you think of?
Talk about an easy set- up and great fine motor dexterity task…
Picking up those tooth picks from the table surface is perfect for a fine motor neat pincer grasp.
Putting them into the little holes of the container works on a tripod grasp and extended wrist.
Holding the container with the non-dominant hand is great for establishing a stabilizer hand (supporting the paper when writing).
More Toothpick Activities
STEM Towers: Challenge your child to build towers using toothpicks and marshmallows. There is power in fine motor STEM! This activity promotes precision and hand-eye coordination.
Pincer Grasp Practice: Encourage your child to pick up toothpicks using only the tips of their thumb and index finger in a neat pincer grasp. They can transfer toothpicks from one container to another, enhancing their fine motor control.
Build letters: Use toothpicks to shape letters of the alphabet. Your child can place the toothpicks on a flat surface to form letters, improving their finger dexterity and control.
Counting and Sorting: Have your child count and sort toothpicks into different groups based on length, color, or other criteria. This activity develops counting skills and promotes attention to detail. One way to expand this activity is to use a marker or paint to color the toothpicks or use (Amazon affiliate link) colored craft matchsticks.
Geometric Shapes: Challenge your child to create geometric shapes, such as squares, triangles, or hexagons, by connecting toothpicks. This activity sharpens spatial awareness and fosters creativity.
Playdough Poke: Make a playdough snake and then use the toothpicks to poke along the play dough. This threading exercise improves hand strength, hand-eye coordination, and fine motor control.
Toothpick Art: Encourage your child to create miniature sculptures or artwork using toothpicks. They can connect toothpicks with glue or build structures, allowing their creativity to flourish while refining their fine motor skills.
Sensory Play: Combine toothpicks with sensory materials like kinetic sand or rice. Your child can bury toothpicks in the material, dig them out, or create patterns and designs. This activity provides tactile stimulation and enhances finger strength.
Fine Motor Mazes: Draw or print mazes on paper and use toothpicks as a stylus to navigate through the maze. This activity strengthens hand control and precision movements.
Plus, you can use the toothpicks in the toothpick art found in our seasonal Fine Motor Kits:
Working on fine motor skills, visual perception, visual motor skills, sensory tolerance, handwriting, or scissor skills? Our Fine Motor Kits cover all of these areas and more.
Check out the seasonal Fine Motor Kits that kids love:
This cutting playdough activity is a fine motor hand strengthening activity that builds scissor skills, bilateral coordination, and more! We love using play dough snakes to target these skills, but in this blog post, we’re talking all things cutting playdough with scissors!
Cutting play Dough
By cutting playdough with scissors, you can quickly target several areas:
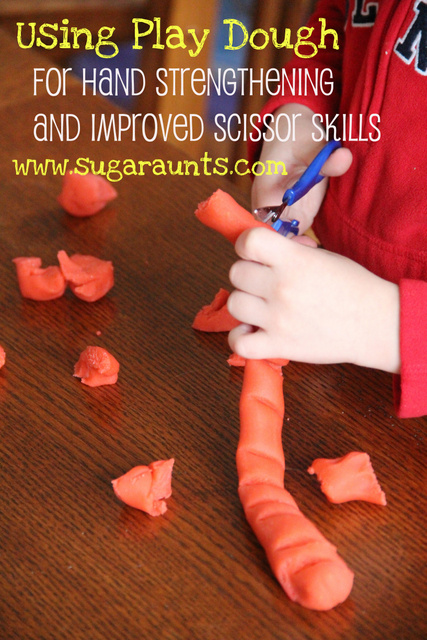
Little Guy is just learning how to hold the scissors, how to coordinate both hands together when cutting, how to open and shut the blades of the scissors to cut smooth lines, and how to stay on a line when cutting.
This little activity is perfect to work on all of those things.
Plus, he thought it was a ton of fun to Cut. Play Dough. With. Scissors.
First, roll out the play dough into a “play dough snake“…this is a perfect fine motor strengthening activity for little hands.
Mom, You then use the blades of the scissors to press lines into the “snake”.
Why cutting play dough?
The child will hold the play dough snake with his assisting (non-dominant hand). Using the helper hand in a coordinated manner can be tricky for the new cutter. A fun way to practice (like this activity) is a real confidence booster.
Holding the scissors in a vertical position is sometimes, a big part of the problem with accuracy of cutting paper along lines. Cutting the play dough snake usually will automatically correct a horizontal or diagonal position of the scissors. Practice will help to carry-over the positioning when cutting paper.
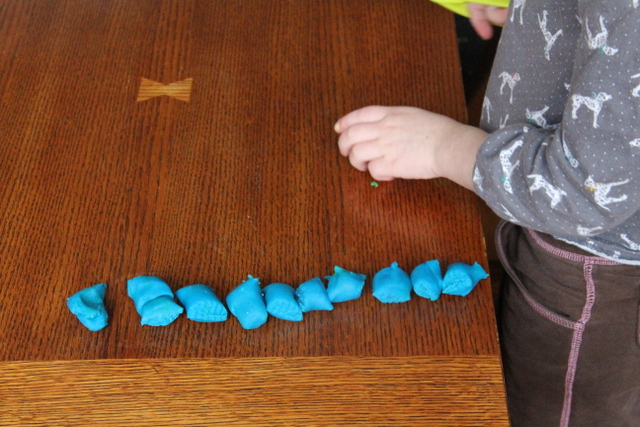
The nice wide and short lines in the play dough snake are great for practicing line awareness and the “open/shut” motion of the scissors when cutting. Plus, the slight resistance of the play dough really provides feedback to the child. We cover this in our post on graded precision.
Just be sure to do this activity with your child. This shouldn’t be an unsupervised activity…a little finger can get caught in the scissors easily.
This one looked like so much fun that Big Sister had to join in too 🙂
Expand the activity to cut play dough with scissors
One way to make this activity more difficult, or to add resistance to the playdough for greater hand strengthening is to freeze the play dough. Popping it in the freezer makes the dough more resistant, adding greater feedback through the hands.
More fine motor activities:
Working on fine motor skills, visual perception, visual motor skills, sensory tolerance, handwriting, or scissor skills? Our Fine Motor Kits cover all of these areas and more.
Check out the seasonal Fine Motor Kits that kids love:
Colleen Beck, OTR/L has been an occupational therapist since 2000, working in school-based, hand therapy, outpatient peds, EI, and SNF. Colleen created The OT Toolbox to inspire therapists, teachers, and parents with easy and fun tools to help children thrive. Read her story about going from an OT making $3/hour (after paying for kids’ childcare) to a full-time OT resource creator for millions of readers. Want to collaborate? Send an email to contact@theottoolbox.com.
The development of fine motor skills such as the pincer grasp is an important aspect of a baby’s growth and development. As a baby grows and gains more control over their movements, they begin to develop the ability to grasp objects with increasing precision. One of the most significant fine motor milestones in this journey is the emergence of the pincer grasp. This grasp enables babies to pick up small objects and use their fingers with greater finger dexterity, allowing them to explore their surroundings in new and exciting ways.
However, the functional use of a pincer grip doesn’t stop in babies and toddlers. Pincer grip use supports independent and manipulation of items with precision and dexterity and is an important part of fine motor work.
In this blog, we will delve deeper into the pincer grasp, exploring what it is, how it develops, and why it is such an important milestone for a baby’s growth and development.
Amazon affiliate links are included in this blog post. As an Amazon Influencer, I earn from qualifying purchases.
What is Pincer Grasp?
The pincer grasp is a significant hand grasp that enables one to pick up and manipulate items with the tips of the fingers and is used to manipulate items such as small pieces of cereal or other little items. When we manipulate objects between the pad of the thumb to the pad of the pointer finger (index finger), we are using pincer grasp.
Pincer grip is essential for babies who are beginning to explore self-feeding with finger foods and begins to develop with the raking motion of the hands used to grasp at items such as food or cereal pieces. The hand eye coordination progression builds from here.
The raking grasp motion we see in young babies is actually a prerequisite to facilitate a pincer grasp development as the motion supports strengthening and coordination with all of the fingers, allowing for development of finger isolation in the index finger and thumb.
With the pincer grasp, the baby can pick up small items between the tips of their index and thumb fingers and bring them to their mouth.
Pincer grip can be broken down into types:
Inferior pincer grasp- Also known as crude pincer grasp, or pad-to-pad grasp, the inferior pincer grasp uses the pads of the index and thumb to grasp objects.
Pincer grasp- Slight flexion of the DIP joint of the index finger and IP joint of the thumb results in a round thumb web space. This grasp component utilizes the tips of these fingers.
Neat pincer grasp- Also known as superior pincer grasp, Neat pincer grasp pulls the tips of the fingers in closer to the thumb web space and requires more flexion of the thumb IP joint and index finger DIP joint as well as flexion of the thumb MP joint and index PIP joint. Neat pincer grip is a more refined and dexterous grip used for extremely precise fine motor tasks such as picking up very small objects like a pin, thread, or sequin.
Development of Pincer Grasp
Pincer grip is one of the first dexterity skills to develop. The grasp pattern is a precision motor skill that emerges when a baby is between 8 to 10 months old and is guided by self-feeding and exploring objects through the primary sensory system at this young age: the mouth.
Inferior pincer grasp begins at 6-9 months. Before a true pincer grasp is established, you’ll notice a lateral pincer grasp, or an inferior pincer grasp. This progression begins as a raking motion from the fingers to grasp at the food pieces, but this movement is typically not successful in picking up small foods like baby puff snacks. The next stage of pincer grasp development progresses as the baby uses the lateral side of the index finger and the thumb to pick up small food pieces using the thumb and the side of the pointer finger to grasp items (not a true pincer grasp).
Pincer grasp develops around 9-12 months of age. This is when you see the baby pick up baby puffs and small chunks of food pieces to pick up the items with the thumb and the pad of the index finger.
Neat pincer grasp develops between 12-18 months and is a much finer skill. This is a common part of feeding developmental milestone achievement which allows babies to pick up and then feed themselves using that pincer grasp. This is when you will see babies pick up small crumbs from the carpet. Baby proofing takes on a whole new level once pincer grasp has developed!
Pincer Grasp Activities
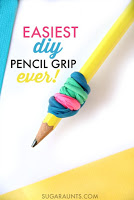
We can use play-based pincer grasp activities to support this development based on the child’s age, development of these motor skills build independence, too. This pincer grasp activity supports precision needed to manipulate a pencil.
Pincer grasp and neat pincer grasp are precision fine motor skills that develop when babies start to pick up cereal in self-feeding. The developmental skill is essential for development of fine motor skills and manipulation of toys and items in play and discovery.
Neat pincer grasp is used to pick up very small items such as perler beads, a thread from a surface, or a needle. You might see the tip-to-tip grasp to pick up a sequin or fuzz from clothing.
Think about the “ok” sign with the thumb and pointer finger touching and a nice round “O” in the thumb web space. That tip-to-tip pinch is neat pincer grasp.
If neat pincer grasp is not developed, kids can potentially present with less thumb IP joint flexion and difficulty opening the thumb web space when manipulating very small items. This can lead to fumbling and decreased dexterity during fine motor tasks.
This post contains affiliate links.
Neat Pincer Grasp Activities
Neat pincer grasp uses the tips of the thumb and pointer finger to stabilize objects. When using a pincer grasp, children use the pads of the thumb and finger to stabilize the object.
In the Fine Motor Kits here on our website, you’ll find many precision activities that support development of pincer grasp. Specifically, there are tearing activities, crumbling activities, pinch activities, and other hand strengthening activities using themed fine motor activities.
Working on fine motor skills, visual perception, visual motor skills, sensory tolerance, handwriting, or scissor skills? Our Fine Motor Kits cover all of these areas and more.
Check out the seasonal Fine Motor Kits that kids love:
Colleen Beck, OTR/L has been an occupational therapist since 2000, working in school-based, hand therapy, outpatient peds, EI, and SNF. Colleen created The OT Toolbox to inspire therapists, teachers, and parents with easy and fun tools to help children thrive. Read her story about going from an OT making $3/hour (after paying for kids’ childcare) to a full-time OT resource creator for millions of readers. Want to collaborate? Send an email to contact@theottoolbox.com.
In celebration of Occupational Therapy Month, we’ve got a series of free OT PDFs and these occupational therapy coloring pages will get you started with the OT fun. April is Occupational Therapy Month! Not only is it a month to celebrate the occupational therapists in your life, but to advocate for our profession. Raise your hand if you have been asked, “what the heck is occupational therapy?” This question comes from adults as much as children. This spring, in celebration of OT month, the OT Toolbox will be offering a series of resources to help educate young learners about the role of occupational therapy. These therapy coloring pages will make advocating for the profession fun AND engaging as users build motor skills!
Today’s resource is occupational therapy coloring pages to start the journey towards advocacy and education.
Therapy Coloring Pages
We wanted to create a set of therapy coloring pages that are as useful as a therapy coloring tool as they are useful for advocating for the profession of occupational therapy. OT professionals know the value of an engaging activity on developing and refining skills in their clients, and these therapy coloring pages do just that! Each therapy coloring sheet includes images of OT equipment which users can color while also learning about the value of OT in supporting client needs.
A therapeutic coloring page is a tool for therapy providers to use with clients because the OT practitioner can target goal areas such as:
Fine Motor Skills
Hand Strength
Visual Motor Skills
Eye-Hand Coordination
Force Modulation (color this item light red and this other therapy picture dark red)
More!
Then, when the therapy coloring sheet is completed, the pictures are great to hang on a bulletin board, door, or hallway and advocate for the powerful nature of occupational therapy!
It is important for people to know who we are and what we do, so they can ask for help when needed, and see that what we do matters. A persons’ occupation is their job. Also known as functional skills, occupations are the day to day tasks we do all day long. Occupations go beyond the workplace.
A child’s occupation is to learn to care for themselves, go to school, play, and develop social skills. An adult’s occupation entails self care skills, social function, caring for others, instrumental activities of daily living (cooking, cleaning, laundry, fixing the car, etc.) along with any work functions they have.
Occupational therapy (OT) helps bridge the gap between where the learner currently is functioning, and independence. For children we might say we bridge the gap between functional and chronological age.
OT might be restorative, or teach new skills. OTs can be found in schools, hospitals, clinics, rehabilitation centers, daycares, home therapy and many other places.
Add these occupational therapy coloring pages to your OT month awareness packet!
Occupational Therapy Coloring Pages
OTs use some fun toys!
Younger learners, especially in schools, have seen many tools therapists use to help their students. These range from fidgets, swings, trampolines, alternative seating, slant boards, pencil grips, and more.
Some often wonder why our learner gets to play with the OT, and get fidget toys to use in class.
Using these occupational therapy coloring pages will help start the conversation about what these tools are, and how they are used. Share these OT coloring pages both with the learners on your caseload, as well as the other students in the school.
While it is true we use some fun toys in therapy, these are tools for the learners who need them. Occupational Therapy for young learners is play based.
This is because the role of the young learner is to play. You will notice that the learner who NEEDS the fidget or other adaptations will use it appropriately as a tool to help them get organized, while the neurotypical student tends to use it as a toy.
Use these occupational therapy coloring pages to talk about what each piece of therapy equipment does for the learner.
Beyond educating others about our amazing profession, great skills are being addressed with these coloring worksheets:
Hand strength and dexterity – coloring inside the lines builds hand muscles and develops muscle control.
Visual motor skills –Combining what is seen visually and what is written motorically. It takes coordination to be able to translate information from visual input to motor output. Coloring, drawing, counting, cutting, and tracing are some visual motor skills.
Visual Perception – Developing figure ground to see where one item starts and finishes, scanning to find all items to color, and recognizing the border lines while coloring.
Proprioception – pressure on paper, grip on pencil
Social/Executive Function – Following directions, turn taking, task completion, orienting to details, neatness, multi-tasking, attending to task, and impulse control can be addressed using these occupational therapy coloring pages PDF.
Fine motor strengthening, hand development, and grasping pattern
Bilateral coordination – remembering to use their “helper hand” to hold the paper while writing. Using one hand for a dominant hand instead of switching back and forth is encouraged once a child is in grade school or demonstrates a significant strength in one or the other.
Strength – core strength, shoulder and wrist stability, head control, balance, and hand strength are all needed for upright sitting posture and writing tasks.
April is also Disability Awareness month. This is a great opportunity to talk about different disabilities, while addressing the tools used to help people. How can you incorporate both of these important awareness months into a teachable moment?
While pediatric occupational therapists do have a lot of fun at our jobs, we are also providing an amazing service to the people we work with. Advocacy for our profession is so important.
With the push to integrate young people with special needs into the mainstream classroom, teachers are finding it more difficult to educate everyone at the same time. Our role as an occupational therapist is to help learners become more independent, provide tools and suggestions to classroom teachers to make their job easier, and help them identify which learners might be struggling.
The OT Toolbox is full of amazing resources for therapists, teachers, parents, and learners of all ages. This post shares what occupational therapy is all about and what tools are needed to make life easier. Stay tuned for more occupational therapy month activities during April.
Free OT Coloring Pages
Want to add these resources to your occupational therapy toolbox? Enter your email address below to grab these printable PDF coloring sheets. These materials are also available in the OT Toolbox Member’s Club!
Level one members will have the opportunity to sign up for and download five different occupational therapy month activities. Level two members will have access to all of these plus the larger collection of OT themed materials.
Want to add this resource to your therapy toolbox so you can help kids thrive? Enter your email into the form below to access this printable tool.
This resource is just one of the many tools available in The OT Toolbox Member’s Club. Each month, members get instant access to downloadable activities, handouts, worksheets, and printable tools to support development. Members can log into their dashboard and access all of our free downloads in one place. Plus, you’ll find exclusive materials and premium level materials.
Level 1 members gain instant access to all of the downloads available on the site, without enter your email each time PLUS exclusive new resources each month.
Level 2 members get access to all of our downloads, exclusive new resources each month, PLUS additional, premium content each month: therapy kits, screening tools, games, therapy packets, and much more. AND, level 2 members get ad-free content across the entire OT Toolbox website.
Victoria Wood, OTR/L is a contributor to The OT Toolbox and has been providing Occupational Therapy treatment in pediatrics for more than 25 years. She has practiced in hospital settings (inpatient, outpatient, NICU, PICU), school systems, and outpatient clinics in several states. She has treated hundreds of children with various sensory processing dysfunction in the areas of behavior, gross/fine motor skills, social skills and self-care. Ms. Wood has also been a featured speaker at seminars, webinars, and school staff development training. She is the author of Seeing your Home and Community with Sensory Eyes.
NOTE*The term, “learner” is used throughout this post for readability and inclusion. This information is relevant for students, patients, clients, preschoolers, kids/children of all ages and stages or whomever could benefit from these resources. The term “they” is used instead of he/she to be inclusive.
Summer is a time when we sometimes need to alter our sensory processing input options. In this blog post, we’ve updated the information to include Summer themed sensory play activities parents can use at home. We also wanted to include ideas for educators and therapy providers running Summer school classrooms or Summer camps. This includes…
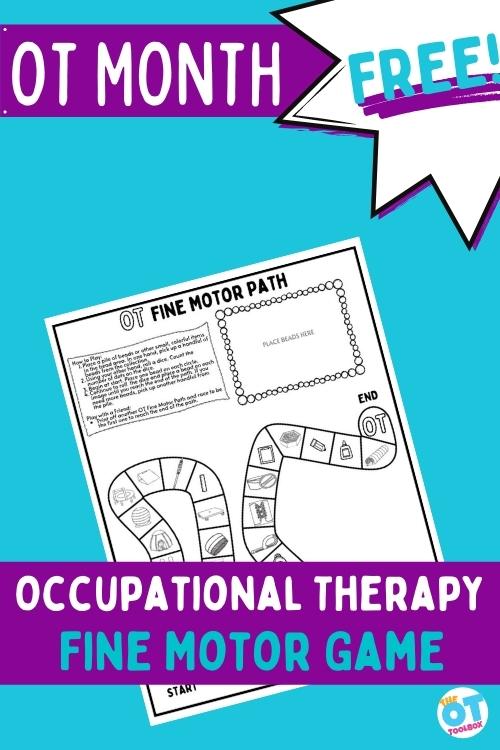
Today, we’ve got a fun occupational therapy fine motor game up for grabs in our series on OT month free downloads. In case you missed the memo, April is occupational therapy month! An entire month dedicated to you, the amazing occupational therapist.
Ready to add a new OT themed PDF tool to your toolbox?
Occupational Therapy Fine Motor Game
Looking for an occupational therapy fine motor game you can print off and target several skills, making one game applicable to your whole caseload? This printable fine motor game does just that. Plus, this OT game printable is perfect for promoting the profession of occupational therapy at the same time!
What makes us amazing?
We focus on the most important skills. Physical therapists might teach people to walk, but I would like to be able to put clothes on if I am going for a walk, or open the refrigerator once I get where I am going! Speech therapists work on speaking and language, but who am I going to talk to if I can’t make friends?
Occupational Therapists (OTs) often get overlooked because people have no idea what we do. What we do makes the MOST impact on people’s lives. Use this month to advocate for the OT profession. Use tools found on the American Occupational Therapy Association (AOTA) website, or highlighted here at the OT Toolbox. The OT Toolbox is rolling out several great activities such as this Occupational Therapy Fine Motor Game to teach others what we do.
The occupational therapy fine motor game is more than just a fun game. It is a tool to work on several skills, while providing a conversation starter to explain what we do, and how we do it.
WHAT SKILLS DOES THE OCCUPATIONAL THERAPY FINE MOTOR GAME BUILD?
Hand strength and dexterity – picking up and placing the beads one at a time builds coordination and the intrinsic muscles of the hands. Rolling the dice builds dexterity also
Visual motor skills –Combining what is seen visually and what is done motorically
Visual Perception – Developing figure ground to see where one item starts and finishes, scanning to follow the path, visual sequencing to follow the pattern, and visual memory to remember the number on the dice while counting the items
Proprioception – feedback from the muscles and joints to roll the dice, and grasp/release the beads onto the correct squares
Counting/Learning Numbers – Count the number on the dice to understand number concepts in addition to picking up and placing the correct number of beads
Executive Function – Following directions, task completion, orienting to details, multi-tasking, attending to task, and impulse control can be addressed using this occupational therapy fine motor game
Coloring – if you choose to have your students color the page first, this builds visual motor skills, along with neatness, accuracy, and attention to details.
Bilateral coordination – remembering to use their “helper hand” to hold the paper while playing. Using one hand for a dominant hand instead of switching back and forth, is encouraged once a child is in grade school, or demonstrates a significant strength in one or the other.
Strength – core strength, shoulder and wrist stability, head control, balance, and hand strength are all needed for upright sitting posture and writing tasks.
How to Use this OT fine motor game in therapy sessions
This game not only develops the underlying skills mentioned above, but there are so many ways to grade this activity and to use it to work on the level that the child or individual is at to challenge and develop skills.
Other tips and tricks to play the occupational therapy fine motor game:
Lowest level learners can use larger items than beads such as pompoms, coins, buttons, or marshmallows
Middle level learners can write the words they see on the game board
Higher level learners can write an idea about the therapy tools in the game. This turns into a multilevel activity. They can also draw about their ideas, or copy the designs.
Laminate the page for reusability. This saves on resources, and many learners love to write with markers! Note: some children love to use wipe off sheets, while others become upset that they can not take their work with them.
Make this part of a larger lesson plan including gross motor, sensory, social, executive function, or other fine motor skills
Vary the size of the items to be picked up. Swap out the dice for a spinner for a different fine motor experience
Talk about the items on the board, describe their characteristics, and give context clues to help your learner understand why they help students learn
Two students can play against each other in a head to head competition. This adds a social element to game play
More or less prompting may be needed to grade the activity to make it easier or harder.
More advanced learners can work on social skills by teaching beginners to play
Learners can explore other games they could make using this activity
Occupational therapy, especially with younger learners, is all about play. That is the occupation of a child.
Use activities like the occupational therapy fine motor game, to build a conversation about how the tools we use help other people learn.
Observations to make with this OT fine motor game PDF
While there are many skills being addressed with a single game like this one, we’ll cover the example of using the OT fine motor game to focus on the development of in-hand manipulation skills. Let’s go over some of the observations we can make while playing this fine motor game with a child.
Because this is more than just a game, think about what you are looking for while building in-hand manipulation:
In-hand manipulation observations:
Can your student pick up the beads one at a time without using a raking grasp or sliding them off of the table?
How many items can your student hold at once without dropping some?
Can your student move the items from the palm of their hand to their finger tips to get them out, or do they drop the beads by opening their fingers?
How many times do you need to repeat the directions so your student can follow them?
How many reminders does your student need while doing this activity?
What is your student’s frustration tolerance when they have to start over?
Is there any cheating or cutting corners going on? There always is.
All of these game observations can be monitored and documented to monitory for progression of skills.
As an added idea, try these games with paper clips using a single item (a great therapy bag addition) to support precision skills and refined motor planning.
Occupational Therapy is a growing profession. Unfortunately there are more and more people needing our services every day. The good news is we are here to help people gain or regain vital skills for independence.
Free OT Fine Motor Game
Want to add this resource to your therapy toolbox so you can help kids thrive? Enter your email into the form below to access this printable tool.
This resource is just one of the many tools available in The OT Toolbox Member’s Club. Each month, members get instant access to downloadable activities, handouts, worksheets, and printable tools to support development. Members can log into their dashboard and access all of our free downloads in one place. Plus, you’ll find exclusive materials and premium level materials.
Level 1 members gain instant access to all of the downloads available on the site, without enter your email each time PLUS exclusive new resources each month.
Level 2 members get access to all of our downloads, exclusive new resources each month, PLUS additional, premium content each month: therapy kits, screening tools, games, therapy packets, and much more. AND, level 2 members get ad-free content across the entire OT Toolbox website.
This month the OT Toolbox is highlighting occupational therapy month by providing insight into what occupational therapists do, along with offering FREE resources to add to your lesson plans. Keep an eye out for more posts from this series, including:
Victoria Wood, OTR/L is a contributor to The OT Toolbox and has been providing Occupational Therapy treatment in pediatrics for more than 25 years. She has practiced in hospital settings (inpatient, outpatient, NICU, PICU), school systems, and outpatient clinics in several states. She has treated hundreds of children with various sensory processing dysfunction in the areas of behavior, gross/fine motor skills, social skills and self-care. Ms. Wood has also been a featured speaker at seminars, webinars, and school staff development training. She is the author of Seeing your Home and Community with Sensory Eyes.
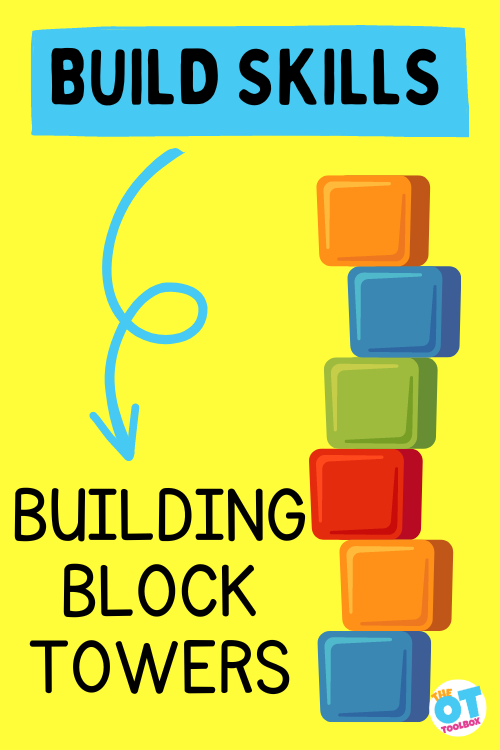
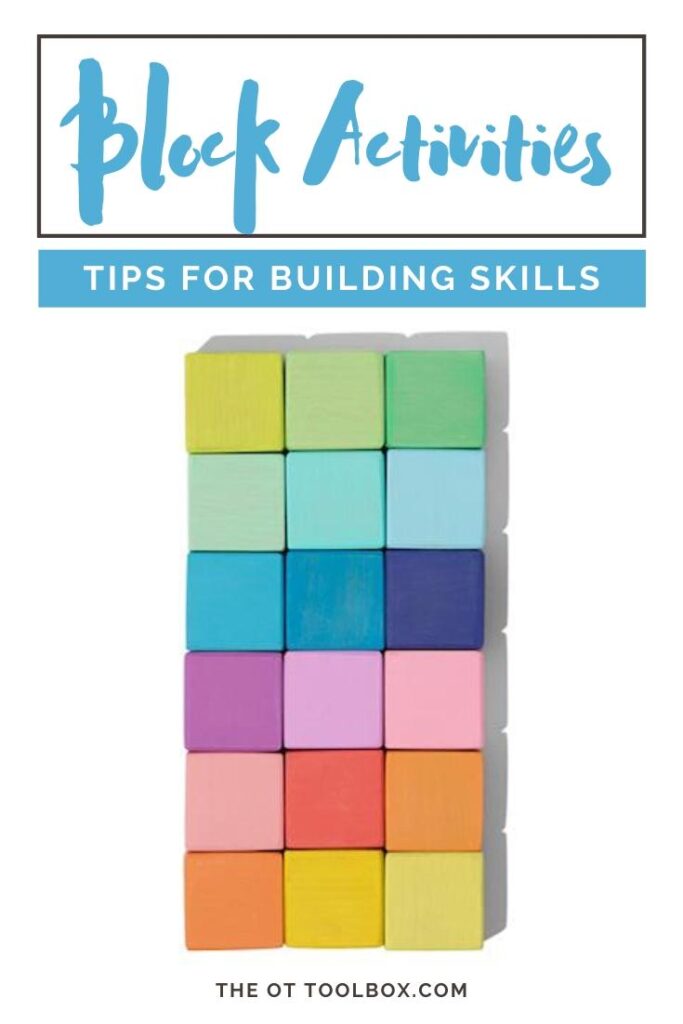
Building block activities like building block towers, and stacking blocks support development of many skills for young children. Development occurs through play and play is the job of the child. By using creative block activities in play, children can thrive in their skill development. We’ve shared specifics on fine motor skills using blocks, however, the skill-building doesn’t stop there. Here, we’ll discuss how and why building with blocks is so powerful in development of kids. We’re covering all things building block activities and exactly HOW to maximize skills like fine motor skills, visual perception, and even social emotional skills…all with toy blocks!
Most of us have strolled through the toy aisle and found a set of building blocks for kids. Building blocks come in different sizes, colors, shapes, and even patterns. Did you know, however, that despite building block activities being one powerful way to build skills, that most sets are not played with once they are in the home?
That’s right…most of the time, those building block sets just sit they’re collecting dust. Today, we’re talking all about how to use building sets with kids to build skills!
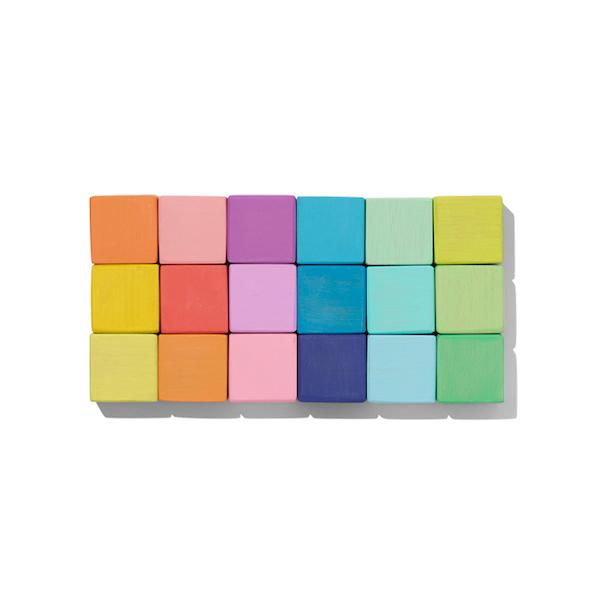
The block set in this picture is our set of Lovevery blocks.
what type of skill is building towers of blocks or stacking blocks?
Toy blocks a are classic toy…and there is good reason. When kids build towers with blocks they are developing skills through play. Knocking blocks over is another set of skills, and stacking blocks to create shapes or forms (a train made from a handful of blocks, for example) is another set of skills. They are all related, however, and together, building towers with blocks results in powerful underlying skills that children can use in later years.
Research tells us that early experiences with blocks stimulate the development of spatial language, cognitive, and problem-solving skills. All of these are the literal building blocks for higher level tasks like reading, writing, executive functioning, math, and communication skills.
We talked previously about the connection between fine motor skills and math. Building blocks are a literal building block to math skills.
There’s more. By building with blocks, kids are establishing concepts of cause and effect (that tower falls down if I build it too high), reasoning (I need to place the blocks flat on each other so they don’t topple over), and creativity, self-esteem, fine motor STEM concepts, early math, language, and motor planning. Wow!
Let’s break this down further.
Building a tower with blocks
When a child builds a tower with blocks, there are several motor and cognitive skills at play:
Gross motor strength and core stability/strength (placing a block on a stack requires posture and positioning, especially as the tower gets taller)
Fine motor precision and graded release, or force modulation- It takes a gentle hand to place a block on a tower with precision and manual dexterity.
Knocking a tower over
Every baby, toddler, and preschooler knows the fun of knocking over a stack of blocks, particularly when it’s a sibling or friend’s tower! What’s happening here?
Emotional practice- when another child’s tower is knocked over, there is sure to be an emotional response. This is not always a malicious act on the part of the tower-knocker! It is a repetition in what will happen however. We see facial expressions, emotions, and outbursts. This can be a good opportunity for problem solving, age-appropriate emotional regulation, personal space, body awareness, force modulation, and language skills.
Building things with blocks
Taking the block tower a step further, we can see more development and precision when creating shapes and forms with blocks. This is another set of skills that are expanded upon:
Today, we are discussing the various ways to play with blocks that build more than wooden buildings…blocks build skills!
Block Activities for Toddlers
For the young child, presenting kids with just a jew blocks is the key to avoiding overwhelm. The nice thing about a variety set of blocks is that the various blocks can be used in different ways while working various skill areas.
During toddler play, young children develop many areas that impact functional skills and independence.
Try these block activities for toddlers to support development of skills. We used the Lovevery block set for these activity ideas.
Sorting Shapes Block Activity– By sorting the colors and shapes of blocks, they are working on so many skills. Visual perceptual skill development begins at a young and age, including the ability to visually discriminate. We know that young babies are able to visually differentiate their mother from another female adult by visual assessment. The same skill can be used and honed with toy blocks
Use a small set of blocks and ask the child to pile clocks into sets according to color or shape. You would be surprised at a young child’s sorting ability and visual discrimination skills.
Sorting block shapes occurs around 15 months and at that time, a shape sorter is the perfect tool for encouraging matching. Visual discrimination skills will improve over the toddler years as your little one begins to recognize differences in shapes such as triangles and pentagons.
Sorting blocks is a literal building block for visual perceptual skills, math skills and executive functioning skills.
Pretend Play Block Activities– Children can use blocks as pretend play items as they interact with adults or other children. Giving blocks a name and a voice offers opportunities act out scenarios, express needs and wants, and practice communication.
By using blocks as pretend people, cars, trains, and animals, toddlers and preschoolers experiment with imagination and creativity. This is the beginning of social emotional skills.
Show your little one how they can set up a little family with the blocks as they talk to each other in words and phrases that your child knows. What a great way to work on communication and language.
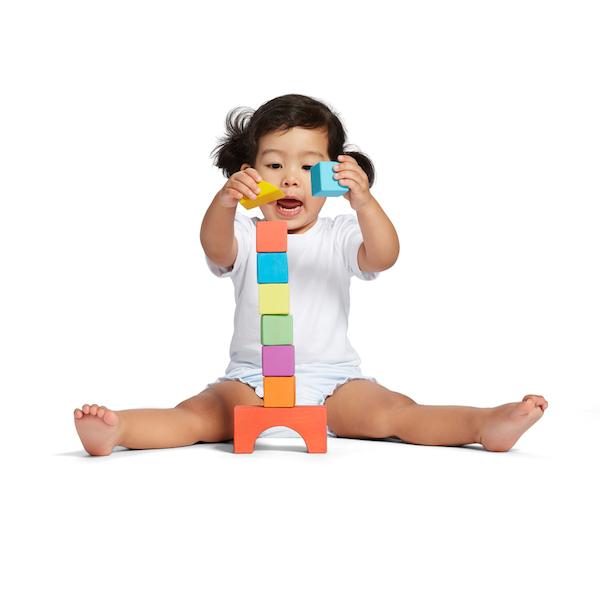
Building Activities- The sky is the limit when it comes to building with blocks. You can show a young toddler how to stack two blocks while the develop the fine motor precision and refined grasp to place blocks and releasing their hand without knocking over the blocks.
Show your little one how to stack one or two blocks with specific colors. By asking them to copy your block form, not only are they working on fine motor skills, they are also building visual perceptual and visual motor skills.
Use Blocks to Make Patterns- Building on the copying skills mentioned above, using blocks to copy and create patterns is an exercise in early visual motor skills, visual perception, and fine motor skills.
It’s also a fun way to introduce early math concepts. Little ones can copy and create patterns using different sizes, shapes, and colors of blocks.
Start out by creating a simple pattern with an AB pattern of blocks. Preschool children can use blocks to create ABB and ABC patterns too.
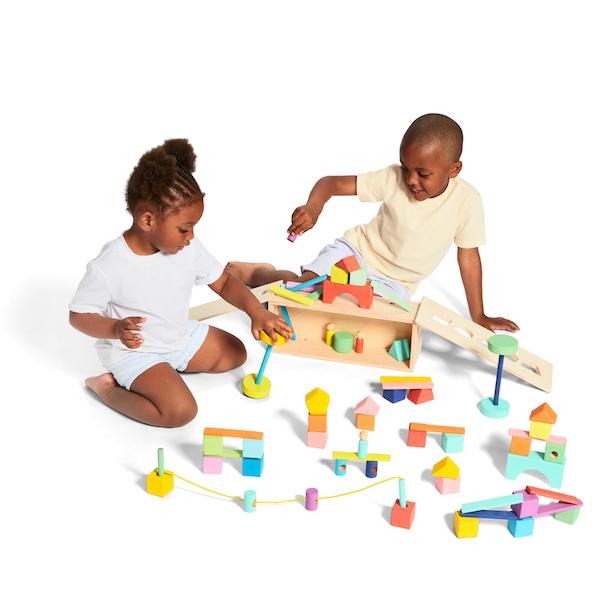
Gross Motor Skills with Blocks- Just because using blocks with preschoolers is a fun fine motor activity, there’s no reason to leave out the gross motor skill development. Use a small wagon, or create a pulling system to help kids with pushing, and moving the whole body while moving blocks from one place to another.
There is a reason why toddlers and preschoolers love to move their toys around in bags or carts…the proprioceptive input that they achieve by pushing or pulling a cart full of toys provides much needed sensory input that helps them organize and calm their bodies. Pretty cool, right?
Another gross motor coordination activity with blocks is a pretty simple one to set up. Use blocks to create obstacle courses, paths, and games. Kids can animal walk from block to block, tip toe between block paths, or transport blocks one by one in a relay race. Block play is so open-ended and can meet any child’s needs.
Build Letters with Blocks- Block activities for preschoolers can involve building and making letters. Letter recognition begins around 24-36 months and during that time is a great way to teach letter identification.
Use building blocks to help kids trace letters using a finger. Point out how the letters are formed and you can even build those letters higher with another layer. Here is information on how to build letters with correct formation.
Stack and Knock Over- Building towers with blocks or a trail of dominos is one way to help kids better understand STEM concepts, cause and effect, and problem solving.
Ask your little one how they can make one block fall over by using another. See if they can figure out how far apart to place blocks to make them push one another over in a row of “dominos”. It’s a fantastic exercise in eye-hand coordination.
Building Borders- Use about 10-20 blocks to create small squares and rectangles to form a border or home for small toys, dolls, or other small toys. By creating a “home” for their toys, children can work on shape identification as well as various skills: eye-hand coordination, visual motor skills, fine motor skills, precision of grasp and release, bilateral coordination, and crossing midline.
Take the house building up a notch by adding layers to the walls. Children can begin to stack blocks and attempt to create higher walls without knocking them over.
Amazon links included below.
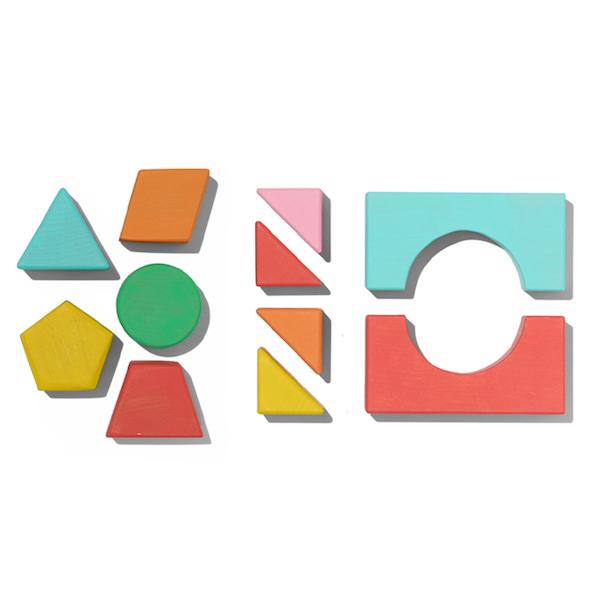
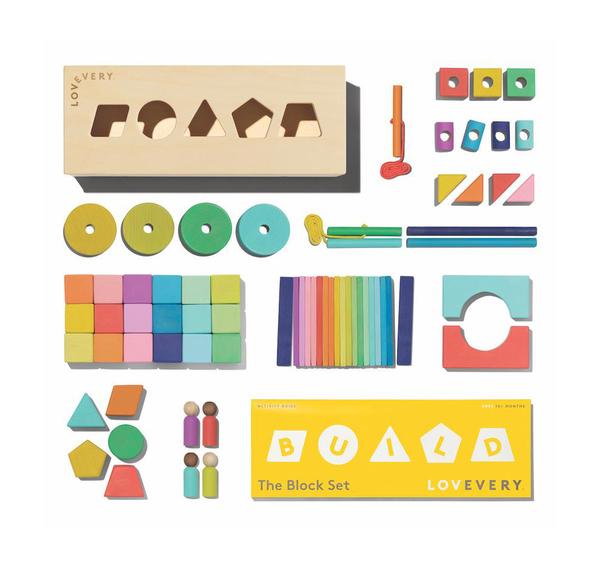
Lovevery Blocks are a new product created by the folks at Lovevery. The 70 piece set is valued at $90.00 and is perfect for kids aged 12-48+ months (and higher! My big kids are loving this set right now!)
Lovevery has thought of your child as they grow. The set includes an activity guide with over 20 block activities designed to build learning and developmental skills as they grow. These are beautifully made blocks that will grow with your child.
70 wood pieces in a rainbow of 18 different hues
18 different shapes and tools
Activity guide with block play ideas to promote skills like visual perception, eye-hand coordination, fine motor skills, gross motor skills, and more
Arrives in a wooden storage box that converts into a pull car
Drawstring cotton bag for flexible storage
Solid wood blocks made of sustainably harvested FSC-certified wood
Water-based non-toxic paint and finishes
Block Activities and Ideas
Also, check out these other toy suggestions based on therapeutic development through play.
Working on fine motor skills, visual perception, visual motor skills, sensory tolerance, handwriting, or scissor skills? Our Fine Motor Kits cover all of these areas and more.
Check out the seasonal Fine Motor Kits that kids love:
Colleen Beck, OTR/L has been an occupational therapist since 2000, working in school-based, hand therapy, outpatient peds, EI, and SNF. Colleen created The OT Toolbox to inspire therapists, teachers, and parents with easy and fun tools to help children thrive. Read her story about going from an OT making $3/hour (after paying for kids’ childcare) to a full-time OT resource creator for millions of readers. Want to collaborate? Send an email to contact@theottoolbox.com.
Sorting colors is a big deal. Young learners in the toddler and preschool stage start out by sorting items such as blocks, plastic animals, coins, or colored items. Later in child development, sorting colors morphs into sorting silverware, matching socks, organizing drawers, or filing papers to name a few life skills. This is all part of child development in color recognition.
Sorting by color is an important skill for organizing items into categories to make sense of them, or for ease of locating them later. It is far easier to find a pair of socks in a drawer when they are matched together rather than in a large multi-colored pile. But what developmental skills are required for sorting colors? How can you support this essential skill?
Sorting Colors
First, let’s break down what we mean by sorting colors…
Sorting by color can refer to anything from colored blocks to silverware does not involve being able to name the item.
Developmentally, a young learner does not need to know their colors in order to sort. They are arranging the items according to their properties. You could sort foreign coins into their respective piles without any idea what they are. By participating in sorting color activities, the young child obtains hands-on practice in several areas of development:
Hopefully as your learner continues to sort items, they may start recognizing the qualities of each item. This can include shade, or color, shape, form, number, etc.
Sorting Colors Development
As with many skills, there is a hierarchy of learning to sorting tasks. Young children develop these skills through hands-on play and by playing with toys.
Development of color sorting progresses through these stages:
Grouping items that are exactly the same. Examples; colored plastic bears, blocks that are all the same size, coins, pompoms
Sorting items that are similar: different brands of socks in similar colors, silverware in varying sizes, towels, a bag of buttons
Sorting items that are similar AND different: sorting items by the color red, that are all different items. Sorting socks that are all different sizes, shapes, weights, and colors. Sorting items by colors that vary (five different shades of red).
Sorting items that have more than one category This stage of development progresses to categorizing objects that can be sorted such as a pile of paper to file. In this case there needs to be one similar quality selected first in order to sort, such as putting all the medical bills together, sorting by date, alphabetizing the papers. The last stage is where we may see challenges impacted by working memory. Those struggling with development of executive functioning skills can be limited in sorting objects in various categories, particularly when a background is busy such as a messy desk, cluttered locker, or home.
Sorting by color is not the easiest way to sort. When there are multiple items that are similar such as 100 colored plastic balls, your learner may not recognize these as different items. They see balls first, not colors. Try sorting very different items first. Example: 5 identical buttons, 3 towels, 4 pencils, and 6 spoons.
Color Sorting and Visual Perception
Sorting involves recognizing an item’s properties, but also visual perception. Through development of these skills, children move from thinking through the sorting of colors to visual efficiency which allows for automaticity in tasks.
Below are some thought processes that integrate color sorting with visual perceptual skills:
Figure ground lets the “perceiver” see the items as part to a whole,
Form constancy recognizes that two balls of different colors are still balls. or two shades of red are still red.
Visual discrimination allows the learner to tell difference between items.
Visual memory is the ability to remember what is seen as the eyes are scanning the items
Color Sorting Teaches Mental Flexibility
When teaching sorting, teach mental flexibility. Sort many different items in many different ways. Sort by, color, size, similarity, quality (4 legged animals), texture, weight, or two qualities.
Sort the same items two different ways. First sort the plastic fruit and veggies (affiliate link) into color, then sort by type. Later your learner can sort by larger categories such as fruits versus vegetables.
Color Sorting and Functional Tasks
Why do some people have difficulty organizing and cleaning up?
Sometimes a large task seems very overwhelming, therefore shut down and refusal tends to occur. The most effective way to combat this is to teach sorting and categorizing. Go into your child’s messy room and look for the categories.
Books all over the floor
Dirty clothes everywhere
Papers and trash scattered around
9 dishes and plates
29 stuffed animals
84 hair clips
64 crayons
Now this task seems much more manageable. I often had to solve this dilemma with my younger daughter.
What other, more complicated ways could she organize this messy room?
Sorting the books into genre, size, type, or alphabetizing
Organizing the dirty clothes into whites and colors
Determining trash versus recyclables
Crayons may be part of the “school supplies” category
Hair accessories or toys might be a larger category
How would you tackle this chore?
Sort into the larger category first such as books, then sort into their subcategories?
Sort into subcategories such as stuffed animals, games, action figures, puzzles, then group into toys?
There is no wrong answer depending on how your brain works. Actually the only wrong answer is not getting started or having a meltdown.
When working on basic sorting colors, and feeling it is futile or pointless, think about the bigger picture. A person who can put their laundry, silverware, and toys away will be more independent than one who can not.
Color Sorting Activities
So, are you wondering about a fun way to build development in this area? We’ve got plenty of ideas.
The OT Toolbox has a great resource for teaching sorting using everyday items.
Amazon has tons of toys and games for sorting! (affiliate link) Don’t limit yourself to store bought items though. Your kitchen, bathroom, junk drawers, and desk are filled with items that can be grouped and sorted.
Color sorting activities can include ideas such as:
Sorting colored circles (cut out circles from construction paper)
Sort different objects by color and drop them into baskets or bowls
Use color sorting activities along with a scavenger hunt. This color scavenger hunt is one fun idea.
Cut out cardboard shapes and sort by color or shape. This cardboard tangram activity is an easy way to make shapes in different colors.
Sort colored markers or crayons
Laminate a piece of construction paper and use it as a play mat. Sort different colored craft pom poms or other objects onto the correct mat.
Print out color words and sort them along with small objects. The Colors Handwriting Kit has these color words and other printable activities for playing with color.
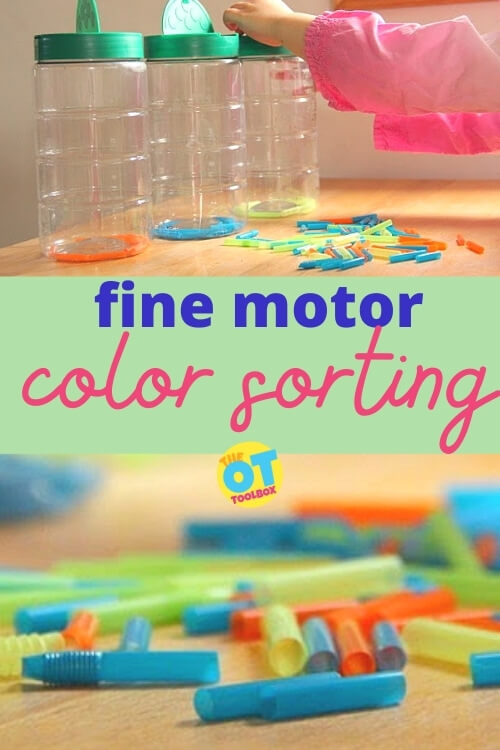
This color sorting activity is a powerful fine motor activity and a super easy way to learn and play for toddlers and preschoolers. We’ve done plenty of activities to work on fine motor skills in kids. This straw activity is the type that is a huge hit in our house…it’s cheap, easy, and fun! (a bonus for kids and mom!)
A handful of straws and a few recycled grated cheese container are all that are needed for tripod grasp, scissor skills, color naming, and sorting.
SO much learning is happening with color sorting!
Fine Motor Color Sorting Activity with Straws
This color sorting activity is a powerful fine motor activity and a super easy way to learn and play for toddlers and preschoolers. We’ve done plenty of activities to work on fine motor skills in kids. This straw activity is the type that is a huge hit in our house…it’s cheap, easy, and fun! (a bonus for kids and mom!) A handful of straws and a few recycled grated cheese container are all that are needed for tripod grasp, scissor skills, color naming, and sorting.
This color sorting activity is great for toddlers and preschools because it helps to develop many of the fine motor skills that they need for function.
I had Baby Girl (age 2 and a half) do this activity and she LOVED it. Now, many toddlers are exploring textures of small objects with their mouths. If you have a little one who puts things in their mouth during play, this may not be the activity for you. That’s ok. If it doesn’t work right now, put it away and pull it out in a few months.
Always keep a close eye on your little ones during fine motor play and use your judgment with activities that work best for your child. Many school teachers read our blog and definitely, if there are rules about choking hazards in your classroom, don’t do this one with the 2 or 3 year olds.
You can adjust this color sorting activity to use other materials besides straws, too. Try using whole straws, pipe cleaners, colored craft sticks, or other objects that are safe for larger groups of Toddlers.
We started out with a handful of colored straws. These are a dollar store purchase and we only used a few of the hundred or so in the pack…starting out cheap…this activity is going well so far!
Cutting the straws is a neat way to explore the “open-shut” motion of the scissors to cut the straw pieces. Baby Girl liked the effect of cutting straws. Flying straw bits= hilarious!
If you’re not up for chasing bits and pieces of straws around the room or would rather not dodge flying straw pieces as they are cut, do this in a bin or bag. Much easier on the eyes 😉
Once our straws were cut into little pieces and ready for playing, I pulled out a few recycled grated cheese containers. (Recycled container= free…activity going well still!) We started with just one container out on the table and Baby Girl dropped the straw pieces into the holes.
By repeating the task with multiple repetitions, kids develop skills in visual attention and visual memory. These visual processing skills are necessary for reading and math tasks.
The ability to recall differences in objects builds working memory too, ask kids remember where specific colors go or the place where they should sort them.
These sorting skills come into play in more advanced learning tasks as they classify objects, numbers, letters, etc.
And, when children sort items by color, they are building What a great fine motor task this was for little hands! Sorting straws into a container with small holes, like our activity, requires a tripod grasp to insert the straws into the small holes of the grated cheese container.
Sorting items like cut up straws helps preschoolers and toddlers develop skills such as:
Fine motor skills (needed for pencil grasp, scissor use, turning pages, etc.)
Hand strength (needed for endurance in coloring, cutting, etc.)
Visual discrimination (needed to determine differences in letters, shapes, and numbers)
Visual attention
Visual discrimination
Visual perceptual skills
Left Right discrimination (needed for handwriting, fine motor tasks)
Counting
Patterning
Classification skills
Preschoolers can get a lot of learning (colors, patterns, sorting, counting) from this activity too. Have them count as they put the pieces in, do a pattern with the colored straws, sort from smallest to biggest pieces and put them in the container in order…the possibilities are endless!
Color Sorting Activity with Straws
Once she got a little tired of the activity, I let it sit out on the table for a while with two more containers added. I started dropping in colored straw pieces into the containers and sorted them by color.
Baby Girl picked right up on that and got into the activity again. This lasted for a long time. We kept this out all day and she even wanted to invite her cousin over to play with us. So we did! This was a hit with the toddlers and Little Guy when he came home from preschool. Easy, cheap, and fun. I’ll take it!
Looking for more fun ways to work on color sorting?
You’ll find more activities to build hand strength, coordination, and dexterity in this resource on Fine Motor Skills.
Colleen Beck, OTR/L has been an occupational therapist since 2000, working in school-based, hand therapy, outpatient peds, EI, and SNF. Colleen created The OT Toolbox to inspire therapists, teachers, and parents with easy and fun tools to help children thrive. Read her story about going from an OT making $3/hour (after paying for kids’ childcare) to a full-time OT resource creator for millions of readers. Want to collaborate? Send an email to contact@theottoolbox.com.
Rainbow Handwriting Kit– This resource pack includes handwriting sheets, write the room cards, color worksheets, visual motor activities, and so much more. The handwriting kit includes:
Write the Room, Color Names: Lowercase Letters
Write the Room, Color Names: Uppercase Letters
Write the Room, Color Names: Cursive Writing
Copy/Draw/Color/Cut Color Worksheets
Colors Roll & Write Page
Color Names Letter Size Puzzle Pages
Flip and Fill A-Z Letter Pages
Colors Pre-Writing Lines Pencil Control Mazes
This handwriting kit now includes a bonus pack of pencil control worksheets, 1-10 fine motor clip cards, visual discrimination maze for directionality, handwriting sheets, and working memory/direction following sheet! Valued at $5, this bonus kit triples the goal areas you can work on in each therapy session or home program.
One question therapists get all the time is about the best crayons for toddlers and specifically which crayons are best to support development. During the toddler years (preschool stage as well), there is a lot of motor and cognitive development happening, making it a great stage to introduce crayons. Let’s talk about the best types of crayons for the toddler years and beyond!
A lot of the recommendations below are based on the development happening during the toddler years, and the crayon recommendations take hand eye coordination of toddlers into consideration.
Crayons for toddlers
Crayons for Toddlers
There are many benefits to coloring with crayons and for many toddlers, it is natural to want to color, making it a win-win in building sensory motor skills.
There is a plethora of information floating around the web about correct crayons and writing utensils for young people. There are a lot of choices, some great, others not so good.
When thinking about crayons for toddlers, there is more to it than simply placing a crayon in the palm! Some things to consider include:
Coloring with a crayon both develops and requires a grip on the crayon. Forcing coloring too early can promote an immature grasp on the crayon when used in small hands.
Coloring offers resistive feedback through the hands by marking the paper. This is a great strengthening activity, but for babies and young toddlers, this can strengthen and add feedback to immature grasps.
Likewise, coloring at the toddler stage can be developmentally great when offering the “just right” strengthening and sensory motor feedback needed to move through grasp patterns.
If you’re thinking about shopping around for the best crayons for toddlers, you’re already in the right frame of mind, because coloring is a tool for creativity that kids need at such a young age.
Coloring with toddlers is all about the unique shape of the crayons out there on the market that are designed to fit small hands: Think rock crayons, egg crayons, and even something called honeysticks.
Do these options surprise you?
Then consider the other options out there to worry about:
Jumbo crayons vs. Triangular crayons
Thick crayons vs. regular sized crayons
96 pack of crayons vs. 8 crayon pack
Brands like Crayola crayons vs. Melissa & Doug crayons
Washable crayons vs. paraffin wax crayons
Pure beeswax crayons vs. crayons with vibrant colors
Non-toxic crayons vs. natural ingredients crayons
Large crayons vs. choking hazard sixed crayons
Food-grade pigments vs. non-toxic natural wax
With all of these considerations, how do you choose crayons that make THE very best crayons for toddlers??
Crayons for kids based on development
Best Crayons for Toddlers
Before deciding which crayons are best for toddlers, understanding the “why and when” is most important. To do so, we need to run through the developmental stages leading up to toddlers coloring with crayons. This is important because you may see some of the earlier considerations in place when a child is not developmentally ready to color. In those situations, is a good idea to back up and build on skills from a developmental standpoint.
Birth to one year: This article from Parents magazine highlights the hand development of babies from birth to one year. In the article it does not mention crayons at all.
Why? Because babies’ hands are not ready for crayons of any kind. Crayons for babies exist out there on the market…but it’s just not developmentally appropriate. The hands of babies do not have the muscle control for handling objects like crayons until about 11 months.
To prepare toddlers to use crayons to support development, the preparation is a must. Spend the time before the toddler years working on overall fine motor development through picking up objects, self feeding, exploring the environment, cause and effect toys, and dumping objects out of containers. This resource on baby play has a lot of great ideas.
If crayons are introduced too early, maladaptive grasping patterns will develop.
From 12-18 months, the toddler stage, little ones begin to refine their hand development. You’ll see in our resource on fine motor milestones, that there is a lot happening during the toddler years.
Around 12 months, children may find it challenging to manipulate small objects with dexterity. At this stage, they are picking up small objects like food pieces with their thumb and pointer finger in a pincer grasp. However, it is difficult for children this age to use dexterity in the fingers of the hand or by isolating fingers or hand separation.
In six months time, by around 18 months of age, manipulating objects such as toys, utensils, and household objects becomes more coordinated.
Is it time for crayons yet? Yes and no.
Making marks on paper, and starting to make strokes, but not with pencils or traditional crayons quite yet.
Remember, those hand muscles are still very primitive at this point, thus the tools need to be also. Think about how large the knobs on toddler puzzles are, or how chunky beginner spoons are. Writing tools need to be designed the same for little hands.
Here are some fine motor and coordination activities to support use of crayons for toddlers:
Amazon affiliate links are included below.
Writing and creating lines with fingers in shaving cream or pudding
Finger painting
Egg shaped chalk (Amazon affiliate link) like these Egg shaped pieces of chalk fit the whole hand without forcing the fingers to grasp the writing tool
Egg shaped crayons like these (affiliate link) also offer resistance when coloring or marking using the whole hand to grasp rather than force a grasp using the fingers which are not ready for that stage yet.
Make your own crayons by melting crayons into muffin trays.
While there are several iPad apps for writing using finger pointing, research shows children under age 2 should have no exposure to electronics. Stick with the basics.
Some coordination activities for 12-18 months can be used to promote eye-hand coordination, proprioceptive input, shoulder stability, and motor coordination. These activities include:
This is also a stage of visual motor growth. Children will begin to integrate the visual input with motor output needed to copy a straight line. A word of caution: at this stage, don’t be concerned with tracing letters or shapes, or copying shapes. Focus is on the simplest of lines: horizontal, vertical lines, circles, and a cross. Read here about pre-writing lines development.
Is it time for regular crayons yet?
Again, yes and no.
Those tiny hands, while that can certainly hold a regular or chunky crayon, are not ready to do so correctly. The grasp starts out as a gross grasp, then to a pronated grasp, finally ending with a tripod grasp around age 4.
Children often get stuck in one of these primitive grasping patterns when given crayons too early. A gross grasp is an appropriate stage of hand development, as is a pronated grasp, however the grasping pattern is supposed to continue to develop to a mature tripod grasp over time.
It often fails when tiny weak hands are holding onto small pencils, crayons, or pens.
Coloring can happen, but it’s at the child’s interest, and shouldn’t be forced.
Here are some crayons for toddlers and preschoolers using this information:
(Amazon affiliate links included below.)
Continue to use the large egg shaped crayons and chalk, as well as finger paints
These unusual looking rocket type crayons have a large bulb for palmer grasping that support development but also don’t force young children into holding utensils with an underdeveloped grasp.
I also love these crayon rocks for toddlers and preschoolers:
Dot markers, while fun and entertaining, also promote the gross and pronated grasps appropriate for this age.
Ages 4-5 the preschool age. Is it time for crayons yet? Yes! However, not all children are ready for traditional crayons.
One-two inch crayons are the best for children through elementary school. It is almost physically impossible to get a fist around a one inch crayon. This promotes a tripod grasping pattern.
During each stage described in this blog post, but especially during the 4-5 age range, don’t feel rushed to put a pencil in the hands of a preschooler. It is common for preschool teachers to think tracing lines, doing simple “prewriting” mazes, tracing their name, and even letter writing activities (including sensory writing trays) is appropriate. Developmentally, it is not. More important at this stage and each stage before, is the PLAY. Play builds the motor, cognitive, sensory, and emotional skills needed for pre-writing. Also read our resource on tracing sheets which needs to be considered for young learners.
If you have children do not like the idea of broken crayons, there are ready-made flip crayons. (affiliate link)
What about the chunky crayons?
You have probably seen the jumbo sized crayons out there. They are commonly offered to the kindergarten age range. You may have even seen these large, chunky sized option in a triangular shape.
However, when it comes to oversized crayons, one size does not fit all. This goes for crayons too. The problem with handing out boxes of large, over-sized crayons to the entire kindergarten class is that, the children that are receiving these boxes of crayons have small fingers, hands, and wrists.
In fact, some hands are much too small for chunky crayons, thus leading to more of a gross grasping pattern, or all fingers around the crayon.
Other children are able to use a tripod grasp but need a larger size to form this grasp properly.
The one benefit to using triangular crayons is that in the classroom setting, they don’t roll across the desk or table and fall on the floor. This is a huge benefit to using the triangular shape because at the kindergarten and first grade age, managing materials as well as body awareness can be a challenge for some kids.
What about traditional crayons?
These can be used if your child has an appropriate grasping pattern such as a tripod, or alternate tripod with two fingers on top.
The thumb wrap grasp, underwrap, and too many fingers on the writing tool are signs your child is not ready for traditional crayons yet.
Understanding the why and when behind hand development and tool use, is critical to selecting the correct tools for each stage of development.
Important note about the ages and stages listed above: Do not rely strictly on the ages above, as children will develop at different ages. These are ballpark ranges for hand development.
While it is going to be impossible to convince “the powers that be” to slow down preschool and kindergarten curriculum, being armed with tools and resources will help children be ready to face this onslaught of demands.
The OT Toolbox is a great resource for articles, worksheets, printables, crafts, and thousands of ideas and products to work on development.
*The term, “child” is used throughout this post for readability, however this information is relevant for students, patients, clients, children of all ages, etc. The term “they” is used instead of he/she to be inclusive.
Victoria Wood, OTR/L is a contributor to The OT Toolbox and has been providing Occupational Therapy treatment in pediatrics for more than 25 years. She has practiced in hospital settings (inpatient, outpatient, NICU, PICU), school systems, and outpatient clinics in several states. She has treated hundreds of children with various sensory processing dysfunction in the areas of behavior, gross/fine motor skills, social skills and self-care. Ms. Wood has also been a featured speaker at seminars, webinars, and school staff development training. She is the author of Seeing your Home and Community with Sensory Eyes.
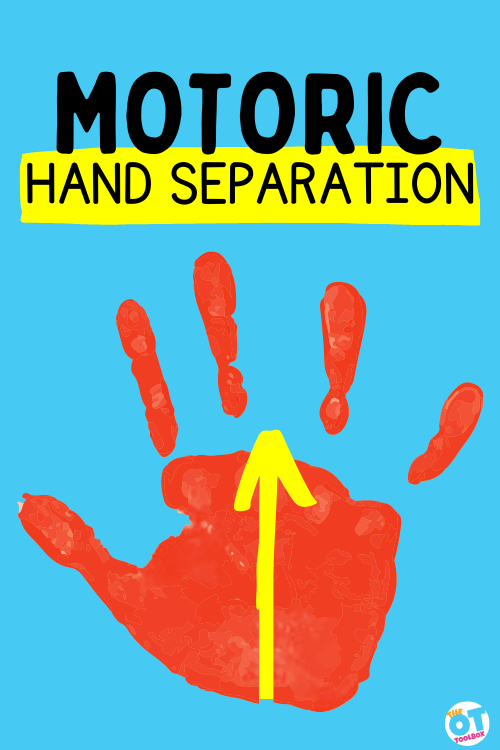
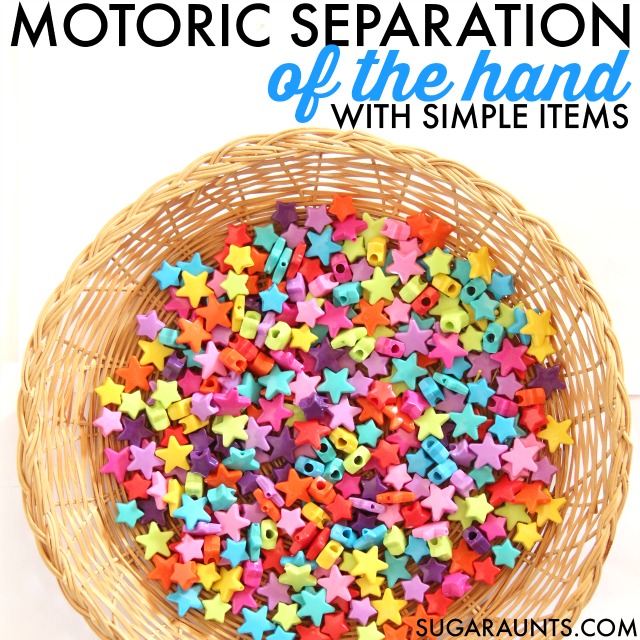
There are many times throughout the day that hand separation in fine motor dexterity is used to stabilize and manipulate objects. But what do we mean by this phrase, “hand separation” and exactly What is Motoric Separation of the Two Sides of the Hand? We’ll get into that here, as well as cover specific separation of the sides of the hand to develop precision and refined fine motor skills.
Hand separation, or motoric separation of the two sides of the hand, plays an important role in fine motor skills.
Motoric Hand Separation
Motoric hand separation is another term for separation of the two sides of the hand and is an important aspect of fine motor skills.
The term “motoric” refers to the motor actions, or the motor skills of the hand. This includes movements, grasp, precision of the fingers, intrinsic muscle strength needed to grasp and manipulate items.
When we refer to motor skills, we are talking about the physical movement of the hand to manipulate, grasp, and use objects by moving the hands.
Motoric skills requires coordination and refined motions of the muscles, joints, skin, and ligaments in the hand. Motoric use occurs in the fingers, palm, and wrist using the following joints:
Wrist
MCP joints
PIP joints
DIP joints
Definition of Hand Separation
Hand separation refers to the fine motor skill in which the two sides of the hand are separated into a “power side” and and “precision side”.
Refinement of fine motor skills like pencil grasp, manipulation of very small items, and managing zippers, shoe laces, and buttons with the precision half of the hand (the radial side) happens when the power half (the ulnar side) is stabilized.
You can imagine a line drawn from your wrist directly down the middle of your hand and between your ring finger and middle finger, separating the precision side of the hand (thumb, pointer finger, and middle finger) with the power side of your hand (pinkie finger and ring finger).
A child is fumbling to manage the buttons on their sweater.
A little one is zipping up their coat and they have the zipper and coat clenched between their pinkie fingers and thumbs.
A Kindergarten student is learning to write letters on lines, but they’ve got the pencil in a clenched grasp, using their whole hand.
All of these examples indicate a fine motorneed to work on motoric separation of the two sides of the hand.
The fingertips are used in so many small motor activities throughout the day, in functional tasks like self-care, dressing, eating, and everyday tasks. Part of these activities involves holding objects in the palm of the hand, manipulating the small objects, and using those materials in daily tasks. Most of this is done without even thinking about the process.
An alternative to a flexed position of the ring and pinkie fingers are when theses two digits are fully extended out and stretched out away from the hand (abducted). This positioning stabilizes the MCP arch and allows for control of the pointer and middle fingers.
Separation of the two sides of the hand allow for more precise use of the thumb.
Full disclosure: This post contains affiliate links.
Assessing for Hand Separation in an OT Evaluation
As always, when completing an occupational therapy evaluation, the primary focus is on function, or the occupation that the individual needs to or wants to accomplish.
What is functionally happening? This is the main place to look when completing an OT eval.
When it comes to the fine motor aspect of functional performance, hand separation can impact precision, dexterity, refined motor skills, coordination. This can lead to safety issues in daily tasks. It can impact learning or performance of self-care. It can mean the individual can not accomplish a great number of functional tasks.
Hand separation is needed for dexterity. A functional fine motor grasp and manipulation of objects is more accurate when the ring and pinkie fingers are flexed (bent) into the palm.
Another intricate part of this fine motor puzzle is the stability offered through the upper body, including the core, shoulder girdle, elbow, and wrist. These areas can impact function, and as always, you should consider proximal stability before distal mobility.
Important things to consider in an occupational therapy evaluation include:
Development of hand separation begins at a young age. We cover this progression in our resource on fine motor milestones.
Hand separation starts when a baby bears weight through their arm and ulnar side of the hand while carrying a toy in the radial side.
This simple activity developmentally lengthens the muscles of the ulnar side.
It’s through play that the separation of the hand develops. As toddlers become more refined at fine motor activities, they gain more dexterity in using just the precision side of the hand.
Whole Hand Grasp- (Typically seen between 12 months-1.5 years) the child holds objects with their whole hand. It looks like they are holding a paint stirrer or potato masher.
Digital Pronate Grasp/ Pronated Wrist Grasp- (2-3 years) The child holds objects with a gross grasp and the wrist facing the ground, or in a pronated position.
Four Fingered Grasp- (3.5-4 years)- Items are held in the fingertips but using the thumb and all four fingers. There is not yet a clear separation of the sides of the hand.
Static Separation of the Sides of the Hand- (3.5-4 years)- The child will hold objects with the precision side of the hand, but there is not joint mobility in the precision side: The joints of the thumb, pointer finger, and middle finger do not move in isolation or as a group to manipulate objects. If there is mobility in the joints, it is crude with objects falling at times and manipulation skills needing more refinement. For example, a child at this age can place a coin into the slot of a vending machine, but they will drop the coin.
Dynamic separation of the Sides of the Hand- (4-6/7 years) With age, the child develops more refined motions in the precision side of the hand, and they are able to move the joints in isolation as they manipulate objects within the hand.
Lateral Separation of the Sides of the Hand- As the child gains more experience with precision skills, they are able to use more motor combinations in fine motor tasks. This looks like holding a key with the side of the pointer finger against the pad of the thumb as they insert a key into a door. Still more refined is holding a keychain of keys in the hand and moving the keys around to find the correct key and then position it between the thumb and lateral finger to unlock a door.
Activities to Improve Motoric Separation of the Two Sides of the Hand
Flip coins
Roll play dough into small balls
Squeeze a spray bottle with the pointer and middle fingers
Pick up small items and “squirrel them away” into the hands: mini marshmallows, cereal, small beads, coins, waterbeads. (affiliate links) (This is also called translation toward the palm.)
Release the items (This is also called translation away from the palm.) Place coins into a piggy bank or beads into a cup.
Hold a cotton ball in the palm with the ring and middle fingers while coloring, writing, or cutting with scissors.
Other activities to work on motoric separation of the hand include:
Stretch rubber bands over the neck of the bottle using a recycled water bottle
Play in a rice sensory bin using the pointer finger to draw. (a great writing tray activity)
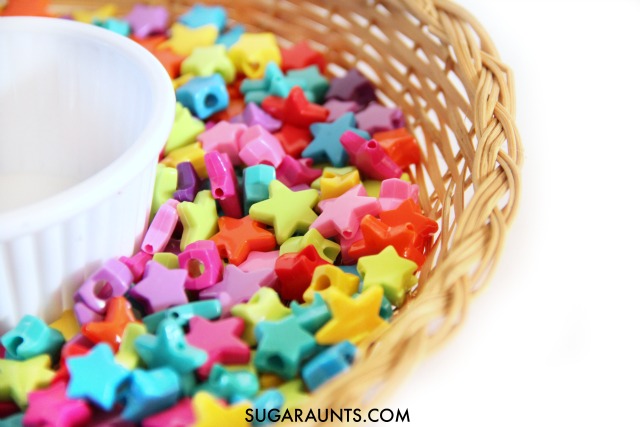
One way to develop hand strength and the refined motor skills needed for motoric separation of the sides of the hand is this beads sorting activity.
You’ll need just a couple of materials to set up this fine motor therapy exercise:
Beads
Two bowls or containers
This is one of the most simple therapy exercises and it has a powerful impact on developing motoric separation of the sides of the hand.
To set up this therapy exercise, place all of the beads into one of the containers. We used star beads but any beads or small items can work for this activity.
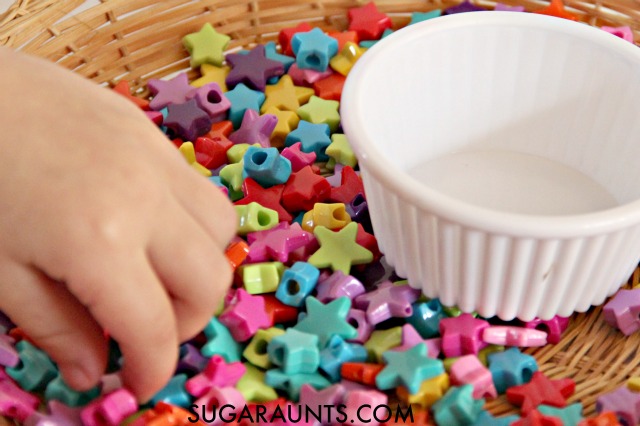
Next, I placed the beads into a shallow basket and asked my kids to grab only one color that they liked best.
They then tried to hold as many of that one color in their hand while picking up more beads.
When they couldn’t possibly hold anymore beads in their cute little hands, I showed them how to drop them into a small cup one at a time, while counting how many beads they had.
Working on fine motor skills, visual perception, visual motor skills, sensory tolerance, handwriting, or scissor skills? Our Fine Motor Kits cover all of these areas and more.
Check out the seasonal Fine Motor Kits that kids love:
Colleen Beck, OTR/L has been an occupational therapist since 2000, working in school-based, hand therapy, outpatient peds, EI, and SNF. Colleen created The OT Toolbox to inspire therapists, teachers, and parents with easy and fun tools to help children thrive. Read her story about going from an OT making $3/hour (after paying for kids’ childcare) to a full-time OT resource creator for millions of readers. Want to collaborate? Send an email to contact@theottoolbox.com.