STEM Fine Motor Activities

Fine motor STEM activities

Occupational therapists work with fine motor development as a cornerstone of treatment.  With the current trend toward STEM education, it makes sense to blend the two into fine motor STEM activities and treatment in order to be more efficient and effective.

Fine motor STEM activities

What is STEM?

STEM stands for science, technology, engineering and mathematics.  According to the U.S. Department of Commerce, STEM occupations are growing at 24%, while other occupations are growing at 4%.  Children in the United States score lower on science and math than students in other countries. 

The push for STEM curriculum helps bridge the gap between genders and races, that are sometimes found in science and math fields.  Students with special needs also lag in these academic areas. Research shows there are not enough students pursuing science, technology, engineering, or mathematic degrees, as compared to the available jobs.

According to the National Science Foundation, “In the 21st century, scientific and technological innovations have become increasingly important as we face the benefits and challenges of both globalization and a knowledge-based economy. To succeed in this new information-based and highly technological society, students need to develop their capabilities in STEM to levels much beyond what was considered acceptable in the past.”

Why Fine Motor and STEM?

Science, technology, electronics and mathematics do not just involve cognitive ability. Fine motor skills are needed for STEM careers that involve typing, building, writing, solving equations, experimenting, research, surgery, as well as everyday function. 

STEM fine motor activities are going to be much more important to build these important skills. As technology gets more scientific and advanced, so too will the need for precise fine motor skills.  Surgeries are much more advanced than 100 years ago.  Engineers are working on tiny circuits and micro computers.

I saw a BMW prototype last week that morphs from a car to a plane that can soar over traffic!  Imagine the dexterity it takes to build that kind of machine!

When should I start working on STEM fine motor activities?  

Caregivers start addressing fine motor skills in babyhood. Encouraging a passion for science and technology can start at the same time.

Selecting a few fine motor toys for young learners that address fine motor skills while developing STEM education. 

For example, check out this super cute (Amazon affiliate link) Frog Balancing Game that can be modified for many different levels of learners. This one game involves:

  • math – counting, sorting, adding, number recognition
  • science -measuring weight, comparison
  • fine motor skills – pick up and manipulate the small objects, hold the cards
  • visual motor skills – read the cards and process the information

How do I make this transition to fine motor STEM?

Change is hard. Especially for seasoned therapists who have used a certain system for a long time, or feel that what they are doing works.  The good news is, you have already been doing STEM fine motor activities with your learners. 

Check out this link on Amazon (affiliate link) to toys/activities that address STEM fine motor activities and skills.

On The OT Toolbox, we share tons of fine motor activity ideas to incorporate STEM into fine motor treatment. Occupational therapists do not usually correlate these activities with STEM, but they fit into both categories.  

Remember pegboard Geo Boards?  This classic game builds fine motor strength, following directions, coordination, motor planning, visual motor skills, visual perception, frustration tolerance, and executive function.  It ALSO addresses math using measurement, shape recognition and patterns; science learning about rubber bands and tension; and engineering to create patterns from a picture.

Fine motor STEM and Lego  

Legos are another classic toy. Use activity analysis to break this game down into its fine motor components, as well as incorporating math, engineering, or technology. 

There is more to LEGO bricks than being able to follow a diagram to make a Harry Potter Hogwarts Castle (love this by the way!).  Speaking of the Hogwarts castle, there was definitely math, engineering, AND fine motor skills needed to build that superstructure. 

Learners can also make graphs of their LEGO, use them for adding/subtracting, use engineering to create items with moving parts, and that is just the beginning. 

By thinking outside the box, learners with special needs can find their special ability using Legos also.

classic toys for STEM fine motor activities

The lists of (Amazon affiliate link) classic toys occupational therapists incorporate into treatment plans is endless.  Take another look at these classics to see how they fit into science, technology, engineering or math.  

  • Peg boards
  • Lacing cards
  • Magnets
  • Measuring tape
  • Swings
  • Pop the Pig, Connect 4, Trouble, Candy Land
  • Lincoln Logs, Connex, Erector Set
  • Baking
  • Slime

Fine motor and STEM activities do not have to include experiments, games, and hands-on activities.  Worksheets serve the purpose of addressing both categories very well. 

The OT Toolbox has great fine motor kits for each season that incorporate math and science along with addressing those needed fine motor skills. 

More ideas from the OT Toolbox

As a seasoned therapist myself, I may dig my heels in at the idea of changing the way I do treatment, or learning a new method. I give a heavy sigh of relief knowing I have been doing STEM all along. I just didn’t call it that. 

Even though occupational therapists are providing the right activities to work on goal achievement, they may be running into students with lack of motivation, refusal, and general dislike of many of the treatment ideas asked of them. 

Teachers and therapists need to help bridge this gap early on, and find a way to teach all learners a respect for STEM and fine motor education.

You are doing a great job incorporating what you already know, into something new!

Victoria Wood, OTR/L is a contributor to The OT Toolbox and has been providing Occupational Therapy treatment in pediatrics for more than 25 years. She has practiced in hospital settings (inpatient, outpatient, NICU, PICU), school systems, and outpatient clinics in several states. She has treated hundreds of children with various sensory processing dysfunction in the areas of behavior, gross/fine motor skills, social skills and self-care. Ms. Wood has also been a featured speaker at seminars, webinars, and school staff development training. She is the author of Seeing your Home and Community with Sensory Eyes.

Working on fine motor skills, visual perception, visual motor skills, sensory tolerance, handwriting, or scissor skills? Our Fine Motor Kits cover all of these areas and more.

Check out the seasonal Fine Motor Kits that kids love:

Or, grab one of our themed Fine Motor Kits to target skills with fun themes:

Want access to all of these kits…and more being added each month? Join The OT Toolbox Member’s Club!

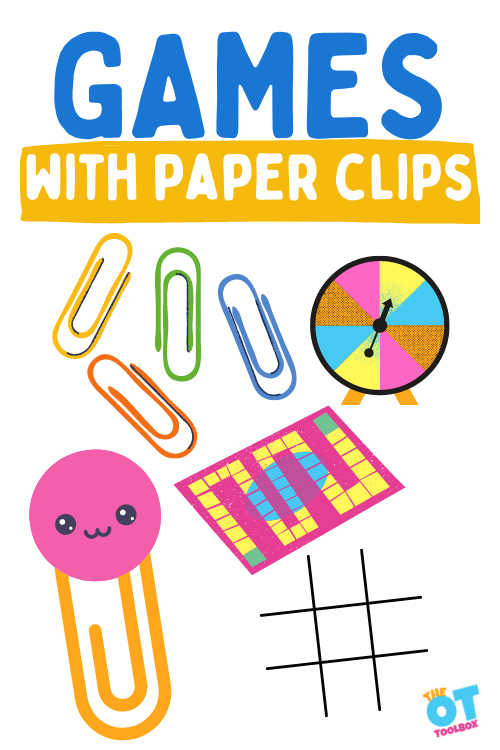
Fine Motor Activities and Games with Paper Clips

games with paper clips

Occupational therapists love to use everyday items in therapy, so these fine motor paper clip activities and fine motor games with paper clips are the best! Be sure to check out all of our fine motor activities with everyday items. You know what I’m talking about…those craft items, things, and tools that we all have in our therapy bags or supply closets. Today we’re covering fine motor activities with paper clips. Scroll down, friends. Below, you will find easy fine motor activities and quick tips to improve fine motor skills all using the simple paper clip!

Games with paper clips

Catch up on the latest tools on The OT Toolbox. Use other everyday items in your therapy bag to with these fine motor activities with craft pom poms and fine motor activities with playing cards.

Paper clip Ideas

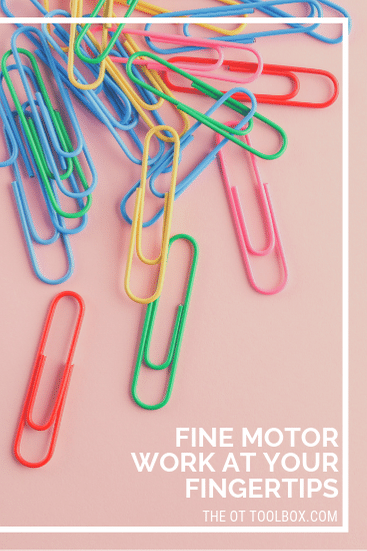
The paperclip. You probably have 6 of them sitting in your junk drawer right now. But have you ever stopped to think about how a simple item can be used as a fine motor powertool to ramp up the motor skills needed for tasks like a functional pencil grasp? Have you considered how a simple item like a paperclip can be used to strengthen and refine fine motor skills? It’s true!

In fact, paperclips are a really great item for improving fine motor skills in preschoolers. The preschool age range is a great time to develop and strengthen particular skills that preschoolers will need for tasks like cutting with scissors, coloring without fatigue, and holding a pencil.

These fine motor ideas are easy and quick ways to boost fine motor abilities using an item that is probably already in your craft supply bin or therapy bag.

Paper clips are a great tool for fine motor development while improving dexterity and the motor skills that preschool (and older) kids need. Read on for fun and easy ways to use paper clips in fine motor play!

Paper clips are some of the best tools for building fine motor, bilateral coordination, and eye-hand coordination skills. Why? You can use them in the typical fashion, or for educational purposes like counting, or you can think outside of the box and add other elements that can address a variety of hand skills that make activities therapeutic and engaging. This even includes creating some games for paper clips, that’s right, games!

Simply adding a die, a spinner, or even a magnetic fishing rod can turn the use of paper clips into a game that kids will enjoy for therapy fun and hand skill development.

One fun idea we use in our Fine Motor Kits is using a paper clip to make a paper clip game spinner that you can easily create for use with many games if you follow the directions in the post and print the spinner templates.

Below are some easy-to-create paper clip activities and games that can build the skills children need to further important development in therapy and beyond. You can make fine motor kits or baggies for the classroom or the home which can generate family engagement and build the skills outside of the therapeutic environment without breaking the bank. We all know that therapists (and teachers) pay for things out-of-pocket, so cheap and easy to implement makes for the perfect set-up.

Games with paper clips

Using everyday materials like paper clips can support development of skills. From using paperclips as a game spinner, or as a game piece counter, you can develop fine motor skills, coordination, and hand eye coordination using a functional item.

The school based OTs will love that playing games with paper clips is a frugal way to extend occupational therapy games and toys with a new spin on typical game play. Plus playing games with paper clips are fun activities kids will get a kick out of!

Kids need fine motor skills for school and play. The problem is when we see functional concerns that limit independence. We might see kids who really struggle with hand strength, dexterity, joint mobility, or precision. We may notice these issues in how a student grasps their pencil.

We may see kids having trouble with buttons, zippers, or snaps because of the fine motor skills they really need to develop. Simple fine motor activities can make a real impact!

Games with paper clips include:

  • Use paper clips as a game spinner- Place the paperclip on a paper. Point the tip of a pencil down into one of of the paper clip loops. Hold the pencil straight up and down. Use your other hand to spin the paperclip around the pencil. This is a great exercise in bilateral coordination, eye-hand coordination skills, and crossing midline.
  • Play games with paper clip counters- Many games can be played using paper clips as game counters. Ask the students to pick up and hold several paper clips in their hand. They can place the paper clips on the game board or use them in various games.
  • Play checkers with paper clips- Use a Checkers board and use two different colors of paper clips. Move the clips to play Checkers.
  • Play Tic Tac Toe with paper clips- Select two different colors of paper clips. Use the clips as game pieces to play tick tack toe.
  • Use magnets and paper clips in game play- Move paper clips using a magnet wand to incorporate bilateral coordination and eye-hand coordination.
  • Flip the paper clip game- Just like paper football, you can flip a paper clip to work on fine motor skills, eye-hand coordination, and proprioception. Don’t flip too hard or too fast by using the “just right” amount of force..
  • Make fun game markers with paper clips- Cut out and glue shapes, images, or icons onto the end of a paper clip. Then use the paper clip game marker in play dough, on games on the edge of a piece of paper, or to keep score along the edge of a piece of paper. We’ve made several paperclip game markers in our Fine Motor Therapy Kits.
  • Hanging Paper Clip Game- Attach string to a table, wall, or between two chairs. Set a timer for one minute. Ask students to clip up as many post its, or pieces of paper as they can in one minute. This is a great activity for upper body strengthening in the upper extremities and working on a vertical plane to develop strength and stability in the core.
  • Find paper clips game- Hide paper clips in a lump of play dough, slime, or thera-putty. Ask students to find the paper clips as quickly as they can.
  • Play a paper fish game with paper clips- Cut out a fish shape from paper. Fold it in half and glue it over a paper clip. Then use a magnet tied to the end of a string in a paper fish fishing game.
  • Creativity Games- Use paper clips to make bracelets, necklaces, and bookmarks. Then, use them as creative prizes in games!
  • Guess the size- Connect several paper clips together and use a ruler to measure how long the string of paper clips is. Then, guesstimate how many paper clips tall things are such as a shoe, a door, or a building! 
  • Timed Clipping- Set a stop watch and clip as many paper clips to the edge of a piece of paper as possible. This is a great activity to support fine motor skills, bilateral coordination, and using a functional task.
  • Paper Clip Threading- Pour a bunch of paper clips on a table. Set a timer for one minute and ask students to pick up and thread as many paper clips as they can onto a pipe cleaner, straw, or piece of thread. This is a great activity to develop refined precision skills needed for dexterity.
  • Build a Tower- Use paper clips and a deck of cards to build a tower as high as you can. This is a powerful fine motor STEM activity.
  • Alphabet Paper Clip Necklace: This is an activity that links paper clips into a chain similar to a necklace by either simply identifying the letters and linking or by linking in alphabetical order. 
  • Magnetic Letters and Numbers Fishing – Place all magnetic letters and numbers into a bowl and then play a fishing game using a paper clip and fishing rod where children ‘go fish’ for letters or numbers and then when caught, they can work on letter identification and formation. 
  • Play number Games with paper clips- Number Game with Paper Clips is a YouTube video explaining how to play. This is a fun activity for kids to create and then do with adult support. It involves a craft-like activity that later allows for the child to use paper clips and number counting as the game.
  • Paper Clip Fishing Game– Use paper fish and draw onto the bodies different shapes or even letters, then attach a paper clip to each fish.  Use a magnet pole to have children fish for different shapes or letters. This one can be tailored to meet the needs of the child making it very versatile. 
  • Paper Clip Fishing Putty – Therapists grab your therapy putty and insert some paper clips vertically for children to use a paper clip and ‘go fish’ for colored paper clips. How do you create?  Place any size paper clips into putty, tie a piece of yarn onto a pencil along with a paperclip, and well, go fish! This makes for an awesome upper extremity activity – grasp, finger strength, upper arm stability, strength, control, and eye-hand coordination! Here is an example of this paper clip game.
  • Play Paper Clip Math Games- Paper Clip Math is an idea makes for a great busy bag or calm-down time activity.  It’s perfect for indoor playtime and hands-on learning.  Not only that, but it is a great way to work on fine motor skills like thumb opposition. 
  • Paper Clip Pattern Hair – This one is cheap and easy and well, fun to create! Cut a piece from a paper towel tube, draw a simple face onto the paper towel tube piece, and then use paper clips along the top to create fun hair. This is part of the back-to-school fine motor kit that can be found here at The OT Toolbox.
  • Also, check out my Crazy Hair Buddies which are created similarly with a variety of tools that can be used such as paper clips, binder clips, and large and small clothespins. 
  • Paper Clip Patterns – All you need for this one is simply just the paper clips! This is an easy visual perceptual activity for older kiddos where you simply use colored paperclips in various orientations and sizes that will help address visual discrimination skills in children. It’s an easy activity to set-up, but highly effective for therapy.
  • Paper Clip Pick-Up – This one is all about paper clips and picking them up one by one.  This is the perfect game to work on fingertip to palm and palm to fingertip translation skills.  First, roll a die and count the dots. Then pick up that number of paper clips using one hand using fingertips to palm translation skills. End with walking them out of the palm one by one using palm to fingertip translation skills and inserting them into a coin bank or other container.
Kids can develop and strengthen fine motor skills using these fine motor activities with paper clips!

paper clip fine motor activities

Adding more fine motor activities into a child’s day can be a struggle. So having an easy list ready to go makes recommending fine motor activities a no-brainer. Use these activity ideas in fine motor home programs or in the classroom for fine motor centers.

Adding them to math centers would be easy…craft pom poms are fun to sort, count, and manipulate!

Why Use Paper clips in FIne Motor Activities?

Paper clips are a tool you need in your therapy bag! They can be a small item that can be used in big ways. Here are just some of the ways that paper clips can address fine motor needs:

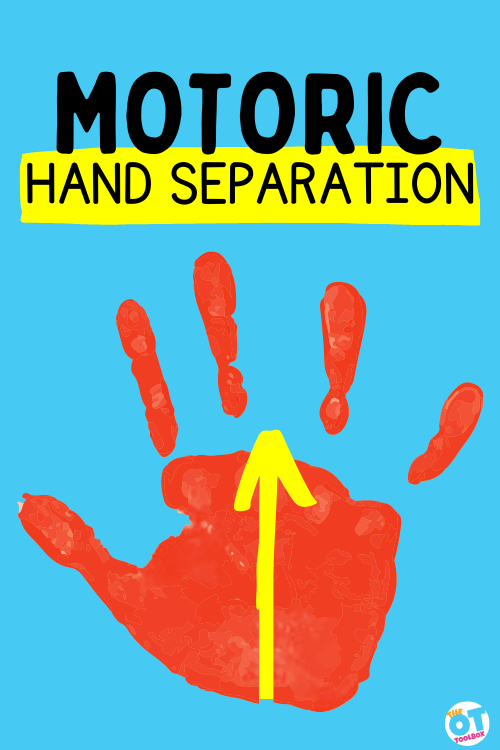
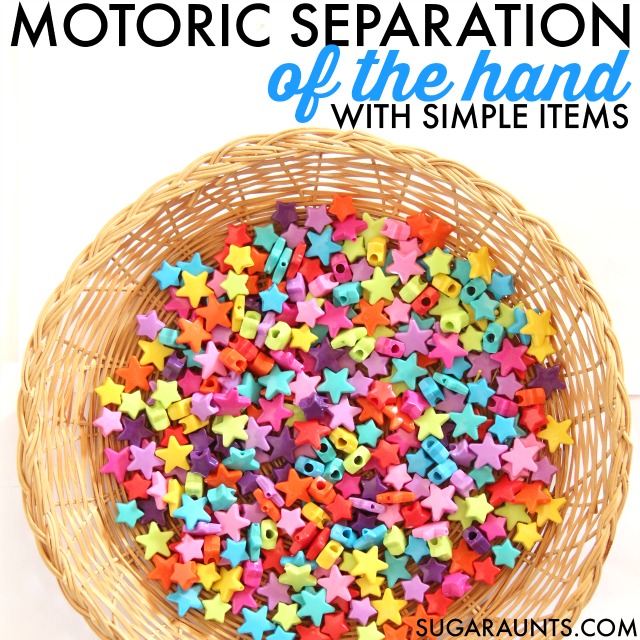
Separation of the sides of the hand– Paperclips are the perfect small item to hold in the palm of the hand, engaging the ulnar side of the hand, while encouraging movement and precision with the pointer finger, middle finger, and thumb. This skill is so important for fine motor precision in tasks like pencil grasp and managing clothing fasteners or tying shoe laces.

Pincer grasp– Paper clips are a powerful means of promoting the precision grasp between the thumb and pointer finger. This motor skill is essential for tasks that require strength and dexterity to manage small items like coins or turning pages in isolation.

In-hand manipulation– Paperclips can be used as a manipulative item for transferring from the palm to the fingertips or vice versa. This is an essential skill needed in pencil grasp and other functional tasks.

Finger isolation– Paperclips can be used in various ways to promote finger isolation needed for fine motor dexterity and functional tasks.

Eye-hand coordination– This skill is an essential fine motor precision skill needed for so many functional tasks such as managing small items, copying letters, and other visual motor skills. Paperclips can be a powerful way to work on this skill area.

Use these fine motor activities using paperclips to improve fine motor skills in tasks like pencil grasp.

Paper clip Activities

Here is a big list of activity ideas for using craft pom poms to work on fine motor skills. What would you add to this list? To start, here are more fine motor activities that use craft pom poms. Using this craft item in fine motor development requires easy set-up with activities like the ones listed below. You’ll see using a water bottle to work on fine motor skills in the list. Here’s a better description of how to make that craft pom pom fine motor activity work.

fine motor paper clip activities

Paperclip FIne mOTOr Activities

So, what can you do with a paperclip to support fine motor skills?

Here they are…loads of fun and easy ways to work on fine motor skills using paper clips! Use these ideas in centers, therapy activities, home programs, and play! Use these ideas in part of an occupational therapy fine motor toolkit!

  • Link the clips together to form a chain. Use those paper clip chains for math!
  • Create shapes with linked paper clips
  • Create letters with linked paper clips
  • Write a number on a piece of papers add that same number of paper clips onto the paper
  • Use the paper clips as a stand for small paper puppets
  • Use four paper clips as legs in animal crafts 
  • Sort paper clips by color
  • Press paper clips onto play dough. Use them to make paper clip flowers!
  • Slide onto color coded paper strips
  • Freeze into ice cubes to paint with water on chalkboard
  • Tie to string and use to thread around chairs
  • Poke holes in a plastic lid. Push paper clips through the holes
  • Slide onto edge of a paper plate
  • Use paper clips to make a DIY fidget tool
  • Pick up with a magnet tied to a string
  • Use to draw in sand
  • Chain together to make number strips
  • Connect pieces of paper to create sculptures
  • Place pencil tip in one end and spin
  • Tape label with number to one end. Slide onto edge of toilet paper tubes
  • Paper Clip Playing Cards – Simply use playing cards and paper clips to draw a card and place that number of paper clips onto the cards. Works on number identification and counting along with fine motor skills. 
  • Paper Clip People – This is a fun activity where you draw a picture of a person and cut it out. Then, you simply place paper clips onto the edge of the paper to create “legs” and “arms” the people. This is a fun way to work on fine motor skills, bilateral skills, and the separation of the two sides of the hand. 
  • Paper Clip Pick-Up – This one is all about paper clips and picking them up one by one.  This is the perfect game to work on fingertip to palm and palm to fingertip translation skills.  First, roll a die and count the dots. Then pick up that number of paper clips using one hand using fingertips to palm translation skills. End with walking them out of the palm one by one using palm to fingertip translation skills and inserting them into a coin bank or other container.
  • Paper Clip Porcupine: This is a fun activity that makes the playdough porcupine a paper clip porcupine! This activity is all about paperclips by creating a playdough porcupine, inserting small paperclips, and using a larger paperclip to pluck out the paperclips. A fun activity for fine motor and eye-hand coordination!
  • Paper Clip Rolls – This is also a cheap and easy activity that allows for color matching and number counting. Great for fine motor, bilateral hand skills, and eye-hand coordination, plus a little visual perception as you have to figure out exactly how to put that clip on.
  1. You can keep it simple by just writing a number on the roll and adding that number of paper clips. 
  2. Use a colored dot sticker, write a number on it, and then match colored paper clips by adding that number.
  3. Use a colored dot sticker, write a number on it, and then use colored paper clips to match the dot while also counting that number of paper clips. 
  4. Simply forget numbers and colors altogether and just clip away.
  • Paper Clip Sculptures and Linked ShapesUse several paper clips together to create a variety of sculptures or even link them together to create shapes and images. Be creative and try some linked-together paper clips for letter formation too!
  • Match play dough and paper clips- We shared this idea in our Play Dough Paper Clip Color Match. This is a simple activity that includes colored play dough and paper clips and facilitates a tripod grasp and allows for strengthening of the hand, especially the arches by pressing the paper clips into the dough in a vertical fashion. This activity is a great warm-up activity for kids before coloring, drawing, or writing. 
  • Simple Paper Clip Chain:  With the use of just paper clips, a child can create a paper clip chain and build important developmental fine motor skills. Use colored clips, large and small clips, and plain clips to create a variety of chains.  This activity works on fine motor skills, but also visual perception as the child works on correctly orienting the paper clips for insertion and rotation of each clip as the chain is being built.
  • Add visual perceptual work to fine motor activities with fine motor color sorting activities for improved eye-hand coordination.

Now, that you have the inspiration and ideas, go gather some paper clips and a few other cheap materials and make some fun games and activities that will motivate children to build important hand skills and other areas of development. Why not have them help you create the kits too? They’d love it and it would be a huge help to you! Grab some baggies, pencil bags, or boxes, or even toss all of the goodies into a plastic storage container and you’ve got a paper clip toolkit! 

Colleen Beck, OTR/L has been an occupational therapist since 2000, working in school-based, hand therapy, outpatient peds, EI, and SNF. Colleen created The OT Toolbox to inspire therapists, teachers, and parents with easy and fun tools to help children thrive. Read her story about going from an OT making $3/hour (after paying for kids’ childcare) to a full-time OT resource creator for millions of readers. Want to collaborate? Send an email to contact@theottoolbox.com.

Working on fine motor skills, visual perception, visual motor skills, sensory tolerance, handwriting, or scissor skills? Our Fine Motor Kits cover all of these areas and more.

Check out the seasonal Fine Motor Kits that kids love:

Or, grab one of our themed Fine Motor Kits to target skills with fun themes:

Want access to all of these kits…and more being added each month? Join The OT Toolbox Member’s Club!

Bat Template Fine Motor Activity

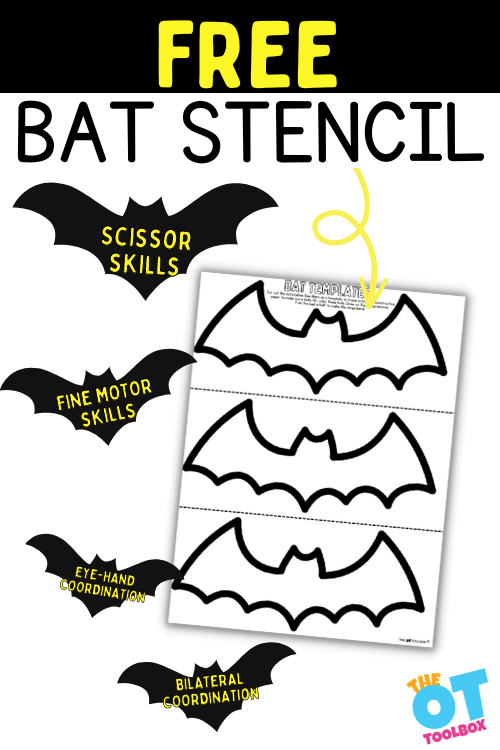
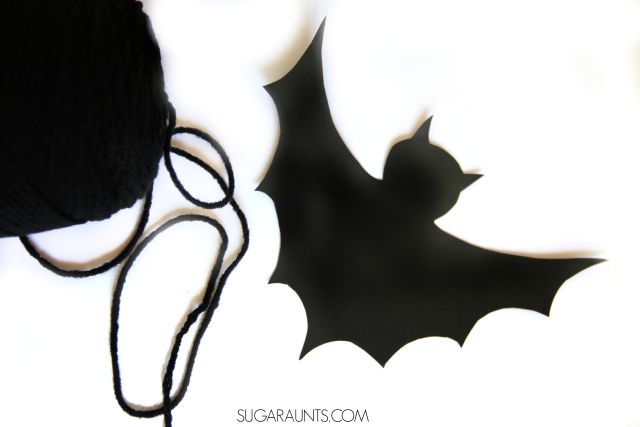
Bat stencil template

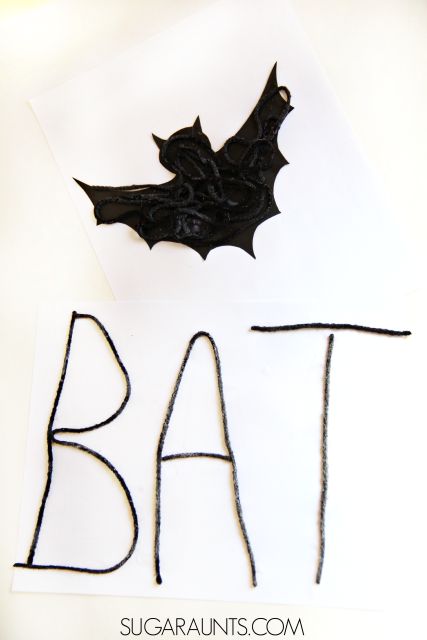
This bat template is a fine motor activity, perfect for building motor skills with a Halloween twist. Use the bat printable as a stencil to cut out, trace, and then use in fine motor work. Add this to your Halloween occupational therapy activities!

Bat Template

Fall is here and that means it’s time to pull out the Halloween crafts! This bat Halloween craft is a favorite in our house, and it’s actually a fun way to celebrate Halloween with kids without spooky decorations.

We also used this bat template in a Stellaluna activity that also challenged visual processing skills. Be sure to check that activity out for another way to use this printable bat stencil.

The nice thing about using our bat template is that it becomes an open-ended Halloween craft idea is one that doesn’t need a lot of materials. In fact, it’s a simple craft idea that is big on the fine motor skill development! When kids make this bat craft, they will be boosting skills such as fine motor strength and dexterity in a big way.

For more Halloween craft ideas, check out some of the ideas at the bottom of this post…it’s the perfect addition if you’re looking for Halloween crafts for toddlers or Halloween crafts for preschool parties.

Related, check out these spider activities for more spooky but fun ideas.

Printable bat stencil to use in fine motor crafts for Halloween


Bat Template Craft

We made this bat craft with a fun sensory twist.  And, since we have a certain second grader that is cursive handwriting obsessed, we decided to add a cursive handwriting twist to this activity.  This activity could work to help kids with letter formation of upper case letters, lowercase letters, or numbers too. The possibilities are endless. 

We arranged the bat template so you can print out one bat printable page and then get 3 bats from the one page.

Or, if you are using the bat templates with a group of kids like in a classroom Halloween party activity, you can easily cut the bat template page into three sections with one bat stencil for each child.

This post contains affiliate links.

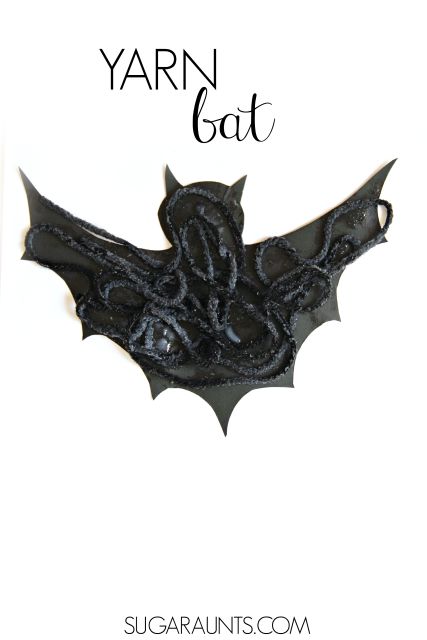
Cut out bat template and trace onto black paper with yarn

Bat Printable

To make your bat craft, you’ll need just a few materials.

Amazon Affiliate links are included.

  • Bat printable (get your copy below)
  • black cardstock 
  • black yarn 
  • Glue 
  • Scissors (THIS is my favorite brand and the ones that I always recommended as an Occupational Therapist!)
  • Pencil or marker

This is a great Halloween craft for preschoolers because it’s a fantastic way to work on scissor skills with a Halloween activity.

Make the Bat Template

  1. First print out the Pat printable onto printer paper.
  2. Cut out the bat templates on the page. Each template has three bats. Students can cut out the bat printable or the adult can do this as preparation work.
  3. Trace the bat template onto cardstock or black construction paper. This is another good task for students to do as tracing the bat template supports development of bilateral coordination skills, eye-hand coordination, crossing midline, and pencil control skills.  
  4. Cut out the bat template.

Kids can cut out the shape using their Scissors for great scissor skill work.  The bat shape is a complex cutting shape and can be done by Elementary aged students.  

Cutting the angled wings and curves can be difficult, but by using the cardstock, kids will get a bit fore proprioceptive feedback from the thicker resistance of the paper material.  

To make the task easier, cut wings without the jagged lines or use thicker cutting lines when you draw the bat shape.  

Decorate the Bat Cutout

Once you have the bat, you’ll need to cut pieces of the black yarn.  Have your child cut long or short pieces, it doesn’t really matter what length they wish to cut for their bat’s texture.  

  1. Cut black yarn for the bat cutout.

Cutting the yarn is a great material to practice appropriate scissor positioning and bilateral hand coordination.  

If a child is holding the scissors on an angle, cutting the yarn will be more difficult.  (You may see them trying to “saw” at the yarn!) Encourage them to hold the scissors straight up and down and the blades of the scissors at a 90 degree angle to the yarn.  You can find more of our Scissor Skills activities.

Child dipping black yarn into glue to stick to the bat printable

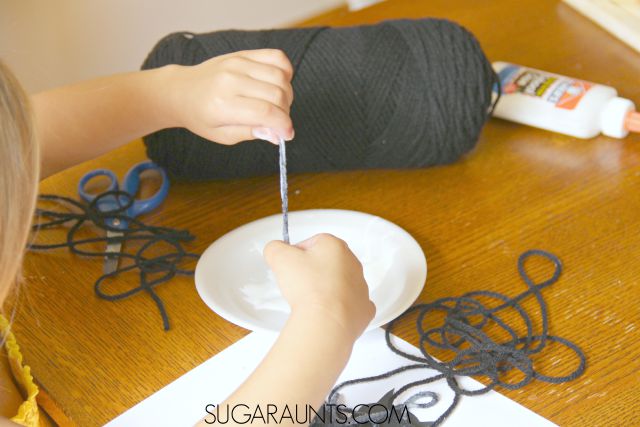
2. Next, pour some glue into a shallow dish or plate.  Show your child how to drag the yarn through the glue and get it nice and saturated with the glue.  Use both hands to pinch and “scrape” off excess glue from the piece of yarn.  

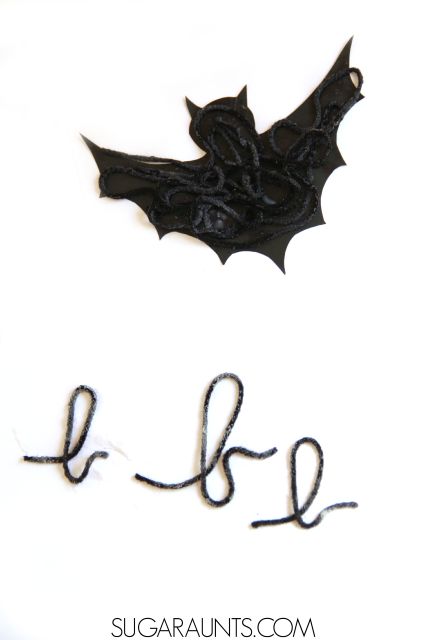
3. Next, drape the black yarn on the bat shape.  You can let your child get as creative as they wish with this part.  Some might like to outline the bat shape and others, just pile it up on the bat.  

4. Let the glue and yarn harden and you’ll have a textured bat craft to use in Halloween decorations this Fall.  You will have to wait for the glue to dry, probably overnight.

Use the Bat Printable in Handwriting Practice

Occupational therapy practitioners know the value of using a single activity or material to develop a variety of skill areas. That is the case with this bat printable…use it to work on handwriting skills too!

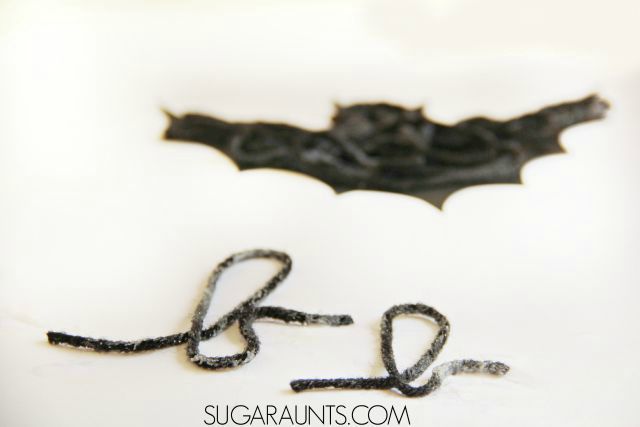
We used those saturated yarn pieces to build cursive letters, but you could build printed letters as well, using our letter construction method.

This would be an excellent way to practice cursive letter formation in our Creative Cursive handwriting journal activity.

Make letters with yarn and decorate the bat printable.

Use this Bat Craft for kids to work on letter formation of any kind. It’s a creative writing activity that they will be sure to remember. Work on forming individual letters, spelling sight words, or making Halloween words.

Bat template and letters made with black yarn.

Use the Bat Printable in Learning

This would work as a very fun…and very sensory…classroom Halloween party idea or learning activity for this time of year, while working on team work skills, and learning components.

  1. Split kids up into teams. Give each team a collection of cut black yarn and a bowl of glue.
  2. Write a spelling word, or a Halloween word on the board or hold up a sign with a Halloween word.
  3. Each team has to work together to use the cut yarn and glue to spell the Halloween word on a piece of paper or cardboard.
  4. Once a team has completed the word, they have to hold up their paper or cardboard. The first team to spell the word with the letters sticking wins! (Too much glue or not enough glue will make this a fun race for Halloween parties for kids of all ages.)
Use black yarn to decorate the bat printable template and then write words with black yarn.

Build printed letters with the glue yarn, too.  We had a lot of fun with this Halloween craft and it was a hit with all of my kids…from preschool on up to grade school.

Check out some of these other Halloween activities and crafts:

Free Bat Template

Want a copy of this free bat template printable? Enter your email address into the form below to get a copy of this Halloween printable. This activity is also available inside The OT Toolbox Member’s Club under our Bat Therapy Theme. Members can log in and get the bat template there without entering an email address. Not a member yet? Join us today.

Free Bat Stencil

    Are you interested in resources on (check all that apply):
    We respect your privacy. Unsubscribe at anytime.

    Colleen Beck, OTR/L has been an occupational therapist since 2000, working in school-based, hand therapy, outpatient peds, EI, and SNF. Colleen created The OT Toolbox to inspire therapists, teachers, and parents with easy and fun tools to help children thrive. Read her story about going from an OT making $3/hour (after paying for kids’ childcare) to a full-time OT resource creator for millions of readers. Want to collaborate? Send an email to contact@theottoolbox.com.

    How to Draw a Cute Owl Directed Drawing

    how to draw an owl easy directed drawing sheet

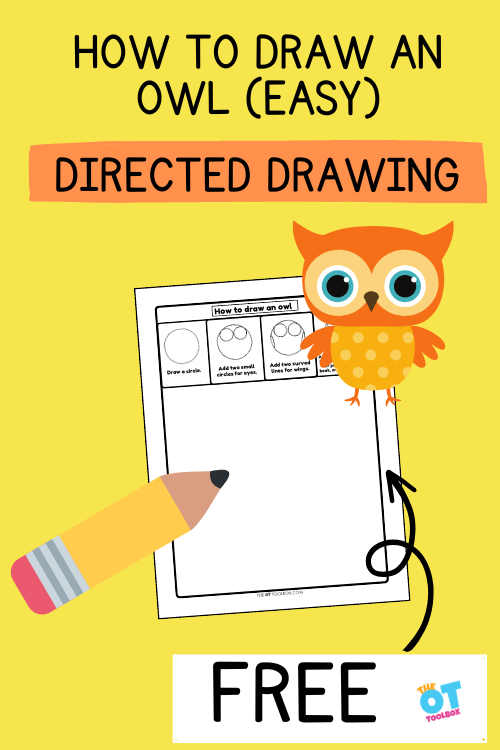
    If you are looking for how to draw a cute owl, than this easy directed drawing owl activity is for you. There are so many benefits to directed drawing when it comes to visual motor skill development, so adding a cute owl to the fun makes sense! In this post, you’ll find a printable “how to draw an owl-easy” worksheet that you can print and use over and over again.

    If you are wondering what ages can use directed drawings, check out our resource on drawing milestones.

    How to draw and owl easy directed drawing sheet

    a word about directed drawing worksheets

    While this is a fun free occupational therapy worksheet, I have to say…sometimes “worksheets” get a bad rap. I mean, hands-on, occupation-centered function is what we do as OTs, right?

    BUT, for some kids, meaningful and purposeful are centered around topics, or themes. Owls are one of those popular topics that draw kids in. And, to take this concept a step further, drawing and creativity is a powerful tool to support and develop creativity as a cognitive skill, but also part of one’s self Creativity and creating are what we do as humans so when a child has an interest such as drawing or learning more about owls, that is meaningful to them.

    That’s where this how to draw an easy owl worksheet comes into play.

    This How to Draw an Easy Owl activity is a directed drawing worksheet that can be used in owl activities in OT or in the classroom. Draw an owl with step by step directions to work on visual motor skills, direction following, pencil control, and more. This easy owl drawing activity uses basic shapes and pencil lines, so it’s a great owl drawing activity for kids!

    how to draw an owl

    How to Draw an Owl

    Owl directed drawing activities like this one is a great way to help kids develop visual perceptual skills and visual motor skills. When kids follow the step-by-step directions on the drawing worksheet, they are developing several skill areas:

    • Visual perceptual skills (form constancy, visual discrimination, visual attention, visual closure, visual memory, sequential memory, visual spatial relations)
    • Pencil control
    • Eye-hand coordination
    • Direction following
    • Working memory
    • Copying skills needed for handwriting

    Directed drawing activities like this owl drawing easy directed drawing page are fun ways to help kids strengthen a variety of areas in a creative way!

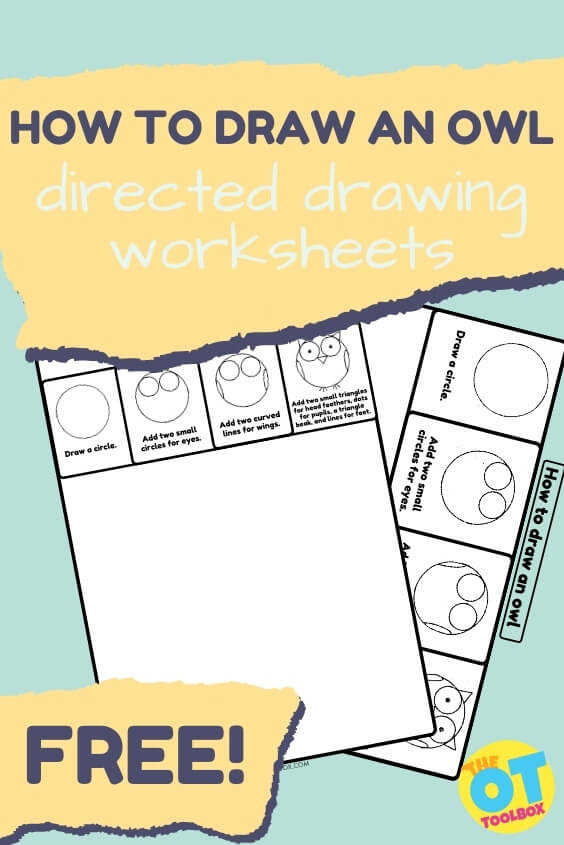
    The directed drawing sheet walks users through the steps to form an easy owl drawing. From a circle, to adding circle eye details, and the beak, and horns, this easy owl directed drawing activity is step-by-step and supports developmental skills.

    Use this directed drawing sheet along with a woodland animals theme in therapy. Think: owl activities, deer crafts, mushrooms to hop along in obstacle courses and forest animal puzzles. There are so many fun ways to incorporate this directed drawing activity into therapy plans!

    How to draw an easy owl

    The directed drawing worksheet walks you through the steps to draw an easy owl:

    1. Draw a circle for the head.
    2. Add two circles for the eyes.
    3. Draw two curved lines to create wings.
    4. Add a triangle beak, triangle ears, and three lines for each claw.

    I like this simple owl drawing because it uses single lines to create the owl. It’s nice because you can work on pencil control and drawing milestones with this version.

    Free how to draw an easy Owl Worksheet

    If you are part of the OT Toolbox newsletter list, then you may have seen this free OT worksheet before. Be sure to subscribe by entering your email address into the button at the top of this page to access weekly free resources!

    I wanted to create a how to draw an owl EASY worksheet for younger kids starting out with pencil control, but also older students who need to work on skills outlined above. In this easy owl drawing, kids can use simple pencil lines to make the cartoon owl drawing.

    This owl drawing easy activity uses simple pencil strokes and only 4 steps to complete the owl cartoon. Kids that are moving from simple drawing lines like circles and curved lines can benefit from the four simple steps to add details to the owl drawing.

    Want to grab a copy of this free how to draw an owl EASY worksheet?

    Just enter your email address into the form below. You can print off the directed drawing sheet and use this to work on copying skills.

    FREE How to Draw an Owl (EASY) worksheet

      We respect your privacy. Unsubscribe at anytime.

      Colleen Beck, OTR/L has been an occupational therapist since 2000, working in school-based, hand therapy, outpatient peds, EI, and SNF. Colleen created The OT Toolbox to inspire therapists, teachers, and parents with easy and fun tools to help children thrive. Read her story about going from an OT making $3/hour (after paying for kids’ childcare) to a full-time OT resource creator for millions of readers. Want to collaborate? Send an email to contact@theottoolbox.com.

      What you Need to Know About a Thumb Wrap Grasp?

      thumb wrap grasp

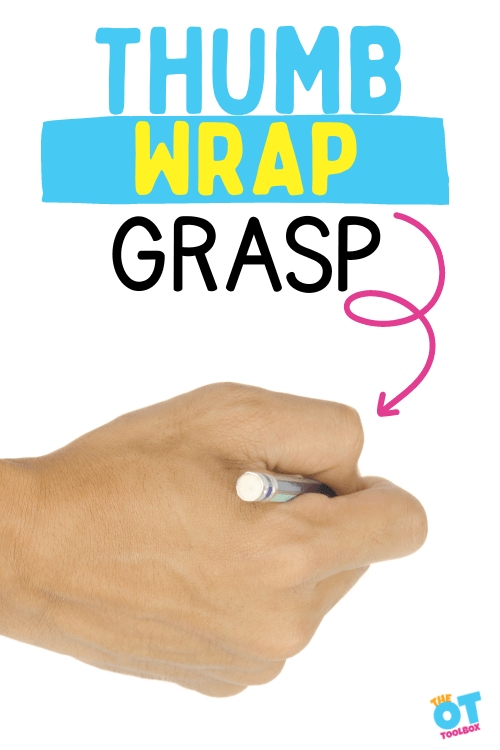
      If you’ve worked with kids on handwriting skills, then you’ve probably seen a thumb wrap grasp at one time or another. Also known as a crossover grasp, a cross thumb grasp, a thumb wrap grasp, (or other descriptive names), a thumb wrap grasp is just that: a holding the pencil with the thumb wrapped around the pencil shaft. Here we are talking about what this type of pencil grasp looks like and what to do about it. Let’s discuss!

      Thumb wrap grasp information

      Thumb Wrap Grasp

      Kids can use some pretty interesting grasps on pencils.  You can see the thumb squashed up against the pencil, the pointer finger wrapped around the pencil, or the thumb wrapped around the fingers.

      Very often, the pencil grasp that a child is using is not one of stability and rather, is a demonstration of instability as weakness in the muscles of the hand is compensating during handwriting. This thumb wrap pencil grasp exercise is an easy one to put together and one that will help kids gain strength in the muscles that make up a functional grasp.  Read on to find out how to work the muscles of the hand to improve the “dreaded” thumb wrap grasp!

      I’ve had a few questions from readers about the thumb wrap grasp.  It seems like this pencil grasp is becoming more prominent in classrooms.

      So, what does a thumb wrap grasp look like?

      The thumb wrap grasp is what you see when you the end of the thumb is wrapped around the pointer finger.  The pencil is supported with the tip of the pointer finger, and supported by the middle finger. The end of the thumb wraps around the pencil to support and stabilize the pencil. With a thumb wrap grasp, typically mobility of the pencil strokes are limited by the thumbs positioning on the pencil.

      However, a thumb wrap grasp can be functional as well. While it’s not a completely horrible pencil grasp, it isn’t a great grasp for speed and efficiency in writing.

      Several anatomical components are involved with a thumb wrap grasp:

      • Opponens Pollicis
      • Flexor Pollicis Longus
      • Interphalnageal Joint (IP Joint) of the thumb
      • Intrinsic muscles

      An open thumb web space is a skill that can help to fix the thumb wrap grasp. Try these fine motor activities to promote an open thumb web space.

      A thumb wrap or thumb tuck grasp can be a part of developmental progress of pencil grasps, but might be one to address during this progression. Read more about pencil grasp development for more information.

      A thumb wrap grasp can also be called different names:

      • Thumb wrap grasp
      • Thumb tuck grasp (pencil is tucked under the pencil, but similar anatomical positioning exists and strengthening can be used to address a thumb tuck)
      • Crossover grasp
      • Cross thumb grasp

      A thumb wrap can also exist in combination with other grasp patterns:

      • Tripod grasp with thumb wrap
      • Lateral thumb wrap grasp
      • Quadrupod grasp with thumb wrap
      Pencil grasp exercise to work on an open web space and flexed thumb needed to remedy the thumb wrap grasp.

      Is the THumb Wrap Grasp Functional?

      *Note* I am one who takes pencil grasps in stride.  So, when I say “dreaded” thumb wrap grasp, I am not completely serious in that this grasp is dreadful or something to fear.  Many (many) of us have unique and very functional pencil grasps.  The issue is when a quirky grip on the pencil becomes a cause for illegibility, fatigue, joint strain, or other concern.  In those cases, a grasp should be addressed. Read more about functional pencil grasp and how a functional grasp can exist even if it doesn’t look like they typical tripod grasp.

      Remember that a functional pencil grasp is the one we want to see. A functional pencil grasp might look like various things. Every child may have different tendencies when it comes to “functional” 

      Functional means the student can hold the pencil, write with legible handwriting, and doesn’t have joints that are hyperextended or otherwise inefficient in joint positioning. Fatigue and endurance play a part in a functional pencil grasp.

      This resource on what therapists want parents to know about pencil grasp is a great read.


      Pencil grasp exercise to work on an open web space and flexed thumb needed to remedy the thumb wrap grasp.
       

      What is happening when a child uses the Thumb Wrap Grasp?

      Full disclosure: This post contains affiliate links.

      The tip of the thumb bends over the pencil and pointer finger, providing stability to the grasp.  Instead of using the opposition muscle of the thumb to grasp the pencil, the child is using the adductor muscle.  The thumb wrap grasp provides stability but it does not allow for quick pencil movements.

      As a child is required to write faster to take notes, the legibility of their handwriting will be sacrificed. Rather than moving the pencil with the tips of their thumb and index finger, the child is manipulating pencil motions with their wrist and forearm.

      In order to improve this grasp, a child needs to strengthen the opposition muscle, Opponens Pollicis, along with Flexor Pollicis Longus to bend the tip of the thumb or the Interphalnageal Joint (IP Joint) of the thumb. Strengthening the intrinsic muscles along with addressing an open web space will improve IP flexion in pencil grasp. 

      Working on precision skills will also help with a thumb wrap grasp.

      Pencil grasp exercise to work on an open web space and flexed thumb needed to remedy the thumb wrap grasp.


      Exercise to Work on a Thumb Wrap Grasp

      Pencil grasp exercise to work on an open web space and flexed thumb needed to remedy the thumb wrap grasp.

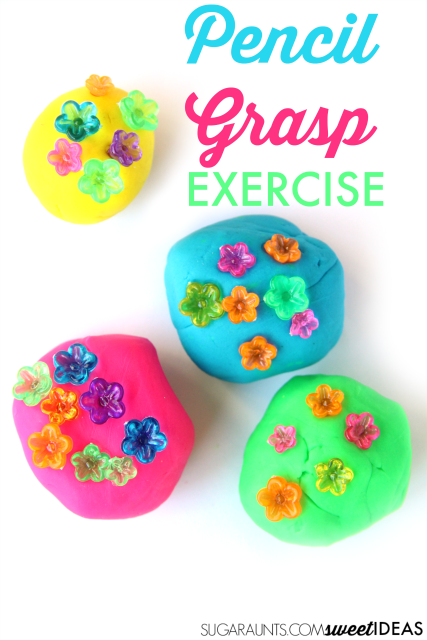
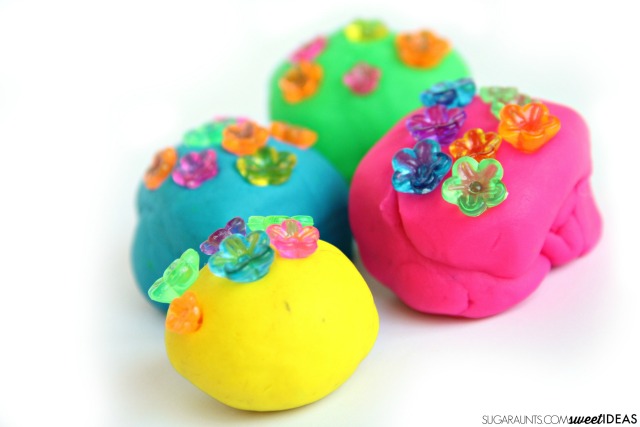
      This is such an easy activity.  Use store bought Play Dough or homemade sensory dough.

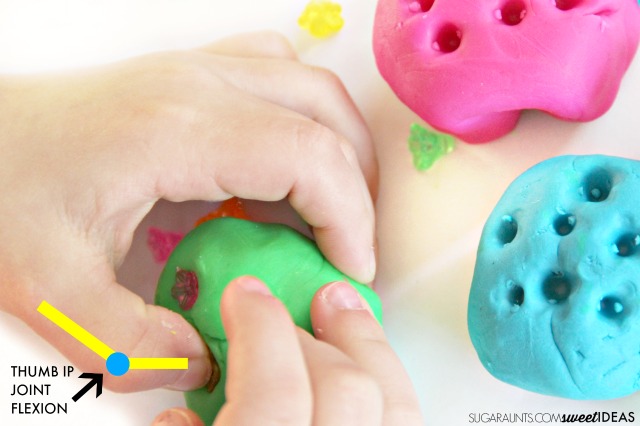
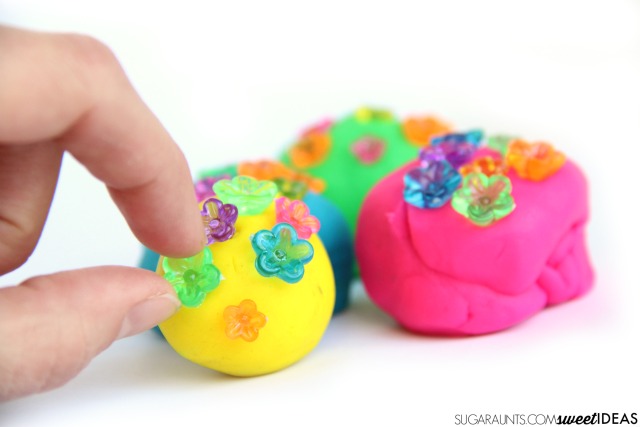
      Press flower beads into the play dough with a bent thumb. Encourage your child to press the flowers into the dough using a their their thumb in a bent position on the edge of the flowers.  This is important, because it works the muscles needed to oppose with an open web space and flex the tip of the thumb.  This is the mobility needed to advance the pencil fluently.  These flower beads are perfect for this exercise because of the length of the flower that can press into the Play Dough.

      Pencil grasp exercise to work on an open web space and flexed thumb needed to remedy the thumb wrap grasp.


      Next, ask your child to pull out all of the flower beads by using the tips of their pointer finger and the tip of the thumb, while ensuring that your child maintains a slightly flexed (bent) thumb IP joint.

      Encourage learning and playful math by counting as your child pulls out the flowers.  If your kiddo is like my preschooler, those flower beads will be hidden pretty far into the play dough.  The search and find is a great overall hand exercise and a fun math activity as you add up the beads!

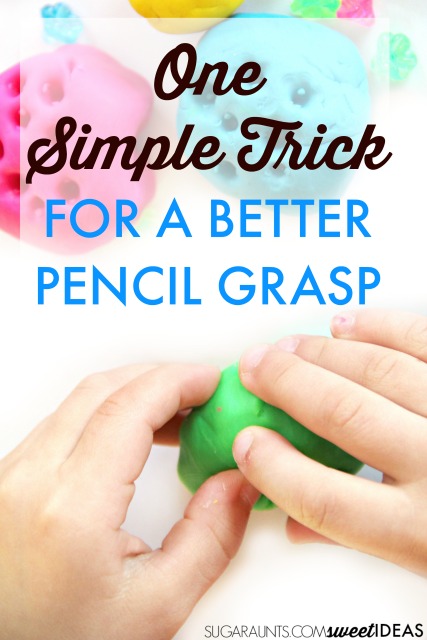
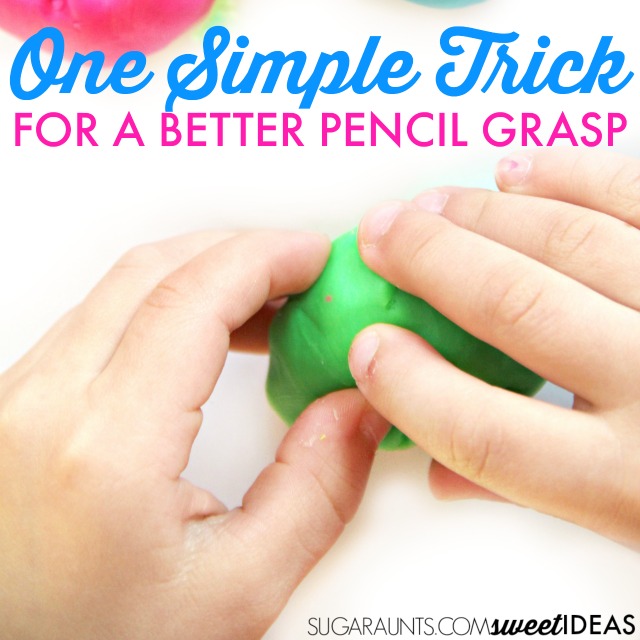
      ONE Simple Trick to Help Kids With Their Pencil Grasp

      SO? How can you use this info to help kids with their pencil grasp? Make them aware of that little bent thumb joint.  Point it out as they are doing the play dough activity and then again when they are holding a pencil.  Remind them of that bent knuckle when they write.  Too much for your kiddo?  Don’t fret. 
       
      Another tip is to use the pencil grip needed for a thumb wrap grasp. This blog post includes pencil grips for each type of grasp.

      Pencil Grasp Tricks and TIps

      Working on the underlying skills of a functional pencil grasp? Battling a thumb wrap grasp that slows down handwriting so much that the kiddo you are seeing on your caseload falls behind in writing speed? Know a child who has hyper-extended joints when holding the pencil?

      Here are some pencil grasp tricks that can help to improve functional grasp. These strategies can address pencil grasp issues such as thumb wrap, inefficient joint positioning, a closed thumb web space, poor separation of the sides of the hand, and other pencil grasp concerns.  

      Use this pencil grasp tricks to help kids improve pencil grasp when writing.
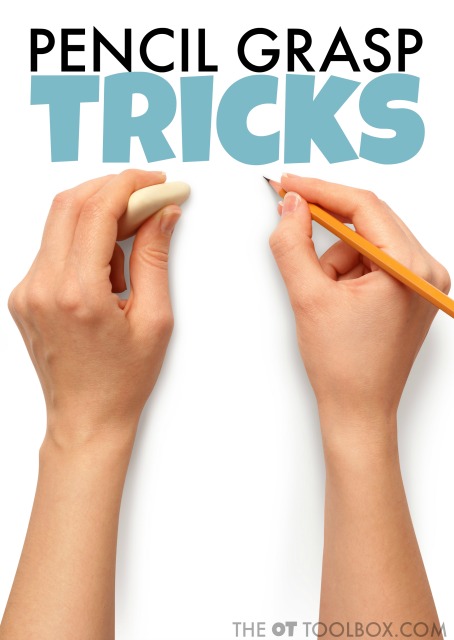
      human hands with pencil and erase rubber writting something

      Pencil Grasp Exercise

      • Try this trick: Ask the child to hold and manipulate a small item such as a kneadable eraser in the non-dominant (non-writing) hand while holding the pencil with the dominant hand. Ask them to manipulate the object with just the thumb, pointer finger, and middle finger. Sometimes that symmetrical movement makes a big difference!
      • This pencil grasp trick uses an item you probably already have in your therapy bag: a clothes pin!
      • This pencil grasp trick helps to work on thumb IP joint flexion…and requires only a marker.

      The pencil grasp exercise and tricks above will help with many kids that need to work on an open web space, not just the thumb wrap grasp.  Try it and let me know how it goes!

      MORE PENCIL GRASP HELP

      Working on a functional pencil grasp with your child or occupational therapy caseload? Need activities to improve pencil grasp that kids WANT to do? These games that improve pencil grasp through fine motor activities are activities that boost the skills kids need for pencil grasp and games that strengthen the hands. Working on pencil grip to make and efficient and functional pencil grasp can be as easy as adding a few fine motor games to your therapy toolbox!

      • Want to know how to fix a problem with pencil grasps?
      • Need help knowing where to start when it comes to immature pencil grasps or a child hating to write because their hand hurts?
      • Need help with carryover of pencil grasps?

      The Pencil Grasp Challenge in open for you! In this free, 5 day email series, you’ll gain information, resources, specific activities designed to promote a functional, efficient pencil grasp.

      know about the skills that make up a functional pencil grasp. You’ll learn what’s going on behind the inefficient and just plain terrible pencil grasps you see everyday in the classroom, clinic, or home. Along with loads of information, you’ll gain quick, daily activities that you can do today with a kiddo you know and love. These are easy activities that use items you probably already have in your home right now.

      Besides learning and gaining a handful (pun intended) of fun ideas to make quick wins in pencil grasp work, you’ll gain:

      • 5 days of information related to pencil grasp, so you know how to help kids fix an immature pencil grasp.
      • Specific activities designed to build a functional pencil grasp.
      • Free printable handouts that you can use to share with your team or with a parent/fellow teachers.
      • You’ll get access to printable challenge sheets, and a few other fun surprises.
      • And, possibly the best of all, you’ll get access to a secret challengers Facebook group, where you can share wins, chat about all things pencil grasp, and join a community of other therapists, parents and teachers working on pencil grasp issues.

      Click here to join the Pencil Grasp Challenge.

      free pencil grasp challenge
      Pencil grasp exercise to work on an open web space and flexed thumb needed to remedy the thumb wrap grasp.

      More fine motor activities you will love:   

      Colleen Beck, OTR/L has been an occupational therapist since 2000, working in school-based, hand therapy, outpatient peds, EI, and SNF. Colleen created The OT Toolbox to inspire therapists, teachers, and parents with easy and fun tools to help children thrive. Read her story about going from an OT making $3/hour (after paying for kids’ childcare) to a full-time OT resource creator for millions of readers. Want to collaborate? Send an email to contact@theottoolbox.com.

      The Handwriting Book is a comprehensive resource created by experienced pediatric OTs and PTs.

      The Handwriting Book covers everything you need to know about handwriting, guided by development and focused on function. This digital resource is is the ultimate resource for tips, strategies, suggestions, and information to support handwriting development in kids.

      The Handwriting Book breaks down the functional skill of handwriting into developmental areas. These include developmental progression of pre-writing strokes, fine motor skills, gross motor development, sensory considerations, and visual perceptual skills. Each section includes strategies and tips to improve these underlying areas.

      • Strategies to address letter and number formation and reversals
      • Ideas for combining handwriting and play
      • Activities to practice handwriting skills at home
      • Tips and strategies for the reluctant writer
      • Tips to improve pencil grip
      • Tips for sizing, spacing, and alignment with overall improved legibility

      Click here to grab your copy of The Handwriting Book today.

      Play Dough Activities for Fine Motor Skills

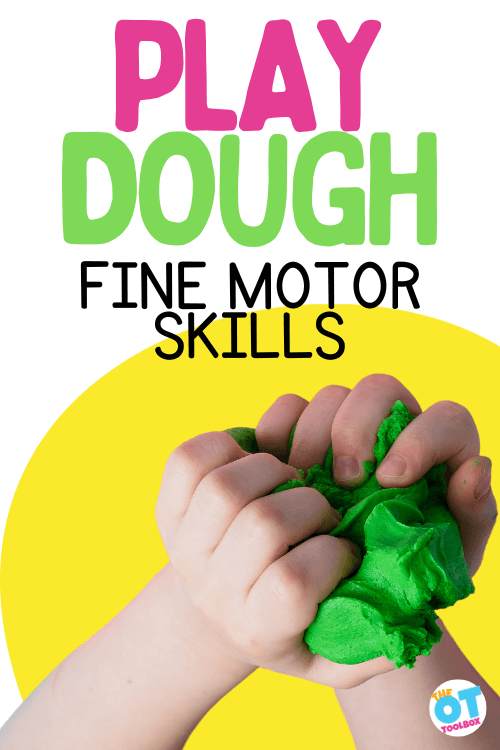
      hands squeezing play dough and text reads "play dough fine motor skills"

      Looking for a play dough activity (or many) that develop and strengthen fine motor skills? Here, you’ll find playdough activities for fine motor skills, and specifically play dough occupational therapy ideas to strengthen the hands, improve eye-hand coordination, and address underlying skills that kids so very need. These play dough exercises are fun tools for finger strength exercises and grip strength exercises that don’t seem so much like “work”.

      play dough fine motor skills

      You’ll find a lot of fine motor activities here on The OT Toolbox…today we’re sharing fine motor activities with play dough. Whether it’s homemade play dough or store bought, play dough is a great way to build motor skills needed for precision tasks like pencil grasp, scissor skills, precision in buttoning, zippering, or tying shoes? Fine motor play is a great way to build the skills kids need.

      occupational therapy fine motor skills

      In occupational therapy, fine motor skills are a huge area of consideration. OTs often address fine motor skills and the impact on play, self-care, and other functional skills. A play dough activity is one way to make strengthening fine motor skills fun!

      playdough activities for fine motor skills

      Here are ways to use a fun play dough activity to strengthen small motor skills…let’s use play dough to work those hands!

      Speaking of occupational therapy and fine motor skills, using other commonly found materials (play dough being one, there are other items that work little muscles of the hand in OT sessions…playing cards, craft pom poms, beads, and paper clips are some ideas.

      Catch up on the latest tools on The OT Toolbox.

      • These activities and paper clip activities are an easy way to address a variety of fine motor needs on the go.
      Use play dough to improve fine motor skills with these fine motor activities using play dough.

      Play dough exercises improve hand strength and finger dexterity.

      Fine Motor Activities with Play DOugh

      We wanted to share the reasons why play dough exercises are a fine motor power tool. However, you’re not limited to using play dough to gain these benefits. Theraputty exercises or slime exercises can be interchanged with the play dough fine motor exercises.

      Here’s the thing: play dough is an easy and effective means for building fine motor skills for preschoolers. The soft and squishy dough provides a tactile sensory challenge with proprioceptive sensory feedback. The bonus is the strengthening of the arches of the hands and precision of grasp.

      Fine motor activities like playing with playdough build many fine motor skill areas:

      Here are all of the intricacies of fine motor skills. Read about the definitions of fine motor skills and how each skill area is needed for tasks like pencil grasp, buttons, and other fine motor tasks.

      Playing with play dough builds other skills as well:

      Check out our video below for play dough exercises that you can do with a container of play dough. In the video, we walk through specific exercises like making a play dough snake, making a play dough snail, pinching off balls of play dough, finger isolation play dough tasks, how to isolate the thumb with play dough, and resistive tendon glides using play dough exercises.

      Follow along with the video for Play Dough exercises to strengthen the hands.

      Build fine motor skills using play dough to improve coordination, dexterity, and grasp.

      playdough activities for fine motor skills

      We’ve covered all of the various ways play dough supports fine motor development. Now, let’s discover how to use play dough for fine motor skills.

      Let’s get to those playdough activities for fine motor skills! A tub of play dough has so many options for building fine motor strength and dexterity.

      • Roll balls of dough between the thumb and pointer/middle fingers.
      • Make a rainbow with rolls of different colors of play dough.
      • Use a play dough mat like this ice cream play dough mat and others on this site.
      • Make play dough snakes and cut with scissors
      • Roll a long rope of play dough and roll it into a cinnamon bun
      • Hide beads and have a race to find them
      • Create an obstacle course for the fingers with hurdles and jumps
      • Spread the play dough out into a pizza. Use scissors to cut it into slices
      • Make a small world with hills and mountains for small animal figures
      • Make a maze for a ping pong ball. Blow the ball through the maze with a straw
      • Make a small keyboard using balls of dough. Press on the play dough balls with one finger 
      • Make a play dough pie. Pinch the crust, create play dough berries.
      • Form letters using the play dough
      • Mix water into the play dough for a squishy, messy dough
      • Build structures using popsicle sticks and play dough. Add details with feathers scraps of paper, etc
      • Make play dough emoji faces 
      • Roll play dough into a sheet. Cut it with scissors.
      • Cut with cookie cutters
      • Press google eyes into play dough
      • Press buttons into playdough
      • Push pegs into play dough
      • Press straws into play dough to make circles
      • Press kitchen utensils into play dough
      • Press feathers into playdough
      • Nature sculptures- add leaves, pine cones, acorns, etc.
      • Make play dough muffins with muffin tin
      • Press rocks into play dough
      • Use candles or pipe cleaners and craft sticks to create playdough birthday cakes
      • Press craft sticks into play dough to make a STEM fine motor building set

      Several of the play dough activities above mentioned using scissors. Here is a resource on types of scissors to start with to address various fine motor needs.

      Printable Fine Motor Play Dough Activity

      One way to support fine motor skills with play dough is using a printable play dough mat. We have many play dough mats here on the site. These are also available in our Membership Club as well as in our fine motor kits.

      What would you add to this list of fine motor activities using play dough?

      Working on fine motor skills, visual perception, visual motor skills, sensory tolerance, handwriting, or scissor skills? Our Fine Motor Kits cover all of these areas and more.

      Check out the seasonal Fine Motor Kits that kids love:

      Or, grab one of our themed Fine Motor Kits to target skills with fun themes:

      Want access to all of these kits…and more being added each month? Join The OT Toolbox Member’s Club!

      Colleen Beck, OTR/L has been an occupational therapist since 2000, working in school-based, hand therapy, outpatient peds, EI, and SNF. Colleen created The OT Toolbox to inspire therapists, teachers, and parents with easy and fun tools to help children thrive. Read her story about going from an OT making $3/hour (after paying for kids’ childcare) to a full-time OT resource creator for millions of readers. Want to collaborate? Send an email to contact@theottoolbox.com.

      Farm Small World Play Dough Activity

      farm small world

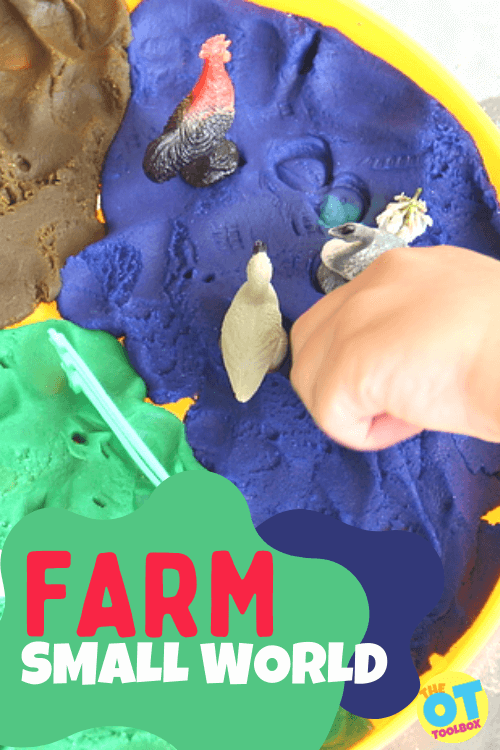
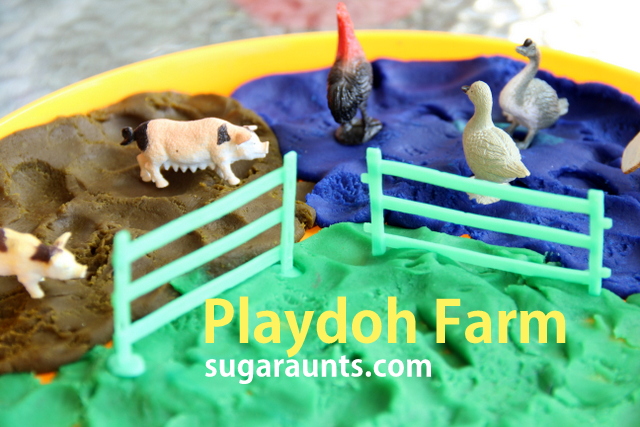
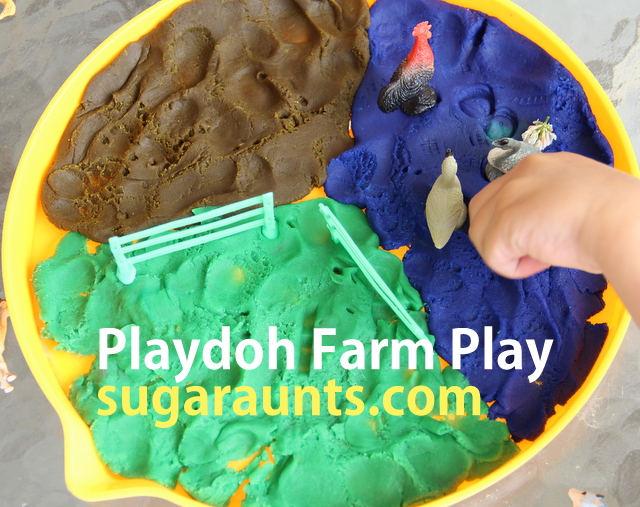
      If you have kids, you’ve probably been aware of the fascination with play dough…and this farm small world hits the mark! We created a farm play dough world using different colors of play dough and a few miniature farm animals to develop fine motor skills, sensory play, and so much more. This was a huge hit when my kids were smaller and one that I love to go back on and look at the pictures! This farm animal play dough idea is a great addition to a farm activities theme for therapy or the classroom!

      Farm small world play dough activity with a farm play dough idea

      Farm Small World

      Play dough farm animals are fun ways to support skills in kids…So, what is a farm small world and how can we use this play dough activity to support skill building in kids?

      First of all, a farm small world is just that: a miniature farm play activity on a small scale. For kids, play is all about pretend, and play is a powerful means to develop skills: motor skills, cognitive, sensory, etc.

      Occupational therapists involve play in therapy sessions to support development of skills through the child’s primary occupation, play!

      A farm small world is a play set-up with a farm theme to inspire skills in areas such as:

      • Fine motor work– Using the fingers to manipulate farm animal figures in play dough for strengthening and precision
      • Heavy work (proprioceptive input) through the hands– By pressing play dough into a small world surface and pressing farm animal figures into the play dough
      • Creativity– Imaginative play to create scenarios, and pretend play scenes using the farm play dough creations
      • Communication skills– Using receptive language and expressive language to communicate between farm animals or farmer, etc.
      • Self-awareness and body awareness– Moving the body through space to manipulate animals and farm figures
      • Crossing midline– Moving on the floor or table surface to reach across the small world farm
      • Floor play– Playing on the floor for heavy work. Also using principles of DIR Floor Play as a therapy modal
      • Visual Processing skills– Eye-hand coordination, visual motor skills, visual scanning, form constancy

      A DIY Farm play dough kit can develop so many skill areas!

      You can even use the play dough farm animals set along with our Farm Brain Breaks for whole-body therapy fun.

      Farm play dough small world with farm animal minifigures

      How to Make a Farm Play Dough Small WOrld

      To create a farm small world play space, you can gather a few materials:

      1. Play dough in various colors (brown, blue, and green)
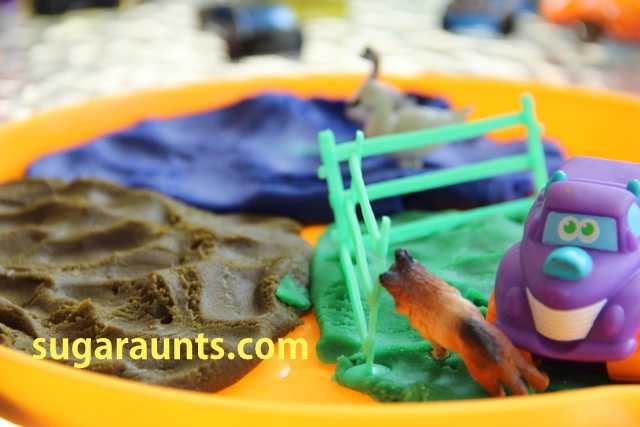
      2. Farm figures: miniature farm animals, plastic fence, and small trucks or tractors if you have them
      3. A surface- We used a plastic frisbee for our farm small world, but you could use a plastic plate, a small bin, or a box.

      To make the farm playdough world, first press the play dough into the surface of the container. Use fingertips to press the brown, green, and blue play doh into the surface.

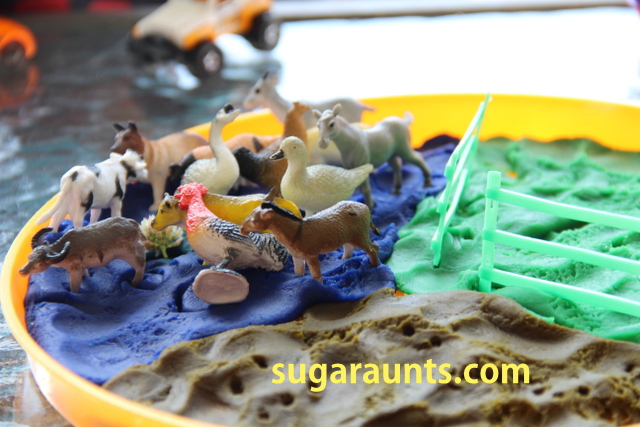
      Next, add miniature cows, horses, chicken, ducks, pigs, etc. Press the farm animals into the play dough to create animal footprints.

      Add farm details such as plastic fencing, miniature tractors, etc.

      Then play with the farm play dough kit!

      Little Guy loved playing with this little play dough set up.  We pulled out our farm animals and a few colors of play dough, and played farm!   Little Guy said we needed to get a couple of his cars too.  Because the animals needed to go places on his farm 🙂

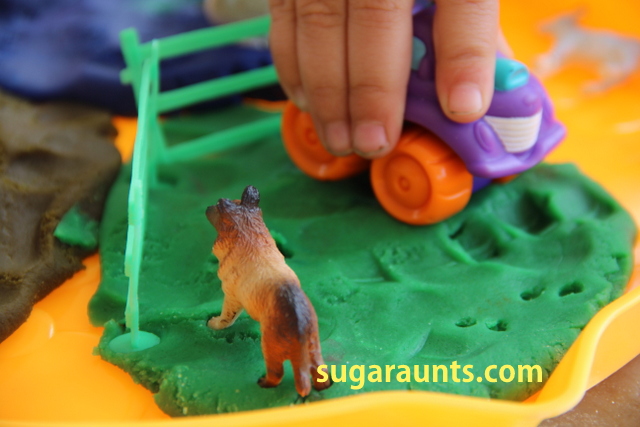
      Use a tractor vehicle in a play dough farm small world activity.

        We explored footprints and tire impressions in the play dough.    

      Child pressing a toy tractor into a farm play dough activity, with tractor tracks in the play dough.

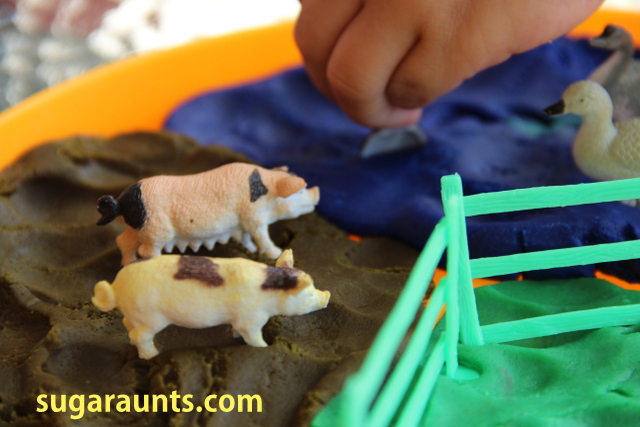
        The pigs had the mud to themselves…

      Farm play dough small world with miniature pigs in brown play dough

        …and all of the birds stayed in the “lake”.

      Play dough farm with chicken, ducks, and geese minifigures.

         And then all of the animals got hot and had to take a dip in the lake 🙂  

      Farm animals in play dough in a play dough small world

      This was a fun way to spend a little time playing with my Little Guy and exploring that imagination of his.  He is such a sweet little dude with big ideas and loves having FUN.  

      Play Dough Animals

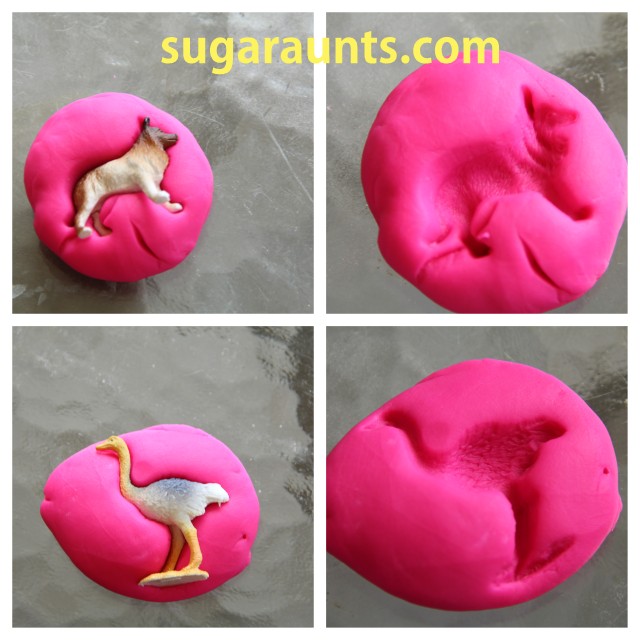
      We thought it was pretty funny to make animal impressions in the play dough, too. These cute little play dough animals were not only a fun fine motor activity, it also is a great tool for developing skills like visual perceptual skills and visual discrimination as well as form constancy too. This is a great way to work on fine motor strength and visual motor skills such as visual closure.

      The play dough animals were little hollow impressions of the plastic animals.

      We played a little guessing game where one of us would cover our eyes and the other would make an imprint in the play dough.  Then the other person would guess what animal made the shape.  We did this for a long time…doing each animal.

      Press animal mini figures into play dough to guess the animal by shape.

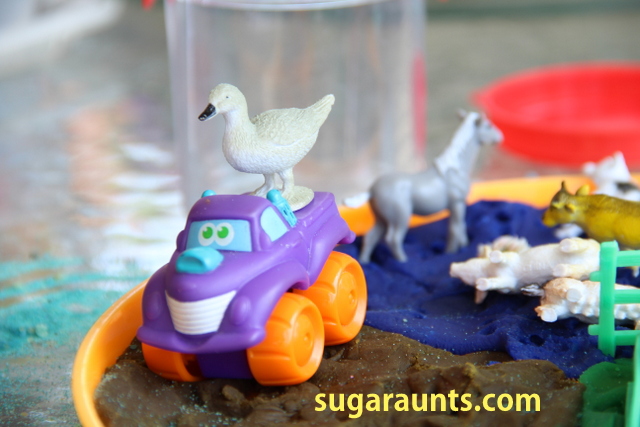
      And then back to the farm we went.  And the animals took a few joy rides on their cars and trucks!  

      Goose toy on a farm tractor in a play dough small world farm activity

      So, what do you think? Does this farm small world play look like a fun idea or what? Farm small world animals and a few containers of play dough can support so many developmental areas!

      Looking for more fine motor and pretend play skill-builders? Check out our fine motor kits for themed OT work, including these:

      Free Farm themed Scissor Skills Sheets

      You’ll also love our Fine Motor Kits:

      Working on fine motor skills, visual perception, visual motor skills, sensory tolerance, handwriting, or scissor skills? Our Fine Motor Kits cover all of these areas and more.

      Check out the seasonal Fine Motor Kits that kids love:

      Or, grab one of our themed Fine Motor Kits to target skills with fun themes:

      Want access to all of these kits…and more being added each month? Join The OT Toolbox Member’s Club!

      Colleen Beck, OTR/L has been an occupational therapist since 2000, working in school-based, hand therapy, outpatient peds, EI, and SNF. Colleen created The OT Toolbox to inspire therapists, teachers, and parents with easy and fun tools to help children thrive. Read her story about going from an OT making $3/hour (after paying for kids’ childcare) to a full-time OT resource creator for millions of readers. Want to collaborate? Send an email to contact@theottoolbox.com.

      Types of Scissors

      Types of scissors

      Did you know there are many different types of scissors to support development of scissor skills? It’s true! No matter the motor skill ability, there are different type of scissors that supports that ability or skill development. Cutting skills, like writing, are a foundational fine motor skill.  Just as you would spend time selecting the right pen/pencil, makeup, hair accessory, or pair of shoes, it is important to select the correct types of scissors.

      Types of scissors and why each different type is used

      Why do different types of scissors matter?  

      What do you look for when selecting that perfect pair of shoes?

      • Fit
      • Size
      • Price
      • Durability
      • Reputation, reviews
      • Quality
      • Functionality 

      Believe it or not, the same care can be placed in selecting the correct pair of scissors.  This is especially important if your learner has fine motor delays, hand weakness, difficulty with motor planning/coordination, small/large/irregular hands, or a diagnosis impacting their skills.

      Here are a few real life examples:

      • Lula is 4 years old with dwarfism.  Her hands are tiny.  Her parents would be very unlikely to buy her shoes that fit a grown man.  At her school, Lula was provided with regular sized scissors, thus struggling to learn this important skill.
      • James is 7 and has Down Syndrome.  Not only are his hands weak, but they are small.  While care is taken to select the right shoes and clothes for him, selecting the right scissors is just as important.
      • Marcy is 5 year old and has cerebral palsy, limiting her hand and arm movements.  She too should have extra consideration in the type of scissors that she uses.
      Different types of scissors

      What are the options for types of scissors?

      *Disclamer – Many of the following product recommendations are affiliate links from AmazonThis does not mean these are the best, just the easiest to find.  If you prefer another vendor, check out the examples below, then type them into your Google search bar.

      1. Small Sized scissors

      Beginner small-sized scissors- These scissors are all small in size.  They are not just for small hands.  These are great for learners with all types of fine motor issues, and hand weakness.

      These beginner scissors are Amazon affiliate links.

      • I like these toddler sized scissors because they are very small.  They are great for tiny hands, or learners with fine motor weakness.
      • This learning pack of scissors contains toddler sized scissors, as well as training scissors.  See below for more information about training scissors.
      • Sewing scissors are great because they are tiny, however, they are SHARP!  If you are going to use these, either dull the edges with a file, or be extra careful with your learners.
      • These Benbow Scissors, made by Mary Benbow are the gold standard of training scissors.  

      2. Training Scissors

      Training scissors should be used as a stepping stone to graduating to a higher level type of scissors, once they are mastered.  If training scissors are not mastered, your learner can use these indefinitely.

      The training scissors listed below are Amazon affiliate links.

      • Self-opening scissors: many learners are able to pinch their fingers together long before they can open them during cutting at will. The key to motivation is success.  While using these scissors, the hands get valuable feedback of this cutting motion. These self opening scissors fit the price and durability category, but they do not fit the functionality definition. These blunt scissors, while inherently safer than sharp scissors, do not cut well, and cause more frustration than progress.
      • Spring-assist scissors- This pair of self opening scissors or these soft-grip scissors fit the function, and durability categories. They are more expensive, but cut better than safety scissors.  They are larger than the toddler scissors, so be sure that size is not a concern first
      • Double loop scissors – While I do not like that these are labeled “mother and child scissors” (because this is not inclusive), they work well.  People learn by doing.  Kinesthetic awareness is learning by moving.  These double loop scissors give your learner the feedback needed to practice and learn the cutting motion
      • Trialing two kinds of scissors- This scissor pack has double loop scissors and self opening scissors to trial different kinds of scissors with your learners, or progress forward as they develop skills.

      3. Scissors for Special Needs

      There are times when traditional scissors do not work and a specific adaptive scissor type is required. If your learner has weakness, a hand injury, tremors, increased/decreased muscle tone, or another long term condition, various scissors for special need areas are a good option. 

      Scissors in this category include loop scissors, block scissors, tabletop scissors, and electric scissors.

      For learners with small hands, or who are developing hand strength, I would recommend self opening scissors first, or using these adaptive scissor types for a very short period of time.

      These different types of scissors designed to meet specific needs are Amazon affiliate links.

      Loop scissors – These are also described as self-opening scissors.  Some learners can not isolate their fingers enough to work traditional scissors, or have a sensory aversion to sticking their fingers into the little holes on the handles of the scissors. These spring open once depressed.  They do take a fair amount of strength to grip for a prolonged amount of time, so these may not be the best choice for your learners with low tone or decreased strength (unless of course you are looking for a tool to increase strength).  

      • While these mini loop scissors at 5.5 inches are smaller and take less grip strength, they also do not cut very fast, instead making small snips.
      • These larger loop scissors at 8 inches are a great choice for stronger hands.
      • These self opening loop type scissors are popular. They require less dexterity than traditional scissors, but they do not cut very well.  Because the mouth of the scissors does not open wide, they do not make large cuts.

      Scissors for Limited mobility –  For learners missing digits, or with limited grasp, such as amputees or quadruplegic patients, use of just one upper extremity, visual challenges, or other mobility and coordination concerns, these tabletop scissors can be fastened to a table with a clamp or velcro to assist in opening containers.  They are not great for intricate cutting, as they are labor intensive and can be frustrating, but more usable for self help skills. 

      Power option – for learners with limited mobility or fine motor dexterity, electric scissors can be a motivating option for cutting.  They take some strength and coordination, but can be helpful for learners who can not use traditional scissors. These types of scissors take some practice to get used to them.

      Left handed Scissors

      Similar to questions on left-handed writing, teachers and parents are forever inquiring about left handed scissors and how to help with left handed cutting. 

      What is the left handed scissors difference?

      There is definitely a difference between left-handed scissors and right-handed scissors. Right-handed scissors have the right blade positioned on top, whereas left-handed scissors have the left blade positioned on top. This prevents unnecessary bending and tearing of the paper. This difference between left and right handed scissors also allows each user to maintain a clear visual view of the cutting line.


      Scissor handles are often molded to accommodate either the left or right hand. When manufacturers claim they have created a pair of ambidextrous scissors, be aware that such a thing does not exist. They have simply created a “neutral” handle accessible for the both left and right hand. The blades are still right-hand oriented. Thus, left-handed users should not be given scissors marketed as being appropriate for both left-handers and right-handers.

      True left handed scissors have the cutting blade positioned on the top. Neutral scissors or scissors that can fit both left and right hands may cause additional frustrations.

      Read more on the term ambidextrous and what this means for functional tasks such as cutting with scissors.

      There are several types of scissors for lefty’s available, but what are the best left handed scissors?

      These basic lefty scissors (affiliate link) are ideal.  If it wasn’t such a right handed world, I would recommend these to all lefties. 

      Being a lefty myself, I understand the benefit and fit of left handed scissors. The majority of scissors your learner will encounter will be right handed, so it is better to learn and adapt to traditional scissors. There are only a few left handed items that are necessary (can opener, ice cream scoop, binder, ladle, vegetable peeler.)

      Tips for Left handed cutting:

      • Use sharp scissors – this way the blade has less chance of just bending the paper instead of neatly slicing through it
      • Don right handed scissors upside down – for some reason putting the thumb in the fingers hole changes the blade position, and makes cutting easier. 
      • Lefties cut CLOCKWISE.  Righties cut COUNTERCLOCKWISE.  This is important.  If your learner cuts in the wrong direction, this leaves them without the ability to hold onto and turn the piece of paper that is being cut.  Try it!

      time to learn to cut

      Now that you have selected the right fit, durability, functionality, and quality of scissors for your learner, it is time to learn to cut!  The OT Toolbox has multiple posts and products available for practicing scissor skills.  There is a comprehensive scissor skills guide available also.

      The key to cutting skills

      • Thumb and middle finger in the scissor loops.  You can add ring finger into the loops if they are large.  Pointer finger stays out and points the way.  This adds to hand stability and opens the arches of the hand further.
      • Thumbs up!  The helper hand grips the object being cut, with their thumb facing up.  This gives the object being held greater stability, and ease of movement. All of the various types of scissors could have a sticker added as an additional adaptation to help with positioning.
      • How to hold scissors – check out this helpful post on the OT Toolbox
      • Steps of scissor skill development
      • Scissor Skills
      • Scissor Skills Crash Course

      Guide to Types of Scissors

      Want a printable guide to the various types of scissors? You are in luck. We have a one page printable guide that shows images of the different versions of scissors on the market. These are the different scissor types you might see in a therapists’ therapy bag!

      Now you can quickly share information on why each type of scissor might be used and determine which type of scissor to use based on the individual needs of the learner.

      To get your copy, just enter your email into the form below.

      This handout set is also available in our OT Toolbox Member’s Club.

      Current Membership Club members can log into your account and head to the dashboard toolbox labeled “Scissor Skills Downloads“. Print off the handouts without the need to enter an email address.

      Want to add this resource to your therapy toolbox so you can help kids thrive? Enter your email into the form below to access this printable tool.

      Want to add this resource to your therapy toolbox so you can help kids thrive? Enter your email into the form below to access this printable tool.

      This resource is just one of the many tools available in The OT Toolbox Member’s Club. Each month, members get instant access to downloadable activities, handouts, worksheets, and printable tools to support development. Members can log into their dashboard and access all of our free downloads in one place. Plus, you’ll find exclusive materials and premium level materials.

      Level 1 members gain instant access to all of the downloads available on the site, without enter your email each time PLUS exclusive new resources each month.

      Level 2 members get access to all of our downloads, exclusive new resources each month, PLUS additional, premium content each month: therapy kits, screening tools, games, therapy packets, and much more. AND, level 2 members get ad-free content across the entire OT Toolbox website.

      Join the Member’s Club today!

      FREE Handout: Types of Scissors

        We respect your privacy. Unsubscribe at anytime.

        a final note on selecting the correct types of scissors

        Pamper your learner with a great pair of scissors, just like you do when you purchase those amazing shoes.  Fit and function over price. Quality always wins.  Fiskars are the gold standard for traditional scissors, and the one type almost every therapy provider has in their OT bag of tricks.  They cut paper well and come in tons of sizes and designs. 

        So…what are the worst scissors?  Most therapists agree that those “safety scissors” that don’t cut anything except maybe playdough are absolutely the worst.  Save those for playdough, and upgrade when it comes to cutting anything else. 

        Victoria Wood, OTR/L is a contributor to The OT Toolbox and has been providing Occupational Therapy treatment in pediatrics for more than 25 years. She has practiced in hospital settings (inpatient, outpatient, NICU, PICU), school systems, and outpatient clinics in several states. She has treated hundreds of children with various sensory processing dysfunction in the areas of behavior, gross/fine motor skills, social skills and self-care. Ms. Wood has also been a featured speaker at seminars, webinars, and school staff development training. She is the author of Seeing your Home and Community with Sensory Eyes.

        *The term, “learner” is used throughout this post for readability, however this information is relevant for students, patients, clients, children of all ages and stages, or whomever could benefit from these resources. The term “they” is used instead of he/she to be inclusive.

        Looking for tips, strategies, and activities to support development of scissor skills? Grab a copy of The Scissor Skills Book!

        The Scissor Skills Book breaks the functional skill of cutting with scissors into several developmental areas including:

        • Developmental progression of scissor use
        • Fine motor skill involvement
        • Gross motor development
        • Sensory considerations and visual perceptual skills

        Each section includes strategies and tips to improve these underlying areas.

        • Help for kids who struggle with cutting accurately
        • Creative tips to keep things interesting for kids who lose interest easily
        • Quick, practical strategies that can be put into action today!
        • Ideas for kids who cut too fast or too slow
        • Support for kids who can’t grasp scissors efficiently
        • Strategies for right-handed and left-handed children

        Click here to get your copy today.

        How to Use Graph Paper

        graph paper uses

        Do you know how to use graph paper to meet specific OT goal areas? We can use grid paper in occupational therapy sessions to develop many goal areas. Did you ever see a student using graphed paper in occupational therapy and wonder about the pre-gridded paper purpose in supporting goals? Not only is graph paper a type of adapted paper for some, it can be a tool too! There are so many different reasons to use this type of paper to support specific handwriting or visual perception needs. Here we are discussing using graph paper and why this type of therapy tool can be helpful.

        Graph paper uses in occupational therapy for handwriting and other areas.

        Graph Paper Purpose in OT

        Graph paper comes in many sizes!  Specific activities can be easily graded in difficulty just by making it easier when boxes are large and of course more challenging as boxes become smaller in size. 

        Graph paper can be used as a tool to support many areas of development:

        How to Use Graph Paper

        Try these paper activities in occupational therapy sessions or at home. Here are ideas on using graph paper to meet specific goal areas in OT or at home:

        Graph Paper for Visual Perception

        Tasks like forming letters the correct size, using margins, aligning lists or columns are all visual perceptual areas of handwriting. You can use grid paper to support these needs.

        Graph paper is great to use for math problems! Simply place one number in each box and line them up so numbers are easily read and there’s a spot for each number in your answer. Your math work just might be easier to do and it will for sure be easier to read.

        Graph paper for visual motor skills

        Related to the visual perception aspect is the contribution of motor skills. In order to copy shapes, copy and write words, recreate graphs, plot lines, etc. one needs visual motor skills.

        Graph paper can be used to address visual motor skills with these activities:

        • Create a plot diagram. Use a ruler to connect lines.
        • Copy shapes and designs using the grid blocks on the paper.
        • Form block letters with or without a model.
        • Cut shapes and trace the shape using the graph paper template.
        • Create symmetry drawings by folding the graph paper in half.
        • Create pencil control exercises to work on precision with pencil use.


        I love to use graph paper for imitating drawings. I will draw an odd shape or maybe even a specific item and ask a student to copy my drawing by counting and using the boxes to replicate my shape. Students can also draw their own shape and try to “stump” the therapist or other player.


        If the adult/other player is creative, s/he can label the boxes with letters and numbers across the top and side edges (kind of like a BINGO board) and the student is asked to fill in box A-1, or C-3, etc. to create a picture that will mysteriously become visible at the end. The one helping here must do a little homework on their own first to make sure the colored in boxes will actually create a picture.

        Draw shapes

        The student can also be instructed (verbally or with written cues) to draw shapes, lines, letters, etc. in certain boxes or at the intersection of certain lines (e.g. put a yellow circle in box A-1, or draw a tree at line F-7 or similar). 

        This helps to follow written instructions, draw a specific shape, and locate the correct space on the graph paper.  Be creative and make it fun!

        Graph paper Letter Size Activity-

        Finally, it would be an injustice to graph paper if I didn’t mention the use it can play in creating letter boxes for a box and dot handwriting task.  Your student may already be familiar with this through OT sessions. 

        Graph lines can be used to outline the space in which a letter sits, using one single box for lower case letters.  Upper case letters and lower case tall letters: (t, d, f, h, k, l, b) will need to include the box ON TOP to make it a one wide by a 2 tall defined space. 

        Lower case letters that are descending below the line, or tail letters (q, y, p, g, j) must include the box BELOW, making it also a one wide by 2 space, but the box on bottom goes below the line on which the letters are written. 

        Missing letter activities-

        Making up a “key” of words, or a game, have the student place the letters in the proper defined word space that has letter boxes outlined or maybe even just the word outlined.  This may be a fun way to practice spelling words. 

        Cutting activity-

        If nothing else, you can always use graph paper to practice cutting on the lines, creating a colored picture, making paper air planes, or crumpling into a ball to play a game.  Graph paper is one style of cutting paper with a graded resistance we talk about in our scissor skills crash course.

        I’m sure your student can think of many non-traditional things to do with it on his/her own!

        If you don’t have graph paper on hand, below are resources I have found which may be helpful.

        More handwriting tips

        The Handwriting Book is a comprehensive resource created by experienced pediatric OTs and PTs.

        The Handwriting Book covers everything you need to know about handwriting, guided by development and focused on function. This digital resource is is the ultimate resource for tips, strategies, suggestions, and information to support handwriting development in kids.

        The Handwriting Book breaks down the functional skill of handwriting into developmental areas. These include developmental progression of pre-writing strokes, fine motor skills, gross motor development, sensory considerations, and visual perceptual skills. Each section includes strategies and tips to improve these underlying areas.

        • Strategies to address letter and number formation and reversals
        • Ideas for combining handwriting and play
        • Activities to practice handwriting skills at home
        • Tips and strategies for the reluctant writer
        • Tips to improve pencil grip
        • Tips for sizing, spacing, and alignment with overall improved legibility

        Click here to grab your copy of The Handwriting Book today.

        Colleen Beck, OTR/L has been an occupational therapist since 2000, working in school-based, hand therapy, outpatient peds, EI, and SNF. Colleen created The OT Toolbox to inspire therapists, teachers, and parents with easy and fun tools to help children thrive. Read her story about going from an OT making $3/hour (after paying for kids’ childcare) to a full-time OT resource creator for millions of readers. Want to collaborate? Send an email to contact@theottoolbox.com.