Clay Letters

clay alphabet

These clay letters are a fine motor activity we made years ago, but we still use them today in multisensory learning activities. In fact, the clay alphabet is such a great tool for sight word and spelling word manipulatives. This week, we used two of my top Occupational Therapy recommendations in a combined fine motor power activity…to make stamped letters for learning!

We used clay and alphabet stamps to make our own clay letters for hands-on learning, including practicing spelling words, sight words, letter identification, and letter order.  This was the perfect learning tool for my second grader, kindergartner, and preschooler!

Make clay letters with alphabet stamps and use them in spelling words, decodable reading, word building, letter identification, and alphabetical order activities for multi- age learning ideas and hands-on learning in this fine motor work learning and play idea for kids.


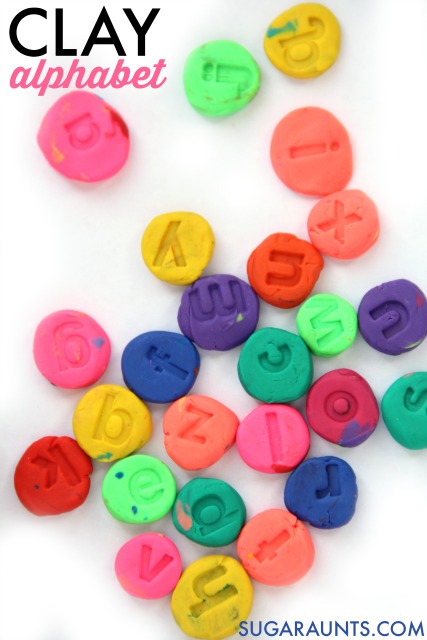
Clay Letters for multisensory learning

As an Occupational Therapist, I often times recommended using clay as a therapeutic tool.  It’s resistive and provides proprioceptive feedback while working on hand strength.  Combined with letter stamps, we were able to make our own movable and colorful letters.  


Pressing the alphabet stamps into the clay is a great fine motor exercise and one that strengthens the hands, promoting a functional pencil grasp, separation of the sides of the hand, and intrinsic hand strength.

Make clay letters with alphabet stamps and use them in spelling words, decodable reading, word building, letter identification, and alphabetical order activities for multi- age learning ideas and hands-on learning in this fine motor work learning and play idea for kids.
 

Fine Motor Work Activity

Make clay letters with alphabet stamps and use them in spelling words, decodable reading, word building, letter identification, and alphabetical order activities for multi- age learning ideas and hands-on learning in this fine motor work learning and play idea for kids.
 

How to Make Clay Letters

This post contains affiliate links.

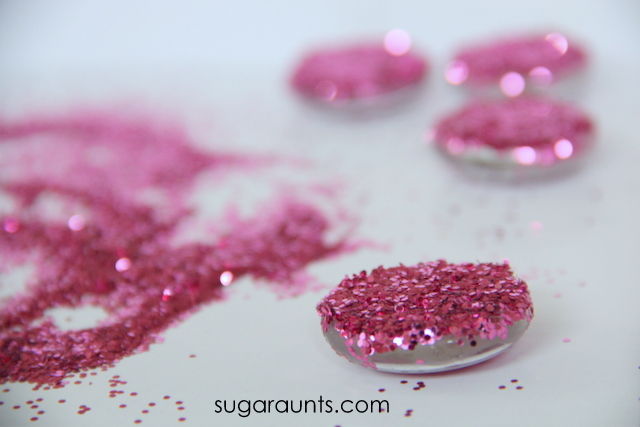
You’ll need to start with alphabet stamps for pressing into the clay, and some colorful clay. You’ll want to get the type of clay that quick dries.

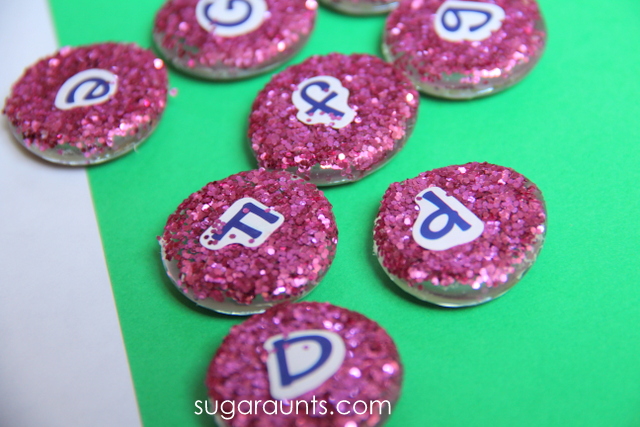
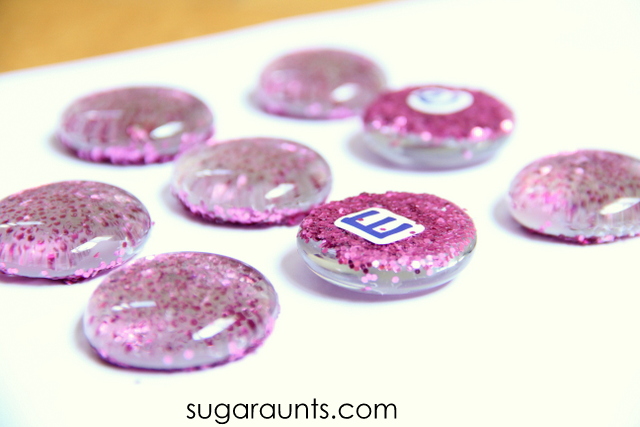
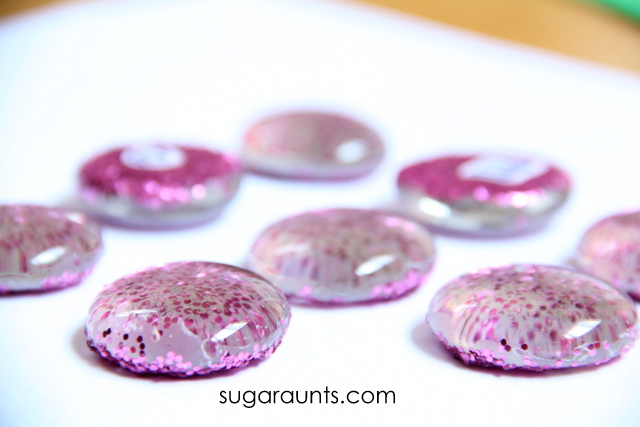
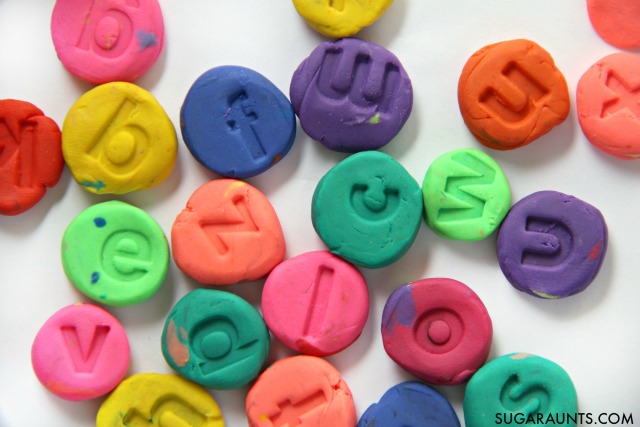
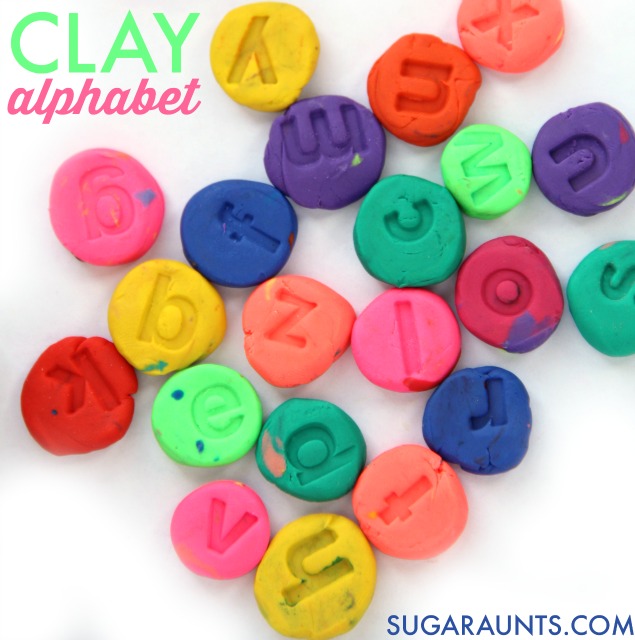
We used our Alphabet Stamp Set to press lower case letters into small, rolled balls of modeling clay. I love the bright colors of THIS brand.

To make he clay letters, kids are really strengthening the hands.

First, ask your child to first pull off small pieces of clay from the long rolls.  Roll the clay into small balls and gently press them into disks.  

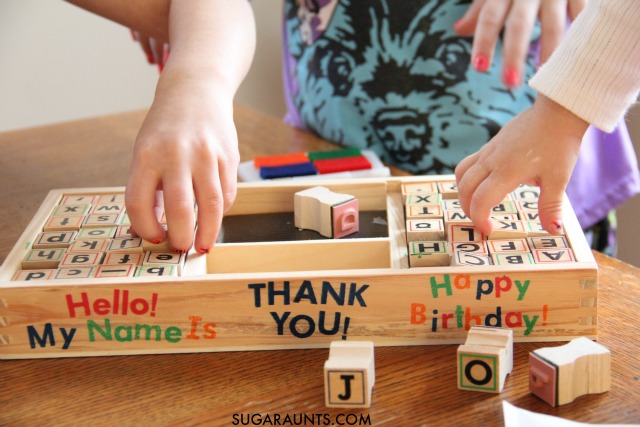
Then, have your child find the letters of the alphabet in alphabetical order.  Using the Melissa and Doug Alphabet Stamp Set was a great way to further our fine motor work.  The size and shape of the letter stamps in this set are perfect for working on intrinsic muscle strength and tripod grasp.  

Pressing the stamps into the clay is a nice way to address precision.  

Press too hard, and the clay disk is too thin.  

Press to lightly, and the letter’s impression is not deep enough in the clay.  This precision of grasp requires proprioceptive awareness.

Make clay letters with alphabet stamps and use them in spelling words, decodable reading, word building, letter identification, and alphabetical order activities for multi- age learning ideas and hands-on learning in this fine motor work learning and play idea for kids.
 

The brand of clay that we used does not harden.  This makes a nice activity for kids, but if you want to keep your letters, use a modeling clay that does dry out.

Make clay letters with alphabet stamps and use them in spelling words, decodable reading, word building, letter identification, and alphabetical order activities for multi- age learning ideas and hands-on learning in this fine motor work learning and play idea for kids.
 

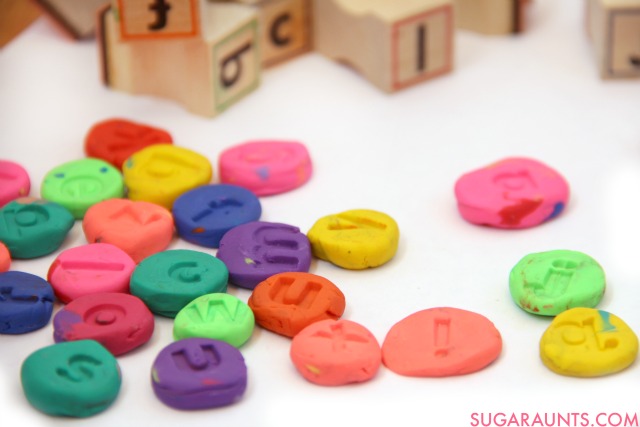
Learning Activities with Clay Letters

We used our clay letters in a bunch of different activities. Try some of these hands-on letter activities:

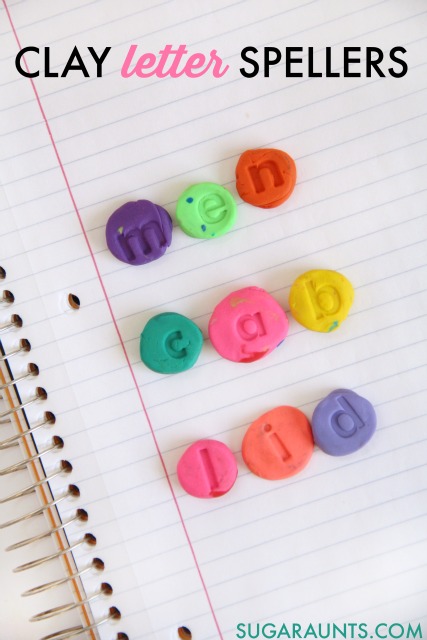
  • Practice spelling words.
  • Practice spelling sight words.
  • Arrange letters on the table.  Ask kids to visually scan for letters to find in alphabetical order.
  • Practice letter identification.
  • Copy the letters to work on letter formation.
  • Arrange the letters on a table.  Pull out a letter and ask your child to name a word that starts with that letter.  Ask them to write the words to practice handwriting.
  • Practice decodable reading and word building with the clay letters.


Make clay letters with alphabet stamps and use them in spelling words, decodable reading, word building, letter identification, and alphabetical order activities for multi- age learning ideas and hands-on learning in this fine motor work learning and play idea for kids.

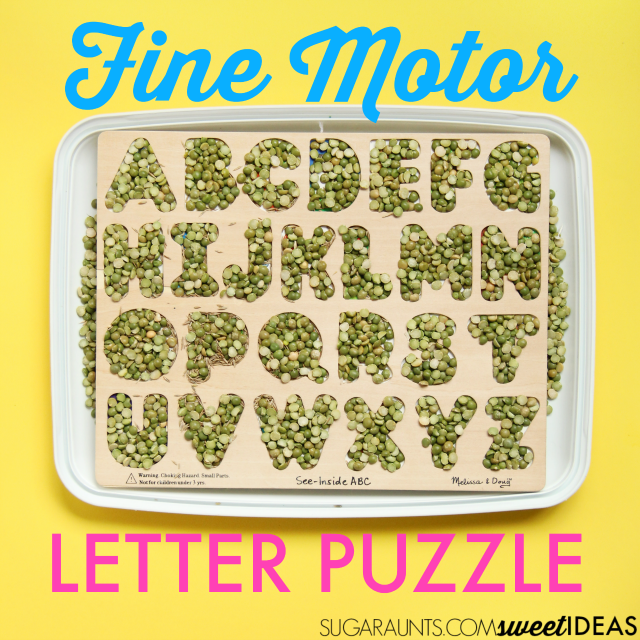
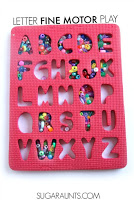
More Letter Fine Motor Activities

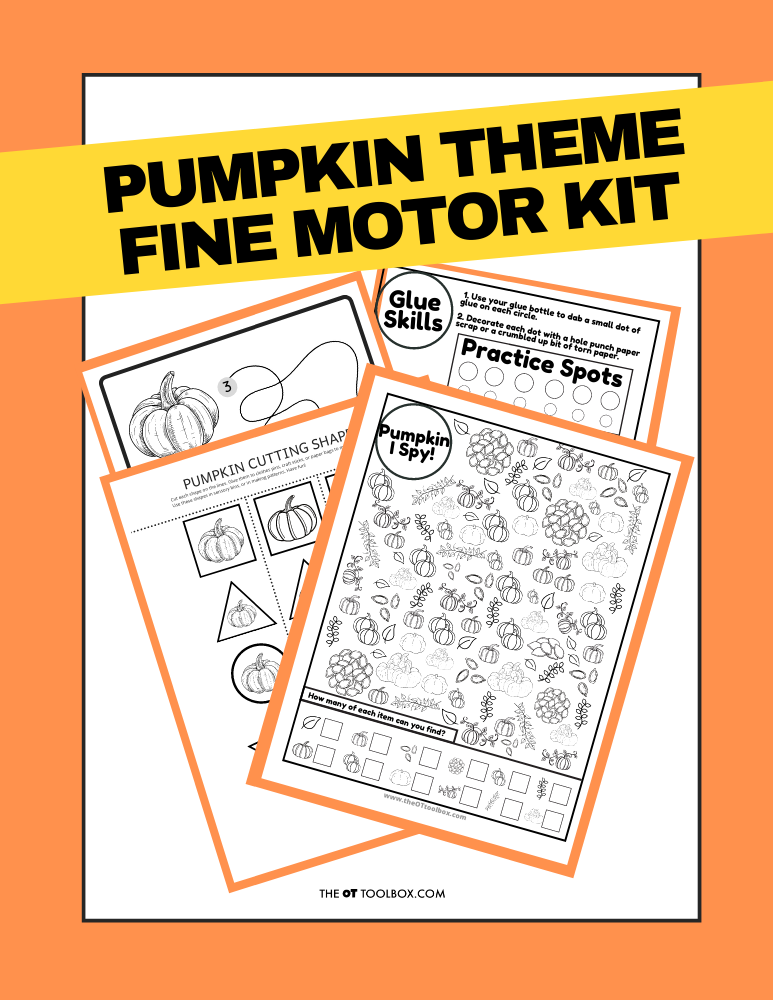
You’ll love the fine motor activities in our Letters Fine Motor Kit. The printable kit is loaded with letter activities that build fine motor skills. You can grab it and all of the other themed fine motor kits below, to build skills through play.

Working on fine motor skills, visual perception, visual motor skills, sensory tolerance, handwriting, or scissor skills? Our Fine Motor Kits cover all of these areas and more.

Check out the seasonal Fine Motor Kits that kids love:

Or, grab one of our themed Fine Motor Kits to target skills with fun themes:

Want access to all of these kits…and more being added each month? Join The OT Toolbox Member’s Club!

Colleen Beck, OTR/L has been an occupational therapist since 2000, working in school-based, hand therapy, outpatient peds, EI, and SNF. Colleen created The OT Toolbox to inspire therapists, teachers, and parents with easy and fun tools to help children thrive. Read her story about going from an OT making $3/hour (after paying for kids’ childcare) to a full-time OT resource creator for millions of readers. Want to collaborate? Send an email to contact@theottoolbox.com.

Snow globe Alphabet Puzzle Cards

snow globe printable for letter matching

Here, you can access a set of free snow globe alphabet puzzle cards. These upper and lower case puzzle cards use printable snow globe puzzles for matching upper and lowercase letters. It’s a fun winter therapy activity that develops many skill areas. Let’s take a look!

This free snow globe printable is a hands-on, multisensory strategy to teach upper and lowercase letter matching. Use the snow globe letter match task in many ways in occupational therapy.

Snow Globe Letter Match

Get ready to have some Snow Globe Letter Fun with these snow globe printables.

Winter is upon us.  For many, this is a wonderful time full of sledding, ice skating, hot cocoa, bonfires, icicles, and snow.  If you live in the cold areas of the globe, winter can be magical.  I am a summer type myself, so winter and cold are not my favorite words.  If I could live in the Bahamas year-round, I would.   Unfortunately, being a popsicle saleswoman does not pay enough.

However, for those who love winter, the cold, and outdoor sports, this is your time! I grew up skating on frozen ponds listening for the crack sound before darting off the ice. We survived the blizzard of 1977 with snow piles as high as the roof.

For me I can get my winter fix on just one blustery day, or by staring into a snow globe! 

Snow globe Activity

Creating a fun winter treatment plan is a good way to pass those long blustery days stuck inside. This week center a lesson around snow globes.  You can research snow globes, talk about collectors, go broad and discuss winter, then start your activity session on snow globes.

Add this free snow globe breath awareness strategy as a deep breathing or self-regulation tool. Kids will love this whole snow globe theme!

Then, print off the snow globe printable at the bottom of this blog post and use it to work on letter identification, visual discrimination, and handwriting skills, and letter formation.

Snow Globe Facts

Writing this blog post led to finding a few fun facts about snow globes. Use these in your therapy sessions, classroom, or home to work on handwriting skills.

  1. Snow globes are a glimpse of winter one can view from the comfort of the beach.  Collectors have shelves lined with snow globes they have gathered from around the world.

2. If you want to bring back a globe from vacation, you will have to pack it in a checked bag.  No liquids over a couple of ounces in a carry-on bag.  I wonder how many awesome snow globes are sitting at security every day after being confiscated from lovely travelers.

3. The Queen of Snow Globes has an entire website dedicated to snow globes.

4. Andy Zito holds the world record collection of globes and domes, a whopping 11,500!

5. You can read about the history of snow globes. The first known snow globe was reportedly created from an idea to make a brighter surgical instrument.

Snow Globe Letter match

If you are looking for printables and snow globe ideas, The OT Toolbox has you covered!  A good place to get started is the Snow Globe Printable Upper- and Lower-Case PDF Printable Puzzle Cards.

This is a cute set of snowglobe worksheets that include the entire alphabet. It uses a winter theme to address goals related to matching upper- and lower-case letters.  Use this as a jumping off point to work on letter recognition, matching letters, and scanning goals. 

There are many ways to use this activity, but the most efficient would be to color in these cards, then laminate them. 

  •  Make this activity easier for learners by coordinating colors on sides that go together, or more challenging by leaving them blank. 
  •  If leaving them uncolored, how about printing them on fun colored paper to help with the less motivated learners?
  • During the entire first week, have all of your learners color a page, then laminate the whole bunch.  Now each student will have had a hand in this reusable activity, that can be repurposed each year.
  • Enlarge these pages to make a great floor puzzle!
  • Project these pages onto a smart board for an interactive game dragging the pieces around the board. I am not a huge fan of technology; however, I like to provide these options for people who are.

The term “jumping off” was used above in reference to this worksheet.  This does not need to be the complete lesson on snow globes OR handwriting. There is a continuum to learning anything.  For handwriting it might start with recognizing letters, move to matching letters or matching upper- and lower-case letters, progress to copying letters, then finally to writing them from memory.

Start where your learner is currently functioning, then move forward. Often it is wise to start at one stage earlier than the current level, so the learner can have a sense of mastery, before moving onto a more difficult challenge.

Have you ever noticed how many of your older learners gravitate toward “baby toys” or easy puzzles? This is because they have mastered them, and that sense of accomplishment, no matter how small, bolsters their spirit. Avoid getting stuck at this stage, but allow it at times, especially for your more reluctant learners.

The OT Toolbox can fill your treatment plan with great ideas, not just worksheets. Look at this post on winter fun activities. Adding our snow globe puzzle cards to a winter theme would be a great way to incorporate various skill areas.

In previous posts such as the Winter Fun Clothes Number Trace Worksheet, several goals were outlined beyond the most obvious.  Check out that post to get an idea of the goals that can be addressed using just one work page such as this Snow Globe Upper- and Lower-Case Letter Matching PDF.

Free Snow globe Printable

Want to add this snow globe letter match to your therapy toolbox? Enter your email address below to access a PDF for matching upper and lowercase letters. This alphabet puzzle card set is also available in The OT Toolbox Member’s Club so members can access it there without entering your email address.

Snow Globe Uppercase and Lowercase Letter Match

    We respect your privacy. Unsubscribe at anytime.

    Enjoy your winter season full of sledding, ice skating, snowball fights, and building snowmen, while I just stare into my snow globe, lounging by the beach.  Just kidding, I do not actually live in the Bahamas yet, but I will be spending one glorious week in the Caribbean getting away from old man winter!

    Stay warm folks!

    Victoria Wood, OTR/L

    Victoria Wood, OTR/L is a contributor to The OT Toolbox and has been providing Occupational Therapy treatment in pediatrics for more than 25 years. She has practiced in hospital settings (inpatient, outpatient, NICU, PICU), school systems, and outpatient clinics in several states. She has treated hundreds of children with various sensory processing dysfunction in the areas of behavior, gross/fine motor skills, social skills and self-care. Ms. Wood has also been a featured speaker at seminars, webinars, and school staff development training. She is the author of Seeing your Home and Community with Sensory Eyes.

    *The term, “learner” is used throughout this post for readability, however this information is relevant for students, patients, clients, children of all ages, etc. The term “they” is used instead of he/she to be inclusive.

    Movement Activities Monster OT Slides

    Recently, I’ve been sharing some occupational therapy slide decks with you. These slide decks are OT activities that can be used in teletherapy sessions as part of distance OT or distance learning. Today, I’ve got movement activities with a monster theme to share. These are monster themed occupational therapy activities that cover a variety of areas. When you access the OT slide deck, use in to work on OT activities like a therapy warm-up, gross motor skills, fine motor skills, visual perceptual skills, visual motor skills, and finally, a self-regulation check-in. Each activity in the collection involves movement activities that build specific skills. Scroll to the bottom of this post to enter your email to access the latest free occupational therapy slide deck.

    Movement activities for occupational therapy sessions with a free OT slide deck that incorporates fine motor, gross motor, coordination, visual motor skills, regulation and other movement in monster theme activities.

    Movement activities

    As always, my mission here at The OT Toolbox is to help you help kids thrive through the use of easily accessible tools and resources.

    try these monster activities for a lesson plan for writing, letter identification through movement.

    The slides included in this set are acceptable movement activities for preschoolers because they use letters, helping preschoolers to recognize and identify letters. The slides would also work as a movement activity for kids in older grades as well, using the handwriting and visual motor activities to build specific skills like visual motor skills needed for handwriting tasks, copying lists of words, and visual perceptual skills needed for reading.

    Monster Movement Activities for Kids

    The slide deck promotes movement activities for kids in several ways. These are the slides and an agenda of activities to use in therapy sessions:

    Warm-Up– Use the gross motor movement activities as a warm up to help with body awareness and a sensory tool to add proprioceptive and vestibular input. Kids can copy the body positioning to challenge balance and coordination, as well as motor planning. I’ve added a visual perceptual component to the warm-up movement slides by asking children to identify a partially hidden letter as they do the whole-body movements. This challenges visual perceptual skills including visual discrimination, visual figure-ground, visual closure, form constancy, and visual memory. Read more about these skills that are needed to complete hidden pictures activities, for example.

    Monster activity with movement activities for preschool and movement activities for kids of all ages.

    Writing- The writing slides in this slide deck ask kids to identify the month they are born and the first letter of their name to create a wacky monster name. They can write this word phrase to practice handwriting. The visual scanning and tracking involved in this activity really challenges the visual processing skills and visual efficiency of the eyes. The movement activity of writing their name incorporates a functional task that they may be working on in their OT goals.

    Kids will love to work on handwriting with this monster name activity.

    Fine Motor- The fine motor portion of this movement activity slide deck involves tearing paper into small pieces. By ripping paper, kids are building hand strength, bilateral coordination, eye-hand coordination, and efficiency of grasp. I’ve added a visual motor component to this activity by asking the child to use those paper scraps in shaping and copying specific shapes. The whole fine motor activity adds much-needed fine motor movement and eye-hand coordination to a shape building activity.

    Visual- The visual portion of this occupational therapy slide deck is a favorite for some kids (My own kids included!) Use the slides to work on visual perceptual skills as they find matching shadows for the monster figures in a series of three slides. After the child completes each slide, ask them to jump and and cheer!

    A monster visual perception activity for ot sessions.

    Calm Down/Check-In- Lastly, you’ll find a calm down slide that incorporates the colors of the Zones of Regulation program. Children can complete the calm down movement activities shown on the slides and then choose a color to check in for their state of feelings.

    Work on self-regulation activities with a monster theme.
    Use the zones of regulation with a monster theme

    Want these movement activity slides?

    Enter your email below. If you are currently on The OT Toolbox newsletter list, this will not add you a second time. It will simply send the slides your way. Enjoy!

    Get this Movement Activities slide deck

      We respect your privacy. Unsubscribe at anytime.

      HERE ARE MORE Movement ACTIVITIES TO USE IN VIRTUAL OT SESSIONS

      Heavy work movement activity cards

      Monthly movement activities

      Teletherapy activities for kids

      Work on fine motor skills in teletherapy

      Colleen Beck, OTR/L has been an occupational therapist since 2000, working in school-based, hand therapy, outpatient peds, EI, and SNF. Colleen created The OT Toolbox to inspire therapists, teachers, and parents with easy and fun tools to help children thrive. Read her story about going from an OT making $3/hour (after paying for kids’ childcare) to a full-time OT resource creator for millions of readers. Want to collaborate? Send an email to contact@theottoolbox.com.

      Pumpkin activity kit
      Pumpkin Fine Motor Kit

      Grab the Pumpkin Fine Motor Kit for more coloring, cutting, and eye-hand coordination activities with a Pumpkin theme! It includes:

      • 7 digital products that can be used any time of year- has a “pumpkins” theme
      • 5 pumpkin scissor skills cutting strips
      • Pumpkin scissor skills shapes- use in sensory bins, math, sorting, pattern activities
      • 2 pumpkin visual perception mazes with writing activity
      • Pumpkin “I Spy” sheet – color in the outline shapes to build pencil control and fine motor strength
      • Pumpkin Lacing cards – print, color, and hole punch to build bilateral coordination skills
      • 2 Pumpkin theme handwriting pages – single and double rule bold lined paper for handwriting practice

      Work on underlying fine motor and visual motor integration skills so you can help students excel in handwriting, learning, and motor skill development.

      You can grab this Pumpkin Fine Motor kit for just $6!

      Colleen Beck, OTR/L has been an occupational therapist since 2000, working in school-based, hand therapy, outpatient peds, EI, and SNF. Colleen created The OT Toolbox to inspire therapists, teachers, and parents with easy and fun tools to help children thrive. Read her story about going from an OT making $3/hour (after paying for kids’ childcare) to a full-time OT resource creator for millions of readers. Want to collaborate? Send an email to contact@theottoolbox.com.

      Crossing the Midline Activity Letter Rainbow

      Crossing the midline letter activity

      This crossing the midline activity is a way to help kids with crossing midline skills, as well as letter identification, using a rainbow theme. In the simple midline activity, children create a rainbow while visually scanning from left to right to match letters with different colors of the rainbow. It’s a letter version of our rainbow ladder that is also instrumental in helping children with underlying handwriting skills including visual motor integration and crossing the midline. Read more about midline crossing in our cross crawl resource.

      Crossing the midline activity for letter fluency, visual motor integration, and midline crossing skills.

      This particular  Kids can work on so many skills with this simple visual motor rainbow.  We worked on matching printed lower case letters to cursive letters but you could do this one with upper and lower case letter match-ups or just matching upper case to upper case.  Some of the underlying skills that is necessary for kids to write legibly are visual motor integration and crossing midline.  This visual motor integration letter rainbow works on those skills with a colorful result.

      We also used our rainbow of hues to work on the visual motor skills needed for pencil control.  This activity also addresses the ability to coordinate visual input to the motor movements of the hands. Kids can work on their fine motor development with the simple rainbow activity described below.


      Work on crossing the midline and letter identification to match letters to cursive letters with a rainbow.


      Crossing the Midline

      In another blog post, we cover more about crossing the midline, particularly with the lower body, in a midline marching activity for children.

      So, what crossing the midline?  

      Midline of the body is an imaginary line that drops from the middle of the head, strait down over the nose, to the belly button and divides the body into left and right sides.  Many movements and functional tasks occur with just one hand, like holding a phone. A user could hold the phone on one side of the body and turn their head to that direction. In that particular task and positioning, the activiy is localized to a side of the body and doesn’t cross the midline.

      Other tasks occur at the midline. This includes activities such as reading a book or brushing the teeth. The dominant hand will do most of the work, like turning the pages of the the book or manipulating the toothbrush, while the nondominant hand assists in the task.

      In our examples, the activity occurs mainly at midline, and there is not much crossing over of the middle of the body. However, the non dominant hand might assist by holding the book or by squeezing the toothpaste onto the tooth brush, (or holding the toothbrush while the dominant hand squeezes the toothbrush).

      As a side note, many of these muscle movement patterns are not something that we think through throughout our day. The movement patterns are just automatic and natural.

      That is part of muscle memory and motor planning that has been established and ingrained. Trouble occurs when there is a block to the automaticity such as difficulty with crossing the midline.

      Still other activities require intense midline crossing. This includes activities where the midline must be crossed in order for the task to be completed. Activities exemplifying midline crossing include dressing the lower body or in play.

      In the example of dressing, you notice that one arm reaches over the midline in order to feed the opposite foot into a pants leg. Similarly, with pulling on socks, both hands reach to one foot and the right arm crosses the midline when pulling on the sock of the left foot.

      Crossing midline refers to moving the left hand/arm/foot/leg across this line to the right side (and vise versa).  Crossing midline also refers to twisting the body in rotation around this imaginary line, and leaning the upper or body across the middle of the body.

      Problems with Crossing the Midline

      When crossing the midline is a problem, or it’s not been properly established as an automatic movement pattern, you may notice these movements instead of crossing midline:

      • Switching hands during an activity
      • Twisting the body to complete tasks- rotating the trunk to complete tasks
      • Preferring to use one hand over the other: Using the right hand for tasks on the right side of the body and using the left hand for tasks on the left side of the body
      • Mixed dominance
      • Trouble with fine motor tasks that require two hands: writing, coloring, cutting with scissors, manipulating utensils, cutting with a knife and fork, etc.
      • Trouble with gross motor tasks like jumping, skipping, hopping, crawling
      • Trouble with laterality
      • Trouble with keeping their place when reading across a page

      Crossing the Midline Letter Activity

      The midline letter activity described here is a beneficial way to work on crossing midline for several reasons:

      • The activity encourages children to cross midline with large motions across a page
      • The activity encourage visual shifting to scan across a page, incorporating crossing the midline into reading and writing tasks which can impact reading fluency and accuracy
      • The activity works on letter identification and challenges children to integrate visual skills with movements (hand eye coordination)

      In the crossing the midline letter rainbow activity described here, we worked on cursive letter identification.

      Many times when children practice cursive writing, they do so in isolated practice settings: practicing rows of cursive letters, one at a time, and then stringing that letter into words on a worksheet.

      Crossing Midline Writing Activities

      But sometimes, the cursive letter fluency piece is skipped. Reading a letter or a word pairs the cursive letter with orthographic patterns so that cursive writing and reading becomes fluent.

      You could use this midline rainbow activity with any letter matching exercise:

      • Matching shapes or colors
      • Matching letters to images that start with that letter to incorporate phonological awareness
      • Matching lowercase printed letters to uppercase printed letters
      • Matching lowercase cursive letters to lowercase printed letters
      • Matching uppercase printed letters to uppercase cursive letters
      • Matching lowercase cursive letters to uppercase cursive letters

      How to Create a Rainbow Arch

      Set up a rainbow arch in occupational therapy as a crossing the midline activity:

      This rainbow activity can be performed in several ways.  Children can work on a large scale and address bilateral coordination and midline crossing with a large piece of easel paper or butcher paper taped to a wall.  Another option is to set this rainbow activity up at a dry erase board or chalk board.

      To make the midline board:

      1. Colored markers/crayons/chalk/colored pencils-We used (affiliate link) Mr. Sketch scented markers to add multisensory learning components.
      2. Next, draw two vertical lines on opposite sides of the paper, or about 2-3 feet apart.  
      3. Along the left vertical line, form letters in one format (print, cursive, lowercase, uppercase, etc.) 
      4. On the opposite line, form either matching letters in upper case/lower case/cursive. Ensure the letters are mixed in order, so the lines need to cross over one another.

      Next, work on crossing midline skills:

      1. To perform this visual motor letter rainbow, ask the child to start on the left side and draw an arching line to connect to the matching letter on the right side of the paper.  Working on a large scale to perform this activity promotes crossing of the midline as well as visual motor skills.


        2. Ask the student to start at the left line and stop at the right line when drawing their rainbow lines. When the child is making the arches, they should not start or go over the vertical lines by more than 1/4 inch.  Ask them to connect the matching letters with matching colored markers. 


      Grade this activity by asking the child to start and end at the vertical lines without crossing over the lines.  This is an excellent way to address pencil control and visual motor skills.

      Rainbow Arch in Occupational Therapy

      A similar version of a rainbow arch can be used in occupational therapy interventions to target a variety of skills. You can vary the activity in many ways, depending on the needs of the individual.

      Try these rainbow arch ideas in OT sessions:

      • Complete the midline activity by completing the rainbow in a standing or seated position.  Be sure to watch for the child to compensate for midline crossing by shifting weight, rotation of the body, pivoting of the trunk, or movement of the legs.  The child should remain facing forward without any of these motions noted.
      • Kids can also complete this activity with diagonals of with strait lines to connect the letters.
      • Address visual motor skills with the letter rainbow on a small scale as a table-top activity.  
      • Draw the lines on a smaller scale and ask kids to connect letters while touching but not going over the vertical lines with the colored markers.
      • Use different surfaces- dry erase board, chalkboard, asphalt or sidewalk with sidewalk chalk, working on a large piece of paper or cardboard on the ground, and paper hung on a wall are all options.
      • Use a variety of writing materials: If working on a dry erase surface, use Dry erase markers. You’ll need a rainbow of colors.
      • Work in a sensory bin using sand or other sensory bin base materials. Letters can be written under the sensory bin, like we did with this sensory writing tray.
      • This activity works well on the ground too. In that case, use Rainbow colored chalk if working on a large piece of cardboard from an old box or on the sidewalk. This option adds resistance to the activity, providing proprioceptive feedback.
      • You could also use crayons, finger paints, colored pencils, sidewalk chalk, or water colors.
      Use scented markers for a multisensory learning approach to crossing the midline and matching letters.

      Need more ways to work on visual motor integration, crossing midline, handwriting, and functional skills? Grab the Colors Handwriting Kit. It comes with activities to promote functional handwriting, and multisensory learning. You’ll also get a bonus offer of fine motor activity pages.

      Just print and go!

      Colors Handwriting Kit

      Rainbow Handwriting Kit– This resource pack includes handwriting sheets, write the room cards, color worksheets, visual motor activities, and so much more. The handwriting kit includes:

      • Write the Room, Color Names: Lowercase Letters
      • Write the Room, Color Names: Uppercase Letters
      • Write the Room, Color Names: Cursive Writing
      • Copy/Draw/Color/Cut Color Worksheets
      • Colors Roll & Write Page
      • Color Names Letter Size Puzzle Pages
      • Flip and Fill A-Z Letter Pages
      • Colors Pre-Writing Lines Pencil Control Mazes
      • This handwriting kit now includes a bonus pack of pencil control worksheets, 1-10 fine motor clip cards, visual discrimination maze for directionality, handwriting sheets, and working memory/direction following sheet! Valued at $5, this bonus kit triples the goal areas you can work on in each therapy session or home program.

      Click here to get your copy of the Colors Handwriting Kit.

      Colleen Beck, OTR/L has been an occupational therapist since 2000, working in school-based, hand therapy, outpatient peds, EI, and SNF. Colleen created The OT Toolbox to inspire therapists, teachers, and parents with easy and fun tools to help children thrive. Read her story about going from an OT making $3/hour (after paying for kids’ childcare) to a full-time OT resource creator for millions of readers. Want to collaborate? Send an email to contact@theottoolbox.com.

      Use rainbow colors to work on the skills needed for handwriting with a visual motor letter rainbow activity.

      Here are more rainbow activities to pair with ours:

      10 Ways to Teach Letter Formation

      letter formation activities

      Here we are covering creative letter formation activities to help children with letter formation practice to create the motor plan of actually writing and forming letters. This handout on letter formation will support parents, teachers, and therapists with advocating for this functional handwriting skill.

      Letter Formation Activities

      To get started, be sure to access these practical and creative letter formation tools:

      In addition to the ideas below, be sure to grab a copy of our color by letter worksheet. It’s a fun way to teach letter formation through a coloring activity that helps kids with the visual memory needed for letter writing skills.

      One thing that is apparent in teaching Handwriting is the very real need  that parents and teachers struggle with when it comes to teaching letter formation.

      Teaching letter formation can be a complicated thing for children with visual perception challenges, fine motor skill difficulties, or sensory processing concerns. In this article, you will find creative ways to teach letter formation.

      So many members of the group question how to teach letter formation. They wonder where to start with teaching kids to write letters or they are challenged by kids who have formed bad habits with letter formation.

      They are seeing kiddos who form letters incorrectly or don’t know where to even start to teach letters accurately from the beginning.


      Read on to find 10 creative ways to teach letter formation whether you are starting at the beginning with a young child or are addressing those pesky bad handwriting habits that have resulted in poor letter formation and therefore, legibility.

      Creative Ways to Teach Letter Formation

      These fun handwriting activities are those that add a fresh concept to teaching letter formation. You can use these ideas to teach pre-writing skills or to work on specific letters.

      Creating a motor plan for handwriting to form letters from muscle memory is the key here. These creative activities support that skill.

      But first, consider these thoughts when teaching kids to write letters…

      When using the ideas below, it’s typically recommended to start with uppercase letters because of the simplified forms and letters that for the most part, start at the top and are formed in a downward pencil stroke, which is developmentally appropriate for young children. Read more about the order to teach letters like cursive letter order here.


      Using a non-pencil activity to teach handwriting can be the trick to get kids interested in writing!

      When kids are learning to write, knowing how to write letters can be hard! These handwriting activities are great for anyone trying to teach letter formation to kids.


      10 Ways to Teach Letter Formation

      Affiliate links are included in this article.

      1.) Work on letter formation by “building” letters- This is a question for some parents, teachers, and therapists. Sometimes we see children who construct letters by parts, but use inappropriate letter formation when building letters. When writing a lowercase letter “d”, they might draw a circle and then draw a line, without the re-trace. Drawing or building letters can have inefficient consequences if kids are just allowed to copy letters inaccurately and without being taught. So often, we see this in those writing tray videos over on Pinterest or Facebook. Read more about writing trays and handwriting and how to use writing trays to effectively teach letter formation. Teaching kids wot build letters with proper sequence in each letter formation is essential! This color-coded letter building activity teaches kids to start at the correct starting spot and to pick up the pencil when necessary. Try this activity for those children who respond well to visual cues. Adding a kinetic twist to teaching letter formation can be just the tool that makes formation stick! 

      2.) Teach Letter Formation with a Writing Tray- The fact is, using a sensory writing tray for handwriting is a technique to practice proper letter formation is a way to incorporate multiple senses into learning letter formation.

      Multisensory learning approaches to handwriting are very effective. Be sure to encourage proper starting points and direction of letter lines such as starting letters at the top and lifting the writing utensil when appropriate to form parts of letters such as the curves in a “B” or the slanted little lines in a “K”. Writing trays can come in all sorts of themes, sizes, and using all types of mediums. You can even create a mini-sensory writing tray like we did. Take it along in your therapy bag or on-the-go to learn and practice letter formation anywhere!

      3.) Use the Sandpaper Letter Trick to Teach Letter Formation- Use a sheet of sandpaper to work on letter formation! This multi-sensory activity uses the senses to teach letter formation, by providing feedback for pencil control and line placement. Adding a quick sheet of sandpaper to your therapy toolkit is an easy way to work on letter placement by adding additional prompts to handwriting.

      4.) Teach Letter Formation with Soap- Kids can learn to write letters in shaving cream, soap, and even pudding! Using multi-sensory strategies to work on letter formation can help kids remember the proper formation. So often we see strategies that are taught in isolation and then not carried over to the classroom or home. When a child is asked to write with increased speed or in a distracting environment, we may see letters that revert back to those bad habits. Adding sensory activities to letter formation such as writing in soap, shaving cream, or sandpaper can provide the feedback kids need to add just one more cue for formation. Remember to provide instruction in proper letter formation and line placement and not just setting up a child with an activity and then letting them “play and write”.

      5.) Teach Letter Formation with Gross Motor Play- Sometimes, adding a movement component to teaching letter formation can be all it takes to make letters “stick”! There are so many options for adding gross motor to letter formation. 


      6.) Teach Letter Formation on an alternate surface with a sensory bag- Fill a sandwich bag with soap, foam, or other liquid material and practice letter formation. You can even tape the sensory bag onto a wall or window to practice letter formation. Read more about how to create and use a sensory bag to teach letter formation in this older post on sensory handwriting


      7.) Use a resistive surface to teach letter formation- The motor plan needed for letter formation can occur with practice on a resistive surface. We’ve shared ideas to teach letter formation on resistive surfaces such as using carpet squares or carpet scraps, a styrofoam tray to learn letter formation, and foam sheets to teach letter formation.


      8.) Teach Letter Formation with the “Ghost Writing” Trick- Have you tried the ghost writing trick to teach letter formation? It’s a fun way to explore the pencil strokes needed for letter formation as well as skills needed for legible handwriting and pencil pressure in written work. 


      9.) Use Boxes and Dots to Teach Letter Formation- This box and dot letter formation trick also helps kids learn letter size or spatial awareness in written work. It’s also a tool to help kids who struggle with letter reversals. You can make your own paper or use graph paper to create a quick practice tool for teaching letter formation. 


      10.) Help kids learn to write with a Kinetic Letter Formation- This is fun kinetic fine motor activity is another spin on adding resistive input and a motor component to letter formation, all using recycled materials or objects found around the home. Use a recycled can and push pins to teach letter formation while improving hand strength and fine motor skills. 

      Working on handwriting with kids? These creative handwriting activities can help kids with letter formation and are a tool for anyone trying to teach letter formation in handwriting.


      Do you have any letter formation activities that you love to use when teaching handwriting? Tell us about them! There are over 14,000 members in the Sweet Ideas of Handwriting Help Facebook Group that love sharing ideas to work on handwriting. 

      Colleen Beck, OTR/L has been an occupational therapist since 2000, working in school-based, hand therapy, outpatient peds, EI, and SNF. Colleen created The OT Toolbox to inspire therapists, teachers, and parents with easy and fun tools to help children thrive. Read her story about going from an OT making $3/hour (after paying for kids’ childcare) to a full-time OT resource creator for millions of readers. Want to collaborate? Send an email to contact@theottoolbox.com.

      The Handwriting Book is a comprehensive resource created by experienced pediatric OTs and PTs.

      The Handwriting Book covers everything you need to know about handwriting, guided by development and focused on function. This digital resource is is the ultimate resource for tips, strategies, suggestions, and information to support handwriting development in kids.

      The Handwriting Book breaks down the functional skill of handwriting into developmental areas. These include developmental progression of pre-writing strokes, fine motor skills, gross motor development, sensory considerations, and visual perceptual skills. Each section includes strategies and tips to improve these underlying areas.

      • Strategies to address letter and number formation and reversals
      • Ideas for combining handwriting and play
      • Activities to practice handwriting skills at home
      • Tips and strategies for the reluctant writer
      • Tips to improve pencil grip
      • Tips for sizing, spacing, and alignment with overall improved legibility

      Click here to grab your copy of The Handwriting Book today.

      In Hand Manipulation Letter Puzzle Activity

      This puzzle activity is a great in hand manipulation activity that develops letter recognition, fine motor skills, and other pre-literacy and fine motor development!


      Kids just have no clue about the technical terms for the fine motor development that they go through.  And that is normal and completely ok.  Parents typically don’t even know what exactly is happening when their child picks up a handful of coins and as they squirrel them away in their chubby little palm before dropping them one by one into a piggy bank.  All that matters is that the child is manipulating items, working their fine motor development, and having fun.


      In-hand manipulation activities are a great way to boost fine motor skills needed for tasks like managing clothing fasteners, using a pencil when writing, manipulating items like coins or beads, and more. 


      This in-hand manipulation activity meets the fun expectation and works on so many fine motor skills. We practiced letter identification and made the activity work for my Toddler, too. 

      Work on fine motor skills like in-hand manipulation with a wooden letter puzzle.  You can do this with any puzzle and work on things like letter identification, letter formation, numbers, animals, or shapes. Perfect for preschool or toddler activities.

      In-hand Manipulation Activity with Puzzles

      This post contains affiliate links. 


      We came up with a similar idea a few months back. It worked for today’s activity with a slight twist. In-hand manipulation is a powerful fine motor skill that that kids use for tasks like manipulating a pencil in writing activities, managing buttons and zippers, manipulating shoe laces, and holding and managing small items such as coins or beads.  You can read much more about in-hand manipulation here.  


      To use puzzles in a fine motor activity like this one, you’ll need a small item such as dry split peas.  Dry beans or field corn would also work for this type of activity.  You’ll also need a wooden puzzle with edges. 

      Use dry peas in sensory play or fine motor activities.


      For today’s activity, we used a Melissa and Doug wooden See Inside puzzle. This was perfect for our activity because the pictures hidden behind the split peas played peek-a-boo with us as we added the peas.  My preschooler worked on her in-hand manipulation skills to fill up the letters by naming the letters and filling the letter space in proper-ish letter formation.  I tried to show her how to fill in the letters with dry peas in the same order she would use to write the letter.  This worked for most of the letters.  If you are working on letter formation with your little one, show them how to fill in the top of the letters as they sprinkle in the beans or peas a little at a time.

      Work on fine motor skills like in-hand manipulation with a wooden letter puzzle.  You can do this with any puzzle and work on things like letter identification, letter formation, numbers, animals, or shapes. Perfect for preschool or toddler activities.


      An upper and lower case letter puzzle would be great for older kids who are working on forming lower case letters. 

      Work on fine motor skills like in-hand manipulation with a wooden letter puzzle.  You can do this with any puzzle and work on things like letter identification, letter formation, numbers, animals, or shapes. Perfect for preschool or toddler activities.


      Work on fine motor skills like in-hand manipulation with a wooden letter puzzle.  You can do this with any puzzle and work on things like letter identification, letter formation, numbers, animals, or shapes. Perfect for preschool or toddler activities.

      We did end up doing the same activity with my Toddler’s chunky pets animal puzzle. This graded activity was great for her in-hand manipulation development too and she got to work on animal identification and animal sounds as she filled up each animal space in the puzzle. 

      Work on fine motor skills like in-hand manipulation with a wooden letter puzzle.  You can do this with any puzzle and work on things like letter identification, letter formation, numbers, animals, or shapes. Perfect for preschool or toddler activities.

      Are you working on in-hand manipulation for functional skill development?  Here are a few more creative ideas that you will love: 


      Glitter Letter Manipulatives for Learning

      letter manipulatives
      These DIY letter manipulatives were very easy to make.  The kids and I have been playing with these letters for a few weeks now.  We love playing with learning elements and we’ve done a lot of letter identification activities.  This one was fun to make and for playing!
       

      Letter Manipulatives

      Letter manipulatives are a hands-on tool for supporting letter identification in young kids. This is a great preschool activity that can be used as a pre-writing activity. Helping kids to identify letters with alphabet manipulatives supports early literacy skills. 

      Alphabet manipulatives like the ones we made below are fun for helping kids to match uppercase and lower case letters, too. 

      They can be used in handwriting tasks or as a writing prompt while working on letter formation

      Use these letter manipulatives in several ways:

      • In sensory bins
      • In an I Spy game
      • With writing trays
      • In play dough
      DIY letter match manipulatives with glass gems.  These are great for letter identification, matching, memory games, pre-reading.


      This post contains affiliate links. 


      How to Make Letter Manipulatives

      This letter learning activity was a lot like our DIY color glass gems.  They are so much fun for sorting, patterning, play on the DIY light box.  We used a similar manner to make these glitter letters. These large glass gems are great for play and learning.  We’ve written letters and shapes on them, and painted them, created art with them.

      If you haven’t made your own DIY decoupage, this is one thing you need to try.  We use this stuff all the time.


      Paint the flat side of the glass gems with decoupage.  Cover with glitter.


      Shake off the excess glitter.  Coat with another layer of decoupage.


      Stick on letter stickers and cover with another thin coat of decoupage.
       
       
      Let those beauties dry.


      When the letters were dry, we played letter memory, sounded out the sounds of the letters, and matched the letters.  This is a great way to play and learn letter identification, letter sounds, pre-reading, visual scanning skills, and more.


      We haven’t tried putting the letter manipulatives on the light table yet, but I think they will look great!
       

      More Ways to Use letter manipulatives


      Work on letter formation, letter identification and handwriting skills with our Fine Motor Letter Kit! Perfect for hands-on letter learning.

      Colleen Beck, OTR/L has been an occupational therapist since 2000, working in school-based, hand therapy, outpatient peds, EI, and SNF. Colleen created The OT Toolbox to inspire therapists, teachers, and parents with easy and fun tools to help children thrive. Read her story about going from an OT making $3/hour (after paying for kids’ childcare) to a full-time OT resource creator for millions of readers. Want to collaborate? Send an email to contact@theottoolbox.com.