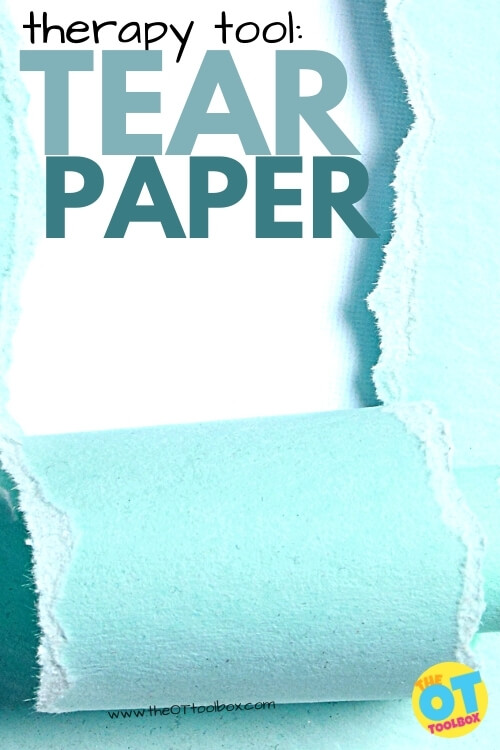
Tear Paper for Fine Motor Skills

Tear paper fine motor activity

Did you know you can tear paper to improve fine motor skills using materials you already have in your home? I have an incredibly easy fine motor activity to share: tearing paper! When kids tear paper, they are developing fine motor skills like grasp, hand strength, eye-hand coordination, bilateral coordination, and more. So often, parents are looking for easy ways to help kids develop fine motor skills, and the very material that can improve all of these areas is found right in the home. Let’s break down tearing paper as an amazing fine motor activity for kids.

Tear paper to build fine motor skills and to use in occupational therapy activities like improving coordination, visual motor skills, and more.

Did you know that a fine motor activity where a child tears up paper builds hand strength, motor planning, and so much more?

Tearing Paper for Fine Motor Skills

Tearing paper a simple fine motor activity that requires only scrap paper and your hands. In fact, tearing paper actually helps children develop so many essential skills: hand strength, hand eye coordination, precision, refined movements, bilateral coordination…

When a child tears a piece of paper, they improve hand strength and endurance in the small muscles in the hand.  

The intrinsic muscles are used to tear up paper and these set of muscles located within the hand are important in so many fine motor skills, including those important to handwriting and coloring, managing buttons and zippers, manipulating pegs, and more.  

When paper is torn, the hands assume a great tripod grasp which is effective and a mature grasp for writing and coloring.  

To hold the paper, the non-dominant hand is assisting in the tearing and encourages appropriate assistance for tasks like holding the paper while writing, and managing paper while cutting with scissors.

Then, to tear a piece of paper, the dominant hand does the majority of the “work” to tear with precision and force, but also along a “line” while tearing.

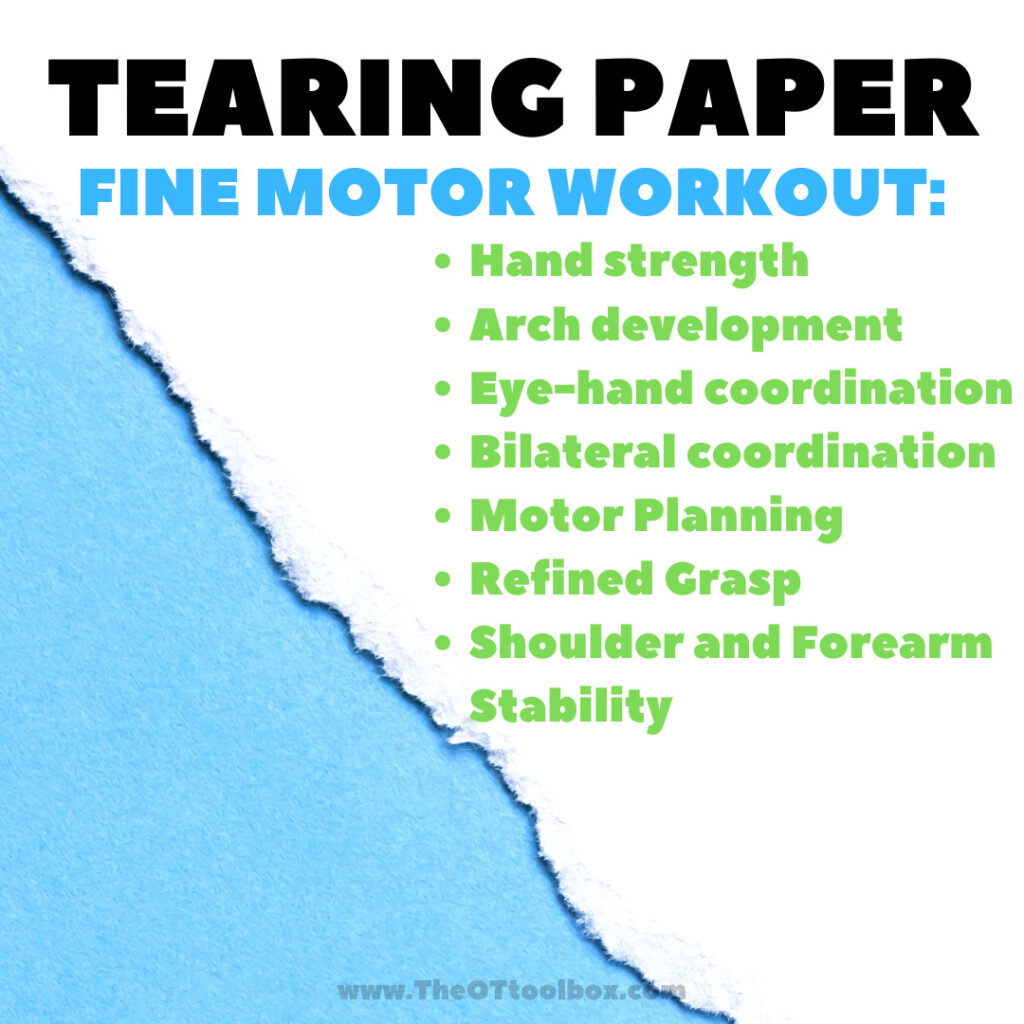
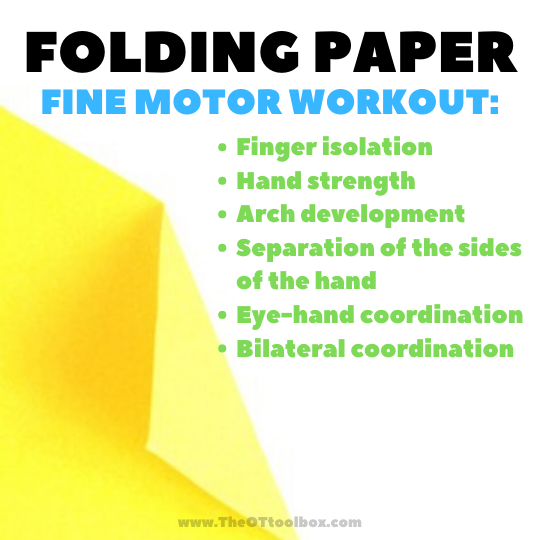
Just look at the skills kids develop with a tearing paper activity:

Other benefits of tearing paper

Not only is ripping paper as a fine motor strategy, tearing off pieces of paper can support sensory needs, coordination, and visual motor skills. When you tear a pieces of paper, so many skills are being developed…

Hand dominance- Holding paper with stability using a non-dominant hand to support the paper, and a dominant hand to make refined tears supports development of bilateral coordination skills. Depending on the intricacy of the paper tear line, more refined motor movements are used. This is a strategy to support graded precision skills.

Sensory Processing- To rip paper, strength and coordination is needed. This process offers heavy work through the finger joints, wrist as a stabile joint, and coordination and stability in the shoulder girdle. Heavy work, or proprioception allows us to know where our body is in space. But the benefits of heavy work can be calming and organizing. Ripping paper can be a sensory diet tool for some individuals.

Visual Motor Skills- To tear paper, visual motor integration is a required part of the puzzle. This includes eye-hand coordination, visual tracking, visual attention, and other areas of visual processing.

Tearing paper is an amazing fine motor activity for kids to build coordination and hand strength.

Tear a piece of paper to build sensory motor skills with an inexpensive therapy tool.

Paper Tearing Activities

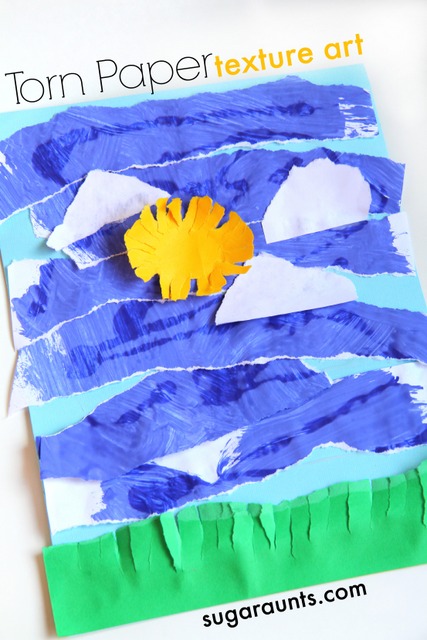
In this paper tearing activity, we use recycled artwork to create Torn Paper Art that would look great on any gallery (or family dining room) wall! All you need to do is rip paper to develop skills.

Tearing strips of paper is especially a great fine motor task.  To work those fine motor skills, start with some junk mail or recycled paper materials and practice tearing.

Tear paper into strips- To tear a long sheet of paper, you need to grasp the paper with an effective, yet not too strong grasp.  Tear too fast, and the paper is torn diagonally and not into strips.

Make slow tears in the paper- Tearing the paper slowly while focusing on strait torn lines really encourages a workout of those intrinsic muscles.  

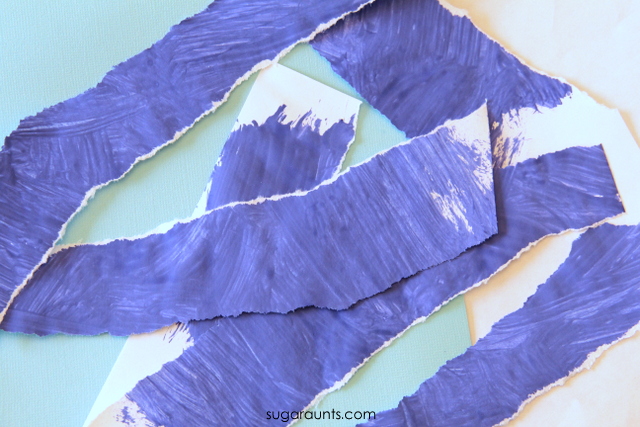
Tear different weights of paper- Paper comes in different thicknesses, or weights. Practicing tearing different thicknesses really hones in on precision skills. We tore an 9×11 piece of painted printer paper into long strips, lengthwise.  The thin paper isn’t too difficult to tear, but requires motor control. Thicker paper like cardstock or cardboard requires more strength to grip the paper. The thicker paper also requires a bit more strength to tear with accuracy and precision. Tearing paper that is thicker like cardstock, index cards, or construction paper adds heavy input through the hands. This proprioceptive input can be very calming and allow kids to regulate or focus while adding the sensory input they need.

Tear paper into shapes– Use the paper to create simple shapes like a circle, square, etc. You can make this task easier by drawing pencil lines and ripping paper along the lines. This is a fantastic way to build motor planning skills. Or, work on visual perceptual skills and try ripping paper into shapes without a template.

Vary the texture of the paper– You can add a sensory component and use different textures of paper. Try painted or colored paper. Try printed paper or a rough paper like last year’s paper calendar. Try ripping cardstock or textured crepe paper. Or, use graph paper as a thinner grade to address a different resistance. We cover all the ways to use graph paper in therapy goals and tearing paper is just one idea.

Work on tearing paper fringes- Tearing into the edge of the page, and stopping at a certain point requires refined motor work. It’s easy to tear right across the page, but requires precision and coordination to stop tearing at a certain point. To grade this activity easier, try marking the stopping point with a pencil mark.

Ripping paper has so many benefits! Did you know that when you tear a piece of paper so much work is being done?

Tearing Paper Exercises

There’s more to tearing paper than just making a mess…Occupational therapy practitioners use this fine motor tool as a way to improve hand strength and other underlying skills that we’ve talked about in this blog post.

But once you have the paper torn into pieces, did you know that you can use those torn paper pieces in fine motor work?

Check out our video on tearing paper. In it, we cover what happens when you tear paper (why occupational therapy providers love paper tearing as a fine motor tool), and then you’ll see specific finger strength exercises and finger dexterity activities you can do with the paper pieces.

tearing paper is a fine motor skills workout for kids.

Types of paper to use in tearing paper activities

There are many benefits to using different textures and types of paper. Let’s take a look at some of the possible types of paper. These are materials that you may already have in your home.

Varying the paper type in torn paper activities can help to grade an activity, or make it easier or more difficult. These are great ways to vary the amount of fine motor strength and precision needed, thereby improving fine motor skills and visual motor skills.

Types of paper to use in tearing paper activities:

  • Junk mail
  • Old phone books
  • Recycled newspapers
  • Magazines
  • Flyers from school or the community
  • Printer paper
  • Notebook paper
  • Cardboard
  • Recycled food boxes (cereal boxes, tissue boxes, etc.)
  • Paper bags
  • Tissue paper
  • Crepe paper
  • Toilet paper
  • Paper towels
  • Napkins
  • Paper plates
  • Recycled artwork
  • Used coloring books
  • Cardboard tubes (toilet paper tubes, paper towel rolls)
  • Old calendars
This torn paper art is a paper tearing activity for kids that uses recycled artwork to build fine motor skills and motor control while tearing paper.

Tear up pieces of recycled artwork to create a new art medium.

Torn paper art  

This ripped paper art is a craft that is so simple, yet such a fun way to create art while working on fine motor skills.  

Tear paper into strips to work on fine motor skills with kids.

You’ll need just a few materials for ripped paper art:

  • Paper (Any type or texture will do…old crafts, kids artwork, or paper that has been painted)
  • Glue
  • Paper to cardstock to use as a base
  • Your hands!

We all have piles of kids’ artwork that is gorgeous…yet abundant.  You keep the ones that mean the most, but what do you do with those piles of painted paper, scribbled sheets, and crafty pages?  You sure can’t keep it all or your house will become covered in paper, paint, and glitter.  We used a great blue page to make our torn paper art.

Making the torn paper art is very simple. It’s a process art activity that will look different no matter how many times you do the activity.

How to create torn paper art:

There is more to this therapy tool than just tearing a piece of paper…Use these tips.

  1. Select a variety of paper colors, materials, and textures.
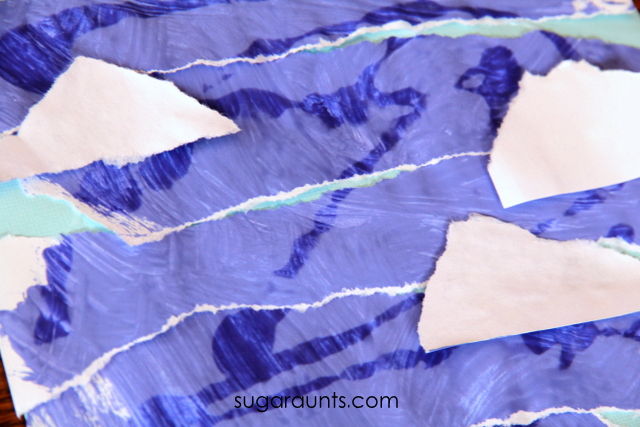
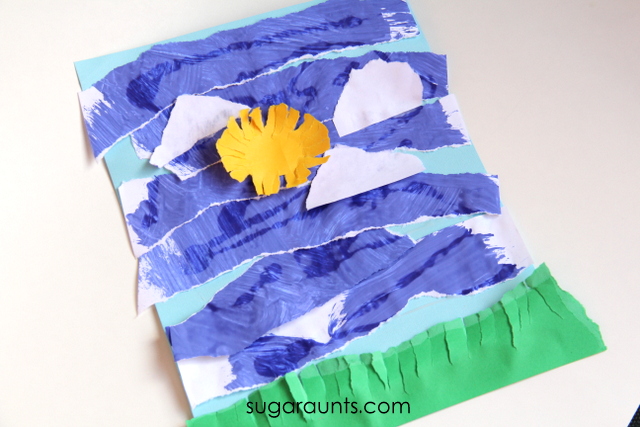
  2. Tear a sheet into long strips.  This will become the sky of our artwork.
  3. Use white paper to create cloud shapes. Tear the paper into shapes.
  4. Use green cardstock or other material to create grass. Tear small strips into the paper but not through to the edge. Create a fringe with the paper.
  5. Glue the torn paper onto the base page in layers.
  6. Use your imagination and have fun!

A few tips for creating torn paper art

Have a variety of paper types, colors, and textures available. Some ideas include using junk mail, recycled artwork, cardstock, construction paper, printer paper, crepe paper, cardboard, cereal boxes, etc.

Use your imagination. You can start with an idea to create or you can go with the flow of the art creation and start without an idea.

If you have trouble coming up with an idea for your torn paper art, try some of these:

  • Create a torn paper landscape
  • Create an object from ripped paper textures
  • Make a torn paper abstract artwork
  • Copy real life objects and make representational art
  • Create a ripped paper still life
  • Use all one color of paper in different textures to make a monochromatic artwork
  • Make abstract portraits
  • Tear the paper into shapes to make geometric artwork
  • Explore art concepts such as size, shape, color, lines, form, space, texture
  • Explore multimedia: Incorporate printed paper, painted paper, glossy paper, cardboard in different textures, crayon colored paper, etc.
Tear paper into strips of ripped paper to work on eye-hand coordination in an occupational therapy activity with recycled materials.
Tearing paper builds fine motor skills and endurance in fine motor precision, making it a fine motor workout!
Ripping paper is a fine motor activity for kids in occupational therapy or working on fine motor skills at home.

 More paper activities

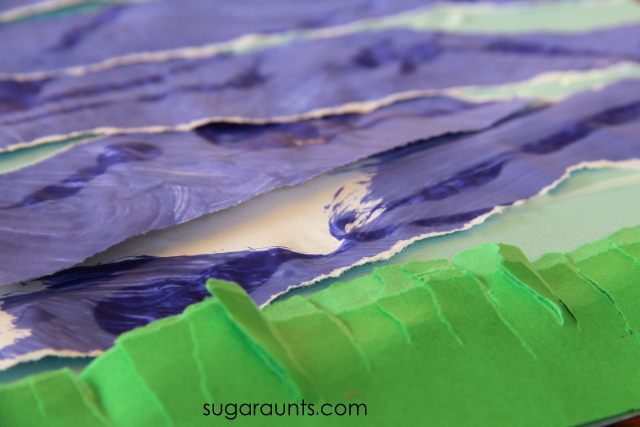
Tear and paste activity with blue paper and green cardstock to create a torn paper collage.

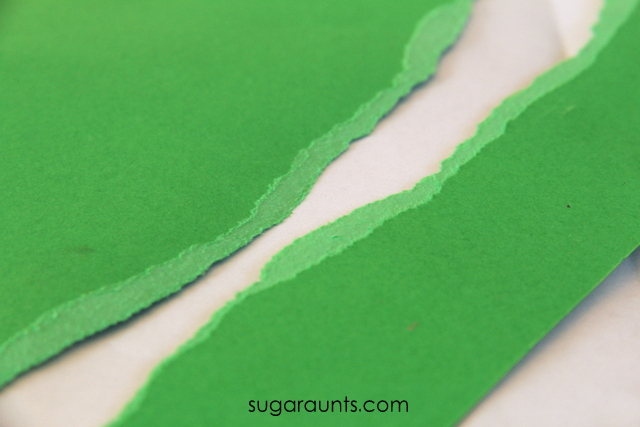
We used one of the long strips of green cardstock to create grass by making small tears.  Be careful not to tear the whole way across the strip!  What a workout this is for those hand muscles.  

Use recycled art like painted paper to create torn art collage while building fine motor skills in kids.

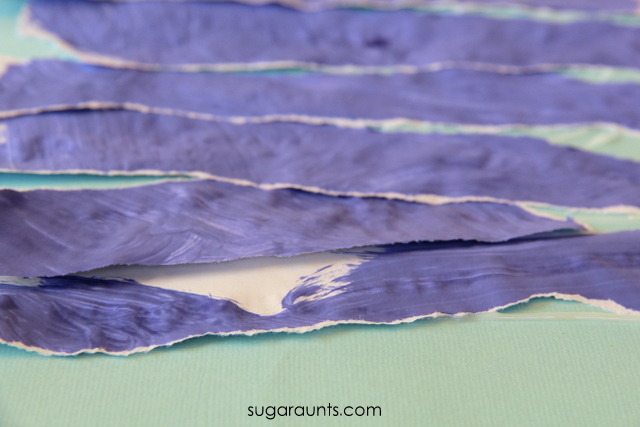
 Next glue the blue strips onto a background piece of paper.  Tear white scrap paper into cloud shapes.  They can be any shape, just like clouds in the sky!

Tear paper to help kids strengthen fine motor skills.

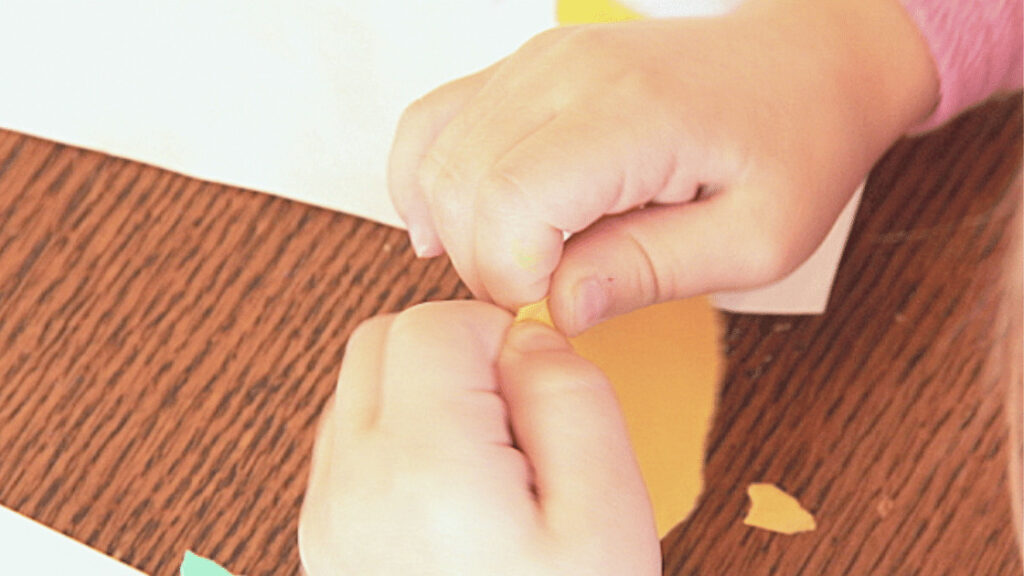
 Grab a piece of yellow cardstock and create a sun.  This is another fabulous fine motor workout.  Tearing a circle-ish shape and creating small tears really works those muscles in the hands.

Tearing paper activity for kids

 Glue the sun onto the sky and enjoy the art.  

More paper activities that build skills:

Working on fine motor skills, visual perception, visual motor skills, sensory tolerance, handwriting, or scissor skills? Our Fine Motor Kits cover all of these areas and more.

Check out the seasonal Fine Motor Kits that kids love:

Or, grab one of our themed Fine Motor Kits to target skills with fun themes:

Want access to all of these kits…and more being added each month? Join The OT Toolbox Member’s Club!

Colleen Beck, OTR/L has been an occupational therapist since 2000, working in school-based, hand therapy, outpatient peds, EI, and SNF. Colleen created The OT Toolbox to inspire therapists, teachers, and parents with easy and fun tools to help children thrive. Read her story about going from an OT making $3/hour (after paying for kids’ childcare) to a full-time OT resource creator for millions of readers. Want to collaborate? Send an email to contact@theottoolbox.com.

Fun Buttoning Activities

Buttoning activities for kids

Using a few fun buttoning activities is powerful when it comes to teaching kids how to button. When you add fun button practice to the functional task of learning to button a shirt or pants, kids can gain independence. Let’s check out some fun buttoning and unbuttoning activities that kids will love. Get ready to fasten a button and build skills!

Buttoning activities for kids

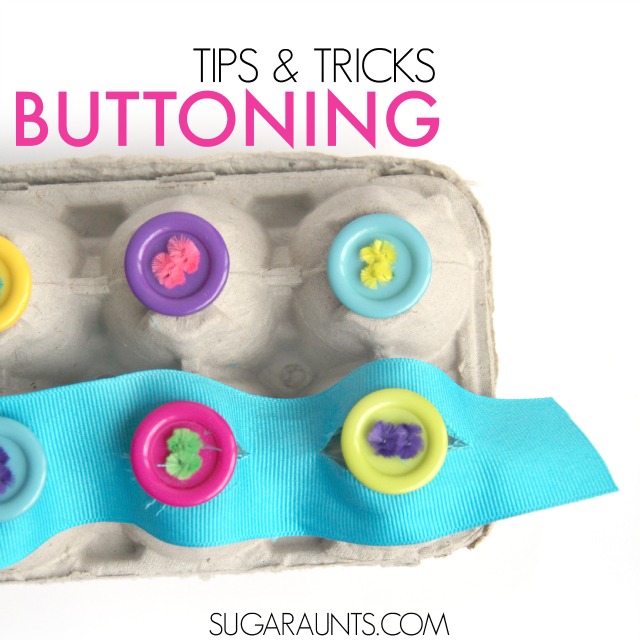
Today, I’ve got a creative way to practice a fine motor task that is often times a tricky for little fumbling fingers: teaching kids how to button…and with a recycled egg carton no less!  

Read more for creative tips and tools to practice buttoning with kids:   As an Occupational Therapist working with kiddos, I often times had children (and adults!) with goals to improve functional skills like buttoning and managing clothing fasteners.  

The best thing (to me) about OT is helping folks to work towards independence in meaningful activities and encouraging self-confidence in function through fun and creative ways.  

Imaging fumbling to fasten buttons in a row on a shirt or jacket.  Trying to push that little button through  the hole of the shirt, but struggling.  But, you have to keep working on it, because it’s something you want to do yourself.  But it’s just so hard.  Still, you keep trying. Over and over again. It’s just not fun.

That’s where fun button practice activities come into play!

This egg carton buttoning activity is definitely fun and works on a task that can get real boring, real quick.  

There is something a little more happy about these buttons and a recycled egg carton. It’s part of our 31 Days of Occupational Therapy series and it’s been a big hit in our house, lately.

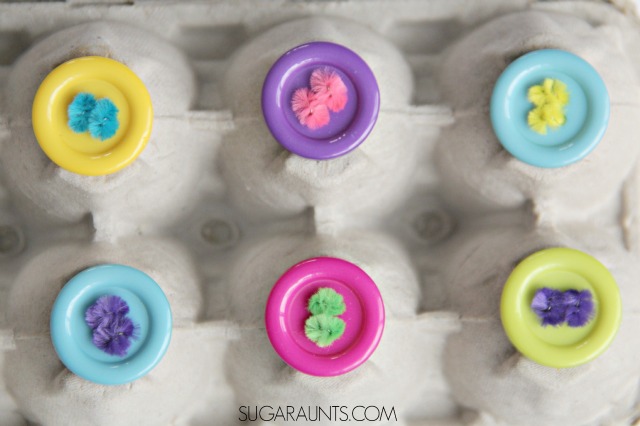
Teach kids how to button with this cute egg carton buttoning activity!  This is fun to make while working on fine motor skills and helping kids with a difficult self-care task.

Skills needed for buttoning

First, let’s talk about why buttoning a shirt is so hard for some kids. When teaching a child to button a shirt or unbutton clothing, sometimes breaking down the task of HOW to button is the hardest part.

You really need a lot of skills in order to button a shirt.  

  • Both hands need to work together in a coordinated manner while doing different movements.
  • Buttons are small in most cases and require a good grasp to hold the edge of the button
  • Hands need intrinsic hand strength and arch development to hold the button and push it through the button hole.  
  • Then there is the other hand working to hold that button hole, with bilateral coordination.  
  • But first, you need to make sure the buttons and holes are lined up correctly.
  • There is a lot of problem solving and sequencing involved in buttoning.  

All of this is done while wearing the shirt and at an awkward position, while looking down.  If any of these areas are a problem area, then buttoning a shirt immediately becomes much more difficult.   

Teach Kids How to Button

There are a few ways that make learning the steps of buttoning a bit easier:  

  • Practice unbuttoning first.  
  • Break down steps of buttoning.  
  • Use consistent verbal and physical cues when helping the child button.  
  • If aligning buttons to the button holes is a difficult task, show them how to take this part a step at a time, by lining up the bottom button to the bottom hole. 
  • Practice buttoning from bottom to top.  The child will have more room to work and a better view of the buttons at the bottom of a vest or shirt.
  • Practice buttoning with shirts/vests that are not visually distracting.  Use a white shirt with colored buttons.  You can also add a dot of paint to buttons to make them stand out.
  • At first, practice buttoning with a shirt laying on the child’s lap or table, and  positioned like it would be on their body.  Practicing with a different shirt on the table gives the child more room to see the buttons and how their hands are working than if they are buttoning on their body. 
  • Then, practice with an over-shirt, with the shirt on their body.
  • Practice with larger buttons.
  • Iron the button and hole edges of the shirt for a stiffer material to work with.
  • Practice with a jacket that is made with a thicker material, like corduroy.
  • For younger kids (age 3) you can snip the button hole just a little to make buttoning easier.

Backward Chaining in Buttoning

Backward chaining is a therapy term that refers to breaking down a task in order to teach specific skills. In learning how to button or unbutton, therapists can use backward chaining to teach kids how to do each step of buttoning in a sequence.

Backward chaining encourages success in buttoning by starting with the last step.

You can teach buttoning skills this way by working on just this last step with your child until they have mastered it. Then, work on the previous step. Gradually, add more steps to the buttoning task until they are able to complete the whole process.

Backward chaining encourages self-confidence and success in learning new skills.

Buttoning Activities

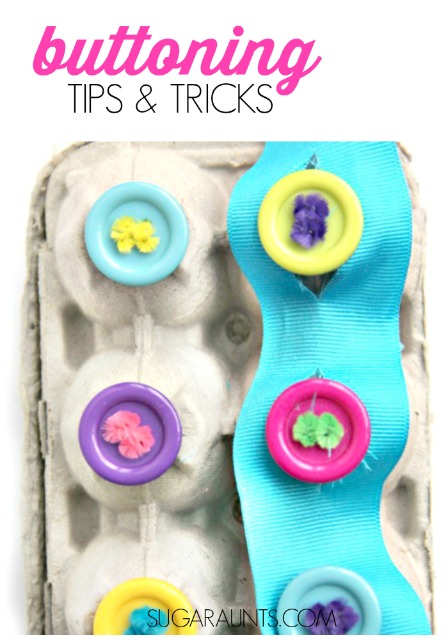
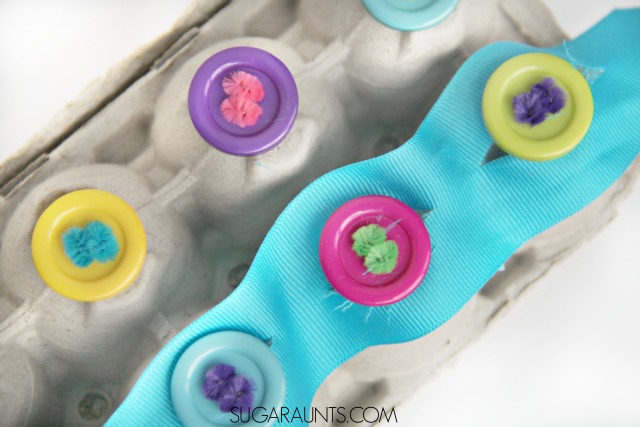
This buttoning activity uses a recycled egg carton to work on the specific skills needed to fasten buttons. These are great buttoning activities for preschoolers and children struggling with the fine motor components of managing buttons on their clothing.

Try these buttoning activities:

  • Work on the fine motor skills needed to button by pushing coins into a piggy bank.
  • Cut a slit in felt and push a coin through the felt.
  • Push buttons through the lid of a recycled container.
  • Try these felt buttons to work on precision and dexterity.
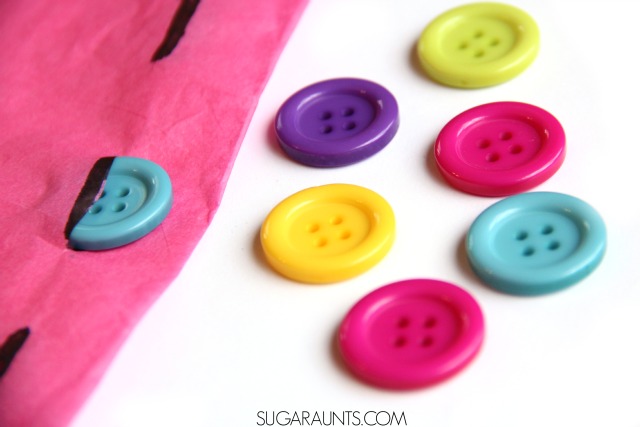
  • Cut slits in paper and push buttons through the slits.
  • Make an egg carton buttoning activity (below)
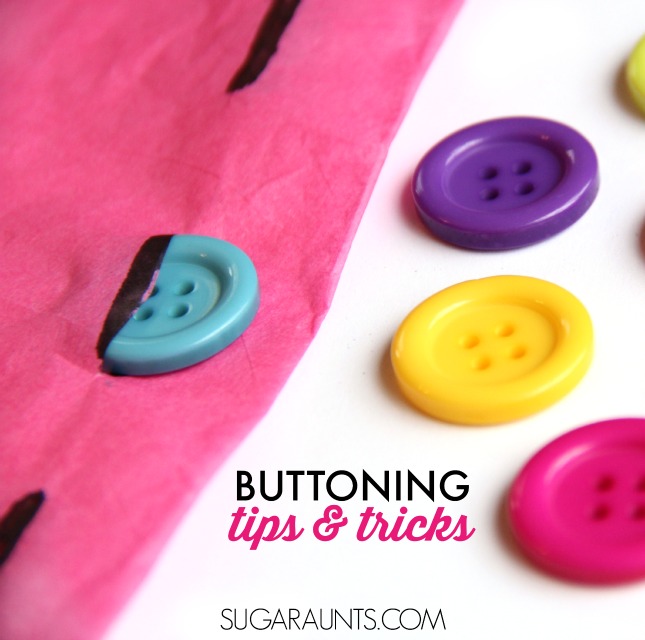
  • Cut a slit in cardstock or construction paper.  Push buttons through the slits.  Try it with tissue paper, too.
  • Hold coins or buttons on the edge and press them into play dough so they are standing on their edge.
  • Thread beads onto pipe cleaners.

RELATED READ: Teach Kids How to Tie Their Own Shoes

Use buttons and paper to work on buttoning and unbuttoning activities. Use these buttoning occupational therapy tips.

RELATED READ: The Ultimate Guide to Teaching Kids to Dress Themselves

Teach buttoning and fastening buttons with this egg carton button activity.

Egg Carton Buttoning Activity

This is a fine motor activity to make the buttoning tool, so get the kids involved in the prep-work!  We made a similar egg carton shoe tying tool recently.  

Yes, sure.  You can work on buttoning and shoe tying with a plain old shirt or shoe. But, sometimes it is good to bring new experiences into the learning process.  

Adding a new way to practice makes it less boring and kids will be excited to try working those buttons again and again.  

You’ll need just a few materials to make this egg carton buttoning activity:

Amazon affiliate links:

Attach buttons to an egg carton to work on buttoning skills with kids. Includes other buttoning activities for kids.

RELATED READ: Teach Kids How to Zipper

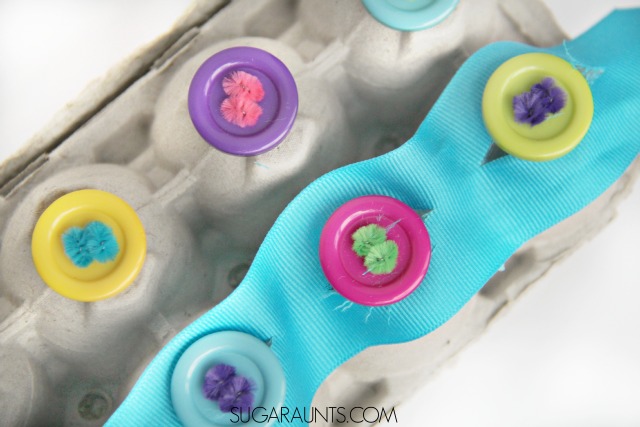
  1. Start by poking the corn holder into the bottoms of the egg carton.  You want four holes for each button.  
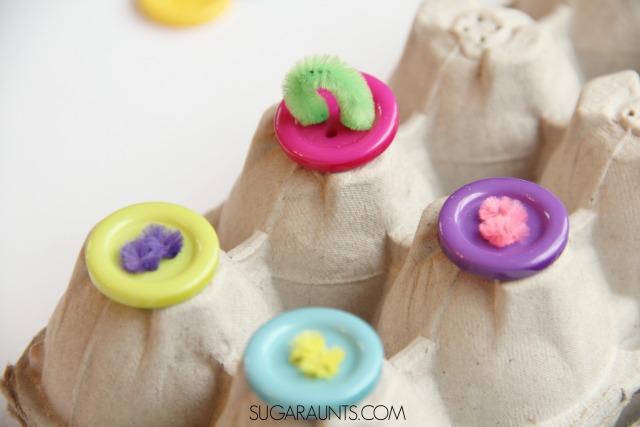
  2. Then thread the pipe cleaner through one of the holes, and through the button and back down through the egg carton, like this:   
Teach kids how to button with this cute egg carton buttoning activity!  This is fun to make while working on fine motor skills and helping kids with a difficult self-care task.

3. Bend the pipe cleaner back up through the holes and back down to the inside of the egg carton.  

4. Twist the pipe cleaner ends together to secure the button.  You will want the button to have some give and not be completely flat against the egg carton.

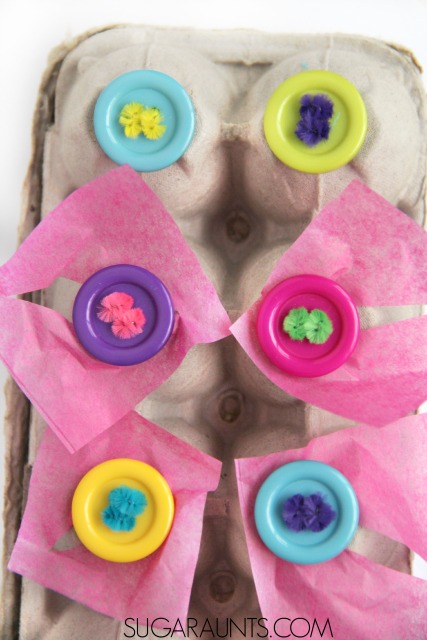
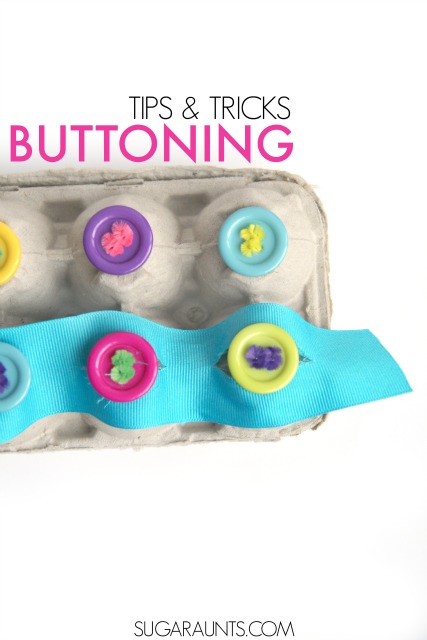
Work on buttoning activities with an egg carton and buttons.

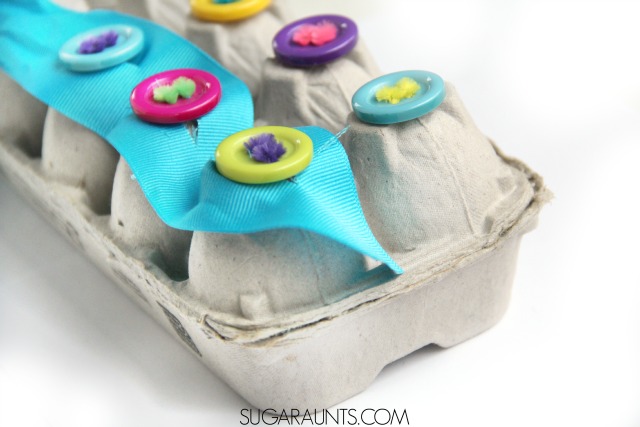
5. Then, start practicing the buttons.  

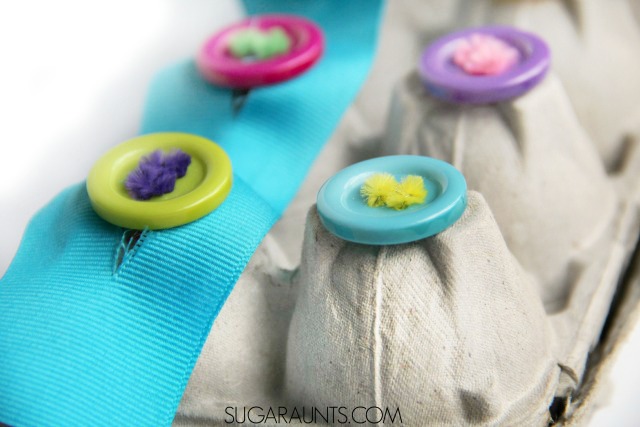
6. Use a long ribbon with slits cut lengthwise.  

7. Practice with the egg carton on your child’s lap or on the tabletop in front of them.  

Teach kids how to button with this cute egg carton buttoning activity!  This is fun to make while working on fine motor skills and helping kids with a difficult self-care task.

For more buttoning activities for kids, try using paper on the buttons, too. Use tissue paper on the buttons for more refined buttoning practice.  We also used squares of cardstock and cut up cereal boxes.  Make sure the buttons are not flush against the egg carton.

Buttoning activities and tips to teach kids to button and unbutton a shirt.

More Buttoning Activities

Looking for even more ways to practice buttoning?  These are some of my favorite items on the market.  

When a child needs to work on some skills for their independence, toys can be the way to go!  These toys are great for developing independence in dressing skills.  This post contains affiliate links.  

Small World Toys Learning – Before and After is great for kids who need to gain insight into concepts of before and after.  You can not put your shoes on before you put your socks on.  Cognitive concepts can be tricky for children to understand if auditory processing of these ideas are difficult.

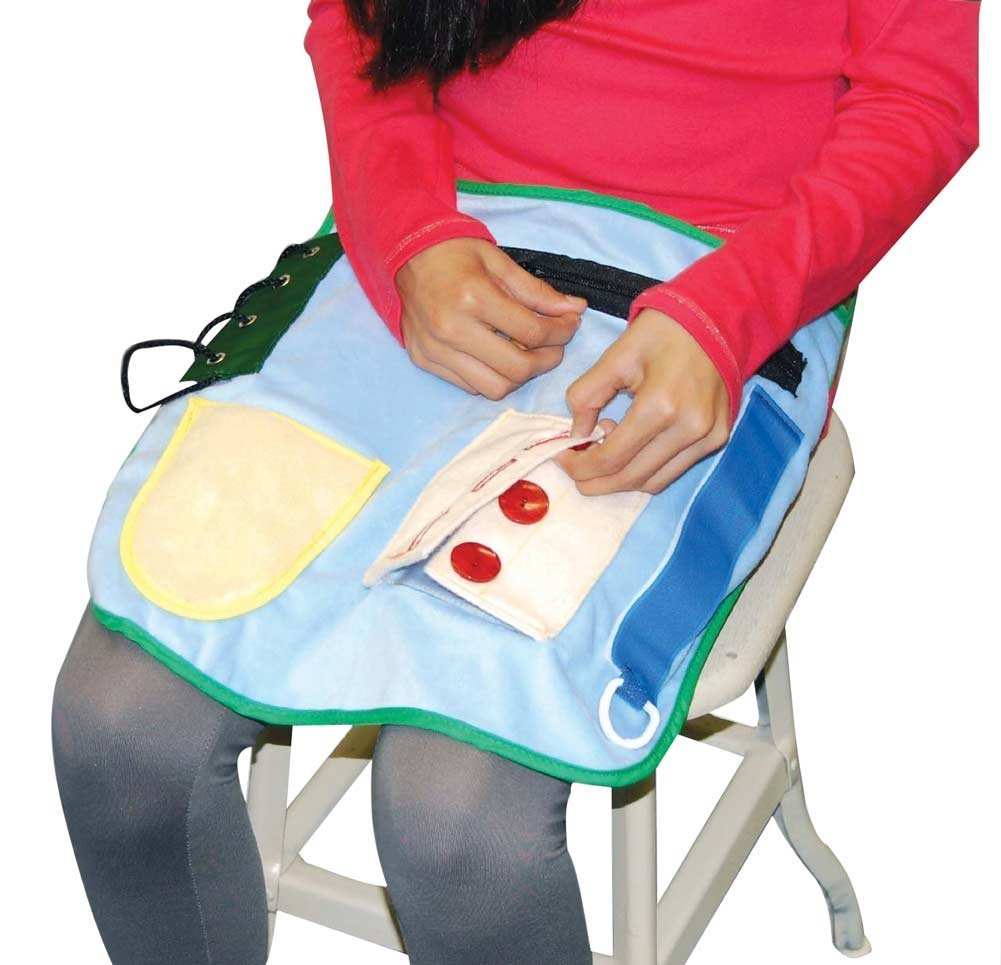
This Special Needs Sensory Activity Apron (Children & Adult Sizes) allows the child to manage the clothing fasteners right on their lap.  This is so great for children with motor planning difficulties.  

You could also use a Montessori Buttoning Frame with Large Buttons Dressing Frame and lay it right on the child’s lap.  

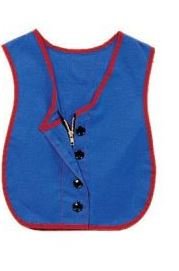
Childrens Factory Manual Dexterity Vests – Button-Zipper Combo Vest is a good way to practice buttons and zippers right on the child.  

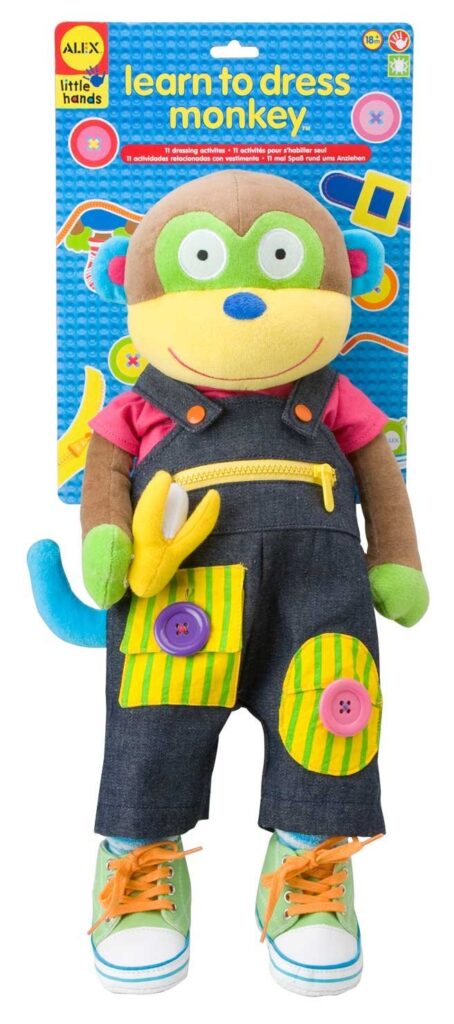
 Learning to Get Dressed Monkey is a fun toy for clothing fasteners.  

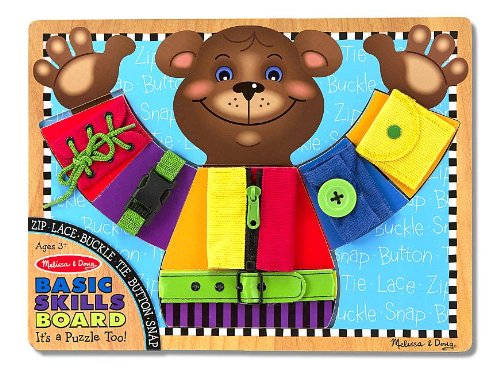
Practice basic clothing fastener skills like buttons, zippers, snaps, and ties with the Melissa & Doug Basic Skills Board.  The bright colors are fun and will get little fingers moving on clothing fasteners.

Teach kids how to button with this cute egg carton buttoning activity!  This is fun to make while working on fine motor skills and helping kids with a difficult self-care task.
How to teach buttoning to kids including tips from occupational therapy for buttoning skills.
Teach buttoning skills to kids with fun buttoning activities.

Working on fine motor skills, visual perception, visual motor skills, sensory tolerance, handwriting, or scissor skills? Our Fine Motor Kits cover all of these areas and more.

Check out the seasonal Fine Motor Kits that kids love:

Or, grab one of our themed Fine Motor Kits to target skills with fun themes:

Want access to all of these kits…and more being added each month? Join The OT Toolbox Member’s Club!

Colleen Beck, OTR/L has been an occupational therapist since 2000, working in school-based, hand therapy, outpatient peds, EI, and SNF. Colleen created The OT Toolbox to inspire therapists, teachers, and parents with easy and fun tools to help children thrive. Read her story about going from an OT making $3/hour (after paying for kids’ childcare) to a full-time OT resource creator for millions of readers. Want to collaborate? Send an email to contact@theottoolbox.com.
Friendship Activities

friendship activities

Today, we are covering friendship activities. These are friendship crafts and lessons that support the social emotional skill development of interacting with others by creating close relationships. Friendship activities are great for therapy interventions and as a supplement to social emotional skills. Friendship activities involve learning and using empathy, and activities to support friendship skills are a great way to develop these learned skills.

These friendship activities support the social emotional skill development of interacting with others by creating close relationships. Friendship activities are great for therapy interventions and as a supplement to social emotional skills. Friendship activities involve learning and using empathy, and activities to support friendship skills are a great way to develop these learned skills.

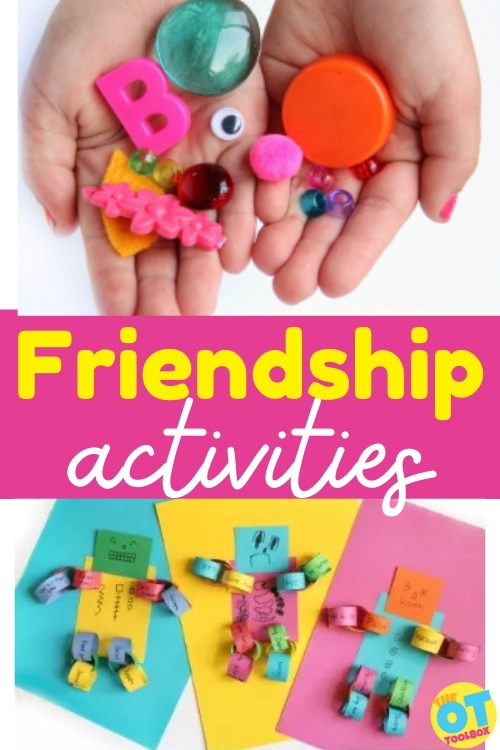
I am excited to share a collection of friendship activities designed to help children establish and build friendships. How do you teach friendship? This can be an abstract concept for kids, but by using friendship skills activities like games to teach social skills, friendship crafts, friendship recipes, and printables about friendship, we can teach children skills like empathy, perseverance, sharing, cooperation, and other essential components of friendship.

Be sure grab these friendship activities for teletherapy:

Writing about Friendship Slide Deck – writing prompts, writing letters to friends, and handwriting activities to develop friendship skills, all on a free interactive Google slide deck.

Personal Space Friendship Skills Slide Deck– Friendship involves allowing personal space, and body awareness and all of this is part of the social skill development that some kids struggle with. Use this free Google slide deck to work on body awareness and personal space.

Friendship activities to help kids develop social skills for friendship skills. Includes friendship recipes, friendship crafts, social stories information, and more.

Friendship Activities

Are you a good friend? Do you make a good friend? Do you have good friends? All of these are such important questions for children who are learning each day the necessary social skills that build lasting friendships. Strong social skills are an important piece of everyday life and the earlier this is recognized, the better social growth and development a child will experience. 

Strong social skills are an important piece of everyday life and the earlier this is recognized, the better social growth and development a child will experience.

Demonstrating and recognizing the friendship qualities that makes a good friend and keeps friendships strong is an important skill to have early on in childhood. Children will develop friendships with others from different backgrounds, cultures, lifestyles, and abilities.

Adults have a responsibility to teach children about kindness and friendship to all. Learning this along with how a good friend acts and behaves and what is the right and wrong way to treat a friend is essential for strong social skill development.

Friendship activities can help children begin to explore the friendship qualities and behaviors that are important to learn how to be a good friend, if they make a good friend, and recognize do they have a good friend.

Read on for some creative ways to engage children in learning friendship skills.

Teaching Friendship Skills to Kids

There are many wonderful activities that can be used to help children develop friendship skills. What are some of the specific skills that are needed for building and maintaining friendships?

  • Empathy
  • Acceptance
  • Sharing
  • Listening
  • Asking questions/being interested
  • Helping others
  • Responding to social situations
  • Communicating
  • Turn-taking
  • Cooperating
  • Solving problems
  • Perseverance
  • Being supportive
  • Trustworthiness

Some of these concepts are very abstract.

Using concrete examples, modeling, social stories, and activities that provide examples of these social skills can be powerful.

One way that I’ve loved to help children with social skill development in hands-on, and memorable ways is through play. To bring real-life visual examples that provide an opportunity for conversation and discussion is to use children’s books to inspire exploration of friendship skill development. Here are children’s books and activities that develop friendship skills.

Use the books to inspire discussion and play-based exploration of concepts such as empathy, acceptance, and differences.

Another way to address abstract concepts is through play. Use everyday toys to explore and develop turn-taking, communication, sharing, and problem solving.

Or, address turn-taking with blocks as kids communicate and practice taking turns.

Explore differences with this friendship sensory bottle.

These other friendship activities will give children the time to play and read to help them build a better understanding of good friendship behaviors and how to demonstrate them. Let’s take a look…

Sensory Friendship Activity

Friendship Countdown Chain

Friendship Ice Cream Cone Throw

Friendship Recipe

Food is always a fun way for children to learn!  Using food is a great way to explore different friendship characteristics while making a tasty friendship treat to eat!

These recipes include food items like cereal, fruit, chocolate, and nuts. Be sure to always check for food allergies and especially peanut or nut allergies, if you include these in your treats. 

Freight Train Activity – This mesmerizing book teaches basic concepts of shapes and colors, but can be expanded to discuss differences, awareness of others.

Friendship Treat Recipe

Friendship Snack Mix

Friendship Snack Mix

Friendship Fruit Salad

Friendship Games

Games are another fun way for children to learn important skills like sharing, empathy, making friends, kindness, differences, and more.  What child doesn’t like games? 

Engage children in these fun games that include a version of I Spy with monsters, bean bag activities played in a group while in a line or a circle, tossing of a yarn ball to say why someone makes a good friend, and activity ideas in a cooperation blog post that includes elements of friendship.

What Makes a Friend? Monster Game

Core Strengthening Friendship Activity

Friendship Yarn Game

Cooperation: 12 Group Activities for Kids

Friendship Crafts

Friendship activities such as those that support the development of social emotional skills through crafts are always a hit. In occupational therapy, crafts are a creative way for children develop motor skills, executive functioning, and emotional regulation, but they are also a fantastic way for kids to express themselves, share and create with others, and develop their skills.

These friendship crafts incorporate all of these elements while focusing on friendship to include spreading kindness, sharing, turn taking, and giving.

Empathy Activity– Use beads and a children’s book to explore empathy.

Super Friend Capes made with tee shirts.

Friendship Rocks Fingerprint Hearts made with rocks and fingerprints.

Friendship Flowers made with construction paper.

Foam Heart Friendship Necklaces made with foam hearts, beads, and yarn.

Beaded Friendship Bracelets made with beads and stretchy cords.

Friendship High Fives made with handprints and construction paper.

Secret Friendship Messages made with white crayons and revealed with watercolor paints.

Friendship Printables

In the classroom, therapy room, and hallway are great places to display friendship posters that show the importance of friendship and help create a positive classroom and school community. They show how to be a good friend and how not to be a good friend as well as help children to gain an understanding of good friendship qualities.

Friendship Posters

How to Be a Friend Posters

Friends Play Dough Printable

Friendship social stories

Social stories, or printable, hand-held stories that describe situations can give kids a concrete plan for everyday tasks. Using social stories to explain social situations is a great way to help kids with abstract concepts.

There are many nice templates out there that cover aspects of friendship, but for the most part, a social story should be individualized for each child.

This article on Autism and Friendship Skills includes important research on this topic to explore, but when it comes to using online social stories, they may not always be appropriate. Writing a social story for your child will be far more effective when you use the images, vocabulary, and terms that make sense to YOUR child or client, and the specific situations that are appropriate to your individual child or client.

Friendship Activities with Books

Mentioned briefly above, using books to help kids explore friendship is an incredibly rewarding way to pair friendship activities with the world of books.

Parents can cozy up with a child under a cozy blanket, for a calming and regulating experience of reading books togeter. Then, there is the oppourtunity to communicate about the characters, their friendships, and their conflicts, and their social situations that they had to navigate.

Through books, families can look at the pictures and come back to specific concepts again and again. And, adding hands-on, multi-sensory play experiences brings those concepts home.

In the resource, Exploring Books Through Play, you’ll do just that.

This digital, E-BOOK is an amazing resource for anyone helping kids learn about acceptance, empathy, compassion, and friendship. In Exploring Books through Play, you’ll find therapist-approved resources, activities, crafts, projects, and play ideas based on 10 popular children’s books. Each book covered contains activities designed to develop fine motor skills, gross motor skills, sensory exploration, handwriting, and more. Help kids understand complex topics of social/emotional skills, empathy, compassion, and friendship through books and hands-on play.

Click here to get your copy of Exploring Books Through Play.

social emotional activities for kids
Regina Allen

Regina Parsons-Allen is a school-based certified occupational therapy assistant. She has a pediatrics practice area of emphasis from the NBCOT. She graduated from the OTA program at Caldwell Community College and Technical Institute in Hudson, North Carolina with an A.A.S degree in occupational therapy assistant. She has been practicing occupational therapy in the same school district for 20 years. She loves her children, husband, OT, working with children and teaching Sunday school. She is passionate about engaging, empowering, and enabling children to reach their maximum potential in ALL of their occupations as well assuring them that God loves them!

Jungle Activities for Therapy

Jungle activities

Working with kids is always an adventure and that’s why these jungle activities fit the bill when it comes to fun therapy activities for kids. Here, you’ll find jungle jungle crafts, jungle sensory bin ideas, and other ways to make a jungle them therapeutic. There are even strategies to use in teletherapy. If you feel like you are a jungle explore sometimes when working with children, put on your adventure hat, because we’re ready for some therapy fun!

jungle activities for a jungle theme in therapy or the classroom

Jungle Activities

This jungle theme is just one of the many therapy themes we have here on the website. These are themed therapy ideas that you can incorporate into your therapy sessions, add to a jungle preschool theme (or any age!), or use at home to help kids develop skills.

When it comes to serving children in the therapy clinic or in the classroom, there are a lot of things to remember when promoting development of functional skills and underlying areas like fine or gross motor skills. And, these considerations carryover to the home, too…Two of the most valuable things that I have learnt from providing occupational therapy services are:

1) that thorough planning is absolutely essential and 

2) that the most effective sessions are fairly simple

The outlines provided in this jungle theme therapy ideas are not prescriptive, set-in-stone templates. They are a framework to hang your own ideas and preferences on. Because sometimes you just need that little spark of inspiration to get you going.

Occupational therapy teletherapy, as with face-to-face therapy, there is no one size fits all. So it’s up to you to adjust your session according to you aims and objectives for each individual child.

Let’s step into the jungle and get some jungle themed activities ready for your littlest adventurers.

jungle themed gross motor activities

A fun jungle warm up or cool down is a fun way to start and end a therapy session, but there are other ways to incorporate jungle gross motor activities into a jungle themed classroom, lesson, or home activities:

  • Use these ideas as a jungle brain break during jungled themed learning
  • Use these whole body movements as a sensory break
  • Work on motor planning and core strength
  • Incorporate bilateral coordination and crossing midline
  • Use as an emotional regulation tool

I am sure that you have realized that the first few minutes of an OT therapy session or teletherapy session are so important in setting the tone for the subsequent time that you will spend with the child. Take time to check in with the child that you are working with in order to get a sense of where they are at on that day. 

This always helps me adjust my energy level and approach according to what the child needs. It’s a great time to introduce the theme of the session and incorporate gross motor activities as a way to “warm up”.

Jungle Animal Exercises

In order to introduce the Jungle Adventure ask your child what their favorite animal is. Talk a bit about what the animal looks like, where it lives, what it eats and why it’s the child’s favorite animal. 

Then explore how their animal moves and act out that animal’s movement. This will lay the foundation for jungle exercises!

Prepare some animal pictures before the session – these can be printed or drawn pictures, flashcards, pictures from magazine or online pictures that you can screen share with the participant.

Present the child with a picture and demonstrate how that animal moves. Then set a timer for 30 seconds while you and the child perform the animal movement together.

Examples of jungle animal movements include gross motor exercises like:

  • Move like a snake
  • Jump like a frog
  • Hop like a bunny
  • Crawl like a lion
  • Sway like an elephant
  • Stomp like a hippopotamus
  • Swing like a monkey
  • Fly like a hawk

There are two main benefits to using gross motor exercises as a warm-up in therapy:

  1. The physical warm up is perfect for getting the child connected to the session and for helping to regulate the child if they have difficulties with focus and attention.
  2. The imaginary element of pretending to be an animal introduces the child’s language of play and brings the teletherapy session to life. 

For more specific physical gross motor goals you can adapt the animal walks to target certain areas:

  • Upper body strength
  • Core strength
  • Co-ordination between left and right
  • Motor planning
  • Bilateral coordination
  • Crossing midline
  • Posture
  • Positioning
  • Changes in position

Animal walks are also an easy exercise to ask the child to practice on their own between therapy sessions to promote their progress in these areas. 

Once the warm up is complete take a seat and catch your breath. You are still in the jungle but now you are going to look at the little creatures that live there. 

Jungle Fine Motor Activities

This section of the session focuses on developing selective finger movements and finger strength with a jungle theme.

As you did with the animal walks in the warm up, select a number of insect pictures that you can present to your child during the teletherapy session. Allow the child to select a picture and then use your fingers to imitate the movement that the insect makes. Moving your fingers like an insect requires a little creativity and imagination! Examples of bugs that I have used in sessions included caterpillars, ants, spiders, butterflies, grasshoppers. 

Demonstrate how the insect moves across your desk or along your arm and encourage your child to copy the motor pattern.

Adjust the demands of the motor pattern according to your child’s ability including more complex, selective finger movements to increase the demands on motor planning. Increase the amount of repetitions or distance the insect has to walk to increase the demands on finger strength. 

For additional activities to develop fine motor skills have a look at these awesome animal themed paper folding activities.

Jungle Activities for Visual perception

Incorporating visual perceptual skills into the Jungle Adventure is easy. The activities that you select will target the specific skills that you are working on with the individual child.

  • For eye tracking you can ask the child follow an animal figurine that you move across a desk, field of vision, or the screen in teletherapy services.
  • Figure ground perception can be developed by working on animal themed I Spy worksheets.
  • Visual discrimination can be encouraged by completing spot the difference worksheets.

I know you will have lots of tools in your box to develop the specific skills you are targeting and I encourage you to use the Jungle Theme to keep the child’s interest and motivation going.  

Jungle Handwriting Activities

When handwriting needs to be incorporated into occupational therapy sessions, there are many ways to use a jungle theme in handwriting goals.

  • Younger children are encouraged to write down the names of the animals or insects that we imitated in the beginning of the session.
  • Older children will enjoy copying out animal themed jokes. 

Try this Jungle Joke for copying:

What do you call a fly with no wings?

Answer: A walk!

Jungle Writing Prompts

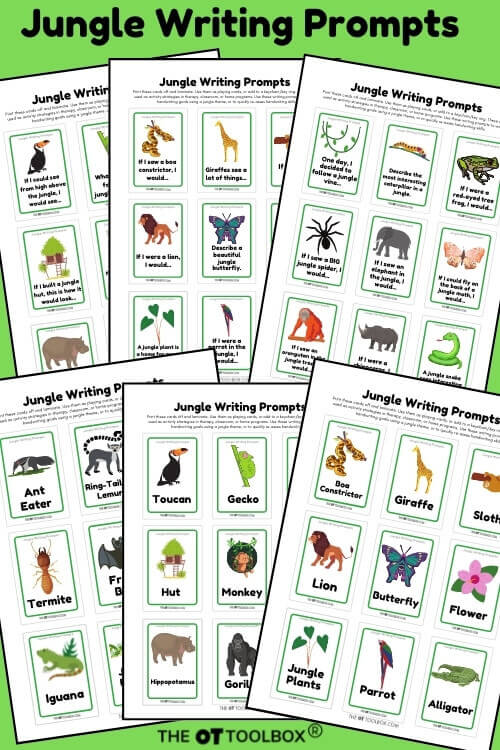
For more handwriting activities, use these Jungle Writing Prompts. These cards are perfect for older students who are writing sentences and paragraphs, AND younger students who copy words.

The Jungle Writing Prompt set includes 54 jungle themed writing prompts, including 27 open-ended sentence prompts and 27 jungle themed words.

Perfect for older students writing in sentence and paragraph format AND younger students copying words, these printable cards can be used in so many open-ended ways in therapy sessions.

Jungle writing prompts
Click here to grab the Jungle Writing Prompts to work on handwriting.

Jungle Sensory Bin

A jungle sensory bin is a fun way to incorporate many different goal areas. Start with a sensory bin material such as flour, dry beans, dry split peas, corn, rice, cotton, water, shaving cream, or shredded paper. Here are more ideas to create an easy sensory bin.

Then add items to your sensory bin:

  • Jungle animal figures
  • Fake flowers
  • Fake leaves
  • Scoops
  • Cups and bowls
  • Jungle animal images

Use the sensory bin to work on tactile exploration, motor skills, executive functioning skills, handwriting, and much more.

The word cards in the Jungle Writing Prompts set includes animal images with words that are perfect for laminating and adding to a Jungle sensory bin.

Well done! You have survived your Jungle Adventure and your children have had a blast. They were having so much fun that I am sure that they didn’t even notice that they were working on their sensory regulation, planning, gross motor skills, fine motor skills and visual perception. All in a day’s teletherapy work.

Contributor to The OT Toolbox: Janet Potterton is an occupational therapist working predominantly in school-based settings and I love, love, love my job. I have two children (if you don’t count my husband!), two dogs, one cat, two guinea pigs and one fish. When I am not with my family or at work I try to spend time in nature. The beach is my happy place.

Colleen Beck, OTR/L has been an occupational therapist since 2000, working in school-based, hand therapy, outpatient peds, EI, and SNF. Colleen created The OT Toolbox to inspire therapists, teachers, and parents with easy and fun tools to help children thrive. Read her story about going from an OT making $3/hour (after paying for kids’ childcare) to a full-time OT resource creator for millions of readers. Want to collaborate? Send an email to contact@theottoolbox.com.
Use a Paper Helicopter as a Therapy Tool

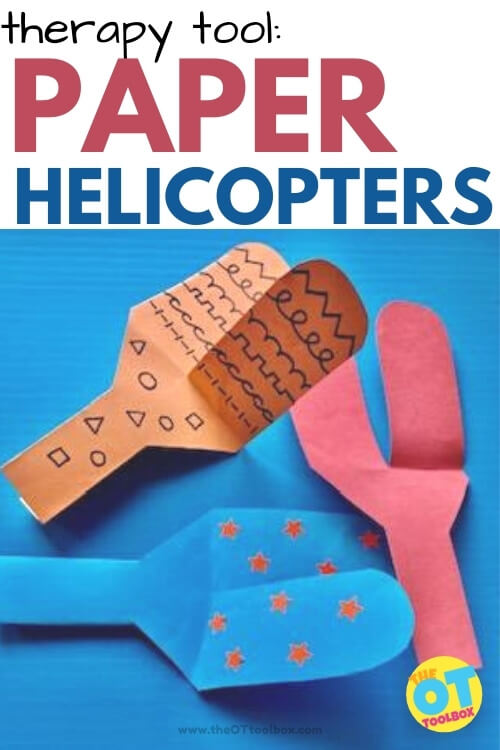
Paper helicopter template

Kids love fine motor crafts and this paper helicopter is just that! If you are needing an occupational therapy activity that develops scissor skills, visual motor skills, fine motor dexterity, pinch and grip strength, eye-hand coordination, balance, endurance, and more…than grab this paper helicopter template as a therapy tool for kids!

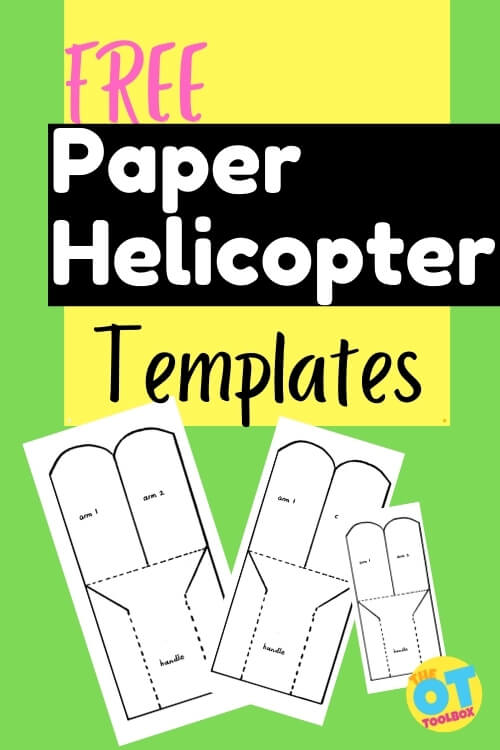
Get this free Paper helicopter template to use to make paper twirlers.

Paper Helicopter

You might be thinking, “What is a paper helicopter?” Well, a paper helicopter is a folded piece of paper that flutters and flies through the air. Similar to a paper airplane, a paper helicopter requires folded paper and is a fun hands-on activity for children and all ages. Paper helicopters, or paper twirlers, are also a low-prep activity that can be adapted accordingly to meet a variety of therapy goals.

I love simple occupational therapy activities that use materials found around the home. That’s why making paper helicopters (or paper twirlers) is one of my favorite paper activities.

Paper helicopters is an easy paper project that can be modified in so many ways to cater for children of various ages and children working on different skills. As an added bonus the kids adore the surprise spin revealed at the end. 

Paper Helicopters for using in occupational therapy crafts

How to make a paper helicopter

All you need to make a paper helicopter is a few materials found around the home:

  • Paper
  • Scissors
  • Pencil
  • Paper clip

Thin cardboard or empty cereal boxes can also be used for this activity. 

  1. Print out the paper helicopter template. (Access the template below).
  2. Cut out the template.
  3. Trace the template onto paper.

Copy or print out the template for the paper twirler (picture 2). You can give your child a copy of the template or you could encourage them to trace the template.  Tracing is a good way to develop pencil control and planning. Children need to work carefully to follow the lines that they trace. Tracing also requires that you stabilize the page with you non-dominant hand encouraging bilateral co-ordination.

Other ideas for developing co-ordination between the left and right sides can be found at Bilateral co-ordination activities

Once the child has a template or outline you can decide how to decorate the paper twirler. 

One option is to stick the page onto a vertical surface and encourage the child to colour in the twirler. Colouring on a vertical surface will develop the child’s upper body strength and encourage wrist extension in a child that may flex / bend their wrist when colouring.

Using a vertical surface can build up physical endurance for drawing and colouring and changing up the way you colour in can motivate a child who may be averse to colouring in. Working on an a vertical surface provides more information and activity ideas around working on a vertical surface. 

If you colour in on the desk you can opt for the type of writing utensil you would like to use. This includes pencils, chalk, coloured pens, markers, pastels. Each choice provides a different feedback and colouring experience for the child. Colouring with crayons provides some more insight on the use of crayons for drawing and colouring activities. 

Instead of colouring you could choose to decorate the paper twirler with stickers. Children will need to use a good refined pincer grip to peel off the stickers and sticking them. The size of the sticker will determine how much refined control the child will need. 

When I am working on visual-motor integration / copying I will draw patterns on one half of the paper twirler and the child to copy the patterns on the other half of the paper twirler. Being able to transfer visual information accurately onto paper is an important skill to develop in preparation for the development of handwriting skills. The importance of copying accurately is further developed in Visual motor skills 

Another option is to practise drawing shapes on the template. 

Letters and numbers can be drawn on the arms of the paper twirler. To add a sensory component I trace a number or letter on the child’s back with my finger and they have to guess what it is. If they guess correctly they can write the letter or number onto their paper twirler. 

For children practising their body image you can draw a person on each arm of the paper twirler. This can be the pilot and passenger ready to go for a spin. 

For older children I turn the template horizontally and draw lines on the two arms of the paper twirler and we practise our handwriting skills. The child can write two wishes, two destinations they would like to go to, something that makes them happy and something that makes them mad. Writing content can be adapted to the therapy session. 

Once the paper twirler has been decorated it will need to be cut out. Give the child the instruction to cut along the solid black line. Make sure to pint out the solid lines and the dotted lines so that the child can differentiate between the two. Cutting on straight lines precedes cutting on curves so you will have to gauge how much assistance your child will need. For more information on cutting have a look at Scissor skills

The final step is to fold on the dotted lines. Piece 1 and 2 fold back to create a handle. One of the arms of the paper twirler folds back slightly and one of the arms folds forward slightly.

Add a paper clip to the bottom to add a small weight that centers the paper twirler. This is just one more way to play games with paper clips!

The paper twirler is ready to spin. Hold it by the handle and let it drop to the floor. Watch it spin!   (paper twirler video)

paper helicopter template

Want to add a paper helicopter craft to your therapy line-up? There are many reasons to do so!

Enter your email address into the form below to grab a free paper helicopter template and start developing many skill areas!

Free Paper Helicopter Templates

    We respect your privacy. Unsubscribe at anytime.

    Contributor to The OT Toolbox: Janet Potterton is an occupational therapist working predominantly in school-based settings and I love, love, love my job. I have two children (if you don’t count my husband!), two dogs, one cat, two guinea pigs and one fish. When I am not with my family or at work I try to spend time in nature. The beach is my happy place.

    Children’s Books for Zones of Regulation

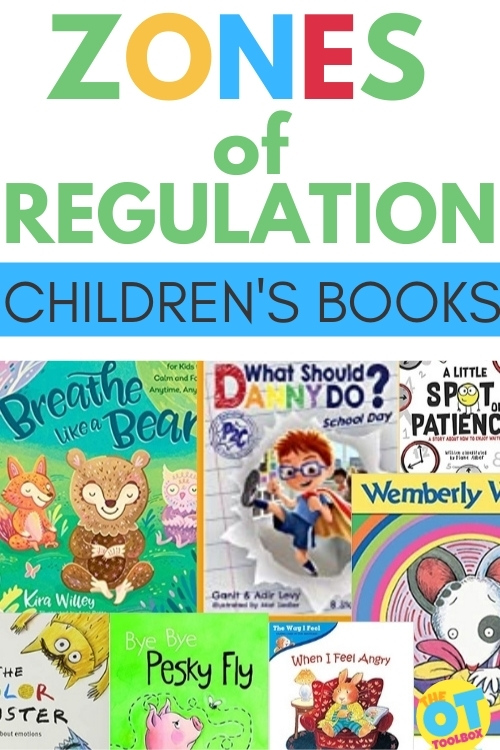
    Zones of Regulation children's books

    Here we are covering tons of Children’s Books for Zones of Regulation. These are self-regulation books for kids that reinforce the concepts from the Zones of Regulation program for self-regulation and self-modulation. These books pair well with the concepts in the popular self-regulation program and go very nicely with the hands-on Zones of Regulation activities that we have here on the website.

    Children's books for Zones of Regulation and books that support self-regulation skills in kids.

    Children’s Books for Zones of Regulation Program

    Identifying emotions can be difficult for some children. Recognizing an emotional state, identifying it within themselves, and then learning strategies for self-regulation are all needed for gaining emotional control. As parents, therapists, and teachers we can and should help young children understand and identify their feelings and help them gain ways to communicate their feelings appropriately to others. 

    Using age-appropriate books are a perfect tool to assist when helping children learn about emotions.

    There are books to help children identify and recognize emotions and to help children discover and learn self-regulation and coping strategies which can help them develop emotional control and maturity within themselves.

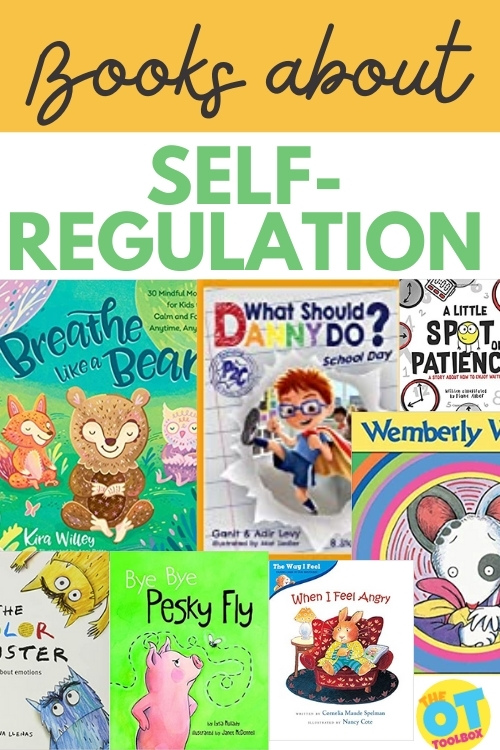
    Books about self-regulation

    Self-Regulation Books

    There is a vast library of books to help and many of these can be easily used as a supplemental tool coupled to the curriculum or programs you already have in place. For the purposes of this post, the books listed here are utilizing the Zones of Regulation™ curriculum as a backdrop. Simply stated, the Zones of Regulation™ curriculum is a color coded, four zone program which is designed to help children navigate their confusing feelings.

    The books in this post are favorites of therapists, teachers, counselors, and parents as they have used them frequently with the children in their worlds. Through these books children will learn to identify emotions and begin to relate their own feelings and emotions to the characters within the books. They will learn techniques and strategies to calm and regulate as they deal with the overwhelming strong feelings they experience in their daily lives.
     

    Amazon affiliate links are included in this post.

    Self-Regulation Books: Books for the Red Zone

    RED ZONE books are those books that have topics such as anger, devastation, elation, explosive behavior, feeling terrified, or hands-on physical reactions such as hitting or kicking, or maybe even yelling.

    The following red zone books are popular among teachers:

    Lifetimes: The Beautiful Ways to Explain Death to Children – This book is perfect for children of all ages when the death of a loved one has occurred or is about to happen. It explains with sensitivity and caring in a beautiful way about the cycle of life and helps a child to understand that all living things have their own lifetimes.

    Llama Llama Mad at Mama – This book is when Little Llama gets really tired and overwhelmed and has a meltdown when running errands with his mom. With Mama Llama’s guidance, they clean up the mess and find different ways to make the errands more enjoyable. Pair this book with a hands-on activity like our Llama Llama Red Pajama heavy work activity that offers great calming proprioceptive input.

    When I Feel Angry – This book explains how different things can make you feel angry, and this is an acceptable feeling; however, it is what you do when you get angry that matters most.

    When Sophie Gets Angry – Really, Really Angry – This book explores the very upsetting feeling of anger and emphasizes that everyone gets angry sometimes. The main character, Sophie, gets really, really angry and kicks, screams, and roars, and then runs into the woods to climb a tree and calm down, she later returns home to her loving family where things are calm and back to normal.

    Self-Regulation Books: Books for the Yellow Zone

    YELLOW ZONE books are those books that have topics such as feeling anxious, excited, frustrated, grumpy, nervous, scared, being silly or wiggly, or feeling worried.

    The following yellow zone books are popular among school counselors:

    Bear Feels Scared – In this cute and compassionate book, Bear gets scared by bad weather and gets lost in the woods. After worry from his friends, they find him and help him to calm his fears. A book that tells a story about fear and reassurance that things do get better.

    Bye Bye Pesky Fly – This is a cute little book about Pig and Fly who end up teaching children how they can deal with situations in relationships that annoy or frustrate them in a kind way.

    Grumpy Bird – This is a fun little character book about Bird who wakes up with the grumpies and when he goes on a walk to shake them off, his friends join in and soon he discovers that exercise and the company of friends can help him shake off his grumpy mood.

    Wemberly Worried – This sweet book is about the mouse Wemberly who worries about everything and after she makes a new friend at school she begins to worry less and less. It’s a cute book that shows children that by facing the anxiety it can get better. It’s an entertaining and reassuring book that shows how anxieties can lessen over time.

    Self-Regulation Books: Books for the Green Zone

    GREEN ZONE books are those books that have topics such as feeling calm, content, focused, happy, proud, ready to learn, and thankful.

    The following green zone books are popular among educators:

    I Am Thankful – This is a special, rhyming book that follows three diverse families as they celebrate the Thanksgiving holiday with their own traditions, acts of kindness, and demonstrating the ways they give back to others.

    I Feel Happy: Why do I feel happy today? – This is a sweet book that teaches young children the feeling of happiness and how sometimes it feels loud and other times it may feel calm. The main character who is a sunshine name Happy, teaches children how being happy feels in the body and what it may look like on the outside.

    Marvelous Me: Inside and Out – This book encourages children to enjoy the things that make them unique and feel proud of who they are! It’s a cute book about a young boy who simply likes himself for who he is and all the things that make him special.

    Self- Regulation Books: Books for the Blue Zone

    BLUE ZONE books are those books that have topics such as feeling bored, depressed, disappointed, sad, shy, sick, or tired.

    The following blue zone books are popular among parents:

    Bored Claude – This cute book is about a shark feeling gloomy and bored. His friends are busy doing things, but Claude isn’t interested in doing what they want to do as he thinks it’s boring. He comes up with a brilliant idea for something that everyone can do together.

    I’m Sad – This book is about Flamingo who talks about feeling sad and his friends who try to cheer him up, but nothing seems to work. Flamingo learns he will not always feel this way and sometimes just being a friend means you just support by being there and you don’t have to try to cheer someone up.

    When Sophie’s Feelings Are Really, Really Hurt – This is a book about how Sophie’s feelings get really hurt in school when the class laughs at her painting making her feel sad and disappointed, but when she explains her painting to everyone, they understand what she is trying to do.

    More Self-Regulation Books

    ALL ZONES books are those books that include all of the emotions. These books are popular among most professionals and parents:

    Glad Monster, Sad Monster – This little brightly colored book shows monsters acting out different emotions and things that could trigger them.

    The Color Monster – This is a fun concept book for children when the Color Monster wakes up feeling many emotions all at once. The book helps children to identifying emotions and learn how to feel more in control.

    The Feelings Book – This bright and colorful book talks about how we all feel different emotions sometimes.

    The Pigeon Has Feelings, Too! – Every young child knows about Mo Willem’s Pigeon and those famous temper tantrums, but this book is about more emotions and The Pigeon makes it more engaging while getting kiddos talking about emotions.

    The Way I Feel – This is a comprehensive book about multiple emotions with fun rhyming text that makes it fun to read aloud. 

    Additionally, GREEN ZONE books are those books that have strategies or techniques for teaching self-regulation and coping skills resulting in children achieving feelings within the green zone. These books are popular among most all professionals, but more directly, among pediatric OT practitioners:

    A Little Spot of Patience – This is a cute little book about learning to enjoy waiting! What? Children can actually learn to enjoy waiting? Yes! This cute book presents ideas of how to pass the time and tells why waiting can make some things better. 

    Breathe Like a Bear – This is a beautiful book with mindfulness exercises designed to teach children strategies and techniques for managing their breath, bodies, and emotions. It has 30 short breathing movements that can be performed anywhere and anytime.

    Even Superheroes Have Bad Days – This is a fun action-packed book with wonderful rhyming text making it a fav among children because what child doesn’t like superheroes! This book reveals many ways that superheroes (and children) can resist the temptation to cause a scene when they feel extreme emotions. It teaches many fun ideas to help children cope with strong feelings and emotions
    when they feel overwhelmed.

    How to Be a Superhero Called Self-Control! – This is a gem of a book for pediatric occupational therapy practitioners as it uses Self-Control, a superhero, who wants to teach children some very special super powers for self-control in learning to deal with anger, anxiety, frustration and other strong feelings. Several strategies such as the use of deep pressure, self-massage, breathing exercises, and other activities are a part so that children can learn to find their own personal peaceful place. Really an OT gem!

    The Impulse Control Journal– This printable workbook is a huge resource when it comes to mindfulness, mindset, impulses, habits, and making choices. There are lists to write out goals, and areas to draw to get kids thinking on how to address regulation needs. This tool is great for impulse control, but covers many other areas as well, including helping kids come up with strategies for self-regulation.

    I Can Do That: A Book on Self-Regulation – Another pediatric OT practitioner gem! This book is told through rhyming text from a child’s point of view and helps children to learn self-regulation techniques by effectively practicing ways they can control their own emotions and actions when they start becoming dysregulated. A great book for children with a sensory processing disorder!
     
    My Mouth is a Volcano! – This is an entertaining book that takes an empathetic approach to teaching children the value of respecting others and listening while waiting for their turn to speak. The character in the book has habit of interrupting others and the book teaches a witty technique to help children learn to manage all of their thoughts and words.

    My Magic Breath: Finding Calm Through Mindful Breathing – This interactive book helps to teach children to breathe along as they learn to make angry and sad feelings disappear. Do you have magic breath! Yes, I do! This book helps to guide children into a calm space of mindfulness.

    My Magical Choices – Another beautiful book with rhyming text that engages children in learning about the choices they make. It teaches children about positive, conscious language while emphasizing a myriad of behaviors such as being responsible, calm, forgiving, and generous empowering them to be responsible for their own happiness.

    The Kids’ Guide to Staying Awesome and In Control – Frankly, this book is jammed full of simple ideas to regulate the emotions and senses helping children to tackle different feelings full force and feel awesomely strong and in control. Can I say another pediatric OT gem here? Some examples of strategies and tools include: breathing, deep pressure holds, finger pulls, use of fidgets, headphones,
    and chewing gum. Children learn to use these to help them feel calm, cool, and AWESOME!

    What Should Danny Do? – This is a creative and interactive book that gives the reader choices of what Danny will do in a dilemma in order to navigate the stories within the book. This empowers the reader to make positive choices while demonstrating the natural consequences to negative selections helping children to understand that the choices they make help to impact their day.

    What Were You Thinking: Learning to Control Your Impulses – This is a great older kid’s book addressing the teaching of impulse control. The main character, Braden, has trouble controlling his impulses and has poor decision-making skills, resulting in ill-timing, disruptive behaviors, and impulsive reactions which impact others around him. The adults in the story must teach Braden impulse control through lessons shared by his teachers and his mom.

    You Get What You Get – This is a very relatable book for some children as the main character, Melvin, throws a fit when he doesn’t get what he wants. The book depicts how he must learn to deal with his strong feeling of disappointment – an important life lesson – “you get what you get and you don’t throw a fit”!

    Through these books, many children will learn about emotions, understand that others feel the same way, and will learn techniques and strategies to deal with these strong feelings in their daily lives.

    It is important to emphasize to all children that there are no “good” or “bad” emotions as we all experience them and that all emotions are okay to feel, but it is important to learn how to manage our emotions for overall health and well-being.

    When children learn to identify emotions and what can trigger them, they can learn effective coping strategies and build a strong emotional foundation allowing for improved social skills and increased self-esteem and self-confidence.

    Finally, using self-regulation books like the ones above are great tools to incorporate into therapy sessions or to send home as recommended reading for families. This is one specific intervention strategy for targeting self-regulation IEP goals.

    Regina Allen

    Regina Parsons-Allen is a school-based certified occupational therapy assistant. She has a pediatrics practice area of emphasis from the NBCOT. She graduated from the OTA program at Caldwell Community College and Technical Institute in Hudson, North Carolina with an A.A.S degree in occupational therapy assistant. She has been practicing occupational therapy in the same school district for 20 years. She loves her children, husband, OT, working with children and teaching Sunday school. She is passionate about engaging, empowering, and enabling children to reach their maximum potential in ALL of their occupations as well assuring them that God loves them!

    Shoe Tying Activity

    Shoe tying activity

    Shoe tying can be trying for little ones, and that’s where this shoe tying activity comes in. This shoe tying egg carton activity is one we developed in 2015, and it’s been shared thousands of times. Here’s why: This hands-on shoe tying task helps kids establish the skills they need to learn to tie their shoes in a fun and stress-free manner. 

    Kids will love this out-of-box shoe tying activity to teach kids to tie their shoes and practice shoe tying with an egg carton. Be sure to check out this massive shoe tying resource that has been recently updated so you can address all of the underlying skills needed to shoe tying with kids. 
     
    You’ll also want to check out our one handed shoe tying resource.
     

    Shoe Tying ACtivity

     
    This shoe tying activity is actually part of a 31 Day series of Occupational Therapy posts using free or almost free materials. In each blog post in the series, I cover creative ways to work on functional skills using everyday materials found around the home. Today we’re using a recycled egg carton as a shoe tying tool.
     
    Shoe tying can be very difficult for kids to master.  Typically, children in Kindergarten show developmentally appropriate fine motor skills for shoe tying.  
     
    Kindergarten is a great time to start teaching kids to tie their shoes. They are gaining more dexterity in their fine motor skills, and are getting used to the routines of getting ready for school on a daily basis.  
     
    Shoe tying is part of that daily self-care schedule.  However, quite often, kids will start tying shoes at older ages. Shoe tying is tough:  There are many steps, two laces that look the exact same, and many times left./right confusion.
     
    Switching hands in tasks and not knowing the difference between left and right hand can be a challenge in a task like shoe tying where the verbal directions involve using the left hand to pinch and the right hand to pull a lace. That’s where using two different colored shoe laces is a benefit in our shoe tying activity.
     
    For left and right knowledge skills, try this related activity to work on left right confusion.
      

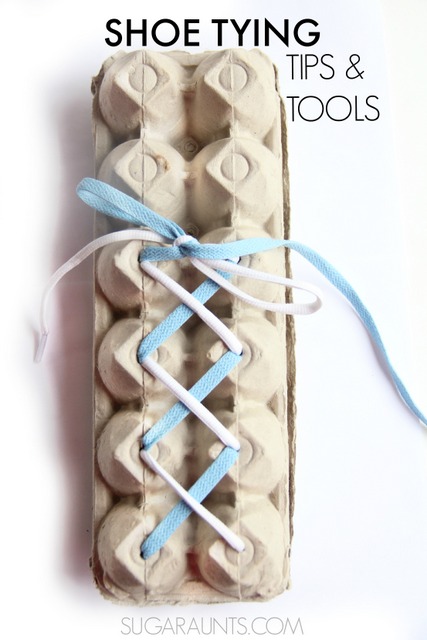
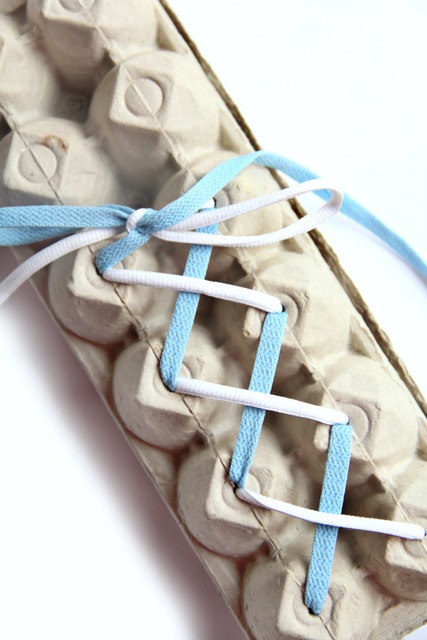
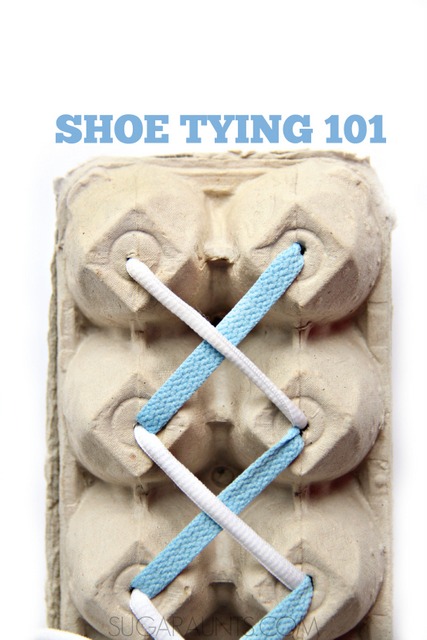
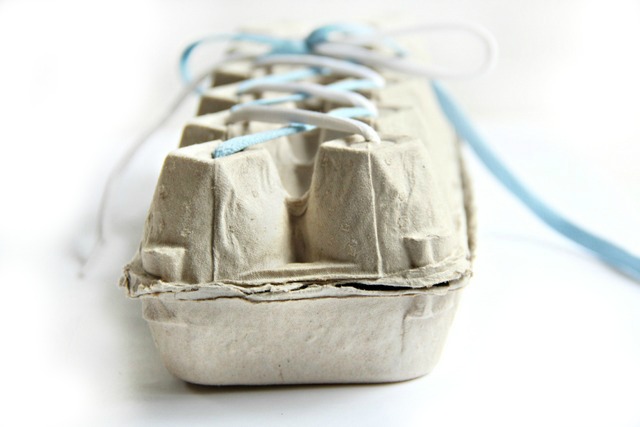
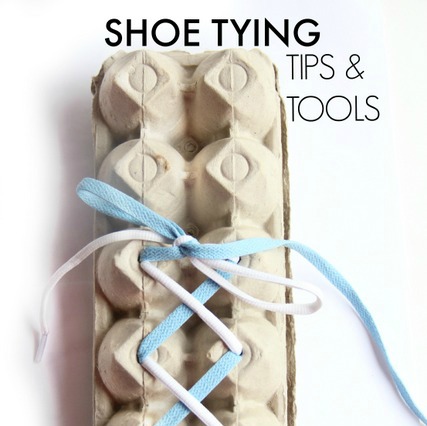
    Shoe Tying Egg Carton Activity


    Shoe tying tips using a shoe tying activity with a recycled egg carton and two different colored shoe laces to teach kids to tie their shoes..


    This post contains affiliate links.
     
     
    This shoe tying activity is a fun way to teach kids to lace and tie shoes with a fine motor twist.
     
     
    Shoe tying activity using an egg carton and two different colored laces.
     
    1. Start with a cardboard egg carton.  If you like, give it a quick spray with disinfectant spray when the kids are not around and let the disinfectant dry. I don’t typically do this step, though. We just try to make sure to wash our hands after playing with egg cartons.  
    2. Make the holes for the laces.  We used golf tees and a hammer for this part.  See how here.  It’s a fun proprioceptive activity for kids that is always a hit in our house.
    3. Grab a set of shoe laces.  Using two different colors is best for new shoe tying friends.  
    4. Tie the laces together at one end and thread them through the holes of the egg carton.  
    5. Start lacing the holes the whole way up the egg carton.  Threading the holes is an excellent fine motor task for kids.  My three year old loved this and wanted to take the laces out and do it again.  Threading the laces encourages bilateral hand coordination which is vital for shoe tying.
    6. Now we’re ready to practice tying shoes!
    How to teach kids to tie shoes using an egg carton as a shoe tying practice activity.


    Shoe Tying Tips

    First, be sure to visit this page on shoe tying for more tips and strategies to teach kids to tie shoes. 

    Many times, children are excited to learn to tie their shoes.  Embrace it, go with it, and practice!  But other times, they just don’t want to learn. That’s ok! Don’t force them and come back to practicing in a week or two. 

    If kids get frustrated with the shoe tying activity, the struggle to get them to sit down can be a difficult thing to overcome from the very beginning and only make the practice time more difficult.  If that is the case, give them time, and revisit shoe tying in a week or two.  

    The key to teaching kids to tie their own shoes is calm, quiet, practice. It’s easy for kids to get upset, frustrated, or anxious when there are so many steps and may feel rushed or upset about their fumbling fingers.    They might have Velcro shoes that they are perfectly happy to pull on quite quickly.  

    With my older child and from helping lots of kids learn to tie their shoes, I’ve seen the incentive of a new pair of sneakers with laces bring on the ambition to give it a shot.  

    Other times, it’s a creative way to practice, simplified directions, or learning steps in chunks that gives kids an oomph of “hey! I CAN do this!”  

    Shoe Tying Activities

    Here are some more shoe tying activities and tips:

    • Consistent verbal cues for each step. Use the same words each time.
    • Practice with the shoe in your child’s lap, not on their foot.  Once they master shoe tying (or at least start to get the hang of it), then practice with their shoe on their foot.  It will then take more practice with the shoe on their foot because when they are wearing the shoe, the laces shorten a bit.
    • Tying shoes has a lot to do with visual perceptual skills. You’ll find easy and fun ways to work on visual perceptual skills through play here. 
    • Place the shoe in their lap or on the floor positioned with the heel close to them and the toe pointing away.
    • Practice with two different colored shoe laces.
    • Tie your own shoe as you prompt your child to tie theirs.  Do the steps at the same time.  Sit beside and position your shoe slightly in front of your child.  You want them to see your shoe as a model in the same position as yours and in a place where they can see your shoe without having to turn their head to much.
    • Avoid saying “right” and “left” when talking about the different strings.  Keeping track of the right/left sides can complicate things for a young child.  Use the names of the laces if you are using two different colored laces or just say, “the lace on this side of the shoe”, or the “Pick up the lace with the hand you write with.”
    • Work in chunks.  Practice only the first step until your child masters that part.  Then, teach the next step and work on those tow steps together before moving onto the next step.
    • Practice with items other than laces.  Shoe laces can be very difficult for young kids to manage.  If they have any trouble with fine motor skills or bilateral hand coordination, it is especially difficult.  Try practicing with stiff shoe laces, wire-edged ribbons, pipe cleaners (twist the ends of two together for length!), or Wikki Stix.
    • When you get to the step where your child pinches the loop, make sure they are holding it close to the shoe.  If they are pinching the loop too far from the shoe, the knot will be too loose.
    • If you’ve been practicing shoe tying for some time and your child is just having too much difficulty, it might be other underlying reasons.  To tie shoes, kids need fine motor skills, bilateral hand coordination, visual perceptual skills, hand-eye coordination, and hand strength just to get the task of shoe tying done. If you feel your child has a difficulty in one of these areas, contact your pediatrician for a referral to an Occupational Therapist for individual evaluation and treatment.
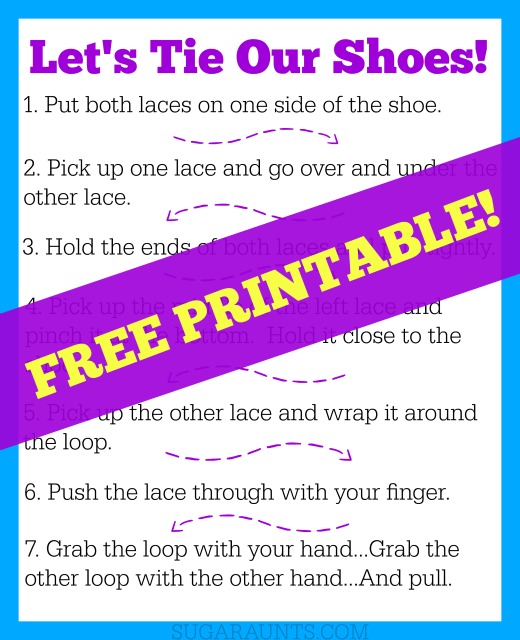
    • I like the simplified steps below for shoe tying.  They are simple and easy for kids to remember.  Write them down and read them as you go through shoe tying with your child.  Our newsletter subscribers can get the image below as a free printable.  J
     
    Teach kids how to tie their shoes free printable
     

    Shoe Tying Task Analysis

    Breaking down the steps to shoe tying and deciphering where the struggle is happening can be a huge part of addressing shoe tying struggles. Use this list of steps to tie shoes to assess where the break down is occurring. 

    Next, look at the underlying areas that play into that aspect of tying shoes. Is it fine motor coordination? Pinch strength? Crossing midline? Bilateral coordination? Attention and focus? All of these areas play into the overall task analysis of shoe tying. 

    Then, focus on addressing those skills during the functional task itself.

    Let’s take a look at each step of shoe tying:

     
    Easy Steps to Teach Kids to Tie Their Shoes:
    1. Put both laces on one side of the shoe.
    2. Pick up one lace and go over and under the other lace.
    3. Hold the ends of both laces and pull tightly.
    4. Pick up the middle of the left lace and pinch it at the bottom.  Hold it close to the shoe.
    5. Pick up the other lace and wrap it around the loop.
    6. Push the lace through with your finger.
    7. Grab the loop with your hand…Grab the other loop with the other hand…And pull.
     
    (Remember to avoid using the words “right” and “left” unless your child has a good grasp of these words.  You can instead use the names of the colored laces, if using two different colored laces, OR use “the lace on this side” or the “hand you write with”. 


    Shoe tying activity and shoe tying tips
     

    More Shoe Tying Activities

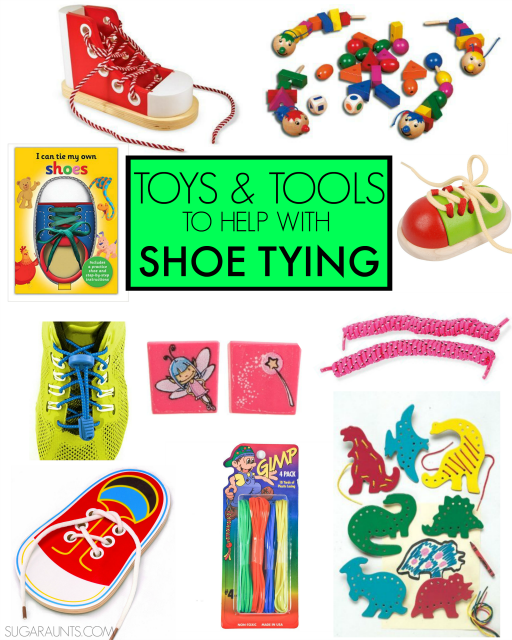
    Looking for more ways to practice shoe tying with kids?  These toys and tools are fun ways to practice with kids.

    They are additional ideas for your soon-to-be-shoe-tyer.  Perhaps you have friends or relatives who are asking for gift ideas for your child, or you are looking for ideas for upcoming holidays.  These are a few ideas that I love for working on shoe tying and can help kids in their fine motor dexterity to help them become successful at tying shoes.
     
     
    Shoe tying toys and activities


    Shoe Tying Toys

    • This Melissa & Doug Deluxe Wood Lacing Sneaker is a great practice tool, with it’s bright colors and stiffer laces than the ones typically on shoes that we wear.  Practice on the model before moving to your child’s real shoe.

    • If you have a little one who loves to read, this I Can Tie My Own Shoes Book is a real incentive to practice shoe tying.
    •  Sometimes, kids just can’t get the hang of shoe tying no matter how hard they try.  These Tie Buddies Shoe Accessory are great for kids that have trouble at the “loop part” of shoe tying.  They eliminate the loops and give kids something to hold onto while tying.  Kids with hand weakness will benefit from this tool.
    • Another modification to shoe tying are these No Tie Shoe Lock Laces .  They can be laced in shoes and help the child’s shoe stay snug.
    • Magic Shoelaces are another way to modify shoe tying.  Use these until your child is ready and able to practice effectively.  They are great laces for kids with difficulties in any of the underlying skills needed for shoe tying.
    • I love a creative practice technique when it comes to any skill for kids.  This Plastic Lacing Cord is an excellent way to practice shoe tying with a more resistive lace.  Use them in place of shoelaces in the egg carton activity that we shared today.
    • Lacing & Tracing Dinosaurs can help kids with lacing, managing strings, threading, bilateral hand coordination, and strength.  It’s a great precursor activity to practicing shoe tying.  
    • For more functional and appropriate play to work on shoe tying, I love this Colorful Caterpillars Game .  It works on bilateral hand coordination and strength needed to tie shoes with dexterity and ease.


      She tying activity with an egg carton and shoe tying tips

    I hope you were able to find some helpful tips and tools in this post.   


    Love this post?  Pin it!  And don’t forget to use that shoe tying joke!  Jokes help with shoe tying 🙂

    Try these shoe tying tips and tricks for teaching kids how to tie their shoes, from an Occupational Therapist
     

    Colleen Beck, OTR/L has been an occupational therapist since 2000, working in school-based, hand therapy, outpatient peds, EI, and SNF. Colleen created The OT Toolbox to inspire therapists, teachers, and parents with easy and fun tools to help children thrive. Read her story about going from an OT making $3/hour (after paying for kids’ childcare) to a full-time OT resource creator for millions of readers. Want to collaborate? Send an email to contact@theottoolbox.com.
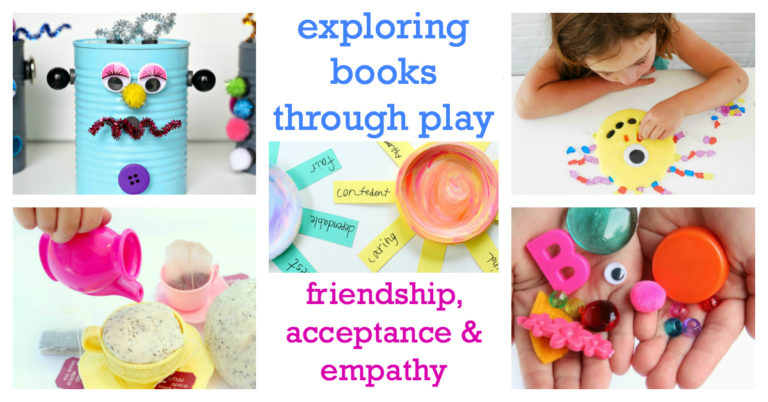
    Free Meet the Teacher and Meet the Therapist Forms

    Meet the teacher Meet the Therapist letter

    Each year, one of the most exciting parts of back-to-school is meeting a new teacher or therapist. That’s why these free meet the teacher forms/ meet the therapist forms are the way to go when it comes to starting the school year off right. Many teachers have created meet the teacher forms to introduce themselves to their new class, and OTs/COTAs should have the same fun to start off a new year of OT services.

    Free meet the teacher meet the therapist letters for back to school.

    Free Meet the teacher templates

    If you’ve worked in the school long, then you’ve probably seen a meet the teacher form or two. Meet the therapist forms are just as important! You can grab this set of editable forms and enter your information, then share them with your new caseload.

    Here’s how it works:

    1. Enter your email address into the form below.
    2. You’ll receive an email with a PDF containing a link to access this template of free meet the teacher/meet the therapist forms. (Save the PDF if you want to make a new letter next year!)
    3. When you click the link on the PDF, you’ll be sent to Canva. If you have a Canva account, you can open the files in Canva.
    4. If you don’t have a Canva account, you’ll be directed to create one (it’s free).
    5. When you open the link, you’ll see a template of 13 different Meet the Therapist Forms.
    6. Click on the text and change it to say what you like. Add a picture of yourself if you like.
    7. Download the page that you like and email it to your student’s parents, print it, or add it to your online classroom.

    When you access this free template of meet the therapist or teacher letters, you’ll find 13 different templates. Each one is editable in Canva, so you can add your own information.

    A Meet the Teacher letter or Meet the Therapist letter is a fun way to start of the school year. You can add fun facts, information about this upcoming school year, and even your working hours. A meet the therapist or meet the teacher letter is the perfect place to set limits on your working days or working times. Don’t set yourself up to answer phone calls or emails outside of your working hours, and you can let parents know that on your back-to-school letter.

    Add in contact information like a phone number or email address.

    Then, use this meet the therapist form on your school webpage, in an email to parents, or in an online classroom. Some forms are even printer friendly, so you can print off copies and send them home with students.

    Have fun making your Meet the Therapist Letter and let’s have a great school year!

    FREE Meet the Therapist Forms for Back-to-School

      So I can best serve you, are you…
      We respect your privacy. Unsubscribe at anytime.

      Colleen Beck, OTR/L has been an occupational therapist since 2000, working in school-based, hand therapy, outpatient peds, EI, and SNF. Colleen created The OT Toolbox to inspire therapists, teachers, and parents with easy and fun tools to help children thrive. Read her story about going from an OT making $3/hour (after paying for kids’ childcare) to a full-time OT resource creator for millions of readers. Want to collaborate? Send an email to contact@theottoolbox.com.
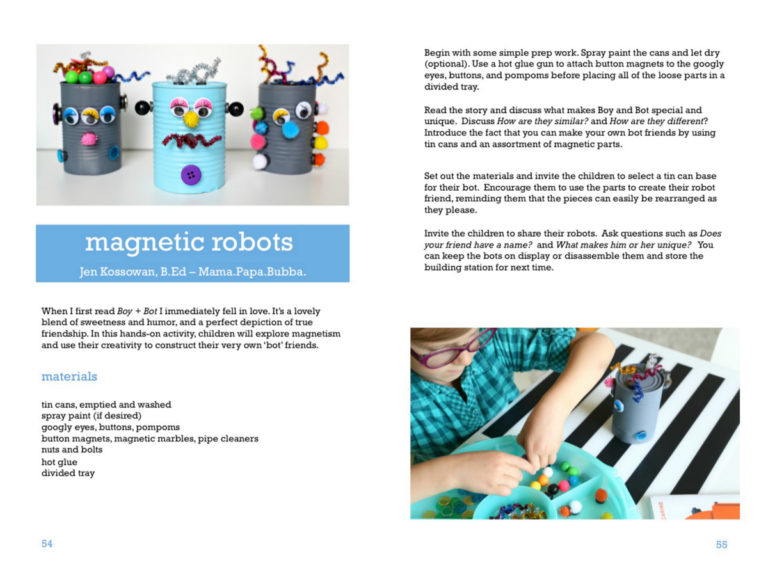
      Memory Card Games

      memory card games

      Occupational therapy professionals know the benefit of using memory card games to build skills in therapy sessions. OTs love to use games in therapy sessions to address a variety areas in novel and fun ways…and kids love the gaming aspect of therapy!
      Memory card games as an occupational therapy activity to work on working memory, attention, concentration, spatial relations, visual motor skills, and handwriting.

      Memory Card Games in Occupational Therapy

      There are so many reasons to play memory games in OT! Areas like executive functioning skills, to working memory, attention, focus, to fine motor skills, visual motor skills, visual perceptual skills, and even handwriting can be improved through the use of memory card games.

      It would be easy to incorporate some handwriting games into a memory card activity.

      We’ve talked about using games in a variety of ways…today, we’re covering the use of a Memory Card Game to work on various skills in OT. Here’s why this simple game is such a powerful tool for impacting function:

      Memory games are a powerful way to work on sort term memory, working memory, and executive functioning skills such as attention organization planning prioritization organizational skills.

      Memory games are fun way for kids to work on short term memory and other skills that are beneficial for learning in the classroom and at home.

      When kids play memory they can work on holding short term information in their memory In their short term memory. This allows them to use visual attention and visual memory while they remember where pictures are located playing a classic memory game.

      Kids with other executive functioning issues me to be struggling with the same challenges in the classroom or at home. By playing a game such as memory kids can work on these executive functioning skills in a fun and low-key manner.

      When they play memory kids can work on prioritization such as choosing which card to pick first.

      When you play memory you pick a card and if you seen it before you you need to remember where you’ve seen that location of the card. This scale requires time management self-regulation and self-control. You don’t want to pick up the next card in a rush without thinking through your your process of where you saw that picture last.

      Memory card games can be used to address visual motor skills.

      Playing a game of memory can help with short term memory and retention of information as well. When kids need to recall where they saw a card in a previous play they need to think back and use their mental memory skills in order to recall where that card is located in the board. This visual component of working memory skills carries over to the classroom when kids need to remember to do it to do their homework or what skills have worked in the past in order to solve problems on tests or in situations of game or learning at school.

      A memory game also helps with multitasking and helping kids to stay and complete a task through to completion. All of these executive functioning skills are powerful skills to develop through play such as using a memory game.

      “Grading” Memory Card Games to Meet Different Needs

      When therapists add a toy or game to their “OT toolbox”, they need to use the material in a variety of ways to meet the needs of different levels of children and while addressing different skill areas.

      This refers to grading activities.

      Grading, in occupational therapy, means making an activity more or less challenging in order to meet the needs of the individual. This can also refer to changing an activity in the middle of the task, depending on how the client or child is responding. Grading is important when it comes to finding the “just right” amount of support or adaptations that need to be made to a task that challenge the client while also allowing them to feel good about doing the therapy intervention.

      If the activity is too easy, you would grade it up to make it a greater challenge.

      If the activity is too hard, you would grade it down to make it easier to accomplish a sub-goal or skillset, while also challenging those skills.

      Memory card games are a great tool to use to challenge a variety of skill levels and abilities.

      • You can help to boost skills by changing the number of matches that you are using in the memory card game. If a child who struggles with attention, focus, impulse control, visual perception, eye-hand coordination, or working memory, you might play the memory game with only two matches or four matches so that there are four or eight cards total on the playing board.
      • You can further adapt this game by giving clear and concise instructions or hints in other words. Try to help the child use their memory, attention, working memory, and recall skills by defining the match that they are looking for and details that are on that image. This can be accomplished by saying things like, “I’ve seen that card before. Have you?”
      • Work on turn taking skills for use in conversation and play with different modifications and adaptations based on the individual’s abilities and areas of development.
      • Another strategy to grade memory games is to ask the child to talk through their moves. This self-reflection can build self-confidence, and it’s a helpful way to remember where they seen a matching card before. And, this self-talk skill also translates over to functional tasks. When a child performs a task such as a chore or a homework assignment they can talk through the task at hand. This allows them to recall what they’ve learned and what’s been successful. They are able to use skills they’ve established in the past. Self talk skill is a great strategy for kids who both struggle with executive functioning skills and anyone in general.
      • Another modification to memory card games include offering visual cues or verbal cues of what the child has seen. You can support this by asking the child “Have you seen this picture already?” Ask them to recall what the image was near on the board and see if you can picture in your mind where that card is in relation to others on the board. This involves a spatial-relations component as well as other visual perceptual skills.
      • Finally it’s helpful to reduce distractions while playing memory game. Sometimes the aspect of attention is limited by other things happening around a child which can’t be addressed in a situation such as a classroom or a community situation however you can work on specific skills such as showing the child how to self regulate like taking a deep breath or preparing themselves before they make their move. This can help with over feelings of overwhelm and stress the kids sometimes get.

      How to play memory games in therapy

      When kids play memory they are playing the classic memory game that you’ve probably played in your childhood.

      1. The game uses matching cards which are placed facedown on the table.
      2. Players take turns selecting to picture cards they turned one over at a time and see if they’ve got a match. If they’ve got a match they can go again.
      3. If the player doesn’t have a match they turn the cards back over so they were they are facedown on the table.
      4. Then the next player goes. The second player selects two picture cards and turns them over one at a time. It’s important to turn the cards over one at a time because if you have a card because if the first card that is turned over is a card that you’ve seen before then you need to remember where that match is on the board. This aspect of playing the game of memory really works on attention focus and impulse control.
      5. Players continue finding the matches until all of the cards are selected.
      6. The player with the most number of matches wins the game.

      What’s missing Activity with memory cards

      “What’s missing” is also another great way to use a memory game to work on specific skills of executive functioning including the ones listed above.

      How to play what’s missing with Memory Cards

      1. To play what’s missing you would set out a spare set number of memory cards on the table face up.
      2. Then the player gets to look at the cards for a set amount of time.
      3. The player tries to memorize every card on the table.
      4. Then the player closes their eyes or looks away from the table while another player removes one or more cards.
      5. Then the first player looks back at the table and tries to recall and identify the missing images.

      What’s Missing games address a variety of visual perceptual skills, visual memory, visual attention, spatial relations, form constancy, and visual discrimination.

      This activity can be graded up or down in a variety of ways by adding more cards shortening the amount of time to look at the cards and remember the cards or to add more matches and to remove more or less cards. To make this harder you can have two all different cards or you can have matches and some without matches.

      Memory games in sensory bins

      Memory cards make a great addition to sensory bins. Children that especially enjoy specific themes can use memory card games in a variety of themes with specific characters or topics such as vehicles, princesses, sports, animals, ect.

      To use memory cards in sensory bins, you need just a few materials. This can include a dry sensory bin material, the memory cards, and possibly scoops, tweezers. Dry sensory bin materials include such as dry beans, rice, sand, shredded paper, etc. Then memory cards can be added to the sensory bin and hidden away, much like we hid sight word cards in this sight word sensory bin.

      Another bonus is then building and refining fine motor skills through the scooping and pouring of the sensory bin materials.

      In the sensory bin, children can look for the matching memory cards. This activity builds skills such as:

      • visual discrimination
      • form constancy
      • visual memory
      • attention
      • sensory tolerance through play
      • fine motor control
      • transferring skills
      • bilateral coordination
      • controlled movements
      • MORE

      Memory Card Games and Handwriting

      Therapists are often looking for short and functional means of working on handwriting skills through play. Memory games are a great way to address this need.

      With a memory card game, children can write down the matches that they’ve found when matching cards. The same is true when playing “what’s missing” games. They can write down the words of the images that they’ve found on the playing board. And, by writing down these words, they can then work on letter formation, letter size, spacing, and legibility. This occurs in a in a short list format that is motivating for kids.

      Yet another benefit of working on handwriting skills with a memory game is that children are excited to find matches. This excitement can translate to the handwriting portion. Kids will want to write more words because that means they are finding more matches. This is a very rewarding and positive way to work on handwriting skills, which can often times, be a challenge for kids.

      Memory Card Games for Therapy

      Memory cards are a powerful tool to add to a therapy toolbox! This is especially true if memory games are focused on an interest of the child. You will really enjoy a new series of themed memory cards with handwriting pages that I have coming to the website shop.

      First up is our Back to School Memory Game and List Writing Prompts!

      Work on attention, memory, focus, visual skills, executive functioning skills, visual perceptual skills, concentration and a variety of other skills. PLUS, the themed cards include handwriting pages with a variety of lined paper options.

      This Back-to-School resource is a great way to quickly assess your caseload for handwriting, coloring, cutting, motor skills, midline crossing, visual memory, visual perceptual skills, motor planning, executive functioning, and more. And, such a fun and motivating activity to quickly and informally reassess each child on your caseload at a “just right” level.

      This memory card activity can be printed off, laminated, and used again and again.

      Click here to add the Back-to-School Memory Game and List Writing Prompts resource to your therapy toolbox.

      Colleen Beck, OTR/L has been an occupational therapist since 2000, working in school-based, hand therapy, outpatient peds, EI, and SNF. Colleen created The OT Toolbox to inspire therapists, teachers, and parents with easy and fun tools to help children thrive. Read her story about going from an OT making $3/hour (after paying for kids’ childcare) to a full-time OT resource creator for millions of readers. Want to collaborate? Send an email to contact@theottoolbox.com.