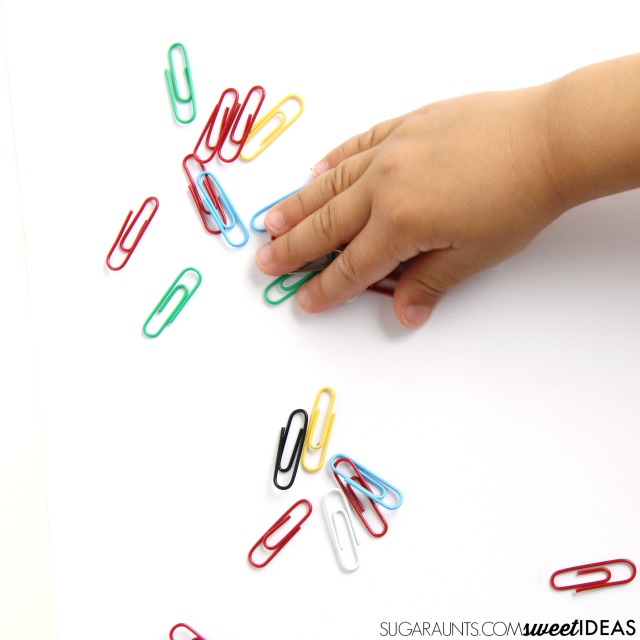
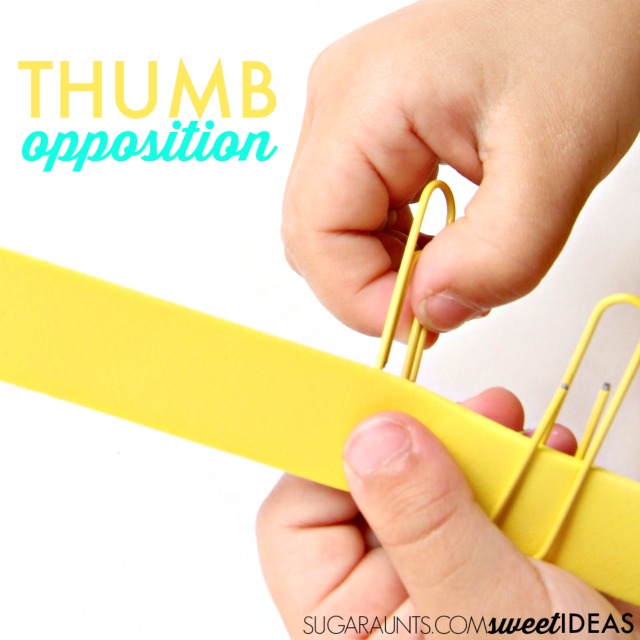
This Fine Motor Paper Clip Math idea is a fine motor math activity that makes for a great busy bag or calm down time activity. We actually have several paper clip activities here on The OT Toolbox because you can target so many fine motor skills with this simple item. It’s perfect for indoor playtime and hands-on learning. Not only that, but it is a great way to work on fine motor skills like finger and thumb opposition. Plus, manipulating paper clips helps with a neat pincer grasp, which is needed for the dexterity of manipulating small objects.
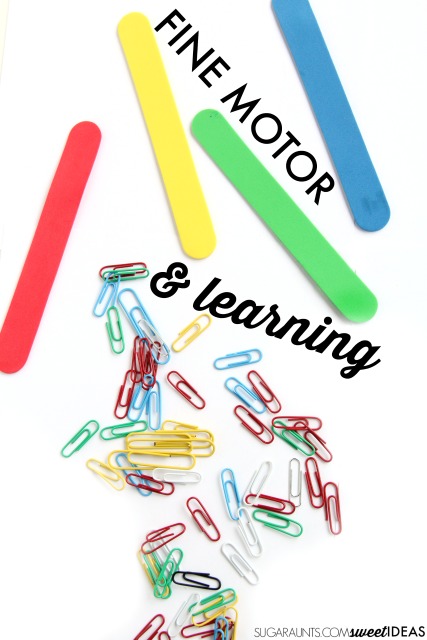
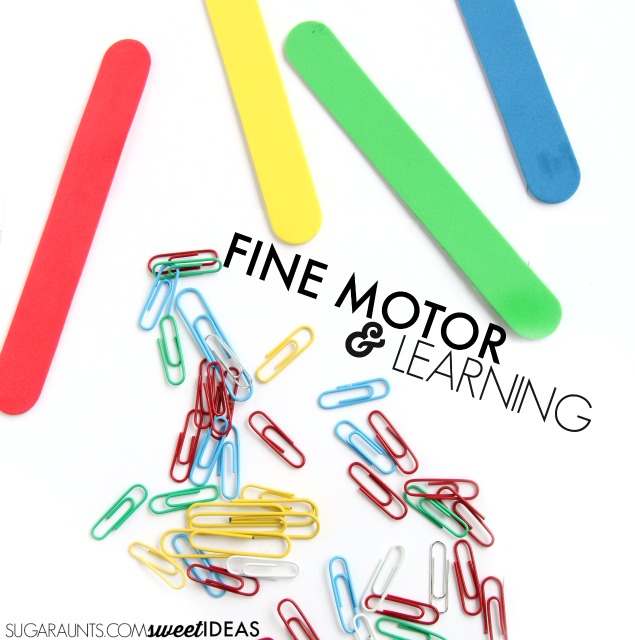
Fine Motor Paper Clip Math
I also love to use paperclips in math activities because you are targeting the fine motor skills needed for a functional pencil grasp and other tasks like stringing beads, zip/unzip, button/unbutton, and various in-hand manipulation skills.
An open thumb web space is a skill is needed for manipulating items like a pencil or crayon, shoe laces, zippers, buttons, and small objects with an open web space.
Often times, we see kids who have their thumb squashed up against their fingers and the side of their palm when they are writing or manipulating items. This opposition fine motor activity is a fun way to work on opening up the web space for improved dexterity.
I love how the two sets linked above (both affiliate links) are all colors of the rainbow. Even better for color matching and color recognition for preschoolers!
So, this activity is completely simple to do; Spread out the paper clips and ask your child to match them up to the craft sticks.
We worked on a few learning activities with this:
Add the number of paper clips.
Add the total number of paper clips on two craft sticks.
Subtract the difference of the number of paper clips on two craft sticks.
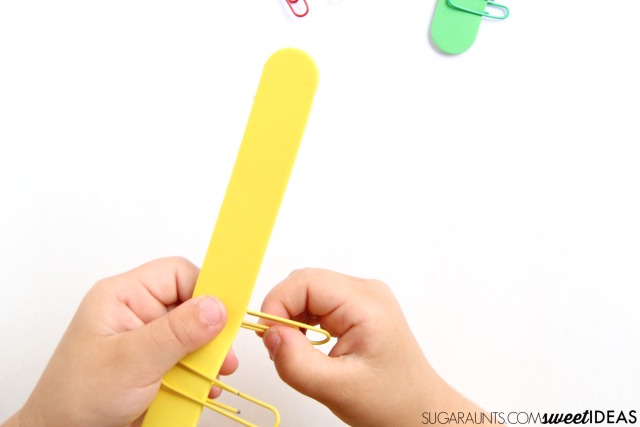
Using the Foam Craft Sticks makes this activity a real workout for the fingers. You could use wooden craft sticks that provide more support and are easier to manage.
But, to really challenge the fine motor skills, the foam craft sticks are the thing to use! They are a little wiggly and require stability of the thenar muscles (muscles of the thumb) to hold the thumb in place as the fingers and the tip of the thumb place the paper clip on the craft stick.
When opposing, the thumb’s thenar muscles work to oppose the pointer finger during functional tasks. This is needed for advancing and positioning a pencil when writing, managing a button with ease, and pulling a zipper. With a closed thumb web space and lateral pinch of the thumb versus true opposition, a child will fumble.
When doing this opposition activity with your child, be sure to verbally prompt them to attend to the bend thumb IP joint.
This is such an easy way to learn and play indoors. Looking for more indoor play ideas?
Working on fine motor skills, visual perception, visual motor skills, sensory tolerance, handwriting, or scissor skills? Our Fine Motor Kits cover all of these areas and more.
Check out the seasonal Fine Motor Kits that kids love:
Colleen Beck, OTR/L has been an occupational therapist since 2000, working in school-based, hand therapy, outpatient peds, EI, and SNF. Colleen created The OT Toolbox to inspire therapists, teachers, and parents with easy and fun tools to help children thrive. Read her story about going from an OT making $3/hour (after paying for kids’ childcare) to a full-time OT resource creator for millions of readers. Want to collaborate? Send an email to contact@theottoolbox.com.
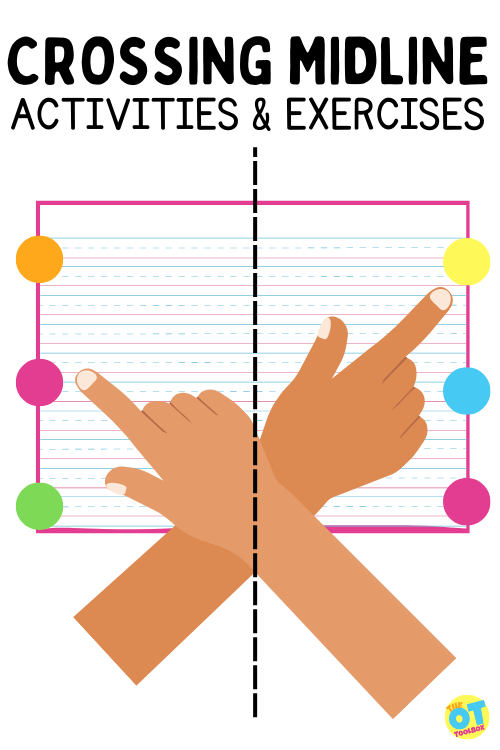
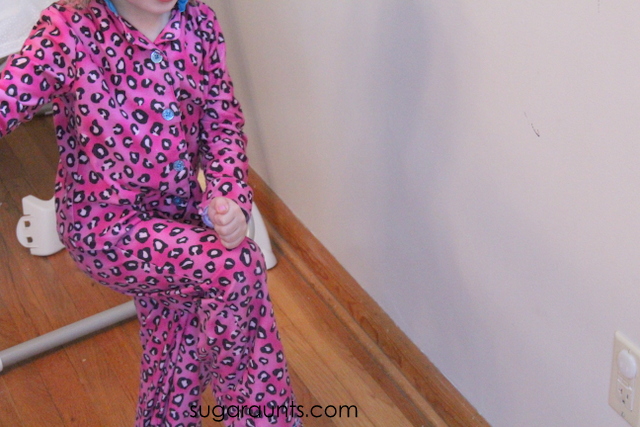
In this blog post, we are covering all things crossing midline activities…but what is crossing midline?? We’ll get into that too, as well as some fun ways to develop midline crossing skills and specific exercises that kids (and all ages) can do to support development of this motor skills task that is huge in the way of gross motor coordination.
Crossing midline is one of those motor skills we do constantly throughout the day, but never really give a second thought. And that automaticity of motor movements is a good thing, too! Imagine processing the action to use one hand to pull a door open. Imagine the time it would take to shower, dress, put on and tie your shoes if you had to process through the action to move your hands fluidly across the middle line of your body.
As therapists, we hear “crossing the midline” all the time. Have you ever wondered what the big deal is? Why is crossing the midline so important? In this post we will delve into what crossing the midline is, what causes issues, and how it impacts daily function, especially schoolwork.
Before we get started, if you are doubting the validity of crossing the midline, tie one hand behind your back and go about your day. How much did you reach across your body to get something? You reached across, diagonal, up and down to interact with your environment. While a two-handed person does not do this much crossing the midline, there is still a fair amount.
What is Crossing Midline?
Crossing midline refers to moving the body (hand/arm/foot/leg across an imaginary line that runs vertically down the center of the body to the other side (and vise versa). Additionally, crossing midline also refers to twisting the body in rotation around this imaginary line, as well as leaning the upper or body across the middle of the body.
Let’s break it down further:
Midline of the body is an imaginary line that drops from the middle of the head, straight down over the nose, to the belly button and divides the body into left and right sides. Imagine a line that starts at the middle part of your hair and runs straight down your forehead and ends at the core of your abdomen. This imaginary line effectively divides your body into a symmetrical (mostly) left side and a right side.
“Crossing the midline” is a simplified way to indicate that part of the body moves over that imaginary line. This can look like 3 different aspects of movement:
Reaching an arm/hand or foot/leg across the middle of the body to the other side of the body (Example: Reaching the right arm across the body for an object placed on a table to the left side)
Rotating the body around the midline in a rotary motion in order to twist at the hips. This can look like putting your hands on your hips and rotating your upper body around at the abdomen (Example: reaching for a seatbelt involves reaching the hand and arm across the midline but it also involves twisting at the hips)
Leaning the upper body over the middle line as in doing a side crunch. The head and shoulders move over the middle of the body (Example: Bending sideways at the waist while getting dressed or reaching while sitting for an object that’s fallen to the floor)
Crossing the midline is a motor skill that requires using both hands together in a coordinated manner (bilateral hand coordination) allows kids to cross midline during tasks. This bilateral coordination ability is deeply connected to crossing midline.
Why is Crossing Midline Important?
Midline crossing is a developmental ability that is important for so many fine motor and gross motor tasks. This relates to functional skills in a major way. When a child has difficulty with crossing midline, they will demonstrate challenges in practically every functional task.
When a child does efficiently cross the midline, they can use their dominant hand in skilled tasks. They develop a dominant hand and the other extremity becomes the assisting hand. They can manipulate objects in the world around them through all planes. They can demonstrate sensory integration by motor skills with vestibular, proprioceptive, and visual input.
In particular, crossing the midline offers vestibular input. Moving the head from center plane shifts position of the inner ears. When bending, twisting, and moving from center, the vestibular system is at work.
When the child does not cross the midline, they tend to use both hands equally in tasks like handwriting, coloring, and cutting with scissors. They may demonstrate awkward movements by moving the body to position itself so they don’t need to cross the middle line.
Challenges with this motor skill impact learning, social skills, play, and self-care.
In particular, we might notice sensory motor challenges at different age levels. For example, for children aged 3-5, we might see specific midline red flags that impact learning and play. We cover this specific age group in our blog post on Crossing Midline Activities for Preschoolers.
Occupational therapy will assess midline crossing skills by observing play and functional tasks.
Crossing Midline Occupational Therapy Asessments
Occupational therapists perform individualized evaluations and assessments of underlying skills as they impact functional performance in every day tasks. Because of this, crossing midline is an essential skill that will be observed and looked for in every OT evaluation.
Occupational therapists can complete a standardized evaluation, but most often, their skilled abilities will enable them to identify when crossing midline is a problem through play and interaction during the evaluation process.
When you are watching for midline crossing, you should observe kids playing in normal situations. A child will demonstrate a tendency to avoid crossing midline in activities or tasks, but if “set up” to cross the midline (i.e. setting items to the left of the body and asking them to reach over the midline with their right hand), they will typically be able to complete the requested movement pattern, but not carry over the action in a normal situation.
If they have difficulty with crossing midline, a child will switch hands during handwriting because both hands get practice with pencil manipulation.
The child might rotate their whole body instead of twisting at the trunk or shift their weight in a task rather than leaning the upper body over the midline.
You can often times observe a tendency to avoid midline crossing in activities such as kicking a ball, throwing beanbags, switching hands in coloring, difficulty with putting on pants and shoes independently, and difficulty with visual tracking and reading.
Crossing Midline Activities
So, what do you do when crossing the midline is an issue? There are many ways to support the development of this skill.
The ideas listed below are fun ways to play and develop motor skills by crossing midline, however they have a sensory component too.
We mentioned above the aspect of vestibular input and proprioceptive input that occurs in crossing the midline. These midline activities have those sensory motor considerations through play.
Toss bean bags -Encourage upper body movement! Bend through the legs, turn sideways, reach back behind you, rotate side to side…encourage vestibular input by bending and rotating.
Slow motion cartwheels- Place both hands on the floor to the side, kick legs over. By doing the cartwheel in slow motion, the body is forced to move sequentially, adding midline crossing at the trunk.
Hit a ball with a bat.
Use pool noodles to hit a ball- think hockey and hitting the ball into a target on the floor
Play catch with rolled socks- Use a bucket or bin to catch the rolled socks. They will fly high, low, left, and right!
Play flashlight tag.
Catch lighting bugs or butterflies.
Show the child how to write their name in the air with large arm movements.
Bend over at the waist and swing the arm side to side, in large circles, and in figure 8 motions.
Play with scarves to music.
Move a ribbon wand to music.
You can use midline crossing activities in OT interventions.
Crossing Midline Treatment Ideas
You can use the ideas above in different ways like in games like Simon Says or the Hokey Pokey. You could add them to obstacle courses or brain breaks. Some other things to consider about crossing midline treatments…
One of the easiest ways to work on midline crossing is to make the opposite side unavailable.
The classic treatment for hemiplegia is to restrict movement of the functioning side, while making the affected side do all the work. You can do this activity yourself, or with your learners. Make the activity rewarding to encourage your learners to want to keep going. Food, stickers, or preferred activities are a great motivator.
Another way to address midline issues is to move objects to the side to encourage reaching. Put a preferred object in different places to encourage your child to stretch to get it.
Sometimes you need to restrict the movement of objects. People will turn and shift their paper or other objects to be able to utilize it without crossing the midline. Fix the paper to the table and encourage your students to sit forward without turning their body.
One of the classic tests, the Bruinicks Oseretsky Test of Motor Proficiency, is a drawing test where learners have to draw inside a narrow path that crosses across the paper. You can quickly see who struggles with this as they quickly turn their paper to make the task easier. The design copy task in this test looks at midline crossing as well. Learners are asked to dot to dot a diamond. They are instructed not to pick up their pencil or shift the paper. This proves to be difficult for many students.
Crossing midline exercises can look like many different things.
Crossing the Midline Exercises
I love this crossing midline exercise below, because it has a ton of different movement options with one fun activity.
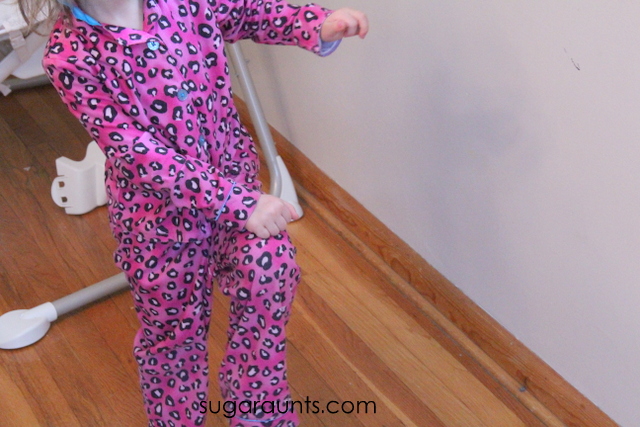
We had fun one winter day with a few crossing the midline exercises, including marching, crossing arms over, and stomping out some wiggles.
Our midline march activity was a marching parade with “Stop Stations”. We marched along to music and when I turned off the sound, the kids had to do a midline exercise.
The midline exercises included:
Place left hand on right knee
Place right hand on left knee
Stand and bend to touch the opposite foot
Standing and place right elbow on left knee
Standing and place left elbow on right knee
Crunches with touching right elbow to left knee
Crunches with touching left elbow to right knee
Cherry picker crunches- lay on the back slightly bent forward at the hips so the upper body is off the ground. Move a ball or small toy from the right side to the left side.
Because we were doing these midline exercises to music that quickly stopped and started, the thought process was quick. The kids had to quickly complete the exercise without much forethought.
This quick start and stop activity allowed them to practice crossing midline without over-thinking about the action.
A crossing midline exercise like the ones in the pictures are easy to incorporate into therapy sessions or occupational therapy at home. Make it fun!
Fine Motor Crossing Midline Exercises
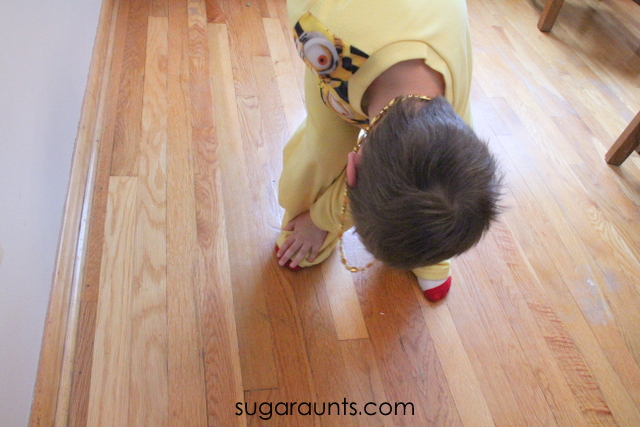
Crossing the midline can be done on a small scale, too. This activity is similar to the midline marching activity described above, but it uses paper, pencil, and small colored dots such as stickers or a small circle drawn with markers.
Draw dots on the left margin of a paper using colored markers or colored stickers. There should be one of each color going down the left margin.
Draw dots using the same colors going down the right margin. Use each color only once.
Turn on music. The student can draw to music on the center of the page using their pencil or markers.
Turn off the music. When the music stops, call out a direction: “Left hand, yellow!” The student should put down their marker and touch the yellow dot on the right margin using their left hand.
Turn on the music to draw again and repeat.
This activity is similar to the gross motor midline exercise because it requires the child to think on the spot. They have to listen to several instructions, but also process the motor skills and cross the midline automatically.
You can adjust this activity by numbering the dots, using less colors, or less dots, and reducing the amount of instructions. This activity can be used with any level by grading the activity.
This post is part of the Gross Motor A-Z series hosted by Still Playing School. You can see all of the gross motor activities here.
Occupational Therapy and Crossing Midline
Now, let’s talk about what an occupational therapy practitioner will assess and why they look so closely at midline crossing during OT evaluations.
As a parent/caregiver you probably do not give “crossing midline” much thought, until you see your little one painting the left side of their picture with the left hand, and the right with the right hand. Difficulty crossing the midline can be caused by several different factors:
Neurological impact – caused by a stroke, brain bleed, or cerebral palsy
Visual deficit – sometimes after having a stroke the visual field is impacted. Persons can see only one side of their visual field, or each side is treated as a separate side, rather than a fluid spectrum. There are other vision disorders that impair the visual scanning field
Low tone and muscle weakness. People with low tone or core weakness may feel unbalanced when they reach across their midline. They might topple over, or feel like they are going to. There are various diagnoses that exhibit low tone, like Down Syndrome and others. It’s important to assess midline crossing skills that might be delayed because of tone or weakness.
Sensory processing – the sensory system is critical in determining position in space, feedback on the muscles and joints, and body awareness. Without this, a person may not notice where their body parts are, or that they are using inefficient movements to complete tasks.
Here is a good hint for new grad OTs or occupational therapy students working in a fieldwork position: Uncovering the “why” is important, in case there is a medical cause that can be corrected. We do want to know the why and that can solve some of the questions that we might have during the evaluation or interventions. However, try not to spend too much time worrying once you have determined the “why”. It is important to get started with treatment.
Pediatric occupational therapists will evaluate midline crossing skills in OT evals.
Evaluating Midline Crossing
Pediatric occupational therapists will note midline crossing in practically every evaluation they do. It might only be a one liner in the eval that you’ll see: “Child crosses midline independently during play.” Or, the description of the midline crossing skills might go more into depth, covering the dominant and the non-dominant hand, various self care skills, whether weighted items were used that triggered more tone during movement, etc. There can be many variances to crossing midline and a skilled eye is key.
Things to look for when assessing crossing midline:
Some symptoms of difficulty crossing the midline will be obvious. Seeing your child eat each side of their plate with a different hand will be hard to miss. In young babies using both hands interchangeably is typical. Movements are not coordinated in young children, neither is hand dominance.
Other signs of not crossing midline might not be as obvious. Watch someone paint a wall. You will probably notice they cross the midline of their body as they reach for different parts of the wall. Someone who does not cross midline will constantly move their body to reach the next part. This type of obvious non-use of the midline might be observed in the child that colors one side of the page with one hand and then complains that they are getting tired and they pick up another crayon with their other hand to color the opposite side of the page. Or, you might see a child struggling to put on a seatbelt in a car. They might pull the seatbelt with their hand closest to the belt, get it to the middle of their body, and then continue to pull the seatbelt with their other hand. They might struggle to engage the buckle of the seatbelt because they only use one hand. Or, they might turn in their seat so the buckle is in the center of their body and midline crossing is taken out of the equation.
Other things to look at when assessing midline crossing:
Hand dominance
Foot dominance
Vision dominance
Hand preference in tasks
Strength, bilaterally
Muscle tone
Motor planning skills
Proprioceptive input and tolerance
Cognition and direction following
How the individual moves when holding items
Different environments (when alone, when in front of peers, confidence in movements, etc.)
Something to consider that isn’t always thought about when you think about midline…vision skills!
Crossing Midline and Vision
Crossing the midline can involve vision also. This means that your eyes scan over the middle of the imaginary line running down the middle of your body. For example, you can move your eyes visually from the far left of your view to the far right. Both eyes should move steadily and together. If there is difficulty with visual midline skills, then you will see a lot of head movement as the individual compensates.
If you can not cross midline visually, you might have difficulty scanning a document, reading fluidly across a page, or doing visual perceptual tasks like word searches, and hidden pictures.
Crossing Midline and Fatigue- Something to Consider
There are times when I fail to cross the midline, even though I am perfectly able. When I am doing strenuous tasks like a large painting, cleaning, or carrying something heavy, I tend to switch hands to alleviate some of the stress on my joints. This does not make me ambidextrous, just tired. Sometimes it takes considerable effort to reach way across my body, when my right hand is already there.
If you have ever broken an arm, you can relate. If you can only use one arm, you have to become adept at reaching across the midline. You may get used to this new movement pattern quickly, while others get off balance, often moving their body to compensate.
Colleen Beck, OTR/L has been an occupational therapist since 2000, working in school-based, hand therapy, outpatient peds, EI, and SNF. Colleen created The OT Toolbox to inspire therapists, teachers, and parents with easy and fun tools to help children thrive. Read her story about going from an OT making $3/hour (after paying for kids’ childcare) to a full-time OT resource creator for millions of readers. Want to collaborate? Send an email to contact@theottoolbox.com.
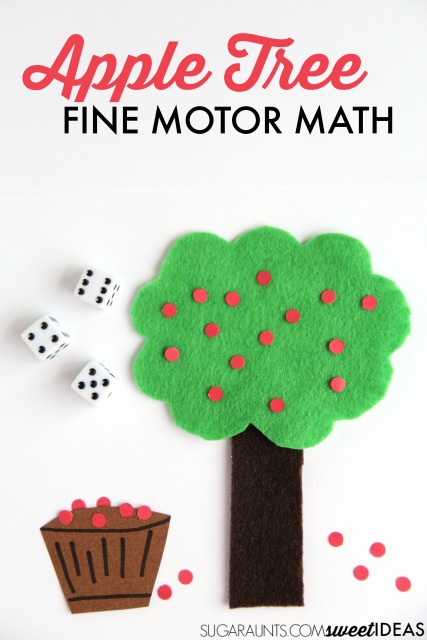
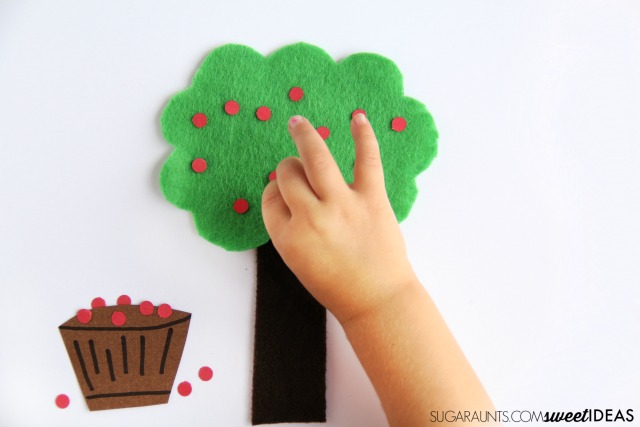
This apple activity is a fine motor activity for occupational therapy sessions with kids that builds many skill areas. I love this fine motor apple activity because you can make it work for the needs of each child. There is power to using hole punch activities with kids! Working on hand strength? Use the hole punch to build skills. Working on dexterity? Pick up the small red circles to place them on the felt apple tree. You can even incorporate it into a vertical plane activity or add apple brain breaks to the session. The sky is the limit!
I love this apple tree activity because you can use dice to work on hand mobility, small apple dots that are precision work, and you can incorporate other skills into the activity.
Pair this apple tree activity with our apple tweezer activity for even more apple themed fine motor fun.
Fine motor strengthening is a hot topic when it comes to back-to-school time. Kids go back into the classroom and need to get back up to speed on all of the fine motor requirements in the classroom. What better way to work on fine motor strength than with a Fall apple theme? This apple themed fine motor activity adds a bit of math, too and it’s super easy to create for hands-on play, learning, and fine motor work.
Fine Motor Strengthening Activity
This apple tree activity is a fun way to build the intrinsic muscle strength of the hands as well as gross grasp strength. It’s an easy activity to throw together, and the steps of the activity help to build strength of the hands, too.
Materials needed to make this apple tree activity:
Scissors (Here are my favorite scissors and why to use each type of scissors for different needs)
To create the apple tree, cut the green felt into a tree-ish shape. Cutting felt is a complex scissor task, so older kids can help with this part. If you are able to use stiff felt, cutting through the material is a strengthening exercise in itself.
Next, cut the brown felt into a trunk shape, by simply cutting strait lines. Consider allowing the child to cut the trunk shape as cutting strait lines on a material such as felt is easier, yet the flimsy material makes it difficult to cut. A stiffer material would work well for this part as well.
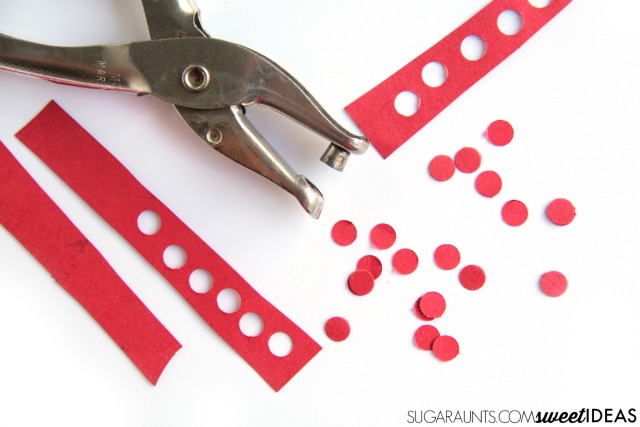
Next, cut the red cardstock into small, thin strips of paper. This is not necessary for the end result of the activity, however there is a fine motor benefit to the extra step. Kids can hold the thin strips of paper with a pincer grasp using their non-dominant, helper hand. Using the small strips of paper requires precision. Kids will then be required to slow down while using the hole punch so that they don’t cut the holes over the edge of the strip of the paper.
Need a hole punch that requires less effort for younger kids or those who need to build their gross muscle grip strength? Try this one.
Hole Punch Activity
Before we move on, I want to take a moment to talk about this portion of the activity.
Cutting paper strips and using a hole punch along the strip is an easy fine motor activity that you can set up with items you probably have on hand….Cut strips of paper. Use different grades and remember that cutting thicker paper means more resistance which is good for strengthening the hands.
Use the brown cardstock to make a small apple barrel shape. This can be used in the math part of this activity.
A slower cut with the hole punch allows for the muscles of the hands to exercise with prolonged tension and increases blood flow. Using the hole punch with slow repetitions builds gross grasp strength.
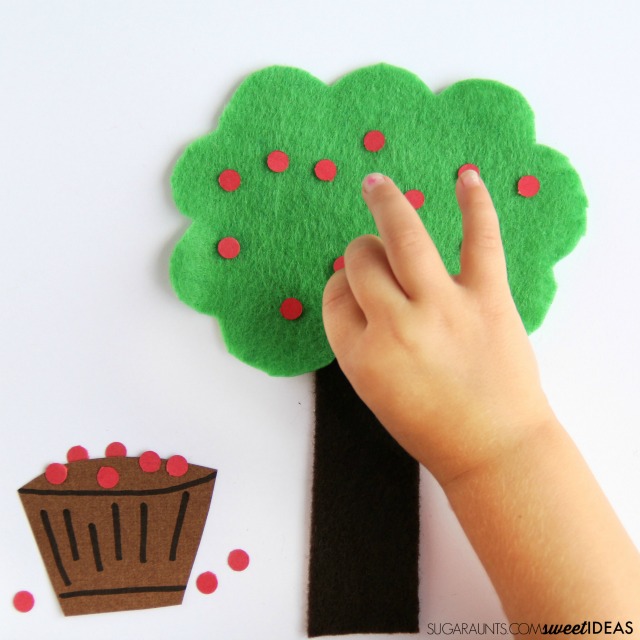
Once the apple tree and apples are created, kids can place them on the tree. The cardstock will not stick permanently to the felt, but they will stay in place for temporary play. Scatter the red cardstock circles, (those are your apples!) onto the table. Show your child or student how to pick up the apples and place them onto the apple tree. Picking up the small cardstock circles is a real workout for the intrinsic muscles of the hand.
To make this activity easier, place the cardstock circles on a piece of felt.
Apple Fine Motor Activity
Add a bit of math to this activity with a pair of dice. Show your child how to roll the dice and then count the number of dots on the dice. They can then add and count the number of apples and place them on the tree.
There are several ways to build on this activity:
Use the dice to add apples.
Subtract by taking away apples from the tree.
Create multiple step math problems by adding and them subtracting the numbers on the dice to put on and then remove apples.
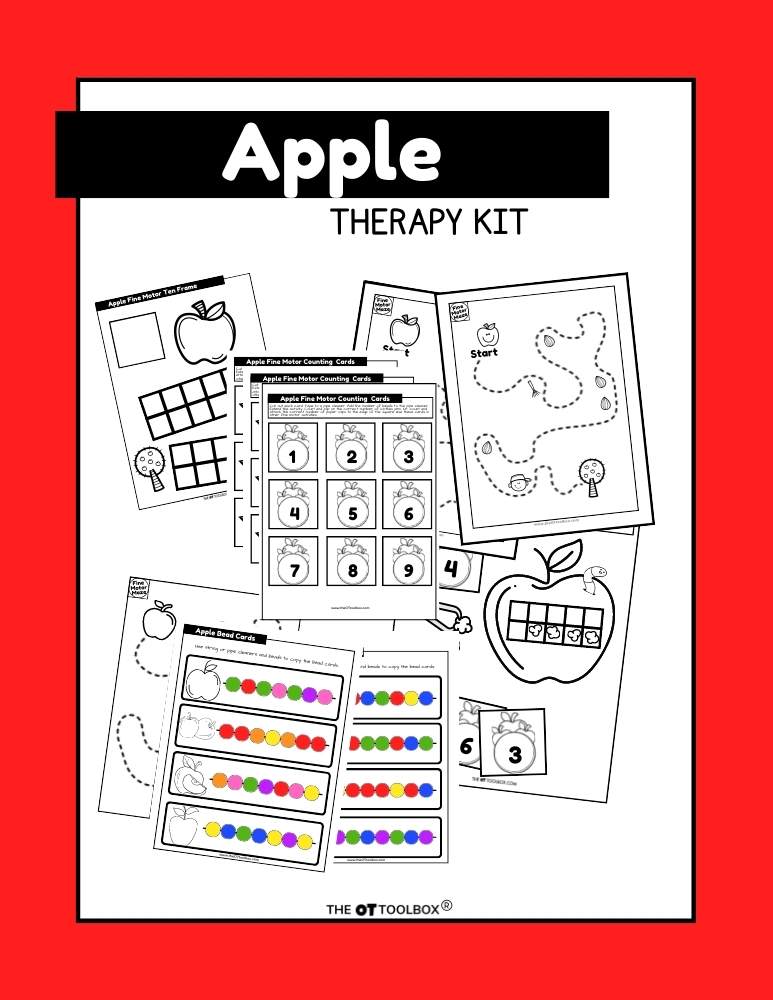
The Apple Therapy Kit is full of fine motor, visual motor, and sensory motor tools to support fine motor skill development needed for handwriting and other functional tasks.
Colleen Beck, OTR/L has been an occupational therapist since 2000, working in school-based, hand therapy, outpatient peds, EI, and SNF. Colleen created The OT Toolbox to inspire therapists, teachers, and parents with easy and fun tools to help children thrive. Read her story about going from an OT making $3/hour (after paying for kids’ childcare) to a full-time OT resource creator for millions of readers. Want to collaborate? Send an email to contact@theottoolbox.com.
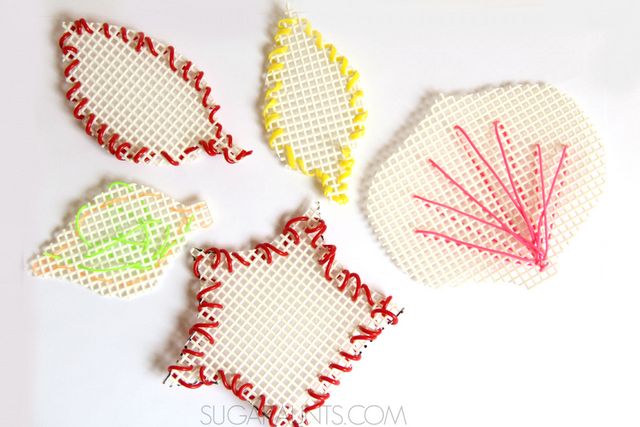
I love this fine motor leaf craft and activity that we did back in September, 2015. It was a fun Fall occupational therapy activity that targets several areas of development: bilateral coordination, wrist stability, fine motor dexterity, and visual motor skills.
This plastic canvas leaf is a fine motor sewing craft for kids.
Fine Motor Leaf Craft
This week in our second grade learning activities, we’re sharing this Fall Fine Motor Leaf craft that is perfect for second graders. We love fine motor crafts and activities and this creative fall art was no exception. Kids of all ages will love crafting up these Fall leaves (my three year old and 8 year old both had a blast!) It’s great because these leaves can get creative and as unique as the crafty kids like!
Fall Fine Motor Leaves Craft
(This post contains affiliate links.)You’ll need just a few materials for this easy Fall craft:
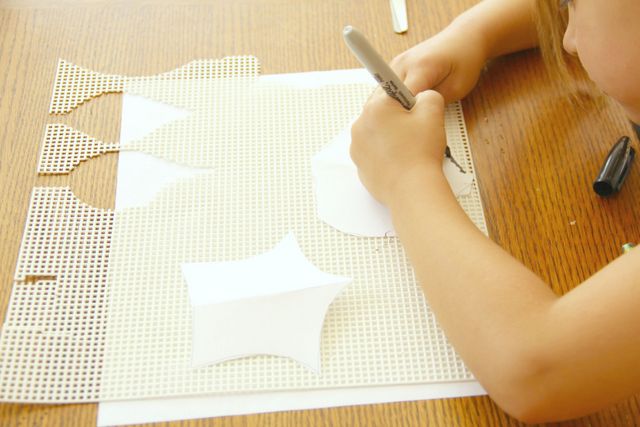
Fold a small square of paper in half and show your child how to draw half of a leaf.
Now is a good time to discuss symmetry and that leaves are symmetrical. Second graders can discuss and learn about mirror symmetry by creating leaves on the halved paper.
Draw leaves on plastic canvas:
Next, trace the leaf shapes onto the Plastic Canvas. Tracing with a marker onto the bumpy textured surface of the canvas is great fine motor work as the child holds the paper in place with their assisting hand and maintains control of the marker while tracing.
You’ll want the child to manage the paper in place with bilateral coordination as they use both hands together in a coordinated manner.
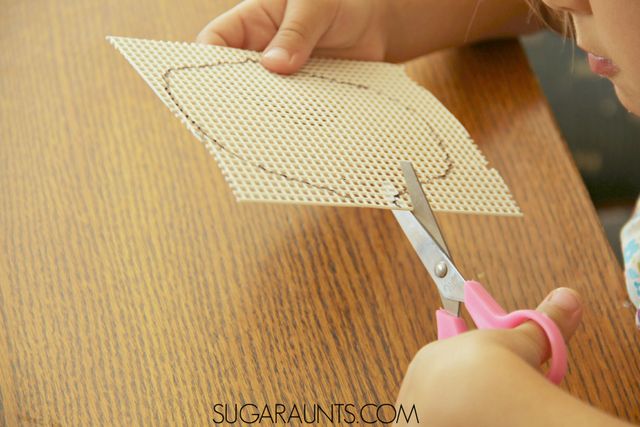
Cut out the plastic canvas shapes.
After tracing the leaf shape onto the canvas, have your child cut out the shape with scissors. What a great scissor activity for older students like second graders!
The holes of the canvas really provides feedback to the child as they cut the curved lines of their leaves.
Lacing plastic canvas shapes
We’ve previously covered why I love lacing activities as an occupational therapist. There are just so many visual motor benefits to lacing tasks that support the areas that we are working on in OT sessions.
The plastic canvas craft is a great way to gain all of the benefits of lacing tasks!
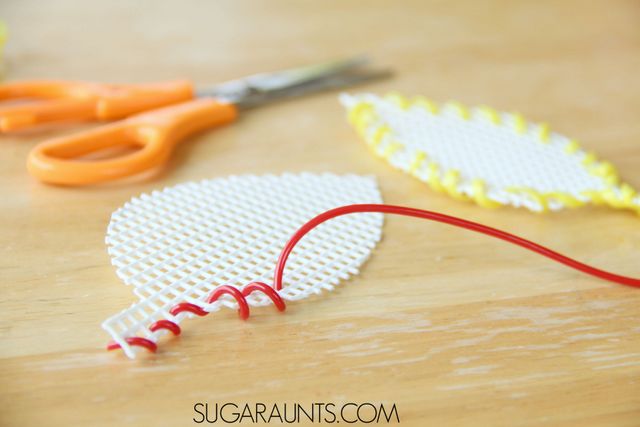
After cutting out the leaves, start lacing! Discuss the colors of the plastic cording and identify warm colors (red, yellow, orange) that might be seen on Fall leaves.
Explore the look of cool colors too (blue, green, purple) through discussion.
Sewing Activity for Kids
This craft is a practical life skill activity, too. Besides the craft aspect, you can support the IADL of sewing with this activity.
Show the child how to thread the plastic cording though the holes of the canvas. Show the students a running stitch and use terms “pull, over, and under”.
Try a whipstitch where the cording goes down through the plastic canvas and around the edge with parallel stitches over the edge of the shape.
These are all great terms to introduce to kids as a pre-sewing skill.
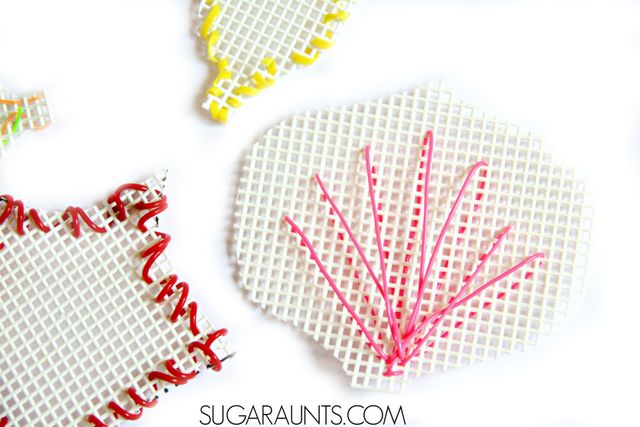
Practice different sewing techniques using the plastic cord to make designs and trim around the plastic canvas leaves.
Allow the child to create as they like on their leaves. Some of our leaves had long stitches that resembled the veins of the leaves (More symmetry!) and others were very creative with their colors and zig zagging lines.
This Fall craft is sure to get the creativity and fine motor skills going!
More skill areas covered in this activity:
Science: Discuss leaf types, tree names, and shapes.
Math: Count out squares and patterns with the stitches.
Crafting: Create a decorative garland with the leaves by hanging all of the leaves together.
Creative Expression: Each leaf can be as unique as your child and the leaves of the trees this Fall.
Functional Skills/Homemaking: Practice types of stitches on the plastic canvas.
Sewing: Encourage more homemaking skills by introducing a plastic needle and thread.
Fine Motor: Many fine motor skills are addressed in this activity-tripod grasp, bilateral hand coordination, scissor skills,
Colleen Beck, OTR/L has been an occupational therapist since 2000, working in school-based, hand therapy, outpatient peds, EI, and SNF. Colleen created The OT Toolbox to inspire therapists, teachers, and parents with easy and fun tools to help children thrive. Read her story about going from an OT making $3/hour (after paying for kids’ childcare) to a full-time OT resource creator for millions of readers. Want to collaborate? Send an email to contact@theottoolbox.com.
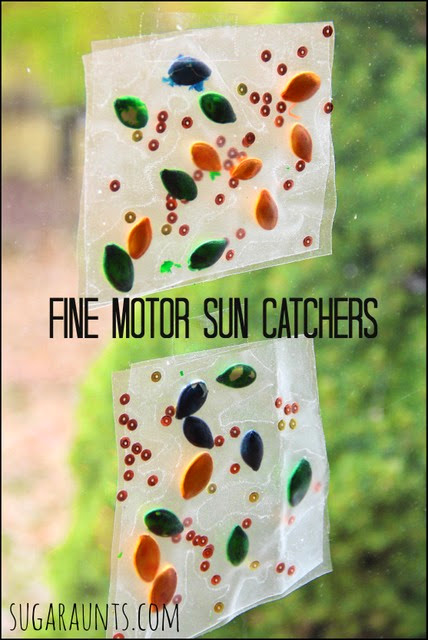
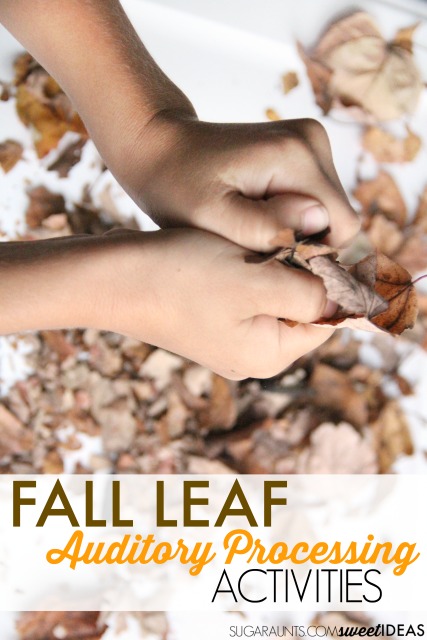
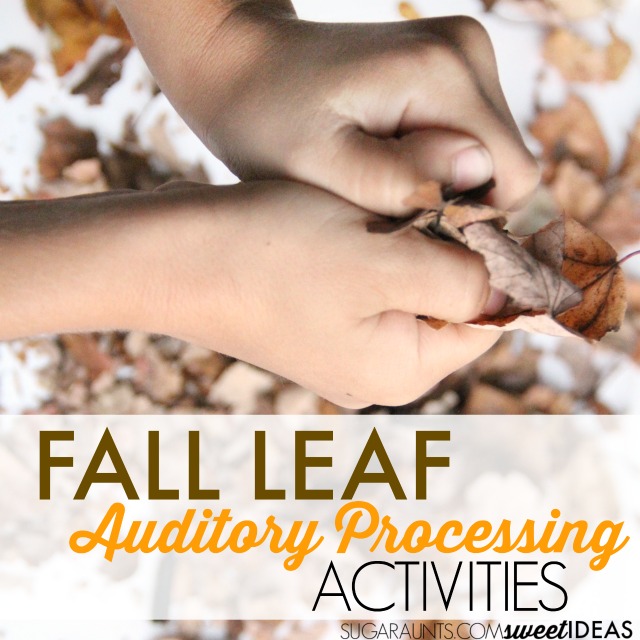
These Fall Leaf Auditory Processing Activities are great for addressing listening skills in kids with or without auditory processing difficulties. Try this creative leaf idea at home or in the school yard to easily strengthen auditory abilities for better learning. Perfect for children of all ages and developmental levels, it’s a Fall themed activity that will help kids learn to listen to details!
For example, we love cutting Fall leaves to practice scissor skills. Another fun (and free) ideas is doing our leaf hole punch activity (also very good for working on scissor skills). Here are more hole punch activities to try.
Let’s get started with the auditory processing info and how we can support this area of development with a handful of leaves…
Fall Auditory Processing Activities
Listening isn’t easy for everyone. For children with auditory processing disorders, learning is difficult. Imagine identifying and localizing sounds in a classroom that is filled with chattering children, scooting chair legs, pencils scratching on paper, and moving, sound-making children. The process of localizing sounds, recognizing sound patterns, discriminating between different letter sounds, and interpreting auditory information can be less than optimal for the child with difficulty processing the sound information that is coming in.
When there are auditory processing difficulties present, a child may tend to have the following problems that interfere with learning:
Poor direction following
Appear confused
Distractibility
Short attention spans
Sensitive to loud sounds
Inconsistently aware of sounds
Poor listeners
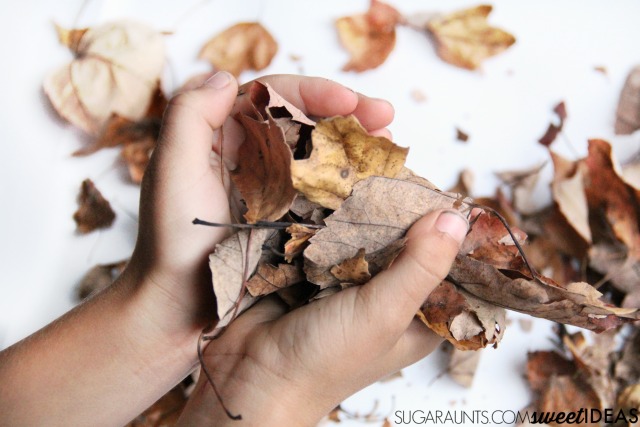
To build and strengthen auditory skills, try using leaves this Fall. The crunchy, dry leaves that cover the ground are nature’s sensory tool when it comes to auditory processing needs.
We first talked about the fall leaves that are covering our lawn and read through this month’s Virtual Book Club for Kids book, (affiliate link) Leaf Man by Lois Ehlert. We talked about how the leaves of fall are all different colors, shapes, and sizes but have one thing in common: a great crunch when they are dry!
To do these sensory Fall Leaf Auditory Processing activity, you’ll need a bunch of leaves that have fallen from trees. Dry leaves will work best, so if the leaves are newly fallen, you will want to gather leaves up in advance. Let them dry indoors for several hours or overnight to get a great “crunch”.
Next, spread out the leaves in a big bin. An under the bed storage bin works great for this activity.
Show your child how to squeeze and crumble the leaves using their hands. Ask them to listen to the crunch of the leaves. Notice how the leaves crumble and give off a satisfying noise as they are shifted around in the bin.
Use the dry leaves to address auditory sensory needs:
Where is that leaf? Ask the child to sit in front of the bin (or if you are outside, sit in front of the adult. Ask the child to close their eyes. Using one hand to crunch leaves, ask the child to say or point to the side that the leaf crunch is coming from. Add a high/low and front/back component by moving around to crumble the leaves, too.
Leaf Pattern- Ask your child to gather a bunch of dry leaves. Using a pile of leaves of your own, complete a crunching pattern as you crumble leaves at different speeds and in each hand. The child can then repeat the pattern.
Sound Stop- Crumble and crunch the leaves. At intervals, stop crunching leaves and wait for a moment. Ask the child to say “Now!” when the leaves stop crumbling.
Falling Leaf Sounds- With the child’s eyes closed, crumble leaves high and low above and below the child. Ask the child to determine if the leaves are above them or below them as they determine the location of the sound.
Lots of Sound Leaves- Add other sounds to the background noise: talking, music, rattle toys, birds chirping, etc. Ask the child to determine when the sound of crunching leaves stop. You can also add a localization dimension to this activity to work on auditory figure ground awareness.
Kids can complete these activities on a one-on-one basis or in a group setting. For kids with sensory issues, or those that are sensitive to crumbling leaves, try using gardening gloves while crumbling.
How would you use Fall’s leaves in a sensory or auditory processing activity?
Add this Fall leaves breathing exercise to these Fall themed activities in therapy:
Address sensory needs while experiencing all that the Fall season has to offer! Grab your free copy of the Fall Sensory Experiences Booklet to create sensory diet activities that meet the needs of individuals in a Fall-themed way!
Looking for more sensory motor fun with a leaf theme? Get a copy of our free Fall Leaves slide deck AND printable Fall leaves visual motor skill worksheets. Get those Fall Leaves worksheets here.
Colleen Beck, OTR/L has been an occupational therapist since 2000, working in school-based, hand therapy, outpatient peds, EI, and SNF. Colleen created The OT Toolbox to inspire therapists, teachers, and parents with easy and fun tools to help children thrive. Read her story about going from an OT making $3/hour (after paying for kids’ childcare) to a full-time OT resource creator for millions of readers. Want to collaborate? Send an email to contact@theottoolbox.com.
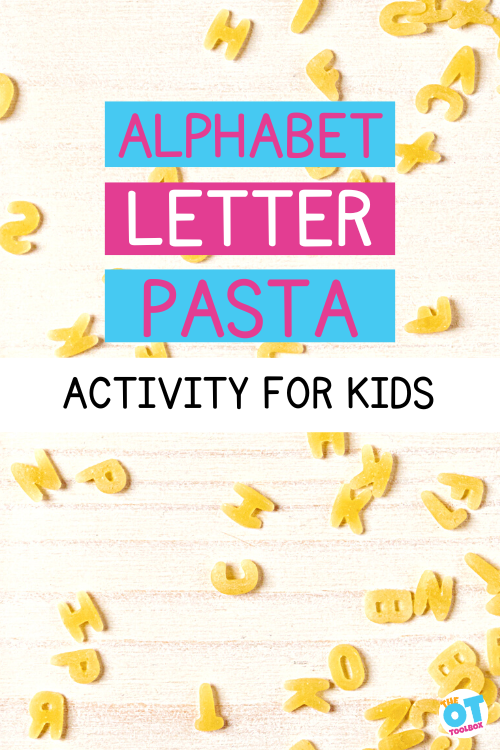
Grab a box of alphabet noodles for a fun multisensory learning activity that builds skills in many areas. We used letters pasta to create a sensory bin that incorporates fine motor skills and a letter learning activity.
Alphabet Noodles
You might remember eating alphabet noodles as a child in soup. But if you have a box of letter noodles on hand, it’s easy to create a sensory play activity that builds skills.
This easy dyed pasta activity combines learning with fine motor development. From the scooping to the neat pincer grasp activity, this is a great way to build many skills! Younger children can use scoops and spoons to develop coordination needed to scoop and pour while gaining exposure to letters. What a fun way to build so many areas!
Alphabet Pasta Activities
So, in addition to the ideas we shared above, we love using dry alphabet pasta in other activities to support fine motor and visual motor skills. I love that you can incorporate the tactile sensory play in learning and skill development.
Some of my favorite ideas for alphabet pasta:
Alphabet Sensory Bin Search: Fill a sensory bin with dry alphabet pasta and small items like pom-poms, beads, or toy animals. Hide letter cards or small objects in the bin, and encourage kids to search for specific letters or objects. This activity helps improve pincer grasp and hand-eye coordination while engaging their sense of touch.
Letter Pasta Sensory Bottle: Create a “Alphabet Seek-and-Find” Sensory Bottle by filling a clear plastic bottle with dry alphabet pasta. Add a few small, colorful beads or buttons to make it more visually stimulating. You can also include a few small trinkets or themed charms to match a specific letter (e.g., a tiny apple for “A”). Seal the bottle tightly with glue to prevent any spills. Here are other sensory bottle ideas to use, like adding scrabble letter tiles to the sensory bottle as an I spy activity.
Pasta Art and Letter Matching: Have kids glue dry alphabet pasta onto construction paper to create letter art or spell out simple words. For an extra challenge, provide them with a printed word and have them match the letters using the pasta. This activity develops both fine motor skills and visual-motor integration as they match letters and manipulate the small pieces. It’s a great letter recognition activity!
This was such a fun activity! I found a bag of alphabet pasta at a local grocery store on sale for a dollar and couldn’t pass it up! We used a little from the bag and used the rest in wedding soup. (Little Guy’s most often request and favorite meal!) Because the only thing that makes wedding soup even more awesome is fun shaped noodles 🙂
How to dye alphabet Pasta
We dyed the pasta in a baggie…added a few drops of red food coloring and 2 Tbsp of vinegar. We dyed this batch back in May and the color is still going strong. The vinegar doesn’t leave an odor when playing with the pasta, but helps the coloring to “stick” to the pasta.
Have the kids shake the bag (or use a lidded plastic container for a fun auditory component!) and get their wiggles out.
I put up a few strips of masking tape on our easel and put out the bowl of pasta. Baby Girl had the job of scooping letters from the bowl onto a plate. She loved using my measuring spoons to scoop. Toddlers seem to love scooping any little bits…peas/beans/rice/sand…and it’s such a great fine motor task for them.
Pinching those little letters was a fun fine motor exercise for working on their tripod grasp and pincer grasp.
I positioned the tape strips high up on the easel to encourage an extended wrist. This wrist position allows for efficient use of the fingers in such a small motor activity.
Big Sister worked on locating letters as I told her how to spell words.
…Baby Girl couldn’t let her big sister do something and NOT get involved…
We also used the alphabet letter pasta to work on a little reading/spelling activity: I stuck on the -AT letters and asked Big Sister to find the letter we needed to spell different rhyming words. Fun!
Alphabet letter pasta can be used in many ways! How do you use this sensory activity to learn and play?
Working on fine motor skills, visual perception, visual motor skills, sensory tolerance, handwriting, or scissor skills? Our Fine Motor Kits cover all of these areas and more.
Check out the seasonal Fine Motor Kits that kids love:
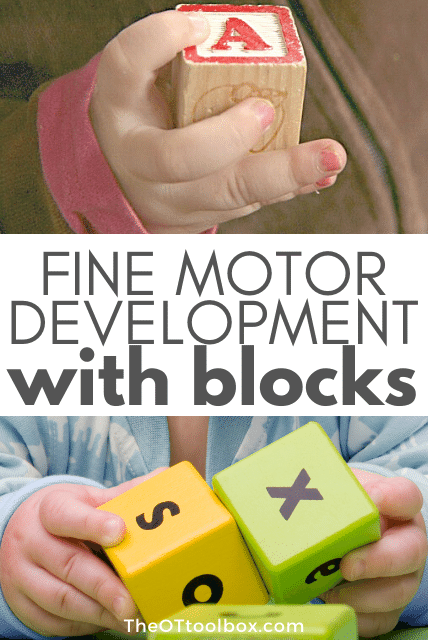
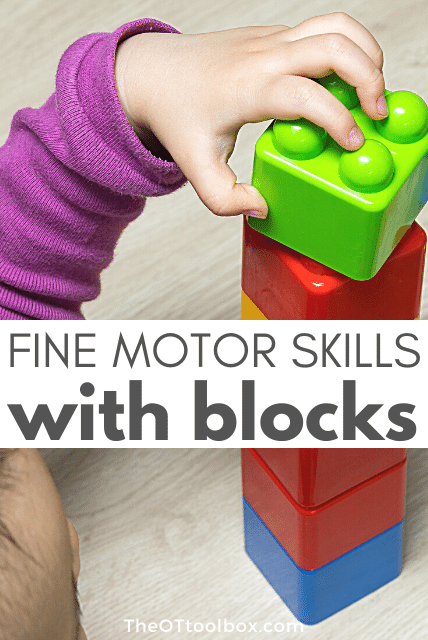
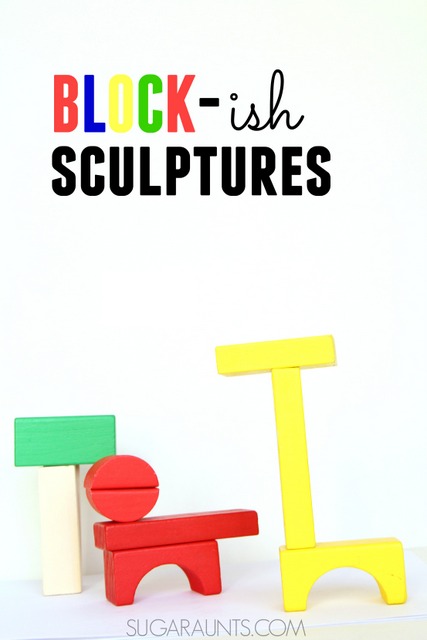
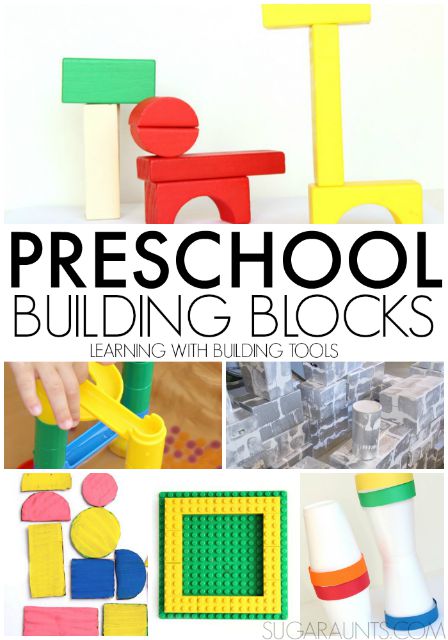
As a pediatric occupational therapist, I’ve used wooden building blocks in occupational therapy many times. For my own children, I’ve used regular wooden blocks as a fine motor tool too! In fact, building with blocks is a fine motor skills that kids need in order to fine motor development many, many, (MANY) times. Wooden blocks are a tool that are used for development of goal progression in treatment activities and in assessment of fine motor developmental level. They are used in visual perceptual skills, and are the perfect open-ended play item.
Occupational therapy practitioners use block toys to support fine motor skills and visual motor skills.
How to Support Fine Motor Skills with Blocks
Also be sure to check out our activity using cardboard bricks as a tool for developing many areas.
Blocks are a great toy for development because you can use different types of blocks for different ages.
Many parents ask “is stacking blocks a fine motor skill?” The answer is YES! As a Mom and OT, I’ve made sure my kids have a lot of wooden blocks (and a couple of varieties of toddler large blocks of the foam and plastic blocks, too!)
Today, I’m sharing how to use wooden blocks in fine motor skill development with kids…all while they play and don’t even realize their fine motor skills are being assessed or worked on! This is a great way to address skills for children and adults…anyone who needs to work on fine motor skill development.
Stacking blocks supports grasp development with various grasp patterns.
Fine Motor Skills and Building Blocks
Full disclosure: This post contains affiliate links.
Stacking blocks is a fine motor skill. And, when children stack blocks, they develop and refine fine motor skills. Check out the list of benefits of playing with blocks that are described below. Each area of development can be developed using a set of building blocks.
Looking at various building blocks from the perspective of an occupational therapist, my favorite wooden blocks are Melissa and Doug Wood Blocks Set. The set is huge and comes with a variety of bright colors in solid wooden blocks, which are sized just right to help kids build fine motor skills.
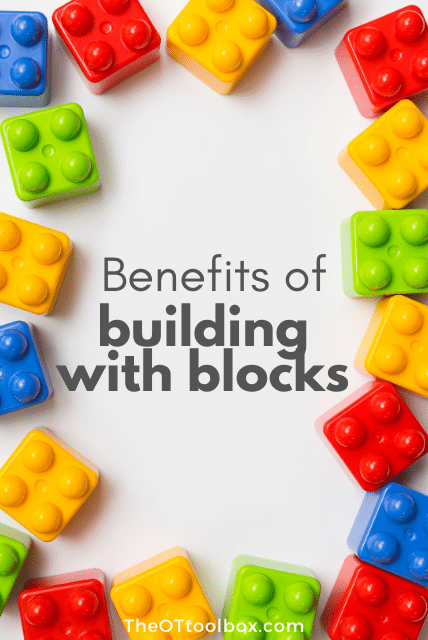
Fine motor skills and building blocks go hand-in-hand…literally! There are SO many benefits to playing with blocks. Let’s break down all of the benefits of playing with blocks…
There are many benefits of building blocks!
Benefits of Playing with Blocks
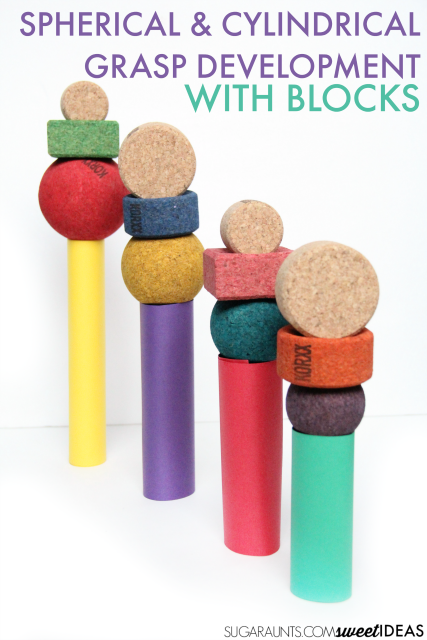
Building with blocks help kids develop grasp- From the time toddlers can grasp a block with their whole hand, grasp development begins. Blocks are a fine motor power tool when it comes to working on grasp development! Read below for the specifics of small kids playing with blocks. By picking up on block, manipulating it in the hand, and placing it on a stack of blocks, children progress from a gross grasp to a radial palmer grasp and then to a digital palmer grasp, followed by a tip-to-tip grasp using the pointer finger and thumb.
2. Building with blocks helps kids develop graded fine motor skills- As small children progress through typical grasp progression, they begin to gain more control over those motor skills. This occurs on a stability basis (use of the core and shoulder to stabilize the arm) and on a dexterous basis (precise, small, and graded movements of the fingers). By gaining these skills, children are able to pick on one block from a stack without toppling the entire block tower. They are also able to place a block onto a stack of blocks without knocking over the entire tower. These graded movements are essential for precision and dexterity in functional tasks as children gain a sense of personal awareness and how their body moves through space in order to pick up and manipulate objects.
This blog post on fine motor precision and graded release explains more on this skill and has a fun fine motor activity to develop graded precision in fine motor skills.
3. Building with blocks helps children develop eye-hand coordination- From a very young age, when babies develop the ability to see and move their arm to reach for a block, those eye-hand coordination skills are beginning to develop. Visual motor integration is a main piece of the visual processing skills puzzle, and coordinating movements with visual information is essential for so many functional tasks in learning and play. Catching a ball, writing with a pencil, cutting with scissors, are just a few examples of eye-hand coordination tasks that rely on the baseline skills developed from a young age. Toddlers can manipulate and build with blocks while developing this skill through play. Stacking, knocking blocks over, building a block train, making towers, and using blocks in constructive play are powerful tools to developing eye-hand coordination skills.
4. Building with blocks helps children develop bilateral coordination– Establishing a hand dominance and laterality is an important fine motor skill that transfers to tasks like writing with a pencil and holding the paper with the nondominant hand. Another example is mastering a zipper while stabilizing the material with the other hand. Still another example of bilateral coordination is cutting with scissors while holding and manipulating the paper with the nondominant hand. All of these tasks requires one hand to manipulate objects with more precision and dexterity while the other acts as a stabilizer. Building with blocks builds bilateral coordination as children stabilize a stack of blocks with one hand and use the other hand to release a block at the top of the stack with graded precision.
5. Building with blocks helps children develop motor planning skills– Motor planning is a physical action that requires observing and understanding the task (ideation), planning out an action in response to the task (organization), and the act of carrying out the task (execution). Building with blocks is a great way to build these sub-skills as kids attempt to build with blocks to construct with blocks.
6. Building with blocks helps children integrate the proprioceptive sense– Proprioception is one of our sensory systems that focuses on awareness of how one’s body moves through space, and how much effort is needed to move in certain ways. The proprioception system receives input from the muscles and joints about body position, weight, pressure, stretch, movement and changes in position in space. Our bodies are able to grade and coordinate movements based on the way muscles move, stretch, and contract. Proprioception allows us to apply more or less pressure and force in a task. Instinctively, we know that lifting a feather requires very little pressure and effort, while moving a large backpack requires more work. We are able to coordinate our movements effectively to manage our day’s activities with the proprioceptive system. The brain also must coordinate input about gravity, movement, and balance involving the vestibular system. Building with blocks is a great way to develop and refine this skill. How much effort is needed to pick up a block and place it in a specific spot without moving other blocks while building a tower of blocks or a block building?
To take this a step further, use larger blocks that require gross motor skills, and more awareness of proprioception skills. Here are DIY cardboard blocks that we’ve made for this very purpose.
7. Blocks help children integrate midline awareness– Crossing midline can be developed from a young age when playing with blocks. This is a great way for babies and toddlers to work on crossing midline, by reaching for blocks, building, and creating.
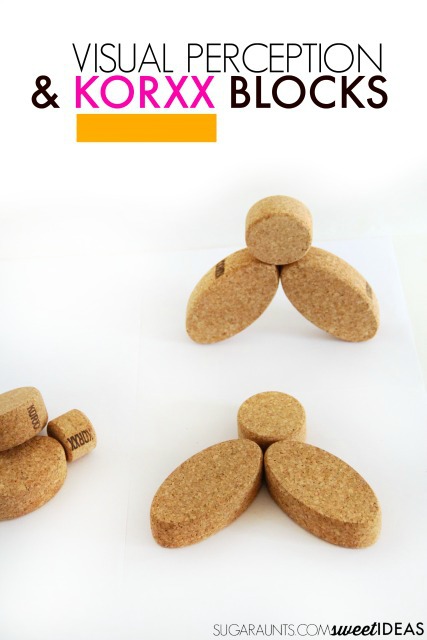
8. Blocks help children develop visual motor skills- Visual motor skills (and visual motor integration) are needed for coordinating the hands, legs, and the rest of the body’s movements with what the eyes perceive. Visual motor skills are essential to coordinated and efficient use of the hands and eyes. Visual motor integration is a skill we require for functioning. There is more that plays into the integration of visual motor skills into what we do and how we use our hands in activities. Building with blocks helps children develop skills in visual perception, eye-hand coordination, and visual processing skills play a part in the overarching visual motor skill development so we can perceive and process visual information and use that information with motor skills to manipulate and move objects in tasks and activities.
By building with blocks, areas like form constancy, visual attention, visual discrimination, spatial relations, visual memory, visual sequential memory, and visual figure ground are developed in accordance with eye-hand coordination, and visual efficiency.
9. Building with blocks develops learning too! Beyond fine motor skills, building with blocks helps kids develop other skills too. What will your toddler learn by picking up Wood Blocks Set, placing them into a container, and stacking towers? (Among other skills):
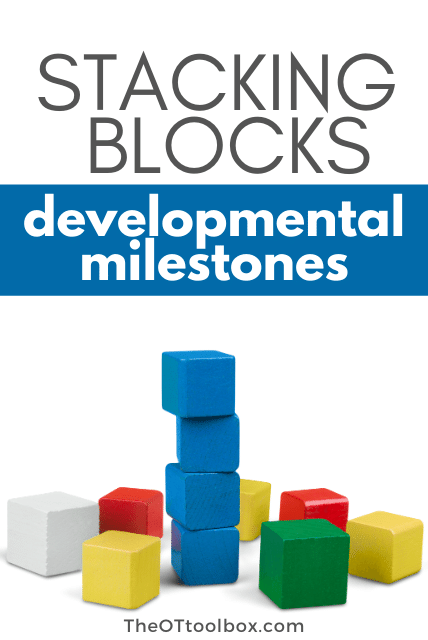
Did you know there are developmental milestones for stacking blocks?
Building Blocks and Development
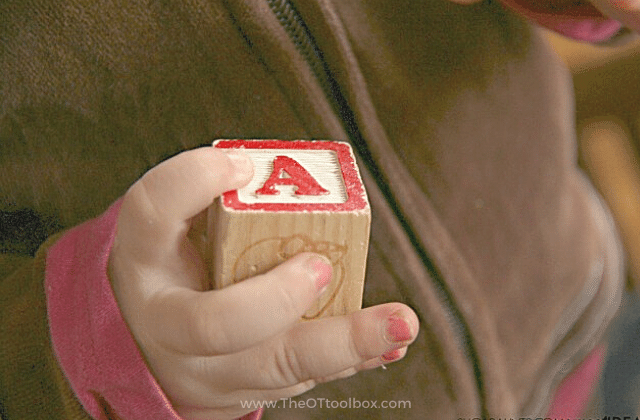
From developing a palmer grasp transition to a radial grasp to a tripod grasp and precision with graded release of motor skills, building with blocks help kids develop so many skills. For today’s activity, we pulled out the one inch square blocks from the set and we used classic Alphabet blocks. (This set has been chewed on and played with by all four of my kids so they look well loved aka have chew marks!)
First up in developing fine motor skills with wooden blocks is the grasp. This is important in fine motor skills in toddlers. Blocks, for toddlers are a fine motor tool that builds on so many areas.
There is a developmental progression of playing with blocks…aka stacking blocks milestones.
Stacking Blocks milestones
One resource that is helpful for occupational therapy providers and parents is knowing stacking blocks milestones. This is because we can help kids achieve fine motor and visual motor skills through play based on the level they are at and based on their age.
We’ve listed the progression of stacking blocks and included the typical age after each task.
The developmental ages of this progression are as follows:
Grasps a block with whole fist, lifting it off a table surface without dropping: 5 months
Grasps a block with all fingers: 6 months
Drops one block when given another: 6 months
Brings hands together when holding a block: 6 months
Grasps a block between the thumb, pointer finger, and middle finger (radial-palmer grasp): 7 months
Transfers a block from one hand to the other: 7 months
Bangs to wooden blocks together with both hands: 9 months
Grasps a block between the thumb, and the pads of the pointer and middle fingers with space between the block and the palm (radial-digital grasp): 11 months
Places wooden blocks into a container: 11 months
Builds a tower of three wooden blocks given a visual example: 15-16 months
Copies and builds a tower of 5 blocks: 19-20 months
Copies and builds a tower of 6 blocks: 21-22 months
Builds a tower of 8 blocks: 25-26 months
Copies a four block “train”: 29-30 months
Builds a 10 block tower: 29-30 months
Copies a three block pyramid or “bridge”: 31-32 months
Copies a four block “wall”: 35-36 months
Builds “steps” using six blocks: 51-52 months
Builds a six block pyramid: 53-54 months
Stacking blocks milestone development happens in natural play. Some ways to foster this skill include:
Modeling shapes and using them in floor play.
Using block creations in pretend play with small toys, and using toys that the child prefers like specific cars and figures.
Starting with easier block forms and then working up to more complicated forms.
The one thing to keep in mind about all of these activities listed below is to consider DIR Floor Time. Blocks are a natural tool to use in this technique because most often, blocks are used on the floor.
Step 1- Make a block line.
This might look like making a single line of blocks in a pretend play activity. You can tell the child that you are making a fence for animal figures or a house for doll figures. They might join in and help you build the line of blocks. If not, invite them! When you are making a line of blocks the goal is to make the blocks touch but not knock over or push blocks when setting them up. You also want to make sure there isn’t too much space in between the blocks or if the blocks don’t line up in a straight line. This is a great fine motor coordination activity and wonderful floor play.
The block line is horizontal on the floor and there is not height to the line of blocks.
Step 2- Stacking blocks: After you place blocks in a line you can work on stacking one block on top of another block. When you move to stacking two blocks, you have a few other components happening that require more developmental progression of fine motor and visual motor skills:
Grasp pattern and type on the block- As grasp is developed, you’ll see more precision and dexterity meaning more complex block designs and stacking.
Thumb web space which is needed for precision in grasp and release. If you see a child holding the block with a closed web space and little precision in the distal joints of the thumb and index fingers, you’ll see less graded precision in both placement and release of the fingers on the block.
Stable wrist needed for proximal support and distal mobility. When the wrist is in a flexed position, you don’t see as much dexterity and refined movements. The neutral wrist positioning with slight extension in the wrist is key.
Step 3- Make a block train. To move from a line of blocks to creating a block wall in progression, we can ask the child to copy a block train. This is a combination of a line of blocks with two stacked blocks to create the stack of the train. Typically, you’ll want to do this step after stacking two blocks because of the combination of skills.
Step 4- Begin stacking blocks. After you have a block train, you can create higher and higher stacks of blocks. The more blocks you add to the stack, the more precision skills and graded release of the hands (arch development, grasp, eye hand coordination, and open thumb web space). More blocks require more precision, because of the placement of the blocks on a higher stack of blocks. If the wrist isn’t stable or the distal joints of the fingers aren’t mobile, you’ll see less precision in placement.
Step 5- Make a block wall. For this stage you want to stack up two or more lines of blocks to make a wall. Start with just two levels and work up from there. You can tell the child that you are making a wall for a castle or a house. The goal here is to stack the blocks with precision to place the blocks on top of one another and not over placing the block so that it’s not stacked up on the bloc below it. You also want to make sure their blocks are not going over the edge so that you end up with a leaning wall. This can be more challenging for little ones, especially when it comes to precision in placing the block and in graded release of the block in its place in the wall.
Step 6- Make a block pyramid. For this stage of stacking blocks milestones this stage requires more complex fine motor precision and visual motor skills. There is a combination of placement of the blog in a line with aligning blocks to the one beside it as well as on top of the block below it in the stack. Additionally, there is placement of the blocks with shift to create steps on each side of the block pyramid.
From here, we can create higher and higher block pyramids.
Activities to Reach Stacking Blocks Milestones
So, now that you know the ages that kids can typically stack blocks, let’s talk about how to support these skills with different block activities.
We love using alphabet blocks because you can incorporate different areas of learning like letter identification, form constancy (different letter fonts are on the different sides of the blocks), and handwriting.
A baby can hold blocks to work on grasp and release.
This Radial Palmer Grasp of wooden block is a beginning grasp in toddlers.
After a radial palmer grasp, children progress to using a Digital Palmer Grasp of a Wooden Block. When children progress in development is the digital palmer grasp of holding a block, fine motor skill development speeds up fast. By holding a block with the pads of the thumb and pointer and middle fingers, kids are working on the in-hand manipulation skills they will need for manipulating a pencil. Make it fun while working on this area: Spin the block around with the tips of the fingers.
How does rotation in the hand help with functional skills? You need simple and complex rotation to complete these tasks:
Rotating a pencil when re-positioning while writing
Opening a toothpaste lid
Turning a paper clip
Turning knobs
Rotating the dial of a combination lock
Use colored blocks in block stacking games in OT sessions.
Block Stacking Games
Now that you’ve read through the benefits of playing with blocks, and the stacking block milestones that impact fine motor skills in children, let’s cover ways to play with blocks while building these essential skills.
While stacking blocks and knocking them down are a fantastic way to help small children build essential skills, there are so many more ways to play with blocks, too.
These block stacking games and block activities can be used for fun block ideas while building skills at home or in occupational therapy sessions.
With my toddler, we used the blocks to build small towers. So, how can you make this a fun activity? Usually, just playing with your kiddo and showing them how to build a tower and knock down a tower makes building with blocks fun at this age.
These Alphabet blocks are great for working on rotation of the fingers. Have your child look for specific shapes and letters on the sides of the blocks.
3. Add small toys like animal figures. Have the animals walk up and down the block steps.
4. Add play dough. Have the child create “mortar” using the play dough between each block.
5. Create a train track and push coins around a masking tape track.
6. Build a wall to divide animal figures into a miniature zoo.
7. Build a small bridge for small doll or animal figures.
8. Build a pyramid and place a coin on each level.
9. Sort the blocks into piles according to shape or color. Create patterns with colors or shapes. Make lines of the blocks and see which line has the most.
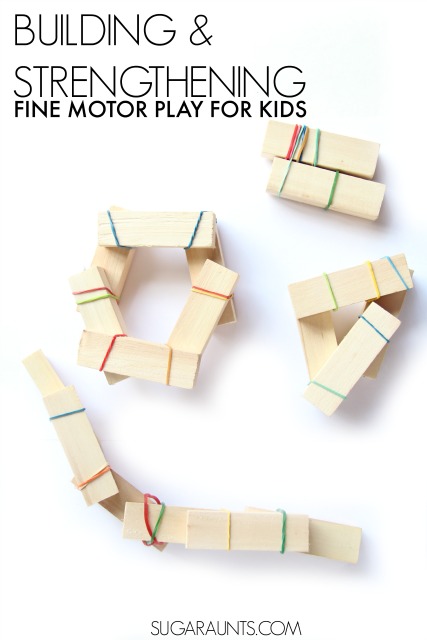
10. Build blocks in water. Use foam blocks or plastic blocks in a low tray of water. How does the water impact stacking? Can you add soap foam? What happens then? There is so much cause-and-effect happening with water and block play! Here you can see how we used water and foam blocks for fine motor skills.
Let your child use their imagination! The best thing about blocks are the open ended-ness that happens when playing. You can create houses, roads, animals, and any imaginative scene possible with just a set of blocks!
Copying Block Designs in Occupational Therapy
Beyond the fine motor skills listed above, there are visual motor skills that develop as well. This was covered briefly above, but to expand, copying block designs in occupational therapy is a skill that builds visual motor and visual perceptual skills needed for handwriting, reading, math, finding items like a utensil in a drawer, and so much more.
When children copy block designs, occupational therapists are working on areas such as spatial awareness, visual discrimination, visual attention, visual sequential memory, visual memory, form constancy, position in space, and other areas.
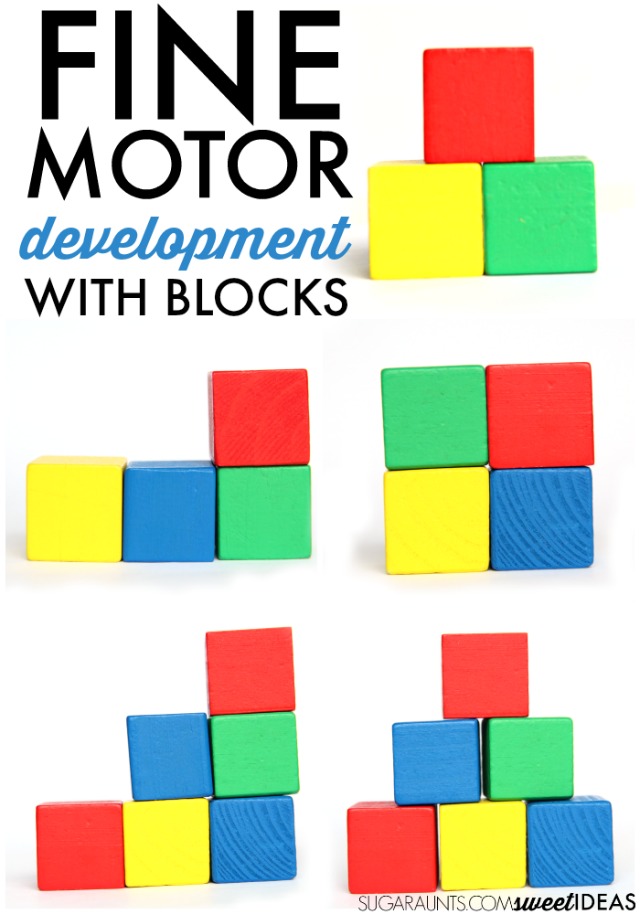
From top right and going clock-wise: 3 block pyramid or bridge, wall, pyramid, steps, and train.
You can also include the colored blocks to work on skills.
Copying specific shapes works on the eye-hand coordination, grasp, precision, and visual perceptual skills needed for functional tasks like handwriting, cutting with scissors, manipulating small items, managing clothing fasteners, and tying shoes, among so many other tasks.
To make copying shapes with blocks fun, try these ideas:
Build a block design alongside the child.
2. Build a block design using only one color of blocks.
3. Build a block design and then cover it with a small dishtowel. Can the child remember the design and build the same design?
4. Build a design and describe the blocks positions. Is one color on top or next to another? Use positioning words like next to, above, below, beside, to the left, to the right, etc.
5. Build bridge block designs and use small figures to cross the bridges.
6. Use different types of blocks. Try using LEGO, duplo blocks, rock blocks, or other three dimensional shapes. The part to focus on is coping forms in the three dimensional aspect, regarding position in space. There are so many different types of blocks on the market that work well for developing these skills.
7. Try building a small block form and then drawing it on paper.
8. Play “What’s Missing”. Build a block design and ask the child to look at the design for 20 seconds. Then, cover the design with a small dishtowel and remove one or more of the blocks. Can the child then look at the block design and figure out what is missing?
9. Make and build- Use colored paper to cut small squares that match the blocks you have in your set. Students can use the paper to “build” a two dimensional block design on paper or on the table top. Then, use real blocks to copy the paper design. This is an exercise in spatial concepts as students need to figure out any blocks that are out of view to hold up the block design.
10. Build block designs in a window or in a sunny place where the design creates a shadow. A flashlight or small lamp could also work as well. Then, place a piece of paper alongside the block design. Ask students to trace the shadow outline.
11. Create block forms that resemble real-life shapes, figures, and other relatable objects. Kids can copy block forms that resemble their favorite animals, people, and things like ice cream cones, presents, toys, vehicles, etc.
A Building Block Maze Activity focuses on gross motor skills and builds spatial awareness skills as well as body awareness and self-awareness to position in space.
This Building Tens Castles is a nice way to help preschool and kindergarten aged students with the concept of tens and place value as they group blocks into groups of tens.
This Word Family BINGO! challenges kindergarten and first grade students to build words by using blocks. It’s a hands-on learning activity that also develops visual perceptual skills, and visual scanning.
Letter matching with this Superhero Alphabet Matching Activity uses blocks to work on letter awareness, recognition, as well as visual perceptual skills.
This Sight Word ABCs with Blocks allows younger elementary school children to work on sight words as well as visual perceptual skills, eye-hand coordination, and motor planning.
For a gross motor activity that gets kids moving, use blocks to work on letters and sounds with this Letter Sound Scavenger Hunt.
Symmetrical awareness is a test of visual discrimination, form constancy, and visual memory. Work on symmetry with this Symmetry with Building Blocks activity.
This word building activity focuses on Building CVC words with Blocks and challenges children with visual perception and visual motor skills.
Working on visual attention, visual memory, and visual discrimination is easy with a block activity like this Making Patterns with Building Blocks idea.
How do you like to play with blocks? Have you tried working on fine motor skills using wooden blocks? Let us know!
Colleen Beck, OTR/L has been an occupational therapist since 2000, working in school-based, hand therapy, outpatient peds, EI, and SNF. Colleen created The OT Toolbox to inspire therapists, teachers, and parents with easy and fun tools to help children thrive. Read her story about going from an OT making $3/hour (after paying for kids’ childcare) to a full-time OT resource creator for millions of readers. Want to collaborate? Send an email to contact@theottoolbox.com.
In this blog post, originally written on November 13, 2015 and updated on July 18, 2024, we are talking all about the benefits of playing with stickers. Occupational therapy providers love stickers as a fine motor tool! Let’s break down the benefits of sticker play with kids…
When you were a kid, did you have a sticker collection? Maybe it was a Trapper Keeper binder with paper, or maybe it was a sticker book with themed pages. Filling it’s pages were puffy stickers, scratch-and-sniff stickers, fuzzy stickers, and glossy glittery stickers.
Thinking back to those sticker collection can bring back memories of sticker trades. All you cared about back then was a complete collection of all the Care Bears or a page full of sticker-y rainbows.
But did you know that peeling all of those stickers has a bigger benefit that a full sticker book page?
Benefits of Playing with Stickers
Occupational therapy providers always have stickers on hand in their therapy toolbox and there’s a reason why…playing with stickers has many benefits!
Playing with stickers can help kids with so many skill areas! They can even be an Occupational Therapist’s secret weapon. School based occupational therapy providers love them for so many reasons. Pulling a fresh sheet of stickers from the OT’s treatment bag can bring on big smiles from kids of all ages. And the best news is, that the children don’t even realize they are working on important child developmental areas!
The Best Reasons to Play With Stickers
Affiliate links are included in this post.
When you see a sheet of stickers, what grabs your attention? Maybe it’s the brightest sticker on the sheet, or maybe it’s a special character. Whatever it is that brings you sticker joy, they all are great for developmental areas.
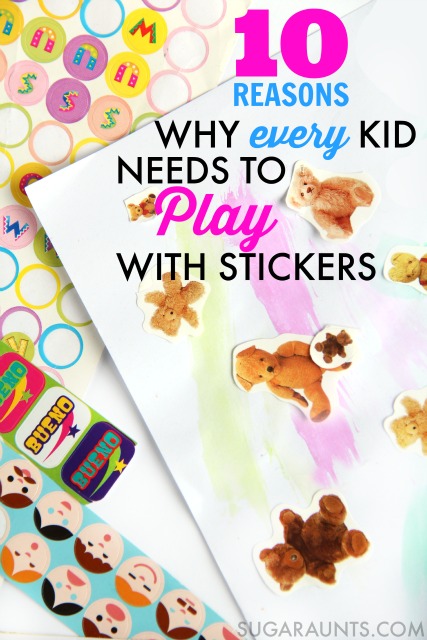
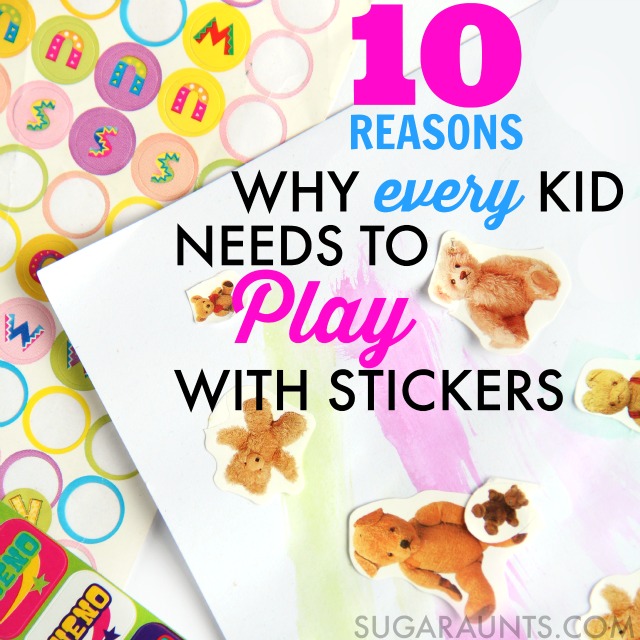
10 Reasons Why EVERY Kid Should Play With Stickers:
1. Neat Pincer Grasp. Stickers are a fine motor powerhouse. Peeling the sticky little pictures requires a neat pincer grasp in order to pull up the edge of a sticker from a sticker sheet. The very tips of the fingers are needed to grip such a small area. For some kids, grasping just the edge of a single sheet of paper is quite difficult. Working with stickers is a great way to practice neat pincer grasp for skills like picking up small beads, string, or a sewing needle.
Extend the skill: Work on pincer grasp by peeling stickers of different sizes. Smaller stickers will be more difficult to peel. Place stickers on strips of masking tape and other surfaces and and peel the stickers up. Then, work on grasp by placing the stickers down on different surfaces. Stick the stickers on paper taped to a wall to encourage an efficient wrist position.
2. Bilateral Coordination– It’s an essential skill for so many functional tasks. Zippering a coat, cutting with scissors, and handwriting are all activities that require bilateral hand coordination. Peeling stickers requires tow hands as you hold the sheet with one hand and peel with the dominant hand. Both hands are involved in the work and doing different tasks.
Extend the skill: Use stickers to work on bilateral hand coordination by using very large pieces of paper and very small sheets of paper.
3. Visual Scanning. Visual scanning is required for skills like reading, writing, searching for an item in a crowded room, and visually scanning the environment. Kids can scan a sticker sheet to peel off the sticker that they want.
Extend the skill: Position stickers all over a page. Ask the child to look for a specific sticker that you describe. They can connect stickers with a crayon, or cut the paper along a line stickers. Position stickers all over a wall and work on visual scanning on a large scale as they look for specific stickers. Add in a flashlight and have the child scan for stickers with the light.
4. Spatial Awareness. Difficulties with spatial awareness can make reading writing, and functioning in all daily tasks practically impossible. Kids may write with sloppy handwriting or have trouble with organizing their body in space. Use stickers as a visual cue for spatial awareness. Kids can see the sticker’s bright color and can use it as a visual cue for where to start writing on a page, how big to form letters, where to stop in the hallway of lockers, where to place folders in a desk, where to place coats in the closet. The use of stickers in this area are limitless!
Extend the activity: Position stickers on the left margin of a paper for kids who need help with writing. Stickers can provide a cue for letter size, too. Use stickers in a large scale maze by sticking them on chairs, walls, and floors. Kids can hop or jump over stickers or go around, and touch stickers while working on spatial awareness.
5. Sensory Exploration. Explore scents with scratch and sniff stickers. Discover textures of smooth, puffy, scratchy, and fuzzy stickers. Kids are very motivated by stickers, too. A sticker can be used as a reward for a child who touches a messy sensory bin or participates in difficult therapy treatment activities.
6. Handedness. Kids often times have trouble learning which hand is which. They will switch hands when writing and can put their shoes on the wrong feet. Use stickers as a visual cue in learning left from right both on their body and off. One sticker can be stuck to just one shoe to help a child learn to put their shoes on the correct feet. You can put a sticker on the top of a child’s coat to teach them which way is up.
Extend the activity: When practicing scissor skills, place a sticker on the side of the paper the child should hold.
7. Separation of the two sides of the hand. Using the thumb side of the hand while bending the pinkie side of the hand in stability defines separation of the two sides of the hand. This is needed for tripod grasp and in-hand manipulation as well as gross grasp and power grip hand strength. Use stickers to work on this by placing a sticker in the child’s palm. They can bend the pinkie, ring finger, and middle finger down to cover up the sticker while using the pointer finger and thumb in fine motor tasks.
Extend the activity: Place a small object like a cotton ball in the hand while using the thumb and pointer finger to pick up stickers.
Stack stickers in a pile by placing them on top of one another. Use a sticker on the tip of a pencil to show kids where to pinch the pencil when sing a tripod grasp.
8. Hand Strength. How can something as small as a sticker work on hand strength? Children need strength in the small muscles of their hands in order to have endurance in coloring, using an open web space when holding a pencil, and when managing buttons and snaps on clothing. Kids can use stickers to build the strength of the intrinsic hand muscles by peeling stickers from resistive surfaces.
Extend the activity: Place stickers on cloth like couches or carpeting and ask your child to unstick the stickers without ripping them. They will need to use the intrinsic muscles and defined arches of the hand to pull them up.
9. Body Awareness. Toddlers can work on naming their body parts by sticking stickers on feet, and other parts. Children with difficulty in sequencing might have trouble knowing if a sock or shoe goes on their feet first. Use stickers to help with organizing and positioning on the body.
Extend the activity: Place stickers on feet, hands, arms, and back. Ask your child to touch certain body parts in a specific order. Work on getting faster. Toddlers can practice naming body parts by trying to peel off a sticker stuck to their wrist as you say “wrist”.
10. Gross Motor Development. Crossing midline, jumping, hopping, skipping, and jumping jacks are gross motor tasks that can be difficult or some kids. Use stickers as a visual cue or obstacle in practicing these areas.
Extend the activity: Place stickers on each knee. Ask your child to touch the right knee’s sticker with their left hand and the left knee’s sticker with their right hand.
Stick stickers high on walls as they try to jump up to touch them with outstretched hands.
MORE reasons to play with stickers:
Literacy
organization
sequencing
problem solving
self-confidence
language development
mathematics
creativity
sense of accomplishment
stress reduction
goal setting
socializing
What are your favorite ways to play with stickers?
So, get your child involved with sticker collections to work on all of these developmental areas. And, you’ll get to relive your childhood with the scratch-and-sniff, fuzzy, hologram, puffy stickers!
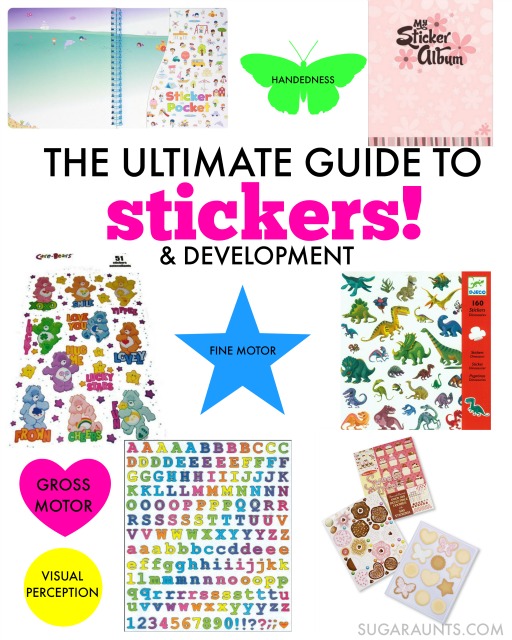
Best Sticker Gifts for Kids
We also have some ideas for sticker toys and sticker gifts that support development of these skills in kids.
I found some very fun sticker activities out there that I wanted to share. Play with your child using these sticker activities as you work on 10+ functional areas:
Every kid needs a sticker collection book! This My Sticker Album has illustrated pages for sticker collections.
Need stickers to add to your collection book? The 1000 Stickers for Girls and 1000 Stickers for Boys should have you covered! (Although who says a truck sticker is just for boys? Nope! I would get both books for my kiddos!)
There are stickers for every theme, character, or interest out there. From Dinosaur Stickers, to Cupcake Stickers …there is something for everyone! (including the Care Bears fans out there!)
I love these Alphabet stickers for name building, letter identification, and spelling word practice.
What stickers do you need in your sticker collection?
You will love our recent 31 Days of Occupational Therapy series where we shared free and almost free ways to work on Occupational Therapy goal areas. This post is a great way to work on functional skills using free or inexpensive items. Most of us have a couple of stickers around the house. Some of my favorite activities from the series include:
Working on fine motor skills, visual perception, visual motor skills, sensory tolerance, handwriting, or scissor skills? Our Fine Motor Kits cover all of these areas and more.
Check out the seasonal Fine Motor Kits that kids love:
Colleen Beck, OTR/L has been an occupational therapist since 2000, working in school-based, hand therapy, outpatient peds, EI, and SNF. Colleen created The OT Toolbox to inspire therapists, teachers, and parents with easy and fun tools to help children thrive. Read her story about going from an OT making $3/hour (after paying for kids’ childcare) to a full-time OT resource creator for millions of readers. Want to collaborate? Send an email to contact@theottoolbox.com.
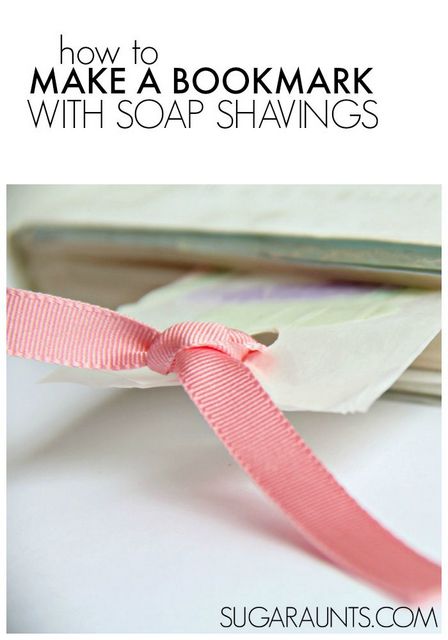
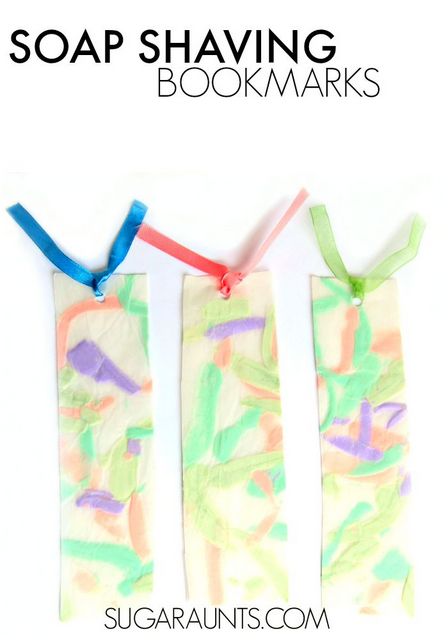
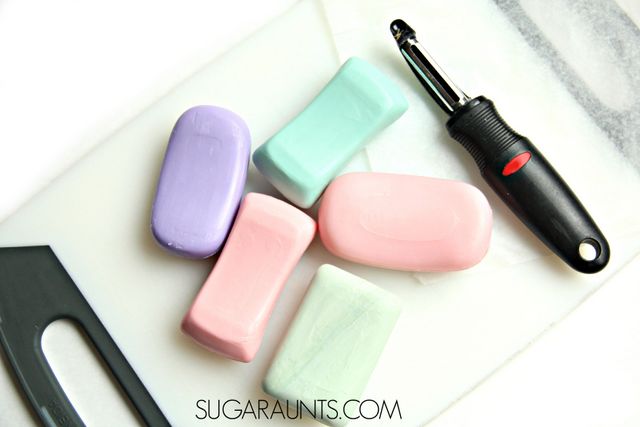
This is a fun activity we did many years ago, and I keep coming back to it. Using soap shavings as a fine motor tool can open the door to motor planning, bilateral coordination, and functional experiences for kids. At The OT Toolbox, we believe in hands-on activities that promote fine motor skills, sensory exploration, and creativity. As pediatric OTs, we know the power of using crafts to support development so this soap shavings craft is a great way to encourage these skills while making something functional and fun. Every parent, teacher, and therapist can benefit from having a collection of soap craft ideas to incorporate into play and learning.
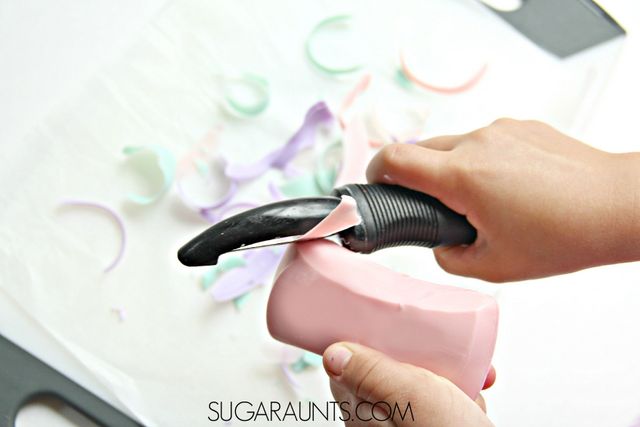
The cool thing about using a vegetable peeler on a bar of soap is that you can use the soap shavings projects to make wax paper bookmarks to other creative soap crafts, and at the same time, you are supporting the development of functional life skills cooking tasks by using the vegetable peeler. If you’re looking for an easy bookmark craft, this simple yet effective activity is a great way to build skills while creating something useful.
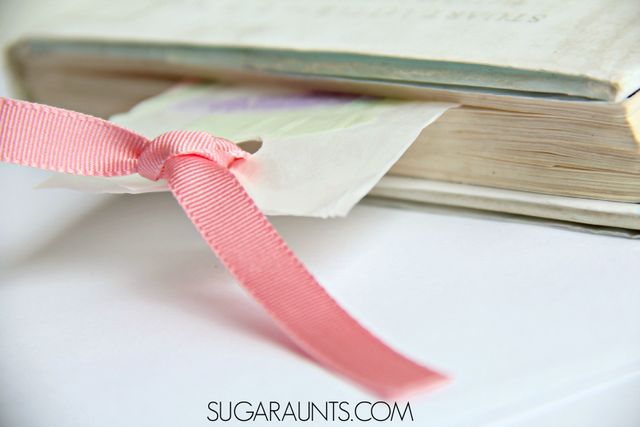
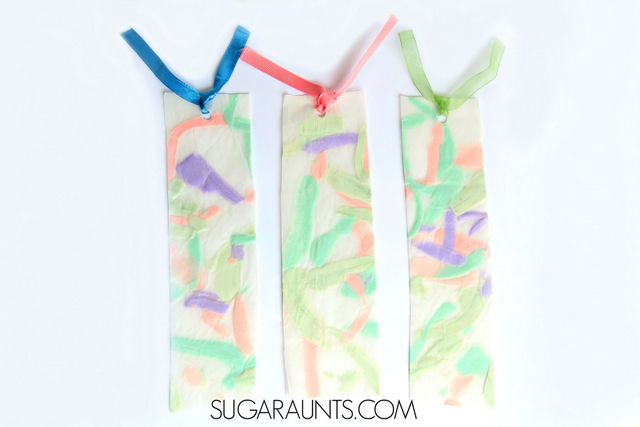
Wax Paper Bookmarks
Today I wanted to share a fun kids craft that supports life skill development: using an iron and ironing board. To make the soap shavings, we also used a vegetable peeler, so this is a great way to incorporate fine motor skills into kitchen tasks needed for using kitchen items like the vegetable peeler. We also worked on a few different skills with this craft: cutting with scissors, fine motor skills, bilateral coordination, and executive functioning. Be sure to check out our music bookmark craft as well.
Soap Shavings Bookmark Craft
Today we are incredibly excited to share this Soap Shavings Bookmark craft with you!
Kids can get creative in their crafting using soap and a few materials from around the house. We made these soap shaving bookmarks and had a blast creating!
This soap craft is as beautiful as it is simple. Kids will love to use a vegetable peeler on bars of soap to create soap shavings.
Here are the steps to make this soap shaving bookmark craft:
To make the bookmarks, lay a sheet of wax paper out on a hard surface like a cookie sheet or cutting board.
Using a bar of soap to practice using a vegetable peeler is a great beginner step for kids learning to use kitchen tools, because the soap peels shavings much easier than an apple skin peels away from the apple.
2. Show your child how to grasp a bar of soap and using hand-over-hand guidance, help your child to slowly peel shavings from the bar of soap. Encourage them to peel away from their body for safety.
This is important when teaching kids how to peel a potato or an apple, as well, so it’s great practice!
3. Peel long strips of soap and small shavings, mixing the colors of the different bars of soap on the wax paper. Managing the vegetable peeler and the soap is a great way to encourage bilateral hand coordination (the use of two hands together in a coordinated manner).
Children need bilateral hand coordination for functional skills like cutting with scissors, handwriting, tying shoes, and managing clothing fasteners. An activity like using a vegetable peeler on a soft bar of soap is a great way to work on using tow hands together effectively with a non-dominant assisting hand and a dominant hand with fluid and controlled motions.
4. Arrange the soap peelings on the wax paper and place the second piece of wax paper on top.
5. Carefully move the wax paper to an ironing board.
6. Place a dishtowel over the wax paper and using an iron heated to medium, slowly press down. The soap will slightly melt and flatten under the heat.
7. Check often to see if the wax paper is adhering. You can remove the dish towel and carefully heat the edges of the wax paper.
8. Cut the wax paper into rectangular book marks.
9. Punch a hole near the top of the book marks using the hole puncher.
10. Tie a piece of ribbon in the hole. This bookmark will smell great and would make a lovely gift!
*Note: This craft should be done under close supervision of an adult. Be careful with the use of a vegetable peeler with small children. For younger children, provide hand-over-hand assistance with the vegetable peeler. Adults may want to complete the peeling portion of this soap craft. Adults or responsible older children should manage the iron. As always, use judgement when it comes to completing this and any activity with your kids.
Using the vegetable peeler and an iron to make our soap shaving bookmark makes working on IADLs fun and engaging. Life skills tasks like cooking is an essential Instrumental Activity of Daily Living that occupational therapy professionals address.
Alternate activities:
Vary the scents and colors of your bookmarks with various soaps.
Add a personal message or quote to the bookmarks.
Add flower petals or scraps of paper to the soap shavings before ironing.
Arrange the soap shavings in a mosaic or mandala pattern.
Using a vegetable peeler to proactive the bilateral coordination and motor planning needed for peeling vegetables is a good way to grade down the activity because of the soft texture of the soap.
Colleen Beck, OTR/L has been an occupational therapist since 2000, working in school-based, hand therapy, outpatient peds, EI, and SNF. Colleen created The OT Toolbox to inspire therapists, teachers, and parents with easy and fun tools to help children thrive. Read her story about going from an OT making $3/hour (after paying for kids’ childcare) to a full-time OT resource creator for millions of readers. Want to collaborate? Send an email to contact@theottoolbox.com.