Colleen Beck, OTR/L is a pediatric occupational therapist and the owner and author of The OT Toolbox website. She manages all of The OT Toolbox social media accounts and runs the popular newsletter.
Read about Colleen's experience and career as an occupational therapist, including how The OT Toolbox began on our About The OT Toolbox page: https://www.theottoolbox.com/about-us/
Colleen created The OT Toolbox in 2011 and since then has written thousands of blog posts designed to support therapy providers, educators, parents, counselors, admin, and caregivers in promoting the healthy development of kids.
Check out Colleen's blog posts below:
Executive function and handwriting are deeply connected. In this blog post, we’re covering how executive function impacts handwriting and the ways to support handwriting by targeting critical thinking skills, including with efficiency. We’ve covered a wide variety of handwriting problems and executive functioning skills can impact these issues in a variety of ways.
Executive functioning skills are crucial for handwriting because they involve higher-order cognitive processes necessary for planning, organizing, initiating, and completing tasks. In the context of handwriting, these skills play a significant role in coordinating the various components involved in the writing process.
Planning: Before starting to write, individuals need to plan and organize their thoughts. This includes considering the content, structure, and overall goal of the writing task. Research suggests that planning abilities are linked to the prefrontal cortex, a region associated with executive functions.
Initiation: Initiating the writing process involves starting the task and maintaining focus. Difficulties in initiation can lead to procrastination or challenges in getting thoughts onto paper. In tasks throughout the day, including specific assignments, like completing a writing prompt or filling out a worksheet, initiation is a key component of executive functioning.
Organization: Organizing information in a coherent and structured manner is essential for effective writing. This includes understanding sentence and paragraph structure.
Working Memory: Working memory is the ability to hold and manipulate information in the mind while performing cognitive tasks. In handwriting, individuals need to recall and apply letter formations, spelling rules, and grammar.
Self-Monitoring: Executive functions help individuals monitor and evaluate their own performance. In the context of handwriting, self-monitoring involves checking for spelling errors, proper letter formation, and overall legibility.
For children or individuals with challenges in executive functioning, difficulties in handwriting can arise. Occupational therapists often address these challenges by incorporating strategies to enhance executive functions, such as providing visual aids, breaking down tasks into smaller steps, and using mnemonic devices.
executive functioning and writing
Handwriting is a complex task. To write a sentence, a child needs to process information, recall important information, plan what he wants to write, initiate the writing task, perform the motor tasks to move the pencil to form letters, organize motor output on the page, manage paper/posture/pencil mechanics, realize errors, and be flexible enough to accept and correct mistakes.
Executive functioning skills can impact legible handwriting and a few tactics can support this area of need.
All of these “parts” of handwriting might sound familiar to the parent, teacher, or therapist of a child with executive function defects.
Executive function is our ability to “get things done”. It is a set of skills that allow us to organize information, plan, learn, multi-task, remember things, prioritize, pay attention, and act on information.
Handwriting for a child with executive functioning problems can be quite challenging.
Handwriting requires visual perception, sensory processing, cognitive components, motoric output, awareness of mistakes, and the ability to correct them just to complete written work.
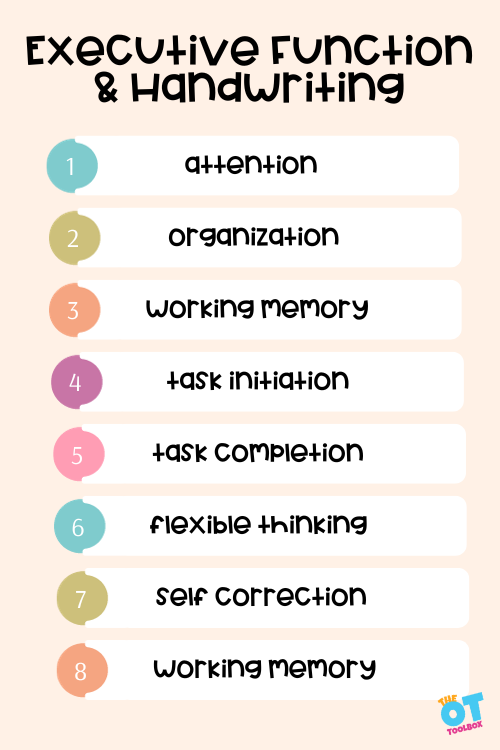
All of this is involved with the ability to complete written tasks using executive functioning skills:
Now, image asking a child with executive function difficulties to write a 5 sentence writing prompt. After an 8 hour day of school. In the environment that the child feels most comfortable to exhibit behaviors (home with his loved ones)…it can be a messy scenario leading to a homework breakdown.
What is Executive Functioning?
One issue that may be causing a child to write well at school and produce completely illegible or totally sloppy written work at home is a deficit in executive functioning skills.
Kids who have trouble managing their executive functioning skills might have trouble with learning, organization, task completion, getting homework done, not losing their essential items, remembering to take their lunch box home each day, and so many other everyday tasks. Executive functioning is a set of mental skills that play a huge part in our daily tasks.
There are several mental processes (or critical thinking skills) involved in handwriting.
So, when it comes to difficulties in the areas listed above, there are certain ways that we see those struggles come to life. In the child with executive functioning disorder or challenges in any one area of executive functioning, it can be helpful to have an executive functioning skills checklist, or list of ways that EF impacts writing. Here are some of the ways that you may see executive function impact writing.
Handwriting and Executive Function Skills
When asked to complete written work, a lack of executive functions or a inability to utilize executive functioning skills may occur. The child may show resistance to the writing topic, trouble initiating, and difficulties with written work output.
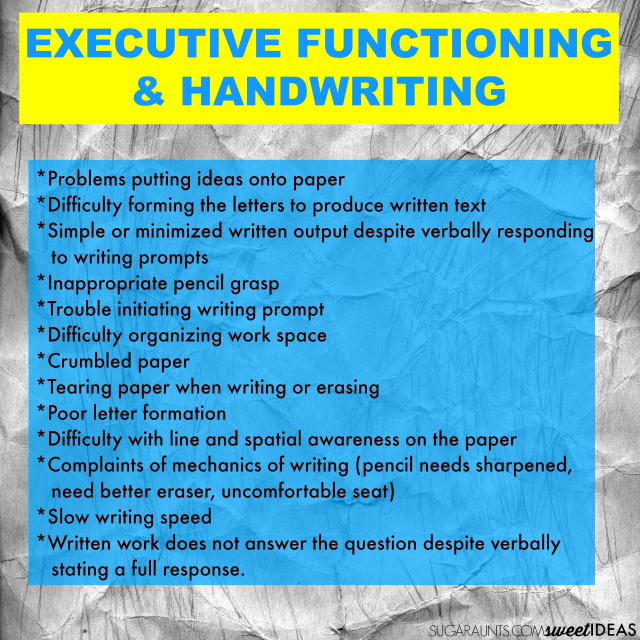
Here are signs of executive function problems in handwriting:
Difficulty generating ideas
Trouble articulating ideas
Problems putting their ideas onto paper
Difficulty forming the letters to produce written text
Simple or minimized written output despite verbally responding to writing prompts
Inappropriate pencil grasp
Trouble initiating writing prompt
Difficulty organizing work space
Crumbled paper
Tearing paper when writing or erasing
Poor letter formation
Difficulty with line and spatial awareness on the paper
Slow writing speed
Complaints of mechanics of writing (pencil needs sharpened, need better eraser, uncomfortable seat)
Slow writing speed
Written work does not answer the question or answers only part of the question despite verbally stating a full response.
Repeats self in written work (in an open ended writing prompt type of task)
How to improve executive functioning skills and Handwriting
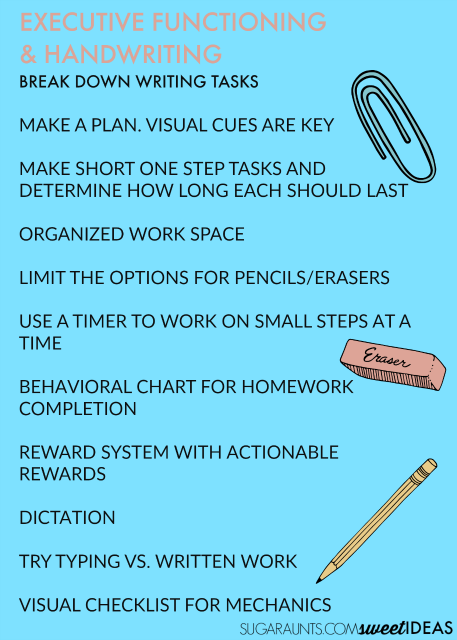
There are tips and supports that can support handwriting and executive functioning skills. These executive function tips can support written work in school or at home with homework. Try these strategies.
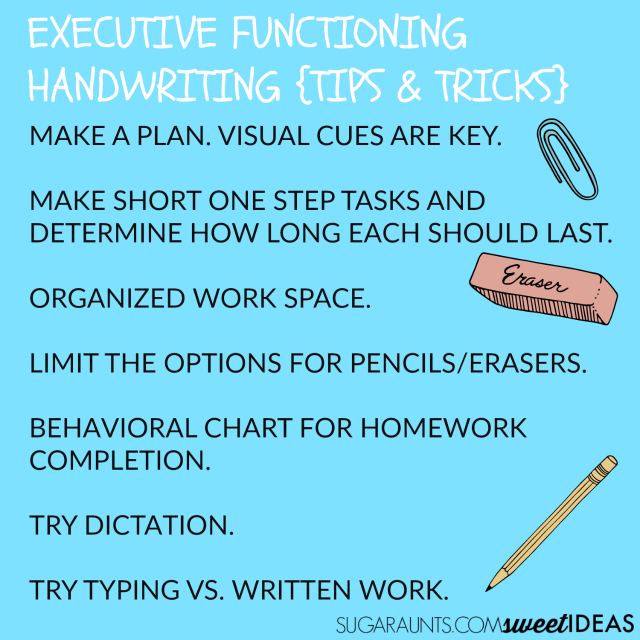
Break down writing tasks. Separate an assignment into smaller parts.
Make a plan. Visual cues are key. Use a highlighter and numbers to create a “to-do” list.
Make short one step tasks and determine how long each should last.
Consistency. Complete written work and homework in a specific place.
Materials in place. Limit the options for pencils/erasers.
Use a timer to work on small steps at a time.
Provide guidelines for written work.
Mark off each task as it is completed.
Behavioral chart for homework completion.
Reward system with actionable rewards: Instead of a toy or sticker, a child can choose to earn earn time to stay up 15 minutes later on Friday, choose the family’s dessert for one day, or pick what to watch for family movie night.
Dictation: Child dictates what he wants to write and parent/teacher/aide/another student completes the writing portion.
Try typing vs. written work.
Visual checklist for mechanics: Capitalization, punctuation, complete sentences, grammar, spelling, line awareness, spacing, letter formation.
This post is part of our Easy Quick Fixes to Better Handwriting series. Be sure to check out all of the easy handwriting tips in this month’s series and stop back often to see them all.
How to Improve Handwriting and Executive Function
One way to support students is through executive function coaching as a way to address specific needs using a coaching model.
One way to work on the handwriting issues that we commonly see, along with the executive functioning struggles is to combine these. Using checklists, or by drawing mind maps, and using visual cues, the child with executive functioning difficulties to “see” the big picture of what they need to accomplish.
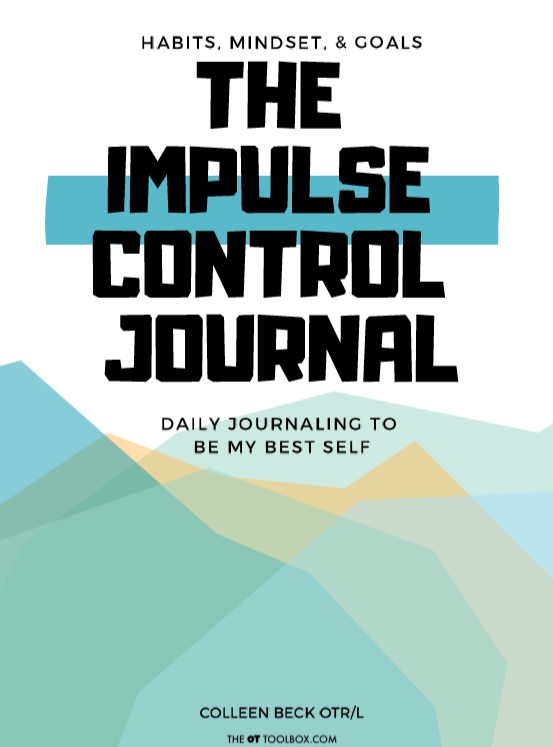
The Impulse Control Journal does just that. It is a printable journal that kids (and teens or adults) can use to figure out what’s going on with attention, organization, planning, prioritization, and other mental skills. It can help them with areas like habits so they are able to accomplish the everyday tasks like planning out a chore or an assignment.
The Impulse Control Journal breaks down executive functioning…but it does it in easy and fun ways and doesn’t make the process overly distracting or overwhelming. Just pull out or print off the pages you need and use them over and over again. The best thing I love about this journal is the fact that the user is totally involved in the process. It’s not just making plans for the child (or teen/individual), but they have a real say in their situation and the ways to work on certain areas.
They are truly involved in the process of working on executive functioning skills.
And, the journal offers a way to work on handwriting with short lists, check boxes, mind maps, and more. So, by addressing the executive functioning skills and handwriting together, the process provides a real opportunity for change.
Colleen Beck, OTR/L has been an occupational therapist since 2000, working in school-based, hand therapy, outpatient peds, EI, and SNF. Colleen created The OT Toolbox to inspire therapists, teachers, and parents with easy and fun tools to help children thrive. Read her story about going from an OT making $3/hour (after paying for kids’ childcare) to a full-time OT resource creator for millions of readers. Want to collaborate? Send an email to contact@theottoolbox.com.
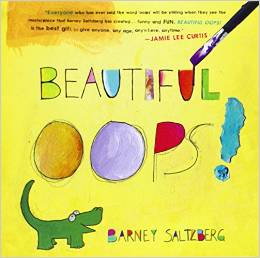
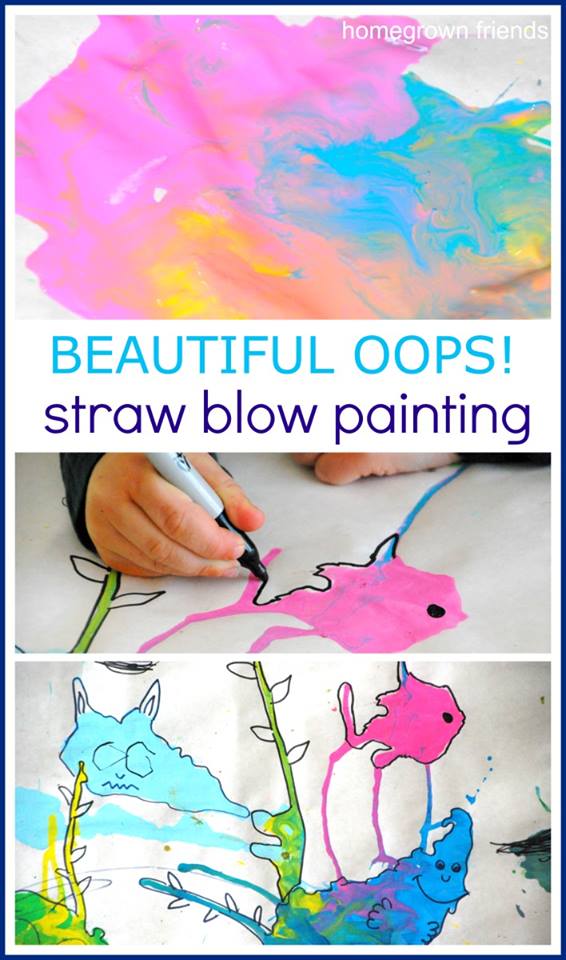
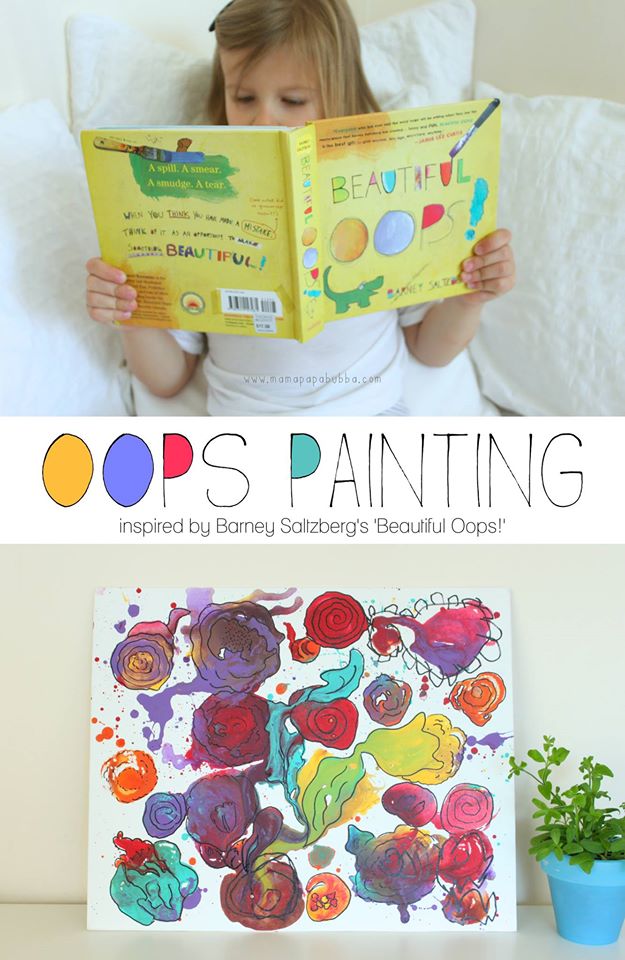
This “Beautiful Oops” activity is a preschool book craft focusing on fine motor skills with a concentration on awareness of differences, making mistakes, and not focusing on specific details, using a creative book activity based on the book, Beautiful Oops by Barney Saltzberg. If you are looking for hands-on book related activities, this one is a big hit!
Beautiful Oops Activity
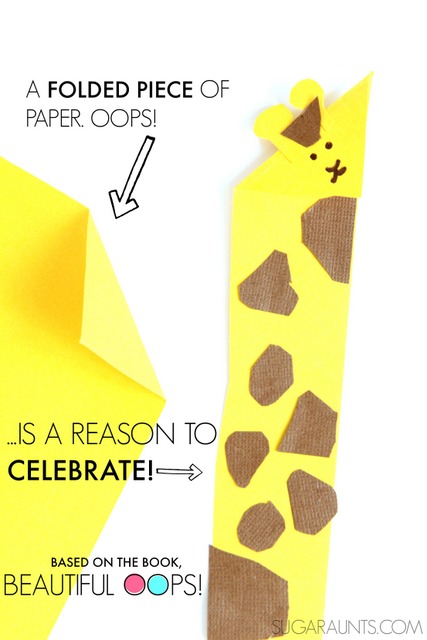
One part of social emotional development is the ability to “go with the flow”. Allowing ourselves to make mistakes and to adjust is a key part of maturity and a personality trait that can be difficult to teach unless given examples and practice. in this book activity, we read the book, Beautiful Oops! and created folded paper crafts using our mistakes.
This book craft is part of a series of activities that help kids build social and emotional skills such as:
acceptance
friendship
empathy
understanding
and other important skills involved with social emotional development.
Have you read the book, Beautiful Oops! by Barney Saltzberg? This is a book that we completely fell in love with. The creative process of art spills out over the pages as little (and big) “oops” messes, tears, and folds become art. While we do many crafts that are focused on an end product, process art is something we love in many creative projects!
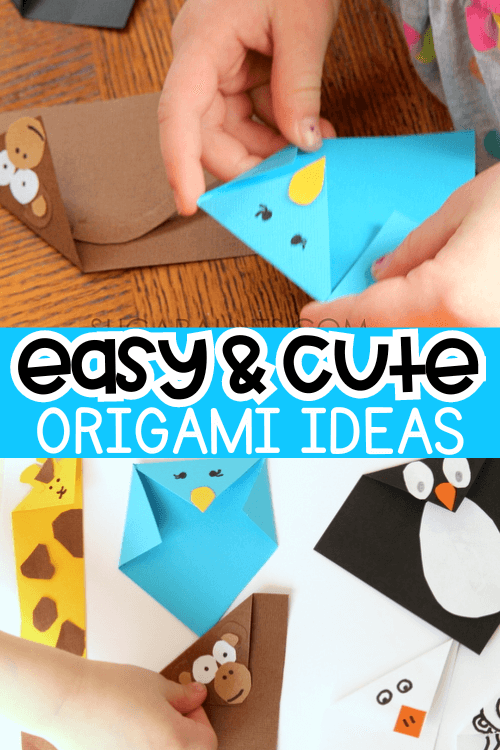
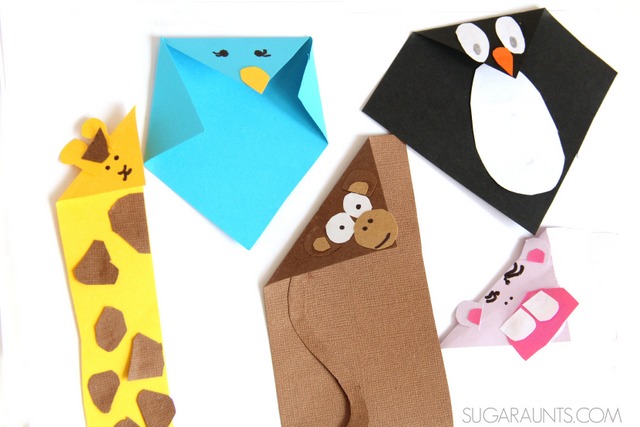
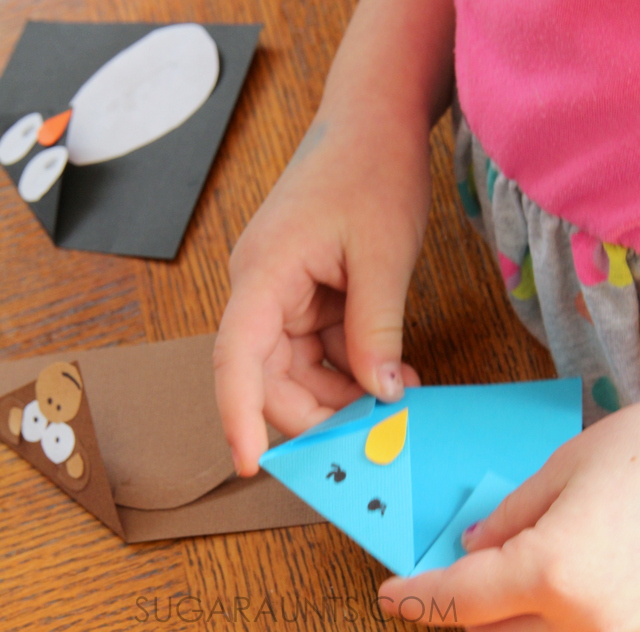
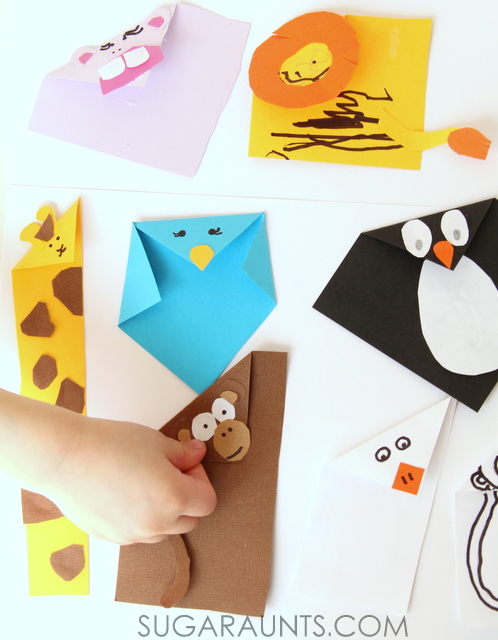
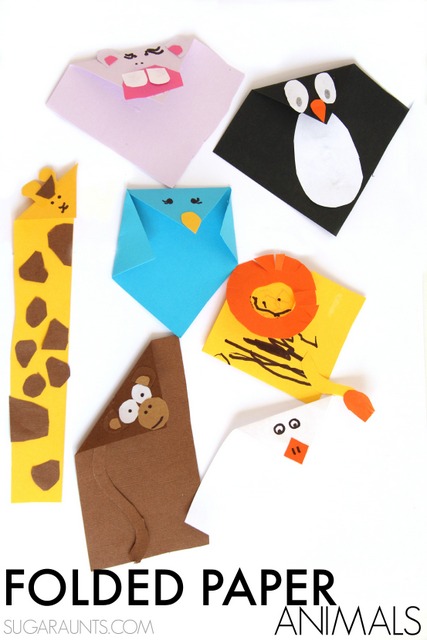
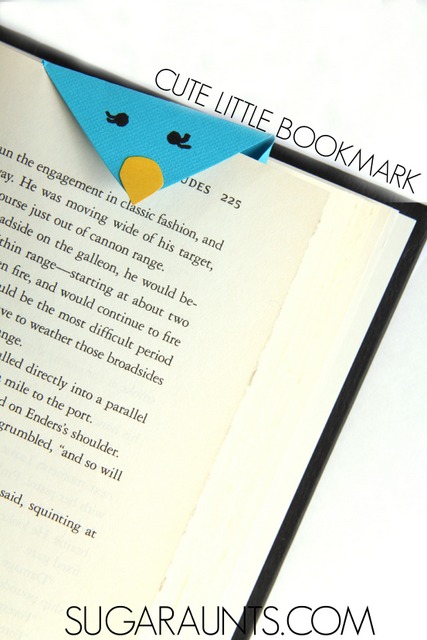
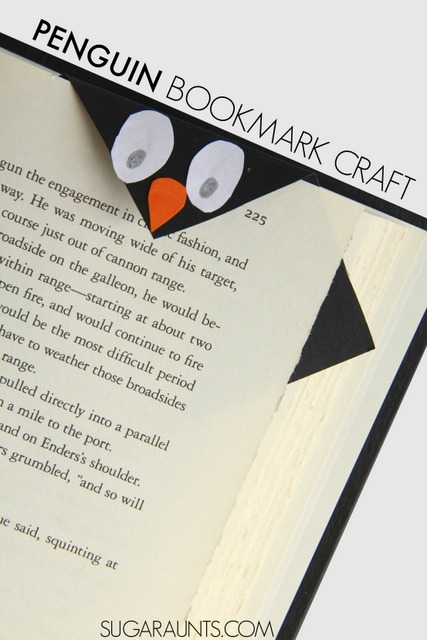
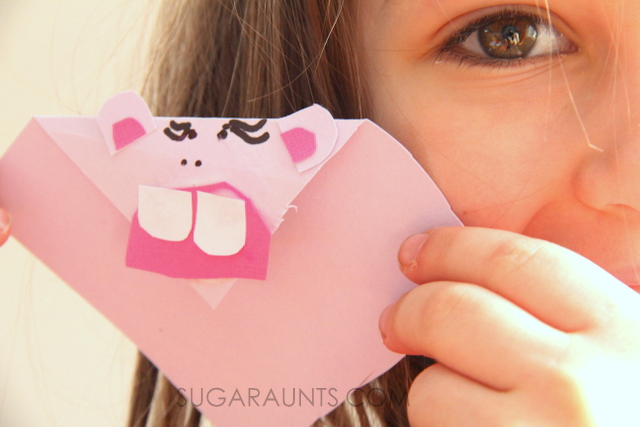
Beautiful Oops! is a process art guide book. As we read the book, one of our favorite pages was the folded corner Oops that became a reason to celebrate with a cute penguin. We decided to make folded paper animals and couldn’t stop creating!
paper folding activity
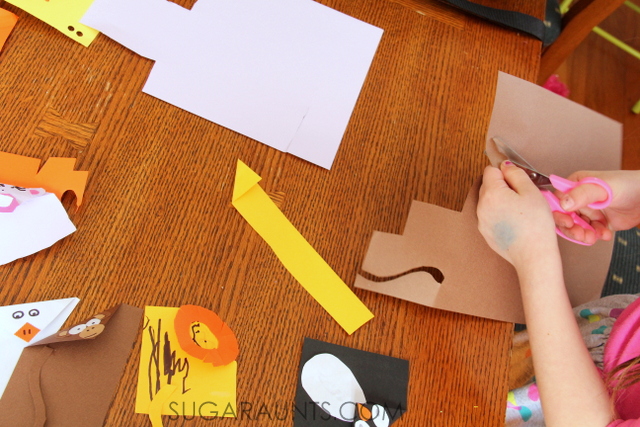
To make our folded paper animals, we started with just a few materials. The best thing about this paper folding activity is that there was no “right way” to do the craft. Each paper fold was part of the process art! Just like in the book, Beautiful Oops, any fold, cut, tear, or pasted paper was part of the process to create something beautiful. When an “oops” happened when cutting the paper or folding the paper, it was just part of the fun!
Gather a bunch of materials to make the paper folding activity:
Paper- scrap paper, construction paper, cardstock…whatever you have on hand
Scissors
Glue
Scraps of materials
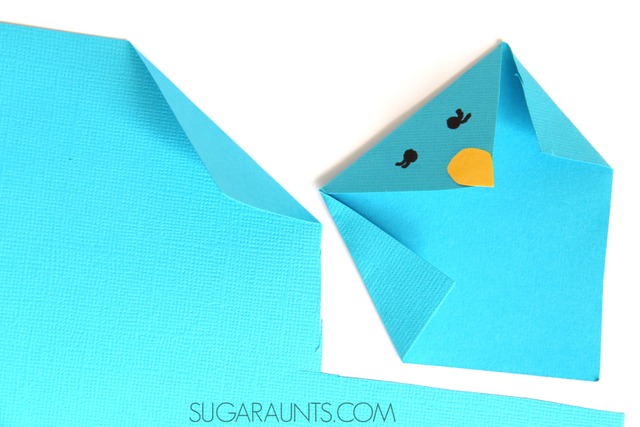
We started with a big pile of assorted cardstock, a few pair of scissors and some glue. We started with a fold on the corner of the paper and let our imaginations go!
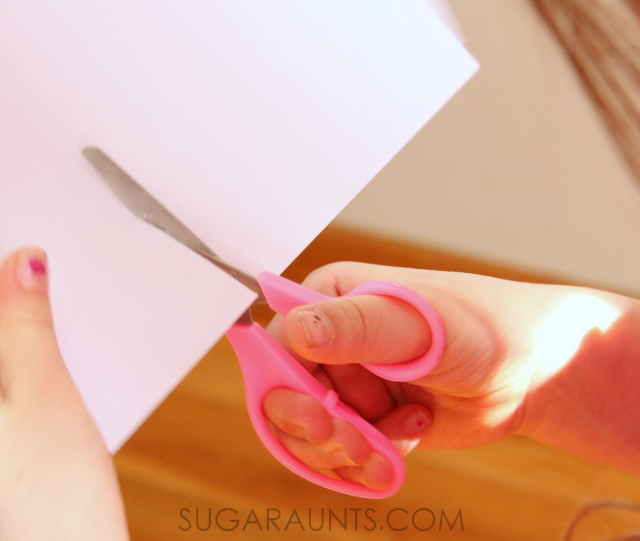
We cut…
…and cut some more…
…and folded…
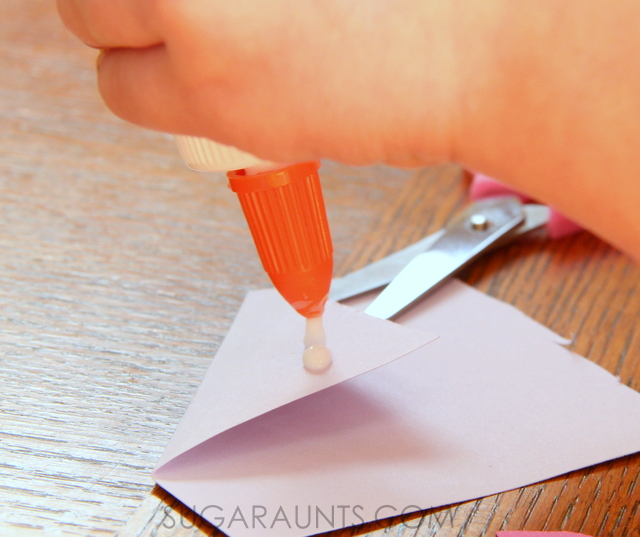
…and glued…
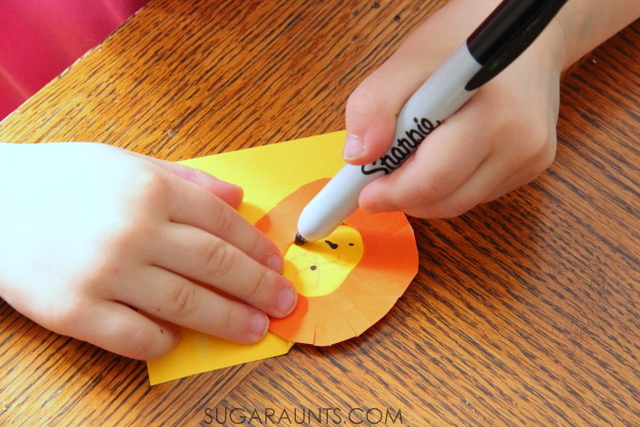
…and added details to our animal creatures.
We made a feeeew animals.
Folding paper Crafts
Use this craft to build fine motor skills! When kids fold paper, they work on a variety of fine motor skills. Click each link to read more about these specific skills and how they impact function.
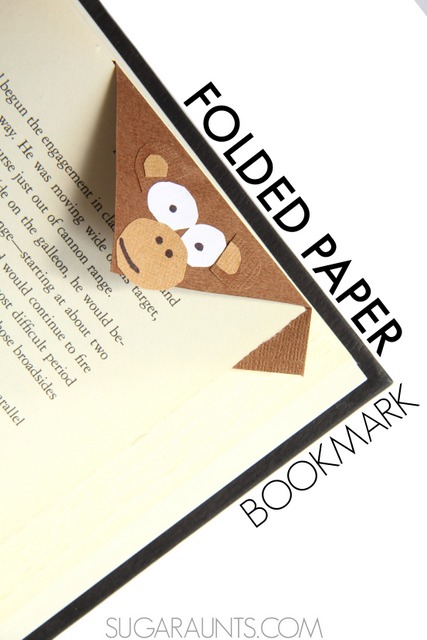
And then put our folded paper creatures to work holding pages in books!
We had a blast with this book and can’t stop making our oops’ beautiful! Looking for more activities and crafts based on Beautiful Oops!? Try these from the Preschool Book Club:
The easy origami paper folding ideas in this blog post are designed to support fine motor and visual motor skills with a single fold of the paper. While this is not the style of traditional origami crafts, the ability to fold the paper’s corner and then use the imagination to create an animal or creature is part of the fun!
In addition to the easy paper folding ideas we listed above, there are other easy origami ideas that can support these skills as well.
Here are some easy origami ideas that you can consider for your classroom:
Paper Airplane– An easy and classic origami project that students can have fun with. You can have a contest to see whose airplane flies the farthest. Use the paper airplane craft with other fine motor components like we did.
Paper Helicopter– We used this activity to work on finger strength and visual skills.
Paper Boat– Create simple paper boats. You can discuss concepts related to floating and buoyancy, making it an educational and creative activity.
Origami Frog– A fun and simple origami frog that can “jump” when you press down on it. This can be a great way to engage students in a quick and enjoyable project.
Origami Fortune Teller (Cootie Catcher)– Fold a fortune teller and let students write or draw their predictions or goals for the upcoming days or weeks. It’s a playful way to set positive intentions. We have a Fall cootie catcher template and a Spring cootie catcher template here on the website.
Origami Bookmark– Create colorful bookmarks with simple folds. Students can personalize them with drawings or quotes, making reading a bit more enjoyable. Here’s another bookmark craft you might like.
Origami Butterfly– Craft simple butterflies with vibrant colors. This can be a great way to discuss symmetry while creating beautiful decorations for the classroom.
Origami Heart– Fold paper hearts for Valentine’s Day or just to spread a bit of love. Students can write positive messages on the hearts. We used cardboard tubes to pinch into a folded heart. While this isn’t a form of origami, it’s an easy and cute paper folding craft.
Origami Fish– Make origami fish and discuss aquatic life or ocean conservation. You can create a collaborative underwater scene by combining the fish.
Origami Star– Craft easy paper stars and discuss their significance in different cultures. You can even string them together to create a festive garland.
Colleen Beck, OTR/L has been an occupational therapist since 2000, working in school-based, hand therapy, outpatient peds, EI, and SNF. Colleen created The OT Toolbox to inspire therapists, teachers, and parents with easy and fun tools to help children thrive. Read her story about going from an OT making $3/hour (after paying for kids’ childcare) to a full-time OT resource creator for millions of readers. Want to collaborate? Send an email to contact@theottoolbox.com.
Working on fine motor skills, visual perception, visual motor skills, sensory tolerance, handwriting, or scissor skills? Our Fine Motor Kits cover all of these areas and more.
Check out the seasonal Fine Motor Kits that kids love:
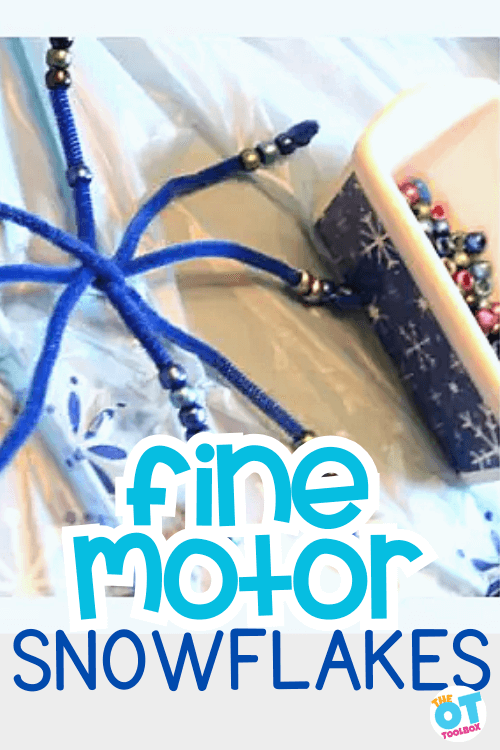
Having a snowflake party? Or maybe just doing a few snowflake activities in your therapy sessions or classroom and want to hit on fine motor skills with a winter theme? You’re in luck! We’ve got a fun pipe cleaner and bead snowflake activity along with a few snowflake crafts, pipe cleaner snowflakes, craft stick snowflakes, and more!
pipe cleaner and bead snowflakes
We’ll start off the snowflake activities with our favorite…pipe cleaner and bead snowflakes. This is one of the best fine motor activities during the winter months for several reasons: it uses items you likely have on hand, and you can target a variety of skills and needs with a single craft.
Eye-hand coordination– You can coordinate visual motor skills by asking the child to create symmetrical designs or copy patterns.
Making pipe cleaner and bead snowflakes can also be a great Indoor Recess Ideas for the winter months, too.
Materials:
To make the pipe cleaner and bead snowflakes, simply place your materials on a table.
Blue or white pipe cleaners
Beads in wintery colors: blues, greys, greens, and white
Then, start making the pipe cleaner bead snowflakes:
Twist pipe cleaners together to create an 8 sided snowflake.
Add beads to each “stem” of the snowflake.
When the beads have been added, bend the end of the pipe cleaner so the beads don’t fall off.
One day last week, us Aunts got together for some much-needed sister hang-out time, play time for the cousins, and a little “blog meeting”.
We had a snowflake party planned with a bunch of fun little ideas to do with the kids.
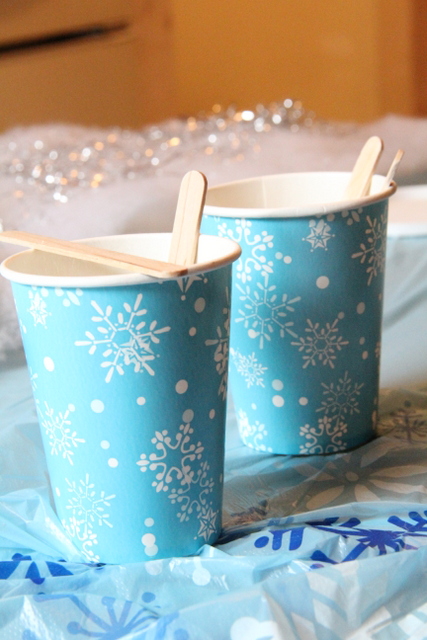
I mean, we found these snowflake cups big-time discounted after Christmas, and had to use them somehow, right??
((The babies had fun putting crafting popsicle sticks into one cup, and then one-by-one, putting them back into the other cup…sounds fun to me!))
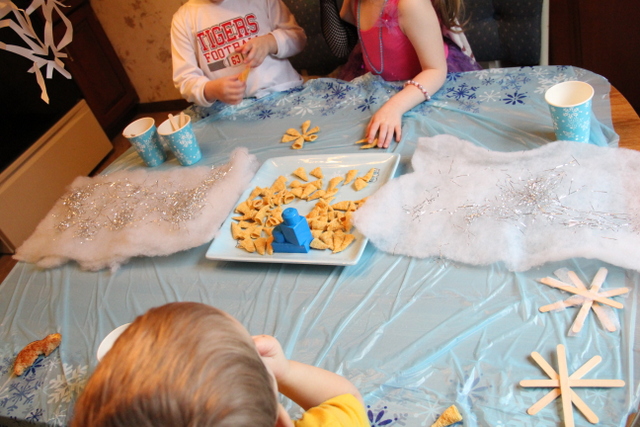
We set the table with some cotton batting and silver tinsel.
Blue Legos are optional.
A little helper thought it fit in with the blue theme pretty well 🙂
Snowflake Sensory Play
We already had a batch of fake snow made up. We added into the bag, foam snowflakes, glass gems, and glitter for fun Snowflake themed fine motor and sensory play!
We made snowflakes with pipe cleaners and beads. This is a great fine motor activity and SO much fun. My kids are always asking to make necklaces and bracelets with beads and pipe cleaners. So, they really loved this one.
Another snowflake craft…
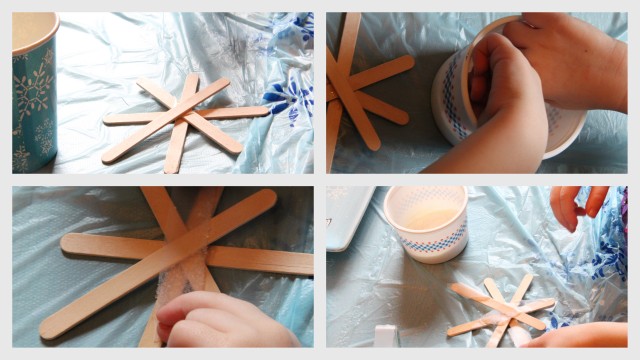
Glue crafting sticks together in a star shape and dip strips of Scotch tape into glitter. Press the tape down onto the sticks. Instant glittery and mess-free snowflake!
We also showed the kids how to fold and cut paper to make snowflakes. They loved cutting triangles and snips into the paper. And especially LOVED opening them up to see the pretty snowflake. They helped us hang the snowflakes and all of the crafts on the window.
There was a little break from the snowflake theme and party mode to take a Super hero break with dish towels for capes.
FUN STUFF! And so cute 🙂
Snowflake Snacks
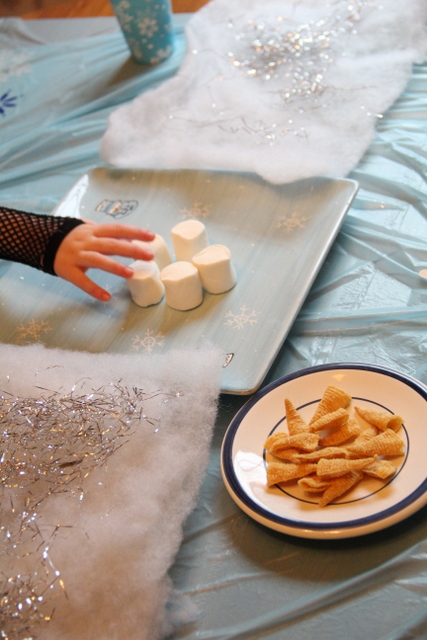
Snowflake snacks were marshmallows (they were snowballs of course 🙂
And bugles (Hats!)
Have you done any fun snowflake crafts or activities? We would love to hear about them 🙂
If you are hanging these pipe cleaner bead snowflakes on a window, you can use a suction cup hanger.
Colleen Beck, OTR/L has been an occupational therapist since 2000, working in school-based, hand therapy, outpatient peds, EI, and SNF. Colleen created The OT Toolbox to inspire therapists, teachers, and parents with easy and fun tools to help children thrive. Read her story about going from an OT making $3/hour (after paying for kids’ childcare) to a full-time OT resource creator for millions of readers. Want to collaborate? Send an email to contact@theottoolbox.com.
What if you had themed, NO-PREP activities designed to collect data and can help kids build essential fine motor skills?
Take back your time and start the year off with a bang with these done-for-you fine motor plans to help kids form stronger hands with our Winter Fine Motor Kit. This print-and-go winter fine motor kit includes no-prep fine motor activities to help kids develop functional grasp, dexterity, strength, and endurance. Use fun, winter-themed, fine motor activities so you can help children develop strong fine motor skills in a digital world.
The Winter Fine Motor Kit includes reproducible activity pages include: pencil control strips, scissor skills strips, simple and complex cutting shapes, lacing cards, toothpick precision art, crumble hand strengthening crafts, memory cards, coloring activities, and so much more.
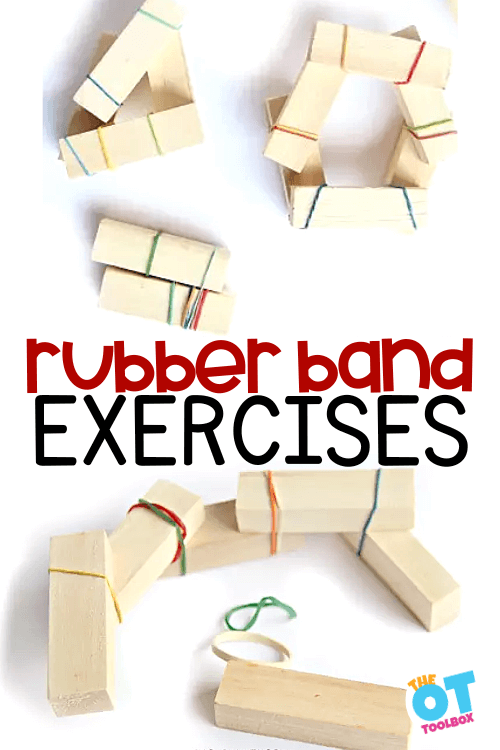
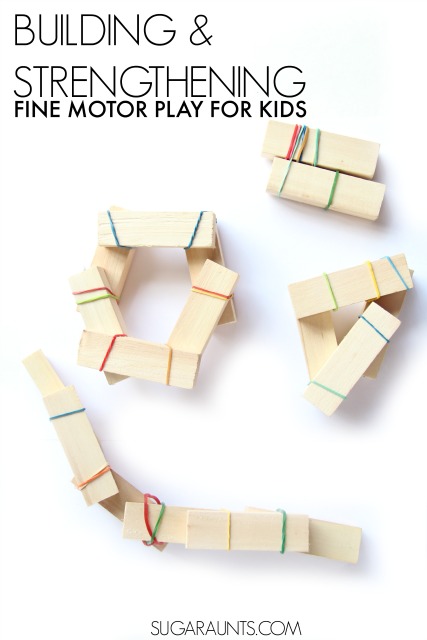
Kids and occupational therapists alike will love this hand strengthening activity for kids. It’s a powerful way to build finger strength and increase grip strength using everyday materials. This fine motor activity is an old one…it’s one that we came up with years ago here on the website. It’s fun to look back at this super easy rubber band activity because the hand strengthening activity is not just fun, but it’s a great therapy tool, too.
Rubber Band Activity
This rubber band activity is a no-prep activity that you can pull out on a rainy day, while waiting at a restaurant, or when the kids are itching for something different to do. This building activity is a fun STEM (Science, Technology, Engineering, & Math) activity that can be modified to meet the needs and interests of your kiddo.
I pulled this rubber band activity out one day when a little niece and nephew were over, and he loved building with something that was a little different than typical building blocks.
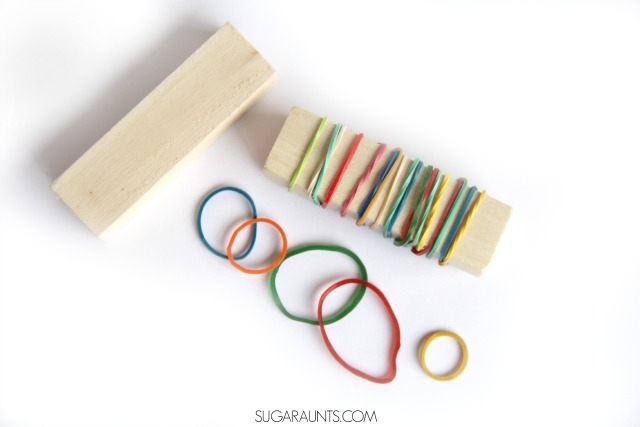
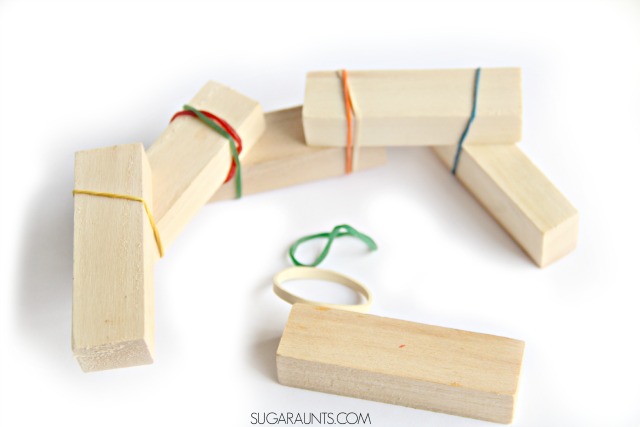
A handful of rubber bands in different sizes. And that’s it!
How to set up this rubber band activity:
Creating a strengthening play activity or an opportunity for data collection using a specific number of repetitions with a rubber band exercise program is easy with just this one activity.
You can create an open-ended play activity by simply offering a box of Jenga blocks and a bag of rubber bands and asking the child to build anything. This provides an opportunity for creative expression and problem solving.
Or, you can set up an exercise program using a specific number of rubber bands and blocks and asking the child to complete certain exercises. (Read about these at the bottom of the blog post).
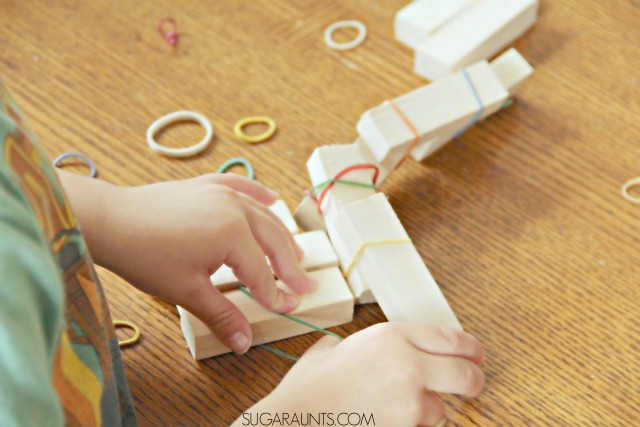
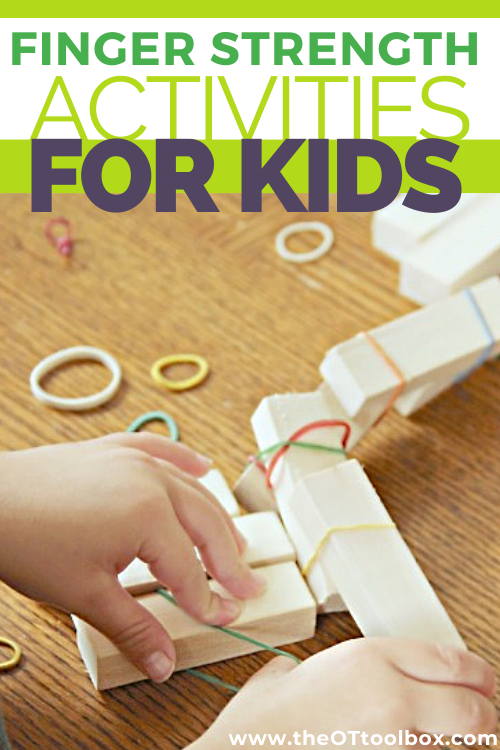
Show your kids how to wrap the rubber bands around the wooden blocks in different ways. Let them get creative with building and creating.
Finger Strength
My little nephew was so excited when I showed him this. Cool Aunt status! He sat and built creations for a long time. And watching those little hands building and working was fun for me! Manipulating the rubber bands is such a fine motor workout for kids. Intrinsic hand muscles are needed for so many functional tasks.
Hand and Grip Strength
When kids have a functional finger strength levels, they are able to write and color with endurance. They are able to manipulate small items. Finger strength looks like the ability to open and close plastic baggies and other meal containers at lunch time in the school lunch room. It looks like the ability to manipulate clothing fasteners like buttons, snaps, and even the buckle on a car seat.
Finger strength can be tested to see if grip and pinch strength are at typical levels for the child’s age, but if you are noticing that activities the child should be accomplishing like managing items is hard, you can look into hand strengthening and grip strength exercises in more depth.
More signs of hand weakness include:
Kids with weakness in their hands may have difficulty with coloring and complain that it hurts to color large areas.
You might see them color or write using their whole arm instead of just their wrist and fingers.
Hand weakness may be indicated by difficulty cutting a smooth line with scissors. Rather, you’ll see jagged snips.
Kids with hand weakness might have trouble managing a zipper or pushing a button through a button hole.
Weakness of the hand is indicated by a poor pencil grasp. Kids with intrinsic muscle weakness will write with a closed thumb web space and will use their thumb to stabilize the pencil.
And then, you’ll see poor hand writing.
Hand weakness is indicated by light pencil pressure that is almost illegible, or very light coloring.
Difficulty with manipulating small items and using in-hand manipulation in managing small parts.
Trouble with grasping tools like utensils. scissors, scoops, tweezers, and eye droppers.
Difficulty manipulating and grasping small toys.
Grip exercises for kIds
We know that kids primary occupation is play, right? Kids learn and develop skills through play! So when it comes to strengthening hands, improving grip strength, forearm strength, and pinch strength, the key is to use games and play!
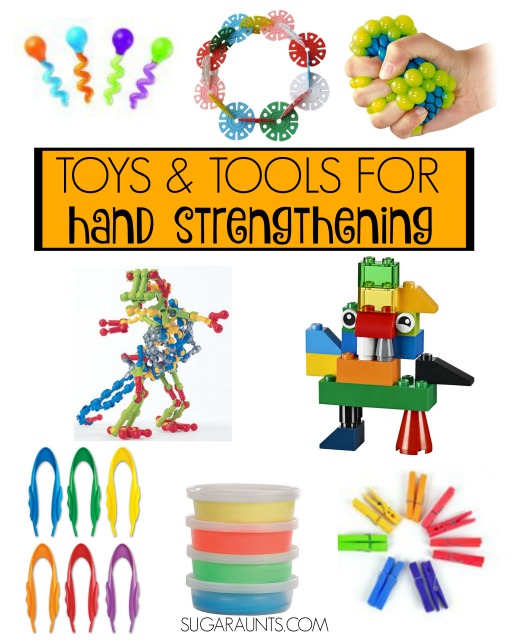
Some other ways that are perfect for hand strengthening are toys and games that are typically recommended by Occupational Therapists. These are some of my favorites:
Toys and Ideas for Working on Hand Strengthening for Kids
Squeezing water bottles to water plants.
Therapy Putty or play dough. Roll the dough into small balls.
Tear paper.
Crumble small squares of tissue paper.
Cut cardstock.
clothes pins to match colors in games and learning activities
Squirt toys like these Munchkin Five Sea Squirts to aim at targets in the bathtub, sink, or plastic bins.
Small blocks such as LEGOs are perfect for strengthening the intrinsic muscles, with their resistance needed to push them together and pull them apart. The position hands need to be in to work LEGOS is perfect for strengthening the muscles in the hand.
Squeeze a hole punch to create lines of holes along an edge of paper.
Eye Droppers and Tweezers are a fun way to explore sensory play while working on fine motor skills.
A squeeze toy like this Squishy Mesh Ball is great for hand strengthening and a fun fidget too.
More grip strength activities that you will enjoy:
The rubber band hand exercises in this activity post are play-based. This means that you can set up an open-ended activity in an occupational therapy session by offering a tray of blocks and rubber bands. You can ask the student or OT client to just build whatever comes to mind.
Ask the child to create structures, build creative items like animals, figures, or anything that comes to their mind.
2. You could also challenge them to create a structure with the blocks and rubber bands using a certain number of items, like 10 building blocks and 10 rubber bands. Ask them how high they can build a structure or if they can build a structure that doesn’t fall over with that number of materials.
Both of these hand exercises are play-based and open-ended, but they are great fine motor STEM activities.
To make the rubber band hand exercises more quantitative, ask the user to use a specific number of rubber bands and blocks. Ask them to wrap 3 rubber bands around each block. When you ask a student to complete this, they are stretching out the extensor muscles of the hands to extend the rubber band around the block.
And, when they pinch and pull the rubber band, the flexors and muscles of the palm of the hand, or the intrinsic muscles, are active. These facilitate strong and refined arch development for endurance in fine motor tasks.
You can grade these rubber band strength exercises in several ways.
Grade the activity harder, or make the exercise more difficult by:
Increasing the number of rubber bands (increase the repetitions)
Increase the number of blocks that the user needs to wrap the rubber bands around (increase the pull and resistance of the rubber bands)
Increase the number of blocks that need to be wrapped with rubber bands (increase the repetitions)
Decrease the size of the rubber band or increase the size of the block (increase the resistance of the band on the muscles)
You can grade the activity down, or make it easier for other users by:
Decreasing the number of rubber bands (lower the number of repetitions)
Decrease the number of blocks that the user needs to wrap the rubber bands around (decrease the pull and resistance of the rubber bands)
Decrease the number of blocks that need to be wrapped with rubber bands (lower the repetitions)
Increase the size of the rubber band or decrease the size of the block (decrease the resistance of the band on the muscles)
Note that when you grade the activity down, you can also increase the overall number of repetitions, which can be beneficial for improving strength and endurance. In this case, you should note the number of repetitions that are completed, because doing the exercises each day with increasing repetitions builds muscle memory and endurance.
These rubber band exercise ideas are similar to a hand gripper workout, only they are play-based. Both offer resistance to the extrinsic flexors and extensors as well as intrinsic muscles.
Hand Exercises with Rubber Bands
Keeping in mind the ability to grade the exercises up or down depending on the unique needs of the individual, you can run through specific hand exercises with rubber bands. Include these rubber hand strengthening exercises in your documentation:
Wrap one rubber band around a block twice (increase or decrease the number of bands)
Wrap a rubber bad around the block lengthwise.
Wrap a rubber band around two blocks to connect the blocks.
Take the block creations apart when completed.
All of these fine motor pinch and grip strength exercises using rubber bands are a hit with kids and occupational therapy providers. You’ll find more ideas in our fine motor kits.
Working on fine motor skills, visual perception, visual motor skills, sensory tolerance, handwriting, or scissor skills? Our Fine Motor Kits cover all of these areas and more.
Check out the seasonal Fine Motor Kits that kids love:
Colleen Beck, OTR/L has been an occupational therapist since 2000, working in school-based, hand therapy, outpatient peds, EI, and SNF. Colleen created The OT Toolbox to inspire therapists, teachers, and parents with easy and fun tools to help children thrive. Read her story about going from an OT making $3/hour (after paying for kids’ childcare) to a full-time OT resource creator for millions of readers. Want to collaborate? Send an email to contact@theottoolbox.com.
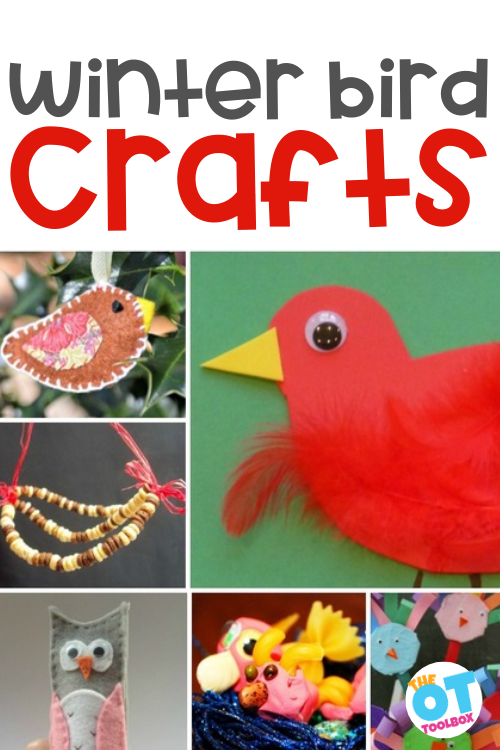
These winter bird crafts are fun winter crafts that support fine motor skills with all things winter birds. We love these as preschool bird crafts because they support skill development, are are great for the winter months when you see cardinals, blue jays, and even a robin or two as winter comes to an end. Kids love these bird ideas, and you will to!
Winter Bird Crafts
Occupational therapy practitioners love crafts for kids because of the skill development that happens with cutting, gluing, and creating. It’s easy to foster skill achievement by adapting or modifying a craft while supporting finger and hand strength, tactile sensory input, scissor skills, and more.
Some of the skills that you can target using our bird craft ideas support occupational therapy goal areas, including:
Here are more winter fine motor activities to build hand strength, dexterity, motor coordination skills, and more.
Bird Ideas for Therapy
Winter Birds of a feather craft together. These bird crafts and activities are sure to keep the kids having fun this winter. We loved this week’s round up of features and added a few extra bird ideas for winter bird fun and play.
Let’s get to the bird craft ideas!
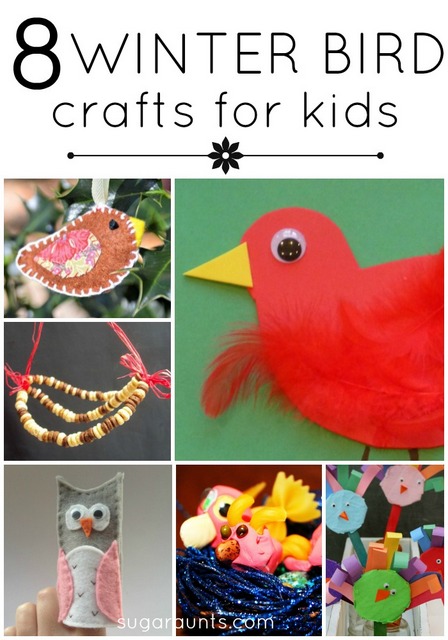
Blue Jay Painting activity- One of our favorite bird crafts is our Blue Jay Craft. This is a great fine motor strength activity because we use a cotton swab to paint in details of the blue jay’s feathers. OT practitioners love to use cotton swab painting because it’s a powerful hand strengthening activity that supports arch development.
Robin craft- One great fine motor activity is our robin egg carton craft. You might see robins throughout the winter and as winter months come to an end. This robin activity is nice because it’s a fun pincer grasp activity for kids.
Owl Crafts for Kids- We have some great owl activities here on the website, and these winter birds offer crafts, activities, and games that kids love. Some activities include our free Owl Directed Drawing worksheet and owl brain breaks. These Owl Finger Puppet from Crafts On Sea are another great addition to an owl theme.
Fine Motor Angry Birds- Building coordination and hand strength is fun with an Angry Birds theme. WE love how Therapy Fun Zone made Catapult Birds using craft pom poms and bird flashcards. I LOVE this activity for fine motor play!
Felt Bird Craft- We love this Felt Bird Ornament craft from Red Ted Art. While the sewing craft is great for older kids, you can grade the activity down by cutting pieces of felt and gluing the pieces together.
Bird Puppets- Making puppets with kids is a nice fine motor craft for preschoolers. These Silly Bird Puppets from Housing a Forest hit the mark.
Cheerio Bird Feeder- This winter bird feeder craft is perfect for the winter months. Plus, when kids thread cereal loops onto a pipe cleaner, they are building skills in bilateral coordination, precision, and eye-hand coordination. These Cheerio Bird Feeders from Happy Hooligans are an easy bird craft for kids.
Cardinal Craft- Cardinals and red birds are often seen during the winter months. This Redbird Craft from Craftulate is an easy winter craft for children working on scissor skills.
Winter Bird Crafts and Activities
What other ways can you create crafts with winter birds? These ideas can hopefully get you started!
For more winter fun, check out:
What if you had themed, NO-PREP activities designed to collect data and can help kids build essential fine motor skills?
Take back your time and start the year off with a bang with these done-for-you fine motor plans to help kids form stronger hands with our Winter Fine Motor Kit. This print-and-go winter fine motor kit includes no-prep fine motor activities to help kids develop functional grasp, dexterity, strength, and endurance. Use fun, winter-themed, fine motor activities so you can help children develop strong fine motor skills in a digital world.
The Winter Fine Motor Kit includes reproducible activity pages include: pencil control strips, scissor skills strips, simple and complex cutting shapes, lacing cards, toothpick precision art, crumble hand strengthening crafts, memory cards, coloring activities, and so much more.
Colleen Beck, OTR/L has been an occupational therapist since 2000, working in school-based, hand therapy, outpatient peds, EI, and SNF. Colleen created The OT Toolbox to inspire therapists, teachers, and parents with easy and fun tools to help children thrive. Read her story about going from an OT making $3/hour (after paying for kids’ childcare) to a full-time OT resource creator for millions of readers. Want to collaborate? Send an email to contact@theottoolbox.com.
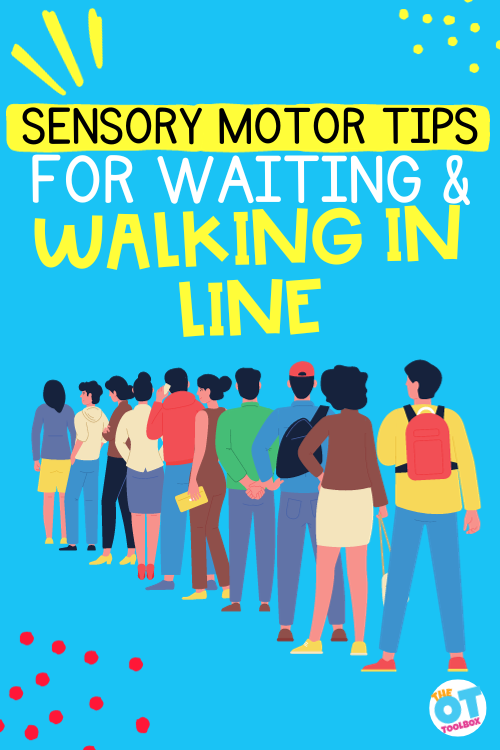
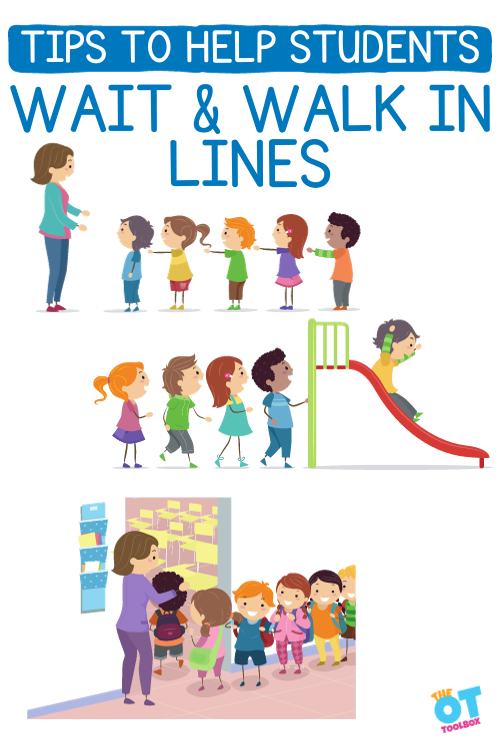
Learning to walk in line may not be easy for some children. There is a lot that goes into students standing in line and walking in a line from classroom to classroom. School based occupational therapy plays a role in this classroom task. Their lack of balance, gross motor coordination, awareness of the body in space, and lack of impulse control can impact their ability to walk in a line with their peers. In this blog post, we’re covering tips and strategies to support students in standing in lines and walking in line in the school environment…basically supporting sensory motor skills for body awareness and patience, which is a life skill needed throughout the community.
Teaching Kids to Stand in Line
Being able to walk in line and stand in line is a part of a child’s educational day, and requires sensory motor, physical, cognitive, and social development. The trouble is that this skill is also impacted by patience, attention, and executive functioning skills, which are far from developed in the school age.
Occupational therapy practitioners can help a child build their skills in this area by working on some foundational skills that will facilitate more complex motor skills and behaviors later on that are essential for success in various aspects of daily life.
We wait in line at the grocery store, at the library, and at the post office. We wait at stop lights and when pulling out onto a highway. We stand in crowds and take our turn each day in the community. This is a life skill that begins in a small group in the school environment as the class moves from activity to activity.
Many school-related activities, such as lining up, walking in hallways, and participating in organized group activities, require the ability to walk in line. This skill is not only important for walking at school, but walking in public places such as family or school outings, on field trips, or other group activities.
Developing this skill in OT can contribute to a smoother transition to school and other social environments.
So, where do you start when teaching a child to walk in line? First, let’s look at the foundational skills necessary for walking in a line and standing in a line at school:
Body Control and Spatial Awareness for Standing in lines
One component of standing in lines that impacts the child that bumps into others without realizing it is the proprioceptive sense. This sensory system allows us to recognize where our body is in space in relationship to other people or objects. It allows us to know how much and how forcefully to move our body.
We can build awareness of body control and spatial awareness with some specific strategies (listed below).
Walking in line requires the maintenance of an upright posture, control over body movements, and understanding where your body is in space, and awareness of visual spatial relationships.
This body awareness and control are essential for various activities, including walking in line, playing with a group of friends, participating in a group activity, engaging in recess, and participating in P.E. and sports.
Mirror play – Use a full-length mirror to encourage children to watch their body movements and make adjustments to stay in line. Also check out our self-awareness games for ideas to support an awareness of how the child’s body moves.
Body poses – Practice various body poses and positions to enhance body and spatial awareness. This can include pretending to be statues or animals and positioning themselves alongside, behind, or in front of objects. You can do this in a small group, too. One way to facilitate an awareness of space and body awareness is by using partner yoga poses as a tool.
Simon Says – Use this simple game with specific movements or activities that involve starting and stopping. For example, use verbal commands like, “Simon says to take three steps forward” or “Simon says stop” or “Simon says position yourself behind the box.” Targeting Simon Says commands to gross motor movements is a great way to work on this.
Balloon buddy -Pretend to give each child an imaginary balloon buddy that is tied to their wrist. They must hold onto their balloon string while walking in line. This will help keep them from getting too close to the child in front of them.
Balance and Coordination for Walking in Lines
Walking in line requires balance and coordination. The body must maintain balance while walking a straight path and be able to coordinate arms and legs to walk smoothly and rhythmically to follow the line as it shifts and changes direction.
Balance and coordination are needed for various complex motor actions that are needed throughout the day and are essential to avoid any collisions with others and objects.
We can facilitate dynamic balance with fun occupational therapy activities. Some activities that can help to work on balance and coordination:
Obstacle courses- OT practitioners LOVE obstacle courses! Use an obstacle course with various elements to promote gross motor balance and coordination that require children to navigate different surfaces, step over objects, and maintain balance while doing so. Consider walking in a straight line, stepping over objects of different heights, walking on a balance beam, or weaving through a set of cones.
Balance beams- You can use indoor balance beams or outdoor balance beams to support balance skills. Use a wide balance beam initially and then transition to a narrow balance beam to advance a child’s skill. Have children walk heel to toe, sidestep, or even backward. Place cones on the left and right sides of the beam and have children squat on the beam to pick them up as they advance to them and stack them within their hands.
Balance exercises- Use basic balance exercises to stand on one foot, stand on a rocker board or wiggle cushion, and walk with bean bags on their head or shoulders without dropping as all of these will help enhance overall stability and coordination.
Motor Planning Skills needed for Walking in Lines
Walking in line requires motor planning as the child plans, sequences, and executes the steps needed to walk in line in the correct order and at the correct time. This skill is necessary as the child navigates their way in line and if the line takes a turn, the child needs to plan and execute the turn smoothly.
There are fun and motivating ways to use play to support motor planning skills needed for standing in lines and walking in lines.
Activities to build their motor planning skills needed for walking in lines and standing in lines:
Follow the leader– Simply designate a leader of the group and let children take turns leading the walking line. The leader can walk in different ways like tiptoeing, giant steps, high knee marching, or heel walking.
Obstacle course with hand use- This is a great activity for teaching students to use coordination and balance to walk in line while holding school supplies. Simply create an obstacle in which a child must navigate while carrying objects either one-handed or two-handed. This will help them to do so when they are in school or in a public setting.
Mirror reflection- This game is similar to mirror play activity described above, but for this activity, we are working on motor planning skills by asking two children pair up and form a line standing side by side in front of a full-length mirror. Each child takes turns by mimicking the movements of the paired person by only looking in the mirror. Many movements can be added to make the activity more or less challenging.
Visual Attention Needed for Walking in a Line
Visual attention is needed when walking in line as the child must keep up with the line and keep pace with the person in front of them. Attention is needed for the student to be aware of any change in direction, needed shift in the line, and for stopping. We’ve probably all seen the line of students that bump into one another down the line after one student stops suddenly. Or the student that misses a turn in the hallway and keeps walking straight, only to lead the rest of the class down the wrong hall.
Activities to help build the visual attention needed to walk in line:
Scavenger hunt- Take children on a scavenger hunt indoors or outdoors with a list of items to look for while walking. This will promote visual attention and observation skills necessary for walking in line. You can try ideas like an outdoor scavenger hunt, Easter egg color hunt, or I Spy activities.
Storytime hunt- Much like a scavenger hunt, a story version is a visual memory task where children read or listen to a story and then go off and try to find elements of the story they just read. They can read the book and then go on a Storytime stroll looking for elements identified in the book. For example, the book is about the zoo, they can look for plastic zoo animals or pictures of zoo animals.
Follow the leader- Have children imitate walking movements while varying the speed, direction, and style of walking to keep their visual interest and challenge their skill. You can target a variety of other skills with follow the leader, too.
Colored directions of the wall or floor- One tool that can be added to the school hallways are visual cues to support needs in following the classroom. These would be used along paths that are used each day. These can help children who have difficulty with visual attention to stay focused on task by visually following or locating colorful visual markers. Consider shapes, letters, numbers, dots, arrows, or even footprints to help them stay in line and proceed in transition. A simple visual marker on the person’s back in front of them can give them just enough visual focus to walk in line successfully. Other visual schedules or various types of prompts can be used in this way, too.
Impulse Control and Waiting in Lines
Walking in line requires impulse control and the ability to adhere to a set pattern or direction. It is needed when the line must start and stop as it navigates its way through a busy environment. Impulse control is valuable for self-regulation and behavioral control that are needed throughout the day in a variety of settings including the ability to walk in line for transitions.
Luckily occupational therapy practitioners use impulse control strategies to support functional skills like waiting in lines. Here are some more activities to work on building impulse control:
Red Light, Green Light game- Have children play the stop-and-go game while walking. Use a fun hand signal or verbal command for children to stop or freeze in place like a statue. Then give them another signal to start walking again.
Musical stop-and-go game– Another form of Red Light, Green Light, but with the starting and stopping of music to freeze in place and then proceed when the music begins again all while walking in line around the room. This game uses auditory processing, which is needed for listening to directions during a multisensory task like moving from one place in the school building to another.
Self-Assessment- Use these impulse control worksheets for self-monitoring how a child walked down a hallway and support them in creating goals for themselves for the next time the class moves together as a group.
Social Skills for Walking in a Line at School
Walking in line requires some form of social skills whether it be by simply participating in the pattern with others or by participating in line activities that facilitate walking in line together successfully.
Social skills need honing to be able to engage successfully in school outings, field trips, or other group activities.
Occupational therapy practitioners use many social skills activities to support social emotional learning. Here are some activities that can help to build social skills needed for walking in a line and patience in group setting:
Games while walking- Simply incorporate well-known group games like Follow the Leader or Mirror, Mirror, Tip Toe walking, or other simple tasks to encourage simple social interaction while walking in line. These games can promote turn-taking and cooperation.
Group walking- It is simply the practice of walking in line as a group. This encourages interaction, cooperation, and turn-taking. Try walking along a masking tape line on the floor.
Peer modeling– This is a highly effective tool for younger children as you think about pairing them with a peer who excels at the skill of walking in line. Peer modeling can be a high motivator for younger children.
Following Instructions and Auditory Processing for Walking in a Line
In the school environment, a student needs to listen to instructions from the teacher about where the class is going and then follow the directions. Sometimes it might be that the class has only 2 minutes to make it to music class. Or maybe they need to be very quiet as they walk by the third grade hallway because students are taking a test.
Listening and responding to specific instructions to walk in line, maintain a certain pace, change direction, or stop is needed at school. Being able to follow these verbal directions is a highly important skill in both academic and everyday settings.
These are just some examples of how direction following and auditory processing skills are used when walking in a hallway as a class. This transfers to the real world every day when it comes to safety in the community.
Simon Says- Playing games like Simon Says will add an element of listening and following directions while following body commands. We have a Simon Says Commands PDF where the directions can be cut out and glued to craft sticks for a gross motor game.
Blindfold Group Game- This game is similar to Simon Says, only each child is blindfolded and they must hold onto a rope or other lengthy item and maintain the line as they not only follow the rope but navigate a course by listening and following the leaders verbal instructions rather than using their sight.
Tips for Teaching Students to Walk in a Line
Frankly, helping any child to develop the skill of walking in line is an important part of their overall motor development. As children learn this important skill, sometimes they need a few helpful tips to move them along successfully and to feel confident in their skills.
Take a peek at these twelve quick tips for walking in line as a child builds their skill in this area:
Tape a line on the floor as both a visual and physical guide for children who require additional support while walking in line. Encouraging children to concentrate on the line helps maintain visual focus in proximity, which minimizes potential distractions from distant stimuli that can be challenging for some children.
2. Have children physically check that they are an arm’s length apart from the person in front of them by extending their arms fully in front of themselves. Another option could be for them to create a personal bubble, or “bubble zone” so as not to pop their bubble by staying the proper distance from those around them. Simply knowing how close or far the body is from surrounding objects, people, or obstacles is an important aspect of spatial awareness to avoid collisions and assist with navigating through spaces.
3. Have children take on the roles of either the leader (engine) or the last person (caboose) in the line, instead of placing them in the middle, which may not be conducive or beneficial for their support. Assigning them these positions not only provides a sense of purpose and importance within the line but also enhances motivation for learning.
4. Minimize the amount of time spent standing vs. walking in line, particularly in crowded areas like hallways. When children are left standing, they may resort to less productive activities to occupy themselves. Explore ways to engage children during wait times in the last section of this post.
5. Having a pair of busy hands is important for some children as they often find less constructive or favorable behaviors to occupy their hands resulting in the touching of other children or objects. To address this issue, consider offering activities that engage their hands while walking, such as interlocking their fingers, pressing their palms together, crossing their arms across their chest, or putting their hands in their front or back pockets.
6. Be precise in the transition time or limit the number of transition times that are needed between activities so as not to be idle too long in one place. This can enhance the success of a line walk.
7. Consider having children transition in smaller lines either before or after the main crowds. This approach helps limit unnecessary distractions and overcrowding anxieties, fostering greater success with line walking as they gain confidence and skill.
8. Have children carry or transport objects while walking in line. Provide them with a two-handed object like a cart or several books or a bag/backpack to carry. This task of carrying an object adds a sense of purpose and introducing additional sensory input. This can be particularly helpful for children who benefit from proprioceptive input for self-regulation.
9. Consider the caboose position for those children who find stairs more difficult to navigate to prevent accidental bumping. Ensure they hold the handrail going up and down the stairs to increase safety and limit speed.
10. Provide verbal warnings to children who need a cue for uneven terrain ahead such as elevated surfaces, grassy areas, stairs, doorways, curbs, holes in the ground or pavement, etc. This is especially needed for times off campus or in unfamiliar locations. Offer a hand to hold to provide better stabilization and balance as they navigate these areas while walking in line with others.
One important tip is to practice, demonstrate, provide verbal cues or visual aids, and give positive reinforcement. It might be too much to expect a classroom full of kindergarten students to come into the school setting and immediately be able to walk in a line in the hallways. Frequent praise or acknowledgment of each small step toward progress will motivate and boost a child’s confidence as they learn to be like the bigger kids in the school building.
Firedrills in Schools
Fire drills or bells are NOT the time to think about walking in line, simply take the hands of those requiring assistance or establish a reliable peer-partner system for a safe and efficient evacuation, ensuring the well-being of all individuals exiting the building!
Sensory Strategies for Walking in Line at School
Ultimately, children will consistently encounter situations where they will be expected to wait in line and it’s not a simple task. Whether waiting in line at school during transitions or waiting in line at the store checkout with mom and dad, this can be challenging.
Because there are so many sensory components that impact direction following, body awareness, and motor planning needed for walking in lines or waiting in lines at school, sensory strategies can be a huge support.
Children will often seek various activities to occupy themselves during these times, and occasionally, their choices are not appropriate.
Try employing these tips to assist them in cultivating a sense of calmness while waiting as needed:
Always carry a hand fidget in your bag when standing in line. This provides a useful option for children to stand or sit patiently, and it might even be beneficial for you as well! Explore items like pop-its, squeeze balls, tangles, bendies, spinners, or stretchies. These keychain fidgets are a powerful strategy for some kiddos!
Teach kids to give themselves heavy work through the hands. Have children push their hands together by placing their palms flat against one another and pushing for the count of 10. Repeat as often as needed.
If there’s a nearby wall, encourage children to do wall push-ups. Instruct them to place their hands flat on the wall, shoulder-width apart, and move their bodies towards the wall by bending their elbows while keeping their gaze fixed on the wall. Guide them to perform wall push-ups slowly, challenging them to see how close they can get their nose to the wall without touching it. This activity provides a nearby focal point, helping them avoid distractions by keeping their focus in close proximity.
If children tend to touch everything while waiting in line, encourage them to practice finger squeezes. Begin with squeezing the nail of their thumb, then progress along each finger until reaching the palm. Continue this sequence with the pointer finger, middle finger, ring finger, and pinky finger. Then, switch to the other hand and repeat the exercise.
Have children star stretch and then cross their arms and legs to give themselves a full body hug for the count of 10. Repeat as often as needed.
Do wall-sits. If there’s a wall or another stationary object nearby, prompt children to sit against it as if sitting in a chair. Time them to see how long they can maintain this position until they become fatigued. Challenge them to increase their time each trial.
Have children give themselves a bear hug while waiting in line. Wrap their arms around themselves and count SLOWLY to 10 while gently squeezing themselves with a hug. Repeat as often as needed.
Finally, keep in mind that every child is different and unique and it is very important to customize all tips and activities to meet their specific needs and abilities.
The key is to ensure that the activities are enjoyable and to celebrate their progress, no matter how small. By incorporating fun games and creative ways to walk in line, children will find it enjoyable and educational.
If you are aware that a child is receiving occupational or physical therapy services, consult with their practitioner. Always prioritize safety, especially when incorporating activities such as blindfolding participants or creating obstacle courses. Adjust the difficulty level based on the age and physical abilities of the participants, and, most importantly, have fun!
Victoria Wood, OTR/L is a contributor to The OT Toolbox and has been providing Occupational Therapy treatment in pediatrics for more than 25 years. She has practiced in hospital settings (inpatient, outpatient, NICU, PICU), school systems, and outpatient clinics in several states. She has treated hundreds of children with various sensory processing dysfunction in the areas of behavior, gross/fine motor skills, social skills and self-care. Ms. Wood has also been a featured speaker at seminars, webinars, and school staff development training. She is the author of Seeing your Home and Community with Sensory Eyes.
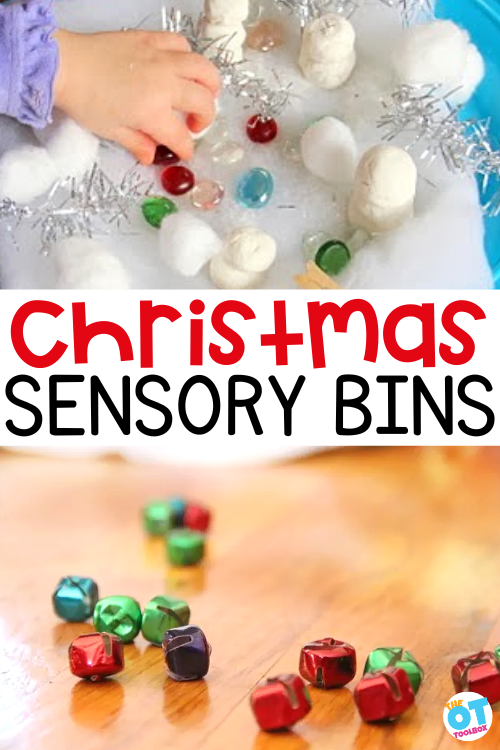
In this blog post, you’ll find fun and easy Christmas sensory bins to use as fun sensory play activities during the holiday season. These festive sensory bin activities are tactile and sensory motor play ideas that support learning and development. You can add these ideas to your Christmas occupational therapy activities in the clinic or home! Kids love this winter sensory bin!
Christmas Sensory Bins
Sensory bins are sensory play activities in a container, offering tactile and sensory motor input with imagination and fine motor benefits. Therapy providers love sensory bins because they can offer a unique and enjoyable way to engage reluctant children who may initially be hesitant about engaging in the sensory elements of tactile defensiveness challenges.
We wanted to put together a collection of Christmas sensory bin ideas to allow kids to immerse themselves in the holiday season through the exploration of their senses. Add these ideas to some of our other Christmas sensory activities to support needs, as well.
Therapy providers love them because a sensory bin is an easy way to support a variety of OT intervention goal areas with one therapeutic tool. Whether creating one for a group of children in therapy or tailoring it to a specific child’s needs and preferences, Christmas sensory bins are a great way to engage their senses, including touch, smell, and sight.
With Christmas sensory bins, children can engage sensory motor skills that impact fine motor development.
Fine motor skills like digging, touching, scooping and pouring, and interacting with the various tools and items in the bins are tools for development.
Adding in holiday themes results in a rich, multi-sensory experience that helps them embrace the holiday spirit.
How to create Christmas Sensory Bins
Need a basic guide to support your inspiration and begin creating a fun and engaging sensory bin for kids? Here are tips to use Christmas sensory bins in therapy sessions or at home. The nice thing is that you can tailor the holiday sensory bin ideas listed below to meet a variety of needs and sensory preferences:
Select a Sensory Bin Container- Choose a container that works for your space, transport, or any specific child’s needs, and don’t forget to consider durability too! The most popular are plastic storage bins, but you can also use trays and wooden bins, and we’ve even seen cardboard boxes such as shoe boxes used as well.
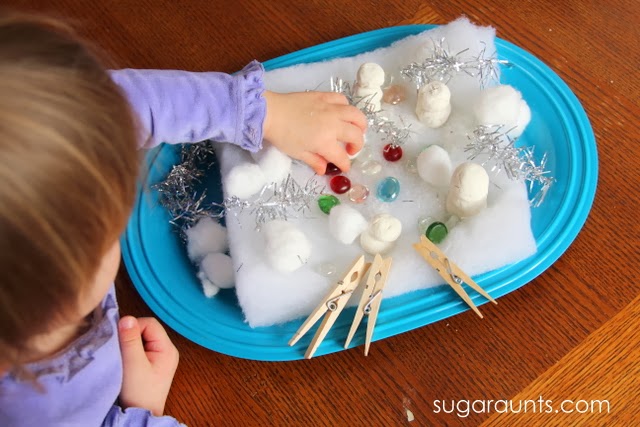
2. Select a Base Material- Choose the type of base material that can be used to represent the festive Christmas holiday, such as fake snow, cotton balls, colorful tinsel, shredded paper, white rice, white beans, Epsom salt, or even white kinetic sand. This gives a snowy or wintery foundation.
Here are our recommendations for sensory bin fillers and therapeutic considerations for each type.
3. Christmas Sensory Bin Themes- Next is coming up with a theme for your sensory bin. This is where the fun starts to begin! You could make it about a Christmas movie or book, a favorite holiday tradition, or something more tailored to each specific child. Think about movies like The Polar Express, The Grinch, Elf, A Christmas Story, A Cat in the Hat Knows a Lot About Christmas, A Charlie Brown Christmas, Prancer, etc.
You could also do Christmas themes like:
reindeer
gifts
Christmas trees
stars
4. Gather Christmas themed sensory bin materials- Choosing the bin items can be so much fun, but can be a lot of work if you choose to change the bin up frequently for individual children. For a Christmas-themed bin consider plastic Christmas trees, toy trains and tracks, a sled with reindeer, plastic or plush figures like Santa and his elves, Christmas string lights, miniature gifts and stockings, tree ornaments, small nutcrackers, etc.
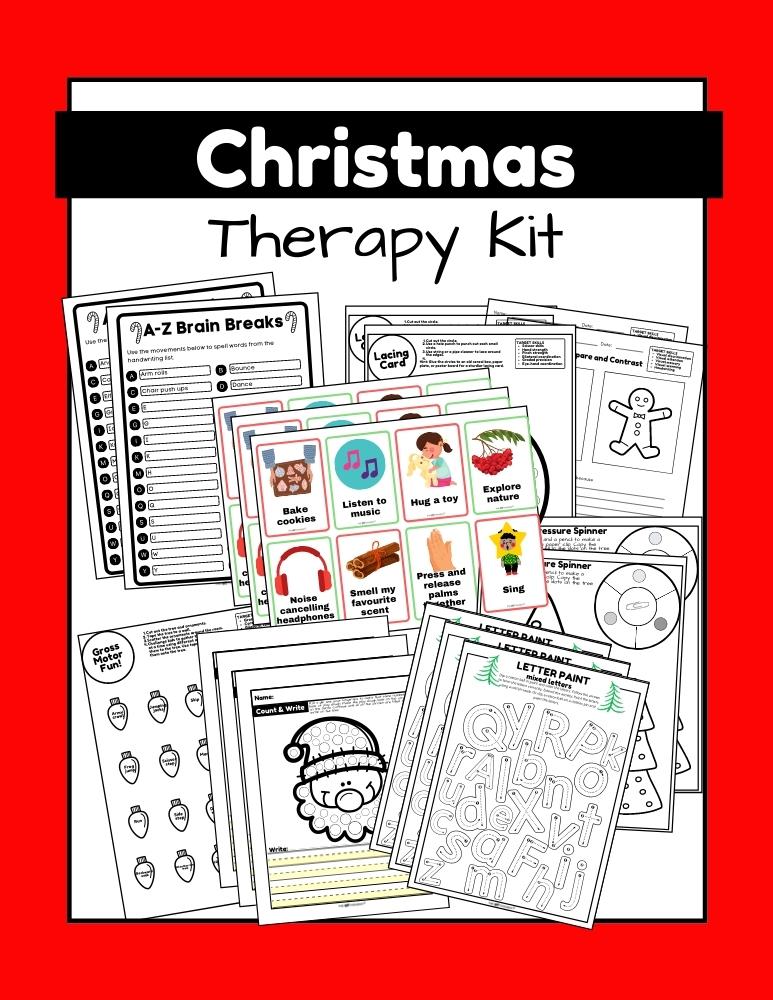
You can add sensory bin cards that have letters or numbers on them too. You can find some in our Christmas Therapy Kit and can be used to find letters and then work on writing them. Some therapy providers even use a candy cane to practice writing the letter or number in a sensory writing tray after the sensory bin card is found.
5. Consider sensory implications- Now is when you work to individualize it more as the sensory piece is what you are attempting to address with this tool. Think about all of the senses and how you might be able to enhance the sensory experience with the themed bin.
Consider adding these sensory items to your Christmas bin:
textured materials like sandpaper, mini-pinecones, beads, pom-poms, colored pasta, cotton, and soft fabric for touch,
colorful base materials such as red and green filler items like dry green split peas, red and green pom-pom balls or plastic gems, shiny tinsel, garland, and colorful ornaments for visual appeal.
Add Fine Motor Tools- You can add a hands-on interactive element with the use of tools such as spoons, scoops, mini-shovels, tongs, and whisks. This adds a sense of movement while engaging fine motor skills and play opportunities.
Tips for Christmas Sensory Bins
If you’re using a Christmas sensory bin in therapy, there are a few things to consider. You’ll want to use the sensory bin with as many kids on your caseload as possible, because setting up a Christmas sensory bin can be a bigger task. The benefit is that you can accomplish many goals with this one treatment too.
It’s also very motivating for kids, so when the holiday break is looming and kids are a little less attentive, a Christmas sensory bin can be motivating and engaging to support therapy participation.
Consider these things when creating your Christmas sensory bin:
Safety of Therapy Clients- The use of sensory bins should always be supervised, especially if there are small objects that could be a choking hazard for kids.
You’ll want to support the needs of each individual, so that might mean you have to remove some items before the session starts.
Cleaning Up the Therapy Space- It’s important to note these bins encourage open-ended exploration, so you should anticipate and consider that play might become messy. To make clean-up easier, consider placing a tablecloth or bed sheet underneath and around the bin – you’ll thank yourself later!
You can involve the kids, and make it a functional life skill…sweeping up sensory bin items, cleaning up the space, and other IADLs to clean up the space are a great activity for the last 5 minutes of a therapy session.
Rotating Sensory Bins- Another tip for your Christmas bin (especially as the holidays come to an end); Consider rotating a variety of items within the bin to keep it fresh and engaging for children. You can rotate the items periodically, and consider introducing new sensory elements and other seasonal surprises. If you have a Christmas movie theme you can easily change out items to match the movie. Think about the change of items based on the timing of the upcoming Christmas holiday. Kiddos love to help with this too!
Now that you have the tips to create your holiday sensory bin, let’s get to the ideas!
Christmas Sensory Bin Ideas
There are multiple Christmas sensory bin ideas out there if you just look around, but if you do not have time for that, we’ve got you covered! Just take a look at the ideas we have gathered for you below:
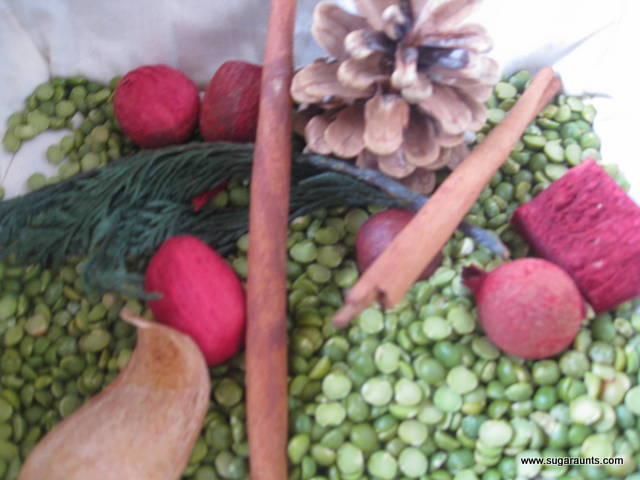
Christmas Nature Sensory Bin– Use dry split peas as a green sensory bin base. Then add Christmas items such as pine clippings (soft branches), pine cones, cinnamon sticks, and pine cones. This holiday sensory bin has a festive scent!
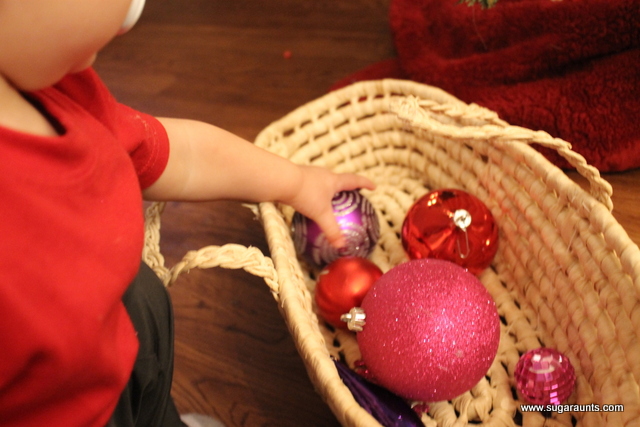
Christmas Ornament Sensory Bin– Add plastic or soft Christmas ornaments to a basket for a toddler sensory bin. This is a fun way to explore holiday decorations and work on visual motor skills.
Christmas Pom-Poms sensory bin– Add craft pom poms in Christmas colors to a tactile and fine motor theme. Simply freeze red, white, and green pom-poms and use warm water tools to free them.
Here’s how:
Wet and freeze a sensory bin quantity of red, white, and green pom-poms of all sizes to represent the Christmas season.
Once they are frozen, bring the pom-poms out of the freezer and place inside of a sensory bin.
When presenting the frozen pom-pom sensory bin, be sure to place a towel underneath it, you’ll thank yourself later. Then present a series of warm water tools such as eye droppers, ketchup or mustard bottles, water squirters, etc. for the child to spray and work on freeing the frozen pom-poms from their frozen despair.
Christmas Search & Find sensory bin with a tactile and visual theme of seek and find by Still Playing School. Color acini de pepe pasta red, combine with green split peas, and add Christmas-themed objects.
Here’s how:
Color the acini de pepe pasta read with use of gel food coloring and a little bit of vinegar in a bowl and then let it air dry in thin layer on large tray. Once dry, combine the pasta with green split peas inside of a sensory bin and viola you have festive Christmas colors! (Note: When the pasta dries it will be in small chunks, so children can work on breaking them apart into smaller pieces.)
Then add some fun Christmas erasers, tiny play gifts, festive foam shapes, etc. Really, you can add anything you want to your Christmas ‘I Spy’ bin just take a look around your belongings and add what creates a festive search and find atmosphere in the bin.
You can choose to add small tools to the bin that will encourage scooping, pouring, digging, and picking out items.
Christmas Lights & Rice open play sensory bin with the visual appeal of colorful mini-by 3D Dinosaurs. Fill a bin with white rice and small ceramic Christmas tree light bulbs for scooping and picking out using tools.
Here’s how:
Fill the sensory bin with simple white rice.
Add some ceramic Christmas tree light bulbs which are like small pegs.
Then toss in a couple of cups and some tweezers to help with scooping and picking out light bulbs from the rice.
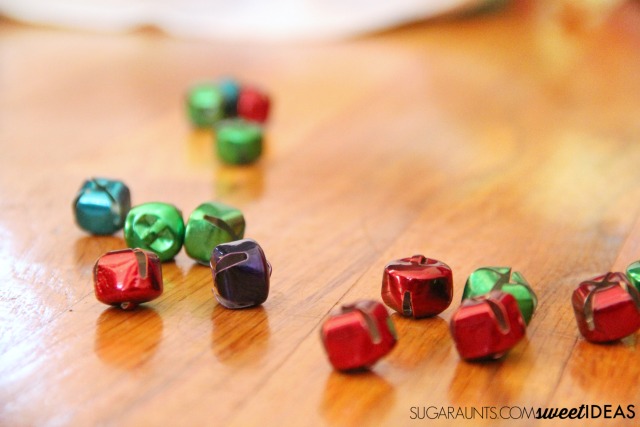
Jingle Bell Sensory Bin– A Jingle Bell Christmas sensory bin with the auditory theme of jingle. Dye pasta green, add colorful bells, and provide tools for sorting and stringing. Add colorful containers for sorting the jingle bells.
Here’s how:
Dye your pasta of choice green with use of green coloring gel. Think about dyeing wagon wheels, rotini noodles, and shells. Let them air dry.
Once they are dry, toss them into a sensory bin and add in some festive colored bells.
Use an upcycled egg carton with the sections colored to match the jingle bells. You could also use other small containers or ice cube trays and a tablespoon or even a set of tongs for children to sort them into the trays.
Add pipe cleaners and children can string the bells.
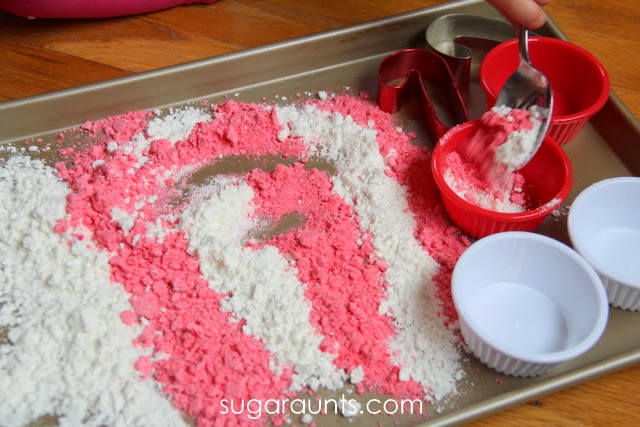
Candy Cane Scented Moon Dough sensory bin with the olfactory theme of mint. Create red and white moon dough with red and green food coloring, add peppermint oil, and customize with objects based on the child’s needs.
Here’s how:
Color moon dough with red and green food coloring and then add a bit of peppermint oil. Let it dry.
Once the rice is dyed, scented, and dry, fill a sensory bin and place on top of a towel. (This helps with clean up later.)
It’s your choice to add whatever you want to the bin based on the child’s specific needs.
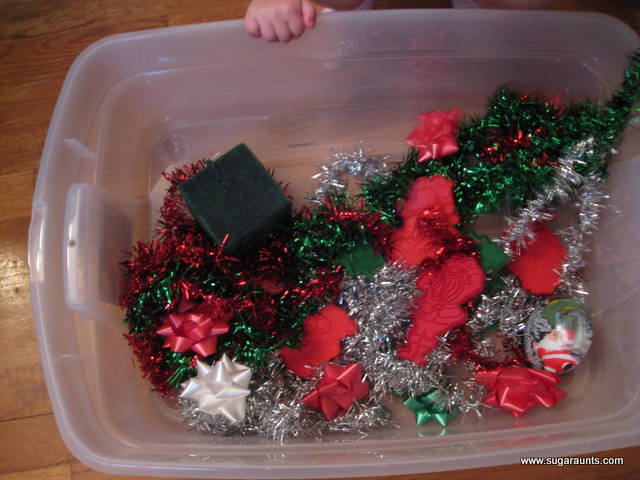
Tinsel & Christmas Bow sensory bin with the tactile and visual theme of tinsel. Use festive-colored tinsel and include red, green, and white holiday bows for digging and sorting. Add cookie cutters and Christmas bows for a variety of tactile input.
Here’s how:
Gather festive colored tinsel and fill a sensory bin.
Place red, green, and white Christmas bows into the bin for a dig and find activity.
You can have plates or cups to have children sort and collect each color of bow.
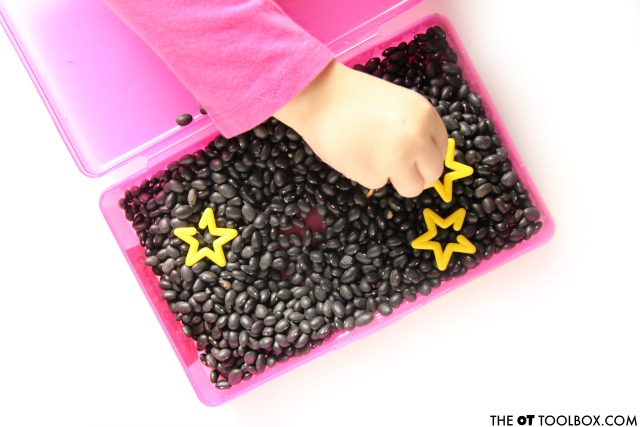
Christmas Star Sensory Bin– Make a mini sensory bin with the tactile and auditory theme of dry beans and miniature stars (love this unique material base). Fill a container with the dry beans and stars. Add tongs or tweezers.
Here’s how:
This is a unique sensory bin where you use dry black beans as your sensory bin filler. You can choose whether to cut our foam or paper stars or use star manipulatives and toss them into the bin.
Toss in some holiday-colored bells and pom-poms to add the festive flair to the bin.
Grab some bottles and have children sort the stars from the dry beans and then shake the bottles to hear the difference.
Gingerbread Man sensory bin with a fine motor emphasis while building tactile (brown rice) and olfactory (nutmeg) while building gingerbread men with cookie cutters by Pre-K Pages. Fill a bin with brown rice, add gingerbread-themed objects, and provide scooping and pouring tools.
Here’s how:
Gather brown rice for this bin. If you desire, you can dye the rice a darker shade of brown and scent it with nutmeg by mixing nutmeg spice into brown liquid watercolor that you will then use to dye the rice. Let the rice dry and then fill a sensory bin.
Add colorful pom-poms that are the same color as gum drops. Add some gingerbread play toys and cookie cutters. Gather measuring cups and spoons for scooping and pouring.
Let children free play with this sensory bin and add other gingerbread themed items to make it more festive.
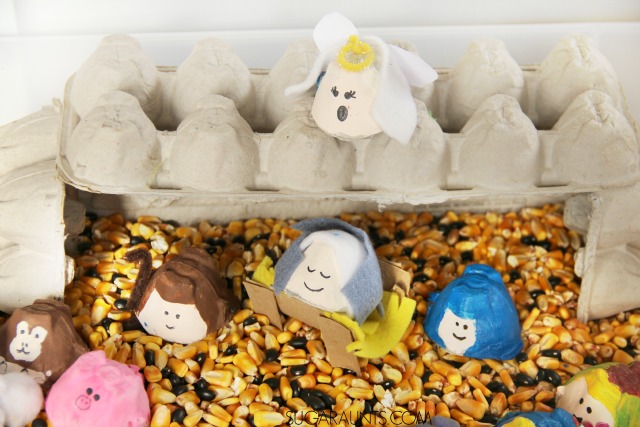
Nativity Scene sensory bin with a spiritual theme that provides the opportunity to reinforce the Christmas story with kids and is easily paired with many children’s books that tell the story of Jesus’ birth. Use dry corn or beans as the filler, and include nativity scene pieces for retelling the Christmas story.
Here’s how:
Use dry corn or beans for a sensory bin filler.
Add whatever nativity scene pieces you may have on hand such as foam or wooden wise men, shepherds, sheep, camels, Mary, Joseph, baby Jesus, angel, star, etc.
Another sensory bin filler for this spiritual theme could be straw or shredded brown paper with the same nativity scene pieces.
Read the story and act it out with the nativity pieces.
Find the Christmas Bells sensory bin has a tactile theme with use of shaving foam by Science Sparks. Fill a bin with shaving foam and add Christmas bells for a tactile experience.
Here’s how:
Use shaving foam to fill a sensory bin or tray and then add Christmas bells.
Children can use their fingers or a pair of tongs to retrieve the bells from the foam and then wipe the shaving foam from them.
Christmas is just around the corner and incorporating sensory bins into your holiday activities can be a fun and therapeutic way to engage with children, encouraging creativity and learning during the Christmas season. Follow the step-by-step guide we’ve provided, and reduce your stress of creating a bin allowing your creativity to take command and shine! Now, go and build a unique Christmas sensory bin that you and your kids will enjoy exploring this Christmas holiday!
Christmas Sensory Bin Fillers
All of the holiday sensory bin ideas can be adjusted to meet the needs of all kids. Try adding these items for more tactile sensory input:
Pine Cones– Natural pine cones provide a tactile experience and a festive scent.
Cinnamon Sticks– Cinnamon sticks add a wonderful aroma and a unique texture to the sensory bin.
Bells– Jingle bells of different sizes contribute to auditory stimulation and visual interest.
Fake Snow– Artificial snow or white sensory material can create a wintry atmosphere.
Ornaments– Plastic or shatterproof ornaments in various shapes and colors for visual and tactile exploration.
Tinsel or Garland– Strands of tinsel or garland provide a shiny and reflective element.
Holiday-Themed Cookie Cutters– Use cookie cutters in the shape of Christmas trees, stars, or snowflakes for cutting and molding activities.
Miniature Trees– Small artificial trees can add a three-dimensional aspect to the sensory bin. You can find these at a Dollar Store.
Baubles– Colorful and lightweight baubles can be included for sensory exploration.
Ribbon Strips– Cut pieces of festive ribbon for sensory play and visual interest.
Sleigh Bells– Include sleigh bells for additional auditory stimulation.
Pompoms– Soft and colorful pompoms in holiday colors for tactile exploration.
Candy Canes (Wrapped)– Wrapped candy canes provide a sweet scent and a textured surface.
Holiday Lights (Battery-Operated)– Use battery-operated string lights to add a warm and festive glow.
Red and Green Rice or Lentils– Dyed rice or lentils in Christmas colors for a unique sensory texture.
Gingerbread Men or Holiday Shapes (Foam or Plastic)– Foam or plastic holiday shapes for tactile exploration and creative play.
Scented Playdough– Make or purchase scented playdough in holiday scents like peppermint or gingerbread.
Wrapping Paper Scraps– Small pieces of festive wrapping paper for crinkling and tearing.
Have you played with a Christmas sensory bin this time of year? It’s a holiday activity that kids love!
Regina Parsons-Allen is a school-based certified occupational therapy assistant. She has a pediatrics practice area of emphasis from the NBCOT. She graduated from the OTA program at Caldwell Community College and Technical Institute in Hudson, North Carolina with an A.A.S degree in occupational therapy assistant. She has been practicing occupational therapy in the same school district for 20 years. She loves her children, husband, OT, working with children and teaching Sunday school. She is passionate about engaging, empowering, and enabling children to reach their maximum potential in ALL of their occupations as well assuring them that God loves them!
Looking for done-for you therapy activities this holiday season?
This print-and-go Christmas Therapy Kit includes no-prep, fine motor, gross motor, self-regulation, visual perceptual activities…and much more… to help kids develop functional grasp, dexterity, strength, and endurance. Use fun, Christmas-themed, motor activities so you can help children develop the skills they need.
This 100 page no-prep packet includes everything you need to guide fine motor skills in face-to-face AND virtual learning. You’ll find Christmas-themed activities for hand strength, pinch and grip, dexterity, eye-hand coordination, bilateral coordination, endurance, finger isolation, and more.
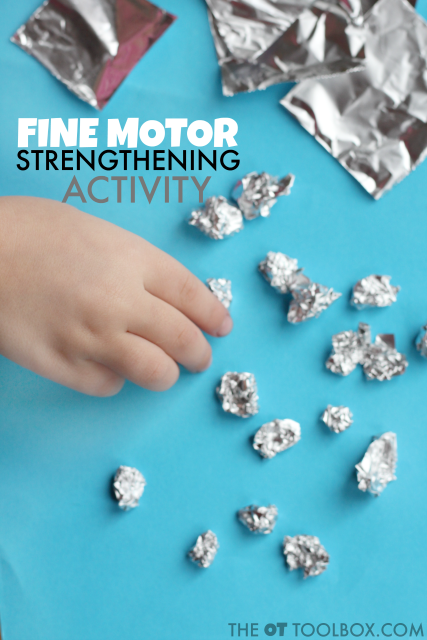
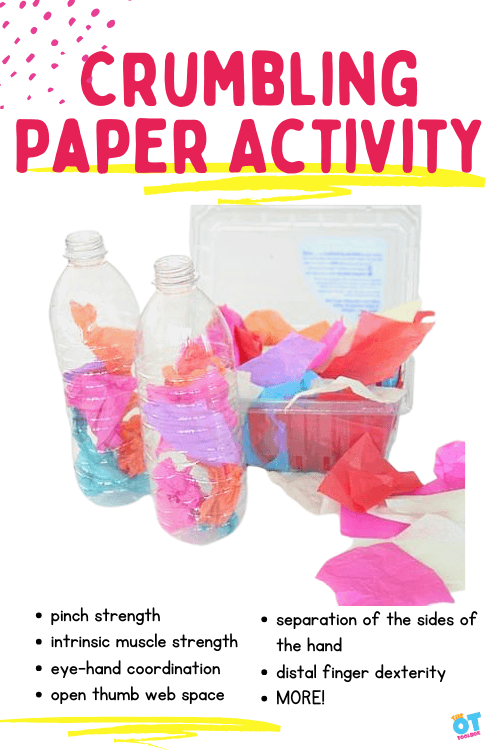
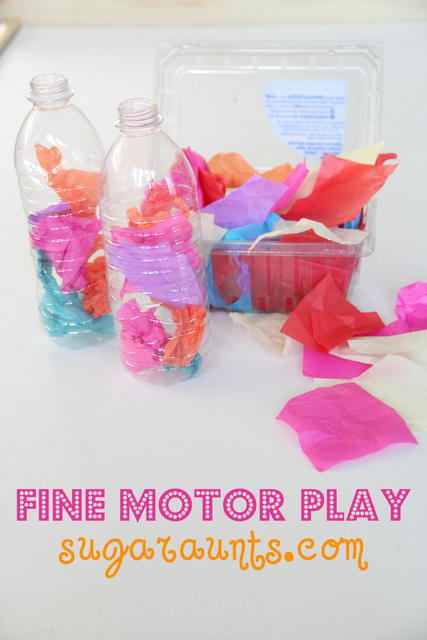
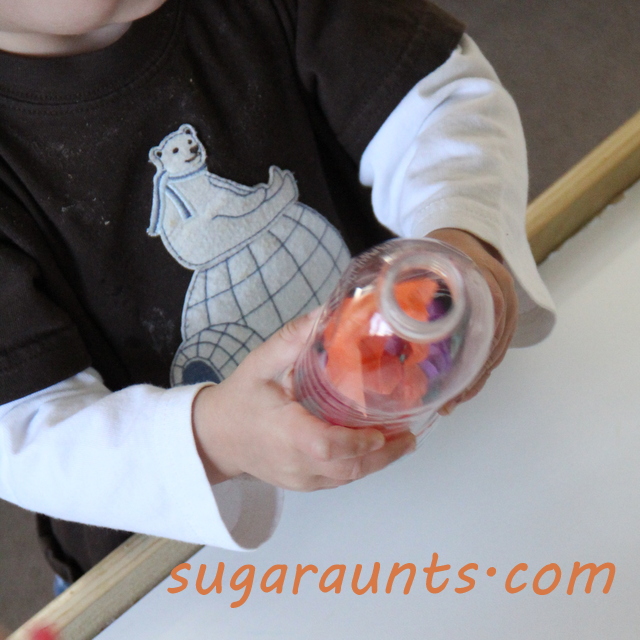
Today we have a tissue paper crumpling activity (or paper crumbling!) that builds many fine motor skills, including hand strength. In this easy tissue paper fine motor activity, we are working on pinching and crumbling paper is an excellent fine motor exercise for children. It is an activity that works the small muscles of the hand and really strengthens the arches of the hands.
There are many fine motor benefits of crumpling paper into small pieces!
Paper Crumpling
Paper crumpling (or paper crumbling) is a great way to play with paper that builds fine motor skills in the hands.
If a child has weak muscles in their hands and the arches are not defined, you may see them holding a pencil or small items between their thumb and the side of their index finger. The arches of their hand may not be defined and nice and round. You may also see them holding their hands close to their chest as they attempt to gain stabilization of their arms to do the small motor task.
To really work those muscles, you could have your child first tear the bits of tissue paper before they crumble them up.
Defined arches are very important in shoe tying, handwriting, and managing clothing like buttons and snaps.
You can see how to incorporate tearing paper into this activity using the video below. Towards the end of the video, you’ll see ways to build fine motor strength and finger dexterity using crumbled paper pieces. The tissue paper squares that we are using in our activity today can be used like shown in the video for more finger strengthening exercises.
Working on fine motor skill development through play supports functional tasks, plus it’s fun!
Paper Crumpling Activity
We came up with this tissue paper crumbling activity many years ago, and it still stands as a great way to work on skills:
We’ve talked about the benefits of tearing paper before, and this activity expands on the skills a bit, because after you tear the tissue paper, you can have your student crumble the paper and then push it into the mouth of a water bottle.
While this is a really simple fine motor activity, it’s great because you build so many skills, and kids typically enjoy this simple task.
Tissue Paper Crumbling Activity
For this activity, you really can use items you have on hand. We used empty plastic water bottles, and colorful tissue paper squares.
Cut tissue paper into small squares.
Remove labels from plastic water bottles.
To increase the fine motor work, you could have the student rip pieces of the tissue paper to really increase grip strength work.
Ask the student to take one piece of tissue paper, and crumble it up with their finger tips.
Then, they should push the crumpled tissue paper into the empty water bottle.
You can make this activity a game by asking them to roll a dice and place that many squares of tissue paper into the bottle. Or you could have them sort colors by filling each water bottle with a single color.
This was an easy and fun little activity to throw together.
We have a bunch of little tissue paper squares in our craft supplies. Put them next to a couple of empty plastic bottles, and the kids know what to do!
Pushing the tissue paper into the spout of the water bottle is great for encouraging a tripod grasp (using the thumb, index, and middle finger).
Holding the bottle with the non-dominant hand allows the child to work on their bilateral hand coordination (using both hands together in a coordinated manner…kids need this when they begin shoe tying and managing the zipper on their coat).
When you ask kids to crumble paper using just the tips of their fingers, you really isolate thumb IP joint flexion as they bend the tips of the fingers. This is needed for dexterity and precision skills in functional tasks such as writing with a pencil.
…And everyone loved the cool crunchy sound the bottle made when you squashed it!
There are so many ways to build skills with this simple tissue paper crumpling activity!
More fine motor fun…
Working on fine motor skills, visual perception, visual motor skills, sensory tolerance, handwriting, or scissor skills? Our Fine Motor Kits cover all of these areas and more.
Check out the seasonal Fine Motor Kits that kids love:
Colleen Beck, OTR/L has been an occupational therapist since 2000, working in school-based, hand therapy, outpatient peds, EI, and SNF. Colleen created The OT Toolbox to inspire therapists, teachers, and parents with easy and fun tools to help children thrive. Read her story about going from an OT making $3/hour (after paying for kids’ childcare) to a full-time OT resource creator for millions of readers. Want to collaborate? Send an email to contact@theottoolbox.com.
Today’s free printable candy cane puzzles are a fun Christmas occupational therapy activity that supports skill-building this time of year. Are you searching for a creative and educational solution to enhance your child’s fine motor skills, eye-hand coordination, scissor skills, and visual perception? Look no further! In this blog post, we’re unveiling the secrets behind free candy cane puzzles and providing you with a free printable PDF to get started.
You could pair these candy cane puzzles with our peppermint moon dough for multisensory play.
Why use mini candy cane puzzles?
We’ve created several versions of these mini puzzles over the years. They are all available inside The OT Toolbox membership club. However, we do have a free version of our pumpkin puzzles here. We love using these mini puzzles for many reasons. It’s a great Christmas fine motor activity and when used in sensory bins, can even be a Christmas sensory activity for this time of year.
Let’s break it down.
The thing is that puzzles are a fine motor learning tool that supports several crucial developmental milestones in children.
Building puzzles in occupational therapy sessions is a fantastic activity that contributes to the development of various underlying skills in individuals, especially in children. Puzzles are a nice way to support carryover of skills at home as well.
Here are some key skills that are enhanced through puzzle-building:
Problem Solving: Puzzles require individuals to analyze the situation, develop a strategy, and apply logical reasoning to find a solution.
Critical Thinking: Engaging with puzzles encourages individuals to think critically, evaluate options, and make decisions based on available information.
Fine Motor Skills: manipulating pieces, pressing puzzle pieces into the space they fit, these tasks support finger isolation, separation of the sides of the hand, coordination, and more.
Hand-Eye Coordination: Manipulating puzzle pieces and fitting them together promotes the coordination between visual information and hand movements.
Precision and dexterity: Placing smaller pieces accurately hones fine motor skills, aiding in tasks that require controlled hand movements. Puzzles can sometimes be a tool used in manual dexterity goals in OT.
Shape Recognition: Sorting and fitting puzzle pieces into specific spaces enhance spatial awareness and the ability to recognize shapes. This is a task that is great for developing skills in letter recognition.
Visual Discrimination: Distinguishing between colors, patterns, and details in puzzle pieces develops skills needed for distinguishing between letters, numbers, and shapes. These skills include form constancy.
Visual Memory: Remembering the shapes and patterns of puzzle pieces helps improve short-term and visual memory.
Pattern Recognition: Identifying recurring patterns in shapes and colors in the puzzle pieces supports memory and cognitive flexibility. Here is more information on the skills used in pattern recognition.
Collaboration: Working on puzzles with others fosters collaboration, teamwork, and communication skills.
Turn-Taking: Sharing the activity requires individuals to take turns, promoting patience and social interaction.
Vocabulary Building: Discussing the puzzle, describing pieces, and talking about the process contribute to the development of vocabulary. This includes Expressive Language (explaining one’s thoughts and strategies during puzzle-solving) and receptive language skills.
Emotional Regulation: Building puzzles supports several areas of emotional skills including Frustration Tolerance (facing difficulties in puzzle-solving helps individuals develop patience and manage frustration when confronted with challenges.) and Sense of Accomplishment (successfully completing a puzzle boosts self-esteem and a sense of accomplishment).
These underlying skills make puzzle-building a versatile and valuable activity for individuals of all ages, contributing not only to academic readiness but also to overall cognitive, social, and emotional development.
Here is a video we made showing how to use these candy cane puzzles in developing skills:
Print off these free candy cane puzzles and build skills this holiday season!
How to use candy cane puzzles in OT sessions
If using a mini puzzle with a holiday theme seems like a fun way to build skills, you can use the free candy cane puzzles we have here on the site.
Step 1: Download the free printable PDF with candy cane puzzles.
Step 2: Color the candy canes to work on visual motor skills. Coloring is a great fine motor task.
Step 3: Cut out the squares for simple cutting tasks. Then cut on the curved lines.
Step 4: Build the puzzles by matching the lines to target fine motor skills, eye-hand coordination, scissor skills, and visual perception.
You can use these several ways, including building puzzles by grading the activities. Offer the student just one or two puzzles at a time to make the activity simpler. Or, increase the number of puzzles to sort the different shapes and line forms.
Before diving into this hands-on activity, ensure you have the following:
Tools: Scissors, printer, and colored markers/crayons. Here are our favorite types of scissors to use to meet different needs with scissor skills.
Safety: Supervise scissor use to prevent accidents.
Laminate: You can laminate these puzzle pieces for durability.
Free Candy Cane Puzzles
Incorporating free candy cane puzzles into your child’s routine can be both fun and beneficial. Download the free printable PDF today and witness the transformative impact on your child’s developmental journey. Take a proactive approach to learning through play!
These candy cane puzzles are delivered by email. Enter your email address into the form below and the printable will be delivered to your email inbox. OT Toolbox members can log into their account and access this printable under our Christmas activities.
Colleen Beck, OTR/L has been an occupational therapist since 2000, working in school-based, hand therapy, outpatient peds, EI, and SNF. Colleen created The OT Toolbox to inspire therapists, teachers, and parents with easy and fun tools to help children thrive. Read her story about going from an OT making $3/hour (after paying for kids’ childcare) to a full-time OT resource creator for millions of readers. Want to collaborate? Send an email to contact@theottoolbox.com.
Looking for done-for you therapy activities this holiday season?
This print-and-go Christmas Therapy Kit includes no-prep, fine motor, gross motor, self-regulation, visual perceptual activities…and much more… to help kids develop functional grasp, dexterity, strength, and endurance. Use fun, Christmas-themed, motor activities so you can help children develop the skills they need.
This 100 page no-prep packet includes everything you need to guide fine motor skills in face-to-face AND virtual learning. You’ll find Christmas-themed activities for hand strength, pinch and grip, dexterity, eye-hand coordination, bilateral coordination, endurance, finger isolation, and more.