What you need to know about Sensory Swings

Sensory swings

If you’ve ever walked into an occupational therapy gym, you may have seen a variety of sensory swings and wondered, “why does occupational therapy swing kids in their OT sessions?” There are many reasons why, and in this blog post, we’ll cover sensory swings, the best sensory swings to use for sensory needs, and why!

Sensory swings for sensory input and occupational therapy swings used in OT sessions

There are many types of sensory swings that we use as occupational therapy providers. This is one piece of sensory equipment that is worth the price. We recommend splurging for a swing of some type in our blog post on creating sensory rooms on a budget.

Sensory Swing Movements

Swings are simply a great tool for sensory input as well as sensory integration. The predictability of linear swinging can be calming and settling for the children who need that support.  For more information on the theory and background on this concept, check out our blog post on Ayres Sensory Integration.

Having the swing perform unpredictable moves such as rocking, spinning, side to side movement, and even start and stop movements while suspended in air, can be very alerting and stimulating for the children who need that support.

In our blog post, Sensory Swings for Modulation you will read how powerful the swing can be when used as a sensory strategy for individual sensory processing needs and modulation. 

There are many considerations when it comes to sensory swings, however. A swing can be a tool for modulation but it can also cause sensory dysregulation in users.

Dysregulation refers to internal needs of the sensory systems that result in meltdown because the sensory processing system is out of balance.

You might find that only 5 minutes of intense swinging leads to dysregulated sensory system with overstimulation. This state can require a long period of time and intervention to get the individual to reset or calm down.

When it comes to sensory swings, different types of movements can impact modulation or dysregulation. It’s important to be aware of these considerations before using a sensory swing as a tool in therapy.

Each individual will be different and it can be a delicate balance of movements that are stimulating verses calming. A swing for one child might spiral into dysregulation with a lengthy period of time and calming input required to regulate the sensory systems. Other individuals may crave intense movements and can benefit from that swing input for a longer period of time, allowing for functional participation.

Alerting sensory swing movements

In general, fast rotary vestibular input is often stimulating. Likewise, quick and sporadic movements on the swing are stimulating.

The vestibular sense which is utilized during swing use helps to activate more body awareness, muscle tone, balance, and coordination as well as providing a level of increased alertness. If you want to learn more about vestibular activities in general, you can read the blog post Vestibular Activities.

Calming sensory swing movements

Calming or regulating sensory swing movements may include gentle, linear movement to calm the vestibular system. These swing pushes should be rhythmical and linear movement as these are more calming swing movements.

The proprioceptive sense can be activated during swing use by reclining in a swing and rocking rhythmically in a swing providing deep pressure input to the body can help soothe strong emotions and decrease engine levels of high alertness. This helps with self-regulation and body control. 

You can see that there are many different variables and each individual will require independent assessment from a qualified professional. This is why simply adding a sensory swing to a sensory room in a school can be a detriment to all of the students. School administrators and educators should always consult the occupational therapy professional before using a sensory swing in the school environment.

Types of sensory swings in occupational therapy and activities to do with sensory swings

Occupational therapy Swings

Sensory processing is not the only area that can be addressed with the use of swings.

How you utilize a swing and even the type of swing you use, can help a child to work on core and upper extremity strengthening, balance, visual processing, bilateral coordination, motor planning, righting reactions, body awareness, position in space, gross motor coordination, neck extension, eye-hand or eye-foot coordination, and visual tracking.

When working with occupational therapy swings, each child is different in their needs and their preferences and it is up to you as the OT professional to determine what is needed and what needs to be worked on for skill development.

It is also your role as the OT practitioner to guide and educate other professionals and parents of children to ensure the child’s needs are being met properly and that safety measures are being utilized.

Now, two questions for you regarding those OT swings:

  1. Do you know what swing to use for the kiddos you see in therapy? 
  1. Do you often ask what activity can I do while they are on this swing so they will continue to remain motivated?

Types of Sensory Swings

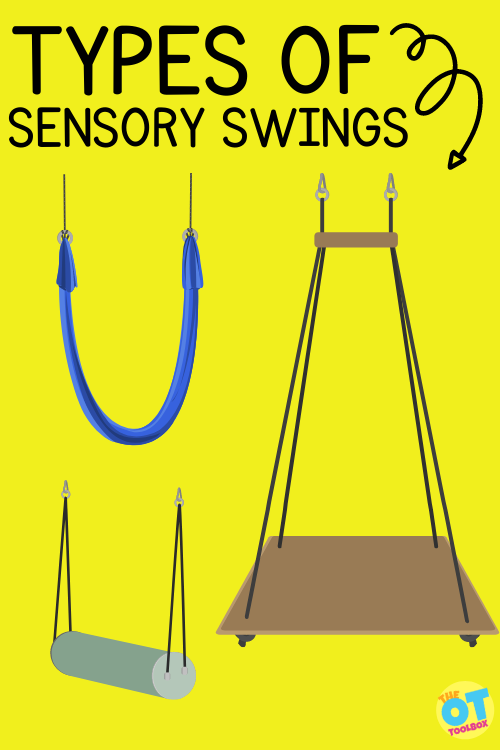
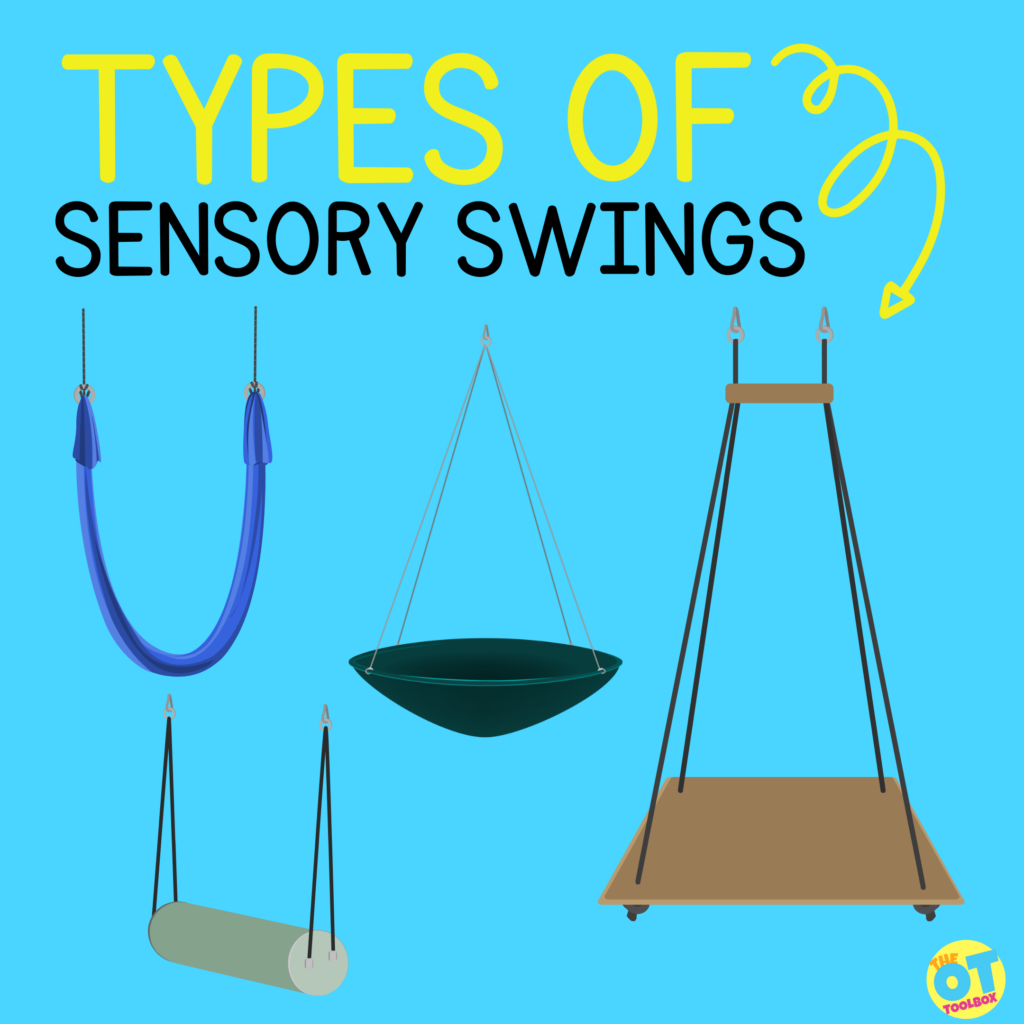
Well, let’s take a look at six of the most common therapy swings utilized in occupational therapy clinics and therapy rooms in schools. These types of sensory swings can be used for various reasons and in a variety of sensory swing activities.

Also, there are swings that parents can use indoors or outdoors to address a child’s sensory needs.  If you read our post Outdoor Sensory Swing you will learn how taking sensory play activities into the outdoors will provide children with many outdoor sensory experiences just by using the world around us.

If purchasing a sensory swing is just simply too expensive to think about, read all about how you can use the playground equipment to address Sensory Integration at the Playground with the guidance of the therapist to meet each child’s needs.  

There is no best sensory swing of this list, rather, each type of sensory swing has it’s own specific uses and benefits to supporting the needs of the individual user.

Bolster Sensory Swing

A Bolster swing (affiliate link) is a type of sensory swing that challenges balance, vestibular processing, motor planning, cervical extension endurance, proximal control/stability, and core strengthening, The child can lie prone, inverted, kneel, sit or straddle the swing. 

Bolster Swing Activities:

  1. Have a child work on hanging inverted like a koala bear and then time them to see if they can meet or beat their last best time.
  2. Have a child kneel on the bolster while hanging on and then attempt to toss bean bags into a basket.  
  3. Have a child straddle the bolster swing like a horse and use a reacher to pick up bean bags from the floor and then try to toss them into a basket using the reacher to toss.
  4. Spread balls around on the floor under the swing and have the children lie prone on the swing and attempt to reach out to pick up the balls and place them in a basket. You will move the swing around as needed.

Ladder Sensory Swing

A Climbing ladder swing (affiliate link) provides the challenge of motor planning while simultaneously working on balance, strength, and body awareness. The child simply works to climb the ladder from the bottom to the top and then back down again. It adds the fun of swinging while providing a challenging workout.

Ladder Swing Activities:

  1. Place a bucket or basket filled with puzzle pieces, letters, shapes, or other items at the top of the ladder for a child to retrieve one at a time by climbing up and down the ladder swing. Then, have them either put the pieces into the puzzle base or practice writing the letter or drawing the shape before going back up the ladder to grab the next item. 
  2. An adult can stabilize the bottom of the swing by holding it steady while the child climbs or an adult can slightly twist and turn the ladder swing while the child attempts to climb up and down. It’s called the ship on the rocky seas! 
  3. Place two or three articles of clothing at the top of the ladder and have the child retrieve one at a time and when they get to the bottom they can work on zipping, buttoning, or snapping!

Hammock Swing

A Cuddle hammock swing (affiliate link) (also called a cocoon swing), is a calming type of sensory swing that provides proprioceptive input, assists with soothing strong emotions, and gives a nice deep pressure input which is calming and grounding for some children. This swing can be an easy first swing for children who need more gross motor support and are fearful of the movement other swings provide.  The Lycra-type material allows children to sit, stand, or lie in the swing making it a highly versatile swing. 

Hammock Swing/ Cocoon Swing Activities:

  1. Have a child lie prone with their head and arms positioned outside the swing. This position creates a form of weight bearing through their arms and works on full upper body strengthening. They will work to pull and push themselves using the floor while inside the swing. 
  2. Place items around on the floor under the hammock just out of the reach of the child and then have them pull themselves along the floor to reach the items, such as bean bags, to toss into a basket. 
  3. Have the child lie prone and then grasp and hold your hands while you are seated on the floor in front of them. They will pull themselves toward you to shift the swing back and forth. 
  4. Have the child lie supine and reach up to remove clothespins that are clipped on the edge of the swing. The swing provides body support but works on building upper extremity strength and endurance as the child works against gravity to reach up. You can alternate activities and have the child place the clothespins instead.
  5. Have the child recline or lie within the swing and simply do deep breathing or mediation exercises while slowly swinging back and forth. 

Pod Swing

A Hanging pod swing (affiliate link) provides vestibular input, assists with balance, and makes a nice cozy pod that gives children a sense of calm regulation and relaxation to just simply cool inside. This swing can serve as a good first swing as it allows for seated support while simply swinging slowly and provides more comfort to children who may be more fearful of the freedom of other types of swings. 

Pod Swing Activities:

  1. Try turning off the lights, playing soft music, and have a child hold a small fidget or light-up toy while swinging slowly back and forth as they stay cuddled inside. 
  2. Place a pillow inside of the pod swing and have the child climb inside to provide a cushy, deep pressure input while swinging slowly and rhythmically in a linear fashion.
  3. Blowing bubbles for the child to watch while seated in the swing provides a calming feel as the motion of the bubbles will be slow as they descend. 
  4. Have the child sit in the swing and complete deep breathing or mediation exercises while slowly swinging back and forth. 

Platform Swing

We covered specifics about platform swings on a related blog post.

A Platform swing (affiliate links) (or this version of a platform swing with net base or material platform base) is the most common swing found in therapy settings and provides the opportunity for calming and alerting to get the child’s engine right where it needs to be for a treatment or classroom session. It is highly versatile as it can help a child build upper body strengthening, core strengthening, balance, and motor planning. 

Platform Swing Activities: 

  1. Use this unstable surface swing to challenge a child’s body positioning to include side-lying, tummy time, tall kneeling, standing, criss-cross sitting, long sitting, and partial kneeling. 
  2. Have the child lie prone with their head and arms positioned over the edge. Then have them walk with the upper extremities around the floor picking up puzzle pieces to place in the puzzle base located in a central location. Pieces are picked up one at a time. 
  3. Place different colored bean bags in a circle on the floor around the swing. Call out different colors and have the child rotate themselves while lying prone on the swing and using their hands to walk around on the floor to stop at each color called out.  Letters and shapes can be used for this activity too.
  4. Place cones on an elevated surface and while the child is either lying prone or in a quadruped position, have them reach out to drop rings onto the cones. 
  5. Have the child sit criss-cross in the center and toss a beach ball to themselves.

Trapeze swing (affiliate link) provides a good opportunity to work on upper extremity strength and endurance, gross grasp skills, trunk strength, and motor planning. If you add lower extremity work also, then you address upper and lower body coordination. 

Activities:

  1. While swinging or not, encourage a child to hold and lift their legs to kick a ball.
  2. While swinging, the child can simply jump over a therapy ball that is placed inside of a tire tube. 
  3. Simply work with a child on grasping and swinging while pumping the swing with their own feet. 
  4. While swinging or not, have a child hold on and lift their legs to kick a set of bowling pins or have them attempt to pick up each bowling pin with their feet and place them in a basket. 
  5. While swinging the child, can work on timing and release to let go and crash into a crash pad.

Sensory Swing Tips

What do you do with all of this information and activity ideas? Go get onto a swing and try out some of these fun activities! That’s right, we as adults need to have some fun too!

But, after you’ve tried them, demonstrate them to the kiddos as they will most likely be more motivated to do the same activity after they see YOU do it. After all, you and I both know that the best way to teach a child is by setting a good example and you’ll get to have some fun in the process! It’s a win-win folks! 

One tip for using a sensory swing in a therapy session can include a visual schedule with a plan that helps the individual with regulation needs. It can include swinging, then heavy work, music, blowing bubbles, dim lights, heavy rhythmic play, and deep breathing. All of these sensory tools regulate the system and can calm the system after the movement from the sensory swing. This is just one example and each individual will benefit from different strategies.

Be sure to take a look at the maximum pounds allowed for some swings as you’ll want to be sure that it will work for all of your kiddos before purchasing.

Always supervise children while on swings especially when rotary swinging as this can instigate seizure activity in some children.

sensory swing safety

There are important things to remember when it comes to sensory swing safety. Safety considerations for sensory swings relate to both in the clinic and, with the ready availability of purchasing a sensory swing online, in the home as well.

Remember these sensory swing safety tips:

  1. Installing a sensory swing- Always read the manufacturer’s instructions and follow them carefully. Different types of sensory swings may have different weight limits, installation requirements, and safety recommendations. You may need specific installation parts for sensory swings, especially considering the weight of the user and how the sensory swing will be used.
  2. Support structures for sensory swings- Make sure the swing is securely anchored to a strong support structure. The support structure should be able to handle the weight of the swing, the child, and any additional equipment or accessories.
  3. Monitor the sensory swing for signs of wear and tear- Check the condition of the swing and its components regularly. Look for any signs of wear and tear, such as frayed ropes, torn fabric, or rusted hardware. Replace any damaged parts immediately.
  4. Supervision during sensory swing use- Always supervise your child while they are using the swing. Never leave them unattended, even for a short time.
  5. Educate the user on how to get on and off the swing, and how to use a sensory swing- Teach your child how to use the swing safely. Show them how to sit or lie down properly, how to hold on to the ropes or chains, and how to get in and out of the swing safely. This is especially important for particular positioning such as laying in supine (on belly) or when spinning is used in the sensory swing. Teach your child and other children using the swing to watch for signs of overuse.
  6. Where to put a sensory swing- Make sure the swing is set up in a safe and open area. The area around the swing should be clear of any obstacles or hazards, such as furniture, sharp objects, or hard surfaces.
  7. Other safety equipment- Consider using a safety harness or seat belt to keep your child secure in the swing. This can be especially important for children who have difficulty sitting still or have balance or coordination issues. You can also consider padding around the swing area on walls using gymnastic pads or wall padding, or cushioning pillows of pads on the floor.
  8. Upkeep- Keep the swing clean and dry. Wipe down the fabric or other materials with a damp cloth and allow it to air dry between uses.
  9. Consider overuse and type of use- If your child has any medical or physical conditions, consult with their healthcare provider before using a sensory swing. They can provide guidance on whether the swing is appropriate and safe for your child’s needs.
  10. Lastly, trust your instincts. If something doesn’t feel right or safe, don’t use the swing until you can address the issue or seek guidance from a qualified professional.
Therapy Swings- What to watch for

When using a therapy swing of any kind, it is a must to watch for overuse or overstimulation. This is because the sensory input of a therapy swing/sensory swing can be very overwhelming.

Particularly with rotary input, a therapy swing (either at home or in the clinic setting or in a sensory room in the school setting) can lead to overstimulation, dizziness, agitation, hyperactivity, fatigue, or other considerations. For this reason, it’s very important to limit rotary input to a specific set of minutes which should be monitored throughout use of the therapy swing.

Also, it’s extremely important for therapy swings to be used under the guidance and recommendation of a pediatric occupational therapy professional.

While sensory swings can be beneficial for children with sensory processing issues, overuse or improper use can potentially cause harm. Here are some things to watch for with sensory swing overuse:

  1. Dizziness or nausea: Rapid or repetitive swinging can cause dizziness or nausea, especially in children who are sensitive to motion.
  2. Overstimulation: While sensory swings can be calming for some children, they can also be overstimulating for others. Overstimulation can cause anxiety, irritability, or difficulty with attention and focus.
  3. Fatigue: Prolonged use of a sensory swing can cause muscle fatigue or soreness, especially in children who have weak muscle tone or low endurance.
  4. Agitation or hyperactivity: Some children may become overly excited or hyperactive after using a sensory swing, which can make it difficult for them to transition to other activities or tasks.
  5. Risk-taking behavior: Children who become overly confident or adventurous on a sensory swing may engage in risky behavior, such as jumping off or swinging too high, which can lead to injuries.
  6. Increased dependence: Overuse of a sensory swing may cause a child to become overly reliant on the swing for sensory input or emotional regulation, which can interfere with their ability to develop coping skills or self-regulation strategies.

If you notice any of these symptoms or concerns with your child’s use of a sensory swing, it may be a sign of overuse or improper use. Consider reducing the amount of time your child spends on the swing, or consulting with a healthcare provider or occupational therapist for guidance on how to adjust or modify the use of the swing to better meet your child’s needs.

The Sensory Lifestyle Handbook walks you through sensory processing information, each step of creating a meaningful and motivating sensory diet, that is guided by the individual’s personal interests and preferences.

The Sensory Lifestyle Handbook is not just about creating a sensory diet to meet sensory processing needs. This handbook is your key to creating an active and thriving lifestyle based on a deep understanding of sensory processing.

Regina Allen

Regina Parsons-Allen is a school-based certified occupational therapy assistant. She has a pediatrics practice area of emphasis from the NBCOT. She graduated from the OTA program at Caldwell Community College and Technical Institute in Hudson, North Carolina with an A.A.S degree in occupational therapy assistant. She has been practicing occupational therapy in the same school district for 20 years. She loves her children, husband, OT, working with children and teaching Sunday school. She is passionate about engaging, empowering, and enabling children to reach their maximum potential in ALL of their occupations as well assuring them that God loves them!

Summer Occupational Therapy Activities

Summer occupational therapy activities

Looking for summer occupational therapy activities to support skill building or developmental areas with a summer OT theme? Today, we have a spin on our traditional occupational therapy activities to bring you Summer occupational therapy strategies that can be used in summer sessions or in home programs for the summer.

Summer Occupational Therapy Activities

Summer OT activities may look a little different than previous years. In years past, therapists may have been gearing up for an end of another school year and a break from in-person OT sessions. In recent years, you may be seeing more pencil grasp needs, self-regulation needs, handwriting issues, and fine motor skill needs.

What hasn’t changed about the end of a school year is the carefree days of summer that are ahead. As an OT, I love the feeling of the start of summer. There is just something about back-to-the-basics play of summer. Running around the backyard, hopping on bikes, sidewalk chalk, sprinklers and water play…summer play is a goldmine of motor and sensory activities that can boost those underlying skills kids NEED.

Because of this, I wanted to put together a resource on summer occupational therapy activities that can be implemented today. These are strategies to use for your own child to boost development and challenge skills. These are ideas to use in teletherapy or in home programs. These are play ideas that help kids with the balance of screens and active play. Use the summer resources for parents, teachers, and therapists to develop underlying skills in very fun ways! These are AWESOME summer occupational therapy activities!

Let’s help kids struggling from a year of mega-screen overload meet the goals they need to thrive. Plus…take more time for you this summer by using done-for-you resources!

Occupational therapists can use these summer occupational therapy activities when planning OT home programs for for summer programs.

Summer Occupational Therapy Activities 

In many areas, schools are winding down for the year. You may have a few weeks or a few days left. The daily countdown of number of remaining school days is dwindling.

You might be wondering how to balance work-from home and making summer days count.

You might be wondering how to keep the kids busy this summer without breaking the bank.

You might be a clinician thinking about summer programming and need a few fresh ideas.

You might be thinking about summer plans and ways to encourage development in fun ways the whole family can enjoy.

You might be a therapist putting together summer home programs.

You might be a teacher who is READY for the final bell to ring this school year 🙂

I wanted to put together a list of resources for summer activities that can boost the skills kids need. The “summer slide” can happen in handwriting and other school-based therapy goal areas, too!

Summer Occupational Therapy Activity Ideas

Occupational therapy practitioners often use movement and sensory experiences in therapy sessions to challenge motor planning, motor skill development, and incorporate sensory motor activity through the primary occupation of childhood: PLAY.

Because of this, sensory motor rich activity is recommended as supplemental and everyday activity for kids of all ages to support development of skill growth. Many of the OT activity ideas listed below also support executive functioning skills, problem solving, and other cognitive aspects of functional tasks.

First, grab this summer sensory path printable packet. It’s a free sensory path printable with a summer theme. Use it in therapy clinics, home OT sessions, or in summer sensory camps!

Try adding these OT activities to your summer bucket list:

  • Make our 3 ingredient kinetic sand– Making kinetic sand offers heavy work through the hands as a self-regulation tool and offers a tactile sensory experience.
  • Make a kite craft to develop fine motor skills, visual motor skills, eye-hand coordination, and scissor skills.
  • Play TV tag (or one of these tag games)- Tag is a great gross motor activity to develop endurance, motor planning, coordination, balance, and visual motor skills while adding proprioceptive and vestibular input to regulate the system.
  • Make an ice cream craft to support hand strength and fine motor skills. This craft is great for developing scissor skills too.
  • Play sidewalk hopscotch– Use sidewalk chalk to draw a hopscotch board. Then play using rocks or bean bags. Hopscotch is a great tool to add heavy work, vestibular and proprioceptive input, and to challenge motor planning, balance, and other gross motor skills. Hopscotch is a way to teach skipping skills, too.
  • Paint rocks- This sensory experience challenges tactile input and offers a fine motor activity. Use finger paints or a paint brush to incorporate tool use and more fine motor work.
  • Wheelbarrow walk– This exercise is a heavy work exercise that helps kids with motor planning, movement, and endurance through play while adding heavy work. Use wheelbarrow walks in relay races or in obstacle courses.
  • Make a flower craft– Go on a nature walk as a motor and sensory experience. Then use the nature hunt findings to make a fine motor flower craft. There will be no two crafts alike with this fine motor activity.
  • Plant seeds- There are so many sensory benefits to gardening. Read more about sensory gardening with kids.
  • Wrap sticks in string- This simple activity is big on bilateral coordination, fine motor skills, precision, eye-hand coordination, and executive functioning skills. Go out in the yard and gather some small twigs. Then, tie a knot with the string and wrap around the stick. Switch out colors to make colorful designs and patterns. Can you cross different colored strings or yarn together to make a pretty wrapped stick? You can see how we wrapped craft sticks in string here.
  • Make lemonade- Making food with kids is a huge fine motor, sensory motor, and executive functioning tool to develop many skills with kids of all ages. Check out our cooking with kids page for tons more cooking ideas and recipes for kids as well as why each recipe supports development of skills.
  • Make a bug catcher– This fine motor activity is a huge hit with kids, and you can use the materials you have on hand. Just raid the recycle bin or grab some boxes and containers before they go into the trash can. Then, head outside to catch some bugs. This is a challenging activity that supports fine motor, visual motor, and sensory development.
  • Visit a playground- Playing at the playground has many sensory integration benefits and there are so many ways to use regular playground equipment to develop motor and sensory skill sin kids. If self-regulation is a challenge, then the playground is a wonderful summer haven for supporting specific needs.
  • Play tug of war- This heavy work game offers strengthening, balance, motor planning, and proprioceptive input that can be calming to support self-regulation needs.
  • Play in the sprinkler- A hallmark of hot summer days is playing in the hose or sprinkler. Children can practice putting on their swimming suit, applying sunscreen, and work on hopping, jumping, skipping, and moving through the sprinkler. And, don’t forget about involving the child in setting up and removing the sprinkler and hose, too. Pulling a hose is an opportunity for proprioceptive input that can be very calming.
  • Pick flowers- Go on a sensory nature walk with the family along a trail or in a park. Picking flowers supports development of visual perceptual skills, working memory, visual processing, fine motor, and self-regulation skills. Getting outside in nature can be a great overall activity that supports development and is a reset for the whole family.
  • Make lunch for your family- Develop fine motor skills, sensory experiences, executive functioning skills, and functional participation development by making lunch or dinner. Here are all of our cooking with kids recipes where you’ll find specific recipe ideas that support development, all from the perspective of an occupational therapist.
  • Chalk line obstacle course- Work on balance, motor planning, gross motor skill coordination through play using sidewalk chalk to create a driveway obstacle course. Can you hop on lily pads, tiptoe along a bridge, and animal walk on a wavy line?
  • Make DIY musical instruments- Making musical instruments are a fun way to build fine motor skills and address auditory processing skills too. Ideas include:
  • Climb a tree- Climbing on trees and limbs are a wonderful way to offer proprioceptive input, vestibular input, visual processing skills with depth perception, visual scanning, and eye-hand coordination. Holding on to a branch, pulling oneself up and over limbs, crossing midline, and bilateral coordination are developed through play. When finished, this is a powerful confidence booster!
  • Write a letter to a friend- (or a post card or email!)- Work on letter formation and other handwriting skills by writing a short letter or card to a friend this summer. It’s a very functional handwriting task that kids will be proud of!
  • Make a fairy garden- Use materials found around the home to support development of fine motor skills. The pretend play is a fun way to develop social emotional skills, too.
  • Wash the car (or a bike)- Support gross motor development by using a sponge, soapy water, and the hose to add proprioceptive input.
  • Watch and draw birds- Look for birds outdoors, in the yard, or from the windows. Address visual scanning, working memory, and pencil skills.
  • Go on a rainbow nature hunt- Use a piece of contact paper and find items of different colors of the rainbow to make a rainbow nature hunt craft. This is a great activity for fine motor, visual processing, and heavy work input.
  • Trace a friend with chalk on a driveway or sidewalk- Use sidewalk chalk to trace a friend on the driveway or sidewalk. This is a great activity to develop fine motor skills, and can support development of interoception by drawing internal organs and talking about how the body works inside and out!
  • Make bubble wands with pipe cleaners- use pipe cleaners and beads to develop fine motor skills to make a bubble wand. Then support oral motor skill development by blowing bubbles.
  • Play Red Rover- Lawn games like red Rover develop gross motor skills, visual motor skills, and executive functioning as well as adding proprioceptive and vestibular input.
  • Write the alphabet with chalk- Writing letters with sidewalk chalk supports the motor plan to create each letter and offers great proprioceptive feedback through kinesthetic learning. Writing letters with chalk or names and words can be a fun summer activity. Then spray the letters and words off with the hose or a spray bottle for more motor skill development!
  • Find shapes and images in the clouds- Look up to work on visual canning, memory, attention, and visual motor skill by finding shapes and outlines in the clouds.
  • Bake cookies
  • FInger paints
  • Fly a kite
  • Splash pad or water park
  • Write in a journal
  • Call a friend
  • Start a kickball game
  • Make leaf rubbings
  • Play hide and seek
  • Catch fireflies
  • Tie dye
  • Play cards
  • Build a fort
  • Have a sleepover
  • Play with glow bracelets at night in the yard
  • Read a book outside
  • Have a family game night
  • Draw self-portraits
  • Walk a pet

Need even more summer ideas?

~Add these hula hoop activities to therapy sessions.

~Use sidewalk chalk to support fine motor skills.

~ Print off and send home this list of 100 things to do this Summer. It’s a therapist-approved list of Summer activities!

~Print off these Summer Writing Lists to work on handwriting skills.

~Grab some of the materials in The OT Toolbox Member’s Club. There is something for everyone and Summer themed activities to support all skill levels.

~ Do some or all of the activities listed here in this Sensory Summer Camp at Home plan. All of the activities and ideas are free and use items you probably already have.

~ Sneak in handwriting practice while traveling with these motivating and authentic ideas. HERE are a few MORE natural writing experiences for summer that keep those pencils moving.

~ Try some of the activities in this Summer Activity Guide designed to encourage play and creativity in activities for the whole family.

~ Practice the motor planning and fine motor skills needed for handwriting and with a sensory twist using the ideas outlined in this Sensory Handwriting Backyard Summer Camp.

~ Try these Backyard Vestibular Activities for Summer to encourage movement and sensory experiences right in the backyard.

~ Print off this June Occupational Therapy Calendar for ideas to last the whole month. (It’s from a couple of years back so the dates are off, but the activities still work!)

~ These no-prep, basically free summer activities won’t break the bank and boost the underlying skills kids NEED, in fun ways.

~ Use sidewalk chalk to boost fine motor skills.  

~Make a summer time capsule with the whole family and create memories that can be looked back on years from now.   

~Create a summer kick-off bucket filled with toys and items for months of sensory play.     

~The kids will love these frozen fruit kabob snacks. It’s a great alerting sensory snack that doubles as a healthy summer treat.

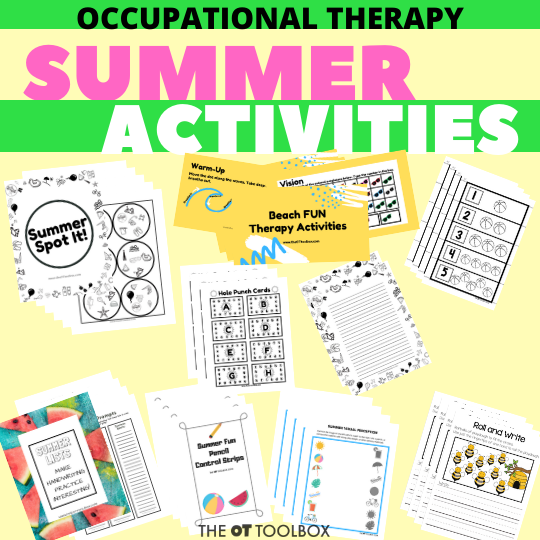
One tool to support Summer OT home programs, OT tutoring sessions, or occupational therapy summer camps is our Summer Occupational Therapy Activities Packet.

It’s a collection of 14 items that guide summer programming at home, at school, and in therapy sessions. The summer activities bundle covers handwriting, visual perceptual skills and visual motor skills, fine motor skills, gross motor skills, regulation, and more.

You’ll find ideas to use in virtual therapy sessions and to send home as home activities that build skills and power development with a fun, summer theme. Kids will love the Summer Spot It! game, the puzzles, handouts, and movement activities. Therapists will love the teletherapy slide deck and the easy, ready-to-go activities to slot into OT sessions. The packet is only $10.00 and can be used over and over again for every student/client!

Grab the Spring Occupational Therapy Activities Packet HERE.

NEW RESOURCE: The Summer Fine Motor Kit– This 90 page packet it specifically designed to build the motor skills kids have been limited in over the past year or so: handwriting, cutting with scissors, small motor manipulation, arch development and hand endurance, strength, pinch, and coloring. The Summer Fine Motor Kit includes different tools and materials than our other fine motor kits, but has some of the most-requested favorites in fun summer themes:

  • Summer Play Dough/Handwriting Mats (3 writing paper styles: single rule, double rule, and highlighted lines)
  • Lacing cards
  • Color and cut sensory bin cards
  • Sea Creature, Summer Play, & Summer Treats Silly Paths (great for pencil control and eye-hand coordination)
  • Tracing mazes/ Fine motor mazes
  • Symmetry drawing page
  • Fine Motor Flip Pages (flip a coin or small object and place them along a path)
  • Glue skills pages
  • Prewriting shapes sheets
  • Toothpick art activities
  • Pencil control worksheets/Fine motor placement paths
  • Scissor skills activities (simple and complex shapes)
  • Sensory bin cards

NEW RESOURCE: The Summer OT Bundle– Want to cover all your bases this summer? This bundle has everything you need for therapy planning, home programs, summer camps, Grandma’s house, or extended school year programs so you can just print and go. The bundle is $20 and includes:

The ideas listed above should help you create therapy home programs, and keep the kids loaded up on creative, open-ended, and movement-based PLAY that their little bodies NEED!

Use these summer occupational therapy activities when planning sensory activities, fine motor, and gross motor developmental ideas for kids.

Want to take summer play to the next level? Be sure to grab your copy of the Summer OT Activities Bundle!

Summer activities for kids

Alphabet Exercises for Kids

Alphabet exercises for gross motor activities for kids with an alphabet theme

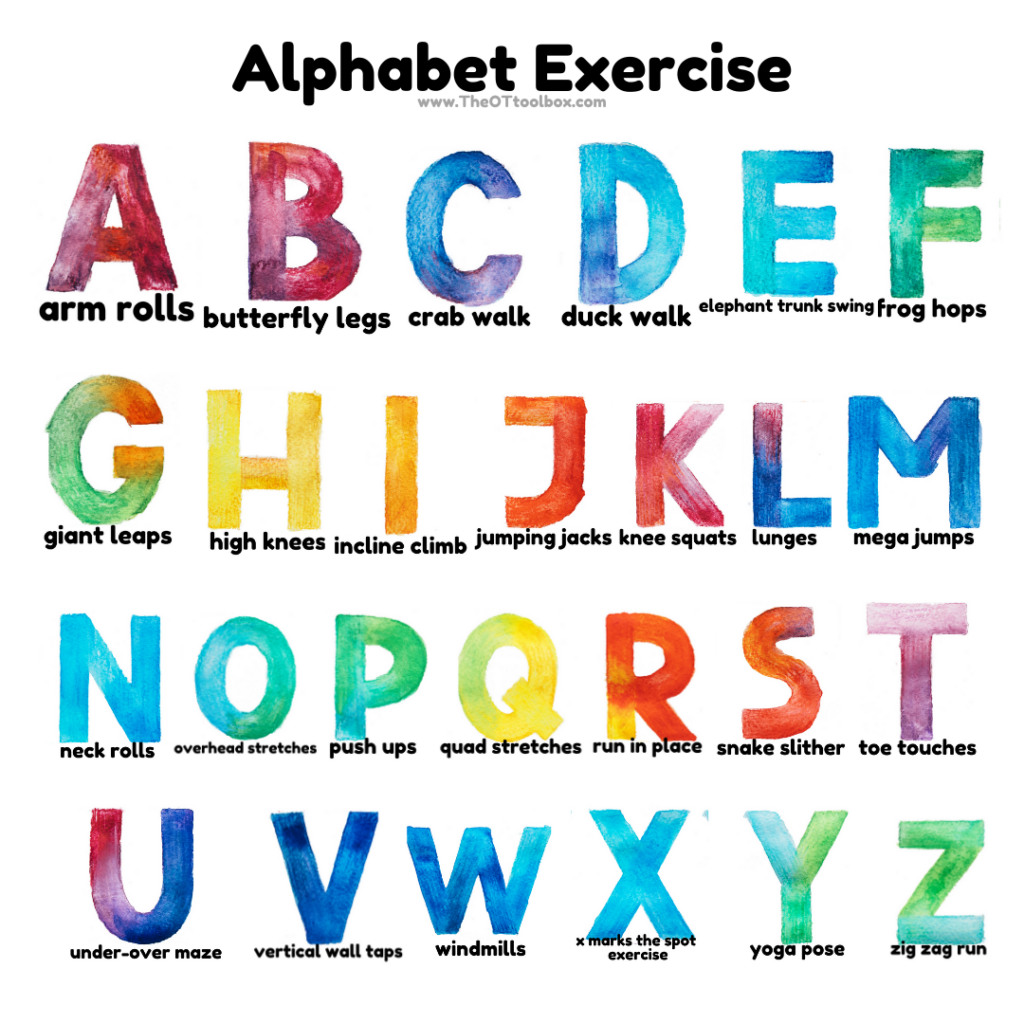
Exercise for kids is so important on many levels. Use these alphabet exercises to help build skills, and get the kids moving with an alphabet theme. Add this alphabet for kids activity to your list of gross motor coordination activities.

Why Use these Alphabet Exercises?

In therapy, we look to help children build their gross motor skills, core strength and endurance, body awareness, motor planning, and self-regulation skills. It is recognized that regular exercise can help defend against childhood mental health and behavioral disorders, such as anxiety and depression.

The consistent engagement in physical activity promotes overall health and wellness and provides a more grounded mindset for daily living and participation in life activities.

These alphabet exercises were actually created as a resource in 2020, when many children were working remotely. With all of the time that children spent completing school work as part of teletherapy activities, or even their increased time engaging with electronics at home, they needed encouragement to exercise or simply participate in physical activity during the day.

However, there is even more of a need for these alphabet exercise even though most students are back to traditional learning environments. Students are on screens more than ever before. The symptoms of too much screen time is evident. Additionally, therapists are seeing more of a need to address self-regulation challenges in schools and in homes.

That’s where this movement-based alphabet for kids comes in as a support activity.

Research tells us that outdoor play is essential. However, even going outside to play or engage in motor skills is a challenge for some children!

Making exercise a fun playtime activity is the best way to help a child build skills while benefiting their health and wellness and keeping weight in check.  

Exercise can build confidence and self-esteem, helping a child to feel better about themselves and increasing their overall happiness.

Alphabet Exercises

One way to engage children in activity is with a structured therapy band exercise program, however, occupational therapy home programs can be creative and use out-of-the-box ideas like this ABC theme exercise activity.

For a printable PDF version of this alphabet exercise page, scroll to the bottom of this page and enter your email address.

These letter exercises are also available in an interactive Google slide deck where students can move parts of the slide as they complete each letter activity. Click here to access that ABC exercises slide deck.

Alphabet exercises for indoor gross motor activities for kids

Alphabet Gross Motor ACTIVITIES

Would you like a playful way to engage a child or children in therapy exercises or in a home exercise program?

How about trying this fun ABC’s of Exercise activity page? There are many ways to use these alphabet exercise letters in learning and occupational therapy activities guided by individual goals.

  • Children can either spell words or even their names to engage in the physical activity which accompanies each letter.
  • Use some homework spelling words and perform the exercises related to them! Wow…homework AND exercise!
  • Another easier way to play is by placing either A through Z foam letters, Bananagrams, or Scrabble tiles into a bag or basket and then have the child pull one letter out at a  time and match it to the corresponding letter on the ABC’s of Exercise chart to perform the exercise listed.
  • Work through the child’s name for an individualized exercise program.
  • Add the letter gross motor activities to a letter of the week learning program.

Don’t have foam letters or board game letter tiles?  No worries, just grab some puzzle pieces, folded pieces of paper, beans or craft sticks and write the letters on them!

Toss any of these into a bag or basket and pick one…easy and cheap!  You can also incorporate some handwriting with this activity too by having them write each exercise letter or a word beginning with that letter after they complete the exercise.

The best part about this activity page is that it is open-ended so you (or they) get to determine how many to perform of each exercise and how many exercise letters to perform.

In addition to being open-ended, this activity page provides a wonderful opportunity for teaching students exercises which can later be used when the child is feeling heightened and needing some self-regulation intervention tools.

Use the activity sheet as an inclusion tool for a whole class activity, small group or individual therapy session, or even as a supplement to a motor pathway in the school building! Have the child do the activity that spells their name when using it as part of a motor pathway in school!

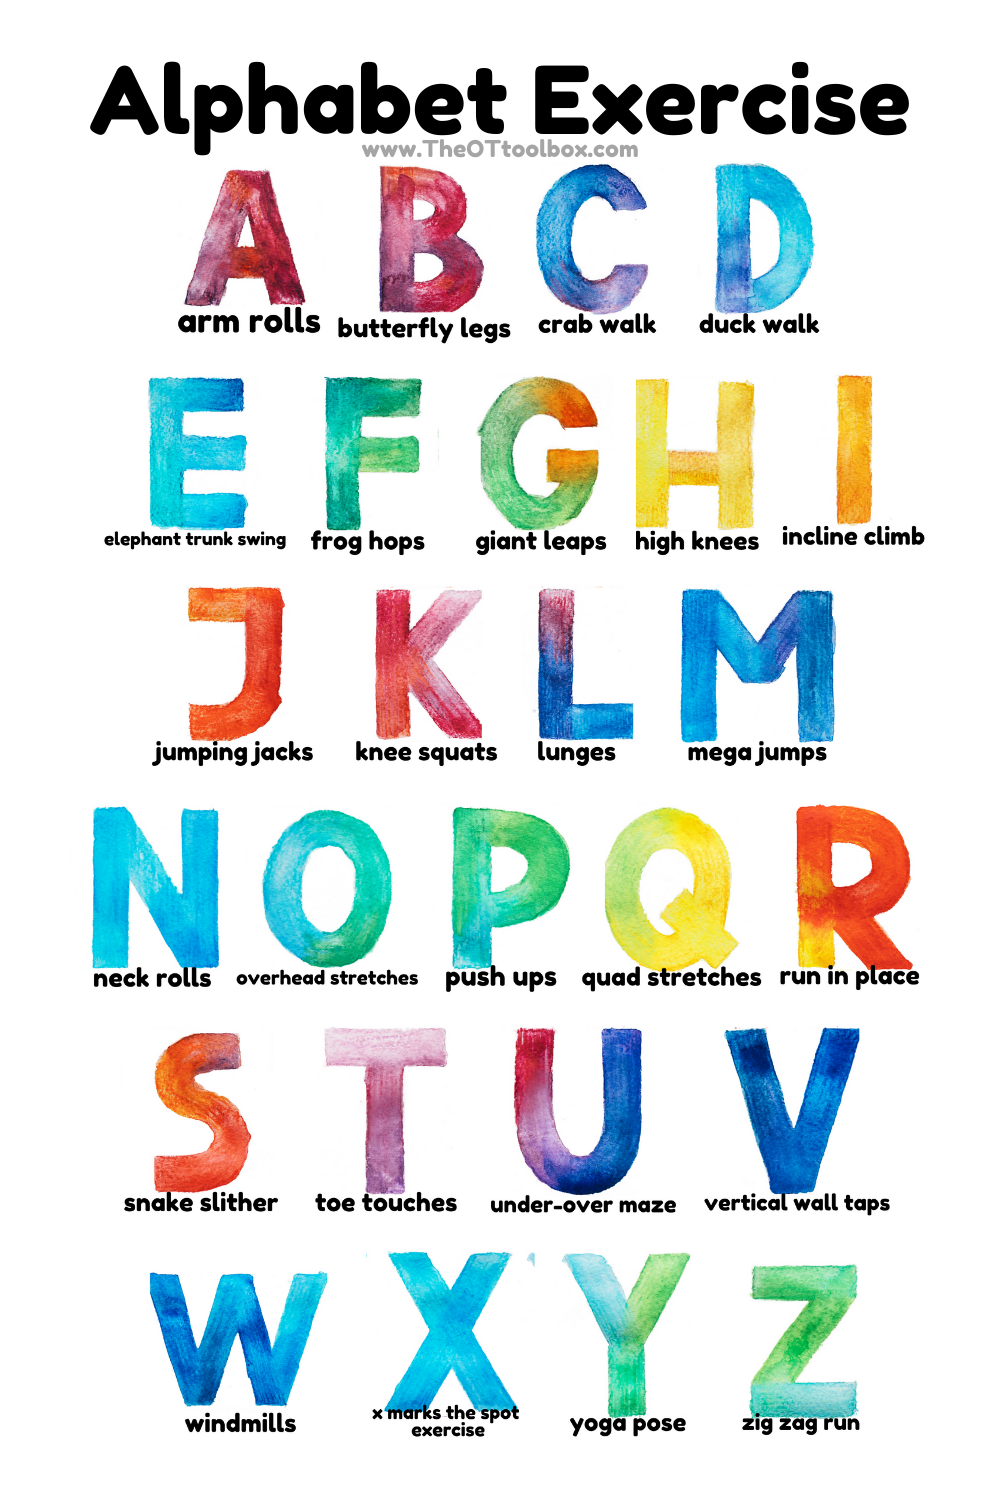
The following list are the exercises and their descriptions which are utilized in the ABC’s of Exercise resource:

ABC Exercises:

A is for arm rolls gross motor activity part of an abc exercise for kids

Arm rolls – Have child lift arms out from their sides and rotate arms in small circular patterns, first forward and then backward.

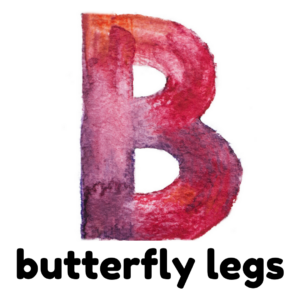
B is for butterfly legs gross motor activity part of an abc exercise for kids

Butterfly legs– Have child sit on the floor with legs flexed and bottom of feet touching. Then have them flap their legs up and down to resemble the wings of a butterfly.

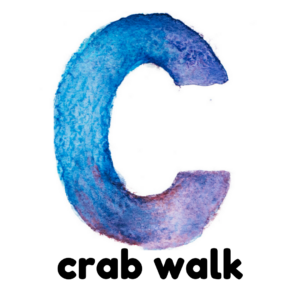
C is for crab walk gross motor activity part of an abc exercise for kids

Crab walk – Have child sit on the floor, lean back on their arms and lift their body up with their legs and arms to walk along the floor resembling the walk of a crab.

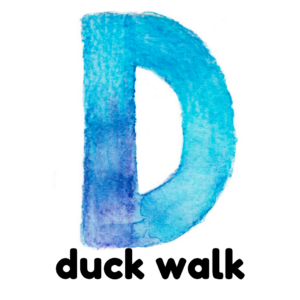
D is for duck walk gross motor activity part of an abc exercise for kids

Duck walk – Have child squat down and walk on the floor while squatted resembling the walk of a duck. Add having them bend their arms up to make them look like duck wings.

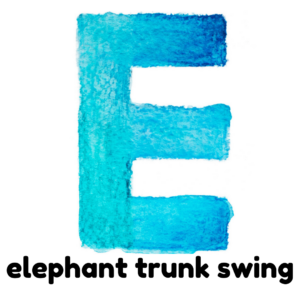
E is for elephant trunk swing gross motor activity part of an abc exercise for kids

Elephant trunk swing – Have child stand up and lean forward with arms extended and fingers linked together. Once this position is achieved, have child sway their arms left and right resembling an elephant’s trunk.

F is for frog jumps gross motor activity part of an abc exercise for kids

Frog hops – Have child squat down on the floor with their arms in front of them and have them leap forward as far as possible resembling a jumping frog. Do this repeatedly.

G is for giant leaps gross motor activity part of an abc exercise for kids

Giant tape lines – Place tape lines on the floor to work on jumping from line to line or complete giant jumps by attempting to jump as far as possible from a standing position.

H is for high knees gross motor activity part of an abc exercise for kids

High knees – Have child lift alternating knees up to hands for tapping and while marching around the room. Have them lift knees as high as possible.

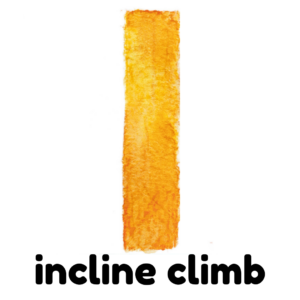
I is for incline climb gross motor activity part of an abc exercise for kids

Incline climb – Have child climb up a slide, long wedge or hillside or toss the couch cushion or even the bed mattress in the floor and make a ramp. If all else fails, just use the stairs!

J is for jumping jacks gross motor activity part of an abc exercise for kids

 Jumping jacks – Have child start by standing with arms out to their sides and legs together then have them jump while spreading their legs and feet apart and arms up and over their head. Follow with bringing arms back to sides and legs and feet back together.

K is for knee squats gross motor activity part of an abc exercise for kids

 Knee squats – Have child start with standing up and then squatting to floor and back up again, repeatedly.

L is for lunges gross motor activity part of an abc exercise for kids

 Lunges – Have child step forward with one leg and lower their hips until both knees are bent, then push back up to starting position. Alternate legs.

M is for mega jumps gross motor activity part of an abc exercise for kids

 Mega jumps – Have child jump from a higher level to the floor, either from a chair, sofa, steps, etc. or they could also simply try to jump as far as possible forward and then try to jump farther each time to beat their last distance.

N is for neck rolls gross motor activity part of an abc exercise for kids

 Neck rolls – Have child stand or sit to roll their neck and head in a circular pattern from left to right and from right to left.

O is for overhead stretch gross motor activity part of an abc exercise for kids

Overhead stretches – Have child reach up overhead, link fingers together (a great finger strength exercise) and stretch arms up as high as possible. Add standing on tiptoes to make it really high. 

P is for push ups gross motor activity part of an abc exercise for kids

Push-ups – Have child lie on the floor and push their body up with their hands and arms. If a regular push-up is too difficult, complete knee push-ups by simply weight bearing on flexed knees while completing push-ups rather than trying to weight bear on toes.

Q is for quad stretches gross motor activity part of an abc exercise for kids

Quad stretches – Have child perform, sit to stands and stand to sits, while sitting in a chair. Do this repeatedly.

R is for run in place gross motor activity part of an abc exercise for kids

Run in place – Have child run in place for a specific amount of time such as while counting to 20.

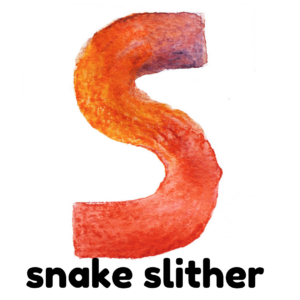
S is for snake slither gross motor activity part of an abc exercise for kids

Snake slither – Have child lie on their stomach and move their body forward trying to keep as much of their body in contact with the floor as possible, similar to an army crawl.

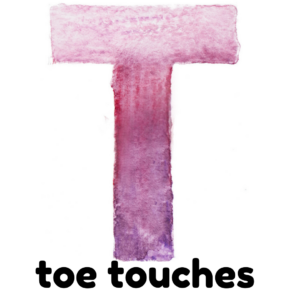
T is for toe touches gross motor activity part of an abc exercise for kids

Toe touches – Have child stand and bend over to touch their toes with their fingers and back up to standing. Do this repeatedly.

U is for under over maze gross motor activity part of an abc exercise for kids

Under/over laser maze – Create a laser maze with use of tape, string, or streamers in the hallway and have child go under and over to move through it. Or have them crawl under tables and over furniture to achieve under/over.

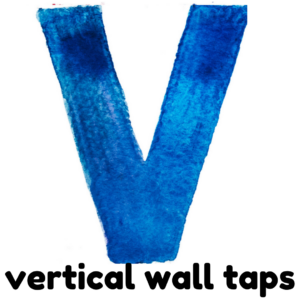
V is for vertical wall taps gross motor activity part of an abc exercise for kids

 Vertical wall taps – Have child stand beside a wall and jump to tap the wall attempting to beat their last height touched with each jump.

W is for windmills gross motor activity part of an abc exercise for kids

Windmills – Have child stand with arms and legs out to the sides. Have them bend over to touch right fingertips to left toes and back up to standing and then bend to touch left fingertips to right toes and back up to standing.

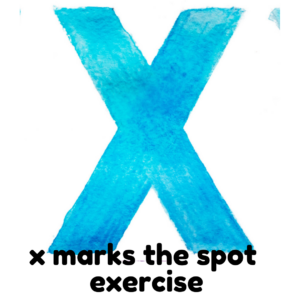
X is for x marks the spot gross motor activity part of an abc exercise for kids

X-marks the spot exercise – Have child cross over legs and feet and cross over arms and hands while jumping to create X patterns with extremities. Or complete ‘X’ cross crawls to work on cross-lateral activity of extremities.

Y is for yoga gross motor activity part of an abc exercise for kids

Yoga poses – Have child pick a yoga pose to complete, such as cat pose, cobra pose, or shark pose.

Z is for zig zag run gross motor activity part of an abc exercise for kids

Zig-zag run – Use small obstacles to create a zig zag course or simply attempt to run a zig zag pattern.

With home learning, indoor activities, and social distancing upon us, this exercise activity page will help meet the needs of your child so they can get in their daily exercise while also releasing some extra “cooped up” energy!

Alphabet gross motor exercises for kids

FREE Alphabet Exercise PDF

Enter your email address below to access this free ABC PDF to add heavy work, core strength, movement, and gross motor skills with an alphabet theme. Use the printable alphabet exercise PDF as a poster for learning letters through movement.

Best of all this alphabet for kids activity supports learning through play!

Get a free ABC Exercise PDF

    Are you interested in resources on (check all that apply):
    We respect your privacy. Unsubscribe at anytime.

    Resources:

    Educating the Student Body: Taking Physical Activity and Physical Education to School. Editors: Harold W. Kohl, III and Heather D. Cook. Authors: Committee on Physical Activity and Physical Education in the School Environment; Food and Nutrition Board; Institute of Medicine. Washington (DC): National Academies Press (US); 2013 Oct 30.

    This post was written by contributor author, Regina Parsons-Allen.

    Hula Hoop Activities

    hula hoop activities

    A hula hoop is a great old-school toy and specific hula hoop activities can be used to not only build strength, coordination, balance, and motor planning, but can be used in other areas such as learning, sensory, and visual motor, as well as gross motor coordination. Hula hoops are versatile and inexpensive, while being colorful and attractive, to spark the interest and motivation of children. There are a wide array of hula hoop activities that can be done, in addition to the traditional method.

    hula hoop activities for therapy and gross motor development

    Hula hoop Activities are great!

    Hula hoops can be used indoors or outdoors and with children and adults of all ages. That’s right all ages. In addition to the conventional manner, there are several imaginative and thoughtful hula hoop activities that are fun and safe for all!  

    Hula hoops are cheap and easy to find. If you don’t have, or can’t find a hula hoop that’s okay, you can make your own hula hoop! The directions are included in this post. People can decorate it however they wish, making it a special craft activity too. 

    Take a look at some fun, creative hula hoop activity ideas to get kids up and active, and a little ‘hoopy’ this season! 

    The hula hoop games and activities below are great for outdoor lawn games this summer, but they can be included in indoor therapy obstacle courses or games to get kids moving!

    Gross Motor hula hoop games:

    • The Floor is Lava Games These are fun games for home on a rainy day. Use a hula hoop as a “safe island” when playing is game. They work on jumping, leaping, hopping, rolling, and crashing.
    • Hula Hoop Jumps – provide heavy work input through the core and gross motor muscle groups, to improve regulation, and body awareness. 
    • Rabbit Hole – is a cooperative gross motor group activity that helps to teach the concept of personal space, using a hula hoop, and safety cones.  This is a great way to teach about personal bubbles.
    • Hula Hoop Run activities – use several hula hoops positioned out on the ground, or floor to create a “tire run” pathway for kids to hop, jump, or leap through. There are several pattern ideas included, which will address gross motor coordination, balance, and agility while having fun too!
    • Hula Hoop Pass – Grab some friends and a hula hoop! Children hold hands while standing in a line or a circle, while working to move the hula hoop around the group, stepping in and out of it, ducking through it, while holding hands. This works to shift the hoop to the next person, until it makes it from the first, to the last person within the group. This is an incredible coordination and motor planning activity that helps to build group cooperation and teamwork.
    • Don’t Jiggle the Spiders! Much like our spider obstacle maze, you can wrap yarn around a hula hoop and thread spider rings through the string. Then, children can move the hoop as a hand-held obstacle course has a fun way to have children work on balance and body control as they work to move through the spider web, designed on a hula hoop, and try not to ‘jiggle the spiders’ while doing so. 
    • Basket of Toys- Here is a fun twist on the traditional toy scavenger hunt. In this game, you scatter small toys or water balloons and hula hoops on the ground. Children work to move the toys and balloons using their feet to their specific hula hoop. What happens if they pop a balloon while kicking? They must visit the Toy Master (and adult or a specific player) and complete a motor task to earn another balloon. A fun way to work on gross motor skills, motor control, and eye-foot coordination. 
    • Hula Blockers is a fun hula hoop game in which each player stands in their own hoop tossing a bean bag into another player’s hoop, while simultaneously attempting to defend their own hula hoop space, blocking another player’s bean bags from landing in their space.

    Add these Gross Motor Coordination Activities for more fun. Or check out these Gross Motor Toys for some fun games.

    Sensory hula hoop actitivies:

    • Hula Hoop Mobile here is a fun visually stimulating idea for children with visual impairments, or other challenges, that might benefit from a colorful hanging mobile that has texture, sound, weight, and visual appeal. It can be used for individual play, or as a group activity.
    • Sensory Hula Hoop Video – need a fun sensory tool for babies? Then this Sensory Hula Hoop video might be a fun DIY for you! It includes a variety of visually stimulating materials as well, as texture and sound. It can be placed flat on the floor to encourage tummy time, or hung above a baby lying supine, to encourage reach and exploration. Note: Always choose baby-safe materials to prevent injury. 
    • Baby and Toddler Tummy Time Activity- Another spin on the sensory hula hoop activity, is to attach baby rattles and baby toys around the circle, then have babies start with tummy time in the center of the hoop. This is a great tool for adding novel activities to tummy time. The circular positioning of the toys around the hoop encourages babies to reach, visually scan, roll, and pivot on the upper body, as they move and stretch to reach, and engage with different toys. 
    • Hula Hoop Canopy – If you’re feeling really ambitious you can create a Hula Hoop Canopy with lights and sheer curtains. It makes a great addition to a calming corner.
    • Hula Hoop Tunnel Activity – Make a tunnel with several hula hoops and you can even add scarves or longer strips of streamers for children to move through making it a gross motor AND sensory experience in one!

    Eye-Hand Coordination hula hoop games:

    • Hula Hoop Web – use masking tape to create a Hula Hoop Web in the hoop. Have children toss cotton balls or pom-pom balls to stick to the web.

    • Hula Hoop Target – Hang a hula hoop from the ceiling or a tree, and you have an instant target for ball tossing.
    • Hula Hoop Bullseyes- Lay different-sized hula hoops on the ground, creating a bulls-eye target. Place numbers inside the hoop to create targets, to score points when tossing a bean bag.
    • Place safety cones on the ground for children to toss a hoola hoop around the cones, to score points. 
    • Hula Hoop Basketball – Hang a few hula hoops from a basketball goal for young children to have their Hula Hoop Goal for ball play. A great way to have younger kiddos enjoy their own skill level of basketball. 
    • Flight School Create this fun game by having children fold paper airplanes, then try to fly them through hula hoops that are hung from the ceiling. Include children of all ages with this fun activity, as you can hang the hula hoops at different heights to accommodate any skill level.  Another way to play when hanging the hoops at different heights, would be to use a point system, and score points based on the different heights of the hoops.  

    Learning games with a hula hoop: 

    • Around the Clock hula hoop activity is a fun way to work on time with kiddos in the classroom, during therapy, and at home! 
    • Hula Hoop Zones Activity- Use red, yellow, green, and blue hoops to work on the Zones of Regulation™ curriculum in the classroom and during therapy. Read more on this activity.
    • Find and Rhyme game is a great way to work on rhyming with young children! All you need are some hula hoops, and plastic plates. It’s similar to a scavenger hunt for words. Here is an explanation.
    • Personal space – Need to help children understand personal space? The use of a hula hoop is the perfect tool! They can sit or stand inside of it, to help them visualize their own personal space, and the space of others. I’ve seen them used while sitting at a table during snack time to help children understand their personal space.

    make your own hoop

    Here are the instructions for Making a Hula Hoop. They include a brief explanation of the three most common types of tubing people use to create one. If you think you need more detailed instructions for creating a hula hoop, take a look at How to Make Your Own Hula Hoop, and see how they designed their hoop using irrigation tubing. 

    Want another fun idea for creating a hula hoop? I found this Snap Together Hula Hoop (affiliate link) that children can work on building before using!  This type of hoop makes it easy to transport and adds another element of motor skills while building and deconstructing.

    more outdoor fun

    There’s only one last thing to say about hula hoops, remember to join in the fun yourself and enjoy some screen-free playtime with kiddos! 

    Want to add this resource to your therapy toolbox so you can help kids thrive? Enter your email into the form below to access this printable tool.

    This resource is just one of the many tools available in The OT Toolbox Member’s Club. Each month, members get instant access to downloadable activities, handouts, worksheets, and printable tools to support development. Members can log into their dashboard and access all of our free downloads in one place. Plus, you’ll find exclusive materials and premium level materials.

    Level 1 members gain instant access to all of the downloads available on the site, without enter your email each time PLUS exclusive new resources each month.

    Level 2 members get access to all of our downloads, exclusive new resources each month, PLUS additional, premium content each month: therapy kits, screening tools, games, therapy packets, and much more. AND, level 2 members get ad-free content across the entire OT Toolbox website.

    Join the Member’s Club today!

    Regina Allen

    Regina Parsons-Allen is a school-based certified occupational therapy assistant. She has a pediatrics practice area of emphasis from the NBCOT. She graduated from the OTA program at Caldwell Community College and Technical Institute in Hudson, North Carolina with an A.A.S degree in occupational therapy assistant. She has been practicing occupational therapy in the same school district for 20 years. She loves her children, husband, OT, working with children and teaching Sunday school. She is passionate about engaging, empowering, and enabling children to reach their maximum potential in ALL of their occupations as well assuring them that God loves them!

    Number Formation Roads

    number formation playmats

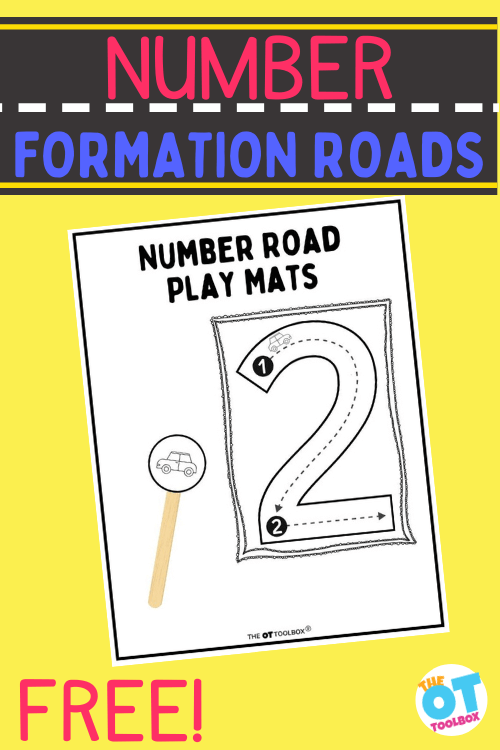
    Today we have a fun free number formation activity for you…printable number playmats! These number formation roads are a great way to work on practicing numbers with hands on play while building strength, dexterity, and fine motor skills. Print them off, use them to drive cars along the number shaped roads, or laminate and us as free printable number playdough mats. The options are limitless!

    number formation road playmats for kids to learn number formation through multisensory play.

    Number Playmats

    Cars are so motivating!  They are not just for boys either.  My girls used cars and trucks in imaginary play, to transport Barbies and action figures to the mall, playground, or to Barbie’s friends house.  It is often necessary to use motivators in enticing young learners to do difficult work. The same way adults work for a paycheck, children work for motivators, prizes, incentives, and other rewards.

    There are so many ways to use toys in occupational therapy, and these play mats are just one way to work on the skill of forming numbers. Learning letters and numbers is difficult, especially when it comes to writing them. 

    These Number Road Play Mats are a motivating activity to address number recognition and formation.

    Why are learners so resistant to writing, coloring, and cutting?

    1. These tasks are difficult.  It is difficult to keep finding motivation to do something hard.
    2. Most of the learners we work with are not good at these tasks, that is why they are getting therapy or other help.  Again it is difficult to stay motivated doing activities you are not good at. 
    3. Visual motor tasks are not predictable.  Puzzles are predictable.  There is only one way a puzzle can go together.  Cutting and coloring are not predictable. It is difficult for a new learner to make exactly the correct strokes on paper, cut on the lines, or glue items in the correct position.  Despite the correct amount of effort, sometimes the eyes/hands/body have different plans.  
    4. It is hard to want to keep trying when failure happens more than success.

    NUMBER FORMATION ROAD PLAYMATS

    How fun are these number formation play mats?  They are not only fun, but functional. People learn by doing. Kinesthetic awareness is the body learning a movement by doing it. 

    We can do many activities without having to see what we are doing, such as walking, riding a bicycle, or texting. Written expression is the same. It is possible to learn to write without great kinesthetic awareness, but it is more laborious, less fluid, and slower. 

    The number road playmats use kinesthetic awareness to teach the body to “feel” the movement of the letters. 

    How to use the Number Road Play Mats

    There are so many hands-on, multisensory ways to work on number formation with road playmats. These can be used over and over again, really establishing a motor plan and muscle memory for forming numbers correctly.

    Amazon affiliate links are included below.

    1. Have learners color, cut, and glue the cars onto craft sticks (popsicle sticks, tongue depressors), then trace around the number roads in the designated sequence. Learners can custom make their cars to fit their style (don’t forget the glitter!).  This adds a coloring, cutting, and gluing element.
    2. Design and color/cut/glue/laminate these ahead of time to make it more of a kinesthetic than fine motor task.  It still involves some visual motor skills, but not as many.
    3. After moving their cars through the paths, have learners use a marker to draw inside the number road playmat paths.  Progress to copying the numbers, when learners are ready to move forward.
    4. Teach learners to put words to their actions.  Examples: seven, “across and down”, nine, “a circle around then a long stick down”.  Use whatever language describes the visual image for your learners. 
    5. Use toy cars to zoom around the numbers!
    6. Find  mini traffic cones (affiliate link), small erasers, pom poms, pennies, gummy bears, or other items, and put them on the roads to build fine motor skills.
    7. Form the numbers on the number formation play mats out of playdough, Wikki Stix (affiliate link), Theraputty, or string. We love Wikkistix activities and these number roads are a great way to build the visual motor skills needed for writing numbers.
    8. Laminate the pages, then spread shaving cream over them and have learners use their fingers to draw the numbers or zoom their cars through them.  This turns it into a multisensory task.
    9. Swap the cars for another picture such as an ice cream truck, bug, puppy, or other motivating object.

    How we learn

    There are four different types of learning styles. Not everyone learns the same.

    • Some people are visual learners, they need to see to process the information. For these learners, visual processing skills are strong. 
    • Others are auditory learners, preferring to hear directions verbally to understand. For these learners auditory processing skills are strong.
    • There are kinesthetic learners, who want to have hands-on experience, to be able to learn.
    • Others are more academic, needing to read and write about what they are learning. 

    It is possible to be one, or all of the above.

    For this reason, it is advantageous to have a multimodal approach, or a multisensory learning approach

    Provide visual, sensory, hands on, auditory, and gross motor experiences to enhance learning. The number playmat can provide instruction through all four learning styles depending on the presentation. Be mindful of the learning preferences of your students, working them into your instruction.  What is your preferred learning style?

    Other great number activities 

    It would be rare for a learner to be able to write all their numbers from just this one printable number formation play mat.  As always, the OT Toolbox is full of great resources to build your toolbox.

    Check them out! 

    Are you a member of the OT Toolbox yet?  

    Want to add this resource to your therapy toolbox so you can help kids thrive? Enter your email into the form below to access this printable tool.

    This resource is just one of the many tools available in The OT Toolbox Member’s Club. Each month, members get instant access to downloadable activities, handouts, worksheets, and printable tools to support development. Members can log into their dashboard and access all of our free downloads in one place. Plus, you’ll find exclusive materials and premium level materials.

    Level 1 members gain instant access to all of the downloads available on the site, without enter your email each time PLUS exclusive new resources each month.

    Level 2 members get access to all of our downloads, exclusive new resources each month, PLUS additional, premium content each month: therapy kits, screening tools, games, therapy packets, and much more. AND, level 2 members get ad-free content across the entire OT Toolbox website.

    Join the Member’s Club today!

    FREE Number Formation Road Play Mats

      We respect your privacy. Unsubscribe at anytime.

      Victoria Wood, OTR/L is a contributor to The OT Toolbox and has been providing Occupational Therapy treatment in pediatrics for more than 25 years. She has practiced in hospital settings (inpatient, outpatient, NICU, PICU), school systems, and outpatient clinics in several states. She has treated hundreds of children with various sensory processing dysfunction in the areas of behavior, gross/fine motor skills, social skills and self-care. Ms. Wood has also been a featured speaker at seminars, webinars, and school staff development training. She is the author of Seeing your Home and Community with Sensory Eyes.

      NOTE*The term, “learner” is used throughout this post for readability and inclusion. This information is relevant for students, patients, clients, preschoolers, kids/children of all ages and stages or whomever could benefit from these resources. The term “they” is used instead of he/she to be inclusive.

      Powerful Action Rhymes and Nursery Rhymes with Actions

      nursery rhymes with actions

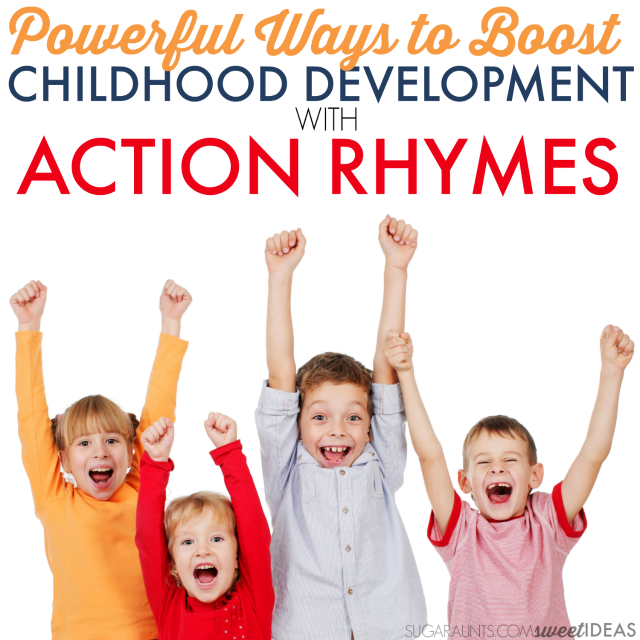
      Kids love finger plays and action rhymes.  You know the ones, right?  Here, we’re sharing nursery rhymes with actions that support development including gross motor coordination, bilateral coordination, and body awareness. These movement and rhyme phrases and songs that fill every childhood, preschool classroom, and library story time are a classic  part of childhood. 

      Rhymes with action movements inspire rhythm and rhyming skills, but there is more than that: They are engaging, fun, and repetitive ways to work on motor development.

      These nursery rhyme actions are great additions to nursery rhyme crafts!

      nursery rhymes with actions


      But, did you know that action rhymes help with childhood development? Childhood development and action rhymes go hand-in-hand so to speak.  Kids learn and grow by moving and repeating and then independently saying and singing rhymes that many kids could sing along to.  

      What are some ways that childhood development and action rhymes help a child grow?

      Action rhymes are a great way to address skills such as:

      Use these creative and powerful nursery rhymes with actions to develop skills in OT sessions.


      This post contains affiliate links.


      Looking for brain break videos for the classroom or home? Here are the best brain break videos on YouTube.

      What are action rhymes?

      Action rhymes are movement songs or nursery rhymes with movement.  

      They might be gross motor activities like “I’m a Little Teapot” or “Duck, Duck, Goose”. Or, they might be a fine motor activity like “Eensy Weensy Spider” or “Where is Thumbkin”.  

      There are so many nursery rhymes with actions out there that preschool classrooms are using or even making up to suit their needs, but one thing is common with all action rhymes; They have sing-song phrases and involve movement.  

      Fine Motor Action Rhymes:

      1. Where is Thumbkin?
      2. Creep Them, Creep Them
      3. Bringing Home a Baby Bumble Bee
      4. 5 in the Bed
      5. Eensy Weensy Spider

      Gross Motor Action Rhymes:

      1. Wheels on the Bus
      2. I’m a Little Teapot
      3. Duck, Duck, Goose
      4. Farmer in the Dell
      5. If You’re Happy and You Know It
      6. Head, Shoulders, Knees, and Toes
      7. We’re Going on a Bear Hunt
      8. 5 Little Monkeys Jumping on the Bed
      9. Grand Old Duke of York

      How to use nursery rhymes with actions to build childhood development?
      Action rhymes and finger plays are perfect for the 18-24 month age range and the preschool years when so much development is occurring.  

      Consider all the ways a toddler or preschooler are developing: fine and gross motor skills, language, cognitive, social-emotional…these years are full of natural progression with development going through the roof!

      Childhood Development and Action Rhymes

      There are so many ways that nursery rhymes with actions help to build childhood development in a healthy way:

      • Fine Motor Skills– Use the fingers and hands to build dexterity, eye-hand coordination, and finger isolation through movement. Encourage kids to follow along with the fine motor action rhymes listed above to improve dexterity and fine motor control.
      • Gross Motor Skills– Using the trunk, legs, and shoulders builds strength in the limbs and core muscle strength needed for attention and focus. Read more developing core strength through movement rhymes here.
      • Social/Emotional Development– Striving for independence, asserting ones independence, engaging with peers, and an emerging awareness of ones own body and a sense of awareness of others is developing and growing in the toddler and preschool years.  Action rhymes in a group setting promote all of these areas. Encourage kids to connect with other children and adults by pairing up kids to perform action rhymes in small groups of kids.
      • Speech and Language Development– The toddler and preschool age sets are flourishing in language skills.  There is a huge opportunity for developing and building skills through repetitive action rhymes.  Children can be encouraged to develop these skills when encouraged to participate in verbal exchanges.  Further promote communication skills by asking questions about the rhymes.
      • Spatial Concepts– Important for awareness of ones self and position in space, as well as in visual motor integration tasks like handwriting, action rhymes allow children to explore position in space through movement. Encourage development and understanding of front/back, over/under, top/bottom, etc. Try this action rhyme trick: when a spatial term is mentioned in an action rhyme, try pointing in the direction instead of saying the words or phrases.
      • Attention Span– Action rhymes allow kids to focus for a period of time on a teacher as well as peers individual and group action rhyme activities. Encourage longer attention by increasing time spent singing action rhymes. Lead into a group activity with action rhymes or use them as a tool to take a break during seated tasks or classroom activities that require focus and attention. 
      • Cognitive Development– Using action rhymes, children are introduced to concepts such as numbers, colors, shapes, sizes, names, letters, and more. Concrete concepts of the toddler and preschool years can be enhanced to more abstract ideas through cognitive development using sensori-motor components of action rhymes.  Movement and learning are very well connected and action rhymes add a sing-song rhyming component as well. Additionally, concepts such as patterning, sequencing, and cause-effect are addressed through action rhymes.
      • Self-Concept– Action rhymes provide an opportunity to learn about body parts. Encourage kids to learn about their body parts with action rhymes like, “If You’re Happy and You Know It”
      • Behavior Development– Action rhymes promote movement and an appropriate opportunity for students to get wiggles and fidgets out in a classroom setting.  Following the rhyme actions, kids can discover how they can move their body in purposeful ways.
      Use these creative and powerful ideas to boost and build childhood development with action rhymes and finger plays with toddler and preschool kids in the classroom, home, or Occupational Therapy clinic.

        What are some favorite action rhymes in your classroom, home, or clinic?  

      More movement and development ideas you will love: 

      The Sensory Lifestyle Handbook walks you through sensory processing information, each step of creating a meaningful and motivating sensory diet, that is guided by the individual’s personal interests and preferences.

      The Sensory Lifestyle Handbook is not just about creating a sensory diet to meet sensory processing needs. This handbook is your key to creating an active and thriving lifestyle based on a deep understanding of sensory processing.

      Colleen Beck, OTR/L has been an occupational therapist since 2000, working in school-based, hand therapy, outpatient peds, EI, and SNF. Colleen created The OT Toolbox to inspire therapists, teachers, and parents with easy and fun tools to help children thrive. Read her story about going from an OT making $3/hour (after paying for kids’ childcare) to a full-time OT resource creator for millions of readers. Want to collaborate? Send an email to contact@theottoolbox.com.

      Star Wars Occupational Therapy Lightsaber

      star wars occupational therapy

      Today I have a fun Star Wars occupational therapy activity. This block light saber requires just one material, but you can use this Lightsaber for so many OT goals! We actually created this counting block light saber years ago (original blog post was written in 2015) for May 4th activities for occupational therapy. May the 4th be with you with this fine motor Star Wars activity!

      Star Wars occupational therapy activities for kids

      Star Wars occupational therapy

      Pediatric occupational therapy professionals know the power of using themes in OT therapy sessions. When we come up with a theme for fine motor, gross motor, visual motor, and sensory motor tasks, we can cover a wide range of OT goals while meeting the client (patient, student, etc.) where they are with a focus on their interests.

      Using interests in therapy fosters meaning and engagement.

      That’s where this Star Wars occupational therapy theme comes into play.

      How many children have you met that love all things Star Wars? When you bring up the topic of light sabers, Millennium Falcon, Chewbacca, and Luke, you may see a sparkle in the eyes of a child that could talk for hours on all things Star Wars. That’s when you know you have a great therapy theme on your hands.

      Using that Star Wars theme in therapy allows kids to focus on the tasks at hand, try new activities, and put themselves out there to try activities that might be just a little difficult on the range of “just right” tasks. The point here is to meet those goals but when working on goals is difficult, it can be easy to quit or give up. However, if there is a topic of interest that really sparks a light of engagement, then you have a tool to support goal development.

      This is when we see kids thrive!

      Let’s go over a few Star Wars occupational therapy activities focusing on fine motor skills, visual motor skills, gross motor skills, handwriting, and sensory play.

      Star Wars Fine Motor Activity- Build a Block Light Saber

      If your sons (and daughters) are anything like mine they love to make lightsabers out of anything.  Ever since they were introduced to Star Wars, the lightsaber is definitely a favorite in our house.  We built these blocks Star Wars lightsabers using counting blocks and wanted to share.  Because it sure is fun!

      The block light saber is a fine motor powerhouse. By snapping together the blocks, you’ll see:

      All of these fine motor skills are essential to functional tasks. Using the Star Wars theme adds a “4th” theme (force) that can’t be beat!

      Build a lightsaber using counting blocks or cubes for a Star Wars occupational therapy theme.

      How to Make a Star Wars Lightsaber with Blocks

      We are sharing affiliate links in this post.    

      To make build our lightsabers, we used one of our favorite toys; these snapping blocks (affiliate link) are a toy that is used almost every day in our house.  From building robots to spaceships, and now lightsabers…we love these blocks.  They are great when used as a counting manipulative for preschoolers.  Other counting blocks (affiliate link) could also be used.   

      Use math blocks or counting snap blocks to make a light saber for May 4th activities or a Star Wars OT theme.

      How to use this light saber in OT activities:

      Visual Motor Skills- Create a block light saber model. Ask the child to copy the light saber using pattern blocks or snap blocks. They can copy the colors and spacing of the blocks to work on visual motor skills.

      Other visual skills addressed with this activity include:

      • Visual scanning
      • Visual attention
      • Visual figure ground
      • Visual closure

      Gross Motor Skills- Use the light saber to copy gross motor movements and motor planning patterns. The therapist can make movements with a block light saber and the client can copy them. Work on adding a sequence of movement patterns to work on sequencing, balance, motor planning, and recall. You can use the light saber like a movement stick like we did with this cursive writing warm-up activity.   

      Other gross motor skills that are addressed with this Star Wars light saber therapy tool include:  

      • Crossing midline
      • Balance
      • sequencing
      • Motor planning
      • Visual tracking
      • Core strength and stability

      Handwriting- This is one way to use the blocks light saber that I really love. Once the light saber has been built, use it as a spacing tool to space between words!

      We’ve created a bunch of DIY spacing tools in the past: This light saber spacing tool joins the ranks of our popular space martian spacing tool, pipe cleaner spacing tool, craft stick and button spacing tool, and our craft stick (with a tracking dot) spacing tool.

      To use the light saber as a spacing tool, the child can build their light saber using the snapping blocks. Then, ask them to write sentences on paper or a dry erase board, focusing on copying or writing words accurately on the lines. Show the child how to place the light saber blocks between each word as a visual cue and a tactile support to add space after the words. When they are completed with writing the sentence, they will have words that are accurately and consistently spaced out, making handwriting legibility a breeze.

      Spatial awareness impacts handwriting legibility in big ways. The child can then recall using a light saber as their handwriting “force” each time they write, whether they have the actual light saber in hand or not. It’s a handwriting force that can’t be beat!

      Sensory Activities- By adding sensory play into therapy sessions, children can address self-regulation needs, sensory challenges, and play-based learning. Scatter the blocks in a sensory bin with scoops, tongs, and cups. You’ll need a sensory bin base material as well. The sensory materials offer a way to explore textures and create in therapy sessions.

      The student or child can find the needed items and then build their own light saber.

      This sensory Star Wars idea addresses various skill areas:

      • Tactile exploration
      • Sensory motor skills
      • Visual processing
      • Proprioception

      Build the lightsabers using a row of counting blocks(affiliate link).  Encourage your child to count out the blocks and match up the numbers when making a double lightsaber.  This is a fun way to encourage math through play and interests in Star Wars.  Have fun with your counting block lightsabers!  

      Add this activity to these other Star Wars occupational therapy activities:

      Star Wars Sensory Activities

      • Use Star Wars Moon Dough to encourage tactile hand sensory input, add heavy work through the hands with proprioceptive input.

      Star Wars Fine Motor

      • Incorporate bilateral coordination, hand strength, coloring skills, and heavy work through the hands to make this Crayon Resist Death Star.
      • Work on scissor skills, bilateral coordination, precision, glue use, and handwriting to make this Star Wars R2-D2 Craft. 
      • Incorporate wrist extension, fine motor precision, hand strength, grasp development, tool use, and scissor skills and Make a Toilet Paper Roll Yoda.
      • Address tripod grasp, neat precision grasp, separation of the sides of the hand, open thumb web space, eye hand coordination, and visual motor skills with this Star Wars Day Perler Bead Pattern.

      Star Wars Handwriting

      Use the light saber spacing tool above with these Star Wars handwriting ideas in occupational therapy sessions:

      • Incorporate letter formation, copying skills, line use, spatial awareness, and handwriting legibility in a functional and meaningful Star Wars craft using this May the Fourth Be With You Card.
      • Use these Star Wars Children’s Books to work on handwriting skills by asking kids to copy sentences from the books or to find specific letters in the book and then work on letter formation. They can even use the pictures as inspiration for creative writing with a Star Wars theme.

      Star Wars Executive Function Ideas

      All of the crafts and activities above involve aspects of executive functioning skills. Making a play dough or slime recipe involves planning, prioritization, and other EF skill work. Try this activity with your star Wars theme to add more executive function work to your occupational therapy session:

      • Make stop action creations and work on planning, prioritization, impulse control, task completion and other executive functioning skills. You’ll find inspiration in this  Star Wars stop action activity.  

      Colleen Beck, OTR/L has been an occupational therapist since 2000, working in school-based, hand therapy, outpatient peds, EI, and SNF. Colleen created The OT Toolbox to inspire therapists, teachers, and parents with easy and fun tools to help children thrive. Read her story about going from an OT making $3/hour (after paying for kids’ childcare) to a full-time OT resource creator for millions of readers. Want to collaborate? Send an email to contact@theottoolbox.com.

      Fidget Kits for Sensory Needs While Travelling

      fidget kits

      Do you know a kiddo that LOVES all things fidget toys? This Fidget Kit is a DIY Travel Sensory Kit that is perfect for on-the-go sensory needs for kids with Sensory Processing Disorders children or those who are Autistic and prefer sensory fidget items. This is a great resource, along with our sensory strategies for road trips. Let’s cover fidget kits, just one occupational therapy kit that meets specific needs. We also have our traveling busy bag for long car rides.

      Read on for tips to help with sensory issues while out and about, how to use and set up a fidget kit, and why fidget kits are a great sensory tool for self-regulation, a sensory diet (based on meaningful and motivating sensory strategies (aka a sensory lifestyle), or sensory needs. 

      Sensory fidget kits

      What are Fidget Kits

      A fidget kit is essentially a collection of fidgets that can be used to meet sensory needs and can be used as a movement break to incorporate specific sensory motor actions into daily functional tasks. Fidget kits may contain squeeze toys, fidget items, pop toys, putty, slap bracelets, Rubix cubes, stress balls, and many other fidget items. These sensory items can be housed in a box, bin, tote bag, shoe box, or any small carrying case. Fidget kits can be used by occupational therapy professionals with a whole caseload of clients, or a fidget kit can be individualized based on one person’s specific sensory preferences.

      Fidget toys support self-regulation and sensory needs so that kids can pay attention, focus, learn, and interact with others. Some fidgets offer heavy work through the hands. Others offer movement for the hands or body.

      A fidget kit can be used in many different ways:

      1. A fidget kit can be used in a sensory corner of a classroom as a calm down area.
      2. Or, a collection of sensory fidgets can be used by one individual for meeting various needs.
      3. Other times, a fidget kit is used as a choice, where use of a sensory tool is selected from a bin or bag of sensory fidget items. In this case, a visual schedule may be incorporated into the fidget toolbox.

      We’ve shared various collections of fidget toy recommendations here on the website in previous years.

      These types of fidget toys are all excellent additions to a fidget kit:

      Occupational Therapy Fidget Kits

      Occupational therapy practitioners know the benefit of carrying a collection of intervention tools in their therapy bag. They create a collection of materials designed to meet various needs on their caseloads. OTs make handwriting kits, scissor skills kits, auditory kits, functional skills kits, and even themed OT kits, or seasonal kits. Each therapy kit contains materials and activities designed to make therapy sessions fun and innovative. A fidget kit is no different!

      Why use fidget kits?

      Have you ever been out shopping the day before Christmas Eve when the entire city is packing everything from pineapples to pickles in their carts?  And while you wear your itchy winter coat and drippy boots, the carts bump into aisles, people are talking everywhere, and buzzes, dings, and noise are everywhere.  

      It is utterly unorganized chaos.   Now imagine you have difficulty ignoring those beeps and buzzes.  That itchy wool coat is SO there.  The people talk and talk and you hear them all.  The utterly unorganized chaos makes you feel so out of sorts that you can’t help but breakdown, throwing yourself on the floor, and trying to make it all go away.  

      Children who live with a Sensory Processing Disorder experience situations like this every day.  It doesn’t have to be a busy holiday for the environment to be too much for their body to organize.  It is everyday life for SPD kiddos.  They over or under process environmental stimulation at the bus stop, in the library, in a restaurant, or while waiting with Mom at the Department of Motor Vehicles. The disruption of typical processing can occur at minor or severe levels, but is always a struggle.     

      Use of a specialized sensory diet can help with over or under sensory responses while out and about.  Specific sensory inputs can help to organize these inappropriate sensory responses.

      Treatment of Sensory Processing Disorder with a Sensory Diet To treat these responses to input, Occupational Therapists perform an assessment of individual abilities and needs.  Using information from evaluation, they establish a diet of sensory integration activities to organize sensory systems so that appropriate and meaningful responses occur. Function and purposeful responses to sensory input in all settings are the goals of sensory integration and sensory diets.  

      A sensory diet is highly specific to the needs of a child with sensory processing disorder.  Sensory diet activities should be specialized to the meet the child’s regulation needs.  Items that are often times found on a sensory diet include activities like wall push-ups, jumping on a trampoline, vacuuming, pillow sandwiches, and kneading play dough (among tons of other ideas!)    But how do you do these sensory diet activities while in a classroom, car, restaurant, or in a while waiting for appointments? 

      This is where a fidget kit comes into play, that can help with sensory needs and can go anywhere.

      How to set up classroom fidget kits

      How to use a fidget kit in schools

      When I started working in school-based therapy in 2000, long before the craze of fidget toys, I created a set of fidget kits for each classroom in one school that I served.

      As the occupational therapist in this school, I worked with many of the children in various classrooms on my caseload. However, I knew the benefit of using fidget items during specified times in the classroom.

      The kits were contained within a clear plastic shoebox with a lid. There would be a list of materials in the kit and a sign out sheet if students removed an item to use at their desk.

      Because I knew the students on my caseload in each classroom, and their sensory preferences, I was able to select specific sensory tools to place in each classroom’s fidget kit. Then, I added additional materials that may benefit the general population of the classroom. These items included things like stress balls, a string of paperclips, a bead on a keychain ring, a fidget desk strip, wacky tracks (clicking string of blocks), finger trap, and Koosh ball.

      I offered a quick in-service to each teacher on the fidget kit that I created for their own classroom. I introduced the fidget kit, showed them the items in the kit and how to use them, and quickly explained the benefits of using a fidget kit to support attention, focus, sensory, and regulation needs in the classroom.

      I explained preferred sensory tools for the students on my caseload and when they may use the materials to best support their education.

      I also quickly explained that we all (whether receiving OT services or not) use sensory strategies all day long throughout our day to regulation, to focus, attend, deal with anxiety, or even boredom. For most of us, this fidgeting, or sensory breaks, looks like getting a cool drink of water, standing up after sitting for a long time, taking a deep breath, sitting up strait, stretching, clicking out pen, or jiggling a leg.

      Finally, I instructed teachers to use the supports as they deemed fit within their classroom. This way, the kit was used correctly within the classroom.

      Consult time with students was spent identifying needs and making changes to the individual student’s items and supports.

      At the end of the school year, I collected all of the kits and saved them for the next school year. These sensory kits were a success with every teacher and were requested again at the start of the next school year.

      How to make a sensory kit

      Sensory fidgeting breaks support learning and paying attention for all individuals and using a kit of fidget tools can support the entire classroom. Plus, another benefit to using a kit with the whole classroom is the normalization of the fidget tools as a generalized support, and using the tools correctly, and not as a means to gain attention. Still other students may feel as if they are being watched when using the fidget tools and when the entire classroom has fidget time, the use is less ostracizing.

      The benefit of creating fidget kits for schools is that you can put the items in any container that suits the needs of the students. Some can even travel from classroom to classroom. Try these ideas:

      • Plastic shoe box
      • Mini tote bag
      • Pencil box
      • Pencil pouch

      fidget kit

      This post contains affiliate links.

      sensory fidget kit

      This travel sensory diet is perfect for on-the-go sensory needs.  We made a small tote bag with fun paint and used it to create a travel sensory diet.  A tote of this size can be slid into a big purse, carried by the child, or carted around in the minivan.  

      The best thing about this travel sensory diet is that you can switch out activities so that new regulating items are added in and old favorites remain.    

      Travel Sensory Diet Bag for on-the-go-sensory needs

      What goes in a fidget Kit?

       A fidget kit can be made up of any sensory motor item!

      Some common sensory items include movement based fine motor or activities that offer heavy work through the hands, or Proprioception Activities Related articles: Proprioception and the hands impacts pencil pressure, and can be a great way to add a quick heavy work brain break.

      • Bungee cord or Exercise band (affiliate link).  These can be used by arms or legs while sitting or standing. 
      • 1 pound wrist weight:  This is an important addition to a travel sensory bag.  The weight provides proprioceptive input as the child carries the bag. Sometimes, just carrying the tote bag can be enough to regulate sensory needs. 
      • Other ideas include wearing the weight on the wrist, ankle, placed on the lap, or draped over shoulders.
      • Use the weight of the bag as input: While seated, hang the loop of the handles over a knee for weight down through the calf and into the foot.  Switch legs after a while.
      • Hang the bag on one shoulder, then the other.
      • Hold the loops of the bag by the hand as if carrying a suitcase. Switch hands often.
      • Hold the loops of the bag by individual fingers.

      Oral Fidget Items

      • Sugar free hard candy
      • Sugar Free gum
      • Eat dried fruit, bagel pieces, popcorn, pretzels, or raisins
      • Kazoo (affiliate link)
        (take the paper out for less noise!)
      • Chew Toy ” or Chew Necklace (affiliate links)

      Scent Fidget Tools

      • Small bottle of scented lotion

      Tactile Fidgets

      • Fidget with sensory koosh balls.
      • Pipe cleaners twisted together make a great fidget toy.
      • Beaded Keychain Friends (affiliate link)
        for fidgeting
      • Small Scrub Brush (affiliate link)
        (The pictured brush is used in the Wilbarger Brushing Protocol.  An Occupational Therapist should train you in this treatment
      • Baby wipe to wipe the face, arms, hands to “wake up” the skin.
      • Fidget items (affiliate link)- The nice thing that is different than in 2000 is that Amazon now has large kits of items available that can be distributed into various smaller kits and recirculated among classrooms.

      Vestibular Fidgets

      • Heavy work activity cards
      • Hang the head and arms down between the legs to touch the floor.
      • Arm windmills
      • Twisting walks: Twist at the waist as the child walks.

      Other sensory diet ideas that work while on-the-go

      These are fidget kit ideas to have on hand that don’t require any equipment. these are sensory strategies that can be “pulled out” anywhere to support attention, focus, emotional needs, or sensory needs.

      • Carry grocery bags.
      • Push shopping carts.
      • Bend over hand hang the head and arms down to the ground.
      • Find a wall for wall push-ups.
      • Hug from a loved one.
      • Chew gum.
      • Drink from a straw.
      • Carry a sports bottle with crushed ice for resistive sucking and chewing ice.
      • March down a hallway.
      • Duck walks.
      • Find stairs and climb them.
      • “Mountain Climb” up a stairwell banister.
      • Use a coat as a sensory wrapper.  Wrap the child up like a sensory burrito with an extra coat.
      • “Prayer Stretch”  Press the palms of the hands together and press hard.
      • “Spider Finger” Stretches” Place fingertips of both hands together and stretch fingers up and down.
      • Spin in a chair (if at a doctor’s office).
      • Chair Push ups.
      • Weighted vest for situations that you know will cause sensory overload.
      • Headphones to cut out background noise.  
      Travel Sensory Diet Bag for on-the-go-sensory needs

        This on-the-go travel sensory bag can go everywhere from the doctor’s office with the too-hot waiting room and buzzing fluorescent lights to the hair salon with the noisy dryers and itchy hair clippings.  

      Travel Sensory Diet Bag for on-the-go-sensory needs


      This post is part of our 31 Days of Occupational Therapy series where you can find free or almost free treatment activities and ideas.  Stop by every day!  You’ll find more fun ideas each day in October.

      Looking for more sensory integration ideas?  These are some of my favorite:

      Dinosaur-Sized Sensory Feelings and Proprioception Activities

        Oobleck in the Marble Run

      Oobleck in the Marble Run

       Alphabet Discovery Bottle

      Alphabet Discovery Bottle

      Fidgeting During Homework

      The Sensory Lifestyle Handbook walks you through sensory processing information, each step of creating a meaningful and motivating sensory diet, that is guided by the individual’s personal interests and preferences.

      The Sensory Lifestyle Handbook is not just about creating a sensory diet to meet sensory processing needs. This handbook is your key to creating an active and thriving lifestyle based on a deep understanding of sensory processing.


      Colleen Beck, OTR/L has been an occupational therapist since 2000, working in school-based, hand therapy, outpatient peds, EI, and SNF. Colleen created The OT Toolbox to inspire therapists, teachers, and parents with easy and fun tools to help children thrive. Read her story about going from an OT making $3/hour (after paying for kids’ childcare) to a full-time OT resource creator for millions of readers. Want to collaborate? Send an email to contact@theottoolbox.com.

      Goals of a Sensory Diet

      benefits of a sensory diet
      Have you ever had a professional mention the term “sensory diet”?  Have you wondered why a sensory diet would be used with kids?  This post describes the goals of a sensory diet for kids with sensory processing needs. 
       
      This resource on how to create a sensory diet is a good place to begin when it comes to creating a sensory plan that helps kids thrive and function in their daily tasks.
       
      This related resource on breaking down goals is another tool you’ll want to add to your therapy toolbox to create a sensory diet. Likewise, consider the sensory diet for adults that can support adults with sensory needs.
      Why do kids need a sensory diet to help with sensory processing problems?
       

      Sensory strategies that are motivating can be a big help for some kids. Try these train themed sensory activity ideas.

      Why Use a Sensory Diet?

      To begin, read this blog on what is a sensory diet. You’ll discover that sensory diets are a commonly known strategy for addressing
      sensory needs.  The term “sensory diet” was coined by Patricia Wilbarger in 1984 to explain how certain sensory experiences
      can improve occupational performance and help to remediate disruption of the sensory processing systems.  
       
      When it comes to benefits, a sensory diet is a means to adjust sensory input in relation to an individual’s
      needs.  
       
      There’s more to it, though. 
       
      Sensory diets don’t need to be a strict set of prescribed structured activities for every child.  They ARE a meaningful set of strategies for developing sensory programs that are meaningful, practical, carefully
      scheduled, and controlled in order to affect functioning.  
       
      We use sensory diets for many reasons: 
       
      Specific needs- While a sensory diet offers specific sensory input at times in preparation for periods of poor regulation, the optimal sensory diet becomes a sensory lifestyle, in which the individual has a “bank” of sensory strategies at their disposal and can use those tools in preparation before a meltdown or crash occurs.
       
      Individualized needs- No two individuals are alike. And, no two individuals will experience the same sensory needs. As a result every sensory diet will differ in sensory input, timing, and various other factors. Sensory diet activities provide appropriate sensory input based on the needs of an individual. 
       
      Balance- Just as a healthy diet consists of a variety of foods, a sensory diet is a balanced set of sensory information that allows an individual to function.  A person cannot survive on broccoli alone. Similarly, a child cannot function with only one type of sensory activities.
       
      Sensory diets are not just for kids with identified sensory issues.  We all need a diet of sensory input. 
       
      Position in Space- Our bodies and minds instinctively know that varying sensory input allows us to function appropriately.  Neuro-typical children naturally seek out a variety of proprioceptive, vestibular, and tactile sensory input.  Children that struggle because of underlying issues or developmental concerns may show difficulties with fine motor, gross motor, sensory processing, self regulation, executive function, creativity, and general life skills. It’s through a process of identifying specific sensory processing needs that these areas can be impacted. 
       
      Routines and Transitions- Having a better understanding of transitions for children, routines, and schedules may allow children to know what to expect in their day. A sensory diet offers this opportunity.
       
      Confidence- When we offer children strategies that support their needs, they thrive. This is true for children of all abilities and skill levels. Involving kids in movement based and sensory activities allows them to connect with others, and learn about the world around them, how their body moves and interacts in daily tasks, and this offers confidnce and further skill-building, as well as overall competence.
       
       
      Regulation Needs- As a result, they are able to accept and regulate other sensory input such as a seam in their shirt, a
      lawnmower running outside their classroom, or the scent of chicken cooking in the
      kitchen.
       

      Why Sensory Diets?

       
      Studies support the use of active participation in multi-sensory activities for at least 90 minutes per week to improve occupational performance and autism symptoms and behaviors (Fazlioglu & Baran, 2008; Thompson, 2011; Woo & Leon, 2013; Wuang, Wang, Huang, & Su
      2010).  
       
      Children who have a toolbox of sensory activities available to them for daily use may benefit from prescribed sensory activities.  These activities can be a part of and incorporated into the day in a natural way.


      Related Read: Here are more sensory-based tricks and tips that help with meltdowns.
       
      Read our blog posts about creating a sensory diet on a budget and calm down corners for more information.


      What is a sensory diet?

       
      A sensory diet is a set of activities that are appropriate
      for an individual’s needs.  Specific and individualized activities that are specifically scheduled into a child’s day are used to assist with regulation of activity levels, attention, and adaptive responses.  
       
      Sensory diet activities are prescribed based on the individual’s specific sensory needs.   Just as there are no two people that are alike, there are no two sensory diets that are alike.  
       
      Every sensory diet will meet the specific needs whether in activity, position, intensity, time, sensory system, or type.  Additionally, a sensory diet can be modified throughout the day and based on variances in tasks.
       
      A sensory diet needs to be specific with thoughtful regard to timing, frequency, intensity, and duration of sensory input.
       
      Goals of a sensory diet


      Goals of a sensory diet are to:

       
      1. Provide the child with predictable sensory information
        which helps organize the central nervous system.
      2. Support social engagement, self-regulation, behavior organization, perceived competence, self-esteem, and self-confidence.
      3.  Inhibit and/or improve modulation of sensation within daily routines and environments.
      4. Assist the child in processing a more organized response
        to sensory stimuli.

      Add these resources to the ones you can find here under sensory diet vestibular activities to meet the sensory needs of all kids. 

       
      Reference:
      Fazlioglu, Y., & Baran, G. (2008). A sensory integration therapy program on sensory problems for children
      with autism
      . Perceptual and Motor Skills, 106, 415–422. http://dx.doi.org/10.2466/PMS.106.2.415-422
       

      Read more on sensory processing information here:

       
      Sensory processing red flags for parents to help identify sensory needs in kids


      The Sensory Lifestyle Handbook walks you through sensory processing information, each step of creating a meaningful and motivating sensory diet, that is guided by the individual’s personal interests and preferences.

      The Sensory Lifestyle Handbook is not just about creating a sensory diet to meet sensory processing needs. This handbook is your key to creating an active and thriving lifestyle based on a deep understanding of sensory processing.

      Colleen Beck, OTR/L has been an occupational therapist since 2000, working in school-based, hand therapy, outpatient peds, EI, and SNF. Colleen created The OT Toolbox to inspire therapists, teachers, and parents with easy and fun tools to help children thrive. Read her story about going from an OT making $3/hour (after paying for kids’ childcare) to a full-time OT resource creator for millions of readers. Want to collaborate? Send an email to contact@theottoolbox.com.