Colleen Beck, OTR/L is a pediatric occupational therapist and the owner and author of The OT Toolbox website. She manages all of The OT Toolbox social media accounts and runs the popular newsletter.
Read about Colleen's experience and career as an occupational therapist, including how The OT Toolbox began on our About The OT Toolbox page: https://www.theottoolbox.com/about-us/
Colleen created The OT Toolbox in 2011 and since then has written thousands of blog posts designed to support therapy providers, educators, parents, counselors, admin, and caregivers in promoting the healthy development of kids.
Check out Colleen's blog posts below:
This time of year, spider activities are a fun way to learn, develop skills through a a weekly occupational therapy theme, and even use in an occupational therapy or classroom Halloween Party ideas! Here, we’ve got you covered on all things spiders…spider crafts, spider fine motor activities, spider gross motor, spider tasks, and even spider themed foods!
Spider Activities
Kids love the fall activities and the themes that come with the season. With festivals, trick or treating, and classroom parties, kiddos will soon be into all things fall and Halloween. In fact, if you are looking for Halloween occupational therapy activities, then these spider activity ideas fit right into the season.
With this seasonal fun, kids will love engaging in some spider activities galore.
Whether doing crafts, motor activities, or sensory breaks, children will find these spider activities intriguing and adults will find them exceptionally skill building. So, it’s a win-win for all!
We certainly have you covered with all kinds of creepy, crawly activities with this activity round-up.
In this post, you’ll find a myriad activity ideas that can help address so many great skills with kids. Do you need fine motor or gross motor activities? We’ve got you covered. Are you looking for skill-building arts and crafts? We’ve got you covered. Are you needing sensory goodies to work on tactile skills or to provide a sensory break? We’ve got them! Do you want some fun snack ideas for a classroom party? Check out the ideas below.
Spider Fine Motor Activities
Use these Spider fine motor activities to build stronger hands, intrinsic hand strength, dexterity to manipulate tools like crayons, glue bottles, scissors, clothespins, and more.
These spider gross motor activities support development of balance, coordination, stability, endurance, position changes, and motor planning with large muscle groups. Include these activities in Halloween obstacle courses and even Halloween parties!
These spider crafts, spider art activities are fun ways to paint, and craft this time of year. Use the spider crafts to build executive functioning skills, like working memory, organization, direction following, planning, prioritization, and more.
While making the spider crafts, kids also develop fine motor skills and sensory input through the tactile sense.
These spider sensory activities are fun ways to challenge the tactile sense, but also add sensory input through the vestibular, proprioceptive sense, and visual sense. Add these activities to a sensory diet this time of year, or use as a brain break with sensory input.
We hope that you have found these ideas perfect to make your October lesson planning a little easier and whole lotta spidery skill-packed fun!
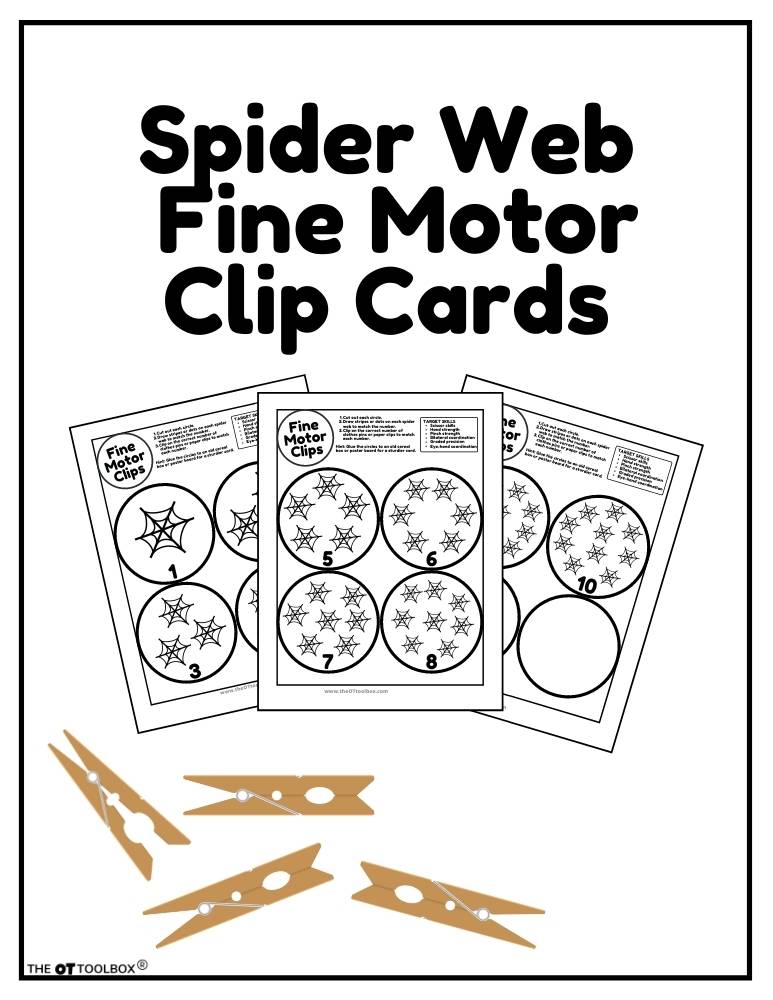
Spider Activity Clip Cards-free download!
Free Spider Activity Cards
These spider activity cards are designed to promote additional skills:
Bilateral coordination
Crossing midline
Eye-hand coordination
Pinch and grip strength
Hand strength
Visual perception
Scissor skills
Coloring skills
and more
Want to get a free set of these spider activity cards? Enter your email address into the form below to access this free download. This printable is also available inside The OT Toolbox Member’s Club. Members can log into their account and access the PDF on our Halloween Therapy Theme page.
More Spider Activities
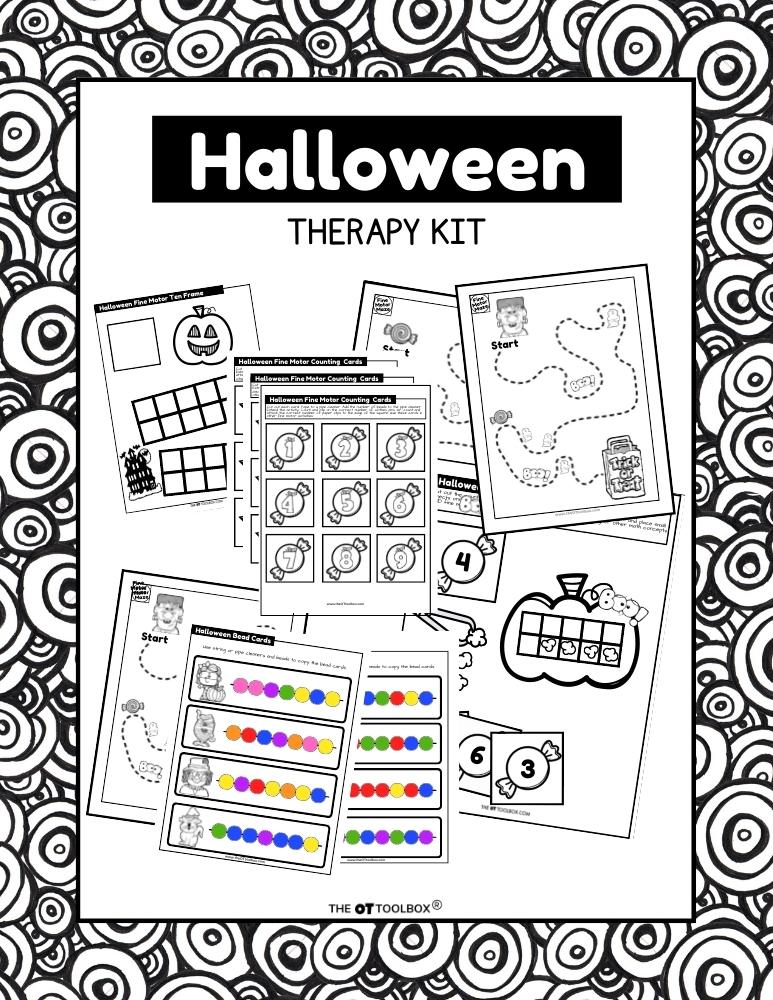
With the Halloween Therapy Kit, you’ll find spider activities, but also all kinds of Halloween motor skills, scissor skills tasks, and fine and gross motor activities.
Get more Halloween therapy tools including spider activities to support development using the Halloween Therapy Kit!
Regina Parsons-Allen is a school-based certified occupational therapy assistant. She has a pediatrics practice area of emphasis from the NBCOT. She graduated from the OTA program at Caldwell Community College and Technical Institute in Hudson, North Carolina with an A.A.S degree in occupational therapy assistant. She has been practicing occupational therapy in the same school district for 20 years. She loves her children, husband, OT, working with children and teaching Sunday school. She is passionate about engaging, empowering, and enabling children to reach their maximum potential in ALL of their occupations as well assuring them that God loves them!
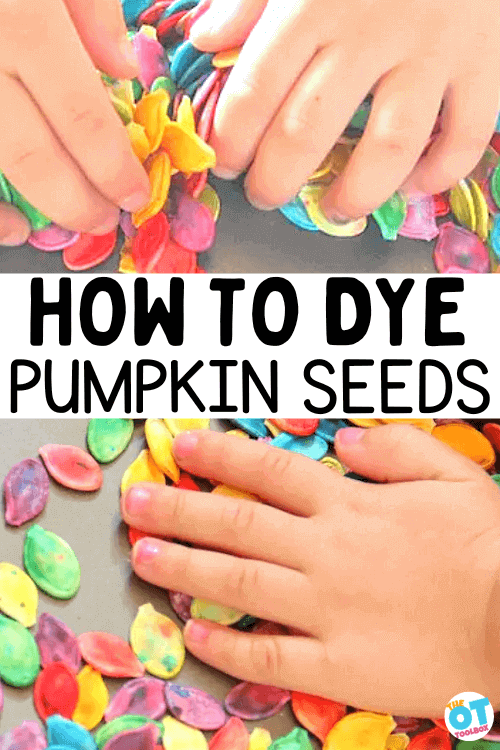
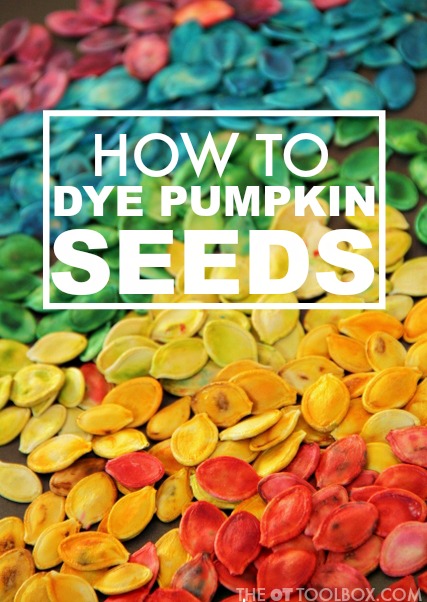
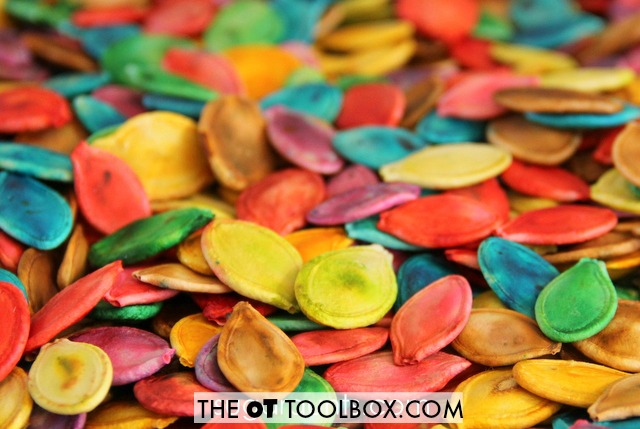
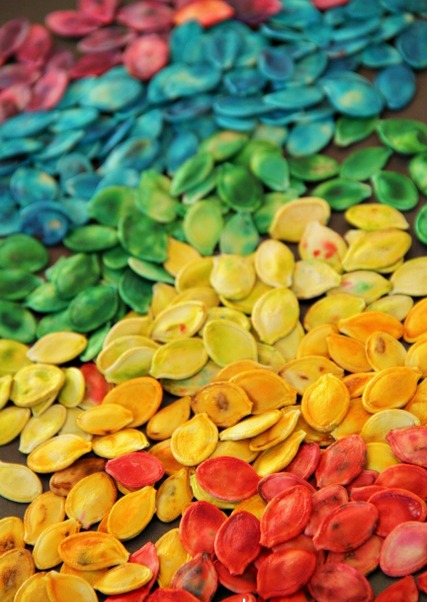
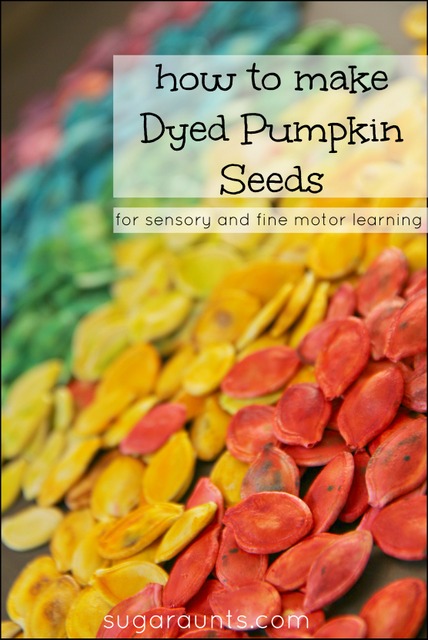
If you’ve ever carved a pumpkin and wondered how to dye pumpkin seeds, then you are in luck. The occupational therapists know the sensory benefits of lifting and carving a pumpkin, as well as separating pumpkin seeds from the ooey, gooey pumpkin guts. Here, we’re sharing one Fall Bucket List item must-have…dying pumpkin seeds for pumpkin sensory play, pumpkin seed crafts, and pumpkin seed fine motor tasks! Read on for an easy dyeing method for pumpkin seeds that can be included in occupational therapy Halloween sessions or sent home as a home program for this time of year.
Once you dye the pumpkin seeds, you can use them for many different activities like we have shown below, AND use them as a sensory base for a pumpkin sensory bin!
This post on how to dye pumpkin seeds was one we originally created back in 2014. The thing is that colored pumpkin seeds is still just as much fun for fine motor and sensory play as it was years ago!
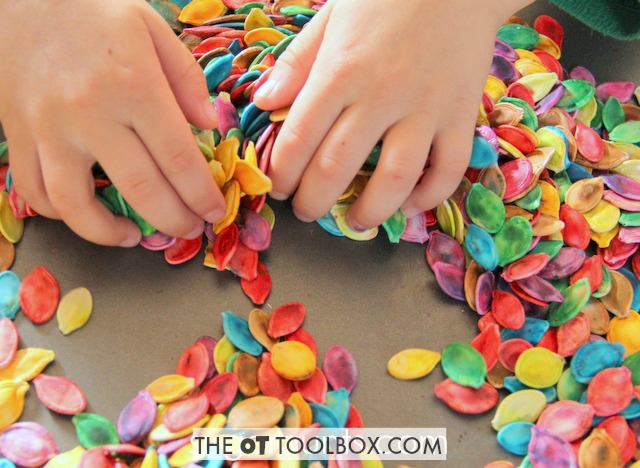
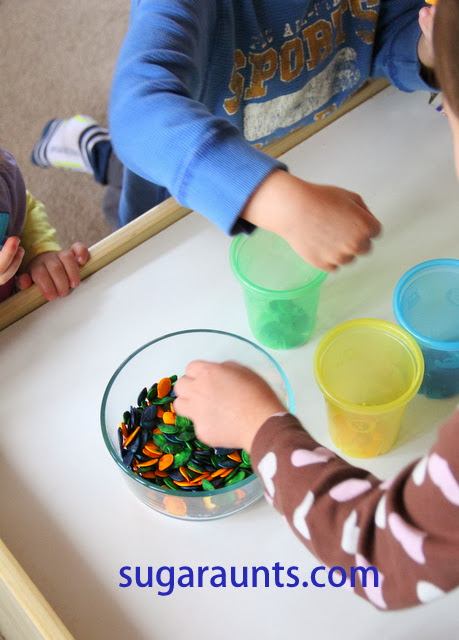
Dying pumpkin seeds isn’t hard. In fact, the kids will love to get in on the mixing action. They will love to use those dyed pumpkin seeds in sensory bins, for fine motor pumpkin seeds activities, or even Fall crafts like this pumpkin seed craft.
Once you dye the pumpkin seeds, use them for tons of fine motor activities, sensory play activities, and visual motor ideas, like sorting pumpkin seeds. These are fun Fall activities that will stick with kids as a memory!
I love that this recipe is simple because it is a great way to support development of specific skills when kids are involved in making the dyed pumpkin seeds. By getting kids involved in the process, you can work on several areas:
executive functioning skills: planning, prioritization, working memory
problem solving
direction following
bilateral coordination
safety awareness
spatial awareness
kitchen tool use
fine motor skills
functional fine motor skills: opening containers, opening a plastic bag, scooping with a spoon, closing a plastic bag
eye-hand coordination skills
proprioception skills and body awareness with shaking a bag to coat the seeds completely
We cover how using recipes to develop skills is such a powerful therapy tool in our resources on our blog on life skills cooking activities. It’s simple recipes like this one and others in our cooking with kids resources that pack a powerful punch in developing skill areas.
Be sure to check out this resource on fine motor kitchen activities to better grasp all of the fine motor skills developed through cooking tasks like this pumpkin seed dying task.
We wanted to make a batch of colorful pumpkin seeds with vivid colors, so I wasn’t sure how to dye the seeds to make the colors really pop. We decided to test which method would work to really get the best colors on our pumpkin seeds.
We tested using To make our seeds this year, we used (Amazon affiliate links) liquid food coloring dye and gel food coloring. In our tests, each type of food coloring worked really well.
One thing to note is that if you use food coloring, technically, the pumpkin seeds are still edible. This is important if you have a child playing with the seeds that might put them into their mouth.
The problem with roasting the seeds after coloring them is that the colors don’t “stick” as well to the seed, making less vivid colors. If you are going to roast the seeds so that they are edible for these situation, I would suggest first roasting your seeds and THEN dying them for the brightest colors.
That being said, you don’t NEED to roast the seeds in order to use them for sensory play. As long as the pumpkin seeds are dry, they will absorb the food coloring.
Materials to Dye Pumpkin Seeds:
To dye pumpkin seeds, you need just a couple of items:
raw, clean pumpkin seeds from a fresh pumpkin
a plastic bag (sandwich bag or a gallon-sized plastic bag)
food coloring
paper towels
That’s all of the items you need to dye pumpkin seeds! This is really a simple recipe, and one that is easy to make with kids.
Dying PUmpkin Seeds
To dye the pumpkin seeds, it is very simple:
Put dry pumpkin seeds into a plastic bag.
Add the food coloring.
Seal the bag shut and shake the bag to coat all of the seeds with the food coloring.
Pour the seeds out onto a surface covered with paper towels (A kitchen counter works well).
Let the seeds dry.
Whether you use liquid food coloring dye or gel food coloring, (affiliate links) add the seeds to plastic baggies and add the food coloring. Seal up the baggies, mix the seeds around, (or hand them over to the kids and let them go crazy), and get the seeds coated in coloring.
For kids that might eat the seeds during play: As we mentioned above, f there are any risks of the child eating a seed during sensory play or crafting, you can first roast the seeds.
Roast the seeds before dying them. Spread the seeds out on aluminum foil spread on a cookie sheet.
Bake at 350 degrees F for 20 minutes. Be sure to check on the seeds often to make sure they are not burning.
Then dye the seeds using food coloring as described above. If you roast them first, the colors will cover any brown spots.
Pumpkin Seed Activities
Once you dye the pumpkin seeds, you can use them in pumpkin seed crafts and pumpkin seed activities that foster fine motor development.
Pumpkin Seed Sensory Ideas:
Pumpkin seeds are a great addition to sensory play experiences. Allowing kids to scoop the seeds directly from the pumpkin is such a tactile sensory experience!
But for some kids, that pumpkin goop is just too much tactile input. Using dyed pumpkin seeds in sensory play is a “just right” challenge in exposure to carving pumpkins. It’s a first step in the tactile experience.
Some of our favorite ways to use dyed pumpkin seeds in sensory play:
Use them in a sensory bin
Use colorful pumpkin seeds in a writing tray
Add dyed pumpkin seeds to a discovery bottle
Use rainbow pumpkin seeds on a Fall exploration table
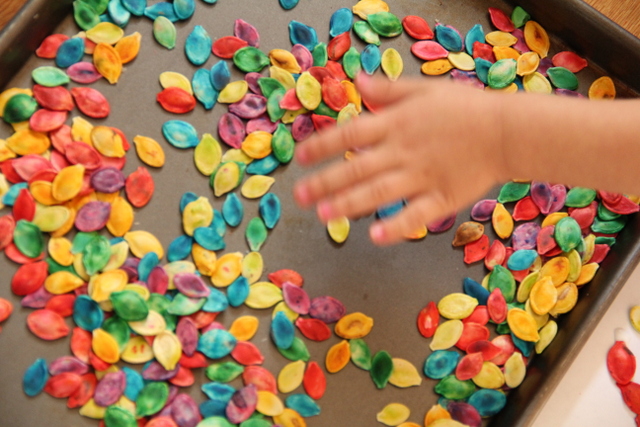
Use the directions listed above to create a set of colored pumpkin seeds. Use the colorful pumpkin seeds in a big pumpkin sensory bin to create a tactile sensory experience. Kids can draw letters in the seeds to work on letter formation. Add this idea to your toolbox of sensory writing tray ideas.
Add a few Fall themed items such as small pumpkins, acorns, pinecones, scoops, and small bowls to the sensory bin activity. Dyed pumpkin seeds are a great sensory bin medium this time of year when making an easy sensory bin.
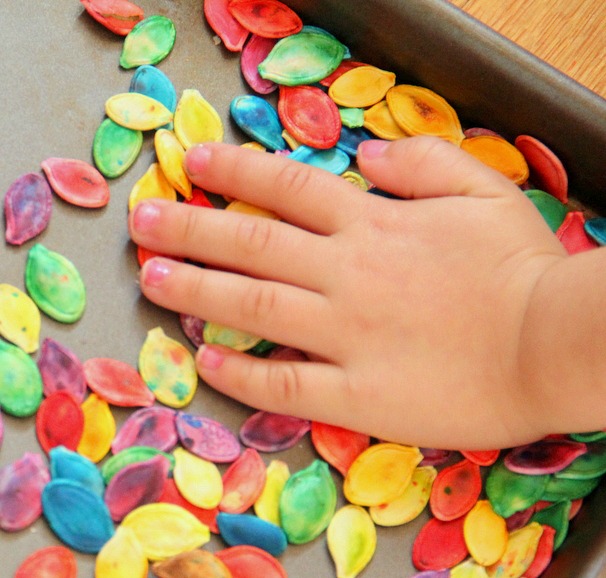
This sensory play activity was very fun. We couldn’t keep our hands out of the tray as we played and created.
Pumpkin Seed Crafts
Pumpkin seeds are a great fine motor tool to use in crafting.
Try these craft ideas using dyed pumpkin seeds:
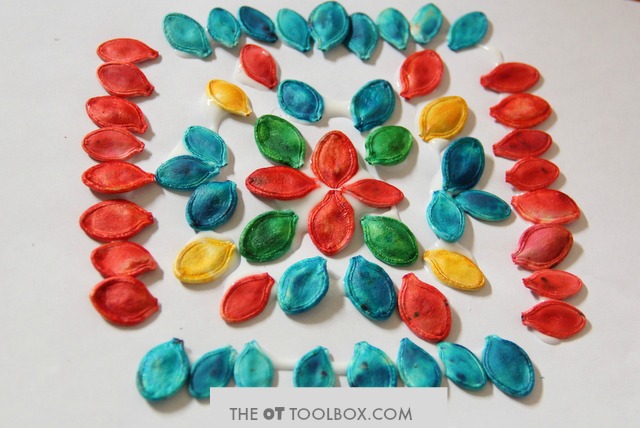
Make a pumpkin seed mandala
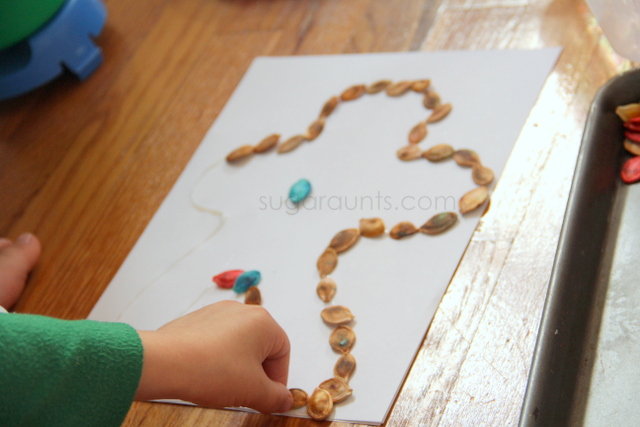
Glue seeds to make a picture using the seeds to outline a shape
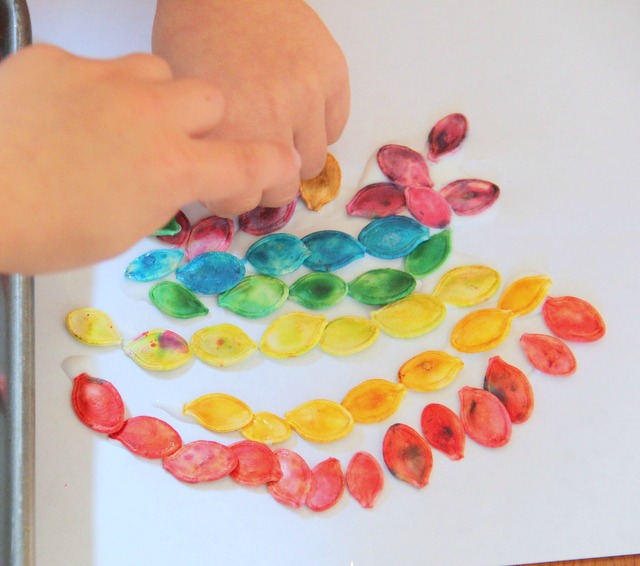
We used our dyed seeds in art projects first. Manipulating those seeds is a great way to work on fine motor skills. Little Sister was SO excited to make art!
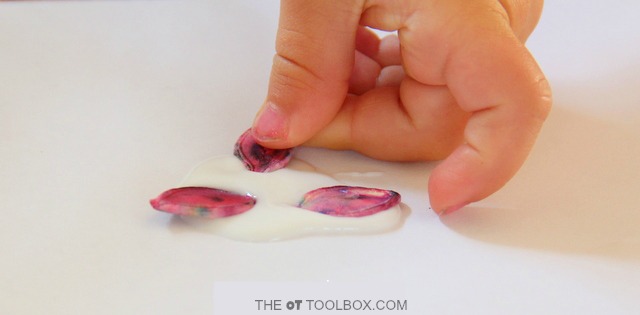
Add additional fine motor work by using a squeezable glue bottle to create a pumpkin seeds craft and pumpkin seed art. Squeezing that glue bottle adds a gross hand grasp and fine motor warm-up before performing fine motor tasks.
Use dyed pumpkin seeds to make a colorful mandala craft with fine motor benefits. Picking up the pumpkin seeds uses fine motor skills such as in-hand manipulation, separation of the sides of the hand, pincer grasp, open thumb web space, and distal mobility.
Placing the colored pumpkin seeds into a symmetrical pattern of colors promotes eye-hand coordination and visual perceptual skills such as visual discrimination, figure ground, and other skills.
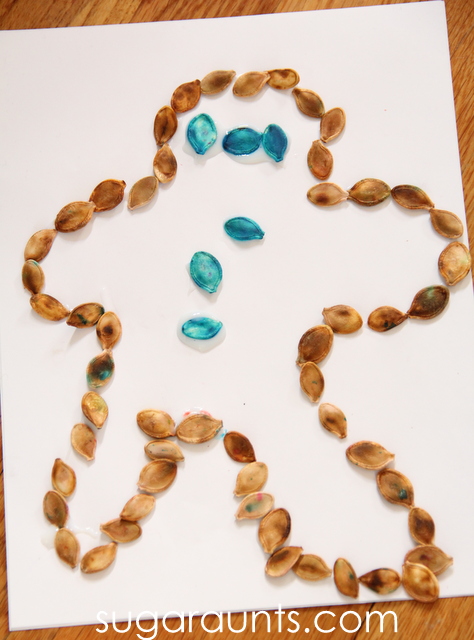
Little Guy made a gingerbread man. Because why not??! 😉
Squeezing the glue bottle into a shape and placing the colored pumpkin seeds along the line is another exercise in visual perception and eye-hand coordination.
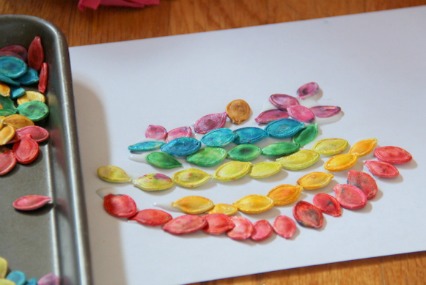
Little Sister made a rainbow with her seeds.
Be sure to use your dyed pumpkin seeds for a few fun ideas like these:
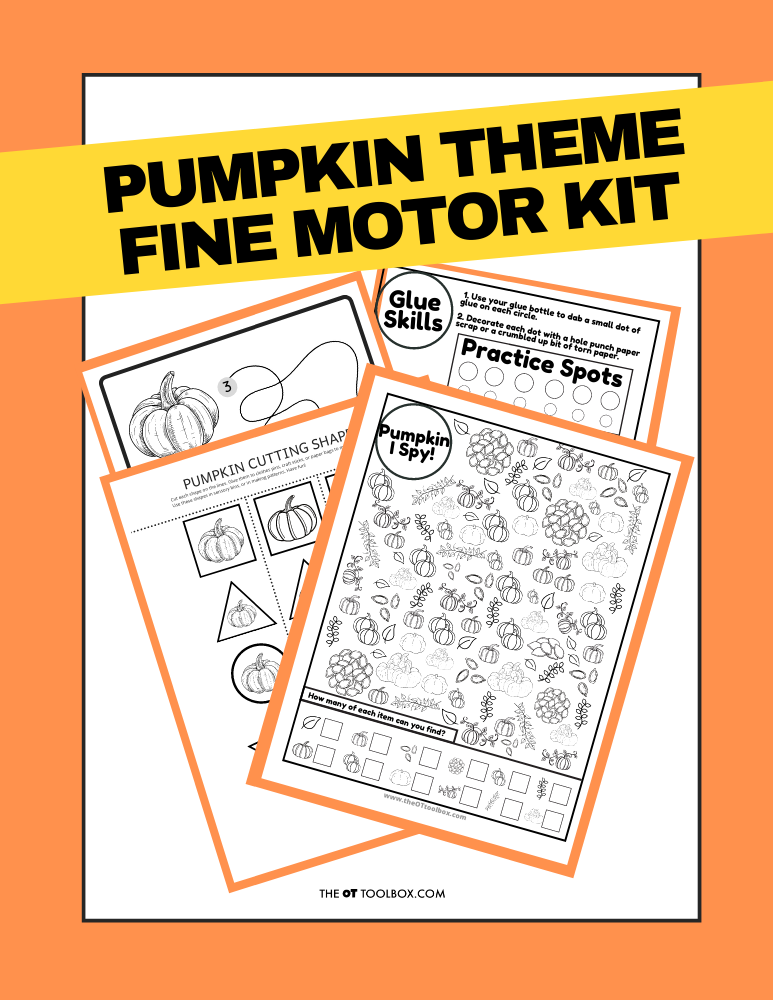
Grab the Pumpkin Fine Motor Kit for more coloring, cutting, and eye-hand coordination activities with a Pumpkin theme! It includes:
7 digital products that can be used any time of year- has a “pumpkins” theme
5 pumpkin scissor skills cutting strips
Pumpkin scissor skills shapes- use in sensory bins, math, sorting, pattern activities
2 pumpkin visual perception mazes with writing activity
Pumpkin “I Spy” sheet – color in the outline shapes to build pencil control and fine motor strength
Pumpkin Lacing cards – print, color, and hole punch to build bilateral coordination skills
2 Pumpkin theme handwriting pages – single and double rule bold lined paper for handwriting practice
Work on underlying fine motor and visual motor integration skills so you can help students excel in handwriting, learning, and motor skill development.
Colleen Beck, OTR/L has been an occupational therapist since 2000, working in school-based, hand therapy, outpatient peds, EI, and SNF. Colleen created The OT Toolbox to inspire therapists, teachers, and parents with easy and fun tools to help children thrive. Read her story about going from an OT making $3/hour (after paying for kids’ childcare) to a full-time OT resource creator for millions of readers. Want to collaborate? Send an email to contact@theottoolbox.com.
If you wrote a future me letter (or any message to my future self) while in school, you can understand the value in this assignment. My class wrote one in high school, and thirty years later I still have mine. Each time I find it, I am amazed at how eerily correct I predicted, or knew my future at fifteen. A message to my future self writing prompt can be an amazing growth mindset project to have students write about, at certain parts of their schooling, and archived for later review.
Use this as a tool to support breaking down goals. Today’s free download is a template writing prompt for a future me letter.
Today’s free download is a template writing prompt for a future me letter.
What is a Future Me letter?
So, what is message for my future self? A message to future me, is just that…a letter for the future version of yourself! It’s a quick glimpse into what you visualize for yourself in your future.
A future me message can be a picture of yourself at it’s current state as you picture yourself now. A future me letter is a great tool for self-reflection. It’s how you would describe yourself to a future version of yourself.
A message to your future self can also be a way to plan goals for yourself. You can visualize your future and make goals for down the road. This can be used along with a goal ladder to work on achieving specific goals.
message to my future self
What would you include if you were to write a “message to my future self”?
Think about how your life looks right now. What would you change about your environment, your career, friends and family, life situations, etc. What wouldn’t you change about those life events and circumstances?
Can you picture a future life with your optimal circumstances? This is a peek into your future life that you might like to live.
A message to one’s future self is a letter about how you might see your future. It’s a description of how things are right now in your current situation and how you might like to change certain things or not change other things.
Much like using the power of yet, a “future me letter” or a “message to your future self” is a growth mindset tactic. Using affirmations and visualizations, a future me sets the stage for setting and accomplishing personal goals.
This task can be a tool for breaking down goals as well as visualizing a future with those goals already being accomplished.
A message to one’s future self might include:
Predictions about what you think your life goals should be
Advice for your future self
Events and feelings you might want to recall later
Your wildest dreams, if you could have anything
Things you would say to yourself, if you were grown up
A future me letter containing highlights of present day to be remembered later
FUTURE ME LETTER AT DIFFERENT AGES
Students (and adults) of all ages can write a future me letter.
Imagine the different letters written by each age student.
Kindergarten future me letter- Kindergarteners might write about their future self becoming a princess or firefighter, or their love of Mom and Dad. They are not able to think beyond what they know, or far outside of their own circle. This can look like a picture or drawing predicting their future selves. It can also be a sentence or two at the end of the kindergarten year.
Elementary future me letter- Elementary age might have a more realistic view on the world, although still limited in what they are able to write about.
Middle school future me letter- The future me letter starts to shine during middle and high school when students are able to think outside of their present self, imagine a future, reflect on past mistakes, and offer advice to themselves.
High school future me letter- In the teenage years is where we start to see a real strategy and prediction of the future self. In the high school years, students are moving toward career readiness as they get first jobs and make post-high school plans. A future me letter written during the high school years can be fairly accurate or completely off base, but the actual letter can be a treasure to read back on as an adult, when all of the learning that has happened is literally on the paper.
In the high school years, self-reflection is important. Covering longer term goals, a future vision of one’s years after high school and the steps to get there can be covered in a future me letter in high school. This is a great addition to occupational therapy for teens.
Future me letter for adults- Just because schooling has passed, doesn’t mean there isn’t a place for a future me letter. In adulthood, writing about future goals and perspectives can be a stepping point for career changes, life goals, and big changes.
No matter the age, this opportunity to look at one’s past, present, and future goals is a wonderful self-reflection activity put into action.
I am a huge fan of the time capsule idea. Collect relevant items from a time period in your learner’s life, and store them away. Once your learner is old enough to reflect and appreciate the information, share the time capsule with them. Given “modern” technology, the time capsule, including future me letters, can be physical items, or documents stored on a floppy disk (remember those?)
Personally I prefer being able to hold and touch physical items from the past.
Writing a message to your future self
Let’s break down the activity analysis of writing a message to your future self.
Writing a future me letter, whether it is kept in a time capsule, posted on the refrigerator, or tossed in the recycle bin (GASP!), is a beneficial assignment. If you prefer a different writing prompt, this list of interest prompts might help your learners get started.
One tool to use in writing a message to ones future self is this goal ladder resource. Use that tool to create actionable steps to achieving a “future you”.
When coming up with a message for your future you to read, it is helpful to reflect on what you would like the future to look like.
This is where self awareness reflection comes in. One needs to be aware of self, but also reflect on current situations as well.
This letter is a great way for therapists to address introspection with clients.
Introspection refers to the examination or observation of one’s own thoughts and feelings. We know that our thoughts and feelings impact daily functioning, executive functioning skills, learning, and social interactions. By taking a look at our thoughts and feelings, we can see where we may want to make some changes for our future self to experience in life.
One way to foster these skills is by targeting self awareness. Use these self awareness games to get the ball rolling.
Use these points as a starting point to create a message to your future self.
Writing a message for your future self in therapy
Writing a message for your future self is a great activity prompt for therapy sessions, beyond the functional handwriting activity. We can use this functional activity to assess and document skills in the future me letter writing prompt.
Accurate documentation, although tedious, is a necessary evil in therapy settings. Documenting handwriting to show progress can be challenging without a rubric.
Does your note reflect accurate documentation, or contain phrases like good line placement, fair letter formation, or poor spacing? Think about how you will determine if the spacing has improved with words like poor/fair/good.
Writing in general is a core skill. It begins with tracing, moves on to copying, then to response writing, or creative flow. Learners can get stuck at any of these stages. Look at this printable Handwriting Tips Pack for strategies. Analyze the activity to see where the learner is lacking the skill to move forward.
Kinesthetic awareness – are the messages from the body going to the right receptors? Read more about kinesthetic awareness here.
Hand strength and dexterity – staying on the lines builds hand muscles and develops muscle control. Is your learner missing some strength or dexterity? This article on hand strengthening activities explains more.
Visual motor skills –Combining what is seen visually and what is written motorically. This takes coordination to be able to translate information from visual input to motor output. Coloring, drawing, counting, cutting, and tracing are some visual motor skills. Poor visual motor skills can be a stumbling block to moving past beginning letter formation. Read about visual motor skills in more detail.
Social Skills/Executive Function – Following directions, task completion, orienting to details, neatness, multi-tasking, attending to task, and impulse control can be contributing to difficulty completing the future me letter. This resource covers the connection between emotional regulation and executive functioning skills.
Handwriting: Letter formation – correctly forming the letters top to bottom. Letter sizing – correctly fitting the letters into the sized lines provided. Spacing, line placement, directionality, and spelling are also needed for success. Read about letter formation for more information and resources.
Copying – copying words from a model, transferring the letters from one place to another is a helpful building block to successful writing. Try these copying cards for more work in this area.
Fine motor- strengthening, hand development, and grasping pattern when holding the writing utensil and managing the paper. Read more about fine motor skills.
Bilateral coordination – remembering to use their “helper hand” to hold the paper while writing. Our resource on bilateral coordination skills covers more.
Strength – core strength, shoulder and wrist stability, head control, balance, and hand strength are all needed for upright sitting posture and writing tasks.
Using a message to future me letter in occupational therapy
Documenting skills in the future me letter writing prompt
Use the message to your future self to identify areas of development:
Accurate documentation, although tedious, is a necessary evil in therapy settings. Documenting handwriting to show progress can be challenging without a rubric. Does your note reflect accurate documentation, or contain phrases like good line placement, fair letter formation, or poor spacing?
Think about how you will determine if the spacing has improved with words like poor/fair/good. The OT Toolbox has some great resources for handwriting rubrics and testing. Try this Handwriting and Data Collection Kit. It comes in a school age kit as well as a preschool edition.
the percentage of correct letters
how many letters are formed correctly/# of reversals/legibility of writing
size of letters in relation to the space, # of letters on the line
Omissions, additions, punctuation errors, and spacing can also be considered
grasping pattern, hand dominance
attention to detail, following directions, prompts and reminders needed, level of assistance given
Number of times you need to repeat the directions so your learner can follow them
Amount of prompts and reminders reminders your learner needs while doing this activity
Determine what goals and skills you are addressing. Are you looking strictly at letter formation, line placement, and alphabet recall, or something else entirely such as executive function, thought processing, and behavior?
This type of documentation may feel foreign at first if this is not what you are used to, however insurance and governing agencies are becoming more strict on accurate documentation practice.
When it comes to reviewing progress and gathering information, you will find thorough documentation will be helpful. Check out How to Reach Handwriting Goals.
Perhaps this future me letter has inspired you to write one to yourself. What would you say to the future you? Don’t get married to that guy, take a different job, say no to that piece of cake, have more children, or become a princess after all.
Free Letter to future self
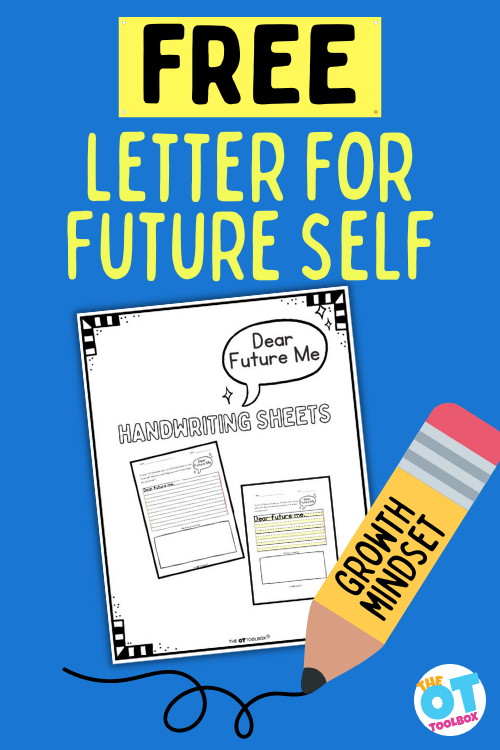
Would you like a to print off a template for a letter to future self to use as a writing prompt? This letter can be used in therapy sessions or for personal use. We’ve covered the various ways to use this resource, and now is a great time to start writing to your future you!
This printable is a resource found inside The OT Toolbox Member’s Club. Members can log in and grab the future me letter under “Handwriting Tools“. Not a member? Enter your email address into the form below to access this printable resource.
NOTE*The term, “learner” is used throughout this post for readability and inclusion. This information is relevant for students, patients, clients, preschoolers, kids/children of all ages and stages, or whomever could benefit from these resources. The term “they” is used instead of he/she to be inclusive.

Victoria Wood, OTR/L is a contributor to The OT Toolbox and has been providing Occupational Therapy treatment in pediatrics for more than 25 years. She has practiced in hospital settings (inpatient, outpatient, NICU, PICU), school systems, and outpatient clinics in several states. She has treated hundreds of children with various sensory processing dysfunction in the areas of behavior, gross/fine motor skills, social skills and self-care. Ms. Wood has also been a featured speaker at seminars, webinars, and school staff development training. She is the author of Seeing your Home and Community with Sensory Eyes.
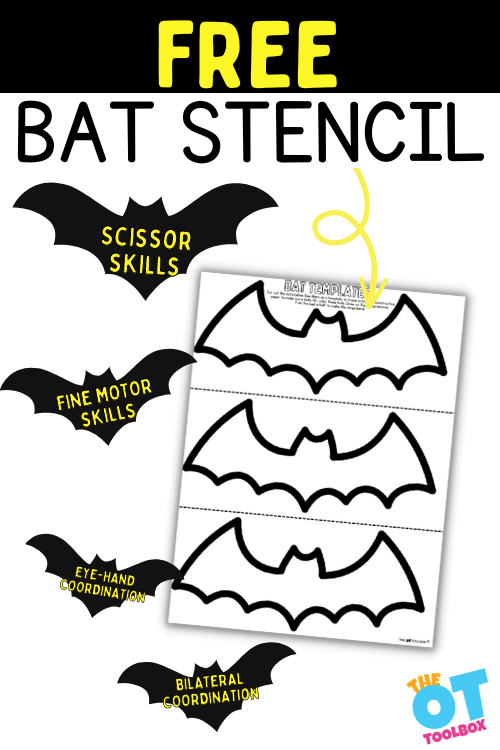
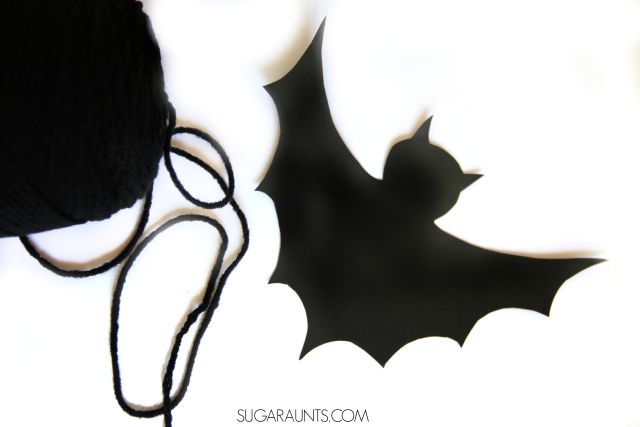
This bat template is a fine motor activity, perfect for building motor skills with a Halloween twist. Use the bat printable as a stencil to cut out, trace, and then use in fine motor work. Add this to your Halloween occupational therapy activities!
Bat Template
Fall is here and that means it’s time to pull out the Halloween crafts! This bat Halloween craft is a favorite in our house, and it’s actually a fun way to celebrate Halloween with kids without spooky decorations.
We also used this bat template in a Stellaluna activity that also challenged visual processing skills. Be sure to check that activity out for another way to use this printable bat stencil.
The nice thing about using our bat template is that it becomes an open-ended Halloween craft idea is one that doesn’t need a lot of materials. In fact, it’s a simple craft idea that is big on the fine motor skill development! When kids make this bat craft, they will be boosting skills such as fine motor strength and dexterity in a big way.
For more Halloween craft ideas, check out some of the ideas at the bottom of this post…it’s the perfect addition if you’re looking for Halloween crafts for toddlers or Halloween crafts for preschool parties.
Related, check out these spider activities for more spooky but fun ideas.
Bat Template Craft
We made this bat craft with a fun sensory twist. And, since we have a certain second grader that is cursive handwriting obsessed, we decided to add a cursive handwriting twist to this activity. This activity could work to help kids with letter formation of upper case letters, lowercase letters, or numbers too. The possibilities are endless.
We arranged the bat template so you can print out one bat printable page and then get 3 bats from the one page.
Or, if you are using the bat templates with a group of kids like in a classroom Halloween party activity, you can easily cut the bat template page into three sections with one bat stencil for each child.
This post contains affiliate links.
Bat Printable
To make your bat craft, you’ll need just a few materials.
Scissors (THIS is my favorite brand and the ones that I always recommended as an Occupational Therapist!)
Pencil or marker
This is a great Halloween craft for preschoolers because it’s a fantastic way to work on scissor skills with a Halloween activity.
Make the Bat Template
First print out the Pat printable onto printer paper.
Cut out the bat templates on the page. Each template has three bats. Students can cut out the bat printable or the adult can do this as preparation work.
Trace the bat template onto cardstock or black construction paper. This is another good task for students to do as tracing the bat template supports development of bilateral coordination skills, eye-hand coordination, crossing midline, and pencil control skills.
Cut out the bat template.
Kids can cut out the shape using their Scissors for great scissor skill work. The bat shape is a complex cutting shape and can be done by Elementary aged students.
Cutting the angled wings and curves can be difficult, but by using the cardstock, kids will get a bit fore proprioceptive feedback from the thicker resistance of the paper material.
To make the task easier, cut wings without the jagged lines or use thicker cutting lines when you draw the bat shape.
Decorate the Bat Cutout
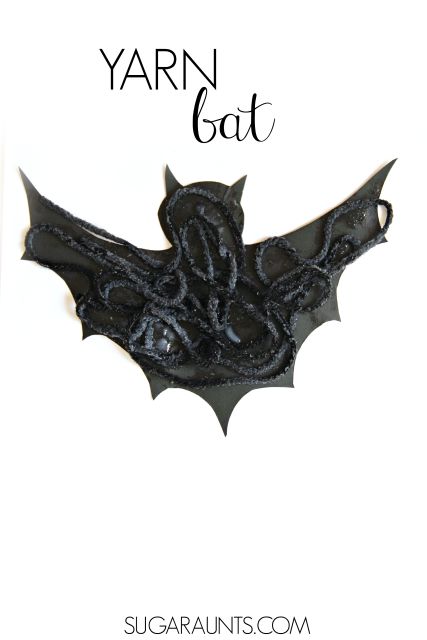
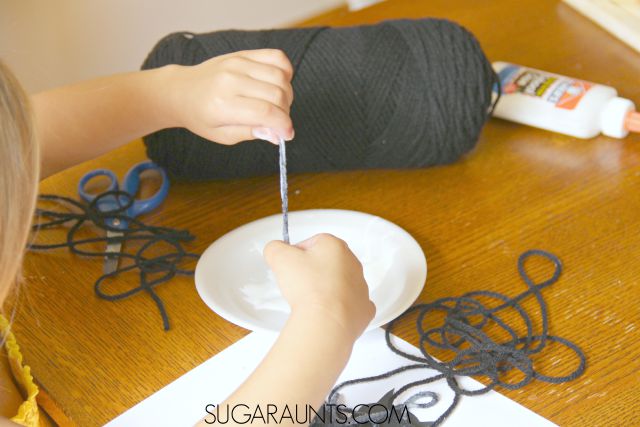
Once you have the bat, you’ll need to cut pieces of the black yarn. Have your child cut long or short pieces, it doesn’t really matter what length they wish to cut for their bat’s texture.
Cut black yarn for the bat cutout.
Cutting the yarn is a great material to practice appropriate scissor positioning and bilateral hand coordination.
If a child is holding the scissors on an angle, cutting the yarn will be more difficult. (You may see them trying to “saw” at the yarn!) Encourage them to hold the scissors straight up and down and the blades of the scissors at a 90 degree angle to the yarn. You can find more of our Scissor Skills activities.
2. Next, pour some glue into a shallow dish or plate. Show your child how to drag the yarn through the glue and get it nice and saturated with the glue. Use both hands to pinch and “scrape” off excess glue from the piece of yarn.
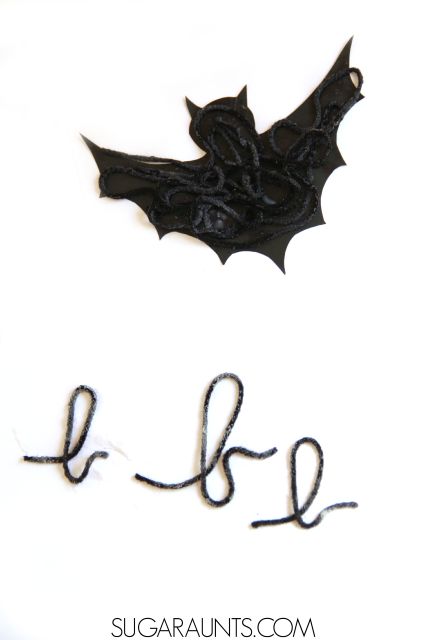
3. Next, drape the black yarn on the bat shape. You can let your child get as creative as they wish with this part. Some might like to outline the bat shape and others, just pile it up on the bat.
4. Let the glue and yarn harden and you’ll have a textured bat craft to use in Halloween decorations this Fall. You will have to wait for the glue to dry, probably overnight.
Use the Bat Printable in Handwriting Practice
Occupational therapy practitioners know the value of using a single activity or material to develop a variety of skill areas. That is the case with this bat printable…use it to work on handwriting skills too!
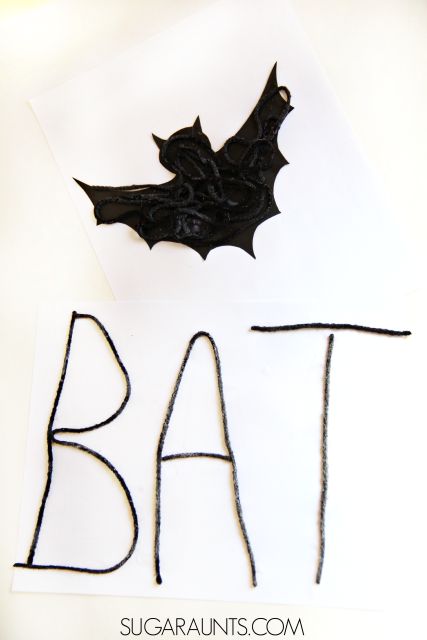
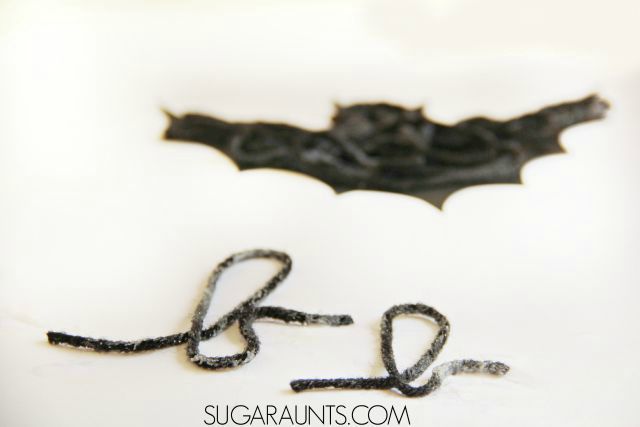
We used those saturated yarn pieces to build cursive letters, but you could build printed letters as well, using our letter construction method.
Use this Bat Craft for kids to work on letter formation of any kind. It’s a creative writing activity that they will be sure to remember. Work on forming individual letters, spelling sight words, or making Halloween words.
Use the Bat Printable in Learning
This would work as a very fun…and very sensory…classroom Halloween party idea or learning activity for this time of year, while working on team work skills, and learning components.
Split kids up into teams. Give each team a collection of cut black yarn and a bowl of glue.
Write a spelling word, or a Halloween word on the board or hold up a sign with a Halloween word.
Each team has to work together to use the cut yarn and glue to spell the Halloween word on a piece of paper or cardboard.
Once a team has completed the word, they have to hold up their paper or cardboard. The first team to spell the word with the letters sticking wins! (Too much glue or not enough glue will make this a fun race for Halloween parties for kids of all ages.)
Build printed letters with the glue yarn, too. We had a lot of fun with this Halloween craft and it was a hit with all of my kids…from preschool on up to grade school.
Check out some of these other Halloween activities and crafts:
Make a Spider Craft using potato stamps. Fun for parties or just Halloween fun with the kids!
Use cookie cutters and chalk to make Halloween Chalk Art. It’s a messy and sensory Halloween activity that the whole family can get involved in.
Want a copy of this free bat template printable? Enter your email address into the form below to get a copy of this Halloween printable. This activity is also available inside The OT Toolbox Member’s Club under our Bat Therapy Theme. Members can log in and get the bat template there without entering an email address. Not a member yet? Join us today.
Colleen Beck, OTR/L has been an occupational therapist since 2000, working in school-based, hand therapy, outpatient peds, EI, and SNF. Colleen created The OT Toolbox to inspire therapists, teachers, and parents with easy and fun tools to help children thrive. Read her story about going from an OT making $3/hour (after paying for kids’ childcare) to a full-time OT resource creator for millions of readers. Want to collaborate? Send an email to contact@theottoolbox.com.
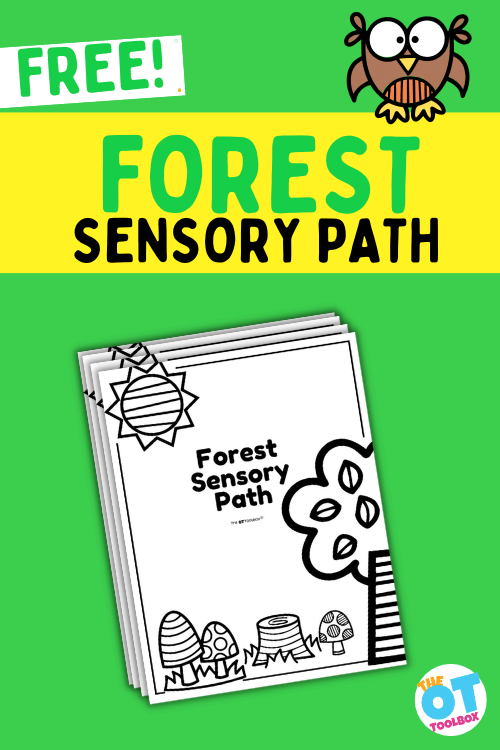
If taking a break is a must, but getting outside is tricky, then this Forest Sensory Path hits the mark! We’ve created another fun printable to our collection of free sensory paths with all of the calming benefits of nature and being in the woods. This printable forest sensory walk is perfect for bringing the calming input of nature into the indoors. Be sure to read this resource on sensory nature walks to read up on those calming and organizing self-regulation benefits of woods and nature.
Forest Sensory Path
It seems life is getting more chaotic since the pandemic. This may stem from isolation, lack of exposure, too much electronic use, stressors, or a sudden thrust back into “real life”. Compounding this is the fact that learners do not know how to combat these environmental stressors, or self regulate. It seems learners need instruction on how to take a break. That’s where these Forest Themed Sensory Path stations come in, which provide a structured sensory break, to help reorganize thoughts and body.
Sensory paths and sensory stations became popular with the addition of expensive stickers set up around the school. These are awesome as a self-regulation activity and to address mindfulness with kids! If you don’t have the budget or space for these custom stickers, try one of the sensory walk stations offered by the OT Toolbox.
This month the Forest Sensory Path will fit in perfectly with your fall leaves occupational therapy theme. Add your email below to be sent this FREE download.
How does the FOrest sensory path work?
Sensory activities like this Forest Sensory Walk Station offer tasks to promote body and mind regulation. The initial response to a learner out of sync is to tell them to calm down.
What does “calm down” mean to you? Adults generally have already figured out appropriate strategies to reduce anxiety, inducing a feeling of calm.
Children have no idea what “calm” looks like, because they rarely act this way. They also lack the ability to calm themselves, or know what to do to slow their body/brain down. Having a strategy, movement, or action to stop, self-analyze, breathe for a moment, and take a break from the environmental or internal input, is a literal break for the brain and body. This is where we get the term brain breaks!
Sensory stations provide the framework for self regulation.
Printable Sensory Path: Forest Theme
This Forest Sensory path combines deep breathing and proprioceptive input with eight different activities. Proprioceptive exercise is a “go to” input for organizing the sensory processing system and regulating the sensory systems.
It is alerting for those who are experiencing low arousal, and calming for those who seek additional input to get regulated.
Connected to proprioception and interoception, deep breathing exercises slow the central nervous system, often elevated during periods of fight or flight responses.
The ultimate goal of sensory regulation is self-regulation. Learners need to understand what strategies work for them, and when they are needed. Sensory strategies are unique to each learner.
Just as adults have different routines they use for concentration and focus, children develop varied strategies.
Imagine the additional responsibility teachers take on remembering and learning the sensory needs of each of their students.
When a student can advocate for themselves, this not only helps the student, but their caregivers as well.
How to use the Forest Sensory Paths?
Lowest level learners need to be taken through the walk step by step
Middle level learners can be supervised while participating
Higher level learners will be able to complete this activity when instructed, or advocate for a sensory break
Laminate the page for reusability. This saves on resources. Caregivers or young learners can help decorate these pages before they are laminated.
Make this part of a larger lesson plan including gross motor, sensory, social, executive function, or other fine motor skills
Print in black and white, in color, or on colored paper for different levels of difficulty
Project this page onto a smart board for students to learn these activities as a group
More or less prompting may be needed to grade the activity to make it easier or harder.
Learners can explore other ways they could use this activity
Explore different options for setting up this sensory station. It could be appropriate in a classroom, hallway, gymnasium, outside the school, or walking into the cafeteria, depending on the needs of your learners
sensory paths for elementary schools
Some of the big budget sensory paths are thousands of dollars and require permanent installation over laminate floors. In many cases, getting approval for the purchase of a sensory path in an elementary school is just out of the question.
The good news is that our printable sensory paths are totally free, AND you can print off the pages and switch out the themes according to the season.
The other benefit that most therapist users see is that the printable pages can be positioned and placed according to the environment. These sensory path pages can be placed in a page protector sleeve and hung in a hallway. Or they can be laminated and placed in a calm down corner. The options are pretty limitless.
A few other common questions about using the Forest sensory path in elementary schools or in therapy clinics can include:
Do sensory paths work for all learners? No. Sensory strategies are not one size fits all unfortunately. Much of the treatment relies on trial and error. If the forest sensory stations walk does not calm your learner, it is possible the treatment came too late, after the learner was already shut down. Some learners are not able to self regulate through all parts of the sensory stations, however it is a great and simple activity for those who do.
How long should my learner use a sensory path? There is no defined time frame for any self regulation strategies. Some learners calm quickly, needing a diversion from their current state in order to regulate. Other learners may take several minutes to calm after an upset. Watch for signs of regulation and calming before suggesting your learner stops. After the Forest Sensory Station Walk, take note of how long your learner is able to stay regulated.
How often should I use a sensory path? Some learners need a boost of sensory regulation every twenty minutes, while others can go several hours before they need a moment to reset. Watch for signs of disorganization and jump in with strategies before meltdown occurs.
Will a sensory path work consistently every time? Probably not. This worked last week, but not this week. What happened? Sensory strategies are not an exact science. Have a large “bag of tricks” in your toolbox to be able to offer several different strategies.
How long will the effects of a sensory path last? Every learner is different. A very dysregulated learner may need almost constant strategies for self regulation. A learner who is more organized and has been practicing strategies for a while, might reap the benefits of this sensory stations for two hours. A great sensory workout can have long lasting effects.
Are sensory paths and sensory stations an evidenced based practice? Because of the nature of sensory dysregulation and the strategies offered, it is very difficult to get consistent data in this area. Use your clinical judgment and observations to determine how effective this Forest Themed Sensory Stations Walk is.
Hanukkah Deep Breathing Printable (add this to pieces from the Winter sensory paths and Christmas sensory paths to create a great Hanukkah Sensory Path)
Want to add a forest themed sensory path to your therapy toolbox? Enter your email address into the form below. This resource is also available inside The OT Toolbox Member’s Club. Members can log into their account and access this resource in the Forest Animals Therapy Theme area. Not a member of The OT Toolbox Member’s Club? Join us!
Victoria Wood, OTR/L is a contributor to The OT Toolbox and has been providing Occupational Therapy treatment in pediatrics for more than 25 years. She has practiced in hospital settings (inpatient, outpatient, NICU, PICU), school systems, and outpatient clinics in several states. She has treated hundreds of children with various sensory processing dysfunction in the areas of behavior, gross/fine motor skills, social skills and self-care. Ms. Wood has also been a featured speaker at seminars, webinars, and school staff development training. She is the author of Seeing your Home and Community with Sensory Eyes.
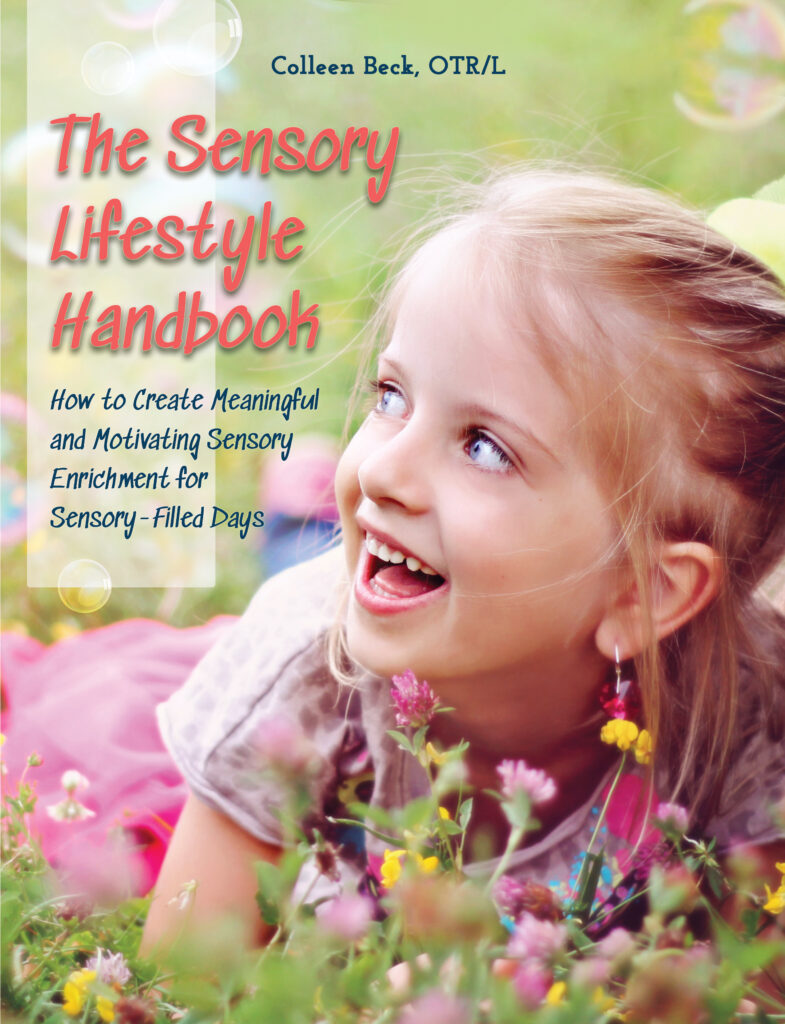
The Sensory Lifestyle Handbook walks you through sensory processing information, each step of creating a meaningful and motivating sensory diet, that is guided by the individual’s personal interests and preferences.
The Sensory Lifestyle Handbook is not just about creating a sensory diet to meet sensory processing needs. This handbook is your key to creating an active and thriving lifestyle based on a deep understanding of sensory processing.
As occupational therapy students, we had to learn bone names and all about anatomy and physiology. Naming bones comes in very handy as an occupational therapist! But, if you are working in pediatrics, kids need to learn names of bones, too! For one thing, kids learn bone names in school. But did you consider the interoception aspect to teaching bone names? When it comes to internal feelings or anatomical states that impact sensory processing and internal body actions, learning names of bones supports this awareness of self. Add this fun way to learn names of bones to your anatomy and physiology games!
Bone Names Activity
Learning human anatomy has a special place in my heart. I mean, those semesters in Human Anatomy, Anatomy lab, and clinical kinesiology bring back fond memories.
So, when my kids ask questions like how their arm can pick up a sandwich, I have a little fun telling them about bones, joints, and muscles. This bone naming activity is just one fun way to teach bone names and teach kids about anatomy.
(Moving a sandwich is a big deal in our house!)
We’ve done a body part identification activity before, using band-aides, but these labels were a big hit with my kids. We used them to practice for a test for my big kids.
My Kindergartner and Second grader had a bones theme in their gym class, we had fun talking about the bones in our body, and made this Bone Identification and movement activity. (It would be great as a skeleton activities for preschoolers, too.
Bones Activity
This bone activity for kids is one they won’t forget…and when teaching human anatomy to kids, it’s one that will stick! The fun stickers help! 🙂
This post contains affiliate links.
I threw this activity together really quickly. We had a few sheets of blank address labels, and I grabbed a red permanent marker (affiliate link). I made a quick strip across the top and bottom of the address labels and then wrote in black marker (affiliate link), “Hello my name is” with the bone names below.
While we used this bone identification activity with kids, it would be a great way to learn bones as part of an anatomy and physiology lesson for OT or PT students, too!
list of bones in human body
After I wrote out the names of the bones, I tested my kids on what they knew. They recalled most of the bones from gym class lessons, but we had a few that needed practicing.
For the second grade and kindergarten physical education curriculum, they had to know this list of bones in the human body:
skull
humerus
radius
ulna
carpals
phalanges
clavicle
sternum
ribs
pelvis
femur
tibia
fibula
tarsals
Complete List of Bone Names
Above is just a simplified list of bone names, which can be used for teaching kids about the skeletal system. A more complete list is as follows. The bone identification activity shown below can definitely be used for this complete list of bone names and bone types. Classifying and naming the entire skeletal system requires much practice, and as occupational therapists we know the power of multi-sensory learning!
Bones in the skull (includes bones in the head and face):
Cranial bones:
frontal bones
Parietal bone
temporal bones
occipital bone
sphenoid bone
ethmoid bone
Facial bones:
mandible
maxilla
palatine bone
zygomatic bone
nasal bone
lacrimal bone
vomer bone
inferior nasal conchae
Bones in the thorax:
sternum
ribs
Bones in the throat:
hyoid bone
Bones in the vertebral column, or spine:
cervical vertebrae
thoracic vertebrae
lumbar vertebrae
Bones in the pelvis:
coccyx
sacrum
ossa coxae (hip bones)
Bones in the legs :
femur
patella
tibia
fibula
Bones in the feet:
Ankle (tarsal) bones:
calcaneus (heel bone)
talus
navicular bone
medial cuneiform bone
intermediate cuneiform bone
lateral cuneiform bone
cuboid bone
Instep bones:
metatarsal bone
Toe bones:
proximal phalanges
intermediate phalanges
distal phalanges
Bones in the middle ears:
malleus
incus
stapes
Bones in the shoulder girdle:
scapula or shoulder blade
clavicle or collarbone
Bones in the arms:
humerus
radius
ulna
Bones in the hands:
Wrist (carpal) bones:
scaphoid bone
lunate bone
triquetral bone
pisiform bone
trapezium
trapezoid bone
capitate bone
hamate bone
Palm or metacarpal bones:
metacarpal bones
Finger bones or phalanges:
proximal phalanges
intermediate phalanges
distal phalanges
We had a blast sticking the labels all over ourselves while saying “Hello my name is humerus!” in funny voices.
While we had the labels on our body parts, we practiced the motions of that bone. We talked about how that bone could move and what it could do.
Yes, your humerus has a job in picking up a sandwich! (This is a very important fact when teaching bone names to preschoolers!)
Bone identification activity with a doll.
Even the baby doll got in on the bone labeling action.
How cute are those tarsals??
Colleen Beck, OTR/L has been an occupational therapist since 2000, working in school-based, hand therapy, outpatient peds, EI, and SNF. Colleen created The OT Toolbox to inspire therapists, teachers, and parents with easy and fun tools to help children thrive. Read her story about going from an OT making $3/hour (after paying for kids’ childcare) to a full-time OT resource creator for millions of readers. Want to collaborate? Send an email to contact@theottoolbox.com.
Teaching a child how to hold a spoon and scoop food requires several motor skills that must be developed before a toddler can use utensils themselves. Even older children struggle with the ADLs of holding a spoon and scooping food to feed themselves. Here, we’re covering sensory motor skills needed to hold a spoon, fork, knife, and other utensils. You’ll also find some creative activities and play ideas to develop the underlying skills that play into using utensils.
How to hold a fork and spoon with efficient grasp patterns.
Note that these strategies and skill areas are needed across the lifespan when it comes to self-feeding. Older children and even adults who may have had a physical or cognitive impairment can benefit from addressing the underlying skill areas needed for using utensils. No matter the age, noting how an individual holds a spoon and fork is part of a comprehensive feeding evaluation.
how to hold spoon and fork
Before we get to the skills in play when holding a spoon or using a fork, let’s cover the specifics on how to hold these utensils. Why? Because often, we see older children who hold a spoon with a gross grasp or hold a fork with the whole hand. These grasp patterns can impact functional performance, but can also be a cause of concern for parents.
Note that the way an individual holds a spoon or holds a fork can differ when adaptive equipment for eating is used.
How to hold a spoon.
how to hold a spoon
To hold a spoon, one needs to grasp the utensil with their dominant hand.
The spoon is placed along the lateral edge of the middle finger or pad of the middle finger.
The pointer or index finger typically rests over the top of the neck of the spoon, and guides movements when scooping.
The thumb rests and stabilizes the flat handle of the spoon on the top, above the pointer finger in a modified lateral key grasp.
The scoop of the spoon is pointing out toward the direction the thumb points, and the handle is above the thumb web space.
In this position, one can scoop with refined movements and graded precision using the pad of the thumb on the flat part of the spoon handle. When the spoon is properly placed in the hand, the wrist is slightly pronated and slightly flexed.
You can see from the image below that there are many different grasp patterns used when holding a spoon, which progress as the child develops more refined fine motor skills. The most efficient grasp pattern is the “adult grip”, however, the other grasp patterns are typically part of a progression as the toddler or young child gains experience with eating with a spoon.
Using a spoon is likely one of the first functional tools that a small child has experience with, and while messy eating will ensue, it is important to allow the baby or toddler experience with holding and manipulating a spoon, even if they are not getting actual food into their mouth at first.
Grasp patterns for holding a spoon. No source was found for this image, may be subject to copyright
Inefficient grasp on a spoon- When the handle end of the spoon is UNDER the thumb web space, the grasp moves into a poor position for function and accuracy of scooping. In this case, the hand moves into a gross grasp pattern, and in order to gain motor control with graded precision, the elbow tends to pop out as the shoulder abducts. In this poor functional grasp pattern, you’ll see the wrist fully supinated.
Activities to move from an inefficient grasp pattern to an efficient grasp pattern include PLAY:
Next, let’s cover the proper grasp pattern required to effectively hold a fork. Note that there are different ways to hold a fork, depending on location, no one way of these different style being better or worse for functional performance to hold and use a fork to stab and eat food.
To hold a fork, the fork is held in the dominant hand much like a pencil is held. The thumb stabilizes the narrow part of the fork handle, or the neck of the fork. This area is located above the prongs, or tines of the fork. The neck of the fork rests on the lateral side of the middle finger or the pad of the middle finger.
Like holding a spoon, the end of the fork is above the back of the hand, and not under the thumb web space into the palm.
The wrist of the hand should be slightly pronated and slightly flexed.
Note that when holding a fork to scoop food, a different grasp pattern is used than when using a fork to stab food, and still another grasp pattern is used to stabilize food when using a knife to cut.
To stab food with a fork, the fork rotates in the hand and skills of in-hand manipulation are used.
To stabilize food with a fork, in order to hold food stabile so a knife can cut the food item, the fork continues to rotate within the hand using in-hand manipulation, but the addition of finger isolation of the index finger is used to hold the fork steady.
Inefficient grasp on a fork– When the end of the fork handle is under the palm, the hand tends to pull into a gross grasp on the fork, which is a more primitive grasp pattern, and is less functional for refined and graded movements. Similar to the motions used with a spoon held in this manner, a fork held in a gross grasp will include elbow and shoulder.
Much like using a spoon, progression from inefficient grasp patterns on a fork is developmental and requires practice. Allowing kids to use and hold a fork with verbal and visual prompts is helpful. Other fine motor and eye-hand coordination tasks will support development from inefficient grasp patterns when holding a fork to more efficient and refined motor skills:
Playing with play dough and using play dough tools like play knives, play forks, and sculpting tools
Before a child can use fine motor tools such as a spoon, fork, knife and other self-care tools (hair brush, toothbrush, pencil, scissors…) independently, there are certain physical, cognitive, and emotional prerequisites that must fall into place.
These self-care skills include many of the same sensory motor components, so in this blog post, we’re covering primarily the skills needed to hold a spoon and fork.
Toddlers and young preschoolers that sit at the table, probably have taken notice of how adults and older children at the table eat. This is actually part of the developmental process. When sitting at a table, a baby and toddler is observing and noticing how older siblings and parents use forks to stab food, spoons to scoop, and knives to cut.
Toddlers often want to take part in the action!
Using a spoon and fork during the Toddler years is a natural development of self-awareness and self-control. Using utensils is part of that progression of feeding developmental milestones that children go through. A child becomes more aware of the skills that they are developing and that they can assert their own independence.
Likewise, using a spoon to eat at first can lead to messy eating with young children, and that’s totally normally, developmentally.
But, before these areas of independence arise, there are certain prerequisites that need to be in place. Using tools in self-feeding, brushing one’s own teeth, using a knife, crayon, pencil, or other tool requires development in a few areas.
Speaking of using crayons to develop motor skills, these crayons for toddlers support fine motor development and coordination skills through play.
This post contains affiliate links.
Skills Needed to Hold a spoon and fork
When you take a look at the motor breakdown of using a spoon and fork, there are several components you’ll see in action:
Posture
Grasp Development
Hand Preference
Cognition
Attention
Eye-hand coordination
Somatosensory experience
And even play!
Let’s cover each of these areas needed to hold a spoon and fork in more detail:
Posture- When using a tool like a fork, pencil, scissors, toothbrush, paint brush, knife…postural control is essential. Like anything else, it all starts at the center and at the body. You can’s use your hands in fine motor play activities if your upper body is slumped or slouched. If postural support is the issue, work on getting into a better sitting position. Speak to an Occupational Therapist for individualized assessment and recommendations.
Grasp Development- For using tools, a child needs prehension skills and precision skills, including grasp, release, and the ability to stabilize their arm and write while moving the hand. Sometimes a pinch or required muscle movement is too much for an unstable arm/wrist and that required muscle effort makes the upper body slouch. Start over with posturing is this happens.
Hand dominance– A true hand dominance doesn’t typically become established until 5-6 years. And that is a good thing! A child’s body is developing strength, balance, muscle tone, and sensorimotor abilities at an even and symmetrical rate in the early years. We want that to happen! If a very strong preference of dominance is noticed at an early age, ask your pediatrician or occupational therapist for assessment of asymmetry or delay.
Cognitive prerequisites– Appropriate ability to follow simple directions is a must in order for use of tools in typical ways. Sure, a fork makes a great hair brush. A spoon is an excellent drumstick. But, inappropriate use of utensils can be dangerous.
Attentional Prerequisites– Appropriate attention span is needed for using tools in functional tasks. This blog post covers more on attention needed during meals.
Constructive play– What? A child needs functional play in order to use a pencil? Yep! Building with blocks, combining toys, and pretending provides the base of fine motor development, skilled use, strength, imagination, and creativity that is needed to problem solve and use tools appropriately.
Eye Hand Coordination– More play! Catch a ball and use crayons to establish the base of hand eye coordination needed for skilled maneuvering of tools to the mouth, paper, hair, or teeth.
Somatosensory Experience– Playing and experiencing the senses in typical every day activities are essential for the child to build on their awareness of textures, weights, manipulating objects, and sizes.
Given all of these areas that a child must have in place before showing success with tools in functional tasks, it’s important to work on certain areas.
Below, you’ll find a great printable resource that covers all of these skill areas that are needed for using a spoon and fork. This is a great handout to use especially when working with families of young children who are learning to hold a spoon and fork.
Teaching kids how to hold a spoon is the first step, but then actually scooping food, getting the food to the mouth, clearing the food from the spoon, and then repeating the process is part of the functional task of eating.
Remember that eating is a developmental process, and that this is another occupation in which practice is key to functional performance!
To improve use with a spoon and fork (and then spoon, fork, and knife!), it’s important to have various opportunities for practice.
Provide opportunities to use tools like spoons in scooping items. You’ll find more information on the topic of scooping in our blog post on scooping and pouring.
These black beans are a great way to practice tool use and all of the skills needed in managing tools. See the bottom of this post for more ideas.
Be sure to provide your little one with lots of opportunities to use tools in activities and play!
Related activities that you will love for teaching kids to use tools:
Sight Word Scoop– this scooping activity encourages users to develop the eye-hand coordination needed to use a spoon to scoop an object in a liquid, much like scooping the remaining cereals in a bowl of milk, or scooping food from a soup broth.
Invitation to Scoop and Pour– In this activity users can use a spoon with graded precision and refined movements to scoop grains of corn which can be a great way to practice motor skills to hold a spoon.
Field Corn Sensory Bin– Another activity using spoons to scoop field corn, this activity offers proprioceptive feedback through the joints and muscles of the hand, wrist, elbow, and shoulder.
Moon Dough Scooping– In this activity, users use a spoon to scoop and pick up a moist and dry material. This can be a great way to practice using a spoon with different materials.
Scooping Ice– Using a spoon to pick up ice is a fun way to practice using a spoon with a different material that also offers precision and refinement in using a spoon or scoop.
Relaxing Lavender Water Bin– Kids love this sensory bin, but therapists love the functionality! Use a spoon to pick up small items in a liquid, developing eye-hand coordination skills with sensory benefits.
(Amazon affiliate link) Learning Resources Handy Scoopers are colorful and bright and a great way to practice the prerequisites for tool use in many ways.
Get this free handout on skills needed to hold a fork and spoon below or in The OT Toolbox Member’s Club
Free Handout- Skills Needed to Hold a Spoon and Fork
Want a printable handout of the skills kids need to hold a spoon and fork? Working with families on teaching kids how to hold a fork and spoon and need actionable tips and strategies in a handout format?
Colleen Beck, OTR/L has been an occupational therapist since 2000, working in school-based, hand therapy, outpatient peds, EI, and SNF. Colleen created The OT Toolbox to inspire therapists, teachers, and parents with easy and fun tools to help children thrive. Read her story about going from an OT making $3/hour (after paying for kids’ childcare) to a full-time OT resource creator for millions of readers. Want to collaborate? Send an email to contact@theottoolbox.com.
In this post, you will find calming bedtime relaxation stretches for kids and families, based on the popular children’s book, Time for Bed. These activities are perfect for helping kids calm down before bed. We know the power of sleep hygiene in child development, but let’s consider the powerful impact of stretches before bed have on children.
Relaxation Stretches for Kids Sleep
An important thing to cover when it comes to helping children fall asleep and stay asleep at night is the concept of pre-bedtime yoga. When kids participate in bedtime stretches as part of their bedtime routine, it’s a sensory diet that supports sleep.
Use animal theme yoga poses to support relaxation at bedtime.
Related is our resource on the role occupational therapy professionals can play in sleep for the whole family, when it comes to supporting a baby or newborn not sleeping.
Relaxation Stretches for Kids Sleep
An important thing to cover when it comes to helping children fall asleep and stay asleep at night is the concept of pre-bedtime yoga. When kids participate in bedtime stretches as part of their bedtime routine, it’s a sensory diet that supports sleep.
I love to bring this concept together for kids by first talking about how everyone needs sleep. Kids, adults, and even pets and animals. Sleep supports growth, learning, and allows our brains to rest. You can even use a few of our hibernation activities to take this concept further with kids, depending on the interest level.
Children can get a little wound up before bed. All it takes is one rouge energy burst and you’ve got giggling kids bouncing from every surface imaginable.
Couch cushions? check. They are jumping up and down.
Running from room to room? Check. There’s two of them chasing one another back and forth will the occasional knee slide across the hardwoods.
Practicing the living room tumbling skills? Yep and check. There’s one more doing somersaults across the room.
Why must they gang up on me with their endless energy during those exhausting pre-bedtime hours?
Having a set of bedtime relaxation stretches in the nightly routine can support sensory needs and promote a sense of calm before bedtime, just when children are wound up and excitable.
benefits of stretching before bed
We know that sleep is a necessary occupation for all of us, but for children sleep patterns and healthy sleep cycles support so many aspects of development.
Cognition
Learning
Behavior
Nutrition
Emotional development
Social development
When children don’t get enough hours of sleep, or if they don’t get quality sleep on a consistent basis, there are several things that can occur:
Poor focus
Trouble concentrating
Attention and behavior problems
Poor academic performance in school
Excess weight or increased food intake
Problems paying attention
Health problems: obesity, type 2 diabetes, poor mental health, and injuries
Decreased physical activity
Poor mental health
Unhealthy risky behaviors related to decision-making
Risk-taking behaviors, bullying,school violence-related behaviors, and physical fighting
Higher risk of unintentional injury
There are several studies describing the benefits of stretching before bed. Kids can benefit from a pre-bedtime stretching sessions to integrate sensory processing systems and the calming benefits of slow movement, heavy work as a regulation tool. This calms the body and helps with relaxation before bed.
Stretching before bed supports sleep quality. One review of multiple studies found that mindfulness meditation practices that incorporate gentle stretching, such as yoga and tai chi, generally improve sleep quality.
Another study found that older adults reported improved sleep quality after performing low level physical and cognitive activity. The researchers found that gentle stretching resulted in better sleep than when the participants performed more strenuous exercises, such as aerobics.
Bedtime stretches help kids stay asleep. A study into resistance exercise training and stretching found that exercises could improve symptoms of insomnia. In the study, the participants performed stretching in 60-minute sessions three times per week for a period of 4 months. The results showed improved sleep quality when stretching in the evening.
Better sleep supports learning and executive functioning skills. Other studies tell us that better sleep hygiene in children support development of executive functioning skills.
yoga poses for stress relief
Today, I’m sharing a great way to calm kids down before bed so that quality sleep is possible. These yoga poses for stress relief and bedtime relaxation promote organizing heavy work through the proprioceptive sensory system and gentle movement through the vestibular sensory system.
Another contributing factor is the interoceptive system which connects our internal systems such as digestion, heart rate, circadian rhythms, and muscle tension. All of these factors play a vital role in impacting sleep, with both the ability to fall asleep, and the ability to stay asleep throughout the night. This study shares more on the interoceptive system’s role in sleep.
These organizing and calming yoga poses stretch the muscles and joints to offer feedback to regulate an overactive system.
If you’ve ever participated in a yoga session, you know the benefits of certain yoga poses in reducing stress and anxiety.
It’s important to make the connection between stress responses, anxiety, over-active thoughts, and a hyper-response to stimulation and emotional responses. The difficulty in identifying and describing emotions in self (a huge part of social emotional learning and development) is referred to as Alexithymia.
Specifically, alexithymia is defined as difficulty identifying and describing emotions in self. We know that noticing and understanding internal body signals (aka interoception) is crucial to a bodily systems, so it makes sense that if interoception is affected, using or showing emotions, and identifying emotions in self will be affected.
Interoception influences emotions by it’s control and underlying influence on internal processes of the body: toileting, hunger, thirst, and sleep!
When interoception impacts sleep, it then further impacts emotions:
stress
getting angry or frustrated easily
anxiety
fear
worry
overly emotional responses
sadness
over-excitability
hyperactive responses
All of these emotional responses are normal and good feelings to experience. However, when sleep is reduced, they can move into an area of impacting other functional tasks or everyday occupations.
You’ll also find information and resources in this article on the limbic system including the stress response. You can see how all of these concepts fit together to impact daily functioning.
How to use yoga poses for stress relief with children
Using yoga to support relaxation at bedtime is not a new concept. Yoga naturally supports relaxation through the heavy work input of the proprioceptive sense.
However, yoga also adds the benefit of deep breathing exercises to calm and center the body as an organization tool.
When it comes to bedtime, adding anything to the nightly routine can mean a delayed bedtime, so making the relaxation stretches part of the routine that is already in place is important. If you read a book together each night, incorporate stretches into that. If brushing teeth and going to the bathroom are the only tasks that happen each night, use the time just after those jobs to do a few stretches.
Adding bedtime stretches for the purpose of relaxation doesn’t need to be difficult. The most important thing here is to make it work for your situation and home. down the somersaults and hardwood floor stunts into relaxing bedtime.
Here are some tips to support relaxation at bedtime:
Use bedtime relaxation stretches in a nightly routine. A visual schedule can be helpful with some kids.
Dim the lights and turn on soothing music
Read a book before bed
Drink a warm drink as a calming food/sensory tool.
Set the mood for sleep with a calming bedroom or sleep space: snuggly blankets, cozy pillows, or cool temperature, depending on the individual’s preferences.
Use the relaxation stretches listed below.
One way that helps to get kids relaxed before bed is reading a great book. When kids can listen to an engaging story that is read aloud, their bodies can’t help but slow down.
Bedtime Relaxation Stretches for Kids
These bedtime relaxation stretches are a combination of relaxing yoga moves and heavy work that helps to ground the body through proprioceptive input to the body’s sensory receptors in the muscles.
Performing these relaxing stretches can help transition kids to a calmed state that allows for a better sleep.
Below are forms of yoga poses for children.
We decided to use one of our favorite going to bed books, (Amazon affiliate link) Mem Fox’s Time for Bed.
In the book, we hear a rhyming verse about each animal’s transition to sleep. It’s such a beautiful book to snuggle up with kids during night time routines. In fact, Time for Bed can easily become one of those books that you read over and over again.
We loved looking at the watercolor pictures in Time for Bed and picturing each animal as it got ready for sleep.
To go along with the book, we tried some of these bedtime relaxation stretches.
Grab your copy of the free printable below by entering your email address into the form, or going to The OT Toolbox Member’s Club and heading to the Mindfulness Toolbox.
To do these exercises, simply cut out the printable on the lines, and create a small stack of stretches. Kids can do one or more of these relaxation stretches to calm down before settling in with the Time for Bed book. (affiliate link)
Simply pull out a couple of the stretches and join your child on the floor to perform each stretch. The stretches are designed based on the animals in the book.
When doing the stretches, hold the stretch for 2-3 minutes while maintaining deep breathing.
Print off these relaxation stretches for a bedtime calm down session for kids.
As we all know, kids will be kids. If your child is getting too wound up from the stretches (because sometimes the sleepy sillies take over and make concentrating on stretches and relaxing deep breaths nearly impossible!) simply put the stretches away and try them another day.
Relaxation stretch for kids, incorporating yoga poses for stress, anxiety, or to calm down before bed.
Your child will love doing these bedtime relaxation stretches with you and the whole family!
Little Goose Stretch– Lie on the floor on your back, with your feet raised up on the wall. Keep your knees straight. Spread your arms out on the floor like a goose. Bend and point your toes slowly.
Little Cat Stretch– Snuggle in tight! Sit criss cross applesauce on the floor. Bend forward at the hips and place your head on the ground. Stretch your arms out on the floor over your head.
Little Calf Stretch– Grasp both hands together behind your back. Bend forward at the hips and raise your arms up behind you.
Little Foal Stretch– Lie on your back and pull your knees in with your arms. Hold the position and whisper about your day.
Little Fish Stretch– Take a deep breath. Hold your breath in your cheeks and puff out those cheeks. Slowly let out your breath with pursed lips.
Little Sheep Stretch– Stand facing a wall and place your feet shoulder width apart. Place your hands flat on the wall, shoulder width apart. Push against the wall by bending and straightening your elbows.
Little Bird Stretch– Close your eyes. Think about your day and take deep breaths. Breathe in through your nose and out through your mouth. Add a “wing” component by raising your arms up high as you breathe in and lowering them as you slowly breathe out.
Little Snake Stretch– Lie on your back on the floor. Keep your legs straight and cross them at the ankles. Place your arms over your head on the floor. Cross them at the wrists.
Little Pup Stretch– Get into a downward dog yoga position.
Little Deer Stretch– Sit on the floor with your legs straight. Spread them far apart and bend at the hips to touch one foot. Hold it and then stretch to touch the other foot.
Try this tonight! Do a few stretches and then snuggle up while reading Time for Bed! (affiliate link)
MORE relaxing bedtime books for kids
These relaxing bedtime books for kids are other ideas to use to support calming sensory input in a relaxation bedtime routine:
Free Printable set of relaxation stretches for bedtime
Use the Time For Bed book and relaxation stretches we used above in a bedtime routine of your own. Get a printable PDF of these stretches by entering your email address into the form below. Or, members in The OT Toolbox membership club can grab this PDF by logging in and heading to Brain Break Tools.
One more thing! If you are into creative ways to extend and learn based on books, you will LOVE this resource! 50 activities based on books that address friendship, acceptance, emotions…This ebook is amazing for covering all things emotional development through play!
This collection of classroom Halloween party ideas are from an old blog post here on the website, but they are fun and engaging Halloween ideas for a school party. When it comes to Halloween party activities, as an occupational therapist, I always encourage sensory motor skills, movement games, and play-based games. Because of this, you’ll want to start with our resource on Halloween occupational therapy activities because there you’ll find activities and ideas based on development and play, perfect for adding to a spooky classroom party! Check out the Halloween activities for elementary students below, too.
Classroom Halloween Party Ideas
all is in the air and that means Halloween is coming! Halloween parties happen in preschool, playdates, the library, and even farms. What better way to bring the whole family together than with a kid-friendly Halloween party? We’ve got tips and ideas for a frugal and fun Halloween party that you can use to play a school or play date party.
We’re excited to plan our fun and frugal kid-friendly Halloween parties. We put together a family-friendly ghost game and spider craft using feature products from the celebration that would be a hit at any Halloween party.
We love to add sensory motor benefits to party activities and the Halloween party ideas below do just that. We’ve included Halloween crafts, not-so-Spooky gross motor activities, Halloween worksheets, and Halloween I Spy games to support skill-building in a whole classroom setting.
These Halloween party activities for the classroom would be great as a “push in” OT session where the therapy provider works with individuals in the classroom setting. Why not use the activities below with a small group or large groups setting while collaborating and consulting with the classroom teacher.
I would start with our pumpkin deep breathing exercise, because it’s a great tool for many goal areas, including self regulation, fine motor skills, executive functioning skills, bilateral coordination, hand eye coordination, and more.
You can start with a fine motor warm up…use our Halloween dexterity exercises as a handwriting warm up or as a fun way to get those fingers moving. Check out our video below…or you can catch it over on YouTube.
Ghost Catch Game
This Halloween game is great for elementary aged students, and a fun one for the whole classroom.
Part of the ghost catch game is making the ghosts, so this can take up some time during the classroom Halloween party, but the fine motor benefits are great. Consider having a ghost-making station first. You’ll need just a few materials:
Boxes of tissues
Recycled paper
Rubber bands
Black marker
To make the ghosts for the catch game, it’s actually very simple, but the fine motor skill development are high:
Each student can have a small stack of recycled paper. Ask students to crumble up a ball of recycled paper. This is a great source for hand strengthening and gross grasp.
Show the students how to wrap the tissue around the recycled paper crumbled ball.
Then, use a rubber band to secure the tissue around the crumbled paper. Allow part of the tissue to hang down like the trailing tail of a ghost. Providing the rubber band offers precision skills, pinch and grip strength as well as bilateral coordination skills.
Finally, use a black marker to draw on a face.
That’s it! Students can create 1 or more ghosts each. They can write their name on the ghost or they can create several for a ghost catch game.
Other ideas include using tissue paper or coffee filters. If using a tissue paper cover to the ghost, you can create different colored ghosts. If using coffee filters, you can create smaller ghosts for more refined fine motor practice.
How to play the ghost catch game:
There are so many ways to play with these ghosts in a classroom Halloween party. You can make the game work for the space you have, and the specific elementary age. Some ideas include:
Break students into pairs. Each can play catch with a ghost by tossing the ghost back and forth. After each toss, the pair takes a step back and tosses the ghost again. If they drop the ghost, they are out. The pair that remains longest wins.
Students can take turns tossing their ghosts into a target. The student with the most ghosts in the target wins.
Use the ghosts like a bean bag game toward a target.
Play ghost cornhole- Play the classic cornhole game but use the ghost crafts.
Use the above ghosts in different Halloween games. These tag games are easily incorporated into a Halloween theme.
Halloween I Spy- Kids love this real toy I Spy game, and you can use all of those old party favors that end up sitting around. Gather some Halloween items:
Halloween mini erasers
Plastic spider rings
Pencil toppers
Bat cut outs
Halloween stickers
Halloween candy
Plastic vampire fangs
Wind up toys
Place the toys on a tray or in a bag and work on visual scanning, visual memory, visual attention, and even stereognosis if you blindfold the students first.
Halloween Worksheets that Build Skills-
It’s great to have some back-up ideas if kids plow through the Halloween activities very quickly. Use this printable Halloween color and find worksheet. It builds visual perceptual skills and is great for coloring, too.
2. These Halloween pumpkin puzzles are fun too. Just print them off, cut out the squares and pass them out. Kids can color, cut, and build them onto a party bag or treat bag.
Some of our favorite Halloween crafts support the development of fine motor skills, executive functioning skills, scissor skills, and encourage sensory experiences in a spookily fun way.
These are great ideas for the elementary aged Halloween party.
These tissue ghosts are like bean bags for classroom games at a Halloween party.
Noodle Spider Craft
This spider craft is just one of the many spider activities we have here on the website.
Use dry elbow noodles to make a spider. This is a great one for building fine motor skills. Dye the pasta ahead of time or make the dying process part of the party experience . (Note that the pasta takes a while to dry. If you are dying the pasta during the Halloween classroom party, it make more sense to use washable black paint incase the colors get onto clothing or hands).
Make a noodle spider craft with students at a Halloween school party.
To make this noodle spider craft, you’ll need just a few materials:
Elbow noodles
Closable plastic zip top bag
Black paint or black food coloring
Hand sanitizer
If you are dying the pasta at home before the party, just take in the colored noodles. If you are coloring the noodles in the classroom, you’ll need the above items.
Toco color the noodles black:
Toss the elbow pasta in a plastic closable baggie with black food coloring or black paint and add a little squirt of hand sanitizer.
Spread the noodles out on newspaper to dry.
Also need:
Black paper
scissors
Glue
Marker
Next, use the colored pasta to make the spider craft:
Each student can pick out 8 pieces of pasta. This is a great exercise in pincer grasp and in-hand manipulation skills.
Cut out a black circle from construction paper. About the size of a bottle cap is good.
Glue the circle onto paper. Use squeeze glue to glue the dyed pasta to a paper around a black circle cut from construction paper.
What a cute craft to send home with the kids! Keep in mind that once the pasta is used for a craft, it shouldn’t be eaten!
Make a Halloween spider craft using colored pasta at a Halloween classroom party, especially good for Halloween school parties for older kids.
Other Halloween crafts for a school party include:
Make a ghost craft for sensory play– This is a fun one for kids to make but also use in sensory bins or fine motor activities.
Make aghost craft with construction paper and hole punches. Glue them to tissue paper for spooky eyes. This is an easy way to work on scissor skills. Kids can also address skills such as bilateral coordination, hand strength with a simple Halloween craft that uses just paper, crayon, scissors, and a hole punch. Use these ghosts to decorate for Halloween and monitor scissor skills.
Make a ghost craft with recycled materials. This is a fun Halloween party craft that can be a tool for working on dexterity, precision of grasp, in-hand manipulation, bilateral coordination, hand strength, and more! These ghosts would make a fun addition to the therapy clinic, OT doorway, or even a bulletin board decoration.
Grab the Pumpkin Fine Motor Kit for more coloring, cutting, and eye-hand coordination activities with a Pumpkin theme! It includes:
7 digital products that can be used any time of year- has a “pumpkins” theme
5 pumpkin scissor skills cutting strips
Pumpkin scissor skills shapes- use in sensory bins, math, sorting, pattern activities
2 pumpkin visual perception mazes with writing activity
Pumpkin “I Spy” sheet – color in the outline shapes to build pencil control and fine motor strength
Pumpkin Lacing cards – print, color, and hole punch to build bilateral coordination skills
2 Pumpkin theme handwriting pages – single and double rule bold lined paper for handwriting practice
Work on underlying fine motor and visual motor integration skills so you can help students excel in handwriting, learning, and motor skill development.
Colleen Beck, OTR/L has been an occupational therapist since 2000, working in school-based, hand therapy, outpatient peds, EI, and SNF. Colleen created The OT Toolbox to inspire therapists, teachers, and parents with easy and fun tools to help children thrive. Read her story about going from an OT making $3/hour (after paying for kids’ childcare) to a full-time OT resource creator for millions of readers. Want to collaborate? Send an email to contact@theottoolbox.com.