Colleen Beck, OTR/L is a pediatric occupational therapist and the owner and author of The OT Toolbox website. She manages all of The OT Toolbox social media accounts and runs the popular newsletter.
Read about Colleen's experience and career as an occupational therapist, including how The OT Toolbox began on our About The OT Toolbox page: https://www.theottoolbox.com/about-us/
Colleen created The OT Toolbox in 2011 and since then has written thousands of blog posts designed to support therapy providers, educators, parents, counselors, admin, and caregivers in promoting the healthy development of kids.
Check out Colleen's blog posts below:
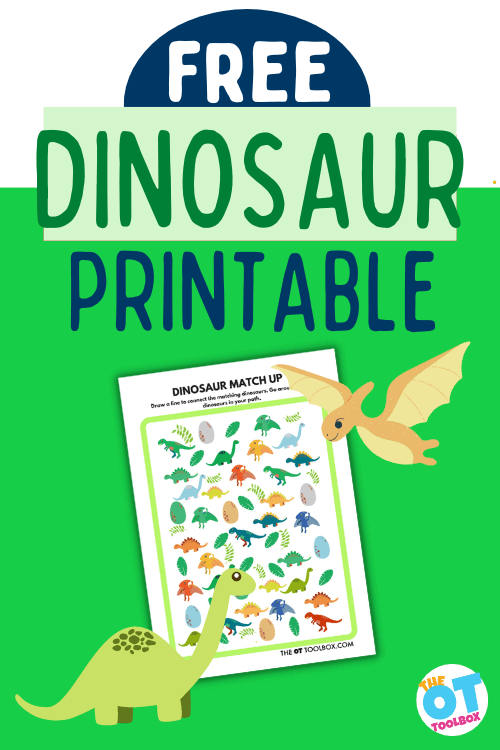
If you know a kiddo that loves all things dinosaurs, than this dinosaur free printable is for you! It’s a visual perception activity designed to develop and support visual perceptual skills such as visual discrimination, form constancy, visual closure, and other visual processing skills (visual tracking for one!) To grab this free printable dinosaur activity, read on! Add this resource to your dinosaur activities for an OT theme.
Dinosaur Free Printable
If you are working on the visual perceptual skills needed for letter formation, handwriting, or reading, then you are probably loving the recent free visual perception printable sheets that we’ve been sharing on the site.
This visual perception worksheet is great for working on skills like visual motor skills, visual scanning, visual figure ground, visual discrimination, spatial reasoning, and visual memory. Also, it’s a great way to develop pencil control by moving the pencil around obstacles as kids connect the matching pairs of dinosaurs.
Visual perceptual skills are needed for so many functional skills. You’ll find easy and fun ways to work on visual perceptual skills through play here.
How to use this dinosaur printable
This printable dino activity can be used in many different ways to support hands-on learning.
Print the page and slide it into a plastic page protector. Kids can then use a dry erase marker to work on the page over and over again.
Try these tips to use the worksheet in different ways:
Connect the dinosaurs with a dry erase marker
Place play dough balls on the matching dinosaurs
Use finger paints to place a fingerprint on each matching dinosaur
Play I Spy: Ask users to find an object that has specific colors or other details
OR, use it right on your tablet. You won’t be able to draw a line to connect matching dinosaurs, but you will be able to save the ink as kids use their finger to connect the matching dinosaurs. They will still address those visual perceptual skills by using the freebie on a tablet’s screen.
Then, use this activity along with other dinosaur activities to support development of other skills. Other dinosaur themed ideas to use along with this printable activity include:
To get your copy of this printable page, enter your email address into the form below. The printable is part of our 24 page free visual perception packet, so you can use all of the items in the packet along with this dinosaur activity. Just print and go!
OR, if you are an OT Toolbox Member, you can log in and go to our toolboxes and access this resource along with every other freebie here on the website. For this particular tool, head to our visual tools page.
Look for more free visual perception worksheets like this one, coming soon to the site.
You can check out our space theme visual perception free printable, or if you sign up for the freebie below, you’ll be directed to a page with all of the free printables in one place.
These visual perception apple theme shape stamps are a perfect way to work on visual perceptual skills and fine motor skills with DIY stampers.
Be sure to try some of these pencil control activities to help with the visual motor skills needed for handwriting and to challenge a child you know with more activities just like the dinosaur free printable.
Colleen Beck, OTR/L has been an occupational therapist since 2000, working in school-based, hand therapy, outpatient peds, EI, and SNF. Colleen created The OT Toolbox to inspire therapists, teachers, and parents with easy and fun tools to help children thrive. Read her story about going from an OT making $3/hour (after paying for kids’ childcare) to a full-time OT resource creator for millions of readers. Want to collaborate? Send an email to contact@theottoolbox.com.
If you are a new parent, then you have probably heard that tummy time is important for your baby, but it’s so important to process the concept of container baby syndrome. In this blog post, we are covering container syndrome, what this means, and what you can do to support your most precious little one.
What is Container syndrome?
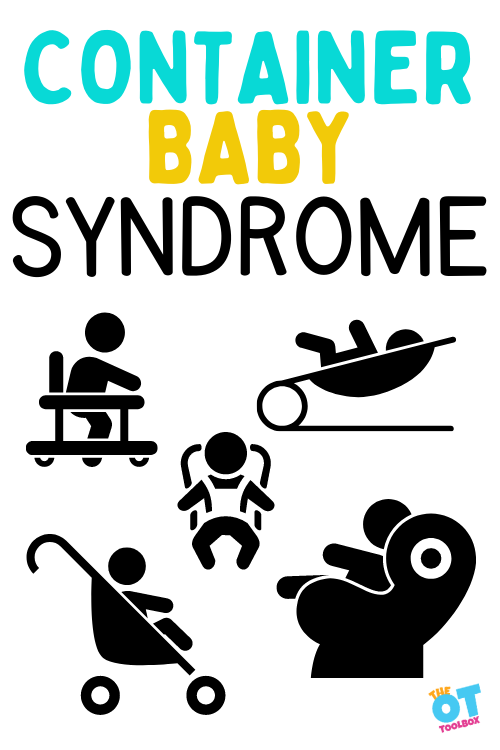
Container Syndrome is a term used to describe the lack of skill in infants who are not allowed ample movement opportunities. Container Baby Syndrome is the result of an infant being placed in a container for an excessive amount of time during the day.
Importantly, this is not to shame use of baby containers…or to say that use of these items is to be omitted at all costs. It’s important for the wellbeing of the caretaker to put the baby down sometimes! Things need done around the home. Parents need a shower, or some time to themselves. Other children need cared for.
The important thing to know here is that we are talking about constant use of baby holders all the time, during the day and night. Moving the baby from one container to another is the issue.
Constant use of positioners, or devices is what leads to the syndrome known as baby container syndrome, not using some of these items sporadically.
This extended time leads to structural, movement, and behavioral challenges as a result.
Baby containers include baby equipment and items such as:
Restrictive playpen that does not allow for movement
Crib
Car seats
Strollers
Bumbo seats
Bouncy seats and swings
Rockers
Nursing cushions
Vibrating chairs
Jumpers
Exersaucers
positioning pillows
Slings
Floor seats
Infant swings
Walkers
Jumpers
The other issue is when the devices are used for nighttime and daytime sleep.
It’s easy to fall into that trap of the newborn sleeping in the rocker chair or bouncy seat because the reclined position puts the upper body into a reclined position, which can help with reflux that a baby might have. The warmth and close sides allow the baby to fall asleep easily. But when the newborn is sleeping in this positioner all night and then wakes for a short period and then goes back to sleep in the same device, is when we see the issues with constant pressure on one side of the head and neck positioning that can lead to issues.
For support and help with newborns not sleeping through the night, be sure to check out our blog post on this topic. Occupational therapy professionals can help with sleep during the newborn stage which impacts so many aspects of functional development and family dynamics.
All of the time spent in these baby containers adds up! When in a positioning device such as the ones listed above, little ones are limited in the motor development that results from stretching, wiggling, turning, reaching, and otherwise moving.
Why Worry About Container Syndrome?
As a new parent, you might be wondering “why can’t I just use the wonderful bouncers, baby rockers, and other entertainment devices for infants and toddlers? After all, I got all of these amazing baby chairs, rockers, and positioners for my baby shower…can’t wait to use them!“
Why should I put my baby on the floor? The biggest reason has to do with the benefits to development. Putting a baby in a container such as a jumper, positioning seat, bouncy seat lead to something called container baby syndrome.
It’s understandable why the baby seat or jumper seems like a better option than the floor for a baby. Parents and caregivers have shown a great deal of support for baby “containers” like bouncy seats, Bumbo seats, and activity centers. In fact, these baby holders have become so popular over the years, that a term has been coined; “container baby syndrome”.
When babies are constantly keep in a space where they cannot freely move, how can they be expected to roll, crawl, or walk, when it is the developmentally appropriate timeframe?
Furthermore, babies need experiences where they can learn from their world in a physical way.
They need to discover “what happens when I move my arm and head like this”?’ Babies may fall over, and have some stumbles along the way, but this is how young children learn about gravity and develop postural stability.
Without those learning opportunities, children will only learn that their seat will catch them from falling, no matter how much they wiggle.
With fewer movement opportunities, a delay may be seen in typical development and reflex integration. More serious issues may occur when we keep babies still, like a flattened head from lying down (positional plagiocephaly) or a tight neck that reduces head movement (torticollis).
There is the visual component too. When babies are in a positioner such as a bouncy seat, they are positioned on their back with little to no neck movement. The neck, back, spine don’t receive the time (even minutes) to stretch, turn, and move. But the eyes are limited as well.
When placed on the back in a reclined position, the eyes are not strengthened to look and gaze based on head and neck movements. The eyes may stay in one place and are not challenged to focus on different depths and peripheral stimuli.
Neck movements are limited to turning from side to side, and they eyes tend to follow the neck. This limited eye movement can later impact other areas of development.
Where did container syndrome come from?
In 1992 the “back to sleep” campaign was introduced to lessen the likelihood of sudden infant death syndrome (SIDS). While the rate of SIDS went down 50%, (yay!) container syndrome rose 600%, to one in seven babies!
This is astounding.
Parents are so nervous about SIDS, they place their babies in various containers most of the day. While this seems a safe, convenient, and supportive option, the use of too many “containers” can lead to container baby syndrome.
Babies who have not had enough tummy time may resist this at first, giving the false impression that the container is the best place for them.
Facial asymmetry. The sides of the baby’s face may appear unequal as a result of skull deformity and flatness
Torticollis. The baby has difficulty turning the head to one side, or keeping the neck and head straight due to muscle tightness on one side of the neck
Decreased movement, strength, and coordination -the baby may not be able to roll, sit up, crawl, lift the head or reach with their arms while on their tummy.
Delayed milestone achievement
Speech, sight, hearing, and cognitive problems – Visual skills can be affected such as following moving objects with the eyes and seeing toys from different distances. Hearing can be disordered, as baby does not hear from all angles. Delayed cognitive skills may arise because the infant is not able to problem solve, explore their environment, or develop language skills
Attention deficit hyperactivity disorder (ADHD)
Increased weight/obesity
How to prevent container syndrome in babies
Container baby syndrome is 100% preventable. If you suspect your baby or a client of yours has symptoms of this syndrome, speak with their pediatrician, get a referral to a physical therapist, and begin working on exercises.
Allow baby plenty of supervised free time on a blanket on the floor, or in a large play yard. Encourage tummy time, reaching for toys, exploration. Some caregivers feel unsure about putting their baby on the floor. A blanket, sheet, or other floor covering can be placed and washed after usage. Or, use toys such as a baby gym to encourage belly play.
Limit baby’s exposure to containers. Use only when transporting the baby, or there is truly no other safe option
Increase supervised tummy time during the day. Your baby may cry and resist at first, as this may be difficult or uncomfortable. Start slowly and persevere. Colleen from the OT Toolbox has a great article on Tummy Time Myths.
Hold your infant in your arms, or in a sling for short periods during the day. This will encourage movement, increased head control, and socialization
Rotate baby through various stations and positions during the day. Holding a baby all of the time is not healthy for a growing child either.
Use gates and other borders to secure a safe place for baby to play, away from wandering pets, or siblings who may step on them
EDUCATE caregivers and other people about the danger of container baby syndrome. Encourage caregivers to provide opportunities for the baby to explore their environment freely. Demonstrate tummy time and other appropriate movement experiences
Activities to Prevent Container Syndrome
Now that it is understood that playing on the floor is important, let’s get into the many different ways you can do it! One of the easiest ways to encourage floortime with your baby is to lay a blanket on the floor, preferably with a carpet underneath for comfort, and place a toy or two near the baby.
Depending on their age and abilities, the baby may be totally independent, rolling and playing happily. If the children are younger, or less comfortable playing by themselves, this is a great opportunity for a caregiver to step in. A fair amount of babies do not like being on their tummy for various reasons, including medical or sensory.
Babies who have gastrointestinal issues may be hesitant to engage in tummy time, as it is uncomfortable. Work through these difficulties while encouraging floor play.
How do I keep them safe down there? Prepare a safe and clean environment for movement. This may involve baby gates, barriers, or a large corral to allow freedom of movement, without risking baby falling down the stairs. Lie on the floor yourself and see what is down there at child level. You may be surprised to notice extension cords, small objects, or other unsafe objects while you are down there.
2 months or younger: Talk with your baby, showing them toys, describing them, and giving them to their hand to feel and explore. Sing songs – whatever songs you know! Encourage them to wiggle their arms and kick their legs along with songs, tickles, or kisses.
3-4 months: Your baby will be able to hold tummy time for a bit longer by now. If they have trouble staying there, lay down with them! Be a part of the team, showing them how fun being on their tummy can be. Babies around this age can reach and bring toys to their mouths, so give them safe opportunities to do so.
5-6 months: Rolling should be part of the baby’s physical development around this time. Encourage this movement by enticing them with something they love. Maybe it’s you, a special toy, the TV remote, or their next bottle. Try singing Five in the Bed. When the song says “Roll over!” show your baby how to roll. During this time of development, your baby may be moving more than ever. They may even be crawling! Encourage even more floor play with these new skills. As long as the area surrounding them is safe, and you are close by, tons of fun (and important development) can be had! Read here about the types of crawling you might start to see at this age.
7-8 months: Just like rolling, encourage crawling by giving the baby lots of space on the floor (that may mean moving aside some furniture) and placing toys or books in various places. There are so many fun games to be played! Playing “Peek-a-boo” where the baby pulls a blanket or towel off to show what’s underneath, is a classic game and critical to development. This teaches baby object permanence. Scatter toys near and far to encourage looking, stretching, and moving.
9-10 months: Around this age, your baby will really be on the go. Maybe a baby obstacle course is up their alley…crawl over mom’s legs, under the coffee table, around the dog, and up the step into the kitchen! Creative barriers and safety gates will likely come into play around this stage to keep young children safe.
11-12 months: Almost one-year-olds may be walking, which means they will likely not tolerate being in a “container” very well anymore. Now that they are cruising on furniture, squatting to pick up toys, and participating more in play, they may likely lead the way! See what your child’s interests are during floor playtime and follow their lead.
Need more tummy time information? The OT Toolbox has several articles on baby play that support the development of balance and coordination through play.
Baby Brain Building with Balls– Encourage eye-hand coordination, visual tracking, visual scanning, bilateral coordination, crossing midline, motor planning, and more.
Another great resource to read more on how to promote development through play is DIR Floortime as it covers strategies to support development through interest-based play.
Victoria Wood, OTR/L is a contributor to The OT Toolbox and has been providing Occupational Therapy treatment in pediatrics for more than 25 years. She has practiced in hospital settings (inpatient, outpatient, NICU, PICU), school systems, and outpatient clinics in several states. She has treated hundreds of children with various sensory processing dysfunction in the areas of behavior, gross/fine motor skills, social skills and self-care. Ms. Wood has also been a featured speaker at seminars, webinars, and school staff development training. She is the author of Seeing your Home and Community with Sensory Eyes.
A final note on container syndrome
While the “back to sleep” campaign has certainly been successful, it is not without pitfalls. The rule of thumb for parenting is; everything in moderation. Not too much screen time, sweets, or containers. Parents do not need to be laden with guilt over container baby syndrome. Most caregivers are doing the best they can with what knowledge they have. As they learn more, they will do more.
NOTE* The term “they” is used instead of he/she to be inclusive.
Want to know how to teach kids to blow their nose so kids can blow their stuffy noses on their own? Many times, we see kiddos with booger-y, runny noses that don’t know how to blow their nose. They might not know how to blow their nose or even how to hold a tissue. Blowing a nose is a functional skill that occupational therapists may see come up in the classroom or at home. Read on for nose blowing tips for kids from an occupational therapist will help kids blow their nose with ease!
Teaching preschoolers to blow their nose is one of the practical life activities for preschool that impact not only functional performance, but learning, too. A stuffed nose effects hearing and auditory processing, which in turn can impact how letter sounds are perceived, verbal directions are heard, and even safety considerations.
How to Blow Your Nose
This time of year, kids get sick. Sometimes it seems like there are more visits to the pediatrician’s office than there is to the grocery store. With children back into the routine of school, there are more opportunities for kids to come into contact with germs from friends and teachers. As parents, one thing we know a lot about is runny noses. When our babies are born, it is usually not long before a runny nose has us and the sweet little baby up at night with the stuffy, congested breathing. When kids start to progress in their self care, they can start to become more independent with the task of blowing their own nose.
Blowing your nose includes steps that can be hard for kids to master:
Knowing that their nose is stuffy or full (interoception, or an awareness of the body)
Knowing to blow boogers instead of sniffing them up into the nose (interoception)
Holding a tissue at the nose without crumbling it (fine motor skills)
Blowing air through the nose and not the mouth (oral motor skills)
Pressing on one nostril and then the other (fine motor skills, interoception)
Knowing that all of the mucus or boogers are gone from the nose (interoception)
Handling a messy tissue without spreading germs (fine motor skills and tactile sensory skills)
Throwing away a tissue and washing hands (executive functioning skills, problem solving, sensory processing, fine motor skills)
And completing all of these tasks WHILE engaging in learning, social events, or performing other tasks. What a challenge for some of the kids we serve!
How can these steps of nose blowing be mastered by kids who struggle with fine motor skills, sensory processing concerns (including tactile or interoception issues), and executive functioning skills?
Tips to teach kids to blow their nose
Today, I’m sharing tips and tricks to help kids learn how to blow their own nose and to develop their ability to perform this portion of personal hygiene and functional skill ability. These are practical tips to teach kids that blowing the nose, wiping runny noses, washing hands when done, and how to use a tissue to blow a nose are all important aspects to take care of your nose.
For the younger children, you might think it is easier to just wipe a runny nose rather than allowing the young child to attempt nose blowing. You might even have the thought, “does blowing your nose help?” cross your mind. But, yes, it is very important to teach kids to blow their nose. And,
This is a great resource to add to a Montessori nose blowing lesson, because of the practical life skills that are addressed through nose blowing activities.
Teaching kids to blow their own nose can be tricky. Children who are typically developing find blowing their own nose to be difficult and children with special needs may have an especially troubling time with independent nose blowing.
There are important parts of the development of the child to consider when it comes to nose blowing. Knowing what a child typically should be able to do in this personal care task can help parents determine if teaching nose blowing is feasible at different ages. Other kids with sensory, fine motor, cognitive, or other struggles will fit into this developmental breakdown differently. You can read more on these areas concerns below.
Nose Blowing Development
While the runny noses that impact newborns seem to happen right away, as children age, you may wonder “When Can Kids Blow Their Nose?” There is much to think about in the nose blowing process…considerations such as body awareness, social awareness, grasping the tissue, and the actual nose blowing process.
Blowing a nose doesn’t come naturally. It’s a skill that needs to be taught. Parents that watch their little ones struggle with boogery, wet, runny noses often wonder when their child is old enough to blow their own nose. In fact, there are milestones that go along with this functional skill.
These are typical age ranges for the breakdown of skills needed for independence in nose care:
Age 1 – The child allows his or her nose to be wiped. Age 1.5– Attempts to wipe nose without actually completing the task Age 2- Wipes nose when asked Age 2.5-3.5- Wipes nose without request Age 2.5-3.5- Blows nose with request
It’s important to note that kids don’t always follow these developmental milestones and that every child is different. They typically developing child may not blow his or her own nose until age 5.
Just like any skill that a child completes, there are various ranges of development. In this post, you will find tricks and tips to help kids develop this skill.
For the child with special needs, independent nose blowing may develop more slowly as a result of concerns in other areas.
How to blow your nose: Fine motor skills needed
When blowing one’s own nose, there are fine motor components that are necessary. Eye-hand coordination, bringing the hands to midline, vision-obstructed motor control, pincer grasp, and pinch grip strength are necessary for managing a tissue. To address these needs, try building the skills needed for each area.
For a child, the process of blowing his or her own nose can be quite distressing.
Children with olfactory sensitivities may breathe primarily through their mouth, making the act of nose blowing difficult. A sensitivity to scents can cause an overreaction to the tissue that needs to be held near the nose.
To accommodate for these sensitivities, try using unscented tissues. Attempting the nose-breathing activities listed below can help.
There are tactile and olfactory sensory skills involved with nose blowing and managing a tissue, but also interoceptive skills.
Interoception is a sensory processing ability that tells us how our body feels and impacts functioning skills. This skills allows kids to understand and feel what’s going on inside their body. When a child struggles with the interoceptive sense, they may have trouble knowing when their nose is full, running, or stuffed. They may not realize they have a booger on their face or when they need to blow their nose. Interoception allows us to know when we are finished blowing our nose and when a child’s nose is empty or they’ve finished blowing.
For young children, the process of completing each step of nose blowing can be a difficult process. Children need to maintain lip closure while breathing through their nose, one nostril at a time.
This multi-process task can be difficult for older children who demonstrate difficulty with cognition. To address these problem areas, try using a social story for the steps of nose blowing. A social story can also help children identify the appropriate time for attempting to blow their nose.
Executive functioning skills play a part in teaching kids to blow their own nose. The problem solving needed to identify when a stuffy nose impacts functioning is just one concern. Here are more ways that executive functioning impacts nose blowing:
Initiation
Planning
Prioritization
Attention
Impulse Control
Working Memory
Cognitive Flexibility
Foresight
If a child has a runny nose when in the classroom, they need to plan out how to get a tissue.
They need the foresight to know that if they don’t blow their nose, they will have a messy nose, runny boogers, or get an ear infection from sniffing too much.
They need to prioritize how to stop writing or reading and how to blow their nose in the middle of the classroom, and then what to do with the used tissue.
They need the impulse control to not sniffle or to throw their tissue in the garbage as opposed to the floor.
They need the working memory and cognitive flexibility to return to the task at hand once they blow their nose.
They need the ability to pay attention to the teacher or their assignment while they blow their nose.
What a lot of executive functioning skills are involved with nose blowing!
How to Blow your nose: Oral motor skills needed
In order to blow the nose, a child needs to maintain lip closure. This can be a very difficult task for children who exhibit oral motor problems. Oral motor skills impact feeding and breathing through the nose (as opposed to mouth breathing), but blowing the nose is impacted by oral motor skill development as well.
Strategies for helping kids learn to blow their own nose:
1. First practice nose blowing with the mouth.
Teach kids bring a tissue to their nose and practice blowing air out of their mouth. In this way, kids understand that blowing out air can move the tissue. They can then progress to closing their mouth and blowing air out through their nose.
2. Teach nose blowing when not sick.
This is an important factor in teaching kids to blow their nose. Parents typically do not consider nose blowing until there is congestion that interferes with breathing.
When kids are trying to learn to blow their nose and they are dealing with a runny or blocked nose, it can be overwhelming and frustrating for kids to breathe while holding their mouth shut. Try practicing nose blowing when the child is feeling well.
3. Teach kids to blow their nose by practicing to blow water.
Teach kids that they can use their nose to blow air through one or both nostrils at a time in order to blow ripples across the surface of water. Ask them to practice pinching their nose.
4. Blow a tissue ball to practice blowing a nose.
Tear a small piece of facial tissue and crumble it into a very small ball. Place it on the table surface and ask your child to blow the tissue on the table using their nose.
5. Blow on a mirror to see the fog to practice blowing a nose.
Ask your child to pinch one nostril closed and to blow air through their nose onto a mirror.
7. Teach the child to hold one nostril with a tissue.
Use your hand to push down on one nostril. Kids can try this skill too, by trying to making the tissue dance with just one side of their nose. Call it a “tissue boogie” and get that tissue dancing by blowing it with the air from one nostril at a time.
8. Teach kids to blow their nose by over-exaggerating.
Over-exaggerate the breathing, closing mouth, and blowing through the nose without a tissue. Sit across from the child and play a game of “Simon Says” to copy the movements to take a deep breath, hold it in, close the mouth, and blow through the nose. You can find functional and practical Simon Says commands on our site.
Colleen Beck, OTR/L has been an occupational therapist since 2000, working in school-based, hand therapy, outpatient peds, EI, and SNF. Colleen created The OT Toolbox to inspire therapists, teachers, and parents with easy and fun tools to help children thrive. Read her story about going from an OT making $3/hour (after paying for kids’ childcare) to a full-time OT resource creator for millions of readers. Want to collaborate? Send an email to contact@theottoolbox.com.
Did you know that sensory processing disorder can be broken down into several aspects of “sensory” based on considerations that you see in sensory challenges? Here, you’ll find a sensory chart covering these sensory processing attributes to better explain the vastness of SPD. You’ll also want to check out our resource containing a sensory processing disorder checklist as it covers sensory red flags that potentially indicate the terms you see below in this sensory chart.
Gaining an understanding sensory processing disorders can have a vast difference in supporting clients, patients, parents, and the entire team involved with children or students who struggle with daily functional tasks as a result of sensory processing differences.
The neurodiversity make us who we are, but understanding how this all works together is pivotal.
For more information on sensory integration, please check out our resource on Ayres Sensory Integration as a tool for understanding the theory behind sensory processes. It can make all the difference in gaining a full picture of the nervous system.
Sensory Processing Disorder Chart
Let’s cover the sensory breakdown to better understand this complex concept and various attributes of sensory preferences and behaviors. These explanations and sensory information is found in greater detail in our resource, The Sensory Lifestyle Handbook.
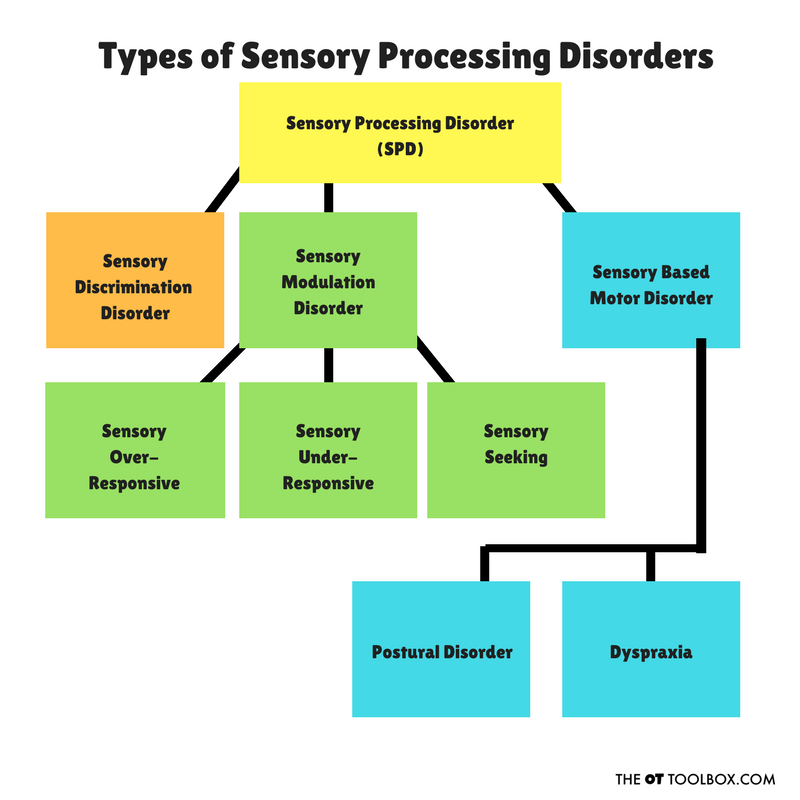
Sensory Processing Disorder as a global umbrella term that includes all forms of this disorder, which includes three primary areas (Sensory Modulation Disorder, Sensory Discrimination Disorder, and Sensory-Based Motor Disorder).
Let’s look at each of these areas:
Sensory discrimination disorders–
Sensory discrimination is defined as the ability to discriminate (or identify) sensory input, sensory differences, quantities, and qualities of sensory stimuli. When we discriminate sensory input, we use our sensory systems to taste, touch, hear, feel, smell, and perceive sensory information. This discrimination allows for safety and functional participation in everyday tasks. Sensory discrimination can mean smelling smoke from the stove vs. smoke from a backyard firepit, hearing an alarm sounding, tasting spoiled food, knowing when to go to the bathroom, knowing when to stop spinning on the swing, and so many other aspects of daily life!
Children with sensory discrimination difficulty have problems recognizing or interpreting differences in stimuli.
They will bump and crash into others or objects.
They might eat until they are sick rather than stopping when full.
Individuals with sensory discrimination disorders frequently drop items
There might be poor balance
Others may be overly afraid of heights
You may see balance and coordination challenges.
It can look like so many different things! Check out this resource on sensory red flags for more descriptions.
There are so many aspects of daily life that are related to sensory discrimination!
Sensory modulation disorder
Sensory modulation disorder is defined as the challenge of interpreting sensory information, either overly responding, under-responding, or specifically seeking out sensory input.
Sensory Modulation Disorder is further broken down into subtypes, or three categories:
Sensory Over-Responsiveness
Sensory Under-Responsiveness
Sensory Seeking
Sensory Over-Responsiveness– With one type of sensory modulation disorder, over-responsiveness, sensory input can be irritating, painful, or abrasive and the individual avoids that particular sensory input. The sensory systems are overly responsive in this way. You may see food or texture avoidance, issues with noisy environments, and distractions by light, sounds, textures, etc.
Sensory Under-Responsiveness- The other end of the spectrum is a under-responsive sensory system. In this case, the individual may not realize or recognize sensory input. They may seek sensory input, but they can also be lethargic or fatigue easily. This is where you will see running into traffic, slow to react, or clumsiness.
Sensory Seeking- Another type of sensory modulation issue is the seeking out of specific sensory input. Likewise, sensory input can be stimulating and pleasant. The individual will seek out sensory input that they prefer: rubbing a particular texture, jumping, crashing, etc. are some examples of sensory seeking.
With each of these types, you will see preferences of certain sensory inputs and a withdrawal from other responses. They may become upset by noises and sounds and are easily distracted by stimuli. Each individual will be drastically different.
These kids have problems regulating response to sensory input.
These subcategories are explained in further detail under the sensory systems section.
For children who struggle in this area, a sensory diet might help them to modulate sensation in the environment. Children experience a poor compatibility of sensory information and the tasks they need to accomplish.
Sensory Based Motor Disorder
Sensory Motor Disorder is another aspect of sensory processing, referring to the motor output as it relates to sensory information. Those with sensory motor disorder challenges have difficulty navigating their world. Their bodies don’t do what their brains tell them to do.
Sensory Based Motor Disorder has two subcategories: Dyspraxia and Postural Disorder.
Dyspraxia– Children with dyspraxia have difficulty planning, timing, organizing, sequencing, or executing unfamiliar actions. These children may appear awkward and poorly coordinated. Dyspraxia describes developmentally acquired motor planning deficits and includes poor planning of movements.
Postural-Ocular disorder– Children with postural-ocular disorder have trouble with controlling movements and posture. They may have difficulty with coordination of functional vision. Joint instability seen in these children results in controlled motions. These children may slouch in their seats and exhibit muscle weakness, low tone, or poor balance. Kids with postural disorders have difficulty keeping up with their peers and may appear as lazy or clumsy.
Sensory Processing Disorder Considerations
Each of the areas described in the sensory processing disorder chart may have some or all of the considerations listed below. We cover these areas in greater detail in our book, The Sensory Lifestyle Handbook.
Emotional regulation– Children with this difficulty have trouble maintaining an emotional state that matches the task or activity. They may overrespond to emotional situations. Read more on emotional intelligence to determine typically developing emotional regulation skills vs. challenges in this area.
Somatodyspraxia is a type of sensory-integrative based dyspraxia where there is evidence of poor processing of somatosensory information. Essentially, somatodyspraxia is a combination of visual and proprioceptive input. The somatosensory system interprets information from the skin and around joints and carries that information to the central nervous system.
This includes tactile discrimination or sensory touch which includes heat or temperature awareness, vibration, pain registration, interoception, pressure, proprioception, and position of body in space. All of this information leads to one’s ability to perceive temporal and spatial organization, develop body scheme and postural response, stabilize the head and body during movement, and interpret touch sensation and pain needed for movements and actions.
Children with somatodyspraxia often exhibit poor tactile and proprioceptive processing, clumsiness, frequent tripping, falling, and bumping into objects; difficulty with fine motor and manipulation skills, and poor organization (Cermak, 1991).
Treatment focuses on providing heavy work, deep pressure, and light-touch experiences. Verbal cuing and feedback may also be used (Koomar & Bundy, 1991). The sensory diet/sensory lifestyle and environmental modification ideas for decreased discrimination of tactile and proprioceptive information should be used in addition to the ideas specific to praxis issues.
Impaired Bilateral Motor Coordination
Children with impaired bilateral motor coordination often exhibit difficulty with bilateral activities, or tasks that require the two sides of the body to work together in a coordinated manner.
This includes clapping, hopping, skipping, and jumping jacks.
Individuals with impaired or delayed motor coordination may have some right–left confusion, avoid midline crossing, and have difficulty developing a hand preference. Additionally, they appear to have vestibular and proprioceptive difficulties.
Treatment generally focuses on providing vestibular and proprioceptive experiences and graded bilateral activities. Treatment may start with simple crossing midline, rotation, and symmetrical activities and work toward asymmetrical activities and more complex coordination skills (Koomar & Bundy, 1991).
The sensory diet/sensory lifestyle and environmental modification ideas for decreased discrimination of vestibular and proprioceptive information that address vestibular input should be used in addition to the ideas specific to bilateral motor coordination.
Tactile Defensiveness
Children with tactile defensiveness often exhibit an aversive response to a variety of tactile experiences, such as craft materials, food, clothing, bathing, or touch. They will often avoid a variety of activities and may react aggressively at times. They can be easily distracted and have difficulty with attention.
Therapy generally focuses on providing heavy work and deep pressure input. Slow linear vestibular input may also be helpful.
Therapy also provides opportunities for participation in graded tactile experiences (Royeen & Lane, 1991). The proprioceptive sensory diet ideas for decreased discrimination of proprioceptive and vestibular information could be used in addition to the ideas specific to tactile defensiveness.
Gravitational Insecurity
Children with gravitational insecurity may exhibit limited participation in gross motor play; avoidance or fear of escalators, elevators, cars, or planes; or resistance to being off the ground. Treatment in the clinic environment generally focuses on providing proprioceptive input and graded vestibular input. In treatment, the child is always in control of the amount of vestibular input received and is never pushed beyond his or her limits (Koomar & Bundy, 1991).
Environmental modifications would focus on helping the child to feel safe in all environments and situations. Sensory diet activities would focus on providing calming proprioceptive input throughout the day. The proprioceptive sensory diet ideas for decreased discrimination of proprioceptive and vestibular information could be used in addition to the ideas specific to gravitational insecurity.
Individuals with these difficulties may have certain behaviors or characteristics in common. There are underlying needs that result in adverse reactions to sensory processing.
The integration of sensory input leads to poor attention, self-regulation, co-regulation, self-monitoring, self-esteem, anxiety, discrimination, motor skills, communication, or responsiveness. Incorporating healthy sensory habits within the family lifestyle is critical to success.
The Sensory Systems
Most of us learn about the five senses early in our childhood education. Taste, touch, sight, sound, and scent are ingrained from a very young age. It might be surprising to find out there are actually more than just five sensory systems. With a typical Google search, you will learn that there are two more sensory systems that are added on to those five sensory systems.
The sensory breakdown includes aspects of each of the sensory systems (listed below):
The proprioception system and vestibular system are two additional sensory systems. However, when we consider perception, regulation, movement, interaction, and functioning, there are actually MORE systems that are involved.
These important systems are deeply connected to the central nervous system and are essential for perceiving and interpreting our world around us. While they do not specifically sense input from the environment, they are and always have been an essential part of our existence.
Interoception is the sensory system of our inner body. It includes organs, our heart, blood vessels, etc. While the receptors to the five commonly known senses are obvious and clear, the receptors to the interoceptive system are inside our bodies. They may not be seen but they are definitely important for functions such as emotional awareness, hunger, nervousness, fear, and feelings. Our ability to sense fullness, elimination needs, temperature, thirst, sweat, and all require regulation of the interception system.
You can see how this system is very much related and a part of other sensory systems in how a person functions.
Additionally, there are other important systems that we are going to discuss in this book. The somatosensory system refers to the integration of the visual and proprioceptive systems in order to perceive and respond with temporal and spatial organization, develop body scheme and postural response, stabilize the head and body during movement, and interpret touch sensation and pain needed for movements and actions.
Finally, praxis, or kinesthesis help us understand how to move our bodies. The praxic system, or the kinesthetic system essentially “puts it all together” when it comes to motor responses to sensory information that has been perceived by the other senses.
Putting it all together
Let’s look at all of the sensory systems in a list:
And the systems that are deeply connected to these sensory systems:
Somatosensory System (Movement organization)
Praxic/Kinesthetic System (How to move)
Challenges with processing can mean that each of these sensory systems do not functioning adequately as an overall well-oiled machine. It’s then that you’ll see individuals with a poor reaction to the environment.
Typically, dysfunction within these sensory systems present in many different ways.
You may see withdrawal or over-responsiveness to auditory and visual stimuli.
You may see lack of focus on tasks and may feel insecurity in the environment, with poor body perception as a result.
A child with sensory difficulties may be over- or under-responsive to sensory input.
They may operate on an unusually high or unusually low level of activity.
They may fatigue easily during activity or may constantly be in motion.
Children may fluctuate between responsiveness, activity levels, and energy levels.
Additionally, children with sensory processing dysfunctions typically present with other delays. Development of motor coordination, fine motor skills, gross motor skills, social-emotional skills, behaviors, executive functioning skills, language, and learning are all at risk as a result of impaired sensory processing.
It is important to note that sensory processing is deeply connected to a combination of the sensory systems working together as well as the impact of environmental stimuli.
Sensation from the environment is combined with family life, parent expectations, peer interactions, classroom rules, community expectations, internal states such as feelings, hunger, fatigue, and health to result in behaviors responses. Looking at the underlying reasons for behavioral responses is absolutely key to identifying strategies to help with “behaviors” or the actions we see.
Sensory Chart
We’ve created a visual, sensory processing diagram to show exactly how these terms break down from an umbrella term of sensory processing disorder into more detailed and nuanced areas. As you can see, there is a lot to the overarching term of “sensory processing”.
This free printable sheet guide to the breakdown or types of Sensory Processing Disorder is a great addition to your therapy toolbox.
Print off the sensory chart and hang in on a wall or bulletin board for sensory processing awareness. This occupational therapy chart is a great visual to share with parents or educators when explaining how the whole system relates to behaviors and sensory considerations.
Sensory Processing Disorder Chart- Enter your email address below to get access to a printable version that can be hung on bulletin boards or used as an educational tool.
Want a printable version of this sensory processing disorder chart? Enter your email address into the form below. You’ll receive the printable chart in your email inbox.
This sensory chart is also found in our Member’s Club. Members can log in and access the handout under our Sensory Downloads area in the membership. While you’re there, also grab other sensory resources without the hassle of entering your email address for each resource.
More Sensory Processing Information
Want to know more or to add another handy educational handout to your therapy toolbox? Grab a copy of each of the sensory processing tools below.
Sensory processing information handout– It’s a great way to break these complex concepts down into easily digestible and understandable information. Print off the pamphlet and use it to share with educators, parents, caregivers so they can better understand sensory processing disorder.
Sensory Red Flags– Print off this list of sensory red flags to use as a checklist to determine sensory challenges.
Sensory Strategies Toolkit– The Classroom Sensory Strategy Toolkit is a free printable packet of resources and handouts that can be used by teachers, parents, and therapists. Whether you are looking for a handout to explain sensory strategies, or a tool for advocating for your child, the Classroom Sensory Strategy Toolkit has got you covered.
Sensory Lifestyle Handbook– This is a resource for those living with, teaching, or working with children with sensory needs. For the child with sensory processing needs, everything about life can be distressing! Sensory processing challenges can impact a child’s every interaction and environment. Sensory challenges affect behavior, self-regulation, attention, development, learning, social skills, emotional development, and independence. The child who struggles with sensory processing may be challenged daily with rigorous interactions. For these children, sensory input or sensory-based accommodations can make all the difference.
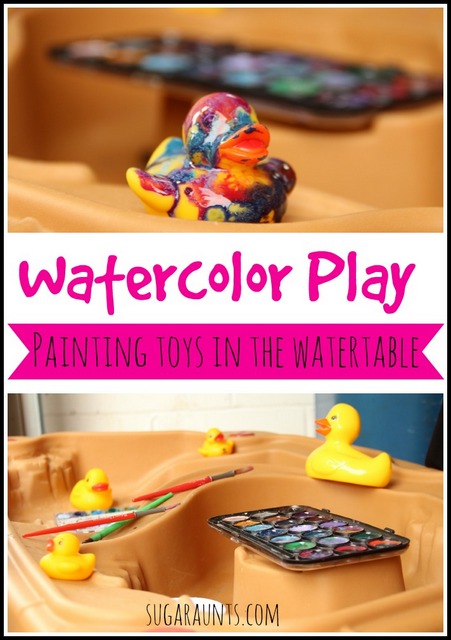
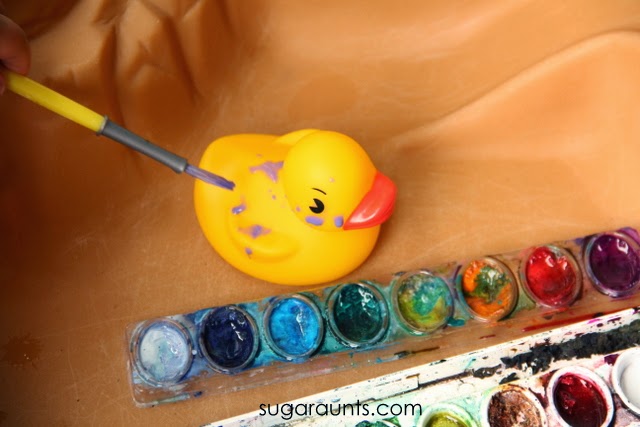
This rubber duck painting activity was a fun creative art idea and sensory play activity using our water table and just water colors. This creative painting activity is a fun one! While using these paint materials won’t permanently paint the rubber duck, it is a great fine motor and sensory play activity for kids! Below you’ll see how to paint a rubber duck while developing skills in kids with a fun summer sensory play activity.
Rubber Duck Painting
This sensory play activity is one we did years ago when my kids were small. While they had fun with the creative painting activity, they didn’t realize that at the same time, they were developing so many skills:
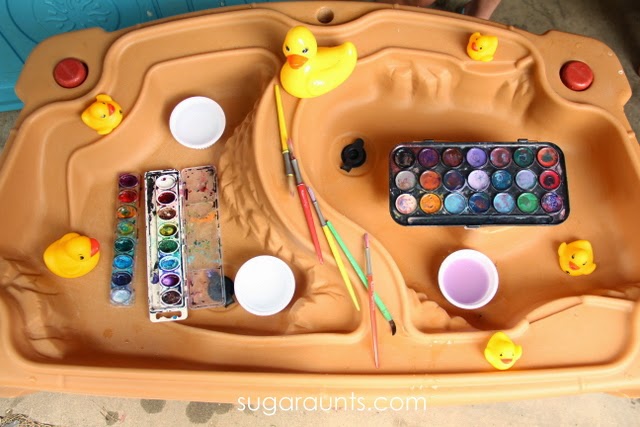
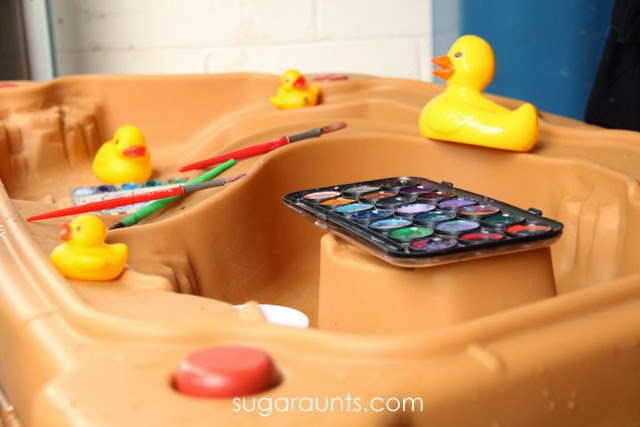
All we used were a few materials for this rubber duck painting activity:
Water table
Water
Paint brushes
Watercolors
Rubber ducks
How to Paint a Rubber Duck
Watercolors are such a fun way to explore color and just have fun! When the kids ask to paint, it’s usually watercolors that they want.
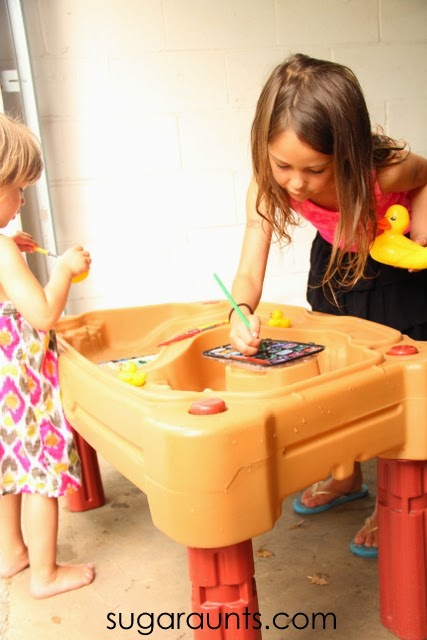
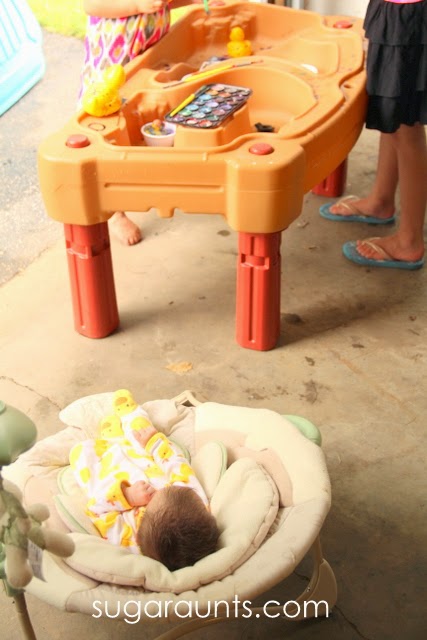
Baby Girl has recently been loving to paint with watercolors. So, when I pulled out the water colors and the water table, there was a little confusion and a lot of intrigue!
We painted rubber ducks in the water table for a fun twist on creating art and exploring colors. The best part was, the easy clean up…right in the water table!
This post contains Amazon affiliate links.
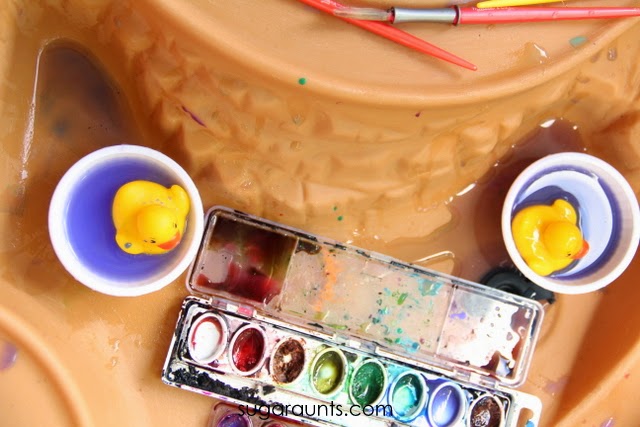
I pulled out a bunch of our rubber ducks (affiliate link) that we have in different sizes and put them in the water table along with watercolors and a few little cups of water.
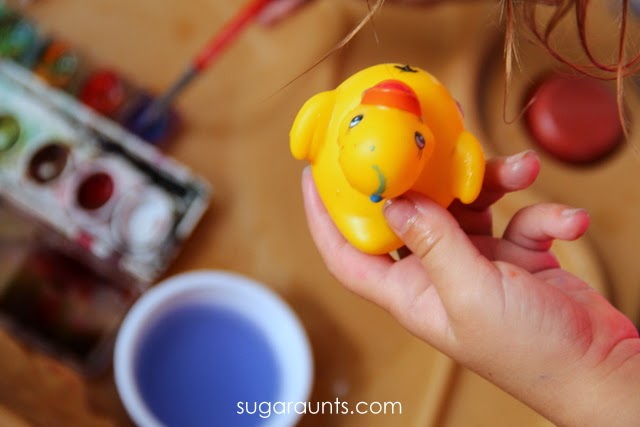
When the kids saw this, they were very excited….and a little confused. I showed them how to paint the rubber ducks and mix colors on the toys. The fun began!
We started out painting some of the rubber ducks all one color, and then mixing in other colors.
Baby Girl painted her rubber ducks her favorite color-purple.
This was such a fun way to paint and explore colors on a hot summer day. These two were pretty serious about their painting.
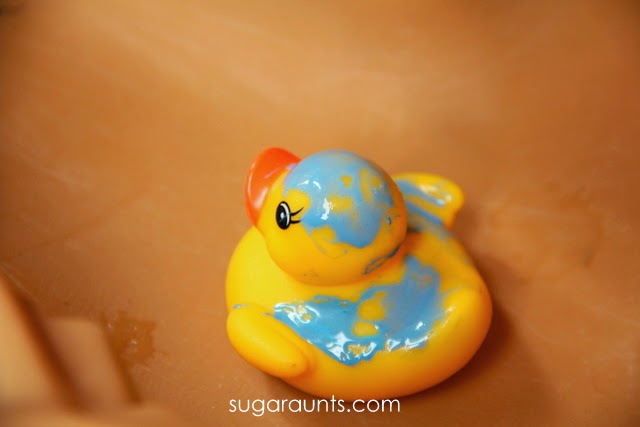
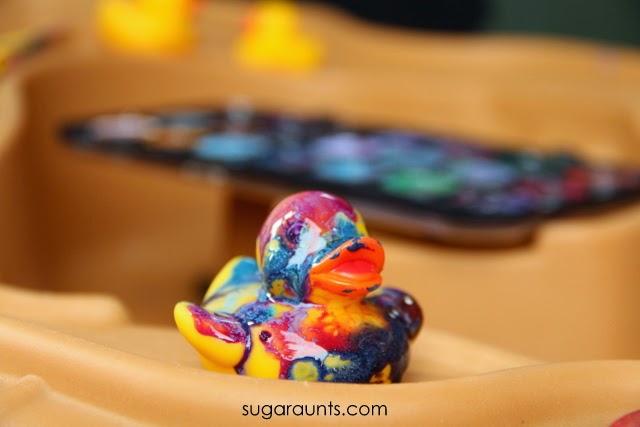
Mixing colors on the toys was so much fun! This rubber duck got a lot of color.
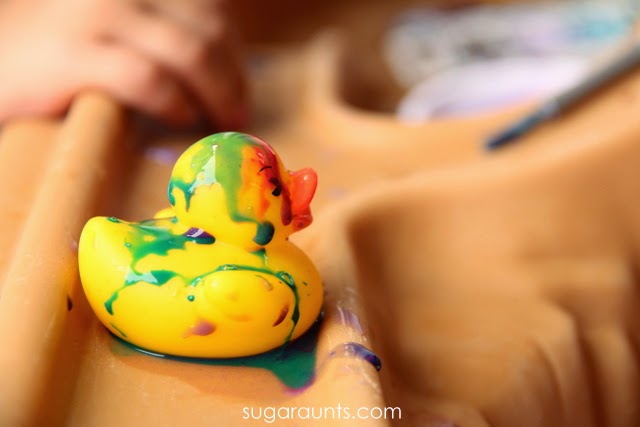
And this one, not so much. We learned that less water and more paint made the colors stay put on the toys.
We had a little audience for our painting activity. The big kids got a kick out of her rubber duckie pajamas that matched. SO cute!
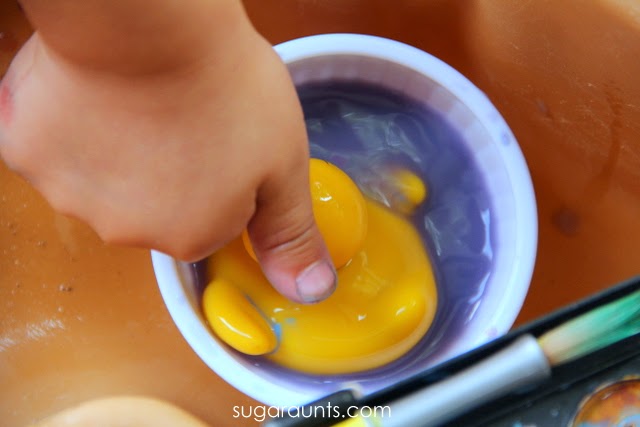
When we were finished with our paining, we gave the ducks a little bath in the containers of water. Perfect for the water table!
We left the paints and the toys out on the water table for a while and came back to painting and rinsing all afternoon.
What other toys can you bring into this painting activity? I’m thinking we’ll bring this watercolor toy painting activity out again with lots of other toys. It was a big hit!
Colleen Beck, OTR/L has been an occupational therapist since 2000, working in school-based, hand therapy, outpatient peds, EI, and SNF. Colleen created The OT Toolbox to inspire therapists, teachers, and parents with easy and fun tools to help children thrive. Read her story about going from an OT making $3/hour (after paying for kids’ childcare) to a full-time OT resource creator for millions of readers. Want to collaborate? Send an email to contact@theottoolbox.com.
There is just something about small world play as a sensory play activity that supports skill development. Occupational therapy and play go hand in hand. When kids participate in small work play, they are building skills in creativity, fine motor skills, sensory exploration, communication, self-confidence, and so much more. Here, you’ll find small world play examples and ideas to support development in these areas.
Small World Play
Before we go further, let’s cover exactly what we mean by small worlds.
A small world is a play activity on a small scale. Kids interact with the miniature toys, small sensory tables and use imaginative play to explore and pretend on a smaller scale.
A small world can be set up in a variety of ways:
In a sensory bin
In play dough
On a train table or other low table
In a cardboard box
In a low tray
On the ground
One way to think about small worlds is a fairy house: Kids set up a fairy house area under a tree or in a corner of the yard. They can move and manipulate items to use in pretend play: natural material or commercial fairy houses, small objects like pebbles, sticks, bark, and fairy objects. These items are all part of the fairy small world.
Why Set up a Small World Play Area?
When kids play in a small world, they develop many areas. Additionally, small world areas offer children in small groups opportunities to experience parallel play in a joined environment so children can see various creative play ideas.
Most likely to develop is fine motor skills, but other areas can develop, too:
Precision
Eye-hand coordination
Finger isolation
Hand strength
Visual motor skills
small world play ideas
There are items your can use from around the home to use in small worlds. Here is a list of items to gather when creating a little world:
Container: bin, box, sensory table, etc.
River rock
Mini figures: animals, farm sets, train sets, dolls, etc.
Sand
Fake flowers
Craft materials
Play dough
Beads
Sensory dough or slime
The options are basically limitless when it comes to setting up a small area. Use the examples below to spark more ideas.
Small World Play Examples
Our kids love small world play. We’ve done so many activities that involve little worlds of imagination and pretend. Small world activities foster language development, story telling, self-confidence, fine motor skills, sensory exploration, and more.
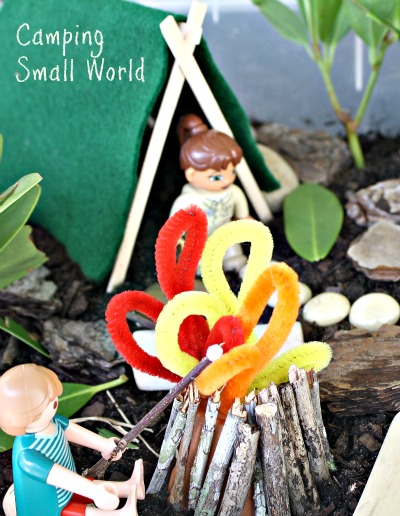
Outdoor small world– We set this activity up under the base of a tree. Use materials like sticks, flowers, rocks, pebbles, roots, grass, etc.
Fairy small world– set up a fairy pretend area in a sand box. Use items like craft houses, rocks, and even glittery items.
Colleen Beck, OTR/L has been an occupational therapist since 2000, working in school-based, hand therapy, outpatient peds, EI, and SNF. Colleen created The OT Toolbox to inspire therapists, teachers, and parents with easy and fun tools to help children thrive. Read her story about going from an OT making $3/hour (after paying for kids’ childcare) to a full-time OT resource creator for millions of readers. Want to collaborate? Send an email to contact@theottoolbox.com.
Looking for a play dough activity (or many) that develop and strengthen fine motor skills? Here, you’ll find playdough activities for fine motor skills, and specifically play dough occupational therapy ideas to strengthen the hands, improve eye-hand coordination, and address underlying skills that kids so very need. These play dough exercises are fun tools for finger strength exercises and grip strength exercises that don’t seem so much like “work”.
You’ll find a lot of fine motor activities here on The OT Toolbox…today we’re sharing fine motor activities with play dough. Whether it’s homemade play dough or store bought, play dough is a great way to build motor skills needed for precision tasks like pencil grasp, scissor skills, precision in buttoning, zippering, or tying shoes? Fine motor play is a great way to build the skills kids need.
occupational therapy fine motor skills
In occupational therapy, fine motor skills are a huge area of consideration. OTs often address fine motor skills and the impact on play, self-care, and other functional skills. A play dough activity is one way to make strengthening fine motor skills fun!
Here are ways to use a fun play dough activity to strengthen small motor skills…let’s use play dough to work those hands!
Speaking of occupational therapy and fine motor skills, using other commonly found materials (play dough being one, there are other items that work little muscles of the hand in OT sessions…playing cards, craft pom poms, beads, and paper clips are some ideas.
We wanted to share the reasons why play dough exercises are a fine motor power tool. However, you’re not limited to using play dough to gain these benefits. Theraputty exercises or slime exercises can be interchanged with the play dough fine motor exercises.
Here’s the thing: play dough is an easy and effective means for building fine motor skills for preschoolers. The soft and squishy dough provides a tactile sensory challenge with proprioceptive sensory feedback. The bonus is the strengthening of the arches of the hands and precision of grasp.
Fine motor activities like playing with playdough build many fine motor skill areas:
Precision- Precision occurs with development of grasp when child to use the pads of the index finger, middle finger, and thumb to manipulate objects with opposition.
Here are all of the intricacies of fine motor skills. Read about the definitions of fine motor skills and how each skill area is needed for tasks like pencil grasp, buttons, and other fine motor tasks.
Playing with play dough builds other skills as well:
Check out our video below for play dough exercises that you can do with a container of play dough. In the video, we walk through specific exercises like making a play dough snake, making a play dough snail, pinching off balls of play dough, finger isolation play dough tasks, how to isolate the thumb with play dough, and resistive tendon glides using play dough exercises.
Follow along with the video for Play Dough exercises to strengthen the hands.
playdough activities for fine motor skills
We’ve covered all of the various ways play dough supports fine motor development. Now, let’s discover how to use play dough for fine motor skills.
Let’s get to those playdough activities for fine motor skills! A tub of play dough has so many options for building fine motor strength and dexterity.
Roll balls of dough between the thumb and pointer/middle fingers.
Make a rainbow with rolls of different colors of play dough.
Roll a long rope of play dough and roll it into a cinnamon bun
Hide beads and have a race to find them
Create an obstacle course for the fingers with hurdles and jumps
Spread the play dough out into a pizza. Use scissors to cut it into slices
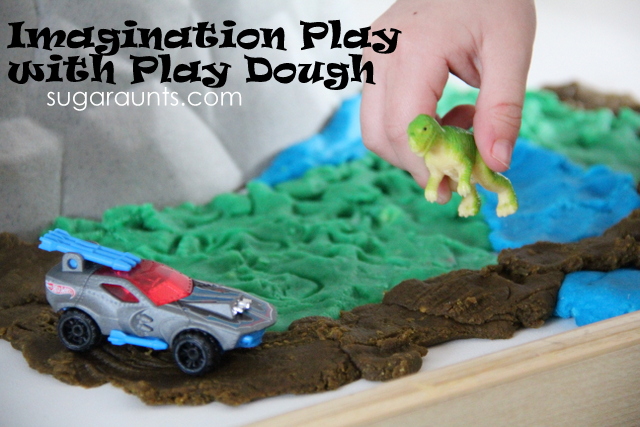
Make a small world with hills and mountains for small animal figures
Make a maze for a ping pong ball. Blow the ball through the maze with a straw
Make a small keyboard using balls of dough. Press on the play dough balls with one finger
Make a play dough pie. Pinch the crust, create play dough berries.
Form letters using the play dough
Mix water into the play dough for a squishy, messy dough
Build structures using popsicle sticks and play dough. Add details with feathers scraps of paper, etc
Make play dough emoji faces
Roll play dough into a sheet. Cut it with scissors.
Cut with cookie cutters
Press google eyes into play dough
Press buttons into playdough
Push pegs into play dough
Press straws into play dough to make circles
Press kitchen utensils into play dough
Press feathers into playdough
Nature sculptures- add leaves, pine cones, acorns, etc.
Make play dough muffins with muffin tin
Press rocks into play dough
Use candles or pipe cleaners and craft sticks to create playdough birthday cakes
Press craft sticks into play dough to make a STEM fine motor building set
Several of the play dough activities above mentioned using scissors. Here is a resource on types of scissors to start with to address various fine motor needs.
Printable Fine Motor Play Dough Activity
One way to support fine motor skills with play dough is using a printable play dough mat. We have many play dough mats here on the site. These are also available in our Membership Club as well as in our fine motor kits.
What would you add to this list of fine motor activities using play dough?
Working on fine motor skills, visual perception, visual motor skills, sensory tolerance, handwriting, or scissor skills? Our Fine Motor Kits cover all of these areas and more.
Check out the seasonal Fine Motor Kits that kids love:
Colleen Beck, OTR/L has been an occupational therapist since 2000, working in school-based, hand therapy, outpatient peds, EI, and SNF. Colleen created The OT Toolbox to inspire therapists, teachers, and parents with easy and fun tools to help children thrive. Read her story about going from an OT making $3/hour (after paying for kids’ childcare) to a full-time OT resource creator for millions of readers. Want to collaborate? Send an email to contact@theottoolbox.com.
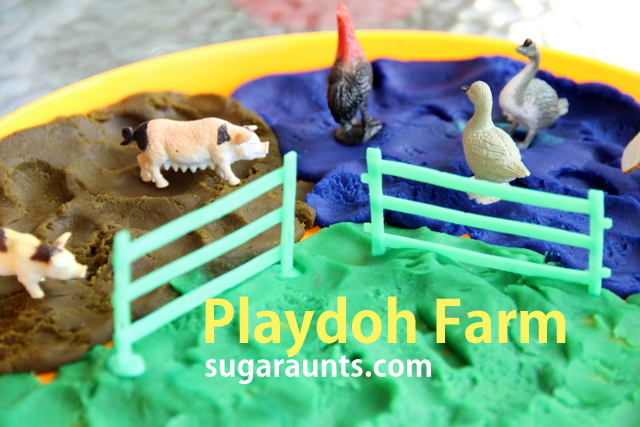
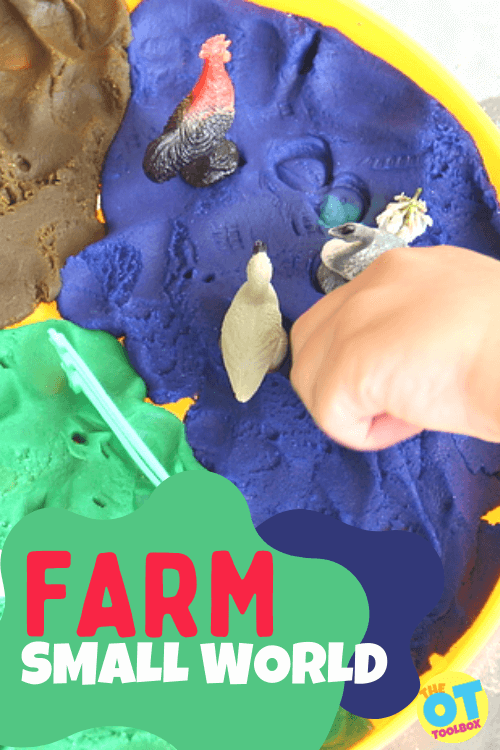
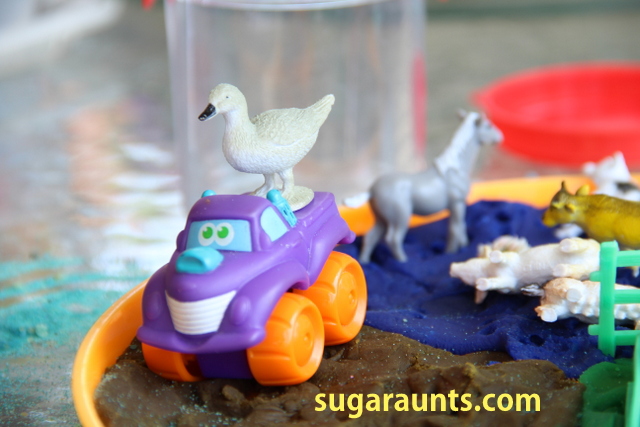
If you have kids, you’ve probably been aware of the fascination with play dough…and this farm small world hits the mark! We created a farm play dough world using different colors of play dough and a few miniature farm animals to develop fine motor skills, sensory play, and so much more. This was a huge hit when my kids were smaller and one that I love to go back on and look at the pictures! This farm animal play dough idea is a great addition to a farm activities theme for therapy or the classroom!
Farm Small World
Play dough farm animals are fun ways to support skills in kids…So, what is a farm small world and how can we use this play dough activity to support skill building in kids?
First of all, a farm small world is just that: a miniature farm play activity on a small scale. For kids, play is all about pretend, and play is a powerful means to develop skills: motor skills, cognitive, sensory, etc.
A farm small world is a play set-up with a farm theme to inspire skills in areas such as:
Fine motor work– Using the fingers to manipulate farm animal figures in play dough for strengthening and precision
Heavy work (proprioceptive input) through the hands– By pressing play dough into a small world surface and pressing farm animal figures into the play dough
Creativity– Imaginative play to create scenarios, and pretend play scenes using the farm play dough creations
Communication skills– Using receptive language and expressive language to communicate between farm animals or farmer, etc.
Self-awareness and body awareness– Moving the body through space to manipulate animals and farm figures
Crossing midline– Moving on the floor or table surface to reach across the small world farm
Floor play– Playing on the floor for heavy work. Also using principles of DIR Floor Play as a therapy modal
Visual Processing skills– Eye-hand coordination, visual motor skills, visual scanning, form constancy
A DIY Farm play dough kit can develop so many skill areas!
You can even use the play dough farm animals set along with our Farm Brain Breaks for whole-body therapy fun.
How to Make a Farm Play Dough Small WOrld
To create a farm small world play space, you can gather a few materials:
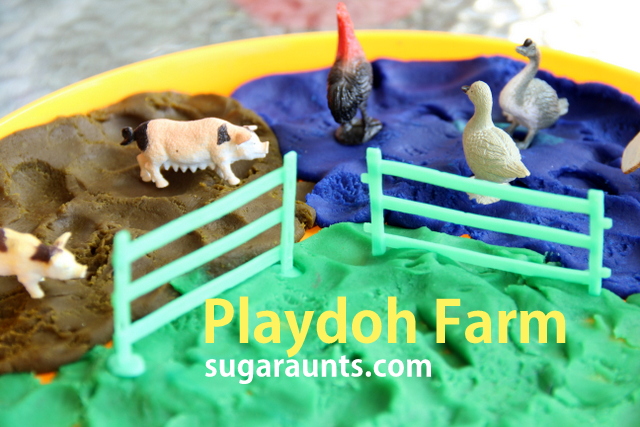
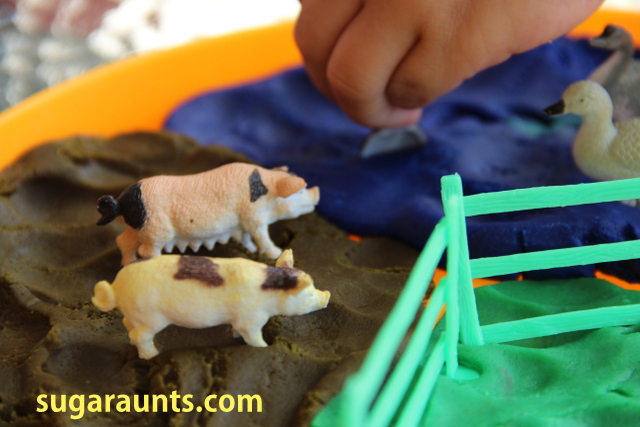
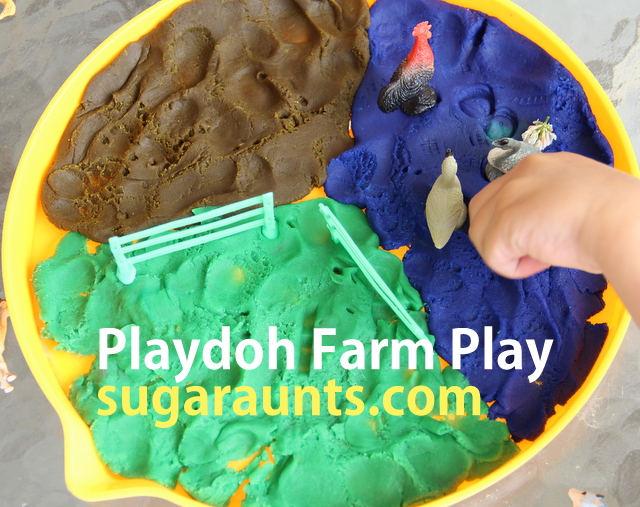
Play dough in various colors (brown, blue, and green)
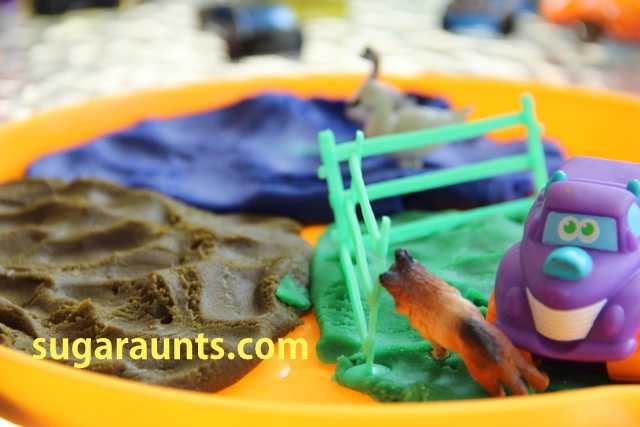
Farm figures: miniature farm animals, plastic fence, and small trucks or tractors if you have them
A surface- We used a plastic frisbee for our farm small world, but you could use a plastic plate, a small bin, or a box.
To make the farm playdough world, first press the play dough into the surface of the container. Use fingertips to press the brown, green, and blue play doh into the surface.
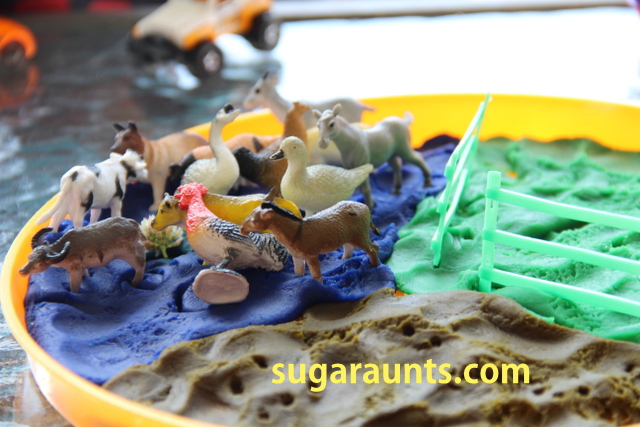
Next, add miniature cows, horses, chicken, ducks, pigs, etc. Press the farm animals into the play dough to create animal footprints.
Add farm details such as plastic fencing, miniature tractors, etc.
Then play with the farm play dough kit!
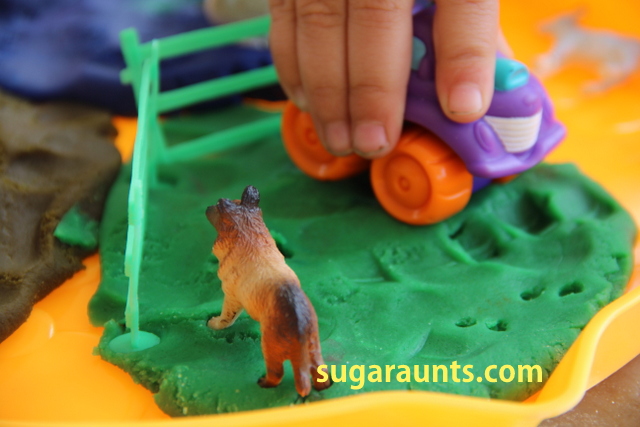
Little Guy loved playing with this little play dough set up. We pulled out our farm animals and a few colors of play dough, and played farm! Little Guy said we needed to get a couple of his cars too. Because the animals needed to go places on his farm 🙂
We explored footprints and tire impressions in the play dough.
The pigs had the mud to themselves…
…and all of the birds stayed in the “lake”.
And then all of the animals got hot and had to take a dip in the lake 🙂
This was a fun way to spend a little time playing with my Little Guy and exploring that imagination of his. He is such a sweet little dude with big ideas and loves having FUN.
Play Dough Animals
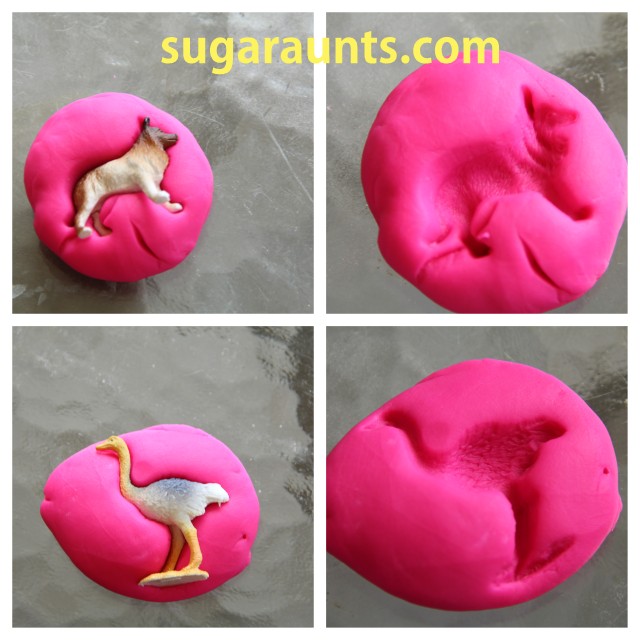
We thought it was pretty funny to make animal impressions in the play dough, too. These cute little play dough animals were not only a fun fine motor activity, it also is a great tool for developing skills like visual perceptual skills and visual discrimination as well as form constancy too. This is a great way to work on fine motor strength and visual motor skills such as visual closure.
The play dough animals were little hollow impressions of the plastic animals.
We played a little guessing game where one of us would cover our eyes and the other would make an imprint in the play dough. Then the other person would guess what animal made the shape. We did this for a long time…doing each animal.
And then back to the farm we went. And the animals took a few joy rides on their cars and trucks!
So, what do you think? Does this farm small world play look like a fun idea or what? Farm small world animals and a few containers of play dough can support so many developmental areas!
Looking for more fine motor and pretend play skill-builders? Check out our fine motor kits for themed OT work, including these:
Working on fine motor skills, visual perception, visual motor skills, sensory tolerance, handwriting, or scissor skills? Our Fine Motor Kits cover all of these areas and more.
Check out the seasonal Fine Motor Kits that kids love:
Colleen Beck, OTR/L has been an occupational therapist since 2000, working in school-based, hand therapy, outpatient peds, EI, and SNF. Colleen created The OT Toolbox to inspire therapists, teachers, and parents with easy and fun tools to help children thrive. Read her story about going from an OT making $3/hour (after paying for kids’ childcare) to a full-time OT resource creator for millions of readers. Want to collaborate? Send an email to contact@theottoolbox.com.
The toddler years can be a struggle! From the age of one year to 3 years, toddlers grow and develop immensely. But when parents are in the midst of toddlerhood, it can seem like the never-ending tantrums, meltdowns, sometimes crazed attempts at independence, and picky eating, sleep issues, etc… never end. Not to mention learning new words (with little-to-no filter), sleep changes, appetite and eating considerations, toddler years can be a real challenge to parents. But as an occupational therapist, there is a very real developmental need for these toddler antics.
Be sure to read our resource on newborns not sleeping through the night, because sometimes sleep habits can carry over to toddler sleep issues that impact function, development, and family dynamics.
Toddlerhood gets a bad rap with terms like the “terrible twos” and the “three-nager years”. But is it all bad? Here’s what your friendly OT wants you to know…
Toddlerhood Development
So, what is it about the toddler years? These cute packages of rolly, squishy, no-longer babies are little people with BIG emotions, BIG personalities, and BIG smiles. Some of the sweetest memories I have from when my kids were younger come from the toddler stage, when little voices pronounce words totally incorrectly…but in the cutest way possible. Those big teethy smiles and non-stop play was nothing but learning and developing skills.
As a mom, I loved to watch my littles learn. I loved to kiss their sweet heads to sleep each night. Oh, there were meltdowns, demanding, whining breakdowns that these cuties experienced (daily). There were messes, spills, diaper issues, and the house was in a constant state of disaster zone.
But as the occupational therapist? I knew this was all part of the stage of development and toddlerhood means messy repetition. (i.e. Yes, we will need to practice cleaning up blocks 37 times a day. Yes, we will do it again tomorrow).
But, from that perspective of a pediatric developmental professional, there is so much more to say about the toddler years. ALL of that pushing buttons, whining, changing minds, meltdowns, carrying purses full of toys, getting into the kitchen cupboards, streaking naked through the house…it’s all essential toddler development! Really!
We have a great resource on child development that covers developmental milestones. From that blog post, you’ll discover the toddler developmental stages that occur from 1-3 years.
Early childhood is a critical time when children develop skills they will use throughout their lives. These areas of development include:
physical
cognitive
communication/language
emotional
social skills
It is during the first years of life that children show a tremendous level of growth in each of these areas.
Occupational Therapy and Toddlerhood…
As a pediatric OT, there are a few sticking points that is important to remember.
The toddler years get a bad rap for behaviors, saying “no”, tantrums, going “boneless” as we used to say about sudden tantrums where the toddler flops on the floor in refusal for some task, activity, or thing like getting dressed. However, if there are extreme issues, regressions, or you have a gut feeling about certain developmental concerns, these may be toddler behavior red flags to explore in further detail along with a pediatrician.
But, here are a few things about the “good” of toddlerhood…
Have patience with your toddler.
Because of the tremendous amount of development, it is easy to become overwhelmed by skills (running, hopping, getting dressed, manipulating toys and materials, self-feeding…the list goes on and on!) Plus, young children want to exhibit independence in these areas. They want to do what mom or dad or big siblings are doing, but they may not have the skills to do so. Frustration ensues!
Things to remember is that the child is developing in all of these areas at once. By watching routines, listening to parents talking, watching siblings, they learn to throw, carry, put away, wash, color…these are multi-faceted skills. There is sensory, motor, cognitive, visual all happening at once with daily tasks.
Plus, the cognitive development occurring at the same time means that following directions are not always on target with what the small child wants to do. They want a piece of toast for breakfast. Then they don’t. It can be easy to lose patience as the toddler has a tantrum on the floor, but they are managing emotions, thought processes, decisions, and communication challenges all at once. It can be a lot to process! Be patient as the adult in the situation.
Patience is key as your little toddler develops skills at the rate that is right for them.
That brings us to our next point.
2. Remember that each child is different.
Toddlers grow and develop at a fairly predictable course and rate. There are general developmental expectations that happen during the toddler years, called developmental milestones. However, not all child achieves these milestones at the same time. And that’s ok!
It can be easy to become upset as a parent when a friend’s child achieves skills or abilities. Remember that each child is on their course of development. From birth to three years, a child visits the pediatrician many times.
You’ll experience many questions on development during those visits, where the doctor or staff ask about milestones. If there is a concern with development, or evident delay, this is where you can explore services to support needs.
Even through each toddler is different and development occurs in different stages, it’s all part of showing independence. This can mean picky eating, throwing food, saying “NO!” or any other aspect of showing independence.
It’s through play that toddlers achieve stability, build relationships with parents, siblings, and others.
They test boundaries and explore the world around them.
Play offers opportunities to use their reflexes, transform motor skills, and distinguish refined motor skills (i.e. using their arms and legs to achieve a desired action such as getting up those stairs!)
Sensorimotor skills expand and toddlers gain control in play objects and tool use; They begin to use crayons, spoons, forks, and manage clothing. Previously, we’ve shared the best crayons for toddlers that support this development through functional play.
Young children are fascinated by mastering new skills and learning new things. You might see them drawn to activities or experiences that offer sensory experiences, are repetitious, or involve exploration. But even though novel opportunities support child development, routine is essential.
Read about the power of play for more ideas to support your toddler.
Physical Development during toddlerhood
Going back to the development aspect, you can generally expect to see the following skills developed during toddlerhood:
12-18 months
First steps
Walking
Climbing stairs
18-24 months
Running
24-36 months
Jumping
Begin to ride a tricycle
3 years
True run with both feet leaving the ground
Walk upstairs with alternating feet
Walk downstairs
Able to remove most clothing
Cognitive Development During Toddlerhood
From 1-3 years of age, so many cognitive skills are built and expanded upon. You’ll notice in the list below that many of these cognitive skill components are grounded in play. Remember that play builds skills! Let’s break down the skills by age:
12-18 months
Includes others at recipients of play behaviors
Imitates new behavior
18-24 months
Demonstrates invention by combining mental combinations
Finds hidden objects (separation skills)
Shows differed imitation
Uses toys or dolls in pretend play
24-36 months
Substitutes objects in pretend play
Integrates themes in play
3 years
Begins operational thinking
Counting words up to 5
Can solve nesting cup problems
Language Development for Toddlers
The first few years are a huge time for development of receptive language and expressive language. Here are some specifics:
12-18 months
Expresses self through jargon, sounds, cries
18-24 months
Understands multi-word phrases/sentences
Uses multi-word phrases to express thoughts (“Me up” to indicate a desire to be picked up; “Mommy go” to indicate that mommy has left the house)
24-36 months
Initiates a conversation with words or phrases
Uses 2 part sentences or phrases (“Me go home.”)
3 years
Understands positional terminology (in, on, under)
Uses more complex sentences
Distinguishes between images and words or text on paper or in books
Begins to generalize rules for verb tenses and using plurals
Toddler Social-Emotional Development
Social emotional development occurs even from the young age in toddler years. Social skill development occurs through interaction with others, play, and day to day tasks. Here are some milestones you may see:
12-18 months
Experiences peak of separation anxiety
18-24 months
Demonstrates less separation anxiety
Begins to show empathy for another person, animal, toy
24-36 months
Begins to respond with empathy to another person’s distress
Includes others in pretend play
3 years
Shows physical aggression over verbal aggression when distressed or upset
Toddlerhood Tips
So, how can you and your toddler thrive during these hectic years? A pinch of patience, play, play, and more play! We actually have actionable strategies over on our toddler play page, including fun ways to play with your toddler that inspire development.
Some quick tips (described in more detail over on that main toddler page) include:
Meet the level of the child.
Set up a toddler safe space.
Be a balanced play partner.
Enjoy & have fun with the play.
Limit screens. (Or use in moderation.)
Transforming Toddlerhood With Play
Ask any occupational therapist and you’ll see that play is the way and the means to develop skills during these years. Looking for therapist-approved activities to inspire learning through play for toddlers? These are some of our favorite ideas:
Or, try making a craft with 2 year olds and 3 year olds…an easy suncatcher activity using items you have in the house!
Colleen Beck, OTR/L has been an occupational therapist since 2000, working in school-based, hand therapy, outpatient peds, EI, and SNF. Colleen created The OT Toolbox to inspire therapists, teachers, and parents with easy and fun tools to help children thrive. Read her story about going from an OT making $3/hour (after paying for kids’ childcare) to a full-time OT resource creator for millions of readers. Want to collaborate? Send an email to contact@theottoolbox.com.