Colleen Beck, OTR/L is a pediatric occupational therapist and the owner and author of The OT Toolbox website. She manages all of The OT Toolbox social media accounts and runs the popular newsletter.
Read about Colleen's experience and career as an occupational therapist, including how The OT Toolbox began on our About The OT Toolbox page: https://www.theottoolbox.com/about-us/
Colleen created The OT Toolbox in 2011 and since then has written thousands of blog posts designed to support therapy providers, educators, parents, counselors, admin, and caregivers in promoting the healthy development of kids.
Check out Colleen's blog posts below:
These Apple Brain breaks are a resource that has been popular on the site for many years. During the fall months, all things apple theme is the way to go, so when it comes to adding themed resources into a Fall, harvest, farm, or back-to-school theme, apple themed exercises and movement activities are the way to go!
These apple brain breaks would be a nice addition to a Fall activity like our apple sensory bin or any of the items in our Apple Therapy Kit.
Apple brain Breaks
Many of you have used the brain break activities that we have here on the OT Toolbox help kids focus and pay attention in the classroom environment. Movement in the classroom is helpful for learning and helping kids with movement needs such as fidgeting or attention. The brain break activities listed below can go along really nicely with an apple theme. Try adding the Apple themed brain breaks in between activities, lessons, and other classroom tasks.
Apple themed brain breaks can be a great way for kids to extend on an Apple theme activity while adding movement into the classroom.
Related read: These visual perception apple theme shape stamps are a perfect way to work on visual perceptual skills and fine motor skills with DIY stampers.
How to Use Apple Brain Breaks
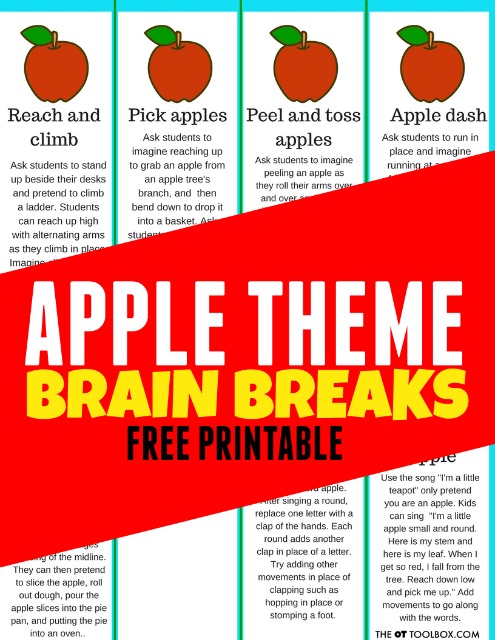
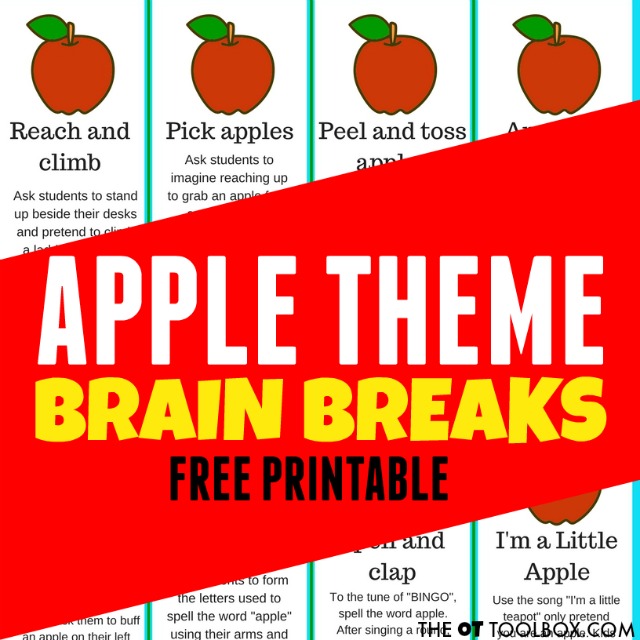
Get this list of apple theme activities as a printable sheet to use in the classroom. Print them off, glue them to cardstock or index cards and laminate for durability. Kids can complete apple brain breaks as a group or individually.
In the PDF below, you’ll find printable cards that you can cut out and use over and over again as a movement break for kids. Other ways to use these fall brain breaks?
Incorporate into an apple tree life cycle curriculum or any apple lesson plan
Use with talking about Johnny Appleseed during the Fall months
Use as a Johnny Appleseed game
Add to a harvest theme or visiting the Farm during the Fall
Use as a transition activity between classroom activities
Great for waiting activities or transitions in an apple themed classroom!
Use when waiting periods during classroom breaks
Add as sensory motor activities to promote attention, focus, re-direction, or needed heavy work input
These apple theme exercises can be added to a weekly therapy theme when planning occupational therapy lesson plans, and then individualized based on the child’s needs and interests.
Apple Exercises
The brain break cards include activities like these ones. These apple theme exercises can be adapted or modified as needed to meet specific needs.
Here are some apple think brain break activities that can be used at movement into the classroom using an Apple theme:
1.) Reach and climb- Ask students to stand up beside their desks and pretend to climb a ladder. Students can reach up high with alternating arms as they climb in place. Imagine climbing up a ladder to reach the top of an apple tree.
2.) Pick apples- Ask students to imagine reaching up to grab an apple from an apple tree’s branch, and then bend down to drop it into a basket. Ask students to repeat this motion repetitively reaching up high and then bending down low to the ground.
3.) Peel and toss apples- Ask students to imagine peeling an apple as they roll their arms over and over again at the elbows. Then ask them to toss an imaginary apple into a bucket. They can imagine the buckets are at different levels and distances as they pretend tossing apples. Continue this exercise for one minute.
4.) Apple dash – Ask students to run in place and imagine running at an apple farm. Students can pretend they are delivering bushels of apple from a tree to a barn as they run in place while carrying an imaginary bucket. Ask them to imagine hopping over logs or running faster or slower.
5.) Make a pie- Ask students to imagine picking an apple and buffing it with their sleeve. Ask them to buff an apple on their left sleeve and then their right sleeve. Doing this activity encourages crossing of the midline. They can then pretend to slice the apple, roll out dough, pour the apple slices into the pie pan, and putting the pie into an oven.
6.) Apple spell- Ask students to form the letters used to spell the word “apple” using their arms and legs. To make an “A”, the student can reach up over their head putting their hands in the middle and stretching their legs wide next. Next, make a “P” by standing with feet together and arms curved toward the side to create the bump of the letter. Complete the same movement again for the second P in the word apple. Next, form a letter L using by sitting on the floor and bending at the waist stretching legs out straight. Finally, create a letter E by sitting on the floor bent at the waist with leg s extended straight and feet together. Put one arm out at the waist and reach the other arm out overhead bent at the elbow.
7.) Spell and clap- To the tune of “BINGO”, spell the word apple. After singing a round, replace one letter with a clap of the hands. Each round adds another clap in place of a letter. Try adding other movements in place of clapping such as hopping in place or stomping a foot.
8.) I’m a Little Apple- Use the song “I’m a little teapot” only pretend you are an apple. Kids can sing “I’m a little apple small and round. Here is my stem and here is my leaf. When I get so red, I fall from the tree. Reach down low and pick me up.” Add movements to go along with the words.
Can you think of any other apple themed brain breaks?
Want a copy of these apple brain break cards to add to your toolbox? Enter your email address into the form below to access these printable tools.
This freebie is also available inside our Members Club! Members have easy access to all downloads on the site, in one place, without the need to enter your email address for each item.
Want to add this resource to your therapy toolbox so you can help kids thrive? Enter your email into the form below to access this printable tool.
This resource is just one of the many tools available in The OT Toolbox Member’s Club. Each month, members get instant access to downloadable activities, handouts, worksheets, and printable tools to support development. Members can log into their dashboard and access all of our free downloads in one place. Plus, you’ll find exclusive materials and premium level materials.
Level 1 members gain instant access to all of the downloads available on the site, without enter your email each time PLUS exclusive new resources each month.
Level 2 members get access to all of our downloads, exclusive new resources each month, PLUS additional, premium content each month: therapy kits, screening tools, games, therapy packets, and much more. AND, level 2 members get ad-free content across the entire OT Toolbox website.
Member’s Club not for you? No worries. You can still access this free resource. Enter your email address into the form and the apple brain breaks will be delivered to your inbox.
More Apple Theme Activities for Kids:
You will love these apple activities to go along with an apple theme.
Colleen Beck, OTR/L has been an occupational therapist since 2000, working in school-based, hand therapy, outpatient peds, EI, and SNF. Colleen created The OT Toolbox to inspire therapists, teachers, and parents with easy and fun tools to help children thrive. Read her story about going from an OT making $3/hour (after paying for kids’ childcare) to a full-time OT resource creator for millions of readers. Want to collaborate? Send an email to contact@theottoolbox.com.
This blog post on meeting handwriting goals is an old one on the website, but it’s a handwriting resource that needed a re-vamp to get the much-needed information out there. One thing that comes up a lot as a school based OT is this: Handwriting goals are addressed in OT sessions but you don’t see the carry over of those goals into real life handwriting situations. This is a real handwriting problem! Let’s break down handwriting goals to improve carry over and how to ensure success with handwriting IEP or 504 goals and accommodations!
What is Handwriting Goal Carryover
Handwriting carry over refers to the concept that the client working with an OT professional in therapy sessions can achieve skills in an isolated environment but are not able to carry over their new skills into the classroom, home, or community.
Carry over of handwriting goals is getting the skills to “stick” when the student goes back to the classroom or writes at home.
There is a lot to unpack here.
Handwriting carry over is specific to handwriting skills, and the reason we are covering this in its own blog post is that this is an area where therapy professionals most often see carry over issues. OT professionals work with students on one of the most common areas in the school environment: handwriting. We address handwriting so often because it impacts learning in such a huge way.
The other thing to consider is that handwriting skills are impacted and influenced by so many areas: sensorimotor, fine motor, gross motor, visual motor, executive functioning, etc.
Handwriting practice is a boring task for most kids. For the children who struggle with the underlying components of handwriting, practice is more than boring. It’s numbing. You can see it in the eyes of many kids who really hate handwriting practice. They glaze over. The child slouches down in their chair, and they go through the motions of writing practice.
And then what has been practiced is not carried over. We’ve covered so many handwriting problem areas on The OT Toolbox. You can find many resources under the handwriting tab at the top of the site.
What does therapy carry over look like?
To better understand this concept, let’s first cover what poor carry over over of handwriting skills looks like:
The occupational therapist or occupational therapy assistant works with a student in an isolated setting. They work with their students one on one, or in a small group. The therapy session may occur in either a pull out model of therapy delivery or therapy services occur using a push-in occupational therapy model of delivery.
In either situations, the student receives concentrated attention and focus on specific goal areas. Take a look at the handwriting goal examples listed below to better understand exactly how focused the therapy session can be.
While carry over of therapy goal areas occur in essentially every goal area we address, handwriting is one of the most commented on. We notice when the therapy professional helps a student working on copying the alphabet and they can form each letter accurately, but then when they complete a similar task in the classroom environment outside of the therapy session, the handwriting results differ drastically.
Another example of handwriting carry over is the student who can copy a list of words with accurate letter formation and line use. In the therapy session, the written work is very legible. But then, that same student immediately returns to the classroom and copies a list of vocabulary words only to show illegible written work with poor line use, poor spacing, and poor letter formation.
Why Handwriting Goals are difficult to carry over into the classroom
So a student does well in therapy sessions and the data shows the child IS ABLE to form letters accuratly, write on the lines, space between letters and words, and read their own writing. But what happens when those achievements don’t carry over to the classroom or the home?
There are several things to consider when it comes to transferring occupational therapy goals into real life. Some of these contributions may include:
The handwriting goal is very specific (see goal examples below).
The child is working on a targeted area of handwriting without distraction.
The student has access to tools to support specific needs in the therapy session. This includes specialized adaptive paper, highlighted lines, positioning tools, etc.
The student feels confident with their therapist by their side, that they can make a mistake and if a mistake occurs, it’s not a big deal. It’s part of therapy.
The student has limited input of other contributing factors: classroom distractions, creative writing aspect, urgency to complete the writing task, etc.
In the classroom environment, handwriting speed is a major contributor. The timeline of the classroom needs to move along, so the student may feel the urgency to keep up with others.
Using specialized paper, pencil grips, handwriting positioners, etc. make the child feel “different” than their peers, so they revert to typical writing patterns rather than using tools that support written work.
All of this can be frustrating….to the child, to the therapy professional, to the teacher, and to the parent.
When the data shows the student has the capability to complete legible written work, and they have worked to strengthen underlying factors, and they have made progress on the goal areas, it is likely that the child can be discharged from therapy services.
Discharge from therapy can be a difficult thing for some parents and teachers to hear.
Therapy professionals have heard things like:
Why can’t you adjust the goal so the child can write legibly in all settings?
Why are you “giving up” on my child?
Why are you discharging therapy when the child can’t read their own writing?
And many other versions of this conversation!
What to do when the Handwriting IEP Goals are Not being carried over
The most important thing to remember is this: Occupational therapy is a support service in the schools. As such, OT professionals address goals that impact education. Therapy services occur at a level that, when handwriting is addressed (likely along with several other goals) for a time of 30 minutes per week.
The child will not progress when only practicing handwriting skills for such a short period of time. And this does not mean that increasing therapy time will make that pivotal difference. Whether a child receives OT services 30, 60, 90, etc., min a week, or 30, 60, 90 minutes a month of consultation, the story is the same: if the child doesn’t practice these handwriting skills every day, carry over is unlikely.
In order to see progression, and this is key, is that the child needs to practice skills throughout the day, at home, and each day.
The difference between successful and legible handwriting in all settings and poor carry over of skills is practice. How do we encourage this consistent use of skills?
Practice daily
OT homework that the child consistently completes at home
Provide the teacher with suggestions to use for the classroom
If a resource aide is available, work with that individual to encourage consistent use of supports: verbal cues, visual cues, specialized paper, pencil grips, etc.
Work on “Small Wins”: When kids sit down to a writing assignment, they can get overwhelmed by the task ahead of them. Then, they know the individual challenges that they are faced with: forming letters correctly, writing on lines, copying sentences without skipping letters, making a “b” and not a “d”, forming letters the correct size, not mixing upper and lower case letters, holding the pencil the right way, not writing too dark or too light, erasing all of the mistakes…it’s a minefield of mistakes waiting to happen!
Work on small wins that can move a child toward a bigger goal. Ask the child to just focus on getting words on the paper. Another assignment can be only about writing on the lines. Another task can be just about making the letters the right size. Ask them to focus on just one thing. Then, when they are done writing, ask them what strategies they used to get that particular part of handwriting legibility done.
Make a big deal about progress- Make small stars on handwriting that is legible, written on the lines, uses appropriate spacing, or meets other goals. Drawing attention to those small wins (even if there are other areas on the page where the handwriting lacked) can be a positive tool for kids who are working on handwriting.
Teach someone else- When we teach, we learn. There is science backing the fact that when we teach something to someone else, it sticks better.
So use this strategy to get kids to notice the individual pieces of handwriting and teach them to another student (or the teacher!)
Break the class down into groups of two.
One student can write and the other is the teacher. They can “teach” how to write on the lines, how to erase mistakes completely, and how to make a straight left margin.
Sometimes that simple assessment helps to make strategies stick better.
Then, switch roles and the other students can become the handwriting teacher.
Make Good Handwriting Part of a Routine: How do we remember to drink 8 glasses of water a day? For some of us, that is a real challenge. For others, they’ve got this covered. They have a routine of water guzzling ingrained in their day so much so that they can easily drink their required glasses of water. Have a cup of water on your desk at all times; make a schedule; make it part of your day!
Make a visual schedule or checklist- So, how do kids make legible and proper handwriting just part of the process of writing? Use a personalized visual schedule for scheduling in handwriting practice time, or checklist to self-monitor handwriting.
Make a DIY handwriting checklist- Some kids might have different items they need to monitor for legible written work. Maybe they need to make sure the tail letters drop down below the baseline. Write the particular handwriting concepts that each child needs to monitor on an index card and post it at their writing station. Laminate the index card and students can check off each item with a dry erase marker during writing tasks.
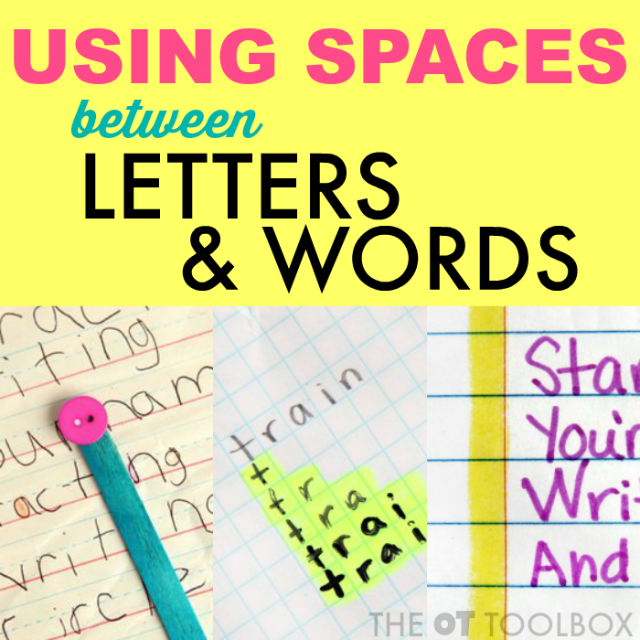
Kids can then look over their handwriting to make sure they’ve used proper formation, line awareness, spaces between words, and size of letters just right! Here is a printable handwriting self-checklist that you can print and use in the classroom.
Technology and Typing- It these things are not working, it may be time to move onto technology as a means for written communication and/or modifications to requirements. Start a typing club for making this fun and engaging.
Handwriting Goal Examples
When it comes to occupational therapy and handwriting IEP goals, the goals are very specific. This is because they are individualized based on the specific needs of the child. The therapist is addressing handwriting in an isolated environment (which occurs whether servicing the child in either the pull-out model or the push-in model of therapy).
Poor transfer of occupational therapy goals can look like essentially any aspect of a handwriting goal.
Below are examples of handwriting goals. These are listed so you can see how specific each goal can be. The data collected from a handwriting goal will show how the student has progressed from a baseline status.
Focusing on these aspects of handwriting (copying from a model, tracing, writing upper case letters or lower case letters accurately, or focusing only on line use or spacing can help with carryover of handwriting goals into “real life”.
Goals for Pre-writing Lines
This goal is necessary for achieving the pre-writing skills required for forming letters and is typically a pre-kindergarten or kindergarten area of focus.
One strategy would be to support the learner in making marks on paper. The goals would focus on pre-writing strokes from a model such as vertical/horizontal/circular formations.
You can include grasping skills within the goal, or keep this separate.
Example: Student will demonstrate improved motor skills by copying vertical/horizontal/circular strokes from a model using a beginning tripod grasp 3 of 4 trials. You can further specify exactly what the strokes should look like in terms of length, degrees of the angles, and formation. The number of trials can be varied, as well as the grasping pattern.
For the student that is able to do pre-writing strokes of lines, a circle, and a cross, the pre-writing goals would focus on copying letters from a model.
There is debate on whether upper or lowercase should be emphasized first.
By the end of the IEP cycle, ________ will form/copy/independently draw (select appropriate terminology) pre-writing lines: vertical lines, horizontal lines, circle, cross, square ________ times in 4 out of 5 treatment sessions with ________ assist with no more than ____ visual/verbal cues (circle or include one or both) to complete the task for increased visual motor/perceptual, graphomotor skills.
Goals for letter formation
For students who are working on forming letters, we can target specific needs with the IEP writing goals.
Lowercase is used more readily, therefore people argue this should be addressed first. However, in terms of fine motor development, the sticks and large curves of uppercase letters are easier to master.
For practical reasons, many people write goals to write a student’s first name. This is a relevant goal, but not always a great starting point if your student has a long complicated name.
A general goal would be that student will copy 5/26 uppercase letters from a model. This does not limit which letters you choose, leading to more of a chance of success.
If you are using the Handwriting Without Tears model, letters are grouped by type, not alphabetical order.
Goals would follow the same format as above: student will improve…..by…copying 5/26 uppercase letters from a model. Variables: number of letters, letter formation, grasping pattern, sizing, spacing, line placement.
Generally goals involving copying basic letters from a model are intended to learn the basic formation, not exact details such as line placement. As the student improves, goals can expand to more letters.
For the student that can write several letters from a model – expand this goal to include all of the letters from a model (or 80-90% to allow room for error) The variables can be accuracy, grasping pattern, and formation.
For the student that can write all of the letters from a model – the next rung on the goal ladder would be to write them from memory. As with learning the letters, the goal can be a certain number/26 from memory. Add specifics such as uppercase, lowercase, accuracy, formation, grasping, etc.
For the student that can can independently form all letters from memory – at this point, the goals can focus on improving letter formation, sizing, and line placement.
Student will improve…by…accurately writing letters without a model with 80% accurate line placement, sizing, letter formation, and spacing.
For the student that can write all of the letters fairly legibly – the goals will focus on putting the pieces together. You can work on copying words from a model, writing from dictation, or writing from a prompt. Each of these types of writing varies in level of difficulty.
Student will improve…by writing a five word sentence from dictation with 80% accurate letter formation, line placement, sizing, and spacing using a tripod grasp. Here is a sample Handwriting Rubric to follow.
Focus is on letter lines. Letter formation is a huge aspect of overall handwriting legibility. All letters can be collected into groups, or families, based on the lines that make up that letter. These letters include:
Straight line letters
Curved line letters
Diagonal line letters
These letter groups can also be further broken down by size:
Uppercase letters
Lowercase letters
Additionally, lowercase letters can be broken down into groups based on size:
Tall letters (letters that touch the top line: b, d, f, h, k, l, t)
Small letters (letters that do not go above the midline: a, c, e, i, m, n, o, r, s, u, v, w, x, z)
Tail letters (letters with a “tail” that drops below the baseline: g, j, p, q, y)
Use our tall and short worksheet to support these concepts in a concrete yet expandable activity.
Finally, a group can be formed into cursive or print and then the cursive group can be sorted into uppercase/lowercase, size, and lines included in the letter:
Cursive letters
Print letters
As you can see, there are a lot of ways to sort out letter formation goals and address each these areas. Goals can be really focused on when in isolation in therapy sessions, but when you put the whole picture together, there can be a struggle to carry over those goal successes into classroom or other real life handwriting tasks.
Some examples of handwriting goals for letter formation include:
By the end of the IEP cycle,_____________ will form/copy/independently write (select appropriate terminology) straight line/curved line/diagonal line (include letter line aspects or generalize to all upper case) capital letters/lower case letters (select appropriate format) ________ times in 4 out of 5 treatment sessions with ________ assist with no more than ____ visual/verbal cues (circle or include one or both) to complete the task for increased graphomotor skills while maintaining a tripod grasp.
By the end of the IEP cycle, _____________ will form/copy/independently write (select appropriate terminology) lower case letters/upper case letters (select appropriate format) with good formation ________ times in 4 out of 5 treatment sessions with ________ assist with no more than ____ visual/verbal cues (circle or include one or both) to complete the task for increased graphomotor skills while maintaining a lack of thumb wrap.
By the end of the IEP cycle, _____________ will form/copy/independently write (select appropriate terminology) lower case letters/upper case letters (select appropriate format) lower case letters using Handwriting Without Tears letter order method (or other appropriate handwriting method) ________ times in 4 out of 5 treatment sessions with ________ assist with no more than ____ visual/verbal cues (circle or include one or both) to complete the task for increased graphomotor skills while maintaining an open web space.
By the end of the IEP cycle, _____________ form/copy/independently write (select appropriate terminology) letters of the alphabet with 90%+ accuracy for correct letter formation ________ times in 4 out of 5 treatment sessions with ________ assist with no more than ____ visual/verbal cues (circle or include one or both) to complete the task for increased graphomotor skills and success in school setting.
By the end of the IEP cycle, _____________ will form/copy/independently write (select appropriate terminology) first and last name with (upper or upper and lower case letters) with/without model ________ times in 4 out of 5 treatment sessions with no more than ____ visual/verbal cues (circle or include one or both) to complete the task for increased graphomotor skills while maintaining a lack of thumb wrap.
By the end of the IEP cycle, _____________ will form/copy/independently write (select appropriate terminology) _____consecutive words/sentences with/without (select appropriate term) a model ________ times in 4 out of 5 treatment sessions with ________ assist with no more than ____ visual/verbal cues (circle or include one or both) to complete the task for increased graphomotor skills and success in school setting.
By the end of the IEP cycle, _____________ will form/copy/independently write (select appropriate terminology) sentences using appropriate size and spacing ________ times in 4 out of 5 treatment sessions with ________ assist with no more than ____ visual/verbal cues (circle or include one or both) to complete the task for increased graphomotor skills while maintaining a tripod grasp.
Handwriting goals for pencil grasp and pencil use
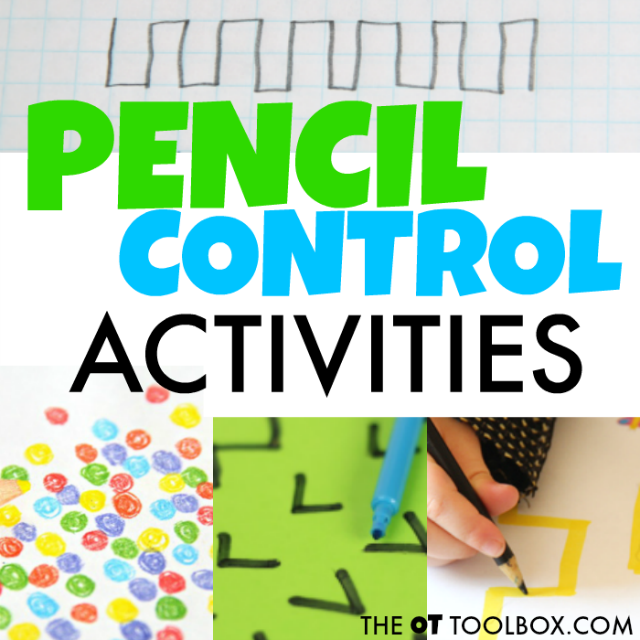
Pencil grasp, and using controlled motions with the pencil, or pencil control, and accuracy of pencil use impact learning. This is one example of a pencil grasp goal that may be used.
By the end of the IEP cycle, _____________ will hold a pencil with a tripod grasp for ___ minutes to improve hand strength and writing endurance in 4 out of 5 treatment sessions with no more than ____ visual/verbal cues (circle or include one or both) for increased graphomotor skills and success in school setting.
Handwriting goal for Spatial awareness
Spatial awareness in handwriting can impact carryover of handwriting skills.
This is one example of a goal for spacing in written work:
By the end of the IEP cycle, _____________ will form/copy/independently write (select appropriate terminology) (words/name/uppercase/lower case letters) with decreased/increased pressure on paper with adequate spacing with no more than ____ visual/verbal cues (circle or include one or both) to complete the task for increased graphomotor skills and success in school setting.
Handwriting IEP Goal for Line awareness
Line awareness includes writing on the lines and not having letters “float” above the lines. It also refers to placing letters accurately related to size of the letter and correct placement on the lines.
Here is one line awareness goal that may be addressed and is commonly an issue with carryover of skill:
By the end of the IEP cycle, _____________ will form/copy/independently write (select appropriate terminology) (words/name/uppercase/lower case letters) with 90%+ accuracy for correct letter placement on the lines ________ times in 4 out of 5 treatment sessions with ________ assist with no more than ____ visual/verbal cues (circle or include one or both) to complete the task for increased graphomotor skills and success in school setting.
Handwriting goal for size awareness
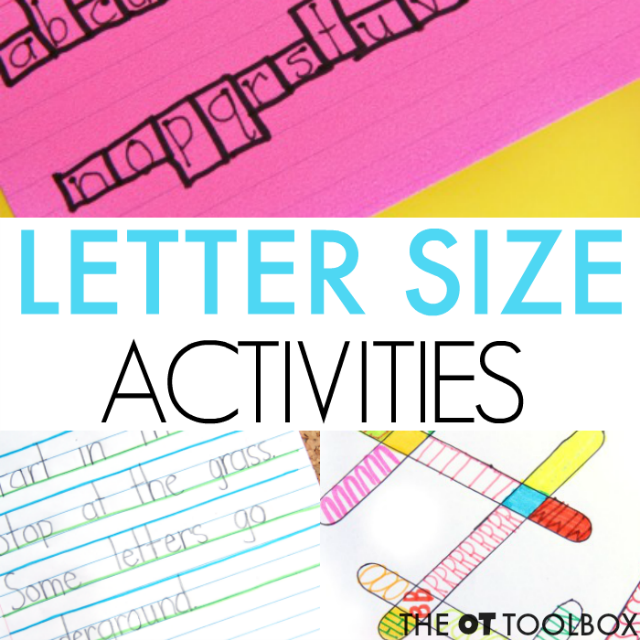
Size awareness in handwriting refers to sizing of letters. Sometimes letters are too large or too small and impact legibility. This can come into play when it comes to carrying over handwriting skills outside of the therapy session.
This is one example of a goal for writing size:
By the end of the IEP cycle, _____________ form/copy/independently write (select appropriate terminology) (words/name/uppercase/lower case letters) with 90%+ accuracy for correct letter size ________ times in 4 out of 5 treatment sessions with ________ assist with no more than ____ visual/verbal cues (circle or include one or both) to complete the task for increased graphomotor skills and success in school setting.
SMART Handwriting Goals
IEP Writing Goals, along with all other IEP goals, need to be SMART in order to be effective. What are smart goals? Check out this post on Breaking Down Goals for specific information on creating SMART goals. If goals are too broad, or unmeasurable, they are prone to failure.
SMART is an acronym for;
S: specific – did you detail what it is you want to achieve?
M: measurable – how are you going to measure success?
A: is this goal attainable or too lofty?
R: is this goal realistic?
T: timebound – Do you have a set timeframe for this goal to be measured?
A final note on handwriting goal carry over
Sometimes goals seem too lofty. Having a goal for perfect handwriting when your learner can not even form their letters correctly can feel daunting. Check out this post on Making a Goal Ladder to see how to better break goals down in the steps.
Breaking IEP handwriting goals down into smaller measurable chunks, makes them more attainable. This might mean learning to write just five of the letters (not necessarily the student’s name as this might contain tricky letters).
Can you imagine thinking about learning 26 letters of the alphabet when you only know one? Not only can students feel overwhelmed, but their team also feels that the end goal seems such a far reach. Setting smaller goals help students feel less overwhelmed and challenged.
Carryover of handwriting skills practiced with the school based occupational therapist or in one-on-one time is most often, not carried over into classroom written work on in free writing tasks.
Handwriting IEP goals for reluctant writers
There are many times we work with reluctant learners. This is especially true for our handwriting kiddos.
They have been getting by with sloppy, illegible handwriting for some time already, so they are not motivated to change. Perhaps their writing is legible, but the letter formation is off.
This is especially difficult to explain why we need to work on improving this type of writing, when they are being somewhat successful already. I talk to these students about writing speed, efficiency, hand fatigue, and spacing/placement errors.
I also explain to them that teachers will start marking off for errors that they can not read clearly. The goal is not perfection, but effective efficient writing.
OT Handwriting Goal Success
These handwriting activities are powerful ways to dazzle your students to using handwriting practices consistently. They may not work for every child, but the trick is to find what works for individual kids and incorporate those strategies.
Now that you have established how to write “smart” goals, break them down into smaller steps, motivate your learners, and encourage success, it is time to translate this information into writing measurable goals. Start with the current level of function and move a couple of rungs up the goal ladder.
So, how can carryover of the underlying skills be turned into consistent handwriting? Start by addressing handwriting issues with these quick handwriting fixes. Use the strategies we’ve covered here in this blog post. Practice. And practice some more!
These lots of different ways to ensure carryover of handwriting goals and practiced skills into all writing tasks in and outside of the classroom.
What are your best tips for ensuring kids carryover concepts from therapy sessions into the classroom or homework?
IEP Handwriting Goal Bank
Once you have written a million and one IEPs, you might find you are using similar goals. Catalog the ones that are SMART and work for you and your learners.
Instead of reinventing the wheel each time you write an IEP, go to your goal bank and select a couple from the list that meets the needs of your learner.
Here are a few websites that include lists of written expression goals. As you can see, the format varies.
For me, the most difficult part is measuring the student’s handwriting. The more specific my goal is, the easier it is to document their progress.
Looking for help with specific handwriting concerns? Click on the images below to find tons of activities and strategies to help:
Looking for more specific ways to incorporate therapy tips and tricks into handwriting at home or in the classroom? Grab a copy of our Handwriting Book to work on consistent written work legibility:
The Handwriting Book is a comprehensive resource created by experienced pediatric OTs and PTs.
The Handwriting Book covers everything you need to know about handwriting, guided by development and focused on function. This digital resource is is the ultimate resource for tips, strategies, suggestions, and information to support handwriting development in kids.
The Handwriting Book breaks down the functional skill of handwriting into developmental areas. These include developmental progression of pre-writing strokes, fine motor skills, gross motor development, sensory considerations, and visual perceptual skills. Each section includes strategies and tips to improve these underlying areas.
Strategies to address letter and number formation and reversals
Ideas for combining handwriting and play
Activities to practice handwriting skills at home
Tips and strategies for the reluctant writer
Tips to improve pencil grip
Tips for sizing, spacing, and alignment with overall improved legibility
Colleen Beck, OTR/L has been an occupational therapist since 2000, working in school-based, hand therapy, outpatient peds, EI, and SNF. Colleen created The OT Toolbox to inspire therapists, teachers, and parents with easy and fun tools to help children thrive. Read her story about going from an OT making $3/hour (after paying for kids’ childcare) to a full-time OT resource creator for millions of readers. Want to collaborate? Send an email to contact@theottoolbox.com.
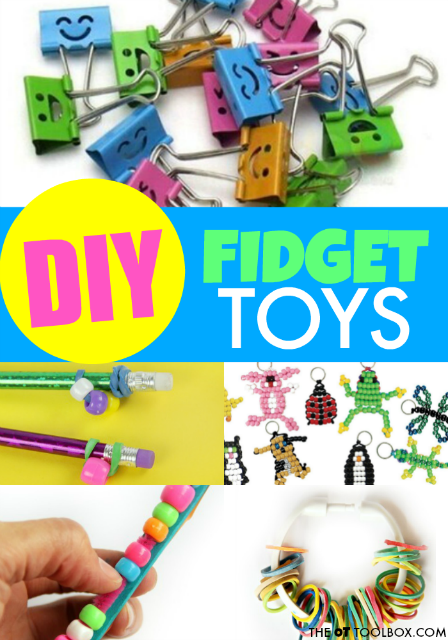
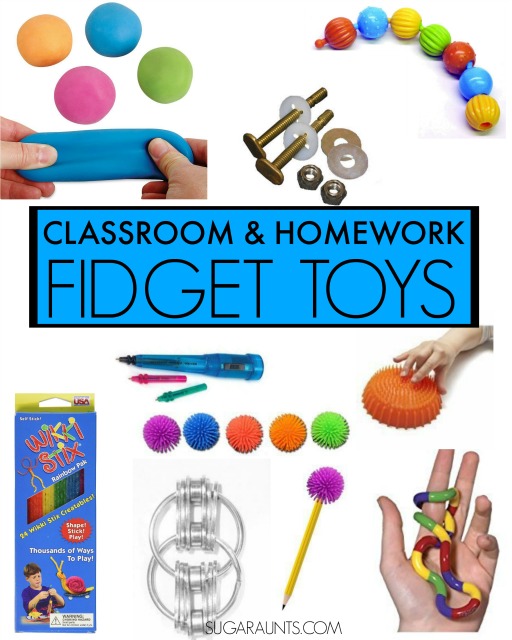
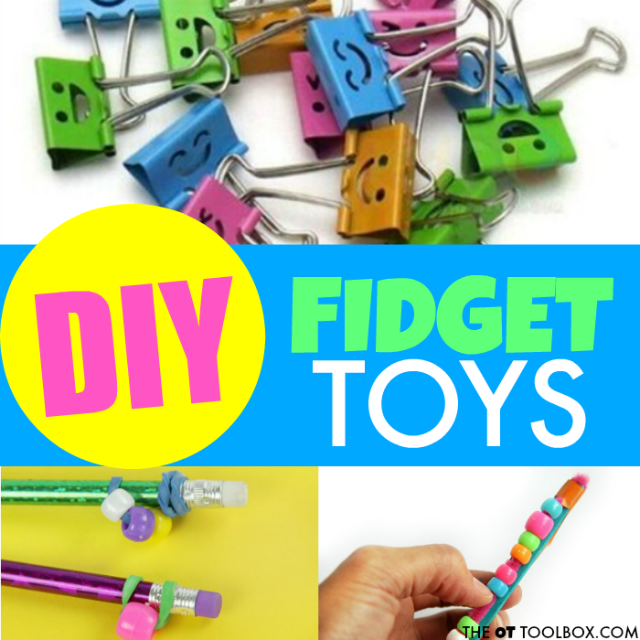
These DIY fidget toys are homemade fidgets that kids can make. Use these fidget items to help kids pay attention and focus in the classroom or home. Add these ideas to your occupational therapy toys that support kids through play while targeting self-regulation skills.
DIY Fidget Toys
Fidget toys are in the hands of many school-aged kids. Students without sensory or attention needs are playing with fidget toys on the playground, on the school bus, and in the classroom. You can find spinner fidgets, and so many other fidget toys in many stores and online, but what about the DIY version?
The thing about some store-bought fidget tools is that they are noisy and call attention to the user. Fidget toys have become more popular in recent years, allowing those that truly need them for meeting sensory and motor needs to be more mainstream.
In fact, using a few of these games with paper clips are good ways to fidget with the fingers using everyday materials.
However, that can be another issue when a student has a fidget tool in the classroom. It can draw attention to the student because other students see the itm as a toy rather than a tool to support learning.
Coming up with quiet fidget toys that help the child meet their sensory and movement needs without creating more noise or attention in the classroom can be tricky. Here are more ideas for quiet fidget toys for the classroom.
So what is the obsession with these fidget toys?
The fidgets are intended to provide kids with a means to occupy their hands so that they can focus during tasks that require attention. There are many children who need fidget tools in order to complete work. Most of us know the feeling: the urge to doodle when talking on the phone or the tendency to tap a foot during a lengthy work meeting.
Fidgeting is a tool that helps us to actually pay attention and focus on the task at hand in many situations. Fidgeting during homework or in the classroom is a common behavior.
You have probably seen kids (and maybe your own kids) spinning these spinner fidget toys.
The fidgets that are in every school and classroom these days are beneficial to some students. For others, they are a cool new toy. For those that require a fidget tool to focus or attend, or have sensory needs requiring the hands and fingers to move, other fidget toys may work just as well.
Fidgeting during work stimulates the brain, allowing a child to complete school work or homework.
Fidgeting is mindless play or touching fingers, pencils, hands…anything that allows a person to focus on the task at hand. Kids that are fidgeting are seeking calm, and focus so that their brain can complete a task.
The problem is when the brain’s urge to fidget distracts a child from school tasks. They might be so wiggly and moving that they just can not sit still and focus in a functional manner. Fidgeting can be managed with less distracting techniques which can allow the child to accomplish the homework, and move on to other things.
Make a paper fidget toy that doubles as a fine motor workout! These paper flextangles are too cool!
How to Make Fidget Toys
Getting kids involved with making homemade fidget toys is part of the fun. There are fine motor benfits involved in this process, too.
First, select the type of DIY fidget you would like to use to meet specific needs.
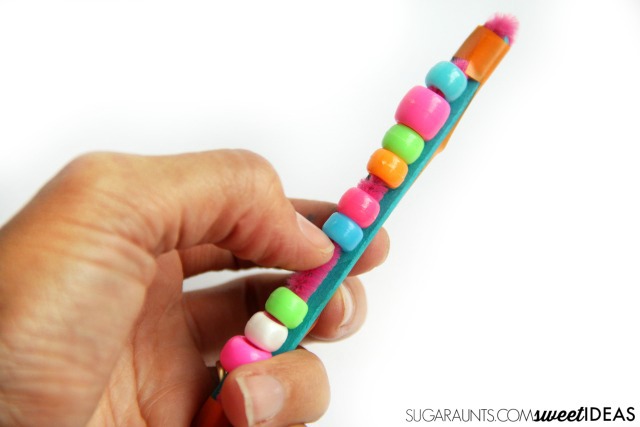
Next, select materials. You may need pipe cleaners, beads, balloons, or nuts and bots.
Prepare a work space. Set out the materails on a table or desk.
Students can select the materials they would like to use.
Create a fidget tool using the materials.
The nice thing about fidgets is that with the growth of YouTube as a resource, there are many videos on how to make fidget toys out there. Use one of those available videos as your inspiration, or use the materials you have on hand.
If one thing is for certain, it is possible to make a DIY fidget toy using anything!
Try these suggestions for homework and classroom fidget tools.
What are your favorite DIY fidget toys? Do you have any favorite tools that work for your child, student, or client?
fidget tool or a fidget toy?
Here is your disclaimer on the wording of this blog post…
The term fidget toy is very well known these days, with the popularity of spinner fidgets. However, there is a distinction between a fidget toy and a fidget tool. When there is a therapeutic need for a product, it is a tool. A therapy tool is one that helps meet goals, results in independence through intervention. Something that looks like a toy can be a tool for the child with sensory needs, fine motor challenges, attention difficulties, or any other problem areas.
Fidget tools are those that help kids cope, meet sensory needs, and get the input they need so they can focus, pay attention, and move. In this blog post, I am using these terms interchangeably, for best search results. In other words, people complete a Google search for fidget toy, not a fidget tool, and I want this information to be found on Google so that the kids who need a fidget tool are well-served!
Need to add DIY fidget toys to a sensory diet? Wondering how to integrate a sensory diet into everyday tasks? A sensory lifestyle may be more of what you are looking for! DIY fidget toys fit right into a sensory lifestyle with ease and flexibility.
Read all about how to create a sensory lifestyle here:
The Sensory Lifestyle Handbook walks you through sensory processing information, each step of creating a meaningful and motivating sensory diet, that is guided by the individual’s personal interests and preferences.
The Sensory Lifestyle Handbook is not just about creating a sensory diet to meet sensory processing needs. This handbook is your key to creating an active and thriving lifestyle based on a deep understanding of sensory processing.
Colleen Beck, OTR/L has been an occupational therapist since 2000, working in school-based, hand therapy, outpatient peds, EI, and SNF. Colleen created The OT Toolbox to inspire therapists, teachers, and parents with easy and fun tools to help children thrive. Read her story about going from an OT making $3/hour (after paying for kids’ childcare) to a full-time OT resource creator for millions of readers. Want to collaborate? Send an email to contact@theottoolbox.com.
Teaching kids to write uppercase cursive can be quite tricky. Upper case cursive letters are part of handwriting and everyday written expression, but when it comes learning the motor plan for forming uppercase letters in cursive writing, establishing fluent writing is needed for accuracy. Below you’ll find tricks for teaching uppercase cursive letters and uppercase cursive letter formation.
Upper Case Cursive
In this blog post, we refer to the terms “upper case cursive letters” and “uppercase cursive”. The semantics of describing capital letters in cursive is simply for understanding the material, and meeting the needs of all individuals seeking resources on teaching upper case letters in cursive formation.
Let’s get started with the uppercase cursive writing resources and tips.
Some uppercase cursive letters are not used as often as their lowercase counterpart.
When kids learn to write their name in cursive and become proficient at their cursive signature the uppercase letter is just part of the writing motor plan becomes natural and a personal part of a personal style.
There are many uppercase cursive letters that can easily be forgotten simply because they are not used very often!
This post is part of our 31 day series on teaching cursive. You’ll want to check out the How to Teach Cursive Writing page where you can find all of the posts in this series.
For more ways to address the underlying skills needed for handwriting, check out the handwriting drop-down tab at the top of this site.
Uppercase Cursive LetterS
Some students develop a natural speed and personal writing style and will prefer to write in cursive. Other students will write only their signature in cursive. Still other students develop a natural speed and personal style and may mix upper and lower case cursive letters.
If you look at the average adult handwriting you may notice that there is a mixture of printed and cursive letters. The goal being functional written work, this is fine for adults and individuals who are writing for speed such as high school students.
However, consistent and accurate formation is needed for formal written work in cursive.
Like the cursive letter families for lowercase, the uppercase letters are divided up into groups of families based on pencil strokes.
Teaching kids to write cursive upper case letters is broken down by formation and pencil strokes. We’ve listed the letters out in groups below to support letter formation and motor planning skills.
The descriptions are designed to promote the easiest formation style of cursive letters, eliminating extra lines such as the beginning loop of uppercase cursive letter C.
The letters that are exact replicas of their printed counterparts are designed to ease transition for letters that are not commonly used in written work. This is a tactic of the Handwriting Without Tears letter order strategy.
Uppercase Cursive Letters D, F, T
Cursive D, F, and T are Uppercase Cursive letters with a downward start.
These letters include D, F, and T. These letters all start with a downward stroke of the pencil. Let’s break these letters down by formation and pencil strokes.
Uppercase cursive D begins down followed by a loop to the left upwards with a curved back to the baseline and a big round curve to finish off the top.
Uppercase cursive F starts in the middle of the letter with a downward stroke followed by a curve to the left and a crossline. Then on top is a crossline topper.
Uppercase cursive T starts with a middle down work stroke in the middle of the letter followed by a curve to the left and no crossline. Then on top is a crossline topper.
Uppercase Cursive A, C, E, O, and Q
Upper case cursive A, C, E, O, and Q are considered “Right curve start uppercase letters” because the pencil stroke starts in the right upper corner. This group includes uppercase letters that start on the right side and curve left. Consider the formation of these letters much like the formation of a printed c.
Uppercase cursive A starts at the right top line and curves to the left with a big C motion to the baseline. The pencil then curves up to close a letter causes at the top line. Retrace back down in loops a way to connect.
Uppercase cursive C starts with a right curve start at the top uppercase C
Uppercase cursive E starts with a right curve start at the top line. It includes two small curves pausing at the middle line before curbing again to the left to the baseline.
Uppercase cursive O is a right curve start beginning at the top line and curving in a big city motion to the baseline. It continues around to close the lot start has a small loop at the top.
Uppercase cursive Q is a right curve start letter beginning at the top line and curving in a big motion to the baseline. Q continues around to close the top of the letter and has a small loop at the end. It then has a kickstand line to complete the letter.
Uppercase Cursive B, P, R, L
These letters are considered “Rocker start uppercase letters“. Uppercase B, P, R, and L begin with a small curving motion to begin the letter at the top line.
Uppercase cursive B starts with a rocker start followed by a straight line down to the baseline. It retraces up to the top line and curve around right to the middle line. Pause and curve around right to the baseline.
Upper case cursive P is a rocker start cursive letter. The letter starts with a rocker line to the top. Straight line down to the baseline. Retrace up to the top line. Curve around with a small curve to the middle line.
Upper case cursive R is a rocker start cursive letter. The letter starts with a rocker line to the top. Straight line down to the baseline. Retrace up to the top line. Curve around with a small curve to the middle line. Kick out to the baseline with a slant.
Upper case cursive L is a rocker start letter that continues with a small loop down to the baseline. The line continues with a small group and diagonal line to connect as it swings away to the baseline.
Upper Case Cursive I and J
Next up in teaching cursive capital letters are the “Left curve start letters“. These letters switch pencil stroke directions and have a starting point on the opposite side of the other letters previously covered. There are just two letters start with a left. These include uppercase letter I and J. Both letters start with the pencil moving in a left line direction.
Uppercase letter I is a left curve start letter. The letter starts at the baseline and swings in a loop to the left and turns at the top line. It continues the tall loop back to the baseline, but continues the motion until reaching the middle line. The pencil pauses and pulls in toward the loop at the midline.
Uppercase letter J is a left curve start letter. The letter starts at the baseline and curves left and then up to the top line. It swings straight back down to the baseline and pass the baseline with a table. The line then swings left and then curves up and away to connect.
Upper Case Cursive H, K, M, N, X, W
Next up are the “Top loop start letters“. Several letter start with a top-starting loop that continues down. These letters include capital H, K, M, N, X, and W.
Uppercase cursive H begins with a top loop that continues down to the baseline. The pencil picks up and starts again at the top line. The pencil stroke goes straight down to the baseline and then swings away to touch the initial pencil line. It swings in a loop and then connects over to the second line.
Upper case cursive H is one of a few letters with two pencil strokes where the pencil picks up to continue a letter. Most cursive letters and all other cursive letters use only a single pencil stroke.
Uppercase cursive K is a loop start letter. It begins at the top with a link to the right on the lease straight line down to the baseline. This is much like the uppercase letter H. However with the K, the second line starts at the top line and continues in to cross the first line with a small loop and then continues out again to the baseline.
Upper case cursive M is a loop start letter that begins at the top line with a loop. The line continue straight down to the baseline and stops. It retraces up over the climb to the top with a bump and continues down to the baseline again. The pencil strip retraces back up that one to the top line and bumps over to the baseline
Upper case cursive N is a loop start letter that begins at the top line with a loop. The line continue straight down to the baseline and pauses. It re-traces back up and curbs away with a bump at the top line. The line continue straight down to the baseline and stops.
Uppercase cursive X is a loop start letter that begins with the loop at the top line followed by a diagonal line down to the baseline. The pencil is picked up and continued at the top line and has a diagonal in the opposite direction to cross at the middle of the X.
Upper case cursive W is a loop start letter that begins at the top line with a loop. The line continues down with a bottom bump inverted bump at the baseline that continues up to the middle line and beyond to the top line. The line is retraced back down with an inverted pump at the baseline. The line continues back up to the top line.
Upper case cursive U, V, W, Y, Z
The last remaining uppercase cursive letters are ones that are very similar information to their lowercase counterparts. They are quite similar in most cases to their printed letter.
These letters include U, V, W, Y, Z
Uppercase cursive U is an exact replica of its printed counterpart.
Uppercase cursive letter V is an exact count a part of its printed counterpart.
Uppercase cursive W is an exact replica of its printed counterpart.
Uppercase cursive Y is an exact replica of it’s lowercase cursive counterpart.
Uppercase cursive Z is an exact replica of the lowercase Z form.
Uppercase Cursive letter practice
Now that you have the specific letter formation directions down and the order to teach uppercase cursive letters, the next step is practice!
Creating a motor plan for automatically creating letters supports handwriting speed, autonomy, and legibility. Practice makes perfect, after all!
But how do you help kids (or adults) create that motor plan for uppercase letters?
Adding sensory motor handwriting strategies! Use the ideas below as a practice component for practicing uppercase cursive writing.
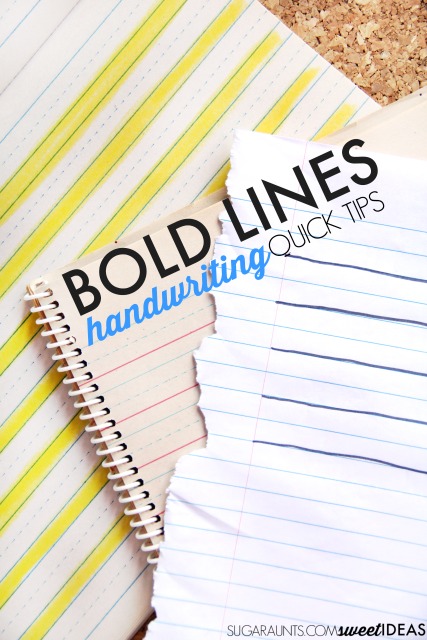
Bold Lines Handwriting Trick– Work on forming uppercase cursive letters on the lines using this bold lines trick.
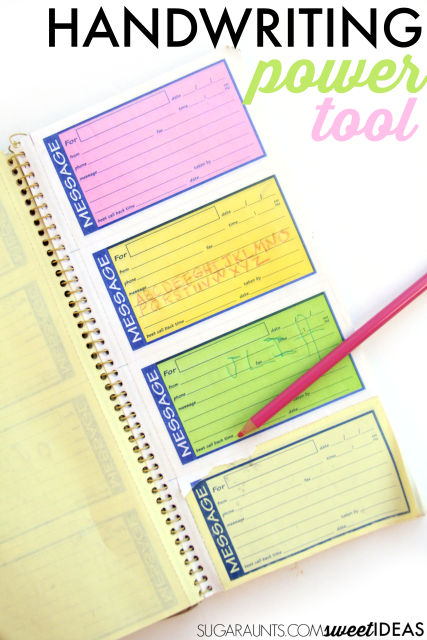
DIY Desk Letter Strip– Make an uppercase cursive letter strip to using forming letters correctly and grouping uppercase cursive letters into families based on the way the pencil strokes go.
Need more uppercase cursive tips? Try the Handwriting Book:
The Handwriting Book is a comprehensive resource created by experienced pediatric OTs and PTs.
The Handwriting Book covers everything you need to know about handwriting, guided by development and focused on function. This digital resource is is the ultimate resource for tips, strategies, suggestions, and information to support handwriting development in kids.
The Handwriting Book breaks down the functional skill of handwriting into developmental areas. These include developmental progression of pre-writing strokes, fine motor skills, gross motor development, sensory considerations, and visual perceptual skills. Each section includes strategies and tips to improve these underlying areas.
Strategies to address letter and number formation and reversals
Ideas for combining handwriting and play
Activities to practice handwriting skills at home
Tips and strategies for the reluctant writer
Tips to improve pencil grip
Tips for sizing, spacing, and alignment with overall improved legibility
There are many reasons why writing uppercase cursive letters are so difficult for many students. While cursive is a fluent progression from printed handwriting and an easier form for many students, there can be some issues that impact legibility and fluency with forming the uppercase version of these cursive letters.
Cursive letters are not used as often as the lowercase counterparts. Because of this, it can be challenging for kids to consistently remember how to form uppercase letters in cursive.
Practicing letters to create the muscle memory is the way to get there. Practice those upper case cursive letters and they will become fluent and legible!
Colleen Beck, OTR/L has been an occupational therapist since 2000, working in school-based, hand therapy, outpatient peds, EI, and SNF. Colleen created The OT Toolbox to inspire therapists, teachers, and parents with easy and fun tools to help children thrive. Read her story about going from an OT making $3/hour (after paying for kids’ childcare) to a full-time OT resource creator for millions of readers. Want to collaborate? Send an email to contact@theottoolbox.com.
From independent play to parallel play to organized games, play exists along a continuum that development can exist at various ages.
The Power of Play
Play is the essence of childhood and it’s the means for children to develop and grow! The incredible power of play is a tool and a means to children development.
It’s through play that kids learn. Kids delight in games, toys, and creative play while developing skills like fine and gross motor development. They learn to self-regulate. They learn to communicate, manage their emotions, and gain valuable sensory input. Play is powerful for kids!
Let’s go over the importance of children’s play…
The Power of Play
Not long ago, I was asked by Radio Flyer to represent occupational therapy as an Expert Play Panelist. Such fun! As occupational therapists, we KNOW the power of play. We KNOW that kids need to move, climb, run, and experience all of their senses in order to grow and develop. Play is the means. Play is very simply, what kids do. It’s their job to play, and play is the way they develop skills they need throughout their life.
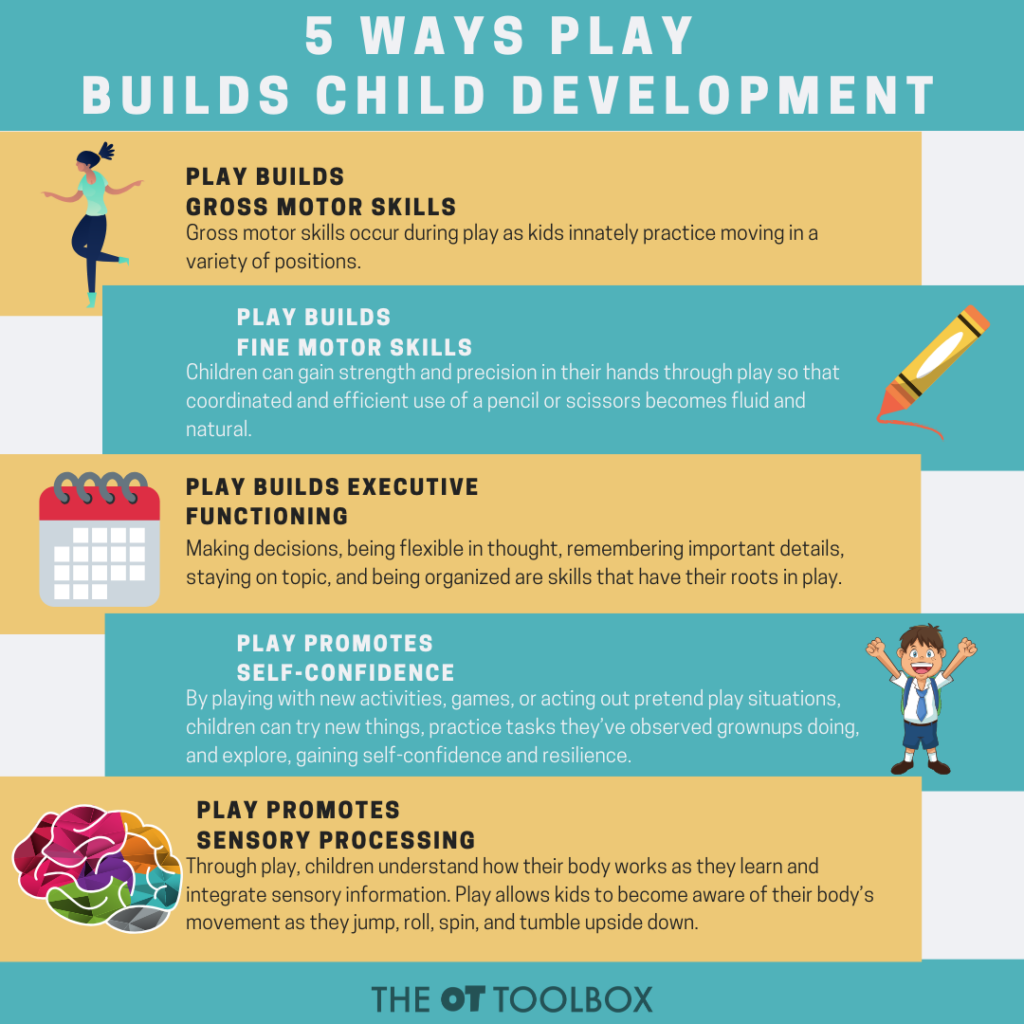
In that blog post, I discussed the power of play on fine motor skills, gross motor skills, self-confidence, sensory processing, and executive functioning skills. All of these areas (and more!) areas by play.
Play is a learning tool. Play-based learning is one way that children can learn valuable lessons through play, however it’s more than that. It’s through play that children learn about the world around them.
Kids learn how things work, move, and interact through play. Movement-based learning offers kids an opportunity to learn through gross and fine motor activities, but while they are moving, they are learning how their body works, too. They develop motor skills at the same time.
Play Development
Here’s the thing. Children develop play skills as they grow. But play also develops skills! It’s a win-win situation.
Play Develops Gross Motor Skills
Gross motor skills occur during play as kids innately practice moving in a variety of positions. Gross motor coordination, balance development, endurance, motor planning, proximal stability, and visual motor skills are all developed through play.
Whole body movements begin to develop from birth, through tummy time and play supports that. But as a baby begins to explore the world around them, they crawl, stand, and walk and all of this is rooted in play. These early gross motor milestones support development of later skills, too.
Play Develops Fine Motor Skills
Play develops fine motor skills through tool use, manipulating toys and pretend materials, and engaging in play activities. Take a look at this fine motor milestones list and see how many of the developmental milestones are rooted in play and exploration of the world using the hands and fingers.
Children can gain strength and precision in their hands through play so that coordinated and efficient use of a pencil or scissors becomes fluid and natural.
Play develops core strength and stability, refined precision skills, and endurance in the hands for managing clothing fasteners and other everyday items.
Play Develops Executive Functioning
By playing with new activities, games, or acting out pretend play situations, children can try new things, practice tasks they’ve observed grownups doing, and explore, gaining self-confidence and resilience.
Play is a way to practice jobs, too. Think about the child that plays house, construction worker, race car driver, or shopping. All of these occupations require executive functioning skills to plan the activity, carry out tasks, and complete the play sequence. This pretend play is a huge role in development of skills.
Play Develops Sensory Processing
Through play, children understand how their body works as they learn and integrate sensory information.
Dr. A. Jean Ayres, an occupational therapist, psychologist, and neuroscientist, developed her Ayres sensory integration theory and practice in the mid 1970s. She recognized that a child’s sensory system can greatly impact how they perceive and interact with the world around them, through play.
Play allows kids to become aware of their body awareness and body movement as they jump, roll, spin, and tumble upside down.
Play that offers a variety of movements and heavy work opportunities offer proprioceptive and vestibular input that impacts self-regulation. These sensory systems, through play are related to interoception, or internal awareness of the body’s functions.
By playing with new activities, games, or acting out pretend play situations, children can try new things, practice tasks they’ve observed grownups doing, and explore, gaining self-confidence and resilience.
Self-confidence allows us to try new things.
And trying new things (and trying the hard things!) is important for kids.
Self-confidence is an aspect of emotional intelligence. It’s part of social emotional skills that allow us to participate in tasks, interact with others, understand and recognize emotions, and essentially function!
All of these areas: motor skills, cognitive skills, social emotional skills, sensory processing skills…they are all founded in childhood, established at a young age through the very fun occupation of PLAY! What’s cool is we are lead as humans to do meaningful and motivating tasks, and play is just that! It makes us WANT to participate so we can learn and develop!
The Role of Play in Child Development
Ok, you might be thinking, “Right. Kids play. That’s nothing new.”
And you’re right. Play is so natural. Some of your earliest and best memories may be of play situations in your own childhood. Play happens instinctively. But the thing is that play is suffering in kids. If you’re in an educational setting or an occupational therapist, you might be nodding your head right now. Kids are different than they were in the past. And play is at the root, once again.
But Play has Changed.
Times change. We know this. Technology advances, knowledge progresses, and the world transforms. However, play being the root of child development, learning, and pediatric skill acquisition doesn’t change.
Here are a few ways that play has changed and how that may look in kids today:
Less Time for Kids in Nature
Kids spend less time outdoors- Do you remember playing outdoors for the entire day and coming home when the streetlights came on? Kids are spending more time indoors. After school hours aren’t spent outdoors or in free-play. They are spent indoors, at child care centers, or after-school programs. Sometimes, it’s the fact that kids need to complete their homework so they can dart off to sports practices or appointments. Other times, it’s not safe for children to play outside in the yard on their own. Kids miss out on the free running space, climbing, running, rolling, and motor development.
Kids are spending more time in the car, running back and forth to organized activities- There are wonderful benefits to spending time on a team or learning an instrument.
However, for children now, they are a member of several sports teams, participating in various activities, clubs, and other organized activities. Sports teams sometimes have more than one practice or game per week. Kids are being run to and from sports practices, instrument lessons, clubs, appointments, and more. All of that time spent in the car limits free and creative play.
This isn’t’ to say that sports and clubs aren’t good for kids! It’s just a point of awareness that time spent in these organized tasks limits free play, outdoor experiences, and growth in learning through the senses and motor experiences.
There are so many benefits to nature play!
Less recess time- Are you seeing this too? Kids in my district are limited in outdoor recess time by the weather. So, when it’s cold or raining, they don’t get to go outdoors to play. And that lack of monkey bar time at recess can be an issue with the afternoon learning. Students in the older grades don’t even get recess in our district.
From grades 4-6, there is a limited time for recess. In fact, recess and lunch time is shared. So if children need extra time to eat, they miss out on recess. Not cool for our kids that are “big kids”!
Kids need that outdoor play.
Are you seeing less recess time at your schools?
Kids are spending more time on technology- The screens are taking over! So often, a child has a phone or tablet screen in front of them rather than spending time playing games, playing with friends, they are playing digital games or watching videos. They are limiting themselves in motor and sensory experiences. Movement and creative play are impacted.
Don’t take this the wrong way: Technology is awesome! It’s a way of life. We are lucky to be alive during this time of knowledge and awareness granted by technological advancements. Kids can learn from devices…some of them know more about technology than their adults. The point is that being aware of time spent in a head-down position holding that phone limits interaction with the world around them. Awareness of this time is key.
There are more changes that we’ve been seeing in kids today. This is just a short list but one to be aware of as practitioners, parents, and teachers. As the adults in the room, we need to make the change that kids need.
We need to be vigilant in making play available to kids…the power of play is essential to child development!
We need to guide children to play.
Because, the organized sports and scheduled activities are fun. It’s fun to play on a team with friends. It’s easy to fall into the day-to-day-life that daily schedules require. It’s fun and exciting to watch YouTube videos and play games with friends online.
It’s our job as parents, teachers, therapists…adults to see the impact these life changes are having on our kids.
Our kids deserve it!
Learning Through Play Quotes
In this blog post, we covered more than just the power of play. You’ll also fine learning through play quotes and memes about play. These quotes about play are just one way to advocate on the power of play.
I’m sharing great social media graphics about play that you can share online. These are importance of sensory play quotes, quotes about play, and play development memes. (Just link to this page as your source!) I’m also talking about the incredible benefits of play in kids.
“There’s no such thing as bad weather, only bad clothes.”
“A fresh start is not a place, it’s a mindset.”
We can take a fresh start on offering play opportunities for our kids. Let’s expose them to the power of play!
“I wouldn’t change you for the world. But I would change the world for you.”
We as parents, educators, and therapy professionals have the opportunity to take a stand on making the power of play more powerful! Let’s change current practices of limited recess time, lack of outside play opportunities, and busyness! Let’s change the world and its expectations and perspectives so we can promote the power of play as a means for supporting child development.
“In every job that must be done, there is an element of fun.”
This quote from the Mary Poppins book and movies equates with the through of play being the work of the child, but it’s through play that development happens and is practiced. Not only can we play to support development, we can make the process therapeutic and fun! It’s all connected!
“Yes, we play in therapy. No, we are not just playing. We are becoming independent, growing stronger, building skills, learning, gaining confidence, obtaining coping strategies, transforming lives…”
This play quote by Colleen Beck, OTR/L at The OT Toolbox shares why play is so powerful and benefits development in children. Play offers tools that a child will use throughout their lives.
“Almost all creativity involves purposeful play.”
Creativity is play and play is creativity. Both are interconnected but also a way to support play development.
“Childhood is a journey. Not a race.”
That childhood journey involves much development; cognitively, physically, emotionally…This is a process and it’s through play that the child has the opportunity to learn and practice essential skills.
Occupational therapy goals can be accomplished with various ball pit activities, and you’ll often see this therapy tool in OT clinics.
“I play with shaving cream, toys, and a ball pit at work. I am an occupational therapist.”
Play is the work of the child, and for the pediatric occupational therapist, play is a tool to support development.
“It seems that play is one of the MOST valuable tools for learning.”
This is one of my favorites of the learning through play quotes. Learning happens through all aspects of play.
“Children have a superpower. It’s this morphing ability to take on amazing powers. If we tell them they are capable, they become capable. If we tell them they are kind, they become kind. Let’s power our kids with the tools they need!”
This play based learning quote is so powerful. We can support the development of kids through play and we can guide them to develop the skills they need!
Free Handout on The Power of Play
Being that we as therapy professionals, teachers, or parents have this knowledge on play and child development, we can be advocates for our kids. Not only that, but by promoting play as a tool for child development, we serve other children as well. It’s an enormous ripple effect that has the power to impact a generation and generations following.
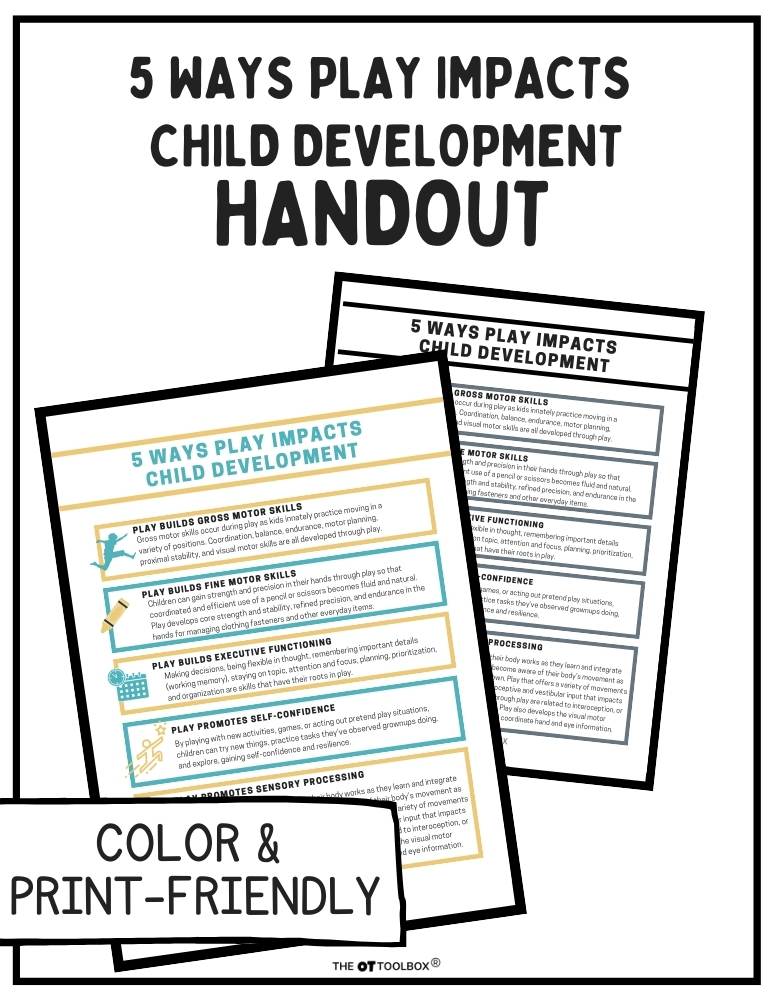
That’s why I wanted to put the information in this blog post into handout form.
Let’s share what we know about the power of play to teach others how play supports essential child development skills.
Print off this handout in either black and white, printer-friendly version or the color copy. They can be used as educational handouts to teach others on the power play has on child development skills.
To get your copy, just enter your email into the form below.
Want to add this resource to your therapy toolbox so you can help kids thrive? Enter your email into the form below to access this printable tool.
This resource is just one of the many tools available in The OT Toolbox Member’s Club. Each month, members get instant access to downloadable activities, handouts, worksheets, and printable tools to support development. Members can log into their dashboard and access all of our free downloads in one place. Plus, you’ll find exclusive materials and premium level materials.
Level 1 members gain instant access to all of the downloads available on the site, without enter your email each time PLUS exclusive new resources each month.
Level 2 members get access to all of our downloads, exclusive new resources each month, PLUS additional, premium content each month: therapy kits, screening tools, games, therapy packets, and much more. AND, level 2 members get ad-free content across the entire OT Toolbox website.
Colleen Beck, OTR/L has been an occupational therapist since 2000, working in school-based, hand therapy, outpatient peds, EI, and SNF. Colleen created The OT Toolbox to inspire therapists, teachers, and parents with easy and fun tools to help children thrive. Read her story about going from an OT making $3/hour (after paying for kids’ childcare) to a full-time OT resource creator for millions of readers. Want to collaborate? Send an email to contact@theottoolbox.com.
Here we are covering how to teach cursive b, cursive e, cursive f, cursive h, cursive k, and cursive l. These loop letters are all connected because of their similar pencil movements that make the letter. You can add these tips and strategies to teach cursive letter writing. Today, you’ll find creative activities and tips for teaching formation of cursive loop letters. Cursive loop letters are those ones that start with a loop line up. Lowercase cursive letters b, e, f, h, k, and l are loop letters.
Writing cursive letters in order with a specific strategy is very helpful in teaching proper letter formation in a way that is logical.
Loop letters are a set of cursive letters that all have a loop in the initial formation of the letter. These loop letters include:
cursive b
cursive e
cursive f
cursive h
cursive k
After the initial loop, or upswing of the pencil, the pencil moves back down toward the baseline and moves into another pattern to form the rest of the letter.
This cursive letter family is a group of cursive letters that are formed with similar pencil strokes.
Breaking letters down into cursive families can help students learn cursive letter formation. Below, you will find information on how to teach cursive letter formation of “tree letters”.
This post is part of our 31 day series on teaching cursive. You’ll want to check out the How to Teach Cursive Writing page where you can find all of the posts in this series.
For more ways to address the underlying skills needed for handwriting, check out the handwriting drop-down tab at the top of this site.
Motor Plan for Formation of “Loop” Letters
When instructing students in forming these loopy cursive letters, start by outlining a cursive letter lesson plan of activities. You can read more about cursive letter lesson plans here. Students can start out with learning the cursive letters that make up the Loop Family.
Start by practicing a series of upward curves across a line of paper. This can look like a string of cursive letter loopy l‘s joined together. When practicing the curve of the cursive letter l motions in a strand across a page, set the child’s awareness on height and the start/stop point of each curve.
Most important is the width of the loop. Instruct students to draw the lines with proper width of the loop. A wide loop will make the letter inefficient and difficult to connect to other letters.
When beginning with cursive instruction, students should concentrate on an upward curve from the base line to the middle line or top line of the paper.
This loop occurs in the Loop Family letters: b, e, f, h, k, and l.
Fine Motor Activity for Practicing Cursive Loop Letters
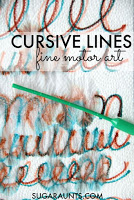
Try this activity to practice the loops of the loopy letters. Use washable markers to draw loops on a paper towel. (Adding pencil lines for writing spaces before starting can be a big help for addressing loop and letter size!)
To the loops, add drops of water and watch the colors expand.
Be sure to talk to the child about loop height and width as these aspects to cursive writing will carry the most weight when it comes to legibility.
For a colorful work of art, trace over the marker loops with additional colored markers. Read more about this cursive handwriting activity and others here on The OT Toolbox.
Activities for Teaching Cursive Loop Letters
Use short phrases to instruct cursive formation. Phrases like “Loop up to the top line” or “Loop up to the middle line” can help.
Try these sensory activities to teach cursive handwriting loop letters: Affiliate links are included below.
Write with glitter or colored glue on lined paper. Allow the glue to dry. Students can feel the raised lines of the loops.
Draw with wet chalk on a chalkboard or sidewalk. Be sure to add guide lines first to address loop height.
Create different sized loops using wikki stix. (affiliate link) Wikki Stix activities are a great tool for getting the hands in on the fine motor action with a tactile experience that promotes motor planning and kinesthetic learning.
How to Teach Cursive b
Use the following verbal prompts to teach lowercase cursive letter b:
Start at the baseline.
Loop up to the top line and back to the baseline.
Swing up to the middle line.
Tow rope away to connect.
Lowercase cursive letter b is a tow rope letter. These are letters that connect at the middle line. They change the beginning of the letter they connect to.
It can be helpful to practice letters that are commonly connected to letter b such as ba, be, bi, bl, bo, br, bu, and by.
How to Teach Cursive e
Use the following verbal prompts to teach lowercase cursive e:
Start at the baseline.
Loop up to the middle line and back to the baseline.
Loop away to connect.
Instruct students to stop at the middle line.
How to Teach Cursive f
Use the following verbal prompts to teach lowercase cursive letter f:
Start at the baseline.
Loop up to the top line and back to the baseline.
Continue straight down past the baseline.
Curve right and up to the baseline, connecting at the strait part of the tail.
Swing away to connect.
Note about cursive letter f– This letter requires the pencil lines to close the tail into a “bunny ear” type of loop. Think about drawing a tall bunny ear. The lines create a long, loop type of shape that does not cross like a the loop on the top part of the f.
Rather, the curved motion has a potential for an opening. It’s important for students to close the tail of the f. Likewise, it’s important to keep the closure point at the baseline. If the closure point creeps up above the baseline or has an opening, the letter can potentially look like a cursive b.
Work on loop formation and motor control for closure points in multi-sensory activities such as with sandpaper or in writing trays. b, e, f, h, k, and l.
When it comes to specific letters, an understanding of tall, short, and tail letters is needed for carryover of accuracy related to line use and size awareness.
Taking the size awareness piece into consideration is an overall understanding of size both on paper and outside the body in the world around us. This tall and short worksheet has a fine motor and visual motor component that can be incorporated into whole-body movement activities to teach these concepts that carryover into handwriting.
How to Teach Cursive h
Use the following verbal prompts to teach lowercase cursive letter h:
Start at the baseline.
Loop up to the top line and back to the baseline.
Pause.
Re-trace back up to bump to the middle line.
Continue over the bump to the baseline.
Swing away to connect.
How to Teach Lowercase Cursive k
Use the following verbal prompts to teach lowercase cursive letter k:
Start at the baseline.
Loop up to the top line and back to the baseline.
Pause.
Re-trace back up to bump to the middle line.
Continue over the bump and pull back into the loop.
Add a kickstand to the baseline.
Swing away to connect.
Use these sensory activities to practice cursive letter k:
Note about cursive letter k– This letter requires the pencil lines to close the bump at the loop. It’s important for students to pull the pencil lines in and to close the bump.
If the closure point doesn’t close at the loop, the letter can potentially look like a cursive h.
Work on loop formation and motor control for closure points in multi-sensory activities such as with sandpaper or in writing trays.
How to Teach Cursive l
Use the following verbal prompts to teach lowercase cursive letter l:
Start at the baseline.
Loop up to the top line and back to the baseline.
Loop away to connect.
A few tips for teaching cursive loop letters
It would be very difficult to teach cursive handwriting only by verbal instruction. Carryover and accuracy would suffer!
A visual component and slow teaching strategies are very important. Try these tips to help with learning cursive loop letters.
Amazon Affiliate links are included in the links below.
Try these cursive writing tools to help with forming letters: Affiliate links are included.
Cursive Writing Wizard is a free app on Amazon that allows students to trace letters and words. The app has stickers and animations as well as handwriting games that promote learning of cursive letters and connecting lines.
Cursive Handwriting Workbook is a workbook for kids in elementary grades and focuses on formation of cursive letters (upper and lower case) as well as words.
Teachers can use a laser pointer in the classroom to help students see parts of cursive letters as they instruct each part of the formation. This is helpful when teaching letters in cursive letter families.
The Handwriting Book is a comprehensive resource created by experienced pediatric OTs and PTs.
The Handwriting Book covers everything you need to know about handwriting, guided by development and focused on function. This digital resource is is the ultimate resource for tips, strategies, suggestions, and information to support handwriting development in kids.
The Handwriting Book breaks down the functional skill of handwriting into developmental areas. These include developmental progression of pre-writing strokes, fine motor skills, gross motor development, sensory considerations, and visual perceptual skills. Each section includes strategies and tips to improve these underlying areas.
Strategies to address letter and number formation and reversals
Ideas for combining handwriting and play
Activities to practice handwriting skills at home
Tips and strategies for the reluctant writer
Tips to improve pencil grip
Tips for sizing, spacing, and alignment with overall improved legibility
Colleen Beck, OTR/L has been an occupational therapist since 2000, working in school-based, hand therapy, outpatient peds, EI, and SNF. Colleen created The OT Toolbox to inspire therapists, teachers, and parents with easy and fun tools to help children thrive. Read her story about going from an OT making $3/hour (after paying for kids’ childcare) to a full-time OT resource creator for millions of readers. Want to collaborate? Send an email to contact@theottoolbox.com.
Writing with both hands is a common concern for parents, teachers, and therapists working with students on handwriting skills. Using both hands to write might look like switching hands while writing or even coloring as a result of hand weakness. But there could also be other considerations at play including mixed hand dominance or confusion on which hand to pick up the pencil and which hand holds the paper.
You’ll definitely want to check out a related resource on more information on hand dominance and establishment of a preferred hand in functional activities.
Writing with both hands- what’s going on
Have you seen a child on your therapy caseload that writes with both hands? Writing with both hands can be a problem when it comes to handwriting legibility and efficiency.
Have you ever wondered is my child a lefty or a righty? Or perhaps writing with both hands piqued your curiosity about whether or not your child is ambidextrous.
Or been asked if they are a lefty or righty and unable to answer?
Have you noticed that your child seems to use both hands equally when writing? If so, your child may be experiencing mixed hand dominance patterns or cross-dominance, and this is why you are not sure if they are a lefty or a righty. Writing with both hands can have implications that affect handwriting.
Read on for information on using both hands to write writing and what you need to know about mixed-handedness.
Where to begin when kids write with Both Hands
First, it’s important to understand what is happening when a student uses both hands to write.
Hand dominance
Let’s discuss mixed dominance to begin. Here is more information about hand dominance and activities to promote laterality.
We get the question about a name for writing with both hands. One way to describe this is the term mixed dominance.
What is Mixed Dominance?
Mixed dominance refers to when a child does not demonstrate a strong preference for either the left side or the right side of the body for completion of activities, or clearly utilizes both hands for specific sets of activities. For example, a kiddo might throw with his left hand, but write with his right hand.
It should also be noted that children with mixed dominance often utilize both sides of the body equally, but poorly. When they fatigue, this leads to confusion with if they are left-side dominant or right-side dominant.
When Does hand Dominance Develop?
Dominance of one side of the body or the other is not expected until 5 years of age. Before the age of 5 years old, use of both hands is expected to a moderate degree. However, most children are showing a strong preference for one hand or the other by 3.5-4 years of age.
Determining Mixed Dominance
Dominance is typically determined through observation of the eyes, hands and feet and which one the child uses for task completion. For example, a child who is demonstrating mixed dominance may be right eye dominant, and left hand/foot dominant or left eye dominant, right hand dominant and left foot dominant, or any combination of these characteristics.
Therapists may utilize the Jordan Left/Right Reversal Questionnaire or clinical observations to help them determine mixed dominance. In a vision screen, the therapist can have the child pretend to be a pirate, and see what eye they close when looking through a tube/rolled paper.
The eye that the child closes is the non-dominant or “weak” eye and the dominant or “strong” eye is the open one. If the “strong” eye does not match the hand preference the child has been showing, this is mixed dominance in action.
Be sure to watch this space, because tomorrow we’ll cover more about writing with both hands, ambidexterity, and mixed dominance.
For more information on visual screening, check out our vision screening packet:
Writing with both hands Impacts Writing and Reading
Children who experience mixed dominance patterns, evidenced by writing with both hands, often have challenges with left/right awareness. This left/right confusion can impact reading and writing, as a result of delayed reading and writing skills.
Left Right Confusion and Handwriting
The child that doesn’t know their left from their right side at the kindergarten to first grade stage may show challenges as they are learning letter formation.
Poor left/right awareness can affect a student’s ability to accurately form letters and result in ‘dyslexia’ looking reversal patterns. Read about more information on occupational therapy dyslexia supports.
The reversal patterns in letter formation and recognition may also lead to poor phonemic awareness, and later poor spelling, further delaying their reading and writing skills.
Reading left to right may also be a significant challenge as a result of poor eye teaming, as both sides of the brain are attempting to ‘dominate’ the skill. This struggle between the two sides of the brain results in poor organization of the information and retrieval of phonemic rules. Here is more information about visual processing and the skills that impact reading and learning.
Difficulties in these areas can be red flags of mixed dominance patterns that need to be addressed.
Switching hands when writing means that the student holds the pencil with a different hand each time and doesn’t have the experience to create motor plans for each letter. They are looking at different angles and directions to the paper, writing sample to copy formations, and establishing loose “muscle memory” when it comes to creating an established plan of action for letter forms.
Writing with different hands can impact overall organization on the paper, too. This includes use of margins, and writing in lists. Typically, when writing, we need to hold the paper with the non-dominant hand to stabilize the paper. Placing letters
More implications of using both hands to write
Mixed dominance does not always seem like a big deal, but when left unaddressed your child may be left frustrated with their struggles in gross motor play, reading and writing.
Struggles in these areas significantly impact a child’s self-esteem and desire to participate in age appropriate activities. Fortunately, mixed dominance can be easily addressed through therapy.
Try this pouring and scooping activity to refine hand dominance in functional tasks.
Occupational Therapists screen for visual problems in order to determine how they may impact functional tasks. Visual screening can occur in the classroom setting, in inpatient settings, in outpatient therapy, and in early intervention or home care.
This visual screening tool was created by an occupational therapist and provides information on visual terms, frequently asked questions regarding visual problems, a variety of visual screening techniques, and other tools that therapists will find valuable in visual screenings.
Occupational Therapy Vision Screening Tool
Click here to read more about the Visual Screening Packet. This is a digital file. Upon purchase, you will be able to access the 10 page file and print off to use over and over again in vision screenings and in educating therapists, teachers, parents, and other child advocates or caregivers.
For even MORE information on eye-hand coordination and activities to use in your occupational therapy practice, you will want to join our free visual processing lab email series. It’s a 3-day series of emails that covers EVERYthing about visual processing. We take a closer look at visual skills and break things down, as well as covering the big picture of visual needs.
In the visual processing lab, you will discover how oculomotor skills like smooth pursuits make a big difference in higher level skills like learning and executive function. The best thing about this lab (besides all of the awesome info) is that it has a fun “lab” theme. I might have had too much fun with this one 🙂
Join us in visual processing Lab! Where you won’t need Bunsen burners or safety goggles!
The Handwriting Book is a comprehensive resource created by experienced pediatric OTs and PTs.
The Handwriting Book covers everything you need to know about handwriting, guided by development and focused on function. This digital resource is is the ultimate resource for tips, strategies, suggestions, and information to support handwriting development in kids.
The Handwriting Book breaks down the functional skill of handwriting into developmental areas. These include developmental progression of pre-writing strokes, fine motor skills, gross motor development, sensory considerations, and visual perceptual skills. Each section includes strategies and tips to improve these underlying areas.
Strategies to address letter and number formation and reversals
Ideas for combining handwriting and play
Activities to practice handwriting skills at home
Tips and strategies for the reluctant writer
Tips to improve pencil grip
Tips for sizing, spacing, and alignment with overall improved legibility
Colleen Beck, OTR/L has been an occupational therapist since 2000, working in school-based, hand therapy, outpatient peds, EI, and SNF. Colleen created The OT Toolbox to inspire therapists, teachers, and parents with easy and fun tools to help children thrive. Read her story about going from an OT making $3/hour (after paying for kids’ childcare) to a full-time OT resource creator for millions of readers. Want to collaborate? Send an email to contact@theottoolbox.com.
I love this Dollar Store therapy idea because it develops so many skills, making the materials a great addition to any occupational therapy bag. If you are looking for a Dollar Store craft that builds several areas (and can be used with a variety of levels of your caseload), then this animal soap holder craft is a great one to try! If you’ve used a soap holder travel item in your travels in the past, then you may even have all of the items you need to make a mini fine motor kit! Plus, it’s a great addition to a list of spider activities if you are using this idea around a theme.
All you need is a plastic travel bar soap case and a few items to create a ton of fine motor skill-building!
travel bar soap case THerapy Kit
Looking for a fine motor craft idea that boosts all of the underlying skills kids need? This fine motor craft is a soap holder animal and it adds opportunities for skills like fine motor strength, precision of fine motor skills, dexterity, coordination, visual motor skills, and many more therapy areas.
The best part is, after kids make this fun fine motor craft, they have a fine motor toolkit that can be used again and again to address the motor skills they need!
Let’s take a look at how to make a soap holder animal and use this fine motor craft idea to maximize the therapeutic benefits!
Dollar Store Craft for Therapy
All you need is a colorful soap holder and a few other materials from the Dollar Store to create your own soap container craft.
Soap holder animals are great busy box kits which are made with simple materials and come in their own storage containers. They address creativity, visual perception, eye-hand coordination, bilateral coordination, problem solving and fine motor skills.
Being stored within themselves makes them easily portable allowing a therapist to toss one quickly into their therapy bag or cart.
Kids love soap holder animal crafts and therapists will find they make for a cool and engaging therapy activity. Soap holder busy box kits fit the bill for many pediatric therapists who travel from site to site.
They are a cheap and easy fine motor craft to transport, are easy to store, and are fun to create with an engaging focus on child skill development.
Therapists will find soap holder animal make for a great send home activity too!
Occupational Therapy Bag Item
Filling a plastic soap dish with small materials is great for the traveling occupational therapist, because you can add this mini container to your occupational therapy bag, and opening and closing the container is part of the therapy processes to further develop fine motor skills, bilateral coordination, and other areas.
Children love opening the boxes to see what’s inside and they are intrigued by what they are able to create with them. They love crafting animals and making them come to life.
Soap holder busy box kits allow for children to expand on their skills while also enjoying the high level of creativity that can be achieved.
With these soap holder creations, children experience an improved feeling of success and achievement having used their own skills to create something fun and entertaining.
Many skill areas are hidden within the process of this fun activity. Just the developmental benefits of bead stringing alone would be enough to make the activity worth using! Bead stringing activities can help improve overall fine motor, visual perception, visual motor and cognitive skills. Functionally, bead stringing can help a child improve their pencil grasp and control for drawing, writing and coloring as well as improve their ability to manipulate fasteners on clothing.
This soap dish kit is actually a piece of pediatric therapy equipment you may not immediately think of when you think of occupational therapy toys, but it’s sure to be a big hit!
Use the travel bar soap case craft to build skills
The skills and target areas addressed with soap holder animal crafts and use of these fun busy box kits include:
Bilateral coordination – The act of opening and closing the boxes, threading and un-threading the beads, and building legs or other appendages requires the child to use two hands together in a coordinated manner.
Pincer grasp and finger strength – Pinching small beads for placement and threading them requires a thumb to index finger pinch pattern and small muscle strength to manipulate and place the bead.
In-hand manipulation – Pinching small beads and turning them around within the fingers for placement requires coordination of the small hand and finger muscles working on shift and rotation movements.
Eye-hand coordination – Threading and un-threading beads and building legs or other appendages requires the child’s eyes and hands to work together.
Visual perception – Recalling the bead color pattern while searching for one specific bead color from a group of assorted beads requires visual memory, visual scanning and visual discrimination skills.
Executive functioning – Deciding what type of creature the child wants to make and organizing and planning their approach while also determining what kind of pattern they want to use and where to place the appendages requires organization, planning and problem-solving skills.
Graded Fine Motor Craft Kids Love
Travel soap dish with lid are nice because you can fill the mini fine motor kit with any item that meets the needs of the child you are working with.
Soap holder busy box kits can easily be downgraded or upgraded by matching the type of materials used to the needs and abilities of the child or by modifying the approach and the necessary skills required to complete the activity.
A few considerations on adjusting this fine motor craft to meet the needs and skills of various children:
1. Consider the use of larger beads vs. smaller beads. Determine if the bead hole diameter is small enough or large enough to meet or challenge the child’s skills.
2. Use flexible string vs. pipe cleaners. (Be sure the string is flexible enough that the box lid can close once they are inserted and that beads do not easily fall off.) Flexible string can provide a good challenge for some children.
3. Keep pipe cleaners full length or cut in half to make the activity more challenging for appendage placement, manipulation, and orientation.
4. Consider keeping the process simple by having the activity set-up for the child and then have them only string the beads.
5. Have the child simply string beads at random vs. following a color pattern.
6. Work on opening containers using the travel soap dish with lid.
How to Make a travel bar soap case craft
Now that you know the total benefits and a few ways to grade the activity, here is what you need to create your very own soap holder animal using a travel bar soap case.
Place all of the materials in the travel bar soap case. It’s ready to go into your occupational therapy bag.
When you are ready to use the travel bar soap case in therapy sessions, pull out the travel bar soap case filled with fine motor items. Kids can open the container and use the materials to thread beads or explore.
Bend the pipe cleaners to make legs for a spider or wings for a butterfly.
Thread beads onto the pipe cleaners.
Place the ends of the pipe cleaners onto the edge of the travel soap container and close the lid.
Decorate the top with googly eyes.
They never get old as they may never be the same creation twice!
Soap holder busy bead kits are easy to assemble for use as a therapy activity or home busy box. Take a short time to gather the materials and use it all year long to build a multitude of skills with children.
Amazon affiliate links are included in this post.
Let us know if you make this soap holder animal fine motor craft!
Regina Parsons-Allen is a school-based certified occupational therapy assistant. She has a pediatrics practice area of emphasis from the NBCOT. She graduated from the OTA program at Caldwell Community College and Technical Institute in Hudson, North Carolina with an A.A.S degree in occupational therapy assistant. She has been practicing occupational therapy in the same school district for 20 years. She loves her children, husband, OT, working with children and teaching Sunday school. She is passionate about engaging, empowering, and enabling children to reach their maximum potential in ALL of their occupations as well assuring them that God loves them!
Looking for more fun ways to develop fine motor skills? Grab one of our digital Fine Motor Kits!
Working on fine motor skills, visual perception, visual motor skills, sensory tolerance, handwriting, or scissor skills? Our Fine Motor Kits cover all of these areas and more.
Check out the seasonal Fine Motor Kits that kids love:
If you are teaching kids to write in cursive handwriting, these tips on how to write cursive a will help with a starter letter that supports the development of cursive writing skills. Writing letter a in cursive might seem like a good place to start when teaching cursive writing (after all, it’s the beginning of the alphabet!), but actually, you’ll want to start developmentally by teaching cursive letters in a sequential order.
How to Write Cursive a
Teaching cursive handwriting is a challenge for many parents and teachers. Taking it step-by-step is key. Here, you will find strategies for how to write cursive letter a. Many times, there is not a specific curriculum that schools use and teachers need to scramble for resources and THEN fit handwriting time into an already jam packed day.
That’s why here at The OT Toolbox, you will find cursive writing tools that can be easily added into a school day. So, if you are wondering how to teach cursive writing, then you are in luck, because we have specific tips and tricks to teach cursive letters a-z.
Here you will find tricks and tips to write cursive a…in fun ways!
Lowercase cursive letter a is one of the wave letters. The letters c, a, d, g, q, and o make up these letters that contain similar letter strokes. That’s why when children are taught to write in cursive, these letters are typically grouped together. We talked about how cursive letters are related and grouped into cursive letter families.
Teaching cursive letters in groups helps with letter formation, including the motor plan to form similar letters. When kids can practice cursive with a sensory approach to writing letters, they engage multiple senses along with the motor movements to form each letter. Grouping them into like letters makes the learning easier.
a in Cursive…where to start?
Start by reviewing how to form cursive c.
Start by reviewing and practicing cursive letter c. Cursive letter c (and cursive a) is a wave letter. Starting with some pencil strokes and multi-sensory practice of the wave formation is a good place to begin. Try some multi-sensory approaches to build motor planning for forming cursive a.
Hold a small crafting pom pom or cotton ball in the thumb, pointer finger, and middle finger. This positions the hand into a tripod grasp and “wakes up” the muscles for writing.
Holding the cotton ball, students can use whole arm motions to “draw” an imaginary wave in the air. Encourage them to be sure to re-trace the wave so it has a big curved portion at the top or crest of the wave. Here is more information on teaching wave letters.
By re-tracing that wave back down to the bottom, they can see the letter “c” or the beginning part of a letter a forming.
One tip to get that line really formed with re-trace is to tell kids that they want the wave to be great for surfing under. If the wave is fat at the bottom, it’s not a surfing wave. We want to see a wave that is ready to fall over and crash so a surfer can surf right along the inside of the wave.
Making a string of cursive c’s or a wave with several waves together is a good exercise.
Next, turn cursive c into a cursive a.
Once that curved c is reviewed, and the students are tracing back over their wave lines so the curve looks like a single line, it’s time to turn lowercase c into lowercase a.
Teach cursive a by telling students to form a cursive c that looks like a wave ready to crash over.
Their pencil should trace back over the wave line and move along the baseline. The pencil should move straight up to the top of the wave and pause where the wave is just about to tip over.
Next, the pencil should trace strait back down to the bottom line of the paper. Then, the pencil can move along the baseline to connect to the next letter. Here are tips to teach cursive letter connections.
Here are those cursive writing directions listed out:
Write a cursive c with the top of the wave ready to crash.
Move the pencil along the baseline and up to touch the tip of the wave.
Pull the pencil strait down to the baseline.
Curve away to connect.
Poor Formation of cursive a?
What happens when the cursive a (or other writing in cursive) falls flat? There can be some troubleshooting to do when it comes to writing in cursive. Here are some problems you might see whth letter a.
The lines curving up to the top of the lowercase a aren’t touching- Remind the student to trace back over the curve of their magic c. Review how to make the curve of a letter c.
The “wave” looks to wide- A gaping wave can make the letter a look sloppy. Teach students to trace back over the curve of the along the same line. Try using rainbow writing for this method.
The up line to touch the top of the a is slanted. The a looks
The Handwriting Book is a comprehensive resource created by experienced pediatric OTs and PTs.
The Handwriting Book covers everything you need to know about handwriting, guided by development and focused on function. This digital resource is is the ultimate resource for tips, strategies, suggestions, and information to support handwriting development in kids.
The Handwriting Book breaks down the functional skill of handwriting into developmental areas. These include developmental progression of pre-writing strokes, fine motor skills, gross motor development, sensory considerations, and visual perceptual skills. Each section includes strategies and tips to improve these underlying areas.
Strategies to address letter and number formation and reversals
Ideas for combining handwriting and play
Activities to practice handwriting skills at home
Tips and strategies for the reluctant writer
Tips to improve pencil grip
Tips for sizing, spacing, and alignment with overall improved legibility
Colleen Beck, OTR/L has been an occupational therapist since 2000, working in school-based, hand therapy, outpatient peds, EI, and SNF. Colleen created The OT Toolbox to inspire therapists, teachers, and parents with easy and fun tools to help children thrive. Read her story about going from an OT making $3/hour (after paying for kids’ childcare) to a full-time OT resource creator for millions of readers. Want to collaborate? Send an email to contact@theottoolbox.com.