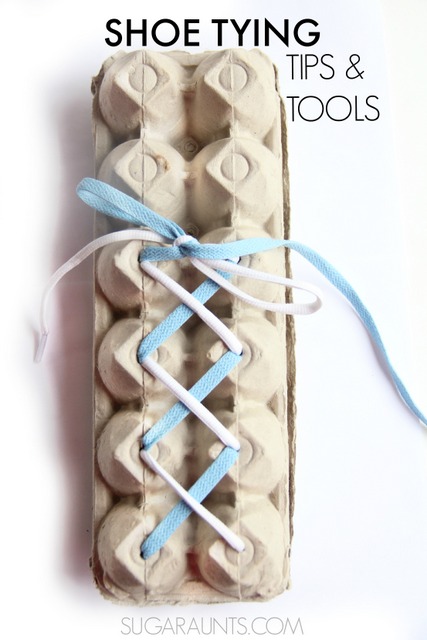
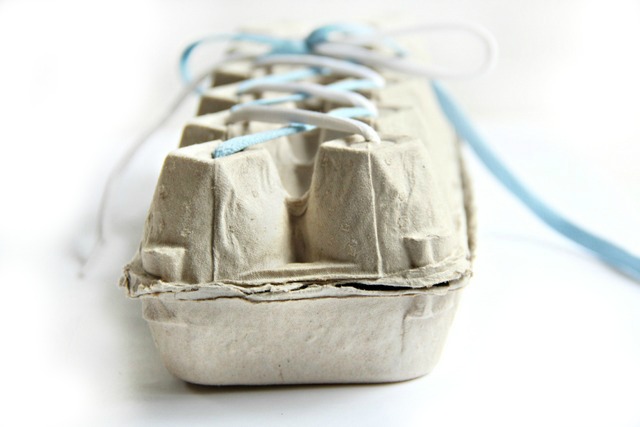
Shoe tying can be trying for little ones, and that’s where this shoe tying activity comes in. This shoe tying egg carton activity is one we developed in 2015, and it’s been shared thousands of times. Here’s why: This hands-on shoe tying task helps kids establish the skills they need to learn to tie their shoes in a fun and stress-free manner.
Kids will love this out-of-box shoe tying activity to teach kids to tie their shoes and practice shoe tying with an egg carton. Be sure to check out this massive shoe tying resource that has been recently updated so you can address all of the underlying skills needed to shoe tying with kids.
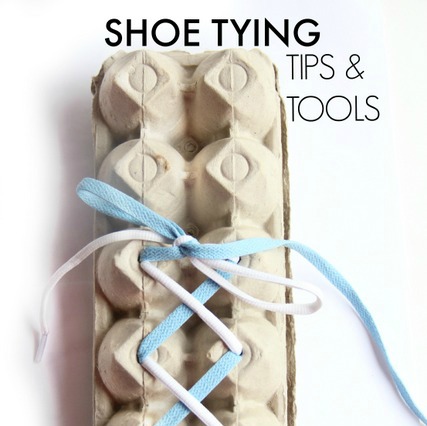
This shoe tying activity is actually part of a 31 Day series of Occupational Therapy posts using free or almost free materials. In each blog post in the series, I cover creative ways to work on functional skills using everyday materials found around the home. Today we’re using a recycled egg carton as a shoe tying tool.
Shoe tying can be very difficult for kids to master. Typically, children in Kindergarten show developmentally appropriate fine motor skills for shoe tying.
Kindergarten is a great time to start teaching kids to tie their shoes. They are gaining more dexterity in their fine motor skills, and are getting used to the routines of getting ready for school on a daily basis.
Shoe tying is part of that daily self-care schedule. However, quite often, kids will start tying shoes at older ages. Shoe tying is tough: There are many steps, two laces that look the exact same, and many times left./right confusion.
Switching hands in tasks and not knowing the difference between left and right hand can be a challenge in a task like shoe tying where the verbal directions involve using the left hand to pinch and the right hand to pull a lace. That’s where using two different colored shoe laces is a benefit in our shoe tying activity.
Start with a cardboard egg carton. If you like, give it a quick spray with disinfectant spray when the kids are not around and let the disinfectant dry. I don’t typically do this step, though. We just try to make sure to wash our hands after playing with egg cartons.
Make the holes for the laces. We used golf tees and a hammer for this part. See how here. It’s a fun proprioceptive activity for kids that is always a hit in our house.
Grab a set of shoe laces. Using two different colors is best for new shoe tying friends.
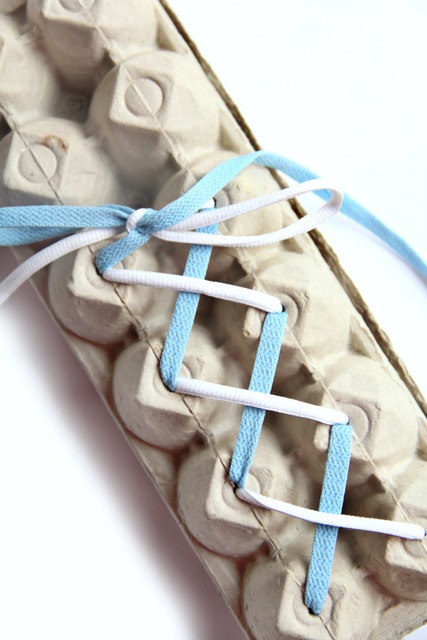
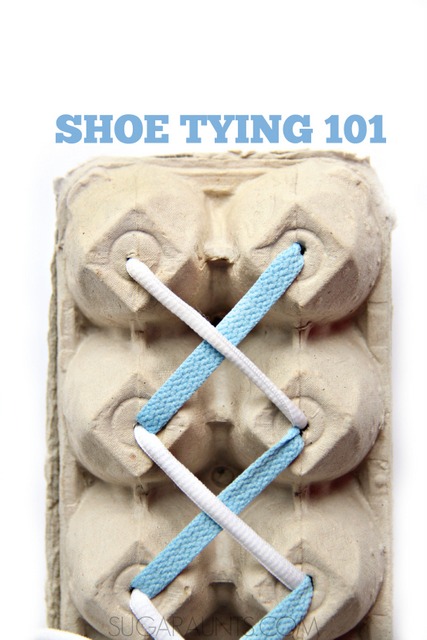
Tie the laces together at one end and thread them through the holes of the egg carton.
Start lacing the holes the whole way up the egg carton. Threading the holes is an excellent fine motor task for kids. My three year old loved this and wanted to take the laces out and do it again. Threading the laces encourages bilateral hand coordination which is vital for shoe tying.
Now we’re ready to practice tying shoes!
Shoe Tying Tips
First, be sure to visit this page on shoe tying for more tips and strategies to teach kids to tie shoes.
Many times, children are excited to learn to tie their shoes. Embrace it, go with it, and practice! But other times, they just don’t want to learn. That’s ok! Don’t force them and come back to practicing in a week or two.
If kids get frustrated with the shoe tying activity, the struggle to get them to sit down can be a difficult thing to overcome from the very beginning and only make the practice time more difficult. If that is the case, give them time, and revisit shoe tying in a week or two.
The key to teaching kids to tie their own shoes is calm, quiet, practice. It’s easy for kids to get upset, frustrated, or anxious when there are so many steps and may feel rushed or upset about their fumbling fingers. They might have Velcro shoes that they are perfectly happy to pull on quite quickly.
With my older child and from helping lots of kids learn to tie their shoes, I’ve seen the incentive of a new pair of sneakers with laces bring on the ambition to give it a shot.
Other times, it’s a creative way to practice, simplified directions, or learning steps in chunks that gives kids an oomph of “hey! I CAN do this!”
Shoe Tying Activities
Here are some more shoe tying activities and tips:
Consistent verbal cues for each step. Use the same words each time.
Practice with the shoe in your child’s lap, not on their foot. Once they master shoe tying (or at least start to get the hang of it), then practice with their shoe on their foot. It will then take more practice with the shoe on their foot because when they are wearing the shoe, the laces shorten a bit.
Tying shoes has a lot to do with visual perceptual skills. You’ll find easy and fun ways to work on visual perceptual skills through play here.
Place the shoe in their lap or on the floor positioned with the heel close to them and the toe pointing away.
Practice with two different colored shoe laces.
Tie your own shoe as you prompt your child to tie theirs. Do the steps at the same time. Sit beside and position your shoe slightly in front of your child. You want them to see your shoe as a model in the same position as yours and in a place where they can see your shoe without having to turn their head to much.
Avoid saying “right” and “left” when talking about the different strings. Keeping track of the right/left sides can complicate things for a young child. Use the names of the laces if you are using two different colored laces or just say, “the lace on this side of the shoe”, or the “Pick up the lace with the hand you write with.”
Work in chunks. Practice only the first step until your child masters that part. Then, teach the next step and work on those tow steps together before moving onto the next step.
Practice with items other than laces. Shoe laces can be very difficult for young kids to manage. If they have any trouble with fine motor skills or bilateral hand coordination, it is especially difficult. Try practicing with stiff shoe laces, wire-edged ribbons, pipe cleaners (twist the ends of two together for length!), or Wikki Stix.
When you get to the step where your child pinches the loop, make sure they are holding it close to the shoe. If they are pinching the loop too far from the shoe, the knot will be too loose.
If you’ve been practicing shoe tying for some time and your child is just having too much difficulty, it might be other underlying reasons. To tie shoes, kids need fine motor skills, bilateral hand coordination, visual perceptual skills, hand-eye coordination, and hand strength just to get the task of shoe tying done. If you feel your child has a difficulty in one of these areas, contact your pediatrician for a referral to an Occupational Therapist for individual evaluation and treatment.
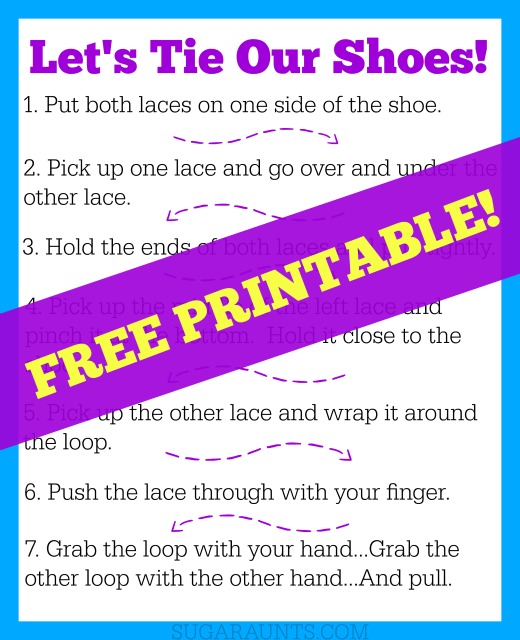
I like the simplified steps below for shoe tying. They are simple and easy for kids to remember. Write them down and read them as you go through shoe tying with your child. Our newsletter subscribers can get the image below as a free printable. J
Breaking down the steps to shoe tying and deciphering where the struggle is happening can be a huge part of addressing shoe tying struggles. Use this list of steps to tie shoes to assess where the break down is occurring.
Next, look at the underlying areas that play into that aspect of tying shoes. Is it fine motor coordination? Pinch strength? Crossing midline? Bilateral coordination? Attention and focus? All of these areas play into the overall task analysis of shoe tying.
Then, focus on addressing those skills during the functional task itself.
Let’s take a look at each step of shoe tying:
Easy Steps to Teach Kids to Tie Their Shoes:
1. Put both laces on one side of the shoe.
2. Pick up one lace and go over and under the other lace.
3. Hold the ends of both laces and pull tightly.
4. Pick up the middle of the left lace and pinch it at the bottom. Hold it close to the shoe.
5. Pick up the other lace and wrap it around the loop.
6. Push the lace through with your finger.
7. Grab the loop with your hand…Grab the other loop with the other hand…And pull.
(Remember to avoid using the words “right” and “left” unless your child has a good grasp of these words. You can instead use the names of the colored laces, if using two different colored laces, OR use “the lace on this side” or the “hand you write with”.
More Shoe Tying Activities
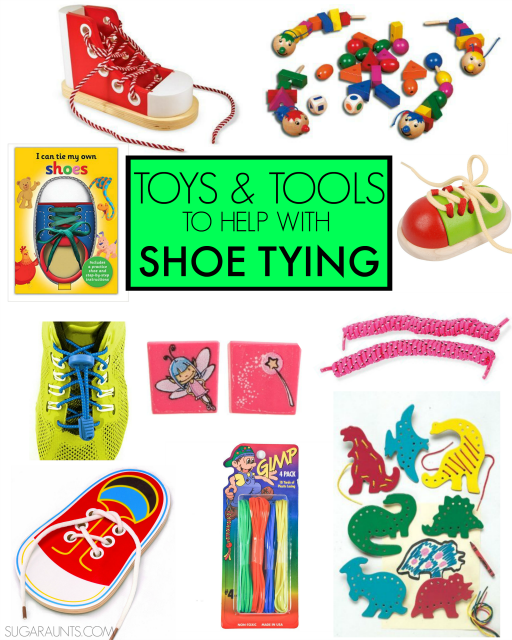
Looking for more ways to practice shoe tying with kids? These toys and tools are fun ways to practice with kids.
They are additional ideas for your soon-to-be-shoe-tyer. Perhaps you have friends or relatives who are asking for gift ideas for your child, or you are looking for ideas for upcoming holidays. These are a few ideas that I love for working on shoe tying and can help kids in their fine motor dexterity to help them become successful at tying shoes.
Shoe Tying Toys
This Melissa & Doug Deluxe Wood Lacing Sneaker is a great practice tool, with it’s bright colors and stiffer laces than the ones typically on shoes that we wear. Practice on the model before moving to your child’s real shoe.
If you have a little one who loves to read, this I Can Tie My Own Shoes Book is a real incentive to practice shoe tying.
Sometimes, kids just can’t get the hang of shoe tying no matter how hard they try. These Tie Buddies Shoe Accessory are great for kids that have trouble at the “loop part” of shoe tying. They eliminate the loops and give kids something to hold onto while tying. Kids with hand weakness will benefit from this tool.
Another modification to shoe tying are these No Tie Shoe Lock Laces . They can be laced in shoes and help the child’s shoe stay snug.
Magic Shoelaces are another way to modify shoe tying. Use these until your child is ready and able to practice effectively. They are great laces for kids with difficulties in any of the underlying skills needed for shoe tying.
I love a creative practice technique when it comes to any skill for kids. This Plastic Lacing Cord is an excellent way to practice shoe tying with a more resistive lace. Use them in place of shoelaces in the egg carton activity that we shared today.
Lacing & Tracing Dinosaurs can help kids with lacing, managing strings, threading, bilateral hand coordination, and strength. It’s a great precursor activity to practicing shoe tying.
For more functional and appropriate play to work on shoe tying, I love this Colorful Caterpillars Game . It works on bilateral hand coordination and strength needed to tie shoes with dexterity and ease.
I hope you were able to find some helpful tips and tools in this post.
Love this post? Pin it! And don’t forget to use that shoe tying joke! Jokes help with shoe tying 🙂
Colleen Beck, OTR/L has been an occupational therapist since 2000, working in school-based, hand therapy, outpatient peds, EI, and SNF. Colleen created The OT Toolbox to inspire therapists, teachers, and parents with easy and fun tools to help children thrive. Read her story about going from an OT making $3/hour (after paying for kids’ childcare) to a full-time OT resource creator for millions of readers. Want to collaborate? Send an email to contact@theottoolbox.com.
Occupational therapy professionals know the benefit of using memory card games to build skills in therapy sessions. OTs love to use games in therapy sessions to address a variety areas in novel and fun ways…and kids love the gaming aspect of therapy!
Memory Card Games in Occupational Therapy
There are so many reasons to play memory games in OT! Areas like executive functioning skills, to working memory, attention, focus, to fine motor skills, visual motor skills, visual perceptual skills, and even handwriting can be improved through the use of memory card games.
It would be easy to incorporate some handwriting games into a memory card activity.
We’ve talked about using games in a variety of ways…today, we’re covering the use of a Memory Card Game to work on various skills in OT. Here’s why this simple game is such a powerful tool for impacting function:
Memory games are a powerful way to work on sort term memory, working memory, and executive functioning skills such as attention organization planning prioritization organizational skills.
Memory games are fun way for kids to work on short term memory and other skills that are beneficial for learning in the classroom and at home.
When kids play memory they can work on holding short term information in their memory In their short term memory. This allows them to use visual attention and visual memory while they remember where pictures are located playing a classic memory game.
Kids with other executive functioning issues me to be struggling with the same challenges in the classroom or at home. By playing a game such as memory kids can work on these executive functioning skills in a fun and low-key manner.
When they play memory kids can work on prioritization such as choosing which card to pick first.
When you play memory you pick a card and if you seen it before you you need to remember where you’ve seen that location of the card. This scale requires time management self-regulation and self-control. You don’t want to pick up the next card in a rush without thinking through your your process of where you saw that picture last.
Memory card games can be used to address visual motor skills.
Playing a game of memory can help with short term memory and retention of information as well. When kids need to recall where they saw a card in a previous play they need to think back and use their mental memory skills in order to recall where that card is located in the board. This visual component of working memory skills carries over to the classroom when kids need to remember to do it to do their homework or what skills have worked in the past in order to solve problems on tests or in situations of game or learning at school.
A memory game also helps with multitasking and helping kids to stay and complete a task through to completion. All of these executive functioning skills are powerful skills to develop through play such as using a memory game.
“Grading” Memory Card Games to Meet Different Needs
When therapists add a toy or game to their “OT toolbox”, they need to use the material in a variety of ways to meet the needs of different levels of children and while addressing different skill areas.
This refers to grading activities.
Grading, in occupational therapy, means making an activity more or less challenging in order to meet the needs of the individual. This can also refer to changing an activity in the middle of the task, depending on how the client or child is responding. Grading is important when it comes to finding the “just right” amount of support or adaptations that need to be made to a task that challenge the client while also allowing them to feel good about doing the therapy intervention.
If the activity is too easy, you would grade it up to make it a greater challenge.
If the activity is too hard, you would grade it down to make it easier to accomplish a sub-goal or skillset, while also challenging those skills.
Memory card games are a great tool to use to challenge a variety of skill levels and abilities.
You can help to boost skills by changing the number of matches that you are using in the memory card game. If a child who struggles with attention, focus, impulse control, visual perception, eye-hand coordination, or working memory, you might play the memory game with only two matches or four matches so that there are four or eight cards total on the playing board.
You can further adapt this game by giving clear and concise instructions or hints in other words. Try to help the child use their memory, attention, working memory, and recall skills by defining the match that they are looking for and details that are on that image. This can be accomplished by saying things like, “I’ve seen that card before. Have you?”
Work on turn taking skills for use in conversation and play with different modifications and adaptations based on the individual’s abilities and areas of development.
Another strategy to grade memory games is to ask the child to talk through their moves. This self-reflection can build self-confidence, and it’s a helpful way to remember where they seen a matching card before. And, this self-talk skill also translates over to functional tasks. When a child performs a task such as a chore or a homework assignment they can talk through the task at hand. This allows them to recall what they’ve learned and what’s been successful. They are able to use skills they’ve established in the past. Self talk skill is a great strategy for kids who both struggle with executive functioning skills and anyone in general.
Another modification to memory card games include offering visual cues or verbal cues of what the child has seen. You can support this by asking the child “Have you seen this picture already?” Ask them to recall what the image was near on the board and see if you can picture in your mind where that card is in relation to others on the board. This involves a spatial-relations component as well as other visual perceptual skills.
Finally it’s helpful to reduce distractions while playing memory game. Sometimes the aspect of attention is limited by other things happening around a child which can’t be addressed in a situation such as a classroom or a community situation however you can work on specific skills such as showing the child how to self regulate like taking a deep breath or preparing themselves before they make their move. This can help with over feelings of overwhelm and stress the kids sometimes get.
How to play memory games in therapy
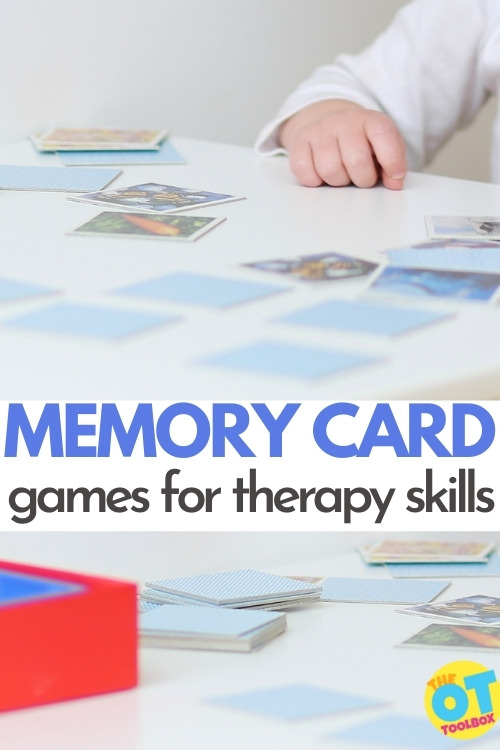
When kids play memory they are playing the classic memory game that you’ve probably played in your childhood.
The game uses matching cards which are placed facedown on the table.
Players take turns selecting to picture cards they turned one over at a time and see if they’ve got a match. If they’ve got a match they can go again.
If the player doesn’t have a match they turn the cards back over so they were they are facedown on the table.
Then the next player goes. The second player selects two picture cards and turns them over one at a time. It’s important to turn the cards over one at a time because if you have a card because if the first card that is turned over is a card that you’ve seen before then you need to remember where that match is on the board. This aspect of playing the game of memory really works on attention focus and impulse control.
Players continue finding the matches until all of the cards are selected.
The player with the most number of matches wins the game.
What’s missing Activity with memory cards
“What’s missing” is also another great way to use a memory game to work on specific skills of executive functioning including the ones listed above.
How to play what’s missing with Memory Cards
To play what’s missing you would set out a spare set number of memory cards on the table face up.
Then the player gets to look at the cards for a set amount of time.
The player tries to memorize every card on the table.
Then the player closes their eyes or looks away from the table while another player removes one or more cards.
Then the first player looks back at the table and tries to recall and identify the missing images.
What’s Missing games address a variety of visual perceptual skills, visual memory, visual attention, spatial relations, form constancy, and visual discrimination.
This activity can be graded up or down in a variety of ways by adding more cards shortening the amount of time to look at the cards and remember the cards or to add more matches and to remove more or less cards. To make this harder you can have two all different cards or you can have matches and some without matches.
Memory games in sensory bins
Memory cards make a great addition to sensory bins. Children that especially enjoy specific themes can use memory card games in a variety of themes with specific characters or topics such as vehicles, princesses, sports, animals, ect.
To use memory cards in sensory bins, you need just a few materials. This can include a dry sensory bin material, the memory cards, and possibly scoops, tweezers. Dry sensory bin materials include such as dry beans, rice, sand, shredded paper, etc. Then memory cards can be added to the sensory bin and hidden away, much like we hid sight word cards in this sight word sensory bin.
Another bonus is then building and refining fine motor skills through the scooping and pouring of the sensory bin materials.
In the sensory bin, children can look for the matching memory cards. This activity builds skills such as:
visual discrimination
form constancy
visual memory
attention
sensory tolerance through play
fine motor control
transferring skills
bilateral coordination
controlled movements
MORE
Memory Card Games and Handwriting
Therapists are often looking for short and functional means of working on handwriting skills through play. Memory games are a great way to address this need.
With a memory card game, children can write down the matches that they’ve found when matching cards. The same is true when playing “what’s missing” games. They can write down the words of the images that they’ve found on the playing board. And, by writing down these words, they can then work on letter formation, letter size, spacing, and legibility. This occurs in a in a short list format that is motivating for kids.
Yet another benefit of working on handwriting skills with a memory game is that children are excited to find matches. This excitement can translate to the handwriting portion. Kids will want to write more words because that means they are finding more matches. This is a very rewarding and positive way to work on handwriting skills, which can often times, be a challenge for kids.
Memory Card Games for Therapy
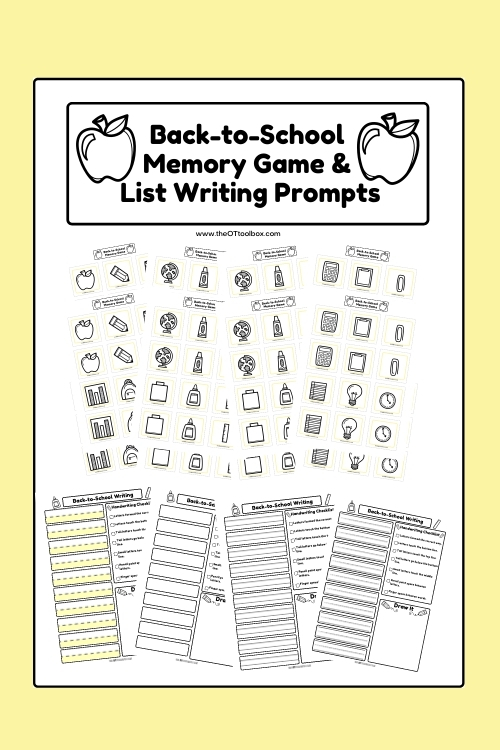
Memory cards are a powerful tool to add to a therapy toolbox! This is especially true if memory games are focused on an interest of the child. You will really enjoy a new series of themed memory cards with handwriting pages that I have coming to the website shop.
Work on attention, memory, focus, visual skills, executive functioning skills, visual perceptual skills, concentration and a variety of other skills. PLUS, the themed cards include handwriting pages with a variety of lined paper options.
This Back-to-School resource is a great way to quickly assess your caseload for handwriting, coloring, cutting, motor skills, midline crossing, visual memory, visual perceptual skills, motor planning, executive functioning, and more. And, such a fun and motivating activity to quickly and informally reassess each child on your caseload at a “just right” level.
This memory card activity can be printed off, laminated, and used again and again.
Click here to add the Back-to-School Memory Game and List Writing Prompts resource to your therapy toolbox.
Colleen Beck, OTR/L has been an occupational therapist since 2000, working in school-based, hand therapy, outpatient peds, EI, and SNF. Colleen created The OT Toolbox to inspire therapists, teachers, and parents with easy and fun tools to help children thrive. Read her story about going from an OT making $3/hour (after paying for kids’ childcare) to a full-time OT resource creator for millions of readers. Want to collaborate? Send an email to contact@theottoolbox.com.
Recently, I was looking into new ways to challenge fine motor skills for my clients – especially ones that did not require purchasing new materials. I wanted something that could challenge scissors use, problem solving, sequencing, attention, and could be used in prep for ADL skills, like buttoning. Then, it came to me: weaving!
Weaving Projects for Kids
Weaving projects and craft are so simple, yet so effective – even the clients that I thought would be frustrated by this old-school craft were super proud of their work. Weaving is something you can do in many different ways, typically dependent on skill level and desired outcomes.
Since we are talking about buttoning skills, I am offering two different options: an advanced one for the kiddos that are almost ready to button independently, and a beginner version for those who are not quite ready to button yet. I hope you adapt these crafts as needed to meet the “just-right” challenge!
Related: Feathers and Burlap Weaving activity that builds bilateral coordination, eye-hand coordination, pinch, grip, and dexterity.
Complex Weaving Instructions
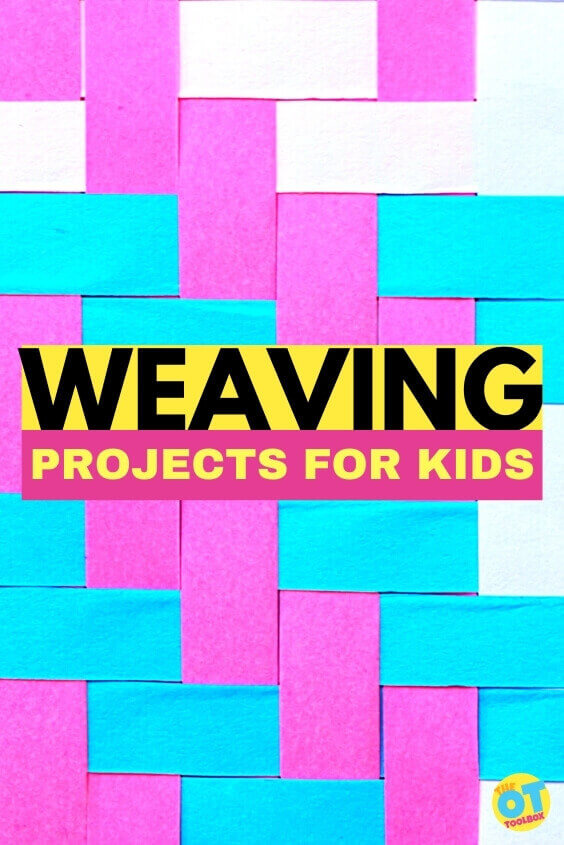
With two pieces of paper of different colors, cut strips of any thickness or length you’d like – just make sure you have an even number. The thinner and longer you cut them, the bigger the challenge. I like to use two different colors to make the task easier to understand and add visual interest.
Cut holes for threading. Half of your strips (or all of one color) need holes for threading. Have your kiddos figure out how big the cuts need to be in order to fit the other strips of paper through.
Fold the paper in order to cut two holes, side by side, throughout the strip of paper. This will be where you weave the other strips of paper through.
Begin Weaving.
Weave the remaining strips of paper (the ones without the holes) into the paper with the holes, making a basket-weave pattern.
Here is where those buttoning skills come into play! The practice of moving the strip of paper through one hole and up and over through the next hole mimics the actions of buttoning and unbuttoning.
If you are creating a specific craft, here is where you can make the weaved pattern into your kids’ desired shape! If you are unsure what you could offer, see the examples below.
Draw the desired object on top of the weaved pattern OR use simple print out to guide the scissors.
Cut the object out.
Add extra paper or decorative objects with glue to seal the edges if you’d like!
Does this sound a bit too challenging for one of your kids? You can lower the difficulty in a few different ways, but below is one idea that is particularly useful if your child demonstrates difficulty with visual motor or perception skills that are required for buttoning.
Simple Weaving Instructions
With two pieces of paper of different colors: a. Cut multiple, 1-inch thick straight lines to the edge of one piece of paper, leaving about an inch uncut on one edge to “hold” all the strips together. b. Cut 1-inch strips of the other piece of paper.
Simply overlap the loose strips of paper onto the other cut paper, every other to make a checkerboard pattern.
Maybe add a gluing or stapling component to challenge them in a different way!
Weaving Projects for kids
I know that it’s so much easier to motivate kids to complete a craft or activity if it is related to a season, holiday, or something that they are personally interested in. That’s one reason why I love weaving crafts – they are so simple at their base, that they can truly be used for anything!
Fall Weaving Crafts- Plaid shirts, apple baskets, spider webs, or hay bales. Winter Weaving Crafts- Sweaters, holiday gifts, Christmas Stockings, or candy canes Spring Weaving Crafts- Easter baskets, Spring dresses, umbrellas, or raincoats Summer Weaving Crafts- Picnic blankets, picnic baskets, or beach towels.
Or for the sporty kiddos in your life, make basketball hoops, soccer goals, tennis rackets, or hockey goalie helmets! The possibilities with weaving projects really are endless.
Here are some additional weaving and buttoning crafts to get the ball rolling!
Sydney Thorson, OTR/L, is a new occupational therapist working in school-based therapy. Her background is in Human Development and Family Studies, and she is passionate about providing individualized and meaningful treatment for each child and their family. Sydney is also a children’s author and illustrator and is always working on new and exciting projects.
Today I have another exciting resource…all about how to teach coloring skills to kids. This is an important developmental skill for kids, and you’ll want to check out our resource on color recognition skills in kids. So often, children do not have the exposure to crayons and paper that is needed for development of fine motor skills or visual motor skills. Teaching coloring skills is just not something parents think about in many cases! Let’s break down coloring skills by age and address specific tips to teach coloring to children.
Coloring is such an important part of childhood and growing up. There are many benefits to coloring as a tool for building skills. Coloring develops hand strength, visual perceptual skills, and precision skills in grasp. It’s the first time many of us express creativity and produce something we are proud of. It boosts confidence, develops understanding of cause and effect, and increases attention spans.
Coloring is also an important stage of child development, too.
Let’s go into age-appropriate specifics on how to teach coloring skills at each age and stage, from babies, to toddlers, to preschool, to Pre-K, to elementary aged children. Specifically, you’ll want to use age-appropriate crayons for toddlers, based on developmental levels.
How to teach coloring skills
Coloring can be hard for kids. Many times, you see kids that refuse to color. Other times you come across kids that prefer markers over crayons. There are reasons for these difficulties, that make sense developmentally. Let’s take a look at the reasons why kids hate to color.
Coloring is HARD!
It hurts the child’s hands to color
Coloring makes the child’s hands tired
Child prefers markers over crayons
Coloring in the lines is hard
It’s hard to finish a coloring page
All of these reasons why kids hate to color are related…and many times, it comes back to a need for developing hand strength and underlying skills.
Skills needed for coloring
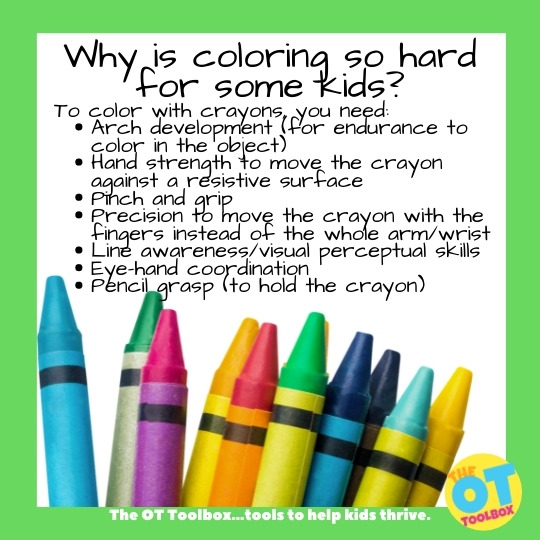
There are several areas, or underlying skills that play an important role in coloring:
Arch development (for endurance to color in the object)
Hand strength to move the crayon against a resistive surface
Pinch and grip
Precision to move the crayon with the fingers instead of the whole arm/wrist
Line awareness/visual perceptual skills
Eye-hand coordination
Pencil grasp (to hold the crayon)
Previous experience with fine motor activities/fine motor skill development
Fine motor skills and coloring- In order to hold a crayon, children need to develop fine motor skills. In order to color in a shape, hand strength is needed. In order to color within the lines, visual motor skills are needed. In order to color a whole shape or figure, distal mobility is needed.
Activities to develop these skills include fine motor play, beading, tweezer use, working on a vertical surface can develop these skills.
Line awareness and coloring– Another aspect of coloring is the line awareness to color within the lines. And, before a child can form letters with ease and fluency, they need to achieve pre-writing lines such as strait lines, squares, triangles, X and diagonals. This resource on line awareness can be a great starting point on this visual perceptual skills needed to color within the lines. Also try these tips to work on line awareness needed for coloring.
Pencil grasp and coloring– In order to teach coloring skills, it is important to progress through the stages listed below, whether at age level or not. Just like the underlying skills needed for pencil grasp development or handwriting, the basic levels need to be achieved. Before a child can hold a pencil with a functional grasp, they need to progress through more primitive grasp patterns such as a pincer grasp, palmer supinate grasp, digital pronate grasp, and quadrupod or static tripod grasp.
All of these underlying skills play an important role in how to teach coloring skills to kids!
Coloring Skills By Age
In this post we will break down the coloring skills you can expect a child to do dependent on age. You will see that we break them down into age ranges – for good reason, too. Every child will develop different skills and different times. Generally, though, there is a developmental path that the majority of children will follow.
If you believe that your child is lagging behind in these skills, talk to your child’s health care team and let them know what you see in your child. They will direct you towards occupational therapy if it is right for your family!
Coloring Skills at BIRTH – 6 MONTHS
Not much coloring going on in this time frame, as you may imagine! Instead, your little one is prepping those little fingers to hold and manipulate objects, that will one day lead to purposeful scribbling!
I always recommend allowing your child to explore coloring as soon as they are able to hold a crayon in their hand and sit up safely in a high chair. Be sure to stay with your baby the whole time you are offering coloring opportunities, as they will likely put their crayons in their mouth.
Support the development of Coloring Skills during infancy:
Babies under six months will typically grasp a small object in the middle or pinky-side of their palm. This grasp pattern is strengthening the building blocks for more refined grasps down the road. Tummy time is a great tool for lengthening the ulnar side of the hand for strengthening so that endurance in fine motor tasks is achievable at older ages. Tummy time also supports arch development even at this young age.
While most parents of new babies will not be thinking of coloring, these activities support the development of MANY motor and cognitive skills, and not just coloring!
Coloring Skills before 1 year
From 6 months to 12 months, babies are certainly not coloring. However, they ARE developing motor and visual skills needed for holding and marking with a crayon in the later years.
Grasping patterns grow a lot during this time! Your baby will start to use their thumbs a little bit more while stacking blocks, be able to pick up their Cheerios with only their thumb and pointer finger (pincer grasp), and can point to objects with one finger. By 12 months old, we should see a pincer grasp while holding small objects. This grasp prepares little fingers for sustained coloring!
Support the development of Coloring Skills during In babies:
Around a year old, your little one may show more interest in scribbling. They will likely make large marks across the paper (and hopefully not the walls!) by using their whole arm to move their crayon. As they develop, you will see that those big movements will get smaller and smaller as fine motor skills are refined.
Grasp: On a coloring utensil, they will use a gross grasp that looks like a fist.
Coloring Skills for Toddlers
The toddler years, for from 12 months to 2 years, is a great window to introduce coloring. It’s during this age that toddlers show interest in coloring and develop skills needed for motor development. This is a great time to explore how to teach coloring skills at an impressionable age!
During the 12 month to two year range, toddlers are building proficiency in coloring skills…and this is a great time to teach coloring!
In this time frame, your toddler will begin to recognize colors and shapes in their environment, and may purposefully choose colors while they are scribbling on paper. They will start to hold their crayon or marker a little more gently, with their pinky down towards the paper, and all fingers wrapped around.
Teach Toddlers to Color:
During the toddler years, exposure is key! You can present many activities and coloring opportunities to color with crayons. Different types of crayons and coloring activities are great exposure, too. Here are tips to teach toddlers to color:
Offer just one crayon at first. Offering too many options can overwhelm the young child.
Try different crayon types. There are different crayon molds that are great for toddlers including egg shaped crayons, rock shaped crayons, or even bath crayons.
Try coloring materials that require less hand strength or resistance, to make a mark. Kwik Stick tempera paints are a great option.
Show toddlers how to color. Color alongside young children for an opportunity to connect with the child and interact. Toddlers love to mimic others and can learn a lot by watching their parent color alongside them.
Offer toddler-friendly coloring pages. A big coloring book with many details can overwhelm a child. Try a printed page with simple shapes in smaller sizes.
Don’t expect perfection. Just putting crayons to the page is a great learning experience that builds hand strength, eye-hand coordination, and coloring experience.
Expect whole-arm movements. Toddlers color with their shoulder and elbow movements, or the proximal movements and won’t color with precise movements of the fingers until an older age. This is normal and to be expected. Coloring for toddlers looks like scribbling and that’s OK!
Encourage coloring and mark-making with coloring games and toys. This post has games and toys for coloring that Toddlers will love.
Work on fine motor hand skills through games involving tweezers, games on the floor, gross motor play, and whole body play activities.
Encourage play with age-appropriate puzzles and blocks.
Your child may start to show more interest in coloring just like you do, trying to copy your marks and paying closer attention to where they are placing their pen to paper. They should be able to copy a vertical line by around age two – this is a key marker for pre-writing skills. Usually around this time they also choose a preferred hand dominance while coloring!
The typical grasp pattern used by toddlers is the Palmar supinate grasp. This is a normal part of development.
Coloring Skills for Preschool (2-3 years)
The early preschool years, or 2- 3 years of age are a prime range for developing beginning coloring skills.
Your young preschool child will start to shift their fingers towards the paper while they hold their coloring utensil by age three. Some children hold their pencil towards the top near the eraser during this stage of development. They should naturally work their fingers down the utensil, closer to the paper, as they get used to this new grasp.
Use these strategies to teach young preschoolers to color:
During the 2-3 year period, you can expect your child to start drawing meaningful images. They will point to a drawing that may look like nothing to you, but then they will tell you that it’s their dog! By age three, your child should be able to do the next pre-writing task: copy a horizontal line and a circle.
Teach Preschoolers to Color (2-3 years old):
For young preschoolers, continued exposure to coloring is necessary. So often, young children skip the needed PLAY that builds fine and gross motor skills. With more and more young children playing primarily on screens versus free play, independent play, and creative fine motor play that builds the necessary hand strength, mobility, dexterity needed for precision, endurance, and progression through typical grasp patterns. Children at the preschool stages need fine motor play, much less screen time exposure, and play experiences.
Another pet peeve of pediatric occupational therapists is the tendency to hand a young child a pencil or pen during the preschool years.
Continue with the suggestions listed above for the baby stage.
Don’t be afraid to use broken crayons. Sounds strange, right? Sometimes a whole crayon is too big for small hands. A broken crayon can be the “just right” size and can be used as a strengthening tool for fine motor skills as well.
Don’t expect perfection. Crayon lines will go over the border of the coloring area and that’s ok!
Offer small coloring spaces with wider borders.
Provide simple shapes for coloring opportunities.
Offer physical boundaries if needed: Use wikki sticks around the coloring area, use your hands to create a small coloring space.
Color small areas on an easel to engage the core as a stabilizer, work against gravity, to place the wrist into extension, to pull the fingers into a tripod type of grasp for dexterity.
Continue easel work and play with lite brite, painting on easels, sticking and peeling tape to the wall, sticking foam pieces to a wet easel surface.
Play with foam sheets on a window. Try this rainbow play activity where preschoolers can stick foam sheets to a wet window. Encourage use of a spray bottle to wet the window and then wipe with a towel to clean up any drips. (It’s a great way to teach colors to preschoolers, too!)
Draw with chalk on a vertical chalk board or on a driveway/side walk.
Try coloring materials that require less hand strength or resistance, to make a mark. Kwik Stick tempera paints are a great option.
Show toddlers how to color. Color alongside young children for an opportunity to connect with the child and interact. Toddlers love to mimic others and can learn a lot by watching their parent color alongside them.
The typical grasp pattern used by young preschool children in the 2-3 year age range is the Digital pronate grasp. Use of this grasp pattern is a typical stage of grasp development.
Coloring Skills in Preschool (4-5 years)
During the later preschool years, at four and five years of age, preschoolers are developing more refined coloring skills as their motor and visual develop integrate.
Around age four is when you can start to see recognizable images appear more regularly in your child’s artwork. Four-year-olds will usually draw people with two, three, or four body parts. For example, the person may have a circle for a head, a rectangle for the body, and two circles for feet.
By the time they are five, they will likely be drawing people with six or more body parts! You will see their drawings becoming more and more life-like, by adding details like fingers, eye color, and buttons on clothing.
By age four, we expect a child to be able to copy a cross – a very tricky visual motor skill! Around age five, we would expect a child to be able to copy a square and color inside the lines fairly well.
Teach Preschoolers to Color (4-5 years old):
For older preschoolers, especially those in Pre-K, it can be common to see preschools and pre-K classrooms where young children are expected to write letters, write their name, or trace letters. This is potentially damaging for the young child and not recommended by pediatric occupational therapists. This premature exposure to writing with pencils, tracing letters, and writing letters isn’t based on child development of motor skills.
It will result in forming letters incorrectly and establishing poor motor plans for letters. It will result in poor pencil grasps that are difficult to change. It will result in forming letters from the bottom or in “chunks”. It is a detriment to children, especially because there is little time in the kindergarten classroom for working on letter formation, pencil grasp instruction beyond the regular curriculum. So changing motor plans and muscle memory that has been poorly established is detrimental for the young child.
What preschool and Pre-K children at 4 and 5 years of age need is play and the opportunity to develop and refine fine motor skills, hand strength, eye-hand coordination, visual motor skills. These skills are strengthened through play.
Try these strategies to teach older preschoolers/Pre-K children to color:
Use all of the strategies previously listed above.
Encourage coloring with interest-based coloring pages (run a Google search for coloring pages, i.e. “unicorn coloring pages”, “superhero coloring pages”, etc. You can generally find free printable coloring pages in most themes.)
Show off art work! Create a space in the home or clinic where coloring projects can be displayed. This is a great motivator for many children.
Encourage smaller coloring areas to improve eye-hand coordination with line use. A smaller coloring space enables children to use their fingers to move the crayon rather than the wrist, elbow, or shoulder.
Use a smaller or broken crayon to promote a developmentally appropriate quadripod or static tripod grasp.
Use simple shapes with curved lines like circles and ovals to promote smooth coloring lines with minimal direction changes and angles to the coloring picture.
If children are complaining of tired hands or tend to switch crayon colors a lot, it can be a sign of weakness in the hands. To strengthen the hands, encourage play with tweezers, tongs, spray bottles, pinch and grip activities, LEGO blocks, play dough, beading activities, peg boards, etc.
If you have a box of crayons with a crayon sharpener on the back, encourage the child to use it to sharpen crayons. The built-in sharpener is great for not only sharpening dull crayons, but also as a hand strengthening device!
The typical grasp pattern in preschool years for 4-5 year olds is the quadrupod or static tripod grasp. Use of either of these grasps is part of typical grasp development.
Coloring Skills at 5-6 years old
Somewhere between ages five and six, we would expect a child to be able to copy multiple shapes, including the ones they would have mastered in the past (i.e. vertical, horizontal, and crossed lines).
Around age five we would like to see what is called a dynamic tripod grasp when a child is writing or coloring. They should have their pencil between their pointer finger and thumb, with the middle finger supporting and the ring and pinky fingers tucked away into the palm. This grasp is “dynamic” if the fingers can move separately from the palm and wrist, allowing for good control of the writing utensil. This growing strength and control is why we see handwriting and coloring skills develop!
By age six, they should be able to copy more complex shapes, like triangles and rhombuses. You could expect them to independently draw some of the more simple shapes as well, like circles and squares.
The dynamic tripod grasp is the most advanced pencil grasp and should continue throughout their life. Typically, whatever grasp a child has habituated by age 6 is the grasp they will likely continue to have.
Teach kids to color at 5-6 years:
Try these strategies to teach children aged 5-6 years old children to color:
Use all of the strategies listed above under preschool, older preschool, etc.
Highlight the line with a marker. A bright color can be a visual cue of where to write. Letters should rest on the line. You can start with a nice thick and brightly colored highlighter like this one and move to a thinner pen like these ones. Sometimes the visual cue of that bright line is enough to keep letters placed correctly.
Another strategy to work on line awareness in coloring is to add bolder coloring shape lines with more contrast by darkening the borders with a black marker. Simply outline the shape with a black marker for a visual prompt.
For kids that show a great deal of difficulty with coloring in a given space, use a stencil made from a thing cardboard like a recycled cereal box. Cut out a rectangle and place it over the given writing space. This will help to remove distractions of the rest of the page and proved a designated space to color within.
Use glue to trace along the outside border of the coloring space. Let the glue dry and then use that tactile border as a physical prompt for coloring lines.
The typical grasp pattern for 5-6 year olds is a tripod/dynamic tripod grasp.
Coloring Skills at SIX YEARS OLD AND BEYOND
Older children can sometimes struggle with coloring and see their peers who seem to have little trouble at all. This can be a stab at their confidence and self-esteem. For older children, coloring often-times is a “sometimes” task in the classroom, so there are limited opportunities for a hands-on fine motor task. Still older students use primarily colored pencils to color in the classroom. Coloring with colored pencils requires even more hand strength, precision, and mobility with the pencil, so this can be a challenge.
Try these strategies for teaching older kids coloring skills:
To teach coloring skills to older children, use all of the methods mentioned under each age level above.
Your elementary-aged child will continue to develop fine motor skills for writing and coloring, as well as manipulating other craft media like clay, papier mache, etc. Creating things with their hands will not only strengthen their muscles but will also benefit their social development, self-esteem, and problem solving skills.
Work on coloring with a variety of crayon types, markers, or paint pens.
Use interest-based coloring books or coloring pages.
A final note on teaching coloring skills
If wondering exactly how to teach coloring skills to children at various ages is something you are looking for developmentally appropriate strategies, this comprehensive resource is for you. Coloring is a child occupation needed for learning, interactive play, and creative play.
Encourage your kids at all stages of development to explore their creativity and the fine motor, visual motor, cognitive and socioemotional skills will follow.
Dosman, C. F., Andrews, D., & Goulden, K. J. (2012). Evidence-based milestone ages as a framework for developmental surveillance. Paediatrics & Child Health,17(10), 561–568. https://doi.org/10.1093/pch/17.10.561
How to Teach Coloring Skills is a collaborative article by Colleen Beck, OTR/L and Sydney Rearick, OTS.
Colleen Beck, OTR/L has been an occupational therapist since 2000, working in school-based, hand therapy, outpatient peds, EI, and SNF. Colleen created The OT Toolbox to inspire therapists, teachers, and parents with easy and fun tools to help children thrive. Read her story about going from an OT making $3/hour (after paying for kids’ childcare) to a full-time OT resource creator for millions of readers. Want to collaborate? Send an email to contact@theottoolbox.com.
Sydney Thorson, OTR/L, is a new occupational therapist working in school-based therapy. Her background is in Human Development and Family Studies, and she is passionate about providing individualized and meaningful treatment for each child and their family. Sydney is also a children’s author and illustrator and is always working on new and exciting projects.
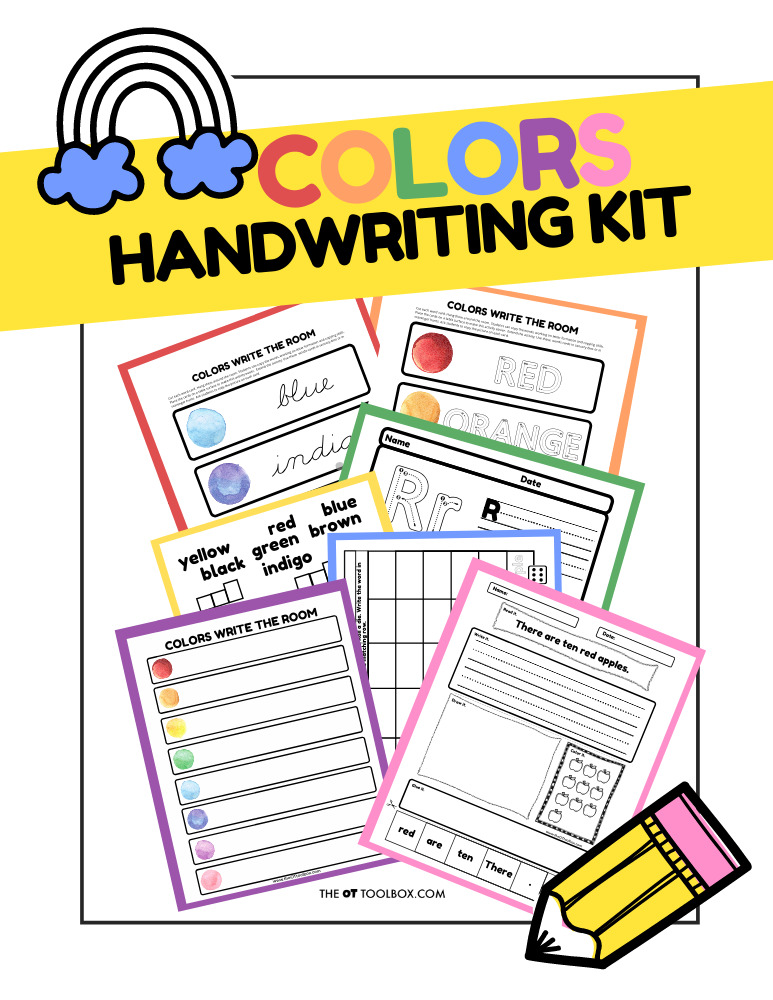
Rainbow Handwriting Kit– This resource pack includes handwriting sheets, write the room cards, color worksheets, visual motor activities, and so much more. The handwriting kit includes:
Write the Room, Color Names: Lowercase Letters
Write the Room, Color Names: Uppercase Letters
Write the Room, Color Names: Cursive Writing
Copy/Draw/Color/Cut Color Worksheets
Colors Roll & Write Page
Color Names Letter Size Puzzle Pages
Flip and Fill A-Z Letter Pages
Colors Pre-Writing Lines Pencil Control Mazes
This handwriting kit now includes a bonus pack of pencil control worksheets, 1-10 fine motor clip cards, visual discrimination maze for directionality, handwriting sheets, and working memory/direction following sheet! Valued at $5, this bonus kit triples the goal areas you can work on in each therapy session or home program.
Colleen Beck, OTR/L has been an occupational therapist since 2000, working in school-based, hand therapy, outpatient peds, EI, and SNF. Colleen created The OT Toolbox to inspire therapists, teachers, and parents with easy and fun tools to help children thrive. Read her story about going from an OT making $3/hour (after paying for kids’ childcare) to a full-time OT resource creator for millions of readers. Want to collaborate? Send an email to contact@theottoolbox.com.
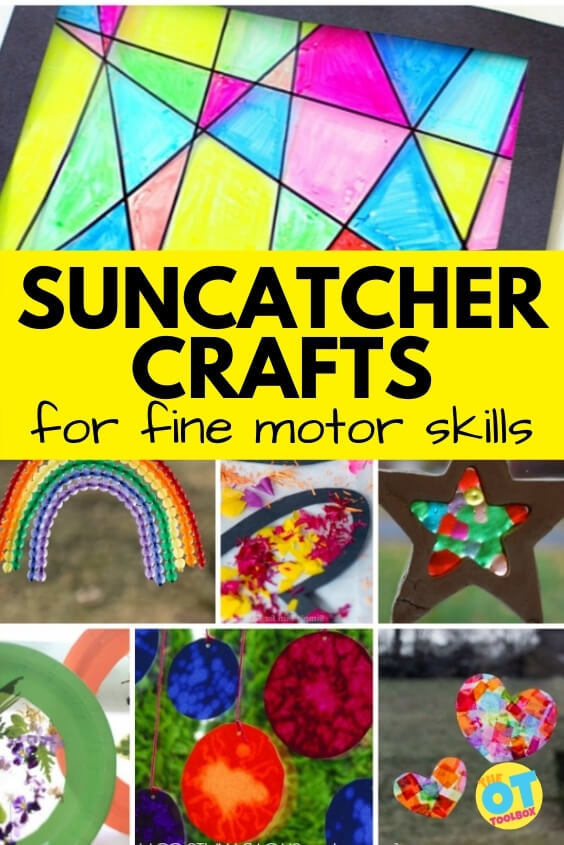
Looking for Summer activities that kids can do in therapy or at home while building fine motor skills? These suncatcher crafts are designed to do just that. I’ve put together a few sun catcher activities that kids can do this summer to work on dexterity and precision…and brighten up any room! Use these DIY suncatcher activities in occupational therapy interventions or therapy at home and let’s get those fine motor skills working!
These are just one of the many occupational therapy crafts for kids that we have here on the site. Use these suncatcher crafts to build essential skills needed for writing, pencil grasp, functioning, and play!
Suncatcher Crafts Kids will Love
This time of year (and all year long, really) suncatchers make a fun craft for kids to make. They brighten up a room by bringing light and color in. We had to look around the webs for more gorgeous suncatcher crafts and found some beautiful crafts for Summer fun. These suncatchers are not only pretty, they use some different materials to catch the sun’s rays and fill your room with color.
Sun catcher Crafts for Kids
This Faux Stained Glass Suncatcher from Buggy and Buddy is a great way to incorporate ruler skills, bilateral coordination, visual tracking, and other visual perceptual skills into a DIY suncatcher craft. Children can then color in the faux stained glass to work on line awareness and pencil control skills. What a great suncatcher activity for therapy!
This gratitude craft doubles as a Flower Suncatcher. Kids can work on scissor skills, bilateral coordination, motor planning, and even social emotional development. Involve the practice of empathy and mindfulness in kids as they focus on things and people they are thankful for when making this creative suncatcher craft.
This Rainbow Suncatcher from Fireflies and Mudpies is a great fine motor workout. Kids can thread beads onto pipe cleaners and build arch development, pincer grasp, tripod grasp, bilateral coordination, and eye-hand coordination skills. Then melt this DIY rainbow sun catcher into the most colorful window decoration.
This Button and Glue Suncatcher can be a fine motor workout as kids improve pinch, precision, eye-hand coordination, in-hand manipulation, separation of the sides of the hand. It’s a fun craft to use the materials you have in your home but also build fine motor skills!
This Crayon Shaving Suncatchers from Red Ted Art is a powerful fine motor activity. It works on separation of the sides of the hand, tripod grasp, and eye-hand coordination skills. Throw in cutting with scissors and you’ve got a scissor skills craft, too! Then, use those left-over crayon shavings to work on finger isolation like we did in this crayon shaving sensory bag.
These Oil Suncatchers from Meaningful Mama addresses a variety of skills: bilateral coordination, scissor skills, pencil control (using multisensory processes with a cotton swab and oil as the writing medium). What a fun way to work on fine motor skills that results in a beautiful sun catcher craft!
This Christmas Tree Suncatcher craft can be used for any theme or holiday. Use the same premise of picking up small sequins for a neat pincer grasp activity that builds arch strength, precision, and opposition of the fingers.
These Tissue Paper Heart Suncatchers from Fireflies and Mudpies can be a creative way to work on scissor skills. Cutting tissue paper is a challenge for kids because of the thin nature of the paper. But, it’s a great way to work on refinement of fine motor skills. Then add the bilateral coordination, motor planning, and visual figure-ground skill work and you’ve got a therapy craft that will be a hit! Here are more fine motor activities with tissue paper that can be used in OT interventions.
This Nature Collage Suncatchers from Hands on as We Grow can be a fun way to work on eye-hand coordination, grasp development, and visual figure ground skills with kids.
These Salt Dough Suncatchers from Homegrown Friends are a gorgeous sun catcher craft that can add heavy work through the hands, followed by pinch and dexterity grasp work.
Need more ways to build fine motor skills through play?
Grab the Summer Fine Motor Kit to work on precision, dexterity, grasp development, and much more!
Colleen Beck, OTR/L has been an occupational therapist since 2000, working in school-based, hand therapy, outpatient peds, EI, and SNF. Colleen created The OT Toolbox to inspire therapists, teachers, and parents with easy and fun tools to help children thrive. Read her story about going from an OT making $3/hour (after paying for kids’ childcare) to a full-time OT resource creator for millions of readers. Want to collaborate? Send an email to contact@theottoolbox.com.
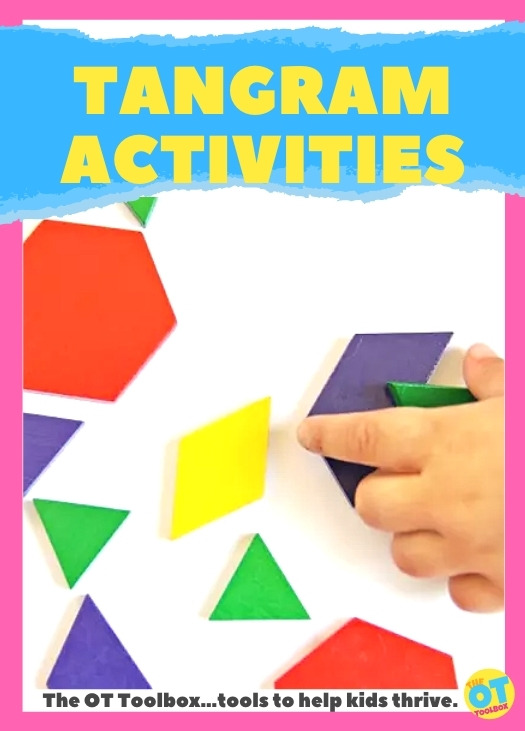
These tangram activities are designed to develop visual perceptual skills, visual motor skills, and fine motor skills in kids. Tangrams make a great addition to any occupational therapy treatment bag!
Tangram Activities
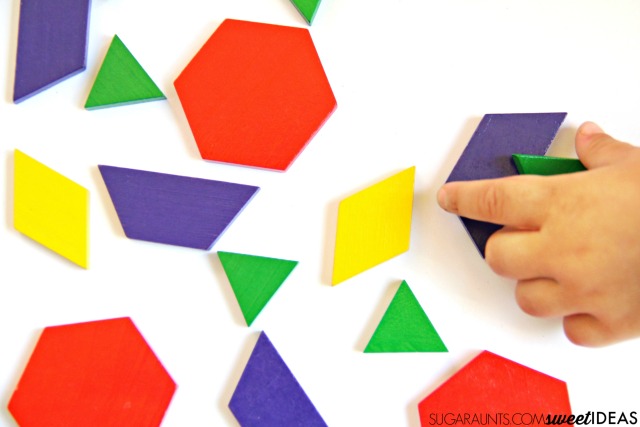
Tangrams are a great tool for learning and development. The colorful shapes are perfect for building images and working on math skills such as shape identification and patterning.
Tangrams are also an easy way to incorporate visual perceptual skills, fine motor skills, and visual motor integration into play.
Development of visual perceptual skills is essential for tasks like reading, writing, math, movement, self-care, and many other functional tasks. These tangram activities are perfect to improve visual perception in a playful way. You can use tangrams to address visual perception in many more ways, including ideas to help with handwriting.
And check out these cardboard tangrams for developing visual motor integration skills.
This post contains affiliate links.
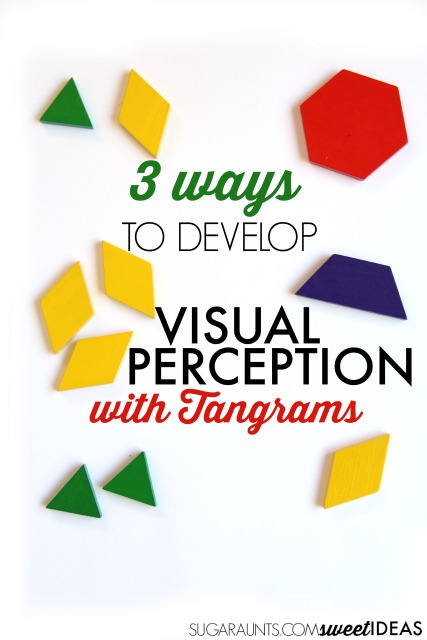
Visual perception allows us to take in visual information, process it, and use it to interpret information from our environment. There are many parts of visual perception, but today, I’ve got three visual perceptual skills that can be developed using tangrams.
Visual Percepetion and Tangrams
1. Visual Discrimination allows us to determine similarities and differences based on color, shape, etch. This skill allows us to know that a 6 and a 9 are different and that a p and a q are not the same letter.
Use tangrams to work on visual discrimination:
Place tangram shapes on a piece of paper. Ask the child to locate all of the triangles, all of the squares, etc.
Ask the child to find shapes that are the same even if they are different sizes. This tangram set has several different sizes of triangles, making it a great tool for form constancy.
Use two different shapes to discuss what makes the shapes similar and different.
2. Visual Memory allows us to retain visual information. We need visual memory in order to copy written work.
Use tangrams to work on visual memory:
Use the tangrams for a hands-on game of “Simon”. Place shapes on a piece of paper, taking turns to add one new shape at a time. Each player should recall the previous round before adding a new tangram shape.
Place several tangram shapes on a piece of paper. Allow the child to stare at the shapes for a period of time. Then, cover the shapes with a second piece of paper. Ask the child to recall the shapes that they saw.
3. Form Constancy is the ability to recognize shapes and forms no matter what position they are in.
Use tangrams to work on form constancy:
Use tangrams to build form constancy by positioning shapes in different positions. Ask the child to locate all of the squares, quadrilaterals, etc.
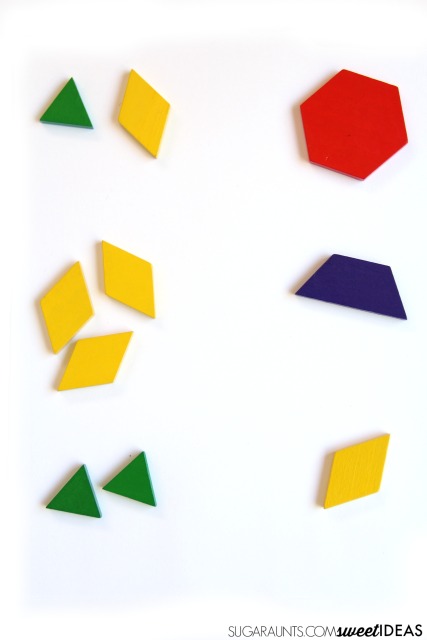
Position shapes on one side of a piece of paper. On the other side of the paper, position shapes that can be combined to make the shape on the first side of the paper. Ask the child to match up the two sides.
Position shapes along one side of a piece of paper. Position matching shapes along the right side of the paper, with the shapes slightly rotated. Ask the child to match up the shapes.
Colleen Beck, OTR/L has been an occupational therapist since 2000, working in school-based, hand therapy, outpatient peds, EI, and SNF. Colleen created The OT Toolbox to inspire therapists, teachers, and parents with easy and fun tools to help children thrive. Read her story about going from an OT making $3/hour (after paying for kids’ childcare) to a full-time OT resource creator for millions of readers. Want to collaborate? Send an email to contact@theottoolbox.com.
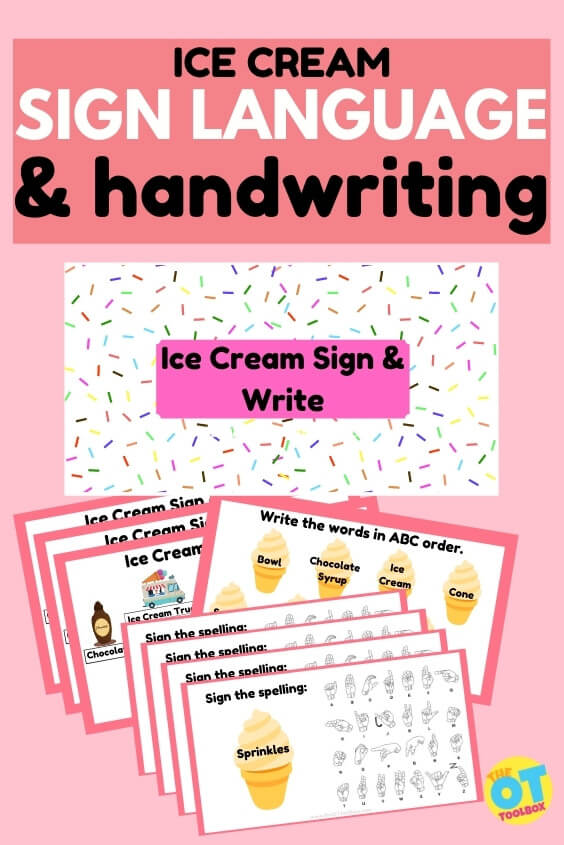
Today I have a fun ice cream writing activity that gets kids excited about writing ice cream words and everything fun and motivating about ice cream. If your kids are anything like mine they love ice cream and the toppings ice cream cones sprinkles and the jingle of the ice cream truck.
Ice Cream Writing
In this ice cream writing activity kids can work on the skills they need for legible handwriting including letter formation sizing spacing and copying skills and the fine motor skills needed for a functional pencil grasp.
All of this happens in an interactive in a free Google slide that you can use in teletherapy face-to-face therapy home programs or in the classroom for with an ice cream theme.
This ice cream writing activity begins with a several ice cream themed words including:
ice cream truck
chocolate syrup
ice cream scoop
cone
sprinkles
spoon
bowl
Ice Cream Writing Skills
Kids can copy the words from the slide deck and work on letter formation, sizing, spacing, and legibility.
You could expand the activity to ask kids to write the words in alphabetical order and address some visual perceptual skills such as visual scanning visual memory visual attention and visual discrimination and others.
Then the slides continue with a visual perceptual exercise that takes away one of the items on the previous slide.
This activity is much like one a hands-on “what’s missing” activity where you lay out several minute items on a table and then ask children to remember what they see in front of them and then after a few seconds you take away one of the items and ask them what’s missing.
“What’s Missing” games are such a great way to work on visual attention and visual memory skills. These skills are so needed for copying materials writing reading and recalling letter formation as well as hand writing rules like using spaces between words in pencil grasp rules.
The slides continue with several of these “what’s missing” activities with the ice cream theme where kids can write out the specific ice cream terms that are missing on each slide in further work on handwriting skills.
Write Ice Cream Words in ABC Order
The next ice cream handwriting activity asks kids to write in alphabetical order, several ice cream words scattered on ice cream cones.
Kids can work on copying those in order and work on the visual memory skills and visual perceptual skills needed for putting words into alphabetical order.
Ice Cream Sign Language Activity
The next several slides include several American Sign Language handwriting activities to spell out ice cream words.
There is an American Sign Language key on each slide so that kids can visually scan to copy the hand formations to spell out the words.
They will love using sign language to spell out ice cream words like sprinkles, scoop, ice cream, bowl, and spoon.
The benefits of asking children to use sign language to spell words is that if they do not know the sign language hand formations, that they need to visually attend to on the screen, using visual memory and visual attention skills to copy the formation.
However using sign language also develops working memory to recall and use the same letters in spelling. American sign language activities and spelling also benefits kids to work on fine motor skills such as:
finger isolation
separation of the sides of the hand
open thumb web space
arch development
dexterity
Ice Cream Writing Prompts
The last activity on this ice cream writing task is a open ended handwriting task which asks students to create sentences using the ice cream words.
You can expand this activity to meet the needs of various levels of children by asking them to copy more sentences or less sentences you can make the sentences very concrete and give them a specific sentence to write that contains the words or you can leave it open ended and ask students to write a silly sentence or a story using the words on the slide.
Use the ice cream writing prompts to meet the needs of your students!
You will also enjoy the other ice cream activities that we have here on the website including:
Would you like to add the slide deck to your therapy Toolbox? Enter your email address into the form below to access this ice cream writing activity.
Colleen Beck, OTR/L has been an occupational therapist since 2000, working in school-based, hand therapy, outpatient peds, EI, and SNF. Colleen created The OT Toolbox to inspire therapists, teachers, and parents with easy and fun tools to help children thrive. Read her story about going from an OT making $3/hour (after paying for kids’ childcare) to a full-time OT resource creator for millions of readers. Want to collaborate? Send an email to contact@theottoolbox.com.
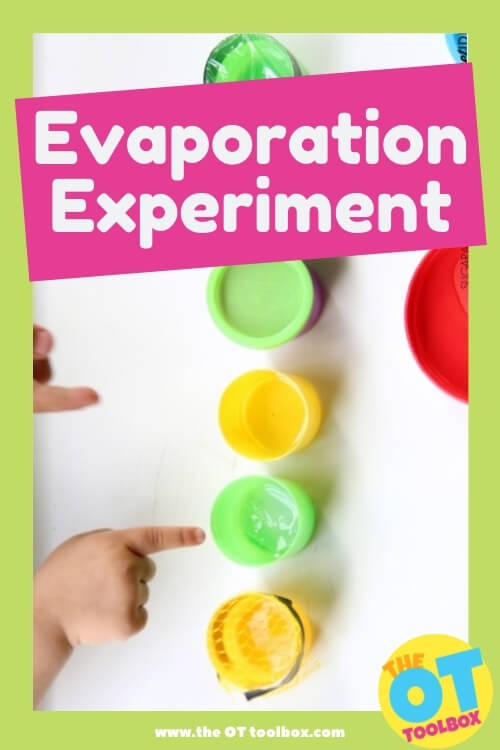
This evaporation experiment uses recycled materials to explore evaporation. Kids can use the recycled materials projects as a science science experiment to explore how evaporation works with different sized containers.
Evaporation Experiment
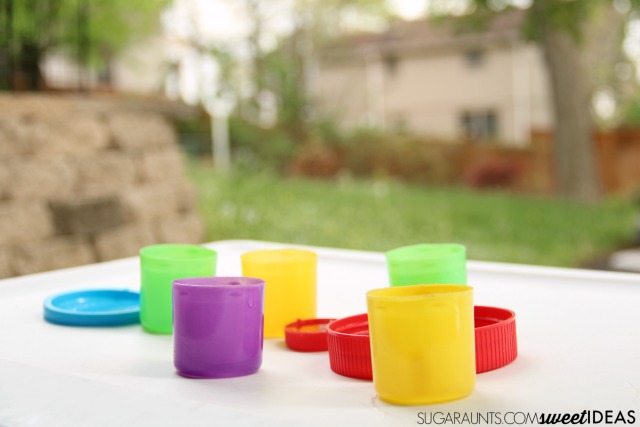
This was SUCH a fun way to explore science with my kids. We talked about water evaporation while engineering a few different water containers and working in a bit of math, too. Getting outside to play is something we do everyday, so this outdoor STEM activity was a perfect way to bring a little bit of learning outdoors on a sunny day.
Evaporation Experiment with Recycled Materials
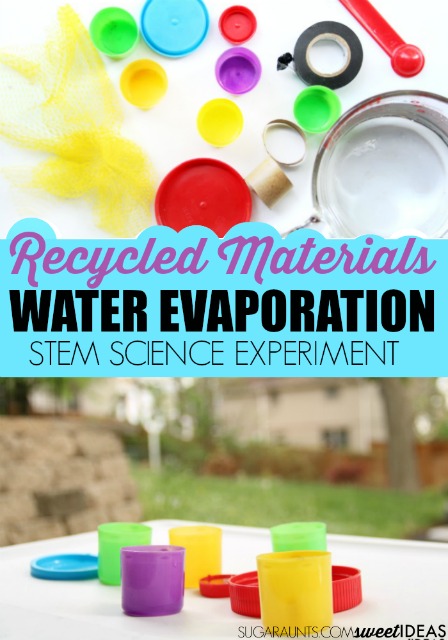
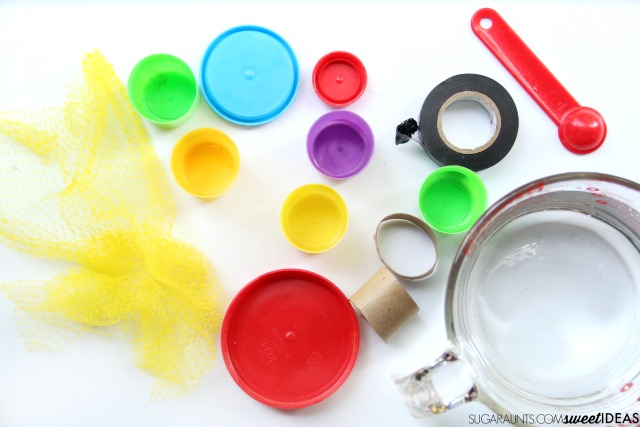
To complete this science experiment, we used all items from our recycle bin. You’ll need a few items to do this evaporation experiment at home:
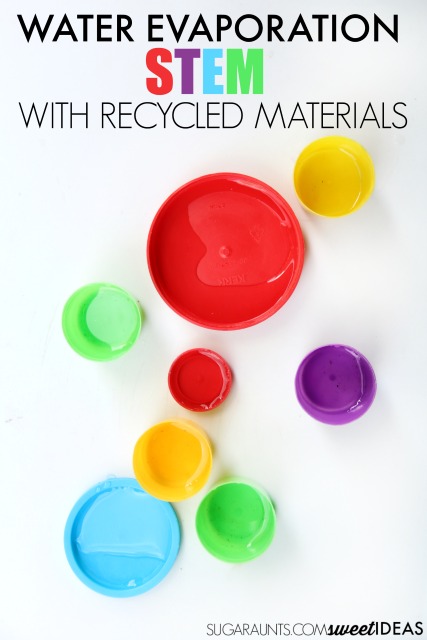
Lids from various containers. (We used lids of various sizes to explore how fast water would based on container size. Some lids you’ll want are deep lids, bottle caps, and low lids like one from a play dough canister.) If you have a recycled materials craft bin started, just pull from there.
Other recycled materials to see if we could adjust the lids that were alike.
Tape (This was the only non-recycled material that we used in this science experiment.)
Eye-dropper, small spoon, or a straw to drop water into the cups and containers.
Evaporation Activity for Kids
To set up this evaporation experiment, we worked on a bit of fine motor skills and visual perceptual skills. First we expored each container, lid, and cup to determine which was biggest, smallest, and which we thought would hold more water.
This is a great evaporation activity for preschoolers!
Determining the containers by size allows preschoolers to explore visual perceptual skills and size concepts.
Next, you’ll need to add the same amount of water to each cup or container. There are several ways you can do this: by using an eye dropper, small spoon (like a teaspoon), or the end of a straw. We used a dropper to fill each lid with the same amount of water. Each lid had 10 ml of water.
You can use the end of a straw to drop water drops into the cups. When you use the straw, kids are working on so many fine motor skills. We talked about how to do this (and why using a straw to drop water into the cups) is such an awesome way to build precision and dexterity in this butterfly painting craft.
My preschooler had fun scooping water into the lids and counted the measurements.
We then noticed how we had four containers that were all the same size. The other lids were various sizes.
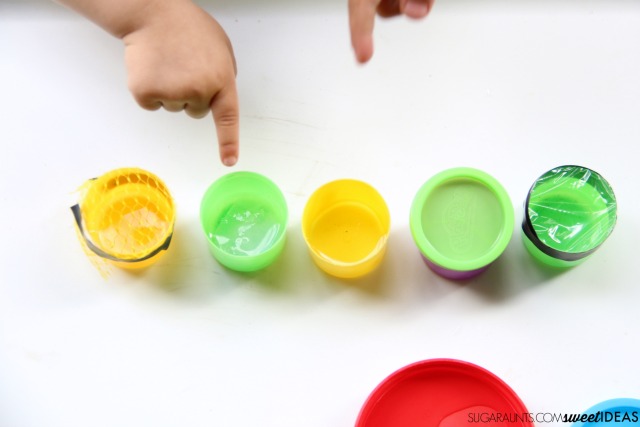
To the four lids of the same size, we modified the containers slightly to see how the top would affect rate of evaporation. We covered one with foil. Another was covered with plastic wrap and poked with small holes. The third was covered with mesh. The fourth container was left open to the air.
Related: You could take this evaporation experiment further and use ice cubes that then melt and evaporate. Here is information on the motor benefits of scooping ice. The ice cubes would then have to melt to a liquid and then go through the process of evaporating to a gas state.
Evaporation Experiment Predictions
I asked my kids from which lid they thought water would evaporate more quickly.
My preschooler said she thought the smallest lid (the bottle cap) would evaporate first because it was the smallest lid. She thought the play dough lid’s water would evaporate slowest because it was the biggest lid. She hypothesized that of the four containers that were the same size, the open container would evaporate first and the covered container would evaporate last.
I thought her answers were interesting and clearly following Piaget’s conservation theory. In this case, she thought the bottle cap appeared to have more water because it was filled to the brim, where the large and low play dough lid was only slightly covered with water.
My older kiddos had different answers: They thought the play dough lid would evaporate first because it had less “deepness” (or depth). We decided that the sun would shine and evaporate this lid’s water first.
They agreed with my preschooler when they said they thought the uncovered lid would evaporate before the covered lid.
While we made good hypotheses with this experiment, we ran into a bit of bad weather luck following our outdoor science. Our sunny day turned into several days of rain and gloomy skies. We’re still waiting for our water to evaporate and will update this post when we have some results!
Colleen Beck, OTR/L has been an occupational therapist since 2000, working in school-based, hand therapy, outpatient peds, EI, and SNF. Colleen created The OT Toolbox to inspire therapists, teachers, and parents with easy and fun tools to help children thrive. Read her story about going from an OT making $3/hour (after paying for kids’ childcare) to a full-time OT resource creator for millions of readers. Want to collaborate? Send an email to contact@theottoolbox.com.
These Earth Day Activities are great for occupational therapy activities because they are full of fine motor work, bilateral coordination, motor planning, and sensory experiences. Plus, when kids create these Earth day crafts and play experiences, they are learning about recycling, cleaning up the Earth, and nature.
Earth Day Activities
Let’s get to the Earth Day fun!
Make a recycled materials craft bin. Kids can gather recyclable materials from food containers, cardboard, artwork, and use them to make a DIY craft bin that is used for making more crafts and using in fine motor or sensory play activities. I love that the wax paper sleeves or egg cartons can be easily stored in cut cereal boxes. What a way to work on scissor skills with a variety of materials.
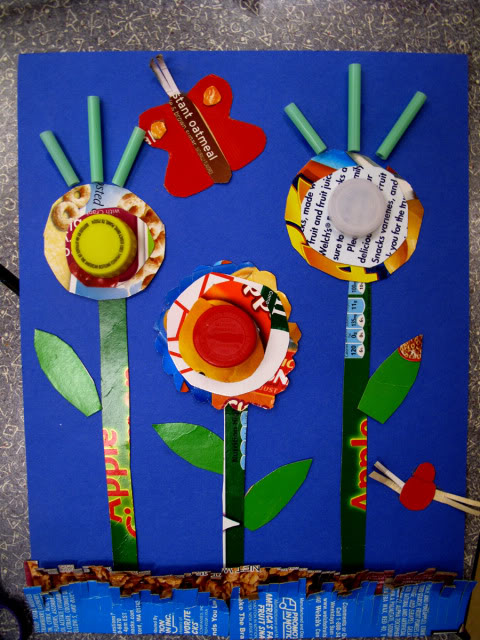
2. Use recycled materials to make a flower craft– Then, after that recycled materials craft bin is sorted, use the items to make a flower craft. Things like used egg cartons, cereal boxes, paper bags, can be cut and manipulated to craft and work on fine motor skills.
3. Head outside. There are so many benefits to playing and exploring the outdoors. And, kids can learn about the earth, too.
4. Read about recycling. These books about recycling are great to incorporate into therapy activities.
5. Incorporate recycled materials into learning concepts. Use these strategies to integrate therapy goals into the classroom with a recycling theme. You’ll find math, reading, science, and more ideas here.
6. Plant something- Explore this post on sensory gardens to find ways to incorporate sensory input in the outdoors.
I was surfing around on some other lovely blogs and trying to find some fun crafts that we could try. Here are a few of our favorite ones we came across all geared towards children ages two through five.
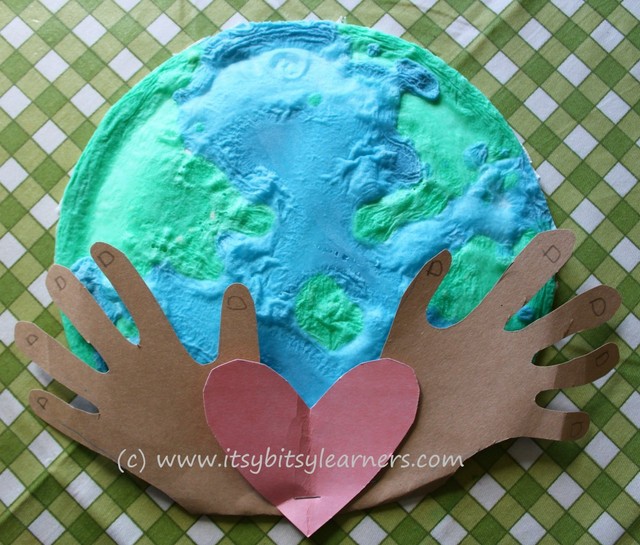
Itsy Bitsy Learners
This is a fun activity for preschoolers using homemade textured paint.
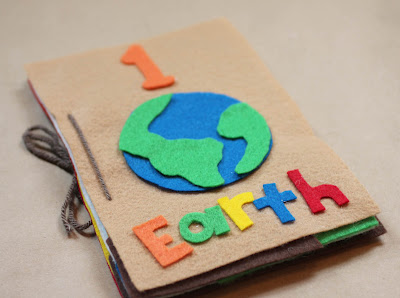
Repeat Crafter Me This Earth Day inspired felt counting book is such a great idea for toddlers.
Imprints From Tricia What a fun idea- go on a nature hunt and create a Nature Book. Press plants, leaves, and flowers into paint and then write to describe the prints. It’s a great sensory based handwriting activity.
Laugh Paint Create Created some great recycled artwork with cardboard food boxes. Work on scissor skills, bilateral coordination, and more.
Teach Beside Me These adorable Rock faces will make anyone smile and make a beautiful addition to a garden.
All of these great posts have inspired us to go create something special out of recycled items or something Mother Earth has provided for us…we can’t wait to get our hands dirty!
Colleen Beck, OTR/L has been an occupational therapist since 2000, working in school-based, hand therapy, outpatient peds, EI, and SNF. Colleen created The OT Toolbox to inspire therapists, teachers, and parents with easy and fun tools to help children thrive. Read her story about going from an OT making $3/hour (after paying for kids’ childcare) to a full-time OT resource creator for millions of readers. Want to collaborate? Send an email to contact@theottoolbox.com.

when the kids are not around and let the disinfectant dry. I don’t typically do this step, though. We just try to make sure to wash our hands after playing with egg cartons.
is a great practice tool, with it’s bright colors and stiffer laces than the ones typically on shoes that we wear. Practice on the model before moving to your child’s real shoe.
is a real incentive to practice shoe tying.
is another fun model shoe with bright and bold colors. This is a good toy to take along on outings with it’s flat shape.
is another fun shoe to practice tying
are great for kids that have trouble at the “loop part” of shoe tying. They eliminate the loops and give kids something to hold onto while tying. Kids with hand weakness will benefit from this tool.
. They can be laced in shoes and help the child’s shoe stay snug.
are another way to modify shoe tying. Use these until your child is ready and able to practice effectively. They are great laces for kids with difficulties in any of the underlying skills needed for shoe tying.
is an excellent way to practice shoe tying with a more resistive lace. Use them in place of shoelaces in the egg carton activity that we shared today.
can help kids with lacing, managing strings, threading, bilateral hand coordination, and strength. It’s a great precursor activity to practicing shoe tying.
. It works on bilateral hand coordination and strength needed to tie shoes with dexterity and ease.