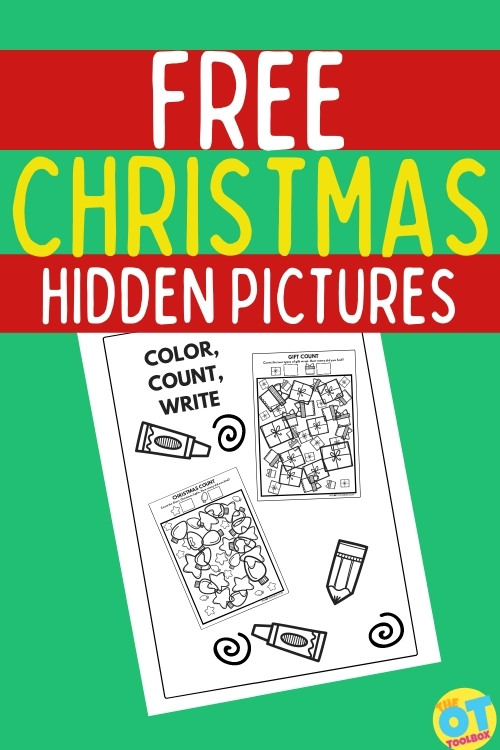
Are you looking for a Christmas hidden picture worksheet that doubles as a visual figure ground activity? This Christmas worksheet PDF can be used with students to also address fine motor skills and coloring? Christmas Color and Count is a printable hidden picture printable PDF 2 page resource that will help you address these skills with your students.
Christmas Worksheet PDF: Hidden Pictures
This Christmas hidden picture resource includes 2 printable PDF pages to use with your students during the holidays. The first page has Christmas lights and stars and the second page has 2 different types of gifts.
These printable hidden picture PDFs work on several areas over the holiday season…when kids might not want to work on difficult skill areas. A festive and fun themed activity can help address the underlying areas that impact handwriting, reading, and other visual processing tasks.
How do Hidden Picture Worksheets Help?
Hidden picture worksheets can address many areas that impact function. Let’s take look at all the ways to use this free hidden picture puzzle in therapy”
These worksheets target the visual perceptual skill of visual figure ground. You will also be able to use these worksheets to work on fine motor skills at the same time while finding and coloring the Christmas stars and holiday lights.
Visual Figure Ground Skills- First, let’s look at the visual perceptual skill of visual figure ground. Visual figure ground is the ability to differentiate or pick out an object from a busy background. This skill is essential for supporting the occupations of students in school, from reading text to finding an item in a cluttered desk.
Students use their visual figure ground skills to be able to differentiate words in a book, when copying information from the board, or when looking for something in their backpack.
You could easily use these Christmas Color and Count worksheets paired with other therapy activities to support visual figure ground skills. An important function of visual figure ground is the ability to scan the environment and find the important visual information.
More ideas using the Christmas Hidden Picture
There are more ways to use this Christmas Printable PDF in a variety of therapy activities to incorporate gross motor skills, fine motor skills, coordination, and more…
Use the Christmas Hidden Picture Printable PDF in an I Spy Game- It would be fun to extend this activity to include a scavenger hunt or I Spy Game in your therapy space, either as a warm up activity or as a game to end your session.
Hide stars or an image of Christmas lights around your space.
You could ask your students to collect the stars or play I Spy with the images of colored Christmas lights.
Other fun games to address visual figure ground include (Amazon affiliate links) Spot It or I Spy Board Game.
Visual Discrimination Activity- Once you have completed a scavenger hunt or other warm up activity and your students are ready to move on, you can begin by having them look at the pictures at the top of the page.
Ask them to identify and describe the key features of the objects they will count. For example, the star has angles and the Christmas lights are rounded.
Ask them to describe the differences between how the 2 gifts look on the second page.
Executive Function Activity- Next, ask your students how they plan to start this activity.
This helps with executive functioning and organization.
Will they find all of one item and then move to the next?
Will they start at the top and scan in a left to right manner?
Asking your students to verbalize their plan will help you understand their organizational strategies and how you may best support their executive functioning.
Visual Scanning Activity- Now, your students are ready to scan and color each shape.
Coloring is a great way to develop fine motor strength and endurance. Coloring is a skill that needs to be taught to support the fine motor development of students. Coloring is a skill that requires hand strength.
Often children with decreased hand strength dislike coloring because they do not have the endurance to complete the task. If you have students who struggle with coloring try offering alternatives to crayons, and then work your way up using crayons or colored pencils.
Often students who have difficulty with the fine motor components of coloring prefer using markers. Markers provide less resistance and for many students they provide more visual interest. Using markers to increase visual attention and motivation for coloring is a great tool for students struggling to build fine motor and visual skills.
For students who may struggle with coloring, think of ways to make it more fun and interesting for them. Here are some ideas:
Christmas Hidden Picture and Strengthening Activity- For students who need additional strengthening opportunities, think about how you can challenge their postural strength and upper body stability.
Other ways to incorporate strengthening into this activity:
Tape the worksheets to the wall at eye level which will address shoulder strength and stability
You could also tape the worksheets under the table and have your students work while lying on their back. This a fun and different way to work on fine motor strengthening!
Find some floor space and have the students lie prone, propped up on elbows while coloring. This position will help strengthen their postural muscles and increase shoulder stability.
Use a large therapy ball instead of a chair to challenge postural strength while coloring at the table.
For students who avoid or dislike coloring, incorporating different positions into your session may help them start and stay engaged, building not only their fine motor skills, but also strengthening their visual attention.
Free Christmas Hidden Picture Worksheet PDF
Christmas Color and Count is a great activity for building important visual figure ground skills and strengthening fine motor endurance at the same time!
Katherine Cook is an occupational therapist with 20 years experience primarily working in schools with students from preschool through Grade 12. Katherine graduated from Boston University in 2001 and completed her Master’s degree and Certificate of Advanced Graduate Study at Tufts University in 2010. Katherine’s school based experience includes working in integrated preschool programs, supporting students in the inclusion setting, as well as program development and providing consultation to students in substantially separate programs. Katherine has a passion for fostering the play skills of children and supporting their occupations in school.
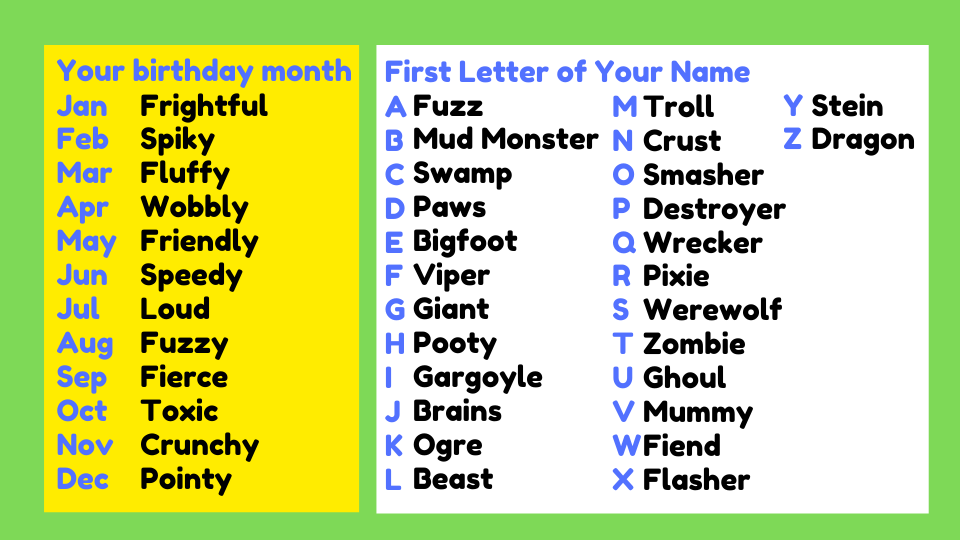
Recently, I’ve been sharing some occupational therapy slide decks with you. These slide decks are OT activities that can be used in teletherapy sessions as part of distance OT or distance learning. Today, I’ve got movement activities with a monster theme to share. These are monster themed occupational therapy activities that cover a variety of areas. When you access the OT slide deck, use in to work on OT activities like a therapy warm-up, gross motor skills, fine motor skills, visual perceptual skills, visual motor skills, and finally, a self-regulation check-in. Each activity in the collection involves movement activities that build specific skills. Scroll to the bottom of this post to enter your email to access the latest free occupational therapy slide deck.
Movement activities
As always, my mission here at The OT Toolbox is to help you help kids thrive through the use of easily accessible tools and resources.
The slides included in this set are acceptable movement activities for preschoolers because they use letters, helping preschoolers to recognize and identify letters. The slides would also work as a movement activity for kids in older grades as well, using the handwriting and visual motor activities to build specific skills like visual motor skills needed for handwriting tasks, copying lists of words, and visual perceptual skills needed for reading.
Monster Movement Activities for Kids
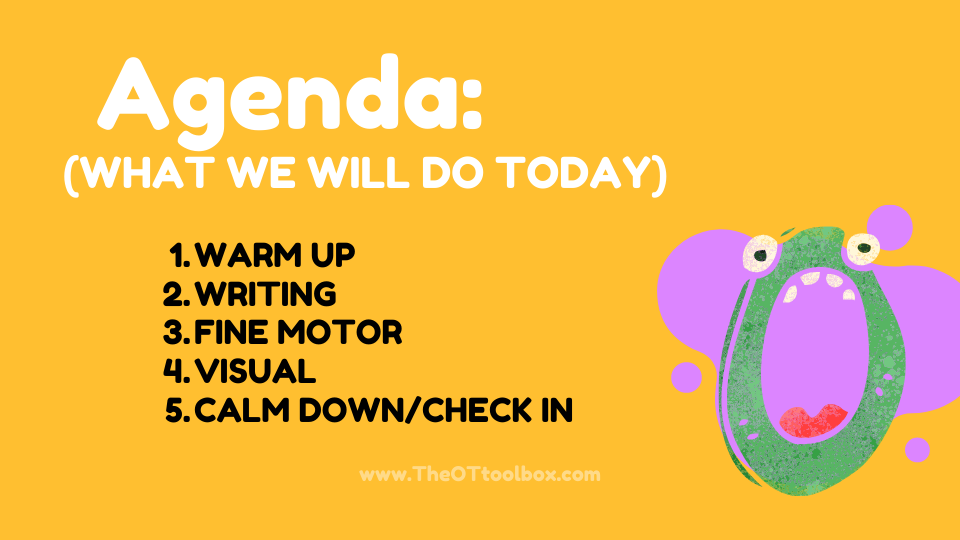
The slide deck promotes movement activities for kids in several ways. These are the slides and an agenda of activities to use in therapy sessions:
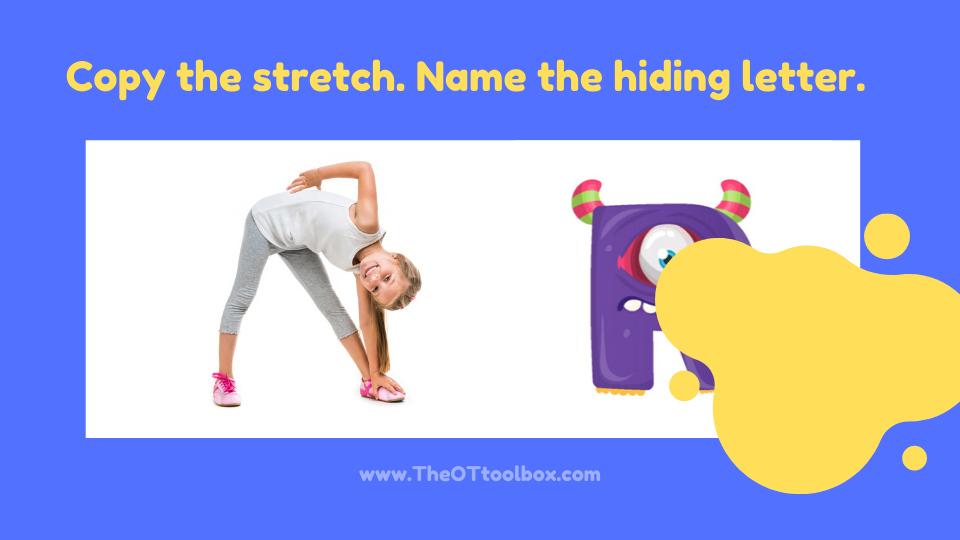
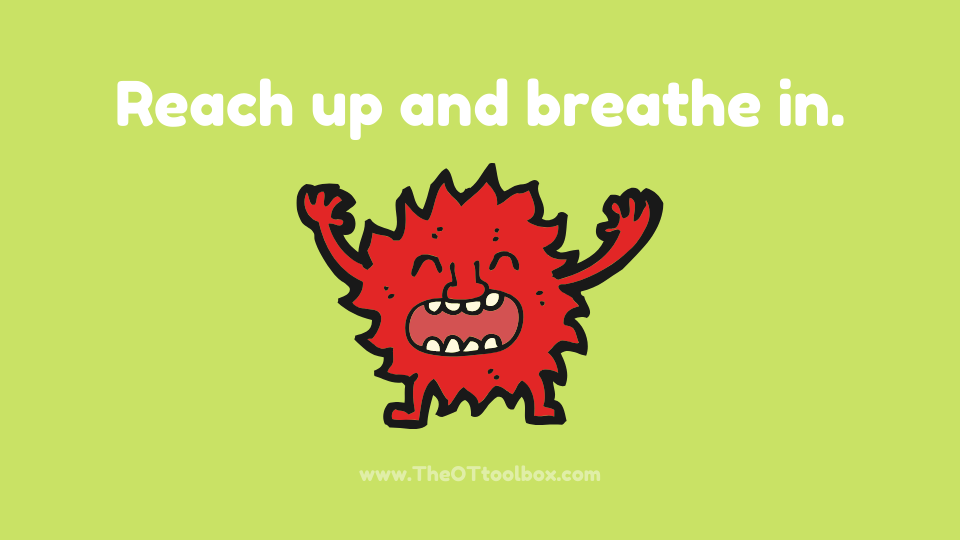
Warm-Up– Use the gross motor movement activities as a warm up to help with body awareness and a sensory tool to add proprioceptive and vestibular input. Kids can copy the body positioning to challenge balance and coordination, as well as motor planning. I’ve added a visual perceptual component to the warm-up movement slides by asking children to identify a partially hidden letter as they do the whole-body movements. This challenges visual perceptual skills including visual discrimination, visual figure-ground, visual closure, form constancy, and visual memory. Read more about these skills that are needed to complete hidden pictures activities, for example.
Writing- The writing slides in this slide deck ask kids to identify the month they are born and the first letter of their name to create a wacky monster name. They can write this word phrase to practice handwriting. The visual scanning and tracking involved in this activity really challenges the visual processing skills and visual efficiency of the eyes. The movement activity of writing their name incorporates a functional task that they may be working on in their OT goals.
Fine Motor- The fine motor portion of this movement activity slide deck involves tearing paper into small pieces. By ripping paper, kids are building hand strength, bilateral coordination, eye-hand coordination, and efficiency of grasp. I’ve added a visual motor component to this activity by asking the child to use those paper scraps in shaping and copying specific shapes. The whole fine motor activity adds much-needed fine motor movement and eye-hand coordination to a shape building activity.
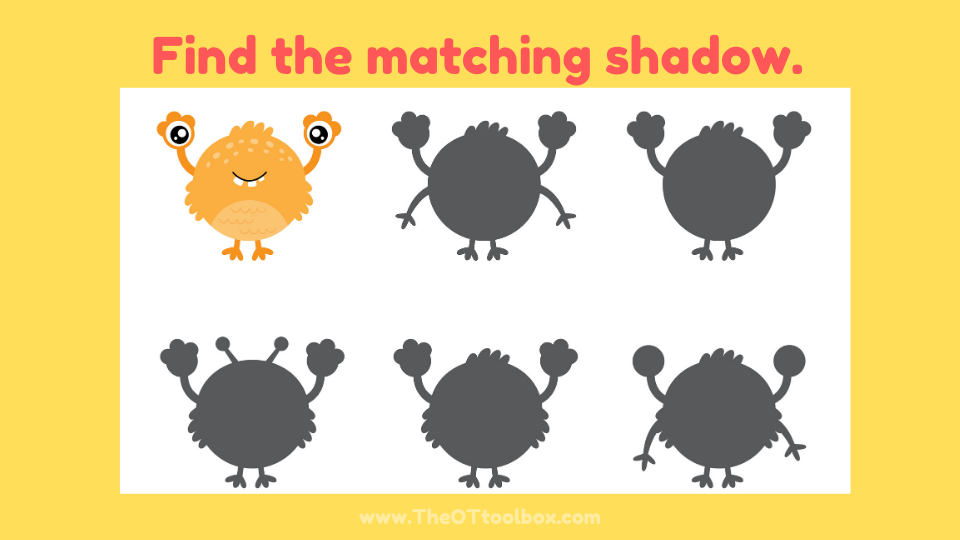
Visual- The visual portion of this occupational therapy slide deck is a favorite for some kids (My own kids included!) Use the slides to work on visual perceptual skills as they find matching shadows for the monster figures in a series of three slides. After the child completes each slide, ask them to jump and and cheer!
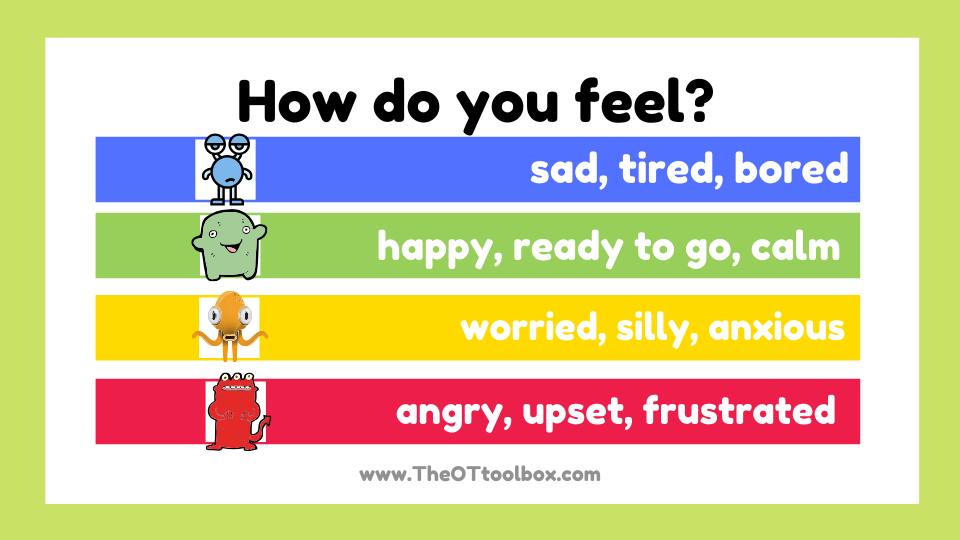
Calm Down/Check-In- Lastly, you’ll find a calm down slide that incorporates the colors of the Zones of Regulation program. Children can complete the calm down movement activities shown on the slides and then choose a color to check in for their state of feelings.
Want these movement activity slides?
Enter your email below. If you are currently on The OT Toolbox newsletter list, this will not add you a second time. It will simply send the slides your way. Enjoy!
HERE ARE MORE Movement ACTIVITIES TO USE IN VIRTUAL OT SESSIONS
Colleen Beck, OTR/L has been an occupational therapist since 2000, working in school-based, hand therapy, outpatient peds, EI, and SNF. Colleen created The OT Toolbox to inspire therapists, teachers, and parents with easy and fun tools to help children thrive. Read her story about going from an OT making $3/hour (after paying for kids’ childcare) to a full-time OT resource creator for millions of readers. Want to collaborate? Send an email to contact@theottoolbox.com.
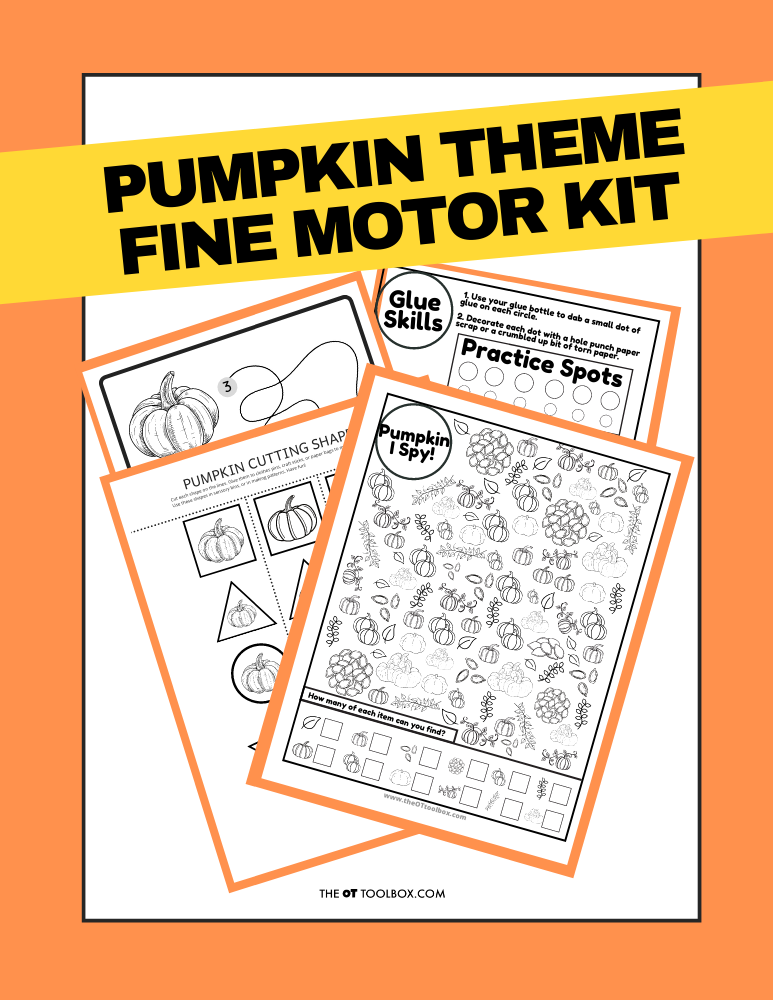
Grab the Pumpkin Fine Motor Kit for more coloring, cutting, and eye-hand coordination activities with a Pumpkin theme! It includes:
7 digital products that can be used any time of year- has a “pumpkins” theme
5 pumpkin scissor skills cutting strips
Pumpkin scissor skills shapes- use in sensory bins, math, sorting, pattern activities
2 pumpkin visual perception mazes with writing activity
Pumpkin “I Spy” sheet – color in the outline shapes to build pencil control and fine motor strength
Pumpkin Lacing cards – print, color, and hole punch to build bilateral coordination skills
2 Pumpkin theme handwriting pages – single and double rule bold lined paper for handwriting practice
Work on underlying fine motor and visual motor integration skills so you can help students excel in handwriting, learning, and motor skill development.
Colleen Beck, OTR/L has been an occupational therapist since 2000, working in school-based, hand therapy, outpatient peds, EI, and SNF. Colleen created The OT Toolbox to inspire therapists, teachers, and parents with easy and fun tools to help children thrive. Read her story about going from an OT making $3/hour (after paying for kids’ childcare) to a full-time OT resource creator for millions of readers. Want to collaborate? Send an email to contact@theottoolbox.com.
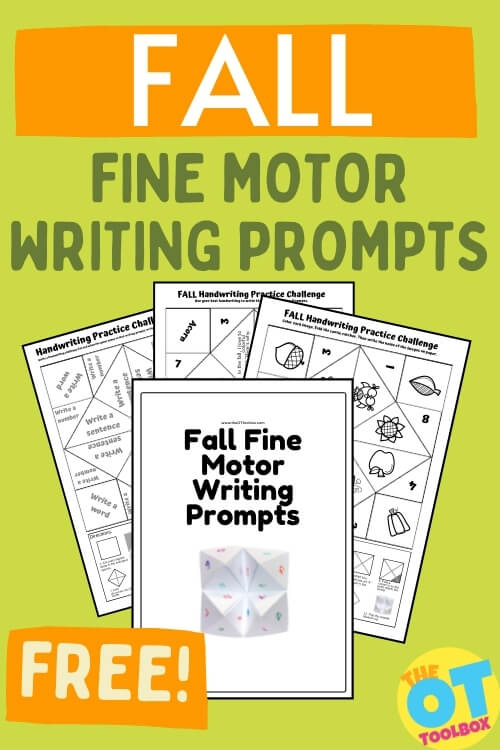
Working on handwriting with kids? This Fall cootie catcher template is a Fall writing prompt activity that builds fine motor skills. Just print off the cootie catcher templates, pick the one that works best to meet the needs of the child you are working with, and work on copying letters, words, and sentences. This cootie catcher PDF is a fun way to work on so many skills!
We shared this Spring cootie catcher earlier this year and it was a huge hit, so this Fall themed printable will be loved as well.
A cootie catcher is a folded paper game that includes squares and triangles that can be opened to contain written words or pictures. Cootie catchers are often used as a paper fortune teller game. A cootie catcher is an form of origami that kids can make, using a cootie catcher template. Once they practice using the blank template, children can learn the motor plan to create paper fortune tellers on their own.
In our case, we are using a cootie catcher as a fine motor tool for kids.
This one in particular includes writing prompts to make handwriting skills motivating and engaging for kids, with a Fall theme.
When you use this cootie catcher, kids can develop so many skills:
Bilateral coordination– When children fold paper, they use both hands together in a coordinated manner.
Hand strength– Pressing the paper into folded shapes requires strength in the hand to create a sharp crease.
Separation of the sides of the hand– Opening and closing the cootie catcher requires both hands to open and close at the thumb web space, and is a separation of the sides of the hand activity.
Arch development– Using fingers to fold paper develops arch development in the hand, which is needed for endurance in fine motor activities.
Finger isolation– Using a finger to fold and crease paper focuses on finger isolation, a dexterity skill in fine motor tasks.
Eye-hand coordination– Using the eyes and hands together to create and use the paper fortune teller develops and refines eye-hand coordination skills.
Want to print off this free cootie catcher? Enter your email to the form below and you’ll receive this printable in your inbox.
Colleen Beck, OTR/L has been an occupational therapist since 2000, working in school-based, hand therapy, outpatient peds, EI, and SNF. Colleen created The OT Toolbox to inspire therapists, teachers, and parents with easy and fun tools to help children thrive. Read her story about going from an OT making $3/hour (after paying for kids’ childcare) to a full-time OT resource creator for millions of readers. Want to collaborate? Send an email to contact@theottoolbox.com.
In occupational therapy, addressing upper body strength can iffy for some. All OT interventions must be functional and based on daily tasks that make up a person’s day. OT is occupation! So when it comes to upper body strengthening, the question can arise whether the strengthen is functional. BUT, when you think about functional tasks, upper body strength is a must. When upper body strength results in less function of daily occupations, upper body exercises relate back to the functional task, making skilled strengthening activities part of the OT treatment plan. Let’s look at upper body strength and upper body strengthening activities that are used in occupational therapy sessions.
The other day I was working on hand strength with a young child in one of my therapy sessions and I noticed how difficult it was for him to keep his arm in position while he was trying to complete the activity. I was reminded once again of how important upper body strength is when we are working towards improving fine motor skills.
Upper body strength is made up of the muscles in the upper chest, muscles in the upper back and muscles attached to the shoulder joint. All of these muscles work together to create stability at the shoulder joint. This shoulder girdle stability is essential for establishing a solid anchor for the rest of the arm. Without this anchor it is difficult to develop good control in the lower arm, hands and fingers. In therapy-speak we talk about developing proximal stability before we can achieve distal control.
The stronger body enables functional performance in purposeful activities.
Development of upper body strength
Upper body strength emerges as young toddlers and children engage in movement activities. In the first few months of life babies push up on their arms when lying on their tummies.
This early weight-bearing leads to strengthening and allows them to progress to four-point kneeling and eventually crawling. Upper body strength is very important as babies pull themselves into standing and begin to cruise along the couch or coffee table. This upper body strength continues to develop as children learn to climb jungle gyms, hold on to swings and learn to ride bicycles. The importance of play and movement in the early years reinforces the need for parents and caregivers to provide opportunities for young children to move and grow.
Read more about the power of play and the impact that the occupation of play has on strength development in kids.
Upper body strength remains vital in school-aged children as they tackle the challenge of refining their fine motor skills.
How to develop upper body strength
When focusing on developing upper body strength in children the vertical surface will become your new best friend!
Working on a vertical surface places extra demands on the upper body as these muscles have to move against gravity to complete the task. Working on a vertical surface has the added bonus of placing the wrist and fingers in a good position for drawing or writing. This is a great way to incorporate finger strength exercises into the task.
A vertical surface can be a wall, a door, a mirror, a blackboard or a white board.
Have a look at the following activities (and purposeful, functional tasks) that you can complete on a vertical surface:
Draw or color pictures
Use tape to stick a piece of paper or picture on the wall. Use chalk, crayons, pastels or pencil crayons to draw a picture or color a picture in. When working for upper body strength try to encourage big movements that incorporate a wide range of movement for the shoulder muscles. Big bold rainbows and large lazy eights work very well. Related, these are the best crayons to support development, based on age and motor skills.
Remember that the physical demands of working on a vertical surface are much greater than working at a table or a desk so give your child a chance to build up stamina and endurance.
Read more about coloring as a functional occupation and the development of coloring skills.
Playdough press
I like to use a mirror or white board for vertical playdough activities. Playdough lends itself to endless creative outcomes and working against a vertical surface adds a new fun dimension. Playdough pieces can be used to fill in outlines of pictures or playdough creations can be stuck onto the white board. A large piece of playdough can be stuck onto the vertical surface and impressions can be made using everyday objects e.g. spoon, pencil. We have even had fun making handprint and footprint impressions.
Also try these play dough activities for improving upper body strength through play.
Stickers
There are many reasons why stickers improve skills. Using stickers adds some refined pincer grip control, pinch strength, eye-hand coordination, wrist stability, shoulder girdle strengthening, and more. Place a page or picture on a vertical surface and use stickers to decorate. You can give verbal instructions to add listening skills and spatial concepts to the task e.g. place the blue sticker next to the cat.
Painting
Painting is another functional task that improves hand and upper body strength. Occupational performance includes leisure activities such as painting and art. Painting is a great functional way to improve upper body strength. Complete your painting activity on an easel or vertical surface.
Shaving cream on a mirror
This fun, messy activity is a firm favorite with children. Spray a dollop of shaving cream into their hands and encourage them to spread it across the mirror to create a shaving cream drawing board. Draw pictures, shapes and patterns across the mirror.
Whiteboard activities
Use whiteboard and white board markers to practice letter or number formations. To improve hand and upper body strength, use the whiteboard to play games like tic tac toe, word searches, and more.
Tearing and sticking
Stick the outline of a picture or shape on the wall. Tear small pieces of paper from a magazine and use a glue stick to paste the pieces onto the shape to fill the shape. Tearing paper strengthens the hand, wrist, shoulder girdle, and upper body. To make this a functional task, try using junk mail as a paper tearing activity.
Body shapes
This works well on a mirror. Ask the child to stand with their back up against the mirror. Use a Koki to trace the outline of the child. Encourage the child to add in the facial detail and clothing in order to complete the picture.
Race tracks
Draw a race track on a chalkboard or on a large piece of paper stuck to the wall. Drive a small car along the race track. Older children can draw their own race tracks. Try this race track activity using wikki stix. Playing on the floor strengthens the upper body, core, shoulder girdle, and wrist.
Using wikki stix activities to pinch and peel on the floor while incorporating upper body support is a great way to build upper body strength through play.
Kids also love this garage door activity where we used magnetic letters on the garage door. What a great activity for using a vertical surface to strengthen the upper body through play.
Tic Tac Toe
This can be played on a vertical surface. Encourage your child to draw the grid before playing the game. Engaging in these activities on a vertical surface will contribute to the development of upper body strength. Many of the games and activities that you have at home or in the classroom can be adapted to ‘vertical’ activities with a bit of tape or prestik.
For more functional upper extremity exercises using functional activities to strengthen the upper body for pencil grasp, scissor use, dressing, clothing fasteners, and more, be sure to grab our seasonal Fine Motor Kits. Each one includes resources for upper body strengthening but can be used on vertical surfaces for shoulder and core strengthening.
These Heavy Work Activity Cards promote full body movement and strengthening through play. Add them to your therapy toolkit.
Contributor to The OT Toolbox: Janet Potterton is an occupational therapist working predominantly in school-based settings and I love, love, love my job. I have two children (if you don’t count my husband!), two dogs, one cat, two guinea pigs and one fish. When I am not with my family or at work I try to spend time in nature. The beach is my happy place.
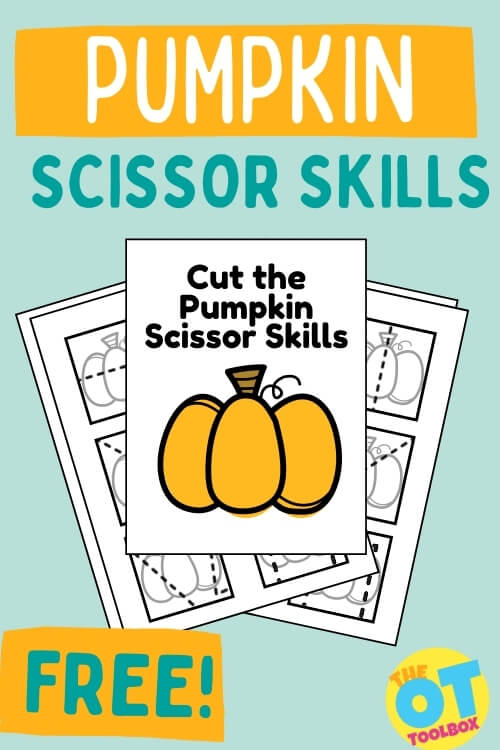
If you’ve been following along with our Fall fine motor activities, then you will love adding these Fall pumpkin cutting activities! I love these pumpkin scissor skill worksheets for cutting practice with a fun Fall theme. The pumpkin images have simple cutting lines, making them a great pumpkin activity for preschool, or any child that is working on early scissor skills. Also check out our pumpkin activities for ways to extend this activity in therapy sessions.
Get a copy of these pumpkin printables by entering your email address into the form at the bottom of this blog post.
Fall Pumpkin Cutting Activity
Print out the pumpkin worksheets and then use them to work on scissor skills with kids. I wanted to create a simple shape (square) to hold the pumpkin shapes. This way, kids can work up to cutting the square as a “next step” in developing scissor skills after cutting strait lines, curved lines, and jagged lines.
Each pumpkin image includes a cutting line. You’ll find strait lines, diagonal lines, angled lines, jagged lines, and curved lines.
Kids can “cut the pumpkin” to slice through the pumpkin pictures!
The lines on each shape start at different sides, so kids can work on placement with their non-dominant hand.
Extend the Pumpkin Cutting Activities
There is more than one way to use these pumpkin shapes this Fall. Try these pumpkin cutting activities to address a variety of skills and abilities:
Start with the large pumpkin cutting pieces and work toward using the smaller pumpkins.
Color in the pumpkins to work on coloring skills, line awareness, and hand strength.
Trace the dotted line with a fingertip to work on finger isolation.
Trace the dotted line with a marker, crayon, or even a bottle of squeeze glue to work on line awareness and visual motor skills.
Cut out the pumpkin images. Cut the dotted lines. Then, these can be used as mini pumpkin puzzles to work on visual perceptual skills.
Place the separated pumpkin images around the room. Kids can complete gross motor actions like donkey kicks, balance beams, lunges, or hops to reach different pieces of the pumpkins. They can try to piece all of the pumpkins together.
After cutting the lines on the large shapes and the smaller pumpkins, then ask kids to work on cutting the square to work on turning the paper to cut around corners.
Use these worksheets as a pumpkin craft ideas for toddlers. If given the cut out pumpkin pieces (start with the strait lines and diagonal lines), toddlers can place the pumpkin halves together like a puzzle. Use glue to glue the pumpkin back together onto construction paper to make a pumpkin patch craft! This would be a great pumpkin craft for preschool, too.
Free Pumpkin Cutting Practice Worksheets
Want to grab these free pumpkin cutting practice sheets? Enter your email into the form below. Have fun this Fall!
Colleen Beck, OTR/L has been an occupational therapist since 2000, working in school-based, hand therapy, outpatient peds, EI, and SNF. Colleen created The OT Toolbox to inspire therapists, teachers, and parents with easy and fun tools to help children thrive. Read her story about going from an OT making $3/hour (after paying for kids’ childcare) to a full-time OT resource creator for millions of readers. Want to collaborate? Send an email to contact@theottoolbox.com.
For more pumpkin and Fall activities, check out these tools:
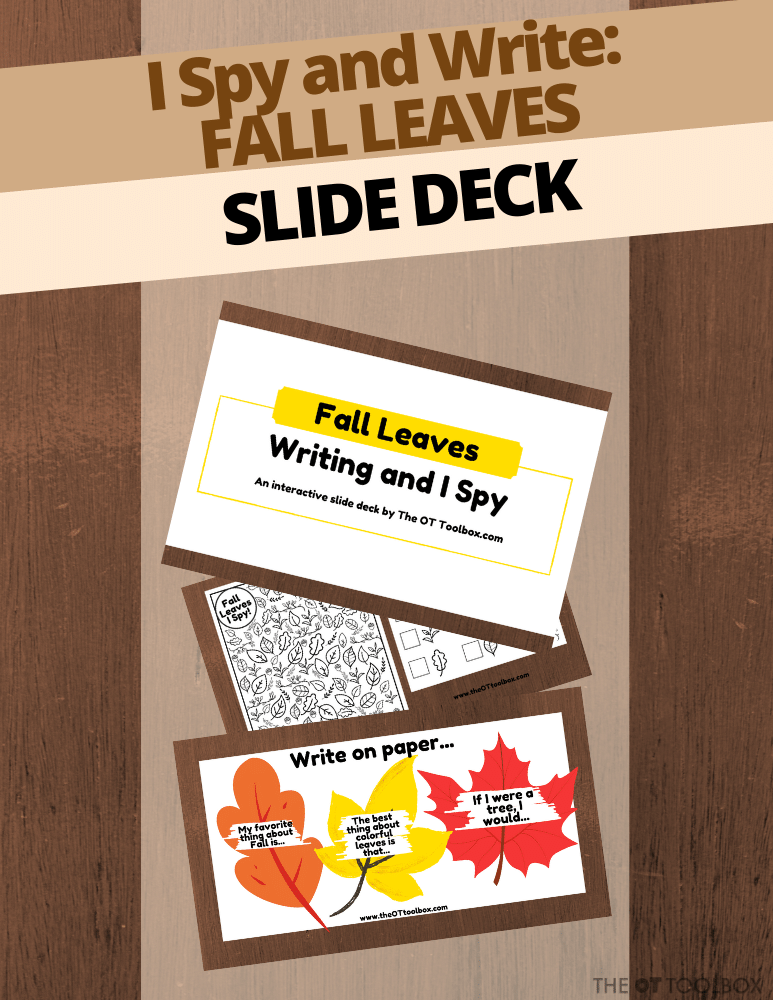
If using a Fall leaves theme in therapy or the classroom is on your Fall to-do list, then this Fall Leaves slide deck is a resource you’ll want to access. I wanted to put together a free slide deck that uses the fun of Fall leaves to work on visual perceptual skills and handwriting. Add some of our favorite Fall Fine motor activities to make a Fall themed therapy session!
Today’s Fall leaves slide deck is just one of the many free slides here on the website, and a great resource for both occupational therapy teletherapy and face-to-face therapy sessions.
Be sure to check out our Fall worksheets designed to build fine motor skills, our Fall leaves slide deck, and our free Fall Fine Motor Kit, all at the bottom of this post. The activities in this free booklet are a fun way to encourage fine motor and gross motor movement and development through fall activities. Scroll to the bottom of this blog post to grab your copy!
You’ll also want to snag this Fall Leaves worksheet. It’s a tic tac toe activity board designed to help kids build skills through play and fine or gross motor activities using Fall leaves.
Fall Leaves Slide Deck
This fall leaves slide deck is a virtual therapy activity that you can use to work on visual perceptual skills. The fall leaves slide deck includes a Fall leaves I Spy game.
Users can look for matching fall leaves and count the number of leaves that match. This I spy activity is powerful in developing visual skills such as visual scanning, visual attention, visual discrimination, figure ground, and form constancy.
This is a great tool for both virtual therapy students and face-to-face activities:
Virtual Therapy Sessions– Open the slide deck on google drive and students can type their answers right on the slide.
Face-to-Face therapy sessions– open the slide deck to use as an outline for interventions. More students are copying written work from a smart screen in the classroom, so the visual shift from vertical to desk top is improtant to address. Print off the screen and work on the I spy sheet right at the desk, or taped to a wall, with movement actions between each type of leaf that the student finds. The options are limitless.
Leaf Handwriting Activities
The free slide deck continues with the fall leaves theme and offers handwriting challenges for users. This can be used to address a variety of needs: letter formation, line use, spacing, sizing, overall legibility, copying from a near source, copying from a distant source, and much more.
Want to access this free therapy slide deck?
Want this free slide deck with a leaves theme? Work on visual perceptual skills and handwriting. Get it here:
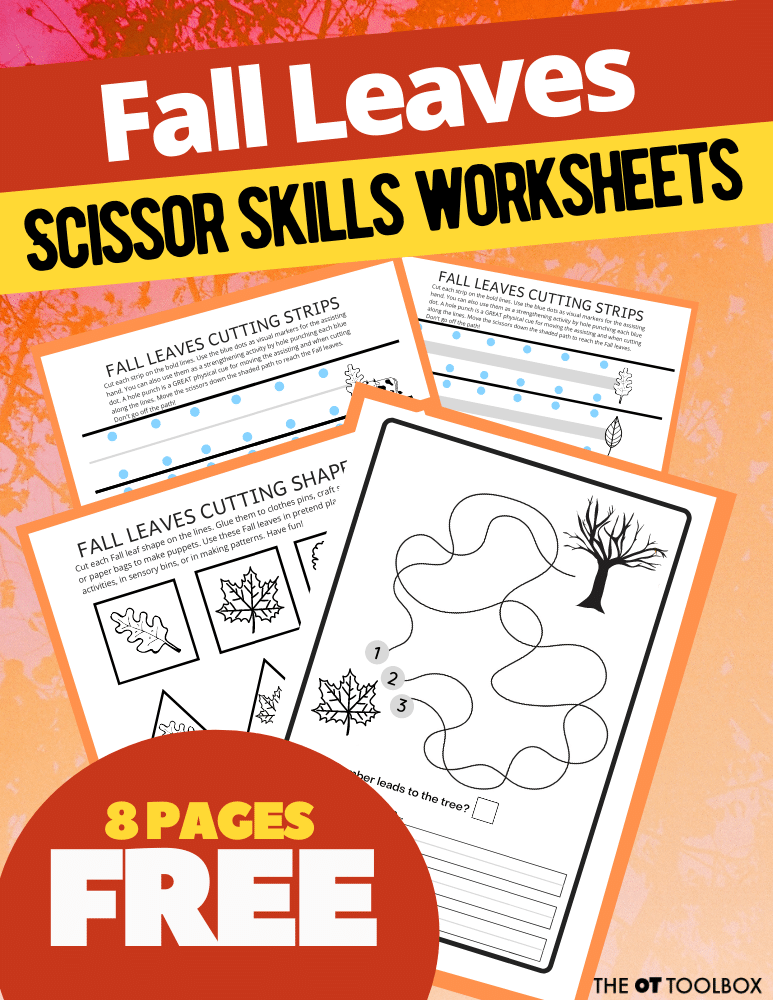
You’ll also love this 8 page packet of fall leaves cutting activities, fine motor pages, and more. This freebie has been added to the subscriber-only library. Join our email list for access.
Colleen Beck, OTR/L has been an occupational therapist since 2000, working in school-based, hand therapy, outpatient peds, EI, and SNF. Colleen created The OT Toolbox to inspire therapists, teachers, and parents with easy and fun tools to help children thrive. Read her story about going from an OT making $3/hour (after paying for kids’ childcare) to a full-time OT resource creator for millions of readers. Want to collaborate? Send an email to contact@theottoolbox.com.
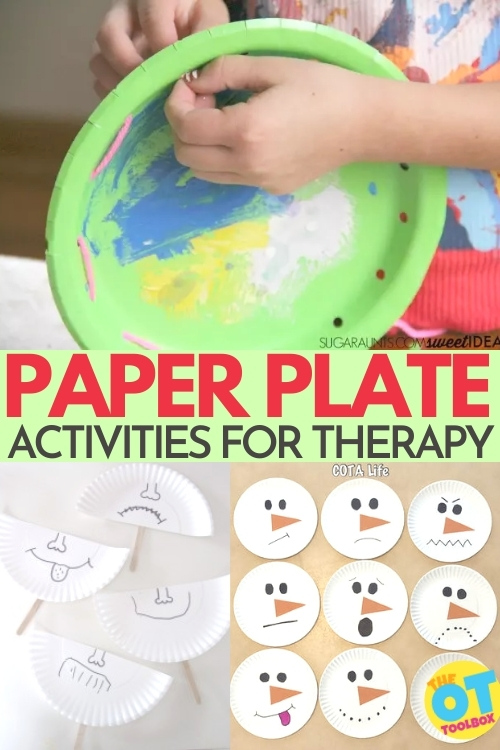
In occupational therapy, paper plate activities are one of those OT intervention tools that are low-cost and can be used in a multitude of ways to support many different developmental skills. From paper plate interactive activities, to scissor activities, to fine motor development, paper plate crafts and sensory activities can be used to promote many skill areas in occupational therapy interventions or at home and in the classroom.
Paper Plate Activities
I get really excited when I talk about the next subject – paper plate activities! Paper plate crafts and activities are so fun and often require very little materials with the end result being so wonderful for kids!
Paper plates can easily be used for arts and crafts, fine motor skills, gross motor skills, subject or topic learning, visual motor and perceptual skills, emotions and self-regulation as well as a myriad of games.
Paper plates can be a go-to when you need a quick activity in any setting or on those cold, rainy days when you need something to keep the kids busy. They are a great motivator for kids and can help build important skills that a child needs to continue to learn and to grow.
Paper plates are a thrifty tool for therapy to build those motor and perceptual skills while providing a fun activity that any child will want to engage in during sessions. The use of paper plates in the classroom can be for exploring emotions and self-regulation, creating after reading a book and lots of subject and topic learning fun. Their use in the home can include arts and crafts, instrument making, and games that result in some fantastic family entertainment.
Paper plates will give you the variety you need to help many kiddos on your caseload, in your classroom, or in your household. So, the next time you’re at the store, grab some plain or even festive paper plates and see what fun you can create with kids and you may find that you enjoy the fun too!
Paper Plate Crafts
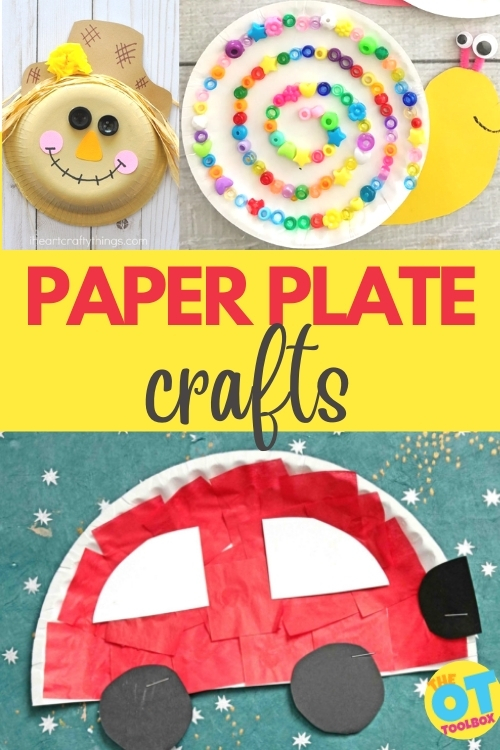
In occupational therapy interventions, we often use crafts as a medium for developing skills (taking us back to our roots of our profession!) These paper plate crafts are great for developing fine motor skills, scissor skills, bilateral coordination, motor planning, executive functioning skills, and more.
Mini Beach– Work on hand strength, utensil use, and more to make a paper plate beach craft.
Paper Bowl Scarecrow Craft– Use this paper plate craft to work on fine motor skills like precision, dexterity, and mixed medium use. Add in emotional learning to make the scarecrow personalized. Kids can take this craft and add their own unique twists for a multi-sensory craft with open-ended results.
Paper Plate Snail Craft– Work on precision, in-hand manipulation, arch development, and other fine motor skills with this paper plate snail craft.
Paper Plate Cars This craft is great for addressing scissor skills.
Thanksgiving Feast Plate – Use this craft to work on functional tasks such as meal skills and utensil use, as well as hand strength.
Tin Foil Moon– This is a great craft for working on graded hand strength and bilateral coordination skills.
Paper Plate Activities for Emotions and Self- Regulation
The best thing about occupational therapy professionals is that they can use ANY material to work on a variety of skill areas. Use paper plates to address social emotional learning and self-regulation skills!
Paper Plate Frisbees– Address eye-hand coordination and gross motor arm coordination.
Paper Plate Skating– Use paper plates for indoor skating and vestibular input.
Paper Plate Learning Activities
Use these activities to work on functional tasks and executive functioning skills needed in daily occupations such as learning, math, using a phone, telling time, name writing, and more.
Now, what are you waiting for? Go grab some paper plates and pick an activity!!
Regina Parsons-Allen is a school-based certified occupational therapy assistant. She has a pediatrics practice area of emphasis from the NBCOT. She graduated from the OTA program at Caldwell Community College and Technical Institute in Hudson, North Carolina with an A.A.S degree in occupational therapy assistant. She has been practicing occupational therapy in the same school district for 20 years. She loves her children, husband, OT, working with children and teaching Sunday school. She is passionate about engaging, empowering, and enabling children to reach their maximum potential in ALL of their occupations as well assuring them that God loves them!
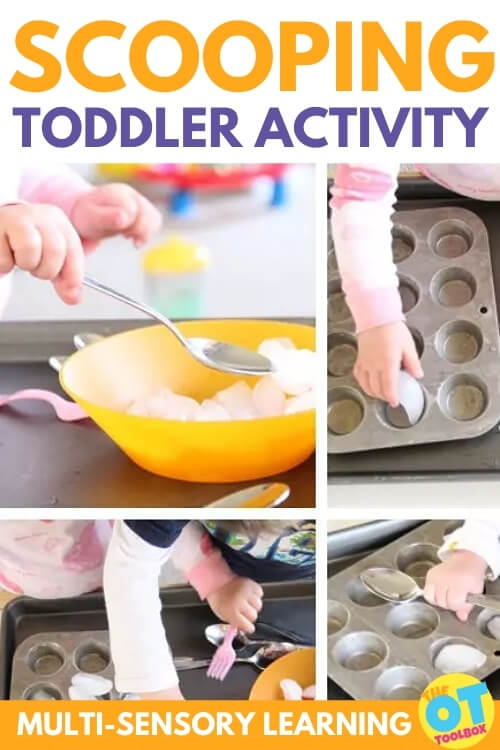
Scooping and pouring. Toddlers pour, and dump toys (or cereal, a cup of water, a bin of diapers…) as soon as they discover that they can. It’s a developmentally appropriate skill that happens as mobility develops. When little ones pick up a bowl or cup and turn out the contents on the floor, it may be frustrating to a mama that’s just picked up all of the toys in the house for the third time, but it is such a great function that is the occupation of play.
These scooping and pouring activities can also help with questions of being ambidextrous or simply having a mixed dominance present.
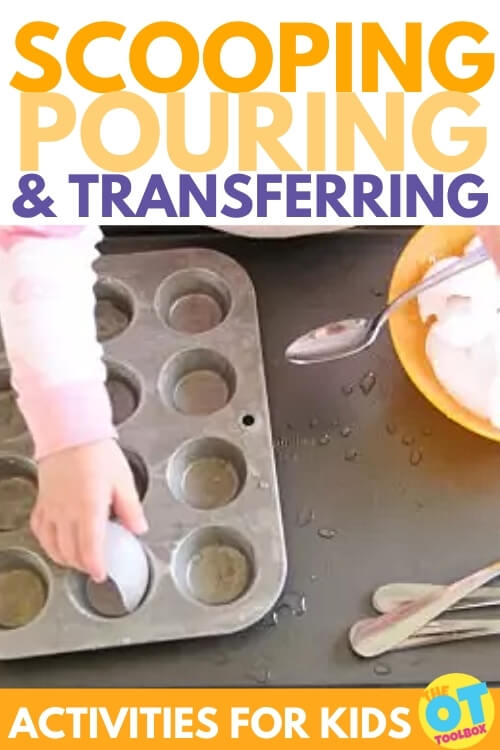
Today, we’re exploring how scooping, pouring, and transferring materials benefits toddlers and preschoolers, in big ways. You can use this fun fine motor and visual perceptual motor activity with children at the toddler, preschooler, and school-aged levels to improve the precision of skills, practice math, and discover skills, all through scooping, pouring, and transferring small items.
Scooping Activities for Toddlers
There are so many benefits to scooping, pouring, and transferring materials. These scooping activities for toddlers are an easy way to help to build motor skills in toddlers and preschoolers, at just the right stage of development. It’s during the toddler years that children develop more motor control, stronger eye-hand coordination skills. They are starting to gain more control of their arms in a coordinated manner, especially when manipulating tools like scoops, spoons, cups, and bowls. It’s through play and the weight of sensory materials that the benefits of scooping, pouring, and transferring of materials builds motor control, more refined movements, and tolerance of a variety of sensory materials.
But, you don’t need to stop at the toddler years. Manipulating tools and sensory materials to pour, scoop, and transfer is great for preschoolers, too!
Benefits of Scooping, Pouring, and Transfering
Fine Motor Benefits of Scooping and Pouring– By manipulating sensory materials, cups, scoops, and bowls, toddlers and preschoolers refine and build motor experience in fine motor skills. Areas of development include: pincer grasp, precise wrist movements, arch development, wrist extension, and separation of the wrist from the elbow.
Development of these areas promotes a more distal motor control while using the proximal arm (shoulder and elbow) to stabilize and support the movements of the distal arm (wrist, hand, thumb, and fingers).
This separation of the proximal stability from the distal mobility is a needed motor development for coloring with the hand and fingers instead of using the whole arm to move the crayon.
You can show a child of this age how to dump the dry cereal from the scoop into a large tray. Kids in the Toddler range would benefit from scooping and pouring using larger scoops or small cups.
In order to scoop food when eating or scooping like in this play activity, kids need precision of very small wrist motions.
Moving the wrist from side to side is called radial deviation (moving the wrist towards the thumb side) and ulner deviation (moving the wrist towards the pinkie finger side).
In addition, slight wrist extension (the wrist slightly bent back in the direction of the back of the hand) is needed to accurately and efficiently scoop and pour.
Simply holding the scoop is an activity for grasp development by refining the arches of the hands and intrinsic muscles.
When kids have trouble with holding a spoon to eat, you can try targeting functional grasp patterns so the child can feed themselves. This is possible with spoon scooping activities that target specific grasp patterns. While this can be accomplished through play and scooping play materials, it’s a great transfer of skills to scooping foods.
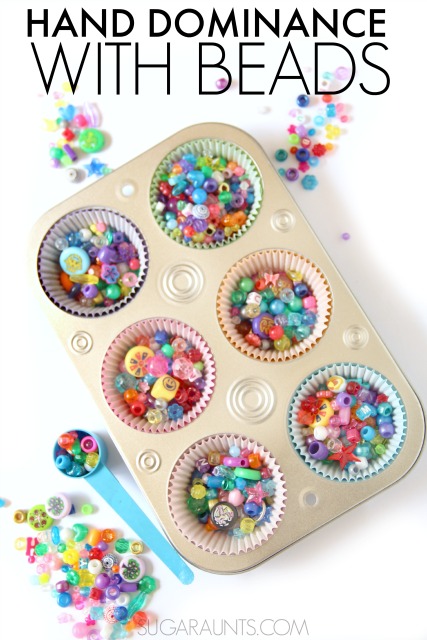
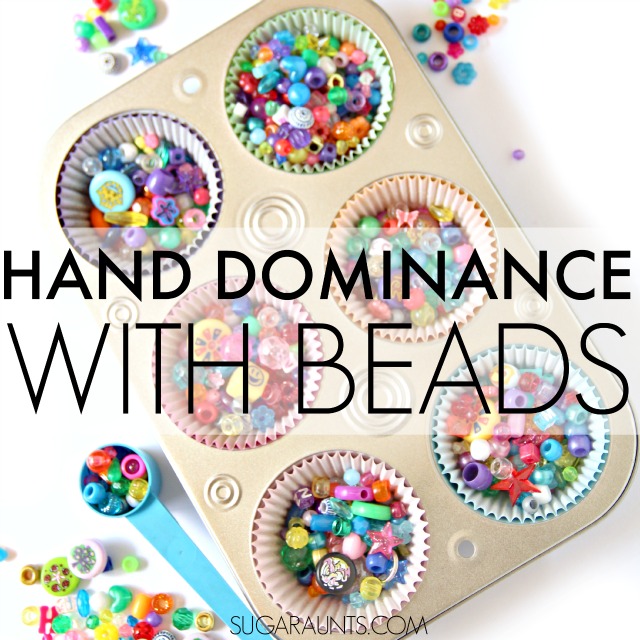
Hand dominance with Scooping, pouring, transferring– Hand dominance is an area that they can be working on, depending on their age. It takes experience, or muscle memory through activities to refine and establish a dominant hand or side of the body. By scooping, pouring kids can hold the container, bin, cups, or bowls with their non-dominant hand while scooping and pouring using a spoon, cup, or bowl with their dominant hand.
As children establish a hand dominance, this refined motor coordination becomes easier to control. Toddlers can start with larger objects and larger scoops. Progressing to more fluid or smaller materials like smaller pellets, flour, or liquids can help preschoolers further refine coordination and manipulation of materials.
Self-Awareness Benefits of Scooping and Pouring– Pouring and dumping is discovery and exploration of gravity, weight, muscle control, cause and effect, and self-awareness. Not only are toddlers discover what they can do by pouring, they are learning about their environment while working on so many skills.
Motor Skills Benefits of Scooping and Pouring– Scooping small items is important in development and refinement of motions needed for managing utensils during self-feeding. This is an important independence step in the Toddler range. The establishment of visual input and motor output results in eye-hand coordination skills.
Also needed is the muscle memory or “experience” in pouring materials. You’ll see this in action when pouring a liquid or something that really “flows”. You don’t want to pick up a pitcher of milk and pour with speed. The liquid will splash out of the cup and onto the floor. It takes motor skill development and experience to know that pouring different materials, liquids, and containers take different amount of force, accuracy, and controlled movements.
Learning by Scooping and Pouring- Adding in learning objectives makes this play activity a bonus. You can add themed materials, counting cards, letter cards, or sensory bin cards. Add math and reading activities by counting or using sight words. Add sensory bin cards. the options are limitless when making pouring and scooping activities educational. One idea we love is using water beads like in our purple sensory bin.
Scoop and Pour for Bilateral Coordination Skills- When pouring and manipulating containers, a development of bilateral coordination skills occurs naturally. A weighted material is in one hand, while the non-dominant hand stabilizes. This transfers to bilateral coordination tasks such as holding the paper while coloring or writing, using two hands in clothing fasteners, cutting with scissors and holding the paper, and the very functional task of pouring materials in cooking!
Mindfulness Benefits of Scooping and Pouring- There is a mindfulness component to sensory play too. Have you ever tried using a zen garden to rake or manipulate sand using a sand tray? If so, then you know the power of mindfully manipulating sensory materials. This mindfulness activity works with children too. Many children find a scooping and pouring activity fun and relaxing. Use the scooping and pouring activity as a heavy work activity that adds calming proprioceptive input with visual attention. Help kids to focus on the sensory material as it slowly pours from the hands or from a cup to another cup.
If kids are moving too quickly or if they become overly excited with the sensory material, add slow movement, a calm environment, a set of “rules” before beginning the scooping and pouring activity, and a broom to clean up!
Sensory Benefits of Scooping and Pouring Activities– By experimenting with pouring, scooping, and transferring materials, children gain sensory benefits. This occurs through the proprioceptive input from manipulating the materials, as well as tactile sensory input.
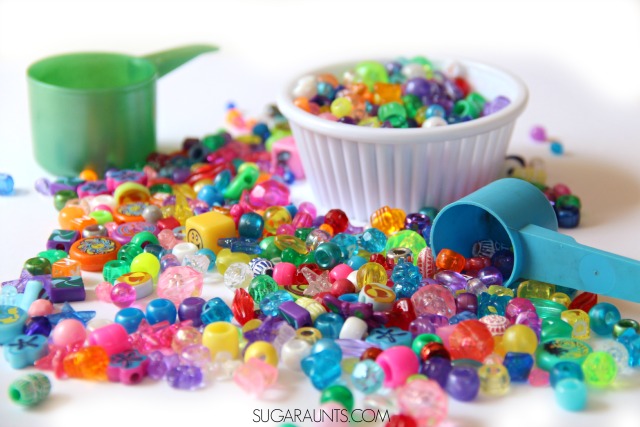
I’ve found pouring and scooping activities to be very calming for children. They love to watch the beads as they fill the scoop and watch them fall into the bowl as they pour. Other children can become overly excited by the visual stimulation of scooping beads and soon the beads will scatter all over the table. You can eliminate mess by doing this activity in a large bin like an under the bed storage bin.
Scooping and Pouring Activities
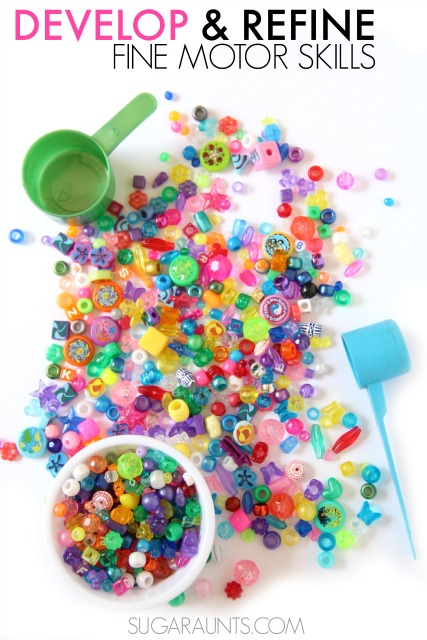
This post contains affiliate links, but you can use items that you already have in your home. We used plastic scoops found in food like cocoa powder, coffee, or iced tea mixes. For the scooping, we used plastic beads that we already had, however, this activity will work with any small item such as rice, dry beans, field corn, pebbles, or sand. Use what you’ve got on hand to make this activity free!
Materials for this scooping and transferring activity include:
Small Plastic beads OR other materials to pour and scoop (Toddler-aged kids can use dry cereal or edible items. See below.)
This activity is very easy to set up.
Simple set out a bowl or tray of beads and scoops in different sizes.
Show your child how to scoop, transfer, and pour the beads into another bowl.
Play!
Precautions for Pouring and Scooping Activities with Toddlers
Just be sure to keep a close eye on your little one. Materials like dry cereal are great for starting out. However, if you try scooping activities with other materials like beads, toys, corn, dry beans, etc, it can be easy for them to forget they are scooping beads and not cereal!
As with any activity found on this blog, use your best judgement with your children. This activity, while beneficial developmentally, is especially a choking hazard for young children. Always stay within hands-reach of young children with a developmental activity like this one.
If you are concerned with your child placing beads in their mouth, simply don’t do this one and put it on hold for a few weeks of months.
Development of Scooping and Pouring skills in Toddlers
Note: Use edible materials for this activity with Toddlers. Dry baby cereal or broken up finger foods (like Cheerios) are great. For Toddlers, they will be focusing on simply scooping and pouring with accuracy.
Grasping pellets (bead-sized items) is a fine motor skill that typically develops around 11 months. Children at that age can grasp small pellets with their thumb and the pad of their pointer finger, with their arm positioned off the table. Holding a scoop with either the dominant or non-dominant hand typically develops around 13 months of age.
Toddlers will use an exaggerated elbow motion when they first begin an activity like this one and until those small wrist motions are developed.
At around 15 months, Toddlers will be able to scoop and pour from a small scooping tool, although as soon as 13 months, many children are able to complete this activity.
Managing a spoon during self-feeding happens around this age, as well, as children scoop food and bring it to their mouth. It is messy, but they are able to get food to their mouth.
Using a scoop to move beads or spoon to eat develops with more accuracy at 15-18 months.
At around 12-13 months, children will begin to develop unilaterality in hand dominance. They will begin to show a preferred hand that manipulates as the other, non-dominant hand assists in holding the bowl or tray.
(Other kids don’t define a hand dominance until later. You can use this activity in the preschool years to work on hand dominance!) You will want to use a wide tray or large bowl for improved accuracy in both scooping and pouring. Try using a spoon for scooping the cereal pellets, too.
Scooping and Pouring Preschool Activity
In the preschool years, sensory bin play with a concentration on scooping, pouring, and transferring is very powerful. It’s at the preschool age that motor skills become more refined. The dominant hand becomes stronger in preparation of pencil grasp and handwriting. The muscles of the hands are used in coloring and cutting activities.
Preschoolers can use scooping, pouring, and transferring activities for functional tasks and learning activities, but also development of motor skills needed for tool use like pencils, scissors, crayons, etc. Use crayons based on development, as we covered in a resource on the best crayons for young children.
Helping kids establish a hand dominance can be a pivotal moment for addressing fine motor skill development concerns. Kids can refine motor actions by using a preferred hand consistently.
Preschool aged children can refine their scooping and pouring activity using beads.
Hand preference in Preschool
While Toddlers begin to show a hand preference, a true hand dominance doesn’t typically develop until 2 to 3 1/2 years. That is such a huge age range! That is because while a toddler can show a hand preference, hand usage is experimented with during different activities throughout the Toddler and Preschool years.
There is typically variability in hand preference as toddlers and young preschoolers poke, pick up, throw, color, and play. Another consideration is that often times, kids of this age are influenced in which hand they choose by position of toy, location of the adult or playmate, method materials are presented, and sitting position of the child. True hand dominance may not be completely integrated in the child until around 8 or 9 years of age.
Knowing all of this, use this activity to practice and play while working on a hand preference. If your child shows a preferred hand, set up the activity to work on scooping with the typically used hand. If your kiddo uses their right hand most of they time in natural situations (You will want to watch how they do things on a normal day and in a variety of activities.), then set the bowl of beads on the left side of the child and the scoop on the right side.
When using pouring and scooping activities in preschool, try these strategies:
Show them how to scoop from left to right. A set up like this one also encourages the left-to-right motion of reading and writing.
Use a variety of materials: dry beans, rice, beads, dry cereal, flour, sand, shaving cream, water, etc.
Use a variety of scoops: spoons, coops, small bowls, cups, pitchers, mixing cups, measuring cups, etc.
Kindergarten Scooping, Pouring, and Transferring Activities
For children in kindergarten and older, scooping, pouring, and transferring activities are powerful as well! You can use this pouring and scooping activity in math, learning, and sensory play-based learning.
Work on measurement
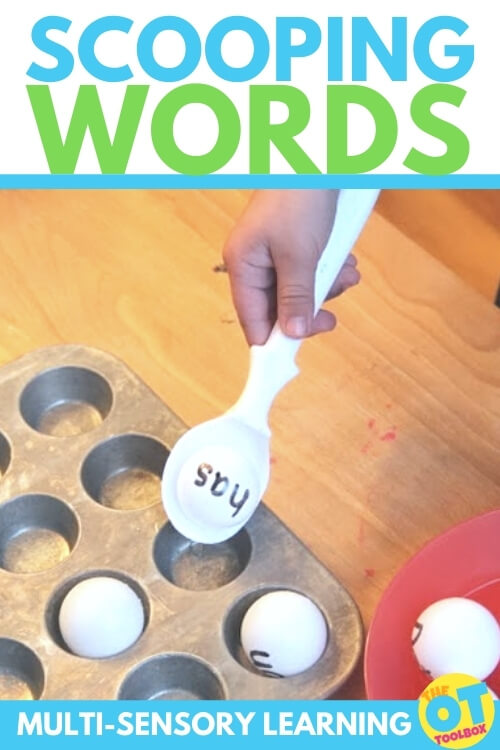
Work on reading, spelling, and letter awareness. This sight word scooping activity is a great multisensory reading activity for kindergarten.
Use scooping in math to add or subtract scoops
Count the number of scoops it takes to fill a container
Use letter or word cards in reading or handwriting activities
Work on prediction- Ask them to predict how many scoops it will take to fill different sized cups and bowls. They can count the number of scoops and see if their prediction was correct.
Incorporate addition and subtraction as they move scoops of beads from one container to another.
Address motor skill development- Scooping works on important skills like bilateral hand coordination, including using the non-dominant hand to assist as they would in holding the paper in writing, coloring, and cutting with scissors.
Pouring, Scooping and Transferring Activities
Try these various pouring scooping and transferring activities with each age range to develop specific skill areas depending on the individual child:
Use a variety of materials for scooping besides beads to work on fine motor control and dexterity. Other ideas include wet sand (heavier and great for coordination and strength) and a light material like foam pillow filler (for more coordination and dexterity).
Water Sensory Bin Ideas– Use a bin and water, along with some scoops and other materials to work on motor skills, coordination, and refined movements. Scooping water takes precision and control, but it’s a great functional task for children.
Scoop Nuts– Use seeds or nuts to scoop and work on scooping different sizes, different weights. This is a great activity for graded precision, sorting, and eye-hand coordination.
Scoop Ice– This simple scooping and pouring activity uses just ice, water, and scoops. Children can work on eye-hand coordination skills to scoop up ice within a bin of water to work on controlled motor skills, utensil use, visual tracking, and more.
Scoop, pour, and transfer dry corn– Grab some un-popped popcorn and some bins or spoons to transfer materials from one container to another. This simple scooping and pouring activity is easy to set up and works for all ages.
Working on fine motor skills, visual perception, visual motor skills, sensory tolerance, handwriting, or scissor skills? Our Fine Motor Kits cover all of these areas and more.
Check out the seasonal Fine Motor Kits that kids love:
Colleen Beck, OTR/L has been an occupational therapist since 2000, working in school-based, hand therapy, outpatient peds, EI, and SNF. Colleen created The OT Toolbox to inspire therapists, teachers, and parents with easy and fun tools to help children thrive. Read her story about going from an OT making $3/hour (after paying for kids’ childcare) to a full-time OT resource creator for millions of readers. Want to collaborate? Send an email to contact@theottoolbox.com.
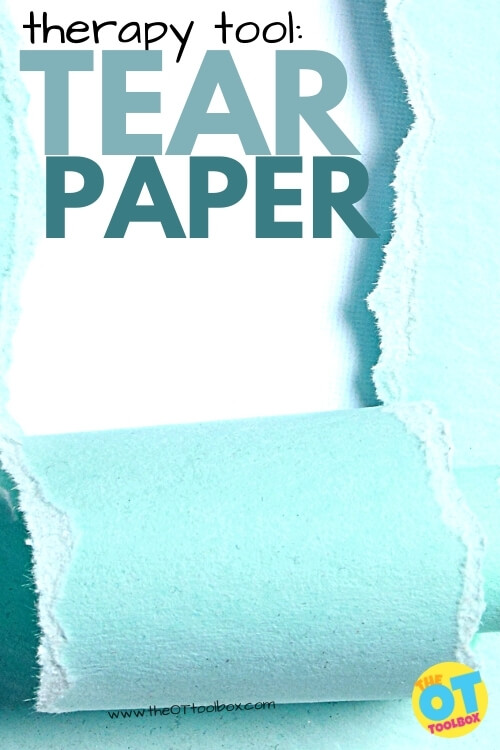
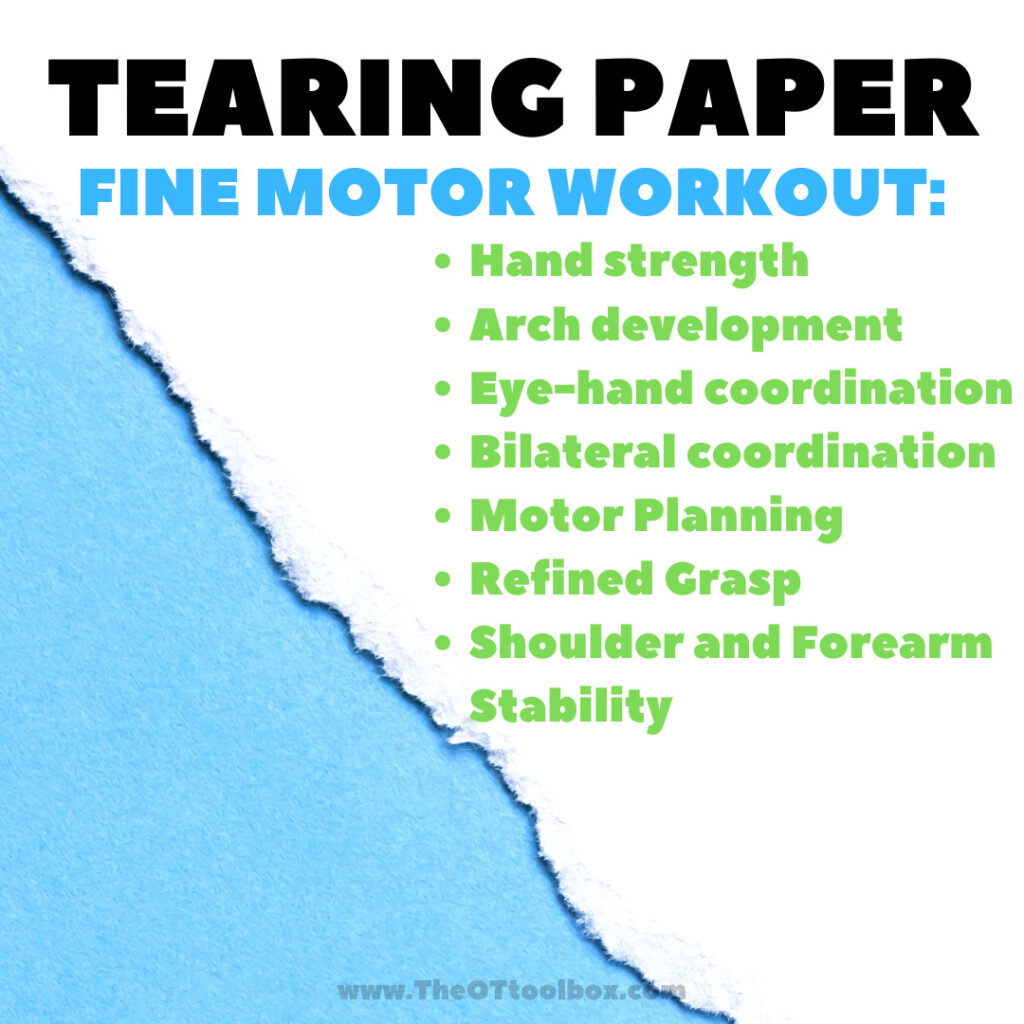
Did you know you can tear paper to improve fine motor skills using materials you already have in your home? I have an incredibly easy fine motor activity to share: tearing paper! When kids tear paper, they are developing fine motor skills like grasp, hand strength, eye-hand coordination, bilateral coordination, and more. So often, parents are looking for easy ways to help kids develop fine motor skills, and the very material that can improve all of these areas is found right in the home. Let’s break down tearing paper as an amazing fine motor activity for kids.
Did you know that a fine motor activity where a child tears up paper builds hand strength, motor planning, and so much more?
Tearing Paper for Fine Motor Skills
Tearing paper a simple fine motor activity that requires only scrap paper and your hands. In fact, tearing paper actually helps children develop so many essential skills: hand strength, hand eye coordination, precision, refined movements, bilateral coordination…
When a child tears a piece of paper, they improve hand strength and endurance in the small muscles in the hand.
The intrinsic muscles are used to tear up paper and these set of muscles located within the hand are important in so many fine motor skills, including those important to handwriting and coloring, managing buttons and zippers, manipulating pegs, and more.
When paper is torn, the hands assume a great tripod grasp which is effective and a mature grasp for writing and coloring.
To hold the paper, the non-dominant hand is assisting in the tearing and encourages appropriate assistance for tasks like holding the paper while writing, and managing paper while cutting with scissors.
Then, to tear a piece of paper, the dominant hand does the majority of the “work” to tear with precision and force, but also along a “line” while tearing.
Just look at the skills kids develop with a tearing paper activity:
Not only is ripping paper as a fine motor strategy, tearing off pieces of paper can support sensory needs, coordination, and visual motor skills. When you tear a pieces of paper, so many skills are being developed…
Hand dominance- Holding paper with stability using a non-dominant hand to support the paper, and a dominant hand to make refined tears supports development of bilateral coordination skills. Depending on the intricacy of the paper tear line, more refined motor movements are used. This is a strategy to support graded precision skills.
Sensory Processing- To rip paper, strength and coordination is needed. This process offers heavy work through the finger joints, wrist as a stabile joint, and coordination and stability in the shoulder girdle. Heavy work, or proprioception allows us to know where our body is in space. But the benefits of heavy work can be calming and organizing. Ripping paper can be a sensory diet tool for some individuals.
Visual Motor Skills- To tear paper, visual motor integration is a required part of the puzzle. This includes eye-hand coordination, visual tracking, visual attention, and other areas of visual processing.
Tear a piece of paper to build sensory motor skills with an inexpensive therapy tool.
Paper Tearing Activities
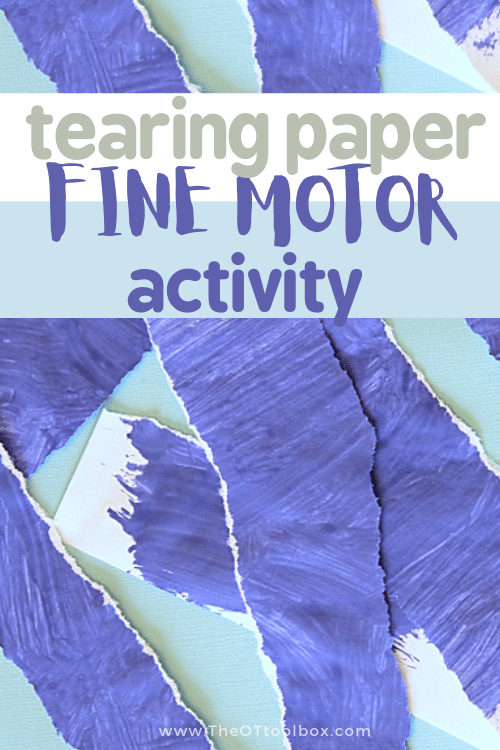
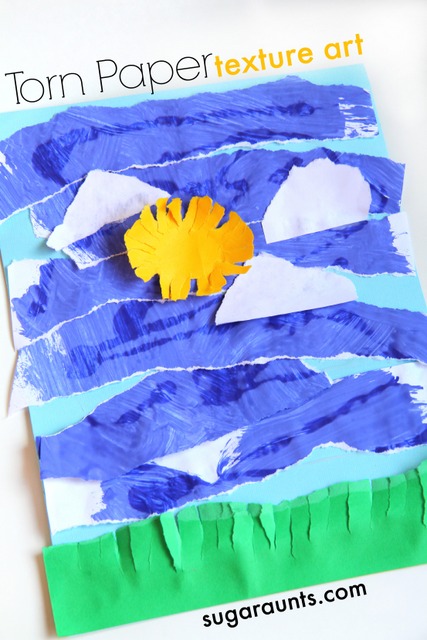
In this paper tearing activity, we use recycled artwork to create Torn Paper Art that would look great on any gallery (or family dining room) wall! All you need to do is rip paper to develop skills.
Tearing strips of paper is especially a great fine motor task. To work those fine motor skills, start with some junk mail or recycled paper materials and practice tearing.
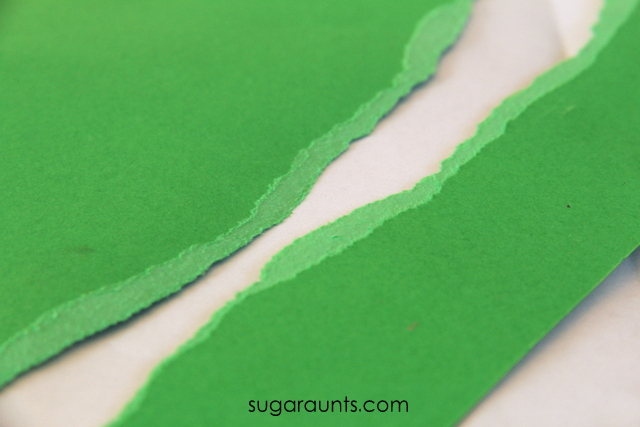
Tear paper into strips- To tear a long sheet of paper, you need to grasp the paper with an effective, yet not too strong grasp. Tear too fast, and the paper is torn diagonally and not into strips.
Make slow tears in the paper- Tearing the paper slowly while focusing on strait torn lines really encourages a workout of those intrinsic muscles.
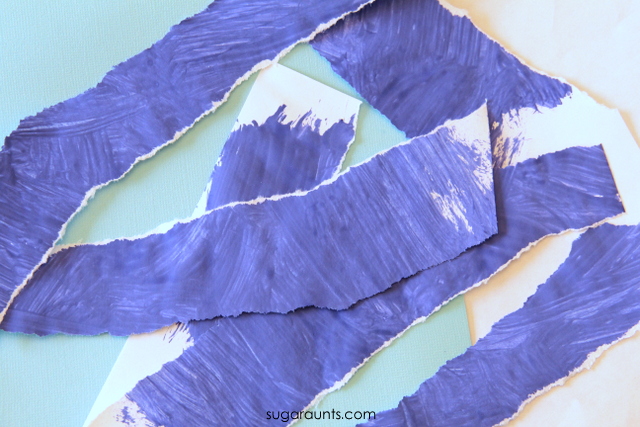
Tear different weights of paper- Paper comes in different thicknesses, or weights. Practicing tearing different thicknesses really hones in on precision skills. We tore an 9×11 piece of painted printer paper into long strips, lengthwise. The thin paper isn’t too difficult to tear, but requires motor control. Thicker paper like cardstock or cardboard requires more strength to grip the paper. The thicker paper also requires a bit more strength to tear with accuracy and precision. Tearing paper that is thicker like cardstock, index cards, or construction paper adds heavy input through the hands. This proprioceptive input can be very calming and allow kids to regulate or focus while adding the sensory input they need.
Tear paper into shapes– Use the paper to create simple shapes like a circle, square, etc. You can make this task easier by drawing pencil lines and ripping paper along the lines. This is a fantastic way to build motor planning skills. Or, work on visual perceptual skills and try ripping paper into shapes without a template.
Vary the texture of the paper– You can add a sensory component and use different textures of paper. Try painted or colored paper. Try printed paper or a rough paper like last year’s paper calendar. Try ripping cardstock or textured crepe paper. Or, use graph paper as a thinner grade to address a different resistance. We cover all the ways to use graph paper in therapy goals and tearing paper is just one idea.
Work on tearing paper fringes- Tearing into the edge of the page, and stopping at a certain point requires refined motor work. It’s easy to tear right across the page, but requires precision and coordination to stop tearing at a certain point. To grade this activity easier, try marking the stopping point with a pencil mark.
Ripping paper has so many benefits! Did you know that when you tear a piece of paper so much work is being done?
Tearing Paper Exercises
There’s more to tearing paper than just making a mess…Occupational therapy practitioners use this fine motor tool as a way to improve hand strength and other underlying skills that we’ve talked about in this blog post.
But once you have the paper torn into pieces, did you know that you can use those torn paper pieces in fine motor work?
Check out our video on tearing paper. In it, we cover what happens when you tear paper (why occupational therapy providers love paper tearing as a fine motor tool), and then you’ll see specific finger strength exercises and finger dexterity activities you can do with the paper pieces.
Types of paper to use in tearing paper activities
There are many benefits to using different textures and types of paper. Let’s take a look at some of the possible types of paper. These are materials that you may already have in your home.
Varying the paper type in torn paper activities can help to grade an activity, or make it easier or more difficult. These are great ways to vary the amount of fine motor strength and precision needed, thereby improving fine motor skills and visual motor skills.
Types of paper to use in tearing paper activities:
Cardboard tubes (toilet paper tubes, paper towel rolls)
Old calendars
Tear up pieces of recycled artwork to create a new art medium.
Torn paper art
This ripped paper art is a craft that is so simple, yet such a fun way to create art while working on fine motor skills.
You’ll need just a few materials for ripped paper art:
Paper (Any type or texture will do…old crafts, kids artwork, or paper that has been painted)
Glue
Paper to cardstock to use as a base
Your hands!
We all have piles of kids’ artwork that is gorgeous…yet abundant. You keep the ones that mean the most, but what do you do with those piles of painted paper, scribbled sheets, and crafty pages? You sure can’t keep it all or your house will become covered in paper, paint, and glitter. We used a great blue page to make our torn paper art.
Making the torn paper art is very simple. It’s a process art activity that will look different no matter how many times you do the activity.
How to create torn paper art:
There is more to this therapy tool than just tearing a piece of paper…Use these tips.
Select a variety of paper colors, materials, and textures.
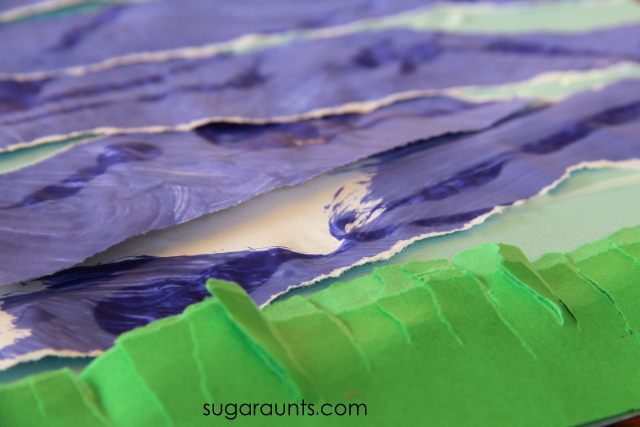
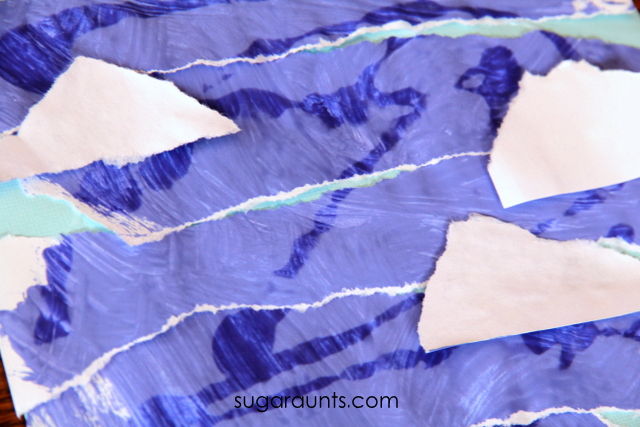
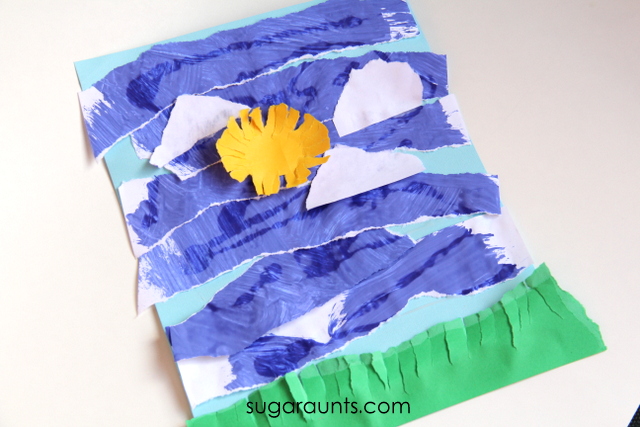
Tear a sheet into long strips. This will become the sky of our artwork.
Use white paper to create cloud shapes. Tear the paper into shapes.
Use green cardstock or other material to create grass. Tear small strips into the paper but not through to the edge. Create a fringe with the paper.
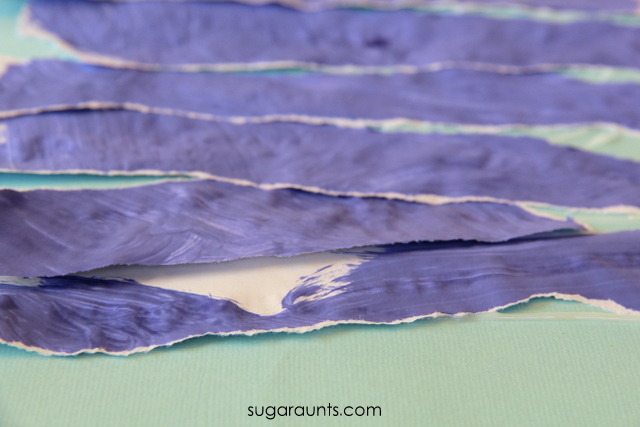
Glue the torn paper onto the base page in layers.
Use your imagination and have fun!
A few tips for creating torn paper art
Have a variety of paper types, colors, and textures available. Some ideas include using junk mail, recycled artwork, cardstock, construction paper, printer paper, crepe paper, cardboard, cereal boxes, etc.
Use your imagination. You can start with an idea to create or you can go with the flow of the art creation and start without an idea.
If you have trouble coming up with an idea for your torn paper art, try some of these:
Create a torn paper landscape
Create an object from ripped paper textures
Make a torn paper abstract artwork
Copy real life objects and make representational art
Create a ripped paper still life
Use all one color of paper in different textures to make a monochromatic artwork
Make abstract portraits
Tear the paper into shapes to make geometric artwork
Explore art concepts such as size, shape, color, lines, form, space, texture
Explore multimedia: Incorporate printed paper, painted paper, glossy paper, cardboard in different textures, crayon colored paper, etc.
More paper activities
Try making this paper helicopter to work on fine motor skills and visual motor skills.
Fold a paper football and work on eye-hand coordination with sight word practice.
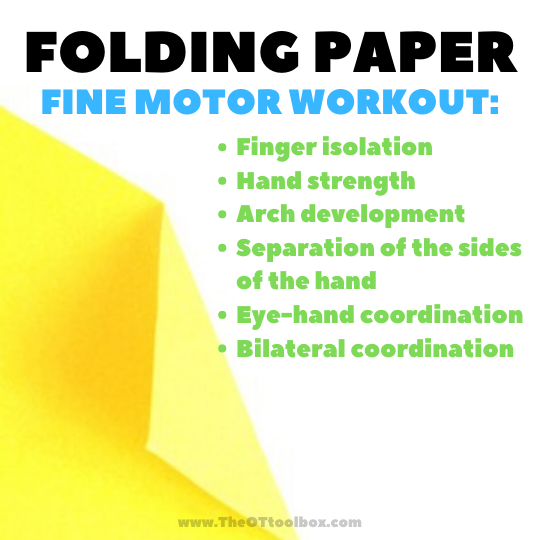
Improve finger isolation, arch development, and hand strength with these folded paper crafts.
We used one of the long strips of green cardstock to create grass by making small tears. Be careful not to tear the whole way across the strip! What a workout this is for those hand muscles.
Next glue the blue strips onto a background piece of paper. Tear white scrap paper into cloud shapes. They can be any shape, just like clouds in the sky!
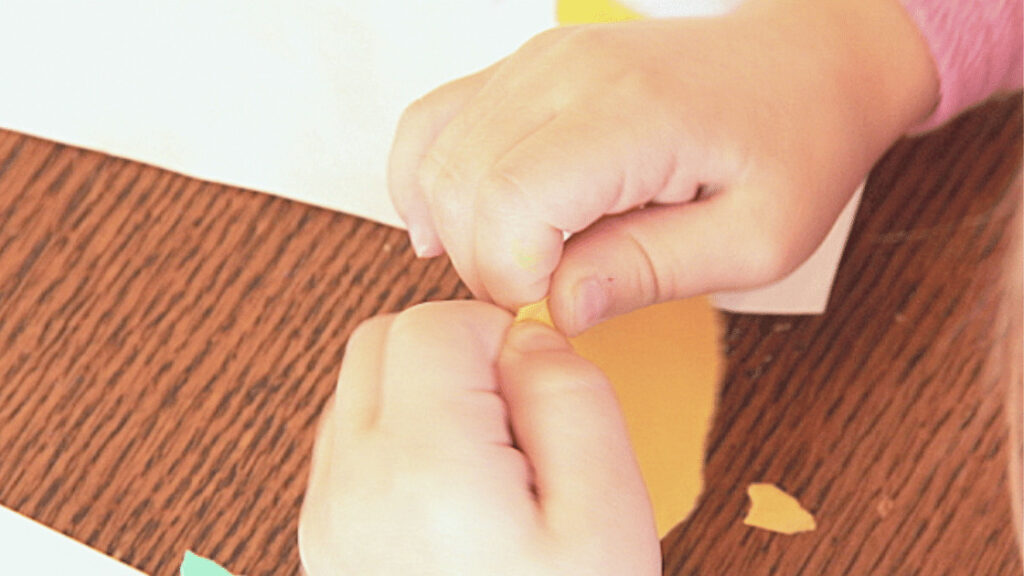
Grab a piece of yellow cardstock and create a sun. This is another fabulous fine motor workout. Tearing a circle-ish shape and creating small tears really works those muscles in the hands.
Working on fine motor skills, visual perception, visual motor skills, sensory tolerance, handwriting, or scissor skills? Our Fine Motor Kits cover all of these areas and more.
Check out the seasonal Fine Motor Kits that kids love:
Colleen Beck, OTR/L has been an occupational therapist since 2000, working in school-based, hand therapy, outpatient peds, EI, and SNF. Colleen created The OT Toolbox to inspire therapists, teachers, and parents with easy and fun tools to help children thrive. Read her story about going from an OT making $3/hour (after paying for kids’ childcare) to a full-time OT resource creator for millions of readers. Want to collaborate? Send an email to contact@theottoolbox.com.