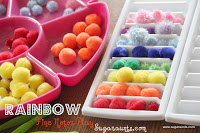
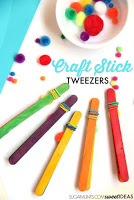
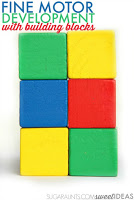
We made these dyed lollipop sticks many moons ago, (2015!) as a fine motor and visual motor tool to use in color sorting and other fine motor activities. The colorful sticks are fun and provide countless opportunities in your OT sessions for creative exploration, problem-solving, and hands-on learning.
We made these dyed lollipop sticks last month and have been playing with them a lot. Counting, patterns, fine motor play, art, visual perceptual work, and imagination are fun with these colorful rainbow sticks. They are so easy to dye with just a little food coloring, and very fun. We’ve used these rainbow sticks in a few different ways recently and will be sharing soon on the blog!
This post contains affiliate links.
Dyed Lollipop Sticks for play and learning
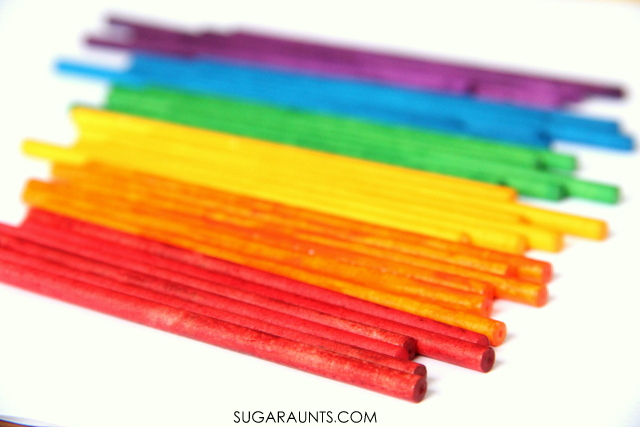
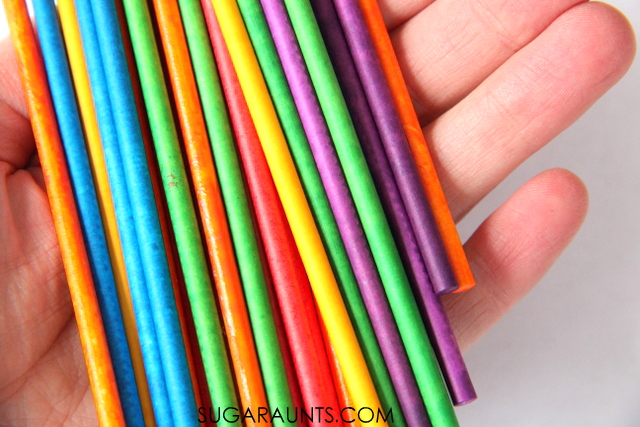
How gorgeous are rainbow lollipop sticks? Don’t you want to play with them?
How to dye lollipop sticks
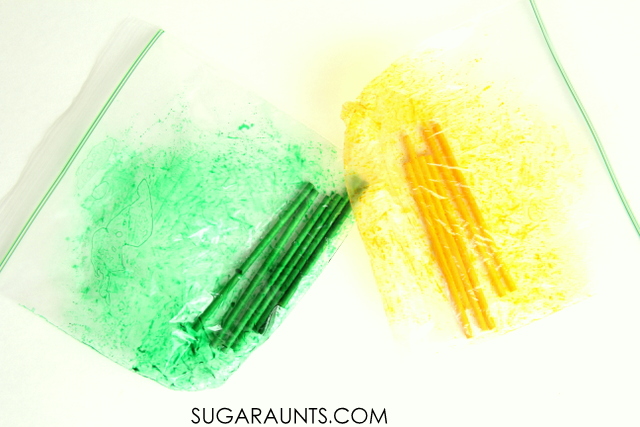
We had a ton of extra lollipop sticks left over from various parties. The idea to color them in rainbow shades came to me after seeing them in the baking bin next to food coloring. A rainbow of manipulatives would be fun for all kinds of play. I put a handful of sticks into small plastic baggies and added a few drops of liquid food coloring. More food coloring will bring out brighter colors.
Shake the baggies around to coat the sticks.
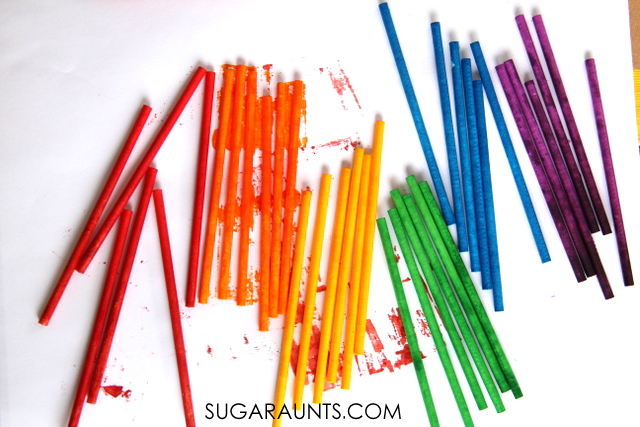
Spread the lollipop sticks out on wax paper and allow them to dry.
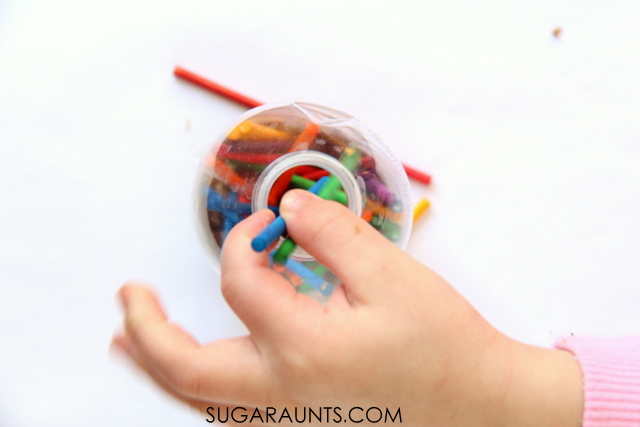
Once dry, you are ready to play! These things are completely gorgeous and we had fun just naming all of the colors, rolling them back and forth, and sorting.
Fine Motor Skills with Dyed Rainbow Lollipop Sticks
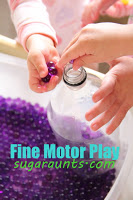
We pulled a plastic bottle from the recycle bin and practiced fine motor skills by dropping the rainbow sticks into the plastic bottle one by one. Drop by colors and work on color identification. Practice beginner math skills by counting one-to-one correspondence as the child names the number of each color. Practice a tripod grasp on the lollipop sticks and pre-handwriting skills.
We shared just a couple of ways to use dyed lollipop sticks in developing sensory motor skills. Here are more ideas:
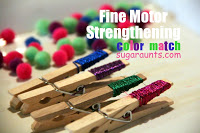
Color Sorting: Have children sort the dyed lollipop sticks by color into matching containers or on a color mat.
Pattern Making: Create and replicate patterns with the sticks, such as alternating colors or building sequences.
Counting and Number Matching: Use the sticks for counting activities or to match with numbers written on paper or cards.
Stick Building: Encourage children to build simple structures or shapes by gluing the sticks together.
Letter and Shape Formation: Have kids use the sticks to form letters, numbers, or shapes on a flat surface.
Tactile Tracing: Glue the sticks to create raised lines on paper for children to trace with their fingers, enhancing tactile feedback.
Matching Games: Write letters or numbers on the sticks and have children match them to corresponding cards or objects.
Sensory Bins: Add the dyed sticks to a sensory bin filled with rice, beans, or sand for children to find and sort.
Stick Weaving: Weave yarn or string around and between sticks placed in a grid pattern, working on fine motor skills.
Craft Projects: Incorporate the sticks into art and craft projects, such as making frames, collages, or decorations.
Rainbow Handwriting Kit– This resource pack includes handwriting sheets, write the room cards, color worksheets, visual motor activities, and so much more. The handwriting kit includes:
Write the Room, Color Names: Lowercase Letters
Write the Room, Color Names: Uppercase Letters
Write the Room, Color Names: Cursive Writing
Copy/Draw/Color/Cut Color Worksheets
Colors Roll & Write Page
Color Names Letter Size Puzzle Pages
Flip and Fill A-Z Letter Pages
Colors Pre-Writing Lines Pencil Control Mazes
This handwriting kit now includes a bonus pack of pencil control worksheets, 1-10 fine motor clip cards, visual discrimination maze for directionality, handwriting sheets, and working memory/direction following sheet! Valued at $5, this bonus kit triples the goal areas you can work on in each therapy session or home program.
Colleen Beck, OTR/L has been an occupational therapist since 2000, working in school-based, hand therapy, outpatient peds, EI, and SNF. Colleen created The OT Toolbox to inspire therapists, teachers, and parents with easy and fun tools to help children thrive. Read her story about going from an OT making $3/hour (after paying for kids’ childcare) to a full-time OT resource creator for millions of readers. Want to collaborate? Send an email to contact@theottoolbox.com.
These Fall Leaf Auditory Processing Activities are great for addressing listening skills in kids with or without auditory processing difficulties. Try this creative leaf idea at home or in the school yard to easily strengthen auditory abilities for better learning. Perfect for children of all ages and developmental levels, it’s a Fall themed activity that will help kids learn to listen to details!
For example, we love cutting Fall leaves to practice scissor skills. Another fun (and free) ideas is doing our leaf hole punch activity (also very good for working on scissor skills). Here are more hole punch activities to try.
Let’s get started with the auditory processing info and how we can support this area of development with a handful of leaves…
Fall Auditory Processing Activities
Listening isn’t easy for everyone. For children with auditory processing disorders, learning is difficult. Imagine identifying and localizing sounds in a classroom that is filled with chattering children, scooting chair legs, pencils scratching on paper, and moving, sound-making children. The process of localizing sounds, recognizing sound patterns, discriminating between different letter sounds, and interpreting auditory information can be less than optimal for the child with difficulty processing the sound information that is coming in.
When there are auditory processing difficulties present, a child may tend to have the following problems that interfere with learning:
Poor direction following
Appear confused
Distractibility
Short attention spans
Sensitive to loud sounds
Inconsistently aware of sounds
Poor listeners
To build and strengthen auditory skills, try using leaves this Fall. The crunchy, dry leaves that cover the ground are nature’s sensory tool when it comes to auditory processing needs.
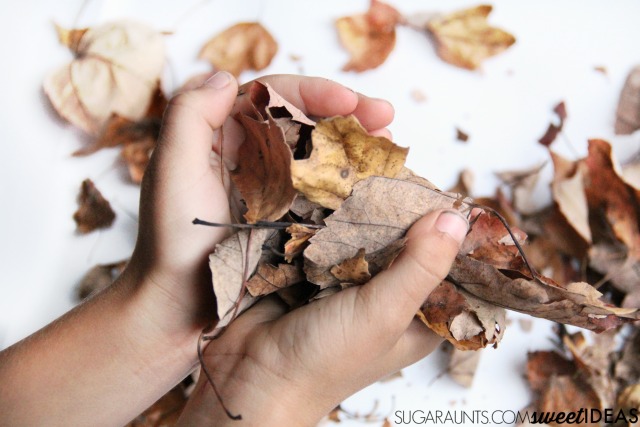
We first talked about the fall leaves that are covering our lawn and read through this month’s Virtual Book Club for Kids book, (affiliate link) Leaf Man by Lois Ehlert. We talked about how the leaves of fall are all different colors, shapes, and sizes but have one thing in common: a great crunch when they are dry!
To do these sensory Fall Leaf Auditory Processing activity, you’ll need a bunch of leaves that have fallen from trees. Dry leaves will work best, so if the leaves are newly fallen, you will want to gather leaves up in advance. Let them dry indoors for several hours or overnight to get a great “crunch”.
Next, spread out the leaves in a big bin. An under the bed storage bin works great for this activity.
Show your child how to squeeze and crumble the leaves using their hands. Ask them to listen to the crunch of the leaves. Notice how the leaves crumble and give off a satisfying noise as they are shifted around in the bin.
Use the dry leaves to address auditory sensory needs:
Where is that leaf? Ask the child to sit in front of the bin (or if you are outside, sit in front of the adult. Ask the child to close their eyes. Using one hand to crunch leaves, ask the child to say or point to the side that the leaf crunch is coming from. Add a high/low and front/back component by moving around to crumble the leaves, too.
Leaf Pattern- Ask your child to gather a bunch of dry leaves. Using a pile of leaves of your own, complete a crunching pattern as you crumble leaves at different speeds and in each hand. The child can then repeat the pattern.
Sound Stop- Crumble and crunch the leaves. At intervals, stop crunching leaves and wait for a moment. Ask the child to say “Now!” when the leaves stop crumbling.
Falling Leaf Sounds- With the child’s eyes closed, crumble leaves high and low above and below the child. Ask the child to determine if the leaves are above them or below them as they determine the location of the sound.
Lots of Sound Leaves- Add other sounds to the background noise: talking, music, rattle toys, birds chirping, etc. Ask the child to determine when the sound of crunching leaves stop. You can also add a localization dimension to this activity to work on auditory figure ground awareness.
Kids can complete these activities on a one-on-one basis or in a group setting. For kids with sensory issues, or those that are sensitive to crumbling leaves, try using gardening gloves while crumbling.
How would you use Fall’s leaves in a sensory or auditory processing activity?
Add this Fall leaves breathing exercise to these Fall themed activities in therapy:
Address sensory needs while experiencing all that the Fall season has to offer! Grab your free copy of the Fall Sensory Experiences Booklet to create sensory diet activities that meet the needs of individuals in a Fall-themed way!
Looking for more sensory motor fun with a leaf theme? Get a copy of our free Fall Leaves slide deck AND printable Fall leaves visual motor skill worksheets. Get those Fall Leaves worksheets here.
Colleen Beck, OTR/L has been an occupational therapist since 2000, working in school-based, hand therapy, outpatient peds, EI, and SNF. Colleen created The OT Toolbox to inspire therapists, teachers, and parents with easy and fun tools to help children thrive. Read her story about going from an OT making $3/hour (after paying for kids’ childcare) to a full-time OT resource creator for millions of readers. Want to collaborate? Send an email to contact@theottoolbox.com.
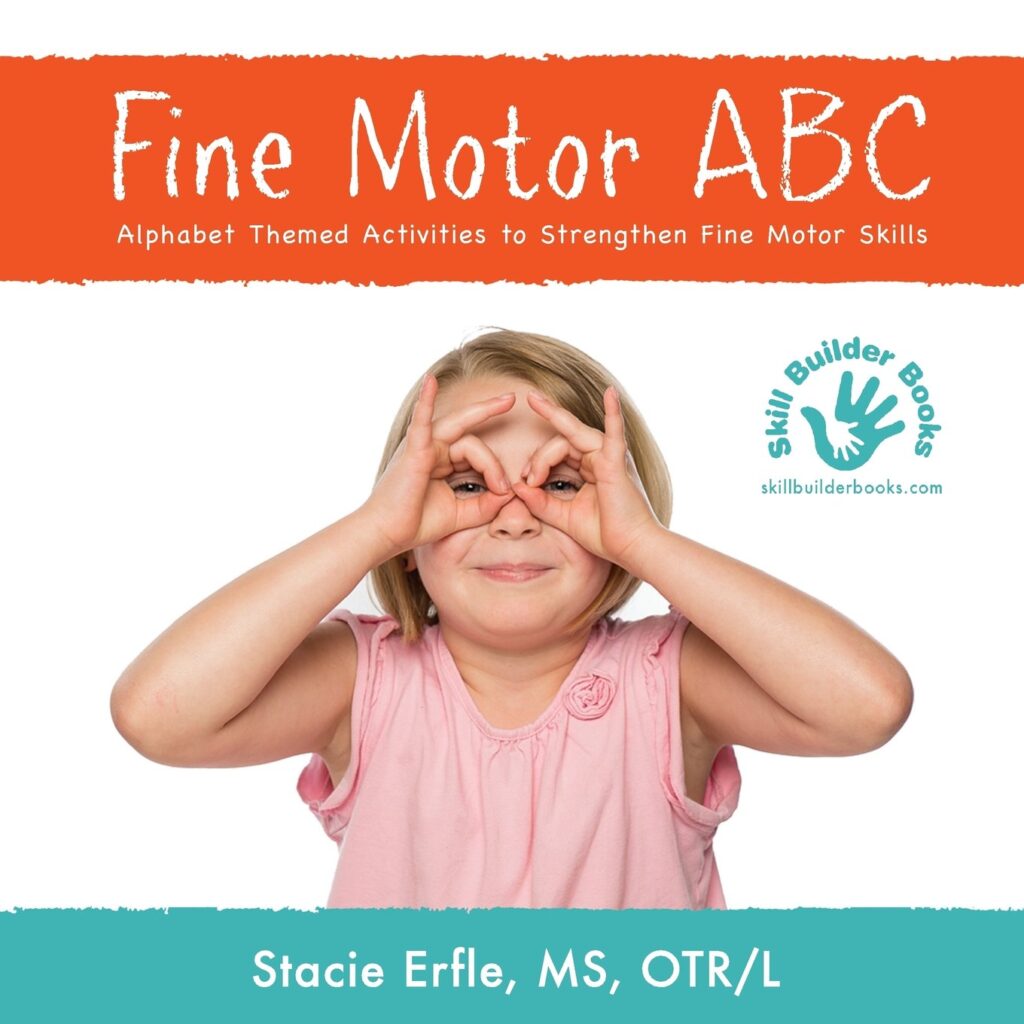
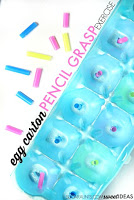
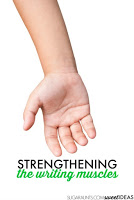
Today, I’m excited to share a fine motor skills book written by a fellow Occupational Therapist. Fine Motor ABC is a book full of alphabet themed activities that are designed to strengthen fine motor skills that are needed for functional tasks such as handwriting. We tried one of the activities and found a great way to encourage a tripod grasp on the pencil when writing with this super simple pencil grasp trick. This would be a great addition to our post on creative ways to improve pencil grasp with fine motor skills.
Easy Pencil Grasp Trick
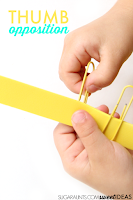
One of my favorite ideas from (Amazon affiliate link) Fine Motor ABC is this super simple tripod grasp idea. We tried a version using a keychain keyring loop to work on encouraging a tripod grasp. What a simple pencil grasp trick!
To use the tool, simply shoe kids how to position the loop right over the ring finger and pinky finger.
They can then tuck the keyring loop over the fingers or simply hold it in place in their palm.
This tactile cue allows them to curve their fingers into the palm while stabilizing the ulnar side of the hand.
The middle finger, index finger, and thumb are then free to manipulate the pencil with the precision side of the hand.
FAQ: Using a Keyring to Support Pencil Grasp
Q1: Why would you use a keyring to help with pencil grasp? A: The Pencil Grasp Trick is a simple method using ABCs to improve how a child holds a pencil, making writing more comfortable and effective.
Q2: How does using a keyring help with fine motor skills? A: By engaging specific hand muscles and coordinating movements, the keyring trick strengthens the fine motor skills needed for writing and other tasks. It engages the precision side of the hand and separates the support side of the hand. See separation of the sides of the hand for more information.
Q3: At what age can kids start using the Pencil Grasp Trick? A: Children as young as 3-4 years old can begin practicing this trick, but it’s beneficial for any child struggling with proper pencil grasp.
Q4: Can this method be used for children with special needs? A: Yes, the Pencil Grasp Trick is adaptable and can be a helpful tool for children with special needs to improve their writing skills.
Q5: How often should my child practice the Pencil Grasp Trick? A: Regular practice, even just a few minutes a day, can lead to noticeable improvements in pencil grasp and writing abilities.
This post contains affiliate links.
Fine Motor Skills ABC Activities
We love the book, Fine Motor ABC because it has alphabet themed fine motor activities that make it perfect for teaching young kids while focusing on much-needed fine motor skills.
Fine Motor ABC is a great book for Occupational Therapists, teachers, and parents or anyone who works with kids. This book is a resource of engaging activities that are designed to target the necessary skills needed for childhood functional tasks. Each letter of the alphabet addresses a fine motor skill with a quick and easy description of the task. There are big, bright images and corresponding hand signs for kids to copy. The engaging description of the activities really had my kids interested in reading through the book.
Following each lettered fine motor activity are through descriptions of the therapeutic reasoning for completing the task. Fine Motor ABC is a book that would be well-used in any home, classroom, or therapy clinic.
Stacie Erfle is an Occupational Therapist who has put creative ideas to work in her book and I’m excited to read the upcoming books on gross motor skills and sensory activities. Read more about the books on the Skill Builder site.
Great ways to use Fine Motor ABC in therapeutic development of fine motor skills in the OT clinic, classroom, or home:
Use the alphabet-themed fine motor activities in order from A-Z.
Complete only a few of the letters, by spelling a word and completing those corresponding fine motor activities.
Spell out the child’s name by completing the fine motor activities that correspond with the letters in the child’s name.
Follow the sign language images at the top of each page. Ask the child to copy the hand signs. Don’t forget to ask the child to carefully turn the pages of the book to see the next sign!
Create a customized therapy home program using the themed fine motor tasks.
Act out the activities without using manipulatives for a different way to practice the fine motor skills.
Work through the book by doing the activities that have a purple border (or blue or orange border!) Next time do a different color.
There are so many ways to use this resource activity book with kids!
More easy pencil grasp tricks for developing fine motor activities that you will love:
Colleen Beck, OTR/L has been an occupational therapist since 2000, working in school-based, hand therapy, outpatient peds, EI, and SNF. Colleen created The OT Toolbox to inspire therapists, teachers, and parents with easy and fun tools to help children thrive. Read her story about going from an OT making $3/hour (after paying for kids’ childcare) to a full-time OT resource creator for millions of readers. Want to collaborate? Send an email to contact@theottoolbox.com.
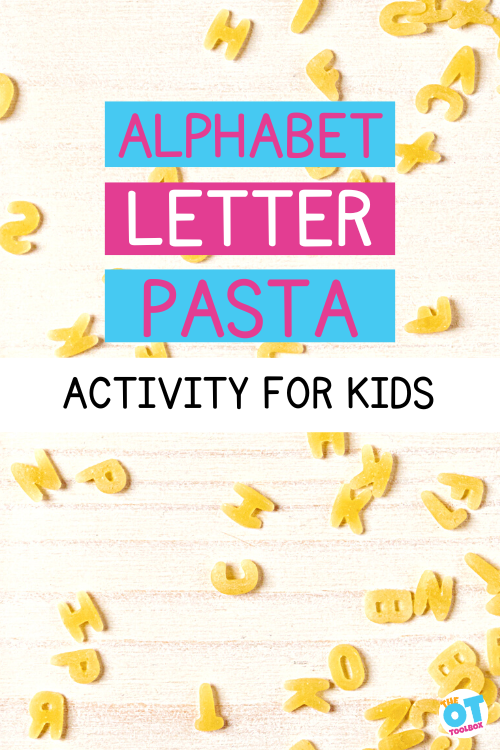
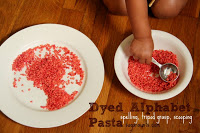
Grab a box of alphabet noodles for a fun multisensory learning activity that builds skills in many areas. We used letters pasta to create a sensory bin that incorporates fine motor skills and a letter learning activity.
Alphabet Noodles
You might remember eating alphabet noodles as a child in soup. But if you have a box of letter noodles on hand, it’s easy to create a sensory play activity that builds skills.
This easy dyed pasta activity combines learning with fine motor development. From the scooping to the neat pincer grasp activity, this is a great way to build many skills! Younger children can use scoops and spoons to develop coordination needed to scoop and pour while gaining exposure to letters. What a fun way to build so many areas!
Alphabet Pasta Activities
So, in addition to the ideas we shared above, we love using dry alphabet pasta in other activities to support fine motor and visual motor skills. I love that you can incorporate the tactile sensory play in learning and skill development.
Some of my favorite ideas for alphabet pasta:
Alphabet Sensory Bin Search: Fill a sensory bin with dry alphabet pasta and small items like pom-poms, beads, or toy animals. Hide letter cards or small objects in the bin, and encourage kids to search for specific letters or objects. This activity helps improve pincer grasp and hand-eye coordination while engaging their sense of touch.
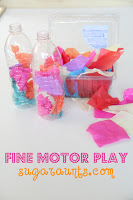
Letter Pasta Sensory Bottle: Create a “Alphabet Seek-and-Find” Sensory Bottle by filling a clear plastic bottle with dry alphabet pasta. Add a few small, colorful beads or buttons to make it more visually stimulating. You can also include a few small trinkets or themed charms to match a specific letter (e.g., a tiny apple for “A”). Seal the bottle tightly with glue to prevent any spills. Here are other sensory bottle ideas to use, like adding scrabble letter tiles to the sensory bottle as an I spy activity.
Pasta Art and Letter Matching: Have kids glue dry alphabet pasta onto construction paper to create letter art or spell out simple words. For an extra challenge, provide them with a printed word and have them match the letters using the pasta. This activity develops both fine motor skills and visual-motor integration as they match letters and manipulate the small pieces. It’s a great letter recognition activity!
This was such a fun activity! I found a bag of alphabet pasta at a local grocery store on sale for a dollar and couldn’t pass it up! We used a little from the bag and used the rest in wedding soup. (Little Guy’s most often request and favorite meal!) Because the only thing that makes wedding soup even more awesome is fun shaped noodles 🙂
How to dye alphabet Pasta
We dyed the pasta in a baggie…added a few drops of red food coloring and 2 Tbsp of vinegar. We dyed this batch back in May and the color is still going strong. The vinegar doesn’t leave an odor when playing with the pasta, but helps the coloring to “stick” to the pasta.
Have the kids shake the bag (or use a lidded plastic container for a fun auditory component!) and get their wiggles out.
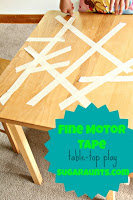
I put up a few strips of masking tape on our easel and put out the bowl of pasta. Baby Girl had the job of scooping letters from the bowl onto a plate. She loved using my measuring spoons to scoop. Toddlers seem to love scooping any little bits…peas/beans/rice/sand…and it’s such a great fine motor task for them.
Pinching those little letters was a fun fine motor exercise for working on their tripod grasp and pincer grasp.
I positioned the tape strips high up on the easel to encourage an extended wrist. This wrist position allows for efficient use of the fingers in such a small motor activity.
Big Sister worked on locating letters as I told her how to spell words.
…Baby Girl couldn’t let her big sister do something and NOT get involved…
We also used the alphabet letter pasta to work on a little reading/spelling activity: I stuck on the -AT letters and asked Big Sister to find the letter we needed to spell different rhyming words. Fun!
Alphabet letter pasta can be used in many ways! How do you use this sensory activity to learn and play?
Working on fine motor skills, visual perception, visual motor skills, sensory tolerance, handwriting, or scissor skills? Our Fine Motor Kits cover all of these areas and more.
Check out the seasonal Fine Motor Kits that kids love:
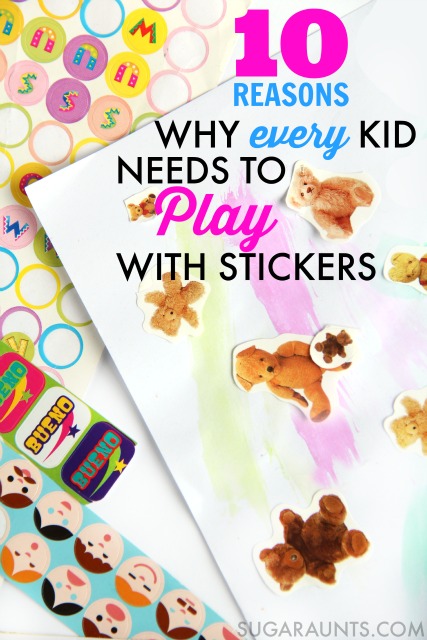
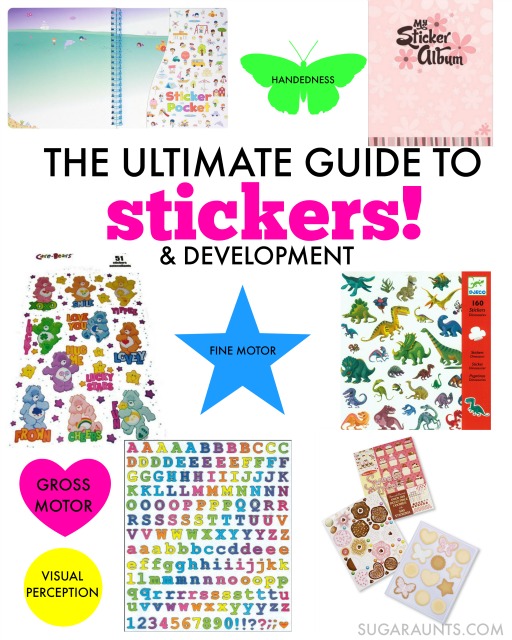
In this blog post, originally written on November 13, 2015 and updated on July 18, 2024, we are talking all about the benefits of playing with stickers. Occupational therapy providers love stickers as a fine motor tool! Let’s break down the benefits of sticker play with kids…
When you were a kid, did you have a sticker collection? Maybe it was a Trapper Keeper binder with paper, or maybe it was a sticker book with themed pages. Filling it’s pages were puffy stickers, scratch-and-sniff stickers, fuzzy stickers, and glossy glittery stickers.
Thinking back to those sticker collection can bring back memories of sticker trades. All you cared about back then was a complete collection of all the Care Bears or a page full of sticker-y rainbows.
But did you know that peeling all of those stickers has a bigger benefit that a full sticker book page?
Benefits of Playing with Stickers
Occupational therapy providers always have stickers on hand in their therapy toolbox and there’s a reason why…playing with stickers has many benefits!
Playing with stickers can help kids with so many skill areas! They can even be an Occupational Therapist’s secret weapon. School based occupational therapy providers love them for so many reasons. Pulling a fresh sheet of stickers from the OT’s treatment bag can bring on big smiles from kids of all ages. And the best news is, that the children don’t even realize they are working on important child developmental areas!
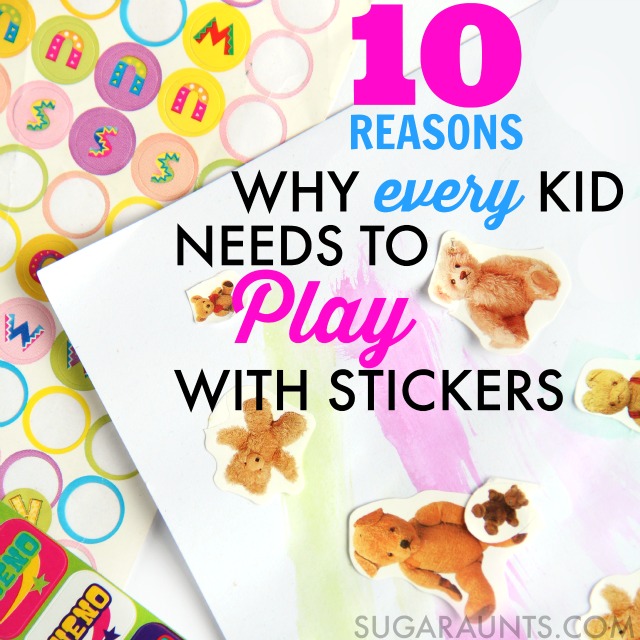
The Best Reasons to Play With Stickers
Affiliate links are included in this post.
When you see a sheet of stickers, what grabs your attention? Maybe it’s the brightest sticker on the sheet, or maybe it’s a special character. Whatever it is that brings you sticker joy, they all are great for developmental areas.
10 Reasons Why EVERY Kid Should Play With Stickers:
1. Neat Pincer Grasp. Stickers are a fine motor powerhouse. Peeling the sticky little pictures requires a neat pincer grasp in order to pull up the edge of a sticker from a sticker sheet. The very tips of the fingers are needed to grip such a small area. For some kids, grasping just the edge of a single sheet of paper is quite difficult. Working with stickers is a great way to practice neat pincer grasp for skills like picking up small beads, string, or a sewing needle.
Extend the skill: Work on pincer grasp by peeling stickers of different sizes. Smaller stickers will be more difficult to peel. Place stickers on strips of masking tape and other surfaces and and peel the stickers up. Then, work on grasp by placing the stickers down on different surfaces. Stick the stickers on paper taped to a wall to encourage an efficient wrist position.
2. Bilateral Coordination– It’s an essential skill for so many functional tasks. Zippering a coat, cutting with scissors, and handwriting are all activities that require bilateral hand coordination. Peeling stickers requires tow hands as you hold the sheet with one hand and peel with the dominant hand. Both hands are involved in the work and doing different tasks.
Extend the skill: Use stickers to work on bilateral hand coordination by using very large pieces of paper and very small sheets of paper.
3. Visual Scanning. Visual scanning is required for skills like reading, writing, searching for an item in a crowded room, and visually scanning the environment. Kids can scan a sticker sheet to peel off the sticker that they want.
Extend the skill: Position stickers all over a page. Ask the child to look for a specific sticker that you describe. They can connect stickers with a crayon, or cut the paper along a line stickers. Position stickers all over a wall and work on visual scanning on a large scale as they look for specific stickers. Add in a flashlight and have the child scan for stickers with the light.
4. Spatial Awareness. Difficulties with spatial awareness can make reading writing, and functioning in all daily tasks practically impossible. Kids may write with sloppy handwriting or have trouble with organizing their body in space. Use stickers as a visual cue for spatial awareness. Kids can see the sticker’s bright color and can use it as a visual cue for where to start writing on a page, how big to form letters, where to stop in the hallway of lockers, where to place folders in a desk, where to place coats in the closet. The use of stickers in this area are limitless!
Extend the activity: Position stickers on the left margin of a paper for kids who need help with writing. Stickers can provide a cue for letter size, too. Use stickers in a large scale maze by sticking them on chairs, walls, and floors. Kids can hop or jump over stickers or go around, and touch stickers while working on spatial awareness.
5. Sensory Exploration. Explore scents with scratch and sniff stickers. Discover textures of smooth, puffy, scratchy, and fuzzy stickers. Kids are very motivated by stickers, too. A sticker can be used as a reward for a child who touches a messy sensory bin or participates in difficult therapy treatment activities.
6. Handedness. Kids often times have trouble learning which hand is which. They will switch hands when writing and can put their shoes on the wrong feet. Use stickers as a visual cue in learning left from right both on their body and off. One sticker can be stuck to just one shoe to help a child learn to put their shoes on the correct feet. You can put a sticker on the top of a child’s coat to teach them which way is up.
Extend the activity: When practicing scissor skills, place a sticker on the side of the paper the child should hold.
7. Separation of the two sides of the hand. Using the thumb side of the hand while bending the pinkie side of the hand in stability defines separation of the two sides of the hand. This is needed for tripod grasp and in-hand manipulation as well as gross grasp and power grip hand strength. Use stickers to work on this by placing a sticker in the child’s palm. They can bend the pinkie, ring finger, and middle finger down to cover up the sticker while using the pointer finger and thumb in fine motor tasks.
Extend the activity: Place a small object like a cotton ball in the hand while using the thumb and pointer finger to pick up stickers.
Stack stickers in a pile by placing them on top of one another. Use a sticker on the tip of a pencil to show kids where to pinch the pencil when sing a tripod grasp.
8. Hand Strength. How can something as small as a sticker work on hand strength? Children need strength in the small muscles of their hands in order to have endurance in coloring, using an open web space when holding a pencil, and when managing buttons and snaps on clothing. Kids can use stickers to build the strength of the intrinsic hand muscles by peeling stickers from resistive surfaces.
Extend the activity: Place stickers on cloth like couches or carpeting and ask your child to unstick the stickers without ripping them. They will need to use the intrinsic muscles and defined arches of the hand to pull them up.
9. Body Awareness. Toddlers can work on naming their body parts by sticking stickers on feet, and other parts. Children with difficulty in sequencing might have trouble knowing if a sock or shoe goes on their feet first. Use stickers to help with organizing and positioning on the body.
Extend the activity: Place stickers on feet, hands, arms, and back. Ask your child to touch certain body parts in a specific order. Work on getting faster. Toddlers can practice naming body parts by trying to peel off a sticker stuck to their wrist as you say “wrist”.
10. Gross Motor Development. Crossing midline, jumping, hopping, skipping, and jumping jacks are gross motor tasks that can be difficult or some kids. Use stickers as a visual cue or obstacle in practicing these areas.
Extend the activity: Place stickers on each knee. Ask your child to touch the right knee’s sticker with their left hand and the left knee’s sticker with their right hand.
Stick stickers high on walls as they try to jump up to touch them with outstretched hands.
MORE reasons to play with stickers:
Literacy
organization
sequencing
problem solving
self-confidence
language development
mathematics
creativity
sense of accomplishment
stress reduction
goal setting
socializing
What are your favorite ways to play with stickers?
So, get your child involved with sticker collections to work on all of these developmental areas. And, you’ll get to relive your childhood with the scratch-and-sniff, fuzzy, hologram, puffy stickers!
Best Sticker Gifts for Kids
We also have some ideas for sticker toys and sticker gifts that support development of these skills in kids.
I found some very fun sticker activities out there that I wanted to share. Play with your child using these sticker activities as you work on 10+ functional areas:
Every kid needs a sticker collection book! This My Sticker Album has illustrated pages for sticker collections.
Need stickers to add to your collection book? The 1000 Stickers for Girls and 1000 Stickers for Boys should have you covered! (Although who says a truck sticker is just for boys? Nope! I would get both books for my kiddos!)
There are stickers for every theme, character, or interest out there. From Dinosaur Stickers, to Cupcake Stickers …there is something for everyone! (including the Care Bears fans out there!)
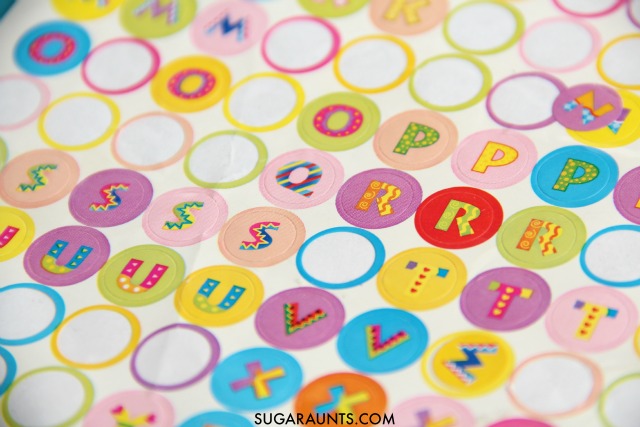
I love these Alphabet stickers for name building, letter identification, and spelling word practice.
What stickers do you need in your sticker collection?
You will love our recent 31 Days of Occupational Therapy series where we shared free and almost free ways to work on Occupational Therapy goal areas. This post is a great way to work on functional skills using free or inexpensive items. Most of us have a couple of stickers around the house. Some of my favorite activities from the series include:
Working on fine motor skills, visual perception, visual motor skills, sensory tolerance, handwriting, or scissor skills? Our Fine Motor Kits cover all of these areas and more.
Check out the seasonal Fine Motor Kits that kids love:
Colleen Beck, OTR/L has been an occupational therapist since 2000, working in school-based, hand therapy, outpatient peds, EI, and SNF. Colleen created The OT Toolbox to inspire therapists, teachers, and parents with easy and fun tools to help children thrive. Read her story about going from an OT making $3/hour (after paying for kids’ childcare) to a full-time OT resource creator for millions of readers. Want to collaborate? Send an email to contact@theottoolbox.com.
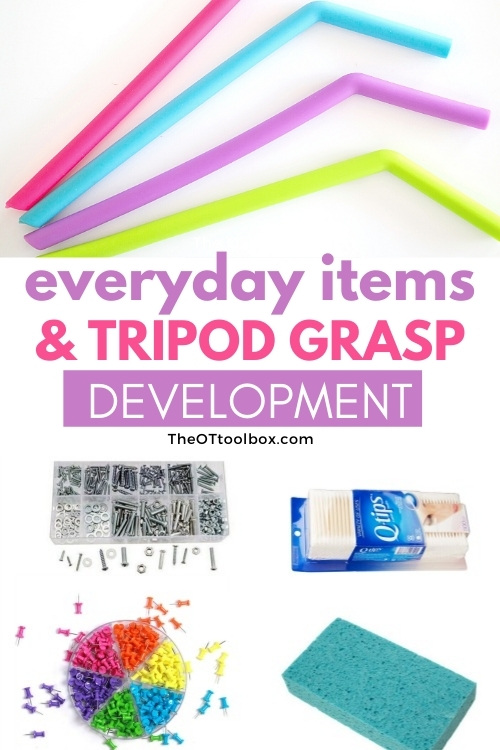
If you are a pediatric occupational therapy practitioner then you know all about tripod grasp and the role it plays in fine motor skills. This precision grasp is part of precision, finger dexterity, and coordination of the hands. Did you know you can work on tripod grasp using everyday items found around the home? There are so many ways to improve pencil grasp and the fine motor skills needed for strong hands using materials like cardboard boxes, straws, and other household items. Here, you’ll find fun ways to improve tripod grasp with the items you already have in your home. Also be sure to check out our blog post on grasp patterns, as understanding various grasps can make the process easier.
It’s the everyday items that help a household to run that are seen by children and experimented with in playful ways.
“How fast can I push this basket across the carpet?”
“Can I stab this spoon into the dirt of that potted plant?”
Kids experiment through play and while they are antagonizing the Spider Plant in the corner, they are learning so much. They are building and developing skills that they need for handwriting, buttoning, and cutting with scissors.
Sometimes it’s the everyday household objects that are so much more fun than toys!
Today’s tips use everyday items to work on a fine motor skill that kids need for handwriting: tripod grasp! Recently, I shared with you a series of 31 Days of Occupational Therapy. It was a fun series, and I loved sharing tips using free or mostly free items. Today, I’ve got an activity that almost made the series, but I just ran out of days. This tripod grasp activity is a fun one in our house.
What is Tripod Grasp?
Let’s start with a definition of tripod grasp because this is a term you hear a lot in child development, and in school based occupational therapy, especially.
Tripod grasp is a grasp using the tips of the thumb, pointer finger, and middle finger. These are digits #1, #2, and #3 of the hand. Tripod means a three legged item like the three legs of a camera tripod, or the three legs of a stool. When talking about the tripod grasp, we mean the first three fingers of the hand used to manipulate objects like a pencil. We use the dominant hand primarily in tasks that utilize a tripod grasp, but you can make and use a tripod grasp with your non-dominant hand, too. (Think about the American Sign Language sign for the word “more”, for example.)
In the traditional tripod grasp used in pencil grasp, the thumb opposes the pad of the index finger and the shaft of the pencil rests on the side or pad of the middle finger.
Tripod grasp is part of the umbrella of fine motor skills. These fine motor milestones are the basis for everything our hands can do.
There are several underlying skills needed for tripod grasp.
Fine Motor Skills Needed for an Efficient Tripod Grasp
In order to use a tripod grasp with efficient motor planning and with endurance, there are several underlying areas that need to be present. These are the areas that we address in occupational therapy activities through play!
Those underlying skills include:
In hand manipulation
Open thumb web space
Separation of the sides of the hand
Arch development
Thumb IP joint flexion
Opposition
In-hand manipulation– In hand manipulation refers to the ability to manipulate objects within the hand. A tripod grasp supports this manipulation of objects. Manipulation of objects within the hand includes three aspects of mobility: translation, shift, and rotation of objects.
Open thumb web space– This fine motor skill occurs in many functional tasks and in order to have a tripod grasp, there needs to be separation of the two sides of the hand, which supports an open thumb space. The thumb web space is that space between your thumb and pointer finger that makes an “O” when you make the “OK” sign. In order to grasp small items with your thumb and index finger, you need to oppose the tip of your thumb to the tip of your pointer finger. Not only do the tips of the fingers need to touch, but the thumb must rotate at the joint closest to your hand. This opposition is needed to manipulate and grasp small items like shoe laces, buttons, and zippers, which requires a form of a tripod grasp.
Separation of the sides of the hand– We mentioned separation of the sides of the hand above, and when tripod grasp occurs, there is a natural separation of the sides of the hand into the precision side and the power side. Separation of the sides of the hand refers to the imaginary line drawn from your wrist directly down the middle of your hand and between your ring finger and middle finger, separating the precision side of the hand (thumb, pointer finger, and middle finger) with the power side of your hand (pinkie finger and ring finger). These two sides work together in skilled activities with precision and power grasp in functional activities.
Arch development– When tripod grasp is used, there is natural positioning of the fingers with slight flexion at the MCP joints and slight flexion of the PIP joint of the pointer finger and middle finger. This mostly extended position of the fingers puts the arch of the hand into a cupped position. Refinement of fine motor skills in the hand (the radial side) happens when the power half (the ulnar side) is stabilized. Separation of the two sides of the hand allow for more precise use of the thumb.
Thumb IP joint flexion– In a tripod grasp, there is thumb IP joint flexion which allows the thumb to oppose the pointer finger and the middle finger. When the IP joint flexion is absent, we see reduced precision and dexterity. The thumb interphalangeal joint is responsible for flexing or bending the end of the thumb. the joint allows us to pick up very small items in pincer grasp and enables a functional tripod grasp while holding a pencil.
Opposition– The thumb opposes the tip of the pointer finger and the middle finger in a tripod grasp. Opposition of the thumb means the tip of the thumb touches the tip of a finger, or the fleshy pad of the thumb touches the pad of a finger. When opposing the thumb to the fingers, small objects are able to be held and manipulated. When opposing, the thumb’s thenar muscles work to advancing and positioning objects.
There are many ways to work on tripod grasp through play!
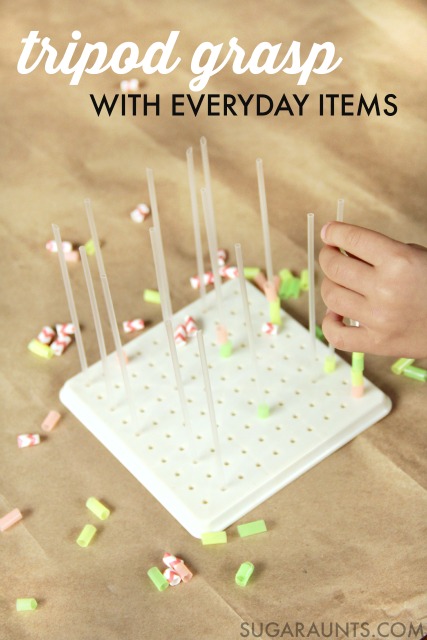
Tripod Grasp with Straws
This post contains affiliate links. This tripod grasp activity was one that we put together one day while cleaning out a cupboard. I shared it over on Instagram recently.
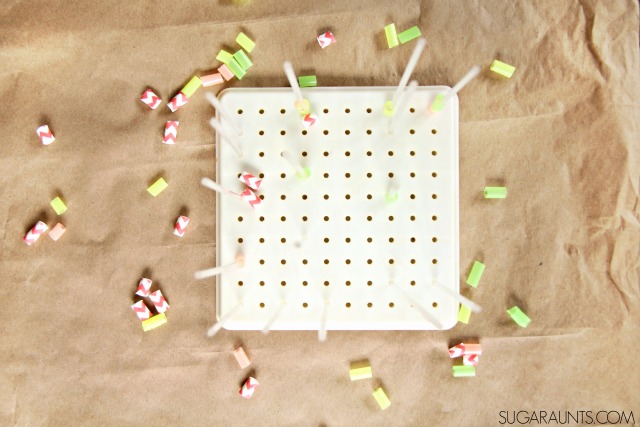
This Peg Board with 1000 Pegs is one that I’ve had in my OT treatment bag for 20+ years. It’s one of my favorite treatment tools for working on so many areas. Push small pegs into the holes to work on in-hand manipulation, tripod grasp, and pincer grip. Copy designs with pegs and work on hand-eye coordination, visual scanning, visual perceptual skills, form constancy, and more. Turn it over and use the back as a mini geoboard with string small loops. Tilt it on a slant and work on an extended surface. This little pegboard has been used by tons of kids working on so many skills. It really is one of my all-time favorite OT activities.
I love that I now get to share this pegboard with my own kids.
We pulled out a handful of straws from a box of juice drinks. These straws were left over from a party where we didn’t use the straws. You could save small straws like this from juice drinks and wash them out. I showed my daughter how to push the straws into the peg holes and she took over, arranging the straws over and over again. We then used cut up pieces of straws and threaded them onto the straw pegs.
Work on tripod grasp with straws
Using a material like straws to develop fine motor strength and dexterity is just one way to work on tripod grasp with everyday items.
Cut a straw into small pieces and thread them onto the juice straws. Picking up the small straw “beads” and threading them onto the juice straws is a great way to work on tripod grasp.
Using the thumb, index finger, and middle finger to pick up small items uses a tripod grasp. This efficient grasp is needed to hold a pencil effectively while handwriting. The small straw pieces require an open thumb web space and defined arches of the hands. What a fine motor workout this is!
Tripod Grasp Activities
Ok, so say you don’t have juice box straws to use in a pegboard. You can use a variety of other household items in a similar way to work on a tripod grasp.
Roll small balls of play dough with the tips of the fingers
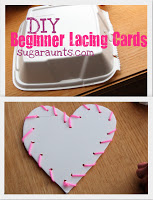
Lacing string onto lacing cards
Fastening buttons
Holding and managing a zipper on a jacket
Pushing push pins into a bulletin board
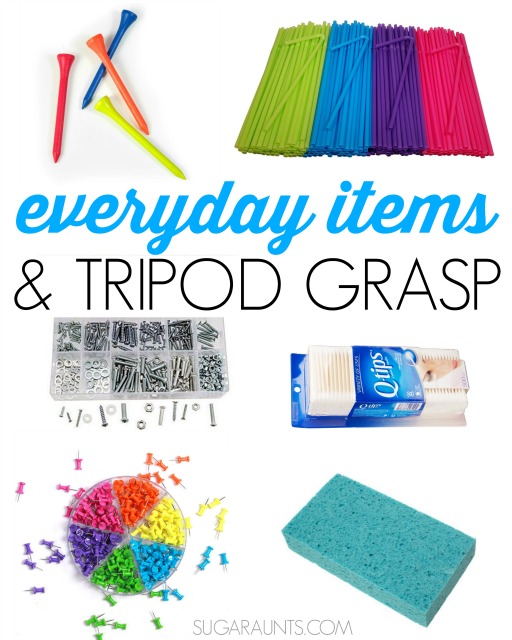
These are some of my favorite every day items to work on tripod grasp. You might find them in a junk drawer or in a closet somewhere. Use them to work on a tripod grasp and efficient handwriting:
These Colorful golf tees are bright and colorful, and perfect for pressing into stryofoam or thing cardboard.
Straws can be cut into small pieces and used as beads. Thread them onto pipe cleaners, string, or other straws.
Screws, nuts, and bolts are a great way to work on tripod grasp and other fine motor skills like in-hand manipulation and rotation.
Cotton swabs make a great writing utensil. Work on tripod grasp while painting with them.
Use Push Pins to work on tripod grasp like we did here. Watch the pointy end with younger kids!
Use a Kitchen sponge to work on a tripod grasp by cutting the sponge into small squares. Squeeze water to fill a container, or use them to paint.
Want to know how to fix a problem with pencil grasps? Need help knowing where to start when it comes to immature pencil grasps or a child hating to write because their hand hurts? The Pencil Grasp Challenge in open for you! In this free, 5 day email series, you’ll gain information, resources, specific activities designed to promote a functional, efficient pencil grasp.
The pencil grasp challenge is a free, 5 day mini course and challenge. During the course of five days, I’ll be teaching everything you need to know about the skills that make up a functional pencil grasp. You’ll learn what’s going on behind the inefficient and just plain terrible pencil grasps you see everyday in the classroom, clinic, or home. Along with loads of information, you’ll gain quick, daily activities that you can do today with a kiddo you know and love. These are easy activities that use items you probably already have in your home right now.
Besides learning and gaining a handful (pun intended) of fun ideas to make quick wins in pencil grasp work, you’ll gain:
5 days of information related to pencil grasp, so you know how to help kids fix an immature pencil grasp.
Specific activities designed to build a functional pencil grasp.
Free printable handouts that you can use to share with your team or with a parent/fellow teachers.
You’ll get access to printable challenge sheets, and a few other fun surprises.
And, possibly the best of all, you’ll get access to a secret challengers Facebook group, where you can share wins, chat about all things pencil grasp, and join a community of other therapists, parents and teachers working on pencil grasp issues.
Colleen Beck, OTR/L has been an occupational therapist since 2000, working in school-based, hand therapy, outpatient peds, EI, and SNF. Colleen created The OT Toolbox to inspire therapists, teachers, and parents with easy and fun tools to help children thrive. Read her story about going from an OT making $3/hour (after paying for kids’ childcare) to a full-time OT resource creator for millions of readers. Want to collaborate? Send an email to contact@theottoolbox.com.
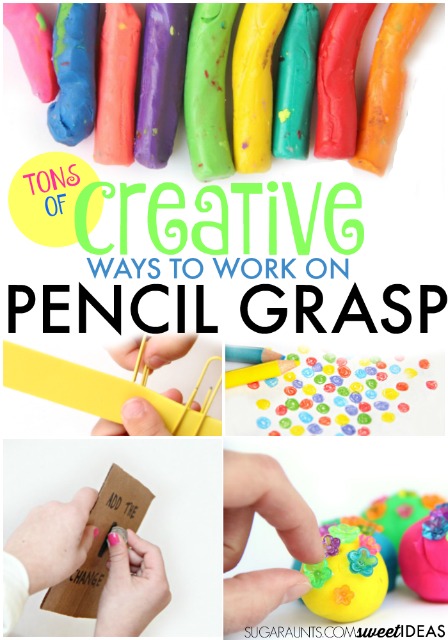
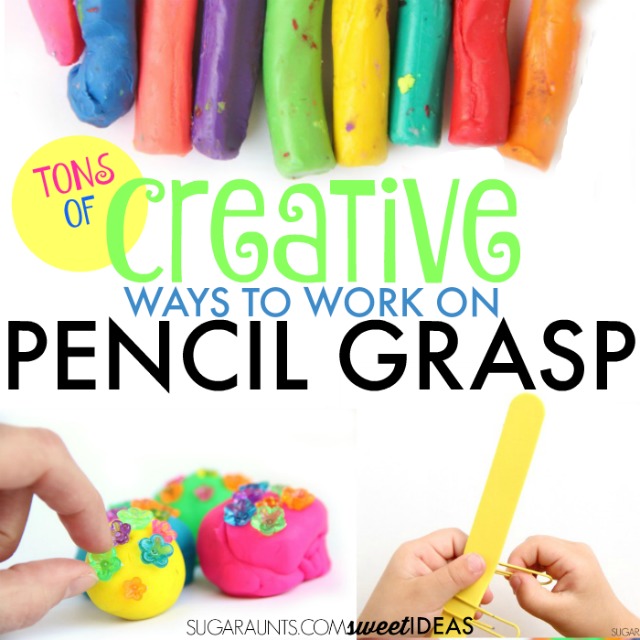
Helping kids with pencil grasp can be a complicated matter. Kids can hold the pencil too tightly or with an immature grasp no matter how many pencil grips you try. But, there is hope. These pencil grasp activities are fun ways to improve pencil grasp with fine motor play. By using play activities to help kids build a better pencil grasp, kids develop a grasp that is strong and dexterous in ways that carryover to holding a pencil. Try these tripod grasp activities to help kids with pencil grasp development. This is something that therapists want parents to know about pencil grasp development…that a functional pencil grasp might not look like a traditional tripod grasp…and that there are fun ways to work on grasp development!
That said…this is the place for all things pencil grip activities that actually make a difference!
Pencil Grasp
I love to share easy tricks to work on things like fine motor skills. Working on pencil grasp and the fine motor skills needed for handwriting are two of my favorite ways to build functional skills as an Occupational Therapist. This blog post is a round up of some of the best pencil grasp activities and ways to develop a more functional pencil grasp through fine motor play activities. I’ve updated this resource to include more recent pencil grip occupational therapy ideas and grasp activities that I’ve shared.
A functional pencil grasp might not “look like” the traditional tripod grasp. One thing to read up on is grasp patterns, because this plays a huge role inholding the pencil.
Want to know how to fix a problem with pencil grasps? Need help knowing where to start when it comes to immature pencil grasps or a child hating to write because their hand hurts? The Pencil Grasp Challenge in open for you! In this free, 5 day email series, you’ll gain information, resources, specific activities designed to promote a functional, efficient pencil grasp.
First, if you’ve go questions about pencil grasp, check out this resource on building fine motor skills through play. You will find TONS of info about the fine motor “parts” of a functional grasp.
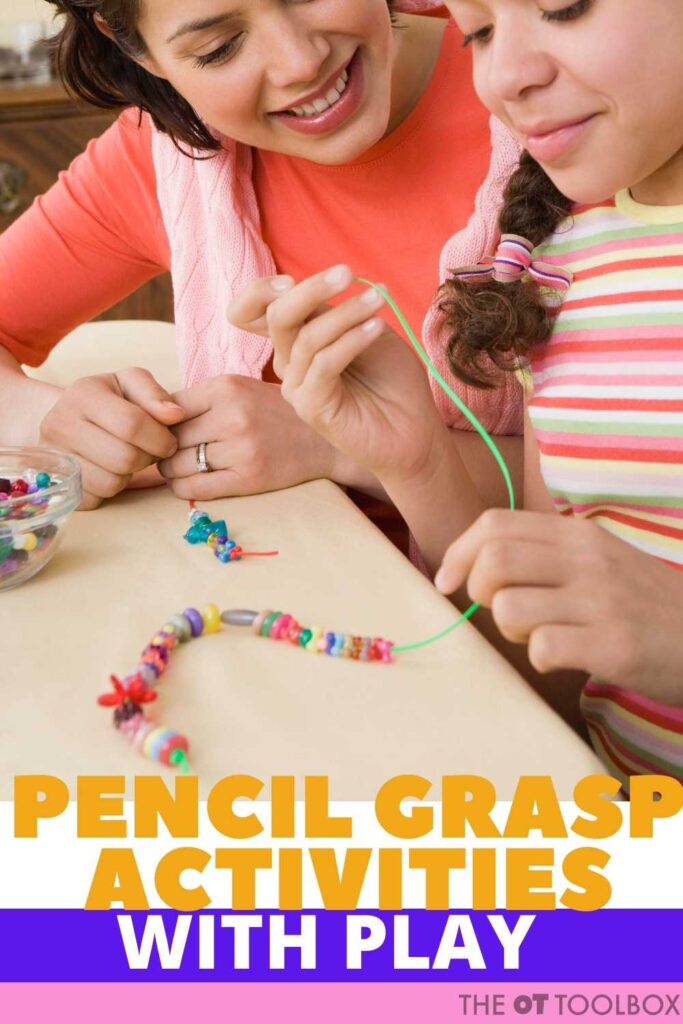
Fine Motor Play Activities to Improve Pencil Grasp
We love incorporating fine motor activities into our play. These posts are some of our favorites from the past year, and as a bonus, will help with the development of the small muscles of the hands. An efficient grip on the pencil uses a tripod grasp (thumb, index, and middle fingers) with an open space between the thumb and index finger. This grasp on the pencil allows kids to better form letters correctly and in a given small space using the fingers to make the pencil movements, vs. using the wrist or whole arm. If your child is struggling with their handwriting, look first at their grasp on the pencil and go from there. Try one of these activities for improved muscle strength and pencil control.
If you are interested in improving pencil grasp, and wondering about all of the fine motor skills that impact a functional pencil grasp, you will definitely want to join the pencil grasp challenge. This free 5 day email series explains everything you want to know about pencil grasp activities that have a powerful impact. Click here to join the Pencil Grasp Challenge.
So let’s get moving on some of the best pencil grip activities that actually make a difference in a functional pencil grasp.
Pencil Grip Activities
We have many pencil grasp tricks up our sleeve as school based OTs…but there are many ways that you can target specific needs with fun and engaging pencil grip activities! Most of these ideas don’t even use a pencil. They target the underlying skill areas like hand strength, dexterity, and precision. Other tasks DO use a pencil though!
While these wouldn’t be specified in a manual dexterity goal, you would target functional skills of handwriting. These ideas are the play-based strategies, or tools.
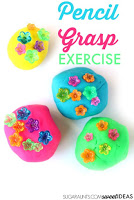
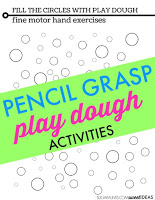
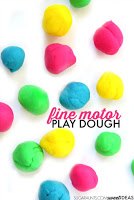
Pencil Grasp Exercises with Play Dough is fun with these mini fluted flower beads. They build a flexed thumb IP joint which is needed for an efficient pencil grasp.
In-Hand Manipulation: Two Activities In hand manipulation is necessary during pencil grasp to manipulate and advance the pencil while writing, as well as making adjustments with the pencil while erasing.
Fine Motor Play with Tissue Paper is a great way to build intrinsic muscle strength. Strength in the intrinsic muscles ensure a functional tripod grasp.
DIY Lacing Cards improves bilateral coordination, needed for holding the paper while writing.
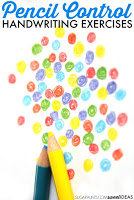
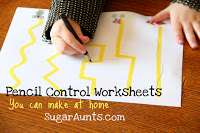
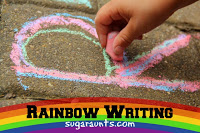
Rainbow Writing provides a resistive writing surface, providing proprioceptive feedback and a way to work on motor planning in letter formation, as well as tripod grasp on the pencil.
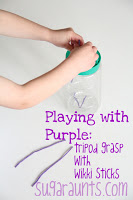
Tripod Grasp with Wikki Stix Pushing the wikki stix into the container works on tripod grasp and intrinsic muscle strength, as well as bilateral coordination.
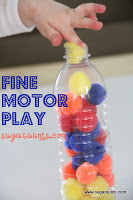
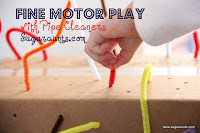
Using Pipe Cleaners in Fine Motor Play also improves intrinsic muscle strength and bilateral coordination with a brightly colored stick. Using the plastic bottle provides great auditory feedback.
Here is more information on pencil control and distal mobility in handwriting.
Colleen Beck, OTR/L has been an occupational therapist since 2000, working in school-based, hand therapy, outpatient peds, EI, and SNF. Colleen created The OT Toolbox to inspire therapists, teachers, and parents with easy and fun tools to help children thrive. Read her story about going from an OT making $3/hour (after paying for kids’ childcare) to a full-time OT resource creator for millions of readers. Want to collaborate? Send an email to contact@theottoolbox.com.
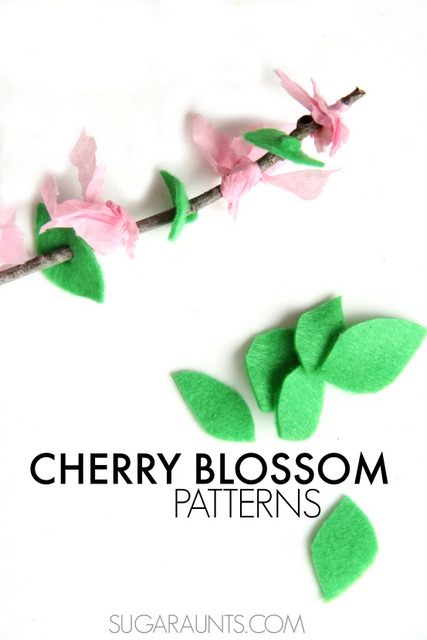
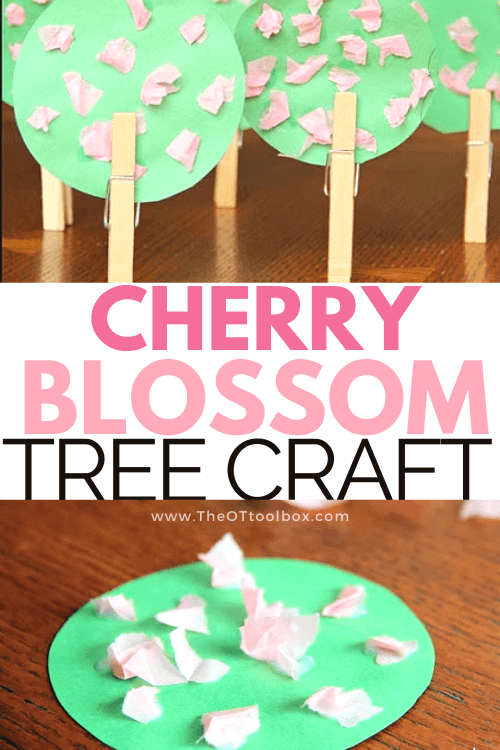
This cherry blossom craft is one of my favorites this time of year because it’s a fine motor power tool that supports so many areas of development with a single craft. We made the tissue paper cherry blossom tree many years ago, and it’s still a favorite when it comes to one craft that supports many areas! This is just one of the fun Cherry blossom crafts here on the site that promote fine motor skills, strengthening, and precision in big ways. Let’s explain…
Cherry Blossom Craft
We made these Cherry blossom trees one day as a Spring occupational therapy activity for kids. This was the perfect way to brighten up our dining room. We had a bunch of paper snowflakes hanging on our window and decided we needed to pull those down and make a few fun spring crafts! This Cherry Blossom Tree craft hit the mark!
Not only were our trees fun to make, they had a great fine motor component to them…and we love fine motor activities!
This post contains affiliate links.
Cherry Blossom Tree craft
We made this tissue paper cherry blossom craft using simple materials that we already had on hand:
Green construction paper
Pink tissue paper
Glue
Clothes pins
We also used scissors, a pencil, and a lid (to create the tree circle)
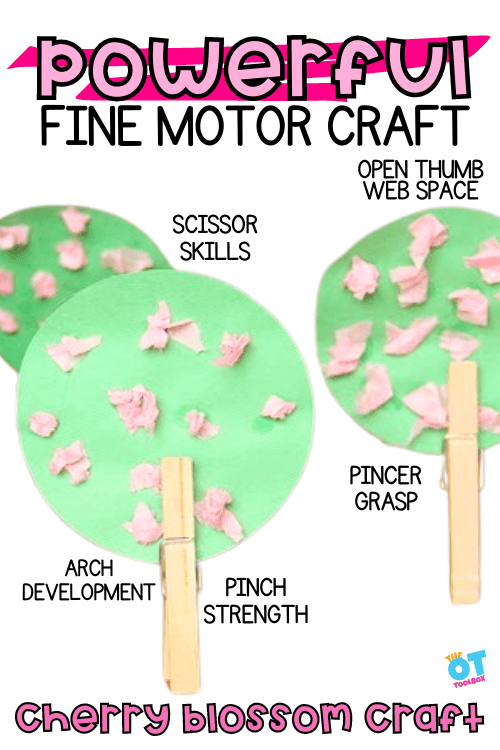
The craft is ideal because there are many skills that are addressed using these materials. We show them in the image at the top of this page, and they include:
Finger strength– needed to pinch the clothes pins as a trunk onto the tissue paper cherry blossom craft.
Arch development– crumbling the paper into small bits requires refinement of the arches of the hand
Pincer grasp– to pick up and manipulate the small crumbled tissue aper pieces and to place them onto glue spots on the tree
There are other skills that are used as well: tripod grasp, gross grasp, bilateral coordination, intrinsic hand strength, etc.
We started with green Construction Paper and a peanut butter jar lid. I traced a bunch of circles (and Baby Girl had to try her hand at tracing, too!)
Holding the lid and tracing around it is a great way to incorporate bilateral coordination and crossing midline. This is a nice precursor to the task of cutting out each circle.
To address scissor skills, consider using thicker paper or cardstock to make the cutting activity easier. Here are strategies for working on scissor skills and cutting accuracy.
These were cut out and we were ready to get started on our trees.
I put a bunch of dots of glue on the circles. Older kids could do this part. Squeezing the glue bottle is a great fine motor strengthening exercise for little hands.
For kids that need help working on graded resistance and grasp when managing a bottle of glue, practicing glue spots onto different sizes of circles like in a glue exercise is a good way to help with this functional task.
The Glue Spots worksheets in the Spring Fine Motor Kit is a good exercise for this activity.
Next, Big Sister pulled small bits of pink tissue paper from a big old sheet.
Tearing tissue paper is such a GREAT fine motor strengthening exercise for kiddos.
Crumbling those little bits works the intrinsic muscles of the hands (the small muscles that are in the hand and make up arches of the palm. Strength of these muscles is so important to endurance in handwriting and coloring, maintaining adequate pressure when coloring, holding the pencil accurately…the needs for defined arches of the hands could go on and on and on!
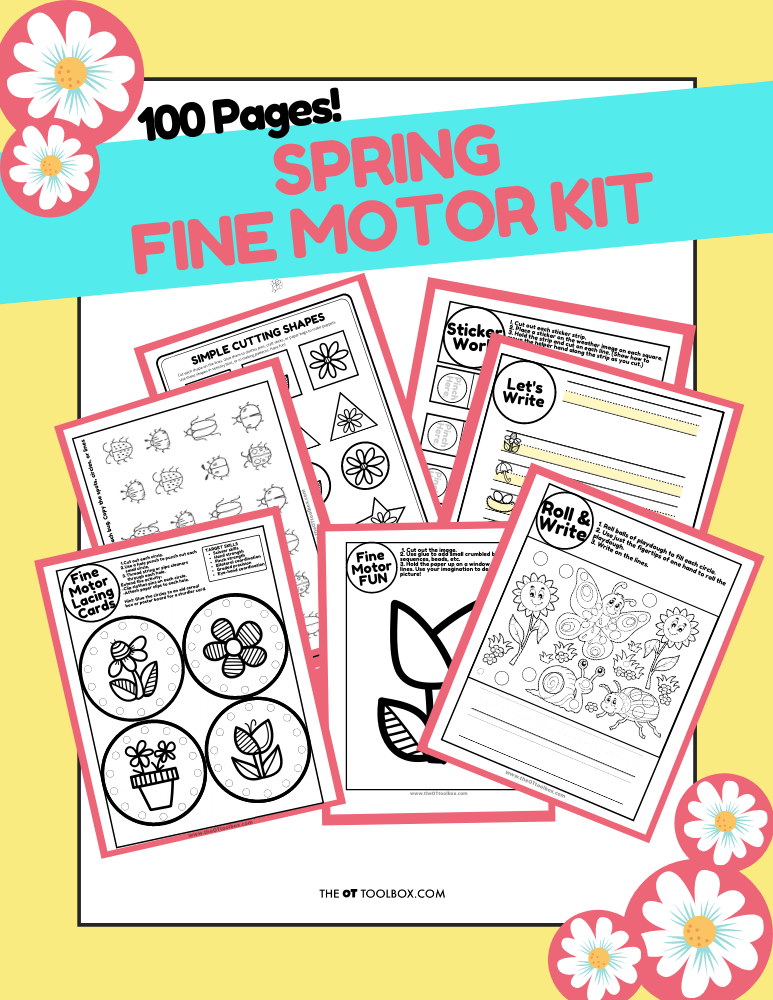
Crumbling tissue paper for crumbled paper art is a functional fine motor craft that kids can hang up and admire their hard work. You’ll find more Crumble Art crafts in the Spring Fine Motor Kit, including templates for 5 different crumble art crafts: flowers, mushroom, rainbow, and Easter egg crafts.
Pressing those little tissue paper crumbles into the glue required a tripod grasp. And, we had a ton of glue spots…so this was a good long activity!
Cover all of those glue spots!
Once our tissue paper/glue was dry, we clipped on clothes pin “trunks” onto our trees. Pinching those pins was another way to encourage hand strengthening. We had a whole forest of Cherry Blossom trees and got them involved on our train table, with the Little People stuff, with little dinosaurs. We played with these Cherry Blossom trees until they fell apart!
Be sure to check out this other cherry blossom fine motor math activity, where we used pink tissue paper to make cherry blossoms and worked on tripod grasp and eye hand coordination skills.
Spring Fine Motor Kit
Score Fine Motor Tools and resources and help kids build the skills they need to thrive!
Developing hand strength, dexterity, dexterity, precision skills, and eye-hand coordination skills that kids need for holding and writing with a pencil, coloring, and manipulating small objects in every day task doesn’t need to be difficult. The Spring Fine Motor Kit includes 100 pages of fine motor activities, worksheets, crafts, and more:
Colleen Beck, OTR/L has been an occupational therapist since 2000, working in school-based, hand therapy, outpatient peds, EI, and SNF. Colleen created The OT Toolbox to inspire therapists, teachers, and parents with easy and fun tools to help children thrive. Read her story about going from an OT making $3/hour (after paying for kids’ childcare) to a full-time OT resource creator for millions of readers. Want to collaborate? Send an email to contact@theottoolbox.com.
Welcome to a winter wonderland on the farm! In today’s blog post, we’re diving into the magical world of sensory play with a snowy farm sensory bin. This delightful activity combines the charm of a farm theme with the sensory joys of winter, creating an engaging and therapeutic experience for children. This is one of our favorite winter sensory bins because you can focus on so many different underlying skills through play.
Whether you’re a parent looking for creative winter activities or a therapist seeking effective tools for skill development, this farm sensory bin is tailored to captivate young minds while addressing various therapeutic areas. Read all about sensory bins in general as a therapy tool to support skill development.
Farm Sensory Bin
We love a great occupational therapy sensory activity because cold winter temps and less daylight hours mean you might not have a chance to get little ones outside as often as you might like. Plus, a farm sensory bin goes great with a Farm theme in preschool or in occupational therapy sessions.
This farm sensory bin has a winter theme, but you could actually set up a farm sensory bin any time of year. In fact, we loved this play dough farm activity that goes along with a farm theme and supports fine motor skills as well as sensory input.
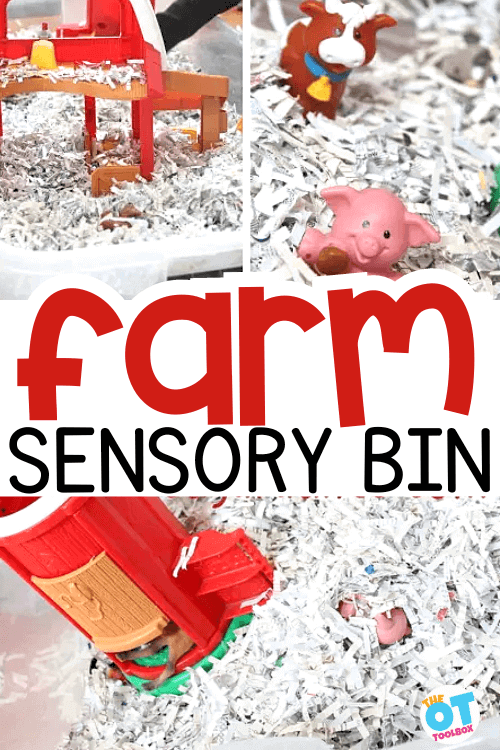
The base of shredded paper sets the stage for a snowy landscape, providing a tactile experience that stimulates sensory exploration and fine motor skills.
This winter-themed sensory bin features a collection of farm toys and mini figures, turning the snowy setting into a farm scene ready for imaginative play.
Farm Animal Sensory Bin
The farm animal sensory bin takes the excitement a step further, introducing miniature figures of beloved farm animals. As children dive into the bin, they engage in hands-on exploration, feeling the textures of the shredded paper, maneuvering the farm toys, and creating their own farm stories.
This sensory-rich experience enhances tactile input, encouraging self-confidence as children express themselves through play.
Farm Theme Sensory Bin Setup
Setting up the farm theme sensory bin is a breeze:
Begin with a large container filled with shredded paper to create a snowy base. You could also use other sensory bin base materials if you don’t have shredded paper on hand.
Add farm toys such as barns, tractors, and mini figures of animals to bring the farm to life.
Encourage creativity by incorporating small props like faux trees or fences. This simple yet effective setup provides a canvas for endless imaginative scenarios.
Before this weekend, we’ve had a super cool spring. With a handful of days where it snowed. We are ready for outside play in short sleeves, running in the yard, and grass stained knees.
But, we have been loving this fun play activity too 🙂
We had a boat load of shredded paper from doing taxes recently. It came in pretty handy for a small world snowy farm scene!
We put some farm animals, the Little People barn, and of course, Little Guy’s construction vehicles.
(how else can the farmer move allll that snow??)
Little Guy went to farm-town with imagination stories and pretend play.
Baby Girl loves to make the animal sounds and had a blast finding them in the shredded paper.
Why This Farm Sensory Bin Helps Development
Beyond simply playing in the sensory bin, this farm sensory bin serves as a therapeutic tool to foster development in various areas.
Mindfulness- playing in a sensory bin can be calming and regulating for kids. Read about Winter Mindfulness Activities for more information.
So much more
Fine motor skills are particularly important in early childhood development, as they lay the foundation for more complex tasks in the future.
Tactile discrimination, exploration, and sensory desensitization are effectively addressed with sensory bins as they are playful and present in a non-threatening way. The playful nature of sensory bins allows children to control their tactile experiences, fostering confidence in their interactions with materials and gradually increasing their comfort with different sensations.
The hands-on nature of the activity promotes fine motor skills as children manipulate the farm toys and engage with the sensory materials. Communication skills blossom as they create farm narratives, fostering language development.
In addition, occupational therapy providers love sensory bins because they can offer a unique and enjoyable way to engage reluctant children who may initially be hesitant about engaging in the sensory elements of tactile defensiveness challenges.
Tactile input and sensory exploration contribute to a holistic sensory experience, supporting overall sensory processing.
My fun-loving Baby Girl instigated this little incident…
she just couldn’t help herself 🙂
What are we learning through play?
Imagination Play
Pretend Play
Learning Animals
Animal Sounds
Visual Scanning
Sensory Play
Farm Sensory Bin Ideas
You can pair this farm sensory bin with other therapy ideas, too. Use some of these tools and resources to support skills like gross motor skills, coordination, brain breaks, and more:
These Farm Brain Breaks can add movement and gross motor input to a child’s day and fit in great with a farm animal theme. Print off the cards and use them in the classroom or home.
These heavy work cards includes a set of 8 farm themed heavy work activities that can be used as a brain break or added proprioceptive input.
Colleen Beck, OTR/L has been an occupational therapist since 2000, working in school-based, hand therapy, outpatient peds, EI, and SNF. Colleen created The OT Toolbox to inspire therapists, teachers, and parents with easy and fun tools to help children thrive. Read her story about going from an OT making $3/hour (after paying for kids’ childcare) to a full-time OT resource creator for millions of readers. Want to collaborate? Send an email to contact@theottoolbox.com.