Visual Discrimination

Visual discrimination

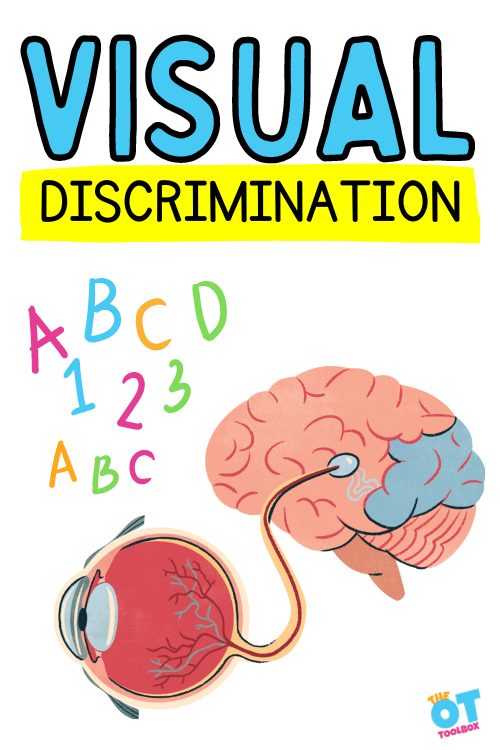
Visual discrimination is just one of the seven types of visual perception impacting visual efficiency.  While the word “discriminate” has many different meanings, visual discrimination refers to the ability to tell the difference between things. Someone who has “discriminating taste” can tell the difference between Heinz and off brand ketchup, for example.

This blog post is part of a series highlighting Visual Perception. 
Visual discrimination

What is visual discrimination

Visual discrimination can be defined as the ability to is determine and classify objects, symbols, shapes, etc. by differences in color, form, size, texture, or orientation, or shape by the eyes receiving visual input and analyzing that information.

Visual discrimination occurs by the eyes and brain detecting differences in objects, utilizing working memory and stored memory to determine distinct differences or matched features.

This visual skill is necessary for reading, writing, math skills, play, activities of daily living, and essentially all aspects of utilizing visual input.

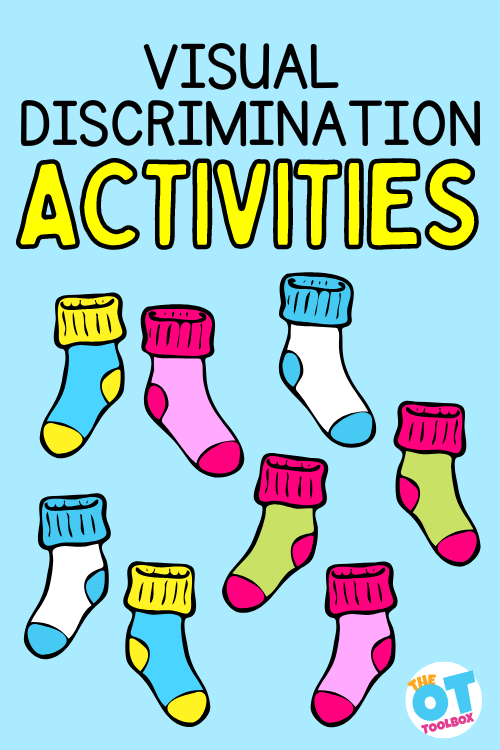
Visual discrimination is a skill that kids need for so many skills.  From identifying and matching socks when getting dressed and doing laundry to recognizing subtle differences in multiple choice problems, visual discrimination is a visual perceptual skill that allows kids to excel in reading, writing, and math activities or struggle!

When explaining visual discrimination, it is important to understand it’s role in visual perception as part of the overall visual processing system. One aspect of visual processing is the component of visual motor skills. Included in visual motor skills are three main areas:

Visual motor skills are made up of several areas:

1. Visual Processing Skills- how the eyes move and collect information. Visual processing skills includes visual tracking, convergence, saccades, visual fixation, and visual attention. A component of visual processing includes visual efficiency.

2. Visual Perceptual Skills- ability to make sense of what we see. Visual perceptual skills are essential for everything from navigating our world to reading, writing, and manipulating items. Visual perception includes visual memory, visual closure, form constancy, visual spatial relations, visual discrimination, visual attention, visual sequential memory, and visual figure ground.  

3. Eye-Hand Coordination- Using the visual input effectively and efficiently with the hands allows us to manipulate and manage objects and items. This area enables us to use visual information in a motor action. Eye-hand coordination requires fine motor dexterity, strength, shoulder stability, core stability, etc.

Why is Visual Discrimination Important?

Visual discrimination is critical for reading fluency, writing, and other academic areas.  It is also important in everyday activities.

  • Finding matching pairs of socks in the drawer. Picking out the navy versus black socks
  • Determining when a letter is reversed in handwriting or on paper. Read here about letter reversals and the role visual discrimination plays in reversing letters.
  • Picking out the sugar versus the flour when cooking
  • Using shampoo before conditioner when they are in similar bottles
  • Reading a map to follow the direction of roads
  • Selecting the correct items in the grocery store
  • Picking out two identical buttons to sew on a shirt from a pile of 30 similar ones
  • Scanning a pile of receipts to find the correct one
  • Looking for a phone number, while scanning a page or ad

How is Visual Discrimination related to reading or dyslexia?

In order to read fluently, the brain clumps letters together to form familiar words. There are tests that show the beginning two letters to a word with the rest jumbled. 

The brain is able to use the context clues to read the jumbled texts.  The brain is also able to read upside down, backward, and in different fonts.  Perception happens beyond the eyes. 

The eyes are just the window, or lens.  The brain is responsible for perceiving or making sense of what the lens has seen.  

Reading fluently requires quickly being able to tell the difference between fonts, discriminating between similar letters (b, d, p, q), clumping words together, determining where one word begins and ends, recognizing familiar words, and other decoding skills.  

People with dyslexia are not readily able to perceive the difference between these similar letters or words. They are able to “see” correctly, but their brain often reverses or mixes the letters and words, making it much more labor intensive to decode.  The good news is, the brain can be trained to make sense of what it sees.

Red Flags for Visual Discrimination Difficulties

Once you have determined visual acuity is 20/20, or has been corrected to working vision, watch for these common signs of visual discrimination issues:

  • Confusing letters and numbers
  • Writing with reversals
  • Difficulty correctly reading aloud
  • Does not enjoy activities such as reading or puzzles
  • Unable to pick out relevant information during open book quizzes, or scanning a page to find an item
  • Difficulty finding objects in drawers or cupboards
  • Slow or unable to find matching objects with subtle differences
  • Delayed or labored acquisition of math and reading skills
  • Poor handwriting – difficulty with letter sizing, spacing, line placement, letter formation
  • Math difficulties – number reversals, losing place when visually counting, difficulty lining up match figures

Fun Fact!

According to theories, males DO have more difficulty with visual perception than their female counterparts.  Males are genetically programmed to hunt, gather, and protect. 

They were not hardwired to cook, clean, shop, match items together, etc.  Males have not evolved quick enough to meet the ever changing challenges they face on a daily basis! 

According to the University of Washington, males can see motion and colors differently than females. This lends to the hunting/protecting theory, however is also linked to autism spectrum disorders in males. 

You can give the males in your life some slack when they just “can’t find” the salad dressing in the fridge next time!

Visual Discrimination Tests

When doing visual perceptual testing, it is important to isolate visual perception from motor skills.  Having students touch the answers rather than writing them, or calling out letters, is a better measure of visual perception. 

The following is a partial list of popular assessments.  The VMI subtest is more of a screener than a true visual perception test.  

Visual discrimination activities

Visual Discrimination Activities

Visual discrimination activities happen everyday through functional tasks. To work on these specific underlying visual processing skills, it is possible to target visual discrimination development through play, games, and activities.

Additionally, there are numerous worksheets, games, activities, and resources available on visual discrimination. 

The good news is, visual perceptual skills can be improved through practice and brain training, and can be incorporated into the client or student’s specific interests and goals. 

  • Sorting – similar buttons, shades of colors, types of toys, box of 100 crayons by color, similar socks, silverware by type or pattern, coins, laundry, etc.
  • Visual discrimination games such as (Amazon affiliate link) Spot it – these games are wildly popular. The OT Toolbox has some Spot It games too
  • The OT Toolbox has their own visual perceptual games as well
  • Puzzles – teach context clues, sorting pieces, noticing differences
  • Word searches
  • Printable worksheets such as I Spy, letter discrimination, etc.
  • Matching activities like this space matching activity
  • Workbooks – (affiliate link) Amazon has some reliable resources
  • Toys/games – if toys and games are more your speed, check out this list of visual perception toys

Visual Discrimination Play Ideas

The visual discrimination activities below support development and refinement of the skills needed to process differences in forms or objects.

  • Visual Processing Bundle– includes printable visual discrimination activities and information to better understand visual processing skills.
  • Free Visual Perception packet– Print these visual discrimination worksheets and use with crayons, pencils, and hands on materials such as wikki sticks or string.
  • Sunshine Visual Perception activity- This Google slide deck is a digital therapy activity that supports development of visual discrimination skills.
  • Color matching Elmer Activity– Use the children’s book, Elmer, to discriminate between details in a book.
  • Finger dexterity exercise– This visual processing activity supports visual discrimination skills by using eye-hand coordination along with utilizing visual information.
  • Practice “b” and “d” with sensory writing– Discrimination between letters is an aspect of visual processing that relates to functional performance in reading and learning.
  • Color shape discrimination Sort– Sorting shapes by color or form is a preliminary task that can be accomplished by young babies and is a building block for more refined skills.
  • Coin discrimination– Visual discrimination skills are needed to sort and use coins when paying for items or counting change.
  • Real toy I Spy game– I Spy games are powerful visual discrimination skills. This activity uses real toys and can be replicated at home or in therapy sessions using household objects.
  • Letters on the garage door– This gross motor visual discriminaiton task can be played outside or inside.

visual discrimination or visual acuity

The most important testing tool you can use is to rule out “visual acuity” problems before visual perception.  Vision plays a major role in learning and visual discrimination is just one aspect of vision and learning.

A pair of glasses is a much easier and straight forward fix than years of visual perceptual training. 

Visit a qualified ophthalmologist to check for any vision difficulties.  Once these are ruled out, use one of the great testing materials listed above to determine any visual perception deficits. 

Victoria Wood, OTR/L is a contributor to The OT Toolbox and has been providing Occupational Therapy treatment in pediatrics for more than 25 years. She has practiced in hospital settings (inpatient, outpatient, NICU, PICU), school systems, and outpatient clinics in several states. She has treated hundreds of children with various sensory processing dysfunction in the areas of behavior, gross/fine motor skills, social skills and self-care. Ms. Wood has also been a featured speaker at seminars, webinars, and school staff development training. She is the author of Seeing your Home and Community with Sensory Eyes.
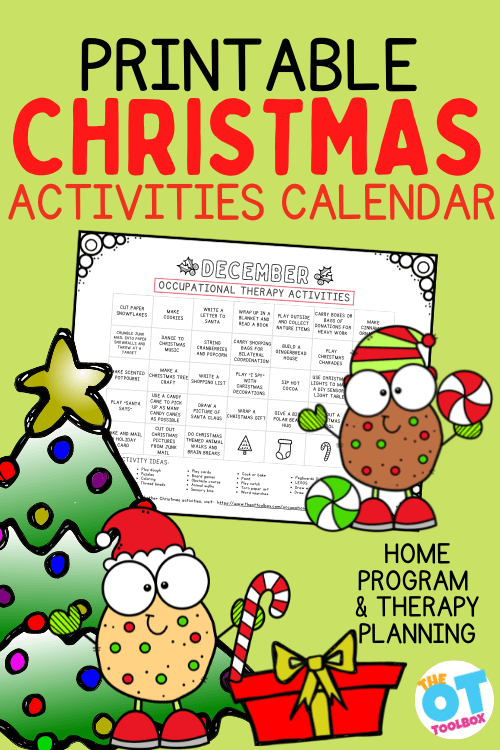
Christmas Activities Calendar

Christmas activities calendar

If you are looking for a few Christmas activities (or a holiday calendar to send home for the Christmas break), then this December occupational therapy calendar is for you! We pulled a few of our favorite Christmas occupational therapy activities and put them onto a printable holiday activities calendar so you can print and go!

You’ll also want to check out our 25 days of Christmas ideas because you can grab 25 printable OT ornaments…perfect for decorating the tree in a therapy clinic!

Christmas activities calendar

Christmas activities calendar

The Christmas season is a hectic and chaotic time.  With holiday parties, altered schedules, and never-ending to-do lists, Christmas can be overwhelming for adults and kids.  Children see and hear everything and the Christmas time stress is no exception. These Christmas occupational therapy activities can be used in the clinic, home, or in a home program during the holidays. Scroll on for some fun OT holiday activities the whole family will enjoy while targeting various needs!

Christmas Occupational Therapy Activities

Adding to the therapy plans, a few occupational therapy Christmas activities is as easy as adding a holiday themed therapy activity or a planning to use a Christmas item such as a stocking, wreath, or candy canes into therapy games.

Children with sensory or developmental needs and typically developing kids feel the sense of chaos this time of year. The overload of sensory input can be exhausting to children with difficulty in processing input from their environment.  I mean, it’s overwhelming for me, too! 


With all of the excitement of the season, it can be hard to keep to sensory integration strategies to help with coping in over stimulating situations. Sensory kiddos can also show over or under-responsiveness to new situations, too.  Imagine walking into a crowded holiday party with music, lights, a dancing crowd, scents of different and weird foods, and lots of overlapping voices.  


A child can easily become over excited or over protective as they attempt to protect themselves from this noisy, smell party!

OT Christmas activities

Christmas OT Activities for kids

Kids who are working on specific skill areas like fine motor or gross motor development can easily become distracted in the excitement of the season and allow practice areas and goals to slide just a bit.  I mean, there are a lot of fun things a kid can be doing…why would they want to work on their letter formation and handwriting??! Adding a few Christmas OT activities for kids to work on various needs can make the therapy “work” more fun and meaningful.


So, with the upcoming season of busy craziness, I wanted to put together this Occupational Therapy Christmas Calendar.

Celebrate the Christmas season with Occupational Therapy goal areas and calming strategies during this hectic season, allowing families to connect and focus on the true meaning of the season while working on developmental areas.

It’s a way for kids and families to connect and cope during this busy season through holiday festivities, while simultaneously working on many Occupational Therapy goal areas.  Work on fine motor skills while building that gingerbread house.  Calm down with proprioceptive input while snuggled up in a blanket with the family and a good Christmas book.  These are Christmas-y ideas that will keep your whole family connected this year.

This post contains affiliate links.

Occupational Therapy Christmas Activities

Celebrate the Christmas season with Occupational Therapy goal areas and calming strategies during this hectic season, allowing families to connect and focus on the true meaning of the season while working on developmental areas.


Add these ideas to your Advent calendar for a Very Occupational Therapy Christmas!


NOTE:  Many skill areas are addressed with each activity.  You might be working on specific areas like calming activities, or handwriting.  Try to adapt the activities below to fit your child’s needs.


The list below can be done in any order.  This is meant to be an easy way to fit Occupational Therapy practice areas into everyday Christmas fun.  

If a day is a little too hectic to fit in an activity, switch it around and do a different activity.  The most important message is to connect with your family and meet the needs of each member in fun and festive ways this Christmas!

Christmas OT activities

Christmas Calendar Ideas

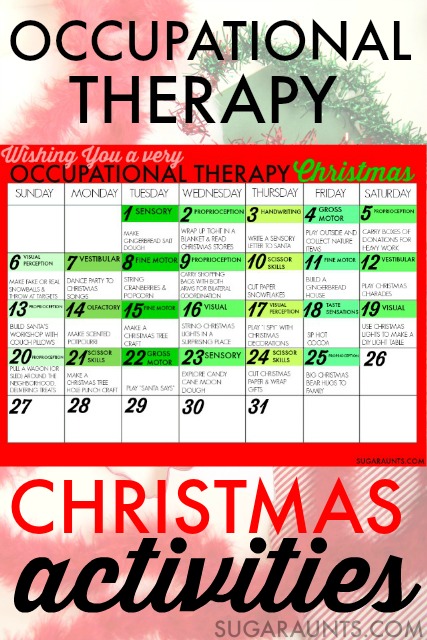
Note that some of the calendar days are slightly different than on the printable Christmas activity calendar below. From playing in the snow to creating your own Christmas memory game…the options are limitless when it comes to making memories and building skills!

Day 1 Make gingerbread salt dough to address fine motor, proprioceptive, and olfactory areas.  Cut out gingerbread men and make a garland…or just play with the dough! You can keep it in a covered dish or plastic bag to play again and again.


Day 2 Wrap up tight in a blanket and read Christmas stories for proprioceptive input.  A warm blanket is calming.  Wrap your child up like a burrito or full body proprioception.


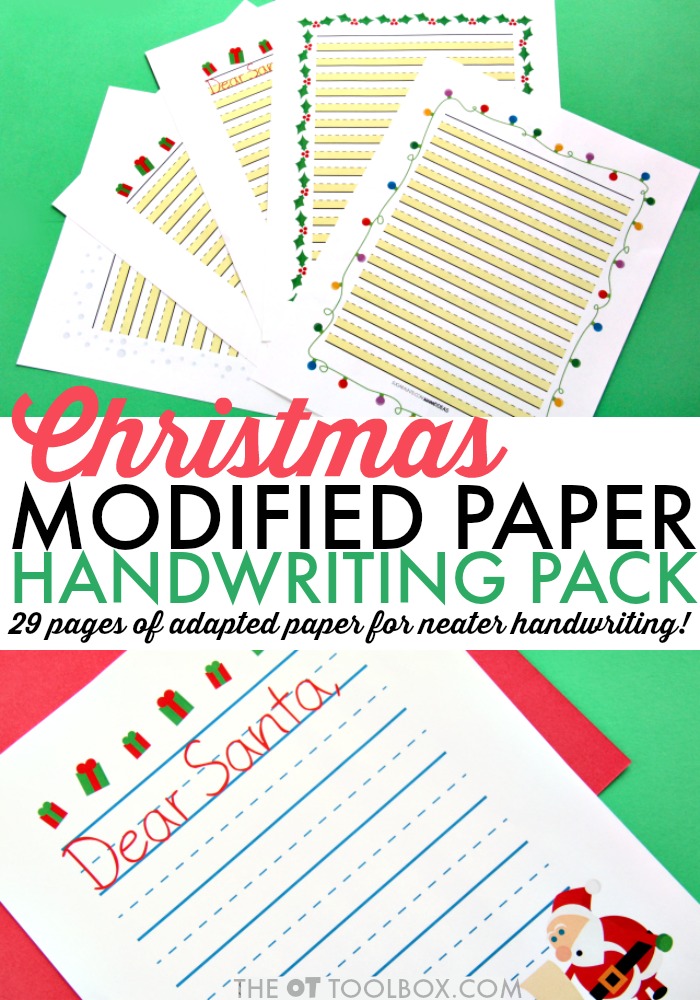
Day 3 Write a letter to Santa.  Provide creative handwriting modifications for fun.


Day 4 Play outside and collect nature items.  Use them to make collage art or create a table-top sensory table.


Day 5 Carry boxes of donations for heavy work input. This time of year, many families donate to others.  Kids can carry boxes and bags for proprioceptive input while doing a good deed.


Day 6 Make snowballs and throw at targets.  If you don’t have snow where you live, make fake snow for sensory fun.  Be sure to take this activity outside! Throwing at a target is a great hand-eye coordination activity. Packing together snowballs requires bilateral hand coordination and proprioceptive information to determine how much pressure is needed. Don’t let that snowball smash in your hands by packing it together too hard!


Day 7 Have a family dance party to Christmas music. Be sure to swing, twirl, jump, and spin or loads of vestibular input.


Day 8 Work on fine motor skills and string cranberries and popcorn on thread with a needle. Managing a needle and thread is a fine motor skill similar to tool use.  Threading popcorn and cranberries works on tripod grasp, bilateral hand coordination, hand-eye coordination, visual scanning, visual tracking, patterning, and more.


Day 9 Carry shopping bags in both hands for bilateral coordination and proprioceptive input.  Not going shopping?  Fill shopping bags at home with cans from the cupboard.  Create an obstacle course to work on motor planning.


Day 10 Cut paper snow flakes to work on scissor skills.  Try cutting coffee filters, newspapers, cardstock, foam craft sheets. and tissue paper for lots of textures and line accuracy practice.


Day 11 Build a gingerbread house and work on fine motor skills. Encourage tip to tip pincer grasp by providing very small candies.  To amp it up a bit, add a pair of tweezers and have your child pinch with a tripod grasp.  Provide an icing bag to work on gross grasp, too.


Day 12 Play Christmas Charades for gross motor and vestibular input.  Encourage movement actions like Santa filling his bag, building a snowman, wrapping presents, and shopping.


Day 13 Encourage proprioceptive input by showing your kids how to build a Santa’s workshop with couch cushions and pillows.  Lifting heavy cushions is a great heavy work activity.  Once done, kids can calm down in their couch cushion workshop under blankets and pillows.  Add a few toys and pretend hammers from a toy tool set for pretend play and problem solving in this Santa’s workshop activity.


Day 14 Make scented potpourri with scents of the season.  Kids can work on scissor skills and fine motor skills by cutting evergreen stems, orange peels, and pulling bits of bark from evergreens.  The scents of this potpourri will fill the home and a fun way to explore the olfactory sense.


Day 15 Make a Christmas Tree Craft and work on fine motor skills, bilateral hand coordination, and strength. Kids will feel a sense of accomplishment when they see their tree decorating the house all season long.


Day 16 Provide a visual sensory activity by stringing a strand of Christmas lights in a surprising place like on the ceiling, along the tops of doorways, or under a dining room table.  Twinkly lights can be used in a calm-down area. Kids can help to string the lights and use bilateral hand coordination, executive functioning and motor planning to figure out where to place lights, hold up the strand, peel and tear tape, and stick it to the lights. 


Day 17 Work on visual scanning and other visual perceptual skills like figure ground by playing a Christmas version of “I Spy”.  Use the decorated Christmas tree as a decoration station: Ask your child to locate a specific colored ornament as they visually scan the tree.  For more fun, play the game while lying on the floor and looking up at the tree. 


Day 18 Make and drink hot cocoa.  The warm drink provides a temperature sensation that is different and new.  Add ice cubes and candy canes for more textural taste sensations. Following multiple step directions in a cooking with kids activity works on so many problem solving, math, and sensory skill areas.


Day 19 Use Christmas lights to create a DIY light table.  Use it for handwriting practice including line awareness, spatial awareness, letter formation, tracing, and drawing.  This is a visual activity that kids will love.


Day 20 Cook up goodies (or wrap pre-packaged treat!) and plan a good deed for neighbors.  Load up a wagon or sled and deliver the treats around the neighborhood.  Pulling a wagon or sled is a proprioceptive activity that can be calming and grounding.


Day 21 Improve hand strength with this fine motor Christmas Tree craft using a hole punch for proprioceptive input to the hands.  Decorate the house with the trees, or create a banner for the mantle.


Day 22 Work on gross motor skills by playing “Santa Says”.  Just like the game Simon Says, kids can copy and listen to directions and motor plan, actions.  Be sure to incorporate bilateral coordination and crossing midline for a brain break activity.  Use these Simon Says commands to get you started.


Day 23 Explore the sense of touch and scent with this Candy Cane Moon Dough sensory bin.  Work on fine motor skills and tool use by scooping and filling cups and cookie cutters.


Day 24 Wrapping presents is a powerhouse of developmental activities:  Measure paper to fit packages, Cut paper with scissors in a strait line, Fold paper, Tear and Cut tape, Stick tape along edges of paper.  Practice motor planning, problem solving, and executive functioning by crossing an item from your to-do list and wrapping a present or tow with your child.


Day 25 Celebrate Christmas Day with big Christmas bear hugs with family and friends. Hugs are great for proprioceptive input to the body. 


Enjoy the season with your family and make each and every moment count

Printable Christmas Activity Calendar

Want to print off a calendar of occupational therapy ideas to support parents? It’s a great way to send kids off to the holiday break with therapy ideas that support skill-building AND celebrate the season. You can grab a copy of this printable calendar by entering your email address into the form below.

The OT Toolbox Member’s Club members will also find this printable calendar inside the Member’s Club in the Therapist Tools section (Level 1 members) and in the Christmas Therapy Theme (Level 2 members).

FREE Christmas Activities Calendar

    We respect your privacy. Unsubscribe at anytime.

    OT Christmas ACTIVITIES

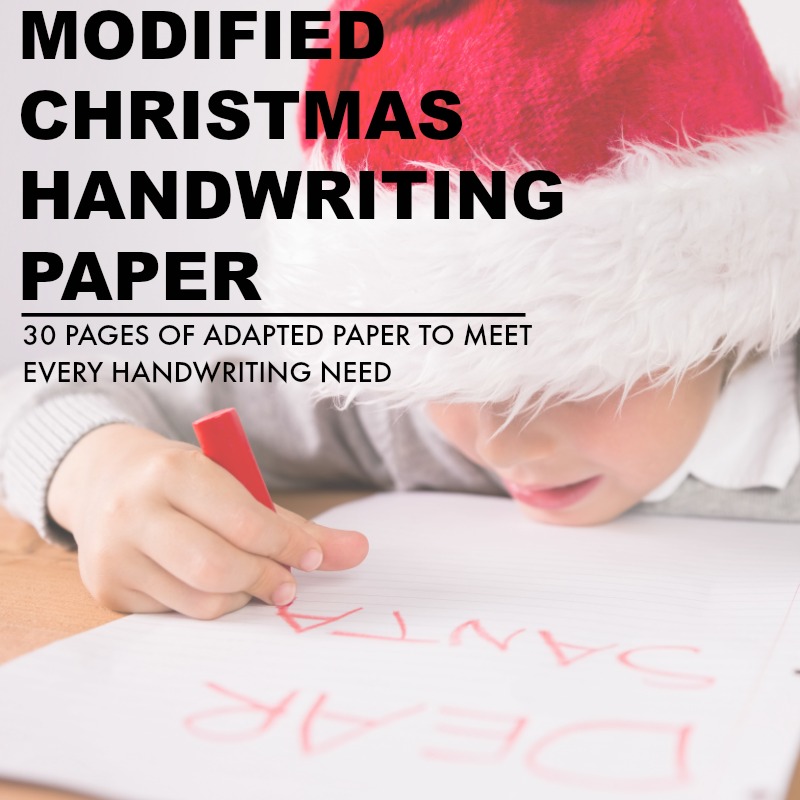
    Extend the OT Christmas activities further by asking kids to write out the therapy schedule on Christmas modified paper to work on handwriting. This is a great holiday activity for the clinic while working on a variety of occupational therapy goals. Clients can then cross off items as they are completed. Grab a copy of this modified Christmas handwriting paper here and work on handwriting with bold lined paper, highlighted lined paper, and color coded paper…all with a Christmas theme!

    Colleen Beck, OTR/L has been an occupational therapist since 2000, working in school-based, hand therapy, outpatient peds, EI, and SNF. Colleen created The OT Toolbox to inspire therapists, teachers, and parents with easy and fun tools to help children thrive. Read her story about going from an OT making $3/hour (after paying for kids’ childcare) to a full-time OT resource creator for millions of readers. Want to collaborate? Send an email to contact@theottoolbox.com.

    Christmas Occupational Therapy Activities

    Christmas occupational therapy activities

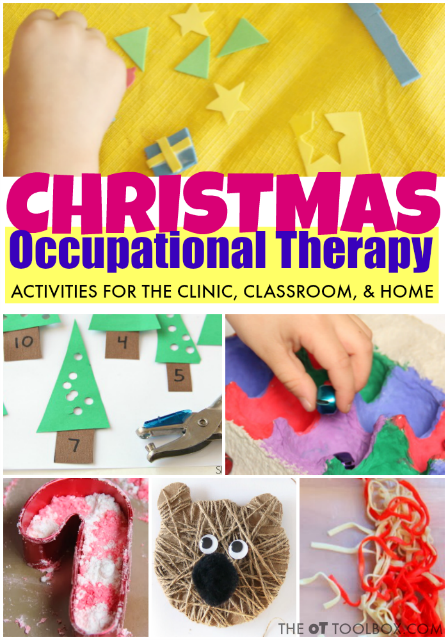
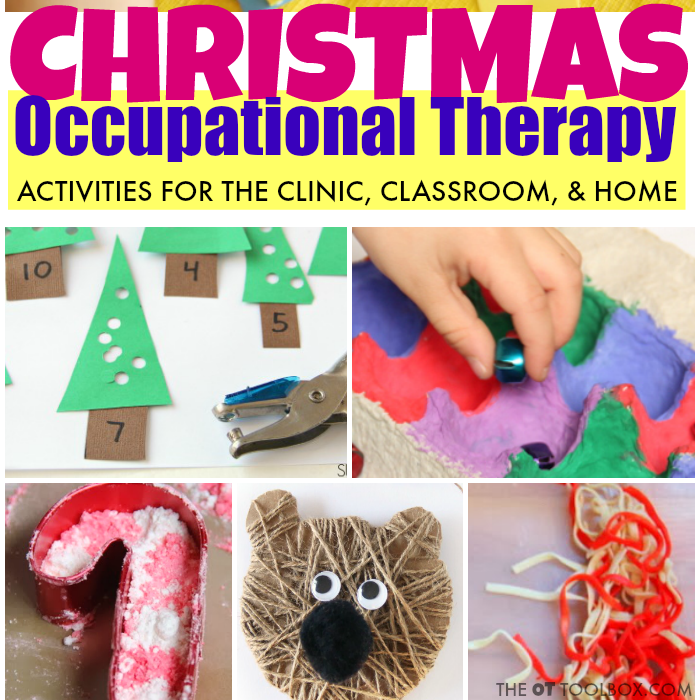
    This time of year, it’s all about the Christmas trees, holiday spirit, and festivities, so these Christmas occupational therapy activities are sure to brighten therapy caseloads! Many years ago, we created a free December calendar with OT activities for Christmas, and you’ll want to grab that resource, too. But if you need extra therapy ideas to plan our a whole month of OT sessions, you’ll find tons of ideas here. Below, you’ll find activities and ideas to use in occupational therapy planning during the Christmas season while building skills in fine motor, visual motor, gross motor, and more.

    Christmas occupational therapy activities

    Christmas occupational therapy activities

    I don’t know about you, but I’m getting into the Christmas spirit. Whether you are trying to think up some fun Christmas occupational therapy activities to add to the mix this month, or are looking for Christmas activities that kids and the whole family will love, it’s a fun time of year for adding creative Christmas ideas! 


    That’s why I wanted to put together some therapist-approved Christmas activities for kids. These are ideas that add a motor component to learning and play. Stay tuned, because this week is all about Christmas activities for kids here on The OT Toolbox! 

    First, let’s share some of our favorite free Christmas occupational therapy activities.

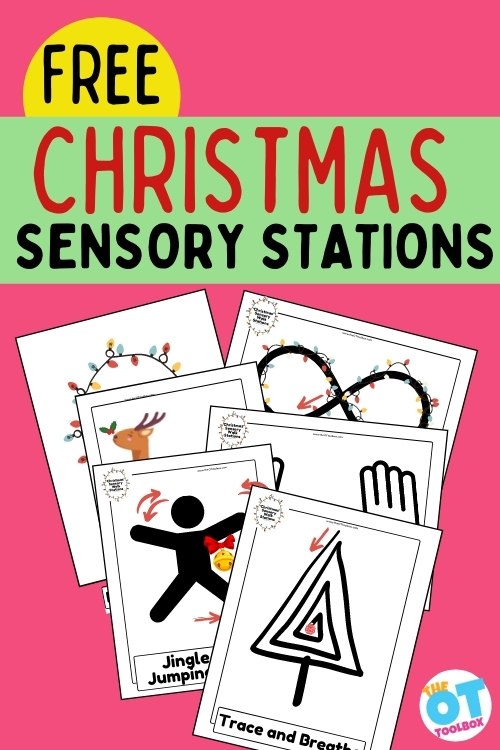
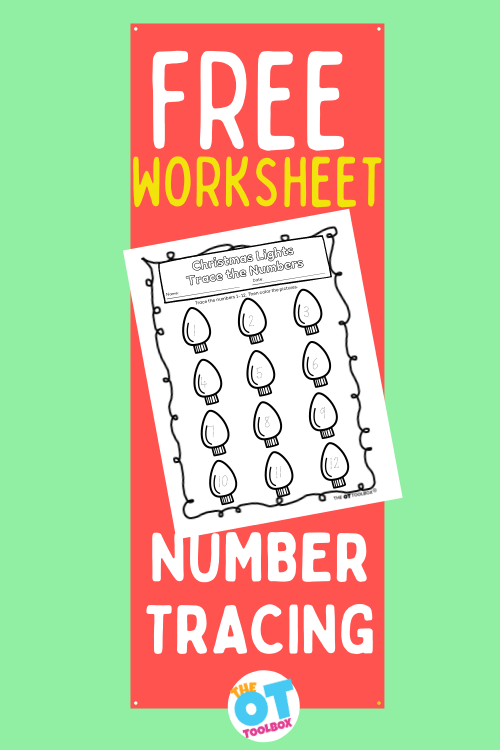
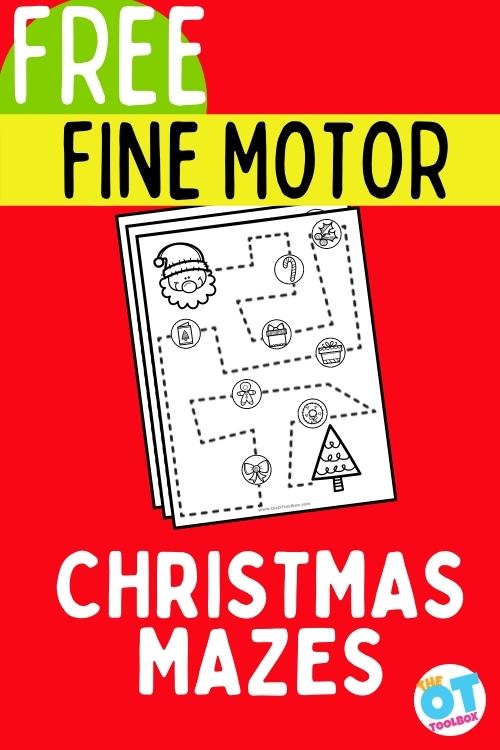
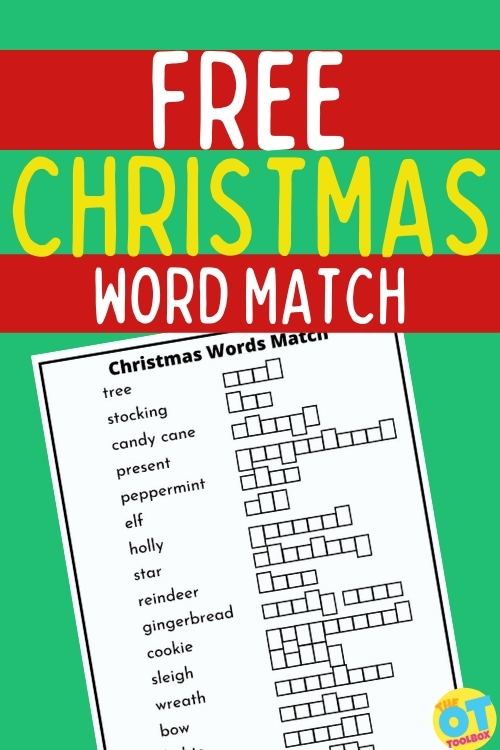
    The team behind The OT Toolbox has been BUSY. There are new free resources you can grab:


    These are all fun ways to support specific skills through play.

    These Christmas OT activities would be a great way to get ideas for home programs or holiday break activities, too! 


    These Christmas activities for kids are perfect for using in occupational therapy activities, in home programs, in the OT clinic, or in the classroom. All of the occupational therapy Christmas activities are designed to promote motor development including fine motor, gross motor, visual motor, and sensory, all with a Christmas theme!

    Christmas Activities for Kids

    Each of the Christmas activities below target specific skills such as sensory, fine motor, visual motor, etc. OR, they target age groups like toddler Christmas activities or preschool Christmas activities.

    All of the activities and ideas you’ll find here are perfect for the occupational therapist looking for Christmas themed fine motor activities, sensory challenges, visual motor activities, gross motor ideas, brain breaks, and more!

    I’ll link to all of the posts this week here but be sure to stop back each day to see the activities and ideas that you can use in therapy treatment sessions, in the classroom, and in the home. 

    Start with a Christmas sensory bin to target fine motor, visual motor, tactile, and even olfactory input.

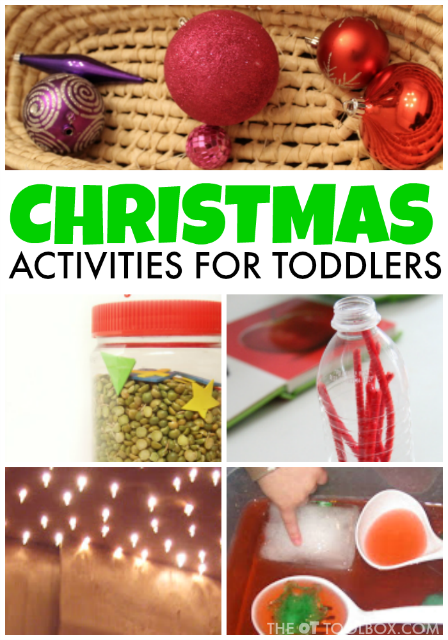
    Christmas Activities for Toddlers– These toddler Christmas activities support development for younger children and support OT goals or the areas of development in toddlers.

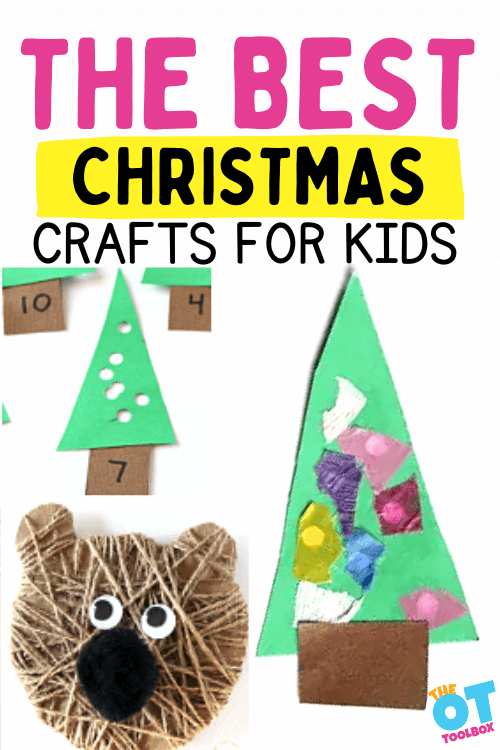
    Christmas Craft Ideas for Kids– Use these holiday crafts to build fine motor skills, eye-hand coordination, sensory moor skills, visual motor skills. Crafts are a powerful therapy tool and these Christmas OT crafts work on hand strength, scissor skills, and so much more.

    Christmas Activities for Preschoolers– These Christmas OT activities for preschoolers develop skills in kids ages 3-5. These moor skill activities can be used in preschool occupational therapy programming or in occupational therapy early intervention.

    Christmas Party Games for Kids– These holiday activities are great for occupational therapy sessions, but they are prefect for planning Christmas parties in the classroom, from the perspective of an occupational therapist mom! Use these fun holiday ideas at home, for family time too.

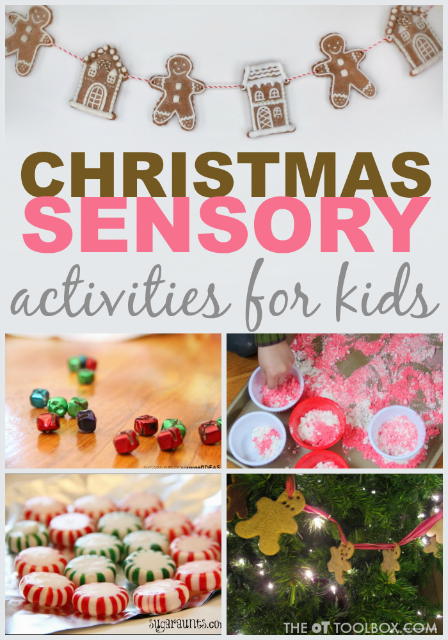
    Christmas Sensory Activities– These Christmas sensory bins, Christmas sensory bottles, writing trays, and sensory dough activities support tactile sensory play during the holiday season. Use these sensory activities at home, in the therapy clinic, or at school to support skill building this time of year.

    You’ll also love:

    Christmas Fine Motor activities
    Christmas fine motor activities to build hand strength.

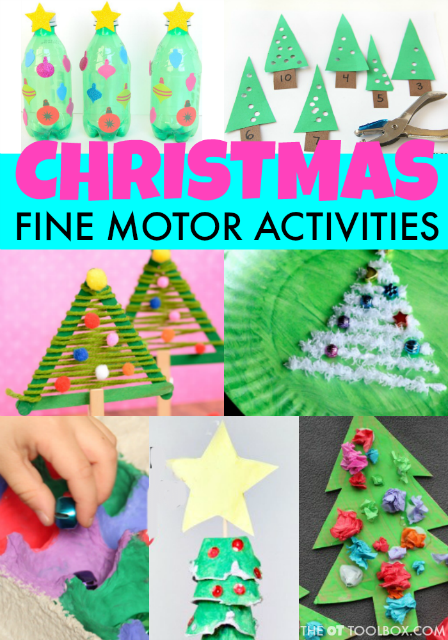
    Christmas Fine Motor Activities– These fine motor activities support eye-hand coordination, hand strength, motor planning skills, separation of the sides of the hand, finger isolation, and much more!

    Christmas calendar


    Be sure to grab our Christmas Occupational Therapy Calendar that is full of therapist-approved Christmas activities for kids this season.


    NOTE-All of the activities and ideas indicated in this article as well as those listed are to be used as ideas to meet the individual needs of each child. All activities should be used according to the child’s individual evaluation and interventions.

    More Christmas Activities

    Working on handwriting with kids this Christmas season? Grab your copy of the Christmas Modified Handwriting Packet. It’s got three types of adapted paper that kids can use to write letters to Santa, Thank You notes, holiday bucket lists and much more…all while working on handwriting skills in a motivating and fun way! Read more about the adapted Christmas Paper here. 

    The Modified Christmas paper is available inside the Member’s Club, in our Christmas Therapy Theme. Members can log in and grab all of those paper formats there.


    Use these Christmas activities for kids in occupational therapy while working on skills like fine motor skills, gross motor skills, visual motor skills, sensory concerns and other occupational therapy goal areas!


    Colleen Beck, OTR/L has been an occupational therapist since 2000, working in school-based, hand therapy, outpatient peds, EI, and SNF. Colleen created The OT Toolbox to inspire therapists, teachers, and parents with easy and fun tools to help children thrive. Read her story about going from an OT making $3/hour (after paying for kids’ childcare) to a full-time OT resource creator for millions of readers. Want to collaborate? Send an email to contact@theottoolbox.com.

    Developmental Tools for Teaching Letter Recognition

    Letter puzzle pieces and a magnifying glass focusing on letter E. Text reads "letter identification"

    This blog discusses activities for teaching letter recognition. At its most basic, letter recognition refers to letter identification. It is one of the main skills children need to know before they can name, write, or sound out the letters. The following fun letter recognition games for preschoolers are based on development and skill progression.

    Be sure to read through our blog post on name practice for kindergarten for resources and tools to support letter use and recognition in children ages 5-6 or for kids at the level where they are recognizing letters in their name. These ideas are great for beginning reading for kindergarten.

    Use our new color by letter worksheet to further develop this letter recognition skill.

    Teaching letter recognition

    What you need to know about Teaching Letter recognition

    Letter recognition, or the ability to recognize and identify letters begins at a very young age. But did you know that teaching letter recognition skills starts way before kindergarten and and even before entering the classroom?

    Kindergarten students are many times exposed to writing and copying letters on trace worksheets, and writing pages. But before a young child can do these skills that are part of the curriculum, knowing what skills lead up to these skills is helpful.

    Even before a young preschooler is able to identify and name letters in printed context such as books or letter play activities, they are learning this skill through the immersion of seeing letters in everyday life.

    Letter identification and the ability to recognize letters in printed form might occur through exposure on television, printed media, following along while a book is being read, or while engaging with technology. 

    There is a progression in the important literacy skill of recognizing printed letters:

    • Letter recognition in isolation – example, pointing out all of the upper case letter As on a letter picture book
    • Letter recognition in every day life – example pointing out the letter S on a stop sign
    • Letter identification – identifying and stating letter’s names
    • Letter identification in text -reading and sounding out a letter’s sound in reading or sounding out written text
    • Matching upper case and lowercase letters– matching the upper case letters to lowercase, and vice versa

    Each step of teaching letter recognition skills is founded in experience and practice. This includes communication with others, exposure, and reading with caregivers. 

    Not every child learns the same way. Starting as young as preschool, caregivers can support children by using their interests and strengths to teach them new skills.

    Children don’t need to read or write until well beyond toddlerhood, but preschoolers enjoy looking at books, finding letters on walks, and learning letters through movement. 

    The best way to teach letter recognition
    The best way to teach letter recognition is by first covering the prerequisite skills.

    Prerequisites to Letter Teaching Letter Recognition

    Several areas are needed to develop letter recognition skills:

    • Object permanence
    • Form constancy
    • Visual discrimination
    • Visual figure ground
    • Working memory
    • Visual memory
    • Visual scanning skills
    • Cognitive skills
    • Physical development

    You can see that these components are founded in visual motor skills, perceptual skills, and working memory.

    Before any of this can happen (and through the process), young children should be exposed to rhymes, songs, and singing the alphabet song. (Add alphabet exercises for movement fun!) Letter formation rhymes can support literacy as well. This is actually the first step in the road to literacy!

    Teaching letter recognition requires Visual discrimination Skills

    Letter recognition/identification is when a person is able to look at a letter and recall it from previous experience. Recognition of letters occurs both in uppercase and lowercase form. Additionally, there is a cursive letter recognition aspect as well. This blog post covers cursive letter recognition skills.

    This site states that even before letter identification, there are a few other skills that should be taught, including visual discrimination, so the child is able to find differences among lines and shapes. 

    Visual discrimination can be taught in isolation through books or letter formation worksheets, or in games and activities such as Memory games, matching and sorting activities, or playing “what’s the same” and “what’s different” through hidden picture activities and puzzles.  We cover this visual perceptual skill in our blog post, Wacky Wednesday book activity.

    Visual Memory Another great play-based activity to develop the visual perceptual memory skills needed for letter recognition, are games that challenge kids to notice differences. Present the child with a tray of everyday items, and ask them to memorize the items on the tray. Ask them to look away or cover their eyes. Take away one or more items, and have them recall the missing items. 

    Letter activities- Other ways to encourage letter play is through printed alphabet worksheets, puzzles, letter magnets, or other alphabet manipulatives such as letter beads. You can ask the child to sort letters based on shape, such as those that include straight lines, versus curved line, or diagonal letters. You can also sort letters by letters based on size: tall letters, short letters, and letters with a tail that hangs below the lines.

    One way to encourage functional handwriting is through addressing letter size. This tall and short worksheet has a fine motor and visual motor component that can be incorporated into whole-body movement activities to teach these concepts that carryover into letter sizing and use in handwriting.

    Prerequisites to teaching letter recognition begins in infancy

    These prerequisite skills that support letter recognition, such as visual discrimination and memory, develop as early as infancy, when young children identify 3D objects that are familiar to them like their bottle, favorite toy, or their parents. It is important infants experience tummy time in order to develop visual motor skills, and strong oculomotor skills, as a result of time spent on the belly while looking at objects.

    As children grow, their visual discrimination becomes more refined and they are able to identify pictures and written words.

    Toddlers are able to point to a picture of a puppy in a book they are reading, or identify who is hiding under the blanket.

    Object permanence and working memory

    When a child sees an object and knows what it is called, this is referred to as object permanence. This requires working memory skill development to use what is seen, remember it, and store it for later retrieval.

    While visual discrimination is the ability to detect differences and similarities in size, shape, color and pattern, cognitive ability is necessary to recognize these differences based on previous exposure, along with memory to have stored that information away in their mind’s eye to recall when needed.

    This skill is typically associated with letter formation and handwriting skills. Identifying and discriminating between differences in letters allow kids to copy and write letters from memory. However, noticing and identifying the differences in the curves, diagonal lines, and lines that make up a letter are essential build up to that skill.

    Hearing and saying the letter sounds associated with letters are part of the process, too. Phonemic awareness is developed initially through play, but this skill continues to develop and progress as reading and literacy skills are refined in kindergarten, first grade, second grade, and beyond.

    Teaching letter recognition begins with the ability to recognize details in visual images

    In more depth, students should identify likeness and differences of shapes or forms, colors, as well as the position of various objects and people. Developing discrimination skills will help children learn the alphabet and then both read and print letters a lot better. 

    There are numerous types of visual discrimination that children should begin to understand and develop. These include: 

    • 3D Objects
    • Shapes
    • Drawings & Pictures
    • Colors
    • Letters and Words
    • Sequences

    Letter recognition games

    The letter recognition activities and games and listed below are fun ways to instruct children in the essential skills needed for reading and literacy. It’s literally the building block to reading.

    • Name Recognition- Start with recognizing the letters of their name. Point out letters in the child’s name and ask them to point to letters in a book or on a sign. Children can first begin with recognizing upper case letters of their name, then moving onto the lowercase letters. Working first with uppercase letters is best, because capital letters are easier to discriminate between. Lowercase letters have many similar letters, b,d,p,g,q, and j. 
    • Bean Bag Letter Toss – Affix upper and lowercase letter stickers to one side of each bean bag. Put a basket or bucket across from your child. As your child throws the bean bags into the bucket, ask them to name the letters and their sounds of the letters. Students can run around looking for matching letters scattered around the room.
    • Alphabet Play dough- Write down large letters on a piece of paper and place that paper into a sheet protector. Encourage your child to form the letters on the sheet protector with play dough of their choosing.
    • I Spy Letter Walk –Take a walk with your child and look for letters in their environment such as on license plates, street signs and building. Play, I Spy, searching for different letters, or letters in sequential order. The printable tools in the Letter Fine Motor Kit are a great resource for this activity.
    • Jumping to letters – Create a letter pathway with sidewalk chalk on a playground or sidewalk. Children can walk, run, jump, or crawl across the letters, naming them as they move forward! Change it up by asking them to walk backwards along the path. This is a fun motor planning activity.
    • Chasing the Alphabet – (Amazon affiliate link:) Sammy Chases the Alphabet is a book I wrote about Sammy the Golden Dog playing fetch with balls around his farm. Each ball has a letter on it. After you read the book, bring the story to life by adding letter stickers to ball pit balls. Toss the balls around a room or outside, and encourage your child to find them all, naming the letters on each ball they find.
    • Food Alphabet Worksheets – Pair real food items with these food worksheets. These worksheets include the letter, a food that starts with the letter, and all of the letters that make the word. As children sound out each letter, ask them to point to the letter that makes that sound.

    more letter recognition Activities

    Alphabet activities like the ones below support recognition skills through repetition. Alphabet recognition occurs through songs, play, and hands-on activities.

    • The Soundabet Song – Letter identification doesn’t just include what letters look like, it also includes what letters sound like. Can your child point to the letter name as well as the sound it makes? This Soundabet Song is a great way to teach kids how to pair the sounds of the letters to what the letters look like. 
    • Letter Push – This ABC play dough activity uses plastic letters and play dough! Add in some fine motor skills to alphabet identification, by having children push plastic letters into play dough while they name the letter. This can be done as a circle time game, where each child take a turn pushing in a letter, or a small group time where every child has the opportunity to push the play dough letters. 
    • Alphabet Sensory Bins – Nothing keeps my preschoolers entertained more then a large sensory bin! Adding alphabet letters or letter markers to the sensory bins for children to find and match, is one of the most exciting letter identification games. Check out these sensory bin base ideas to use in different letter recognition sensory  bins.
    • This alphabet sensory writing tray requires users to recognize letters by uncovering them from a sensory medium. This is a great activity for recognizing letter parts such as diagonals or the curved part of a letter as the letter is uncovered.
    • Metal alphabet tray play – My favorite is to add a metal pan to the sensory table, and ask kids to stick the magnet letters they find in the sensory materials onto the metal pan!
    • Alphabet Discover Bottle – This sensory discovery bottle can be used before naptime, bedtime, in a calm down corner, or as a learning activity. As children shake the bottle, they can name the letters that appear! 
    • Match letters- Match uppercase letters to lower case letters, match different fonts of letters, and match letters in different environments (books, signs, on television, in print, etc.)
    • Gross motor activities- Use a letter floor mat to jump on a specific letter. Ask the child to find a letter magnet and place it on the letter mat.
    • Letter recognition scavenger hunts- Use ideas like these letter clothes pins scavenger hunt for ideas.
    • Write letters in shaving cream or in sand
    • Sort letters by word families when teaching letter groups
    • Play beginning sound games- I spy with my little eye, a word that starts with /b/
    • Use dot markers to dot letters
    • Spot letters on a white board and trace with a dry erase marker
    • make letters from pipe cleaners
    • Sensory play activities
    • Trace letters on sandpaper

    A note teaching letter recognition skills:

    Learning through play doesn’t have to be stressful. Every child learns differently, and that includes recognizing letters of the alphabet. Once a child has developed the visual discrimination, expressive language and receptive language skills needed to participate in letter identification activities, notice what motivates them to learn.

    Do they like to move, cut, color, dance, or sing? Pick a letter activity that you know your child will love, and they will keep coming back for more. This will result in increasing their attention span and learning new letters daily. Follow your child’s interests and you will surely have a wonderful time!

    letter identification

    Today’s post addresses Letter Identification. What happens if your student copies letters, but is unable to recognize them? Can a student who can not identify letters learn to read? Letter identification is at the core of reading and writing, which are important life skills.

    letter identification before copying and tracing

    Many therapists and teachers work on copying and tracing long before their students can recognize the letters. Have you thought about what happens if your student copies and traces letters, but is unable to identify them?

    Tracing is not going to teach number/letter formation if the learner does not know what those figures are. To a learner who does not know these symbols, they will be tracing lines and circles, not learning numbers or letters.

    This holds true for copying letters and numbers. For example, the “H” becomes just sticks, while the “b” is a ball and a stick rather than recognized symbols.

    Theoretically if a person writes or traces the letter “A” enough times, the body will start to recognize this pattern (through motor planning and kinesthetic awareness), and commit it to memory. 

    This only works if the learner understands what is being traced or copied, and can add meaning to it.

    can a student who is unable to identify letters learn to read?

    Sadly students who are unable to recognize letters can learn to read, but not efficiently or effectively. Learners who are unable to identify letters will memorize the way words look as a clump, rather than using letter identification and phonemic awareness. This holds true for math. Students can learn ways to get around multiplication and division without memorizing these facts.

    Because students can “get by” this is why it is critical to insure students have the necessary building blocks for learning before moving on. Pushing students through to the next grade without having the necessary skills, is an ongoing problem. How many high school students have you seen that are unable to do simple math in their head, or spell simple words? Too many.

    IdentificATION OF lETTERS FOR READING

    Let’s circle back to letter identification now that you have a better understanding of the need for letter identification before teaching reading, copying, writing, or tracing.

    One of the pre-reading skills kids need to be a successful reader is letter knowledge.

    Letter Knowledge begins with Letter Identification which is also known as Alphabet Recognition.

    Students have different learning styles, therefore they need to be exposed to new information in various ways.

    Learners can understand information by:

    Offering several different teaching styles is the key to meeting the needs of all different types of students. Sometimes this takes many trials to find the one that sticks.

    I had a reluctant learner who was unable to recall or identify his letters despite repetition, flash cards, games, puzzles, worksheets, or any other activity I presented. In the past I had used my students specific interests to spark their learning. Many lines were made making Thomas the Train tracks across the paper.

    This student loved Star Wars. He could name every character. Lucky for me, there are many Star Wars characters! I paired a letter with each character. We used A for Anakin, S for Stormtroopers, C for Chewbacca, and so on. At first we worked on pairing them verbally/auditorily. Then I made flash cards with pictures of each character near their name and picture. Because this was motivating for him, my student quickly learned letter identification!

    activities to teach letter idenfication

    Before children are able to learn to read or identify letters, you can work with them to understand what they are. This can be done by reading stories, singing songs, telling nursery rhymes, and talking to them. Once they begin to notice that stories or other items have symbols, you can point to the words as you read them. Here are some simple letter identification activities:

    • Point out print wherever you see them. On signs, license plates, television, books, packages, clothing, or anywhere you might find written print.
    • Look for specific letters in books or magazines. Ask the child to name the letter and the sound.
    • Make arts and crafts with specific letters. Write it in sand, shaving cream, or a foggy mirror. Letter of the week crafts are fun, too. We have printable letter crafts inside The OT Toolbox Membership.
    • Practice writing letters with different toys or activities. Magnetic letters, books, magazines, puzzles, flash cards, and games like Scrabble, are handy options to have letters readily available for letter identification.
    • Form letters out of pretzel dough, play dough, popsicle sticks, pasta, or cookie cutters for sensory letter formation.
    • Play a Letter Scavenger Hunt and have students look for certain letters you have hidden around the room or house. A scavenger hunt is another great use for magnetic letters. Enhance this activity by adding finding items that start with that letter.
    • Use a keyboard to identify letters. Keyboarding skill is a great life skill tool to have. Finding and identifying letters is a great way to practice and learn the letters in a functional way.

    ot toolbox resources for letter recognition

    • Developmental tools for teaching letter recognition – This blog discusses activities for teaching letter recognition
    • Here is a recent post on Learning Letters with Bottle Caps
    • The OT Toolbox Archives contain dozens of posts related to letter recognition.
    • Alphabet Movement Cards – Alphabet Movement Cards combine love of letters, along with aerobic activity to work on muscle strength, tone, focus, attention, or add a much needed sensory break between tabletop tasks. 
    • Letter Formation Themed Activities – This page includes all of our Letter Formation theme activities. You’ll find letter formation themed fine motor activities, letter printables, and A-Z therapy tools of all kinds! Plan out a week (or weeks) of activities for your whole therapy caseload. Just print and go!

    Letters are everywhere!

    When you start to think about letters, you realize they are everywhere! Use what is readily available to immerse your learners in knowledge. You might have to get creative once in a while, like my Star Wars guy, but that is what makes this job so fun!

    Jeana Kinne is a veteran preschool teacher and director. She has over 20 years of experience in the Early Childhood Education field. Her Bachelors Degree is in Child Development and her Masters Degree is in Early Childhood Education. She has spent over 10 years as a coach, working with Parents and Preschool Teachers, and another 10 years working with infants and toddlers with special needs. She is also the author of the “Sammy the Golden Dog” series, teaching children important skills through play.

    The Letter Fine Motor Kit is a 100 page printable packet includes everything you need for hands-on letter learning and multisensory handwriting!

    This resource is great for pediatric occupational therapists working on handwriting skills, fine motor skills, visual motor skills, and more. Use the activities to promote a variety of functional tasks.

    Teachers will find this printable packet easily integrated into literacy centers, classroom activities, and multisensory learning.

    Parents will find this resource a tool for learning at home, supporting skill development, and perfect for therapy at home!

    MULTISENSORY HANDWRITING

    Grab the Letter Fine Motor Kit and use all of the senses, including heavy work, or proprioceptive input, through the hands ask kids build and manipulate materials to develop handwriting and letter formation skills.

    How to Encourage Growth Mindset Mistakes

    growth mindset mistakes

    When using a growth mindset mistakes can help you grow! Rather than thinking our intelligence is fixed and unchanging, the growth mindset encourages people to see their abilities as things that can improve. Here, we’re covering why it is important to teach students the growth mindset. You’ll also find strategies to move from a fixed mindset to a growth mindset when mistakes happen.

    Growth mindset mistakes

    Growth Mindset Mistakes

    In life we strive to be perfect. Some of the best inventions have come from mistakes.  For children (and adults), it can be a real challenge when simple mistakes happen. Errors happen all day long: in math problems, in conversation, in the classroom, or in a myriad ways!

    The problem is when these mistakes become a setback in emotional or behavioral self-regulation. 

    Mistakes are part of the learning process!

    Developing a growth mindset is about what you are going to do, not what you can’t do. Try again, or make the most of what you have already.  

    Learning from mistakes examples:

    Some inventors decided to make the most of what they had created by accident.  They learned something valuable from their mistakes. Check it out!

    • Penicillin – Alexander Fleming was a medic through WWII.  He was used to using antiseptics to treat infections, but was trying to find a safer alternative. He was studying staphylococci in several petri dishes. He stacked them on top of each other and went on vacation. When he returned, he discovered there was a fungus growing on several of the dishes that had destroyed the staphylococci infection. His poor housekeeping skills and growth mindset mistakes lead to the discovery of penicillin!
    • Microwave – Percy Spencer was working on magnetron technology. When he stood too close to the magnetron he noticed his candy bar had melted in his pocket. He tried popcorn, eggs, and other foods next to the magnet and voila! The microwave was invented.
    • Potato Chips – This was the result of trying to please a picky customer.  Cornelius Vanderbilt repeatedly sent back his potatoes to the chef because they were too soggy. After several returned attempts, the chef decided to slice the potatoes really thin and fry them as a joke. The customer loved these fried potatoes, and the potato chip was born.
    • Velcro – George de Mistral was walking his dogs and noticed several burrs sticking to their fur. He marveled at the way these burrs clung to the dogs. After a few trials and mistakes (including chopping bits and pieces off of the material), he created what is now known as velcro.
    • Post it Notes – Dr. Spencer Silver was trying to invent an extremely strong adhesive. What he ended up with was an adhesive that stuck but could easily be unstuck and repositioned. He deemed this mistake a failure, until someone suggested reusable book marks and notepads.  The classic yellow color was born from the only available colored paper at the time!
    • Coca Cola – This popular drink was born from nerve tonic. This was supposed to cure all ailments. Unfortunately it had alcohol in it, and in the age of prohibition it had to be removed. A little sugar was added and the carbonated beverage was advertised as making people healthier. We now know that this beverage definitely does not make one healthier, it does the opposite. However, in moderation, it is a sweet treat with a boost of caffeine.
    • Slinky – Richard James was attempting to invent a spring that would stabilize equipment on Navy ships. He accidentally knocked it off his table and was delighted to see how it slinked down to the floor.  While the Navy rejected his invention, millions of children throughout the world have owned at least one Slinky.
    • Silly Putty – During WWII James Wright was trying to invent a cheap alternative to synthetic rubber.  He accidentally spilled boric acid into silicone oil and created a stretchy bouncy product.  This toy has morphed into Theraputty, a helpful tool for strengthening and stretching muscles. Check out these theraputty exercises for ideas to use this tool!)
    • Playdough – This craft staple and children’s favorite building material was designed as a wallpaper cleaner. With the decline in popularity of wallpaper in recent years, the company is thankful they rebranded this as the playdough we know today! And, we all know the benefits of play dough, so this is a wonderful mistake that was made!

    These are just a few of the inventions made while trying to invent something else.  The products were born from people learning from mistakes. There are dozens more including; Crazy glue, popsicles, artificial sweetener, Viagra, Smart Dust, ice cream cones, the pacemaker, and more.  

    Why are these mistakes important? We can help kids see that there is importance of mistakes happening. Otherwise these products would never have been invented!

    What else did these inventors learn from their growth mindset mistakes?

    A growth mindset is “the understanding that abilities and understanding can be developed” (Mindset Works, n.d.). Those with a growth mindset believe that they can get smarter, stronger, and more talented through putting in time and effort.

    This way of thinking became popular through the work of Carol Dweck in her book (Amazon affiliate link) Mindset.  She teaches about the “power of yet.” This mindset shifts the focus away from all the things one can not do, to what one can not do YET.

    The power of yet teaches people:

    • they can learn
    • learning takes time and effort
    • results come from hard work
    • giving up isn’t an option 

     This is huge when we think about the kids we serve and the ability to develop and strengthen self-esteem.

    These inventors believed they could learn new skills with enough effort and practice. Giving up was not an option for them. If they had given up on their “mistakes”, and not persevered with their ideas, they would not have invented some amazing products!   

    I don’t believe these inventors “got lucky” or “were in the right place at the right time”. Perhaps they did have a little fortune on their side in their innovation, but most of them had the growth mindset, and will to succeed.  

    If they had not invented what they did, they probably would have gone on to create something else, or reach other an achievement. 

    Mindset is the difference between those who excel and those who give up. The issue is that there can be discomfort in making errors…and then persevering.

    Learning from mistakes and moving forward drives people to succeed. It offers a chance to reframe mistakes into another chance, a new opportunity, or another try. Some people innately have this drive, while others need to develop it. 

    Mindset Tools for Mistakes

    Below are some mindset tools to help us make mistakes with a growth mindset. These are new strategies, but also tools to support mindset.

    As therapy professionals, educators, or parents, we can drive the enthusiasm in persevering or trying again. The obstacles kids struggle with are part of the course, and we can support that development with words of encouragement. The OT Toolbox is featuring several posts involving mindset to help create a treatment plan for yourself, or the learners you work with.

    Use these tools in a growth mindset lesson to support self-awareness skills.

    Develop Brain Skills- Brain activity happens with learning, and making mistakes is part of that learning process. Using persistence to complete a task is not only an executive functioning skill, it’s also an opportunity to develop grit, or resilience. This is an important life skill!

    • Amazon (affiliate link) has a great Growth Workbook for Kids. It is a fun and engaging activity book, for ages 8 to 12, that can help you train your brain and develop creative problem-solving skills through practice and perseverance. You’ll learn how to foster a “can-do” attitude and celebrate your mistakes as a path to ultimate success.
    • Mindsetkit has a great presentation on the critical role of mistakes.  

    Give yourself permission to make mistakes- Switch thinking from an error that means starting over is a bad thing. Mistakes can be permission to achieve a new skill. 

    Sometimes, as humans, we view mistakes as something bad. But when we stretch mistakes into something good, it’s switching the perspective in our brains. We can try a different strategy. We can use new skills that we learned as a result of that mistake. 

    Working with kids is a great opportunity to try again, but an important one that can have a huge impact!

    Learn from mistakes- There is always an AHA-moment mistakes allow. At some point, maybe long after the mistake has happened, that we have a moment of “Aha!” where we learn something about ourselves. We can ask ourselves a few questions as part of this mistake learning:

    • What have you learned from making mistakes?  
    • What did the mistake teach me?
    • What did I do that contributed to this mistake?
    • What can I do differently next time?
    • What tools can I use next time?
    • Was this a “big mistake” or a “small mistake”?
    • What did I learn from this mistake?

    Talk about different kinds of mistakes- Not all mistakes are life threatening, or high-stakes mistakes! We can work with kids to identify different types of mistakes. Ask kids to identify different scenarios on a scale of intensity.

    • small mistakes
    • big mistakes
    • life-threatening situations 
    • learning curve errors
    • sloppy mistakes

    Find courage to try again- I have learned that there is not much that can not be undone or fixed. This gives me the courage to try. Talking about this concept of trying again can be helpful for kids. We can even bring up times in our life that we as therapists have had to try again.

    • Don’t like that paint color in your bedroom you just painted?  Paint over it.
    • Not sure about the tattoo you just had done? Get it removed or “painted over”
    • Not thrilled with the way your hair color/cut came out? It will grow back, or try again with another color.
    • Cookies came out overdone? Chop them up and sprinkle over ice cream, or feed them to the goats.

    Mistakes can be spun as a trial run. Every mistake is good practice for the next time!

    Use self-talk- Kids can use self-talk as a strategy to hush that inner critic that tends to “beat up” our emotional state. Instead of repeatedly thinking “I’m so dumb”, “How could I make this mistake”, or “I’ll never be good enough”, we can teach kids the emotional regulation strategy of self-talk to support their mindset. 

    Positive self-talk is a huge asset to teach to switch the perspective of mistakes as a bad thing to just part of the learning and living process. There is power of the word that  we speak to ourselves!

    A final note on growth mindset mistakes 

    I once took a pottery sculpting class years ago on a whim (actually after a bad breakup).  My coil pot was crooked, bumpy, and leaning to the side.  Instead of becoming discouraged, I took a step back.  It kind of looked like the sorting hat from Harry Potter.  I painted it and proudly display it as a sorting hat replica!  What could have been a mistake and failure, turned into a one of a kind art piece.

    Victoria Wood, OTR/L is a contributor to The OT Toolbox and has been providing Occupational Therapy treatment in pediatrics for more than 25 years. She has practiced in hospital settings (inpatient, outpatient, NICU, PICU), school systems, and outpatient clinics in several states. She has treated hundreds of children with various sensory processing dysfunction in the areas of behavior, gross/fine motor skills, social skills and self-care. Ms. Wood has also been a featured speaker at seminars, webinars, and school staff development training. She is the author of Seeing your Home and Community with Sensory Eyes.
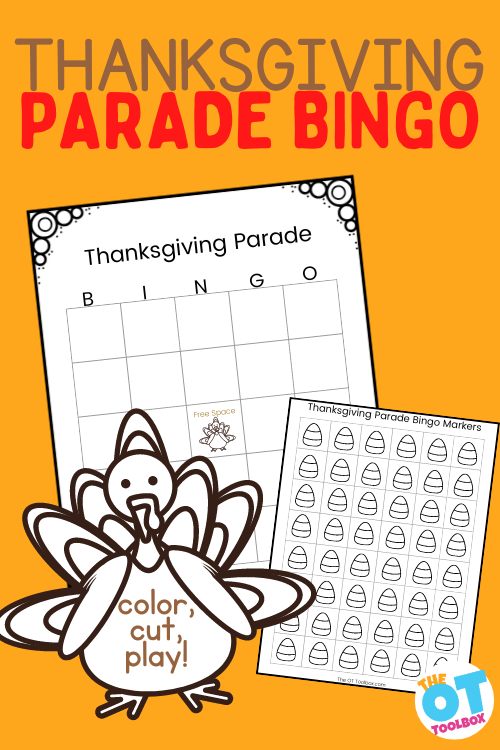
    Thanksgiving Parade BINGO

    Grab a copy of our Thanksgiving parade bingo and connect with family, develop fine motor skills all while watching the Thanksgiving day parade! This free printable thanksgiving bingo is perfect for Thanksgiving morning while watching the parade with the family. Add this fine motor tool to your Thanksgiving occupational therapy activities!

    Thanksgiving parade bingo

    Thanksgiving Parade Bingo Cards

    One of my favorite holiday traditions I have with my kids is sitting down to watch the Thanksgiving Day Parade. Watching the parade, floats, musical acts as they kick off the holiday season is such a calming and fun time for us as a family. One way that we enjoy the time together as a family is by playing Parade BINGO.

    Many moons ago, I came up with this game and made a quick little BINGO board. My kids would fill in the squares with things they thought they would see in the parade, and we would mark the spaces with candy corn as we saw items on our BINGO cards.

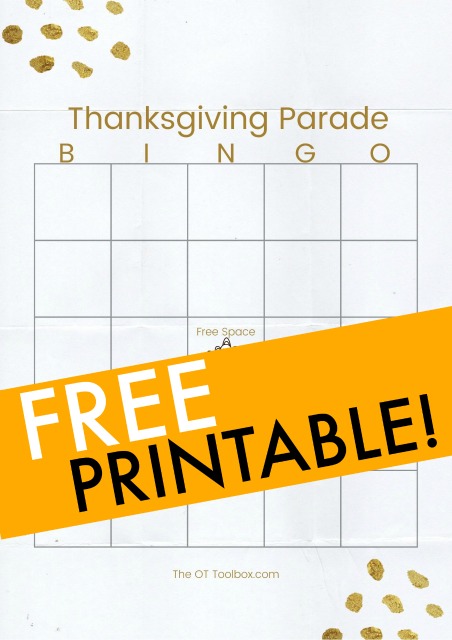
    This has been such a fun tradition for us that I’ve shared out makeshift BINGO cards on Instagram each year. This year, I decided to make a quick printout so you can play along too, with literally no-prep.

    Free printable parade BINGO card

    Thanksgiving Parade BINGO Game

    You know how to play BINGO, but did you know that by playing the simple game, kids are working on a variety of skill areas? Things like visual perception, discrimination, form constancy, visual memory, visual scanning, figure-ground are just some of the visual processing skills that are addressed with a game of BINGO.

    Then there’s the auditory processing skills, executive functioning skills, fine motor skills, and even handwriting. Problem solving, self-awareness, and so many more skills are impacted with this simple game.

    Thanksgiving Parade Bingo and Handwriting

    The Thanksgiving parade BINGO game works the same way you would play any other BINGO game. Fill in the spaces, watch the parade, and when you see an item on your card, place a small marker on that space.

    You could also have kids color in the space to work on hand strength and line awareness, or you could mark an “X” on the spaces. The options are limitless.

    Ask kids to write out the names of items they may see in the parade:

    • Marching bands
    • Singers
    • Dancers
    • Turkeys
    • Floats
    • Parade balloons (Check out the full list of floats and balloons on the parade website.)
    • Frosty the snowman
    • Santa Claus

    You can play this game too. Print out the BINGO game card below and make a handful of copies. Play as a family, or let each family member have their own card.

    Send the handouts home with clients or students as “homework”. Families will get the chance to connect and build memories all while working on the skills kids need.

    UPDATED! This parade bingo game has been updated with candy corn bingo markers. Use the bingo markers to up the fine motor skill development level:

    • Color the candy corn markers
    • Cut out the bingo markers on the lines or around the curves of the candy corns.
    • Place the bingo markers on the bingo board
    • Or, use real candy corn (or crumbled paper, play dough, beads, or other markers) for fine motor precision skills.

    Have fun with your game of Thanksgiving Parade BINGO. Enjoy!

    Get a free Parade BINGO game

      We respect your privacy. Unsubscribe at anytime.

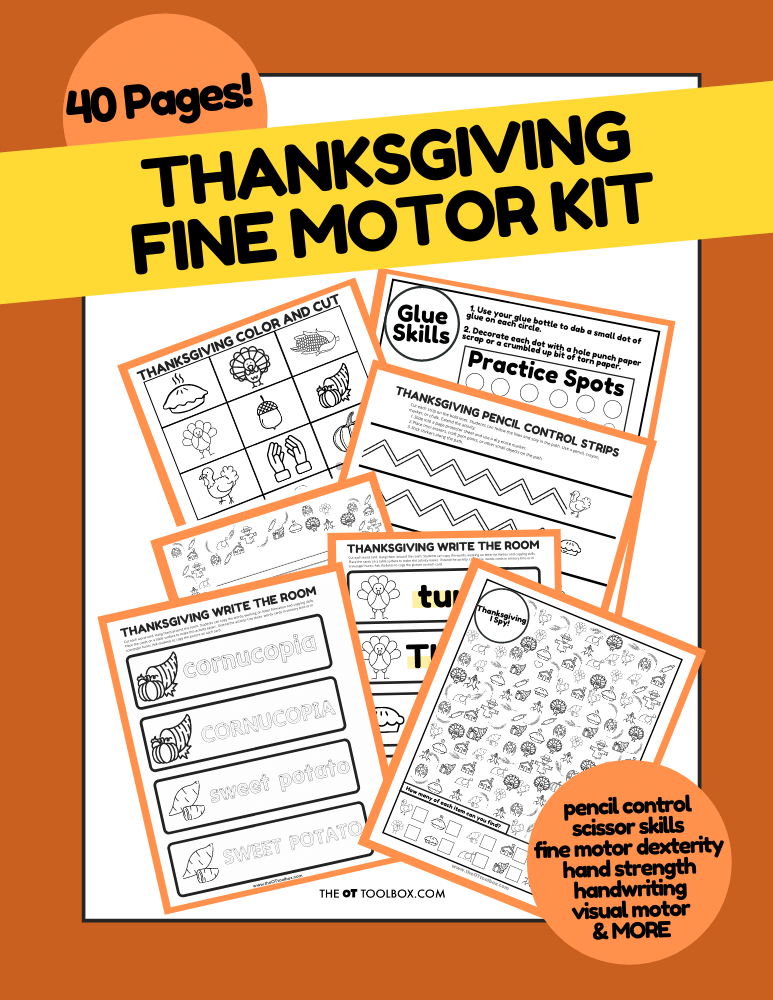
      Pair the Thanksgiving Parade BINGO game with more tools to support development with our Thanksgiving Fine Motor Kit!

      Colleen Beck, OTR/L has been an occupational therapist since 2000, working in school-based, hand therapy, outpatient peds, EI, and SNF. Colleen created The OT Toolbox to inspire therapists, teachers, and parents with easy and fun tools to help children thrive. Read her story about going from an OT making $3/hour (after paying for kids’ childcare) to a full-time OT resource creator for millions of readers. Want to collaborate? Send an email to contact@theottoolbox.com.

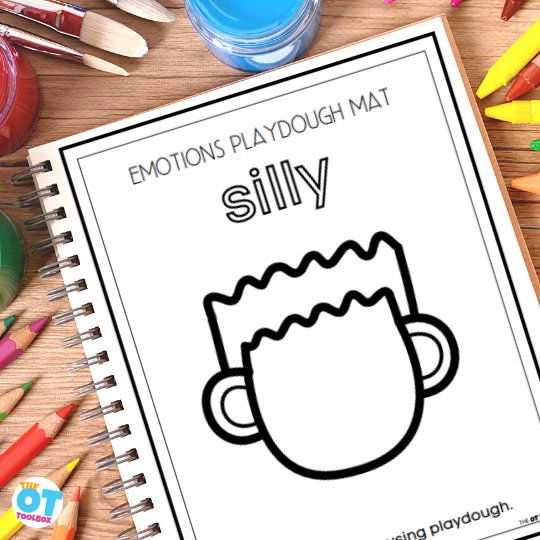
      Emotions Playdough Mats

      emotions playdough mats

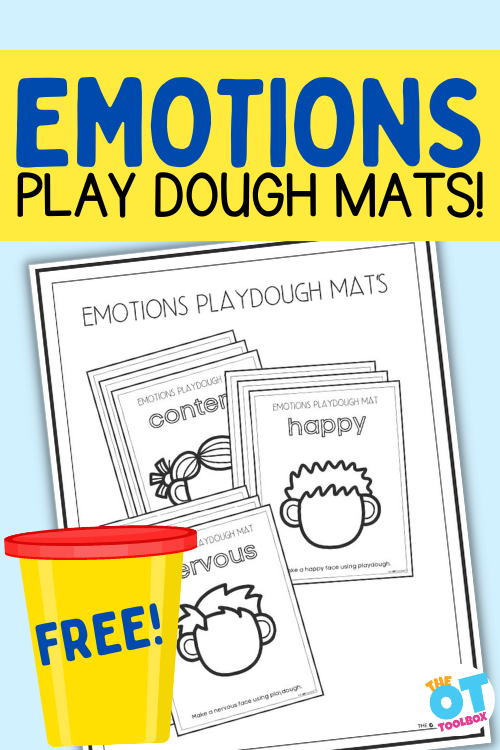
      One fun therapy tool to address social emotional learning in children are emotions playdough mats. Kids can use the printable play dough mats as tools to develop emotional awareness. understanding feelings, naming feelings, and practicing facial expressions. All of this occurs along with the many benefits of play dough! Let’s get some emotions play dough activities into your hands!

      Emotions playdough mats

      Emotions Playdough Mats

      Facial expressions convey feelings and emotions. This is an important social and emotional skill for preschoolers. It’s through play and practice that young children explore different emotions. Using play as a tool to support that development makes sense!

      Arlin Cuncic from Very Well Mind states, “If you only listen to what a person says and ignore what their face is telling you, then you really won’t get the whole story. Often, words do not match emotions, and the face betrays what a person is actually feeling”.  You can read more about Understanding Emotions through Facial Expressions.  

      Early research stated we have seven universal facial expressions, however research from 2020 states we have closer to sixteen.  Some expressions may last a long time, making them easier to read, however there are also micro expressions that are fleeting. A micro expression may be covering up a lie or concealing another emotion. The introduction of global mask wearing made reading facial expressions that much more difficult. 

      Many people have difficulty reading emotions or understanding them. Today’s freebie, the Emotions Playdough Mats is a great tool to teach and talk about feelings, facial expressions, and emotions. 

      Emotions play dough mats

      Use Playdough mats to learn feelings

      Some emotions such as anger, crying, and happiness are fairly easy to read, but what about the more difficult facial expressions such as disgust, disappointment, boredom, disinterest, or doubt?  

      Younger learners often say they are bored, when really they might be overwhelmed, frustrated, anxious, tired, scared, or a host of other emotions. Using tools like the emotions playdough mats is a non threatening activity to help learners understand these complicated feelings. 

      One way to support this development is by using a PDF play dough mat with a feelings theme. Toddlers, preschoolers, kindergarteners, and older children can use this strategy to practice different facial expressions while creating faces made from playdough.

      People learn by doing, not just listening or watching someone else do it. The Emotions Play Dough Mats explore through play. 

      Play based therapy is at the heart of occupational therapy. The great thing about this activity is that it works on multiple skills whether in the classroom or therapy clinic.

      • Playdoh is a great sensory medium – it addresses tactile, visual, olfactory, and proprioceptive input for little hands.
      • The dough can be purchased or made at home. I found this cute website for sensory dough in dozens of different styles.  If you prefer to make your own, you can find different playdough recipes here.
      • Playdough is also great for strengthening the tiny hand muscles. Make your dough soft or stiff, or substitute with therapy putty for a more intense workout
      • Working with playdough is a great fine motor activity. Folding, pinching, pulling apart, flattening, molding, cutting, and rolling are great fine motor skill builders
      • Cutting playdough is a powerful fine motor activity! Add scissors and cut out the shapes you need.

      How to Use Feelings Playdough mats

      What are some other skills you can think of that can be incorporated into working on the emotions playdough mats while creating play dough faces?

      1. Print off the PDF files.
      2. Laminate them or you can slide the page into a page protector sleeve. 
      3. Use play dough to create faces on the playdough mats based on the prompts.

      Use the printable pdf file over and over again to support social emotional learning with children!

      There are more ways to use these resources to address fine motor, sensory motor, visual motor, and of course social emotional skills: 

      • Use play dough to create facial features. Children can explore and identify nuances of facial features that are paired with emotions. These features might include furrowed eyebrows, frown lines around the cheeks, small eyes, etc. By using the playdough face mats, kids can create these features.
      • ​How about social function?  Following directions, turn taking, task completion, orienting to details, neatness, multi-tasking, attending to task, and impulse control can be addressed using the playdough emotions mat
      • What about bilateral coordination?  Using two hands together to create the playdough pieces, or one hand to hold the paper while the other hand works the playdough to create facial expressions, facial features, and emotions in the dough.
      • Can you think of visual perceptual skills addressed with this activity?  Parts to whole, copying from a model, creating a representation from a picture, visual memory and recall are just a few.
      • Explore social skills- These emotion playdough mats are perfect addition to social skills interventions. Ask the child why a person may feel the way the facial expression is depicting. How can they support or help a person who feels that way? Have they ever felt that emotion or feeling? What did they do about it when they did feel that emotion? This feelings activity can go in so many different directions using a bit of follow-up questions and conversation while creating with the emotions playdough mats. Include a social skills checklist and you’ve got a strategy to support social emotional development in therapy sessions.
      • Focus on fine motor strength by creating a small face from the play dough. Can you use a toothpick or a pencil point to poke a smile or frown into a ball of play dough? This can be another fun hands strengthening activity of its own!

      We love to use play dough mats like this emotions mat to work on hand and finger strength. You can use the play dough fine motor exercises shown in the video below to support these skills. The video includes finger strength exercises.

      How can you modify these playdough emotions mats? There are so many ways to extend this social emotional learning activity!

      • Definitely think about laminating these to make them easier to use, more eco friendly, and less messy
      • Cut out facial expressions from magazines to glue to the blank faces. Now you have added cutting and pasting to your task!
      • Have your learners draw facial expressions instead of using playdough. Voila! A visual motor task has been born
      • Create a smart board activity so learners can draw on the board, drag pieces, or work together
      • Take pictures of their artwork and create a collage to keep
      • Make this part of a larger lesson plan by adding gross motor, social, sensory, and other fine motor games
      • Pre-cut pieces of facial expression for beginning learners to identify and glue
      • Advanced learners can talk about the emotions, research them, write stories or situations about each face, and role play
      • Use fine motor add-ons to improve dexterity and eye-hand coordination. Think: craft pom poms, sequins, googly eyes, pipe cleaners, etc. Use the materials to add to the various emotions on the free playdough mats.
      • Emotions Monster I Spy page is a great resource to add to your lesson plan
      • The Emotions Frog Slide Deck is another great tool
      • Incorporate these social emotional learning worksheets for more fine motor work while exploring feelings with kids.
      • The OT Toolbox also has a spring themed slide deck to add to your “toolbox”

      While there are definitely people who can’t read facial expressions or body language, there are others who are too attuned to these. The Highly Sensitive Person is often hypersensitive to the emotions and facial expressions of others. They feel and notice much more than typical people. The HSP might be shy or cautious because they feel and see too much.

      They may avoid eye contact because of the amount of information transmitted through the face. If you are highly sensitive you might find daily occurrences to be “too much”.  

      Too loud, bright, busy, chaotic, messy, overwhelming, smelly, sticky, and on and on.  The irony of wearing masks, is that they have been great for those who are highly sensitive to facial expressions. 

      Whether your learners are highly sensitive, just learning about emotions, or having difficulty reading non verbal communication, the emotions playdough mat is a creative way to add fun into your treatment plan while working on important skill acquisition.

      Free printable emotions playdough mats

      Would you like a free printable playdough mats of your own to work on SEL with kids? Get a PDF version of these playdough mats to print off and use with your therapy caseload or in your classroom (or home)!

      Enter your email address into the form below to access this printable resource. Or The OT Toolbox Member’s Club members can access this inside the membership on our social emotional toolbox. 

      FREE Emotions Playdough Mats

        Are you interested in resources on (check all that apply):
        We respect your privacy. Unsubscribe at anytime.

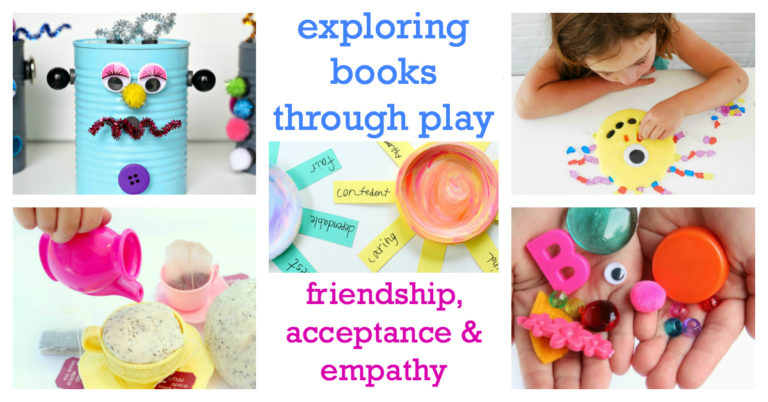
        Working on addressing feelings, emotions, acceptance, and empathy in kids? Use the hands-on activities selected to support these concepts in skills using popular children’s books as a theme. Grab Exploring Books Through Play: 50 Activities Based on Books About Friendship, Acceptance and Empathy today!

        Victoria Wood, OTR/L is a contributor to The OT Toolbox and has been providing Occupational Therapy treatment in pediatrics for more than 25 years. She has practiced in hospital settings (inpatient, outpatient, NICU, PICU), school systems, and outpatient clinics in several states. She has treated hundreds of children with various sensory processing dysfunction in the areas of behavior, gross/fine motor skills, social skills and self-care. Ms. Wood has also been a featured speaker at seminars, webinars, and school staff development training. She is the author of Seeing your Home and Community with Sensory Eyes.
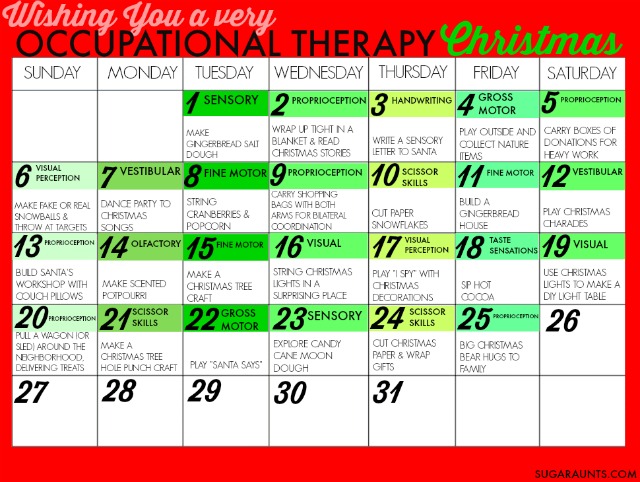
        Snipping Paper

        snipping paper

        For young children, snipping paper with scissors is a challenge! Today we are covering this first stage of using scissors so you can teach preschoolers, kindergarteners, and older kids how to snip paper, even if they have never touched a pair of scissors before.

        Using scissors is a part of every classroom and many times we see kids come into the school environment having never used scissors. But did you know that according to the Peabody Developmental Motor Scales, snipping paper with scissors should be mastered around 25-26 months?  (Read about other fine motor milestones.)

        Interestingly, when researching articles for this blog, I discovered a plethora of different information.  Occupational Therapists and their blogs indicate cutting around two years of age.  “Mama” blogs are all over the place from age 3-8 to start giving kids scissors. 

        When should kids begin to snip paper? We’ll get into that below. But first, let’s define what it means to “snip paper”.

        Snipping paper

        What is snipping paper?

        Snipping paper is the first stage of cutting with scissors and refers to the single open and shut motion of cutting into a page. When children learn to cut with scissors, they will open the scissors away from the paper and cut into the paper. There is no forward progression of the scissors across the page. 

        You’ll see in this resource on scissor skills activities how this progression occurs.

        When young children first snip paper with a pair of scissors, they may snip into the paper along the length of the paper. 

        Snipping paper is an important stage of learning motor control and bilateral coordination skills used to cut more complex shapes. It’s a fine motor activity all kids must learn at one point.

        Snipping is seen when paper strips are cut into squares or the edge of a piece of paper is snipped into a fringe. 

        To progress beyond snipping, the scissor user needs to progress to more refined fine motor skills, including graded scissor use so they can open and close the scissors while using a forward motion across the page. Additionally, there is a graded “hold” on the scissors as the hand closes but does not completely close the scissor blades. This concept is covered in our resource on difficulty cutting with scissors.

        Whether snipping or progressing from this stage, practice is the essential piece of the puzzle. Let’s go over a few cutting tricks to support this development.

        When Snipping Paper isn’t introduced at home

        The issue with this is that children arrive at kindergarten and are handed a pair of scissors. IF the educator has time in their busy curriculum to teach their students how to use scissors, they have many skills to cover:

        • How to properly hold the scissors with a safe and efficient grip
        • How to grasp the paper with the assisting hand
        • How to hold  the paper while moving the scissors around the shape
        • How to open the scissors to snip paper without pushing through the page
        • How to then grade the opening and shutting of the scissors to stop at a stopping point
        • How to turn the page while managing proper upper body positioning
        • How to cut along lines of various shapes,
        • and all of this WHILE using safe use of the scissors

        To complete this list in the busy classroom, WITH a group of 30 new scissor users…there MIGHT be enough time left in the school year to finish out the remainder of the school year to use those snipping skills to actually cut out crafts, spelling worksheets, and multi-step activities. 

        Therein is the problem that we typically see: the children without exposure to scissor use at home have trouble with the visual and motor aspect of using scissors once they get to the classroom setting.

        Over the years when assessing young children, at least two thirds fail this task due to “lack of exposure” or never handling scissors.  The reasons I am given are often a nervous parent/caregiver/teacher/grandparent. 

        This can be expected given the fact that you are about to hand a sharp object to a toddler, however, if a child never experiences a task, they will never master it.

        I am in no way advocating giving a two year old unsupervised access to large scissors.  Or a three year old for that matter. What I AM advocating or suggesting, is working with toddlers 20-24 months on beginning scissor skills including snipping paper. 

        When are kids ready for Snipping Paper

        To give you an idea of the timeline for scissor skills: 

        • 25-26 months snipping with scissors
        • 37-38 months cutting paper in half (not on any line)
        • 41-42 months cutting a five inch line within half inch of a straight line
        • 49-50 months cutting a circle within ¼ inch of the curved lines (first of the simple shapes)
        • 53-54 months cutting a square within ¼ inch of the lines, including around the corners (the second of the simple shapes)

        After this a child would move toward more complex shapes, smaller shapes, thinner lines, with increased accuracy.

        As you can see, there is a span of 11-12 months between snipping with scissors and cutting across a piece of paper in a straight line.  This is a considerable amount of time to practice and work on fine motor development including scissor skills.

        If you, or the caregiver are timid about offering scissors for cutting practice, there are several different scissor options from blunt playdough scissors, to scissors that only cut paper, to tiny toddler scissors that can be used before handing over “real” scissors.  

        Supervision when snipping paper

        As with any activity, supervision is the key. As a seasoned occupational therapist, I myself have developed ninja reflexes when working with young children.  I can thwart danger in a microsecond. This is the type of supervision to develop with a two year old.  

        Another note on supervision.  Once showing this child how to use scissors, be sure to put ALL scissors out of reach of your curious toddler. 

        I can not tell you the number of times I have had an irate caregiver call me upset that I taught their toddler to cut with scissors, only to find they snipped the dog, their own hair, all the books, the couch, and whatever was not nailed down.  

        As with everything else hazardous, if you do not trust your child to follow instructions, remove them out of harm’s way.

        How to Teach Kids scissor Snipping

        On to the fun stuff! Here are some tips to teach kids how to use scissors in snipping paper. This is the first step of cutting with scissors and often time the most challenging aspect for parents.

        1. Start with exploration of scissors. Let the child try and figure out what these do first.  Do they touch the paper with them?  Open and close their pair? Hold them with two hands? Read more about sensory touch as a strategy to support this level of the scissor use process.
        2. Grasp the scissors. Move on to teaching the child how to correctly hold their pair of scissors with an appropriate grip. Start with this resource on how to hold scissors. The OT Toolbox has several great resources for scissor skills and selecting types of scissors:

        Correct scissor positioning will include grasping the handles in a specific way. The thumb in the small hole and the third, fourth, and maybe fifth fingers in the larger loop.  Pointer finger stays out of the scissors.  It is there to “lead the way”.

        The supporting hand will hold the paper or whatever object the child is cutting with their thumb upward.  Remember “thumbs up”,  for helper hand.  It will take a lot of practice for your youngest learners to master this position, so start early.

        3. Practice with scissors. Practice building the intrinsic hand muscles to prepare for cutting skills by using tongs, picking up tiny objects, working on dressing and fasteners, playing with putty and dough, fine motor exploration, or doing puzzles. Try this cutting with scissors program.

        Just kidding, that wasn’t all that much fun.  That was the Pre-Fun. The following snipping activities can be used by pediatric occupational therapists to work on functional task of cutting with scissors.

        cutting activities for preschoolers

        Snipping paper is often a huge accomplishment in the preschool years. Work on scissor skills development with these snipping activities.

        These activities can be an extra challenge that supports development of bilateral coordination and eye-hand coordination, leading to skill development. 

        Beginner snipping activities

        This stage involves practice when cutting different objects

        • Snipping items into thousands of tiny pieces seems far more motivating than cutting snips into a single piece of paper
        • Play Dough (or other homemade dough) is a good start with blunt scissors.  The dough is easier to grab than a flimsy piece of paper.  
        • Make a play dough snake, sausages or worms of dough and encourage snipping through it.
        • Use these toys to support scissor skills
        • Cut junk mail
        • Set out a tray of index cards. Cut a fringe around the edge of the cards
        • Work on placement and positioning of the elbows.
        • Place stickers on the edge of a piece of paper. Snip beside the stickers but not over them.
        • Tear paper into pieces to work on hand strength and wrist stability needed to snip with scissors.
        • Use a marker to create lines along a paper strip. Cut along the marker lines to create small pieces of paper
        • Straws provide another option for beginning snipping as they are easy to hold
        • Snipping note cards into shreds is handy
        • Snipping through strips of cardstock to create confetti, very motivating and fun
        • This (Amazon affiliate link) PlayDough BarberShop toy is excellent motivator for anyone working on scissor skills 
        • Cutting real food such as french fries, pizza, soft pretzels, pancakes makes the activity more relevant for a young learner

        Second stage snipping

        This stage of snipping with scissors will involve lighter weight paper and objects for cutting. These are more flimsy but sometimes easier to cut for a learner with weak hands

        • Snipping through magazines (here is where you have to be careful of curious toddlers who will cut through all of your favorite magazines and books). Supervise, supervise.
        • Snipping construction paper or regular weight color paper
        • Opening packages by snipping with scissors
        • Creating crafts and collages by gluing little pieces of objects onto paper. Drippy glue is a great way to add a sensory experience to this activity
        • Snip stiff ribbon
        • Snip yarn
        • Cut paper towel rolls at the edge. Add a bit of fun by drawing a face on the paper towel roll and cut down the length to make hair
        • Snipping worksheets are available online everywhere, including the Scissor Skills Home program which covers all stages of scissor use.
        • Try cutting green strips of paper to make grass fringe or a hula skirt
        • Cutting coupons is functional and good practice
        • The Scissor Skills Printable Pack offers printable tools for snipping skills and beyond

        A note about Scissors: 

        There are many types of scissors that can be used with different needs and using a different type may support development of snipping skills depending on the skill and need being targeted.

        • Small toddler scissors are just right for tiny hands. 
        • Self opening or loop scissors are another way to make cutting easier for those learning to cut, or lacking the intrinsic hand muscles to open and close scissors.  
        • Did you know left handed people cut in a clockwise direction while their right handed friends cut counter-clockwise?  This allows the helper hand to support the paper adequately while cutting.
        • See this article on developing scissor skills grasp.

        For more cut, paste and color activities, check out this Animal Alphabet workbook!

        Keep watching the OT Toolbox for upcoming cutting PDF and creative worksheets, cut and paste pages, and themed lesson plans.

        Remember to supervise your young learners with scissors.  I don’t want any calls about who now has a new haircut or owes the library $534.00 because of chopped up books!

        The Scissor Skills Book breaks the functional skill of cutting with scissors into several developmental areas including: developmental progression of scissor use, fine motor skill involvement, gross motor development, sensory considerations and -visual perceptual skills

        Each section of The Scissor Skills Book includes strategies and tips to improve these underlying areas:

        • Help for kids who struggle with cutting accurately
        • Creative tips to keep things interesting for kids who lose interest easily
        • Quick, practical strategies that can be put into action today!
        • Ideas for kids who cut too fast or too slow
        • Support for kids who can’t grasp scissors efficiently
        • Strategies for right-handed and left-handed children

        Victoria Wood, OTR/L is a contributor to The OT Toolbox and has been providing Occupational Therapy treatment in pediatrics for more than 25 years. She has practiced in hospital settings (inpatient, outpatient, NICU, PICU), school systems, and outpatient clinics in several states. She has treated hundreds of children with various sensory processing dysfunction in the areas of behavior, gross/fine motor skills, social skills and self-care. Ms. Wood has also been a featured speaker at seminars, webinars, and school staff development training. She is the author of Seeing your Home and Community with Sensory Eyes.
        Crayons for Toddlers

        crayons for toddlers

        One question therapists get all the time is about the best crayons for toddlers and specifically which crayons are best to support development. During the toddler years (preschool stage as well), there is a lot of motor and cognitive development happening, making it a great stage to introduce crayons. Let’s talk about the best types of crayons for the toddler years and beyond!

        A lot of the recommendations below are based on the development happening during the toddler years, and the crayon recommendations take hand eye coordination of toddlers into consideration.

        crayons for toddlers
        Crayons for toddlers

        Crayons for Toddlers

        There are many benefits to coloring with crayons and for many toddlers, it is natural to want to color, making it a win-win in building sensory motor skills.

        There is a plethora of  information floating around the web about correct crayons and writing utensils for young people. There are a lot of choices, some great, others not so good.

        When thinking about crayons for toddlers, there is more to it than simply placing a crayon in the palm! Some things to consider include:

        • Coloring with a crayon both develops and requires a grip on the crayon. Forcing coloring too early can promote an immature grasp on the crayon when used in small hands.
        • Coloring offers resistive feedback through the hands by marking the paper. This is a great strengthening activity, but for babies and young toddlers, this can strengthen and add feedback to immature grasps.
        • Likewise, coloring at the toddler stage can be developmentally great when offering the “just right” strengthening and sensory motor feedback needed to move through grasp patterns.

        If you’re thinking about shopping around for the best crayons for toddlers, you’re already in the right frame of mind, because coloring is a tool for creativity that kids need at such a young age.

        Coloring with toddlers is all about the unique shape of the crayons out there on the market that are designed to fit small hands: Think rock crayons, egg crayons, and even something called honeysticks.  

        Do these options surprise you? 

        Then consider the other options out there to worry about:

        • Jumbo crayons vs. Triangular crayons
        • Thick crayons vs. regular sized crayons
        • 96 pack of crayons vs. 8 crayon pack
        • Brands like Crayola crayons vs. Melissa & Doug crayons
        • Washable crayons vs. paraffin wax crayons
        • Pure beeswax crayons vs. crayons with vibrant colors 
        • Non-toxic crayons vs. natural ingredients crayons
        • Large crayons vs. choking hazard sixed crayons
        • Food-grade pigments vs. non-toxic natural wax

        With all of these considerations, how do you choose crayons that make THE very best crayons for toddlers??

        crayons for kids
        Crayons for kids based on development

        Best Crayons for Toddlers

        Before deciding which crayons are best for toddlers, understanding the “why and when” is most important. To do so, we need to run through the developmental stages leading up to toddlers coloring with crayons. This is important because you may see some of the earlier considerations in place when a child is not developmentally ready to color. In those situations, is a good idea to back up and build on skills from a developmental standpoint.

        Birth to one year: This article from Parents magazine highlights the hand development of babies from birth to one year.  In the article it does not mention crayons at all.  

        Why? Because babies’ hands are not ready for crayons of any kind. Crayons for babies exist out there on the market…but it’s just not developmentally appropriate. The hands of babies do not have the muscle control for handling objects like crayons until about 11 months. 

        To prepare toddlers to use crayons to support development, the preparation is a must. Spend the time before the toddler years working on overall fine motor development through picking up objects, self feeding, exploring the environment, cause and effect toys, and dumping objects out of containers. This resource on baby play has a lot of great ideas.

        If crayons are introduced too early, maladaptive grasping patterns will develop.  

        From 12-18 months, the toddler stage, little ones begin to refine their hand development. You’ll see in our resource on fine motor milestones, that there is a lot happening during the toddler years. 

        Around 12 months, children may find it challenging to manipulate small objects with dexterity. At this stage, they are picking up small objects like food pieces with their thumb and pointer finger in a pincer grasp. However, it is difficult for children this age to use dexterity in the fingers of the hand or by isolating fingers or hand separation.

        In six months time, by around 18 months of age, manipulating objects such as toys, utensils, and household objects becomes more coordinated.

        Is it time for crayons yet?  Yes and no. 

        Making marks on paper, and starting to make strokes, but not with pencils or traditional crayons quite yet. 

        Remember, those hand muscles are still very primitive at this point, thus the tools need to be also. Think about how large the knobs on toddler puzzles are, or how chunky beginner spoons are. Writing tools need to be designed the same for little hands.  

        Here are some fine motor and coordination activities to support use of crayons for toddlers:

        Amazon affiliate links are included below.

        • Writing and creating lines with fingers in shaving cream or pudding
        • Finger painting
        • Egg shaped chalk (Amazon affiliate link) like these Egg shaped pieces of chalk fit the whole hand without forcing the fingers to grasp the writing tool
        • Egg shaped crayons like these (affiliate link) also offer resistance when coloring or marking using the whole hand to grasp rather than force a grasp using the fingers which are not ready for that stage yet.
        • Make your own crayons by melting crayons into muffin trays.
        • While there are several iPad apps for writing using finger pointing, research shows children under age 2 should have no exposure to electronics.  Stick with the basics.

        Some coordination activities for 12-18 months can be used to promote eye-hand coordination, proprioceptive input, shoulder stability, and motor coordination. These activities include:

        Children ages 2-3: At this stage of toddlerhood, hand development is starting to become more defined. 

        This is the stage when the young child begins to develop more muscle control needed for precision and dexterity of motor skills in the hand.

        You’ll begin to notice finger isolation, hand separation, and arch development. You’ll also see more refined movements with the thumb in finger opposition. This is where precision in fine motor skills is seen.

        This is also a stage of visual motor growth. Children will begin to integrate the visual input with motor output needed to copy a straight line. A word of caution: at this stage, don’t be concerned with tracing letters or shapes, or copying shapes. Focus is on the simplest of lines: horizontal, vertical lines, circles, and a cross. Read here about pre-writing lines development.
        Is it time for regular crayons yet? 

        Again, yes and no.

        Those tiny hands, while that can certainly hold a regular or chunky crayon, are not ready to do so correctly. The grasp starts out as a gross grasp, then to a pronated grasp, finally ending with a tripod grasp around age 4.

        Children often get stuck in one of these primitive grasping patterns when given crayons too early. A gross grasp is an appropriate stage of hand development, as is a pronated grasp, however the grasping pattern is supposed to continue to develop to a mature tripod grasp over time.

        It often fails when tiny weak hands are holding onto small pencils, crayons, or pens. 

        Coloring can happen, but it’s at the child’s interest, and shouldn’t be forced.

         Here are some crayons for toddlers and preschoolers using this information:

        (Amazon affiliate links included below.)

        • Continue to use the large egg shaped crayons and chalk, as well as finger paints
        • These unusual looking rocket type crayons have a large bulb for palmer grasping that support development but also don’t force young children into holding utensils with an underdeveloped grasp.
        • I also love these crayon rocks for toddlers and preschoolers:
        • Dot markers, while fun and entertaining, also promote the gross and pronated grasps appropriate for this age.
        • Bath finger paints are a great alternative to using crayons.

        Ages 4-5 the preschool age.  Is it time for crayons yet?  Yes!  However, not all children are ready for traditional crayons. 

        One-two inch crayons are the best for children through elementary school.  It is almost physically impossible to get a fist around a one inch crayon. This promotes a tripod grasping pattern.

        During each stage described in this blog post, but especially during the 4-5 age range, don’t feel rushed to put a pencil in the hands of a preschooler. It is common for preschool teachers to think tracing lines, doing simple “prewriting” mazes, tracing their name, and even letter writing activities (including sensory writing trays) is appropriate. Developmentally, it is not. More important at this stage and each stage before, is the PLAY. Play builds the motor, cognitive, sensory, and emotional skills needed for pre-writing. Also read our resource on tracing sheets which needs to be considered for young learners.

        If you have children do not like the idea of broken crayons, there are ready-made flip crayons. (affiliate link)

        What about the chunky crayons? 

        You have probably seen the jumbo sized crayons out there. They are commonly offered to the kindergarten age range. You may have even seen these large, chunky sized option in a triangular shape. 

        However, when it comes to oversized crayons, one size does not fit all. This goes for crayons too. The problem with handing out boxes of large, over-sized crayons to the entire kindergarten class is that, the children that are receiving these boxes of crayons have small fingers, hands, and wrists. 

        In fact, some hands are much too small for chunky crayons, thus leading to more of a gross grasping pattern, or all fingers around the crayon. 

        Other children are able to use a tripod grasp but need a larger size to form this grasp properly. 

        The one benefit to using triangular crayons is that in the classroom setting, they don’t roll across the desk or table and fall on the floor. This is a huge benefit to using the triangular shape because at the kindergarten and first grade age, managing materials as well as body awareness can be a challenge for some kids.

        What about traditional crayons? 

        These can be used if your child has an appropriate grasping pattern such as a tripod, or alternate tripod with two fingers on top.

        The thumb wrap grasp, underwrap, and too many fingers on the writing tool are signs your child is not ready for traditional crayons yet.

        Understanding the why and when behind hand development and tool use, is critical to selecting the correct tools for each stage of development.

        Important note about the ages and stages listed above: Do not rely strictly on the ages above, as children will develop at different ages. These are ballpark ranges for hand development. 

        While it is going to be impossible to convince “the powers that be” to slow down preschool and kindergarten curriculum, being armed with tools and resources will help children be ready to face this onslaught of demands. 

        The OT Toolbox is a great resource for articles, worksheets, printables, crafts, and thousands of ideas and products to work on development.

        *The term, “child” is used throughout this post for readability, however this information is relevant for students, patients, clients, children of all ages, etc. The term “they” is used instead of he/she to be inclusive.

        Victoria Wood, OTR/L is a contributor to The OT Toolbox and has been providing Occupational Therapy treatment in pediatrics for more than 25 years. She has practiced in hospital settings (inpatient, outpatient, NICU, PICU), school systems, and outpatient clinics in several states. She has treated hundreds of children with various sensory processing dysfunction in the areas of behavior, gross/fine motor skills, social skills and self-care. Ms. Wood has also been a featured speaker at seminars, webinars, and school staff development training. She is the author of Seeing your Home and Community with Sensory Eyes.