Auditory Attention Activities

auditory attention activities

Below, you will find information on how to improve attention and memory with auditory processing techniques, specifically through auditory feedback. We’re sharing information regarding an auditory processing tool and auditory attention activities to utilize auditory feedback to promote attention and memory within functional tasks. Attention to language, aspects of sound, and auditory memory skills can be impacted by auditory attention. This as well as auditory sensitivities can impact learning and functional participation in everyday tasks.

Auditory attention activities for kids and adults

On a daily basis, therapy providers witness the strong connections between attention and memory, and their influence on function. They’re also able to prescribe customized therapy programs that ameliorate each level of auditory processing needed to carry out a task. Activities that work multiple systems while strengthening the foundation of function help to streamline therapy and meet goals. This wholistic approach is a hallmark of the occupational therapy profession.

Auditory Processing

We’ve shared various auditory processing activities here on The OT Toolbox. Today, we’re chatting about auditory feedback and the part this plays in improving attention needed in learning. You can find additional resources and activities like this auditory feedback tool at the bottom of this post.

Tips and strategies to improve attention and memory with auditory processing.

Memory and Attention are the Foundations for Learning

Memory and attention work together in the brain to form the basis of our cognitive abilities. Attention is the ability to process information—sometimes selectively—and memory is the ability to store that information for retrieval as needed.

This foundation impacts everything we do, including basic cognitive tasks (such as brushing our teeth) and more complex tasks (like playing a musical instrument).

What is auditory feedback and how does this  skill play into auditory processing and its impact on attention and memory?

What is Auditory Feedback

Auditory Feedback is a natural process in the human body that helps us understand and modulate sound and speech signals in real time. When we speak, our ears receive the signal, and our brains make sense of it.

In the case of vocalizations, and to a greater extent speech, our brains modulate the productions in real time so that we can quickly adapt, ensuring our message is accurate.

Strengthening the Foundation

Simply using the auditory feedback system—or auditory feedback loop—is one way to ensure that memory and attention continue to work well. We do this every day by listening to sounds and speaking.

In order to improve these skills, we need to challenge the brain in specific ways. We know that the brain is plastic; it is a living organ that changes and adapts to the needs of the body. I

f someone stops using their left arm, the brain will strengthen connections to the right arm to compensate. Furthermore, the neural connections that aren’t being used for the left arm will start to deteriorate, which is hard evidence for the “use it or lose it” adage.

Practical and Results-Focused Brain Training

Disclosure: Affiliate links are included below.

Capitalizing on the audio-feedback loop and its ability to improve memory and attention in the brain is the business of Forbrain® Bone Conduction Headphones. With these headphones, a simple task can become a multi-faceted memory and attention-boosting transformation.

Bone conduction hearing is ten times quicker than air conduction and while using Forbrain, which includes a microphone and a dynamic filter, manipulated sound stimuli reach the brain quicker, and are presented in a way that’s naturally challenging.

Challenging the brain is synonymous with growing the brain!

The use of bone conduction headphones has been proven to improve therapy outcomes. One study suggests that there is a real basis for the claims that Forbrain can improve voice quality and the executive attentional mechanisms and memory. The results suggest that an auditory feedback device such as Forbrain® could be helpful in improving focus in those who have attention disorders such as ADHD, and those who have difficulties with speech production and auditory processing (Escera).

For more information on the bones in the ears, check out this list of bone names which covers all of the bones in the body.

Easy auditory Attention activities:

These auditory attention activities are easy ways to to improve attention through auditory processing. These strategies can be used at any age, and depend on the need. Learners that struggle with listening comprehension will find strategies that impact attention. Younger children will benefit from quick activities such as nursery rhymes and clapping games that impact auditory attention skills at an age-appropriate level.

It’s as simple as wearing the headphones while carrying out auditory feedback activities during therapy or during everyday tasks. All of these strategies impact auditory memory.

Examples of activities might include:

  • Reading a book or poetry aloud
  • Reciting nursery rhymes
  • Clapping games and movement activities
  • Practicing tone and pitch while singing
  • Playing a musical instrument
  • Memorizing material for an exam
  • Performing exercises to improve posture and diaphragmatic breathing

Forbrain isn’t just for therapists or those of us in a therapy program. If you or someone you know can benefit from the improved memory and attention abilities that Forbrain provides, read more about using a bone conduction headset and grab one of your ownn here.

Tips and tools for better attention using auditory feedback and other auditory processing strategies.

References:

Escera, C. (2015). A scientific single case study on speech, auditory processing and attentional strengthening with Forbrain® . Retrieved from Agency name website: https://www.forbrain.com/uploads/editor/files/Scientific_Research_Forbrain-Carles_Escera-Summary_Report.pdf

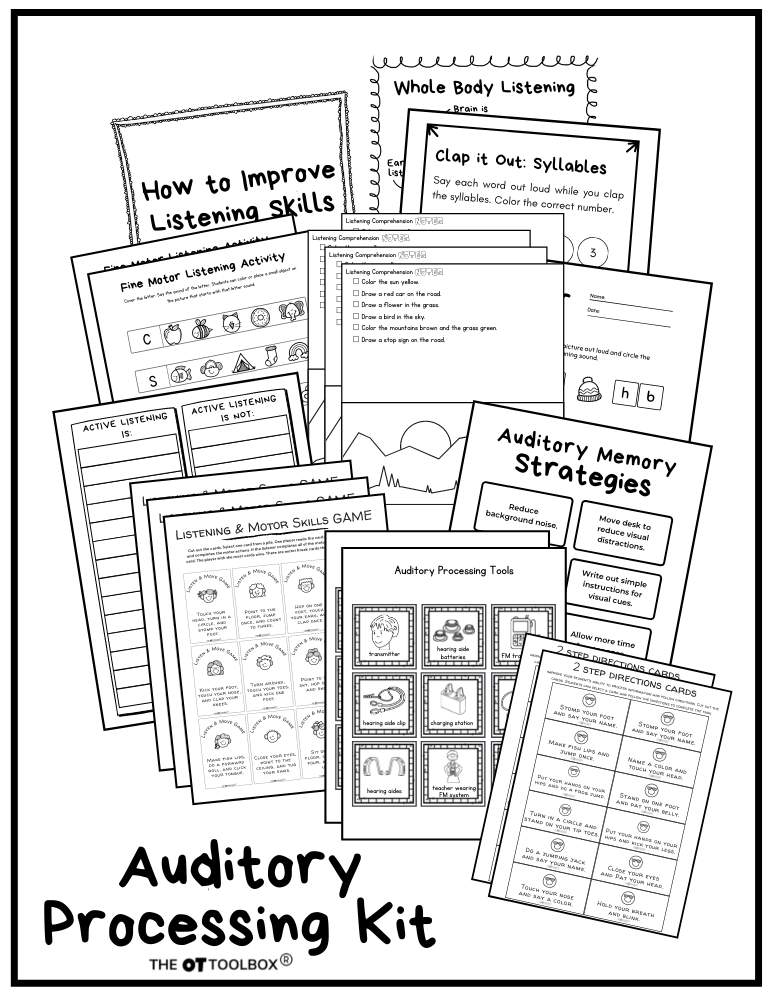
The Auditory Processing Kit is a tool to support learners by building skills in listening comprehension, auditory processing needs, and much more. The tools offer support to learners with hyper-responsive or hypo-responsive auditory systems. Therapists love the hands-on activities to support learning and active listening through play and handwriting tasks.

  • Listening Comprehension
  • Fine Motor Listening Skills
  • How to Improve Listening Skills Poster
  • Clap It Out Syllables Orthographic Activities
  • Beginning Sounds Letter Activity
  • Rhyming Words Activity
  • Activity Listening Activity
  • Hearing Skills Activity
  • Auditory Memory Strategies
  • What Does Active Listening Look Like?
  • Whole Body Listening Activity
  • Whole Body Listening Poster
  • Listening and Motor Skills Game
  • 2 Step Direction Cards
  • How to Support Hyper-Responsiveness of the Auditory Sense (handout and info sheet)
  • How to Support Hypo-responsiveness of the Auditory Sense (handout and info sheet)
  • Auditory Processing Tools Cards
  • Auditory Processing Speed -2 Digit Numbers
  • Auditory Processing Speed -3 Digit Numbers
  • Auditory Processing Speed -4 Digit Numbers

Use the handouts and posters to teach about the auditory system and auditory challenges, with strategies to support individualized needs. Get your copy of the Auditory Processing Kit today.

Colleen Beck, OTR/L has been an occupational therapist since 2000, working in school-based, hand therapy, outpatient peds, EI, and SNF. Colleen created The OT Toolbox to inspire therapists, teachers, and parents with easy and fun tools to help children thrive. Read her story about going from an OT making $3/hour (after paying for kids’ childcare) to a full-time OT resource creator for millions of readers. Want to collaborate? Send an email to contact@theottoolbox.com.
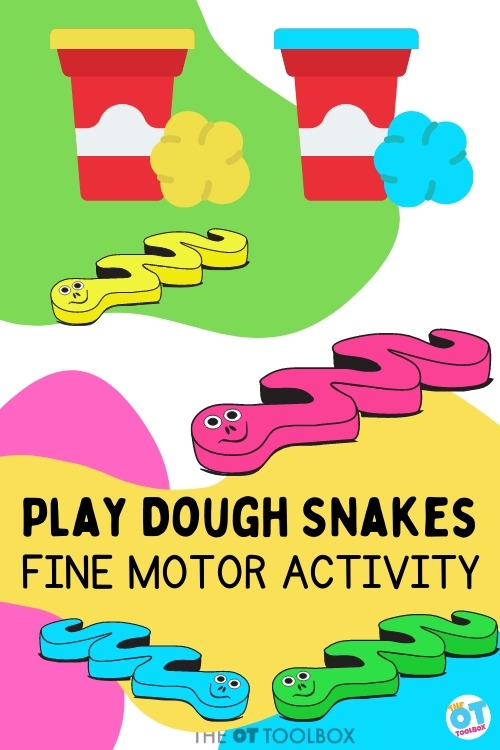
Make a Play Dough Snake to Build Fine Motor Skills

play dough snakes

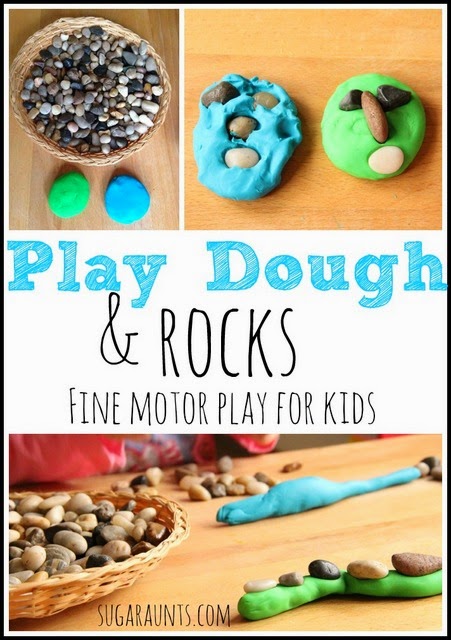
If you’ve ever played with Play Doh then you may have made a play dough snake. But did you ever stop and think about the various fine motor skills being developed with that simple play dough creature? Here we have a super simple and fun activity using play dough and rocks: Making play dough snakes! When you make a play dough snake so many skills are developed.

play dough snakes are an easy way to work on fine motor skills with kids.

Play Dough Snakes

We are big fans of play dough.  Adding in fun little extras (like making play dough snakes!) is a great way to keep it interesting, and get those fingers moving with fine motor work.  We shared a picture of this activity on Instagram and it was such a hit, that we had to share our play in a blog post!  We used regular play dough this time, but a batch of homemade play dough recipe would be perfect for this activity, too. 

The thing is that Play Doh snakes can be made with any type of play dough, homemade dough, slime, or even kinetic sand.

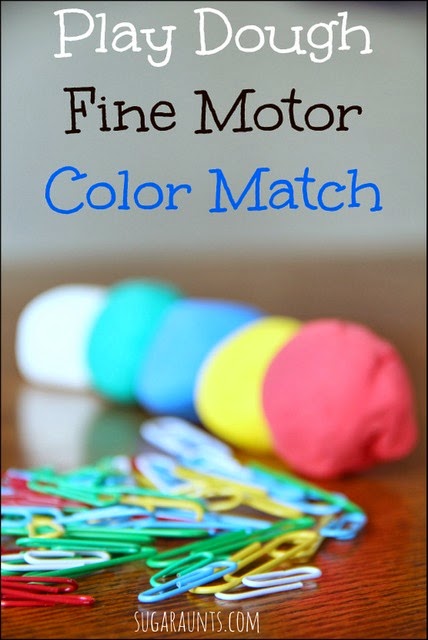
Simple therapy tools like play dough can support big goal achievement. Similar to these games with paper clips, using play dough to build hand strength and fine motor skills is easy and fun.

{This post contains affiliate links.  

Play Dough Snakes and Fine Motor Skills

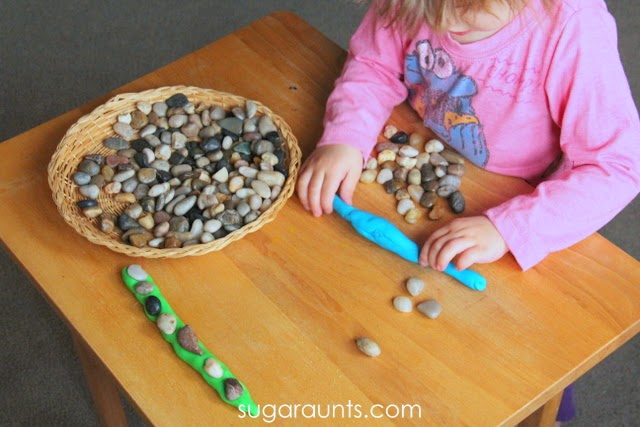
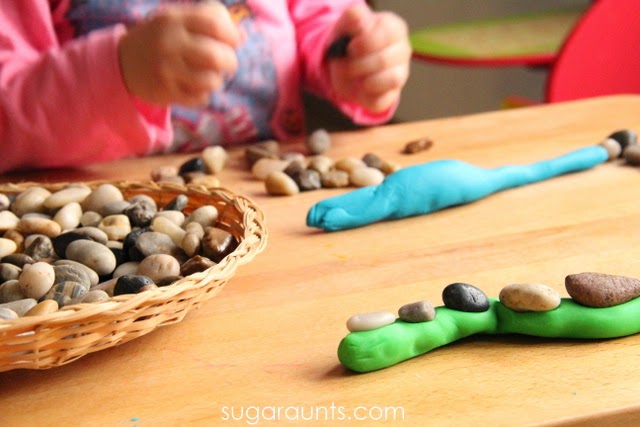
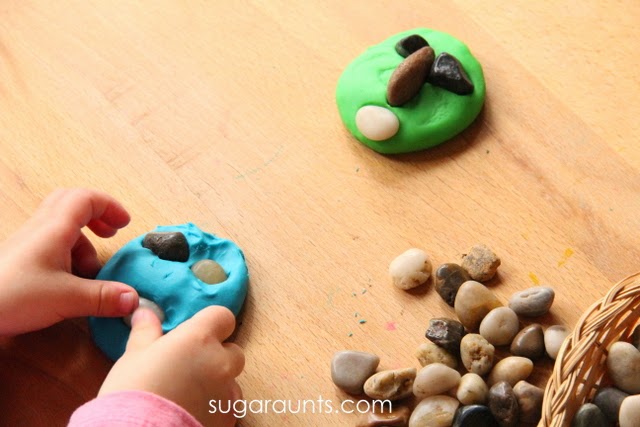
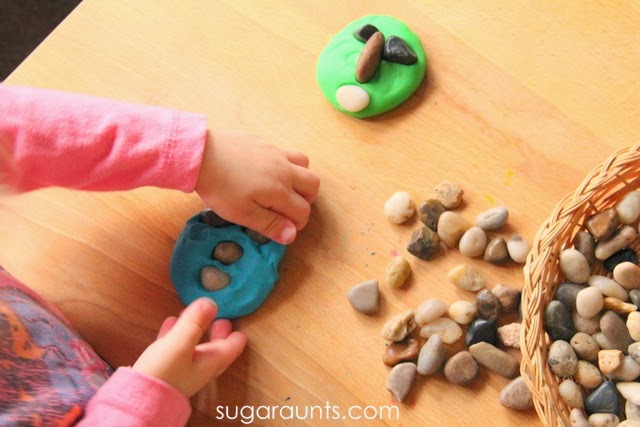
Baby Girl loved this!!  I pulled out a few colors of play dough and a basket of  River Rocks.  She got started sorting, picking out her favorites, and pushing them into the play dough. 

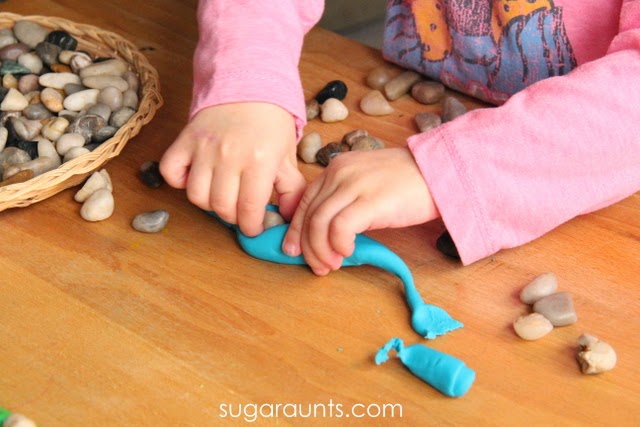
I showed her how to roll a play dough snake to really work on those fine motor skills. 

By rolling a snake from playdough, so many fine motor skills are developed:

Pinching those play dough snakes and pressing the stones into the play dough really works the intrinsic muscles of the hand, and upper body strength.  It’s a fun way to practice tripod grasp, too.

How to Make a Play Dough Snake

To roll a play dough snake, all you need is a lump of play dough. Then, follow these directions to support fine motor skill development:

  1. Use both hands to roll play dough on the table surface. Both hands should work symmetrically together (bilateral coordination)
  2. As the play dough is rolled, it gets longer.
  3. Use varying amounts of pressure through the palms of the hands to make sure the play dough snake is even. (Graded pressure)
  4. As the playdough snake gets longer and thinner, use the finger tips to roll with more precision. (Precision skills)

Rolling a snake from play dough is a great way to strengthen the muscles of the hands, lengthen the muscles inside the hand (intrinsics), and work on grasp, and finger isolation.

Here is another way to work on intrinsic strength using play dough.

 I made a play dough snake and pressed rocks along the length.  Baby Girl watched and started making her own. 

More skills with Play Dough Snakes

After you’ve made a few snakes from play dough, you can continue the skill-building.

Freeze the play dough to make a stronger resistance. Freezing play dough for heavy work play is a great opportunity to challenge fine motor skills and add more resistive feedback through the hands.

Cut the Play Dough Snake- After you have a nice long ribbon of playdough created, use scissors to create marks along the length. Cut the play dough snake along those textured marks to work on scissor skills and visual motor skills. The play dough offers great feedback through the hands.

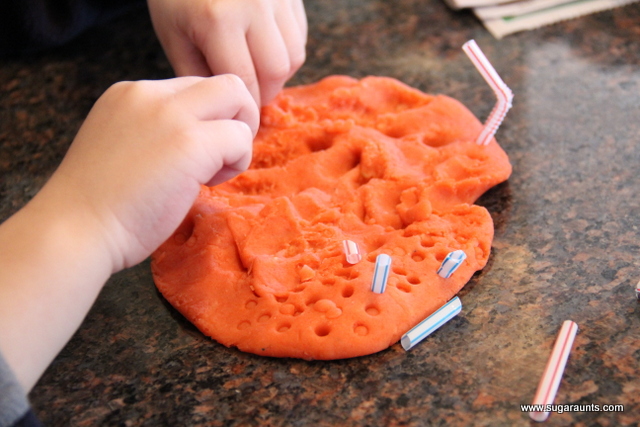
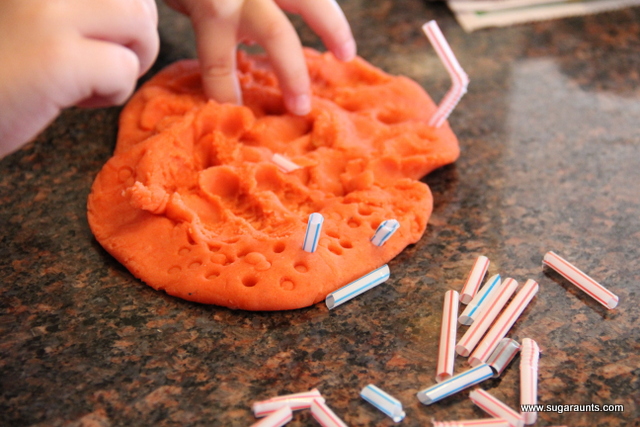
Add rocks to the play dough snake- Pushing the rocks into the play dough is a great fine motor proprioception activity.  This resistive activity really “wakes up” the small muscles in the hands.  What a great way to warm up the hands before a handwriting activity for older kids.  Proprioception activities like this one are a good way to calm and organize your child.  This activity would be a great addition to a Sensory Diet or a Sensory Lifestyle.  

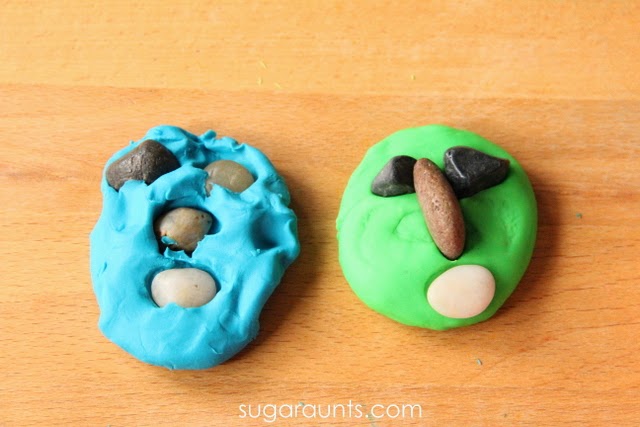
We made our snakes into faces, too. I made a play dough face and Baby Girl was able to copy one to make her own.  We talked about all of the parts of the face.  Such a fun way to play and learn!

  After she made her play dough face, she made them talk to each other…”hi, how are you…” and conversation back and forth.  Language development is fun with play dough!

These cuties were best buds by the time we were done!

Let us know if you do this activity at your home or school. 

 
Create and explore proprioception with kids in this fine motor activity with play dough


More play dough ideas you may like:


Working on fine motor skills, visual perception, visual motor skills, sensory tolerance, handwriting, or scissor skills? Our Fine Motor Kits cover all of these areas and more.

Check out the seasonal Fine Motor Kits that kids love:

Or, grab one of our themed Fine Motor Kits to target skills with fun themes:

Want access to all of these kits…and more being added each month? Join The OT Toolbox Member’s Club!

Colleen Beck, OTR/L has been an occupational therapist since 2000, working in school-based, hand therapy, outpatient peds, EI, and SNF. Colleen created The OT Toolbox to inspire therapists, teachers, and parents with easy and fun tools to help children thrive. Read her story about going from an OT making $3/hour (after paying for kids’ childcare) to a full-time OT resource creator for millions of readers. Want to collaborate? Send an email to contact@theottoolbox.com.
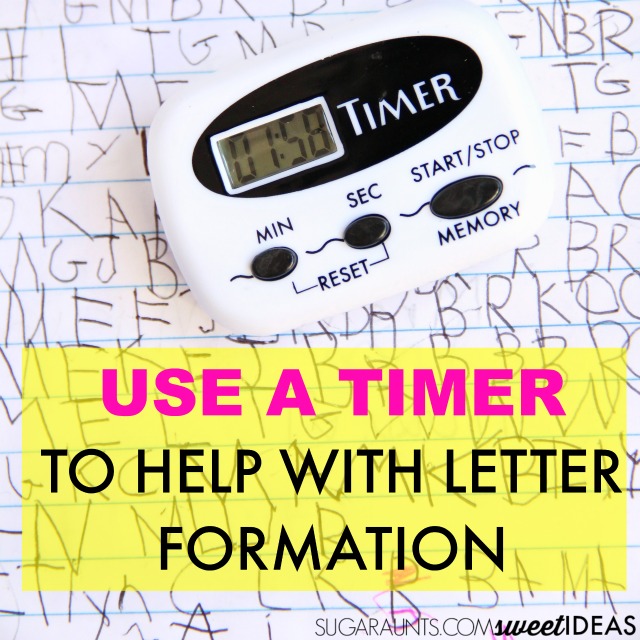
Use a Timer to Work on Writing Speed

how to use a timer to work on writing speed

Many times, school-based OTs are asked about normal writing speed. Just how fast should kids be writing and how can you improve writing speed while maintaining legibility? This super easy handwriting trick is one that can be done right now.  Pick up your phone, turn on the timer app and start practicing handwriting. Read on for a writing speed activity that you can work on any time. Working on speed of writing is a great way to support bad handwriting issues.

We also love the benefit of using a timer to work on time management skills in general. This is a great tool to have on hand!

How to use a timer to improve writing speed and maintain handwriting legibility.

Writing Speed Activity

Using a timer to help with reaching a normal writing speed (or FUNCTIONAL writing speed) while maintaining legible letter formation is one way that kids can develop consistency with correct letter formation, speed, and accuracy.

Remember that the main goal is functional handwriting legibility when completing writing tasks independently.  

Related, is this resource on a functional pencil grasp, as pencil grasp can also suffer when writers are rushed to complete a writing task. But the main thing to keep in mind is:

  • Is the written sample legible?
  • Is the written sample completed within a reasonable amount of time?
  • Is the written work illegible when required to be written in a specific amount of time?

Remember that when writing in a faster time (as when copying notes that are on a digital slide deck and the material must be copied before the next slide is shown) it is expected that proper letter formation suffers.

Think about the last time you quickly jotted down a phone number. Did the numbers look different than your normal handwriting? Young writers are the same way, but as long as the written work is legible, we are good to go!

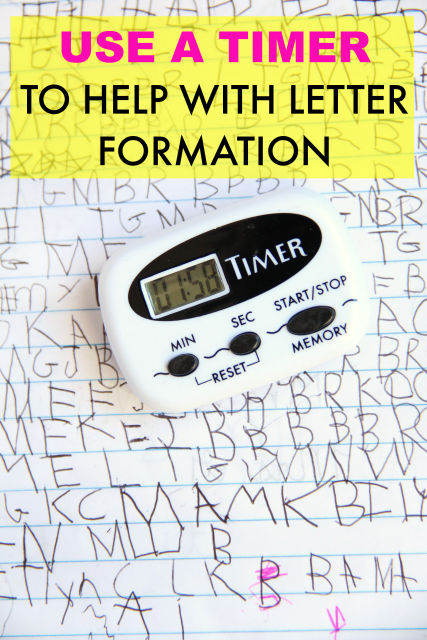
How to use a timer to help kids work on letter formation, handwriting skills, legibility, speed, and accuracy of written work.

How to Use a Timer to Help with Writing Speed

This post contains affiliate links.  

Students who are working on handwriting are often times addressing letter formation skills.

The ability to construct letters stems from a top to bottom approach and in correct letter formation order.  For example, a child should not be writing a letter in sections or with unnecessary re-trace.  

Many times you see preschool children form letters by sections and not constructing the letter correctly.  These inaccuracies can be carried over to the later grade years and will absolutely interfere with legibility as the child is required to write more, at faster speeds, and in smaller spaces.  

Addressing correct letter formation is a must for legibility.  

So, the child who needs to work on “building” correct letter formation can typically perform these tasks when working one on one with an individual who provides differing levels of support.  

These might include verbal cues, visual cues, and physical prompts.    

But how is the child to transition from varying percentages of cues to more independence in their written work?  

A timer is an easy tool to use in this instance.   I love to grab a kitchen timer for practicing written work.  

Turn on the timer and use it to work on writing speed AND legibility:

  1. Tell your child that you are going to turn on the timer to count how long it takes them to copy a line or sentence with accuracy.  
  2. Then, try to beat that time while maintaining accuracy with correct letter formation.  When kids are rushed to complete written work, they tend to speed up and return to comfortable, bad handwriting habits.  
  3. Using the timer to copy one line with a goal to beat their own time is a motivating way to encourage carryover of appropriate skills.  

Next, check the work. Kids love when they can check their speed and try to beat their time. Try jotting down the time spent writing and check each letter formation.

This is a great time to collect data on legibility, too.

Mark off the number of correct letter formations in a sentence. Or jot down the amount of letters that are legible (or illegible) during a specific amount of time.

Many learners will want to try to beat their score on the next trial!

Timers for Writing

There are many writing timers that can be used to work on hand writing speed.

These timers for writing are great because they are small and easily fit into a therapist’s therapy bag:

This one has a magnetic back, making it convenient to stick to metal desks.

A small timer that fits into the palm of the hand is perfect for the clinician’s therapy bag or for fitting into a desk pencil box.  

using a phone timer to work on writing speed

While a phone timer is great, the phone itself can be a distraction for kids.  

Some kids can become hyper-focused on the time as it counts and will stare or become anxious about the time as they watch the numbers change.

A wind-up kitchen timer can help in those cases. You will need to count down to figure out the time spent on a handwriting task.  

However, a phone timer or the good, old microwave timer will do the job too, and in some cases can be motivating for some children.

This timer trick works best with kids who are working on letter formation and can form letters accurately and with correct formation with extended time, modifications, and/or added cues.  

More ways to use a timer in handwriting: 

  • Use a timer to work on speed.  For the child that writes very slowly or becomes overly focused on letter formation, use the timer as a countdown to improve speed and accuracy.  Mark each trial with time and correction errors. 
  • Set the timer for handwriting time.  This is a good way to get kids who are not motivated to work on handwriting skills.  Small rewards such as choosing a fine motor or visual perception activity between writing trials can be reward options.
  • Work on am and pm activities.
  • Use it along with moveable parts on a clock face, using manipulatives like we did in this rock clock activity.

Here are more time telling activities that may be used along with our timer handwriting activity.

How to use a timer to help kids work on letter formation, handwriting skills, legibility, speed, and accuracy of written work.

Be sure to check out all of the easy handwriting tips in this month’s series and stop back often to see them all.    

You’ll also want to join the Sweet Ideas for Handwriting Practice Facebook group for more handwriting tips and tools.  

Colleen Beck, OTR/L has been an occupational therapist since 2000, working in school-based, hand therapy, outpatient peds, EI, and SNF. Colleen created The OT Toolbox to inspire therapists, teachers, and parents with easy and fun tools to help children thrive. Read her story about going from an OT making $3/hour (after paying for kids’ childcare) to a full-time OT resource creator for millions of readers. Want to collaborate? Send an email to contact@theottoolbox.com.

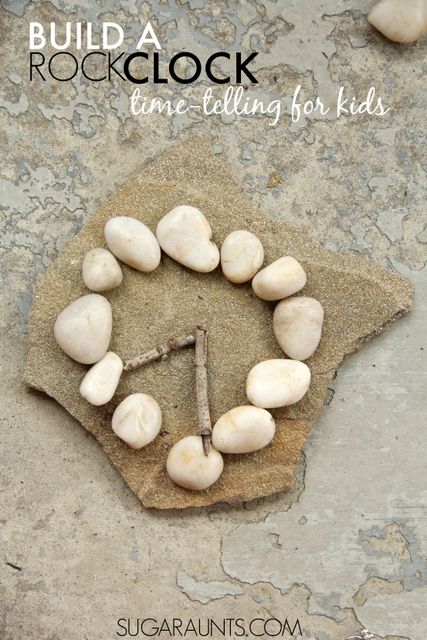
How we Can Tell Time Through Rocks (hands on learning)

Use rocks to make a rock clock

In this activity, we can use rocks to tell time! It’s true…not by shadows and watching the sun as it passes by, but by physically moving and manipulating rocks as a time telling tool. In this rock and learn math activity, we can use rocks found around the home with heavy work input as a clock building time telling activity! This is just one more way to teach kids to tell time through hands on play.

Tell Time Through Rocks

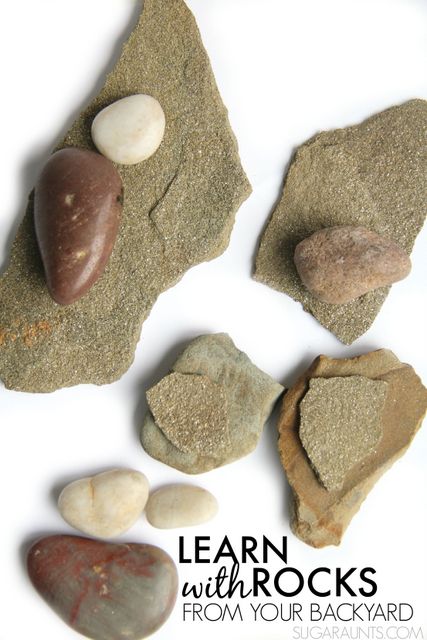
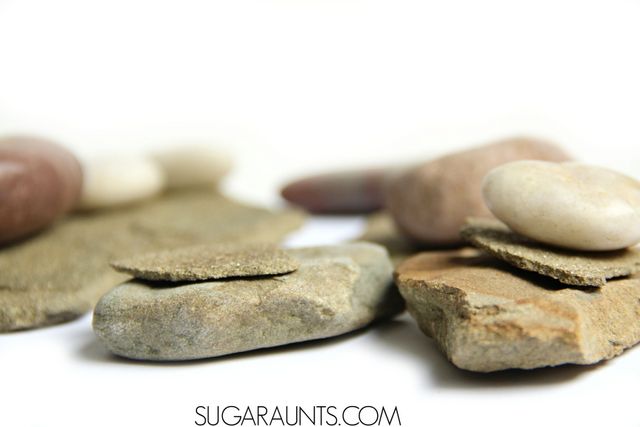
It’s always nice to play and learn with the kids when the supplies are completely free.  Learn and play with rocks from your backyard or natures walks with a few fun ideas to Learn using Rocks!   You might have seen a few of our other rock activities.  (We really have a lot, believe it or not!)    

In this activity, though, we are asking kids to lift rocks that offer heavy work input, or proprioceptive input while learning to tell time using a simple rock.

Learn with rocks, including teaching kids to tell time, math, literacy, fine motor, sensory.

Teach kids for free using rocks!

This post is part of our month-long Learning with Free Materials series where we are sharing learning ideas for homeschoolers and school-extension activities using items that are free or mostly free (i.e. CHEAP or you already have in the home)…and rocks are most certainly free!  

This series is part of the 31 Days of Homeschooling Tips as we blog along with other bloggers with learning at home tips and tools.  We do have affiliate links in this post for your convenience.

While using rocks in clock building not time telling, but to learn the concepts of time is fun, it’s also functional. Kids can play to learn and learn to play with rocks!

Use rocks to tell time

  There are a ton of ways to learn at home, either through homeschooling, or as school-based enrichment activities using rocks from your own backyard. 

Let’s take a look at more ideas for rocks:  

Math with Rocks

  • Count rocks in a line.
  • Add and subtract with rocks.
  • Sort rocks by characteristic.
  • Arrange rocks and pebbles into patterns with AB, ABA, ABBA, ABAB, and more complex patterns.
  • Create charts on the ground using rock markers.
  • Write numbers on rocks as a manipulative in math problems.
  • Tell Time with rocks.
Build a clock with rocks to teach kids to tell time, including minute hands, hour hands, and numbers on the clock.

Teach Time Telling with a Rock Clock

We used smooth rocks to create and build a clock.  Clock building and time telling is a fun and common activity for us recently, so building a clock with rocks was a challenge when the rocks didn’t have numbers written on them.  

Teach kids to position the “3”, “6”, “9”, and ” 12″ rocks first then fill in the other “numbers”.  

You could also write the numbers on the rocks using a (Amazon affiliate link) paint marker.  Use twigs to create the minute and hour hands and work on time telling outdoors with nature.

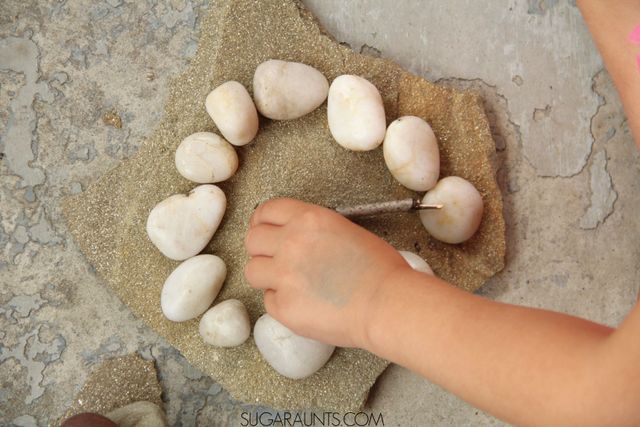
Use pebbles to teach time with rocks. This is a fun hands on activity for kids learning to tell time.

Use smaller pebbles to teach time with rocks. We found smooth pebbles from a garden that worked well as the numbers on a clock.

Kids can move them around to the correct position on the rock clock face. This is a fun hands on activity for kids learning to tell time.

Engineering with Rocks

Rocks are a great material in STEM for kids:  

  • Build towers.
  • Create bridges using rocks.
  • Explore balance.  How does one rock balance on another.  Will a different rock stay put in the same way?
  • Explore force and movement. How can rocks move items?

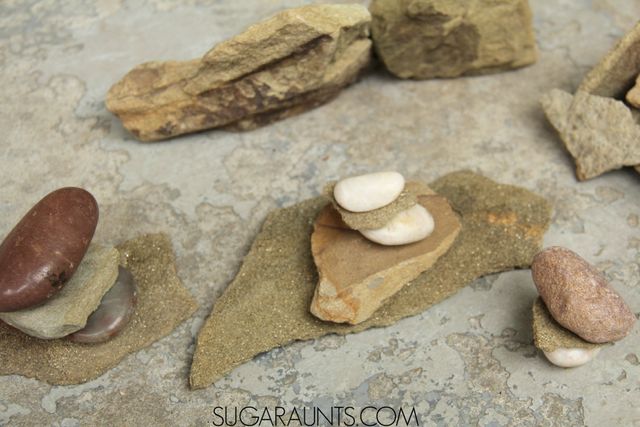
Building a small tower of rocks is a great eye-hand coordination and fine motor activity, and you can show kids how to mark shadows from the sun to mark the passing of time.

As the sun moves across the sky and the shadow from the rock tower moves along the ground, kids can associate the passage of time with this visual. Then move the hands on the clock to show how much time has passed.

Use rocks to teach like telling time with rocks.

Rocks in Literacy

  • Use that paint marker like we did here to build letter blends.
  • Use the rocks in a letter sensory bin.
  • Use rocks and pebbles in pretend play and story telling literacy activity by creating story-based small worlds.

  More learning ideas using rocks: Use rocks in sensory play,  pretend play sensory bins,  and fine motor with play dough.

A final note on this rock clock activity

While teaching time isn’t something that is always addressed in occupational therapy, we can support the need to learn time as it relates to time management and functional task completion. After all, if one can’t note the time on the clock, they can’t be out the door to school or an appointment, resulting in many issues.

OTs do support their clients in the educational space, and sometimes telling time is a challenge, especially for those with executive functioning issues, visual perceptual issues, or cognitive impairments. So in theses cases, OT can intervene to support the educational curriculum or to offer alternatives that help the individual to succeed at their goals.

When working with this clock activity, learners or clients can build on educational goals as well as executive functioning skills.

These kids rock ideas develop many skill areas:

  • They can learn clock concepts
  • Participants can manipulate small objects to develop fine motor skills.
  • Clients or students can use the hands-on approach to develop motor planning and eye-hand coordination skills while learning time to the nearest five minutes
  • They can develop and learn relationships between time elements.
  • Participates can learn through play.
  • Students can develop and create, using rock manipulatives as a models to support learning.
  • Participates can develop skills and experience in using symbols in learning, organization, working memory, communication, mathematical skills, and more.

How will you use this rock clock activity to teach time or time telling skills through play?

Colleen Beck, OTR/L has been an occupational therapist since 2000, working in school-based, hand therapy, outpatient peds, EI, and SNF. Colleen created The OT Toolbox to inspire therapists, teachers, and parents with easy and fun tools to help children thrive. Read her story about going from an OT making $3/hour (after paying for kids’ childcare) to a full-time OT resource creator for millions of readers. Want to collaborate? Send an email to contact@theottoolbox.com.
Shamrock Crafts

Shamrock crafts

Are you feeling lucky? Well, you should as you’ve hit the pot o’ gold upon finding this collection of shamrock crafts! Check out all of the shamrock and clover crafts below…you’ll find St. Patrick’s Day activities that are great additions to your occupational therapy crafts. They are not only fun to make and get kids engaged and motivated, but they are meant for the kiddos in your life to engage in this holiday season. There are festive fun and even sweet-tooth candy crafts included in this post. Kids will love the crafts they will be able to produce during a holiday that is not as actively celebrated in the United States, but should be! 

These shamrock crafts are perfect for a St. Patrick's Day party or in OT sessions. Use the clover and shamrock craft to develop skills.

Shamrock Crafts

These shamrock crafts can work on much needed skill development and practice! That’s right, crafts that build important skills such as fine motor, visual motor, gross motor, sensory motor, and even oral motor.

So, read on below and find some shamrock fun that will help you combine this holiday theme with some educational and therapeutic activities to get festive while having some fun!

Wearable Shamrock Crafts:

These fun, festive crafts are all about creating wearable jewelry, like rings and necklaces, but there is also a craft for a wearable puppet glove too.

These can easily be used to give to a friend or make for an awesome therapy group activity! They will encourage separation of the two sides of the hand, in-hand manipulation, precision grasp, dexterity, and arch development making them purposeful and productive.

  1. Pipe Cleaner Shamrock Rings is an activity that generates a wearable ring, but incorporates important fine motor skills as well as sequencing in order to be able to follow the directions to build the ring successfully.

Definitely a craft for older children as it needs more advanced hand skills and the ability to sequence the steps for the most success. 

2. Twizzler Rainbow Necklaces is an activity that doesn’t really use shamrock shapes necessarily, but does give younger kiddo the opportunity for participation in the making of a craft for the holiday that doesn’t require advanced cutting skills, only snipping if you want them to engage in the preparation.

If not, no worries, they simply need the use of fine motor precision, bilateral hand use, and eye-hand coordination skills to string the Twizzler pieces.

You can also add a shamrock adornment to really make it festive! Read about using licorice as an oral sensory tool to calm and regulate emotions or sensory needs.

3. Shamrock Puppet Glove Craft is an activity that doesn’t necessarily have to be made by a kiddo, but is definitely used by a kiddo and think about all of the skills you can work on with this puppet glove. 

Not only can you work on the skill of donning the five-fingered puppet glove, but you can work on finger isolation, finger awareness, dexterity, and eye-hand coordination to wiggle those puppets. 

Edible Shamrock Crafts: 

These tasty craft ideas are all about the color of St. Patrick’s Day with the end result being a tasty treat reward.  What child would not won’t to do these, right? They easily address bilateral and eye-hand coordination, color recognition and patterning, pincer grasp and precision skills. 

Cooking with kids is a powerful tool for developing executive functioning skills, fine motor, and sensory needs, so when you combine shamrock themed snacks and crafts, you’ve got a pot of gold therapy tool!

  1. Shamrock Chocolate Pops is an activity that is quick to put together and ideal for the younger kiddos to engage in as they require only a few steps to do with adult supervision and the end result is a tasty shamrock treat. 

2. Rainbow on a Stick is an activity that uses colorful Fruit Loops and marshmallows, so really, it’s more like a party or snack food idea. It uses bilateral hand skills and eye-hand coordination as well as fine motor precision to thread, plus a little finger strength to be able to push the marshmallow completely onto the end of the stick to use as a tip and prevent the cereal from falling off. No shamrocks here, but an idea could be just to have kiddos use green Fruit Loops. 

3. These rainbow snacks are not shamrock themed, but they go perfectly with a St. Patrick’s Day activity set. Kids will love to help prepare the rainbow pepper snack but not realize they are working on so many fine motor skills.

Fine motor shamrock crafts:

These shamrock crafts include folding, tearing, painting, cutting, pasting, weaving, beading, direction following, and sequencing.

All of these fine motor actions will help a child of most any age and skill level to work on bilateral hand use, eye-hand coordination, scissor grasp, hand dominance, strengthening, finger isolation, and grasping patterns. 

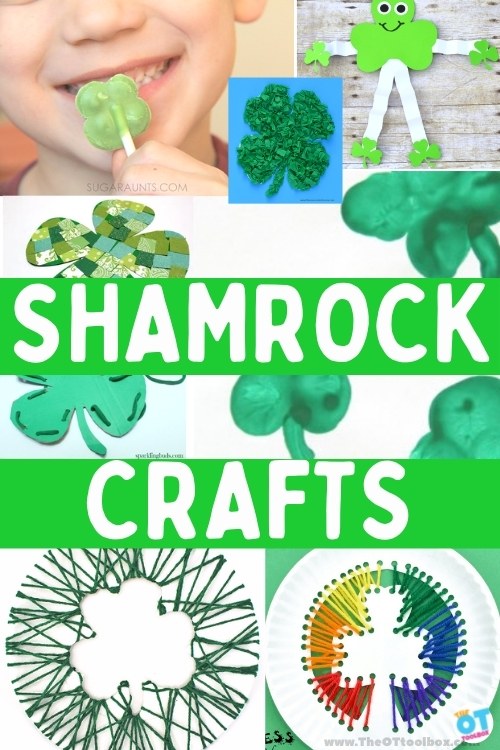
  1. Clover Thumbprint Craft uses finger isolation skills and the targeted use of the index finger in isolation. This clover fingerprint art allows for isolation of one finger and the flexing of the remaining fingers into the fist. This helps to build separation of the two sides of the hand. This craft also incorporates eye-hand coordination too!

2. You can take the finger isolation skill craft further with this Rainbow Finger Isolation Craft which uses ALL of the fingers with each finger making the curve of the rainbow using a different color of paint. 

3. Beaded Shamrocks use a pincer grasp to place the beads onto the pipe cleaner shamrock, but the design of the actual shamrock address advanced hand skills, direction following, and sequencing skills to shape the pipe cleaners into shamrocks while also placing beads. 

4. Crepe Paper Shamrock is a fun activity that is perfect for practicing the fine motor pinch pattern and improving strength and endurance. Children will tear crepe paper strips into squares and then pinch the squares into balls to glue onto the shamrock template. 

5. Shamrock Twirler Craft is a simple cutting, painting, and assembly craft that produces a fun pinwheel-like craft that can also give the opportunity for children to work on some oral motor skills as they can learn to blow the twirler.  Blowing can help to generate some deep breathing which can be used as a festive self-regulation tool. 

Read more about the benefits of using a paper twirler craft in therapy.

6. Mosaic Paper Shamrock is similar to the crepe paper shamrock in that a child has the opportunity to cut various shades and patterns of green paper into strips and then cut or tear those strips into small squares to glue them onto a shamrock template. This crafty idea works on eye-hand coordination skills to cut and glue, scissor grasp to cut, and if tearing, finger strength and bilateral coordination too.

7. Fine Motor Shamrock Craft is a craft that includes a little tactile tolerance with the use of glue and salt and then allows for finger strengthening and grasp work to squeeze an eye dropper repeatedly to color the salt with green food dye and create shamrocks!

You can also work on tripod grasping skills too as they repeatedly must fill up the eye dropper. 

8. Rainbow (and Shamrock) Windsock Craft is a craft that can be hung outdoors once it is finished!  It allows for advanced direction following and sequencing as a child will paint, cut yarn, use a heart puncher, glue hearts into shamrocks, and then completely assemble the windsock together using all craft materials.

Older kid groups will love this activity to engage in and hang outdoors.  

9. Shamrock Man Craft is a whole-body craft that is similar to the Mat Man figure from Handwriting without Tears™ in that children assemble the body, eyes, legs, arms, feet, and hands, but with a shamrock theme.

Children will have the opportunity to cut out pieces, fold accordion style, and then glue to assemble. Lots of multiple skills can be addressed with this craft to include grasp, bilateral hand use, eye-hand coordination, and body awareness.

Downgrade and upgrade as needed to meet the level of challenge of child needs. You can find our version of this craft in your OT Toolbox Member’s Club March materials.

10. Yarn Wrapped Shamrock Craft is an activity that addresses bilateral coordination and hand dominance to wrap the yarn string around the cardboard shamrock to cover it in greenery yarn. 

The best part? This is a freestyle craft that most any child can engage in and simply wrap as desired. It makes for a great holiday ornament as the end result too. 

11. Shamrock Nature Craft has children venture into the outdoors to select greenery that would make a great contribution to the image of a shamrock created on the pavement or sidewalk with chalk.

This is a different approach to crafting for kiddos and depending on what aspects you want them to engage in, they can work on finger and hand strengthening, bilateral hand use, visual discrimination, and freedom in creativity.

12. I’m slipping in this Fine Motor Rainbow Craft  here that also includes work on fine motor skills to string the beads onto pipe cleaners and sequencing skills to assemble the pipe cleaners into a 3D rainbow. It makes for a great display! 

13. One more rainbow slip-in as it is so pretty and festive! The Yarn Wrapped Rainbow Craft is a fun activity that addresses bilateral coordination and hand dominance as these hand skills are needed to wrap the yarn string around the cardboard rainbow to cover it in a stunning rainbow appearance.  The best part? This is another freestyle craft that most any child can engage in and simply wrap as desired. It makes for a great holiday ornament!

14. Shamrock Template– In the OT Toolbox Member’s Club, under March activities, you’ll find a shamrock template which can be used to develop scissor skills, eye-hand coordination, and fine motor skills as kids pinch paper and glue it to the template. Or glue on other small objects like green beads or craft pom poms. The shamrock printable template can be used in so many ways!

Visual motor shamrock crafts:

These fun visual motor crafts are for younger and older kiddos as you can downgrade and upgrade as needed to address a variety of skills with the children in your life. Maybe they need to work on tool use such as scissor cutting, hole punching, and lacing or maybe they need a more simplified version where lacing or wrapping is the only skill needed to complete.

  1. Shamrock Lacing Crafts- I just LOVE everything about this Shamrock Lacing Craft! It includes cutting skills, hole punching skills, bilateral hands skills to lace around the shamrock, pinch grasp and bilateral hand skills to pinch and push the yarn through the eyeholes, and lastly, eye-hand coordination skills to organize hand and finger movements to lace this craft while also following a sequence pattern. OT practitioners will LOVE this one too as it can easily be upgraded and downgraded as needed to make it a great intervention activity. Oh, did I mention it is rainbow colored too? So festive! 

2. This Shamrock Lacing Craft is a simple lacing craft for younger kiddos to engage in and practice some fine motor precision and bilateral coordination while they push and pull the lace through the holes and don the shamrock with an outline lace. 

3. Here is a different version of the Yarn Weaving Shamrock Craft that includes yarn wrapping, but you loop the lace around the outer edge of the paper plate that has the shape of as shamrock cut out of the middle. It’s a fun visual effect and there’s no need for a hole punch with this one!

Sensory shamrock crafts:

We have to mention sensory crafts that can easily be created with the use of shamrocks.

  1. Shamrock Balance Beam- You can have a child cut out the shamrocks themselves so they can take this fun Shamrock Balance Beam Craft home. Balance beams are an easy way to incorporate some vestibular input into the day of a child, allowing them to refocus, improve behavior and impulsivity, regulate their arousal level, improve overall attention, gain better balance and help with their posture. 

2. Making these Salt Dough Shamrocks provides tactile input as the child can work on making the dough, molding the dough, and cutting the dough to create festive shamrocks that can easily be turned into ornaments. 

3. Shamrock Play and Craft provides light tactile input as the child smears and moves the shaving cream around on a heavy weight paper shamrock to color it…it’s something similar to puffy paint.

Now it’s time to go gather your supplies and get your shamrock crafting on for the holiday.  This lucky round-up will make for productive use in the therapy room or just for enjoying at home. Good luck and happy crafting as you work with kiddos on building important skills that are golden in motivation and productivity!

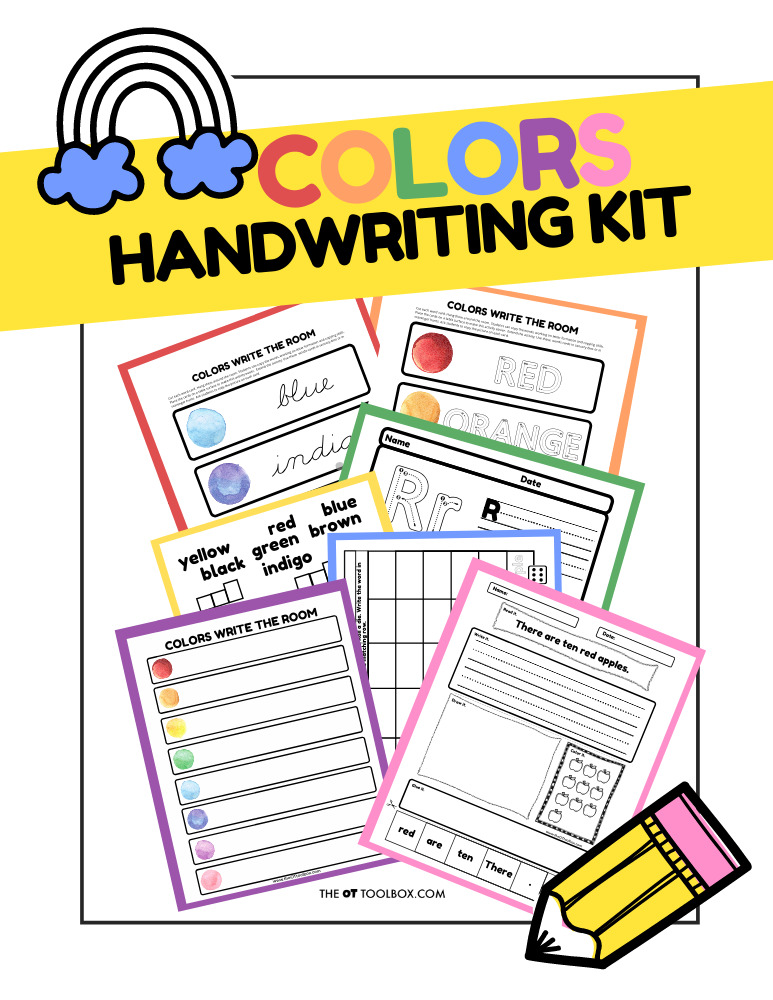
Prefect for this time of year is our Colors handwriting kit! Celebrate the colors of the rainbow with this motivating and engaging handwriting tool:

Colors Handwriting Kit

Rainbow Handwriting Kit– This resource pack includes handwriting sheets, write the room cards, color worksheets, visual motor activities, and so much more. The handwriting kit includes:

  • Write the Room, Color Names: Lowercase Letters
  • Write the Room, Color Names: Uppercase Letters
  • Write the Room, Color Names: Cursive Writing
  • Copy/Draw/Color/Cut Color Worksheets
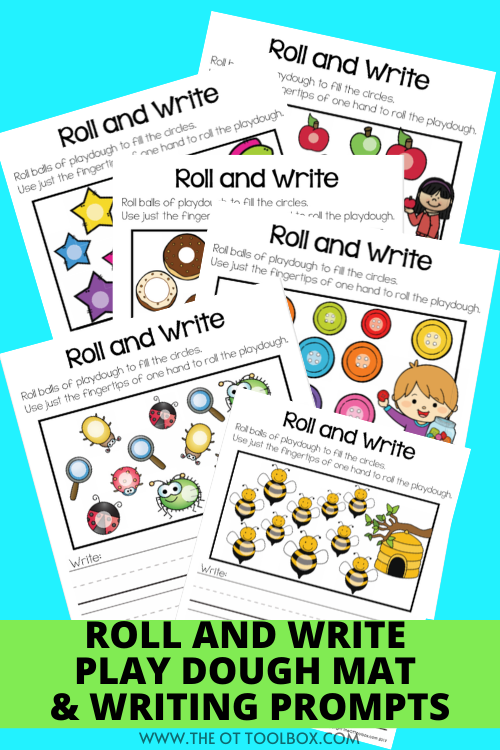
  • Colors Roll & Write Page
  • Color Names Letter Size Puzzle Pages
  • Flip and Fill A-Z Letter Pages
  • Colors Pre-Writing Lines Pencil Control Mazes
  • This handwriting kit now includes a bonus pack of pencil control worksheets, 1-10 fine motor clip cards, visual discrimination maze for directionality, handwriting sheets, and working memory/direction following sheet! Valued at $5, this bonus kit triples the goal areas you can work on in each therapy session or home program.

Click here to get your copy of the Colors Handwriting Kit.

Regina Allen

Regina Parsons-Allen is a school-based certified occupational therapy assistant. She has a pediatrics practice area of emphasis from the NBCOT. She graduated from the OTA program at Caldwell Community College and Technical Institute in Hudson, North Carolina with an A.A.S degree in occupational therapy assistant. She has been practicing occupational therapy in the same school district for 20 years. She loves her children, husband, OT, working with children and teaching Sunday school. She is passionate about engaging, empowering, and enabling children to reach their maximum potential in ALL of their occupations as well assuring them that God loves them!

Lion and Lamb Self-Regulation Activity for Kids

lion lamb self regulation activity

This Lion and Lamb Self-Regulation Activity for kids is perfect for helping kids build their ability to control emotions and behaviors in a fun, spring themed way.  Use this tool to help kids adjust to difficult situations in the classroom or at home. Self-regulation is a big term. Let’s see if we can explain that term a little here and provide you with strategies to help with regulation.

Lion and Lamb Self regulation Activity

In like a lion and out like a lamb self regulation activity for kids

Here, we’re covering a fun self-regulation activity using the imagery of in like a lion and out like a lamb…typically depicting the volatile March weather. BUT, we can take that metaphor and relate it to the story emotions using lion terms like fast, loud, tearing, roaring, etc. and the soft and quiet emotions we relate to a lamb: soft, quiet, calm, etc.

When learners use those terms to identify their own feelings and emotions, we give them the words to describe how they feel. We also provide a visual imagery of how their body looks both from the inward and outward perspectives. This is a powerful concept for kids and one that can take the self-regulation process to the next level of automaticity.

This lion and lamb activity is a self-regulation activity that kids will love for understanding emotional regulation, self-control, and strategies to help them manage their emotions and behaviors. with a cute lion and lamb craft.

Occupational therapy and self-regulation

In occupational therapy, self-regulation activities can play a big part in treatment interventions. Kids can really struggle with emotional control or mindfulness in a situation in a way that impacts their functioning. Understanding how sensory processing plays a part in regulation and behaviors is part of the occupational therapy self-regulation intervention plan.  

Occupational therapists can help parents, teachers, and children understand what is going on behind big emotions or big behaviors. They can help them see that self regulation strategies can make a huge difference in paying attention and learning in the classroom or completing tasks that need to be done at home. 

Self-regulation is a difficult skill for many children.  Kids of all ages and developmental levels have a need to build on their self-regulation skills. Building self-regulation skills allows kids to deal with their emotions in appropriate and functional ways.  

When a child is able to control their emotions, they can adjust to situations while managing their feelings and behaviors.  Here is more in-depth information about self-regulation.

This self-regulation activity helps children understand and put words into the ways their body and mind may be reacting to certain situations.

Lion and Lamb Self-Regulation Activity 

This post contains affiliate links.  

Lion and lamb self-regulation activity for kids

Using a lion and lamb metaphor is a concrete way for kids to learn about and understand self-regulation.  Many times, kids understand when their body or brain is not in control.  Situations can get away from a child, when they are unable to react or respond in an appropriate manner. 

Kids can use the idea of a lion and lamb to understand different ways that they might be feeling.  This activity should be done in a separate time from breakdowns or tantrums.  When a child is calm and open to talking about previous situations, sit down with the child or group of children and talk about how it might feel to be a lion and a lamb.  


Self-Regulation Activity For Kids

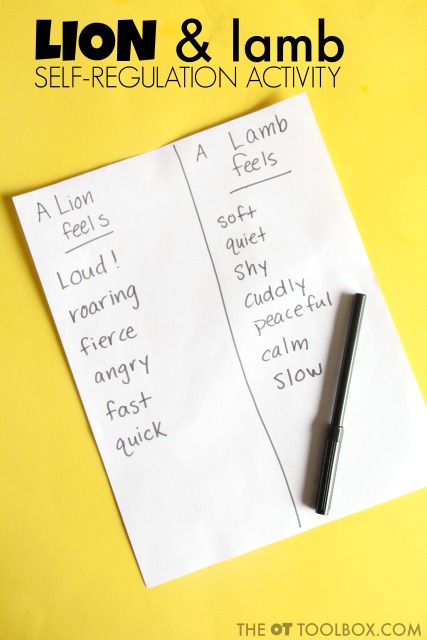
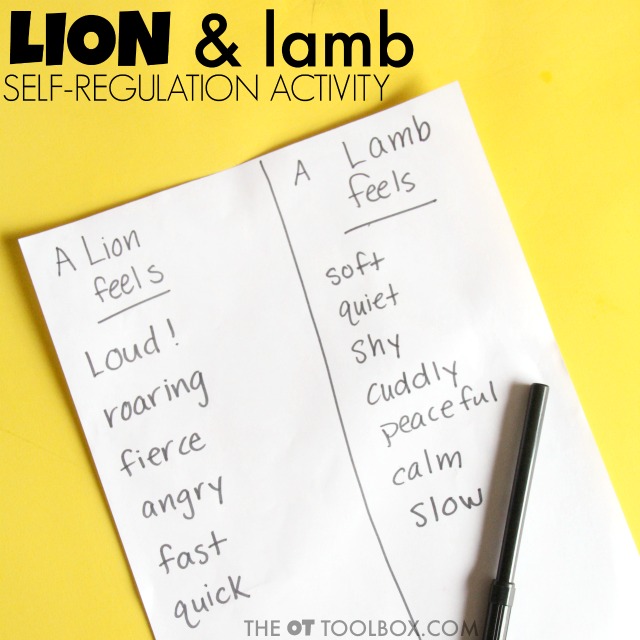
For this activity, I used just a piece of paper and divided it into two columns. This could be done on a large notebook on an easel in front of the classroom and hung as a poster in the classroom.  This paper is a great price and can be used on any easel

Use the lion and lamb imagery to work on feelings concepts and emotional learning.

Social emotional learning plays a huge role in how we act, or behave. It’s all part of that self-regulation piece that impacts learning, interaction with others, and daily functioning.

I asked my preschooler and first grader how a lion might feel and how a lamb might feel.  We talked about how lions are load and fast and how a lamb is calm and quiet.  As they mentioned describing terms, I just jotted them down on the columns. 

Then, we looked at the whole list for each animal.  At this point, you can talk with the class about how we all feel all of these ways at one time or another.  Sometimes we feel soft-spoken and slow and other times we feel loud and “roar-y”!

Self-regulation is adapting to and responding to sensory, emotional, and cognitive input.  The way our body and mind acts and thinks can get stuck if we don’t use our self-regulation abilities. Below, you will find a list of self-regulation strategies. They can be incorporated into occupational therapy’s self-regulation suggestions, or used to meet the child’s needs with adapting to and responding to sensory/emotional/cognitive input.

Use the lion and lamb metaphor to help kids adjust in appropriate ways.  You can tell your child or students that there are times that it is appropriate to “be a lion” and there are times that it is appropriate to “be a lamb”.  

in like a lion out like a lamb craftS

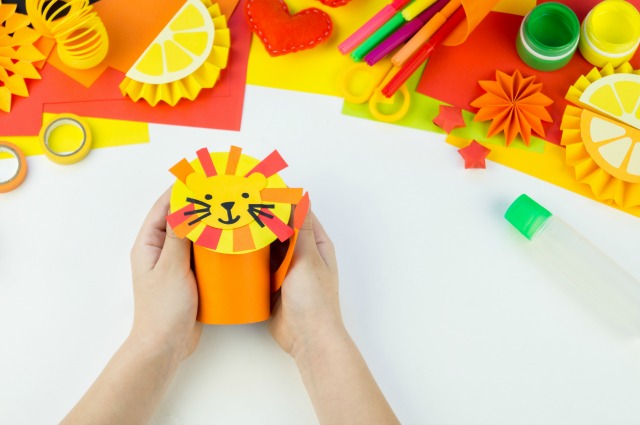
Lion craft to use as a self-regulation activity for kids

Then, take the discussion further by incorporating a lion and lamb craft.

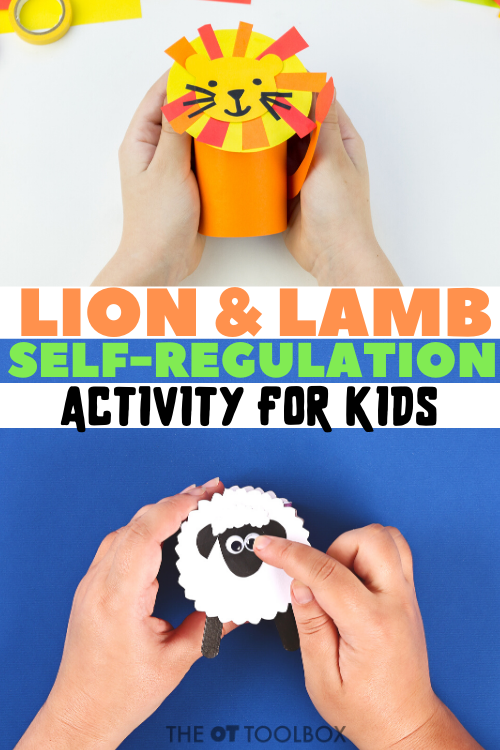
  • Some ideas are using toilet paper rolls to make a lion and a lamb. Kids can work on the fine motor skills to cut out paper parts and glue them onto the toilet paper roll.
  • For some kids, the crafting experience can be an exercise in self-control, too!

These lion and lamb themed activities would be another great way to incorporate a lion and lamb theme into discussion with your kids or classroom:  

  1. Make a pine cone lamb craft while talking about the qualities of a lamb. (Fireflies and Mudpies)  
  2. Use a lion and lamb ten frame to work sneak address math concepts with the same theme. (Fun-a-Day)
  3. Make these In like a lion and Out like a lamb puppets and get creative with the imagination play. (Still Playing School)    

Talk about how “lion weather” might be blustery and fast, windy and stormy. It relates back to a loud lion that is rough, fierce, or angry.

Lamb craft as a self-regulation activity for kids

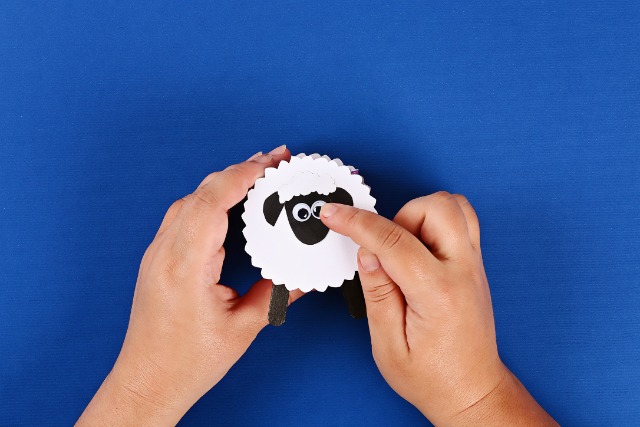
Then make a lamb craft out of a toilet paper roll. Kids can cut the paper pieces from cardstock or construction paper and work on gluing them on by copying a visual model. While crafting, discuss the qualities of a lamb, and how that relates to calm or soft voices, or peaceful and soft voices.

Another idea is to use this lamb handprint craft. Simply make a handprint using white paint and draw on the features of a lamb. Children can make the lion craft in the same way by sing yellow paint and drawing on or gluing on feature of the lion.

More Self-Regulation Activities


Next, come up with techniques to adjust to situations when the child needs to switch from a lion to a lamb or vice versa.  One strategy is using sensory tools to help calm down or speed up our bodies.  Try these sensory activities as a list of self-regulation strategies to address many different needs and interests.

Try some of these calming sensory ideas to calm down a “lion”

  • Wall push ups
  • Chair push ups
  • Carrying a stack of books
  • Pushing a laundry basket full of toys
  • Tug of war
  • Animal Walks
  • Yoga
  • Deep breathing
  • Stress toys
  • Drinking from a cup with a straw
  • A calm-down station or corner
  • Wrapping up in a blanket
  • Pillow sandwiches

Try some of these ideas to alert a “lamb”

  • Jumping 
  • Skipping
  • Trampoline
  • Jumping Jacks
  • Head Shoulders Knees and Toes
  • Icy drink
  • Clapping games
  • Spinning on a swing
  • Dancing 
  • Brain Breaks
  • Playing catch

More lion & lamb activities

More sensory heavy work activities you may like:

Proprioception Backyard Play Activities

Fall Proprioception Activities

Play Dough and Rocks Fine Motor Proprioception

Ice Cube Proprioception Activity

Spring Occupational Therapy Activities

Add these lion and lamb ideas to your Spring occupational therapy line-up. Here are more ways to keep your therapy planning full for the next few months:

Lion and lamb self regulation activities

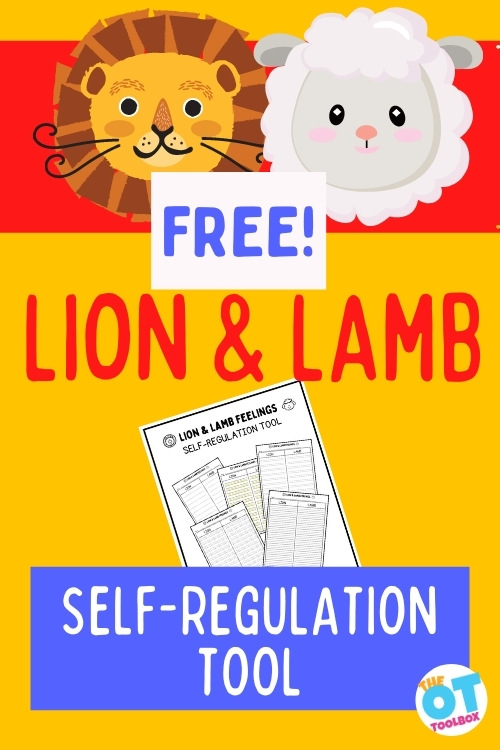
Free Lion and lamb Self Regulation Tool

Print off this self-regulation PDF and work on identifying areas of self-regulation with a lion and lamb theme. This is great for the month of March, but can be used any time of year using the lion and lamb imagery.

Self-regulation is a difficult skill for many children mainly because of the development happening along with outside influences in the world around them. Day to day tasks can feel very “out of ones control” to children. Add in emotions, communication struggles (We all struggle to communicate our feelings and emotions at one time or another!)

Kids (and older…adults included) of all ages and developmental levels have a need to build on their self-regulation skills. Building self-regulation skills allows kids to deal with their emotions in appropriate and functional ways.

When a child is able to control their emotions, they can adjust to situations while managing their feelings and behaviors.

Using a lion and lamb metaphor is a concrete way for kids to learn about and understand self-regulation. Many times, kids understand when their body or brain is not in control. Situations can get away from a child, when they are unable to react or respond in an appropriate manner.

Kids can use the idea of a lion and lamb to understand different ways that they might be feeling. This activity should be done in a separate time from breakdowns or tantrums. When a child is calm and open to talking about previous situations, sit down with the child or group of children and talk about how it might feel to be a
lion and a lamb.

How to use this self-regulation tool:

  • Ask the user to list out different ways a lion and a lamb might feel or behave. Write down different ways to describe a lion and a lamb.
  • Talk about how lions are load and fast and how a lamb is calm and quiet.
  • For younger users, consider writing down their responses as they dictate words that describe a lion or lamb.
  • Then, look at the whole list for each animal. At this point, you can talk with the client/student about how we all feel all of these ways at one time or another. Sometimes we feel soft-spoken and slow and other times we feel loud and “roar-y”!
  • Use the lion and lamb metaphor to help kids adjust in appropriate ways.
  • You can tell your child or students that there are times that it is appropriate to “be a lion” and there are times that it is appropriate to “be a lamb”.
  • Then cover various coping tools, self-regulation strategies, and other means to support potential self-regulation needs.


You’ll find 6 different paper types in this packet to incorporate handwriting needs into the activity.

Then, users can use the language that they have listed to address feelings or emotions. Create a strategy when they feel a certain way. Lion feelings might indicate a need for calming input or heavy work. Lamb feelings might need alerting input. This is a great tool to start talking about various needs and social emotional learning!

Want to add this resource to your therapy toolbox so you can help kids thrive? Enter your email into the form below to access this printable tool.

This resource is just one of the many tools available in The OT Toolbox Member’s Club. Each month, members get instant access to downloadable activities, handouts, worksheets, and printable tools to support development. Members can log into their dashboard and access all of our free downloads in one place. Plus, you’ll find exclusive materials and premium level materials.

Level 1 members gain instant access to all of the downloads available on the site, without enter your email each time PLUS exclusive new resources each month.

Level 2 members get access to all of our downloads, exclusive new resources each month, PLUS additional, premium content each month: therapy kits, screening tools, games, therapy packets, and much more. AND, level 2 members get ad-free content across the entire OT Toolbox website.

Join the Member’s Club today!

Free Lion & Lamb Self-Regulation Tool

    We respect your privacy. Unsubscribe at anytime.

    Colleen Beck, OTR/L has been an occupational therapist since 2000, working in school-based, hand therapy, outpatient peds, EI, and SNF. Colleen created The OT Toolbox to inspire therapists, teachers, and parents with easy and fun tools to help children thrive. Read her story about going from an OT making $3/hour (after paying for kids’ childcare) to a full-time OT resource creator for millions of readers. Want to collaborate? Send an email to contact@theottoolbox.com.
    Teaching Time to Kids

    tips to teach kids to tell time

    Part of executive functioning skills that is so important in every functional task, is teaching time to kids. The ability to tell time on a clock is not easy, and it can be very abstract for some children. However, time telling is a skill needed for activities of daily living and IADLs. In this blog post, you’ll find tips for teaching time skills to kids, and find out how to tell time on a clock using hands-on learning approaches.

    Teaching Time to Kids

    For parents, the task teaching kids to tell time is just part of parenting. But when we teach kids to tell time, there are many other skill areas to consider.

    Learning time on a clock can be very challenging visually and cognitively.

    Concepts such as executive functioning, fine motor skills, size awareness, and even handwriting play into learning about time. Here, we’ll cover how occupational therapy plays a role in learning about telling time.

    Teach kids to tell time with these hands-on multisensory strategies that address the impact of other underlying issues related to telling time.

    Working on how to tell time on a clock with kids? Try these OT-approved ideas…

    Occupational Therapy and telling Time

    In occupational therapy, we work on time management as well as other executive functioning skills. Time in OT is an important factor. We also address self-care and any occupation that takes up a person’s day. So, when daily occupations need to be accomplished throughout the day, or in preparation to leave the house, time is a big component.

    Time management refers to the ability to estimate how much time one has to complete a task. Time management also includes management of the time one has to complete a task in a given time.

    Time management impacts occupational performance because one can overestimate how much time they have to complete a task. Or they can underestimate how long a task takes to complete. Both of these scenarios result in poor performance of the task.

    Occupational therapists can address time in these ways:

    • The amount of time needed to accomplish a task
    • The amount of time needed to prepare for a task
    • Completing tasks in a given amount of time
    • How to tell time on a clock of various types- digital, analog, watch, phone apps, etc.

    Each of these areas relate to executive functioning and time management. There are tools and strategies that can help with these areas, such as timers, apps, calendars, planners, task checklists, visual schedules, and focusing on each of the executive functioning skills in a regimented manner (The Impulse Control Journal breaks this down for skill-building).

    Occupational therapists in the schools can work with kids on learning to tell time.

    For school-based OT practitioners, there can be an added challenge in the time telling saga. Children learning to tell time are tackling a very abstract concept.

    Learning to tell Time and Visual Perception

    Students that struggle with visual perception can be challenged by worksheets with faces of clocks. This can lead to difficulties in writing clock times or identifying time on the clock.

    When it comes to how to tell time on a clock, there are a lot of visual perceptual skills involved!

    • visual discrimination
    • form constancy
    • visual attention
    • visual memory

    Typically, in second grade math, learning to tell time on a clock involves worksheets, packets, and math pages that ask students to match the analog clock to the digital clock.

    But in second grade, we may see students on the OT caseload struggling with visual attention, visual memory, visual discrimination, letter and number reversals, form constancy, and other visual processing issues.

    The clock face has many visual details that can impact working memory, specifically related to visual discrimination, visual attention, form constancy (many clocks have very different number fonts). Some clocks have Roman numerals that throw another wrench into the learning.

    For our learners with visual perception and visual motor integration issues, clock worksheets are a real struggle.

    Because of these considerations, and the others listed below, how to teach a child to tell time can vary so greatly depending on the needs of the individual.

    Learning to tell time and Handwriting

    Using a pencil to write clock times and minute or hour hands onto clock forms.

    Second grade math involves many clock worksheets. The pencil skills needed to write time, mark hour and minute hands on paper clocks, and writing numbers can impact teaching time to kids.

    You can really work on how to tell time on a clock by targeting the number identification skills.

    Number formation is a big issue when it comes to completing those clock worksheets, and an area in which the school-based occupational therapists can support the students on their caseload.

    Learning tell time and fine motor skills

    Fine motors skills involved with moving clock hands on model clocks in the classroom.

    Moving the minute hand and hour hand on a clock model helps kids understand how time moves, how much time is in a day, and how to identify sections of time: hours, minutes, seconds, half-hours, quarter hours, and days.

    These models help kids grasp the concept of time. But for the student with fine motor challenges, understanding clocks and telling time on a model clock is a struggle.

    To move the clock hands on a model clock, fine motor skills are needed:

    • Finger isolation
    • Separation of the sides of the hand
    • Precision
    • Graded grasp and movements
    • Motor planning

    The visual of a model clock can become more challenging when these fine motor issues exist.

    Learning to tell time and executive function

    Time and learning how to tell time on a clock is a big part of executive function…and executive functioning skills plays a major role in telling time.

    Kids learn to tell time, typically in second grade, however, without consistent use of analog clocks, kids lose that ability to tell time. When it comes to the time management aspect of executive functioning skills, there is a lot to be said for watching the minute hands tick around the clock as time passes.

    The passage of time on a digital clock just doesn’t have the concrete visual impact that the ticking hands has on the face of an analog clock.

    Executive functioning skills such as attention, foresight, task completion, and others play a role in telling time and managing time.

    We talked about time blindness in our post on adult executive functioning issues. However, time blindness impacts all of us at one time or another, and all ages, too.

    Also, the number of minutes in five minute increments and the number of minutes in an hour or quarter hour can be a challenge for those with executive functioning skills to recall. Working memory plays a big part in math skills!

    The abstract concept of teaching time on a clock

    Kids not exposed to analog clocks. This makes an abstract concept even more abstract! Our kids that need concrete examples and visual cues to learn will struggle with this concept of learning to tell time on a clock.

    Other kids need concrete examples in learning. time doesn’t offer that option.

    Teaching kids how to tell time can start with the process of discovering the parts of a clock.  

    Many of our young learners are exposed to only the digital clock of an Iphone, a microwave clock, stove clock, or the digital time shown on a television cable box, for example.  The important skill of learning to tell time is just not a part of the typical day for many learners.

    However, what is important is the concept of time. We all have daily routines that revolve around the passage of time. 

    teach how to tell time on a clock with multisensory activity

    Below, you’ll find resources for time teaching in the classroom or home. School based occupational therapy professionals can use these concepts and hands-on time activities to support time management needs, or to work in a push-in OT session in school-based OT services when children are learning time in school.

    Or, use these interactive telling time activities to support learning how to tell time on a clock as part of the child’s educational curriculum.

    A few easy ways to make learning about time more interactive AND supporting development of underlying areas is through the fun activities listed here.

    Try some of these clock activity ideas to teach kids how to tell time on a clock:

    • Create a rock clock for heavy work input that supports the motor planning work needed for moving clock hands
    • Try a telling time apps that can support time management needs
    • Address time concepts of am and pm to help with executive functioning skills.
    • Use sidewalk chalk to create a large clock. This is a great activity for offering resistive feedback when learning about the hands of the clock
    • Use a timer to focus on time management and the passage of time needed to complete a given task.
    • Use clock puzzles
    • Work on the number of hours on a clock using playdough and a clock playdough mat
    • Young children can learn about size awareness to understand the big hand and the little hand
    • Use a hula hoop to create a large clock to focus on motor planning and gross motor skills in a clock game
    • Teach the passage of time by using a dry erase marker to color on the face of a clock. Students can see how the minute hands moves within the estimated time as they perform the task at hand.
    • Another clock game is to create a paper clock and use paper hour hand and minute hand to focus on fine motor skills and bilateral coordination skills
    • Move the hands of a clock and have a dance party. When the clock reaches a certain time, the students can dance.
    • Play tell time games and other clock games: Ask students what time of day they  might eat breakfast, play outside, get on the school bus, etc.
    • Make a bottle cap clock for movement and learning with time telling (see below)

    Teach Time with a Bottle Cap Clock

    This bottle cap clock was a fun way to teach my kids how to tell time on a clock. We practiced time telling with recycled bottle caps for hands on learning while building a clock.

    My daughter was taught time telling this past year while in the first grade, but it was fun to work on the parts of a clock and to practice time telling to the minute.  As she heads into second grade, she’ll be learning to tell time to the minute, so we added a minute component to our time telling with the bottle caps.

     
    Teach kids how to tell time with hands on learning in this first grade or second grade time telling activity using recycled bottle caps.  Build a clock and practice telling time!


    How to teach kids how to tell time: 

    This post contains affiliate links.  

    We love to use bottle caps in learning activities: stamping sight wordsletter learning, or 10s counters, and are excited to add this activity to this month’s Learning with Free Materials series, part of the 31 Days of Homeschooling Tips as we blog along with other bloggers with learning at home tips and tools.

    Teach kids how to tell time with hands on learning in this first grade or second grade time telling activity using recycled bottle caps.  Build a clock and practice telling time!

     To begin this time telling activity, I wrote the numbers 1-12 on bottle caps using a  permanent marker.  Find a large round placemat/charger and have your child work on positioning the numbers as they appear on the clock.  

    In this hands-on clock building activity, first show your child how to place the 12, 3, 6, and 9 on the clock face.  This is a good way to teach the concept of quarter hours and half hours, as well as quarter after, quarter to, and half-past.

    Show them how the other numbers can fit within the numbers 3, 6, and 9 on the clock. The space left between 12 and 3 can hold the numbers 1 and 2 and so on.

     Use the marker to write the minute numbers on the opposite side of the bottle caps.  So, when they flip over the number one, it will have “5” written on the other side.  Number 2 will have “10” written on the other side.  

    Once they’ve built their clock, they can turn over all of the bottle caps and count out the minutes by fives.

    Teach kids how to tell time on a clock with multisensory clocks
    Teach kids how to tell time with hands on learning in this first grade or second grade time telling activity using recycled bottle caps.  Build a clock and practice telling time!

     We then used a round glass dish to build the clock.  

    Use foam craft sticks like for the minute and hour hand.  Cut one shorter than the other to teach about size awareness of the different hands on the clock.

    Be sure to have your child identify the names of the hour hand and minute hand as part of this learning and clock building activity.  

    On the glass plate, pour a small amount of water.  The added sensory component of the water is fun for a spin on this clock building task, because the bottle caps and the foam craft sticks will stick to the glass dish with the water.  Practice moving the hands around to tell different times.

    Teach kids how to tell time with hands on learning in this first grade or second grade time telling activity using recycled bottle caps.  Build a clock and practice telling time!

    how to tell time on a clock

    After you’ve targeted the underlying skills outlined above, and used the multisensory clock activities above, you can move on to how to tell time on a clock with worksheets and real clocks!

    Target skills like:

    • hour hand
    • minute hand
    • second hand
    • number placement on a clock
    • telling time on the hour
    • telling time on the half hour
    • telling time on the quarter hour
    • learning about elapsed time

    What are your favorite ways to teach kids how to tell time on a clock?

    Colleen Beck, OTR/L has been an occupational therapist since 2000, working in school-based, hand therapy, outpatient peds, EI, and SNF. Colleen created The OT Toolbox to inspire therapists, teachers, and parents with easy and fun tools to help children thrive. Read her story about going from an OT making $3/hour (after paying for kids’ childcare) to a full-time OT resource creator for millions of readers. Want to collaborate? Send an email to contact@theottoolbox.com.

    Spring Occupational Therapy Activities

    Spring occupational therapy activities

    There might just be a turn in the weather! Spring therapy takes on a whole new meaning with these Spring occupational therapy activities! With a new season comes a new set of OT activities for the school-based occupational therapist or the OT working in early intervention or an outpatient clinic. I’m excited to share an update to our Spring Occupational Therapy packet that now has a TON of therapy tools and Spring activities to develop various skills like fine  motor, gross motor, visual perceptual, handwriting, sensory tolerance and play, and more.

    Use these Spring OT ideas in everyday play!

    If you are specifically looking for SPRING CRAFTS that support occupational therapy goals, we have that, too!

    Spring occupational therapy activities for helping kids develop skills, in school based OT, early intervention, and at home.


    Spring Occupational Therapy Activities

    Looking for fun ways to add a creative spin to therapy sessions this time of year? You’re in luck! This week on The OT Toolbox, you’ll find loads of Spring activities. Each day, we’re rounding up activities, ideas, strategies, and tips that all have a Spring theme in common. Use these activities in your therapy plans to meet the specific needs of kiddos. 

    You’ll find tons of activity ideas in our Spring Fine Motor Kit, too.

    Here’s what you can find when it comes to Spring Occupational Therapy activities here on The OT Toolbox:

    Spring Fine Motor Activities– Spring crafts, spring fine motor precision activities, sorting insects, mixing colors, and beading rainbows! These Spring fine motor activities develop hand strength, coordination, pincer grasp, and a functional pencil grasp!

    Spring Gross Motor Activities – Work on balance, coordination, core strength, and motor planning skills with these gross motor activities for Spring. Kids will love the therapy slide decks that challenge skills (great for pediatric physical therapy, too!)

    You’ll love the Spring balance beams, sequencing activities, and more (with shoulder stability, balance, coordination, and core strengthening activities at the focus!)

    Spring Sensory Activities– these Spring sensory play ideas include sensory bins and heavy work activities that are great for sensory diets. While you’re at it, be sure to grab these Spring OT tools:

    • Spring Sensory Stations– great for building a sensory walk with a Spring theme
    • Outdoor Sensory Diets– so much information about supporting sensory needs through being outdoors.
    • Sensory Garden– Create a sensory garden on a large scale or small scale to support sensory needs through gardening this Spring.

    Spring Visual Perception Activities– Use these Spring OT ideas to support visual perceptual skills like visual discrimination, visual closure, form constancy, figure ground, and other visual motor skills with a Spring theme.

    Spring Handwriting Activities– School based OTs will love these handwriting occupational therapy ideas to support legibility, functional pencil grasp, writing on lines, and letter formation.

    So, be sure to check out each link above to load up on creative ways to promote healthy development of kids!

    Use these Spring Occupational Therapy activities to promote skills like fine motor work, gross motor skills, bilateral coordination, eye-hand coordination, and more, all with a spring theme!


    Working on occupatioanl therapy goals? Here are OT activities designed to use a spring theme for fine motor skills, gross motor skills, handwriting, visual motor skills, sensory processing, bilateral coordination, and more.


    There’s more…
    This time of year, one of our more popular products here on The OT Toolbox is our Spring Fine Motor Kit!

    Colleen Beck, OTR/L has been an occupational therapist since 2000, working in school-based, hand therapy, outpatient peds, EI, and SNF. Colleen created The OT Toolbox to inspire therapists, teachers, and parents with easy and fun tools to help children thrive. Read her story about going from an OT making $3/hour (after paying for kids’ childcare) to a full-time OT resource creator for millions of readers. Want to collaborate? Send an email to contact@theottoolbox.com.

    Flower Crafts for Kids

    Flower crafts

    Flower crafts are a great occupational therapy tool to develop fine motor skills, visual motor skills, executive functioning skills, and other child development areas. Here, you’ll find creative ways to support skills through craft ideas. Add these ideas to your Spring occupational therapy activities or your Spring crafts.
    Flower crafts to use in occupational therapy or in the preschool classroom or home to help kids develop fine motor skills.

    Flower Crafts for Occupational Therapy

    I love these flower crafts to help develop fine motor skills. By tearing paper, cutting different textures, and using glue bottles children develop hand strength, coordination, and dexterity.

    Spring is in the air.  And depending on where you live, lots of heat or lots of rain!  Let’s celebrate the beginning of May with flowers.  These are our favorite flower crafts that we have done, and you may have missed.  We’ve added some of our favorite flower crafts for kids from around the web, too.  Click around and check out a few new blogs and find lots of flowery fun for the kids!

    Start with some of these flower crafts to support the development of scissor skills, eye-hand coordination, and precision:

    • Cupcake Liner Flowers– Snip the cupcake liners and develop scissor skills.
    • Foam Flower Craft– Use materials from the dollar store to work on eye-hand coordination and finger isolation.
    • Cupcake Liner Sunflower Craft– Work on precision, pincer grasp, in hand manipulation, and separation of the sides of the hand with this sunflower craft.
    • Gift Bow Stamp Art- Use a gift bow to make fun flowers. This is a great heavy work and process art activity for sensory input and eye-hand coordination skills.
    • Paper Clip Flowers and Play Dough– This fine motor strengthening activity uses flowers made from paper clips for a great hand strengthening activity.
    • Pipe Cleaner Flower– This flower craft is a great fine motor activity for kids, but also works as a DIY zipper pull to help children become more functional with self care.

    Kids will also love making these flower snacks, too, for a full flower theme in therapy or at home!


    Flower crafts for kids to make
     

    Flower crafts for kids

    Cherry Blossom craft– This flower craft uses clothes pins and crumbled tissue paper. It’s a great fine motor activity for developing hand strength.
     
    You’ll find other Cherry blossom crafts here.
     
    Stamped art flower- Cut various textures and grades of paper to work on fine motor skills with this stamped flower craft.
     
     
    Recycled artwork spring flower craftThis flower craft uses recycled materials so kids can cut different textures.
     
    Feather flower craft-This flower craft supports the development of sensory challenges. Include various textures and sticky fingers by gluing feathers and painting.

    Stamped flower craft from Happy Hooligans 
     
    Tissue Paper flower bouquet from Home Grown Friends
     
     
    Magazine roses– Use recycled magazines and straws to make these magazine roses. When kids roll the magazine paper, they are building bilateral coordination skills, and hand strength.
    Nature Hunt Flower craft- This tulip craft uses real flowers plus crafting materials but offers children a chance to get outside for much-needed sensory and calming input in nature.

    Paper Plate Daffodils from Here Come the Girls

    Marbled Coffee Filter Flower from Frogs and Snails and Puppy Dog Tails

     
    Egg carton tulip craftThis Springtime tulip craft has many textures and kids can use the idea to make a process art flower craft!
     
    Textured tissue paper flower from Buggy and Buddy


    Popsicle Stick Craft Tulips from All Done Monkey
     
    Mother’s Day Flower crafts– You’ll find more flower crafts in this Mother’s Day craft list. Plus, use the ideas in this post in your own Mother’s Day crafting!
     

    This flower craft uses items from the recycle bin. Add it to some other recycled crafts for Earth Day fun while building skills.

    What is your favorite flower?  Have you made a craft with that flower?  

    A few more Flower Crafts and Activities

    More flower themed crafts and activities can be found in our Spring Fine Motor Kit! Designed to build fine motor strength, dexterity, endurance, and manipulation of tools like crayons, markers, glue bottles, and scissors, the Spring Fine Motor Kit has you covered with flower tissue paper crafts, flower push pin activities, and writing flower names to develop handwriting skills.

    Read more about the Spring Fine Motor Kit.

    Colleen Beck, OTR/L has been an occupational therapist since 2000, working in school-based, hand therapy, outpatient peds, EI, and SNF. Colleen created The OT Toolbox to inspire therapists, teachers, and parents with easy and fun tools to help children thrive. Read her story about going from an OT making $3/hour (after paying for kids’ childcare) to a full-time OT resource creator for millions of readers. Want to collaborate? Send an email to contact@theottoolbox.com.