Colleen Beck, OTR/L is a pediatric occupational therapist and the owner and author of The OT Toolbox website. She manages all of The OT Toolbox social media accounts and runs the popular newsletter.
Read about Colleen's experience and career as an occupational therapist, including how The OT Toolbox began on our About The OT Toolbox page: https://www.theottoolbox.com/about-us/
Colleen created The OT Toolbox in 2011 and since then has written thousands of blog posts designed to support therapy providers, educators, parents, counselors, admin, and caregivers in promoting the healthy development of kids.
Check out Colleen's blog posts below:
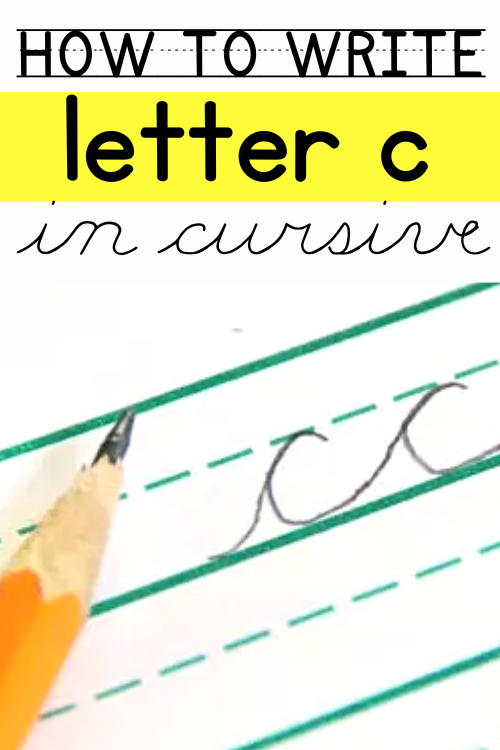
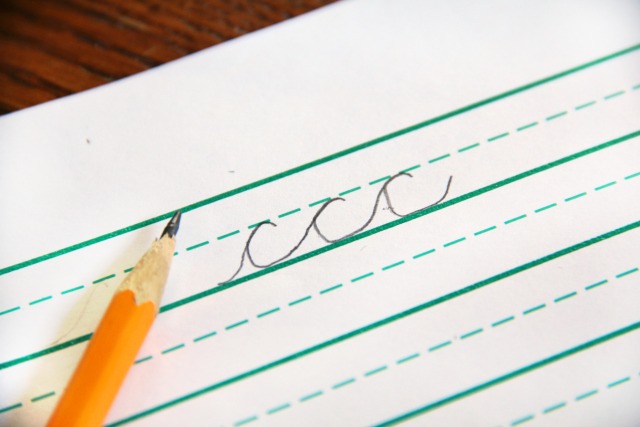
we’ve covered many cursive letter resources here on the site, and this blog on how to write c in cursive is one of the top! There’s a reason why: Cursive c is a building block for forming other cursive letters. After learning how to make cursive c, students can then easily transition to several other cursive letters! Let’s get started with how to teach cursive, starting with the lowercase letter c.
Amazon affiliate links are included in this blog post. As an Amazon Influencer, I earn from qualifying purchases.
How to Write C in Cursive
Cursive handwriting can be a difficult thing to teach kids. Today, I’m starting a new series on how to teach cursive letters in fun and creative ways.
In this series, we’re starting with how to write cursive c first.
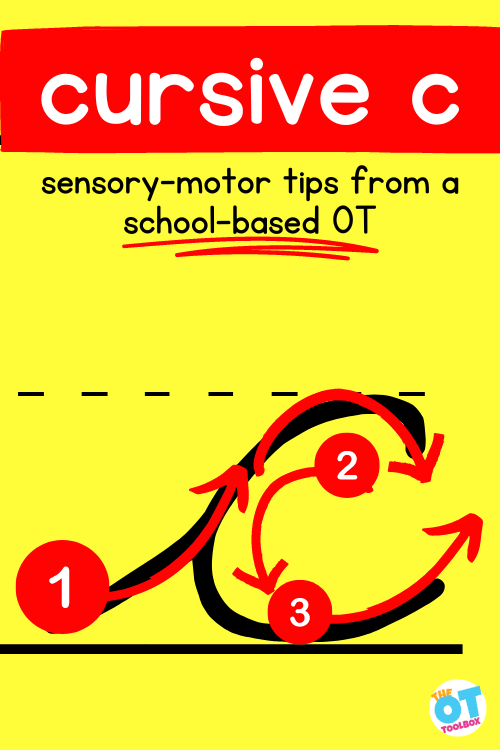
Letter “c” is one of the first letters that kids are taught when learning cursive. The letter is directly related to it’s printed counterpart. The curve of the letter is one of the most basic pre-cursive strokes that are made and helps to build several other cursive letters (a, d, g, q, and o).
In the Loops and Other Groups cursive writing program, these letters are called Clock Climbers. They are the letters a, d, g, q, o which start with the cursive c formation. The lines “climb a clock” around a curve.
The fact is that fluent cursive writing predicts high level spelling and composing skills, more so than manuscript or typing. And, in fact, studies show that test completed in cursive receive higher scores than those completed in manuscript.
First up is how to make letter c in cursive. This series will most definitely not be in alphabetical order for many reasons, mainly because the cursive writing alphabet is typically not taught in alphabetical order. Rather, the letters are taught in groups of related pencil lines. This supports the motor plan of forming each individual letter and helps with carryover skills. Read more about this concept in our post on cursive letter families.
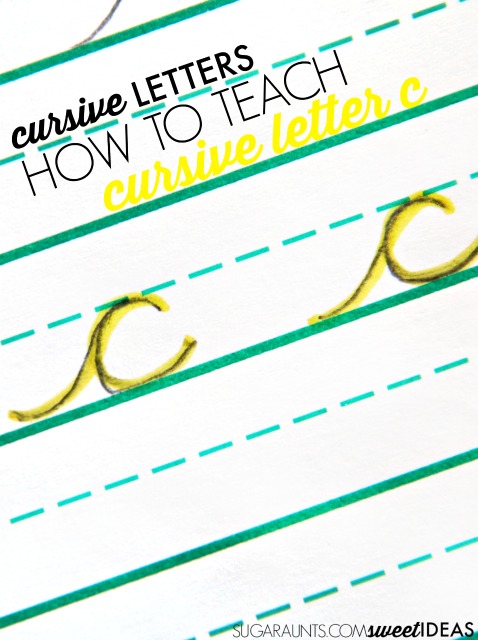
Let’s start with addressing cursive letter c!
In this blog post, images show use of raised line paper. While this type of adapted paper isn’t a must, the raised lines support development of line awareness when teaching this lowercase cursive letter formation.
How to Teach c in Cursive:
This post contains affiliate links.
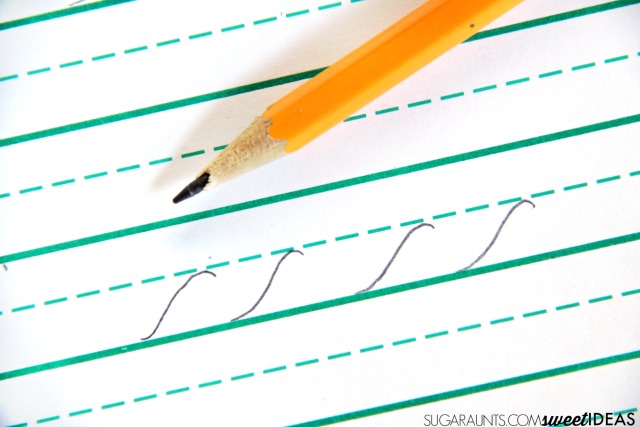
Beginning Upstroke
The beginning upstroke of the beginning lines in cursive “c” can be practiced in creative ways in order to help with re-trace when forming the curve of the letter.
There is research that shows teaching the cursive letter c like a cursive “i” with a hooked top, the carryover of legibility is better.
Re-trace-
After forming the up-stroke of the letter, the curved top, and the re-trace back to the bottom of the letter, it is helpful to work on sliding the pencil along the baseline of the paper to develop letter connectors and to improve legibility. Read about tips to teach cursive letter connectors. The letter c has a re-trace at the beginning of the letter and traces back over the initial letter connection from the start of the letter.
Practice-
The final step of writing cursive c is to practice, practice, practice! When it comes to writing c in cursive, there are many tips that you can use. Try the activities listed below as well as these practice tips:
Write Cursive C with Gross motor practice- Use whole body movements to practice formation. This can occur on the ground with chalk, on a dry erase board at the vertical, in the air with air writing, or using the ideas listed below.
Rainbow writing- The child writes the letter in one color and then trace over it with another color. Continue to trace over the letter with each color of the rainbow. This can be done on a large scale with chalk, markers, etc.
Tips for helping kids stop at the baseline when writing the letter “c”:
Use a verbal prompt to bump the bottom line. Trace the baseline with a highlighter for a visual prompt. Try some of these tricks for writing on the lines.
Establish a motor plan to make cursive c consistently
After cursive letter c has been taught, the next step is multisensory exposure to the motor plan to complete the letter consistently. This establishes the kinesthetic input and practice trials. We cover this in more detail in a blog post on motor planning and handwriting.
With different tactile and sensory-based movements of handwriting, repetitions allow information to be embedded in the brain.
Here are some activities to work on cursive c:
The Handwriting Without Tears program (affiliate link) promotes forming letter c without the starting stroke, making formation easier for most kids.
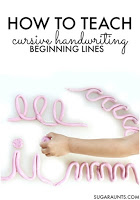
Use sensory textures to teach letter c and the strokes needed to make the letter.
Try practicing cursive handwriting and more cursive letter c practice with these creative cursive handwriting ideas like Textured Cursive Lines
The Handwriting Book is a comprehensive resource created by experienced pediatric OTs and PTs.
The Handwriting Book covers everything you need to know about handwriting, guided by development and focused on function. This digital resource is is the ultimate resource for tips, strategies, suggestions, and information to support handwriting development in kids.
The Handwriting Book breaks down the functional skill of handwriting into developmental areas. These include developmental progression of pre-writing strokes, fine motor skills, gross motor development, sensory considerations, and visual perceptual skills. Each section includes strategies and tips to improve these underlying areas.
Strategies to address letter and number formation and reversals
Ideas for combining handwriting and play
Activities to practice handwriting skills at home
Tips and strategies for the reluctant writer
Tips to improve pencil grip
Tips for sizing, spacing, and alignment with overall improved legibility
Colleen Beck, OTR/L has been an occupational therapist since 2000, working in school-based, hand therapy, outpatient peds, EI, and SNF. Colleen created The OT Toolbox to inspire therapists, teachers, and parents with easy and fun tools to help children thrive. Read her story about going from an OT making $3/hour (after paying for kids’ childcare) to a full-time OT resource creator for millions of readers. Want to collaborate? Send an email to contact@theottoolbox.com.
A final note on Cursive C
Learning cursive c is a common starting point for other cursive letters due to the beginning formations of the pencil strokes. Once a learner has cursive c down pat, you can add a single stroke or combination of pencil strokes to form cursive d, g, o, and q.
Use the strategies shared above to work on the visual motor, sensory motor, and muscle memory to create cursive letters with fluency and efficiency.
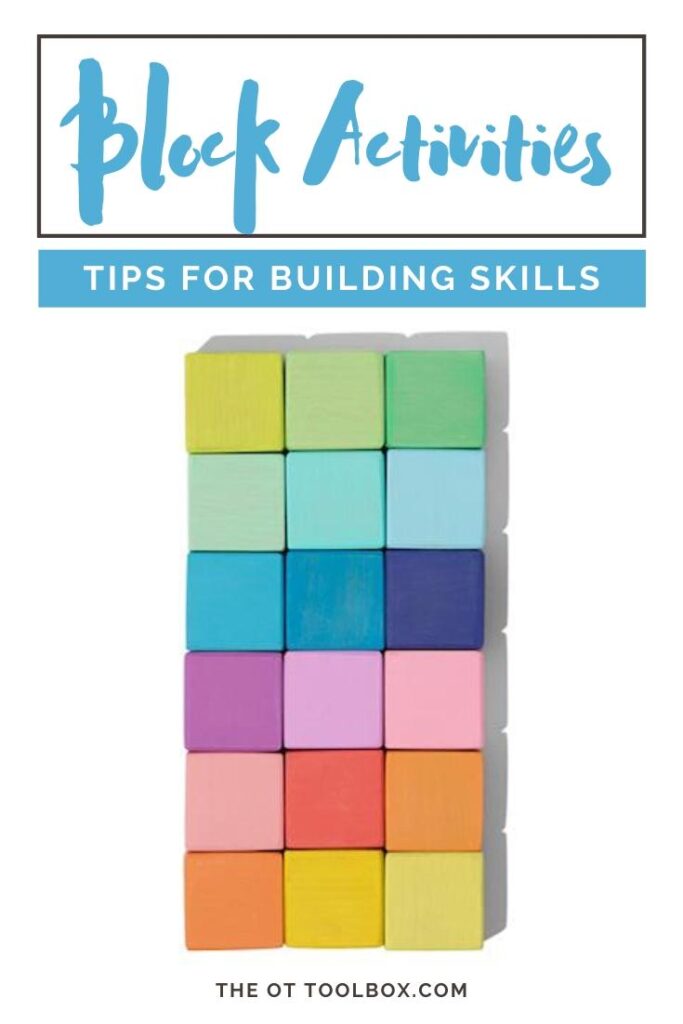
Building block activities like building block towers, and stacking blocks support development of many skills for young children. Development occurs through play and play is the job of the child. By using creative block activities in play, children can thrive in their skill development. We’ve shared specifics on fine motor skills using blocks, however, the skill-building doesn’t stop there. Here, we’ll discuss how and why building with blocks is so powerful in development of kids. We’re covering all things building block activities and exactly HOW to maximize skills like fine motor skills, visual perception, and even social emotional skills…all with toy blocks!
Most of us have strolled through the toy aisle and found a set of building blocks for kids. Building blocks come in different sizes, colors, shapes, and even patterns. Did you know, however, that despite building block activities being one powerful way to build skills, that most sets are not played with once they are in the home?
That’s right…most of the time, those building block sets just sit they’re collecting dust. Today, we’re talking all about how to use building sets with kids to build skills!
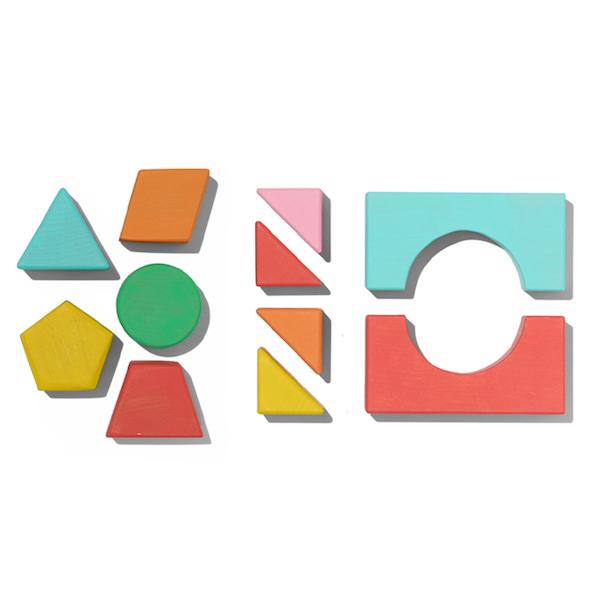
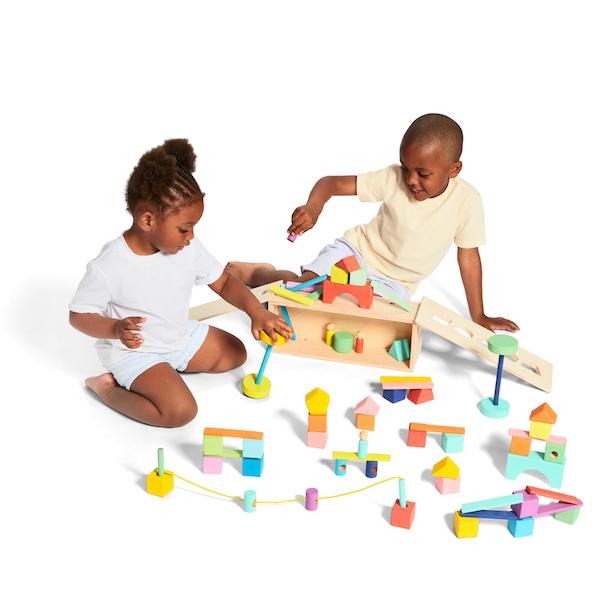
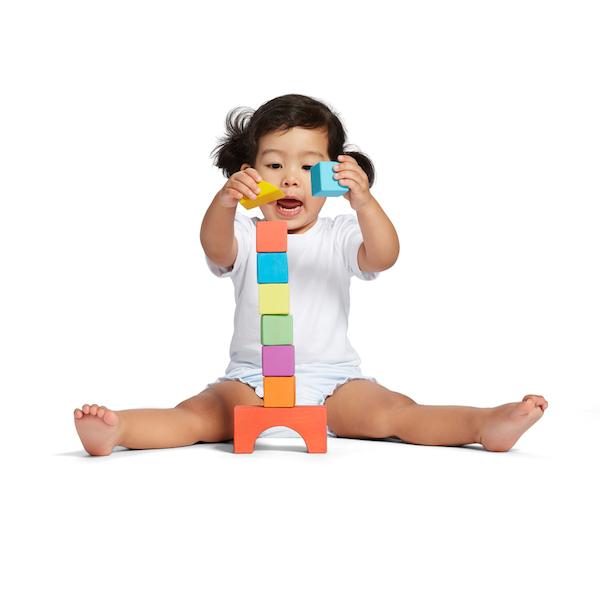
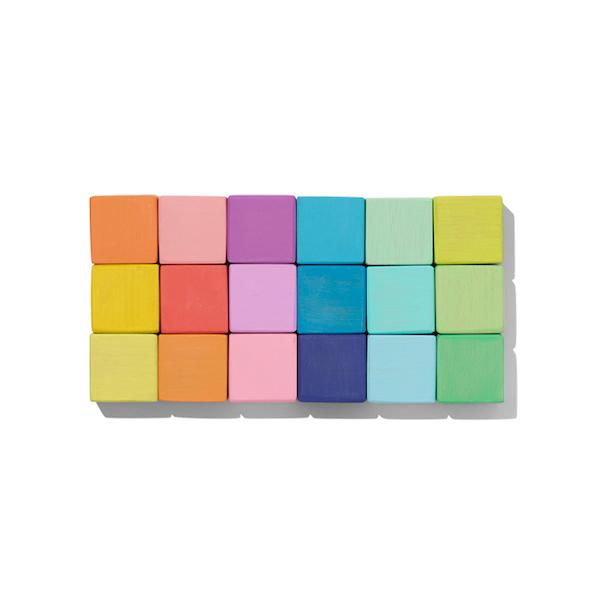
The block set in this picture is our set of Lovevery blocks.
what type of skill is building towers of blocks or stacking blocks?
Toy blocks a are classic toy…and there is good reason. When kids build towers with blocks they are developing skills through play. Knocking blocks over is another set of skills, and stacking blocks to create shapes or forms (a train made from a handful of blocks, for example) is another set of skills. They are all related, however, and together, building towers with blocks results in powerful underlying skills that children can use in later years.
Research tells us that early experiences with blocks stimulate the development of spatial language, cognitive, and problem-solving skills. All of these are the literal building blocks for higher level tasks like reading, writing, executive functioning, math, and communication skills.
We talked previously about the connection between fine motor skills and math. Building blocks are a literal building block to math skills.
There’s more. By building with blocks, kids are establishing concepts of cause and effect (that tower falls down if I build it too high), reasoning (I need to place the blocks flat on each other so they don’t topple over), and creativity, self-esteem, fine motor STEM concepts, early math, language, and motor planning. Wow!
Let’s break this down further.
Building a tower with blocks
When a child builds a tower with blocks, there are several motor and cognitive skills at play:
Gross motor strength and core stability/strength (placing a block on a stack requires posture and positioning, especially as the tower gets taller)
Fine motor precision and graded release, or force modulation- It takes a gentle hand to place a block on a tower with precision and manual dexterity.
Knocking a tower over
Every baby, toddler, and preschooler knows the fun of knocking over a stack of blocks, particularly when it’s a sibling or friend’s tower! What’s happening here?
Emotional practice- when another child’s tower is knocked over, there is sure to be an emotional response. This is not always a malicious act on the part of the tower-knocker! It is a repetition in what will happen however. We see facial expressions, emotions, and outbursts. This can be a good opportunity for problem solving, age-appropriate emotional regulation, personal space, body awareness, force modulation, and language skills.
Building things with blocks
Taking the block tower a step further, we can see more development and precision when creating shapes and forms with blocks. This is another set of skills that are expanded upon:
Today, we are discussing the various ways to play with blocks that build more than wooden buildings…blocks build skills!
Block Activities for Toddlers
For the young child, presenting kids with just a jew blocks is the key to avoiding overwhelm. The nice thing about a variety set of blocks is that the various blocks can be used in different ways while working various skill areas.
During toddler play, young children develop many areas that impact functional skills and independence.
Try these block activities for toddlers to support development of skills. We used the Lovevery block set for these activity ideas.
Sorting Shapes Block Activity– By sorting the colors and shapes of blocks, they are working on so many skills. Visual perceptual skill development begins at a young and age, including the ability to visually discriminate. We know that young babies are able to visually differentiate their mother from another female adult by visual assessment. The same skill can be used and honed with toy blocks
Use a small set of blocks and ask the child to pile clocks into sets according to color or shape. You would be surprised at a young child’s sorting ability and visual discrimination skills.
Sorting block shapes occurs around 15 months and at that time, a shape sorter is the perfect tool for encouraging matching. Visual discrimination skills will improve over the toddler years as your little one begins to recognize differences in shapes such as triangles and pentagons.
Sorting blocks is a literal building block for visual perceptual skills, math skills and executive functioning skills.
Pretend Play Block Activities– Children can use blocks as pretend play items as they interact with adults or other children. Giving blocks a name and a voice offers opportunities act out scenarios, express needs and wants, and practice communication.
By using blocks as pretend people, cars, trains, and animals, toddlers and preschoolers experiment with imagination and creativity. This is the beginning of social emotional skills.
Show your little one how they can set up a little family with the blocks as they talk to each other in words and phrases that your child knows. What a great way to work on communication and language.
Building Activities- The sky is the limit when it comes to building with blocks. You can show a young toddler how to stack two blocks while the develop the fine motor precision and refined grasp to place blocks and releasing their hand without knocking over the blocks.
Show your little one how to stack one or two blocks with specific colors. By asking them to copy your block form, not only are they working on fine motor skills, they are also building visual perceptual and visual motor skills.
Use Blocks to Make Patterns- Building on the copying skills mentioned above, using blocks to copy and create patterns is an exercise in early visual motor skills, visual perception, and fine motor skills.
It’s also a fun way to introduce early math concepts. Little ones can copy and create patterns using different sizes, shapes, and colors of blocks.
Start out by creating a simple pattern with an AB pattern of blocks. Preschool children can use blocks to create ABB and ABC patterns too.
Gross Motor Skills with Blocks- Just because using blocks with preschoolers is a fun fine motor activity, there’s no reason to leave out the gross motor skill development. Use a small wagon, or create a pulling system to help kids with pushing, and moving the whole body while moving blocks from one place to another.
There is a reason why toddlers and preschoolers love to move their toys around in bags or carts…the proprioceptive input that they achieve by pushing or pulling a cart full of toys provides much needed sensory input that helps them organize and calm their bodies. Pretty cool, right?
Another gross motor coordination activity with blocks is a pretty simple one to set up. Use blocks to create obstacle courses, paths, and games. Kids can animal walk from block to block, tip toe between block paths, or transport blocks one by one in a relay race. Block play is so open-ended and can meet any child’s needs.
Build Letters with Blocks- Block activities for preschoolers can involve building and making letters. Letter recognition begins around 24-36 months and during that time is a great way to teach letter identification.
Use building blocks to help kids trace letters using a finger. Point out how the letters are formed and you can even build those letters higher with another layer. Here is information on how to build letters with correct formation.
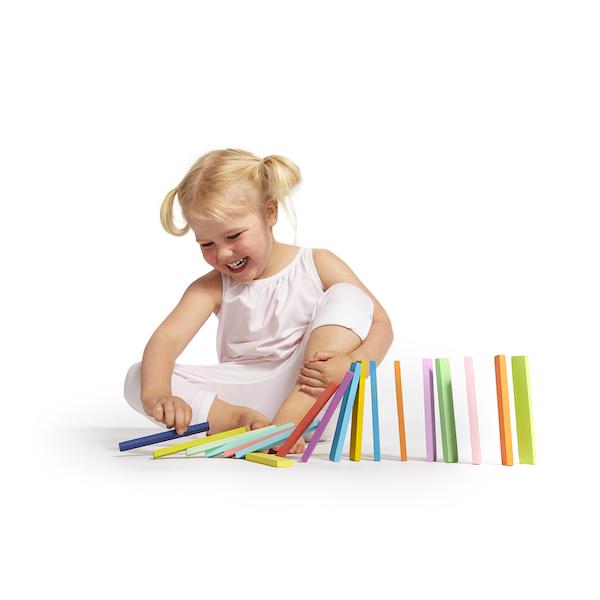
Stack and Knock Over- Building towers with blocks or a trail of dominos is one way to help kids better understand STEM concepts, cause and effect, and problem solving.
Ask your little one how they can make one block fall over by using another. See if they can figure out how far apart to place blocks to make them push one another over in a row of “dominos”. It’s a fantastic exercise in eye-hand coordination.
Building Borders- Use about 10-20 blocks to create small squares and rectangles to form a border or home for small toys, dolls, or other small toys. By creating a “home” for their toys, children can work on shape identification as well as various skills: eye-hand coordination, visual motor skills, fine motor skills, precision of grasp and release, bilateral coordination, and crossing midline.
Take the house building up a notch by adding layers to the walls. Children can begin to stack blocks and attempt to create higher walls without knocking them over.
Amazon links included below.
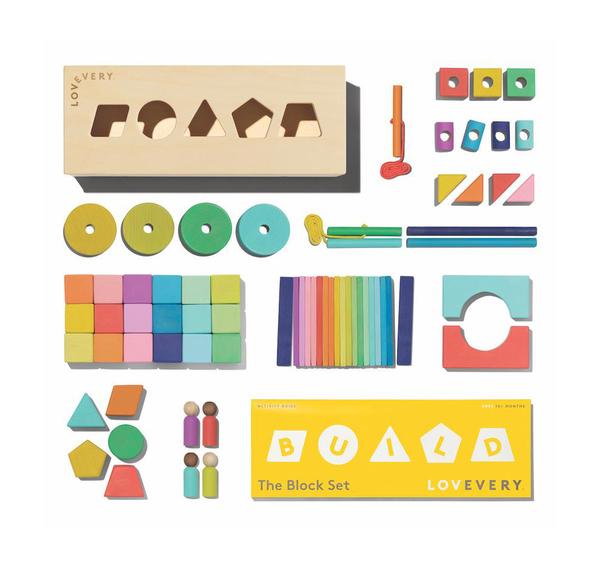
Lovevery Blocks are a new product created by the folks at Lovevery. The 70 piece set is valued at $90.00 and is perfect for kids aged 12-48+ months (and higher! My big kids are loving this set right now!)
Lovevery has thought of your child as they grow. The set includes an activity guide with over 20 block activities designed to build learning and developmental skills as they grow. These are beautifully made blocks that will grow with your child.
70 wood pieces in a rainbow of 18 different hues
18 different shapes and tools
Activity guide with block play ideas to promote skills like visual perception, eye-hand coordination, fine motor skills, gross motor skills, and more
Arrives in a wooden storage box that converts into a pull car
Drawstring cotton bag for flexible storage
Solid wood blocks made of sustainably harvested FSC-certified wood
Water-based non-toxic paint and finishes
Block Activities and Ideas
Also, check out these other toy suggestions based on therapeutic development through play.
Working on fine motor skills, visual perception, visual motor skills, sensory tolerance, handwriting, or scissor skills? Our Fine Motor Kits cover all of these areas and more.
Check out the seasonal Fine Motor Kits that kids love:
Colleen Beck, OTR/L has been an occupational therapist since 2000, working in school-based, hand therapy, outpatient peds, EI, and SNF. Colleen created The OT Toolbox to inspire therapists, teachers, and parents with easy and fun tools to help children thrive. Read her story about going from an OT making $3/hour (after paying for kids’ childcare) to a full-time OT resource creator for millions of readers. Want to collaborate? Send an email to contact@theottoolbox.com.
One tool that a therapy provider has in their toolbox is the picture story sequence. You might be wondering what we mean by this, but you probably have seen a picture sequence in one place or another every day! From picture instructions, to safety visuals, to everyday visual schedules, we all use picture story sequences! Using a sequence of pictures, we can support children in learning new skills, life skills, and comprehension of learning. Let’s break down picture story sequences as a tool.
In this article, we’ll explore the power of visual cues and provide tips on creating effective picture story sequences to help your kids learn new tasks. You’ll learn what picture story sequences are, why they work, how to create them, and how to use pictures to work on life skills.
What is a Picture Story Sequence?
Picture story sequences are a visual aid that helps learners comprehend information more easily. They comprise a series of images that show the steps to take when doing a task, along with a brief description of each step. Picture story sequences work to teach the steps of a task.
Sometimes, traditional methods of teaching just don’t cut it. That’s where visual prompts can make a world of difference. Did you know that picture story sequences can greatly aid in understanding and retaining information?
Research shows that sequencing pictures are an effective tool for teaching children essential life skills.
This is an effective tool for so many individuals because they engage multiple senses, including sight, which is a powerful learning tool. They break down complex or abstract concepts into more manageable pieces, making it easier for kids to understand and remember them.
Specifically, a picture story sequence is a series of images or illustrations that depict a sequence of events. These images are arranged in a specific order to convey a narrative or convey information about a particular topic or skill.
Picture Story Sequences for Learning
Picture story sequences can be used as visual aids to support learning, especially for children who may have difficulty understanding abstract concepts or have limited language skills.
A sequence of images may also be used to tell a story. You can teach young learners about first, middle, next, last, and other time-based concepts using the key events of a story. There are several skills that are covered when using pictures to tell about events of a story:
sequencing
cause and effect
problem-solving
context
comprehension
language development
creativity and imagination
In a picture story sequence, the images usually have captions or labels that describe what is happening, helping the viewer to understand the sequence of events and the context of each image.
One visual graphic example of a sequence of events along with a dialogue the individual can use in a functional task is a social story. This version supports individuals by following a visual expression of the progression of a task.
How do picture story sequences work?
By following picture story sequences, kids learn to organize their thoughts and systematically follow instructions. They also improve their memory and attention skills, as they have to recall the steps in the right order.
Picture story sequences also allow kids to work independently and at their pace, as they can refer to the images and the text as many times as they need.
A young learner can use a picture that represents a part of a task to put the steps into order.
A sequence of images can also be used to identify materials that are needed for life skills tasks. For example, a learner can identify cooking life skill materials needed to wash the dishes by using the images.
The steps of a task can be used in both forward chaining and backward chaining to support success with task completion
Learners can use visual cue cards or picture cards to support life skill work. A user might place the picture cards in a sequential order as they talk through an activity. Then, the individual can identify materials that might be needed.
A therapy provider can ask about difficulties that might come up to address problem solving and target cognition.
When you use a story sequence to retell a story, children can place the images in order to identify parts of the story from beginning to end. This might look like placing picture cards on a table as they re-tell the story using the visual cue cards. Plus it can be a fun and interactive way to incorporate creative storytelling with visuals.
When used to re-tell a story, kids can work on:
Comprehension
First, middle, last
Pulling out important features of a story or test
Re-telling skills
Problem solving
Empathy
Creativity to come up with different endings or scenarios for a story
Language development-identifying what a character might have done or said instead
Understanding consequences of actions in a story
Social emotional learning
Visual sequencing cards can also be used to target social emotional learning. A therapy provider can ask a client or student to identify what event might have led to an emotional expression and then the next steps that should occur.
This is great practice for a student to talk through and problem solve in a stress-free environment. It’s an activity that supports development of empathy and conflict resolution.
Using pictures to show progress through a situation supports a child as they become more aware of situations and the feelings of others as they grow in the stages of empathy development.
How to Create Picture Story Sequences
Effective sequences can be created by keeping it simple, using clear images, and making them relatable to your child’s everyday life.
To create an effective picture story sequence, start by identifying the task or skill you want to teach. Break it down into steps and determine what visual aids would be helpful to represent each step. Use clear, simple images that accurately depict each stage of the process.
Break down the task- write out the steps or identify the steps of a task in order.
Take pictures of the activity being done. Or, use clip art, or photos found online to depict the steps of the activity or story.
Create cards by gluing the images onto index cards, cardstock, or cardboard.
If needed, add Velcro to the back of the cards. The cards can then be stuck to the other side of the Velcro attachment on a sequencing board.
Using Picture Story Sequences to Teach Life Skills
Picture story sequences aren’t just useful for teaching new tasks, they can also be a powerful tool for teaching essential life skills. From personal hygiene routines to independent living skills, picture sequences can provide a visual roadmap for children to follow as they learn critical skills that will help them navigate the world around them.
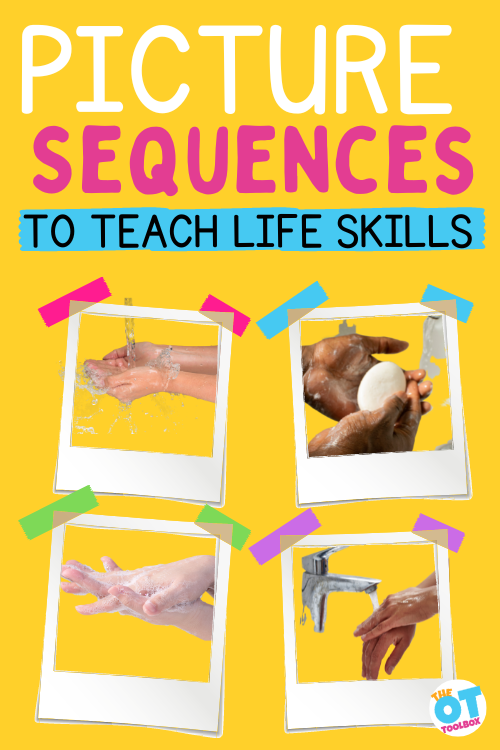
For example, picture sequences can be used to teach children how to keep themselves clean and healthy. With a sequence of images showing each step of the process, children can learn how to properly wash their hands, brush their teeth, and take care of other basic hygiene tasks.
Picture sequences can also be used to teach important life skills such as cooking, grocery shopping, and budgeting. By breaking down complex tasks into smaller, more manageable steps, children can gain a better understanding of how to perform these tasks successfully.
One way to do this is to use our life skills cards and work through essential daily tasks using images specific to the individual.
Tips for Using Picture Story Sequences
Picture story sequences are an effective tool for teaching children new skills and concepts. However, to get the most out of this learning method, it’s important to keep a few things in mind. Here are some tips to help you make the most out of picture story sequences with your child:
Consider the sequence of the steps carefully and ensure they follow a chronological order that makes sense to the child. Use text to supplement the images, adding brief descriptions or instructions that the child can easily understand.
Make the sequence interactive by involving the child in the process of creating it. Ask them to provide feedback on the images and text, and encourage them to identify any steps that may be confusing or unclear.
Review the sequence with the child several times, ensuring they understand each step before progressing to the next one. Encourage them to refer back to the sequence as often as they need to reinforce their understanding.
Start with simple tasks: Begin with tasks that are easy to understand and execute. This will help build your child’s confidence and make them feel more comfortable with the learning process.
Use real-life scenarios: Incorporating real-life scenarios into the picture story sequence can make it more engaging and relevant for your child. For instance, if you are teaching them how to make a bed, use pictures of their own bed rather than generic images.
Use age-appropriate language: Make sure that the language used in the sequence is appropriate for your child’s age and developmental level. Using complex vocabulary or concepts can be overwhelming and confusing for young learners.
Add variety: Keep things interesting by including a variety of tasks and activities in your picture story sequences. This can help prevent boredom and maintain your child’s attention throughout the learning process.
Encourage participation: Encourage your child to participate actively in the learning process by asking them questions, soliciting their feedback, and incorporating their ideas into the sequence.
Picture story sequences are a powerful tool for therapy providers, educators, and parents to use with children. By breaking tasks down into manageable steps and providing visual cues, kids are better able to understand and retain information in both literary and life skill events.
By implementing picture story sequences, you can help your child succeed in learning new tasks while building their confidence and independence. Remember, a picture is worth a thousand words!
Colleen Beck, OTR/L has been an occupational therapist since 2000, working in school-based, hand therapy, outpatient peds, EI, and SNF. Colleen created The OT Toolbox to inspire therapists, teachers, and parents with easy and fun tools to help children thrive. Read her story about going from an OT making $3/hour (after paying for kids’ childcare) to a full-time OT resource creator for millions of readers. Want to collaborate? Send an email to contact@theottoolbox.com.
There are many sensory activities that can be used to dye Easter eggs. In this blog post, you’ll find several sensory ways to dye eggs. Whether you are using natural egg dyes, movement activities to dye eggs, or using a rice shake egg dye activity, the sensory egg activities are perfect for adding movement that meets sensory needs. Add these sensory egg ideas to your Easter occupational therapy ideas!
Sensory Egg Activities
These sensory egg activities are fun and use all the senses! First, let’s explore the various senses that can be used when coloring eggs. Start by reading our resource on sensory play. You’ll see that there are 9 sensory systems at work at any given time:
Take a look on Pinterest, and you can find SO MANY different ways to dye Easter Eggs. We didn’t see any collections that centered on Sensory Exploration while dying eggs.
These are some fun, creative ways to dye eggs with a Sensory twist.
Movement sensory egg ideas
These ideas use movement to dye eggs. When shaking an egg in a paint bag, or shaking an egg in a bag of glitter or shaving cream, kids can use several sensory components:
Vestibular input by jumping or shaking
Bilateral coordination to use both hands together in coordinated manner to shake a plastic bag
Tactile sensory input to utilize several textures.
Visual sensory input with bright and colorful visual input.
Craftaholics Anonymous made glitter eggs. You can use a hardboiled egg and use any egg dye kit. Place the egg in a plastic baggie of glitter and shake, shake, shake!
The Chocolate Muffin Tree used crayon shavings to decorate. Can’t you just smell the crayons by looking at this picture? Use the same plastic baggie technique listed above but add crayon shavings. This is just another benefit of coloring and reason why coloring is such a great activity for kids!
Martha Stewart shows us how to decorate with thread to make a textured egg. This is a great bilateral coordination activity when wrapping string around an egg. But is this a sensory activity?
When you consider the kinesthetic input of wrapping string around and egg, plus the other contributions: visual input, motor coordination, proprioception, then yes!
You could make melted crayon shaving eggs. These look so textured and fun!
Adding crayon shavings offers a specific scent, or olfactory input.
Creaative Green Living decorated patterned eggs using silks. This sensory egg dying technique offers tactile sensory input.
Lovely Indeed explores patterns and textures using Washi tape. Peeling tape adds fine motor proprioceptive input through the joints in the fingers. This is a great pincer grasp activity.
Add stickers to work on fine motor skills…pinching little stickers on the eggs. This site shares some natural dying techniques, too. There are many reasons why playing with stickers supports development. This is a great sensory egg activity!
Toddler Approved used baking soda and vinegar to make these fun eggs.
Explore those senses while dying eggs!
More sensory egg ideas for dying Easter Eggs
These ideas use tactile sensory input, movement (Vestibular sensory), visual sensory input. Each of these ideas are fun and creative was to color eggs!
Natural Dyes: You can use natural dyes to color your Easter eggs. For example, beetroot juice will give a pink hue, turmeric can give a yellow hue, and red cabbage can give a blue hue.
Kool-Aid: You can use Kool-Aid to dye your Easter eggs. Kool-Aid comes in a variety of colors and smells, and can be a fun sensory experience for kids.
Shaving Cream: You can create a marbled effect on your Easter eggs by using shaving cream. Simply apply a layer of shaving cream to a shallow dish, add a few drops of food coloring or liquid watercolors, and swirl the colors together with a toothpick. Then, roll your egg through the shaving cream and let it sit for a few minutes before wiping it clean. Then, use those toothpicks to work on precision and dexterity using our toothpick holder activity.
Glitter: You can add some sparkle to your Easter eggs by using glitter. Simply brush some glue onto your egg, sprinkle glitter over it, and let it dry.
Rice Shake: You can use rice and food coloring to create a sensory egg dyeing experience. Fill a sealable plastic bag with uncooked rice, add a few drops of food coloring, and shake the bag until the rice is evenly coated. Then, place your egg inside the bag, seal it, and shake it until the egg is evenly coated.
Many of these sensory activities for dying eggs can add sensory input to support self-regulation or to a functional sensory diet, and more!
The Sensory Lifestyle Handbook walks you through sensory processing information, each step of creating a meaningful and motivating sensory diet, that is guided by the individual’s personal interests and preferences.
The Sensory Lifestyle Handbook is not just about creating a sensory diet to meet sensory processing needs. This handbook is your key to creating an active and thriving lifestyle based on a deep understanding of sensory processing.
Colleen Beck, OTR/L has been an occupational therapist since 2000, working in school-based, hand therapy, outpatient peds, EI, and SNF. Colleen created The OT Toolbox to inspire therapists, teachers, and parents with easy and fun tools to help children thrive. Read her story about going from an OT making $3/hour (after paying for kids’ childcare) to a full-time OT resource creator for millions of readers. Want to collaborate? Send an email to contact@theottoolbox.com.
Crawling is a babies’ first move toward independence, but did you know there are different types of crawling a baby can use? In this post we will explore: when babies start to crawl, types of crawling (army crawl, cross crawl, bear crawl, asymmetrical crawling), why crawling is important, and how to teach crawling. Crawling is not just a gross motor activity. Crawling is a motor task component baby play that activates several of the senses, is a social event, and is the beginning of functional play.
WHEN DO BABIES START TO CRAWL?
Babies start to crawl between six and ten months, however with the various types of crawling, there are things to know about skills that impact a baby’s ability to move from place to place.
Some skip crawling all together, moving straight to cruising furniture and walking. We will explore later why skipping crawling is not a great idea.
In order to crawl, babies need a few skills, developmentally. This progression to crawling is a sequence of events.
Before crawling, babies learn to:
Roll over
Push up on their arms during tummy time
Rock back and forth on their knees,
Push backward
When given plenty of opportunity for movement, this stage of development often happens naturally. Crawling gives the baby an excellent sense of power and accomplishment. It is a huge boost to their self esteem.
There are several systems at play for these skills and crawling as a result to occur. The underlying skills involved with crawling includes:
Cognition
Problem solving
Balance (motor skills)
Sensory system
Gross motor skills
Coordination
Visual Motor skills
Spatial Relations
Referring specifically to the motor skills needed to crawl, we can target gross motor coordination and balance, no matter what type of crawling or mobility that a baby is using. The crawling movements utilize strength, mobility, and stabilization of the muscles of shoulders, neck, arms, back, trunk, and head need to be strong enough to support the weight of the baby.
Binocular vision is needed for babies to switch between distance and close up viewing as they navigate their space. Crawling offers a great mental workout as well.
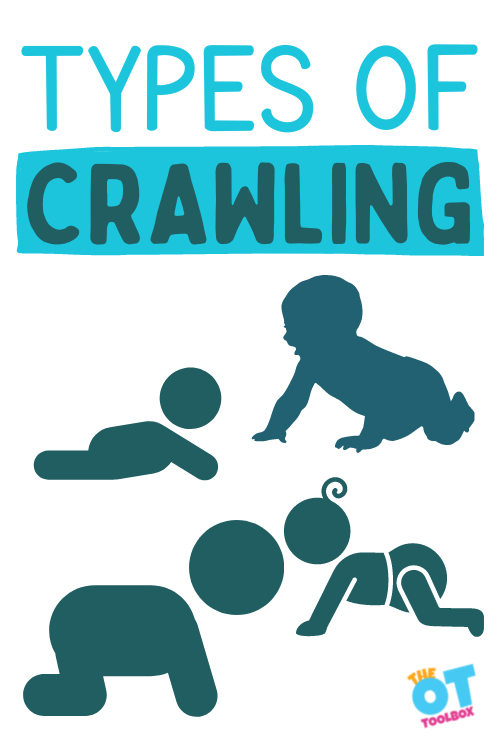
Types of Crawling
Did you know there are different types of crawling? Some of these types of crawling styles are a progression in coordination and balance. The baby will begin with one type of crawling and move onto a different crawling style, developmentally.
Other types of baby crawls are the style that the baby adopts either because one of the underlying skills have not yet developed, or they get into a habit and realize that they can get from A to B efficiently using the particular style. The different ways babies crawl do not necessarily mean a problem. However, there are aspects of each type of baby crawling style which we can look at.
Let’s take a closer look at each style of crawl.
Crawling on Hands and Knees
Crawling on hands and knees, or the classic hands and knees crawling style is a form of cross crawl – in therapy language this is often referred to as creeping. Babies bear weight on their hands and knees, moving one arm with the opposite knee forward at the same time. This is the classic, traditional, most beneficial type of developmental crawling.
Bear crawl
Related to the classic crawling style on hands and knees, is the bear crawl. The bear crawl style of crawling is one in which babies cruise around on their hands and feet with their bottom up in the air. This type of crawl provides great proprioceptive input, as well as reciprocal movement.
Army Crawl or Commando crawl
The army crawl, or otherwise known as the commando crawl, is a belly crawl style of crawling. This military style crawl involves babies on their tummies pulling themselves along with their arms and elbows while their stomach drags on the floor. This type of crawl is excellent for building upper body strength, as well as providing great sensory input.
Scoot Crawling
The bottom scoot crawl, or scoot crawling is another style of crawling. In this type of crawl, babies sit on their bottom, pulling themselves with their arms. While this is a functional type of movement, it is not the most efficient or beneficial. While scooting on their bottom, babies do not get the same reciprocal type of movement, or input through their legs and shoulder girdle.
Crab crawl
Crab crawl is a crawling style in which babies move themselves backward or sideways in this type of crawling movement pattern. They might be prone (belly down) or supine (belly up) as they move. This might be a functional movement style, but it is not providing the correct input and movement patterns for typical development.
Roll crawl
A roll crawl is another type of crawling which works as a mode of transportation for babies. With roll crawling, babies get where they want to go by rolling. This style of crawling is effective, in that the child gets to where they want in a room, however rolling crawl is not an efficient style of movement, nor is it a means of developing the best movement patterns.
Have you seen any of these types of crawling in action? Let’s move onto why crawling skills are an important part of development for young children.
Why is crawling important
There are many reasons why babies need to crawl as a developmental progression. Crawling is so important! Let’s take a look at each of the reasons why babies need to crawl.
Gross motor development – babies learn to coordinate both sides of their body as they crawl. They have to balance their body, while an arm and leg is off of the ground at the same time. Joints need to flex and extend, muscles must synchronize, all while each side of the body is doing a completely different movement.
Eye-hand coordination- By crawling, babies develop eye-hand coordination. By moving toward a target, reaching for toys, and engaging in the world around them, coordination between the eyes and body develop.
Sensory development – proprioception, or input/feedback through the muscles and joints is the primary input developed through crawling. In addition, vestibular input is engaged through movement of the head and input through the ear. Vision, tactile, and hearing senses are activated as well during crawling. Babies learn through exploring their environment. During crawling, most of the senses are alerted, organized, and used to maneuver through space.
Mental/cognitive development – problem solving, memory, and processing information are needed for crawling. The corpus callosum is activated in a balanced way during cross crawling, facilitating both sides of the brain to communicate. The corpus callosum is not activated the same way during alternate methods of crawling (bottom scooting, crab crawl, commando crawl).
Crawling helps joint sockets form – as the baby crawls forward the hip sockets form, the muscles pulling them forward and inward. This sets the development in motion for future walking.
Crossing midline – this is a vital skill for further development. Cross crawling improves spinal rotation, eye hand coordination, and learning to separate both sides of the body which will be used later on (bike riding, playing the piano, running, climbing stairs). Here are some cross crawl exercises for older learners to practice and develop this critical skill.
Crawling supports reading skills- Crawling on hands and knees helps reading! All this integration of brain halves, reflexes, and hand-eye coordination helps prepare the brain and body for reading. Crawling supports learning, creative problem solving, and brain function in general.
Visual Skills- When crawling, a baby is developing the building blocks of visual perception, visual tracking and visual scanning, as well as vision development When crawling a small child moves through space and the eyes develop visual convergence. Visual saccades and tracking is also a component of development. Read more about the development of visual spatial skills happening during the baby years.
NOTE: babies who crawl in alternate methods, while demonstrating creative ways of getting around, may be showing signs of delayed development. They may have learned to compensate for poor strength, coordination, sensory skills, or cognitive development. Moving babies through the traditional methods of crawling can help with overall development. Babies who skip crawling should be encouraged to move through this stage of development, as it will develop critical baseline skills to be used later on.
How to teach Crawling
The easiest way to encourage crawling is by setting up an optimal environment for exploration.
Plenty of tummy time on a safe surface may be all that is needed for these skills to develop. Some families do not have a safe space at home for crawling. Get creative by suggesting a blanket on the grass, an open space such as the beach, the library floor, or a tarp on the ground covered by a blanket.
Avoid propping the baby up and placing it in containers. Container baby syndrome is increasing at an alarming rate as caregivers place young babies continually in car seats, carriers, bouncy seats, swings, or being held all of the time.
If your baby arches her back a lot, does not want to curl up and snuggle, does not use both arms and legs, uses rolling more often than crawling, or does not seem interested in moving, seek assistance from a functional neurology doctor.
Allow your baby to explore their environment freely. Create safe zones free of wires, choking hazards, and other dangers. Encourage caregivers not to be afraid to let their baby struggle. Caregivers need to understand that babies will topple over several times before getting it right. A baby who is too sheltered will learn that movement is scary.
Hold a rolled up towel under your babies’ belly while they are in prone to relieve some of the weight off of their extremities, provide extra support, and move the baby through the crawling motions.
Help the baby get into a crawling position and gently rock them back and forth to stimulate movement. Place items just out of reach of the baby to encourage them to reach for it, or move to try and get it.
Help parents and caregivers understand misconceptions that a baby isn’t “advanced” who skips crawling, “so cute” by bottom scooting instead of cross crawling, or “lazy” because they choose not to move. While these aren’t always red flags for future difficulties, they can be, and should not be overlooked.
Victoria Wood, OTR/L is a contributor to The OT Toolbox and has been providing Occupational Therapy treatment in pediatrics for more than 25 years. She has practiced in hospital settings (inpatient, outpatient, NICU, PICU), school systems, and outpatient clinics in several states. She has treated hundreds of children with various sensory processing dysfunction in the areas of behavior, gross/fine motor skills, social skills and self-care. Ms. Wood has also been a featured speaker at seminars, webinars, and school staff development training. She is the author of Seeing your Home and Community with Sensory Eyes.
Fine motor math is more than just a fine motor activity with math concepts. Here, we are covering specifically, the topic of how fine motor skills and math skills are connected. Increasing research is showing the connection between math and fine motor. Here, we’re looking at how these two seemingly different areas are closely connected. We covered some of this connection in our resource on fine motor STEM.
Fine Motor Math
In young learners, we see fine motor and math more often than with older students. The ability to problem solve (an early math building block) and fine motor go hand in hand. But it doesn’t stop there. We see in early learning the use of counters to support one-to-one correspondence.
Other early math skills that utilize fine motor skills:
Shapes
Spatial concepts
Math patterns
Same and difference
Number identification
Counting objects
These early mathematical concepts support numerical skills and more abstract thinking further along. The development of early mathematical skills builds upon itself.
Later we see primary school children using fine motor math activities in hands-on math activities. Manipulatives like paper clips are used to measure. Counters are used to add and subtract. Snap blocks are used to grasp grouping and counting skills.
What is a numerical skill?
A numerical skill is an ability to understand and work with numbers. This includes a range of math abilities, from counting and recognizing numbers to performing mathematical operations such as addition, subtraction, multiplication, and division.
While it may not seem obvious, there are underlying skills that impact numerical skill abilities and math development.
Numerical skills are essential for a wide range of tasks, from simple daily activities such as telling time and measuring ingredients to complex tasks such as calculating probabilities and analyzing data.
Some common numerical skills include:
Counting: The ability to count objects and recognize number symbols.
Number recognition: The ability to identify and name numbers.
Comparing numbers: The ability to determine which number is greater or smaller than another.
Addition and subtraction: The ability to add and subtract numbers.
Multiplication and division: The ability to multiply and divide numbers.
Estimation: The ability to make approximate calculations and estimations.
Measurement: The ability to measure quantities such as length, weight, and volume.
Numerical skills develop gradually over time and are influenced by factors such as genetics, environment, and early experiences.
Numerical skills can be improved through practice and instruction, and early intervention can help children develop a strong foundation in these skills that can benefit them throughout their lives.
Piaget, in his theory of play, theorized that people learn by doing. We call this kinesthetic awareness, or the connection between the body and the brain.
Early mathematical skill involves counting with the fingers, learning to isolate digits, and clapping/tapping out numbers. This is the beginning of fine motor skills and math development.
Fischer, Stoeger, and Suggate concluded that, “FMS (fine motor skills) are closely related to early numerical skill development through finger-based numerical counting that aids the acquisition of mathematical mental representations.” Fischer, Stoeger, Suggate. 2017.
A relatively new math program called Touch Math, uses kinesthetic awareness by having students touch the numbers while counting the dots, in order to make a better connection to counting, rather than rote memorization.
It has been hypothesized that early acceleration in mathematics frees brain space and working memory. This allows the brain and working memory to be utilized on more complex equations.
What does this mean?
It means that counting on fingers is ok!
It is a great stepping stone to moving further into math concepts using other methods such as number lines, touch math, memorization, or counting objects. This is a critical stage in development of fine motor and math skills.
Let’s explore some of the ways fine motor skills and math development are correlated:
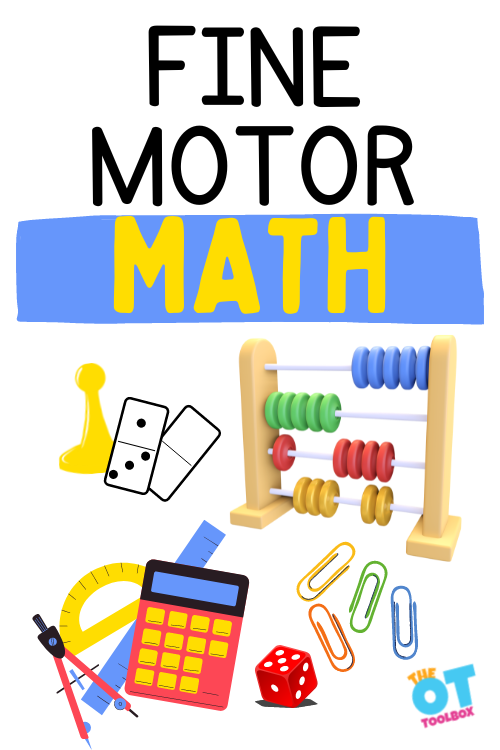
Ancient mathematicians used an abacus method of sliding beads across a platform to calculate sums thus incorporating fine motor skills into math
Modern math involves using a calculator, dependent on fine motor precision to press the correct keys in sequence
Stringing beads develops fine motor skills while working on patterns, copying designs, counting, and sorting
Unifix cubes (or snapping cubes) are used for counting, addition, and subtraction, but also involve fine motor precision to move, count, touch, stack, and sort the cubes.
Other tools such as a ruler, protractor, stencil, tape measure, pencil, scissors, or compass rely on accurate fine motor skills
Graph paper, number lines, timed tests, and lining numbers in rows all require fine motor precision
Flash cards, clothespins, manipulatives, and worksheets are some more tools used in math development
DEVELOPING MATH SKILLS THROUGH FINE MOTOR PRECISION IS NOT NEW
Educators have been using these tools forever, this is not new.
What IS new, is the amount of children starting school with below average, or poor fine motor skills. This is in addition to limited reading, math, and writing skills.
Below average development in the early years may be due to a lack of exposure, too much time on screen electronics, or a physical impairment. The pandemic is largely to blame in recent years due to the amount of children being home, not exposed to materials, concepts, and tools.
If children are struggling to hold a writing tool, manipulate objects, or move their fingers, how are they going to focus on the higher math concepts such as long division, geometry or algebra?
Older students may be unable to do fractions, multiplication, or larger sums, due to poor baseline skills. These students are still trying to figure out how to count their fingers, put their numbers in columns, or do simple addition, rather than solving equations.
How can you help?
Go back to the basics. Take a break from fancy computer programs and iPad apps. Focus energy on working with math manipulatives:
Pegs and pegboards All of these math manipulatives build the foundational skills needed for higher learning.
Building gross motor skills will also develop core strength, upper body strength, shoulder stability, and wrist/hand strength.
Think of all of the ways you could use paperclips, not only to develop math skills, but improve fine motor precision at the same time.
A box of odds and ends from the junk drawer or tool shed serve as great manipulatives for both understanding math concepts, and developing fine motor skills. We have several ideas for occupational therapy kits to use for fine motor skill development. A math kit could easily support learning and motor skills.
Curriculums all around the world are shifting their focus to more computer based learning as it is “more appealing” to learners. While this might be accurate, it is not well rounded or beneficial to developing crucial skills. If you are unable to eliminate all the computer based work, add fine motor manipulatives along with these lessons to improve skills. Worksheets are preferable to computer based programs as they incorporate pencil/crayon use, cutting, and gluing.
Check out this great Outer Space Fine Motor Pack that includes bead activities, counting, sorting, graphing, and tool use of scissors/tongs/pencils. Building fine motor skills is not only essential for math, but handwriting, self care, and life skills.
Research on Fine motor and math skills
Research is offering more and more evidence that there is a positive correlation between fine motor development and math abilities in children. Depending on the age of the child and the fine motor contribution, we can visibly see the impact of fine motor dexterity and hand eye coordination on math manipulatives.
While we know that fine motor development and the small motor movements of the hands and fingers, hand strength, dexterity, and coordination, several studies have found that children who have well-developed fine motor skills tend to perform better on math tasks than those who do not.
For example, a study published in the Journal of Experimental Child Psychology
found that preschool children who had better fine motor skills were also better at math skills. These early math skills specifically included:
counting
number identification
pattern recognition
Specific fine motor tasks that seem to play a role in math skills (according to this study) were pegboard activities and threading beads activities.
As occupational therapy practitioners, we know the activity analysis behind these fine motor tasks.
So, when we look at the connection between fine motor skills and early math skills, we can connect the dots.
There’s more…
According to Pitchford, Papini, Outhwaite, and Guilliford, “The influence of fine motor precision and math abilities emerges over the first year of schooling, and might be closely linked with the numeracy skills children are acquiring, and the practice children have in writing numbers, as well as carrying out other math based activities that require fine motor precision”.
Taking this further, “Fine Motor Integration remains a significant predictor of math ability, even after the influence of non-verbal IQ has been accounted for.” Pitchford, Papini, Outhwaite, Guilliford, 2016. Through different studies, such as the one above, there has been a correlation between fine motor skills and math development.
It might be that both fine motor tasks and math activities require the manipulation of abstract concepts.
For example, to add, subtract, multiply, and divide, manipulate fractions, shapes, decimals, and percentages, children need to grasp the concept of numerical symbols and steps to complete math processes. The child needs to think abstractly. Math requires mental manipulation of concepts, numbers, and symbols.
In fine motor skill activities, the child needs to manipulate small objects using their hands. While the manipulatives or objects are physical items, the child needs to manipulate the object in order to accomplish a specific task. Before they can do the task, they need to see the process in their mind’s eye.
Both math and fine motor tasks require spatial relationships, and visual processing skills.
For some kids, this can be a real stumbling block.
The child might be able to manipulate numbers and symbols to complete math tasks but fine motor tasks is a challenge. It’s the spatial relations and the ability to conceptualize the fine motor task in their mind’s eye followed by follow-through.
However, some individuals can strengthen one domain by building on skills of the other.
A child who is strong in fine motor skills but weaker in math concepts can use manipulatives to build on math skills.
A child who lags behind in fine motor dexterity and manipulation skills can utilize math skills to build strength in fine motor.
Another study published in the Journal of Learning Disabilities found that fine motor skills were significantly correlated with math achievement in children with learning disabilities.
In that study, the researchers found that fine motor skills in children with learning disabilities were significantly correlated with math achievement. They determined that the children with better fine motor skills had higher math achievement scores, and especially math reasoning and problem solving skills.
The researchers used fine motor tasks like drawing lines, copying shapes, and using tweezers to pick up small objects. Children with stronger fine motor skills in those tasks were able to achieve higher skills in addition, subtraction, multiplication, and division problems.
Tips to improve fine motor math
Modern day learners are so reliant on calculators, simple math such as making change, calculating a tip percentage, or figuring out a discounted price, requires the use of technology.
I have had to tell shopkeepers, and people at garage sales how much change to give me while they were whipping out their phones to calculate $20.00-5.00.
While I understand we are in the technology era, it saddens me to see the foundational skills being lost or forgotten. Some classrooms have eliminated pencils/crayons/scissors entirely, in favor of using an iPad.
We can support kids who struggle with both math and fine motor skills (or one skill area of the other…)
Other tips to support a student who struggles with fine motor skills to improve their math skills (and vice versa):
Incorporate math and fine motor in the classroom- Encourage parents and educators to incorporate fine motor skills into their lesson plans as this correlates to improved math and writing scores. When therapy providers utilize push-in model of therapy this can happen efficiently.
Use manipulatives: Manipulatives are a fine motor tool, or physical objects that students can use to represent math concepts. For example, you can use blocks, counters, or beads to help students understand numbers, addition, and subtraction. Providing manipulatives can help students with fine motor difficulties to engage with math concepts in a more hands-on way, which can enhance their understanding and make learning more accessible. By using manipulatives in math, students grasp the abstract concepts using concrete objects and are offered an opportunity to practice motor skills. For those struggling with the fine motor concept, you can modify the manipulatives to make them larger or easier to manipulate.
Use technology: While it’s important to reduce screen time (use this screen time checklist to support this need), the fact is that technology is here to stay. Many technology tools, such as calculators or digital math programs, can help students with fine motor difficulties to engage with math concepts without having to rely on handwriting or drawing skills. For example, a student can use a digital drawing tablet to practice writing numbers and math symbols, or use a speech-to-text program to dictate math problems. This is an adaptation for students that can help them thrive.
Focus on the student’s strengths: Students with fine motor difficulties may have strengths in other areas, such as verbal reasoning or visual-spatial skills. By focusing on these strengths, you can help students to engage with math concepts in ways that are more comfortable and accessible for them. For example, you can use visual aids, such as diagrams or charts, to help students understand math concepts, or engage them in verbal discussions about math problems.
Focus on a student’s interests: Occupational therapy providers love to use a client’s indivudualized interests in building skills because the motivation improves when a meaningful theme is used. Try using manipulatives that support interests, or math problems that focus on a specific topic or theme.
Provide targeted fine motor practice: Fine motor skills can be improved through targeted practice. For example, students can practice using tweezers (like this tweezer math activity), threading beads, or drawing shapes to improve their fine motor control. By providing targeted fine motor practice, you can help students to develop the skills they need to engage with math concepts more effectively.
Use multi-sensory approaches: Engaging multiple senses can help students with fine motor difficulties to better understand and remember math concepts. For example, you can use music, movement, or tactile experiences to help students engage with math concepts in a more holistic way.
All of these tips can be graded to meet the individual’s needs.
In the Fine Motor Kits here on The OT Toolbox, you’ll find various fine motor numerical activities designed to support math and motor skill development.
Working on fine motor skills, visual perception, visual motor skills, sensory tolerance, handwriting, or scissor skills? Our Fine Motor Kits cover all of these areas and more.
Check out the seasonal Fine Motor Kits that kids love:
Victoria Wood, OTR/L is a contributor to The OT Toolbox and has been providing Occupational Therapy treatment in pediatrics for more than 25 years. She has practiced in hospital settings (inpatient, outpatient, NICU, PICU), school systems, and outpatient clinics in several states. She has treated hundreds of children with various sensory processing dysfunction in the areas of behavior, gross/fine motor skills, social skills and self-care. Ms. Wood has also been a featured speaker at seminars, webinars, and school staff development training. She is the author of Seeing your Home and Community with Sensory Eyes.
Are you taking care of yourself with self care strategies as a busy therapy provider? Changes in routines, uncertainties, new requirements for therapy interventions…all of these transitions are reasons to add self care strategies in order to maintain occupational balance. In this post, I wanted to put together a toolbox for you. Here, you will find tips for self care for therapy providers. These are resources for self-reflection, mindfulness, self-care strategies, and easy ways for you to take care of yourself as a therapy provider.
Take current events, the additional responsibilities of distance learning (and teaching your own kids), social distancing, and the stress of getting through the grocery store. Then add the task of planning and running teletherapy sessions. Add digital communication with kids at extreme needs to regular work challenges (Helloooo billing, documentation, productivity…or even unemployment.)
All of this together can build to create a tipping point of worries, stress, and anxiety for therapy providers.
Self Care Strategies for Therapy Providers
Therapy professionals are no strangers to the need to have a self care plan in place. Occupational therapists, OTAs, speech therapists, and physical therapists, PTAs, are long-time sufferers of therapy burnout.
Take a look at the caseload requirements, productivity standards, and unpaid tasks that many therapists need to balance. But add in the new challenges with serving clients with increased productivity requirements, in many cases and self care for health professionals is very much-needed now more than ever.
Being cooped up at a computer means you may not be getting your regular exercise and dose of fresh air. All of that time spent indoors can lead to worries, depression, or a building up of anxiety in your chest. These self-care strategies are ways to heal those overwhelming feelings.
Self Care Balance
The thing is that as occupational therapy providers, we KNOW the need for balance. The occupational balance of work/play/rest is very much a service to ourselves and a fine line that must be honored. We recognize the need to set realistic expectations for ourselves.
We know the power that limitations in self care has when combined with work demands, income concerns, and health and safety of ourselves and those we love. But, HOW is that self care balance and a healthy lifestyle possible during uncertain times?
Pour yourself a cup of tea or grab yourself a hot mug of coffee. Curl up with a cozy blanket or sit in the outdoors as you read this, friends.
Here are self care strategies that will serve you well as therapists or health care professionals.
Self Care Strategies
Using self care methods as a healthcare provider offers an opportunity to promote your own well-being in order to maintain a healthy lifestyle so that you are capable of serving those in need. Sometimes it’s good to turn your well-tuned “OT lens” on yourself, right?
Try these strategies for emotional self care and physical self care needs. Some ideas may work for some, but not others. Others may find just the coping tool needed to find peace or a sense of occupational balance during uncertain times.
Mindfulness Strategies– Meditation or mindfulness practice on a regular basis offers a time for respite in daily schedules. Mindfulness is a great tool for boosting mental health. By intentionally being mindfully aware in situations, you can focus on the current situation by being present.
Sensory Diet– As therapists, creating sensory diets is second nature. But, when the feelings of stress and burnout occur, what if we turned out therapy hat onto ourselves by using those very sensory tools as coping strategies? Here is an explanation of what a sensory diet is to get you started. Think outside of the box when it comes to identifying needs.
You may not be experiencing the typical signs of sensory distress, but worries, sadness, or emotional fluctuations can be a change from the norm that are impacted by a few sensory tools. Here are tools for creating a sensory diet that works for you.
Turn off the News (or Facebook!)- We talk a lot about screen time for kids, but adult screen free time is important, too! Giving your brain a rest on what other’s think or see is a way to give your mental health priority.
When everyone’s got an opinion (and it’s not at all encouraging, hopeful, or helpful…) all of that information can man overload in your brain that builds the stress levels.
Give yourself permission to social distance from and social media.
Journaling– Using a journal to self-reflect is a means of taking time to think through thoughts and emotions. By writing out problems, one can reflect on possible solutions and problem solve ways to address concerns. Your journal is a place to be kind to yourself. Use it well!
Yoga/Exercise- Schedule time in your day for some exercise, whether that be a 10 minute walk, yoga stretches in the morning, or a full exercise routine. Take a walk after work or at the end of the day, or do a quick YouTube video to get the blood moving.
Physical exercise, especially aerobic exercise has been show to improve regulation, emotions, and mood. For the busy therapist, a treadmill workout that fits into everyday schedules is the way to go.
This is the time that I love to run along to music, podcasts, and even Netflix when running on the treadmill. Can you pair a HIIT treadmill workout with an OT podcast or fun movie?
Self-Reflect- Take a good look at this whole situation. When you step back for a moment, it’s pretty darn surreal, right? We are in the middle of a very fascinating yet scary experiment in social awareness, communication, emotions, health, and everything about modern life! We as therapy providers teach kids about self reflection.
We instruct clients of all ages about tools and strategies to self-reflect for awareness into specific occupations so they can thrive.
Take just a few minutes to create a self care assessment of how you are responding to current situations. How can you use that information to come up with a plan?
Can you take a minute for personal self-reflection, and come up with a few coping strategies that will work for your situation? Think about what you would say to a client in the same situation.
Sleep in- Saturdays used to be full of kids’ sports, running to the market, appointments, events, visiting, errands, and all sorts of tasks, right? Use the slower days to give yourself a dose of rest. Sleep in an hour. Or as late as the kids allow. If sleeping in is a no-go, try an afternoon nap when the kids nap or hit the hay an hour or two earlier.
Focus on Efficient Sleep- At the very least, aim for effective sleep. Turn off the screens right before bed. Use a fan or white noise. Add light reducing curtains. Open a window for a cooler sleeping environment. Layer on a heavy blanket or weighted blanket for added proprioceptive input. Reduce caffeine in your diet. Sleep is good and good sleep is better.
Drink Water- Be sure you are drinking enough water. Schedule an alarm on your phone if needed.
Go Outside- Just sitting outside or being outdoors can make a difference. Breathe the fresh air, notice the birds, chat with the neighbors. Be mindful of your surroundings and notice your senses and how the air smells, the breeze feels, focus on the warmth of the sun, and the sounds around you.
Read a book- Spending a few minutes in another world can take your mind off things. Don’t have the energy to read? Try a podcast or audio book.
Turn off Notifications- Constantly being available wears on a person. With working from home, it’s possible that work hours run into the evening. Turn off the message and email notifications to give yourself a break.
Advocate for Yourself- When things build up, emotions can run deep. This article on AOTA offers some advice for self-advocating to address emotional, physical, or cognitive needs. We teach our clients about self-advocacy. Use those tools on yourself, too!
Set realistic expectations- Just because you don’t have the regular commute to work and now supposedly now have all of this time on your hands, you don’t need to try a new hobby, learn to cook, keep the house clean, teach the kids, maintain a schedule of 15 teletherapy sessions a day, and start running.
Give yourself flexibility and maintain realistic expectations for the time that you have during a day. Consider you personal tasks, abilities, and limitations. Give yourself some leeway. You don’t need to get it all done plus take on more.
Gratitude- Identifying things that you are thankful for has been shown to impact anxiety, depression, and worries. Write down one thing that you are thankful for each day. Use the time right before bed to identify one thing that happened during the day that you are grateful for. That simple thought of positivity can be very impact.
Deep Breathing-Deep breathing exercises aren’t just for the kids! Deep breathing is a tool for all ages. Deep breaths in through the nose and out through the mouth activates the regulatory system and offers a means for better for rest and digestion, by impacting the parasympathetic nervous system.
Phone a Friend- Talking to a friend or family member is one way to work through problems. Practice well-being by talking with someone who cares
Listen to a Podcast- Try a self-help podcast, a mindfulness podcast,
Focus on Executive Functioning Skills- As therapy providers, we know the power of tweaking a few executive functioning skill areas. Procrastination, time management, and breaking down tasks can be a game changer in achieving goals and getting things done. When you just don’t feel like moving, a few executive functioning tricks can be the ticket to effective use of time.
Still need more ideas to cope with difficulties as a therapy provider? Try to add just one or two of these self-care strategies into your daily tasks. Put some tasks aside (like chores that can wait until the weekend) and focusing on the most important items that need accomplished in the day. These tips for attention and focus can help.
They are the same strategies that we recommend to our clients, so using them for our own lives should be easy, right? We as occupational therapists are masters of adaption!
psychological self care
An important component of all of the self-care strategies listed in this post is the psychological self care aspect.
By the term “psychological self care” we are referring to the specific actions and practices that we as therapy providers can engage in as a tool to support our mental and emotional well-being.
This means that we, as OT professionals, take care of our psychological needs, knowing that stressors impact our ability to manage stress, engage with others with empathy, and function in day to day tasks. When we have the appropriate tools to support mental health, we can be proactive and intentional about setting boundaries.
Not only is the emotional aspect of self-care a form of self-awareness and self-compassion, but it builds resilience in ourselves. Having coping mechanisms, stress relievers (like taking a minute to do relaxation breathing even during a busy day) supports social, emotional, and mental health needs.
All of these tools are strategies we have in our therapy toolbox as professionals, but sometimes, pulling out the correct resources for ourselves is more difficult than supporting our clients.
Taking care of our psychological needs is an important part of therapy self-care and promotes mental health.
Affiliate links are included in this post, but I only recommend products that I own, and love!
Colleen Beck, OTR/L has been an occupational therapist since 2000, working in school-based, hand therapy, outpatient peds, EI, and SNF. Colleen created The OT Toolbox to inspire therapists, teachers, and parents with easy and fun tools to help children thrive. Read her story about going from an OT making $3/hour (after paying for kids’ childcare) to a full-time OT resource creator for millions of readers. Want to collaborate? Send an email to contact@theottoolbox.com.
If you are looking for fun ways to help toddlers develop skills through play, then this hand eye coordination activities for toddlers is for you. During the toddler years, there is much development happening. Whether you need fun ways to help little ones build gross or fine motor skills, this hand eye coordination activity will support the cognitive and physical development the young child can use for learning and play.
Hand Eye Coordination Activities for Toddlers
Hand eye coordination refers to the coordination between visual input through the eyes and physical motor movements through an integration of the visual and motor systems in order to use the hands and arms.
Hand Eye coordination for toddlers is necessary for play, self-feeding, and increasing independence in young children.
This is a developmental skill that begins at a young age and progresses in skill and precision.
Examples of Hand Eye Coordination in Toddlers
Toddlers gain precision and accuracy in motor skills at a rapid rate. You’ll notice this as they become more and more refined in motor skills. Some examples of activities that require hand-eye coordination during the toddler years includes:
Taking off clothing (shirts/pants) and putting on clothing
Putting toys into containers, bags, purses
Participating in pretend play
Self-feeding using feeding utensils (Read here for tips on how to hold a spoon to encourage self-feeding skills
Drinking from an open cup
All of these functional areas of day to day activities for toddlers build skills through actually participating in the task. However, you can definitley foster the underlying skills needed to support independence through play! For example, we love using play based learning or a craft for 2 year olds and all ranges of toddlerhood!
Why build hand eye coordination in toddlers?
There are many benefits to encouraging hand eye coordination activities in toddlers. Through play, you can create opportunities for young children to gain the type of play that the young child needs. This includes fine motor play, gross motor play, and not screen use!
Some benefits for toddlers to participate in hand eye coordination tasks includes:
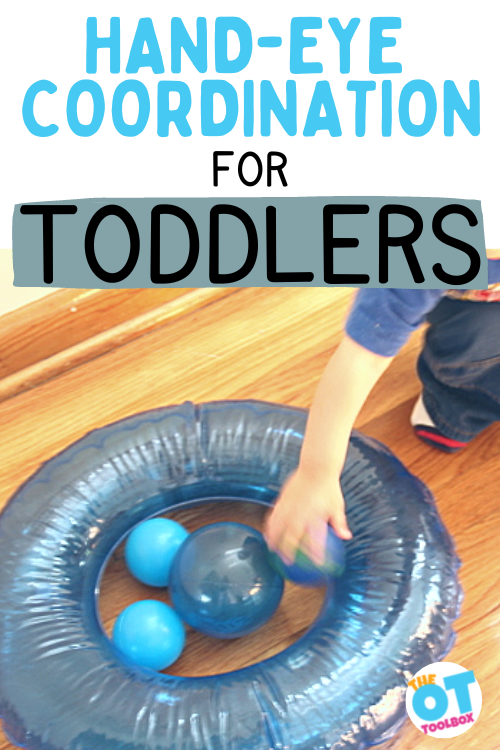
Try the hand eye coordination activity we did using an inner tube. This is a great color activity for young children.
This was a fun little play activity for the Toddlers. Niece and nephew (19 months) was with us one day and LOVED doing this.
I put the blue inner tube and a little basketful of balls out on the dining room floor. I put one ball into the center of the inner tube and he was INTO it! Little nephew went crazy putting the balls in the center, taking them out, putting them back into the basket. This was FUN!
What are we learning with this activity?
Eye-Hand Coordination
Toddler Visual-motor skills
Cause and effect (if I throw this ball into the center, it might bounce out…)
Learning colors
Gross Motor Skills (throwing, rolling, bouncing)
We’ve been on a BLUE kick around here these days.
This was a fun little play activity for the Toddlers. Nephew (19 months) was with us one day and LOVED doing this.
This little (and EASY…seriously, it does not get much easier than this…) game will be coming out again. This Aunt can clean up the breakfast mess when something like this is going on!
Tips for Toddler Hand eye coordination skills
When setting up activities for toddlers, some tips include following the child’s lead. Offer support when needed, but allow the young child to participate in the process. Sometimes working and playing along side the toddler offers a model that the young child can copy if they like, but they won’t feel pressured and they still have the autonomy that gives them a sense of success.
Most of all, have fun!
Colleen Beck, OTR/L has been an occupational therapist since 2000, working in school-based, hand therapy, outpatient peds, EI, and SNF. Colleen created The OT Toolbox to inspire therapists, teachers, and parents with easy and fun tools to help children thrive. Read her story about going from an OT making $3/hour (after paying for kids’ childcare) to a full-time OT resource creator for millions of readers. Want to collaborate? Send an email to contact@theottoolbox.com.
If there’s one thing occupational therapy providers want parents and educators to know, it’s about the importance of fine motor activities for preschoolers. The toddler and preschool years are a time for play and through fine motor skills activities, young children can develop the essential motor skills needed for child development. In this blog post, you’ll find fine motor skills for preschool. You’ll also want to check out indoor gross motor activities for preschoolers for ideas to support the fine motor development in the preschool years.
Fine motor activities for preschoolers
Fine motor skills lay the foundation to writing and is a skill often focused on during the preschool years. These fine motor milestones are not only for pre-writing, but they are necessary for children to develop independence including picking up tiny objects, wrist rotation and motor planning skills, all used for self care purposes.
We need fine motor skills to eat, get dressed, complete tasks with both hands and so much more. This blog includes what fine motor tasks children need to know before they start preschool and some fun sensory based fine motor activities you can do anytime!
The best part about working with preschoolers, is that I can use a variety of different mediums to teach new skills. Sensory-rich fine motor activities are always a hit, keeping children engaged in their play for long periods of time. Not only does fine motor development affect children’s academic levels, but speed of task performance is impacted as well.
We talk about these skills (listed below) in our resource on pre-writing skills that develop handwriting. While the areas covered in that blog post refer to the fine motor skills necessary for handwriting, the same skill areas impact functional performance in many areas (self-care, play, clothing fasteners, etc.)
Speed of fine motor work, manual dexterity, and accuracy of motor movements are combination of several factors including:
Sensory-Motor Skills- Closely integrated into each of these areas (and mentioned above) the underlying area of sensory-motor contributions should be considered. The pyramid of learning explains how the developmental base that enables refinement in higher levels of development is the sensory system.
We know that the areas are all closely related areas and act as pre-requisites for fine motor development. These aspects should be considered as well:
Gross motor development
Reflexes– A child’s ability to automatically react to environmental events. When reflexes are retained, function may be impacted.
Fine motor skills in the preschool range are very much play-based and function-based. Young children strive to “do it myself” and attempt fine motor tasks that they see others complete: buttons, seat belt buckles, zippers, etc.
When these tasks are a challenge, a child’s self esteem can suffer, play options can become limited and the child may not want to try the functional tasks on their own. This can impact independence development such as self-care, school tasks, self-feeding, etc.
The best way for children to master fine motor skills is to give them ample opportunities to practice.
According to our kindergarten activities page, fine motor skills that children should master by the time they start Kindergarten are related to fine motor skills:
Show hand dominance
Draw vertical and horizontal lines and a cross
Copy vertical lines, horizontal lines, a cross, circle, and square
Color in a picture
Cut with scissors (start here with types of scissors to use in preschool)
Draw a human figure with features
Stack blocks
Copy simple block forms
Donn and doff a coat or jacket
Put on and take off socks and shoes
Manage a spoon and fork
Manage food containers for lunches
Begin to show independence with clothing fasteners like buttons and zippers
Put on and take off a backpack
Manage Lego, beads, tongs, stickers and other small items
Complete crafts with instruction
Development of fine motor skills in preschool play support these skills in kindergarten.
All of these skills require developed tone in the hands, increased stability in the thumbs and fingers, developed and defined arches of the hands, improved precision with in-hand manipulation and improved endurance in hand strengthening activities.
Improved hand strength is the foundation to be able to complete the needed skills. “Hand strength is impacted by various components. When it comes to hand strength, there is a lot to uncover. Many aspects of motor skills impact strength and endurance in the hands. Some of those areas include these concepts:
Intrinsic hand strength
Thumb strength and stability
Motor control
Separation of the sides of the hand
In-hand manipulation
Wrist stability
Wrist extension
Finger strength
Range of motion of the arm: upper arm, forearm, wrist, fingers, and thumb
Hand muscle tone
Including sensory components in every day fine motor activities is a great way to encourage young children to practice all of the skills.
One key component that should be discussed is the impact that wrist range of motion has on fine motor dexterity and strength. We cover this more in our blog post on wrist extension, but you should know that the ability to move the wrist into an extended position ensures a flexed wrist isn’t used.
To better understand these areas, you’ll want to check out our developmental checklist resource for therapists or parents. It’s a valuable tool for pediatric occupational therapy practitioners working in the preschool setting. Also be sure to check out occupational therapy in preschools for more information.
Favorite Fine Motor Activities for Preschool
In addition to doing the activities listed above, here are my favorite fine motor activities for preschool that develop fine motor skills.
Sensory bags– Even if you have a child that doesn’t like to get their fingers messy, sensory bags will be a hit! Mix some shaving cream and food coloring together then fill up a plastic sandwich baggie.
After taping the top closed, allow children to “write” on the bag! They can use their fingers, a marker with it’s cap on or another drawing object to draw on the bag.
If you are practicing letters, place some ABC cards near the bag and allow children to imitate letters or shapes. If you have younger children. This sensory paint bag for writing is one example.
Sensory bags and sensory bins build the small hand muscles through fine motor exploration and are motivating for kids.
Play dough shapes– There are many benefits to play dough, making it a valuable tool for any preschool classroom.
If you haven’t brought out the play dough yet, grab the bin and start molding! Play dough is a wonderful activity that supports fine motor development and hand strength by pushing, pulling and patting play dough.
Using the rolling pin or play dough scissors and play dough cutters, children are able to incorporate wrist rotation and develop hand strength. If you don’t have any play dough, here is a list of great homemade play dough recipe.
Extend the activity and challenge preschoolers to make a play dough snake.
Another idea is to hide small objects like rocks, beads, or coins in the play dough. Challenge kids to find and rescue the objects. When they find the hidden bead (or other small item), they should squirrel the object away in the palm of their hand using just the fingers of their one hand. This task challenges in-hand manipulation skills and is a power exercise for the small muscles of the hand.
Sensory writing trays– Sensory writing trays are not just for writing, but they do offer fine motor benefits that are powerful assets to fine motor development.
This super fun table activity brings the sandbox indoors! Add four cups of sand to a tray and some letter or shape cards to the table.
You can even make colored sand to make the activity more fun. Encourage preschoolers to copy the letters in their sand with either their fingers, a writing utensil or a toy.
Some materials you can use include:
Rice
Sand
Dry beans
Sprinkles
Spray bottle painting– Spray bottles are a great activity to work on hand strength and separation of the sides of the hand. Fill a spray bottle with water and use it to:
Water plants
Spray paper with water
Spray a chalkboard with water
Spray paper with watered down paint
This super fun activity involves a little bit of water and some artistic visions. Place some butcher paper on the fence and fill up some spray bottles with tempora paint and some water. Squeeze those spray bottles towards the paper and see the new mural come to life!
This activity can also be done with individual pieces of paper on an easel. This hand strengthening activity should be done only outdoors, as the spray is known to splatter!
Sound freeze drawing– Using paint, crayons, markers or chalk, tell your child to sit down in front of a piece of paper and draw only when they hear music! The only rule is that they need to keep the drawing inside the paper! Turn on some music and encourage your child to draw until the music stops! After 30 seconds, hit the pause button, and see if your child can “freeze” in place (including their drawing utensil!) Turn the music back on and repeat for as long as you like! This motor planning activity is a lot of fun!
Fine Motor toys for preschoolers
Fine motor skills for preschoolers are developed through play. Use these simple fine motor toys and activities to build strong hands:
Gather the items listed below to create a toolbox of fine motor materials. Having these items on hand can mean fun fine motor activities happen at a moment’s notice.
Tweezers
Pipe cleaners
Thread or yarn and beads
Pom-poms
Ice cube tray
Pipettes or eye droppers
Glue
Clothespins
Straws cut into small pieces to lace or press into play dough
Paper clips
Cardboard
Alphabet beads or letter magnets
Egg carton and golf tees
Rubber bands
Squeeze bottle
Paper plates and a hole punch to make homemade lacing cards
Playdough
Toothpicks
Dotstickers or any sticker
Golf pencils
Add these fine motor activities to your therapy tool box:
One way to work on fine motor skills is to use one material for a variety of skill areas. We’ve put together some resources to just that! Try these specific tools to work on fine motor skill development in kids:
There are fine motor activity snacks for preschool, too. While these items are intended for snacking, you can have the preschoolers get involved with making their snack and sneak in some fine motor practice.
Allowing young children to be involved in cooking activities for kids and making their own snacks is a fun way to build strong hand muscles and self-confidence at the same time.
When coming up with snack ideas that kids can help to make in the preschool classroom, you want to consider food items that promote a pincer grasp.
Practicing fine motor skills doesn’t have to be boring! Add in some sensory components and your kids will have a wonderful time mastering fine motor skills at all developmental levels. As children learn to copy images, draw with a purpose, cut with scissors and rotate their wrists to complete activities, they will be able to participate in a variety of activities, including being more independent as they reach Kindergarten.