How to Teach Spacing Between Words with a Clothespin

spacing between words with a clothespin craft

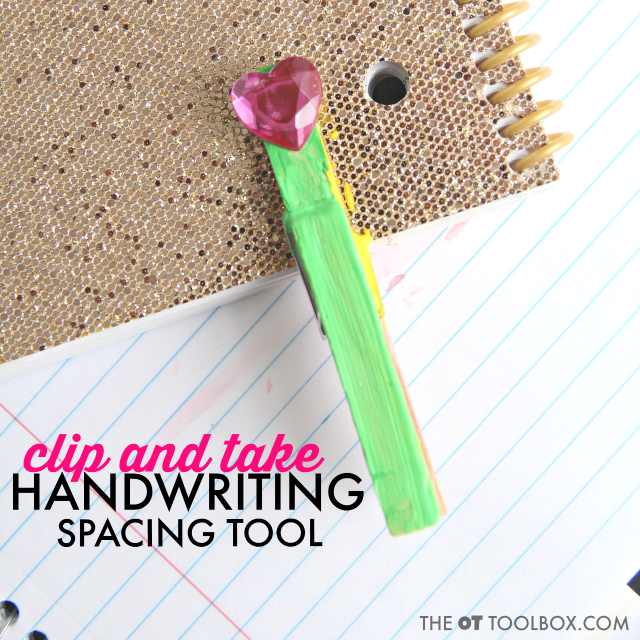
If you are working on spacing between words when writing, then this OT trick is for you. Many years ago, we created this blog post using a clothespin to teach spacing in handwriting. It’s a simple activity really, and one that kids love to use because they can make the clothespin spacing tool their own! Let’s teach spacing between words with a cute clothespin craft!
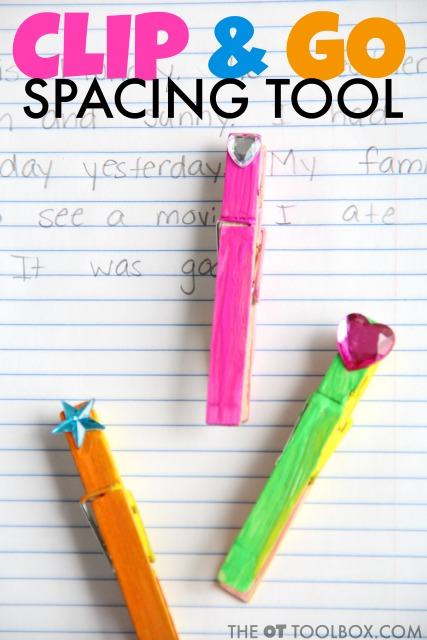
Use a clothespin to teach handwriting as a spatial awareness tool.
Use a clothespin to teach spacing between words.

Teach spacing between words

When it comes to legibility in handwriting, spacing between words makes all the! Addressing spatial awareness in handwriting can make a big difference in legibility fairly quickly given intervention, practice, awareness, and the tools to address spacing in written work.

Using a visual and physical cue to teach spacing between words is very effective. This is especially true for young students who are beginning to write with more organizational requirements: lines, margins, smaller writing spaces, and faster writing speeds are some of these organizational needs in handwriting tasks.

Let’s break those areas down to describe how each might impact letter formation and legibility of written work:

  • Line use- Line use progresses from kindergarten (where many students are exposed to writing letters and words on lines for the first time. This progresses to first grade with more writing requirements. Moving onto second grade may bring a smaller line space for written work. In third grade, writing lines may be smaller yet. In about fourth grade, many students move to a lined notebook. These pencil control and line use can impact legibility especially when handwriting lessons are rushed in the general curriculum of most schools. This blog post on line awareness is a great resource for written work requirements.
  • Margin use- One visual perception component to handwriting includes margin use in written work. This impacts legibility when writing on a sheet of paper or moving to the next line. Sometimes, margins creep over across the page as a student copies lists or words or writes sentences as in a journal. Spatial relations includes the visual perception aspect, particularly the visual processing skill of visual tracking, which includes following the pencil as in copying words. Visual attention and visual scanning are also involved. This blog post on margins in handwriting covers this area in more detail.
  • Writing in smaller spaces- Sizing in written work impacts legibility. When letters are written to large, the spacing can be crowded, leading to poor legibility. This can be especially the case when writing on worksheets or workbook pages with limited space availability. This blog post on spatial awareness is a good one to check out regarding sizing and space use.
  • Faster writing speeds- Writing sped impacts legibility because when a student writes quickly, sometimes the legibility of accurate letter formation is lost. When this is the case, adding a bit of space between words can impact overall legibility. As students progress, writing speed requirements increase. Consider the second grader that is required to copy their homework onto their notebook or homework planner. There is only so much time in the school day, so a limited chunk of time is given for this task. When a student struggles with pencil control, letter formation, motor planning, or any other contributing factor, this can really impact written work on a functional handwriting task that has dire consequences. When the student comes home for the day, they are unable to read their homework assignment. This same issue is true for older students. In middle school or high school, they are unable to copy notes in their class. This can lead to difficulty copying notes and studying. This resource covers writing speed in written work.

We’ve shared several handwriting spacing tools here on The OT Toolbox, like a cute DIY space martian spacing tool and this pipe cleaner spacing tool.

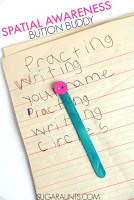
Sometimes a simple visual cue like this craft stick spacing tool and pointer stick can make a big difference in handwriting spatial awareness and handwriting legibility.

Read on for another quick craft that kids can make and use to teach spacing between words…using a clothes pin for better spatial awareness in written work.

WHy Use Clothes Pins to Strengthen Hands

There are many ways a clothes pin is a hand strengthening tool. It’s actually always found in my occupational therapy bag because it’s so versatile when it comes to hand strengthening.

Here is a video that shows the different grasp patterns that you can target with just a clothes pin:

Clothes pins can be used to work on hand strengthening and grasp pattern development!

Handwriting Spacing Between Words Tool

This clothespin spacing tool is one that can be attached to a notebook or folder and used again and again…because any school-based OT knows that those spacing tools can get lost very easily!

The best part of this handwriting spacing tool is that kids can make their own, while creating a unique tool that fits their personality!

First, read more about how spacing tools work.
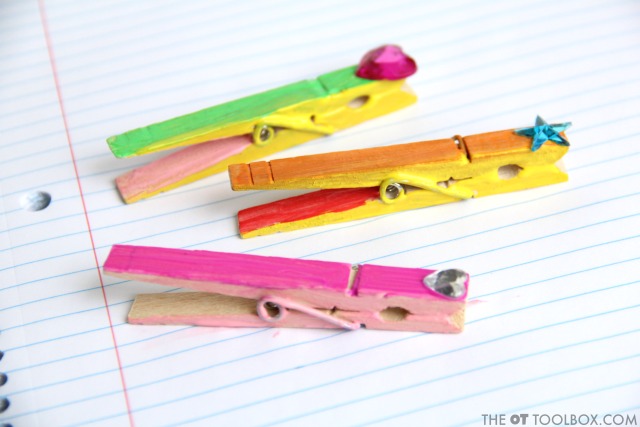
Teach spacing between words with a clothespin for better legibility and spatial awareness in handwriting.

Next, get all of your materials ready, because this handwriting spacing tool is a fun activity! In fact, school-based therapists can create a group activity in a classroom with random items found in a craft bin…while boosting those fine motor skills!

To make a DIY spacing tool, you’ll need a clothes pin. The wooden type is perfect for painting and decorating, making a fine motor craft based on the child’s interests, favorite color, etc. When the child makes their own spacing tool, they are more likely to use it again and again.

Using the clothes pin clip allows the spacing tool to be saved. (Better yet, the clip prevents another lost therapy item later found at the bottom of a backpack or in the midst of desk chaos!)
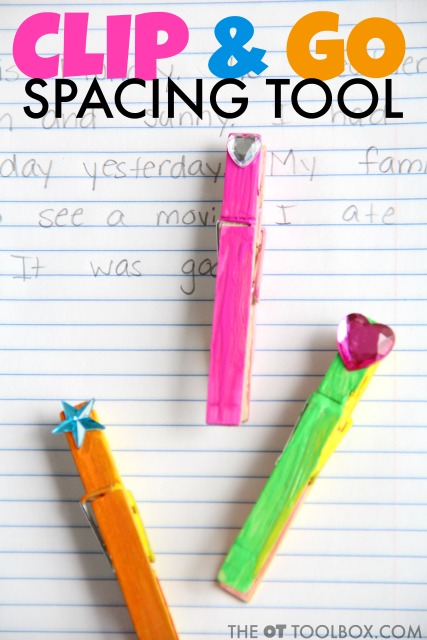
Kids can make these clothespin spacing tools to learn spacing between words in handwriting for better legibility and neat written work, just clip to a notebook or folder!

How to teach spacing between words with a clothespin:

The clothes pin clip is perfect for attaching to notebooks, folders, or a pencil box on a desk. Students will always know where their spacing tool is…but how do they use it?

Use a clothespin to teach spacing between words the same way you would use other spacing tools.

Show students how to place the clothespin on the paper after the last letter of a word. They can keep the clothespin in place as they write the next word in a sentence. They physical and visual cue of moving and seeing the clothespin can make a lasting impact on spacing between words.

Think about it this way: the messiest written work is easier to read when it has space between words. As readers, we tend to fill in missing blanks using our predictive reading skills. When words are spaced out, students will be better able to read back over notes, homework assignments, and other written work.

Spacing is often times, the easiest way to make a big impact on handwriting legibility!

For younger students, using the clip portion of the clothespin spacing tool can be achieved using strips of paper to practice handwriting. Simply cut regular double ruled paper into strips and clip the clothespin between each word as the child writes.

Those strips can even be laminated and handwriting practiced with a dry erase marker.

Using the clothespin spacing tool can make a big impact on written legibility!

Use a clothespin craft to work on spacing between words.

To make the ClothesPin Spacing Tool

You’ll need some basic craft items (affiliate links are included below):
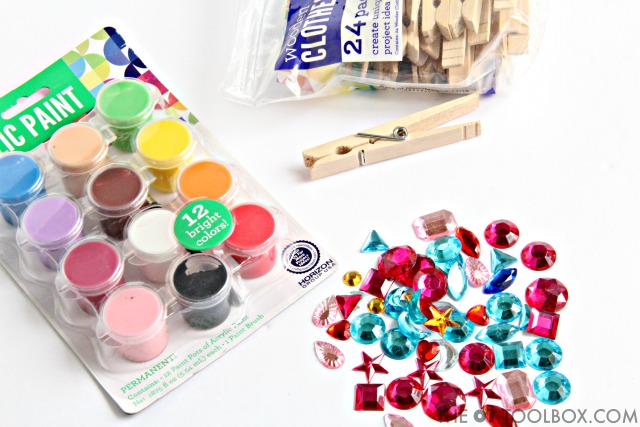
Kids can make this clothespin craft in occupational therapy or school to teach spacing between words for better handwriting.
Handwriting craft for occupational therapy
  1. Next, get the kids started on painting. Ask the child or group of kids to paint all sides of the clothes pins.
  2. On the wet paint, glitter and sparkling gems can be added.
  3. Let the paint dry and embellish with additional items including gems, stickers, puffy paint, or other items.
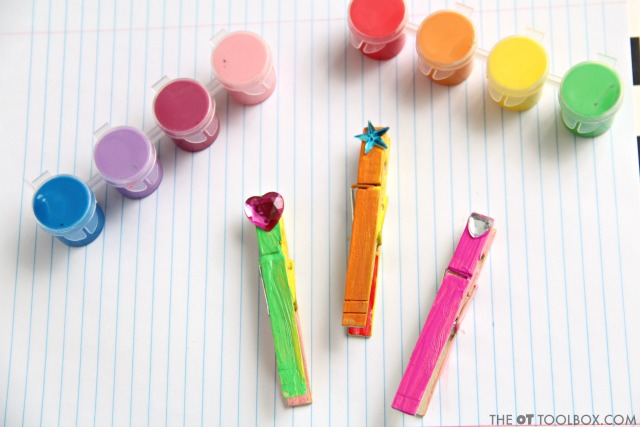
Make a clothespin craft to work on spacing between words when writing.
Paint clothespins and add gems or stickers for an occupational therapy handwriting craft.
Use a clothespin craft to teach spacing between words for better legibility in handwriting.

Looking for more ways to teach spacing between words? Try these ideas:
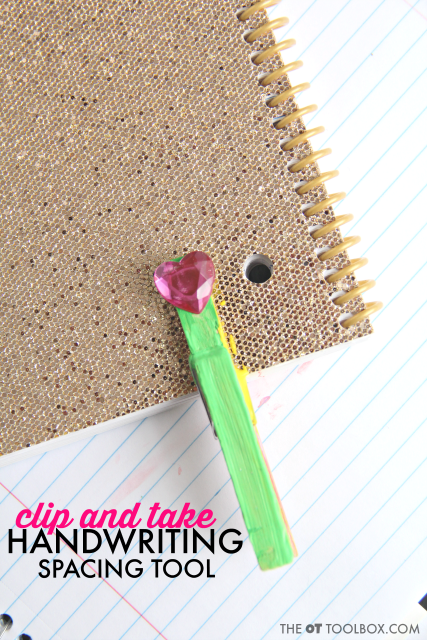
Use a clothespin craft to teach spacing between words using a clip clothespin for better legibility and spatial awareness in handwriting.


Visual Perception and spatial awareness in kids.  What is Spatial awareness and why do kids have trouble with spacing between letters and words, reversing letters, and all things vision.  Great tips here from an Occupational Therapist, including tips and tools to help kids with spacing in handwriting. Visual Spatial Relations activities for handwritingEasy accommodations for poor spatial awareness in handwriting.Try this line awareness and spatial awareness handwriting activity using puzzle pieces and crayons to work on handwriting in a fun and creative way that doesn't require writing.
 
 
Looking for more ways to address spatial awareness? 
The Handwriting Book is a comprehensive resource created by experienced pediatric OTs and PTs.

The Handwriting Book covers everything you need to know about handwriting, guided by development and focused on function. This digital resource is is the ultimate resource for tips, strategies, suggestions, and information to support handwriting development in kids.

The Handwriting Book breaks down the functional skill of handwriting into developmental areas. These include developmental progression of pre-writing strokes, fine motor skills, gross motor development, sensory considerations, and visual perceptual skills. Each section includes strategies and tips to improve these underlying areas.

  • Strategies to address letter and number formation and reversals
  • Ideas for combining handwriting and play
  • Activities to practice handwriting skills at home
  • Tips and strategies for the reluctant writer
  • Tips to improve pencil grip
  • Tips for sizing, spacing, and alignment with overall improved legibility

Click here to grab your copy of The Handwriting Book today.

Colleen Beck, OTR/L has been an occupational therapist since 2000, working in school-based, hand therapy, outpatient peds, EI, and SNF. Colleen created The OT Toolbox to inspire therapists, teachers, and parents with easy and fun tools to help children thrive. Read her story about going from an OT making $3/hour (after paying for kids’ childcare) to a full-time OT resource creator for millions of readers. Want to collaborate? Send an email to contact@theottoolbox.com.

Breaking Down Goals

breaking down goals

Making and keeping goals is hard, but breaking down goals into bite sized, smaller steps can be key to achieving a larger objective. According to an article in Psychology Today, 80% of people’s New Year’s resolutions fail by February!  The author goes on to give her thoughts and theories as to why they fail in this article.  Breaking down goals into measurable chunks will increase your chances of success.

Breaking down goals

breaking down a smart goal into steps

So often, we have good intentions when it comes to setting goals for ourselves. But there are many reasons why goals fail, and setting huge, audacious goals can be part of that reason. But for the most part, we can pinpoint four reasons goals fail.

Four traps to goal success: 

  • People don’t set clear goals
  • They feel discouraged
  • They feel overwhelmed
  • They are not ready to change

Do any of these reasons sound familiar?

It makes sense! But, the real reason goals fail, beyond these four things, is when people are drawing a mind map, creating a plan, or a goal, they are not SMART about it. We might make a goal that is lofty, unrealistic, and it’s not specific enough to know where to begin. Let’s take a look at these components to a good goal…

Start by understanding the concept of SMART goals. People are very smart, just not about the way they start projects or set goals. 

SMART is an acronym for;

  • S: specific – did you detail what it is you want to achieve?
  • M: measurable – how are you going to measure success?
  • A: is this goal attainable or too lofty?
  • R: is this goal realistic?  
  • T: timebound – Do you have a set timeframe for this goal to be measured?

First decide if the goals are SMART.  Are the goals specific and measurable, or too general?  Are they actually attainable and relevant? 

Once you have a goal in mind (that can be further broken down), you can move on and actually break down the goals and get started on that first step.

goal oriented mindset

If you or your learners are working on a goal oriented mindset, breaking down goals is a terrific method to improve the likelihood of success.  Featured in this post are a specific tool for breaking down goals into measurable chunks. This printable resource supports individuals in using a goal oriented mindset to accomplish tasks they set out to achieve.

In this activity, learners can break down goals to make them more attainable.

Once the larger goal is set, use the goal-oriented mindset strips to break them down.

Decide on the overall goal- At the top write the overall goal: I will clean my room.  Make this more specific by adding time frames, steps, ways to measure success, and possibly a reward at the end.  A better goal might be worded; I will clean my room, to be inspected every Sunday, and check off at least 8/1o items on the list each week.  *Striving for 100% all the time might lead to failure.

Break the goal down into steps- Help your learner decide what the steps might be to achieving this goal. Write each of these steps on the first strip, then staple the second strip on top.  Each time a part of the goal is accomplished, your learner will snip off the next piece of paper to reveal another chunk of their goal.

Some of the steps to cleaning a bedroom might be:

  1. Put all dirty laundry in the basket
  2. Take all plates, cups, and other dishes out of room
  3. Put trash in the bin, then empty bin
  4. Put clean laundry away
  5. Put toys in their boxes or back on the shelves
  6. Change sheets
  7. Vacuum
  8. REWARD!

Each one of these tasks is measurable.  Make them attainable by changing and tweaking as needed.  Having a list like this makes this overwhelming chore seem more doable. If not, you may end up with a kid like mine, who would just lie in the middle of the mess and cry.

Check out this post on writing a goal ladder for another method to achieving goals.

A BIT OF INTROSPECTION BEFORE GETTING STARTED

Before trying to “break down goals” into steps, think about a goal you have recently set for yourself. It could be one that was a great success, or went down in a ball of flames.

Now look back and determine if your goal was SMART.  Did it have all the pieces it needed, or was it flawed from the start? 

Then recheck and see if you fell into one of the four traps:

  • People don’t set clear goals
  • They feel discouraged
  • They feel overwhelmed
  • They are not ready to change

A goal was set for me last year to keep the dog off of the bed and couch.  It was a miserable failure.  Why? I was (and still am not) not ready to change. While the goal was clear, it was not attainable.  

Once you have spent a little time on introspection, it is time to share your wisdom and skills with your learner.  If you are not able to set and achieve goals, it will be harder to help others to be successful. This goal oriented mindset will not be impossible to teach if you are not great at meeting your own goals, as we are often able to teach others to do what we can not do ourselves.

If this idea of breaking down goals into chunks makes sense, these goal-oriented mindset strips are a great jumping off point to getting organized and working on executive function. How about learning to make and follow checklists?

Our learners know they need to change and grow, but may get stuck in the first step of figuring out what goals to set.  Change may seem overwhelming, they are not aware of what they need to learn, or can not think past this current moment to imagine a goal. 

Adult goals seem to revolve around the following:

  • Lose weight
  • Learn to cook, fish, surf, snowboard, etc
  • Eat less, or eat healthier
  • Exercise more
  • Worry less, or decrease stress
  • Save more money
  • Have a better body image

What are some good goals for your younger learners?

  • Join a team
  • Clean their room
  • Write neater
  • Read more
  • Make a new friend
  • Learn a new skill (shoe tying, bike riding, shoot a basket)
  • Eat more vegetables
  • Watch less television
  • Play less video games

Of course these goals would need to be SMART in order to lead to success. Help your learners break down their goals with these mindset strips along with other strategies to develop a goal oriented mindset.

Setting and working on goals is part of executive functioning skills. The OT Toolbox is full of posts on EF.  Just type Executive functioning in the search box, or check out this executive function course to get started.

Other resources for kids on breaking down goals include:

As for my goal of not having the dog on the bed or couch, I have written that one off, and decided to focus on something more attainable. 

Free Activity for Breaking Down Goals

Above, we shared how to use this printable resource that helps users to break down their goals into bite sized pieces. You can get a copy of that goal breaking activity here. Simply enter your email address into the form below to access this file. Print off the tool and get started with creating goals and breaking them down!

This item is also available inside our OT Toolbox Member’s Club.

Want to add this resource to your therapy toolbox so you can help kids thrive? Enter your email into the form below to access this printable tool.

This resource is just one of the many tools available in The OT Toolbox Member’s Club. Each month, members get instant access to downloadable activities, handouts, worksheets, and printable tools to support development. Members can log into their dashboard and access all of our free downloads in one place. Plus, you’ll find exclusive materials and premium level materials.

Level 1 members gain instant access to all of the downloads available on the site, without enter your email each time PLUS exclusive new resources each month.

Level 2 members get access to all of our downloads, exclusive new resources each month, PLUS additional, premium content each month: therapy kits, screening tools, games, therapy packets, and much more. AND, level 2 members get ad-free content across the entire OT Toolbox website.

Join the Member’s Club today!

Breaking Down Goals Activity

    We respect your privacy. Unsubscribe at anytime.

    NOTE*The term, “learner” is used throughout this post for readability and consistency. This information is relevant for students, patients, clients, preschoolers, kids/children of all ages and stages or whomever could benefit from these resources. The term “they” is used instead of he/she to be inclusive.

    Victoria Wood, OTR/L is a contributor to The OT Toolbox and has been providing Occupational Therapy treatment in pediatrics for more than 25 years. She has practiced in hospital settings (inpatient, outpatient, NICU, PICU), school systems, and outpatient clinics in several states. She has treated hundreds of children with various sensory processing dysfunction in the areas of behavior, gross/fine motor skills, social skills and self-care. Ms. Wood has also been a featured speaker at seminars, webinars, and school staff development training. She is the author of Seeing your Home and Community with Sensory Eyes.

    Sensory Activities For 1 Year Olds

    sensory activities for 1 year olds

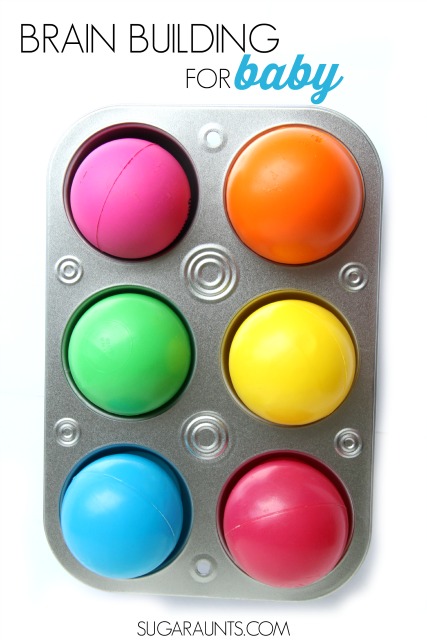
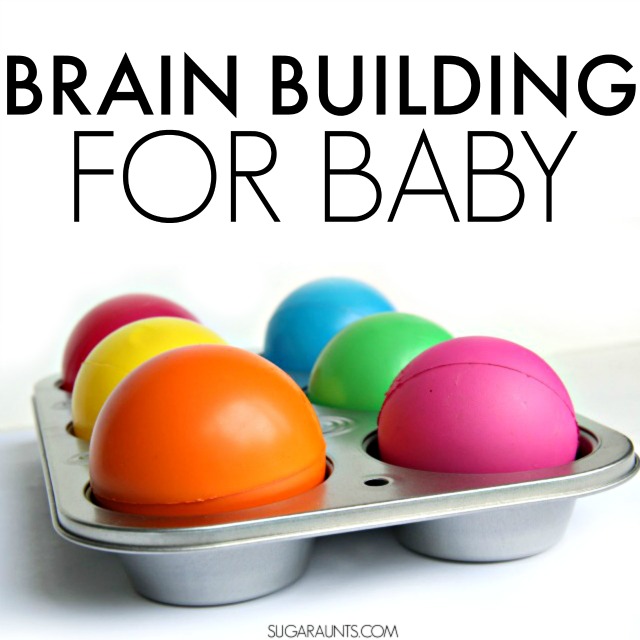
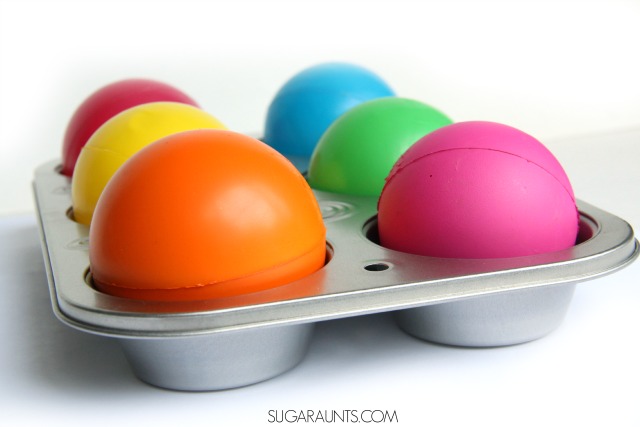
    This blog post is one of the oldest posts on the site, but the sensory activities for 1 year olds that we shared way back when are just as fun now! When this post was written, the babies that played with the balls and muffin tins were just 11 months and going on 1 year. Those little ones are now 11 years old! This is such a great brain building activity for babies that I wanted to reshare the idea for the latest crop of babies out there!

    If you are looking for more Baby activities, try the fun over on our Baby Play page. You’ll also find some great ideas for different ages on this post on baby sensory play.  We’ve been busy!

    This is my favorite activity to help babies learn colors.

    sensory activities for 1 year olds

    sensory activities for 1 year olds

    This sensory activity for 1 year olds is an easy activity to set up. You’ll need just a few items:

    • colorful balls
    • muffin tins

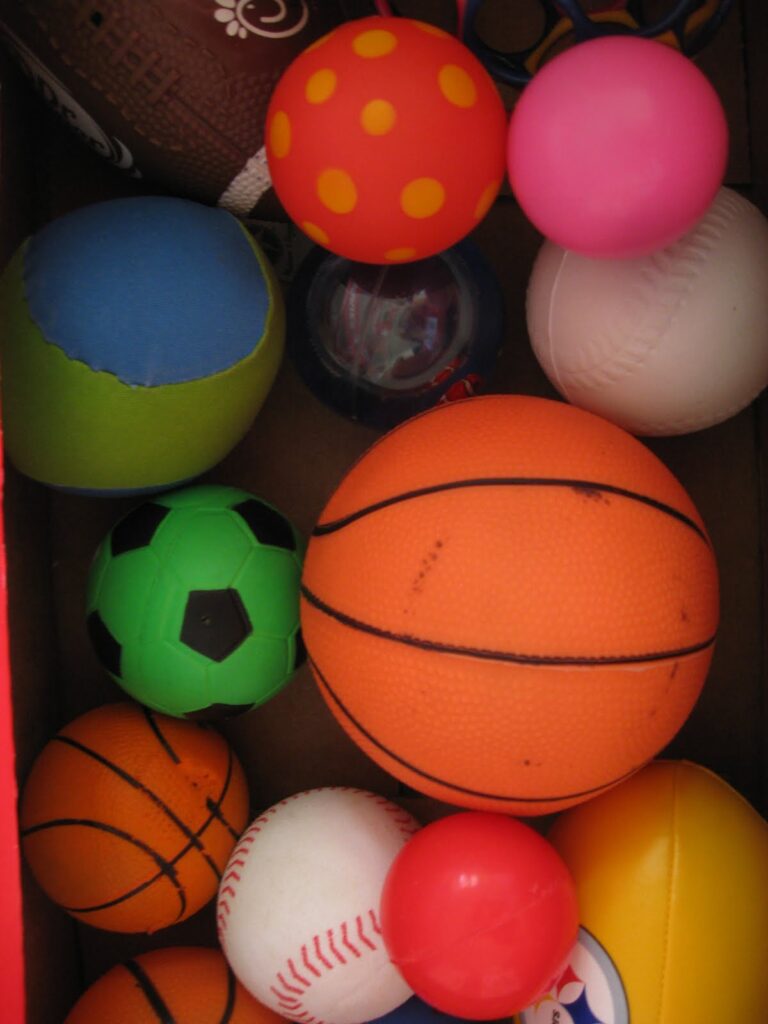
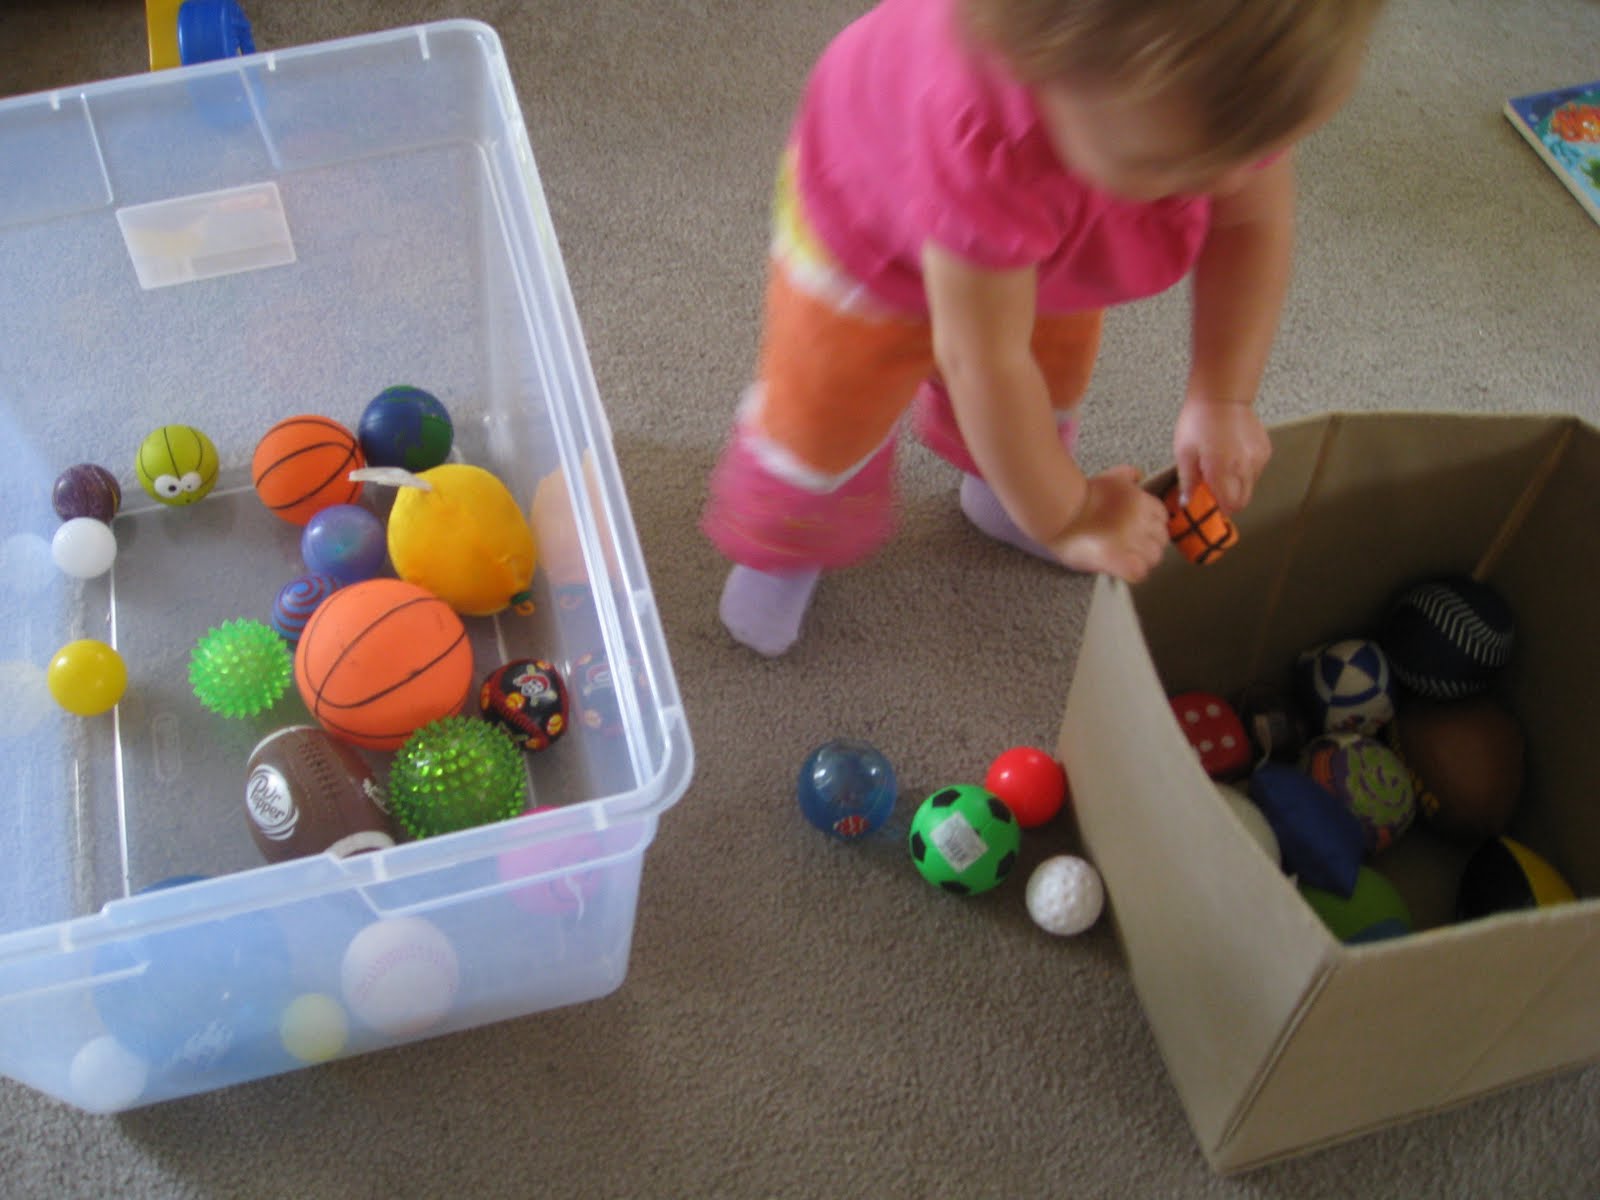
    You can add create another sensory activity for the babies with the same colorful balls and a cardboard box or basket. We also used an empty cereal box with hole cut into the sides.

    Each sensory activity here supports development of eye-hand coordination, grasp and release, core strength and stability in dynamic sitting, positioning and seated play on the floor (floor play).

    Baby and Toddler Brain Building activity using balls and a muffin tin. Perfect for developing fine motor skills, visual perceptual skills in an active activity for sitting and mobile babies.

    An important consideration is the use of baby positioners as they can impact powerful movement-based play in babies.

    The best for sensory play for 1 year olds is just playing on the floor! There are so many benefits to playing on the floor with a basket of balls and a few muffin tins.

    Baby and Toddler Brain Building activity using balls and a muffin tin. Perfect for developing fine motor skills, visual perceptual skills in an active activity for sitting and mobile babies.

    What do babies love to do? Take things out and put them back into containers.

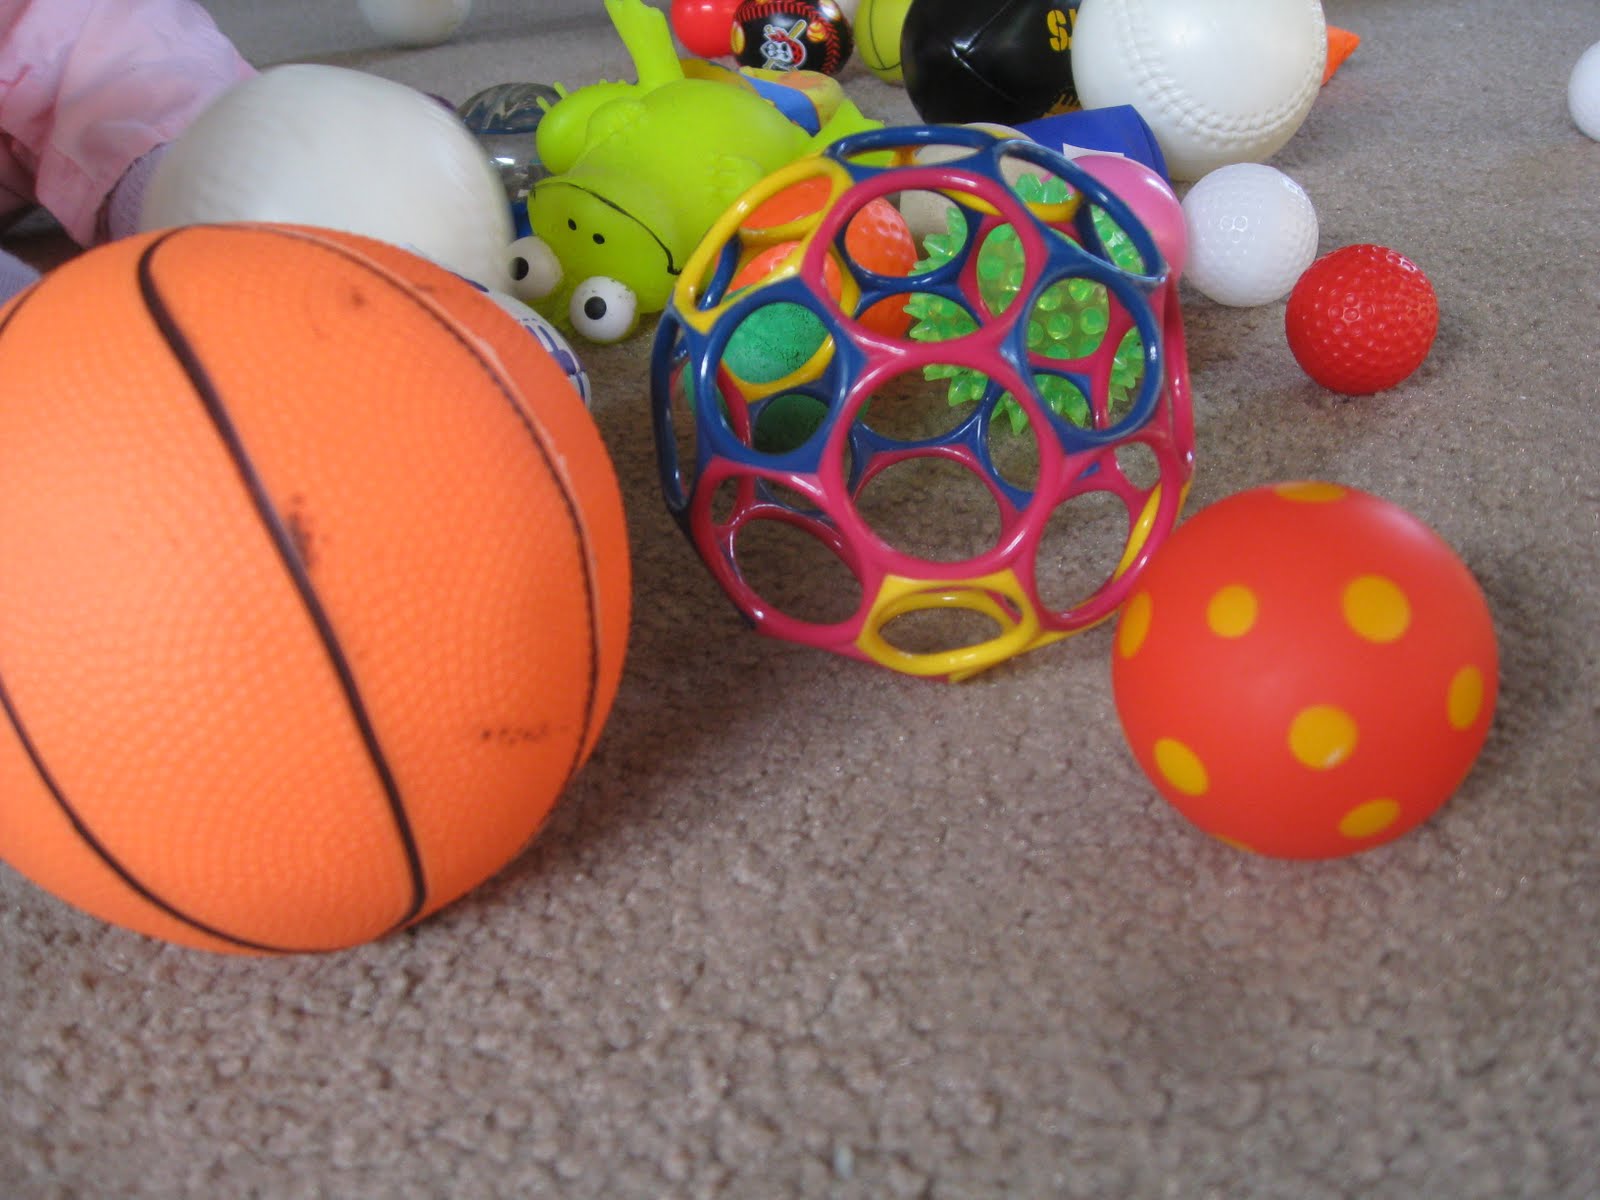
    We have a bunch of different colored and sized balls that are so fun to play with in so many ways. I had my niece and nephew here one day and we needed something different to do. My nephew and my Baby Girl are both 11 months old and they absolutely loved this play activity! 

    I pulled out my muffin tins and they had a blast putting the balls into the tins, taking them out, putting them back into the box, and pulling them out again!

    Little Guy (my 3 year old ) loved joining in too. Really, who could resist playing with all of these colorful balls???

    Peek a Boo Sensory Activity for 1 year olds

    What else do babies love? The peek-a-boo game!

    It’s at this age (around one year) that babies often struggle with separation anxiety when being dropped off at a caregiver’s when separated from their parents or caregivers. You will even see signs of separation angst when a parent goes into another room, which can especially happen when the baby is tired.

    The next sensory activity for baby was a fun one!

    We had an empty cereal box that I cut circles into. They had a ton of fun putting the balls into a hole, and pulling a different one out as the box moved around…there were a lot of little hands in there moving that box around 🙂

    The it’s-there-then-it’s not of a great game of peek-a-boo (or peek-a-ball in this case!) is awesome in building neural pathways of the brain. 


    More sensory activities for babies

    Other sensory activities for 1 year olds and babies include using small baskets or boxes to transfer the balls from one container to the other.

    Transferring from box to box…working those hands to pick up different sized/weighted/textured balls.  Dropping the ball to see what happens is so predictable, but it is important in learning for babies. Just like when baby drops the cup from her highchair a million times…

    We had a ball!

    (couldn’t resist that one…heehee)

    Baby and Toddler Brain Building activity using balls and a muffin tin. Perfect for developing fine motor skills, visual perceptual skills in an active activity for sitting and mobile babies.

    Need more sensory ideas for 1 year olds? Try these:

    • Sensory tables- put interesting toys, textures, scoops, and containers on a low table like a coffee table. The new cruiser or early walker can stand at the table and explore the textures
    • Messy play on a highchair- Strap baby in and encourage messy food play. Thing about apple sauce, pudding, or mashed potatoes.
    • Textured fabrics- Put a bunch of fabric scraps into a box and invite the one year old to pull them out and put them back in.
    • Play with cups and spoons– with supervision- This is a great activity for eye hand coordination skills.
    • Use a baby gym to encourage reach and play in various positions.

    Bilateral Integration

    bilateral integration

    Bilateral Integration is an area that kids need for so many tasks…but it’s not a developmental milestone that stands out unless a problem is necessarily noticed unless there is a problem. What we do notice in as our kids grow and develop are the motor skills that impact functioning. We notice use of both hands, fluid and efficient movements in tasks like playing, getting dressed, and interacting with peers. Let’s take a look at bilateral integration and dissect how to support this essential sensory motor skill.

    Another resource that supports this information is our blog post on bilateral coordination. You’ll find many bilateral integration activities in that blog post.

    Bilateral integration resources and information

    Bilateral Integration

    From writing and holding the paper, to holding a art project and cutting with scissors, to zippering a jacket, coordinating both sides of the body in an efficient manner is a skill that is necessary for almost everything we do.

    Bilateral coordination develops from a very young age. When babies begin to bring both hands together at their mouth, you are seeing coordinated efforts begin. When the infant pushes up on both arms while lying in a tummy time position, the integrated movements of both hands and legs occurs along with strength and control.

    Research tells us that motor tasks like jumping, jumping jacks, riding a bike, hopping, etc. become easier and more fluid with age as children develop. It’s through play, sensory input, motor skill experience, and activities that these skills are developed.

    Below, you will find bilateral integration activities that can be incorporated at various ages. Use these bilateral coordination activities to promote coordinated and efficient movements in meaningful activities.

    What is Bilateral integration?

    Bilateral integration refers to the ability of both sides of the brain to work together in a coordinated manner. We see this ability when the skills associated with the left side of the brain are done in conjunction with skills associated with the right side of the brain.

    Skills associated with the left side of the brain:

    • Speech and language- Understanding using language (listening, reading, speaking and writing)
    • Comprehension
    • Math problems and facts
    • Handwriting
    • Linear thinking
    • Memory for spoken and written messages
    • Logic
    • Verbal language
    • Sequencing

    Skills associated with the right side of the brain:

    • Creativity and imagination
    • Creative thinking
    • Spatial skills
    • Intuition
    • Art, drawing, and creative artistic skills
    • Musical skills

    Then, when other aspects of functional performance are added to the mix and the individual is still able to complete the task, this is bilateral integration in action.

    Those other considerations include:

    • Attention and focus
    • Proprioceptive input
    • Vestibular input
    • Visual information
    • Motor targets achieved, or motor control shown by fluid movements
    • Praxis- movements thought about and completed in coordinated manner

    When both sides of the body work together in a coordinated manner so that the individual can manipulate objects such as cutlery with various amounts of force modulation, taking in sensory stimuli such as sights, sounds, tastes, and proprioceptive and vestibular input, and managing posture, coordination, and body awareness, bilateral integration is visible.

    When bilateral coordination or bilateral integration is intact and progressing appropriately through development, it is an indicator that both sides of the brain are communicating effectively and sharing information during functional tasks. 

    Tasks that require bilateral integration

    Knowing what we covered above, it is easy to see how some daily tasks are impacted by coordinated and integrated motor skills requiring both sides of the body. Each of these skills requires and has input from other sensory systems and cognitive systems as well, such as proprioceptive input, executive functioning, attention, and even creative thinking and problem solving.

    • Writing and holding the paper in a stable position
    • Cutting and holding the paper steady and at an appropriate height
    • Putting on a coat while holding a backpack (or other item)
    • Tying shoes
    • Pulling up pants and not losing balance
    • Putting socks on
    • Jumping jacks with coordinated movements
    • Turning a page and writing or copying work
    • Typing
    • Squeezing toothpaste and brushing teeth
    • Flossing teeth
    • Playing an instrument
    • Using a knife and fork
    • Pouring water from a pitcher into a cup
    • Cooking skills: chopping, cutting, slicing, peeling, taking food out of packages, putting food into the microwave or stove, taking food out of the fridge
    • Reaching for objects
    • Stabilizing an object with one hand while manipulating another object with the other
    • Jumping rope
    • Catching a ball
    • Riding a bike
    • Swimming
    • Many more tasks!
    These bilateral integration activities are creative ways to help kids with bilateral integration needed for fine motor tasks like handwriting, scissor use, and other functional skills.

    Bilateral Integration Activities 

    Amazon affiliate links are included in this post.

    First, let’s talk about some ways that coordinated use of the arms and legs are needed for coordinated movements. These are skills and tasks that can easily be performed by some children. Others, who struggle with motor planning, core strength, posture needs, left-right discrimination, visual motor skills, or many other areas can struggle. It’s easy to see that simply addressing some areas won’t fix the issue when an underlying concern is present.

    To promote the skills needed for these tasks, try some of the activities listed below to promote bilateral integration:

    Related Read: Here are are some additional bilateral coordination activities with a winter theme.

    Bilateral Integration Activities for Babies

    Bilateral movements are part of everyday life for baby! From turning, creeping on the floor, rolling, sitting, crawling, cruising on furniture, and taking first steps, babies are developing bilateral integration skills from birth.

    Read here about the types of crawling, all of which integrate bilateral coordination and motor planning.

    Encourage these bilateral integration activities with babies:

    There are ways to support child development at this stage through age-appropriate play that will support the child’s progression at later stages, too.

    • Provide various toys and objects appropriate for young babies. Include bold colored objects including black, white, and red items or contrasting colors, toys, or pictures on a blanket or play mat during tummy time. This black and white board book (affiliate link) can be propped up or used while on an adult’s lap.
    • Provide gentle infant massage during and after bath time, and on all extremities. Here is a resource book on infant massage. (affiliate link)
    • Provide toys and age-appropriate objects for reach and grasp. This banana toothbrush teether (affiliate link) has molded handles that make it a great teething item for little ones.
    • Provide teething toys as baby brings hands together at their mouth.
    • Provide toys that are appropriate for mouthing that can be held in both hands.
    • Provide hand-held toys while the child is seated in a high chair. This one (affiliate link) has a suction cup base to keep it stable, but has a black and white ring at the base that babies can grasp with one hand while manipulating with the other hand.
    • Provide toys of various weights when seated upright to provide resistance against gravity and to promote strengthening of the upper extremities. Blocks, rings, sorting toys, or something like this quality teething toy (affiliate link) made of heavier materials can be useful to provide variances in weight, while still allowing the baby to manipulate the item.
    • Provide toys available on a high chair or table surface at various distances to provide opportunities for depth of perception when reaching for toys and bringing them to the mouth.
    • Continue tummy time while playing in prone to promote strength and stability in upper extremities.
    • Use the ideas in our baby play library for more ideas.

    Bilateral Integration Activities for Toddlers

    Provide toys requiring one hand to stabilize a base while the other hands manipulates an object. Shape sorters are great for this.

    Other toys include:

    • Peg Boards (affiliate link)
    • Blocks- These press and stay sensory blocks are perfect for encouraging one hand to use as a stabilizer and one hand as a
    • Play Dough
    • Drawing/coloring- Here is more information on the benefits of coloring.
    • Use these crayons for toddlers to support bilateral coordination skills during coloring.

    Bilateral Integration Activities for Preschool

    Preschool is a time for building hand strength, coordination, eye-hand coordination, and improving motor skills needed for the upcoming years. You can find many preschool activities here on our website, but some specific ways to support bilateral integration include:

    • Encourage kids to participate in cooking activities.
    • Use play dough to cut with scissors and roll out play dough snakes or balls of play dough.
    • Age-appropriate crafts and craft sets are great for this age.
    • Play with stickers of various sizes.
    • Make “snow angels” on a carpet or fluffy blanket
    • Simon Says is a great game for encouraging novel and varied motor combinations. Use these Simon Says Commands to get started.
    • Play various song and movement games such as the Hokey Pokey, Farmer in the Dell, etc. Here are movement and song activities that can be used in circle time, warm-ups, centers, or in group activities. All of these move and dance songs promote core strength and stability.
    • Climb on outdoor play areas at playgrounds and in low trees.
    • Add sensory! Try this table top bilateral coordination activity to draw shapes.
    • Draw with both hands! This four leaf clover activity is a powerful one as it covers a variety of skills.

    Bilateral Coordination Activities for School-Aged Kids

    In schools, development of bilateral integration is important for tasks like putting on a coat or jacket and backpack, holding a paper with the supporting hand and writing, and using scissors. There are many other bilateral integration tasks that happen throughout the day.

    Some ways you can support development of these skills include:

    Try these bilateral integration activities and coordination ideas to promote use of both hands together in activities such as handwriting, cutting with scissors and so many other tasks!

    Last thoughts on encouraging bilateral integration

    The best way to encourage and promote integration of both sides of the body? Movement and play! Get the kids active, moving, and experiencing various planes against resistance and with exposure to all types of sensory experiences.

    The combination of proprioceptive input into a play experience that promotes strengthening in a fun way provides all of the benefits kids need to improve bilateral coordination skills. Add personal interests as the child grows. And finally, have fun!

    Use these bilateral coordination activities to promote bilateral integration needed for skills like writing and holding the paper and any activity that uses one hand to manipulate an object while stabilizing with the other hand.

    Feeding Developmental Milestones

    feeding developmental milestones

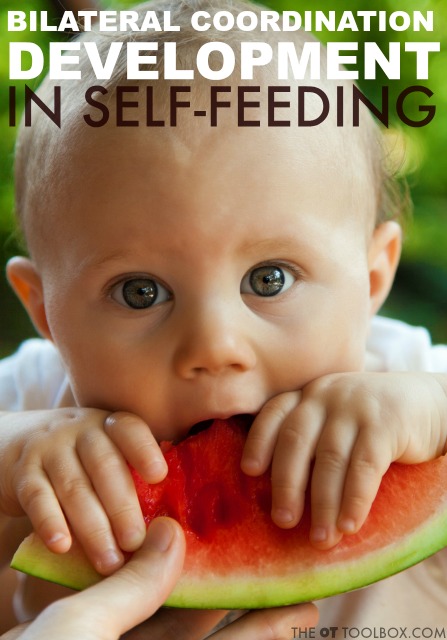
    Below, you will find resources on feeding developmental milestones and information on development of bilateral coordination that are needed for the feeding skills to use both hands together in a coordinated manner. These bilateral coordination milestones are needed for independent feeding skills, so let’s break this down.

    Development of bilateral coordination skills is necessary for improved self-feeding in toddlers and improves through the childhood years. Independence with feeding skills is an important part of child development!

    Feeding developmental milestones in kids

    Bilateral Coordination Development

    When we talk about bilateral coordination development, we can also mean bilateral integration. Typically, bilateral coordination skills refer to the physical sensory motor use of both sides of the body in a coordinated and fluid manner.

    However, bilateral coordination requires the overarching bilateral integration of the brain hemispheres and takes into consideration the ability to manage all of the functions listed above.

    In fact, there are three components of bilateral coordination and these play a role in feeding developmental milestones:

    • Symmetrical movements- picking up a bottle with both hands to drink
    • Reciprocal movements- Using one hand to pick up food and another to pick up food the next time; we see this with babies and toddlers especially
    • Dominant hand/supporting hand movements- Using a knife to stabilize the food and the knife to stab the food. Or, holding a bowl with the supporting hand and the dominant hand to scoop the food from a bowl

    Independence with feeding progresses from symmetrical movements to reciprocal movements, to dominant/supporting hand movements.

    One way to really take a look at the developmental progress of bilateral coordination skills is through the functional task of feeding using cutlery, or utensils like spoons, forks, and knives and drinking tools: cups, bottles, etc.

    When children learn to feed themselves and become more independent with self-feeding tool use with finger foods, utensils, or cups, development of bilateral coordination is one aspect that is necessary.

    When we think about self-feeding, problems can arise based on a variety of areas. Upper extremity coordination is one of those aspects that are evaluated and addressed when self-feeding difficulties are present.

    When thinking about development of self-feeding, consider the following issues related to bilateral coordination difficulty and try using some of the bilateral coordination activities based on development of bilateral coordination to improve feeding skills.

    Related: For several ideas to support bilateral coordination skills while indoors, try our list of Winter Bilateral Coordination Activities that kids will love!

    Discover typical development of bilateral coordination in feeding skills in kids, which are needed for improved independence in self-feeding.

    Bilateral Coordination Milestones

    Bilateral coordination development begins prior to birth, while in the womb with the physical movements felt by the mother. From there and immediately after birth, bilateral coordination milestones are achieved.

    Amazon affiliate links are included in this post.

    feeding developmental milestones

    Development of bilateral coordination in self-feeding depends greatly on the child’s developmental level. Below, we’ll go through feeding milestones by age.

    Development of feeding skills is just one skill that is a great way to to assess and analyze the development of bilateral coordination. Also, development of fine motor skills and visual motor skills have an impact on coordination of the hands in self-feeding.

    In one blog post, we covered the skills needed for independence with functional tools, including holding a spoon, scooping with spoons, using forks, and other tools like toothbrushes, hair brushes, etc. That is a good place to start with understanding all of the other areas of development that go into tasks like feeding.

    Throughout these ages, oral motor development plays a significant role in the manipulation of foods. Consider how these aspects of oral motor skills impact the developmental progression of feeding skills:

    • Rooting
    • Sucking
    • Swallowing
    • Gag reflex
    • Tongue movement
    • Jaw thrust
    • Jaw movements (moving jaw side to side to move food and movement of foods)
    • Lip closure during swallow phase of eating and drinking
    • Biting into foods
    • Tolerating different solid food and liquid consistencies

    Development of bilateral coordination occurs at every stage of childhood and can be observed through feeding abilities.

    Newborn Feeding Skills

    At the newborn stage, primitive reflexes dominate movements. In particular the rooting reflex supports feeding at this age.

    Babies aged 0-3 months will root, suckle, and swallow in feeding activities. This stage progresses as vision and motor control develop.

    Related to this stage is our resource on the strategies occupational therapists can address when newborns are not sleeping through the night, as sleep impacts routine and feeding schedules.

    Feeding milestones 4-6 months

    In this stage, development of coordination between the eyes and motor skills are just developing. The child explores with their eyes, hands, and mouth and will start to reach for objects purposely around four months. Accuracy of hand use is limited.

    Babies can be observed using both hands in play as they pick up objects in their line of sight. However, they typically will pick up items with the hand that is closest to the object or toy. 

    During this phase, the baby is spoon fed and when presented with a spoon, makes a suckling movement with lips and mouth. The baby will show a gag reflex at this age. With foods on a spoon, the baby will thrust their tongue out at the presence of foods and push the spoon away at times.

    Look for munching of the jaw, or movements in the jaw indicating a chewing pattern, even though the young child can not chew at this stage.

    Feeding Skills at 6-9 Months

    At this stage, the child is typically sitting up with or without support. The child’s hands are often times used in grasp with a clenched or a fist-like grasp.

    The child will begin to separate the thumb from the rest of the fingers to use a gross grasp on objects. Babies at this stage will typically place everything in their mouth, using both hands together in symmetry.

    The child will hold a bottle or cup with assistance, placing both hands on the cup/bottle, but are not able to hold the cup or bottle on their own.

    The gag reflex is still present but it is less sensitive to foods and utensils.

    The baby has a voluntary bite on soft foods, chew cookies, and baby teething foods. They will begin to hold those items independently using both hands together at their mouth.

    You will see a raking motion from the fingers, but this movement is typically not successful in picking up small foods like baby puff snacks. the baby can , however begin to pick up small food pieces using the thumb and the side of the pointer finger to grasp items (not a pincer grasp)

    Feeding Skills at 9-12 Months

    The child is able to sit upright without support and develops proximal stability, allowing for increased development of distal extremities.

    In this stage, babies are developing pincer grasp and thumb and finger opposition skills. This stage brings the ability to hold one object in each hand such as two blocks.

    The baby will be able to bring both hands together at the same time. Children will be able to begin finger feeding skills around 9 months as they bring dry cereal foods to their mouth with a scraping motion.

    Finger isolation on both hands begins as they poke foods and explore textures with their hands. Children will use both hands to smear food and bring soft foods such as wet foods like a cereal mix or applesauce to their mouth. The child will be able to hold a cup with both hands and bring it to their mouth.

    This stage is when we begin to see functional performance related to arch development. As refined motor skills continue, this base will continue to include utensil use.

    The child will start to hold a fork and spoon with a gross grasp, or a palmer grasp but without a dominant arm. At this stage, grasp of the spoon occurs with a palmer grasp. The child will not hold the bowl or plate with their non-assisting hand.

    You may see the baby begin to take longer sips from a straw while managing the liquid in their mouth to show a true drink. Similarly, with cup use, there is more drinking patterns as a result of the increased jaw control. However, at this age, these drinking skills are with an adult present to hold and remove the cup or straw. The bilateral coordination skills are not present in order to engage the hands either symmetrical coordination or as a dominant hand/supporting hand along with the drinking aspect.

    You will start to see more controlled use of the thumb and pointer finger in a true pincer grasp to pick up foods. This occurs between the tip of the thumb and the pointer fingers. The baby at this age can finger feed themselves.

    Feeding Skills at 12-15 Months

    In this stage, the child begins to dip their spoon into foods. They will have more accuracy with dipping as opposed to scooping foods.

    The spoon is held with a digital grasp and the child will likely switch hands while holding the spoon. The child will lift and drink from a cup with one hand.

    As toddlers progress in development, they will begin to establish a dominant hand and crossing midline. This ability to utilize a dominant hand and a non-dominant hand in activities indicates a maturation of the brain and lateralization in functional tasks, which is very important for motor planning, directionality, and visual motor skills. 

    A scooper bowl with suction base (affiliate link) can be  help with scooping development and bilateral coordination at this stage.

    The child at this age can hold a spoon with a gross grasp or palmer grasp with an inverted wrist. They will dip the spoon in food. The spoon will make it back to the mouth, but typically, the spoon is only touched to the lips. They will not likely remove all of the food from the spoon using their lips at this point. The motion of the spoon is entirely with the shoulder and elbow. The wrist is in one position so that the spoon is dipped into the food upside down. You’ll see increased shoulder abduction in order to get the spoon into the food. The spoon may be upside down in their mouth too.

    Read more in a related blog post about how to hold a spoon.

    Feeding Skills at 15-18 Months

    The child is able to support the bowl with one hand while scooping with a spoon. Children can hold a small cup and pick out pieces of dry cereal or snacks.

    Fine motor skills are developing quickly.

    Drinking from a cup can move from a sippy cup to a spouted cup. Other young toddlers can drink from a straw. Holding the cup moves from a two handed grasp to a single grasp. You’ll see grasp on the handle of a sippy cup or spouted cup begins to move from a gross grasp to a pincer grasp. This grasp pattern development occurs in this later stage of toddler range because of the weight of the cup/drink.

    By the end of this age range, the 18 month child can hold an open cup on their own to pick up, drink, and set the cup back down with just some spilling of the liquid.

    Feeding Skills at 18-24 Months

    As a child gets closer to two years of age, the variety of foods increases and this allows for greater exposure to textures of foods (mushy, crunchy, etc.) and types of foods (liquids, solid foods, mixed consistency foods).

    The child will typically be able to drink from a cup with accuracy and with one hand but with more accuracy and precision. As the child moves toward two years, you can see a desire to drink from an open cup, but the accuracy of motor control and attention skills are not there for this type of cup.

    There will be more coordination of the spouted cup or sippy cup and accuracy, with less spillage.

    At this stage, the child will use a dominant hand in self-feeding and will begin to supinate the forearm when scooping with a spoon, resulting in greater accuracy. This looks like a typical spoon motion with the wrist, however there will still be a palmer or gross grasp on the spoon.

    By two years, the toddler can use the spoon to scoop and feed themselves chunkier or thicker foods such as applesauce, mashed potatoes, etc.

    Development of bilateral coordination for feeding skills is essential for accuracy and improving independence in self-feeding in kids.

    Feeding Skills at 24-36 Months

    During this stage, the child’s dominant hand is more established and the child can support with the non-dominant hand with greater accuracy.

    There will be greater control of forearm supination so that the palm is facing upward when scooping. Typically, the child is able to self-feed without assistance.

    Around 2.5 years, the child can drink from an open cup with one hand. A small, “pixie” cup or slightly larger small cup is great for this. They can also hold the spoon with a “palm up” position on the spoon. This allows for greater accuracy and ability to self feed thinner soups or cereals with milk.

    By the end of this stage, around 3 years, the child can use a fork to pierce soft foods and they can brink the fork to their mouth and remove the food using their teeth and lips.

    Feeding Skills at 3-4 Years

    The child will begin to use a fork with improving accuracy. They can use a straw and hold the cup with one or both hands. They can also hold a cup while drinking from a straw on their own, and without assistance.

    The child can use a pitcher to pour water into a cup, demonstrating bilateral coordination with advancement to the dominant hand/assisting hand stage.

    The child will use both hands together with improving coordination in self-feeding. At this age, it’s a great time to get kids involved in helping to cook recipes. This experience in the kitchen along with an adult supports development of fine motor, sensory motor, and visual motor skills. Check out these cooking with kids recipes to support these areas.

    Feeding Skills at 4-5 Years

    Children will be able to use a knife to spread butter or peanut butter with the dominant hand while holding the plate or bread with their non-dominant hand.

    Beginning use of child-friendly knives is appropriate. They will press with the knife rather than chopping or slicing.

    In this stage, you’ll see a coordinated use of hands, in most cases. At this age, it’s important to expose the preschool child to lots of fine motor play and sensory motor play experiences to support development and exposure to motor activities. These promote development needed for fine motor skills and success in later years in the classroom.

    Feeding Skills at 5-6 Years

    Children will use a fork and spoon accurately. They will be able to scoop, poke, and stab with a fork using appropriate positioning and without use of the non-dominant hand to support the plate.

    The child will begin to use a knife to cut foods.

    Feeding Skills 6+ Years

    The child will be able to cut meat with a knife with increasing accuracy and ability. As they develop, the child will increase coordination with knife and fork use in a coordinated manner.

    Spilling of cups and foods decreases with age and development.

    Attention in feeding tasks develops as children progress through the various stages, too. This makes a big difference in accuracy as well.

    The video below shows how grasp patterns impact holding a spoon and fork in feeding tasks. This is important because we can promote more independence with self-feeding by implementing simple activities and specific cues to promote a functional grasp on the fork or spoon. If you can’t view this video, check out our video on YouTube: Using a Spoon-3 Activities to Target Grasp Patterns.

    Trouble with Feeding Development

    It’s important to remember that all children are different and the developmental milestones for feeding tasks listed above are not set in stone. There is always fluidity with development and feeding skills are no different.

    If there are skills that seem to be delayed, be sure to reach out to the child’s pediatrician and a pediatric occupational therapist for individualized feeding evaluation and assessment as well as a specific treatment plan based on the individual’s needs.

    Some things to consider that may be impacting feeding development include oral motor problems, determining if the feeding development issues are a result of sensory vs. oral motor considerations, or there is a need for specific adaptive feeding equipment.

    Development of bilateral coordination skills in feeding occurs throughout childhood.

    Fall Ten Frames

    Fall ten frames

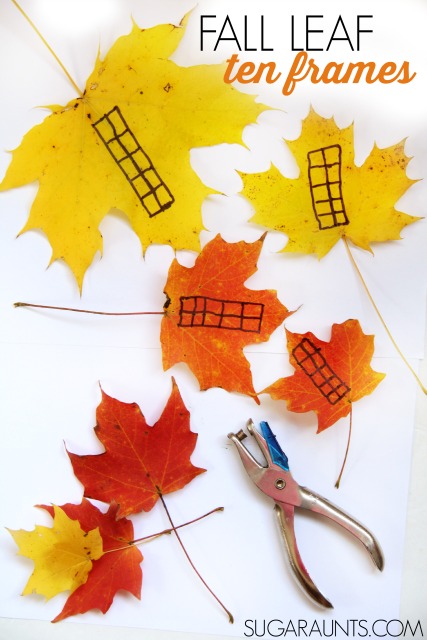
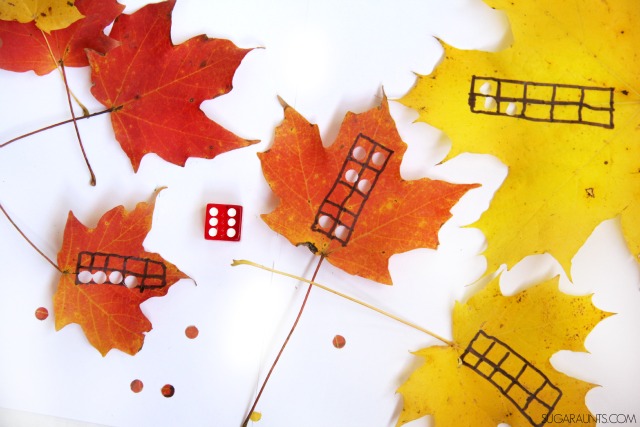
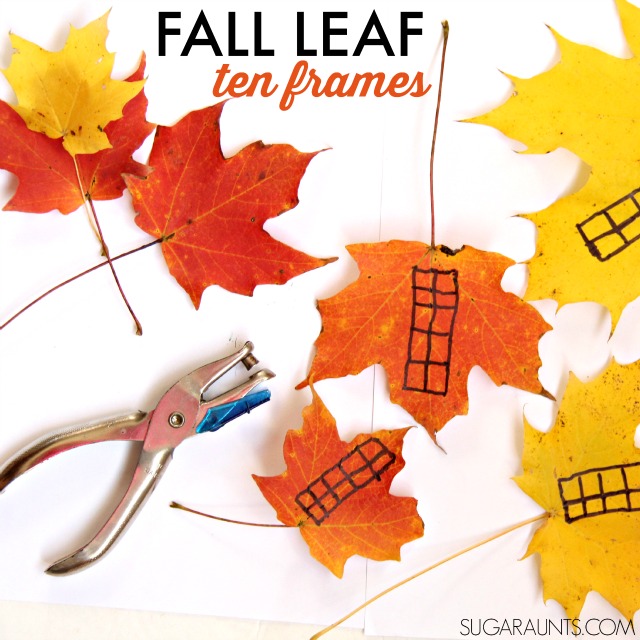
    These Fall ten frames are a fun math leaf activity. All you need is a few leaves from the yard and a hole punch to work on math skills, and the sensory benefits of heavy work through the hands. It’s a fun way to teach math through play with sensory math! Add this hole punch activity to your therapy line up this Fall!

    Fall Ten Frames

    This time of year, we are on leaf overload.  Just playing in the yard, we have piles and piles of leaves in of all the Fall colors.  I love getting outside with my kids and playing in the piles of leaves each year.  It is such a sensory and just plain old fun way to experience the season of Fall. 
     
    We used some of those colorful leaves in a fun Math Ten Frame activity that combined fine motor strengthening for a powerful fine motor punch.  
     
    Make fall ten frames with real leaves
     

    This post contains affiliate links.

    How to make Fall Ten Frames

    Gather your materials:

    • Leaves
    • Black marker
    • Hole punch
    • Die or dice

    That’s it! Next, get started on creating the leaf ten frames.

    First step: Go out and gather those leaves! Nature hunts rock, and the crunchy, cool weather of Fall makes memories.  
     
    Gather pretty leaves along your way and bring them on home.  
     
    Note: You will want leaves that are not crunchy. Those dried up leaves are perfect for a different sensory activity- working on auditory processing skills with leaves! 
     
    For this activity, you’ll want to gather colorful, freshly fallen leaves or leaves still on the tree will work best for this activity.
     
    Next: Grab a Black Marker (affiliate link) and draw a ten frame on the leaf.  You’ll need a Hole Punch (affiliate link) for the math, and a die.  
     
    Draw ten frames and punch holes in leaves with a hole punch


    Using Ten Frames with Older Kids

    This fall math activity can be used with older kids, too on a variety of math skills.
     
    Roll the die and have your kiddo count the dots.  They can then use the Hole Punch (affiliate link) to mark off the correct number of dots on the ten frame.  
     
    By rolling the die, kids can practice their ability to subsidize. 
     
    Subsitizing refers to the math skill of knowing the number of dots on the dice by just glancing is a skill of subsidizing in math. and will help kids as they get older with math. Subsitizing helps a child advance to more advanced addition and subtraction, and allows for number sense in math.
     
    Older kids can benefit from this activity, too.  I still use ten frames with my second grader.  They are a powerful way to introduce groups and multiplication concepts.  
     
    Usually, I have my second grader roll the die twice or tree times and add the total before filling in the ten frame.  Ten frames also are a way to hone base ten concepts.  
     
    How can you get a number to a base ten by “borrowing” from another number.  A math strategy like this is a good way to work on regrouping in addition.
     
    You can grade this activity for older kids by using two dice.  Have them add the dots of both dice and punch holes from two leaves.  
     
    Practice adding both numbers together. Ask them how to combine the numbers from both dice to form a full ten frame.  
     
    Ask them to figure out how many holes are left over from the total.
     

    Punch Holes in Leaves

    Using a Hole Punch (affiliate link) provides huge proprioceptive input to little hands, which is such a good way to “wake up” hands before a writing activity. This input through the hands offers heavy work input that can “wake up” the hands. The great thing about proprioception tasks like this one is that heavy work can also be used to “calm down” the nervous system.
     
    Similarly, we used scissors to cut real leaves along lines and develop fine motor skills, scissor skills, and eye-hand coordination, which also offered sensory motor feedback through the hands. 
     
    Combine math, handwriting, and literacy by counting out numbers on the leaves, writing numbers on paper, and creating sentences based on the numbers.  You can also tally number of the different colored leaves and write down the results on paper.
     
    You might have seen a recent post about gross grasp and why kids need to work on this area for development.  
     
    A hole punch is a fabulous way to work on gross grasp and other fine motor strengthening, like thumb stability and motion needed for scissor use.  
     
    Plus when you have all of the holes punched out from the leaves, you can use pincer grasp to pick up and sort the leaf circles. This is a great precision grasp and release activity to develop dexterity in fine motor skills.
     
    Draw ten frames on leaves for fall math

    Use this activity all Fall long for math, proprioception, and fine motor strengthening!  And enjoy those crunchy Fall colors before they are gone!
     

    Looking for more hands-on, playful math activities?  These are some of our favorites: 

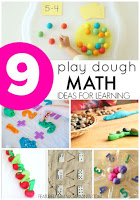
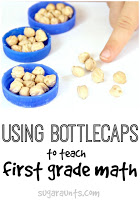
     Commutative Property of Addition  How to Add with Regrouping  Use play dough in math  Bottle caps in first grade math
     

    More fine motor fun…

    Working on fine motor skills, visual perception, visual motor skills, sensory tolerance, handwriting, or scissor skills? Our Fine Motor Kits cover all of these areas and more.

    Check out the seasonal Fine Motor Kits that kids love:

    Or, grab one of our themed Fine Motor Kits to target skills with fun themes:

    Want access to all of these kits…and more being added each month? Join The OT Toolbox Member’s Club!

    Colleen Beck, OTR/L has been an occupational therapist since 2000, working in school-based, hand therapy, outpatient peds, EI, and SNF. Colleen created The OT Toolbox to inspire therapists, teachers, and parents with easy and fun tools to help children thrive. Read her story about going from an OT making $3/hour (after paying for kids’ childcare) to a full-time OT resource creator for millions of readers. Want to collaborate? Send an email to contact@theottoolbox.com.
    Matching Uppercase and LowerCase Letters

    uppercase and lowercase letter matching

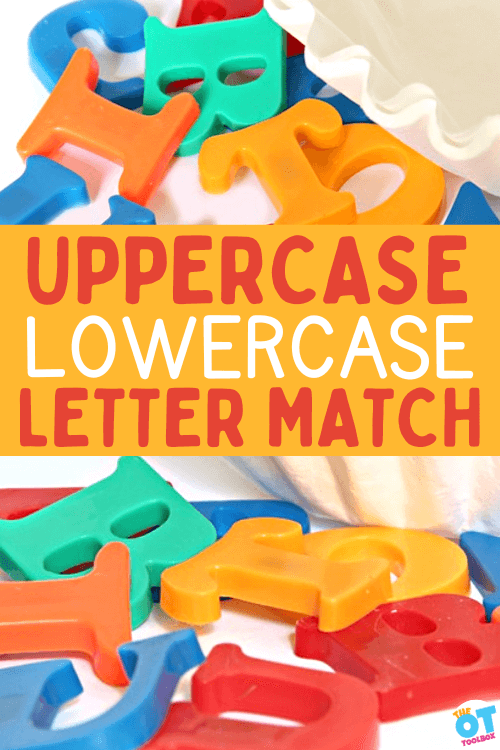
    This interactive and hands on game to teach matching uppercase and lowercase letters is a fun gross motor game for preschool and kindergarten. Use this interactive letter activity along as an alphabet matching with objects and a sensory-motor learning activity!

    Matching uppercase letters to lowercase letters is a literacy task that supports reading skills, but also challenges visual discrimination skills, form constancy, and visual scanning, all of which are visual processing skills needed for handwriting and reading comprehension. What’s fun about this activity is that it builds these skills in a fun way!

    Be sure to grab our color by letter worksheet to work on letter matching, visual discrimination skills.

    Uppercase and lowercase letter match activity

    Matching Uppercase and Lowercase Letters

    Learning letters and matching upper and lower case letters is a Kindergarten skill that can be tricky for some kids.  We made this easy prep letter identification activity using items you probably already have in the house.  If you’ve seen our blog posts over the last few days, you’ve noticed we’re on a learning theme using free (or mostly free) items you probably already have.  

    We’re sharing 31 days of learning at home with free materials this month along with 25 other bloggers in the 31 days of homeschooling tips series.  

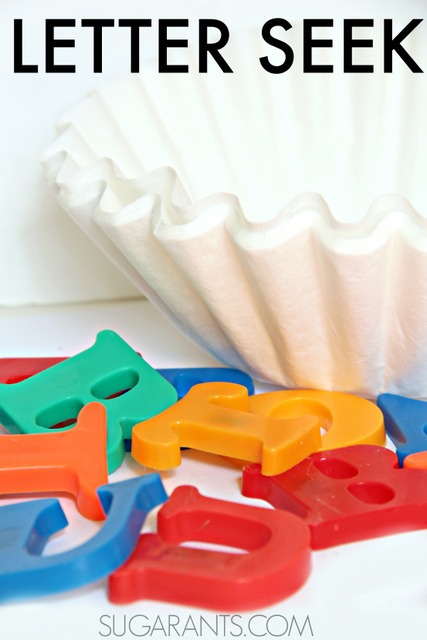
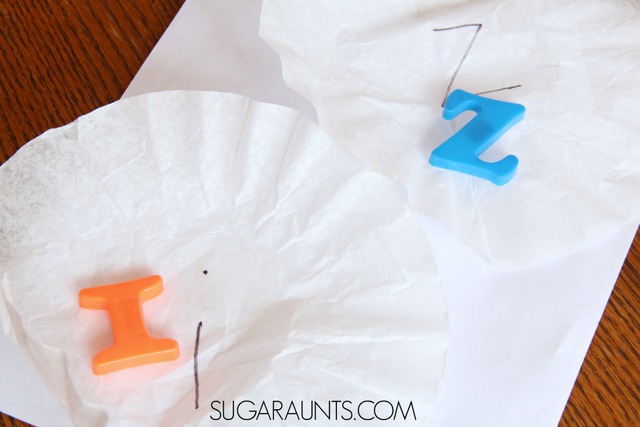
    Today’s easy letter learning activity can use any letters you have around the house or magnetic letters and coffee filters.

    Matching upper and lower case letters and alphabet letter identification can be difficult for kindergarteners.  Use this letter matching game to prepare for kindergarten skills and gross motor play along with visual scanning. Uses magnetic letters and coffee filters for easy prep and set-up.  Great letter matching ideas and activities here!


    While this activity is almost free if you’ve got the items at home already, we’re sharing the affiliate links for the items in this post.

    Matching upper and lower case letters and alphabet letter identification can be difficult for kindergarteners.  Use this letter matching game to prepare for kindergarten skills and gross motor play along with visual scanning. Uses magnetic letters and coffee filters for easy prep and set-up.  Great letter matching ideas and activities here!

    How to play this interactive letter matching activity

    You’ll need just a few items for this letter matching activity:

    • Magnetic letters
    • marker
    • coffee filters (but paper towels or recycled paper would work as well.

    To set up the activity, there are just a few steps:

    (Amazon affiliate links included below.)

    1. Grab the magnetic letters from the fridge and 26 coffee filters.
    2. Use a permanent marker to write one lower case letter of the alphabet on each coffee filter.
    3. With your child, match the magnetic letters to the lowercase letters on the coffee filters.
    4. Ask the child to help you crumble each letter inside the coffee filter that has its matching lowercase letter.
    5. Continue the play!
    Matching upper and lower case letters and alphabet letter identification can be difficult for kindergarteners.  Use this letter matching game to prepare for kindergarten skills and gross motor play along with visual scanning. Uses magnetic letters and coffee filters for easy prep and set-up.  Great letter matching ideas and activities here!

    More ways to match uppercase and lowercase letters

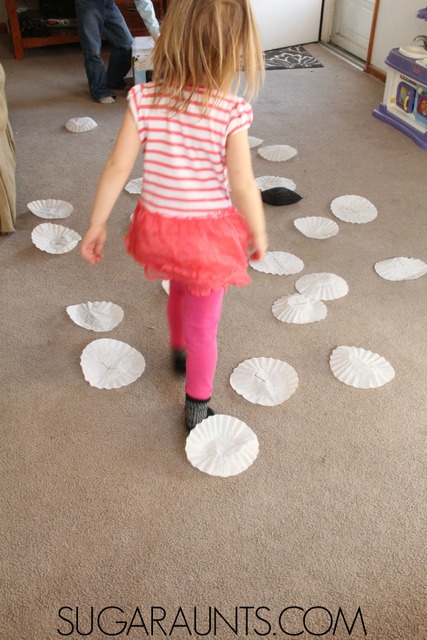
    By matching the magnetic uppercase letter to the lowercase letter on the coffee filter, kids get a chance to incorporate whole body movements and gross motor activity while looking for matching letters.

    With your child, first match up each lower case coffee filter letter to the upper case magnetic letter.  

    You can spread the filters out to encourage visual scanning and involve movement in the activity, OR you can stack the coffee filters in a pile and one by one match up the letters.  This technique requires the child to visually scan for the upper case magnet letters.  

    Try both ways for more upper/lower case letter practice!

    We then wrapped the coffee filters around the magnets in a little bundle.  There are so many games you can play with these upper and lower case letters:

    • Match the same letter– match uppercase letters to uppercase letters and lowercase letters to lowercase letters.
    • Alphabet matching with objects– Match an object that starts with the letter of the alphabet. Use small objects inside the coffee filter and match it to lowercase letters written in the coffee filter with uppercase magnet letters.
    • Match the picture with the letter– Print off pictures of words that start with each letter of the alphabet. Then match the picture with letters of the alphabet using lowercase letters written on the filter and uppercase letters in magnetic letter form.
    • Play a letter memory game– Hide letters around the room and challenge kids to find the letters in order to match the uppercase letter to the lowercase letters.
    • Letter sound matching– Make a letter sound and challenge kids to find the letter that makes that sound.
    • Letter Hide and Seek- Hide the bundled up letters around the room while your child hides his eyes.  Send him off to find the letters and ask him to open the bundle and identify the letter.
    • Letter Toss Activity- Toss the coffee filter bundles into a bucket or bin.  Any letters that make it into the bin are winners!
    • Name the letters- Unwrap the bundles and name the letters.  Spread the coffee filters out around the room.  Toss magnetic letters onto the matching lower case letter.  
    • Letter toss game- Toss a bean bag onto the coffee filters.  The child can identify the lower case letter, then go to the pile of magnetic letters and find the matching upper case letter.  
    Matching upper and lower case letters and alphabet letter identification can be difficult for kindergarteners.  Use this letter matching game to prepare for kindergarten skills and gross motor play along with visual scanning. Uses magnetic letters and coffee filters for easy prep and set-up.  Great letter matching ideas and activities here!

    Can you think of any more ways to work on upper and lower case letter matching with coffee filters and magnetic letters? 

    Matching Big and Small Letters

    The nice thing about this activity is that you can teach the concepts of big and small letters. When we say “big letters” and “small letters”, we are showing the concept of letters that touch the top and bottom lines, or the upper case letters.

    And teaching children the difference between those big letters and the small letters which touch just the middle point are part of the visual discrimination process that is needed for handwriting on the lines, or line awareness skills.

    You will enjoy more alphabet posts from our archives:


    Looking for more interactive letter activities to match uppercase and lowercase letters? The Letters! Fine Motor Kit is for you!

    Letters Fine Motor Kit
    Letter Kit for fine motor, visual motor, and sensory motor play.

    This 100 page printable packet includes everything you need for hands-on letter learning and multisensory handwriting!

    This digital and printable packet includes these multisensory handwriting and letter formation materials:

    • A-Z Multisensory Writing Pages
    • Alphabet Fine Motor Clip Cards
    • Cut and place Fine Motor Mazes
    • A-Z Cotton Swab Cards
    • A-Z Pattern Block Cards
    • Fine Motor Letter Geo-Cards
    • A-Z Color and Cut Letter Memory Cards
    • Color By Size Sheets
    • A-Z Building Block Cards
    • A-Z Play Dough Letter Formation Cards
    • Graded Lines Box Writing Sheets
    • Alphabet Roll and Write Sheets
    • Pencil Control Letter Scan
    • Color and Cut Puzzles

    All About Me Free Printable PDF

    all about me free printable pdf

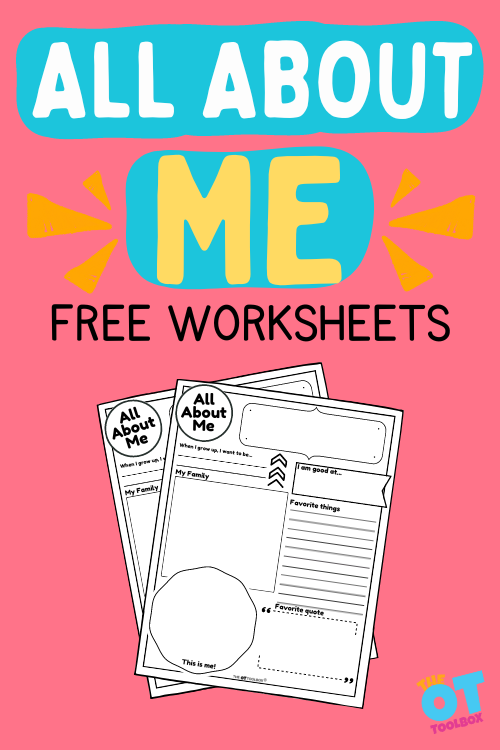
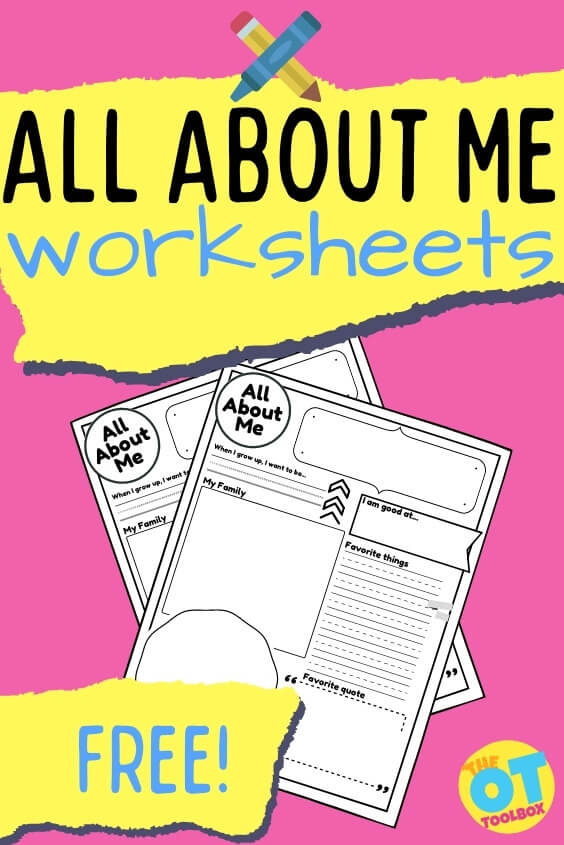
    Today, I have an exciting free printable for back-to-school: An all about me free printable PDF! An all about me activity is a great way to get to know students at the beginning of a new school year, and this free all about me printable is a writing and drawing activity designed specifically to focus on handwriting skills while allowing kids to tell all about themselves. Just print it off and get to know your new students this school year!

    For age-appropriate activities, check out our All About Me preschool activities, too.

    all about me free printable pdf

    All about me worksheet

    I wanted to create an all about me printable worksheet that is slightly different than the others you may find available online. This worksheet focuses on list writing, use of spaces on a page, and drawing skills.

    Here’s why: I wanted this resource to tell us more about the child’s specific interests and facts like birthdates…I wanted this about me worksheet to help the therapist or teacher gain knowledge about the child’s handwriting and spatial awareness skills.

    This all about me worksheet tells us several things about the student:

    • Favorite things
    • Draw myself
    • When I grow up
    • All about my family
    • My favorite quote

    While completing the all about me activity, kids can tell a bit about themselves as an icebreaker to a new school year. The best thing about this all about me activity sheet is that it covers a variety of topics and includes drawing and writing sentences. You can really screen a student’s writing skills, pencil control skills, and visual motor skills with this activity sheet.

    To make this all about me activity even more interactive, ask kids to bring in a few items from home that tell about themselves. Ideas can include favorite things, sports or hobbies, family members, pets, etc. As long as all of the items can fit inside a brown paper bag, kids can bring that in their backpack and share a bit about themselves as an activity ideas for the beginning of the school year.

    all about me free printable: Favorite Things List

    Students can list out their favorite things on the lined paper. The worksheet includes a list so they can write out their favorite foods, sports, animals, colors, etc. Kids have the choice to write a list of the things that are most important to them, making the sheet personalized and not a cookie cutter worksheet.

    When the student writes out a list of words on the about me sheet, we can see how they use lines, spatial awareness, margins, letter size, and formation in a list.

    All About Me Drawing

    Students can draw a picture of themselves in the given area and we can look at their eye-hand coordination, spatial relations, body awareness, and pencil control.

    All ABout Me Growing Up

    Students can write out what they want to be when they grow up on the writing lines. Not only can we take a look at their handwriting in this space, but we can then see their interest and focus learning and therapy activities on that functional task.

    This is a great space for writing sentences and paragraphs. Kids can work on these skills but it’s also a good opportunity to quickly assess how students use spatial awareness, margins, and line use when writing sentences that they create, or the creative writing aspect where students compose the sentences rather than copy them from a model.

    All About Me (and My Family)

    All about the student includes the family unit, too! Students can write or draw about their family in the open space, and we can take a look at detail orientation of the child. Also, we can then ask the child about sending home notes and home exercise programs to parents when they complete this section of the About Me worksheet.

    My Favorite Quote

    Finally, there is a space on the All About Me Worksheet for a favorite quote. Students can either write a quote that they like or can make up a personal saying that they enjoy. This space can tell us a lot about the child’s mindset, motivation, and mindfulness awareness.

    Free All About Me worksheets for students aged kindergarten through middle school. Use this for back to school handwriting tasks and getting to know new students at the start of a school year.

    All About Me Worksheet for Middle School

    This All About Me worksheet is great for both younger ages (kindergarten through third grade) because one sheet includes a double rule writing lines. The second page is a duplicate worksheet, but contains single rule writing lines, making it great for older students (fourth grade through middle school).

    There aren’t many about me handouts for older students, so it was important to me to create a writing activity for students using a smaller writing area.

    Free All About Me Worksheet

    Want a copy of this free all about me worksheet PDF? Enter your email address below and grab this printable freebie!

    FREE All About Me Worksheet

      So I can best serve you, are you…
      We respect your privacy. Unsubscribe at anytime.

      More Back-to-School Freebies

      Don’t miss these free back-to-school materials and tools:

      Colleen Beck, OTR/L has been an occupational therapist since 2000, working in school-based, hand therapy, outpatient peds, EI, and SNF. Colleen created The OT Toolbox to inspire therapists, teachers, and parents with easy and fun tools to help children thrive. Read her story about going from an OT making $3/hour (after paying for kids’ childcare) to a full-time OT resource creator for millions of readers. Want to collaborate? Send an email to contact@theottoolbox.com.
      Self Regulation Strategies

      Self-regulation is a crucial skill that influences a child’s ability to manage emotions, behavior, and attention. As occupational therapy practitioners, professionals working with kids with emotional and behavioral needs, teachers, and parents, understanding effective strategies to support children in developing self-regulation skills is essential.

      This blog post explores evidence-based approaches for therapists working with children on their caseloads, offers insights for teachers in the classroom, and provides practical tips for parents to implement at home.

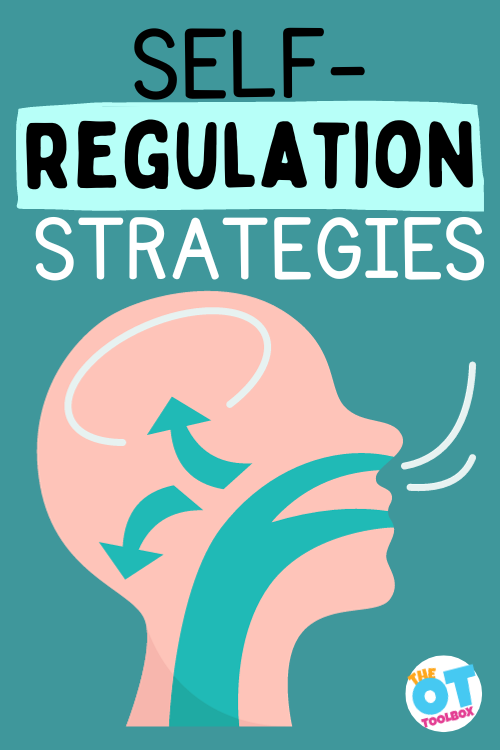
      image of a face breathing in and arrow pointing to the brain and the body

      What is a self regulation Strategy?

      Self-regulation strategies refer to techniques and behaviors individuals use to manage their own emotions, thoughts, and behaviors in order to achieve specific goals or respond adaptively to different situations. These strategies empower individuals to stay focused, control impulses, and navigate challenges effectively.

      Developing self-regulation is often challenging for many children and even adults. Throughout the day, individuals face various situations demanding a keen awareness of themselves and others, coupled with the ability to exercise self-control.

      Self-regulation involves managing, sustaining, and adjusting one’s arousal levels, emotions, and behaviors. It hinges on impulse control, working memory, and the general capacity to keep oneself in check. The process of experiencing emotions, understanding desires, and making decisions based on these concepts necessitates motivation, willpower, and higher-level thinking.

      Ideally, children should attain an optimal level of self-awareness and mindfulness, enabling them to recognize their inner feelings and emotions. This awareness is crucial for effective self-regulation. Children must learn strategies and techniques tailored to their needs, aiding them in transitioning from a less optimal state to a readiness for action.

      Understanding how sensory processing impacts behaviors and emotions is key when it comes to sensory dysregulation and meltdowns or regulation needs.

      Read about interoception here. This is important because of the role of the limbic system, the vestibular system, proprioceptive system, and overall sensory processing systems in functional tasks.

      To support this process, additional mindfulness activities are beneficial, serving as valuable additions to a child’s “Regulation Toolbox.”

      Understanding Self-Regulation

      Before delving into strategies, it’s important to grasp the concept of self-regulation. According to Zelazo and Carlson (2012), self-regulation involves the ability to manage and modulate emotions, behaviors, and attention in response to environmental demands. This skill is fundamental for a child’s success in various life domains.

      Be sure to read about emotional regulation and behavioral regulation.

      Another key point to understand is the connection between executive functioning skills and emotional regulation.

      Self Regulation strategies for Therapy

      School-based occupational therapy professionals (OTs) play a crucial role in supporting students’ self-regulation and overall participation in their education.

      Their involvement extends beyond direct intervention with students to collaborating with teachers and other professionals, such as school social workers or guidance counselors. Here’s how school-based OTs contribute to the team:

      1. Assessment and Intervention for Individual Students:
        School-based OT assess students’ sensory and motor skills, identifying any challenges that may impact self-regulation and participation. Based on assessments, OTs/OTAs develop individualized intervention plans to address specific needs. Interventions may include sensory strategies, fine motor, gross motor coordination activities, and adaptive tools to support self-regulation in the classroom (Case-Smith et al., 2015). This can also look like using self awareness games and activities to support self-reflection skills when needed.
      2. Collaboration with Teachers:
        School-based occupational therapy professionals collaborate closely with teachers to integrate strategies that enhance self-regulation within the classroom environment. This collaboration may involve providing teachers with information about a student’s sensory needs, suggesting modifications to the classroom setup, and offering guidance on incorporating sensory breaks or activities that promote attention and focus (Morrison et al., 2020).
      3. Professional Development and Training:
        OT professionals contribute to the professional development of teachers and other school staff by offering training sessions on topics related to sensory processing, motor skills development, and self-regulation. This empowers educators with the knowledge and skills to implement supportive strategies for all students, not just those receiving direct OT services (Murray et al., 2016). Using programs such as Zones of Regulation, The Alert Program, (Amazon affiliate links) Test Drive, and The Sensory Connection.
      4. Consultation with School Staff:
        Collaboration between school-based occupational therapy professionals and paraprofessionals, educators, specials teachers, guidance counselors, social workers, etc. is essential to address the holistic needs of students. OT professionals can provide valuable insights into how sensory and motor difficulties may contribute to these challenges. Joint planning and consultation help create comprehensive support plans for students (Parham et al., 2011).
      5. Incorporating Sensory Strategies in the Classroom:
        OTs assist teachers and other professionals in integrating sensory strategies seamlessly into the classroom routine. This may involve providing sensory tools, creating sensory-friendly spaces such as a self regulation station or a calm down corner, or suggesting activities that promote self-regulation. By embedding these strategies into the daily routine, students can benefit consistently (Mulligan, 2018).
      6. Advocacy for Inclusive Environments:
        School-based OTs/OTAs advocate for inclusive practices that support the participation of all students. This includes working with teachers and administrators to create environments that are accessible and accommodating to diverse sensory and motor needs. Through advocacy, occupational therapy contributes to fostering an inclusive and supportive school culture (Polatajko et al., 2012).
      7. Data Collection and Progress Monitoring:
        OT professionals collaborate with teachers to collect data on the effectiveness of interventions and make data-driven decisions. Regular progress monitoring ensures that strategies are tailored to meet the evolving needs of students, and adjustments can be made as necessary (Case-Smith et al., 2015).
      8. Using a variety of calm down toys based on interest and motivation.

      Other ideas include:

      • Winnie the Pooh characters are another way to work on identifying arousal level.  Tigger bounces around and is not always the best friend to have around.  Eeyore on the other hand often stays home, not wanting to get out at all.  While Pooh gets into some sticky situations, he is generally well regulated.  When kids can identify with familiar characters, they are able to better define their own feelings. 
      • One of my teacher friends describes the “monster inside”.  We all have a little monster inside, but we usually keep it tucked away. When we let our monster out, we need to find a way to pull him back in before he hurts someone. Sesame Street has a great video to demonstrate belly breathing.

      School-based OTs are integral members of the education team, contributing their expertise to create environments that facilitate self-regulation and maximize students’ participation in their education. Their collaboration with teachers and other professionals ensures a holistic and inclusive approach to supporting the diverse needs of students.

      Self Regulation Strategies for Teachers

      Self-regulation strategies are crucial in the classroom setting for several reasons, as they significantly impact a child’s academic and social development. Here are key reasons why implementing self-regulation strategies in the classroom is essential:

      1. Enhanced Learning Readiness:
        Self-regulation is closely linked to attention and focus. Children who can regulate their emotions and behaviors are better able to engage in learning activities. According to Blair and Diamond (2008), self-regulation supports cognitive functions, including working memory and flexible thinking, which are essential for academic success.
      2. Improved Classroom Behavior:
        Effective self-regulation strategies contribute to positive classroom behavior. When students can manage their emotions and impulses, disruptions are minimized, creating a more conducive learning environment for all. This aligns with the findings of Raver et al. (2011), who highlight the connection between self-regulation and behavioral outcomes in the classroom.
      3. Social Skills Development:
        Self-regulation is integral to the development of social skills. Children who can regulate their emotions are better equipped to navigate social interactions, resolve conflicts, and collaborate with peers. Gaining control over impulsive behaviors fosters positive relationships with teachers and classmates (Murray & Rosanbalm, 2017).
      4. Reduction of Stress and Anxiety:
        The classroom can be a source of stress for many students. Teaching self-regulation strategies helps children cope with stressors and anxiety, creating a more emotionally supportive learning environment. The work of Durlak et al. (2011) emphasizes the positive impact of social-emotional learning programs, which often include self-regulation components, on reducing stress in students.
      5. Long-Term Academic Success:
        Self-regulation skills cultivated in the classroom have long-term implications for academic success. Research by Moffitt et al. (2011) suggests that early self-regulation is a strong predictor of academic achievement and positive life outcomes in adulthood.
      6. Individualized Learning Support:
        Different students may require varying levels of support in developing self-regulation skills. Implementing strategies tailored to individual needs allows teachers to provide targeted support, fostering a more inclusive and effective learning environment (McClelland et al., 2010).
      7. Preparation for Life Skills:
        Beyond academic achievement, self-regulation is a life skill with broad applications. Teaching self-regulation in the classroom equips students with the tools they need to succeed not only academically but also in various aspects of life, including future employment and personal relationships (Jones et al., 2015).

      There are many ways to support these needs in the classroom setting.

      1. Classroom Environmental Modifications: Teachers can create a supportive environment by implementing sensory-friendly classroom modifications. This aligns with the findings of Dunn et al. (2016), emphasizing the impact of the environment on a child’s self-regulation.
      2. Visual Supports and Schedules: Utilizing visual supports and schedules helps children understand expectations and routines, promoting self-regulation (Smith et al., 2015). This can be particularly beneficial for children with neurodevelopmental disorders.
      3. Incorporating Movement Breaks: Research by Mahar et al. (2006) suggests that brief movement breaks during the school day can enhance attention and self-regulation. Teachers can integrate short physical activities to support students’ regulatory needs. Read about movement activities in the classroom for ideas.
      4. Sensory-Based Interventions: Occupational therapists can incorporate sensory-based interventions to help children regulate their emotions. Research by Case-Smith et al. (2015) highlights the effectiveness of sensory integration techniques in improving self-regulation in children. This can include fidget tools, brain breaks, etc.
      5. Mindfulness and Yoga: Introducing mindfulness and yoga practices in therapy sessions can positively impact self-regulation. The study by Felver et al. (2015) emphasizes the benefits of mindfulness interventions in reducing emotional reactivity and enhancing attention. This can also include deep breathing exercises, sensory paths, etc.
      6. Social Skills Training: Building social skills is crucial for self-regulation. Therapists can employ social skills training programs, as suggested by Gresham and Elliott (2008), to enhance a child’s ability to navigate social situations successfully.

      Self-regulation strategies are essential in the classroom setting to create an optimal learning environment, foster positive behavior and social skills, reduce stress, and lay the foundation for long-term academic success and life skills development.

      Self Regulation Strategies for Parents:

      Self-regulation is essential at home for various reasons, as it significantly influences a child’s overall well-being and development. Here are key reasons why self-regulation is crucial in a home setting:

      1. Emotional Well-Being: Self-regulation helps children manage their emotions effectively. At home, where a child experiences a range of emotions, from excitement to frustration, the ability to regulate these emotions contributes to a more positive and emotionally stable environment (Denham et al., 2012). This results in overall family wellness.
      2. Positive Social Interactions: Developing self-regulation skills enables children to navigate social interactions at home. It involves understanding and respecting others’ perspectives, turn taking, and resolving conflicts peacefully. These social skills foster positive relationships within the family and contribute to a harmonious home environment (Graziano et al., 2007).
      3. Academic Success: Self-regulation is not only crucial for emotional and social aspects but also for academic success. Children who can regulate their attention and focus are better equipped to engage in learning activities and complete homework tasks. This, in turn, supports their academic achievement (Blair & Diamond, 2008). Here are tips for fidgeting during homework.
      4. Independence and Responsibility: Self-regulation fosters independence and a sense of responsibility. Children who can manage their time, complete tasks independently, and make appropriate decisions are better prepared for the increasing responsibilities they face as they grow (Zelazo & Carlson, 2012).
      5. Healthy Lifestyle Habits: Self-regulation extends to health-related behaviors, such as eating habits and sleep routines. Children who can regulate their impulses are more likely to make healthy choices, contributing to their overall well-being (Riggs et al., 2010).
      6. Parent-Child Relationships: Self-regulation positively impacts parent-child relationships. When children can express their needs and emotions in a regulated manner, it fosters open communication and understanding between parents and children. This, in turn, strengthens the parent-child bond (Denham et al., 2012).
      7. Preparation for Life Skills: The self-regulation skills learned at home have broader implications for a child’s future. The ability to regulate emotions, manage stress, and make thoughtful decisions prepares children for success in various life domains, including relationships, education, and future employment (Moffitt et al., 2011).
      8. Reduced Stress and Anxiety: Home environments can sometimes be sources of stress for children. Self-regulation skills help children cope with stressors and anxiety, creating a more emotionally supportive and calming atmosphere at home (Durlak et al., 2011).

      Some strategies to support self regulation at home may include:

      1. Establishing Consistent Routines: Consistent routines at home contribute to a child’s sense of predictability, aiding in self-regulation (Fiese et al., 2002). Parents can create daily schedules that include predictable activities.
      2. Promoting Emotional Literacy: Parents play a crucial role in helping children identify and express emotions. The work of Denham et al. (2012) emphasizes the importance of promoting emotional literacy for better self-regulation outcomes. For more information, read about emotional intelligence. An activity like our lion and lamb emotions activity can help.
      3. Collaboration between Parents and Therapy Providers: Effective communication between parents and therapists is vital. Collaborative efforts, as recommended by Bundy et al. (2016), ensure a holistic approach to supporting a child’s self-regulation across different settings.

      Enhancing self-regulation in children requires a collaborative effort from therapists, teachers, and parents. By implementing evidence-based strategies tailored to each setting, we can empower children to develop essential skills for emotional and behavioral self-regulation

      The resources in the Sensory Lifestyle Handbook really go into detail on this concept, in using movement and sensory tools as regulation strategies and coping strategies help kids function, within their daily functional tasks. For example, it is possible to incorporate regulating activities within the classroom, home tasks like self-care or chores, and the community. Check out the Sensory Lifestyle Handbook for more information on this concept.

      Research on Self Regulation

      • Blair, C., & Diamond, A. (2008). Biological processes in prevention and intervention: The promotion of self-regulation as a means of preventing school failure. Development and Psychopathology, 20(3), 899-911.
      • Case-Smith, J., Weaver, L. L., & Fristad, M. A. (2015). A systematic review of sensory processing interventions for children with autism spectrum disorders. Autism, 19(2), 133-148.
      • Denham, S. A., Bassett, H. H., & Wyatt, T. (2010). The socialization of emotional competence. In Handbook of socialization (pp. 614-637). Guilford Press.
      • Dunn, W., Little, L., & Dean, E. (2016). Sensory processing in autism: A review of neurophysiologic findings. Pediatric Physical Therapy, 28(3), 272-282.
      • Durlak, J. A., Weissberg, R. P., Dymnicki, A. B., Taylor, R. D., & Schellinger, K. B. (2011). The impact of enhancing students’ social and emotional learning: A meta-analysis of school-based universal interventions. Child Development, 82(1), 405-432.
      • Fiese, B. H., Tomcho, T. J., Douglas, M., Josephs, K., Poltrock, S., & Baker, T. (2002). A review of 50 years of research on naturally occurring family routines and rituals: Cause for celebration?. Journal of Family Psychology, 16(4), 381.
      • Felver, J. C., Celis-de Hoyos, C. E., Tezanos, K., & Singh, N. N. (2015). A systematic review of mindfulness interventions for youth in school settings. Mindfulness, 6(6), 1241-1256.
      • Gresham, F. M., & Elliott, S. N. (2008). Social skills improvement system. In Handbook of psychoeducational assessment (pp. 647-678). Guilford Press.
      • Graziano, P. A., Reavis, R. D., Keane, S. P., & Calkins, S. D. (2007). The role of emotion regulation in children’s early academic success. Journal of School Psychology, 45(1), 3-19.
      • Jones, S. M., Bailey, R., & Jacob, R. (2015). Social-emotional learning: From research to practice. Applied Psychology, 7(1), 62-79.
      • Mahar, M. T., Murphy, S. K., Rowe, D. A., Golden, J., Shields, A. T., & Raedeke, T. D. (2006). Effects of a classroom-based program on physical activity and on-task behavior. Medicine and Science in Sports and Exercise, 38(12), 2086-2094.
      • McClelland, M. M., Cameron, C. E., Duncan, R., Bowles, R. P., Acock, A. C., Miao, A., & Pratt, M. E. (2014). Predictors of early growth in academic achievement: The head-toes-knees-shoulders task. Frontiers in Psychology, 5, 599.
      • Moffitt, T. E., Arseneault, L., Belsky, D., Dickson, N., Hancox, R. J., Harrington, H., & Caspi, A. (2011). A gradient of childhood self-control predicts health, wealth, and public safety. Proceedings of the National Academy of Sciences, 108(7), 2693-2698.
      • Morrison, J., Cosbey, J., George, N., & Thomas, J. (2020). Occupational therapy’s role in mental health promotion, prevention, & intervention with children & youth: A scoping review. Occupational Therapy in Mental Health, 36(1), 30-49.
      • Mulligan, S. (2018). Tools for the sensory connection program: A sensory processing disorder parent training. Academic Press.
      • Murray, D., & Bundy, A. (2016). Sensory integration: Theory and practice. F.A. Davis.
      • Murray, D. W., & Rosanbalm, K. (2017). Promoting self-regulation in the first five years: A practice brief. OPRE Report 2017-77. Washington, DC: Office of Planning, Research, and Evaluation, Administration for Children and Families, U.S. Department of Health and Human Services.
      • Parham, L. D., Coyne, L., & West, S. (2011). Sensory processing difficulties in children with functional constipation: A retrospective chart review. American Journal of Occupational Therapy, 65(4), 472-479.
      • Polatajko, H. J., Davis, J. A., & Marushak, J. P. (2012). Designing and implementing a model for delivering school-based occupational therapy services. OTJR: Occupation, Participation and Health, 32(3_suppl), S3-S11.
      • Raver, C. C., Garner, P. W., & Smith-Donald, R. (2007). The roles of emotion regulation and emotion knowledge for children’s academic readiness: Are the links causal?. In Cognition and emotion (pp. 1-30). Psychology Press.
      • Riggs, N. R., Greenberg, M. T., Kusche, C. A., & Pentz, M. A. (2006). The mediational role of neurocognition in the behavioral outcomes of a social-emotional prevention program in elementary school students: Effects of the PATHS curriculum. Prevention Science, 7(1), 91-102.
      • Smith, C. J., Rozga, A., Matthews, N., Oberleitner, R., Nazneen, N., & Abowd, G. D. (2015). Investigating the accuracy of a novel gesture-based child-computer interaction system for classroom use. In Proceedings of the 14th International Conference on Interaction Design and Children (pp. 252-255).
      • Zelazo, P. D., & Carlson, S. M. (2012). Hot and cool executive function in childhood and adolescence: Development and plasticity. Child Development Perspectives, 6(4), 354-360.

      For specific self regulation strategies related to each daily task that can be implemented right in the functional task, check out The Sensory Lifestyle Handbook.

      The Sensory Lifestyle Handbook walks you through sensory processing information, each step of creating a meaningful and motivating sensory diet, that is guided by the individual’s personal interests and preferences.

      The Sensory Lifestyle Handbook is not just about creating a sensory diet to meet sensory processing needs. This handbook is your key to creating an active and thriving lifestyle based on a deep understanding of sensory processing.

      Colleen Beck, OTR/L has been an occupational therapist since 2000, working in school-based, hand therapy, outpatient peds, EI, and SNF. Colleen created The OT Toolbox to inspire therapists, teachers, and parents with easy and fun tools to help children thrive. Read her story about going from an OT making $3/hour (after paying for kids’ childcare) to a full-time OT resource creator for millions of readers. Want to collaborate? Send an email to contact@theottoolbox.com.