Colleen Beck, OTR/L is a pediatric occupational therapist and the owner and author of The OT Toolbox website. She manages all of The OT Toolbox social media accounts and runs the popular newsletter.
Read about Colleen's experience and career as an occupational therapist, including how The OT Toolbox began on our About The OT Toolbox page: https://www.theottoolbox.com/about-us/
Colleen created The OT Toolbox in 2011 and since then has written thousands of blog posts designed to support therapy providers, educators, parents, counselors, admin, and caregivers in promoting the healthy development of kids.
Check out Colleen's blog posts below:
As occupational therapy professionals, we see firsthand how tightly woven sensory processing, executive functioning, and emotional regulation are in a child’s daily life. While each of these systems has its own role, they don’t operate in isolation. Instead, they constantly interact, either supporting or interfering with one another depending on the child’s sensory experience and environment.
Here are some helpful resources to support your understanding and practice:
When a child struggles with loud noises (sensory processing), it can be harder to focus (executive functioning) and manage frustration (emotions). These systems work together to support self-regulation.
Sensory Processing and the “Traffic Jam” Effect
When a child’s sensory system becomes overwhelmed by input (like loud noises, bright lights, or scratchy clothing) or under-stimulated by an environment that lacks movement or tactile input, it’s like a traffic jam in the brain. The neural pathways are working overtime to manage the incoming data, but there’s no clear flow. As a result, the child may appear distracted, impulsive, emotional, or even shut down entirely.
This reaction isn’t always a behavior like it might seem. It can actually be sensory overload. The brain is busy trying to process sounds, movement, balance, touch, and other inputs, leaving little bandwidth for higher-level thinking or regulation.
How Executive Functioning Is Impacted
Executive functioning refers to the set of mental skills that help us plan, organize, focus, remember, and manage emotions. These skills are crucial for things like following instructions, transitioning between tasks, or problem-solving in social situations.
But when a child is stuck in a sensory jam, their ability to access those executive functioning skills becomes impaired. Imagine trying to solve a puzzle while someone is shining a flashlight in your eyes, playing loud music, and tugging on your shirt. That’s what it can feel like for kids with sensory processing challenges trying to focus in a busy classroom or crowded lunchroom.
Research published in the American Journal of Occupational Therapy highlights these relationships, showing that sensory processing behaviors are significantly correlated with executive function and emotional regulation difficulties, especially in children who have underlying developmental concerns. Source: AJOT.
Emotional Regulation and Sensory Needs
When a child doesn’t have the sensory support they need, frustration builds quickly. A small demand can feel insurmountable. This is why we often see sensory dysregulation manifest as big emotions: meltdowns, tears, yelling, or complete withdrawal. These aren’t bad behaviors; they’re signs the child needs support.
When we support a child’s sensory needs, we’re helping their nervous system return to a regulated state. And when the sensory system is regulated, the emotional brain can calm down, and the thinking brain can take over. This is where the real magic happens in occupational therapy.
Occupational therapy can get a reputation in the school environment as the “handwriting teacher”, but we support the student in a much wider way. We’re supporting the foundation of a child’s ability to learn and grow. Through sensory strategies, routines, movement breaks, environmental adaptations, and regulation tools, we build a bridge from sensory stability to emotional and cognitive growth.
Additional supports we offer as pediatric occupational therapists include:
By recognizing the connection between sensory processing, executive function, and emotions, we can better support children in a compassionate, whole-child-centered way.
What This Looks Like in the Real World
Use real-life classroom or home examples to illustrate how these three areas show up:
In the classroom: A child distracted by hallway noise may struggle to start tasks and become frustrated quickly.
At home: A child who can’t tolerate the feeling of clothing tags may resist getting dressed and have emotional outbursts.
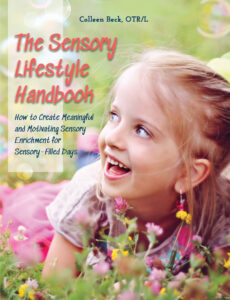
Creating a lifestyle that supports sensory needs will support executive functioning. The Sensory Lifestyle Handbook covers this.
Think about a child you know: Do you notice signs of sensory overload, executive function challenges, or big emotions? What small adjustment could support their self-regulation today?
Colleen Beck, OTR/L has been an occupational therapist since 2000, working in school-based, hand therapy, outpatient peds, EI, and SNF. Colleen created The OT Toolbox to inspire therapists, teachers, and parents with easy and fun tools to help children thrive. Read her story about going from an OT making $3/hour (after paying for kids’ childcare) to a full-time OT resource creator for millions of readers. Want to collaborate? Send an email to contact@theottoolbox.com.
Today, we have a couple of separation anxiety activities that can support kids who struggle with school drop off. Many times, kindergarten or preschool drop off is full of tears, especially those first few weeks of school. Here, you’ll find a great connection activity to help preschoolers and parents find a way to make preschool drop off easier by connecting through the book, Owl Babies. Use this Owl Babies activity to help with that preschool separation stage. This post shares movement based separation anxiety activities that can help kids who are experiencing separation anxiety in preschool drop off, with ideas based on the children’s book.
Separation anxiety can occur at various ages and stages, including toddler, preschool, kindergarten, and school-aged.
For example, in the toddler years, separation anxiety is quite common. However, if there is extreme separation anxiety, this might be a toddler behavior red flag or something to look into.
Separation Anxiety in Preschool or Kindergarten
Step into a preschool classroom on the first day of school and you will likely see a few tears here an there (possibly some of those tears coming from the parents dropping off their child for the first time!).
Separation anxiety in preschool age is normal! But here’s what you need to know about that visible preschool behavior that may be fueled by something besides getting used to leaving mom/dad/caregiver for the first time…and how to help with a simple preschool self-regulation strategy.
The movement-based, sensory activity we share below can actually be used with preschool through kindergarten:
the 3 year old preschooler who is just being dropped off for the first time
the 4 year old preschool student
pre-k kids
kindergarten students
older, grade school students who are sad or upset on the first day of school
preschool anxiety
So, what is happening with preschool anxiety that causes tears, meltdowns, and clinging to mom or dad at the day care or preschool drop off?
You have probably seen it before:
Every Monday, Wednesday, and Friday, it’s time for preschool. The routine at home is the same: excitement, packing the bag, and gearing up for a day of learning colors, songs, preschool activities, and nursery rhymes. Getting into the car and driving to preschool is no problem.
But then you pull into the parking lot and the worries begin.
Tears, crying, clinging to Mom, negotiations, promises of seeing the little one in just 2 short hours.
Two minutes later, she is happy, playing with play dough, and dry of all nose drips.
It might even seem as if the preschool separation meltdown is just part of the morning routine.
As a momma of four, I’ve seen plenty of tear-filled drop-offs.
And it just never stops breaking your heart.
Separation anxiety is actually considered a normal process that occurs in early childhood, as a result of a maturing physical, cognitive, and emotional development. Specifically, the areas of development that lead to a period of separation anxiety in young children include:
Visual processing system (visual memory, visual closure)
Social-emotional maturation (emotional connections, attachment, and feeling safe with certain individuals)
Despite the normal development that results in fears, worries, or flat out meltdowns following or leading up to a period of separation, severe separation anxieties do have the potential to negatively impact a child’s social and emotional functioning and this is especially true when the young child then avoids certain places, activities, and experiences that are necessary for healthy development.
Separation Anxiety Disorder
Sometimes, the family, parents, or caregivers also avoid these places, experiences, and activities. This can lead to even more negative experiences. When the family supports avoiding certain places or situations because of the young child’s separation, we can have situations where separation anxiety “hangs around” longer than is part of typical development.
Officially, Separation Anxiety Disorder (SAD) is defined as “developmentally inappropriate and excessive anxiety concerning separation from home or from those to whom the individual is attached” (American Psychiatric Association, 2000). However, for the young child, separation angst does not mean a disorder is present. It is only when the anxiety levels are so severe that they are not appropriate for developmental age that the official diagnosis of Separation Anxiety Disorder should be investigated.
For those with severe symptoms, Separation Anxiety Disorder may result in school refusal and a disruption in educational attainment, refusal to attend doctor’s appointments, dentist visits, or other situations where a child is separated, no matter the physical distance, from the parent or caregiver.
What causes Separation Anxiety Disorder?
There are many developmental areas that enable to progression of separation anxiety in toddlers and preschoolers from levels of worry and age-appropriate anxiety at separation to an inefficient and “disorder” level of worry.
Studies show us that some of these considerations may include:
Parenting behavior
Low parental warmth
Poor attachment
Trauma to the parent during the baby’s young years (death in the family, environmental, or other big situation)
Trauma to the child (Adverse childhood experiences, both large and small)
Insecure or anxious attachment styles
Diminished sense of control over one’s environment
Overprotective and over involved parenting behaviors
Parental intrusiveness- including extreme decision making on the part of the parent
Parental intrusiveness- including providing excessive assistance in the child’s daily activities (beyond age-appropriate ability)
Common signs of separation anxiety in kids
The natural and developmental stage of separation anxiety occurs from around age 6 months when the baby is able to notice that something is missing from their field of vision. This skill requires development of several areas:
Visual perception
Attention
Working memory (executive function)
Sensory motor
Separation anxiety typically continues from around 6 months of age to about 5 years of age, however signs of separation anxiety can persist after age 5 and through age 6.
However, the cognitive and emotional development that occurs during this age allows for kindergarten and younger elementary aged individuals to separate from their loved ones and know that they will be there even when the are not in view.
Once the underlying areas noted above develop (around 6 months of age), you may see some common signs of separation anxiety:
Crying when the parent leaves the room or home
Upset and crying when a babysitter or caregiver comes into view
Tantrums
Avoidance behaviors (refusing to participate in activities that require separation)
Clinging to parents
Refuse to attend certain situations
Apprehension about harm coming to parents
Fears the parent will leave and not return
Running from the classroom/school bus/appointment setting
Today, I’m sharing a simple trick for helping kids with separation anxiety at kindergarten, preschool, or other drop-off situations like day care, a caregiver’s home, nursery school, or a church Sunday school room. These separation anxiety strategies can be addressed in occupational therapy sessions, used in cognitive therapy, or simply trialed at home or at school. Each of the separation anxiety activities listed below may be helpful in any situation where there is anxiety and stress as a result of separation from a parent or caregiver.
separation anxiety activities
One tool that can support separation anxiety in the classroom is starting each day with a feelings check in. This can help to get a handle on how emotions are impacting behaviors.
This post contains affiliate links.
Social Stories- Use social stories to create a visual narrative about how drop offs go and that parents will be back to get the child. Social stories can offer a verbal narrative for the child to use during these situations. Some of our social stories include:
Self-Regulation Strategies- Practice the regulation tools that support the individual’s emotional status with self-regulation strategies. Select a set of calming or heavy work strategies that can be used in preparation for the separation situation, whether that be using at the school bus stop (like this deep breathing school bus exercise) or while driving into school. Having those set of strategies readily available and discussing how the child feels will go a long way.
Movement-based separation activity – One fun way to work on separation anxiety in preschoolers that becomes part of the routine…here we are talking about the preschooler or kindergarten aged child that cries, clings to Mom or Dad, but then warms up to the classroom activities.
Practice routines- Do the same thing every day during the week in preparation for school, including bed times, morning routines, and transportation routines. These visual schedules can help with some individuals.
Wearable Charm- Another similar strategy is to create a DIY separation anxiety charm. Kids can make this along with the family adding heavy work through the hands. then, wear the charm to know that parents and caregivers still love and miss them even when not in view.
Get enough sleep– Practicing good sleep hygiene is important for the child as well as the parent or caregiver. This has an impact on behavioral response and self-regulation. Read a related blog post on supporting newborns not sleeping as sleep in young ones in the home can impact sibling and parent sleep.
Books about Separation- The activity listed below uses the book Owl Babies. But we added a heavy work goodbye sign that parents and children can use at school drop offs to ease separation anxiety. Or, this activity could work for kids that struggle with the transition to the classroom, because they are missing Mom and Dad or other caregiver.
Use the book, Owl Babies by Martin Waddell!
Use a magic number- In some cases, it can be hard for children to separate for even a very short period of time, and even in an environment such as the home. One strategy is the magic number technique. In this activity, the child and parent/caregiver can practice away time for short periods of time. Select a “magic number”. Then, move away from each other by going into a different room of the house. Use a timer or a watch to count up to that magic number. Try increasing the magic number up by a few minutes at a time until it’s less difficult to spend time apart.
Create a plan- Having a plan or set of coping strategies prepared for time apart can help. For the kindergarten separation anxiety issues, maybe looking at a picture of the family that is stashed inside a pencil box would help. For another student in kindergarten, maybe touching a special keychain attached to the shoe or belt loop would work. Having this plan prepared before heading into the kindergarten room or daycare setting is key.
Owl Babies Activity
We read the book, Owl Babies (affiliate link- As an Amazon Influencer, I earn from qualifying purchases) and fell in love.
The sweet little Owl Babies in the book wake up from a nap to find their mother gone from the nest. The owl siblings go through a series of concerns and thoughts about where their mom might be with a little almost-tears.
My older kids thought the book was pretty awesome and decided that each of the owl babies in the book were one of the girls in our family. There were a few similar personality traits that aligned with the owls in the book and the sisters in our house.
The idea of knowing that mom comes back when she leaves is a lesson we’re going through at Sunday School each week and one that happens so often with kids. Just like the Owl Babies (affiliate link), it can be hard to stay calm and not worry when mom goes away.
We decided to come up with an owl themed movement activity that kids could do when they are feeling anxious after leaving mom or dad.
School Drop Off Anxiety
This activity would be perfect for preschool kids or kindergarten students who are experiencing separation anxiety at the start of school or in a new classroom situation. For kids that cry at school drop off, or really struggle with missing Mom or Dad, this school drop off anxiety activity can help.
To do the activity, first read Owl Babies (affiliate link) together. Then, talk about how the owls in the book must feel when they see their mother has gone out of the nest. Finally, talk about how when the mom or dad in your family has to go away for a little while, they always come back and that they are thinking of the little one in your home while they are gone.
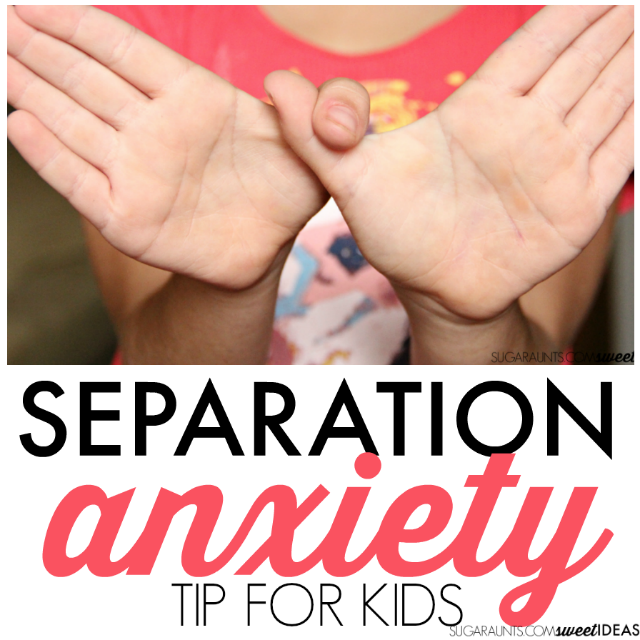
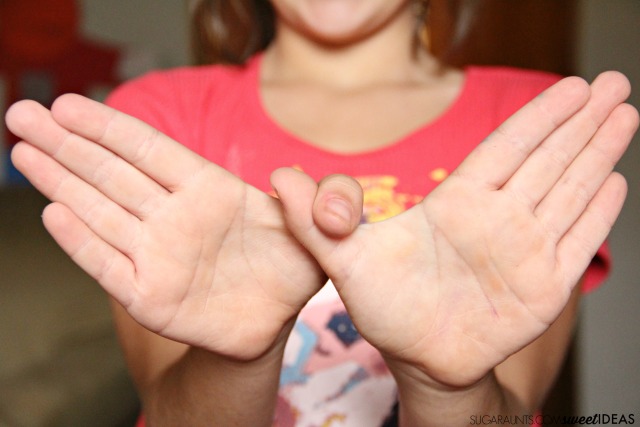
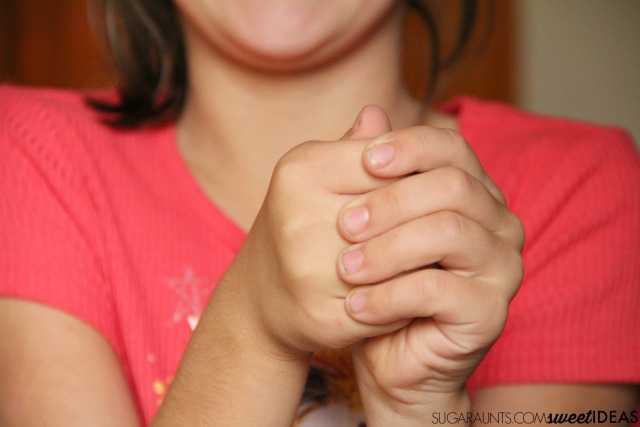
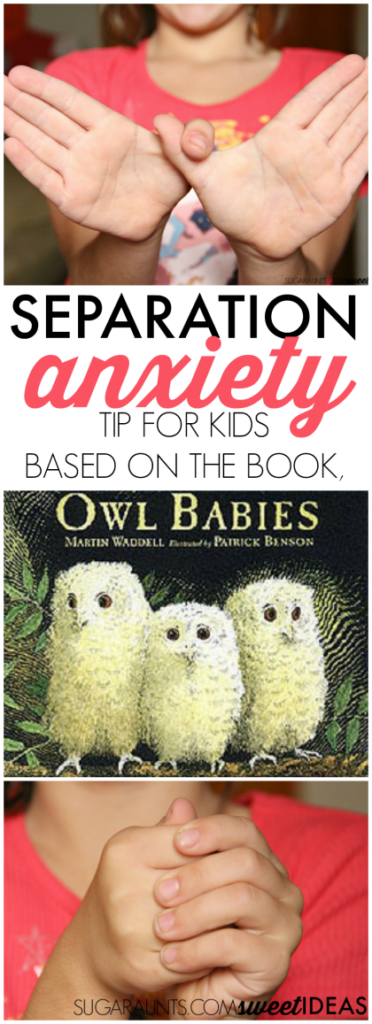
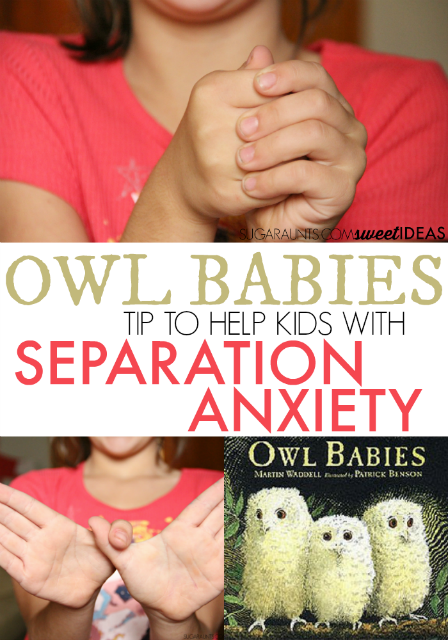
One easy way to help with separation anxiety is to come up with a hand signal. We decided that making a bird wing sign would be a lot like an owl in flight. Hook your thumbs together and spread your fingers out to create the wings of an owl.
Then, wrap both hands around your thumbs to create a little owl baby of your own. Now, squeeze your hands tight to give them a hug. Your child can do this motion when the are feeling sad or nervous at school. Tell them to think about the owl babies in the book (affiliate link) and how they felt when their mom came back.
Squeezing the hands tightly can provide a bit of proprioceptive input that is calming in a stressful situation like the preschool drop-off. A simple hand hug might be just the thing that can help! It’s a self regulation activity that supports the whole body as a mechanism to address emotional regulation needs that show up as crying, clinging, and bolting “behaviors”.
Then, when you pick up your little baby, be sure to swoop them up in a big hug!
This activity would work with preschoolers who are a little older than my two year old. She really enjoyed the book, Owl Babies (affiliate link), though and we have read it again and again!
Let me know how this tip to help with separation anxiety works with your preschooler!
This Owl Babies activity is a fun and interactive book for kids of all ages!
Let’s go a bit further with kindergarten separation anxiety and how to support this need.
Kindergarten Separation Anxiety
One thing about kindergarten separation anxiety is that it may not rear it’s head until after school has started. Typically (in many cases, not all cases), young children and parents are very excited for their little ones to head off to kindergarten. There are a lot of new things to experience as a new kindergartener!
However, one new consideration may end up being a case of worries and anxieties after the school year has begun!
What’s going on here?
At the start of a school year, after school has been in session for a few days or weeks, things start to get old, quick. The young child has to wake up early every day. They have to spend 8 or more hours in school, paying attention, and on high alert, every day, Monday through Friday. There are new routines, new peers, new rules, new learning, new transportation, and they can be on high alert all day.
Sometimes we see kindergarten students who experience a separation anxiety from their parents or guardians as a result. This involves stress and worries that might be brought up during the night, before bed, before school, at school, or even during slow times at home.
The kindergarten child who is attached to their special parent, guardian, sibling, etc. are now spending many hours away from their person, people, and routines.
Kindergarten separation anxiety may include fears as well:
they are going to miss out on something at home
their special person will become sick or have an accident while they are not together
they, the kindergartener, may worry that they will become sick, lost, or hurt while away at school
they may worry that they will become lost in the school or on the way to school
Some things that we see with kindergarten separation anxiety may include:
Outbursts at home before school
Refusing to get ready for school
Outbursts or meltdowns before bed or on Sunday night
Refusing to go to school
Refusing to go on the bus
Refusing to sleep alone
Being afraid or fearful when they weren’t before
Refusing to do things they used to like to do like playing with friends
Refusing to leave the home or be away from their parent/guardian
Feelings of intense fear or helplessness
Agitated behavior
Anxiety that presents as crying, tantrums, shrinking away, or running away from unfamiliar people or situations
Excessive fear about other situations
Trouble falling asleep or staying asleep
Reverting to younger habits such as sucking their thumb or talking in a “baby voice”
Restlessness
Trouble concentrating or paying attention
Worry during other times of day or night
There may be other things going on too. With the kindergarten age, it might be hard for the child to express all that they are experiencing. We can however, support separation anxiety in kindergarten students.
How to support Kindergarten Separation Anxiety
One of the most important ways to help a kindergarten student who is experiencing separation anxiety is by giving them words for what they are experiencing.
Talk about separation anxiety- It’s important for the child to realize and understand that we all have worries and anxiety. We all experience stress at some point or another. We can come up with tools to support and work on these worries, however, so they don’t become all that we think about. What we don’t want is for the worries to prevent participation in all of the fun activities that comes along with kindergarten!
Give words to the feelings that the child is feeling. This involves interoception (the sensory system that allows us to recognize internal sensations). One of these aspects is headaches that come because of worries or anxiety. Other feelings might be rapid heartbeat, stomach ache, dry mouth, sweating, cold hands, tingly fingers, etc.
Read books about separation anxiety in kindergarten. There are a lot of great books out there about kindergarten separation anxiety in particular. That tells us that this is a very common issue!
Some of our favorites include: (Amazon affiliate links below)
Focus on Kindergarten Friendships- One of the fun things about kindergarten is meeting new friends. But being worried and over-thinking might mean that there is less time to talk to friends and do all of the fun kindergarten things! Try helping your kindgergartener to focus on friends when they are feeling very anxious about going to school.
Enlist a friend to help walk them to the classroom
Have a buddy to get started during the day
Check in with a friend when they feel the worries
Create a social support system with a small group of friends by having playgroups on the weekends or after school.
Make a Clock- Using paper, make or draw a clock with the time that the child will reunite with their adult. This visual cue can help them to see that they will return to their loved ones. Include “grace” time for a window of time to allow for the school bus, traffic, etc. Plus this is a good clock activity too!
Separation Anxiety Occupational Therapy
Just like in kindergarten, sometimes we see clients that are worried or anxious about coming into the occupational therapy space. This might especially be the case for the new child experiencing OT for the first time. For parents to better know what to expect in OT sessions, read our getting started with occupational therapy blog post.
Using some of the same strategies listed above and under kindergarten separation anxiety can support these kiddos so they can participate in therapy. Separation anxiety may need work with a child psychologist, however occupational therapy can support families and the team using meaningful and motivating strategies as well as tools that enable the individual to participate in daily functional tasks.
Work to establish a secure relationship to the teacher/therapy provider/classroom support staff/peers with the aim of reducing dependence on parents or guardians in the school environment over time
Create a social story on being away from loved ones for short periods of time
Educate parents and educators on the limbic system and the possibility of the child being in a fight or flight state as well as tools to support the child in this manner
Educate and provide interventions on interoception and support the child with tools to slow a fast heart rate, etc.
Support the child and the family as a unit with education on co-regulation
Create a consistent goodbye routine. Try a wave at the window, a special hug pattern, or a simple phrase you repeat each day. This predictability helps ease transitions.
Use a comfort item like a small object from home, such as a blanket, scarf, or paper heart with kisses
Keep goodbyes short and positive
Talk about emotions. Name what your child might be feeling and normalize it: “It’s okay to feel sad or nervous when saying goodbye.”
Practice separation in small ways. Try short separations before school starts, such as staying with a trusted babysitter or family member for brief periods.
Prepare your child for what to expect. Talk about who they’ll see, what they’ll do, and when you’ll be back. Use visuals or picture schedules if needed.
Build self-regulation skills. Use calming strategies like deep breaths, squeezing a stuffed animal, or stretching to help regulate emotions during drop-off.
Encourage independence with routines. Allow your child to take part in getting ready, putting on their backpack, or walking to the classroom to build confidence.
Involve familiar family members. If multiple caregivers are part of the routine, make sure they follow the same goodbye pattern to provide a sense of security.
Watch for physical symptoms. Complaints of stomachaches or headaches can be signs of anxiety. Take these seriously and seek support if they persist.
Use books and pretend play. Reading books about school or playing “going to school” with dolls can help your child process and understand their feelings.
Limit big changes at the same time. If possible, avoid starting preschool during other major transitions such as a move, new sibling, or recent illness.
Stay calm and supportive. Your emotional state influences your child’s. Show confidence in their ability to manage the separation.
Communicate with the teacher. Let the classroom teacher know your child’s needs. Teachers can offer extra support during arrival time.
Seek help when needed. If anxiety is impacting your child’s daily function or not improving over time, talk with a pediatrician or occupational therapist.
Separation Anxiety and Occupational Therapy
Occupational therapy empowers individuals with meaningful and motivating tasks. When separation worries interfere with the things that matter most to the child, we see the intersection with occupational therapy.
As an occupational therapist supporting families in both early intervention and school-based settings, I often help parents navigate preschool separation anxiety with developmentally appropriate strategies rooted in emotional regulation. One of the first steps is understanding that separation anxiety is a type of anxiety that emerges when a child feels unsafe or unsure when leaving primary caregivers, especially in a new place with new people like a preschool classroom or a new babysitter.
It can look like temper tantrums, crying, clingy behavior, or even physical symptoms such as stomachaches or headaches. Some children experience nightmares or regressions in sleep routines. These are not behavioral “problems,” but symptoms of separation anxiety that reflect developmental needs. Pediatricians and child development professionals, including an MD, often agree that this is a normal stage that can benefit from structured support and consistency, not punishment or abrupt transitions.
One powerful tool I recommend is establishing a simple and predictable goodbye routine or goodbye ritual. This could be a wave at the window, a special hug sequence, or even a secret handshake. This can be something consistent that becomes part of your family’s life and supports the child’s ability to manage emotions.
Younger children may also benefit from a transitional object like a blanket or a paper heart with kisses on it tucked into their pocket or backpack. These comfort items act as sensory tools to reduce tension and help children self-soothe throughout the day. When families create and practice these routines together, it eases the stress of the exit and builds resilience over time.
It’s also important to involve family members in the routine if multiple primary caregivers are involved in drop-off. In some cases, when separation anxiety in preschoolers becomes disruptive or persists beyond the expected developmental window, it may be helpful to consult with a pediatrician to rule out other concerns such as illness or to discuss options if anxiety feels like a disaster at every drop-off. These small, meaningful strategies can transform what feels overwhelming into a smoother, more confident transition. It’s helpful for both the child and the parent!
Occupational therapy empowers individuals with meaningful and motivating tasks. When separation worries interfere with the things that matter most to the child, we see the intersection with occupational therapy.
Colleen Beck, OTR/L has been an occupational therapist since 2000, working in school-based, hand therapy, outpatient peds, EI, and SNF. Colleen created The OT Toolbox to inspire therapists, teachers, and parents with easy and fun tools to help children thrive. Read her story about going from an OT making $3/hour (after paying for kids’ childcare) to a full-time OT resource creator for millions of readers. Want to collaborate? Send an email to contact@theottoolbox.com.
Hand strengthening and finger strengthening are a part of occupational therapy interventions, in every day tasks. There is more to developing strong and efficient hands than just using a hand grip exerciser or therapy putty to strengthen fingers.
Here, you will find a collection of fine motor resources and hand strengthening activities that can be used to improve tone in the hands, increase stability in the thumb and fingers, develop and define arches of the hands, improve precision with in-hand manipulation, improve endurance in hand strengthening activities.
Below, you will find hand strengthening activities for kids, hand strength activities for adults, and therapy tools to develop hand strength. The activities to strengthen fine motor skills included in this post are perfect to improving grip strength, pinch strength, or as part of a finger exercises program for handwriting.
One thing to keep in mind when it comes to hand strengthening and when creating a hand strength exercise program is that it is very possible (and a theme of a pediatric OT!) to develop fine motor skills and hand strength through play!
Hand Strengthening
Let’s take a closer look at hand strengthening…in fun and creative ways!
Occupational therapists use functional tasks, or daily occupations, to improve hand strength so that the clients they work with can lead functional lives: so they can have strong and efficient hands to do those tasks that take up their day.
Think about it this way: with weak hands, it is very difficult for a child to color a coloring page. But, through coloring and using crayons, they are improving their hand strength so they can color larger pictures or tackle more difficult fine motor tasks.
Adequate finger and hand strength is a crucial foundation skill necessary to successfully perform most activities of daily living such as opening snack wrappers, flushing the toilet, opening the tap, buttoning your shirt and so the list goes on.
Not only do we need adequate hand strength for our ADLs, it directly impacts on our ability to perform school related tasks such us cutting, writing and manipulating materials such as glue.
How do you know if a child has weak hands?
Hand strength is an important area of development.
Kids who struggle with hand strength may have difficulty with grasping a pencil, coloring, holding and using scissors, managing clothing fasteners, attaching a seatbelt, squeezing a glue bottle, opening and managing food containers, tying shoes. There are many fine motor activities needed in school that will be a red flag for determining if a child has weak hands.
Luckily, there are many fun ways to improve a child’s hand strength.
The best way to improve overall strength is through meaningful and motivating activities…especially everyday play!
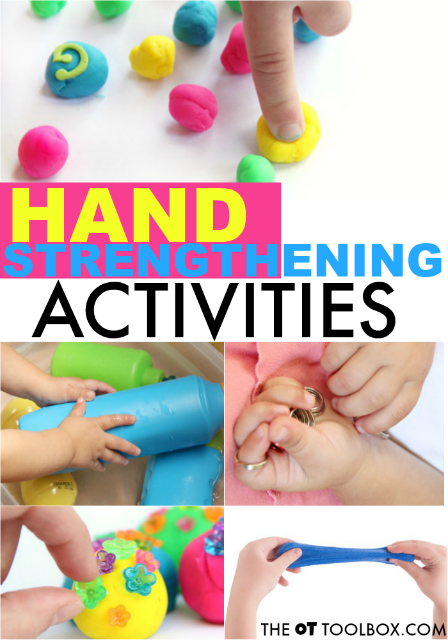
Here, you will find a collection of pinching, pulling, and pushing activities, weight bearing activities, squeezing activities, and overall grip and pinch activities.
These ideas improve tone in the hands, increase stability in the thumb and fingers, develop and define arches of the hands, improve precision with in-hand manipulation, improve endurance in hand strength, and address hand separation into a fine motor side and a power side.
Fine Motor Strength is essential for so many reasons! From maintaining a grasp on a pencil to opening and closing scissors, to buttoning buttons, snapping snaps, tying shoes, coloring a picture without stopping, to most everything we do…hand strength matters!
I wanted to cover fine motor strength and the skills kids need for pencil grasp, managing scissors, working clothing fasteners, and using those hands. So often, we see weak arches, instability, and low tone in the hands that transfers to awkward use of the hands, impractical grasps, and poor endurance in writing or coloring. Sneaking in a few strengthening activities each day can make a world of difference!
Hand Strengthening Activities
Today includes a collection of hand strengthening activities that can be used as hand strength activities for adults, and to develop hand strength. Scroll through the activities below to find creative hand strengthening ideas to improve grip strength, pinch strength, or as part of a finger exercises program for handwriting.
One way I can tell if hand strength is an issue is if a child (or adult) is able to push the button on a seatbelt or car seat buckle to release the seatbelt. That button requires A LOT of strength in the hands, doesn’t it? You need various components of stability too: wrist stability, thumb stability, arch development, finger strength, separation of the sides of the hand, as well as range of motion of the upper body (shoulder, elbow, forearm, wrist, fingers) and crossing midline. This is a challenging functional task for those with hand weakness.
For younger kids, it’s a safety issue to be able to push that button on the seatbelt. But at a certain age (different for each child depending on various issues), if they should be able to release their seatbelt, but they can not, this tells me that hand weakness is something to work on.
There are, of course many other examples at various ages and stages with age-appropriate tasks that also show me that hand strength is lacking. This is just one example.
Let’s go into these factors effecting hand strength…
What Impacts Hand Strength?
Hand strength is impacted by various components. When it comes to hand strength, there is a lot to uncover. Many aspects of motor skills impact strength and endurance in the hands. Some of those areas include these concepts:
Intrinsic hand strength
Thumb strength and stability
Motor control
Separation of the sides of the hand
In-hand manipulation
Wrist stability
Wrist extension
Finger strength
Range of motion of the arm: upper arm, forearm, wrist, fingers, and thumb
Hand muscle tone
A hand therapist will have various hand strength norms by using a dynamometer to measure grip strength, pinch strength of various pinches. Having an understanding of hand musculature and anatomy of the hand and upper extremity is important too.
First, check out our huge online library of fine motor activities. This is a collection of all of the fine motor activities on The OT Toolbox. There’s something for everyone.
One thing that makes a big difference in fine motor dexterity is addressing separation of the sides of the hand. This post explains more about motoric separation of the hand and here is another fun activity that really strengthens those muscles.
Intrinsic Hand Strength
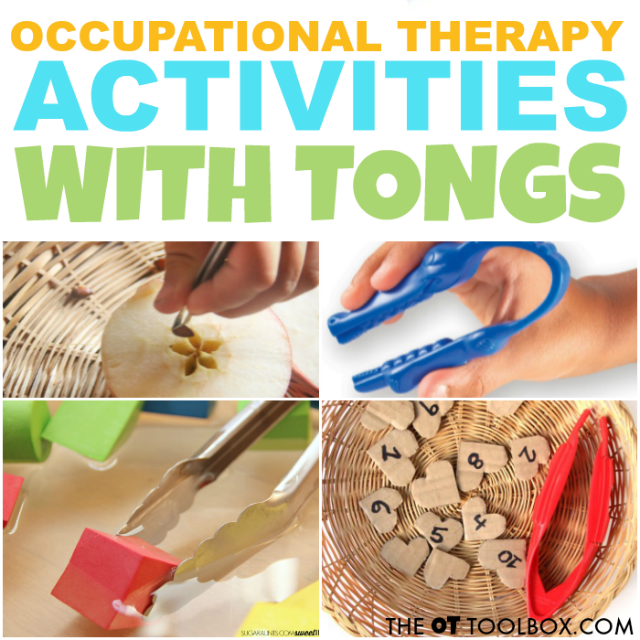
One of my favorite ways to work on hand strength is by using tongs. These OT activities using tongs are great for developing and strengthening the arches of the hands for improved intrinsic strength.
In fact, the intrinsic muscles are the muscles in the hand that define the arches of the hands, bend the knuckles, and oppose with the thumbs. Activities like this intrinsic muscle strengthening activity can easily be replicated at home or in the therapy room.
Among these muscles are a group called the lumbricals. The lumbrical muscles have a job to bend (flex) the MCP joints and extend (straighten) the PIP and DIP joints. When the lumbricals are in action, the hand might look like it is holding a plate with the big knuckles bent and the fingers extended. Read more about strengthening the intrinsic muscles here.
When kids write or color with a thumb web space area squashed shut, it’s a sign of problems. Then might be compensating for thumb instability, underdeveloped hand arches, and/or poor strength. Each of these problem areas will lead to difficulties with handwriting, dexterity, manipulation of small items like beads, and pencil grasp.
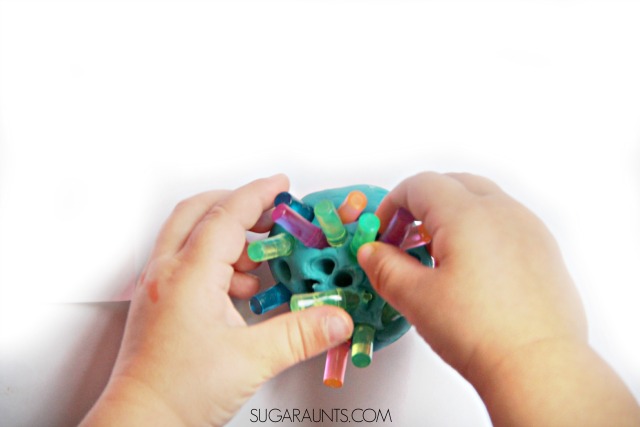
Another activity that is easy to set up is using play dough or more resistive thera-putty and pushing pegs (we used Lite Bright pegs) into the dough. Writing with a closed web space is inefficient and will cause poor and slow handwriting, especially as kids grow and are expected to write at faster speeds. A closed web space while attempting to manage fasteners such as buttons and zippers will lead to fumbling and difficulty. So, what do you do if you’ve got a kiddo who is squashing that web space shut during functional tasks? I’ve got a few ideas on how to work on open thumb web spaces.
Thumb Strength and Stability
Next let’s talk about thumb stability and strength. This is needed to support dexterity of the thumb in pincer grasp movements and in opposition of the thumb to the fingertips.
In-hand manipulation is a skill requiring strength in the hands. Activities like this in-hand manipulation activity can boost these skills. There are several aspects to in-hand manipulation: ▪ Finger-to-Palm Translation: Movement of an object from the fingers to the palm i.e. picking up a coin and moving it to the palm.
▪ Palm-to-Finger Translation: Movement of an object from the palm to the fingertips. (i.e. moving a coin from the palm to the fingertips to insert into a vending machine.)
▪ Shift: Slight adjustment of an object on or by the finger pads. (i.e. adjusting a pencil up and down in your hand.)
▪ Simple Rotation: Turning or rolling an object 90 degrees or less with the fingers moving as a unit. (i.e. unscrewing a toothpaste lid)
▪ Complex Rotation: Turning an object more than 90 degrees using isolated finger and thumb movements. (i.e. Turning a paperclip)
Each of the above skills can occur with items “squirreled away in the palm using the pinky finger and ring finger. This is called “with stabilization”. If other items are not pocketed away in the palm while in-hand manipulation occurs, it is called “without stabilization”.
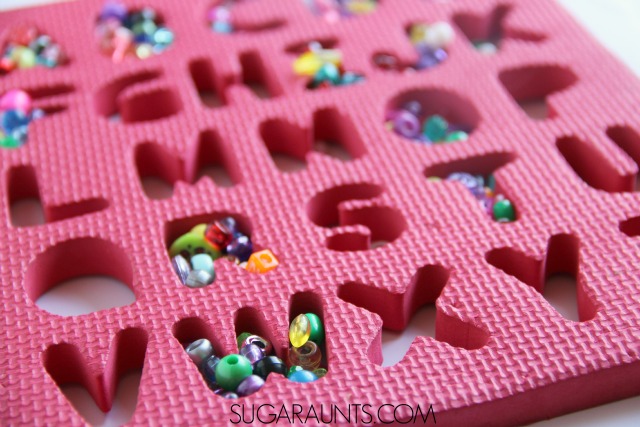
One way I like to work on in hand manipulation is to use a foam puzzle and fill the spaces with beads. You can have the child hold the beads in the palm of their hand. Then, they can drop the beads into the puzzle spaces one at a time. Sort by colors or just drop a certain number of beads into the spaces. This works on coordination skills.
Wrist stability is one of the essential areas that impact hand strength.
Due to the anatomical nature of the tendons in the forearm and hand, a stabile wrist impacts hand strength, specifically grip and pinch.
When the wrist is flexed (bent forward towards curved fingers in a grasp), there is little chance of fine motor dexterity. A flexed wrist in functional tasks limits use of the fingers due to the tendons of the fingers being shortened as they work to stabilize the wrist. The fingers just can’t move like they are supposed to.
There are many exercises and activities that can be done to build the stability of the wrist so that it maintains a slightly extended position during fine motor activities.
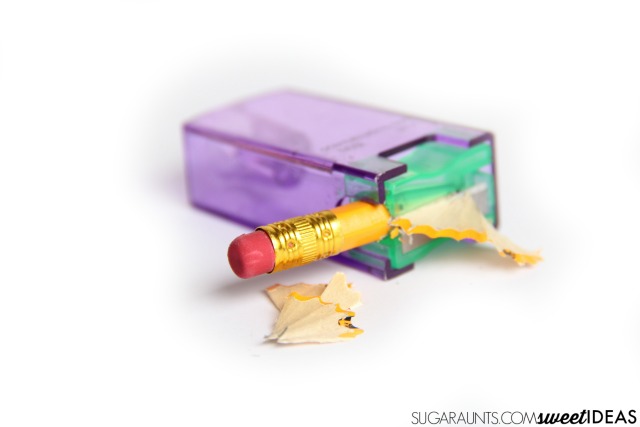
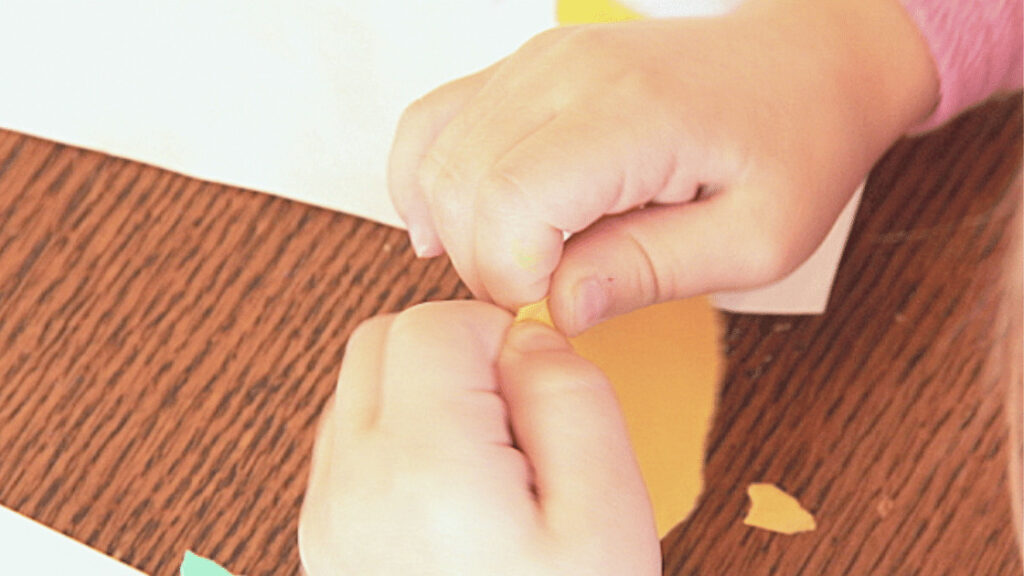
One fine motor activity I like to use in OT sessions is to have the child use a small pencil sharpener to sharpen a pencil. A shorter pencil is better because you encourage the hands to move closer to the pencil sharpener. It makes the hands work hard to twist the pencil to sharpen it. This really works on wrist stability and hand strength.
Upper Body Strength Impacts Hand Strength
Upper body strength is made up of the muscles in the upper chest, muscles in the upper back and muscles attached to the shoulder joint. All of these muscles work together to create stability at the shoulder joint. This shoulder girdle stability is essential for establishing a solid anchor for the rest of the arm. Without this anchor it is difficult to develop good control in the lower arm, hands and fingers. In therapy-speak we talk about developing proximal stability before we can achieve distal control.
The stronger body enables functional performance in purposeful activities, specifically strong and efficient hands.
hand strengthening activities:
Hand strengthening activities can use the items you have in your home or therapy bag. Activities that involve play are best for developing hand and finger strength in kids. Some of these ideas can integrate play and stronger hands:
How will you use the hand strengthening activities and ideas listed above? Maybe in a home exercise program or in a therapy program that runs throughout the school year? Maybe you will use the ideas at home or in a clinic. The ideas are endless!
Think about it, how much do you use your hands throughout the day? Would you say it is from the moment you turn off your alarm clock in the morning to the minute you cover up in bed at night? How about the times you use them during the night, such as when you go to the bathroom or readjust the covers or the pillow?
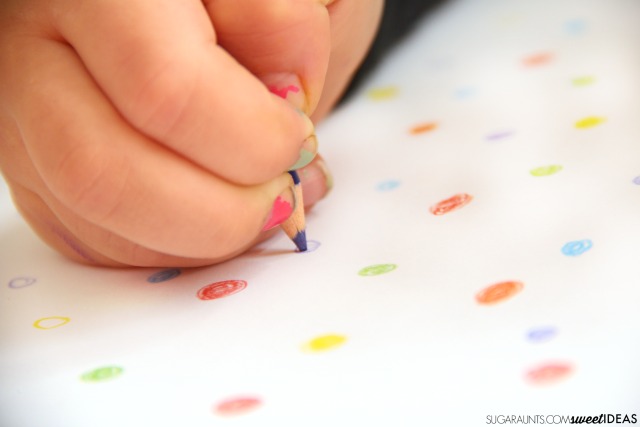
One trick I like to use is using colored pencils to make little circles and then color them in with small pencil strokes. It really works on intrinsic hand strength and arch development.
If you’re like many of us, the list of necessary tasks you need to do using your hands each day could go on and on and on. No matter how often you use your hands, they need to be in good shape and strong enough to manage all the tasks you need and want to do daily.
However, with children, they don’t necessarily think about the times they need to use their hands and the strength the hands need throughout the day, but we bet they often think of the times that their hands have failed them and they were too weak and they couldn’t accomplish the tasks and activities that were important to them. We do believe they think about those times.
On a personal note, I work with many kids in the clinic that struggle with cutting, coloring, handwriting, drawing, pencil grasp, gameplay, dressing, and other self-care skills and the one factor that often comes into play with my kiddos is their decreased hand and finger strength.
Hand Exercises for strength
We put together a list of hand exercises for strength. You can find this below and it includes using tools like hand grippers, therapy putty, a squeeze ball, rubber bands, and other items. We wanted to include both items that you can find in the home and items that might be in a therapy bag or in therapy supplies.
For this blog post, we will be addressing hand strength exercises and activities that can be used in the clinic, classroom, and home setting with many of them simply using some inexpensive supplies that you may already have on hand.
Some are direct exercises for older kids while some will be fun game-like exercises or activities for younger kids because we all know children need to be motivated at their level of age and level of interest, that’s why we’ve given you a variety of ideas. Board games have a lot of small pieces that are great for manipulating and using in play. These are great fine motor items for older kids!
Also, one last note, please don’t forget that even gross motor activities can also help build hand strength too! Things like wall push ups, animal walks, crawling, heavy work exercises, pulling themselves while prone on a scooter board, weight-bearing over therapy balls, climbing, and playing on the playground equipment are all fun ways to add gross motor input but also support wrist strength and stability and strengthening of the arches of the hands.
hand strengthening exercises for kids
Below are hand strengthening exercises for kids that use a variety of different materials. You’ll find different activities and ideas under each section.
power grip is simply taking a ball of therapy putty and squeezing with a gross grasp until as flat as possible, repeat
flat pinch is taking the therapy putty and creating a fat therapy log for the fingers to pinch flat as they attempt to stay, repeat
full grip is taking the therapy putty and creating a fat therapy log placing it vertically within the hand and then squeezing to make the log grow out of the top within the webspace, repeat
thumb press is taking a log or ball of putty and squeezing or pressing the thumb into the ball or log, repeat
finger curl is taking the therapy putty and placing at the base of the fingers within the palm and then squeezing the fingers into the putty making and fist, repeat
Squeeze ball exercises:
gross grasp is squeezing the ball repeatedly with the whole hand and holding for 3-5 seconds and repeating multiple times
gross grasp with a squeeze ball that has a face – simply squeeze with the whole hand to distort the face on the squeeze ball
Squeeze and feed the tennis ball (the size of the slit opening can make the ball easier or more difficult to squeeze open)
squeeze the ball open to feed the ball individual objects
squeeze the ball and scoop dry beans with a spoon to feed the ball
Rubber band exercises
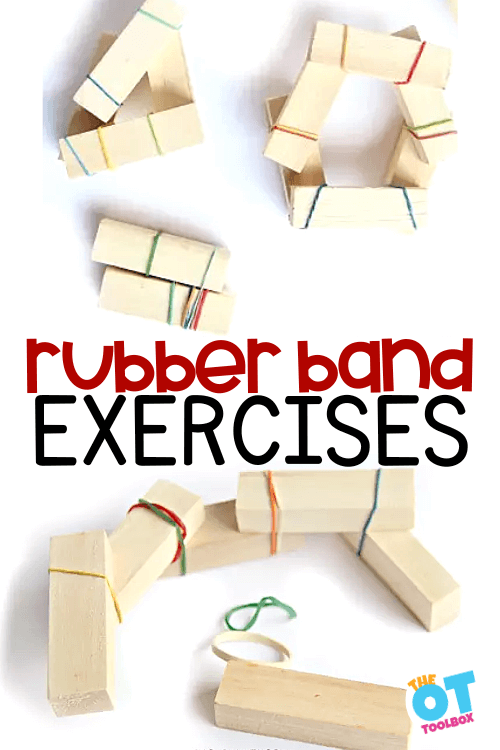
wrap rubber bands around the fingers including the thumb and then stretch out the hands and fingers to spread the fingers outward as far as possible, repeat
Hand pushes and pulls
simply place palms of hands together and push together, repeat
place a small squeeze ball between the palms of the hands and push together to flatten the ball, repeat
simply intertwine fingers together and attempt to gently pull them apart, repeat
Palm rotation with bounce balls or marbles
place 2-4 marbles or small bounce balls into the palm of the hand and attempt to rotate them in a circle while only using one hand
Fist to fan to fist fingers
open the hand by fanning (spreading) out the fingers and hold
close the hand by fisting the fingers together and hold
Make an O to fan to O position
curl the fingers into an O shape and hold
open the fingers into a fan and hold
Piano push
slightly curl the fingers like playing the piano and then push against a stable surface such as a tabletop or wall, repeat
Crumbling paper balls
Use any type of paper and work on this task as bilateral or unilateral exercises.
bilateral – use two hands with both working individually to crumple flat sheets of paper into paper balls (you can re-use each sheet by flattening the sheet again after crumpling or you can use a new sheet)
unilateral – use one hand at a time to crumple flat sheets of paper into paper balls (same as above you can re-use each sheet or you can use a new sheet)
Wringing water out of washcloths or sponges
bilateral – use both hands together to twist and wring out a wet washcloth or a small hand towel
unilateral – use one hand at a time to squeeze a wet washcloth to wring out the water
bilateral/unilateral – use two hands at the same time, but both working individually to squeeze water out of sponges
Create tongs out of a Pringle’s lid or other large flexible lids
use these recycled lids as tongs and squeeze with the whole hand to pick up objects and sort them
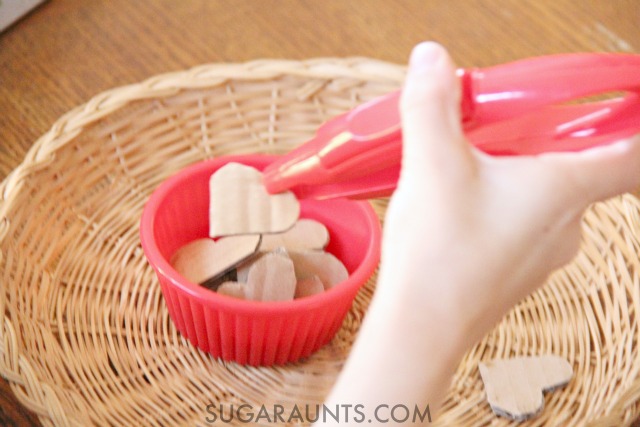
You can also use cardboard to cut shapes or even small squares. Then use tongs to pick them up and sort them. Here is how we used cardboard hearts with tongs
Condiment bottles and a turkey baster
use condiment bottles or a turkey baster to blow cotton balls or pom-pom balls in a fun race against a partner (you can use one or two hands to squeeze)
Milk the latex glove
this hand strengthening exercise is where you fill a latex glove with water and then knot the opening. Use a pin to poke a small hole into the tip of each finger then a child will work on squeezing the water out of each finger like milking a cow.
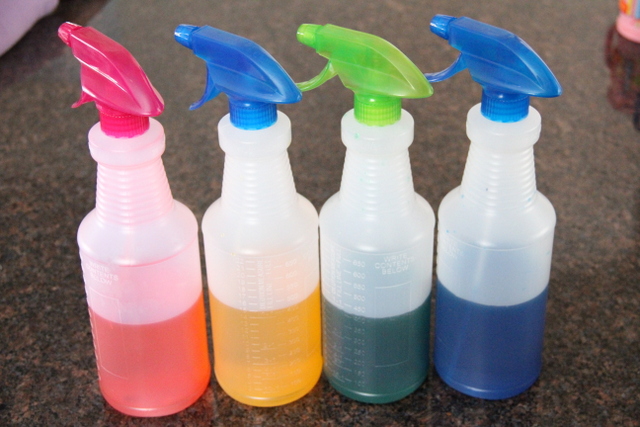
Spray bottle – Either use water or add food coloring or watercolors to the water. Then spray the water onto paper. We even painted snow with the spray bottles.
use a spray bottle to form letters on the sidewalk or side of the building
use the spray bottle to clean a chalkboard
Robot or Gripper claw apparatus
full hand reacher and/or gripper apparatuses are easy for kids to use to pick up objects at a distance to transport to a nearby laundry basket or box or simply from left side to right side or vice versa
Office supply tool use to promote hand strength when in use:
Stapler to staple along a strip of paper or even around shapes
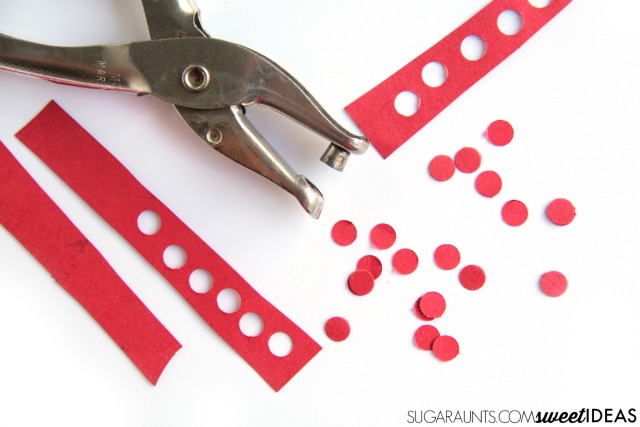
Hole punch to punch holes along a strip of paper or even around shapes
Bottle glitter glue to trace letters or shapes
Rubber band wrap to wrap around a canned good or a fun pool noodle friend
Marker cap removal or matching to simply remove and put back on the marker or before use mix up the color caps on the markers and have the child fix your mix-up of marker caps
Scissor cutting with play dough or putty to cut play dough or putty logs or snakes into pieces
House tool use to promote hand strength when in use:
New plunger removal from the floor (ugh, don’t use a used one) – simply use it on a hard floor surface to push down and pull up
Pushing and pulling a weighted laundry basket – simply have a child push a weighted laundry basket across the floor or tie a rope onto the basket and have a child pull it hand-over-hand to themselves
Pulling a rope with any weighted object on the end such as a weighted scooter board, box, or even a chair – make sure they use hand-over-hand
Pull pieces of Velcro apart – you can use large strips
Place whole hand chip clips onto the edge of a box, rope, etc., and remove
Grasp and lift a canned good for hand strength in all planes – up, down, left, right, cross midline, bicep curl, etc.
Roll a water bottle or canned good in the open hand while supine on the tabletop – probably for an older kiddo
Palm down wrist flexion exercise – drape over the edge of a table and grasp a water bottle or dumbbell and flex up while lifting – probably for an older kiddo
Bean bag spatula flip (grasp activity) – use bean bags and a kitchen spatula to flip bean bags from one side to the other
Use commercially available tools and games to promote hand strength (Amazon affiliate links included below):
Amazon affiliate links are included in this blog post. As an Amazon Influencer, I earn from qualifying purchases.
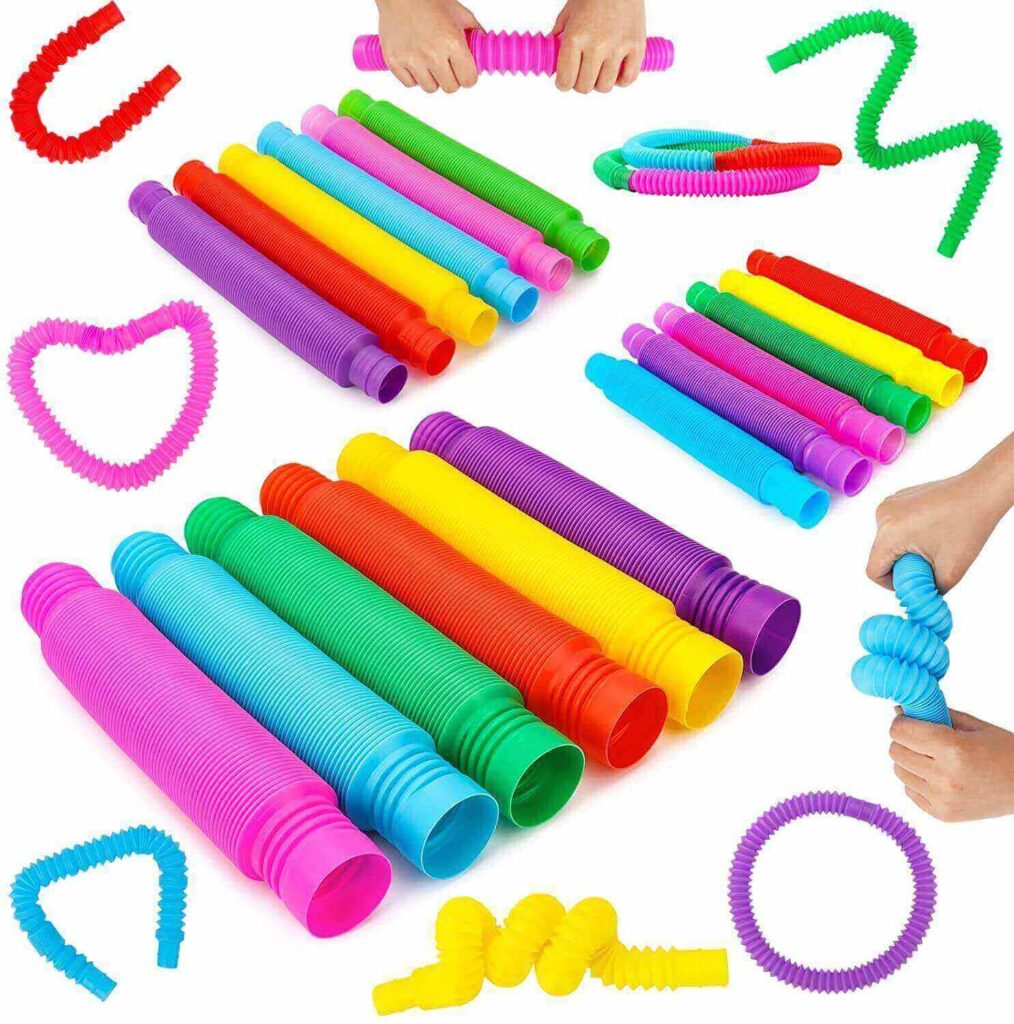
Pop Toobs – pull apart for the fun sound and push together to do again or use more than one and link them together. Read about how to use pop tubes for fine motor skills.
Squigz – push onto a dry erase board, hard surface floor, or therapy ball and pull off in a color sequence
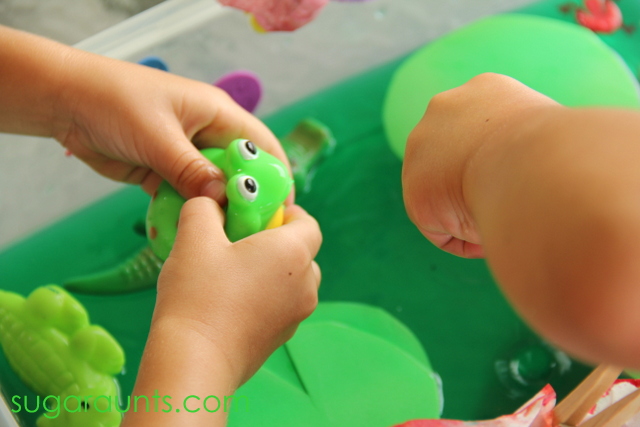
Squeeze animals – distort their bodies and faces or use bath toys that blow air, have children blow small pieces of cotton balls or pom-pom balls in a race against a partner. Here is how we used squeeze bath toys in a sensory bin.
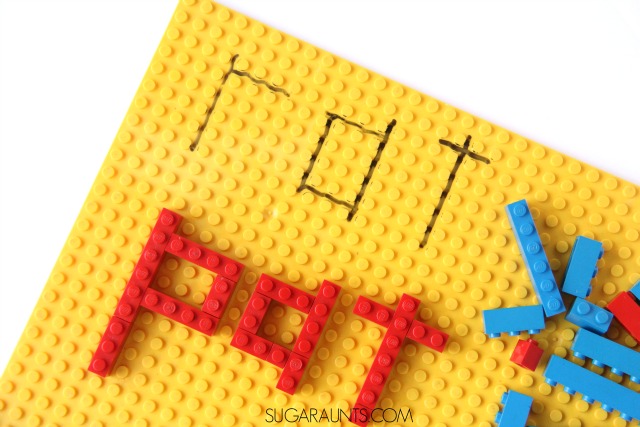
Lego brick building and destruction – use the bricks to build simple towers or even buildings or objects with the use of picture cards. You can also use them to build words.
Build and destruct Mr. Potato Head – use the fun game to work on hand strengthening. They can build the correct way or a distorted way for fun.
Build and destruct Cootie Bugs using the fun game to work on hand strengthening. This one is a little tricky for younger kiddos as the legs must go in at a slight angle which may make them more appropriate for older kiddos.
These resources include 10-12 no-prep game boards that you can print and play to practice finger isolation, left and right-hand discrimination, overall fine motor coordination, finger dexterity and build hand and finger strength. If you want to jazz up any warm-up routine, these are what you need as they are engaging for kids and are a great tool to use before coloring, cutting, handwriting, or typing work.
Want to read more about hand strengthening and further build your therapist toolkit?
It’s my hope that these resources are a huge help for you! Here are a few more topics related to strength in the hands that you may need in your therapy toolbox:
Working on fine motor skills, visual perception, visual motor skills, sensory tolerance, handwriting, or scissor skills? Our Fine Motor Kits cover all of these areas and more.
Check out the seasonal Fine Motor Kits that kids love:
When working on hand strengthening, it’s helpful to understand the difference between intrinsic and extrinsic hand muscles. This is important for us occupational therapy providers who are explaining WHY we are doing the activities we are doing in therapy sessions, and how they relate to everyday tasks and the daily activities that require fine motor strength.
Intrinsic hand muscles are the small muscles located within the hand itself, responsible for fine motor control, finger coordination, and refined movements like isolating the index finger, forming a tripod grasp, or manipulating small objects.
Intrinsic hand exercises: Activities such as putty pinches, finger walks, or buttoning tasks are great examples of intrinsic hand exercises that target these small muscles.
Extrinsic hand muscles originate in the forearm and are responsible for larger hand movements like gripping, squeezing, and lifting. These muscles work in tandem with the hand to support strength and endurance.
(Basically, you want to target the small muscles within the hand)
Therapy putty pinches – Pinch putty or clay using the thumb and each finger individually (especially the index finger).
Buttoning practice – Use shirts or button boards to build fine motor coordination.
Paper crumpling – Crumple a sheet of paper into a ball using one hand.
Coin flipping – Practice flipping and stacking coins using the thumb and fingers.
Finger opposition drills – Touch each fingertip to the thumb in sequence.
Bead stringing – Use small beads, LEGO, or Duplo blocks to promote precision and control.
Pegboard tasks – Place and remove small pegs using a pincer grasp.
Clothespin clipping – Pinch and place clothespins on the edge of a container.
Squeeze-and-release sponge – Encourage refined grip with a wet sponge. Bonus: Use chalk pieces on the wet surfaces.
Lacing cards – Thread yarn or string through holes to improve finger dexterity.
Extrinsic hand exercises: Examples of extrinsic hand muscle strengthening activities include wrist curls using a small can, squeezing a stress ball, or using a hand gripper. Supporting both muscle groups builds the foundation for coordinated, strong, and functional hand use in daily tasks.
These activities want to target the larger muscles in the forearm that control hand movement)
Wrist curls – Use a small can or light hand weight to curl the wrist up and down.
Squeeze ball or therapy ball – Strengthen the flexor muscles through repeated gripping. Another good idea is to use squeeze bottles to spray water at a target. You can also use a squeeze glue bottle to get that squeeze action.
Theraband wrist extensions – Anchor the band and pull the wrist up and back.
Hammer rotations – Hold a small hammer or similar object and rotate the wrist side-to-side.
Playdough squeezing and rolling – Roll thick dough into logs using palm pressure.
Weighted object carry – Carry grocery bags or weighted items to build endurance.
Towel wringing – Twist a wet towel to activate both grip and wrist muscles. Bonus: Use the towel for a tug-of-war game.
Opening jars – Simulated or real jars help build functional forearm strength.
Elastic band finger extensions – Place a band around fingers and stretch outward.
Wall push-ups or tabletop push-offs – Engage upper forearm and wrist stabilizers. Kids also love animal walks or wheelbarrow races.
Does My Child Have Hand Weakness?
Wondering if your child might have hand weakness? There are a few common signs to watch for that can point to weak grip strength and reduced use of important muscle groups in the hands.
Kids with hand weakness may tire quickly when writing or coloring, avoid fine motor tasks like cutting or drawing, and struggle with daily activities such as opening jars or zipping jackets.
You might notice them using their whole arm to move rather than isolated finger or wrist motions, or frequently switching hands during a task. A loose or awkward pencil grasp, low endurance during schoolwork, or difficulty with utensils can also signal reduced hand grip strength or limited mobility in the small muscles of the hand.
As an occupational therapist, our job is to analyze function. That’s the everyday activities we do. You can check functional activities like towel wringing, using scissors, or managing clothing fasteners. This can offer insight into different types of grip strength, such as pinch grip and power grip.
If you notice these signs, it can help to introduce functional exercises that build strength through play, such as squeezing sponges, using therapy putty, or practicing with clothespins. A pediatric occupational therapist may use tools like a hand dynamometer to assess hand strength and create a plan that targets specific muscle groups for improved hand function.
Colleen Beck, OTR/L has been an occupational therapist since 2000, working in school-based, hand therapy, outpatient peds, EI, and SNF. Colleen created The OT Toolbox to inspire therapists, teachers, and parents with easy and fun tools to help children thrive. Read her story about going from an OT making $3/hour (after paying for kids’ childcare) to a full-time OT resource creator for millions of readers. Want to collaborate? Send an email to contact@theottoolbox.com.
The school based-Occupational Therapist is getting ready to head back into the school year this Fall. Getting organized can be one of the hardest parts of school-based OT. These tips and tricks are some that I’ve used during my years as an Occupational Therapist working in the schools.
Getting Organized for Back-to-School as a School-Based OT
A new school year brings new schedules, caseloads, and responsibilities. The workload can feel overwhelming before the first week ends. Building strong organization systems now is actually a form of self care that supports a smoother year and protects against burnout. A well-planned routine can help you stay focused on your students and the meaningful work you do.
Organization begins with the tools you use daily. Here are some ideas I like that are free or inexpensive and are easy to implement:
Paper Planner
A physical calendar or paper planner keeps schedules, meetings, and deadlines in one place. Writing things down creates a visual record that’s easy to reference during a busy day.
Weekly Brain Dumps
Weekly brain dumps clear mental clutter by moving every task, reminder, and idea onto paper. This keeps priorities visible and reduces the risk of forgetting important details. It’s important to put it on actual paper as opposed to a digital list on your phone. Then cross off those tasks or to-do’s when they are done@
Clean your space
A tidy workspace supports focus. Clearing surfaces at the end of the day means you start fresh each morning. Decluttering removes unnecessary items and creates space for the materials and tools you use most. Having a designated home base for keys, wallet, and phone prevents wasted time searching for essentials.
Morning routines
Morning routines set the tone for the day. Planning clothes, meals, and therapy materials the night before prevents rushing. This extra preparation gives you more time to connect with students and begin the day with energy. Recognizing your own wins, no matter how small, helps maintain motivation and reinforces the value of the work you do.
Strong organization habits allow you to manage the demands of school-based OT more effectively. Clear systems, purposeful routines, and intentional self-care can help you maintain balance through the school year.
One of the tell-tale signs of a school based OT is the suitcase on wheels that is pulled around from school to school. Some school-based OTs pull a bin or carry a large bag, but whatever the means of dragging around that bag of OT tricks, it needs to be organized and it needs to be all in one place.
The OT who works in schools might see kids from Kindergarten on up through high school age in the same day. They could be travelling from school to school within a single school day and have a work day that includes visits to classrooms, scheduled IEP meetings, make parent phone calls, and complete annual reports.
In order to avoid feelings of overwhelming disorganization, the school-based OT needs to be organized!
These are some of the ways that I maintained order while working as an Occupational Therapist in the schools:
A great travel bag: A bag on wheels is perfect for pulling fine motor tools, visual motor integration exercises, various types of scissors, and creative treatment activities. You’ll want a bag on wheels because sometimes an OT working in schools has to set up shop in storage areas, stairwell hallways, or backstage extra rooms. Being a therapist who only visits a particular school one day a week, most Occupational Therapists don’t get a special work area. They might need to find a desk area where they can and that can mean a lot of walking inside the school. You’ll also want to use a durable bag with a lot of pockets for holding treatment materials.
Paper organization: An accordion-style file folder is great for organizing different types of writing paper, several thicknesses of paper for teaching scissor skills, and therapist-parent communication forms or home recommendation sheets.
Binder: Keep all of your documentation sheets, schedules, calendars, note pages, and treatment planning templates in one place. A portable three hole punch is perfect for filing away and organizing sheets of paper while on-the-go.
More School-based Occupational Therapy organization ideas:
Take time to observe students in their natural environment. Plan on “pushing in” to the classroom with treatment occurring right at the student’s work space. Making adaptations and accommodations can happen with the tasks the student is working on at that moment.
Make time to get to know the “helpers” and staff in your school. The school principal, secretary, custodian, and teacher’s assistants can be a great help.
Keep extra pens, post-it notes, and highlighters in your bag.
I am hopeful that these tips will help with organizing a successful start to the school year. An organization system can be so helpful in improving productivity, maximizing time management, and reducing feelings of overwhelming stress due to paperwork and disorganization.
One tip that I always use as a school-based OT is using a paper planner. I NEED to write things down on calendars, lists, and have it all in one place. Digital just doesn’t work for me!
That’s why I created my own therapy planner where I can pull out the types of pages that I need for my specific caseload. I print off pages and use them over and over again to make lists, brain dumps, and more.
The Build Your Own Therapy Planner is the ultimate back-to-school organization tool for school-based OTs. Designed with flexibility in mind, it lets you choose exactly the pages that work for your caseload so you can stay organized all year long.
The planner includes a one-page master planning sheet to map out your schedule with teacher lunch, recess, specials, and caseload information all in one place. This is perfect for taking the chaos out of scheduling. You’ll also find monthly calendars, to-do lists, IEP-at-a-glance pages, evaluation and re-evaluation trackers, and monthly consultation logs to keep your workload on track. For a personalized touch, choose from a variety of cover designs and patterned pages that you can print, laminate, and reuse to make your planner fun and functional.
It’s great for tracking meetings, planning therapy sessions, keeping tabs on your students’ progress. The Build Your Own Therapy Planner is designed to help you start the school year organized and confident.
Colleen Beck, OTR/L has been an occupational therapist since 2000, working in school-based, hand therapy, outpatient peds, EI, and SNF. Colleen created The OT Toolbox to inspire therapists, teachers, and parents with easy and fun tools to help children thrive. Read her story about going from an OT making $3/hour (after paying for kids’ childcare) to a full-time OT resource creator for millions of readers. Want to collaborate? Send an email to contact@theottoolbox.com.
A child with food texture issues can have a lot going on beneath the surface. What looks like extremely picky eating can be texture aversions that impact nutritional intake and participation in meals. Let’s explore specifically food texture sensitivity and what to do about this aspect of “picky eating”.
This may be a complicated topic, because what one person deems “picky” may be another person’s dream diet. It’s all subjective, to say the least. But when does food preference become an issue and who can help? Sometimes young children can have sensory food aversions to specific textures. It’s here that we’re covering specific and common food texture sensitivity that we see in children.
An occupational therapist can help, of course!
Related: Not sure if you have a picky eater? Seeking out an occupational therapist to complete a feeding evaluation is key. Also be sure to check out the Food Inventory Questionnaire for more clarity.
TYPES OF FOOD TEXTURE ISSUES
When food texture issues are the main culprit of a nutrition deficit, an occupational therapist can help you and your family identify the underlying factors and provide solutions to develop a broader food acceptance. Now, let’s dive into the various types of different textures of food and try to get into the mindset of a “picky eater”.
Some things to consider are the various textures that a single type of food can have. When you break down each type of food, you can see how a child might have a fear of food textures. The foods they are eating might be different each time they try them!
Fruit Textures
In the fruit category, we have lots of different textures going on. You may come across a child who eats certain kinds of fruits, like grapes, but will not touch foods of a different texture, like strawberries. But why is sensory touch an issue? Let’s break down the various textures, both inside and outside of some common fruits:
Various meats are very common for children to avoid because of the meat textures. Oftentimes, the exception here is with processed meats like we would find in chicken nuggets.
The texture of tough meat can be really difficult to chew as an adult, much less a child. Because the texture is so different from what many babies start out eating (purees), the introduction to meat may be a bit of a shock for toddlers.
Meat texture can range from crumbly (ex: ground beef) to stiff (ex: chicken breast) and from wet (ex: rarer steak) to dry (ex: plain baked turkey).
If a child is averse to meat, try offering it in many different forms before ruling it out! I find that cold cuts are often the most accepted of meats (besides chicken nuggets), usually offered on their own or alongside other sandwich foods.
Cheese Textures
While there are harder cheeses, most toddlers are exposed to softer cheeses like mozzarella string cheese or sliced American or cheddar cheese. However, the temperature of these cheeses changes their textures.
We need to think about what reactions we get for something gooey like a grilled cheese sandwich versus something more firm, like a string cheese straight from the fridge.
Most cheese is smooth and soft, meaning that the sensory input is fairly “low”. I have the word “low” in quotation marks because although it may seem like it is not very much input compared to something harder, crunchier, or bumpier, it may still be a texture that is non-preferred for some, leading it to feel like a much greater sensory experience for them.
Pureed Foods
Pureed foods, and foods with a pureed consistency are often the most accepted foods on this list, as they are introduced very young and do not need to be touched by the hands to eat.
Using a spoon instead of the fingers reduces the amount of sensory nerve stimulation that is associated with the food texture, and is, therefore, lighter on the system.
Pureed foods have a soft, silky, slimy, slippery texture. They do not require much activity from the mouth to eat – no chewing or moving the food about – all they have to do is swallow. This limits the amount of time to experience the food texture as well.
If your toddler is stuck on purees, try first to introduce purees with chunks. Oatmeal is a good option in this category as well.
Texture of Bread
Most toddlers love bread. The texture of bread is soft, smooth, not very complex in flavor, and easy to chew. It’s a calming food texture to eat!
Just like cheese though, the texture of bread can change, or be different depending on warmth of bread and especially the type of bread. In the case of bread, the texture changes when you toast it or add anything as a topping.
Texture changes between the middle of bread and the crusts may be why so many children prefer their sandwiches crustless! If your child does love bread but has limited nutritious foods in their repertoire, consider enriched breads with whole grains to try and fill that gap.
Cracker Texture
Crackers share some of those characteristics: they are generally smooth and lightly flavored, but they are moderately crunchy. The addition of a “crunch”, or being a firmer item in general, may be the difference between your child being able to eat bread, but not crackers.
Crackers can vary from brand to brand. Goldfish crackers from the commonly known brand can have a different taste and texture than a generic or store-bought brand. Similarly, a saltine can differ from brand to brand.
This list of foods and associated textures is certainly not exhaustive, but we hope you can use it as a resource to think about food textures moving forward.
HOW TO BROADEN FOOD ACCEPTANCE
There are many ways to address food texture issues so that nutritional input is broadened to a healthy diet. Some of these considerations are occupational therapy interventions that may be addressed in therapy sessions. Below, we’re covering:
Oral sensory strategies for food texture sensitivity
Play-based strategies for addressing texture sensitivities
Explore food texture issues by playing with food
Texture exploration without food
Oral Sensory Techniques for food texture issues
They are various ways to improve texture acceptance, but not very many that we can discuss without knowing more specifics about which food textures are causing an issue. Broadly speaking, alerting techniques are recommended for kiddos that have limited food texture tolerance.
Alerting sensory techniques for feeding involve increasing stimulation to the nerves in the mouth in a way that the child enjoys. By increasing input in a positive way, the nerves become desensitized and primed for experiencing more textures.
If this were completed in a fashion that the child did not enjoy, the technique is no longer valid. In other words, forcing someone to do something they dislike is never a good way to increase that behavior in the future.
Examples of alerting sensory input for feeding include:
Cold items like popsicles or frozen teethers/chewies
Vibrating items like an electric toothbrush or a (Amazon affiliate link) z-vibe
Fun candies like pop-rocks (for that sizzle and bang!) or rock candy (for that super interesting mix of sharp, smooth, and crunchy texture). Candy is not the best mechanism for broadening a diet, but it can be a very well-accepted item that provides a new texture to the mouth.
Alerting sensory inputs are not only beneficial for increasing food tolerance, but they are also great for attention, self-regulation, and more! Check out our posts about Sensory Popsicles and Sensory Water Bottles for more information on that.
Play-Based Sensory Techniques for Issues with Food Texture
In conjunction with oral sensory techniques, I always offer families ideas to explore various textures in and out of the kitchen.
Explore Food Texture Issues by Playing with Food
Important Disclaimer: Families that are not comfortable using food for non-nutritive purposes, like some of the activities below, should refrain from doing so. You know your family’s needs best!
Exploring Texture sensitivity through Play without Food
You can use pretend foods during playtime (they could be invisible or plastic/wood), or create a themed sensory bin using a variety of sensory bin bases for various textures. But really, ANY way to increase your child’s sensory input, especially to textures, will benefit their feeding experience. Remember that these items do not need to be mouthed to help. Just touching the skin increases texture tolerance. Here are some ideas:
I will be the first to admit that sometimes, picky eaters are just picky eaters regardless of the sensory experience. If this is the case for your little one, I would check out Kids Eat in Color, a nutritionist who has tons of great resources for families with questions about picky eaters.
Also, your OT may suggest other ways to increase functional independence during meal times with some adaptive equipment for eating. Although it may be stressful, try to keep mealtimes low-pressure and fun!
The Sensory Lifestyle Handbook walks you through sensory processing information, each step of creating a meaningful and motivating sensory diet, that is guided by the individual’s personal interests and preferences.
The Sensory Lifestyle Handbook is not just about creating a sensory diet to meet sensory processing needs. This handbook is your key to creating an active and thriving lifestyle based on a deep understanding of sensory processing.
Sydney Thorson, OTR/L, is a new occupational therapist working in school-based therapy. Her background is in Human Development and Family Studies, and she is passionate about providing individualized and meaningful treatment for each child and their family. Sydney is also a children’s author and illustrator and is always working on new and exciting projects.
Texture Progression
Introducing a texture progression or hierarchy can help children gradually tolerate a wider range of food textures.
Starting with smooth, predictable textures like purees and moving toward mixed, chewy, or crunchy textures gives the nervous system time to adapt without overwhelm.
Occupational therapists often use this approach to guide safe and structured food exploration, helping children build confidence and reduce anxiety at mealtimes.
Case Example:
OT Strategies for Food Aversion
Occupational therapy offers hands-on tools that support oral sensory needs and food exploration. Items like textured spoons, chew tubes, and vibrating tools (such as a Z‑Vibe) can help children tolerate new textures while building oral-motor strength.
These tools can be especially useful for children with sensory processing challenges, making feeding therapy more effective and personalized.
Multisensory Mealtime Approaches
Sensory challenges with food rarely begin and end at the table. Preparing the body through deep pressure activities, vestibular input (like swinging), or calming breathing exercises before meals can help reduce sensory defensiveness.
Integrating sensory diet strategies into mealtime routines creates a more supportive environment for children who are sensitive to food textures, smells, or presentation.
When to Seek Professional Help
Some feeding issues go beyond picky eating and require support from an occupational therapist or feeding specialist.
Signs such as frequent gagging, weight loss, refusal of entire food groups, or high distress around eating are red flags.
An OT trained in feeding therapy can assess oral-motor function, sensory sensitivities, and behavior patterns to create a targeted plan that supports safe and successful mealtimes.
Sensory Feeding Therapy Strategies for Texture Challenges
Sensory feeding therapy helps children who experience discomfort, vomiting, or refusal when trying new foods. These responses are often related to how their body processes sensory information, especially in children with sensory processing disorder or those on the autism.
Feeding therapists use evidence-based strategies like gradual exposure, play-based food exploration, and calming routines to reduce anxiety during meals. This type of therapy is especially helpful for kids who have developed strong food texture aversions and need structured, supportive guidance.
Food Texture Progression for Feeding Therapy
When working with kids who have food texture aversion, it’s important to move slowly and intentionally through food textures. Begin with very smooth, uniform foods and work toward more complex textures as tolerance improves. This sample texture progression supports swallowing, chewing, and comfort with small bites:
Mixed textures: oatmeal with fruit, cereal soaked in milk
Crunchy or firm textures: dry cereal, crackers, raw veggies
Multi-textured: layered meals like lasagna or sandwiches
Unpredictable or resistant foods: salads, meats, mixed dishes
Progression can vary from child to child. Take cues from their preferred texture, use a fork to offer small bites, and always allow the child to lead. Click to see examples of food chaining activities that follow a texture progression.
Feeding OT Strategies for Food Texture Aversion
Children with food texture aversion may show symptoms like gagging, refusal, or strong reactions when offered unfamiliar or mixed textures. These reactions are a sign of sensory overload or a lack of integration between texture, taste, and smell.
Occupational therapists support these challenges using strategies like tactile food play, gradual exposure, and oral motor warm-ups.
Introducing new foods alongside preferred snacks in small amounts and without pressure can reduce fear and build tolerance.
Picky Eating Sensory Approach: What Parents Should Know
Picky eating isn’t always a behavior issue. It often stems from sensory discomfort. Children on the autism spectrum, or those with sensory processing disorder, may react to certain textures with avoidance, gagging, or even vomiting.
Foods like eggs, pasta, or cereal can feel too slippery, sticky, or crunchy depending on the child’s sensory profile.
A picky eating sensory approach focuses on building trust, offering food without pressure, and supporting regulation during meals. Simple steps like involving the child in food prep or offering foods on divided plates can make meals feel safer.
When to Seek Feeding Therapy Professionals
Sometimes, food refusal goes beyond picky eating and requires help from feeding therapists or OT professionals. Red flags include sudden refusal of smoothie, soups, or other familiar foods, extreme discomfort with food smells or textures, or refusal to swallow certain consistencies.
If your child regularly refuses vegetables, gags at new textures, or eats fewer than 10 different foods, it’s time to consult with a professional. Feeding therapy offers structured, individualized support and helps families develop realistic strategies for long-term success.
Colleen Beck, OTR/L has been an occupational therapist since 2000, working in school-based, hand therapy, outpatient peds, EI, and SNF. Colleen created The OT Toolbox to inspire therapists, teachers, and parents with easy and fun tools to help children thrive. Read her story about going from an OT making $3/hour (after paying for kids’ childcare) to a full-time OT resource creator for millions of readers. Want to collaborate? Send an email to contact@theottoolbox.com.
Let’s talk body awareness activities using proprioception, or heavy work to bring awareness to where the body is, how the body moves, and awareness of self. Proprioception is one of the senses that is involved with everything we do. This sensory system plays a major role in body awareness. Below you’ll find body awareness occupational therapy activities to support this motor concept.
Be sure to check out a related resource, our self awareness games blog post for activities to support overall awareness of self.
Take a quick moment to stop and consider the position you are in right now. Are you lounging back on a couch? Sitting at a desk? Bouncing on a city bus as you glance at your mobile device? Are you perched in an office chair with your legs folded under you? Are you hanging out at the playground and glancing at your phone while your kids run in circles?
Here’s one of my favorite OT tips for supporting proprioception and body awareness skills: If you need activities that provide proprioceptive input, and for quick grab-and-go options, our Heavy Work Activity Cards make movement breaks easy and visual.
What is Body Awareness?
The definition of body awareness is this… Body awareness refers to being aware of the body’s position in space at rest and during movement. This concept can be broken down into having an awareness of body parts by name, movement, discrimination of sides of the body, and movement throughout space.
Being aware of our body position is something that happens automatically and naturally. That body awareness occurs naturally. The proprioceptive sense allows us to position our bodies just so in order to enable our hands, eyes, ears, and other parts to perform actions or jobs at any given moment. Proprioception activities help with body awareness.
The proprioceptive sense sends information about our body’s position to the brain so that we inherently know that our foot is tapping the ground as we wait on the bus or that our leg is curled under the other on the couch even while we do other actions or tasks.
This awareness allows us to walk around objects in our path, to move a spoon to our mouth without looking at it, and to stand far enough away from others while waiting in a line at the grocery store. It enables a student to write without pressing too hard or too lightly on their pencil when writing, and it helps us to brush our hair with just the right amount of pressure.
Proprioception is essential for everything we do!
Sometimes, the proprioceptive system does not do it’s job.
When the proprioceptive system isn’t functioning properly, body awareness and motor planning can be a problem.
When a child needs to pay attention to where their body is in space at all times, they can not attend to other important information like what is happening in their world around them. He or she can not automatically adjust to environmental changes. The child then needs to visually compensate in order to adjust his or her body. This can result in a child being clumsy, fearful, are even scared in certain situations.
Examples of Body awareness
Below are two situations that describe a child with proprioception challenges. In both, imagine a child who struggles to know where their body is in space.
Body awareness navigating bleachers- Imagine you are sitting on a set of bleachers in a crowd of wiggly, moving, and LOUD students. There is a lot going on around you, whether you are at a sporting event or in a gymnasium.
But, you also notice the bleachers don’t have a bottom to the steps; that is, you can see directly down to the ground below you. Kids are standing up, sitting down, jumping, roughhousing, and you are SCARED.
Your body doesn’t know how to position itself in a safe manner. You don’t know what action will come next and you don’t know where to look. You don’t know where your feet are or if your hands are supporting you.
Climbing up and down the bleachers is downright terrifying! For the child with proprioceptive struggles, just sitting on a set of bleachers can be challenging and overwhelming.
Body awareness sitting at a classroom desk- Now think about the child who is sitting at their desk and is required to write a journal entry. For the child with proprioceptive challenges, this can be a task with many “self-checks”.
They need to look at their feet to make sure they are under their desk so they don’t get in trouble for almost tripping someone between the desk aisles. They need to make sure they are sitting upright in their chair and that their back is touching the chair’s backrest.
They need to hold the paper and the pencil like they were taught. They need to align the paper and the words and then think about how hard to press on the paper, how to make the lines for individual letters, and how to string together letters to make words.
What a workout it is just to get settled in and started on a writing task! By now they might have lost several minutes of the writing time and they still don’t know what they are even writing about!
Both of these situations happen on an every day basis.
For the child with proprioception difficulties, the ability to be aware of their body in space and plan out motor actions is very much a struggle. These kids might appear fidgety, unsure, overwhelmed, clumsy, awkward, uncoordinated, or lazy.
When children or adults struggle with awareness of body positioning or movement patterns during activities, functional tasks can be a struggle. Every day tasks are difficult or impaired.
Occupational therapists work with individuals of all ages on functional tasks that occur in all aspects of daily living. Movement is part of the daily task completion, so it is likely that if body awareness is an issue, there are functional impairments at play.
Occupational therapy professionals will focus body awareness goals on the functional task that is impaired.
OT goals for body awareness can be specifically focused on improving body awareness during those functional tasks. Activities that address those goals can include heavy work, attention to task, motor planning, fine or gross motor skills, sensory input in the way of organizing proprioceptive input or vestibular input, visual cues and prompts. There are many ways this skill area can be addressed and these goals will be individualized for the child or adult.
Additionally, OT goals for body awareness may focus on motor planning. Proprioception is very closely aligned with body awareness and motor planning.
Need more information on proprioception and the other sensory systems and how they impact independence? Grab this free sensory processing disorder information booklet and free email series on sensory processing.
In this blog post, we are specifically discussing how to use proprioception activities to help with body awareness.
The proprioceptive system is alerted through heavy work activities that involve heavy pressure, firm sensations, large, forceful motor movements, and pushing or pulling activities. These actions can be calming and organizing.
Try these proprioception activities to help with body awareness at home, in the classroom, or in play.
Proprioception activities at home
Carry full laundry baskets to the laundry area
Empty wet clothes into the dryer
Change sheets
Pull weeds
Pull garbage cans to and from the curve
Carry in grocery bags
Carry donations to the car
Wash windows
Scrub carpets
Shovel snow
Rake leaves
Mop floors
Vacuum
Rearrange furniture
Proprioception activities in the classroom
Carry piles of books
Rearrange furniture
Help gym teacher move mats
Carry bin of lunchboxes to/from the lunch room
Wall push-ups
Chair push-ups
Clap erasers
Stack books in the library
Place chairs on desks at the end of the day, pull them down again in the morning
Looking for more ways to add proprioception activities into play and therapy? Try the ideas below. Just click on the images to read more.
In the Sensory Lifestyle Handbook, we cover motor planning and body awareness concepts as they are deeply related to sensory processing. Much like the body awareness activities listed in this blog post, the book discusses how to integrate functional tasks within the day that offer organizing and regulating input through functional activities.
Not only are these activities regulation tools, they are also activities that support development of body position in space and awareness of the body’s movements.
The Sensory Lifestyle Handbook walks you through sensory processing information, each step of creating a meaningful and motivating sensory diet, that is guided by the individual’s personal interests and preferences.
The Sensory Lifestyle Handbook is not just about creating a sensory diet to meet sensory processing needs. This handbook is your key to creating an active and thriving lifestyle based on a deep understanding of sensory processing.
Body Scheme and Body Awareness
Another way that you may have heard body awareness phrased is “body scheme”. This is just another way to explain the awareness one has of their body and the various parts of the body. Body scheme allows us to be aware of the spatial relationships of where the body is in space in a given activity.
Body scheme involves proprioceptive awareness so that we can move and interact in the world around us.
We can define body scheme as the awareness of body parts and the position of the body and it’s parts in relation to themselves and to the objects in the environment.
When there are deficits in body scheme, we may see certain difficulties:
challenges with apraxia, or difficulty with purposeful movement in relation to sensory input, movement, and coordination.
The individual might not recognize body parts or the relationship between them. This is especially observed in neuromuscular disturbances such as a CVA (stroke)
Movements may be considered unsafe. We might see difficulties with intentional movement and problems navigating busy hallways, stadium steps, bleachers, etc.
There are typically related deficits related to body scheme or body awareness difficulties. These may include:
Body awareness challenges like moving and utilizing the body without looking at or thinking about how the body needs to move. This awareness of the body in space results in functional and efficient movements with coordination.
Challenges with body scheme may be a cause of brain damage or brain injury such as a neuromuscular impairment. However, difficulties with body scheme may be a result of other deficits as well, including visual-spatial deficits, sensory processing challenges, verbal, or conceptual considerations.
Using Heavy Work Cards for Proprioceptive Input and Sensory Regulation
Proprioception is the body’s ability to sense its position in space, and when kids engage in heavy work activities, like pushing, pulling, lifting, or jumping. These types of activities activate the sensory processing system. This input supports better motor planning, coordination, and self-regulation. Our Heavy Work Activity Cards are a simple way to offer proprioceptive input through movement-rich activities that can be done in short bursts throughout the day.
Colleen Beck, OTR/L has been an occupational therapist since 2000, working in school-based, hand therapy, outpatient peds, EI, and SNF. Colleen created The OT Toolbox to inspire therapists, teachers, and parents with easy and fun tools to help children thrive. Read her story about going from an OT making $3/hour (after paying for kids’ childcare) to a full-time OT resource creator for millions of readers. Want to collaborate? Send an email to contact@theottoolbox.com.
For young (and old) children, a great calming classroom tool that supports learning, social participation, and school tasks is the calm down corner. A calming corner in the classroom can be a great sensory strategy to support emotional regulation needs in students. It’s a place to calm or re-organize in a personal bubble, meeting regulation needs so learning can happen. Let’s go over fun calm down corner ideas to support various regulation needs in the classroom.
As a pediatric OT, I love easy activities that I can use over and over again. One of my favorites are my heavy work activity cards that I can print off and use different themes based on the time of the year. Stock your calm-down corner with visual supports like our Heavy Work Activity Cards, which offer quick movement options for sensory regulation.
They are a great addition to calm down corner ideas like the ones below!
Calm Down Corner
As an Amazon Influencer, I earn from qualifying purchases.
A classroom calming area can include a variety of movement and sensory based activities or tools.
A place to sit: A visual space for a child to sit in their calming area, that is large enough for one child only. This could be a bean bag chair, a cushion or a pillow. These soft spots will help make the cozy corner comfortable so children feel they can stay as long as they would like. There are so many options when it comes to Flexible Seating tools – bean bag chair, movement seat, deflated beach ball seat, couch, soft chair, floor mats, large pillows
Soft surfaces – yoga mat, gymnastics mat, or soft rug
Timer – visual timers with countdown options are great
Preferred sensory items such as tactile toys, chewing items, plushies, fidgets, etc.
Books: Looking through picture books of all kinds, helps to give children something to do, while keeping their minds calm. Most of the time that children are interested in using a cozy corner, is when they are feeling overwhelmed.These Zones of Regulation booksthat talk about different feelings and support regulation and processing through feelings such as sad, scared, angry and more. These empathy and friendship books are another tool to consider. Place the books in a basket or a shelf for easy access.
Emotional Supports: Visual and tactile supports help people of all ages, but it is essential to have a visual space in the classroom for preschoolers to retreat to when they need time to calm down. Soothing Sammymakes creating this area simple and makes it a positive experience for children. This adorable golden retriever has his calm down house which can be placed in the cozy corner, with items that help children calm down using their sensory system. As they calm down, they can use the visuals included in the kit to explain to other children and adults how they are feeling and what they need support with.
Stuffed Animals or Baby Dolls: When feeling lonely, sad, scared or overwhelmed, having access to baby dolls or adorable stuffed animals makes the space less lonely. Additions such as baby doll blankets, bottles and other caretaking tools, allow children to comfort others as they work on comforting themselves.
Personal space: Adding a privacy cover or even simply a boundary to the cozy corner space helps children not to be distracted by other aspects of the environment. Placing fabric, cloth or other child-safe covers over the cozy space allows children to feel like they are in charge of their own space. Some child care centers place the cozy areas in small tents, (Amazon affiliate links) canopies (affiliate link) or wooden privacy cube like this one. (affiliate link)
A feelings check in could be a great addition to this space. The child could enter the calm down area and identify how they are feeling and then use strategies to support those needs.
This list is just the beginning! A calm down corner can include any item from the list above or classroom sensory diet strategies, based on the needs of the individual student.
Calm down corners can be quiet soothing areas to decompress for certain learners, while others need a more active calm down area in classrooms.
How to Add movement to a calm down corner
There are many different ways that children can calm down. Movement is one of the most beneficial and complicated ways to manage feelings and emotions.
There are two different types of movement patterns that support the sensory system.
Both of these types of movement activities increase awareness of where a body is in space, calms the central nervous system and regulates emotions in an amazing way. Movement is complicated as it can be alerting and calming. Picking the right activity for the desired outcome is tricky, but effective.
Help your learner understand what they need for self regulation, rather than bouncing all over the calm down corner.
How is movement calming?
Have you noticed that children seem to pay attention longer after moving around for a while? This isn’t just because they are tired after completing an active task. Children and adults are able to attend for longer periods of time when movement breaks are embedded into their daily schedules due to the sensory benefits it provides.
For adults that have desk jobs, it is widely known that every 20 minutes, they should stand up. This not only helps blood flow, but also awakens the body. When children are engaged in circle time, implementing movement based activities within circle (like freeze dancing, jumping and marching) is beneficial to improving attention.
Movement has many benefits, including helping calm down when feeling overwhelmed with emotions.
When the sensory system becomes overstimulated due to internal feelings and frustrations, some people are quick to seek out movement activities to calm down. Adults may go for a walk or run, chew gum, lift weights or kick a ball. This strategy directly affects proprioceptive input.
There are many ways the body processes movement. This impacts the central nervous system in different ways.
Proprioceptive inputs is one of the ways the body processes movement. It tells the brain where the body is in space. Proprioception is guided by skin, muscle, and joint receptors in the body, to connect to the brain through the nervous system. In this way, a person knows where their body is in space, and what the body is doing, without needing to watch the body parts move. A great example of proprioception, is being able to walk down the stairs without looking at ones legs or feet
Heavy work, or tasks that involve heavy resistance, offers input to the muscles, joints, and connective tissue, and is essential to regulating the sensory system
In this article on neuroplasticity, evidence suggests the sensorimotor cortex that governs proprioception is not fixed, and can be changed through external manipulation.
Vestibular movement, like proprioception, also helps alert us where our body is in space. This system operates through the inner ear, passing information to the brainstem, affecting many areas of the body. If a person starts jumping, rocking to music, or dancing to calm the body, it activates the vestibular system. This article on vestibular activities does a great job explaining this system.
more about the vestibular system
Receptors in the inner ear, found in two structures (the otolith organs and the semicircular canals), respond to linear/angular/rotational movement, gravity, head tilt, and quick movement changes.
The receptors in the ear, provide information to the central nervous system about the body’s position in space. Information is used to:
control posture, eye, and head movements
correct the eyes with head and body movements
muscle tone and postural adjustments
perceive motion and spatial orientation, and integrates somatosensory information
Through the vestibular and proprioceptive systems, the body processes information about where it is space, interprets movement patterns, and recognizes touch and joint pressure. These senses greatly impact the ability to calm down by triggering pressure points through movement (such as rocking or swinging).
When a child (or adult) becomes upset or overwhelmed, it is helpful to utilize the vestibular and proprioceptive systems as intervention tools. This helps a person calm and self regulate, in order to process their feelings and problem solve.
Because children often need sensory strategies to self regulate, having a designated calm down area set up in the home/classroom makes redirecting children to the appropriate calming activities much easier.
The Soothing Sammy program is a great way to encourage children to take part in creating their own calm down corner through a story about a dog, Sammy, a golden retriever. As children help build Sammy’s calm down area to use when overwhelmed, they are gently taught that it is okay to have a variety of feelings. As children look through the book, they learn how to use objects in their calm down corner when needed, including drinking water, wiping their face with a cloth, jumping on a small mat (proprioceptive and vestibular input) and much more.
There are so many items that we can add to a calm down corner and every calm down corner will be different based on individual children’s needs. In the Soothing Sammy curriculum, there are recipes for lavender bubbles, slime, tactile fidgets, paint, and others.
Proprioception Calm Down Corner Ideas
Here are some great proprioceptive strategies to include in a calm down corner:
Calming Corner Printables- Print off the sensory stations listed below. These support heavy work needs (and vestibular input)
Jumping mat or small trampoline. When children jump, they put pressure on their joints
Weighted blanket. Weighted blankets provide deep pressure over the entire body, making this activity one of the an effective whole-body proprioceptive strategies to help children calm down
Watering plants. Lifting a watering can, can impact joints all over the body. As children stoop down to pick up the watering can, moving it over plants of different heights, they are getting great input
Weighted ball. Lifting and rolling over a weighted ball increases proprioceptive input in the hands, arms, shoulders, and core.
Play Dough. Squishing, squeezing and pulling apart playdough or clay, increases proprioceptive input in hands and small joints.
Some of these activities can be alerting or calming, therefore some trial and error may be needed.
Vestibular Calm Down Corner Ideas
Movement with changes in positioning can be calming as well. Think slow, rocking movements. Here are some Vestibular strategies to include in a calm down area:
Farm Brain Breaks – These simple, yet fun activities, provide visual ways to complete vestibular activities
Calming Corner Printables- Movement like yoga poses or those offering brain breaks can be just the calming input needed.
Swinging – Help your child move and sway in different directions with an indoor or outdoor swing. A Sensory Swing for modulationis an amazing way to provide an option to swing in a home or preschool setting
Trampoline – Provide a small trampoline for your child to jump on. (Amazon affiliate link:) This toddler trampoline with handle is perfect for indoors spaces
Dancing – Any type of movement to music, including freeze dancing or shaking instruments (such as a tambourine, bells, maracas) or using scarves, are wonderful additions to a calm down corner
Yoga Poses – There are several themed yoga poses perfect for children. Add a yoga book or cards like these Unicorn Yoga Posesto any calm down area
calming corner printables
One tool to add to a calming corner or calming space is a printable that offers a visual designed to promote calming and organizing self-regulation. These calming corner printables are easy to print off and start using right away.
Over the years, we’ve created seasonal sensory paths, or sensory stations that support regulation needs. We’ve received wonderful words of thanks and feedback letting us know how loved these sensory stations have been.
Check out each of these seasonal calming corner printable packets. Pick and choose the ones that support your needs in the classroom, therapy clinic, or home:
Additionally, other calming corner printables might include deep breathing posters. We have many free deep breathing exercises on the website, including:
Finally, a brain beak printable like our popular alphabet exercises makes a great wall poster for a calming corner of the classroom.
Keep in mInd about setting up a calming corner in classroom
Calm down areas should incorporate all the senses, as every mood, trigger, situation and response is different. Equally important is the co-regulation aspect, which relates to responding to the mood and behavior of those around us, or the peers that may be present in a classroom or home setting.
By utilizing a variety of calming tools in a calming corner, or calm down space within the classroom, children will be able to identify what they need, the moment they need it, while still engaging in active learning.
It can be daunting and complicated providing for the needs of all of your different learners, however, by incorporating vestibular and proprioceptive materials in a calm down corner, children are able to use these powerful movement strategies when they need them the most, all while taking a multisensory approach to academics.
Sensory Corner
We’ve covered ways to set up a calming area, but what if you really want to feature the cozy aspect of a sensory space in a classroom or home? A sensory corner is very much the same concept, with different terminology. The key to a calm down space is incorporating sensory components within these areas.
Research shows that having a designated space for children to have alone time in, during their school day, is a way to support emotional development and independence, while also teaching children that it is okay for their friends to take a break.
When combining visual, tactile and other sensory components into the design of a cozy area, children will independently seek it out when they need a break from their peers.
in the classroom is a cozy or quiet space for one child to spend time independently when they feel like they need a break from the regular commotion of a preschool day. This area can be used to take a sensory break, to calm down when they are feeling upset or overwhelmed, or to just take a break.
This area should be accessible for all children at any time of the school day. This area is best used when it is at the child’s level, is situated in an area of the classroom that is far away from the busier/louder areas of the classroom, and includes sensory supports to encourage calming and peaceful experiences.
Whatever you call your safe space, and however you set it up, what matters most is your intention.
Why Use a Sensory Corner?
A calming corner or a sensory corner may be used for many various reasons.
There are hundreds of reasons why children might need to take a break from other children in the classroom. They may feel sad, overstimulated or just need time to recharge.
This may include:
Feeling overstimulated in the classroom
Overwhelming feelings
Needing to recharge or refocus
Having a bad day
Changes in routines
Feeling “out of sorts”
Worried about a home situation
Worried about a friend situation or social situation
Worried about a test or project in the classroom
Sadness about home situations
Missing family or pets
Not sure what to expect or what is expected of them
Remember that the goal of the sensory corner is to offer a safe space, or to give children a place to calm down, feel safe, and regroup when they are overcome with big emotions at school.
One thing to consider is that a calm down area of the classroom can be effective at the start of the school year due to transitions in the classroom when a new classroom may mean a lot of unexpected sensory input. This is a great addition to back-to-school sensory activities that support students of all abilities.
Where to put a cozy area:
When looking at an indoor preschool classroom set up, there are many centers that are utilized by children throughout the day. The key is to avoid adding visual noise, or visual clutter when adding a cozy area to the classroom.
Some of the busiest areas include the circle time/gross motor area, the block area and the art areas. These areas tend to attract groups of children at once and aren’t the best spaces to put next to a calming area.
The library, dramatic play and animal/science areas, tend to be more quiet spaces in the classroom. Each of these spaces will support a calmer environment to build a calm down area. When deciding what wall or area to place the calm down spot, keep in mind the following environmental components:
Is there a window nearby that will give off too much light?
Are there large gross motor/sensory spots that are noisy?
How many pictures are on the wall, and are they soothing?
What are the colors of the walls by the calming area, and are they overstimulating?
Is the space adequate for one child, or will more children try to encroach on their alone time?
Can this space be easily visible by a teacher doing active supervision?
Is this space near high traffic areas, like the entry door or bathroom?
Many spaces may feel like the perfect spot for a calm down space inside the classroom. You know your kids the best and where they spend most of their time. As the school year progresses, there may be times where you want to move your calm down area to a better spot, and that’s okay!
Outdoor Sensory corner Ideas
Don’t forget about the outside as an option for a calm down space! We know the many benefits of outdoors as a calming area, so simply going outside is a great option for calming the mind and body while organizing (or regulating) the sensory motor systems. The outdoors is one way to add free sensory motor options to the classroom.
Kids need quiet spaces while they are playing outdoors also. When setting up an outdoor learning environment, make sure to incorporate some independent areas in a shady area of the playground. These spaces could be near the garden, near a book reading area, under a nice shade tree or near a swing. You can even add an outdoor sensory swing as a calming option.
When setting up an outdoor area as a sensory corner for classroom breaks, consider what science says: Research on outdoor sensory play tells us that playing outdoors supports development, but there are emotional benefits as well as benefits to learning.
Some components to think about when setting up your outdoor calm down area include:
Is it sunny or shady?
Is it near an area where children will be running quickly?
Is it near a highly trafficked area, like a parking lot, walkway or door?
Quiet cozy areas should be available for children at all times. It isn’t a punishment corner, rather a space that children can “take a break” when they need it.
Here are 5 simple ways to incorporate cozy spaces outdoors so children have the opportunity to play on their own when needed.
1.Place to Sit: The first step to creating a safe space is for children to have a space to be on their own. You can create this in a similar way with an area rug or cushion like the indoors, or you can create something with more of a visual “splash” like these calming spaces in children’s swimming pools.
2. Gardens: Nature is a great accessory to a cozy nook area outside. Consider creating a cozy nook with a variety of plants. Adding trellis’s and arches where different vegetables and flowers and grow over a child’s safe space, incorporates natural colors and healthy foods into the safe space that children will spend their time. Sensory gardening is also a great option for a sensory break from the classroom that fosters learning!
3. Swings: Attaching a child safe swing to a tree provides a sensory rich safe space where children have the opportunity to have quiet time and self soothe. There are so many sensory swing options including a hammock swing and a platform swing.
4. Individual Art Space: Child initiated process art in nature can be a calming and essential experience that supports children when they are overwhelmed or overstimulated. A simple way to create this individualized space is by attaching an easel to a fence and offering different mediums to use with the easel (markers, paint, chalk.) Some of these creative painting ideas are fun to try in a sensory calm down space.
5. Sensory Table: A small sensory table or a sensory bucket is a wonderful way to encourage individual calming time while outside. You can add a variety of different materials to the sensory tub, or offer options of 5 or six sensory buckets. This could include bubbles and wands, sand, goop or some more of these sensory bin ideas. Another idea is to set up a nature table. You could even use a picnic table with a sand writing tray on top where users draw in the sand on the table surface.
Best Practice for Calm Down Corners
No matter what you call them: calm down corners, cozy corners, or sensory corners…and no matter where they are located: indoors or outdoors, in the home, or in the classroom, these sensory spaces are a valuable tool for promoting self-regulation and emotional well-being.
They provide a dedicated space for students to practice calming techniques and engage in activities that help them manage their emotions. Calming corners may include tools such as breathing exercises, visual aids with coping strategies, mindfulness activities, and calming sensory items like stress balls or visual timers…or any item that offers a sense of peace.
The key is to create an environment that is quiet, comfortable, and free from distractions, allowing students to recharge and regain focus when needed!
If you are setting up a calm down corner for your classroom as you gear up for a new school year, be sure to check out our resource on back-to-school sensory activities as an addition to your classroom calming area.
Heavy Work Activities for Calm Down Corners and Self-Regulation
Including heavy work in a calm-down corner can help children reset their bodies and minds during times of dysregulation. The resistance and pressure involved in heavy work helps to activate the proprioceptive system, which is known to reduce anxiety and improve self-regulation. Use our Heavy Work Activity Cards in your calm-down space to give kids structured, calming options they can choose independently.
Colleen Beck, OTR/L has been an occupational therapist since 2000, working in school-based, hand therapy, outpatient peds, EI, and SNF. Colleen created The OT Toolbox to inspire therapists, teachers, and parents with easy and fun tools to help children thrive. Read her story about going from an OT making $3/hour (after paying for kids’ childcare) to a full-time OT resource creator for millions of readers. Want to collaborate? Send an email to contact@theottoolbox.com.
In this blog post we are covering all things vision impairment and occupational therapy. Visual Impairments such as convergence insufficiency, impaired visual saccades, or other visual problems like blurred vision can present as a problem in the classroom. Students with visual impairments will flourish with effective classroom accommodations for visual problems. Below, you will find strategies that school-based occupational therapists can use as accommodations for addressing visual needs while meeting educational goals.
Be sure to check out our resource on vision as a starting point.
Visual impairment can mean a lot of things. Basically, this is any vision disability where eyesight is impacted. Vision impairment is a term used to describe any reduction in a person’s ability to see that cannot be fully corrected with glasses, contact lenses, medication, or surgery. It can affect one or both eyes and may involve difficulty with visual acuity (clarity), visual fields (peripheral vision), or how the brain processes visual information.
Vision impairment includes a wide range of conditions, from mild vision loss to complete blindness. It can impact daily activities such as reading, writing, navigating environments, recognizing faces, or participating in school and work tasks. The World Health Organization defines vision impairment as a presenting visual acuity worse than 20/60 in the better eye, and blindness as worse than 20/400.
In occupational therapy, vision impairment is considered in the context of how it affects function, independence, and participation in meaningful activities.
Types of Visual Impairment
Occupational therapy works with an enormous variety of diagnoses and conditions. There can be many reasons for a visual difficulty. These can occur in childhood or at any age.
Here’s a list of diagnoses and eye conditions associated with visual impairment:
There are so many ways an occupational therapy professionals can help with vision needs. We have a full list with more examples below.
Adapt tasks and environments (contrast, lighting, positioning).
Use tactile, auditory, and kinesthetic compensatory strategies.
Incorporate vision-related goals into play, self-care, school, and leisure tasks.
Collaborate with vision specialists (e.g., Teachers of the Visually Impaired, Orientation & Mobility instructors).
Promote safe mobility through environmental modifications and task adaptations.
Build strength, balance, and core stability through play or movement-based interventions.
Support motor development with hands-on guidance and tactile cues.
Collaborate with physical therapists and orientation & mobility specialists as needed.
Encourage self-advocacy and confidence in movement through supportive, success-based activities.
Offer large print options
Work alongside a behavioral optometrist or vision rehabilitation professional like vision therapy
Training in various devices and supports in various environments
Work with a mobility specialist
Visual Impairment Accommodations for the Classroom
The fact is, vision impacts learning. When visual problems exist, it can be be helpful to next address what to do about those problems to maximize learning. Often times when vision is discussed as a concern, a parent or caregiver may push back saying that the child has had their vision checked, and that they can see fine. Despite education, and handouts, the parent still resists getting a more in-depth vision evaluation for their child. Now what? Good news is that there are some accommodations that can be made in the classroom to assist the child. These strategies are also great for kiddo’s who already have glasses but are still struggling.
What are accommodations for visual problems?
Accommodations are strategies set forth that allow a student to change the method of how learning happens. Accommodations for visual problems can address visual needs through changes in seating, presentation of visual information, test information, or classroom activities without modifying what is tested, completed, or taught.
The visual accommodations listed below are means for addressing visual problems without changing classroom expectations for learning.
Preferential Seating
Preferential seating means a lot of different things to every professional. Typically, it mean that the kiddo is placed at the front of the room, closest to the teacher where they can receive an increased level of support from the teacher. However, this is not necessarily the best for a child with vision deficits. There are a few keys points to preferential seating for kiddos with vision deficits that should be considered.
● Proximity to the board ● Direction in which the child is facing in relation to the board or main work area ● Level of visual distractions around the room including posters, boards and other children ● Is the goal of seat work and need for use of board to achieve completion of work?
Proximity to the Board
Being closest to the board is not necessarily the best position for a child facing vision challenges particularly if they are not acuity based in nature.
For instance, a child that is struggling with saccades and tracking may not succeed in a front and center position. This would challenge their eyes constantly to look in all directions for information. A better position for them would be to the left or to the right in the first 2-3 rows. This would limit the amount of tracking to either side that would need to be completed.
This position would also benefit a child with who struggles with filtering visual information and needs information to be limited on one side.
When recommending a seat based on proximity to the board, it is important to think about what challenges the kiddo is facing visually and to recommend a seat that promotes success.
Face the Front
Is the Child Facing the Board?
There are a lot of classroom set-ups these days that have children not facing the board or at an awkward angle. This is okay if the child is not expected to copy work from the board or utilize information from the main learning space.
When it doesn’t work, is when the child needs to utilize this information. It is best to have the child facing the board straight on or with a slight angle if they are not seated in the center. Limit turning of the head over 45 degrees to prevent eye strain and an increased chance of the child losing their place when copying.
There are times that it is appropriate to have the child’s back to the board and main learning space. I will get to that in just a moment.
Reduced Visual Distractions
Limiting visual distractions and over stimulation is a large part in helping kids with visual deficits. If there is too much information in front of them or around them, they are more likely to get lost visually, leading to more time needed to complete tasks and increases in errors when copying or missing written steps.
This is one of the few times that it is okay to have a child’s back to the board or main work area. Especially, if the child does not need to see the main area. Typically, this is the case for lower levels of education such as kindergarten through second grade, or when the curriculum begins to focus on board directed teaching.
Other ways to limit visual distractions are to keep the main learning space clear of extraneous posters, charts or decorations, along with conscious choices for seating the child. Having the child’s back to busy walls and a large portion of their peers can be helpful.
Most people think that windows are distractions for kiddos, but for a child with vision deficits, sitting near or facing a window can give a much needed visual “break” from stimulation. So don’t rule out a window seat yet!
Increased White Space
Worksheets can be very overwhelming for a child with a visual deficit. They may have a hard time reading a busy worksheet, completing a math worksheet or miss parts of multi-step directions.
One way to help avoid this is to provide increased white space. White space refers to the amount of blank or void areas on a piece of paper. The higher the amount of white space, they less likely a child with vision deficits is to struggle.
This means limiting the number of math problems on a page from 6 to 3 for example. Or utilizing the Handwriting Without Tears lined paper versus traditional triple lined paper.
Sometimes changing the handout or worksheet is not an option and other strategies need to be utilized. The use of an extra sheet of paper to block out extra information can be helpful in creating the white space that is needed.
Decreased Visual Distractions
I touched on this in preferential seating section in regards to the overall placement of the child in the room. However, visual distractions can also come from items in the child’s work space. Distractions may include name tags, behavior systems, letter lines, a peer across from them and even work to be completed. These visual distractions may cause the kiddo to feel visually unorganized leading to the appearance of sloppy work and poor time management, and even signs of anxiety.
One way to help eliminate visual distraction within the workspace is to limit what is on the child’s desk. Keep the kiddo’s work space limited to a name tag and one other item. If other items are needed on the desk or workspace, have them arranged so that they are not in the child’s direct line of sight while working.
For instance, crayon boxes and utensils may be shared at a table or grouping of students. Have the items place to the left or right of the child so that their direct line of sight is clear.
Also limit that amount of ‘work’ that is place in front of the kiddo. I say ‘work’ lightly as most ‘work’ for kids are worksheets and craft projects. By presenting one item at a time, it can help the child’s visual space remain clear and help them stay visually organized and on task.
Visual Structure for Reading and Writing
Sometimes limiting visual distractions is not enough support for visual organization. Sometimes, the child needs even more structure to support successful learning patterns and work completion.
One strategy is to provide the child with graph paper to write on. This is very structured and provides concrete boundaries for letter orientation, sizing, and spacing. It also provides visuals for completing math problems in straight lines.
Other forms of visual structure include colored lines to indicate top and bottom of the lines for writing, along with highlighted “spacer” lines for completion of longer work.
Color coding can also be a helpful tool in providing visual structure for older children. It be as general as a different colored folders/notebooks for each subject to allow the child to quickly scan and find what they need, to as complex as writing parts of a math equation in different colors. Or even going as far as to writing the parts of a paragraph in different colors.
Visual structure can be as simple, or as complex as it’s needed to be to meet the kiddo’s needs.
Each child is different and finding the right visual supports is a trial and error process that takes time and patience to work through. Evaluating the child’s weaknesses will help to determine the best supports and path for success in the classroom despite their visual challenges.
More resources that can help with understanding and advocating for visual impairments:
Now what? When vision problems are suspected after a screening by the OT, it is best practice to refer the family to a developmental optometrist.
A developmental optometrist will complete a full evaluation and determine the need for corrective lenses, vision therapy or a home program to address vision concerns.
As occupational therapists, it is imperative that we rule out vision problems before treating handwriting or delays in visual motor integration, to ensure the best possible trajectory of development and success for the child.
Occupational Therapy Vision Screening Tool
Occupational Therapists screen for visual problems in order to determine how they may impact functional tasks. Our newest Visual Screening Tool is a useful resource or identifying visual impairments. Visual screening can occur in the classroom setting, in inpatient settings, in outpatient therapy, and in early intervention or home care.
This visual screening tool was created by an occupational therapist and provides information on visual terms, frequently asked questions regarding visual problems, a variety of visual screening techniques, and other tools that therapists will find valuable in visual screenings.
This is a digital file. Upon purchase, you will be able to access the 10 page file and print off to use over and over again in vision screenings and in educating therapists, teachers, parents, and other child advocates or caregivers.
One thing about a visual impairment that we don’t often think of at first is the body awareness and orientation aspect. These areas can really impact functional skills, which our primary goal in occupational therapy.
There are other things we want to consider as well when we work with the child with a visual challenge. These items are listed below and they can be part of our evaluation as well as treatment interventions. We’ll want to add these factors to our documentation of therapy treatment sessions when we are offering our accommodations or rehabilitation services because each area listed might impact quality of life and life skills.
Because the school based OT helps with the child’s educational performance and participation, these are areas we should be aware of when creating treatment plans.
Peripheral vision
Vision loss or level of challenge
Visual acuity
Low vision and resulting needs
Visual fields
Visual tracking
Visual attention
Visual memory
Occupational therapy Evaluation for Visual Impairment
Occupational therapy plays a key role in supporting individuals with visual impairments by addressing how vision affects daily function and participation. When working with children or adults with visual impairments, OTs consider several key areas as part of an OT evaluation:
Visual Acuity
Clarity or sharpness of vision.
Affects reading, writing, recognizing faces, and seeing details in the environment.
Visual Fields
The entire area a person can see without moving their eyes or head.
Peripheral field loss can affect safety, mobility, and spatial awareness.
Visual Tracking (Oculomotor Skills)
The ability to follow a moving object or maintain focus on an object while the head moves.
Impacts reading fluency, copying from the board, and ball skills.
Visual Scanning
The ability to scan a space or environment efficiently.
Important for locating objects, navigating spaces, and reading.
Visual Attention
Focusing on relevant visual information while ignoring distractions.
Affects classroom performance, self-care routines, and task completion.
Visual Discrimination
Telling the difference between similar-looking objects, letters, or shapes.
Impacts handwriting, reading, and puzzles.
Visual Memory
Recalling visual information after seeing it.
Essential for spelling, following directions, and remembering routines.
Visual Figure-Ground
Distinguishing an object from a background.
Important for finding items in a cluttered space or reading text on a busy page.
Depth Perception
Understanding spatial relationships between objects.
Crucial for mobility, stairs, catching a ball, and pouring liquids.
Eye-Hand Coordination
Using visual input to guide fine motor tasks.
Affects handwriting, dressing, cutting, and feeding.
Visual Motor Integration
Coordinating visual perceptual skills with motor output.
Impacts drawing, writing, and tool use.
Occupational therapy plays a key role in supporting individuals with visual impairments by addressing how vision affects daily function and participation. When working with children or adults with visual impairments, OTs consider several key areas:
1. Visual Acuity
Clarity or sharpness of vision.
Affects reading, writing, recognizing faces, and seeing details in the environment.
2. Visual Fields
The entire area a person can see without moving their eyes or head.
Peripheral field loss can affect safety, mobility, and spatial awareness.
3. Visual Tracking (Oculomotor Skills)
The ability to follow a moving object or maintain focus on an object while the head moves.
Impacts reading fluency, copying from the board, and ball skills.
4. Visual Scanning
The ability to scan a space or environment efficiently.
Important for locating objects, navigating spaces, and reading.
5. Visual Attention
Focusing on relevant visual information while ignoring distractions.
Affects classroom performance, self-care routines, and task completion.
6. Visual Discrimination
Telling the difference between similar-looking objects, letters, or shapes.
Impacts handwriting, reading, and puzzles.
7. Visual Memory
Recalling visual information after seeing it.
Essential for spelling, following directions, and remembering routines.
8. Visual Figure-Ground
Distinguishing an object from a background.
Important for finding items in a cluttered space or reading text on a busy page.
9. Depth Perception
Understanding spatial relationships between objects.
Crucial for mobility, stairs, catching a ball, and pouring liquids.
10. Eye-Hand Coordination
Using visual input to guide fine motor tasks.
Affects handwriting, dressing, cutting, and feeding.
11. Visual Motor Integration
Coordinating visual perceptual skills with motor output.
Impacts drawing, writing, and tool use.
OT Considerations
Adapt tasks and environments (contrast, lighting, positioning).
Use tactile, auditory, and kinesthetic compensatory strategies.
Incorporate vision-related goals into play, self-care, school, and leisure tasks.
Collaborate with vision specialists (e.g., Teachers of the Visually Impaired, Orientation & Mobility instructors).
In addition to sensory processing and perceptual aspects, visual impairments often come with physical challenges that occupational therapists must consider. These physical issues can impact mobility, posture, coordination, and overall independence. Here are key physical areas related to visual impairment that OTs address:
Postural Control and Stability
Children or adults with visual impairment may adopt compensatory postures (e.g., tilting the head, leaning forward) to optimize remaining vision.
Poor postural control can affect sitting balance, endurance, and core strength, limiting participation in seated tasks like handwriting or meals.
Gait and Mobility
Visual impairment may lead to cautious, unsteady walking, wider stance, or shuffling.
Individuals may avoid movement altogether due to fear of falling, leading to decreased physical activity and muscle weakness.
Balance and Vestibular Integration
The visual system plays a large role in maintaining balance.
Without reliable visual input, individuals rely more heavily on vestibular and proprioceptive systems, which can be underdeveloped or dysregulated.
Motor Planning (Praxis)
Difficulty visualizing actions before performing them can lead to trouble with sequencing, initiating, or completing motor tasks.
This affects dressing, navigating environments, and tool use (like scissors or utensils).
Spatial Orientation and Body Awareness
Visual cues help us understand where we are in space and how to move around obstacles.
Visual impairment can lead to reduced spatial judgment, making tasks like reaching, climbing, or navigating stairs more difficult.
Delays in Gross and Fine Motor Skills
Infants and young children with visual impairments may miss out on visually-motivated movement (e.g., reaching, crawling, walking), leading to motor delays.
Fine motor skill development can also be impacted due to limited visual feedback.
Fatigue and Overuse
Individuals with visual impairments may experience increased fatigue due to constant physical and cognitive effort to compensate.
Overuse injuries (especially in the neck, shoulders, and hands) can result from repetitive adaptive strategies (e.g., leaning, squinting, using mobility aids).
Colleen Beck, OTR/L has been an occupational therapist since 2000, working in school-based, hand therapy, outpatient peds, EI, and SNF. Colleen created The OT Toolbox to inspire therapists, teachers, and parents with easy and fun tools to help children thrive. Read her story about going from an OT making $3/hour (after paying for kids’ childcare) to a full-time OT resource creator for millions of readers. Want to collaborate? Send an email to contact@theottoolbox.com.
We’ve created a sensory processing disorder checklist as a tool for sensory processing needs. Having resources like this sensory processing and self-regulation checklist will support sensory needs in individuals of all ages.
Sensory processing disorder is a condition where the brain misinterprets sensory information so that the body responds in atypical ways. Sensory processing disorder can be broken down into different categories, but one thing is clear: interpretation of sensory input is “off”.
Printable Sensory Processing Disorder Checklist
Below, you will find a list of common sensory responses that might be seen with sensory processing disorder. Use this sensory processing disorder checklist to better understand responses to sensory input. It will be helpful to read this sensory processing disorder chart to get a bigger picture on this umbrella term.
I see evidence of sensory processing challenges everywhere. Though not all of them should be classified as disorders. Sometimes it is ok to be a seeker or an avoider for our safety, wellbeing, career, or comfort. A person who is sensitive does not necessarily have a disorder until it affects their daily life. I do not like a lot of textures, however, I am functioning well in my day to day life.
Here are a few other examples of sensory red flags that are not damaging:
Certain athletes feel a drive to exercise. They must do it for their well being. Perhaps their arousal level is off, and exercise provides the modulation they need.
Football players love crashing and bumping. Is it possible they are sensory seekers, driven to engage in this sport?
Goldilocks had a hard time finding the right porridge, bed, and chair. Maybe she was sensitive to texture, taste and temperature. Eventually she found the right situation that suited her needs. She did not have a meltdown or shutdown in the process.
In The Old Hat, New Hat Book Papa Berenstain had a hard time finding the right hat. Too twisty, too twirly, too beady, too bumpy. In the end he decided on his familiar hat. This might be classified as a disorder if he “needed” a new hat and could not get one. We see this often with children having to get new shoes. Change is hard.
What professions can you see might be tactile seekers? Gardeners, artists, potters, masseuses, and chefs?
Who is likely to be avoiding stimuli when choosing their profession? People who choose to work at home, solitary workers, librarians, a spa manager, or an accountant?
Is it fair to say that people who choose high energy jobs are seekers or sensory integrated? Nurses, teachers, taxi drivers, OT/PTs? Maybe. Perhaps like me, they are not seekers or well integrated, but driven to help. I am exhausted mentally and physically at the end of the day. My profession is probably toxic for me, but important enough that I keep going.
When looking at all the red flags in diagnosing others, it is important to judge the impact the difficulty is having on life. This level of difficulty will determine who needs sensory processing treatment, who needs accommodations, and who is doing just fine.
The picky eater who lives on two foods and is not getting adequate nutrition is worth taking a look at. A child who is so sensitive to textures that he can not find anything to wear to school, or gets naked everyday in public, is struggling. The child whose meltdowns are so significant, they interfere with their daily life, needs some intervention.
In my career I have seen the whole spectrum of sensory processing difficulties. I have worked with children so impacted that it is a wonder they are surviving. On the other hand, I have evaluated children who are just quirky, not atypical. I remember trying to explain this to a parent. Her son was just quiet and introverted. He liked chess and robotics. He had a small social circle, but had friends and was doing well in school. Not everyone needs treatment or “fixing”. We all are not suited to be gardeners, football players, or electricians.
When looking at sensory difficulties, we need to focus our attention on the impact. This is why our goals are not often simply “improve sensory processing”. In the examples above with the picky eater and the child who will not wear clothes, the goals would focus on increasing food intake, and decreasing tactile aversion so the student can wear something to school.
Sensory Processing Disorder and Early Intervention
I talk a lot about education and early intervention. Help stem the flow of a problem before it gets too big. Educate large groups of people about a topic and treatment, so it can have a trickle down effect. One of the key factors in working with people is understanding. In my book, Seeing your Home and Community with Sensory Eyes, I spend time in each chapter helping the caregiver or recipient of the information understand what is happening with sensory struggles. I describe why your child may be screaming, kicking, refusing, or melting down in each setting. Then we look toward communication, treatment, and accommodation. It is available here on the OT Toolbox, in digital format or on Amazon (affiliate link) in print if you prefer.
Sensory processing Disorder Test
Using a sensory processing disorder checklist is just one step in completing a SPD test or assessment. It’s important to start somewhere and getting information from parents, educators, and others who know and love the child or individual is a key step in moving in the right direction with a sensory processing disorder evaluation. We want to see what’s really happening and what’s impacting function so the checklist portion is really important.
A checklist for sensory issues can be part of a screening tool. This gathers so much information and can really drive the evaluation process.
Other sensory processing assessment tools include observation, questionaries, and then the standardized assessment performed by an occupational therapist. The evaluating OT will use one of several sensory processing assessments to create a clinical picture that is part of the skilled evaluation process for SPD.
Sensory Processing Evaluations
Here are some of the most common evaluations that can be used to assess sensory processing. These sensory processing disorder tests do can be used along with other sources of information to get a bigger picture of what’s going on.
Sensory Integration and Praxis Tests (SIPT)– This test is appropriate for children aged 4 months through 8 years, 11 months. It’s a very comprehensive assessment. The SIPT does require extensive training to administer.
Sensory Profile 2– This assessment is appropriate for birth-14 years, 11 months. It is a comprehensive evaluation and it has a school companion form for the child’s teacher to complete.
Sensory Processing Measure-2 (SPM-2)– This evaluation is appropriate for children aged 4 months-87 years. It is a quick assessment and it has a home and a school form that can be used for a comprehensive look at the child across environments.
Evaluation in Ayres Sensory Integration® (EASI)– This evaluation is appropriate for children aged 3 years through 12 years. It’s based on Ayres Sensory Integration® and it’s a very comprehensive eval. Examiners do need to be trained in order to do this evaluation.
Structured Observations of Sensory Integration (SOSI-M)– This assessment is appropriate for children aged 5 years to 14 years.
Here are a few other sensory processing assessments to be aware of:
Short Sensory Profile (SSP): 3–15 years
Sensory Experiences Questionnaire (SEQ 3.0): 5 months – 6 years
Diagnostic Interview for Social and Communication Disorders (DISCO): All ages
Adolescent/Adult Sensory Profile (AASP): Adolescent and adult ages
Working in the sensory realm is difficult and confusing. There can be 1001 combinations of reasons a person is having difficulty, and just as many possible solutions. Once you find a solution, it may only work a handful of times. Broaden your OT Toolbox with treatment ideas, checklists, and resources.
Speaking of OT Toolbox, our website is packed with valuable resources. Yes you can go onto AI and get a quick answer, but it will not be full of resources, hands on activities, and fun!
With sensory processing disorder, input from each of the sensory systems can be interpreted by the brain in different ways. Kids can hyper-respond or overreact to sensory input. Or, they can hypo-respond, or under-react to sensory information.
Sensory processing disorder can be seen in children or on adults.
Sensory Processing Disorder Checklist
Putting it all together – Let’s look at all of the sensory systems in a list:
Visual System (Sight)
Auditory System (Sound)
Tactile System (Touch)
Gustatory System (Taste)
Olfactory System (Smell)
Proprioceptive System (Position in space)
Vestibular System (Movement)
Interoceptive System (Inner body)
Typically, sensory dysregulation within these three systems present in many different ways. A child with sensory difficulties may be over- or under-responsive to sensory input. They may operate on an unusually high or unusually low level of activity. They may fatigue easily during activity or may constantly be in motion. Children may fluctuate between responsiveness, activity levels, and energy levels.
Additionally, children with sensory processing differences typically present with other delays. Development of motor coordination, fine motor skills, gross motor skills, social-emotional skills, behaviors, executive functioning skills, language, and learning are all at risk as a result of impaired sensory processing.
Sensory Processing Disorder Symptoms
It can be overwhelming when you start looking into various symptoms in sensory processing disorder. But if you are wondering about specific signs of SPD in your child, it can be helpful to have a comprehensive checklist of various areas that impact learning, play and functioning.
The comprehensive list of sensory signs and symptoms listed below are helpful to spot an issue in your child, but more so can help you pinpoint a starting point with helping your child so you can support their needs.
red Flags for Tactile Dysregulation
Tactile defensiveness, or what is sometimes described as tactile differences, refers to differences in how an individual experiences and responds to touch-based sensory input. This can include avoiding certain textures or, for some, actively seeking out tactile sensory experiences.
When we use terms like disabilities, dysregulation, differences, or challenges, or our goal is not to label an individual as having a deficiency or to pathologize sensory differences. Sometimes you may even hear the term dysfunction. When these terms are used, the goal is to describe sensory preferences and needs that may be impacting participation in everyday activities.
It is important to recognize that sensory processing is a spectrum of diverse experiences. Some sensory responses may create barriers to functional skills, such as self-care, play, or learning, not because there is something “wrong” with the person, but because their sensory system may require additional support or accommodations. Using this lens allows us to be neuro-affirming: we are not trying to “fix” or “normalize” an individual’s sensory experiences, but to understand and support their sensory needs so they can engage meaningfully in their environment.
Tactile defensiveness refers to avoidance of certain textures or the seeking out of tactile sensory input. These indicators can mean a sensory issue with the tactile sensory system.
Consider the sensory checklist based on the tactile system:
Hyper-responsiveness of the tactile sense may present in a child as over-responsiveness or overreaction to tactile sensation. This looks like:
Overly sensitivity to temperature including air, food, water, or objects
Avoidance to messy play or getting one’s hands dirty
Avoidance of finger painting, dirt, sand, bare feet on grass, etc.
Clothing preferences and avoidances such as resisting shoes or socks
Annoyance to clothing seams or clothing textures
Resistance to hair brushing
Over-reactive to unexpected touch
Overreactions to accidental or surprising light touches from others
Avoids affectionate touch such as hugs
Avoids washing hands at the sink
Difficulty with clothing fasteners like buttons, zippers, and belts
Challenges in the shower or bathtub with soap, washcloths preferences, and soap textures
Refuses to use glue
Hypo-responsiveness of the tactile sense may present in a child as under-responsiveness or under-reaction to tactile sensation. This may look like:
Seeks out tactile sensory input
Bumps into others
High pain tolerance
Stuffs food in mouth
Licks items or own skin
Not aware of being touched
Seems unaware of light touch
Startles easily when touched
When getting dressed, doesn’t notice clothing that is twisted
Tendency for self-abusiveness: biting self, rubbing self with heavy pressure, head-banging, pinching self, etc.
Doesn’t notice a runny nose, messy face, or messy hands
Puts items in the mouth
Lack of personal space
Runs into other children without noticing
Has difficulty maintaining space in line; bumps into others without noticing
Falls out of chair
NEEDS to touch everything
Uses a tight pencil grip on the pencil
Writes with heavy pencil pressure
Tears paper when cutting with scissors
Unintentionally rough on siblings, other children, or pets
Always touching others or things
Seeks out messy play experiences
Prefers to rub or feel certain textures
Difficulty with fine motor tasks
Craves touch
Doesn’t seem to notice unexpected touch
Constantly playing in the soap or water at the sink
red Flags for Proprioception Dysfunciton
The Proprioception Sensory System is the recognition and response to the body’s position in space with an internal feedback system using the position in space of the joints, tendons, and muscles. This sensory system allows the body to automatically react to changes in force and pressure given body movements and object manipulation. The body receives more feedback from active muscles rather than passive muscle use. Related to the proprioception system is praxis or motor planning. Individuals are able to plan and execute motor tasks given feedback from the proprioceptive system. Praxis allows us to utilize sensory input from the senses and to coordinate hat information to move appropriately.
Hyper-responsiveness of the proprioception sense may present in a child as over-responsiveness or overreaction to proprioceptive sensation. This may include postural insecurity. This may look like:
Uses too little pressure when writing or coloring
Prefers soft or pureed foods
Appears lethargic
Bumps into people or objects
Poor posture, slumps in their seat
Poor handwriting
Inability to sit upright when writing or completing desk work; Rests with head down on arms while working
Challenged by clothing fasteners ( how much force to use with fastening buttons, zippers, and belts, or snaps)
Hypo-responsiveness of the proprioceptive sense may present in a child as under-responsiveness or underreaction to proprioceptive sensation. This looks like:
Uses excessive pressure when writing or coloring
“Jumper and crasher”- seeks out sensory input
Can’t sleep without being hugged or held
Bumps into people or objects
Seems aggressive
Grinds teeth
Walks on toes
Chews on pencils, shirt, sleeve, toys, etc.
Prefers crunchy or chewy foods
Cracks knuckles
Breaks pencils or crayons when writing or coloring
Pinches, bites, kicks, or headbutts others
Difficulty with fine motor skills
Poor handwriting
Poor awareness of position-in-space
Stomps their feet on the ground when walking
Kicks their chair or their neighbors chair in the classroom
Frequent falling
Clumsiness
Poor balance
Constantly moving and fidgeting
Poor attention
Uses extreme force
Has unexpected bruises
Seeks out wrestling games
red Flags for Vestibular Differences
Vestibular dysregulation refers to differences in how an individual perceives and responds to movement, balance, and spatial orientation. This may look like avoidance of certain types of movement (such as swinging or climbing), or an increased need to seek out movement experiences (like constant spinning or jumping). When describing vestibular needs or sensitivities, it is important to approach this language with care. When we see red flags related to vestibular challenges, we can acknowledge that these sensory differences may affect a person’s comfort, safety, and ability to participate in daily activities.
Recognizing vestibular differences through this lens allows us to support each individual’s unique sensory profile without the goal of “correcting” or changing who they are. Instead, we aim to create environments, strategies, and opportunities that honor sensory needs and promote functional engagement. A neuro-affirming approach respects that sensory processing differences are part of human diversity, and that with the right supports, individuals can thrive in their own way.
The Vestibular Sensory System is the sense of movement and balance, and uses the receptors in the inner ear and allows the body to orient to position in space. The vestibular system is closely related to eye movements and coordination. Vestibular sensory input is a powerful tool in helping children with sensory needs. Adding a few vestibular activities to the day allows for long-lasting effects. Every individual requires vestibular sensory input in natural development. In fact, as infants we are exposed to vestibular input that promotes a natural and healthy development and integration of all systems.
Vestibular dysregulation and problems with the Vestibular Processing System can present as different ways:
Poor visual processing
Poor spatial awareness
Poor balance
Difficulty with bilateral integration
Sequencing deficits
Poor visual-motor skills
Poor constructional abilities
Poor discrimination of body position
Poor discrimination of movement
Poor equilibrium
Subtle difficulties discerning the orientation of head
Trouble negotiating action sequences
Hyper-responsiveness of the vestibular sense may present in a child as over-responsiveness or overreaction to vestibular sensation. This look may look like:
Experiences gravitational insecurity
Overly dizzy with motions
Resistant to moving activities such as swings, slides, elevators, or escalators
Fear of unstable surfaces
Unable to tolerate backward motions
Unable to tolerate side to side motions
Illness in moving vehicles
Avoids swings or slides
Gets motion sick easily
Appears “clingy”
Refuses to move from the ground (i.e. jumping or hopping activities)
Difficulty/fear of balance activities
Refusal to participate in gym class
Refusal to try playground equipment
Fearful on bleachers or on risers
Fear or dislike of riding in elevators or escalators
Fearful of movement
Dislike of spinning motions
Avoids chasing games
Overly fearful of heights
Nauseous when watching spinning objects
Poor posture
Easily fatigued
Poor coordination
Low muscle tone
Poor motor planning
Fearful when a teacher approaches or pushes in the child’s chair
Clumsiness
Poor attention
Difficulty or fearful on stairs
Fearful during situations of constant motion
Struggles or fearful on ladders
An extreme dislike of high places
Refuses to sit on or try a bike
Hypo-responsiveness of the vestibular sense may present in a child as under-responsiveness or underreaction to vestibular sensation. This may look like:
Constant movement including jumping, spinning, rocking, climbing
Craves movement at fast intervals
Craves spinning, rocking, or rotary motions
Poor balance on uneven surfaces
Constantly fidgeting
Increased visual attention to spinning objects or overhead fans
Bolts or runs away in community or group settings, or when outdoors or in large open areas such as shopping malls
Difficulty maintaining sustained attention
Impulsive movement
Constantly getting up and down from desk in the classroom
Walks around when not supposed to (in the classroom, during meals, etc.)
Loves to be upside down
Head banging
Hypermobile or all over playground equipment
Leans chair back when seated at a desk
Loves spinning
Rocks self-back and forth when seated
Poor posture
Poor coordination
Poor motor planning
A deep need to keep moving in order to function
Frequent falling
Clumsiness
Poor balance
Poor attention
Always in constant motion
Prefers being in high places
Red Flags for Visual SYSTEM Dysregulation
Visual dysregulation refers to differences in how an individual processes and responds to visual input, such as light, movement, patterns, or cluttered environments. Some individuals may be more sensitive to bright lights, busy visuals, or fast-moving scenes, while others may seek out visual stimulation through watching spinning objects or moving their eyes in specific ways. When we use the term dysregulation to describe these sensory experiences, it is not to imply a problem or deficit, but to acknowledge that visual processing differences may influence an individual’s comfort, attention, and participation in everyday tasks.
Taking a neuro-affirming perspective, we recognize that sensory differences, including those in the visual system, are a natural part of human variation. Our goal is not to “normalize” visual responses but to support individuals by adapting environments, offering accommodations, and providing strategies that help them engage meaningfully in their world. By understanding and respecting visual sensory needs, we can better empower individuals to navigate their surroundings in ways that feel safe and supportive.
Eighty percent of the information we receive from our environment is visual. When perception of this information is not processed correctly, it can create an altered state that influences many areas: eye-hand coordination, postural reflexes, and vestibular processing are all influenced and reliant upon the visual system.
The visual system is the sensory system that most individuals rely upon most heavily for daily tasks. Visual information is perceived by cells in the back of the eye. These cells (rods and cones) relay and transfer light information into information that is transferred to the central nervous system. These photoreceptors are able to perceive day time vision and night time vision, with adjustments to sensitivity of light intensity. They are able to respond to different spectrum of color and differentiate color information. The rod and cone cells, along with the retina, process a great deal of visual information in the neural structure of the eye before transmitting information to the central nervous system.
The relay of information from the eyes to the central nervous system are made up of three pathways. Pathways project to different areas of the brain and allow for:
Processing and recognition of faces/shapes/motion (the “what” and “where” of objects)
Integration of information in order to coordinate posture and eye movements
Oculomotor adaptation.
Hyper-responsiveness of the visualsense may present in a child as over-responsiveness or overreaction to visual sensation. This may look like:
Complains of lights being too bright
Unable to tolerate certain lighting such as fluorescent overhead lights
Struggles with sudden changes in lighting
Challenged by bright or flashing lights
Colorful lights “hurt” the eyes
Complains of headaches in bright light
Complains of the “glow” of unnatural lighting
Distressed by light sources
Sensitive to light
Sensitive to certain colors
Distracted by cluttered spaces
Avoids eye contact
Trouble with puzzles
Frustration at the movies
Difficulty reading
Difficulty finding objects in a busy drawer
Hypo-responsiveness of the visual sense may present in a child as under-responsiveness or underreaction to visual sensation. This looks like:
Attracted to spinning objects
Difficulty with visual perception
Difficulty with eye-hand coordination
Difficulty with reading and writing
Holds or presses hands on eyelids in order to see flashing lights
Squints or presses eyelids shut
Flaps hands or objects in front of eyes
Holds eyes at the movies
red Flags for Auditory SYSTEM Dysregulation
Auditory dysregulation refers to differences in how an individual perceives and responds to sounds in their environment. This may include heightened sensitivity to certain noises, difficulty filtering out background sounds, or a strong preference for certain auditory experiences. Some individuals may cover their ears, avoid noisy environments, or become overwhelmed in spaces with unpredictable sounds, while others may seek out calming or repetitive auditory input. When we use the term dysregulation in this context, it is not to suggest that there is something wrong with the person, but rather to acknowledge that their auditory processing needs may impact comfort and participation in daily life.
A neuro-affirming approach recognizes auditory processing as a diverse experience, not a flaw to be corrected. Our role is to honor and support each individual’s auditory needs by offering accommodations, adapting environments, and providing tools that help them engage in ways that feel safe and manageable. By understanding these sensory differences, we can foster inclusion and respect for all sensory profiles.
Receptors for the auditory system are located in the inner ear and are responsible for receiving vibration from sound waves and changing them to fluid movement energy. Information is projected to the central nervous system and transmits sound frequency as well as timing and intensity of sound input. The auditory system is integrated with somatosensory input in order to play a role in controlling orientation of the eyes, head, and body to sound.
Hyper-responsiveness of the auditorysense may present in a child as over-responsiveness or overreaction to auditory sensation. This may look like:
Startles easily to unexpected sounds
Dislikes noisy places
Overly sensitive to speakers on radios
Fearful of smoke detectors, overhead speakers
Shushes others or asks others to stop talking
Holds hands over ears
Sensitive to certain sounds such as lawnmowers or the hum of the refrigerator
Easily distracted by sounds and background noise
Hums to block out background noise
Hypo-responsiveness of the auditory sense may present in a child as under-responsiveness or underreaction to auditory sensation. This looks like:
Seems to be unaware of sounds
Holds radio speakers up against ears
Doesn’t respond to alarms
Makes silly sounds at inappropriate times or frequently
Mimics sounds of others
Talks to self
Difficulty locating sounds, especially when in a noisy environment
Hums in order to hear the sound of humming
red Flags for Gustatory System Dysregulation
Gustatory dysregulation refers to differences in how an individual experiences and responds to taste and oral sensory input. This can include strong preferences or aversions to certain flavors, temperatures, or textures of foods and drinks. Some individuals may seek out intense flavors like spicy or sour foods, while others may avoid specific textures or have a very limited range of preferred foods. When we use the term dysregulation in this context, it is not intended to pathologize sensory preferences, but to describe how these differences may influence eating habits, nutritional intake, and participation in mealtime routines.
Viewing gustatory processing through a neuro-affirming lens allows us to respect individual sensory needs and preferences without the goal of “fixing” them. Instead, the focus is on understanding how these sensory differences impact daily life and finding supportive strategies to promote positive mealtime experiences. This might include offering a variety of sensory-friendly food options, gradually expanding food exploration in a safe and supportive way, and working collaboratively with families to honor each child’s unique sensory profile.
The gustatory system perceives input through the tongue. Taste cells in the mouth perceive five sensations: salty, sweet, bitter, sour, and savory. The gustatory system is closely related to the sense of smell and proprioception. How we perceive taste is deeply influenced by the sense of smell.
While many children with sensory needs have a tendency to chew on their shirt collars or pencils as a sensory strategy in order to seek proprioception needs, the behavior may occur as a result or as a reaction to under-responding to oral input. Other children may seek out intense taste sensations and in that case put non-edible items into their mouth to satisfy that sensory need. Still other children may over-respond or under-respond to certain flavors or taste sensations. For those children, it is common to experience food refusal related to texture or taste.
Hypersensitivity to oral sensory input may present in a child as over-responsiveness or overreaction to gustatory sensation. This looks like:
Dislike of mixed textures (cereal in milk or chunky soup)
Avoids temperature extremes (unable to tolerate hot or cold foods)
Prefers foods that do not touch or mix on their plate
Use of only a specific spoon or fork or no utensil at all
Intolerance to teeth brushing.
Anxiety or gagging when presented with new foods
Drooling
Hypo-responsiveness of the gustatory sense may present in a child as under-responsiveness or underreaction to gustatory sensation. This may look like:
Licking objects
Bites others
Chews on clothing
Hums all the time
Prefers a vibrating toothbrush
Prefers spicy foods
Stuffs food into cheeks
Prefers food very hot or very cold temperature
red Flags for Olfactory System Dysregulation
Olfactory dysregulation refers to differences in how an individual perceives and responds to smells in their environment. Some individuals may be highly sensitive to certain scents and may become overwhelmed, nauseous, or distressed by everyday smells such as perfumes, cleaning products, or certain foods. Others may seek out strong or specific scents as a way to self-regulate. Using the term dysregulation here is not meant to label these sensory responses as a problem, but to acknowledge that olfactory processing differences can affect comfort, attention, and participation in daily routines.
A neuro-affirming perspective recognizes that variations in how we experience smells are part of natural sensory diversity. The goal is not to eliminate these differences, but to provide support that respects individual needs. This might include adapting environments to minimize triggering scents, offering preferred calming smells, and helping individuals develop strategies to navigate scent-rich settings more comfortably. By understanding and honoring olfactory sensory needs, we can foster more inclusive and supportive environments.
The olfactory system, or the system that enables the sense of smell, has receptors in the tissue of the nose that are connected by pathways to the brain. Connections occur via two pathways, one being a direct route to neurons in the brains and the second being a path that passes near the roof of the mouth. This channel is connected to the taste of foods.
There is some evidence indicating that the sense of smell is more associated with memory than the sense of vision or the other senses. The connection of the olfactory sense to the emotional part of the brain and previous experiences, as well as hypersensitivity or hyposensitivity to smells can cause anxiety or sensory related breakdowns in children with sensory processing difficulties.
Hyper-responsiveness of the olfactorysense may present in a child as over-responsiveness or overreaction to olfactory sensation. This may look like:
Overly sensitive to smells
Notices smells others don’t
Anxious around certain smells
Holds nose in response to certain scents
Challenged in the shower or bathtub, with overwhelming preferences and disliking certain scents
Hypo-responsiveness of the olfactory sense may present in a child as under-responsiveness or underreaction to olfactory sensation. This may look like:
Smells unusual items like paper or certain materials
Prefers strong scents
Red Flags for Interoceptive System Dysregulation
Interoceptive dysregulation refers to differences in how an individual perceives and interprets internal body signals, such as hunger, thirst, fatigue, pain, temperature, or the need to use the bathroom. Some individuals may have difficulty recognizing or responding to these signals, while others may experience them as overwhelming or confusing. When we describe interoceptive dysregulation, it is not to suggest a deficit or problem within the individual, but to acknowledge that these sensory differences can impact self-awareness, self-care, emotional regulation, and participation in everyday routines.
A neuro-affirming approach respects that interoceptive experiences vary widely among individuals and are a natural part of sensory diversity. Rather than aiming to “correct” these differences, the goal is to provide support and tools that help individuals better understand and respond to their internal cues in a way that feels right for them. This may include using visual supports, developing body awareness activities, or building self-advocacy skills. By honoring interoceptive needs, we can help foster greater comfort, autonomy, and engagement in daily life.
The interoceptive sensory system is an area that most people are not as familiar with. This system is connected to amygdala, the emotional system, the limbic system, our emotional awareness, our feelings, and subconscious arousal. Receptors for the interoceptive system are in our organs and skin. The receptors relay information regarding feelings such as hunger, thirst, heart rate, and digestion to the brain. This is the foundation to sensations such as mood, responding to the moods and emotions of others (co-regulation), emotions, aggression, excitement, and fear and in turn, promotes the physical response of our bodies.
Physical responses include functions such as hunger, thirst, feelings, digestion, heart rate, and body temperature.
Hyper-responsiveness of the interoceptivesense may present in a child as over-responsiveness or overreaction to interoceptive sensation. This may look like:
High pain tolerance
Distracted and overwhelmed by feelings of stress
Distracted or overly sensitive to sensations of stomach digestion
Distracted or overly sensitive to sensation of heart beat
Always hungry or thirsty
Eat more and more often to avoid feelings of hunger
Unable to sense the feeling of being full; overeats or overdrinks
Overwhelmed by feelings of sadness, anger, happiness, etc. and unable to respond appropriately
High urine output
Use the bathroom more often than necessary to avoid feelings of a full bladder or bowel
Distracted by changes in body temperature
Distracted and overly sensitive to sweating
Overly sensitive to feeling ticklish or itchy
Overly sensitive to cold or heat
Overly sensitive to signs of illness
Fearful of vomiting
Hypo-responsiveness of the interoceptive sense may present in a child as under-responsiveness or underreaction to interoceptive sensation. This may look like:
Low pain tolerance
Poor or low response to interoceptive stimuli
Doesn’t know when to go to the bathroom
Never says they are hungry or thirsty
Does not drink or eat enough
Difficult to toilet train
Never complains of being cold or hot (always wears shorts in the winter or pants in the summer)
Never complains of sickness
Difficulty falling asleep
Unable to identify feelings of stress
Unable to identify specific feelings and appropriate responses
Sensory Checklists, explained
There is a lot to think about here, right? Taking a giant list of common sensory processing disorder lists and knowing what to do with that list is complicated. What if you had strategies to address each sensory system’s over-responsiveness or under-responsiveness so you could come up with a sensory diet that helps kids function?
Sensory processing is broken down by sensory system so you can understand what you are seeing in the sensory responses listed above. Then, you can use the lists of sensory activities to help the child complete functional tasks while they get the sensory input they need to focus, organize themselves, and function.
The sensory activities are presented as meaningful and motivating tasks that are based on the child’s interests, making them motivating and meaningful.
You can get the Sensory Lifestyle Handbook and start building a sensory diet that becomes an integrated part of each day’s daily tasks, like getting dressed, completing household chores, school work, community interaction, and more.
In young children, sensory issues can present leading to the early intervention process. Having a sensory processing disorder checklist on hand can help relieve some of the questions parents have about development and whether a behavior or action is typical or not.
Characteristics of sensory issues show up during these young years. You may see frustration or meltdowns due to unexpected touch.
You may identify tactile defensiveness even in the infant years when babies pull away from heavy input of a cuddle or wrapped blanket. You may notice sensory preferences in the way of seeking out a pacifier for comfort (long beyond the typical pacifier stage). You may even identify distress with certain aspects of sensory input as listed in the sensory processing checklists above.
A few helpful resources are listed below:
Meltdowns– This blog post covers temper tantrums verses sensory meltdowns.
Sensory integration at the playground – Exploring different sensory input areas at the playground can help identify sensory challenges in young children.
A Final Note on Examples of Sensory Processing Dysregulation
This extensive list of sensory red flags is meant to act as an educational tool for parents, educators of children.
As occupational therapists, we strive to support children and their “team” of parents, caregivers, family, and educators with resources and information that will serve the individual child so that they can function in everyday life tasks.
The purpose of this sensory processing disorder checklist is to help parents and professionals who interact with children become educated about particular signs of sensory processing differences.
A checklist is not to be used as the absolute diagnostic criteria for labeling children with sensory processing disorder. It is simply a resource to be used as a starting point when identifying distress symptoms to explore further.
If you have difficulty understanding your child’s sensory preferences, sensory avoidances, use this sensory processing disorder checklist as a starting point and reach out to a pediatrician and pediatric occupational therapist.
For a comprehensive look at sensory processing throughout every day activities, try our Sensory Lifestyle Handbook.
Colleen Beck, OTR/L has been an occupational therapist since 2000, working in school-based, hand therapy, outpatient peds, EI, and SNF. Colleen created The OT Toolbox to inspire therapists, teachers, and parents with easy and fun tools to help children thrive. Read her story about going from an OT making $3/hour (after paying for kids’ childcare) to a full-time OT resource creator for millions of readers. Want to collaborate? Send an email to contact@theottoolbox.com.