This blog on sensory goop painting was originally published 1-23-14 and updated 11-8-23.
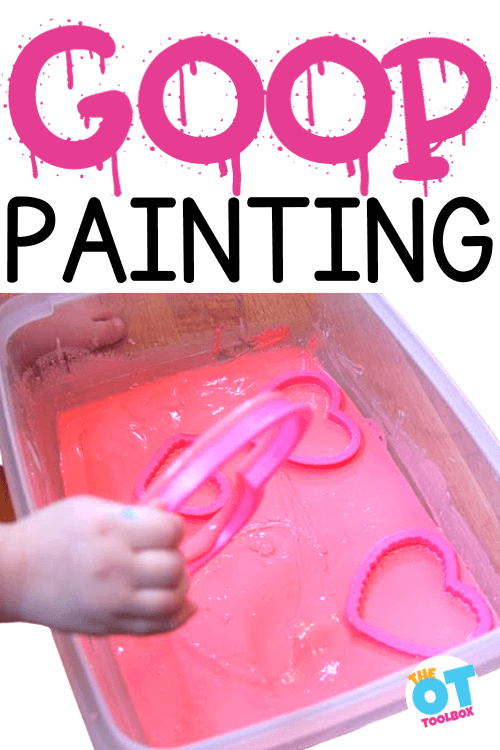
This goop painting activity is a creative painting idea that uses messy sensory play to build skills in a creative way. Pair this goop activity with one of our oobleck activities for more ways to foster skill-building through messy play.
When you use goop painting as a therapy tool, you can support a variety of needs. Whether you are focusing on the tactile benefits listed above, or using the goop paint activity as a calming or alerting sensory medium, you can support regulation needs.
How to make Goop Paint
The goop paint that we used in the activity below actually used left over moon sand that we made using cornstarch and lotion.
The cool thing about “goop” is that as a sensory material, you can basically mix up any ingredients to get a messy sensory material.
To make this type of goop paint, use these ingredients:
2 cups cornstarch (or baking soda or flour would work as well)
1 cup water
1/4 cup glue
food coloring
To make the goop paint, mix all of the ingredients together. Use a spoon or craft stick to stir until they are combined.
You will need to adjust the ingredients, depending on the type of glue used and the type of dry material. You’ll want the goop mixture to be liquidly, but not too runny.
Then, you are ready to paint!
Paint with Goop
Valentine’s Day is just around the corner. We don’t normally do holiday crafts and activities this far ahead, but our Valentine’s Day Goop Painting came about from a previous material…and it was so much fun, that I was excited to share, haha! This Valentine’s Day activity is perfect to add to occupational therapy plans this time of year.
Sensory Play is so much fun. We do a ton of sensory activities, crafts, and play every day.
Whether the kids are messing around in the sink, exploring textures in a bin of toys and “stuff”, or crawling under blankets and cushions…sensory play happens ALL the time in a child’s daily play. Inviting a child to try new experiences like with this goopy Valentine’s day play activity is just another way to learn through play.
Valentine’s Day Goop Painting
You may have seen our Candy Cane Scented Moon Dough post back around Christmas-time. That post turned into this Valentine’s Day Goop activity (and sensory-tastic painting fun!). When we finished up that activity back in December, I saved the red and white (turned pink once we were done playing!) moon dough in a gallon sized baggie. This was the perfect shade of pink for a Valentine’s’ Day themed sensory activity!
Note: This post contains affiliate links.
Valentine’s Day Sensory Activity
The powdered left-overs from our Candy Cane Moon Dough and a little water were all that we needed to make this goopy fun.
We had about 2 cups of the powdered material…Check out the post here to see how we made it. I added a half cup of water and got a nice goopy, messy, sensory texture to play with. The peppermint scent was still really strong and when we were playing, Baby Girl said it “smells like candy canes, Mom”!
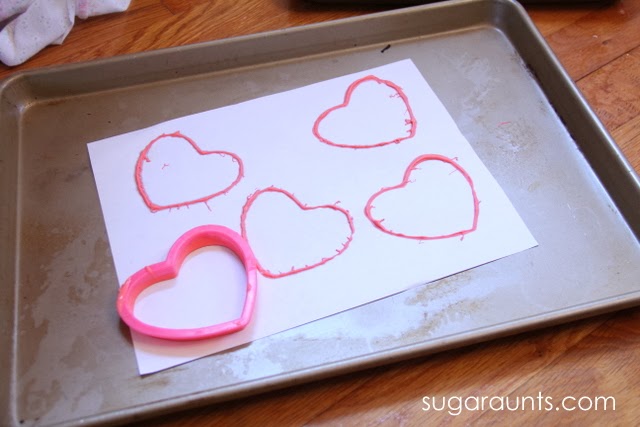
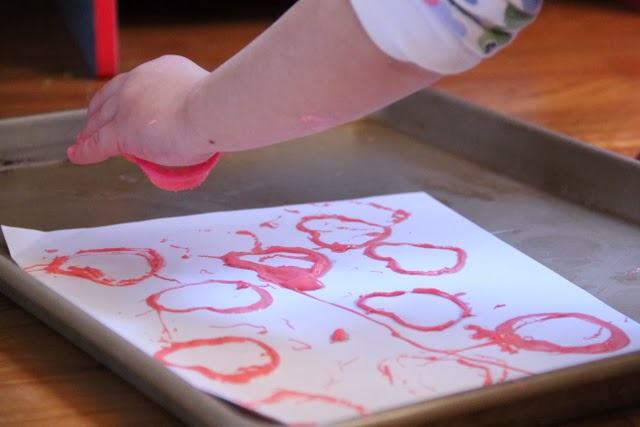
I threw in a few (Amazon affiliate link) heart cookie cutters and Baby Girl got to playing. She liked to have a wet washcloth right next to her to wipe her hands off every once in a while. This was some messy stuff!
We had paper and a felly roll pan next to the bin of goop and did some goop painting by stamping the cookie cutters onto the paper. It was so meant to paint like this! Baby Girl sat there for a LONG time stamping, and stamping, and stamping some more.
(seriously…we had 14 pages filled with hearts!!)
Messy, sensory, goopy fun!
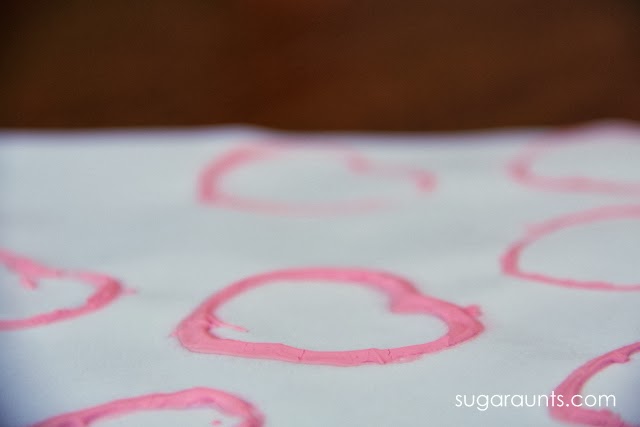
The goop made the heart stamps a big lumpy texture. So much fun to stamp! I joined Baby Girl and stamped a bunch of hearts too…
When the hearts dried, they were a pretty stamp. However, this is not something that can be saved to decorate cards or hung on the wall. The hearts flaked away if you touched them. Maybe a little glue added would help to preserve these pretty hearts? We’ll try that next time!
Let us know if you try this activity. We would love to see your play in action!
Colleen Beck, OTR/L has been an occupational therapist since 2000, working in school-based, hand therapy, outpatient peds, EI, and SNF. Colleen created The OT Toolbox to inspire therapists, teachers, and parents with easy and fun tools to help children thrive. Read her story about going from an OT making $3/hour (after paying for kids’ childcare) to a full-time OT resource creator for millions of readers. Want to collaborate? Send an email to contact@theottoolbox.com.
It’s that time of year and having a few back to school sensory activities up your sleeve can make all the difference in a stuffy, hot classroom when kids need self-regulation tools after a long summer break. Whether you are looking for classroom sensory diet strategies, or sensory strategies for the school-based OT, putting a back-to-school spin on “sensory” is a hit during the Fall months.
Back-to-School Sensory Activities
The back-to-school season is a prime time to dust off those sensory cobwebs and consider how sensory motor input supports students.
In this blog post, you’ll find a list of ways to support sensory needs using a back-to-school theme. The ideas are great for this time of year when welcoming a new roster of students into the classroom.
Our free sensory strategy toolkit is another great resource that supports school-based OTs, educators, and parents of students with sensory needs.
You’ll also find many resources, including a printable sensory activity sheet here on this article about calm down strategies for school.
These ideas for sensory seekers can be adapted to meet school-based needs (or used in the home for homework time, the after-school period, or homeschooling)
Why Use Back-to-School Sensory Activities?
Heading back into the school year can throw some kids for a spin. The first few weeks can be a change in routine from the safety of home. For kids who are starting up on a homeschool routine, it can be difficult to pay attention when sensory needs and distractions are in the next room. This can lead to self-regulation needs that support the student’s ability to concentrate and learn after a summer off from the routines of school.
Other reasons for using sensory strategies during the back-to-school season include:
Earlier wake-up times after a summer of staying up late and sleeping in. A quick sensory motor brain break can make all the difference.
A new routine may throw some students for a loop.
The transition period can be a real challenge for some children. It might be the early alarm clock or using time management in the morning that is a challenge. For other kids, moving to a new school, or even just going back to the classroom in general can be a challenge. Try these transition strategies to support these needs.
Distractions and Technology: With the prevalence of screen time in kids, and the use of technology/devices, students may find it difficult to focus on schoolwork without being distracted by social media, video games, or other online activities. A quick sensory break can help with attention and distractions.
Social-emotional needs:Social emotional dynamics can change over the summer, and students may feel pressure to fit in or establish their social identity when school resumes. This pressure can affect their self-esteem and confidence. The ability to regulate emotions might lead to challenges with learning due to the emotional regulation and executive function connection.
You may have a child of your own that “crashes” after a week of school during this time of year. There is a lot happening that is just exhausting during the return to school. Sometimes, all it takes for an easy transition into the back to school days is a sensory strategy that meets the needs of the sensory child. Let’s explore these ideas below…
Back-to-School Sensory Ideas
These sensory activities are ones that can easily be used in the classroom or homeschool room. They are strategies that can be incorporated into the student’s daily routine within the school environment.
These school sensory activities are presented in list form for ease and planning, but they can be used in a classroom sensory diet or in various strategies.
The ideas below are ones that easily allow the child to meet their sensory needs in a natural way, so that it is not an interruption to the classroom or other students.
Rather, some of these sensory strategies are movement and heavy work-based ideas that can easily be adapted for the whole classroom for brain break type of activities.
As always, these sensory ideas are ONLY ideas and should be regarded as a reference. Every child is different and has different sensory needs.
The ideas presented below are not regarded as Occupational Therapy treatment and should only be used in addition to and along with an individualized Occupational Therapy plan made following assessment.
Sensory Activities for Back to School
This post contains affiliate links. As an Amazon Influencer, I earn from qualifying purchases.
1. Wall Push-Ups- Show the student how to push against the wall while doing “push-ups” from a standing position. This is a great heavy work activity, or a quick “brain break” activity that provides proprioceptive input for heavy work for improved focus, calming, and self-regulation.
2. Desk Fidget- Use a DIY fidget or a store bought hand fidget toy (affiliate link) to allow the child tactile sensory or proprioceptive input to the hands for improved attention and focus while sitting and performing desk work.
3. Chair Push-Ups- Allow the child to push up from the seat with his arms, keeping the elbows strait. Pushing up through the arms provides proprioceptive heavy work through the upper body.
4. Move desk/furniture.
5. Erase the chalkboard or dry erase board.
6. Sensory errand- Carry milk crates or plastic bins full of books or supplies from center to center around the classroom or from room to room in the building. Some schools have an “important message” to other classrooms or the office in the form of a folder. Just moving, taking a quick walk through the hallway, to deliver a note or other message can offer a much-needed sensory break. For more heavy work input, add a tote bag filled with books or ask the student to push a cart with materials.
7. Shoe laces fidget- Add a couple of beads to the child’s shoe laces for a fidget toy that can be used discretely while sitting in floor circle time or during desk work.
8. Manual Pencil Sharpener- Turning and sharpening pencils with a manual pencil sharpener provides proprioception to bilateral upper extremities. This can be a good task prior to writing tasks.
9. Backpack for carrying supplies from room to room- Students can carry supplies to other classrooms in a backpack for heavy input. This can be a calming strategy while walking the hallways to other areas in the school as well, such as while walking to the lunch room or special classes. The hallway can be an overwhelming and high-sensory environment so deep pressure to center the child can be helpful.
10. Stapler heavy work- Staple paper or remove staples from a bulletin board for upper body proprioceptive input.
12. Place chairs on rugs. Sliding chairs on classroom floors can lead to auditory overload for some sensory kids. Try using carpet squares under each individual chair. When the child pushes his chair out, he can slide the chair right on the carpet square out from the desk.
13. Hallway March- Get the whole class involved in a “walk this way” activity. They can march from the classroom to specials or the lunchroom. Try other brain break and whole body movements while walking in the line down the hallway, too: Try high knee lifts, toe walking, heel walking, elbows to knees, and patting the knees while walking.
14. Sports bottles for drinking- Sipping water through a long straw or sports bottle (affiliate link) can allow the students to focus and attend given proprioceptive input through the mouth. This is a great whole classroom strategy for helping with attention and self-regulation. Read more about using a water bottle as a sensory tool.
15. Movement breaks in the gym or classroom- A quick brain break can help kids focus during periods of desk work.
16. Push mats in the gym- Moving those big gym mats is a great whole body proprioception activity. Or, ask students to move desks or other equipment that uses the whole body.
17. Auditory support- Headphones for limiting auditory stimulation during center work or times when there is a lot of chatter in the classroom. Here are more tips for auditory sensitivity in the classroom.
18. Visual picture list- Knowing what to expect is a non-traditional sensory strategy. But when you think about it, the visual input is a support when it comes to knowing what is next, how much time is left until lunch, and how much longer the day will last. A visual schedule can be a benefit for the whole classroom. Try this daily pocket chart schedule. (affiliate link)
19. Simon Says Spelling- Try practicing spelling words with a movement and vestibular sensory input Simon Says version. Try these Simon Says commands if there are a few extra minutes to use up during the school day or between transitions.
20. Play dough math for proprioceptive input through the hands. Try a math smash type of activity and use a heavy resistive dough like this DIY proprioception dough. There are many benefits of play dough and sensory input is just one of them!
21. Kneaded eraser for sensory input through the hands- Use a kneaded pencil eraser (affiliate link) for a hand-held fidget that doubles as an eraser with proprioceptive input.
22. Crunchy snack break- Try snacks like pretzels, crackers, kale chips, popcorn, or roasted chickpeas for an alerting snack. Oral motor exercises offer calming or alerting input and using a crunchy (or chewy) snack can support these needs.
23. Sensory bin for math or sight words- Create a sight word sensory bin or even use a sensory bin for math or spelling words. This can be a fun and unexpected way to dive back into spelling after the summer break! Add tactile sensory input to learning using a variety of sensory bin fillers. Ideas include shaving cream, shredded paper, crafting pom poms, among many other ideas.
24. Vibrating pen rainbow writing for sight word or spelling practice- Proprioceptive input to the hands can be very helpful for many kids, especially if they are writing with too much pencil pressure.
25. Jump/move/hop in hallway- Take a movement and brain break with a hallway movement activity. Add learning aspect with spelling, facts, or math.
26. Roll a ball on the legs- Add a vestibular aspect to vocabulary or themed learning, including history, English language arts, or science. Kids can answer questions and when they answer the question, they roll the ball along their legs by bending down to roll the ball on their thighs.
27. Hopscotch Math- Add a hopping proprioception activity to the classroom with a hopscotch board created right in the classroom using masking tape.
28. Graph Paper Writing- Add a visual sensory twist to handwriting, math, spelling, or any written work by using graph paper. The added lines can be just the visual spatial prompt needed for kids with visual sensory processing concerns. Here are more sensory based reasons to use graph paper.
29. Make a desk sensory diet box- Use a dollar store pencil case to create customized sensory diet bins that can fit right into the desk. Items would be used specific to the child’s needs, but might include resistive putty, paper clips for fidgeting, or movable toys (affiliate link). Use these occupational therapy kits for more ideas.
30. Wash desks with spray bottles. Squeezing a spray bottle to wash desks or water plants offers heavy work through the hands.
31. Cut classroom decorations from oaktag. Heavy input through the hands by cutting thicker paper is a great way to add a quick and functional movement break. Students will love to see their handiwork on the walls, too.
33. Try a sensory swing- Sensory swings for modulation can be used when applicable and recommended by an occupational therapy provider. Sometimes, you’ll see these in a sensory room or in a therapy room in the school. Here is more information on types of sensory swings.
All of these ideas support sensory needs and are great activities to use during the back-to-school time. We love that they are fun, functional, and the whole classroom can benefit!
Want more ideas to support sensory needs at school? Grab a free copy of our Classroom Sensory Strategy Packet.
Related resources include our blog post on Ayres Sensory Integration. This is a great place to start with gathering information on the sensory processing systems and the related behavioral, emotional, physical, and cognitive responses that we see.
Colleen Beck, OTR/L has been an occupational therapist since 2000, working in school-based, hand therapy, outpatient peds, EI, and SNF. Colleen created The OT Toolbox to inspire therapists, teachers, and parents with easy and fun tools to help children thrive. Read her story about going from an OT making $3/hour (after paying for kids’ childcare) to a full-time OT resource creator for millions of readers. Want to collaborate? Send an email to contact@theottoolbox.com.
The Sensory Lifestyle Handbook walks you through sensory processing information, each step of creating a meaningful and motivating sensory diet, that is guided by the individual’s personal interests and preferences.
The Sensory Lifestyle Handbook is not just about creating a sensory diet to meet sensory processing needs. This handbook is your key to creating an active and thriving lifestyle based on a deep understanding of sensory processing.
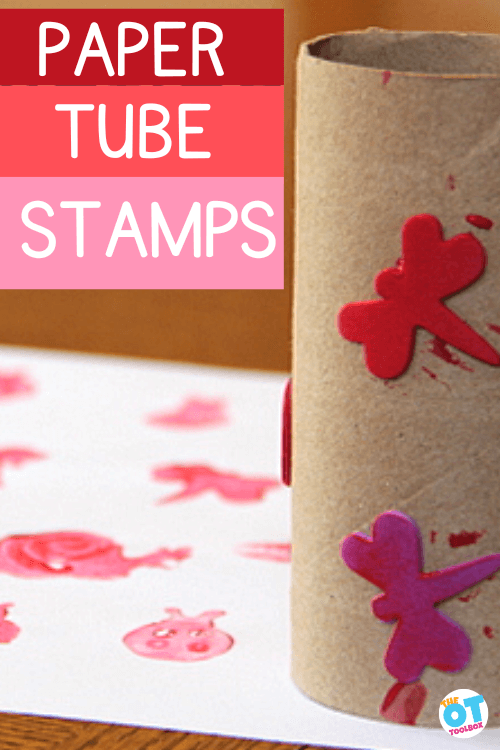
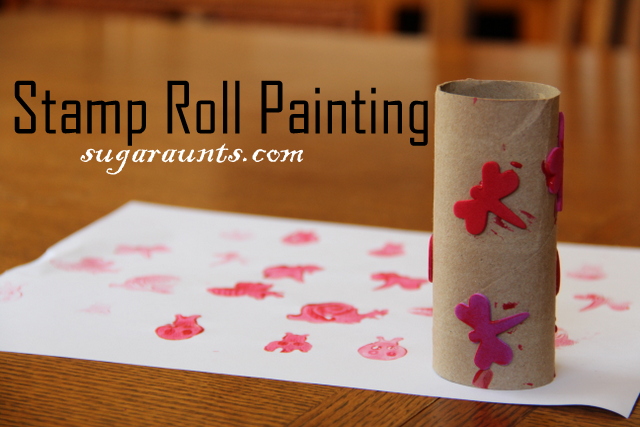
This toilet paper roll stamp art is a fun creative painting activity we’ve had on the website for many years. Kids love the messy sensory fun of painting with a toilet paper roll. Therapy providers love using the recycled materials in building skills like bilateral coordination, motor planning, and more!
toilet paper roll stamp
Therapy materials are expensive, so using items that you typically throw away are wonderful! That’s where this toilet paper roll stamp comes into play. All you need are a few toilet paper rolls or paper towel tubes and some foam stickers to get started.
To use a paper tube into a stamp, you’ll need just a few items:
Recycled paper tube (toilet paper roll or the inside of a paper towel roll)
Foam stickers
Paint
Paper
Paint brush- this item isn’t necessary unless you want to paint the foam stickers to extend fine motor skill work.
To set up the painting with stamps activity, ask your child to help you stick the foam stickers all around the paper roll. There are so many benefits of playing with stickers and this part of the activity is another skill-builder.
Why?
Because when kids position stickers on a paper tube, they are building several motor areas:
Bilateral coordination to hold the paper tube and to stick the sticker onto the tube with the other hand
Wrist extension to position the sticker on a vertical or slanted surface
After positioning the stickers onto the paper roll, pour some paint onto scrap paper or in a low tray.
Show users how to roll the paper tube into the paint. This is a great exercises in graded pressure, or proprioception. If they press too hard, paint covers the whole paper tube. If they don’t press hard enough, paint will not evenly cover the foam stickers. This awareness carries over to pencil pressure when writing.
Or, paint the foam stickers with a paint brush. This is a great way to work on pencil grasp with extended wrist, which pulls the muscles of the hand and wrist into an optimal position for pencil grasp through a play activity.
Then, roll the paper tube onto paper. This again supports awareness of proprioception as well as bilateral awareness. If they press too hard, the paint images are squished and you can’t tell what the stamp is. If pressed too lightly, the paint doesn’t transfer to the paper. Using both hands together with equal pressure is a bilateral coordination skill that transfers to functional tasks.
We love any painting play in this house. Big Sister was really into this project.
We stuck foam stickers onto an empty paper roll and she got busy painting them.
(I love her concentration here…)
After the foam stickers are painted, roll away!
Pretty Prints!
An easy and fun little painting craft!
Working on fine motor skills? Grab one of our Therapy Kits for printable activities that build finger dexterity, fine motor strength, and coordination needed for tasks like using scissors or pencil grasp.
Working on fine motor skills, visual perception, visual motor skills, sensory tolerance, handwriting, or scissor skills? Our Fine Motor Kits cover all of these areas and more.
Check out the seasonal Fine Motor Kits that kids love:
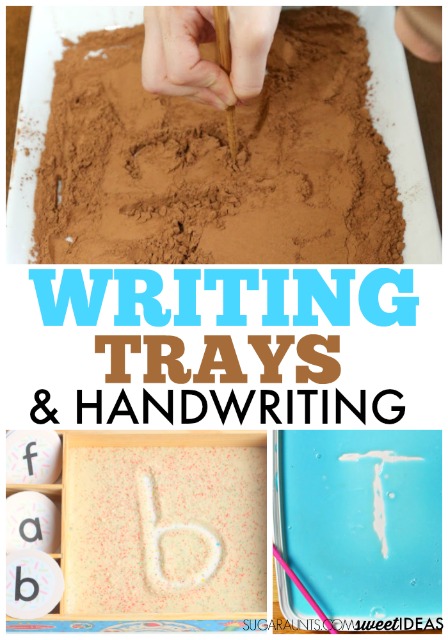
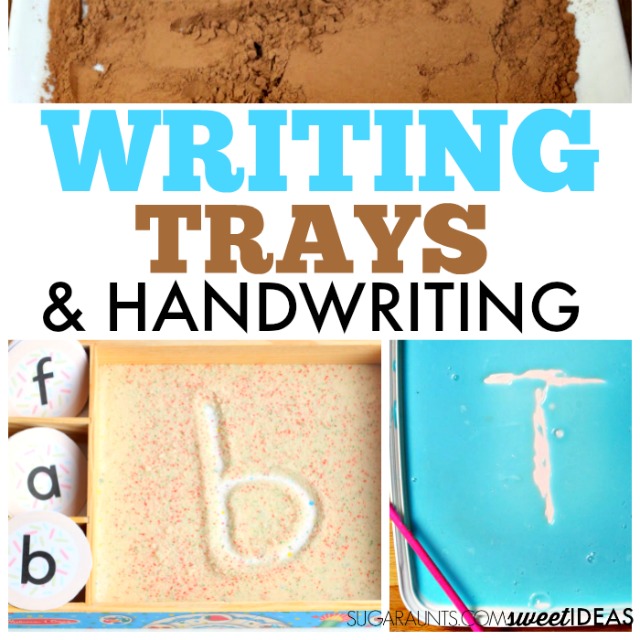
Writing trays are a fantastic way to help kids work on handwriting, letter formation, and pre-writing skills. There are so many benefits to a sand tray (or other sensory writing materials) in helping with letter formation and handwriting. There is a reason that writing trays are a popular way to encourage fine motor skills and an introduction to handwriting; They use a tactile sensory strategy to encourage movement in learning in a multi-sensory way. Writing Trays make letter formation fun and meaningful in a play-based manner.
Amazon affiliate links are included in this blog post. As an Amazon Influencer, I earn from qualifying purchases.
What is a writing tray?
I’ve used writing trays in my occupational therapy interventions and with my own kids for years. Writing trays are such a powerful tool to add a multi-sensory component and moveemnt to learning to write.
Writing trays are a dry or wet sensory material in a low tray or bin type of container. Children can use their finger or a tool such as a pencil, paint brush, or other item to draw, write letters, or form numbers into the sensory material.
Writing Trays are a creative way to help kids learn to write letters, numbers, shapes, and pre-writing strokes. There are a ton of different ways that writing trays can be set up and used in letter formation. Essentially, a writing tray uses a low container (or TRAY) and a medium that can be moved and shifted for writing.
Sensory writing trays can contain sensory fillers of any type. If you are able to move the material in a way that letters can be drawn in the tray, then the sensory writing tray is a success. With a sensory writing tray, children can write letters independently or copy letters from a visual letter card.
You can find them used in schools, clinics, preschools, early learning centers, and homeschool dinging rooms.
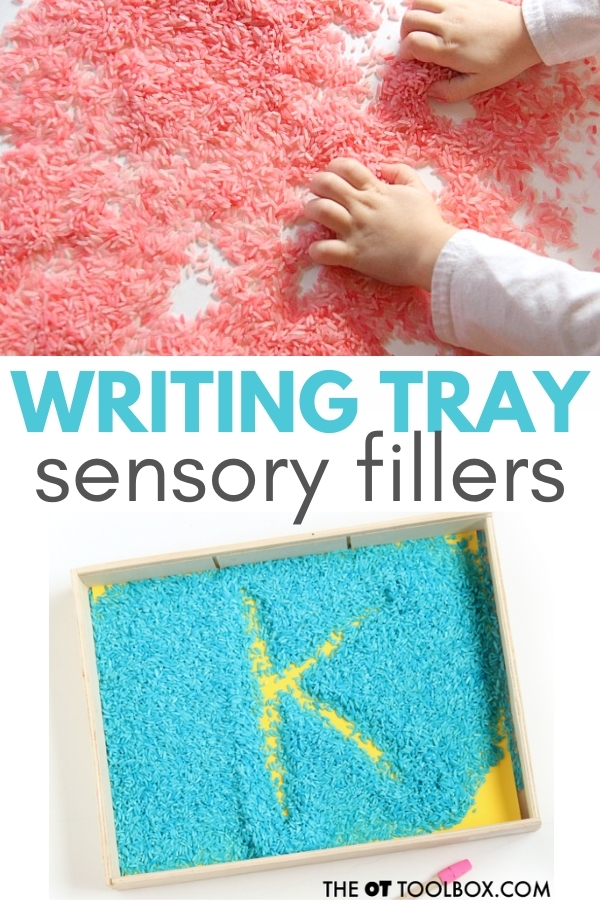
Writing Trays are filled with a filler that us manipulated and shifted so that letters or writing lines are visible. Some ideas for filling a writing tray include the sensory materials listed below.
Sand (affiliate link) Colored Sand Rice Dyed Rice Salt Dyed Rice Play Dough (affiliate link) Other Doughs Sugar Flour Cornmeal Slime (Check out the fun we had with slime in a writing tray!) Spices (affiliate link) Crushed Chalk (affiliate link)
While sometimes, a child can use their finger to form the lines in their writing tray, a writing tool is typically recommended. (More on that below.)
Sensory Writing Tray Benefits
Kids can use writing trays to practice letter formation, or pencil control and stroke sequence in writing letters.
Typically, they will be provided with a visual cue or cue card for copying the letters/numbers/shapes.
Other times, kids can form the letter/number/shape independently when prompted to make a specific letter. This is a great way to work on visual memory and independent letter formation.
Be sure to verbally prompt children to form letters or build letters with correct stroke sequence. This is essential for carryover of accuracy with letter formation in handwriting.
Otherwise, the child is simply playing in the sensory tray and not effectively using the writing tray as a tool for improved handwriting.
Encouraging the child who is learning pre-writing strokes and beginning letter formation can use a writing tray as a base for forming letters independently. Try using visual and verbal cues to promote correct letter construction.
A few more must-dos when using a writing tray for addressing letter formation:
Make sure letters are not formed in parts. In other words, don’t allow kids to make a circle and then a line to form an “a”.
Make sure letters are formed from top to bottom.
Realize that the motor plan to form letters with your finger is different than the motor plan to form letters with a pencil or other pencil-like writing tool.
The nice thing about writing trays is that they are very versatile. Students of all ages can use writing trays to work on different levels of handwriting. Some ways to work on handwriting include:
A writing tray can be an effective tool in boosting fine motor skills. Kids can use their finger to form lines and letters while strengthening finger isolation and separation of the two sides of the hand, including an opportunity for the ulnar side fingers to tuck into the palm for a more effective pencil grasp when writing.
Children can also use a tool to form letters in a writing tray. This can be an opportunity to develop pencil grasp.
However. There are a few items that should be mentioned about using a writing tray to address pencil grasp and appropriate motor plan for letter formation.
Writing Trays are a common tool. But if you just place a writing tray in front of a child, you will likely see an inefficient writing activity. You will probably see most kids forming letters with an awkward grasp on the writing tool, a flexed and deviated wrist, an abducted shoulder, and generally ineffective positioning.
Positioning absolutely carries over to letter formation and handwriting.
A writing tray can be used to address pencil grasp and handwriting needs. However, it is essential to use the tray in a proper manner. There are a few ways to do this:
Place the writing tray on a slight slant. Try using a DIY slant board.
Use a low edged tray.
Use verbal, physical, and visual cues for appropriate positioning.
Position the writing tool in your child’s hand with an appropriate tripod or modified tripod grasp.
Show the child how to hold the tool at the end of the tool as if they were holding a pencil.
Once you’ve got your writing tray set up and positioning taken care of, it’s on to the fun stuff…making a writing tray!
How to make a Writing Tray
Making a writing tray to gain benefits of teaching sensory handwriting is easy. You can use materials found around the home.
The options are limitless when it comes to writing tray combinations! You can create a writing tray in any theme or to meet any need. You’ll need just a few items: a container, a filler, a tool, and letter cards.
Writing Tray Ideas
First, you’ll need a low tray, basket, bin, or other container. We’ve used a variety of containers in our sensory writing trays. You’ll want a container that will hold the sensory writing material within its edges.
In some cases, you can even scatter the sensory material on a flat surface like a table or a plastic table cloth on the floor. For example, we used dyed rice right on the kiddie picnic table for a pre-writing and hand strengthening activity.
Kids will be using a tool or their hands to write letters and the sensory material can scatter. Some specific ideas include:
Kitchen baking trays (jelly roll pan or cookie sheet with edges)
Food storage containers
Melissa and Doug wooden puzzle boxes
Cardboard boxes cut low on the sides
9×11 cake pan
Shirt box
Tray
Low basket
Writing Tray Tools
Next, you’ll need a tool to use to write the letters. This can be items found in the home as well. Some writing tray tools include:
Next, an important part of a writing tray is the letter model. As mentioned above, writing trays are great for copying pre-writing lines, shapes, letters, numbers, and words.
Cards can be used as a visual model for forming letters or words. Some cards include direction arrows. Others might include a sight word or spelling word for the child to copy. These cards can be positioned in different positions to address different needs.
Position the letter cards right in the tray for near-point copying.
Position the writing tray cards in a vertical position near the writing tray to challenge vision shift.
Hang the writing cards on a wall for far point copying to work on visual shift, visual attention, visual memory, and copying from a distance.
Writing Tray Fillers
You’ll also need a sensory material to act as a filler. This is the material that the child will actually “write” in. When we say “write”, they are using the tool to form letters as the sensory filler moves in the tray. They will not actually write a letter with a pencil or other marking device. Sensory filler material can be as creative as you let it. Some writing tray fillers include these materials:
Click each link for ideas on how to set up these creative writing trays.
As you can see, the ideas are limitless when it comes to sensory handwriting! Use a theme or materials that meet the needs of your child or client and are motivating and fun!
Colleen Beck, OTR/L has been an occupational therapist since 2000, working in school-based, hand therapy, outpatient peds, EI, and SNF. Colleen created The OT Toolbox to inspire therapists, teachers, and parents with easy and fun tools to help children thrive. Read her story about going from an OT making $3/hour (after paying for kids’ childcare) to a full-time OT resource creator for millions of readers. Want to collaborate? Send an email to contact@theottoolbox.com.
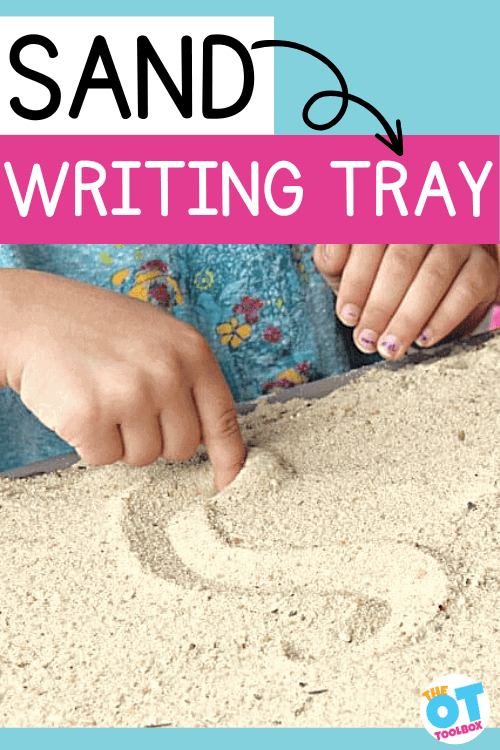
Sand Writing Tray
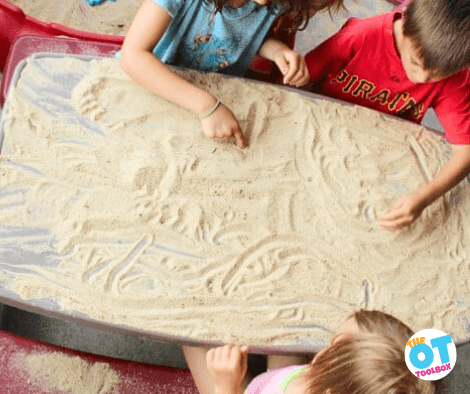
One very easy way to create a sand writing tray is to use a child’s picnic table placed either outside in a sandbox or over a tarp (or outdoor space where it’s ok that sand goes into the ground and lawn).
We loved using our kid’s picnic table in this way to make a sand writing tray.
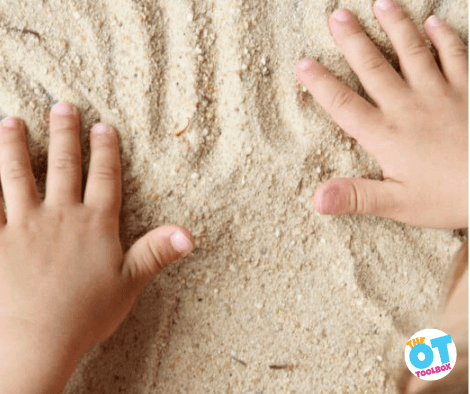
For this sand writing tray, we made it super simple and just dumped a thin layer of sand onto our (Amazon link) Little Tykes picnic table. Then, I invited the kids to all sit down and draw in the sand using their fingertips. This is a great exercise in finger isolation.
Practicing letters in a sensory surface like writing and drawing in sand on a picnic table surface is a motivating and fun activity for kids because it’s not something they typically do.
Kids learn new skills well with a multisensory learning experience and a sand writing tray is a great, inexpensive way to do just that.
To encourage vocabulary and verbal expression, tell stories on the table surface and ask questions that extend the story further. Then, while practicing lines and drawing shapes and figures, gently smooth the sand with the palm of your hand and start over again!
Preschoolers can practice pre-handwriting lines, while older kids can form letters and numbers in the sand. They can also copy and trace letters to improve their penmanship skills.
There are many sensory activities that can be used to dye Easter eggs. In this blog post, you’ll find several sensory ways to dye eggs. Whether you are using natural egg dyes, movement activities to dye eggs, or using a rice shake egg dye activity, the sensory egg activities are perfect for adding movement that meets sensory needs. Add these sensory egg ideas to your Easter occupational therapy ideas!
Sensory Egg Activities
These sensory egg activities are fun and use all the senses! First, let’s explore the various senses that can be used when coloring eggs. Start by reading our resource on sensory play. You’ll see that there are 9 sensory systems at work at any given time:
Take a look on Pinterest, and you can find SO MANY different ways to dye Easter Eggs. We didn’t see any collections that centered on Sensory Exploration while dying eggs.
These are some fun, creative ways to dye eggs with a Sensory twist.
Movement sensory egg ideas
These ideas use movement to dye eggs. When shaking an egg in a paint bag, or shaking an egg in a bag of glitter or shaving cream, kids can use several sensory components:
Vestibular input by jumping or shaking
Bilateral coordination to use both hands together in coordinated manner to shake a plastic bag
Tactile sensory input to utilize several textures.
Visual sensory input with bright and colorful visual input.
Craftaholics Anonymous made glitter eggs. You can use a hardboiled egg and use any egg dye kit. Place the egg in a plastic baggie of glitter and shake, shake, shake!
The Chocolate Muffin Tree used crayon shavings to decorate. Can’t you just smell the crayons by looking at this picture? Use the same plastic baggie technique listed above but add crayon shavings. This is just another benefit of coloring and reason why coloring is such a great activity for kids!
Martha Stewart shows us how to decorate with thread to make a textured egg. This is a great bilateral coordination activity when wrapping string around an egg. But is this a sensory activity?
When you consider the kinesthetic input of wrapping string around and egg, plus the other contributions: visual input, motor coordination, proprioception, then yes!
You could make melted crayon shaving eggs. These look so textured and fun!
Adding crayon shavings offers a specific scent, or olfactory input.
Creaative Green Living decorated patterned eggs using silks. This sensory egg dying technique offers tactile sensory input.
Lovely Indeed explores patterns and textures using Washi tape. Peeling tape adds fine motor proprioceptive input through the joints in the fingers. This is a great pincer grasp activity.
Add stickers to work on fine motor skills…pinching little stickers on the eggs. This site shares some natural dying techniques, too. There are many reasons why playing with stickers supports development. This is a great sensory egg activity!
Toddler Approved used baking soda and vinegar to make these fun eggs.
Explore those senses while dying eggs!
More sensory egg ideas for dying Easter Eggs
These ideas use tactile sensory input, movement (Vestibular sensory), visual sensory input. Each of these ideas are fun and creative was to color eggs!
Natural Dyes: You can use natural dyes to color your Easter eggs. For example, beetroot juice will give a pink hue, turmeric can give a yellow hue, and red cabbage can give a blue hue.
Kool-Aid: You can use Kool-Aid to dye your Easter eggs. Kool-Aid comes in a variety of colors and smells, and can be a fun sensory experience for kids.
Shaving Cream: You can create a marbled effect on your Easter eggs by using shaving cream. Simply apply a layer of shaving cream to a shallow dish, add a few drops of food coloring or liquid watercolors, and swirl the colors together with a toothpick. Then, roll your egg through the shaving cream and let it sit for a few minutes before wiping it clean. Then, use those toothpicks to work on precision and dexterity using our toothpick holder activity.
Glitter: You can add some sparkle to your Easter eggs by using glitter. Simply brush some glue onto your egg, sprinkle glitter over it, and let it dry.
Rice Shake: You can use rice and food coloring to create a sensory egg dyeing experience. Fill a sealable plastic bag with uncooked rice, add a few drops of food coloring, and shake the bag until the rice is evenly coated. Then, place your egg inside the bag, seal it, and shake it until the egg is evenly coated.
Many of these sensory activities for dying eggs can add sensory input to support self-regulation or to a functional sensory diet, and more!
The Sensory Lifestyle Handbook walks you through sensory processing information, each step of creating a meaningful and motivating sensory diet, that is guided by the individual’s personal interests and preferences.
The Sensory Lifestyle Handbook is not just about creating a sensory diet to meet sensory processing needs. This handbook is your key to creating an active and thriving lifestyle based on a deep understanding of sensory processing.
Colleen Beck, OTR/L has been an occupational therapist since 2000, working in school-based, hand therapy, outpatient peds, EI, and SNF. Colleen created The OT Toolbox to inspire therapists, teachers, and parents with easy and fun tools to help children thrive. Read her story about going from an OT making $3/hour (after paying for kids’ childcare) to a full-time OT resource creator for millions of readers. Want to collaborate? Send an email to contact@theottoolbox.com.
One of the first postnatal senses to develop is sensory touch. There are eight senses to sensory processing, with touch being one of the more important ones. The tactile system helps the brain understand and make sense of the world around it. Starting in infancy, people use touch to explore objects, protect themselves from danger, and safely navigate their world. Sensory touch is an important piece to looking at a sensory processing disorder checklist.
Sensory touch
According to what we know about sensory processing, and looking at the sensory processing disorder chart, The body sends tactile information to the somatosensory cortex through neural pathways to the spinal cord, the brain stem, and the thalamus.
The primary somatosensory cortex is the primary receptive area for touch sensations and is located in the lateral postcentral gyrus, a prominent structure in the parietal lobe of the human brain.
Think of sensory touch and the tactile system as a set of wired pathways, similar to the inner workings of a machine. In a typical body, the wires are the correct size, go the right direction, and send the appropriate information from the touch receptors to the brain.
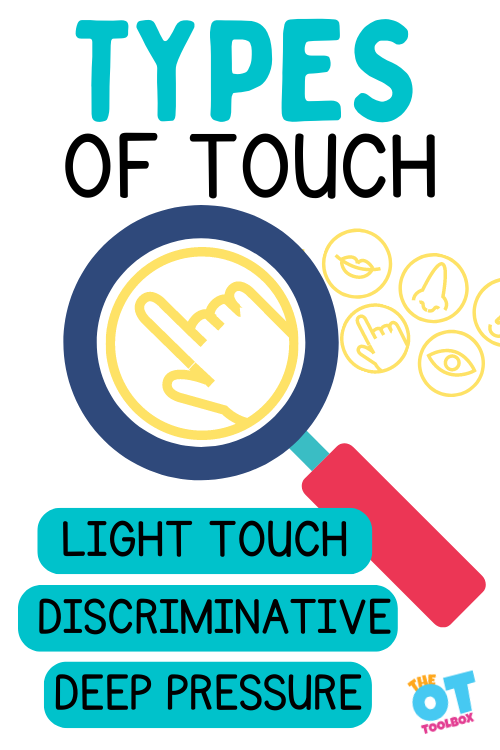
Three Types of sensory touch
There are three types of touch; light touch, deep pressure, and discriminative touch.
Light touch is alerting. It may alert you to danger such as something touching the skin, or brushing against a spider web. For those with sensory sensitivity, light touch can be bothersome, painful, and elicit negative emotions.
Deep pressure tends to be calming. Hugs, weighted blankets, and compression clothing, offer external deep pressure sensory touch. Deep pressure can also alert the body about how tight something is, if there is too much pressure, or not enough.
Discriminative touch alerts the body/brain to the type of sensory touch. It helps describe the incoming information. Was it sticky, wet, dry, rough, bumpy, hot/cold, or smooth?
Sensory Touch Issues
How does this affect people with sensory touch difficulties?
If the sensory touch system is not functioning optimally, the wiring can be off. Some wires might be too large, sending too much information at once (sensitivity).
Other wires may be too small, not sending enough information (sensory seeking).
Sometimes the wires are too long, taking it longer for the messages to be sent to the brain and registered.
Other times the wires don’t go where they are supposed to, and misinformation is sent.
Slow responses to touch sensory input, or the wiring may be too long/send misinformation:
Doesn’t notice if hands or face are messy or dirty
Doesn’t cry when seriously hurt and isn’t bothered by minor injuries
May not notice if bumped or pushed
Seeking out touch sensory input or the wiring is too small:
Touching people to the point of irritating them
Loves messy play
Likes haircuts
Constantly touching objects, running their hands along the walls, or playing in the dirt
Sensitivity to touch sensory input or the wiring is too big:
Dislikes having hair cut or brushed
Difficulty with toe and fingernail cutting
Fussy with food textures
Avoids getting messy, wants to wash hands immediately
Does not explore with touch
Irritated with certain clothing textures, labels and seams and socks. Avoids new clothes
Sensory Touch and Function
So, how does touch affect functional tasks?
Touch is critical to making sense of the world. Along with the other senses, it teaches the brain the characteristics of an object or situation.
This is the reason babies and young children touch everything! They can not understand a new object without physically exploring it.
Let’s break down the definition of sensory touch terminology:
Stereognosis – a fancy word meaning; the ability to feel an object, and know what it is without seeing it. An example of stereognosis is reaching into a bag to find a set of keys.
Dyspraxia – difficulty with motor movements. Without the correct sensory touch information, movements and motor planning can be difficult. Is that sand going to be soft and squishy, how close to the wall am I walking, how much force do I use when petting this puppy?
Tactile defensiveness – Inability to tolerate touching food, wearing certain clothes, standing in line, being touched, exploring the environment, or experiencing new tactile sensations.
Another component of touch that impacts functional performance is the information about touch that keeps us safe and gives us information about the world around us. This includes touch information such as:
Where is a particular item touching me?
The sensory touch awareness that “disappears” over time (feeling your socks on your feet when you put them on, but then not constantly feeling the “feel” of the socks on your feet). This awareness isn’t always present in Autistic individuals.
Is this item hot or cold?
Is a particular item too sharp or dangerous?
Somatosensory Touch
Somatosensory touch is a physiological body process which includes several aspects of sensory touch:
Exteroception input which can include touch sensitivity, thermoreceptive input (heat and temperature awareness), pain receptors
Interoceptive perception– awareness of pressure or feelings inside the body
Proprioceptive perception– feelings and awareness of joints and body awareness.
Research about the somatosensory touch sense
There are several research articles available on the somatosensory or tactile system:
This article covers the sensory neurons of touch, including important information about the somatosensory system which serves three major functions; exteroreceptive (perception of sensory stimuli outside the body and on the skin), interoceptive (perception of internal stimuli inside the body), and proprioceptive functions (for the perception and control of body position and balance). Of important mention is the inclusion of
This article which covers the development of touch.
This article which discusses the common influences of the visual and tactile systems in using similar cognitive processes to enable humans to rely merely on one modality in the absence of another to recognize surrounding objects.
This article discusses how Meissner’s corpuscles work in sensory touch, and how the location and presence of the number and distribution of Meissner’s corpuscles occurs in different locations on the human body.
These are scientific journal articles which provide facts and research on theories about the sensory touch aspect of sensory processing. To the layperson, they are difficult to read and decipher. Using the wiring example above, along with concrete examples may prove to be more beneficial to caregivers.
Sensory Integration and Touch
Sensory integration is the ability to correctly receive and interpret information from the senses. Difficulty with sensory integration, often labeled sensory processing disorder, results in misinformation about incoming information.
It can be in one or more of the senses.
For more information on this theory, please do read our resource on Ayres Sensory Integration for an understanding of what is happening in our nervous systems that results in the motor or behavioral output. It’s truly fascinating!
Why do babies touch everything?
Babies and toddlers explore with touch. A person who has not integrated this sense, may need to explore with touch long beyond the acceptable time frame. Learners who are developmentally delayed may exhibit “inappropriate” sensory behaviors because their system is functioning at a much lower level.
A four year old functioning at a one year old level would be expected to explore with taste and touch.
Infants and children who are born prematurely may also have difficulty with sensory regulation. Their sensory systems were not developed well in utero, and it is almost impossible to mimic the womb sensations in an external NICU.
Premature children may be especially vulnerable to sensory challenges.
Sensory Touch Preferences
Everyone has their own set of sensory preferences. You might dislike wearing jeans, cut the tags in your clothing, love snuggling under a heavy blanket, or prefer not to get messy.
These can be normal reactions to touch. It becomes a problem when the reaction to sensory input impacts function.
The person who can not wear any clothes, is not able to be around people who might touch them, or has a panic attack stepping on the sand, are on the further ends of the typical spectrum.
Their ability to lead a productive life is being compromised by their sensory difficulties. These are the people who may benefit from treatment.
What can I do about this?
The first step is understanding. Understanding a child is not “bad” or being difficult on purpose. Provide good tactile experiences to nurture and build the sensory system.
Understanding sensory touch, along with the other seven senses is tricky and complicated. What seems like a basic human function, can be a tangled web of crossed wires and misinformation.
NOTE*The term, “learner” is used throughout this post for readability and inclusion. This information is relevant for students, patients, clients, preschoolers, kids/children of all ages and stages or whomever could benefit from these resources. The term “they” is used instead of he/she to be inclusive.
Victoria Wood, OTR/L is a contributor to The OT Toolbox and has been providing Occupational Therapy treatment in pediatrics for more than 25 years. She has practiced in hospital settings (inpatient, outpatient, NICU, PICU), school systems, and outpatient clinics in several states. She has treated hundreds of children with various sensory processing dysfunction in the areas of behavior, gross/fine motor skills, social skills and self-care. Ms. Wood has also been a featured speaker at seminars, webinars, and school staff development training. She is the author of Seeing your Home and Community with Sensory Eyes.
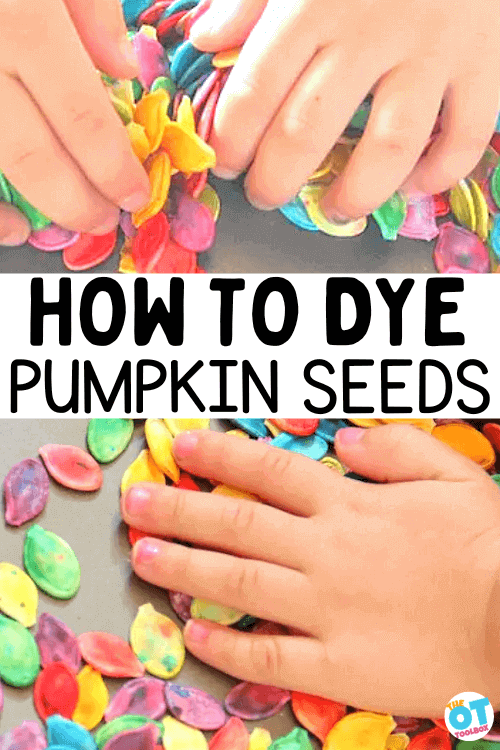
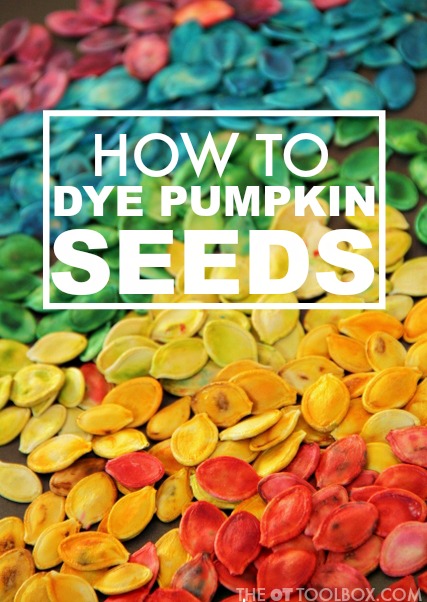
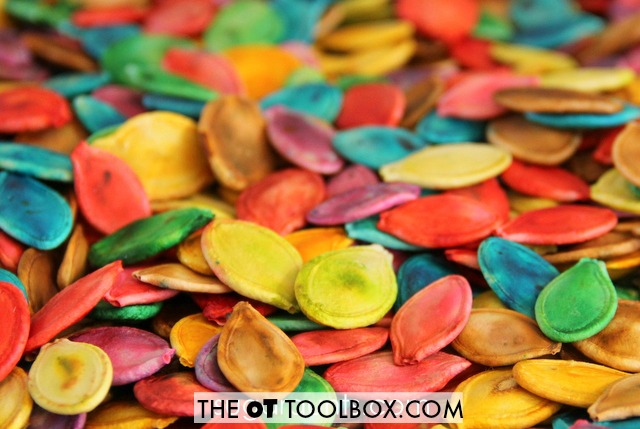
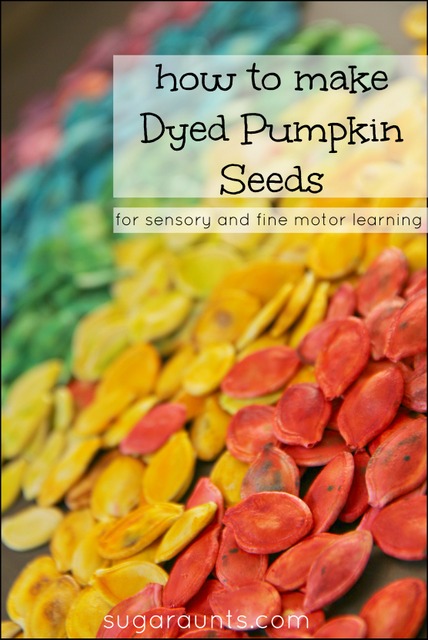
If you’ve ever carved a pumpkin and wondered how to dye pumpkin seeds, then you are in luck. The occupational therapists know the sensory benefits of lifting and carving a pumpkin, as well as separating pumpkin seeds from the ooey, gooey pumpkin guts. Here, we’re sharing one Fall Bucket List item must-have…dying pumpkin seeds for pumpkin sensory play, pumpkin seed crafts, and pumpkin seed fine motor tasks! Read on for an easy dyeing method for pumpkin seeds that can be included in occupational therapy Halloween sessions or sent home as a home program for this time of year.
Once you dye the pumpkin seeds, you can use them for many different activities like we have shown below, AND use them as a sensory base for a pumpkin sensory bin!
This post on how to dye pumpkin seeds was one we originally created back in 2014. The thing is that colored pumpkin seeds is still just as much fun for fine motor and sensory play as it was years ago!
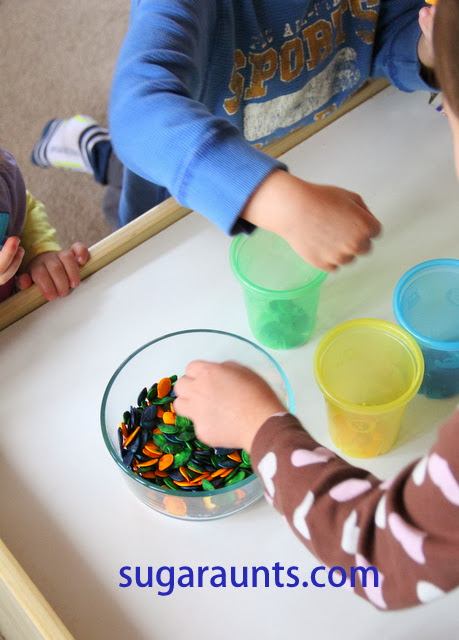
Dying pumpkin seeds isn’t hard. In fact, the kids will love to get in on the mixing action. They will love to use those dyed pumpkin seeds in sensory bins, for fine motor pumpkin seeds activities, or even Fall crafts like this pumpkin seed craft.
Once you dye the pumpkin seeds, use them for tons of fine motor activities, sensory play activities, and visual motor ideas, like sorting pumpkin seeds. These are fun Fall activities that will stick with kids as a memory!
I love that this recipe is simple because it is a great way to support development of specific skills when kids are involved in making the dyed pumpkin seeds. By getting kids involved in the process, you can work on several areas:
executive functioning skills: planning, prioritization, working memory
problem solving
direction following
bilateral coordination
safety awareness
spatial awareness
kitchen tool use
fine motor skills
functional fine motor skills: opening containers, opening a plastic bag, scooping with a spoon, closing a plastic bag
eye-hand coordination skills
proprioception skills and body awareness with shaking a bag to coat the seeds completely
We cover how using recipes to develop skills is such a powerful therapy tool in our resources on our blog on life skills cooking activities. It’s simple recipes like this one and others in our cooking with kids resources that pack a powerful punch in developing skill areas.
Be sure to check out this resource on fine motor kitchen activities to better grasp all of the fine motor skills developed through cooking tasks like this pumpkin seed dying task.
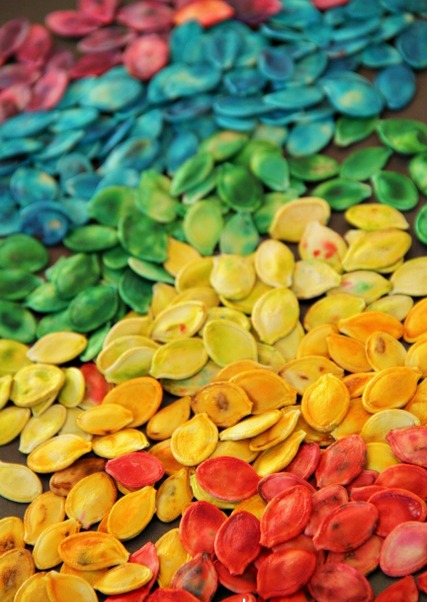
We wanted to make a batch of colorful pumpkin seeds with vivid colors, so I wasn’t sure how to dye the seeds to make the colors really pop. We decided to test which method would work to really get the best colors on our pumpkin seeds.
We tested using To make our seeds this year, we used (Amazon affiliate links) liquid food coloring dye and gel food coloring. In our tests, each type of food coloring worked really well.
One thing to note is that if you use food coloring, technically, the pumpkin seeds are still edible. This is important if you have a child playing with the seeds that might put them into their mouth.
The problem with roasting the seeds after coloring them is that the colors don’t “stick” as well to the seed, making less vivid colors. If you are going to roast the seeds so that they are edible for these situation, I would suggest first roasting your seeds and THEN dying them for the brightest colors.
That being said, you don’t NEED to roast the seeds in order to use them for sensory play. As long as the pumpkin seeds are dry, they will absorb the food coloring.
Materials to Dye Pumpkin Seeds:
To dye pumpkin seeds, you need just a couple of items:
raw, clean pumpkin seeds from a fresh pumpkin
a plastic bag (sandwich bag or a gallon-sized plastic bag)
food coloring
paper towels
That’s all of the items you need to dye pumpkin seeds! This is really a simple recipe, and one that is easy to make with kids.
Dying PUmpkin Seeds
To dye the pumpkin seeds, it is very simple:
Put dry pumpkin seeds into a plastic bag.
Add the food coloring.
Seal the bag shut and shake the bag to coat all of the seeds with the food coloring.
Pour the seeds out onto a surface covered with paper towels (A kitchen counter works well).
Let the seeds dry.
Whether you use liquid food coloring dye or gel food coloring, (affiliate links) add the seeds to plastic baggies and add the food coloring. Seal up the baggies, mix the seeds around, (or hand them over to the kids and let them go crazy), and get the seeds coated in coloring.
For kids that might eat the seeds during play: As we mentioned above, f there are any risks of the child eating a seed during sensory play or crafting, you can first roast the seeds.
Roast the seeds before dying them. Spread the seeds out on aluminum foil spread on a cookie sheet.
Bake at 350 degrees F for 20 minutes. Be sure to check on the seeds often to make sure they are not burning.
Then dye the seeds using food coloring as described above. If you roast them first, the colors will cover any brown spots.
Pumpkin Seed Activities
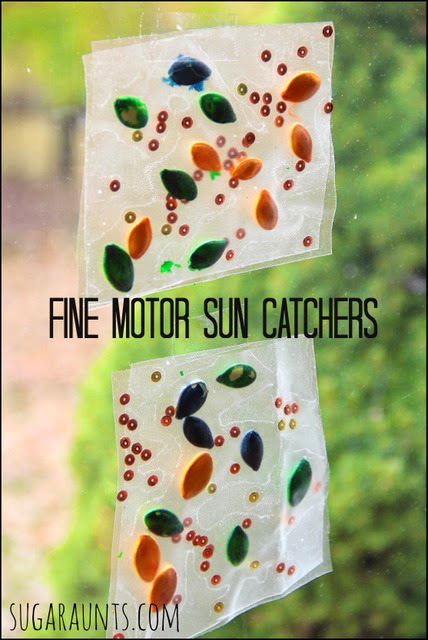
Once you dye the pumpkin seeds, you can use them in pumpkin seed crafts and pumpkin seed activities that foster fine motor development.
Pumpkin Seed Sensory Ideas:
Pumpkin seeds are a great addition to sensory play experiences. Allowing kids to scoop the seeds directly from the pumpkin is such a tactile sensory experience!
But for some kids, that pumpkin goop is just too much tactile input. Using dyed pumpkin seeds in sensory play is a “just right” challenge in exposure to carving pumpkins. It’s a first step in the tactile experience.
Some of our favorite ways to use dyed pumpkin seeds in sensory play:
Use them in a sensory bin
Use colorful pumpkin seeds in a writing tray
Add dyed pumpkin seeds to a discovery bottle
Use rainbow pumpkin seeds on a Fall exploration table
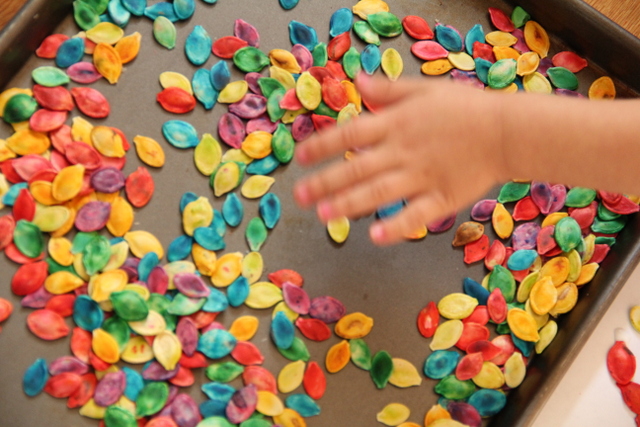
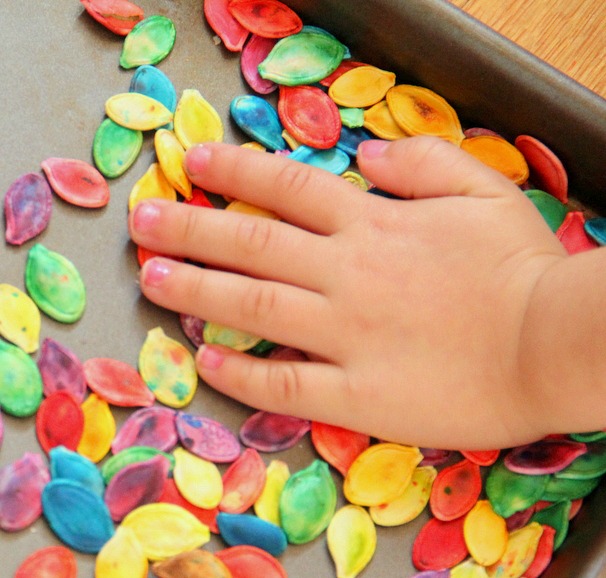
Use the directions listed above to create a set of colored pumpkin seeds. Use the colorful pumpkin seeds in a big pumpkin sensory bin to create a tactile sensory experience. Kids can draw letters in the seeds to work on letter formation. Add this idea to your toolbox of sensory writing tray ideas.
Add a few Fall themed items such as small pumpkins, acorns, pinecones, scoops, and small bowls to the sensory bin activity. Dyed pumpkin seeds are a great sensory bin medium this time of year when making an easy sensory bin.
This sensory play activity was very fun. We couldn’t keep our hands out of the tray as we played and created.
Pumpkin Seed Crafts
Pumpkin seeds are a great fine motor tool to use in crafting.
Try these craft ideas using dyed pumpkin seeds:
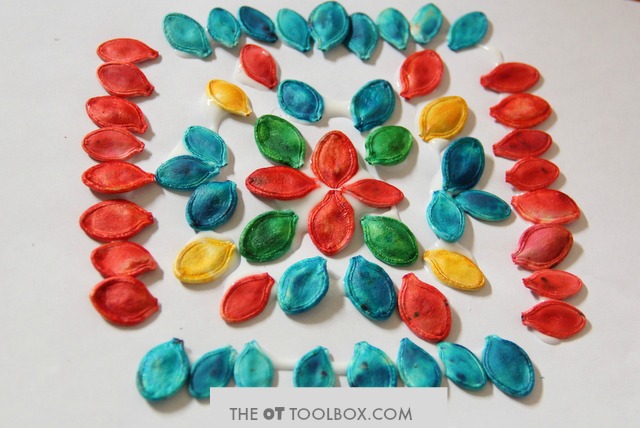
Make a pumpkin seed mandala
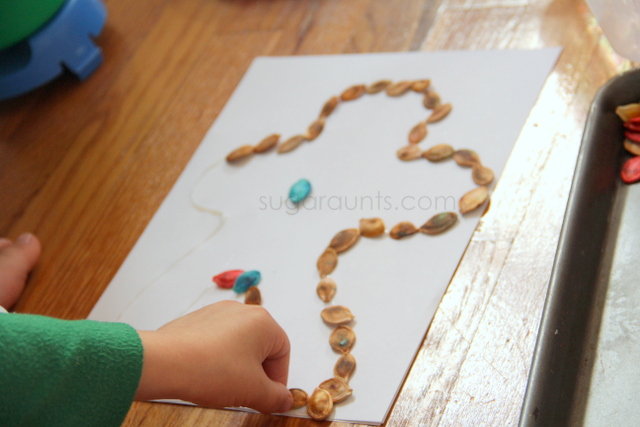
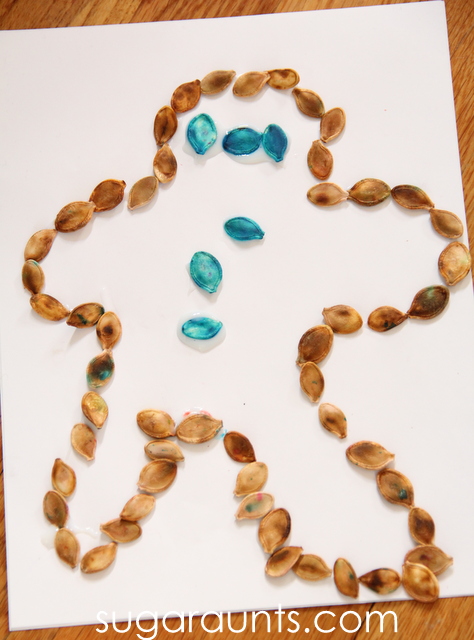
Glue seeds to make a picture using the seeds to outline a shape
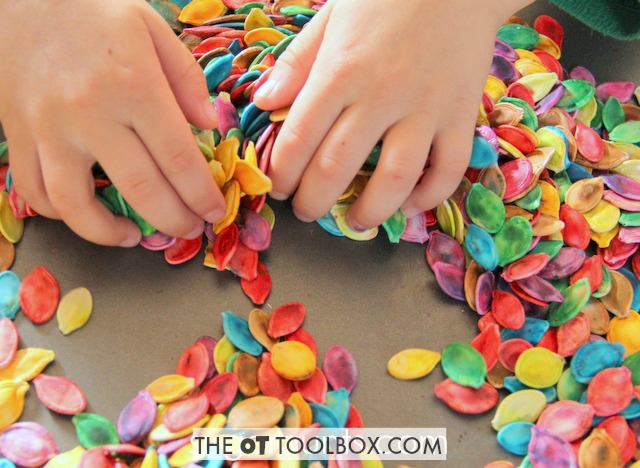
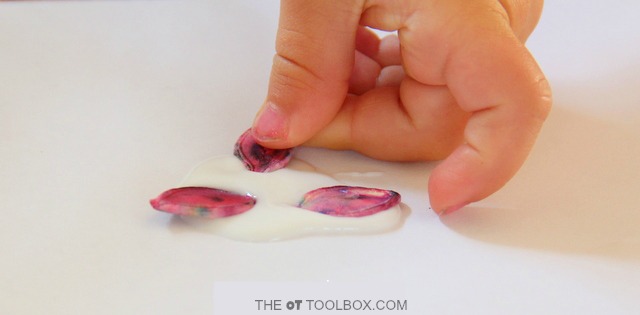
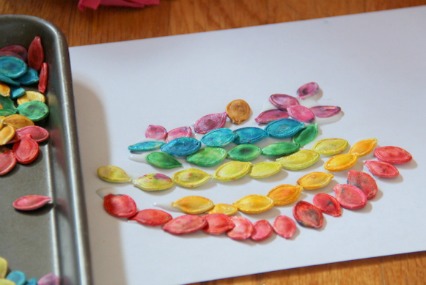
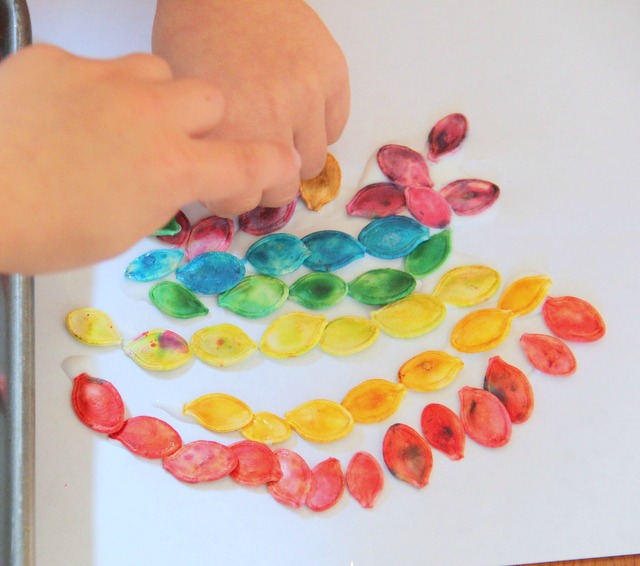
We used our dyed seeds in art projects first. Manipulating those seeds is a great way to work on fine motor skills. Little Sister was SO excited to make art!
Add additional fine motor work by using a squeezable glue bottle to create a pumpkin seeds craft and pumpkin seed art. Squeezing that glue bottle adds a gross hand grasp and fine motor warm-up before performing fine motor tasks.
Use dyed pumpkin seeds to make a colorful mandala craft with fine motor benefits. Picking up the pumpkin seeds uses fine motor skills such as in-hand manipulation, separation of the sides of the hand, pincer grasp, open thumb web space, and distal mobility.
Placing the colored pumpkin seeds into a symmetrical pattern of colors promotes eye-hand coordination and visual perceptual skills such as visual discrimination, figure ground, and other skills.
Little Guy made a gingerbread man. Because why not??! 😉
Squeezing the glue bottle into a shape and placing the colored pumpkin seeds along the line is another exercise in visual perception and eye-hand coordination.
Little Sister made a rainbow with her seeds.
Be sure to use your dyed pumpkin seeds for a few fun ideas like these:
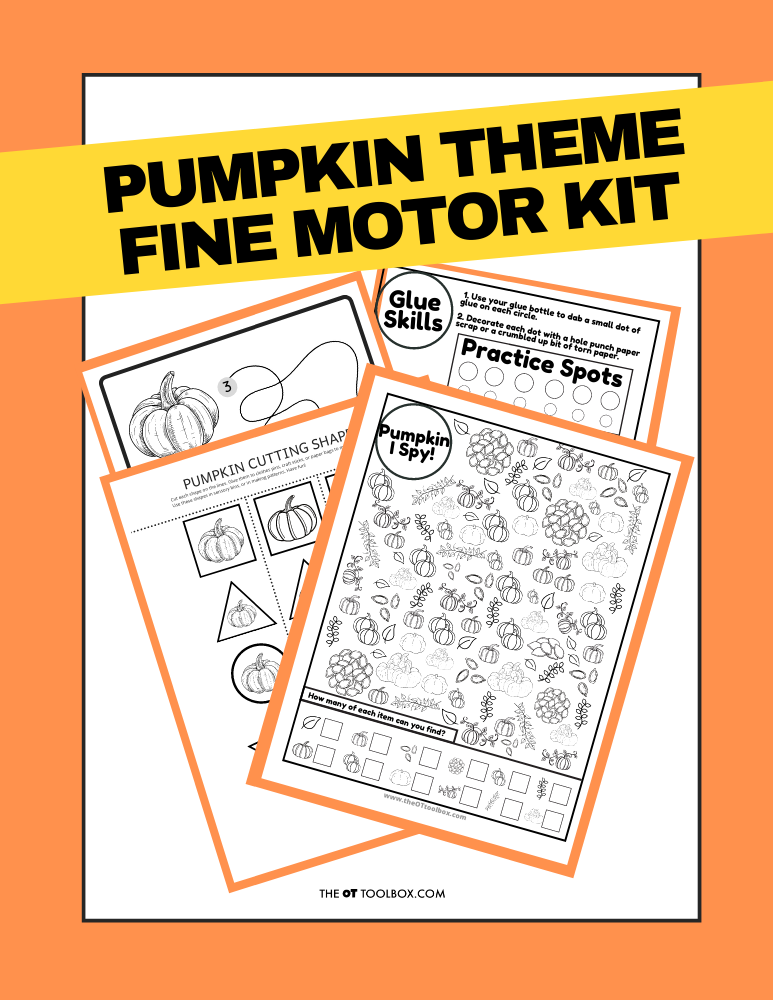
Grab the Pumpkin Fine Motor Kit for more coloring, cutting, and eye-hand coordination activities with a Pumpkin theme! It includes:
7 digital products that can be used any time of year- has a “pumpkins” theme
5 pumpkin scissor skills cutting strips
Pumpkin scissor skills shapes- use in sensory bins, math, sorting, pattern activities
2 pumpkin visual perception mazes with writing activity
Pumpkin “I Spy” sheet – color in the outline shapes to build pencil control and fine motor strength
Pumpkin Lacing cards – print, color, and hole punch to build bilateral coordination skills
2 Pumpkin theme handwriting pages – single and double rule bold lined paper for handwriting practice
Work on underlying fine motor and visual motor integration skills so you can help students excel in handwriting, learning, and motor skill development.
Colleen Beck, OTR/L has been an occupational therapist since 2000, working in school-based, hand therapy, outpatient peds, EI, and SNF. Colleen created The OT Toolbox to inspire therapists, teachers, and parents with easy and fun tools to help children thrive. Read her story about going from an OT making $3/hour (after paying for kids’ childcare) to a full-time OT resource creator for millions of readers. Want to collaborate? Send an email to contact@theottoolbox.com.
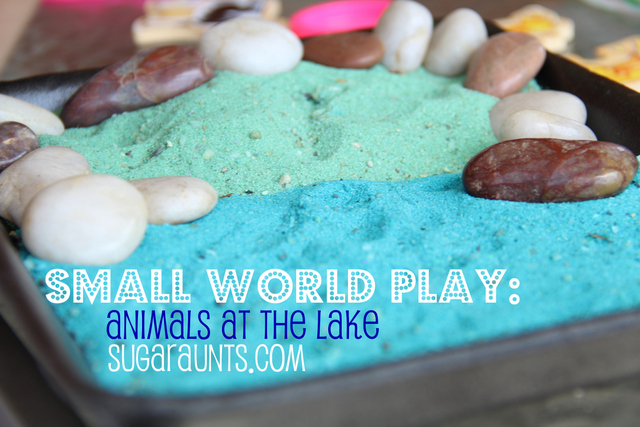
There is just something about small world play as a sensory play activity that supports skill development. Occupational therapy and play go hand in hand. When kids participate in small work play, they are building skills in creativity, fine motor skills, sensory exploration, communication, self-confidence, and so much more. Here, you’ll find small world play examples and ideas to support development in these areas.
Small World Play
Before we go further, let’s cover exactly what we mean by small worlds.
A small world is a play activity on a small scale. Kids interact with the miniature toys, small sensory tables and use imaginative play to explore and pretend on a smaller scale.
A small world can be set up in a variety of ways:
In a sensory bin
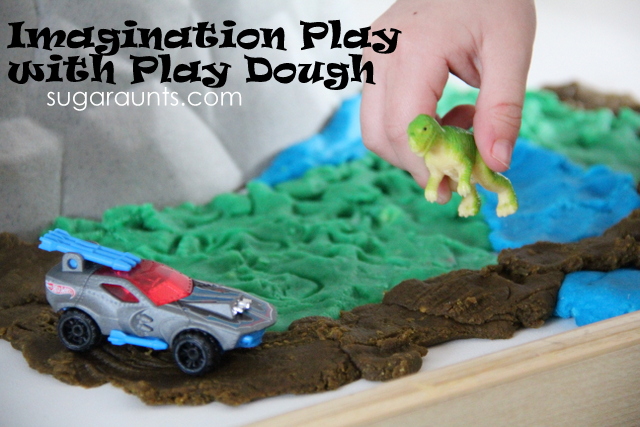
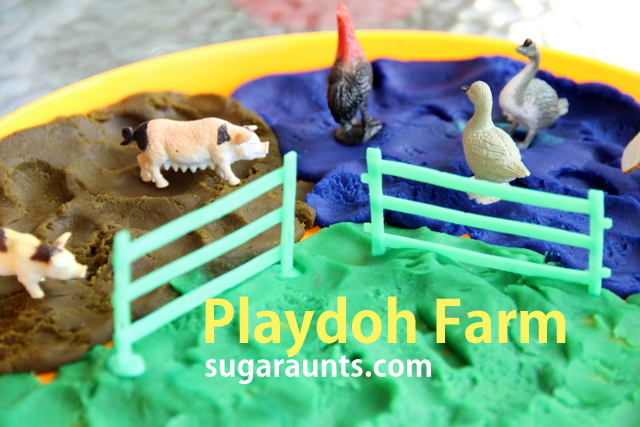
In play dough
On a train table or other low table
In a cardboard box
In a low tray
On the ground
One way to think about small worlds is a fairy house: Kids set up a fairy house area under a tree or in a corner of the yard. They can move and manipulate items to use in pretend play: natural material or commercial fairy houses, small objects like pebbles, sticks, bark, and fairy objects. These items are all part of the fairy small world.
Why Set up a Small World Play Area?
When kids play in a small world, they develop many areas. Additionally, small world areas offer children in small groups opportunities to experience parallel play in a joined environment so children can see various creative play ideas.
Most likely to develop is fine motor skills, but other areas can develop, too:
Precision
Eye-hand coordination
Finger isolation
Hand strength
Visual motor skills
small world play ideas
There are items your can use from around the home to use in small worlds. Here is a list of items to gather when creating a little world:
Container: bin, box, sensory table, etc.
River rock
Mini figures: animals, farm sets, train sets, dolls, etc.
Sand
Fake flowers
Craft materials
Play dough
Beads
Sensory dough or slime
The options are basically limitless when it comes to setting up a small area. Use the examples below to spark more ideas.
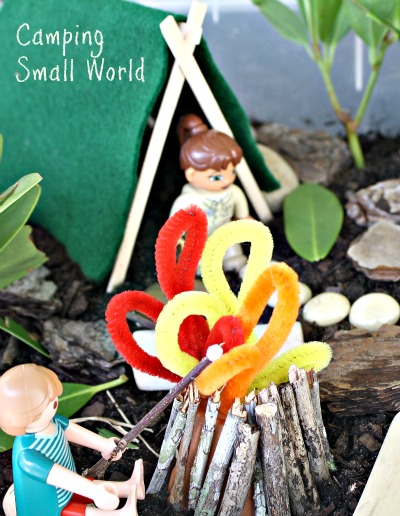
Small World Play Examples
Our kids love small world play. We’ve done so many activities that involve little worlds of imagination and pretend. Small world activities foster language development, story telling, self-confidence, fine motor skills, sensory exploration, and more.
Outdoor small world– We set this activity up under the base of a tree. Use materials like sticks, flowers, rocks, pebbles, roots, grass, etc.
Fairy small world– set up a fairy pretend area in a sand box. Use items like craft houses, rocks, and even glittery items.
Colleen Beck, OTR/L has been an occupational therapist since 2000, working in school-based, hand therapy, outpatient peds, EI, and SNF. Colleen created The OT Toolbox to inspire therapists, teachers, and parents with easy and fun tools to help children thrive. Read her story about going from an OT making $3/hour (after paying for kids’ childcare) to a full-time OT resource creator for millions of readers. Want to collaborate? Send an email to contact@theottoolbox.com.
Research has a lot to say about nature play. When it comes to outdoor play, there is a lot that can be discussed too. Occupational therapy professionals encourage a lot of open-ended play, outdoor games, and outdoor play. There is a natural sensory aspect to outdoor play, which supports self-regulation, emotional regulation, attention, and learning, all through just playing outside! Today we are talking all about what the research has to say about outdoor sensory diet activities and outdoor play.
Benefits of Nature Play
Taking sensory diet strategies outside is nothing new. But, doing so may just be a meaningful way to create the “just right” state of alertness and calming nature that, well, nature provides! But to take it a step further, did you know there are benefits of outdoor games? Did you know that the outdoors support executive functioning skills, self-regulation, and motor skill development…all through playing outside?
Use this information when explaining about what a sensory diet is and what a sensory diet looks like for kids with sensory needs.
There are quite a few benefits to sensory experiences in the outdoors:
Children have a large opportunity for sensory input through playground play. But, in recent times, children experience playgrounds that are more safe, allowing for less risky play. Encouraging specific activities such as a playground sensory diet on playground equipment can be beneficial to sensory needs.
Another item to consider is the aspect of applying sensory diet strategies within the classroom or home environments as a fix for sensory processing needs. The specific and prescribed sensory diet activities for a particular child can be very helpful in addressing specific sensory-related behaviors.
However, the use of a sensory tool such as an alternative seating system within the classroom provides only one type of vestibular and/or proprioceptive input, such as up and down vestibular input. The child who plays outdoors encounters a wide variety of sensory input across all sensory systems!
You might even call sensory tools used to address specific needs a sensory band-aide. What if we as therapists could encourage authentic sensory input in the outdoors (or indoors, as indicated) that addresses all of the sensory systems. Using meaningful play experiences not only provide all the benefits of play. They encourage healthy development through the senses.
Research on Outdoor Play
There are many benefits of outdoor play.
There have been decades of research on the benefits of play in kids. The information below depicts how outdoor play impacts sensory needs in kids. This is not an exhausted review of the literature, simply a smattering of research available on the topic.
Research shows us that some of the developmental and primary tasks that children must achieve can be effectively improved through outdoor play.
These benefits of outdoor play include:
exploring
risk-taking
fine and gross motor development
absorption of basic knowledge
social skills
self-confidence
attention
language skills
Wow! Playing outside has a bigger impact than we may have thought!
Other research has shown an increase in communication, along with more observed emotions, and increased interactions in children with autism when more time was spent outdoors.
Studies have found that dynamic and varied outdoor play offers opportunities for decision making that stimulate problem solving and creative thinking, opportunities that aren’t as easily found in the more static indoor environment.
Still other research supports the many health benefits:
One study found a sensory diet in outdoor play along with sensory integration therapy resulted in better functional behavior of kids with ADHD (Sahoo & Senapati).
Using sensory activities that are specific in time and quality such as those in a sensory diet should be done in an authentic and meaningful manner in a child’s life. In this way, sensory input is motivating to the child in that it goes along with interests and the environment in which the child lives.
It’s a fact that kids are spending less time playing outdoors. From after-school schedules to two working parents, to unsafe conditions, to increased digital screen time, to less outdoor recess time…kids just get less natural play in the outdoors.
Some therapists have connected the dots between less outdoor play and increased sensory struggles and attention difficulties in learning.
Knowing this, it can be powerful to have a list of outdoor sensory diet activities that can be recommended as therapy home programing and family activities that meet underlying needs.
From an occupational therapy perspective, nature play offers supports for underlying skill development. Children have the opportunity to develop motor skills, visual perceptual skills, confidence, executive functioning skills, and self-regulation that enables them to feel confident in their abilities. These areas of development support functioning and independence!
When heading outdoors, you can put on a coat, boots, or jacket and work on self-dressing skills. You can experience all of the motor rich opportunities for movement in the outdoors. Navigating the environment (whether in the woods or the city) offers visual perception, motor planning, and eye-hand coordination opportunities.
Just going outside for a walk is an exercise in skill-building!
Outdoor Sensory Play Ideas
Knowing the benefits of outdoor games and free play, let’s cover some fun ways to offer the movement, regulation, and input from the outdoors. Here are some outdoor play ideas that tick all of the boxes.
Need some outdoor sensory play ideas? Try these outdoor backyard sensory diet activities that inspire free play in the outdoors while encouraging sensory input of all kinds!
Sensory diets and specific sensory input or sensory challenges are a big part of addressing sensory needs of children who struggle with sensory processing issues. Incorporating a schedule of sensory input (sensory diet) into a lifestyle of naturally occuring and meaningful activities is so very valuable for the child with sensory needs.
Sensory diets and specific sensory input or sensory challenges are a big part of addressing sensory needs of children who struggle with sensory processing issues. Incorporating a schedule of sensory input (sensory diet) into a lifestyle of naturally occurring and meaningful activities is so very valuable for the child with sensory needs. That’s why I’ve worked to create a book on creating an authentic and meaningful sensory lifestyle that addresses sensory needs. The book is now released as a digital e-book or softcover print book, available on Amazon. The Sensory Lifestyle Handbook walks you through sensory diet creation, set-up, and carry through. Not only that, but the book helps you take a sensory diet and weave it into a sensory lifestyle that supports the needs of a child with sensory processing challenges and the whole family. Get The Sensory Lifestyle Handbook here.
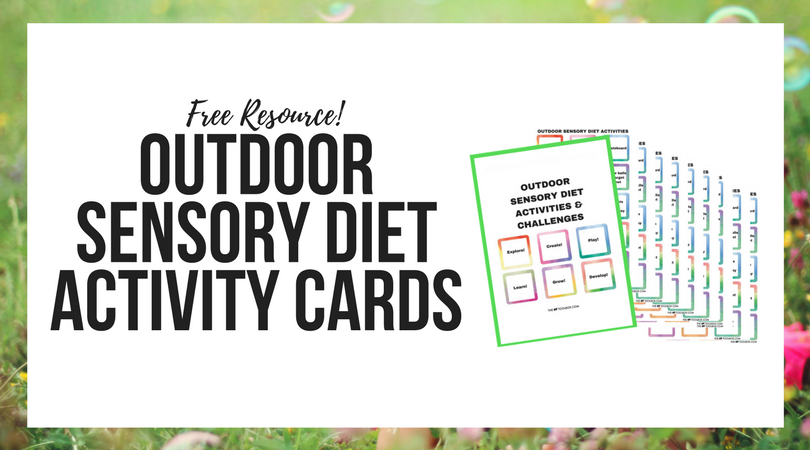
That’s where the Outdoor Sensory Diet Cards and Sensory Challenge Cards come into play. They are printable resource that encourages sensory diet strategies in the outdoors. In the printable packet, there are 90 outdoor sensory diet activities, 60 outdoor recess sensory diet activities, 30 blank sensory diet cards, and 6 sensory challenge cards. They can be used based on preference and interest of the child, encouraging motivation and carryover, all while providing much-needed sensory input.
30 blank sensory diet cards, and 6 sensory challenge cards
They can be used based on preference and interest of the child, encouraging motivation and carryover, all while providing much-needed sensory input.
Research tells us that outdoor play improves attention and provides an ideal environment for a calm and alert state, perfect for integration of sensory input.
Outdoor play provides input from all the senses, allows for movement in all planes, and provides a variety of strengthening components including eccentric, concentric, and isometric muscle contractions.
Great tool for parents, teachers, AND therapists!
Be sure to grab the Outdoor Sensory Diet Cards and use them with a child (or adult) with sensory processing needs!
Benefits of Nature Play References:
Frost, J. & Sutterby, J. (2017). Our Proud Heritage: Outdoor Play Is Essential to Whole Child Development. Retrieved from: from: https://www.naeyc.org/resources/pubs/yc/jul2017/outdoor-play-child-development
Hanscom, A (2017, October). The decline of play outdoors and the rise in sensory issues. OccupationalTherapy.com, Article 3990. Retrieved from http://OccupationalTherapy.com.
Moore, R. (2014). Nature Play & Learning Places. Creating and managing places where children engage with nature. Raleigh, NC: Natural
Learning Initiative and Reston, VA: National Wildlife Federation
Version 1.2.
Von Kampen, M. (2011). The Effect of Outdoor Environment on Attention and Self-Regulation Behaviors on a Child with Autism. Retrieved from: https://digitalcommons.unl.edu/cgi/viewcontent.cgi?referer=https://search.yahoo.com/&httpsredir=1&article=1118&context=cehsdiss
Sahoo, S. & Senapati, A. Effect of sensory diet through outdoor play on functional behavior in children with ADHD. The Indian Journal of Occupational Therapy. Vol. 46, (2 ) 49-54.
What are your favorite outdoor play ideas?
Colleen Beck, OTR/L has been an occupational therapist since 2000, working in school-based, hand therapy, outpatient peds, EI, and SNF. Colleen created The OT Toolbox to inspire therapists, teachers, and parents with easy and fun tools to help children thrive. Read her story about going from an OT making $3/hour (after paying for kids’ childcare) to a full-time OT resource creator for millions of readers. Want to collaborate? Send an email to contact@theottoolbox.com.