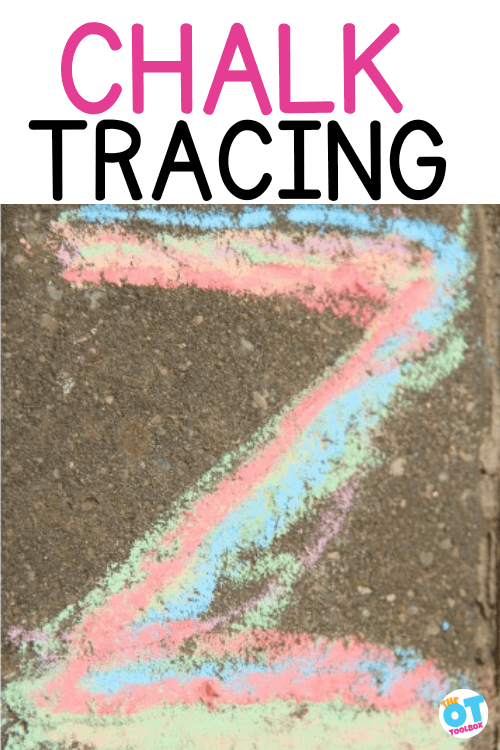
Have you heard of rainbow writing? How about chalk rainbow writing? There are many fine motor and visual motor skills that are used when using rainbow writing as a handwriting practice strategy! Let’s break down what rainbow writing is and how this chalk writing activity is a skill-builder for letter formation. Also check out our handwriting library for more ideas.
Tracing letters with chalk is a handwriting practice strategy that helps to build muscle memory when learning letter formations. You can rainbow write on paper or with different utensils such as crayons, colored pencils, markers, or chalk!
Tracing Letters with Chalk
Tracing letters with chalk is a colorful way to practice letter formation. The strategy builds skills in visual motor and hand eye coordination in order to trace over the lines of a letter.
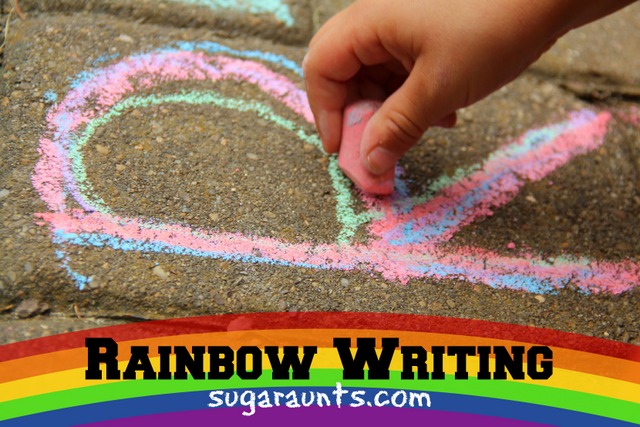
When you use chalk tracing to practice a letter or a word, the child traces over the letter with each color of the rainbow.
They will end up with 6 or 7 trials in writing over the letter.
Some things to consider with tracing with chalk
Tracing over letters with chalk, crayons, or colored pencils is a powerful strategy when practicing letter formation and the line awareness needed for letter size and line placement.
Read through this resource on tracing sheets to see the pros and cons of tracing with kids.
Some things you’ll want to consider about chalk tracing writing activities:
Be sure to watch how the student starts the letters. It can be easy to start a poor muscle memory for writing the letters if they start at the wrong starting point or form the letters incorrectly. This creates an incorrect motor plan in the handwriting process.
Make sure the letters don’t progressively get worse as the student traces over the letters when rainbow writing.
Some kids tend to make the rainbow letters with colors next to each other like a rainbow rather than tracing on top of each color. Ask the student to make a mixed up rainbow by tracing right on top of each color.
Rainbow Writing with chalk
We did rainbow writing with chalk one day. This was a great way to work on letter formation while outside because there was the added benefit of playing on the ground.
Using chalk to practice letters supports development by adding proprioceptive input through the core, strengthens the shoulder girdle for adding more stability for writing, as well as adding strength and stability to the wrist. It’s also a great way to focus on wrist range of motion exercises in a fun way.
We have a big ol’ bucket of chalk that we play with almost everyday. Our sidewalk and driveway have been know to be very colorful at times! We took the chalk to our sidewalk squares one day this week and practiced a little letter formation.
Our sidewalk squares were the perfect area to practice forming letters accurately. I used simple verbal cues to describe the formation of each letter (big line down, little curve around, little line) and we started in the corner of each square as we made the letters.
I made the letter first and Big Sister and Little Guy watched. Then we went to work making our letters very colorful!
Tracing the letters over and over again was a great way to practice accurate formation. Big Sister got into this activity. Little Guy only wanted to make a few letters that are in his name.
When the child is tracing the letters over and over again, they become more efficient at planning out and executing the movements needed to make a letter accurately. This activity is great for a new writer because they are given a confined space to practice a letter, and visual cues (and verbal prompts from mom).
Use the activities and ideas in The Handwriting Book for more ways to work on writing skills.
The Handwriting Book is a comprehensive resource created by experienced pediatric OTs and PTs.
The Handwriting Book covers everything you need to know about handwriting, guided by development and focused on function. This digital resource is is the ultimate resource for tips, strategies, suggestions, and information to support handwriting development in kids.
The Handwriting Book breaks down the functional skill of handwriting into developmental areas. These include developmental progression of pre-writing strokes, fine motor skills, gross motor development, sensory considerations, and visual perceptual skills. Each section includes strategies and tips to improve these underlying areas.
Strategies to address letter and number formation and reversals
Ideas for combining handwriting and play
Activities to practice handwriting skills at home
Tips and strategies for the reluctant writer
Tips to improve pencil grip
Tips for sizing, spacing, and alignment with overall improved legibility
Colleen Beck, OTR/L has been an occupational therapist since 2000, working in school-based, hand therapy, outpatient peds, EI, and SNF. Colleen created The OT Toolbox to inspire therapists, teachers, and parents with easy and fun tools to help children thrive. Read her story about going from an OT making $3/hour (after paying for kids’ childcare) to a full-time OT resource creator for millions of readers. Want to collaborate? Send an email to contact@theottoolbox.com.
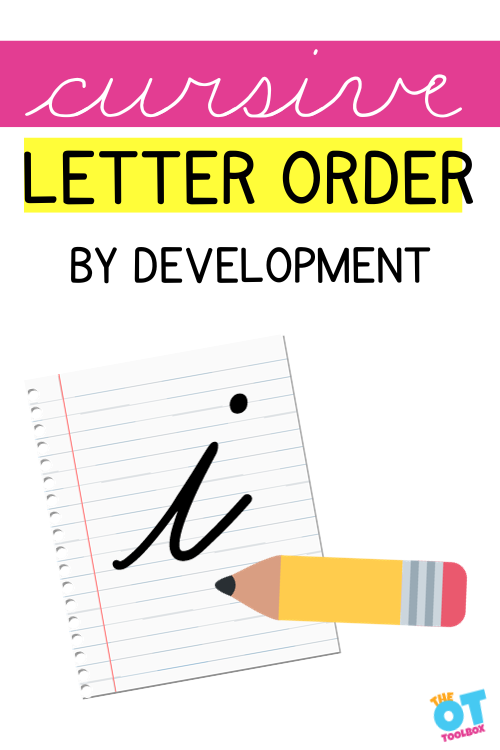
Did you know there is a specific order to teach cursive letters to promote cursive writing legibility and carryover of cursive handwriting? Occupational therapy providers work with the occupation of handwriting and cursive letters are part of that process. In this post, you’ll learn about cursive writing order to teach letters of the alphabet, including the Handwriting Without Tears letter order for teaching cursive. The order that kids should learn the cursive alphabet, including print letter patterns that are directly transferable to cursive alphabet letters.
Using a developmental approach to teaching cursive letters supports children and sets them up for success.
order to teach cursive letters
The order that cursive letters are taught is based on development of skills. Just like the order to teach printed letter formation is based on development of pencil control skills, visual motor skills, cursive letter order is also taught developmentally.
This means that letters are grouped into similar pencil strokes, or letter families.
Learning to write the alphabet in cursive, writing one’s name in cursive, and writing words in cursive is something that many kids want to do around the second grade.
It’s around second grade, or 7-8 years of age that fine motor skills develop in such a way that pencil control and graded precision are developed to enable greater in-hand manipulation, and movement through the range of mobility in the thumb and intrinsic muscles within the hand.
This enables pencil movements to become more mobile and fluid, which are pre-requisites for cursive writing skills.
Prior to this skill achievement, handwriting is taught based on pencil strokes, including uppercase letters before lowercase letters because of the developmental aspect of learning letter formations.
Cursive seems like a “grown up” style of communication that kids see adults or older students using and they try to make swoopy writing on their own.
Some children can be very motivated to learn to write the alphabet in cursive and use it in their written work.
However, one tip for teaching children to write in cursive is to go through the letters in an order that makes sense according to the pencil movements needed to create the letters.
Writing cursive letters in a group of similar pencil strokes is helpful for carryover of pencil control practice and letter formation. Here is more information on teaching groups of similar cursive letters together in a chunk, or cursive letter families.
Once kids have a start on cursive letter formation, they can practice in creative ways like on the window.
Other children who may not be exposed to cursive written work might have their first exposure to cursive in the classroom. Still other students might be in a public or private classroom where cursive handwriting has been dropped from the curriculum. These kids may need extra practice at home or might need to learn cursive handwriting from the very beginning.
But where to start when teaching kids (or adults!) the cursive writing alphabet and how to form words in cursive? Read on for tips and strategies to get started on learning cursive letters.
Cursive Letters Order
We’ve touched on cursive handwriting in previous posts, include a small piece about starting to teach cursive letters. This strategy will outline the alphabet and the letter order to make learning cursive more easy, based on learning letters in a developmental and progressive order.
There are print letter patterns that are directly transferable to cursive letters.
These are cursive letters that are formed similarly to their printed letter counterparts. The muscle movements of the hands that are used to form some printed letters are directly related to the same letters. For this reason, it’s a good idea to start with these letters when learning the cursive writing alphabet.
The printed letter patterns that make up some letters will transfer directly to cursive, and when formed with a few subskills, cursive letter formation will easily follow (in most cases):
Left-to-right strokes
Good starting points
Direction of movement
Consistent stopping points
Control of downstrokes
Smooth rhythm
Given the subskills noted above, cursive letter formation will lend to more legible letter formation. Often times, learning correct letter formation and motor practice will help with legibility and ease of cursive writing into a viable form of written communication.
Cursive Letter Order Patterns
If you take a look at cursive letters, you might see a pattern that is similar among the letters. This is part of why we use a cursive pre-writing lines approach when teaching cursive for the first time.
You’ll see pencil and paper activities that support this pencil movement with different pencil strokes:
Upswing (the line to start a cursive i or t)
Downswing (the line to start a cursive c or a)
Both of these movements can transfer to different starting lines for the other letters. The muscles used to make these lines can then transfer to the other starting movements. Check out our blog post on cursive beginning lines for more information on this concept.
Heling kids to start off with confidence in pencil control to make these beginning strokes supports confidence when learning cursive letters from the start!
When teaching the cursive alphabet, where to begin?
These letters have print patterns that are directly transferable to their cursive letters. This is related to the pencil strokes that are used to form the cursive letters. For this reason, there is a different order to teach cursive lowercase letters compared to their uppercase letter counterpart.
When we consider printed letters, we can directly translate the pencil strokes to some of the cursive letter counterparts. This means that learning the cursive letter form of the letter should be easier based on knowledge of the printed letter’s form.
Having letter recognition skills for printed letters supports the ability to learn cursive letters. For example, there are printed letters which directly translate to the pencil strokes in cursive:
t, i, and u and w transfer to their cursive letter counterparts.
e and l transfer to their cursive letter counterparts.
n, m, p, and h transfer to their cursive letter counterparts.
a, c, d, q, and o transfer to their cursive letter counterparts.
j and g transfer to their cursive letter counterparts.
This means that the remaining letters are the only ones that need to be taught as a new handwriting motor plan in mind. Those letters include:
b, f, k, r, s, v, x, y, and z
We can help learners with this group by calling them cousins or relatives to their printed letter counterpart because they are similar, but different.
Lowercase Cursive Letters
The following letters transfer directly to their cursive letter forms: c, a, d, g, o, q, i, t, u, j, e, l, f, h, p, n, and m.
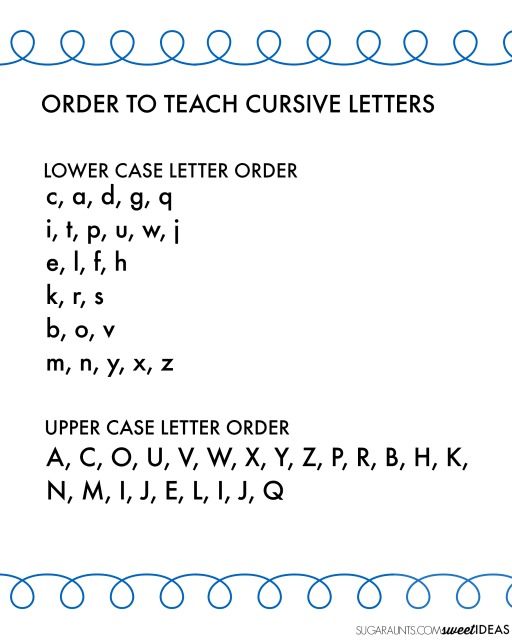
Knowing that there are letters that use similar motor plans as a starting point, it is recommended to follow an order when teaching lowercase cursive letters:
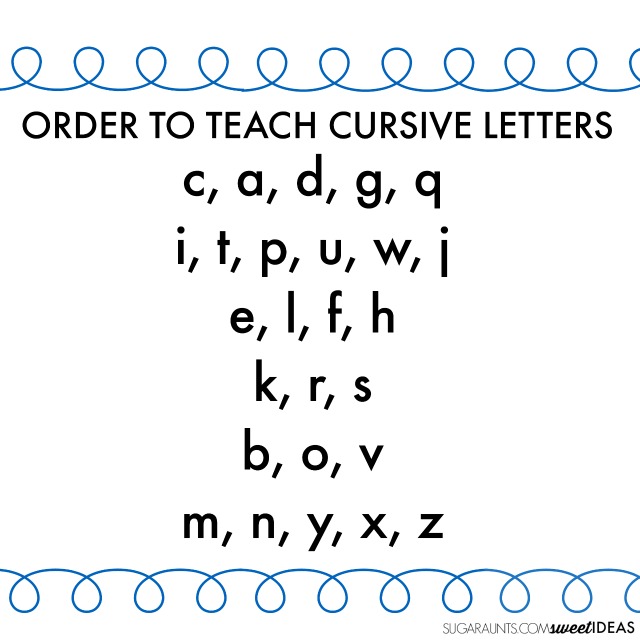
c, a, d, g, q – These letters can be considered “wave letters” because of the beginning stroke.
i, t, p, u, w, j – These letters can be considered the “tree letters” because of the beginning line to swing up. e, l, f, h – These letters can be considered the “loop letters” because of the loop that the pencil makes.
k, r, s
b, o, v – These letters can be considered the “tow truck letters” because of the ending connection.
m, n, y, x, z – These letters can be considered the “bump letters” because of the beginning pencil stroke.
Uppercase cursive letters
Upper case cursive letters should be presented in a specific order as well:
A, C, O, U, V, W, X, Y, Z, P, R, B, H, K, N, M, I, J, E, L, I, J, Q
This letter order uses a combination of research-based strategies and focuses on movement based patterns as well as common letter formations, i.e. the way the letters connect to form words. Read about how to connect cursive letters for specifics.
In general, it’s considered that the baseline connecting letters are taught prior to the middle line connecting letters. This isn’t accurate for the Learning Without Tears program (Handwriting Without Tears cursive letter order) when it comes to letter w which is taught near the beginning, due to it’s direct translation from the printed version of letter w.
This upper case cursive letter order (or cursive capital letters) order teaches upper case letters that are similar to lower case letters first. Always teach lower case cursive letters before upper case letters.
The Handwriting Book breaks down the functional skill of handwriting into developmental areas. These include developmental progression of pre-writing strokes, fine motor skills, gross motor development, sensory considerations, and visual perceptual skills. Each section includes strategies and tips to improve these underlying areas.
Strategies to address letter and number formation and reversals
Ideas for combining handwriting and play
Activities to practice handwriting skills at home
Tips and strategies for the reluctant writer
Tips to improve pencil grip
Tips for sizing, spacing, and alignment with overall improved legibility
A final note on teaching cursive letters
Sometimes, cursive letters are taught as a writing format for children that struggle with the motor plan to form and use legible printed handwriting. This might be the case for several reasons:
The motor plan to form printed letters is choppy and difficult to recall the different pencil strokes for each letter.
Cursive letters use a smoother flow to form letters. The continuous hand movements can be easier for some students because it involves fewer stops and starts compared to print writing.
The challenge of letter reversals and letter confusion that occurs with dysgraphia can mean that cursive writing may be easier to learn and use than printed handwriting. This is because cursive letters connect with continuous pencil strokes, leading to less letter reversals and other common writing errors associated with dysgraphia.
Just like printed handwriting, cursive letters are one form of written expression however, there are differences when it comes to legibility. Perfect formation and pencil strokes are not always necessary!
Cursive Letters Tips
We have many blog posts here on The OT Toolbox that support cursive letter writing. Explore these activities and tools to teach the cursive alphabet.
Colleen Beck, OTR/L has been an occupational therapist since 2000, working in school-based, hand therapy, outpatient peds, EI, and SNF. Colleen created The OT Toolbox to inspire therapists, teachers, and parents with easy and fun tools to help children thrive. Read her story about going from an OT making $3/hour (after paying for kids’ childcare) to a full-time OT resource creator for millions of readers. Want to collaborate? Send an email to contact@theottoolbox.com.
Part of handwriting legibility is the visual motor skills needed for pencil control and one tool in our toolbox are pencil control worksheets. Pencil control in isolation isn’t always addressed, but actually focusing on the refined pencil strokes and controlled movements of the pencil makes a huge difference in overall legibility. In this blog post, you’ll find many pencil control worksheet ideas and even have the ability to access a few of our favorites.
Pencil Control Worksheets
Pencil control worksheets, or printable PDFs that target specific visual motor skills needed to move the pencil with precision and refined movements are tools that support handwriting.
When we use pencil control worksheets, it’s more than just moving the pencil to make marks.
Pencil skills worksheets can target many aspects of writing with a pencil:
Making small lines within a given space
Moving the pencil within a given space on a paper with presence of finger dexterity
Writing a letter on a small space, such as on our code breaker worksheets
Using precise movements in order to re-trace over letters when forming the alphabet correctly (letters like h, m, n, and r have re-trace where the pencil moves over an already formed pencil line).
Using worksheets to target specific skills like practicing letter formation isn’t always ideal. The occupational therapy practitioners may actually sway away from rote handwriting practice.
We’ve all seen it: A child is copying letters on a worksheet and the letters progressively get worse as they go across the page…or the margin creeps in as the child writes down the paper.
That is not to say that all letter formation worksheets are bad! In fact, we LOVE to target specific skills using letter writing practice on printable PDFs.
The OT trick is to facilitate the underlying skills, special themes that make the worksheet fun and engaging, and even using interactive worksheets that support skills in games or play-based learning.
The multisensory aspect is what turns an ordinary writing worksheet into a therapy tool!
All of these reasons are why using pencil control worksheets are great ways to target specific skills leading to handwriting legibility and functional writing skills.
Below, you’ll find ideas to make DIY pencil control worksheets, and then some of our favorite pencil control sheets. You can also grab a printable pencil control worksheets pdf at the very bottom of the page.
DIY Pencil Control Worksheets
The ideas below are some of our favorite ways to create your own DIY pencil control worksheets.
Does your school-aged child have difficulty with line awareness, pencil control, or letter formation? Is your preschooler just learning to control the pencil while making straight lines, the diagonal lines of an “X” or the angled, connecting lines of shapes like a square, rectangle, or triangle? Do you know a child who is learning to control the “wobble” of the pencil while making a circle that connects the start to the finish?
All of these are pencil control skills!
It is easy to make fun worksheets that apply to your child’s needs/age-appropriate level/skills…and interests!
To make your own worksheets, you need just a few items:
plain paper
lined paper
graph paper
marker or highlighter
markers
pencil
stickers
dice
You don’t need to use all of these items…the activities below can be created over the course of several days or weeks. Pick and choose an activity and then go from there!
These are some easy handwriting exercises that can be done at home, or in the classroom. However, going from personal experience, the school-based OT doesn’t always have a ton of supplies on them. Depending on the setting and schedule, you may only have a marker, a pencil, and some paper in your possession. That’s where these DIY pencil and paper worksheets come into play.
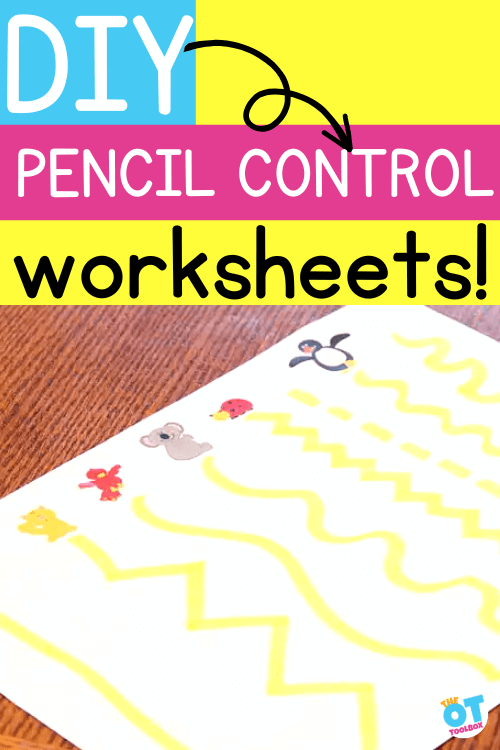
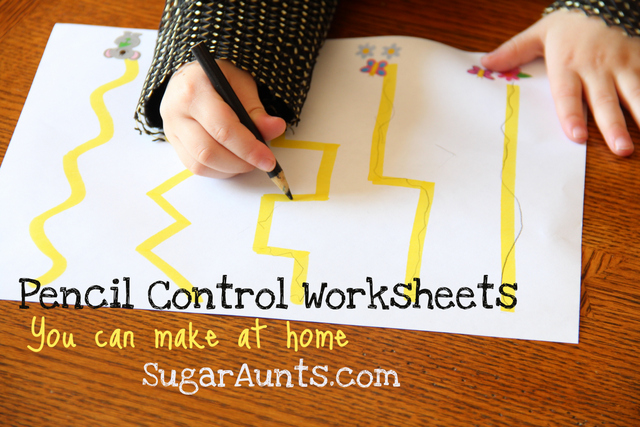
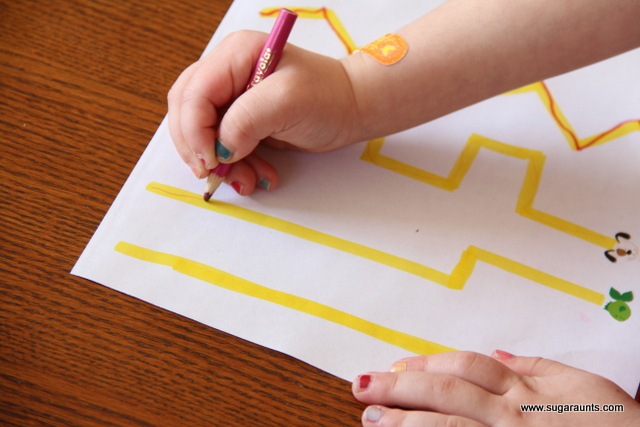
DIY Pencil Control Sheet with Stickers
This worksheet activity is great because it targets pencil skills with a motivation factor. Using fun stickers makes it engaging for the user. Plus, you can factor in the benefits of playing with stickers by asking the child to place the sticker at one end of the lines.
Try to find some stickers that work with your therapy theme of the week or just are fun and motivating for the child’s interests.
Don’t have stickers? It’s not a big deal. Draw a small smiley face, simple car for the child that loves vehicles, or even colors of the rainbow. You can easily factor in so many personal interests to make this activity motivating with a simple drawing.
To make this pencil control activity:
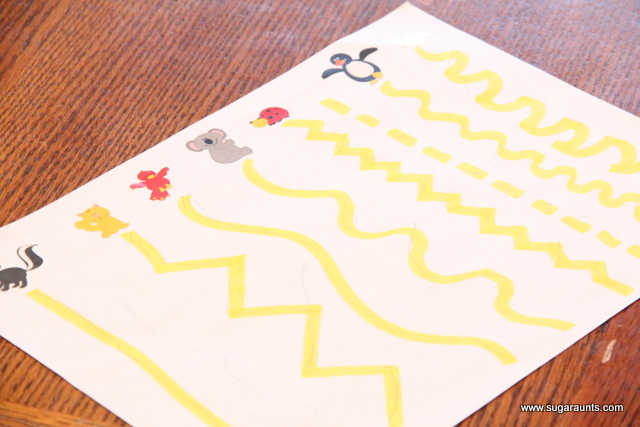
Use a highlighter to make straight, angled, and curvy lines going across the page…or add different twists and turns for your older child to trace along.
Grade the activity with the line width. Use thicker lines for a new writer and the school-aged child can work on very thin lines.
Add a sticker at one end of the line. You can also add another sticker at the other end of the line if you like.
Ask the child to keep the pencil lines inside of the yellow guide. Fun stickers at the end of the lines always help 🙂
Graded Pencil Control Activity
This handwriting activity can be “graded” (adjusted to start out very easy for the child and then changed just slightly to make it more and more challenging). Grading an activity is helpful for the learner because it allows the child to feel success and gain confidence during a task, but also builds success with more difficult levels.
Ideas to grade these pencil worksheets:
Consider orientation: By changing the direction of the lines, you can target different skills.
Lines that start at the top of the page and go down toward the child’s body are easiest. Start there. Consider placing this style of worksheet activity on a slant board or vertical surface for strengthening, support, or upper body positioning.
Consider using all curved lines or all angled lines, depending on the needs of the individual.
((I love Little Guy’s knight costume sleeve in this picture. He rocks the knight costume at lease once a day haha!))
DIY Pencil Control Sheets- Shapes
For the preschool child who is just learning to control the writing utensil, requiring them to write letters or write their name is beyond the scope of their development. We cover this in our resource on what happens when preschoolers are asked to write.
The pre-writing skills preschoolers actually need involve lines, shapes, coloring, and of course, fine motor play! We can target these skills using a pencil control sheet on shapes.
Think of it this way: To make a letter “A”, a child needs to create diagonal lines, which are two separate pencil strokes. The pencil needs to be placed at the correct point as the second line is created. The diagonal lines are further down the line-up, developmentally. Then, the middle line needs to connect two diagonal lines. For the child with an “A” in their name, asking them to make these marks before typical developmentally ready, you may end up with curved lines, shaky pencil marks, and misaligned connecting lines.
Practicing these skills in preschool over and over again leads to a motor plan for a poor letter formation.
That’s where pre-writing lines pencil control tasks are key.
We can foster the line markings of letters by making shapes and lines that ARE developmentally appropriate.
Pre-writing skills that can be targeted with pencil control shapes include:
Straight lines
Starting the pencil at a certain point
Stopping the pencil at a certain point
Diagonal lines of an “X”
The angled, connecting lines of shapes like a square, rectangle, or triangle (making a sharp corner)
Smooth pencil strokes to create a curved line of a circle
Connecting shapes completely to close the shape
Hand strength and endurance to color in the shapes
Lifting the pencil and placing it on a specific point (Like adding a triangle to the top of a square to create a house, which is a skill needed to form some letters like adding the middle line to an “A”)
This DIY worksheet is similar to the one described above. Simply draw shapes using a marker. Create thicker or thinner lines. Then ask the child to trace over the lines.
You can then ask the child to color in the shapes using a crayon. We explained the skills behind this task in our pencil control activity which used colored pencils to fill in circles.
DIY Pencil Control WORKSHEET with Line Awareness
The next worksheet idea focuses on spatial awareness skills in handwriting. This is also a pencil control technique.
Use a blank piece of paper and using a marker, draw a shape such as a square.
Draw a square around it.
Take turns with your child to make larger and larger shapes.
This activity is an easy way to work on pencil control skills using pre-writing shapes, but also focuses on the sharp angle of lines as they turn a corner.
When the child makes the shape around your shape, they can work on pencil control for evenly spaced pencil strokes.
It’s a lot like doodling you did in your notebooks or while talking on the phone, right?
Taking turns with your little handwriting student helps them to see an accurate shape right next to the lines that they are drawing…with sharp edges and straight lines.
DIce Pencil Control Worksheet
Big Sister LOVED doing this one. She filled out the whole sheet and had so much fun! She would roll the dice, count the dots, and draw the dots (in the correct arrangement) in the squares on the page.
To create this DIY worksheet, you’ll need:
Blank paper
Marker
Dice
Pencil, crayon, or marker
You can work on so many skills with this activity. Counting, Copying, and Drawing with accurate spacing all work on her visual perceptual skills and spatial awareness.
Set this activity up by:
Draw lines to create a large grid on the paper.
Roll a dice. We used a large dice but a regular game dice would work too.
Count the dots on the dice using the point of the pencil. Touch each dot. (A GREAT activity for targeting graded precision skills with the pencil)
Then draw the dots on the paper in one of the spaces. Draw the dots exactly as they are on the dice.
These skills are essential for forming letters on lines, placing letters close enough to others in a word, and when copying lists of words. It’s a great beginner activity for near point copying skills.
Make early handwriting fun and your preschooler will have success…and love it!
Printable Pencil Control Worksheets
Printable pencil control PDFs are an easy way to work on skills in therapy. You can print off a handful of the worksheets for your therapy caseload and use them in a variety of ways to target different OT goals and by grading the activities.
In The OT Toolbox Membership Club, we have over 130 printable pencil control worksheets (along with a thousand+ other skill-building activities and PDFs!). Membership Club members can log in and then head to our Pencil Control Skill to access them all.
Some of our favorites include:
Pencil control mazes
Dot games
Simple line printables
Eraser skill PDFs
Pencil control roads
Mazes
Connect the dot PDFs
Pre-writing pencil mazes
Pencil shading worksheets
Pencil line drawing activities like adding textures, dot features, or symmetry activities
Word search printables
Connect the matching items
So many more!
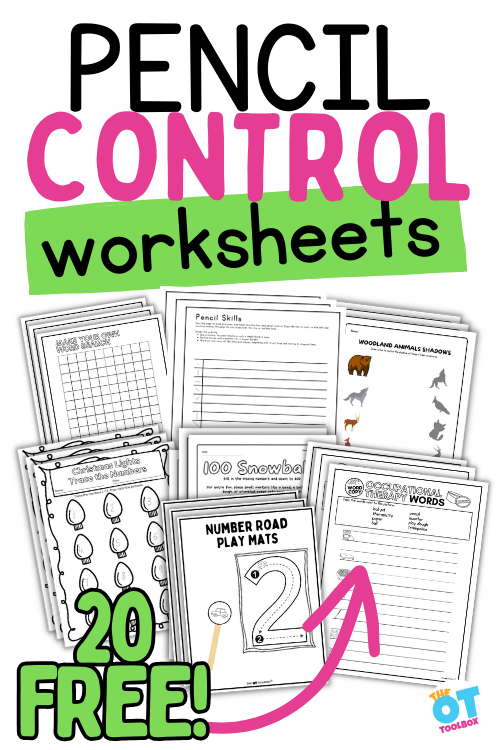
20 Free Pencil Control Worksheets
To get some printable pencil control worksheets, head to these blog posts. Each one addresses various aspects of handwriting skills, but in them, you can get a free printable pencil control PDF.
To get these printable worksheets, simply go to the bottom of the blog post and enter your email address into the form. (Each printable is also found in Level 1 of our membership, where are all “freebies” can be found. Level 2 members also get this benefit as well).
Pencil Control Exercise– Copy pre-writing lines and shapes in a given space, between writing lines
Cotton Swab Art PDF– Break a cotton swab in half and use it to dot the lines
Fine Motor Writing Sheets– Place play dough or small objects in the dots…or mark each dot with an X to fill the picture. Then write on the lines
For more resources, check out our library of letter formation worksheets. These printables are free and can be used to target a variety of skills.
Get all of the items listed above when you join The OT Toolbox Member’s Club! Free printables are available in our Level 1 membership and the freebies PLUS 1500+ more printable tools are available in our Level 2 membership!
Join The OT Toolbox Member’s Club today!
Colleen Beck, OTR/L has been an occupational therapist since 2000, working in school-based, hand therapy, outpatient peds, EI, and SNF. Colleen created The OT Toolbox to inspire therapists, teachers, and parents with easy and fun tools to help children thrive. Read her story about going from an OT making $3/hour (after paying for kids’ childcare) to a full-time OT resource creator for millions of readers. Want to collaborate? Send an email to contact@theottoolbox.com.
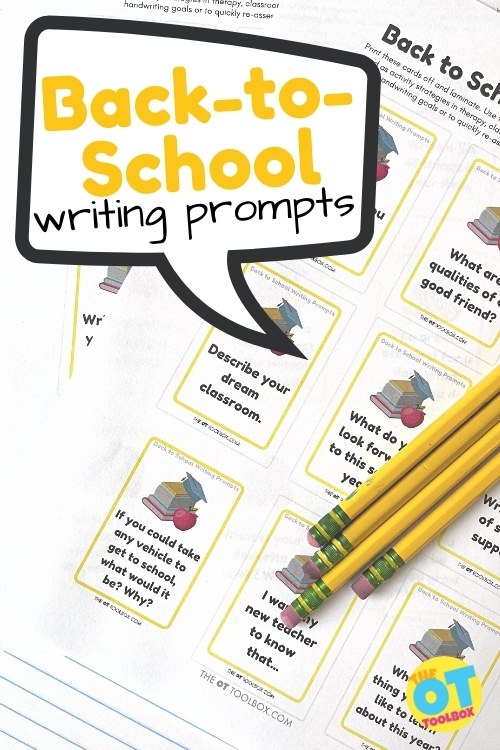
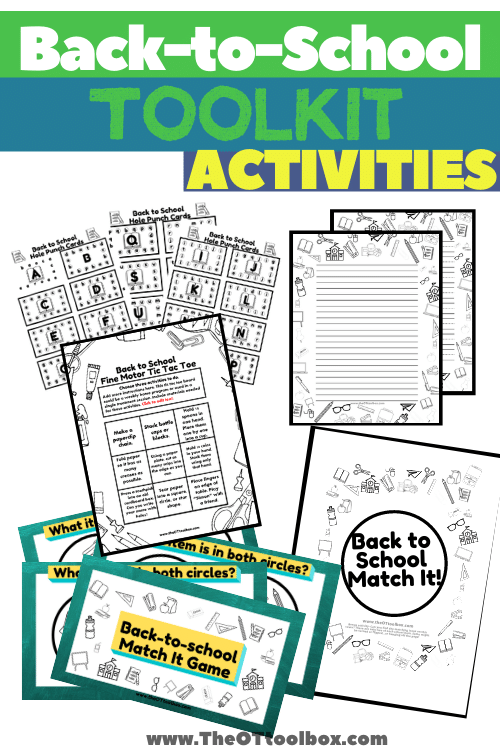
Looking for first day of school writing prompts? The free back to school writing prompts in this blog post is a great addition to your back-to-school occupational therapy ideas. Grab the printables below and let’s head into the new school year with tools to support students!
First Day of School Writing Prompts
It’s that time of year! Getting back into the classroom means switching from summer fun mode to handwriting, reading, writing, and learning. These Back to School Writing Prompts are a fun way to get to know new students and get those pencils moving.
Handwriting can be an overwhelming topic to dive into at the start of the school year, so let’s make it easy and low-stress. Print off these free back to school writing ideas and start the school year off right (or write)!
Back to School Writing Prompts
Sometimes you need some back to school activities and specifically, ideas for back to school writing that are “no brainer” for the student. In other words, kids can struggle with getting back into routines of the classroom. They might not have picked up a pencil all summer long, in some cases! That’s where these back to school writing activities come into play.
There are several ways you can use these free writing prompts with kids this school year:
First day of school writing Prompts
The first day of school is all about learning the classroom, setting up expectations, getting to know the building, the schedule, and getting to know the teacher and peers. But what about easing into handwriting and writing tasks?
Setting up a first day of school writing activity that is low-key, fun, and all about the student is the way to go. Use these first day of school writing prompts to get kids back into the routine of a daily writing prompt.
Continuing with the thought that returning to school after a summer break means a few days of getting used to classroom rules and schedules, you can use these writing cards for the first week or more.
Print off the cards and randomly select a card each day of the first week of school. This is a great way to get to know students and incorporate handwriting into each day of the first week of school.
Give the student a choice
Handwriting can be like pulling teeth for some kids. It’s just hard. Whether their hand hurts when they hold the pencil, or handwriting is hard to read, it can be a real challenge for some kids. Offering a choice can give the student some say in the matter. Allow them to select a card randomly and then they can write out their response to the writing prompt. Or, give them a choice between two writing prompts.
Play a writing game
Use these printable writing prompts in a game! Print off the writing prompt cards and then allow the students to pick one card. They can use that card as their back to school writing topic. It’s a great way to get to know the students in the classroom or on your therapy caseload while getting an idea of their current handwriting levels and abilities.
So, how will you use these back to school writing prompts?
To grab your copy of this free resource, just enter your email address into the form below. Print them off and get ready to start the school year off on the right foot!
More Back to School Writing ideas
Add these writing prompt cards to your back-to-school line up of activities:
Colleen Beck, OTR/L has been an occupational therapist since 2000, working in school-based, hand therapy, outpatient peds, EI, and SNF. Colleen created The OT Toolbox to inspire therapists, teachers, and parents with easy and fun tools to help children thrive. Read her story about going from an OT making $3/hour (after paying for kids’ childcare) to a full-time OT resource creator for millions of readers. Want to collaborate? Send an email to contact@theottoolbox.com.
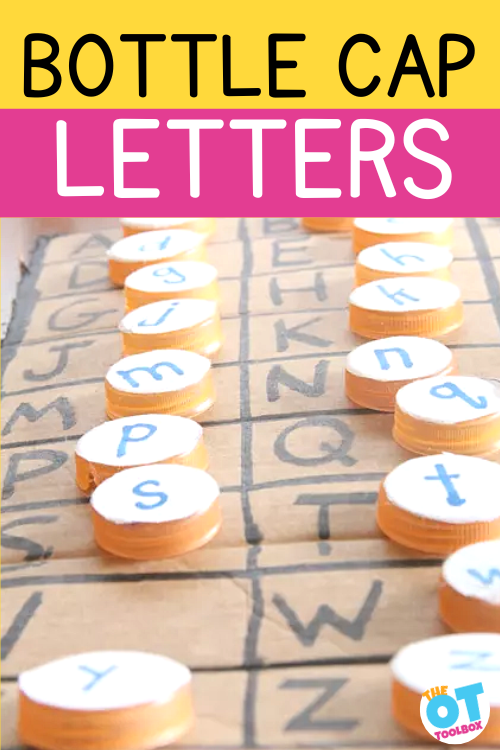
In this older blog post, we shared how to make your own bottle cap letters for multisensory learning and fine motor play. Creating DIY instructional materials can be both educational and fun. One creative idea is to make bottle cap alphabet letters.
Bottle Cap Letters
By collecting various bottle caps and adding individual letters to them, you can create a unique set of bottle cap letters. This homemade alphabet set can be used for matching big and small letters, helping children learn the alphabet in an engaging way. Kids can enjoy the tactile experience of sorting and matching the big and small bottle cap letters, making it a hands-on learning activity that enhances their letter recognition skills!
This Letter Learning game was something I made for Big Sister a couple of years ago. We have played with the letter bottle caps so many times and in a ton of ways.
How to make bottle cap letters
You’ll need just a few materials:
26 bottle caps (one for each letter of the alphabet)
Label paper
Marker
Cardboard for a play mat
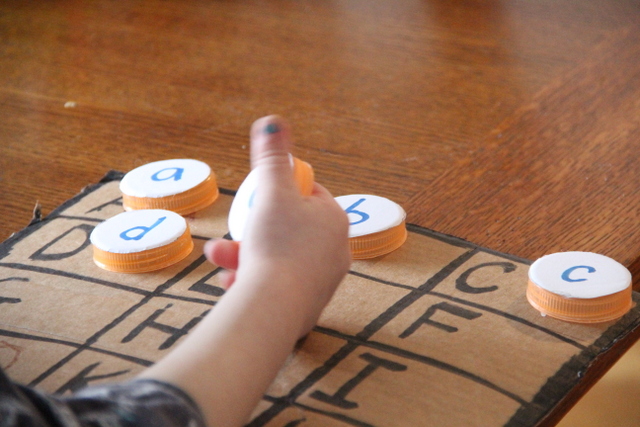
The cardboard has upper case letters and the bottle caps are used to match the letters.
It doesn’t matter what size bottle caps you use because you cut the label paper to fit the caps. If you use a lot of milk in your home, or have access to a bunch of bottle caps in the same size, use those.
In our case, we had a case or two of Gatorade bottles and used those bottle caps to make our letters.
I used a sheet of label paper to make the lower case letters.
Trace a bunch of circles in the correct size.
Cut out the circles.
Write the letters.
Stick them to the bottle caps. Easy!
How to use alphabet bottle caps
Our homemade bottle cap letters are a great DIY instructional material to use in learning and play.
We’ve also played with the bottle caps in play dough,
Use them to spell names and words.
Move the bottle cap alphabet to label objects with it’s starting letter.
Work on learning which direction the “p”, “b”, and “d” should go. This is a great hands-on activity to target letter reversals!
They are so great to manipulate and play with in a sensory bin filled with corn, too.
Or, pair the letter bottle caps with our alphabet exercises to target fine motor and gross motor skills.
How else can we play with these bottle caps??
Working on fine motor skills, visual perception, visual motor skills, sensory tolerance, handwriting, or scissor skills? Our Fine Motor Kits cover all of these areas and more.
Check out the seasonal Fine Motor Kits that kids love:
Colleen Beck, OTR/L has been an occupational therapist since 2000, working in school-based, hand therapy, outpatient peds, EI, and SNF. Colleen created The OT Toolbox to inspire therapists, teachers, and parents with easy and fun tools to help children thrive. Read her story about going from an OT making $3/hour (after paying for kids’ childcare) to a full-time OT resource creator for millions of readers. Want to collaborate? Send an email to contact@theottoolbox.com.
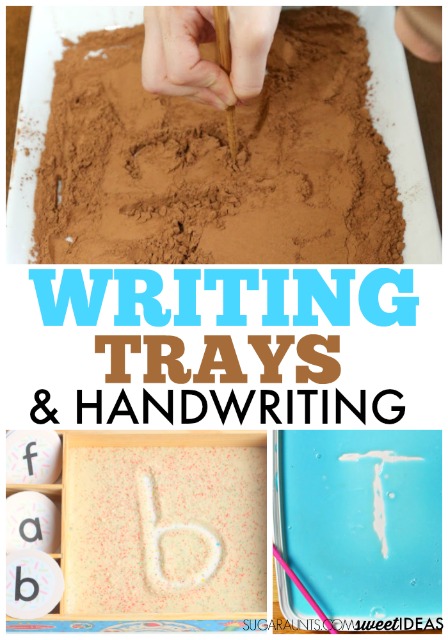
Writing trays are a fantastic way to help kids work on handwriting, letter formation, and pre-writing skills. There are so many benefits to a sand tray (or other sensory writing materials) in helping with letter formation and handwriting. There is a reason that writing trays are a popular way to encourage fine motor skills and an introduction to handwriting; They use a tactile sensory strategy to encourage movement in learning in a multi-sensory way. Writing Trays make letter formation fun and meaningful in a play-based manner.
Amazon affiliate links are included in this blog post. As an Amazon Influencer, I earn from qualifying purchases.
What is a writing tray?
I’ve used writing trays in my occupational therapy interventions and with my own kids for years. Writing trays are such a powerful tool to add a multi-sensory component and moveemnt to learning to write.
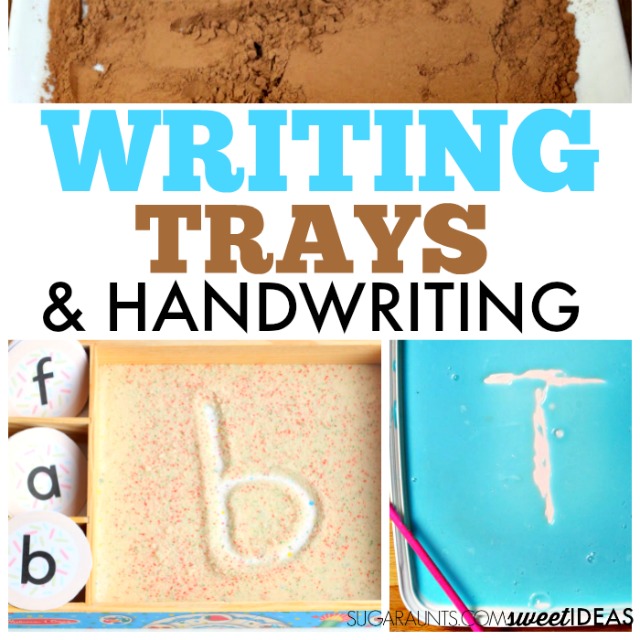
Writing trays are a dry or wet sensory material in a low tray or bin type of container. Children can use their finger or a tool such as a pencil, paint brush, or other item to draw, write letters, or form numbers into the sensory material.
Writing Trays are a creative way to help kids learn to write letters, numbers, shapes, and pre-writing strokes. There are a ton of different ways that writing trays can be set up and used in letter formation. Essentially, a writing tray uses a low container (or TRAY) and a medium that can be moved and shifted for writing.
Sensory writing trays can contain sensory fillers of any type. If you are able to move the material in a way that letters can be drawn in the tray, then the sensory writing tray is a success. With a sensory writing tray, children can write letters independently or copy letters from a visual letter card.
You can find them used in schools, clinics, preschools, early learning centers, and homeschool dinging rooms.
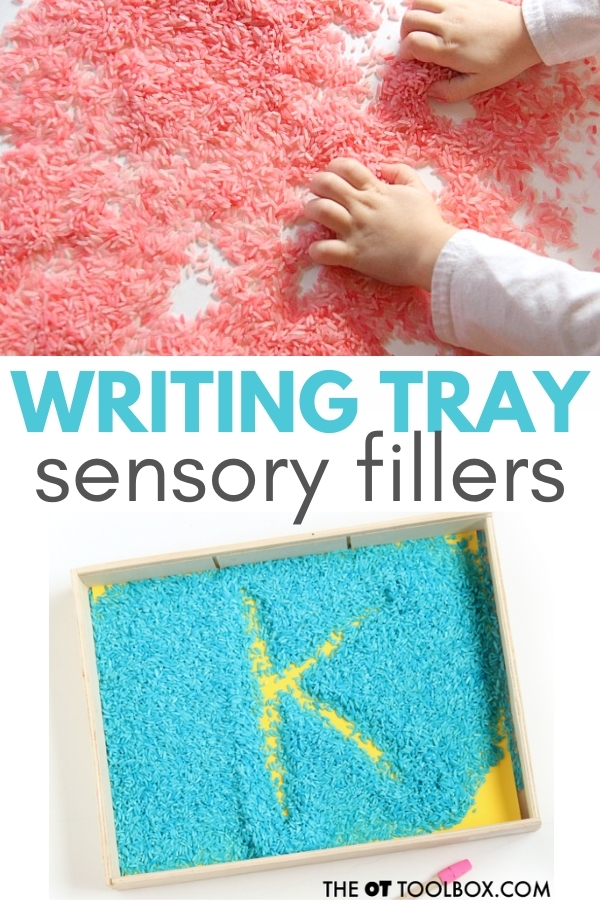
Writing Trays are filled with a filler that us manipulated and shifted so that letters or writing lines are visible. Some ideas for filling a writing tray include the sensory materials listed below.
Sand (affiliate link) Colored Sand Rice Dyed Rice Salt Dyed Rice Play Dough (affiliate link) Other Doughs Sugar Flour Cornmeal Slime (Check out the fun we had with slime in a writing tray!) Spices (affiliate link) Crushed Chalk (affiliate link)
While sometimes, a child can use their finger to form the lines in their writing tray, a writing tool is typically recommended. (More on that below.)
Sensory Writing Tray Benefits
Kids can use writing trays to practice letter formation, or pencil control and stroke sequence in writing letters.
Typically, they will be provided with a visual cue or cue card for copying the letters/numbers/shapes.
Other times, kids can form the letter/number/shape independently when prompted to make a specific letter. This is a great way to work on visual memory and independent letter formation.
Be sure to verbally prompt children to form letters or build letters with correct stroke sequence. This is essential for carryover of accuracy with letter formation in handwriting.
Otherwise, the child is simply playing in the sensory tray and not effectively using the writing tray as a tool for improved handwriting.
Encouraging the child who is learning pre-writing strokes and beginning letter formation can use a writing tray as a base for forming letters independently. Try using visual and verbal cues to promote correct letter construction.
A few more must-dos when using a writing tray for addressing letter formation:
Make sure letters are not formed in parts. In other words, don’t allow kids to make a circle and then a line to form an “a”.
Make sure letters are formed from top to bottom.
Realize that the motor plan to form letters with your finger is different than the motor plan to form letters with a pencil or other pencil-like writing tool.
The nice thing about writing trays is that they are very versatile. Students of all ages can use writing trays to work on different levels of handwriting. Some ways to work on handwriting include:
A writing tray can be an effective tool in boosting fine motor skills. Kids can use their finger to form lines and letters while strengthening finger isolation and separation of the two sides of the hand, including an opportunity for the ulnar side fingers to tuck into the palm for a more effective pencil grasp when writing.
Children can also use a tool to form letters in a writing tray. This can be an opportunity to develop pencil grasp.
However. There are a few items that should be mentioned about using a writing tray to address pencil grasp and appropriate motor plan for letter formation.
Writing Trays are a common tool. But if you just place a writing tray in front of a child, you will likely see an inefficient writing activity. You will probably see most kids forming letters with an awkward grasp on the writing tool, a flexed and deviated wrist, an abducted shoulder, and generally ineffective positioning.
Positioning absolutely carries over to letter formation and handwriting.
A writing tray can be used to address pencil grasp and handwriting needs. However, it is essential to use the tray in a proper manner. There are a few ways to do this:
Place the writing tray on a slight slant. Try using a DIY slant board.
Use a low edged tray.
Use verbal, physical, and visual cues for appropriate positioning.
Position the writing tool in your child’s hand with an appropriate tripod or modified tripod grasp.
Show the child how to hold the tool at the end of the tool as if they were holding a pencil.
Once you’ve got your writing tray set up and positioning taken care of, it’s on to the fun stuff…making a writing tray!
How to make a Writing Tray
Making a writing tray to gain benefits of teaching sensory handwriting is easy. You can use materials found around the home.
The options are limitless when it comes to writing tray combinations! You can create a writing tray in any theme or to meet any need. You’ll need just a few items: a container, a filler, a tool, and letter cards.
Writing Tray Ideas
First, you’ll need a low tray, basket, bin, or other container. We’ve used a variety of containers in our sensory writing trays. You’ll want a container that will hold the sensory writing material within its edges.
In some cases, you can even scatter the sensory material on a flat surface like a table or a plastic table cloth on the floor. For example, we used dyed rice right on the kiddie picnic table for a pre-writing and hand strengthening activity.
Kids will be using a tool or their hands to write letters and the sensory material can scatter. Some specific ideas include:
Kitchen baking trays (jelly roll pan or cookie sheet with edges)
Food storage containers
Melissa and Doug wooden puzzle boxes
Cardboard boxes cut low on the sides
9×11 cake pan
Shirt box
Tray
Low basket
Writing Tray Tools
Next, you’ll need a tool to use to write the letters. This can be items found in the home as well. Some writing tray tools include:
Next, an important part of a writing tray is the letter model. As mentioned above, writing trays are great for copying pre-writing lines, shapes, letters, numbers, and words.
Cards can be used as a visual model for forming letters or words. Some cards include direction arrows. Others might include a sight word or spelling word for the child to copy. These cards can be positioned in different positions to address different needs.
Position the letter cards right in the tray for near-point copying.
Position the writing tray cards in a vertical position near the writing tray to challenge vision shift.
Hang the writing cards on a wall for far point copying to work on visual shift, visual attention, visual memory, and copying from a distance.
Writing Tray Fillers
You’ll also need a sensory material to act as a filler. This is the material that the child will actually “write” in. When we say “write”, they are using the tool to form letters as the sensory filler moves in the tray. They will not actually write a letter with a pencil or other marking device. Sensory filler material can be as creative as you let it. Some writing tray fillers include these materials:
Click each link for ideas on how to set up these creative writing trays.
As you can see, the ideas are limitless when it comes to sensory handwriting! Use a theme or materials that meet the needs of your child or client and are motivating and fun!
Colleen Beck, OTR/L has been an occupational therapist since 2000, working in school-based, hand therapy, outpatient peds, EI, and SNF. Colleen created The OT Toolbox to inspire therapists, teachers, and parents with easy and fun tools to help children thrive. Read her story about going from an OT making $3/hour (after paying for kids’ childcare) to a full-time OT resource creator for millions of readers. Want to collaborate? Send an email to contact@theottoolbox.com.
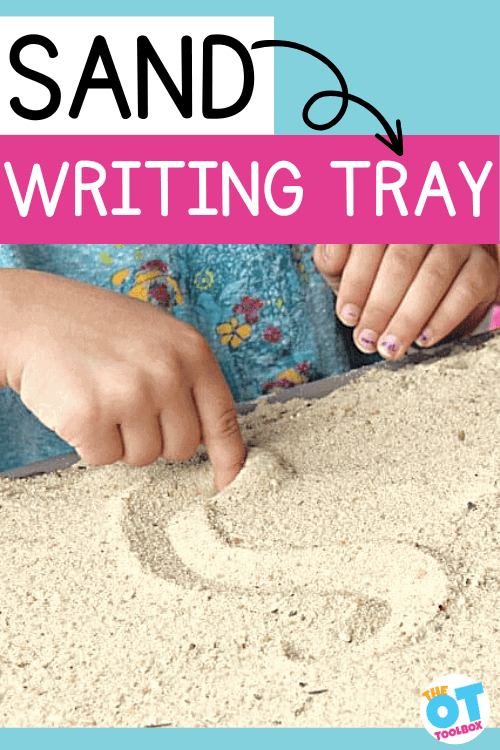
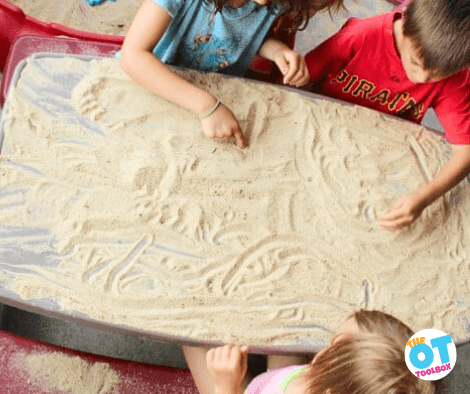
Sand Writing Tray
One very easy way to create a sand writing tray is to use a child’s picnic table placed either outside in a sandbox or over a tarp (or outdoor space where it’s ok that sand goes into the ground and lawn).
We loved using our kid’s picnic table in this way to make a sand writing tray.
For this sand writing tray, we made it super simple and just dumped a thin layer of sand onto our (Amazon link) Little Tykes picnic table. Then, I invited the kids to all sit down and draw in the sand using their fingertips. This is a great exercise in finger isolation.
Practicing letters in a sensory surface like writing and drawing in sand on a picnic table surface is a motivating and fun activity for kids because it’s not something they typically do.
Kids learn new skills well with a multisensory learning experience and a sand writing tray is a great, inexpensive way to do just that.
To encourage vocabulary and verbal expression, tell stories on the table surface and ask questions that extend the story further. Then, while practicing lines and drawing shapes and figures, gently smooth the sand with the palm of your hand and start over again!
Preschoolers can practice pre-handwriting lines, while older kids can form letters and numbers in the sand. They can also copy and trace letters to improve their penmanship skills.
This prewriting strokes activity targets the motor plan needed for forming prewriting lines. In this blog post, you’ll find a creative way to target pre-writing strokes using a hands-on activity. Creative ways to practice handwriting can be the trick for helping kids write with better legibility. But what if you are starting at the very beginning? Preschool kids who are working on pre-writing lines can use creative techniques, too! Be sure to check out this resource on pre-writing skills that need to be developed before handwriting and using a pencil is possible.
Amazon affiliate links are included in this blog post. As an Amazon Influencer, I earn from qualifying purchases.
Pre-Writing Strokes
We have covered pre-writing strokes in detail in our blog posts covering this developmental progression, so adding this particular activity idea to your toolbox just adds an additional way to work on the pre-writing strokes that young children need prior to writing skills are established.
This pre-writing lines activity is a winner because it’s a novel way to target strength and motor planning without using worksheets.
Copying the straight lines, crosses, and circles over and over again can become a little boring for preschoolers. Try this creative way to practice pre-writing lines while working on fine motor skills with preschoolers.
We cover pre-writing lines in more detail here in this pre writing strokes PDF.
Pre-writing strokes include:
Horizontal line
Vertical line
Circle
Cross
Square
Diagonal Lines
“X” Shape
Triangle
Pre-writing lines are an important step for preschool-aged kids and for developing a basis for proper letter formation. Establishing pre-writing lines allow kids to strengthen hand muscles, promote pencil strokes needed for letters, and improve pencil control.
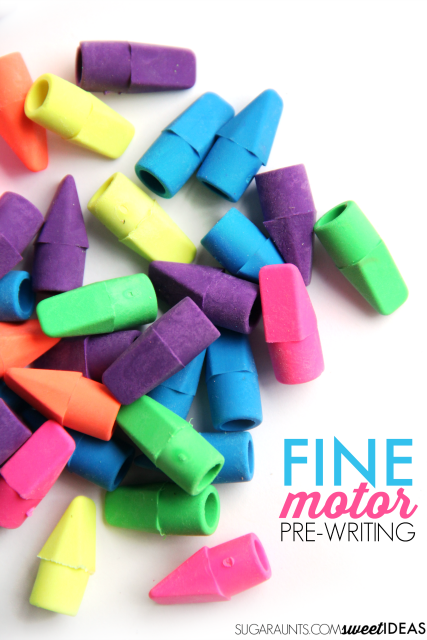
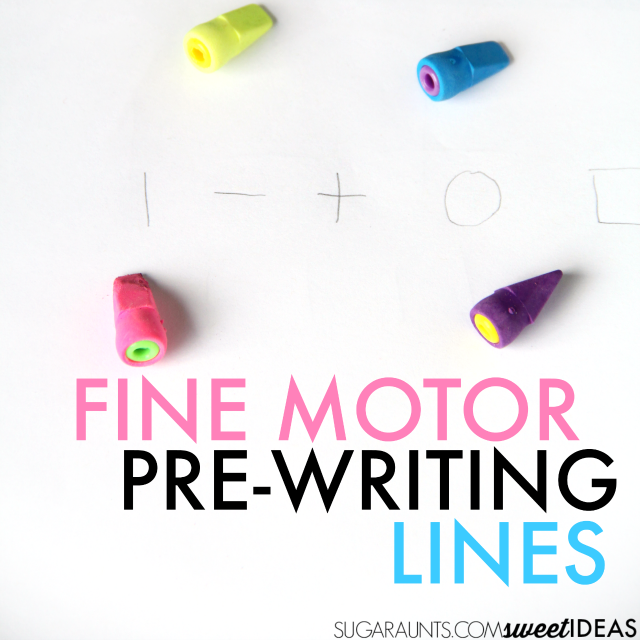
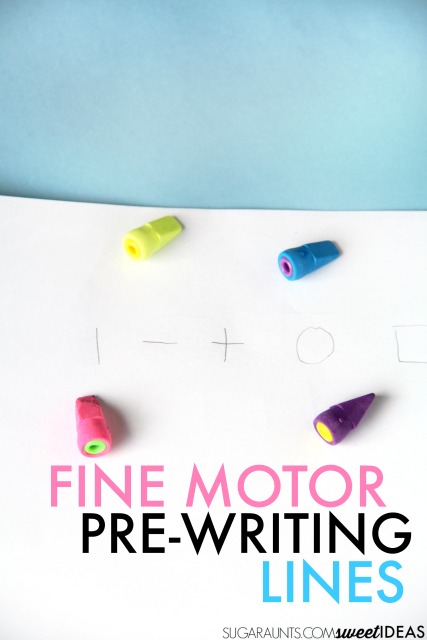
This pre-writing lines fine motor activity can help kids improve hand strength while promoting a tripod grasp. I pulled out our stash of pencil eraser toppers (affiliate link) and a handful of pony beads (affiliate link).
1. Kids can start the activity by pushing the pony beads (affiliate link) into the eraser toppers (affiliate link). This is a strengthening activity in itself, allowing children to strengthen their intrinsic muscles which help with arch development.
This is important for proper pencil grasp and for smaller controlled pencil motions when writing letters.
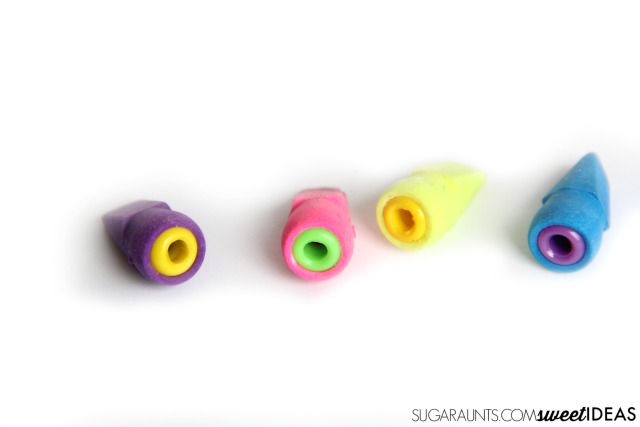
2. You will need to add the pony beads (affiliate link) to the erasers to provide a stable eraser (affiliate link) when pinching. Without the pony beads (affiliate link), kids will pinch the eraser too much and it will squash closed.
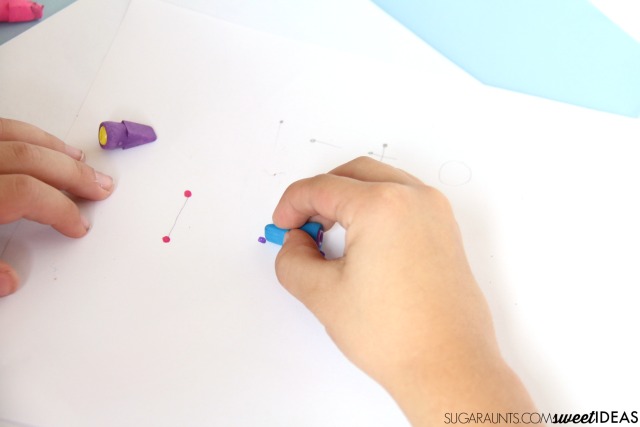
3. Next, with a pencil, draw pre-writing strokes on a piece of paper. For younger children, you can form the lines more lightly. For older kids, or those who need to address strengthening issues, draw the lines a little darker.
4. Use a marker to draw a starting dot and ending dot. Form the pencil line between the dots. The dots provide a starting and ending point for the child to trace the pencil line.
5. While the child is erasing the pre-writing lines, be sure to provide verbal and visual cues to ensure proper direction formation.
Looking for more ways to address handwriting needs? Try these:
Want to know more about The Handwriting Book? Click on the image above to find out how to address every underlying area related to handwriting skills. Click here to BUY NOW.
Today, we have another OT PDF, this one is an occupational therapy equipment list. We created this printable list of OT equipment as a writing exercise. It’s another free download that you’ll want to grab for OT month! For occupational therapy month, we’ve been sharing free OT-themed tools and this occupational therapy equipment list handwriting pages is today’s freebie! Pediatric occupational therapists have some cool tools, so why not use those OT equipment items in handwriting practice? It’s a great way to promote the profession during OT month and all year long!
OT practitioners work with clients on myriad aspects of daily life tasks. Because an OT professional can support their clients in essentially any aspect of living, the equipment used is vast and can be unique to each individual. However, the OT or OTA has a commonly used list of occupational therapy equipment that is found in almost every OT clinic or therapy bag. In today’s blog post, you’ll find an occupational therapy equipment list PDF which providers can print off to use as a handwriting exercise with clients and students. Put those OT items students use each therapy session to greater use!
Amazon affiliate links are included in this blog post. As an Amazon Influencer, I earn from qualifying purchases.
Occupational Therapy Equipment List
Occupational therapy (OT) helps people become more independent. Whether it is babies, toddlers, students, people who are disabled or have had an accident, or those being rehabilitated from surgery, OT’s play a vital role.
The cool thing is that OT equipment can literally be anything that helps people achieve functional goals, in any aspect of life!
OT equipment items could be the toys, tools, and games that help to develop skills:
This list of OT items are just the beginning of our arsenal of tools!
When it comes to school-based occupational therapy and outpatient occupational therapy equipment, there can be differences based on the educational modal vs. the medical modal of therapy intervention.
Having the right equipment and tools is essential for facilitating the development and progress of students. Here’s a list of commonly used occupational therapy equipment for school-based OT:
Fine Motor Therapy Tools:
Pencil grips or adaptive writing tools for improved grip and control.
Precision toys
Tweezers or tongs and small objects to manipulate
Coins and slotted containers
Scissors with spring-loaded handles or loop scissors to assist with cutting skills.
Play dough or thera-putty
Paper for coloring drawing, cutting and tearing
Manipulative toys like pegboards, lacing cards, and building blocks to enhance fine motor coordination
Sensory Integration/Sensory Processing Tools:
Sensory balls or therapy putty for tactile stimulation and hand strengthening.
Sensory play materials like sensory bins, shaving cream, writing tray materials, etc.
Weighted blankets or vests to provide calming input and promote self-regulation.
Therapeutic swings or therapy bands for vestibular and proprioceptive input.
Ball pit
Fidget toys
Tunnels
Floor markers, masking tape for obstacle courses
Deep breathing exercises
Seating and Positioning Aids:
Adaptive seating options like wobble cushions, therapy balls, or stability discs to improve posture and core stability.
Adjustable-height desks or tables to accommodate different student needs.
Lap trays or angled writing boards to provide a stable surface for writing and activities.
Cognitive Tools:
Visual timers or schedules to assist with time management and organization skills.
Memory games, puzzles, or matching activities to enhance cognitive skills
Cooking activities and materials
Games
Visual schedules
Checklists
Scheduling tools and planners
Visual Processing Tools:
Visual supports such as visual schedules, picture cards, or visual cueing systems for task completion and transition support.
Mazes
Puzzles
I Spy
Word search activities
Gross Motor Equipment:
Balance beams
therapy balls or therapy mats for improving balance and coordination
Scooters, tricycles, or adaptive bikes
Cones or targets for obstacle courses
Mini trampoline
Masking tape for obstacle courses
Hula hoops
Bean bags for gross motor games
Adaptive Tools for Self-Care:
Adaptive utensils, plates, or cups for promoting independence in eating and drinking.
Dressing aids such as buttonhooks, zipper pulls, or elastic shoelaces for developing self-care skills.
Adaptive equipment for toileting, including raised toilet seats or step stools.
Assistive Technology:
Alternative keyboards, computer mice, or speech-to-text software for students with fine motor or writing difficulties.
OT apps
Visual or auditory aids, such as timers or reminders, on tablets or smartphones to support organization and time management.
While these look like toys (and in some cases are), they are often valuable tools to build independence, strength, focus, and help bridge the gap between functional and chronological age.
Use this word copying worksheet to talk about what each of these tools are, while building some great skills.
We serve people from birth to the end of life. Did you know that April is OT Month? A month-long celebration to advocate for the work we do. The OT Toolbox will be offering several valuable activities to share with your learners to educate them about our role.
Occupational Therapy Equipment List Handwriting Worksheets
Today’s freebies are occupational therapy tools handwriting worksheets.
These occupational therapy equipment handwriting worksheets PDF highlight just a handful of the tools we use to help learners grow.
The occupational therapy tools, handwriting activity is presented with two sets of lines, to use with different levels of learners. Each picture is presented in simple black and white to encourage coloring as well as copying the words.
How can I modify this task to work with all groups of learners?
Lowest level learners can cut and paste the words into the correct rows
Middle level learners can copy each word into the lines
Higher level learners can write a sentence using the key words or write how these items can be used in therapy
Take away the word bank for higher level learners to sound out the words, or dictate the spelling aloud for a higher level challenge
Make this occupational therapy, copy the word sheet part of a larger lesson plan including gross motor, sensory, social, executive function, or other fine motor skills
Print in black and white or color for different levels of difficulty
Cut the shapes and make a matching activity instead of using a writing tool to copy the words
Talk about the equipment, describe their characteristics, and give context clues to help your learner understand why these tools are helpful
Enlarging the font may be necessary to beginning handwriting students who need bigger space to write.
Project this page onto a smart board for students to come to the board and write in big letters.
More or less prompting may be needed to grade the activity to make it easier or harder.
More advanced learners can work on social skills by talking to the group about these therapy tools
Write a report about occupational therapy, types of equipment, the history of OT, different disabilities, or how the equipment is used
Turn it into a gross motor task, sensory activity, following directions, or combination of all of these
Work in pairs or in a small group to address problem solving, turn taking, and sharing information with others
Talk to young learners about the role of occupational therapy
It is difficult enough to talk to adults about what occupational therapists do. Now try describing this to a group of first graders! If you describe it as playing on swings, trampolines, riding scooters, and getting fun fidgets, you will have everyone in the school trying to figure out a way to sign up for OT!
Instead talk about the kinds of goals we address, and how we help other students to be more independent using the tools described on the occupational therapy tools, handwriting worksheet.
Start the conversation to promote the OT Profession
The conversation about what occupational therapists do might sound like this:
OTs might help a student who can not open all their lunch containers by themselves
If a student can not use the bathroom independently, put on their coat, wash hands, or eat their lunch with utensils, they might need occupational therapy
Not everyone is able to write their letters, cut, and color like the rest of the class. OTs work on helping students to improve these skills so they can keep up with the class
Some students have difficulty making friends, playing with other people, following directions, sharing, taking turns, or standing in line. Some of these students might need occupational therapy to help them with these skills
Have you noticed some students get in trouble at school? They don’t finish their work, their stuff is a mess, they don’t listen to the teacher very well, and seem to make a lot of mistakes? These are not bad students, they may need some help to get better. There is a whole team to help students like these, OTs are one of them.
How do you think some of the items on the occupational therapy tools handwriting worksheet help students?
The month of April is specially dedicated to sharing our knowledge with other people. Take a moment to give yourself a pat on the back while you are at it! Keep an eye out for several posts this month dedicated to advocating for the OT profession.
Free OT Equipment Worksheets
Grab these OT equipment list handwriting worksheets and get started to open conversations about what we do as occupational therapists! AND work on the functional task of handwriting skills during your conversations.
Want to add this resource to your therapy toolbox so you can help kids thrive? Enter your email into the form below to access this printable tool.
This resource is just one of the many tools available in The OT Toolbox Member’s Club. Each month, members get instant access to downloadable activities, handouts, worksheets, and printable tools to support development. Members can log into their dashboard and access all of our free downloads in one place. Plus, you’ll find exclusive materials and premium level materials.
Level 1 members gain instant access to all of the downloads available on the site, without enter your email each time PLUS exclusive new resources each month.
Level 2 members get access to all of our downloads, exclusive new resources each month, PLUS additional, premium content each month: therapy kits, screening tools, games, therapy packets, and much more. AND, level 2 members get ad-free content across the entire OT Toolbox website.
Don’t miss the other OT month freebies! This month the OT Toolbox is highlighting occupational therapy month by providing insight into what occupational therapists do, along with offering FREE resources to add to your lesson plans. Keep an eye out for more posts from this series, including:
Victoria Wood, OTR/L is a contributor to The OT Toolbox and has been providing Occupational Therapy treatment in pediatrics for more than 25 years. She has practiced in hospital settings (inpatient, outpatient, NICU, PICU), school systems, and outpatient clinics in several states. She has treated hundreds of children with various sensory processing dysfunction in the areas of behavior, gross/fine motor skills, social skills and self-care. Ms. Wood has also been a featured speaker at seminars, webinars, and school staff development training. She is the author of Seeing your Home and Community with Sensory Eyes.
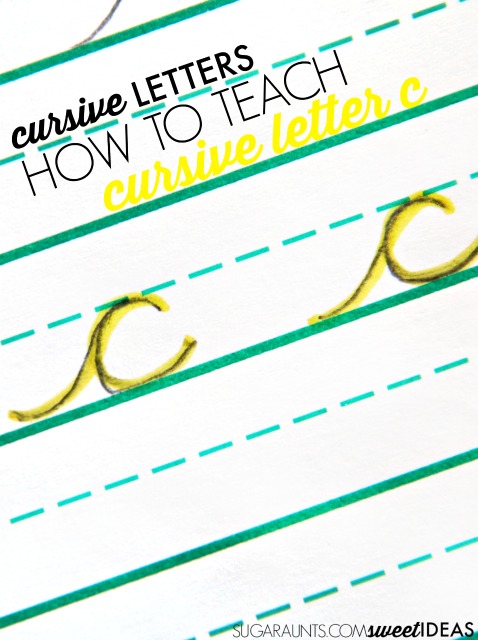
we’ve covered many cursive letter resources here on the site, and this blog on how to write c in cursive is one of the top! There’s a reason why: Cursive c is a building block for forming other cursive letters. After learning how to make cursive c, students can then easily transition to several other cursive letters! Let’s get started with how to teach cursive, starting with the lowercase letter c.
Amazon affiliate links are included in this blog post. As an Amazon Influencer, I earn from qualifying purchases.
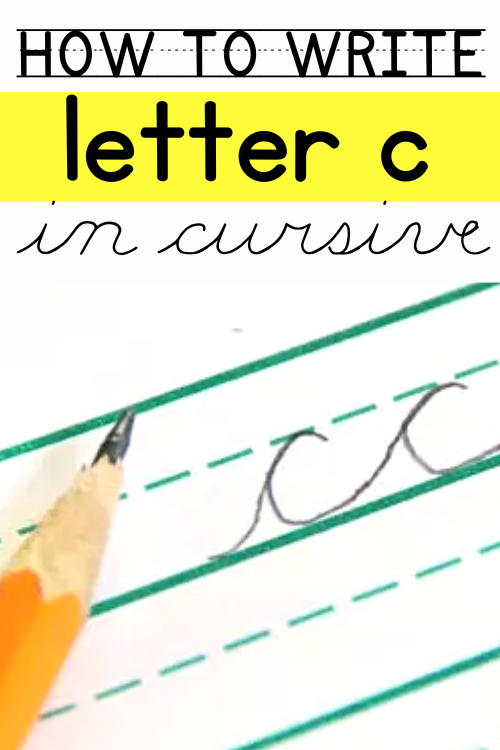
How to Write C in Cursive
Cursive handwriting can be a difficult thing to teach kids. Today, I’m starting a new series on how to teach cursive letters in fun and creative ways.
In this series, we’re starting with how to write cursive c first.
Letter “c” is one of the first letters that kids are taught when learning cursive. The letter is directly related to it’s printed counterpart. The curve of the letter is one of the most basic pre-cursive strokes that are made and helps to build several other cursive letters (a, d, g, q, and o).
In the Loops and Other Groups cursive writing program, these letters are called Clock Climbers. They are the letters a, d, g, q, o which start with the cursive c formation. The lines “climb a clock” around a curve.
The fact is that fluent cursive writing predicts high level spelling and composing skills, more so than manuscript or typing. And, in fact, studies show that test completed in cursive receive higher scores than those completed in manuscript.
First up is how to make letter c in cursive. This series will most definitely not be in alphabetical order for many reasons, mainly because the cursive writing alphabet is typically not taught in alphabetical order. Rather, the letters are taught in groups of related pencil lines. This supports the motor plan of forming each individual letter and helps with carryover skills. Read more about this concept in our post on cursive letter families.
Let’s start with addressing cursive letter c!
In this blog post, images show use of raised line paper. While this type of adapted paper isn’t a must, the raised lines support development of line awareness when teaching this lowercase cursive letter formation.
How to Teach c in Cursive:
This post contains affiliate links.
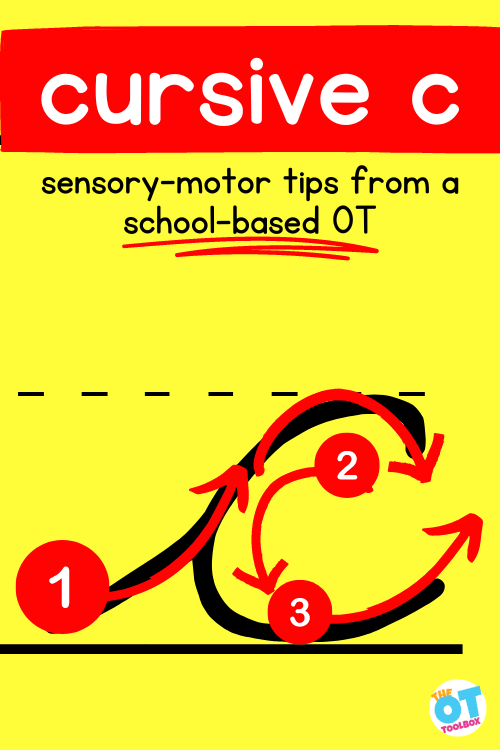
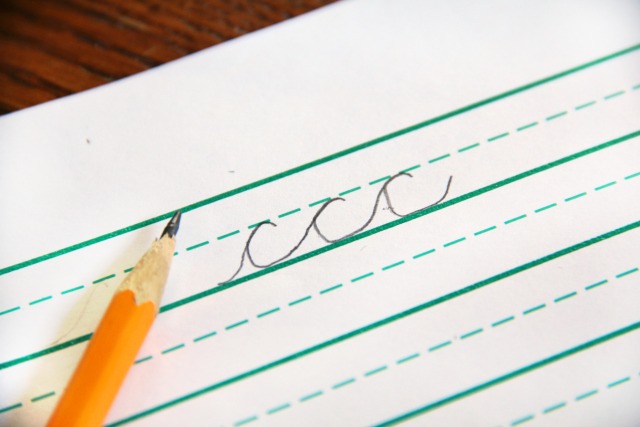
Beginning Upstroke
The beginning upstroke of the beginning lines in cursive “c” can be practiced in creative ways in order to help with re-trace when forming the curve of the letter.
There is research that shows teaching the cursive letter c like a cursive “i” with a hooked top, the carryover of legibility is better.
Re-trace-
After forming the up-stroke of the letter, the curved top, and the re-trace back to the bottom of the letter, it is helpful to work on sliding the pencil along the baseline of the paper to develop letter connectors and to improve legibility. Read about tips to teach cursive letter connectors. The letter c has a re-trace at the beginning of the letter and traces back over the initial letter connection from the start of the letter.
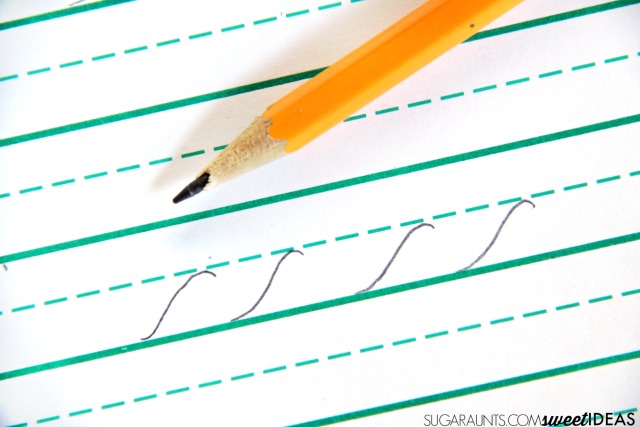
Practice-
The final step of writing cursive c is to practice, practice, practice! When it comes to writing c in cursive, there are many tips that you can use. Try the activities listed below as well as these practice tips:
Write Cursive C with Gross motor practice- Use whole body movements to practice formation. This can occur on the ground with chalk, on a dry erase board at the vertical, in the air with air writing, or using the ideas listed below.
Rainbow writing- The child writes the letter in one color and then trace over it with another color. Continue to trace over the letter with each color of the rainbow. This can be done on a large scale with chalk, markers, etc.
Tips for helping kids stop at the baseline when writing the letter “c”:
Use a verbal prompt to bump the bottom line. Trace the baseline with a highlighter for a visual prompt. Try some of these tricks for writing on the lines.
Establish a motor plan to make cursive c consistently
After cursive letter c has been taught, the next step is multisensory exposure to the motor plan to complete the letter consistently. This establishes the kinesthetic input and practice trials. We cover this in more detail in a blog post on motor planning and handwriting.
With different tactile and sensory-based movements of handwriting, repetitions allow information to be embedded in the brain.
Here are some activities to work on cursive c:
The Handwriting Without Tears program (affiliate link) promotes forming letter c without the starting stroke, making formation easier for most kids.
Use sensory textures to teach letter c and the strokes needed to make the letter.
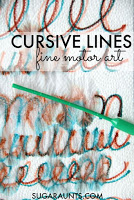
Try practicing cursive handwriting and more cursive letter c practice with these creative cursive handwriting ideas like Textured Cursive Lines
The Handwriting Book is a comprehensive resource created by experienced pediatric OTs and PTs.
The Handwriting Book covers everything you need to know about handwriting, guided by development and focused on function. This digital resource is is the ultimate resource for tips, strategies, suggestions, and information to support handwriting development in kids.
The Handwriting Book breaks down the functional skill of handwriting into developmental areas. These include developmental progression of pre-writing strokes, fine motor skills, gross motor development, sensory considerations, and visual perceptual skills. Each section includes strategies and tips to improve these underlying areas.
Strategies to address letter and number formation and reversals
Ideas for combining handwriting and play
Activities to practice handwriting skills at home
Tips and strategies for the reluctant writer
Tips to improve pencil grip
Tips for sizing, spacing, and alignment with overall improved legibility
Colleen Beck, OTR/L has been an occupational therapist since 2000, working in school-based, hand therapy, outpatient peds, EI, and SNF. Colleen created The OT Toolbox to inspire therapists, teachers, and parents with easy and fun tools to help children thrive. Read her story about going from an OT making $3/hour (after paying for kids’ childcare) to a full-time OT resource creator for millions of readers. Want to collaborate? Send an email to contact@theottoolbox.com.
A final note on Cursive C
Learning cursive c is a common starting point for other cursive letters due to the beginning formations of the pencil strokes. Once a learner has cursive c down pat, you can add a single stroke or combination of pencil strokes to form cursive d, g, o, and q.
Use the strategies shared above to work on the visual motor, sensory motor, and muscle memory to create cursive letters with fluency and efficiency.


