Colleen Beck, OTR/L is a pediatric occupational therapist and the owner and author of The OT Toolbox website. She manages all of The OT Toolbox social media accounts and runs the popular newsletter.
Read about Colleen's experience and career as an occupational therapist, including how The OT Toolbox began on our About The OT Toolbox page: https://www.theottoolbox.com/about-us/
Colleen created The OT Toolbox in 2011 and since then has written thousands of blog posts designed to support therapy providers, educators, parents, counselors, admin, and caregivers in promoting the healthy development of kids.
Check out Colleen's blog posts below:
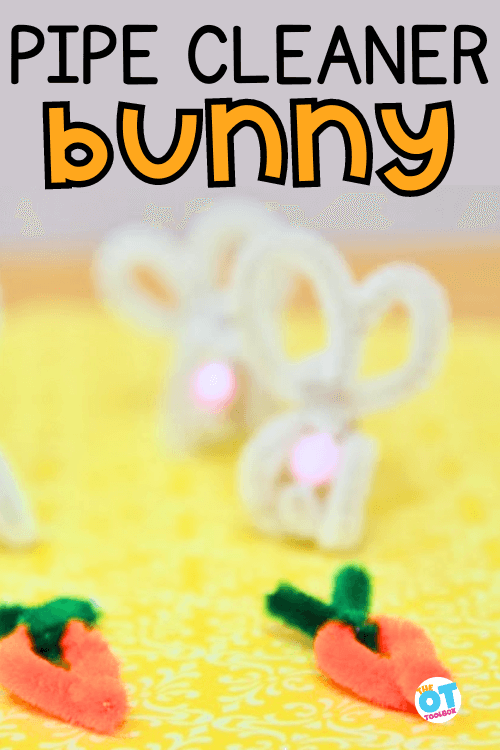
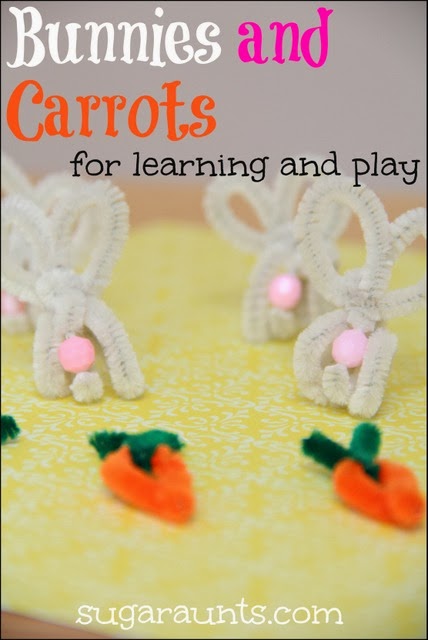
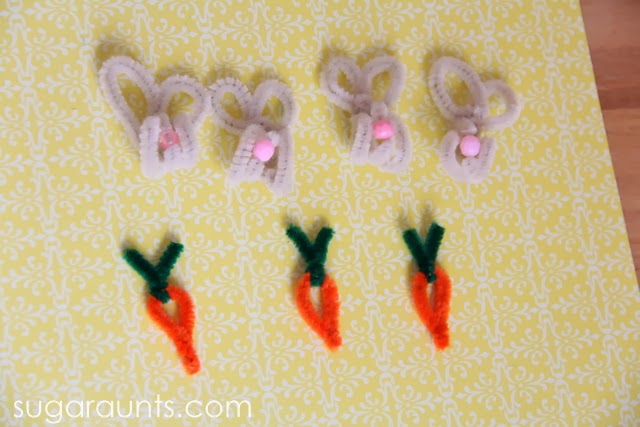
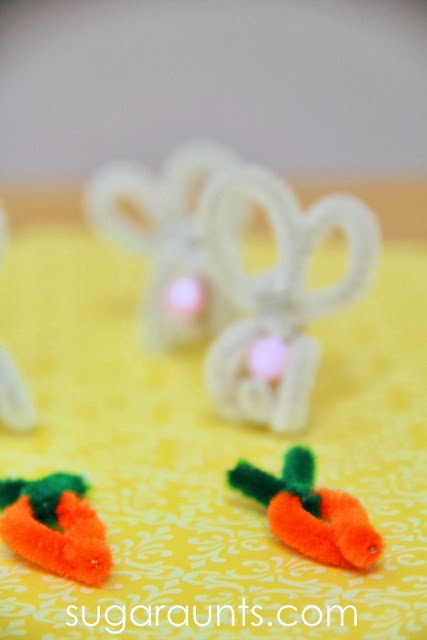
These pipe cleaner bunny crafts are a fun Easter craft that supports fine motor skills. We LOVED making these and then using them over and over again!
With Easter being right around the corner, these pipe cleaner bunny crafts and pipe cleaner carrots are a great way to add fine motor skills to your Easter occupational therapy line up. These bunny cuties were easy to make and have been seen a lot in our play time recently. This isn’t the first time that we’ve made Easter Bunny fine motor activity.
Pipe Cleaner Bunny and Pipe Cleaner Carrots
So WHAT is a manipulative?? (Even spell check doesn’t know, so maybe we should explain…) These cute little bunny manipulatives can be used for so many fun activities: counting, patterning, sorting, arranging…so much learning can happen with little objects that kids can manipulate.
So we love making fun kids crafts that double as a therapy tool. When you bend and fold pipe cleaners into shapes, you’re actually working on several skills:
I’ve caught baby Girl playing with these bunnies and carrots as she made them talk to each other. What a great way to work on language and conversation! Throw these bunnies and carrots into a sensory bin and you’ve got a sensory activity where the kids can explore textures and senses.
There are SO many ways these manipulatives can be used in learning and play.
How to make a Bunny with Pipe Cleaners
Here’s what we did to make the pipe cleaner bunnies…
First, you’ll want to gather your materials:
White pipe cleaners
Pink pony bead
Check out the directions to make the pipe cleaner bunny craft under each picture. We wanted to add a step-by-step visual.
To start, I created a handful of Easter Bunnies using off-white pipe cleaners. It’s not hard to do…
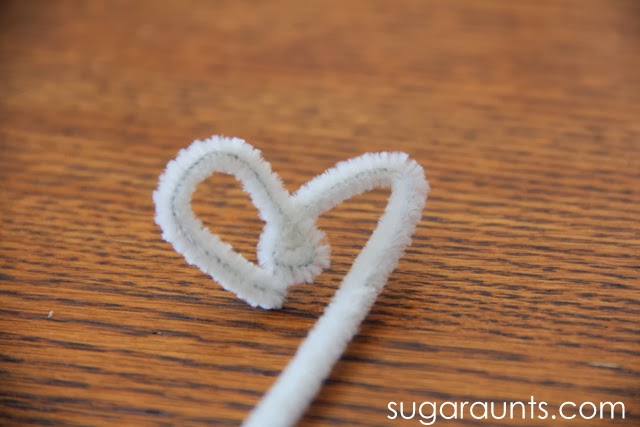
1. Bend the pipe cleaner to make two bunny ears.
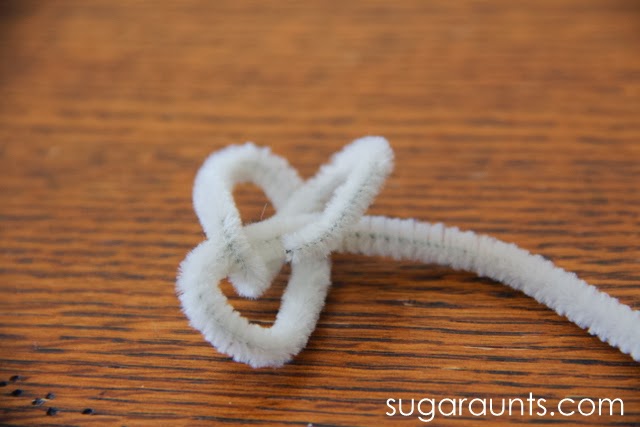
2. Twist the pipe cleaner around and through the first “ear”, then through the second “ear”. The second ear is not a complete loop, so the tail end of the pipe cleaner doesn’t really go through the ear.
You’ll pinch the pipe cleaner so it stays put. See the next picture.
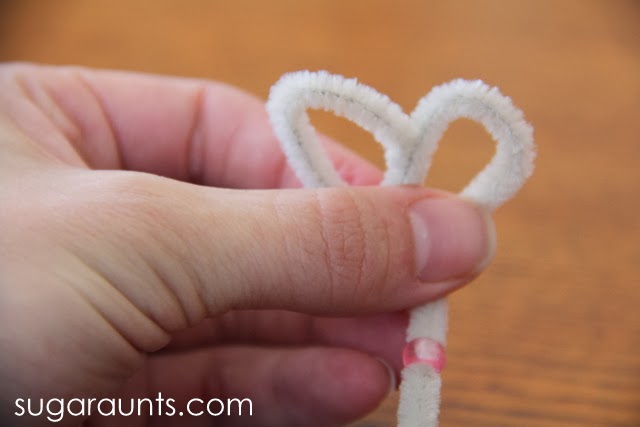
3. Pinch the “ears” in place and pull the long end strait down.
4. Thread a pink bead onto the pipe cleaner for the bunny’s nose.
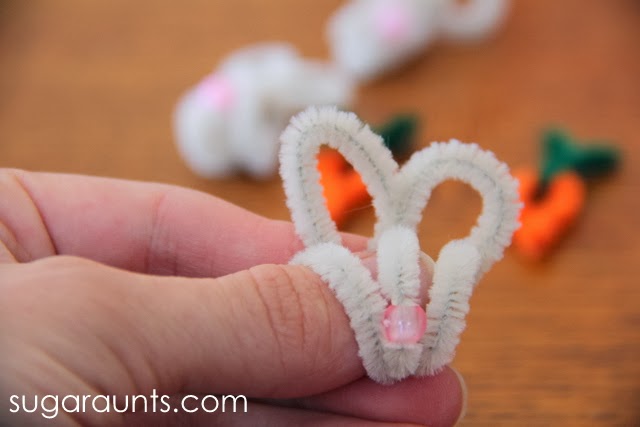
5. Wrap the long end of the pipe cleaner straight up and around your thumb.
6. Repeat twice, making one loop to the right of the bead and one loop to the left of the bead.
7. Pinch it so it stays in place. You can kind of squash the bunny down to make it stay put.
Pipe Cleaner Carrot
The pipe cleaner carrots are just a piece of an orange pipe cleaner bent into a carrot shape and a small piece of green pipe cleaner twisted around to make a stem. Super easy to make.
Make a handful of each and you’re ready for counting, patterns, sorting, adding, and subtracting…
How many ways can you think of to learn and play with these guys?
Our bunnies have been found all over the house this last week. The carrots made their way into the Little People house and eaten by the Lalaloopsy friends. The bunny manipulatives have even been caught hanging out with a few Ninja Turtles!
Let us know if you make these bunny and carrot manipulatives. We would love to see how you’re learning and playing!
For more Easter fine motor activities, check out the Spring Fine Motor Kit.
Spring Fine Motor Kit
Score Fine Motor Tools and resources and help kids build the skills they need to thrive!
Developing hand strength, dexterity, dexterity, precision skills, and eye-hand coordination skills that kids need for holding and writing with a pencil, coloring, and manipulating small objects in every day task doesn’t need to be difficult. The Spring Fine Motor Kit includes 100 pages of fine motor activities, worksheets, crafts, and more:
Colleen Beck, OTR/L has been an occupational therapist since 2000, working in school-based, hand therapy, outpatient peds, EI, and SNF. Colleen created The OT Toolbox to inspire therapists, teachers, and parents with easy and fun tools to help children thrive. Read her story about going from an OT making $3/hour (after paying for kids’ childcare) to a full-time OT resource creator for millions of readers. Want to collaborate? Send an email to contact@theottoolbox.com.
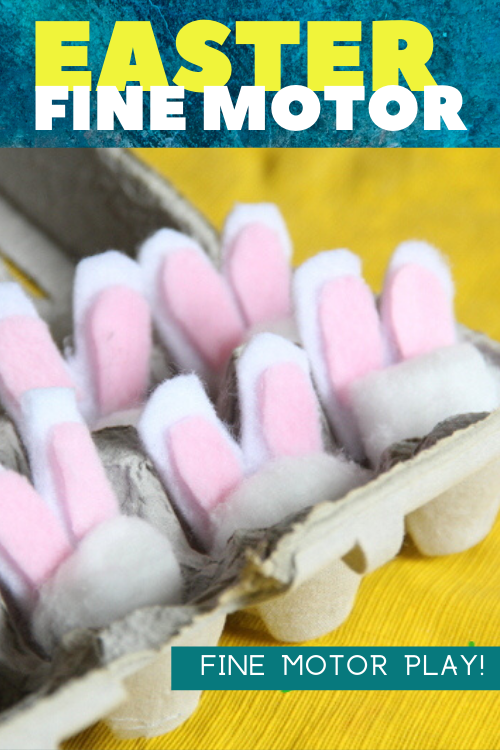
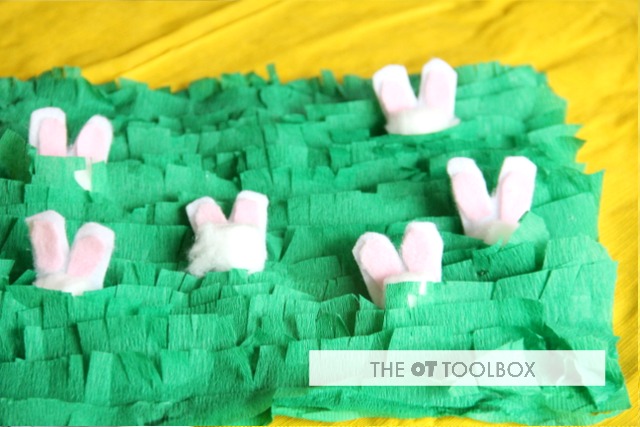
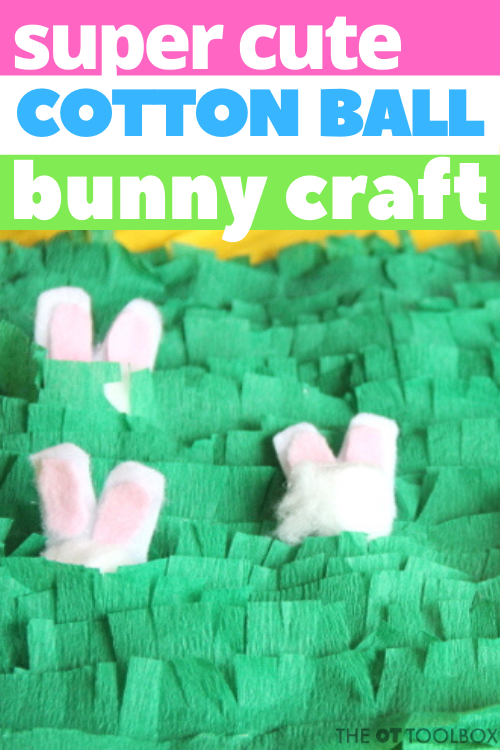
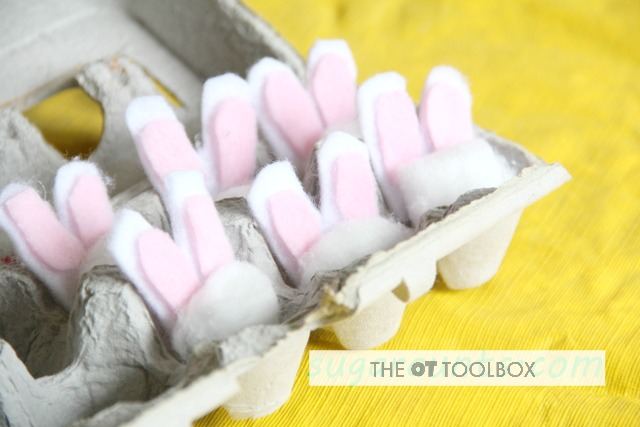
Working on oral motor exercises as a sensory processing strategy for self-regulation, or as an oral motor tool to address physical needs? Ok, so we made a cute little cotton ball bunny to use in an Easter sensory activity as a small world play area to work on fine motor skills with an Easter theme. However, using them in imagination play, but, there are so many oral motor benefits to using these little cotton ball bunnies, too.
It was so much fun with that little cotton ball bunny family that we turned it into a big old collection of bunnies! That’s not all…we used them in an oral motor exercise, with major self-regulation benefits. Here is a how to for this Easter craft for kids as well as a run-down on oral motor skill work with everyday items.
One thing I love about this is that we were blowing cotton balls with straws as a calming and regulating activity, but it was a lot of fun, too!
You’ll also want to check out our other Bunny Activities:
Oral motor skills play a big part of feeding. In fact oral motor problems and feeding can impact food preferences as well as ability to eat certain food textures. There is a lot of information on oral motor skills on The OT Toolbox.
Adding sensory work through the mouth in the form of proprioception is a powerful way to help kids recenter and gain input that is calming and regulating. That input “wakes up” the muscles of the mouth.
There is a mindfulness portion to this oral motor strategy, too. Taking deep breaths is so important in relaxation it brings awareness to your body. In this Easter oral motor activity, kids can blow through a straw to move the cotton ball bunnies while focusing on a static viewpoint at the end of the straw.
Did you know that blowing cotton balls with straws can do all of this??
Talk about centering and regulating! You can even ask the child to breathe in while you count to 5 and then breath out as they move the bunny with the power of their breath.
Oral Motor Exercises for Heavy work
To do this self regulation activity, it’s actually pretty simple.
Line up a row of cotton ball bunnies on the table.
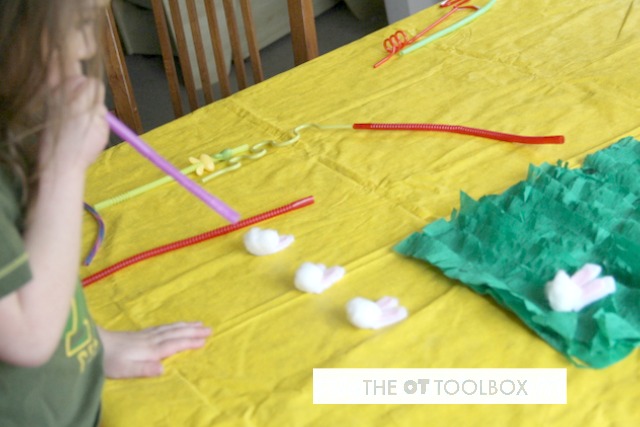
Give the child a straw and ask them to blow into the straw to push the bunny toward a target.
You can ask them to move a certain number of bunnies in a specific amount of time, or they can simply move all of the bunny family with their breath.
Oral Motor Exercise
I wanted to try a little Easter-themed game with Big Sister. (She didn’t know that it was actually an oral motor exercise that supports development!)
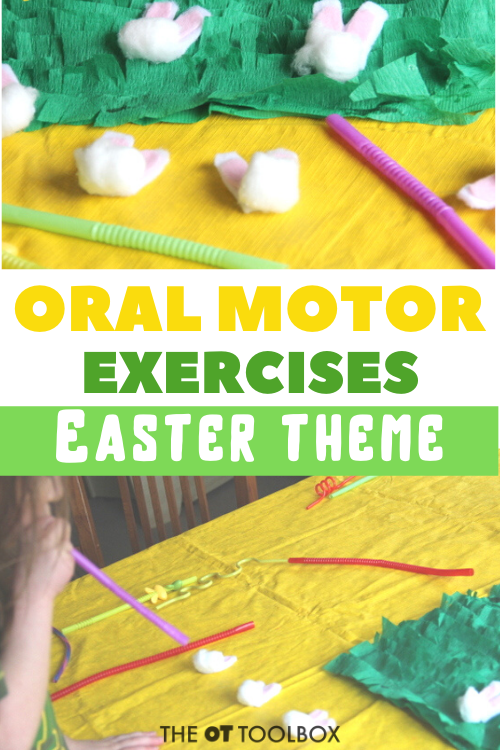
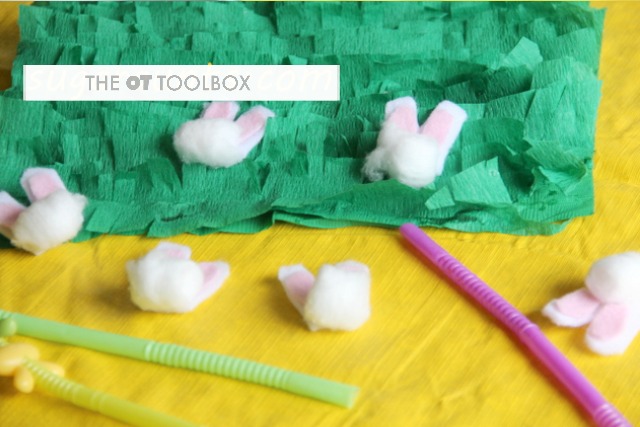
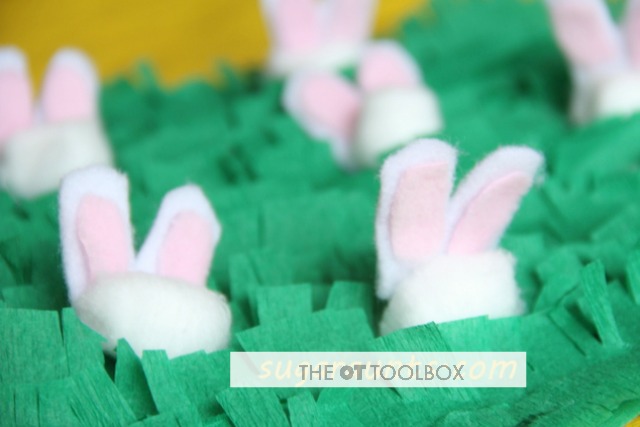
I put the cotton ball bunnies out on the table, along with the grass and some straws. She had to blow the bunnies into the grass using a straw.
Scroll below for instructions on how to make the DIY grass matt to use in sensory play activities.
To make the oral motor exercise easier or harder:
Try using different lengths of straws to change the breath power and amount of deep breathing they need to take.
You can also pinch the straw to require more effort in the oral motor therapy idea.
Try using different types of straws, too. Some ideas include using a large sports straw like we did in the pictures here, or a coffee stirrer straw.
The options are endless and can be means of grading this activity up or down to meet the specific needs of the child.
This is a fun exercise/game for kids with oral-motor problems including poor lip closure, stability of the jaw, or muscle development of the mouth, jaw, and tongue. Blowing through a straw can also help with sensorimotor integration.
Older kids who constantly put things into their mouth (pencils, clothing, fingers…) may be seeking oral input/sensorimotor input that their body needs.
This game is a fun way to work on any of these areas. Use fatter straws at first and work toward thinner straws for a graded exercise. If this activity to too difficult for your child with oral-motor or sensorimotor needs, try a smaller item such as a feather or a crafting fuzz ball.
You could also work on oral motor skills and the proprioceptive heavy work with this Egg Boat activity.
Oral motor exercises like these are beneficial to add heavy work input through the mouth and lips that is calming and regulating.
Fine Motor Skills Activity
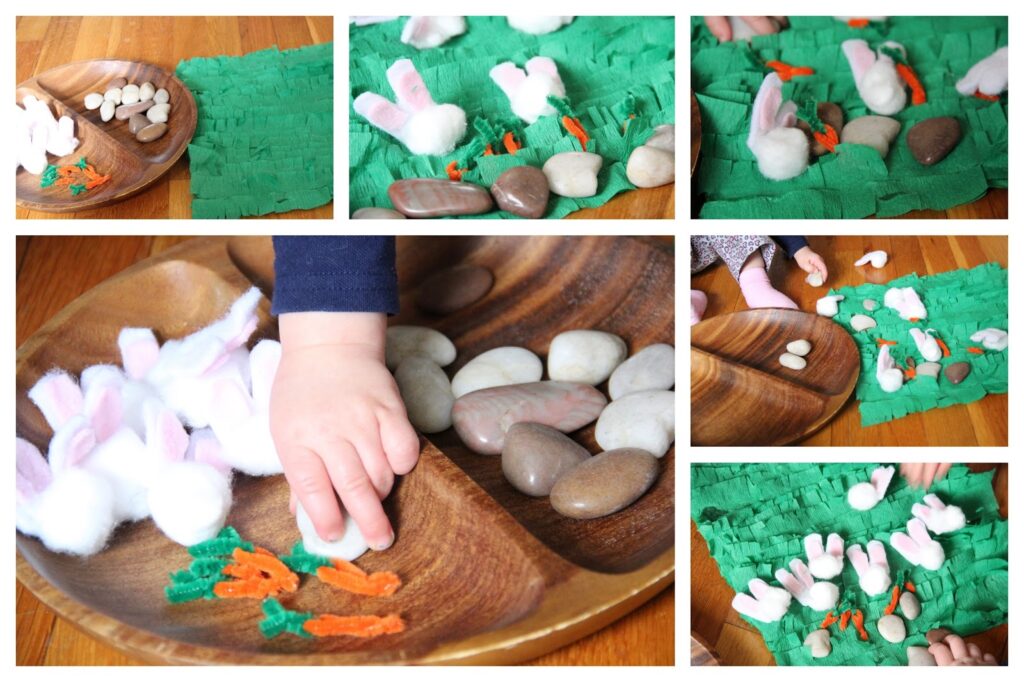
These little Easter bunny crafts were perfect to in a fine motor skills activity, too. With a tray, a handful of river rocks, and a DIY crepe paper matt, we made an Easter-themed small world to work on fine motor skills with my littlest one.
My daughter, who was a toddler in these photos, loved to explore and play as she picked up and moved the cotton ball bunnies, the rocks, and small carrots.
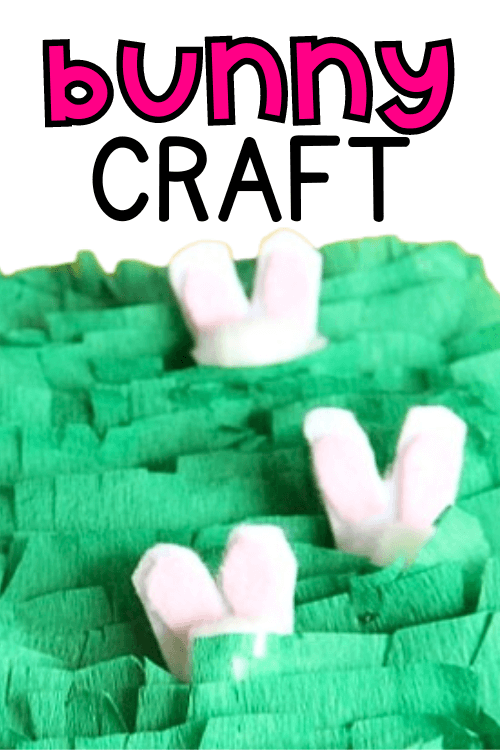
To make the grass matt, we used a roll of green crepe paper. It was glued on one side to a sheet of construction paper. I asked my preschooler to snip into the edges of the top side of the crepe paper, so it made a fringed edge. This was a great scissor activity for her.
This Easter play activity turned out to be a fun fine motor activity for toddlers and a fine motor ideas for preschoolers, too! I think the quote from my preschooler was… “Wow, this is cool, Mom!”
Easter Play IDEA
Play idea for toddlers- Baby Girl especially loved playing with the little bunnies in an Easter small world play set-up. She would move the bunnies, stones, and carrots one at a time from the bowl to the grass…and then back again.
Play idea for preschoolers- Big Sister had fun using the bunnies for imagination play, making them go into their garden, lining up the rocks, and making the bunnies steal the carrots.
Little Guy wanted nothing to do with any of this. I guess there were not any superheroes or bad guys involved. Cute little bunnies are not his thing 🙂
We are having a lot of fun with our little bunnies!
TO make the Cotton Ball Bunny Craft
Making this Easter bunny craft is super easy.
We used a glue gun to make sure the pieces were securely attached for sensory play with my toddler. However, regular craft glue would work as well.
You’ll need a cotton ball, white foam sheet, and a pink felt sheet.
Cut out two large white ears and two smaller pieces for the inner ear.
Use the craft glue to hold these pieces in place.
Add gentle pressure to make sure all of the pieces are securely attached.
This bunny craft came together fairly quickly, so I was able to create a whole set of the bunnies.
Then, use them to play!
Spring Fine Motor Kit
Score Fine Motor Tools and resources and help kids build the skills they need to thrive!
Developing hand strength, dexterity, dexterity, precision skills, and eye-hand coordination skills that kids need for holding and writing with a pencil, coloring, and manipulating small objects in every day task doesn’t need to be difficult. The Spring Fine Motor Kit includes 100 pages of fine motor activities, worksheets, crafts, and more:
Colleen Beck, OTR/L has been an occupational therapist since 2000, working in school-based, hand therapy, outpatient peds, EI, and SNF. Colleen created The OT Toolbox to inspire therapists, teachers, and parents with easy and fun tools to help children thrive. Read her story about going from an OT making $3/hour (after paying for kids’ childcare) to a full-time OT resource creator for millions of readers. Want to collaborate? Send an email to contact@theottoolbox.com.
Whether it’s the classroom, home, or day to day life…coping strategies for kids are needed. Coping strategies are mechanisms or tools to adjust and respond to emotions, stressors, and unbalance so that one can function and complete daily occupations, or everyday tasks. Coping tools help to balance and regulate a person. Coping strategies can look different for every individual and that’s why this giant list of coping skills will be powerful in building a toolbox of strategies for kids (or teens and adults!)
the strategies that we’ve shared here are great for adding to a budget sensory room in the school environment, or a calm down corner at home.
What are Coping Strategies
We all need coping strategies! It can be difficult to cope with stress or worries as a child. Most of the time, it can be hard to just figure out what is going on with the mood swings, frustration, behaviors, and lack of focus. Most of these problems can be a result of a multitude of problems!
And, helping kids to understand the size of the problem is part of this because then we can help them know how to cope.
From emotional regulation concerns, to sensory processing issues, to executive functioning struggles, to anxiety, communication issues, or cognitive levels–ALL of the resulting behaviors can benefit from coping strategies.
It’s not just overstimulation anxiety or worries that causes a need for sensory-based coping strategies. Emotional regulation, an unbalanced sense of being, stress, situational or environmental issues…the list of concerns that would benefit from sensory coping tools could go on and on.
Incorporating sensory strategies and sensory play into a coping toolbox can help kids with a multitude of difficulties. Try using some of these ideas in isolation and use others in combination with one or two others. The thing about coping strategies is that one thing might help with issues one time, but not another.
Coping Strategies for Kids
One thing to remember is that every child is vastly different. What helps one child cope may not help another child in the same class or grade. Children struggle with issues and need an answer for their troubles for many different reasons. The underlying issues like auditory processing issues or low frustration tolerance are all part of the extremely complex puzzle.
Other contributions to using coping strategies include a child’s self-regulation, executive functioning skills, self-esteem, emotional regulation, and frustration tolerance. That makes sense, right? It’s all connected!
Coping Skills for Kids meet needs
Coping skills are the tools that a person can use to deal with stressful situations. Coping strategies help a us deal with occupational unbalance, so that we can be flexible and persistent in addressing those needs.
Coping skills in children can be used based on the needs of the individual child. Also, there is a lot to consider about the influence of factors that affect the person’s ability to cope with areas of difficulty. Likewise, feedback from precious coping efforts relates to the efficacy of a coping plan. (Gage, 1992).
Coping skills in kids depends on many things: wellness, self-regulation, emotional development, sensory processing, and more.
Having a set of coping skills benefit children and adults! Every one of us has stress or worries in some manner or another. Children with sensory processing issues, anxiety, or social emotional struggles know the stress of frustration to situations. It’s no surprise that some of these issues like sensory processing disorder and anxiety are linked.
Research on wellness tells us that child well being is dependent on various factors, including parental resources, parental mental health, parental relationship quality, parenting quality, father involvement, family types, and family stability. What’s more is that taking a look at the overall balance in a family and the child can provide understanding into things like stress, frustration, anxiety, and overwhelming feelings. The wellness wheel can help with getting a big picture look at various components of overall well-being.
Coping Flexibility
In fact, studies tell us that coping flexibility may be an important way to investigate coping. Coping flexibility, or an individual’s ability to modify and change coping strategies depending on the context, can be impacted by executive functioning difficulties including flexible thinking, working memory, impulse control, emotional control, and self-monitoring.
And, having more coping strategies in one’s toolbox coping may be an important precursor to coping flexibility, especially because having flexibility in coping abilities can only be obtained if an individual is able to access and use different coping strategies. It’s the chicken or the egg concept!
Another study found that children who used problem solving or constructive communication were better able to manage stress and that those who used maladaptive strategies like suppressing, avoiding or denying their feelings, had higher levels of problems related to stress. It makes sense. The most effective coping strategies are ones that adapting to the stressors rather than trying to change the stressors.
So, how can we help with stress and frustrations? One tool is having a set of sensory coping strategies available to use in these situations.
Types of coping skills
All of this said, we can break down coping skills for kids into different types of coping strategies that can be added to a coping toolbox:
Physical- exercise, movement, brain breaks, heavy work are some examples. Physical coping strategies might include pounding a pillow in frustration, using a fidget toy, running, yoga.
Sensory- While there is a physical component to sensory coping strategies (proprioception and vestibular input are just that: physical movement…and the act of participating in sensory coping strategies involves movement and physical action of the body’s sensory systems) this type of coping tool is separated for it’s uniqueness. Examples include aromatherapy, listening to music, mindfulness (interoception), and sensory play.
Sensory strategies that are motivating can be a big help for some kids. Try these train themed sensory activity ideas to get your creative juices flowing.
Emotional- Thinking about one’s feelings and emotions is the start of emotional regulation and social development. Acting out feelings, talking to a friend or teacher…communication is huge!
These social skills activities are a great way to build awareness of self and others and can double as coping tools too.
Communication- Talking about feelings, talking to others, writing in a journal, singing. Have you ever just had to “vent” your feelings about a situation? That ability to “let it all out” is a way to process a situation and talk through solutions, or find common ground in a situation.
List of Coping skills
1. Move- Get up and run in place, jog, do jumping jacks, or hop in place.
2. Fidget tools in school– Use learning-friendly fidget tools, perfect for the classroom or at-home learning space. Here is one desk fidget tool that kids can use while learning.
3. Talk- Talk about it to a friend, talk to an adult, or talk to a teacher.
4. Snuggle- Grab a big cozy blanket and pile pillows around you to build a fort of comfort! The pressure from the blanket and pillows provides proprioceptive input.
5. Take a bath or hot shower.
6. Blow bubbles. The oral sensory input is organizing.
9. Pound play dough. Try a heavy work dough like this DIY marshmallow proprioception dough.
10. Use a keychain fidget tool. This is a DIY fidget tool that kids can make while building fine motor skills. Attach it to a belt loop, backpack, or even shoe laces for circle time attention.
11. Exercise. This alphabet exercise activities can be helpful in coming up with exercises for kids. Use the printable sheet to spell words, the child’s name, etc. This alphabet slide deck for teletherapy uses the same letter exercises and offers exercises for each letter of the alphabet. Use it in teletherapy or face-to-face sessions or learning.
17. Listen to the sounds of the ocean on a soothing sounds app or sound machine.
18. Count backwards. Try walking in a circle while counting or other movements such as jumping, skipping, or hopping.
19. Drink a cold drink.
20. Drink a smoothie. There are proprioceptive and oral motor benefits to drinking a smoothie through a straw. Here are rainbow smoothie recipes for each color of the rainbow.
21. Squeeze a stuffed animal.
22. Listen to music.
23. Hum a favorite song.
24. Blow bubbles.
25. Chew gum.
27. Tear paper for fine motor benefits and heavy work for the fingers and hands.
28. Smash and jump on ice cubes outdoors. Jumping on ice is a great activity for incorporating prioprioceptive sensory input.
29. Journal. The Impulse Control Journal is an excellent tool for self-awareness and coming up with a game plan that works…and then keeping track of how it all works together in daily tasks.
30. Guided imagery.
31. Think of consequences.
32. Stretch.
33. Go for a walk.
34. Write a story or draw a picture. Sometimes it helps to crumble it up and throw it away!
35. Blow up balloons and then pop them.
36. Take a time out.
37. Animal walks.
38. Imagine the best day ever.
39. Swing on swings.
40. Name 5 positive things about yourself.
41. Draw with sidewalk chalk. Drawing can relieve stress.
43. Add movement- This monster movements slide deck uses a monster theme for core strength, mobility and movement breaks. It’s perfect for teletherapy and using as a coping strategy.
Brain breaks are a powerful and effective way to address regulation needs, help with attention, and impact learning into the classroom or at home as part of distance learning.
The impact of emotions and changes to routines can be big stressors in kids. They are struggling through the day’s activities while sometimes striving to pay attention through sensory processing issues or executive functioning needs. Brain breaks, or movement breaks can be used as part of a sensory diet or in a whole-classroom activity between classroom tasks.
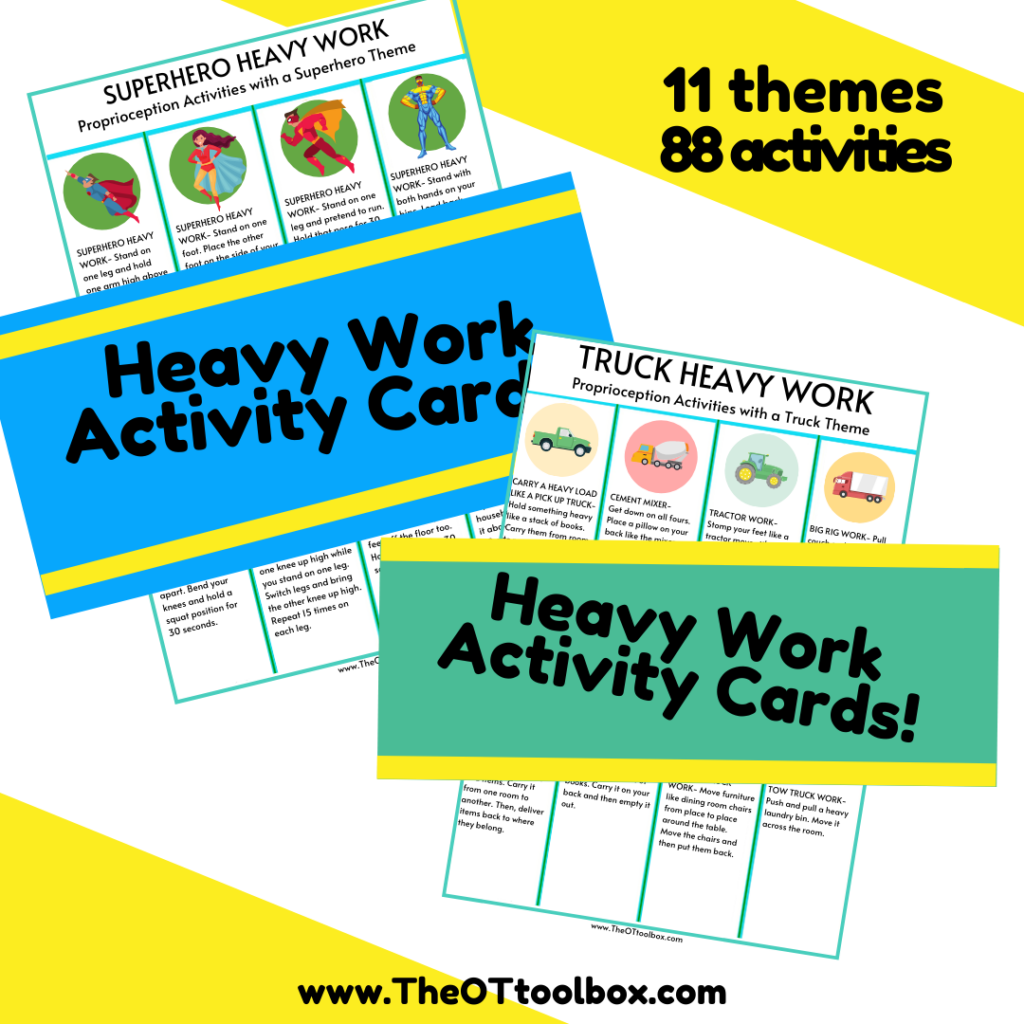
This collection of 11 pages of heavy work activity cards are combined into themed cards so you can add heavy work to everyday play.
Coping strategies for kids printable
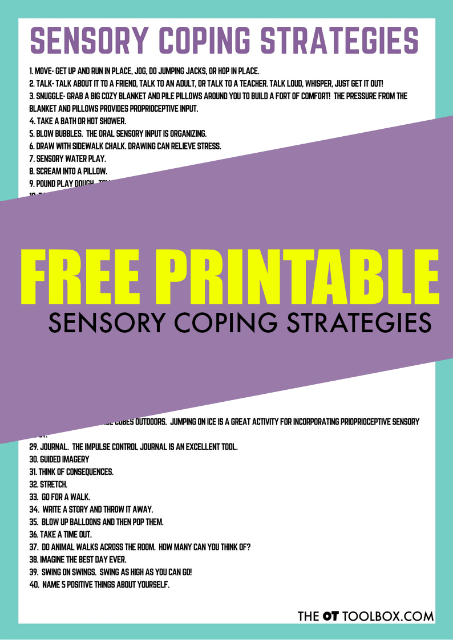
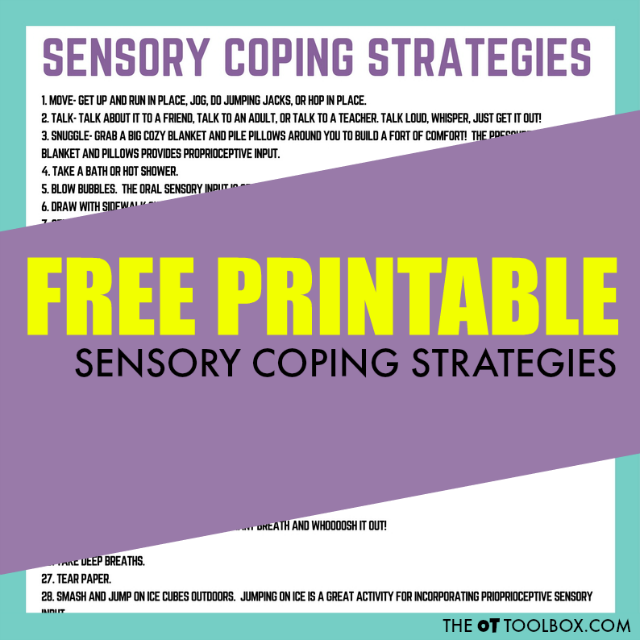
Want a printable list of coping tools for kids? This list of coping skills can be printed off and used as a checklist for building a toolbox of strategies.
Get the printable version of this list. It’s free!
Coping strategies can come in handy in many situations:
When saying “calm down” just isn’t enough…
When a child is easily “triggered” and seems to melt down at any sign of loud noises or excitement…
When you need help or a starting point to teach kids self-regulation strategies…
When you are struggling to motivate or redirect a child without causing a meltdown…
When you’re struggling to help kids explore their emotions, develop self-regulation and coping skills, manage and reflect on their emotions, identify their emotions, and more as they grow…
Gage, M. (1992). The Appraisal Model of Coping: An Assessment and Intervention Model for Occupational Therapy, American Journal of Occupational Therapy, 46, 353-362. Retrieved from : oi:10.5014/ajot.46.4.353 on 5-24-27.
Colleen Beck, OTR/L has been an occupational therapist since 2000, working in school-based, hand therapy, outpatient peds, EI, and SNF. Colleen created The OT Toolbox to inspire therapists, teachers, and parents with easy and fun tools to help children thrive. Read her story about going from an OT making $3/hour (after paying for kids’ childcare) to a full-time OT resource creator for millions of readers. Want to collaborate? Send an email to contact@theottoolbox.com.
So often, we see a child of therapy evaluation and find a need for therapy intervention, but that’s where the resistance begins. Here we are talking how to manage resistance in therapy, and not only that; but how to engage with kids so that we get the truly motivated buy-in for engaging in occupational therapy interventions.
We’ve all had to pull some magic out our our OT hat to engage a resistant child in therapy. The thing is that working on hard things is…hard! Let’s go over some therapy activities for resistant clients. We’ll also cover examples of client resistance in therapy. You might have seen some of these a time or two in your therapy sessions!
Resistance in therapy
If you’ve worked in OT for even a short time, you have probably experienced resistance from your clients. There are many reasons for barriers to participation in occupational therapy intervention. From differing perceptions to the outcomes of OT interventions, to not understanding what occupational therapy is and what it can do for the client, understanding therapy process is just one aspect of client resistance.
There are so many different reasons why a therapy client my object therapy participation. Encouraging participation in therapy sessions and functional engagement in daily tasks can be a couple of underlying areas that we are trying to address in therapy sessions. But what’s more is that beyond client resistance, there may truly be functional occupations that are being missed or delayed as a result of resistance to therapy.
Additionally, when children are asked to participate in a therapy activity or to stop doing a preferred activity and move to another, sometimes challenging, task. In this way the transitions for children to move from preferred to non-preferred activities is sometimes hard to get their “buy in,”.
It doesn’t have to be that way, however.
Let’s cover various techniques to support children showing resistance in therapy sessions. We’ll also cover how to support follow transitions and make engaging in therapy fun through meaningful games and some simple resources to utilize to make sure therapy activities happen smoothly throughout the therapy session.
examples of client resistance in therapy
I’m sure, if you’ve worked with kids before, that you’ve seen a few (or all) of these examples of client resistance in your therapy sessions.
Complain about therapy activities
Express doubts about the therapy’s effectiveness
Challenge the therapist’s suggestions
Question the purpose of the therapy
Non-Compliance with therapy tasks
Refuse to participate
Skips therapy sessions
Silent during therapy
Refuses to engage
Changes the subject
Sarcasm or joking as a way to avoid participating
Hostile behaviors
Make excuses
Tantrum or meltdown
Leaving the room or therapy area
Ignoring instructions
Complaining about therapy tasks
Other things like body language or bad language can be examples of resistance to participate in therapy, too. In a few cases, I’ve experienced physical aggression during therapy sessions. These situations were with students who had behavior plans in place by the school. Some students had a history or physical aggression across all classrooms. If there are events like hitting, kicking, biting, spitting, throwing objects, or other physically aggressive acts, then therapy sessions would stop for the safety of the student and others, including myself as the therapist.
It can depend on the student, however, a behavior plan will have a list to follow in various situations, and there might even be a paraprofessional that is with the student at all times.
Why do clients show resistance in therapy?
Before we get into strategies to encourage functional participation, let’s break down why we may see failure to participate during therapy sessions.
Therapy makes the client look and feel “different” than everyone else- Going to a therapy session is not something that every child or teen does, so attending therapy can be a reason that makes them look different. This can lead to resistance to participate and a feeling of dread when it comes time for therapy sessions.
Especially for our middle school students receiving OT services, and for individuals who are very much aware that they are doing something that not everyone else is, this can be a big deal.
Don’t understand occupational therapy- Many times, we as therapy professionals are ready to evaluate or treat a resistant client and the individual states something like, “why are you here?” or “what is occupational therapy” or “who are you and why are you asking me these questions?”!
Do any of these questions sound familiar? Many times clients/patients/students are referred to occupational therapy evaluations without knowledge. This is the case in hospital or clinical situations when OT orders are part of the inpatient process. In the school based scenario, a student is referred to occupational therapy by the IEP team or a child’s parent. Refer to differences between an IEP and 504 for more information.
Many times, the individual has no idea they are going to be seen by OT. This can lead to refusal and a resistance to participate. Whether you are working with a child in the classroom setting in a push in model or pulling a child out of the classroom, this can be a reason that resistance to participate in therapy occurs.
Therapy is hard- Therapy tasks aren’t always easy, especially if your child is participating in an activity that they love doing. If asked to step away from an activity before they are done, they may become upset and non compliant. This can be true with the child working on handwriting tasks or working on strengthening. It is HARD to write and copy all of those sentences. It requires a lot of concentrated effort doing something difficult.
The same is true for strengthening tasks that require engagement and consistent use of muscle groups. It’s easier to regress to that comfortable and “easy” positioning. As an adult, if you are working on a project on your computer, how much advance notice would you like before you have to finish what you are working on and move to a new activity?
Therapy is a change from the normal day to day activities- Even if the typical day to day functions is something that is being worked on, including participation and functional performance, it can be a change from the “norm” to engage in therapy sessions.
Would you appreciate your coworker walking in while you are typing mid sentence, closing your laptop lid, taking you by the hand stating “it is time for the staff meeting. Let’s go!”
Or would you rather they say “just letting you know that you have five minutes before the staff meeting, see you there!”
My guess is that you would like to have some advanced notice before you have to stop working. This is the same for a child who is playing. When they are actively engaged in an activity, they have a plan and don’t appreciate being interrupted in the middle of it. This could be anything from playing with play dough, to completing a puzzle or pretend play.
Therapy challenges the unexpected- Sometimes when kids or teens participate in therapy sessions, they don’t know what to expect. They know that they are working on specific skills, but what if that skill of task is so new and novel that the fear of the unknown exists.
This can be particularly true with things such as toileting. For the child with interoceptive sensory considerations, they may have no idea how a bowel movement on the toilet feels.
This fear of the unknown can be a real area of resistance.
Clients Resist certain parts of therapy
What if children don’t want to stop what they are doing and resists participation in some therapy activities?
You have probably seen this in action when a child LOVES a specific therapy game or activity. It might be that they love anything to do with a therapy swing. But what might really be happening is that the child is overly focused on that item because it’s been a cause for positive feedback in the past.
Or maybe, if the item is a sensory activity like a sensory swing, that the child receives the sensory input that they crave.
Or, perhaps the preferred activity is a highly motivating activity because it’s a theme or character that the child really loves. In these cases it can be very difficult to move from the preferred activity to a non-preferred activity.
In many cases, the child even becomes overstimulated or dysregulated as a result of focusing on that one particular activity, or as a result of reciting too much stimulation or a certain type of sensory input from that one activity.
When a child feels like they don’t want to transition to a new activity or that they didn’t have enough time to finish the task they were completing, they may become upset and hard to calm down.
In these cases, using a positive redirection activity that will give children the ability to comfort themselves and they are feeling overwhelmed.
Giving them time and space to calm down is very important, especially in a non-threatening way. If the child is upset, part of the therapeutic process is to support the child to calm down, identifying feelings and emotions, and offering support. Therapy professionals can guide them through communicating how they are feeling and participating in solving the problem at hand.
How to engage a Resistant Child in therapy
the child that resists therapy sessions is struggling. But that doesn’t mean the therapy strategies and goals are not appropriate!
Whether you are working in a clinic, hospital setting, or school-based, resistance to therapy happens. When giving instructions and laying out transition expectations to young children, it is important to keep in mind their individual and collective developmental age range in order to give clear and concise directions.
The following are strategies to engage the child or teen showing resistance in therapy.
This can include components of getting buy-in that are important to include in every direction given to a young child.
1.Clear and concise expectations- Having a plan of expectations and then using clear directions in those expected task completion is a key way to support engagement.
Use these tips to support and give clear expectations with clients:
When giving a statement or direction to a child, make sure that it is easy to understand.
Using one or two step directions, children will be able to remember what is being told to them.
When giving the directions, make sure you are in the same room as the child (not yelling “it’s time for dinner” from the kitchen area), preferably kneeling down at their eye level.
Additionally, certain tools can support the “flow” of therapy sessions and offer a visual cue for participants with concrete expectations. Strategies that can support these expectations in therapy include:
2. Stick to Routines. When we work on daily routines, such as bedtime, clean up time, morning routines, leaving the house, etc., we use routines to make sure that the routine of events is the same every time. This strategy can carryover to therapy interventions. Using a similar routine for therapy sessions can include premeditated steps in order to allow children to feel successful and prepared for what is coming next.
Here is a great example of a therapy session routine:
Arrive to therapy
Check in
Sit in the same spot in the waiting room
Move to the therapy clinic area
Hellos and talk about last session
Discuss areas that the client wants to work on
Warm up activities
Address identified needs
Preferred activity
Cool down activities
Discuss home program and plan for next visit
Another schedule strategy that can be used for countering resistance to participation in therapy includes staggering preferred activities with non-preferred tasks. For the child that struggles with handwriting and really is resistant to handwriting tasks, you can stagger preferred activities (while selecting options that also address underlying areas of need or other goal areas). You can come up with a treatment intervention plan that includes options for the client to select from that are both preferred and non-preferred.
This strategy can look like:
Arrive to therapy
Check-in
Select activities to address based on goal areas
Preferred activity
Non-preferred activity
Preferred activity
Non-preferred activity
Preferred activity
Cool down activities
Discuss home program and plan for next visit
One of the best ways to make transitioning from a preferred activity to a non-preferred activity is to make it FUN! When the transition process is exciting, children will join right in.
You can find more examples of daily routines that are used for functional participation here on the website.
3. Utilize Auditory Cues– To make sure that the child in therapy hears what you are saying, when you are giving them the directions, have them stop and look at you.
A fun way to do this with young children is to have a saying such as “1,2,3 FREEZE” where they put their finger over their lips and look at you. There are so many other fun “stop and listen” sayings and games that you can find in this video.
4. Creativity- If you’ve ever worked with kids before, then you know that engaging a resistant child in therapy sessions requires creativity, flexibility, and patience. The kids we serve are struggling in some way (developmentally, cognitively, with sensory processing, or many other ways) and that impacts the way they do things they need to be doing or want to do (This is the functional aspect of OT).
When we work with kids on these challenges, it can be hard for them to actually do the things that we ask them to do. For example, your student with handwriting goals might think “Writing is hard, so why do I want to do hard things?”
It’s our job as the OT professional to help our clients and patients to feel comfortable while building skills. That might mean using less of a structured session and more of a safe space where the child can express themselves.
We do this with our OT thinking caps on, and sometimes that requires some real creativity.
Some of the ways I like to have fun in occupational therapy sessions to make kids feel more comfortable (while being creative about working on those goals) includes:
Play: Play is the work of the child at all ages. You can use play activities, games, toys, and creative activities that align with therapeutic goals.
Use their Interests: Tailor your OT activities to the child’s interests. That might mean using specific therapy themes or writing interests-based handwriting lists. When you incorporate interests into OT sessions, it can increase engagement and motivation.
Sensory Strategies: The benefit with using sensory activities like slime, sensory bins, etc. is that it is engaging and motivating. Some kids love (and crave) this sensory input.
Movement: Some of our kids LOVE to move. They crave movement. You can incorporate activities that involve movement, such as obstacle courses, yoga, or simple exercises. These can help the child focus, reduce anxiety, and improve their mood.
Storytelling and Role-Play: You can help your therapy client to participate by including storytelling or role-play. This can help them express emotions, practice social skills, and work through challenging scenarios in a safe and controlled environment. Floor play does this to meet OT goals.
Crafts: Use OT crafts to help kids to express their feelings and experiences. Some kids love drawing, painting, or sculpting. This can be particularly effective for children who may have difficulty expressing themselves verbally.
Technology and Digital Tools: The draw of the screen is real! But with recent advances in technology, we as OTs can use that to our advantage to support very functional skills. Use OT apps to promote the skills that need development.
Choice and Control: A simple choice board can do wonders! Give children some control over their therapy sessions by allowing them to choose between activities. This can help increase their sense of autonomy and engagement.
Build a Therapeutic Relationship: You learned about “therapeutic use of self” in your OT classes. That tool is a real strength! Spend time building rapport and trust with the child. Show genuine interest in their thoughts, feelings, and interests. A strong therapeutic relationship can reduce resistance and increase engagement. We have some rapport activities in a blog post about back-to-school because that time of year can be a time to strengthen those OT/student relationships.
Games for Resistance in Therapy
Here are four games that make participating in therapy interventions fun. Use these ideas to counter resistance to therapy activities.
Timer Games – Using timer games are great for making clean up time fun. These games include: “How fast can you clean up all the toys?” or “Can Charlee put all the blue blocks away faster than Henry can put all the green ones away?” When children are engaged in a game during clean up, it’s not so boring!
Movement Songs – Pairing movement and music together to get children to a specific place will make the transition very exciting. I love using songs like “We are the dinosaur marching marching” or “Flap your arms like a butterfly to the line” or “Jump like a bunny all the way, over to the _____.” When pairing a movement activity with a direction and melody, children learn that transitioning to the new activity location is just as fun as what they have been doing!
Jobs – Making children an active part of the next activity, but giving them a very specific job, makes them feel important and gives them purpose for moving to the next activity. For example, if you want your child to transition to nap time, they can help pick out the books that are going to be read to the children, or they can put a new pillow case on their pillow. If children are transitioning to mealtime, they can set the table, or hand the other children their name cards. There are so many different jobs that allow children to become part of the new activity.
Visual Supports- When creating a routine for the classroom or at home, there are several ways to include visual supports to make transitions easier for the children and for you. Using a visual schedule will make your days so much calmer! You can create a visual schedule for different parts of your day (such as morning and bedtime routines) or for your full day. The visual schedule will help children understand what is coming next.
Every day children are asked to transition at least 50, maybe 100 times. That is A LOT! Children don’t always have a lot of control over what is going to happen during their day, but allowing them time in between new activities, making the transition fun, and giving them a job to feel important, will make transitions feel less like a chore. As adults, if we stay consistent, giving children directions while being mindful of their developmental level, our days will become less stressful and more fun!
Colleen Beck, OTR/L has been an occupational therapist since 2000, working in school-based, hand therapy, outpatient peds, EI, and SNF. Colleen created The OT Toolbox to inspire therapists, teachers, and parents with easy and fun tools to help children thrive. Read her story about going from an OT making $3/hour (after paying for kids’ childcare) to a full-time OT resource creator for millions of readers. Want to collaborate? Send an email to contact@theottoolbox.com.
This article on shamrock balance beam ideas was originally written in March 2016. We updated it in March 2024 and included new information on how to grade up or down a balance beam, and balance beam ideas for preschoolers and toddlers.
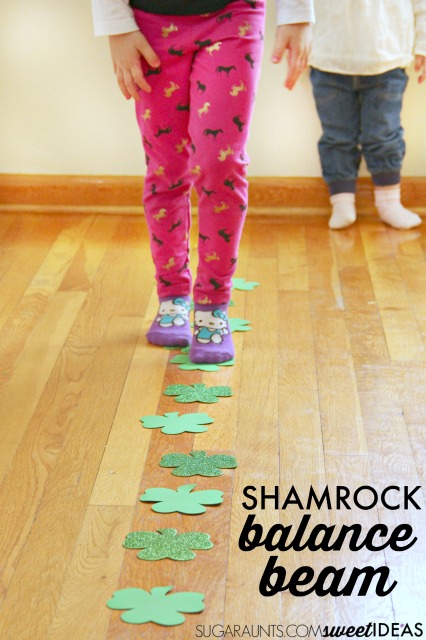
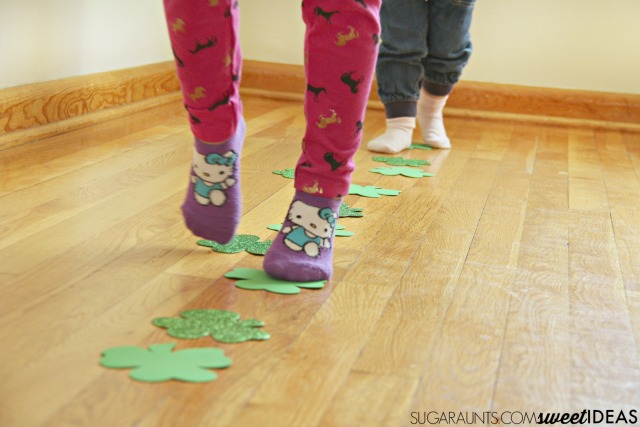
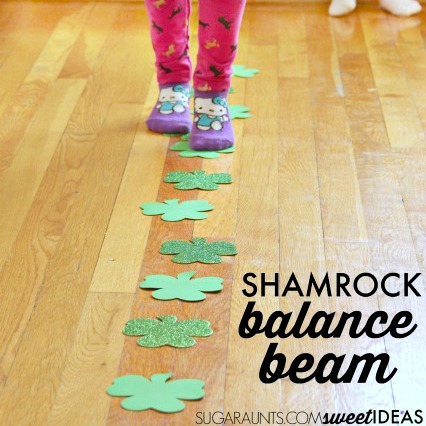
This shamrock balance beam uses foam shamrocks we found at the dollar store. It’s a fun indoor balance beam to use with a St. Patrick’s Day theme or a Spring theme in occupational therapy. In fact, you could use this gross motor activity along with our Spring sensory walk and you’ve got a great obstacle course for therapy sessions.
This shamrock activity is a great balance beam for preschoolers because when the child steps along the shamrocks, their movements are very precise. One way that I actually like to use it as a path to follow a few leprechaun activities in OT sessions, too!
Shamrock Path Balance Beam Activity
There is just something about easy sensory play that makes mom and kids happy. Balance beams are a way to incorporate vestibular sensory input into a child’s day, allowing them to refocus, improve behavior and impulsivity, regulate arousal levels, improve attention, Improve balance, and help with posture.
One thing we see a lot in schools or in therapy clinics is the need for vestibular input. There are sensory red flags that come up a lot. And while not every child has every red flag show up…and red flags might not mean there is for sure an issue that needs addressed. (This is where the OT eval comes into play!)
Some things to consider about vestibular challenges…
Children with vestibular problems might seem inattentive. These are the kiddos that appear lazy, showing excessive movements, anxious, or attention seeking. They might have trouble walking on uneven surfaces, changing positions, or resist certain positions.
One way to address these needs is with a balance beam, like this Shamrock St. Patrick’s Day balance beam.
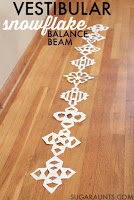
A while back we shared a snowflake balance beam for indoor vestibular sensory input…And we’ve been on a balance beam kick ever since!
For our balance beam, we used foam shamrocks along the floor. Position them as close to each other as your child needs. To extend the activity a bit, move them further apart or add curved and turns to your balance beam.
For our balance beam, we used foam shapes. You can adapt this to any theme by cutting foam shapes or using any type of foam piece in place of the shamrock. Then, you can help preschoolers and toddlers develop skills all year round, with the same activity.
It’s very possible to create a beginner balance beam using shapes or tape along the floor.
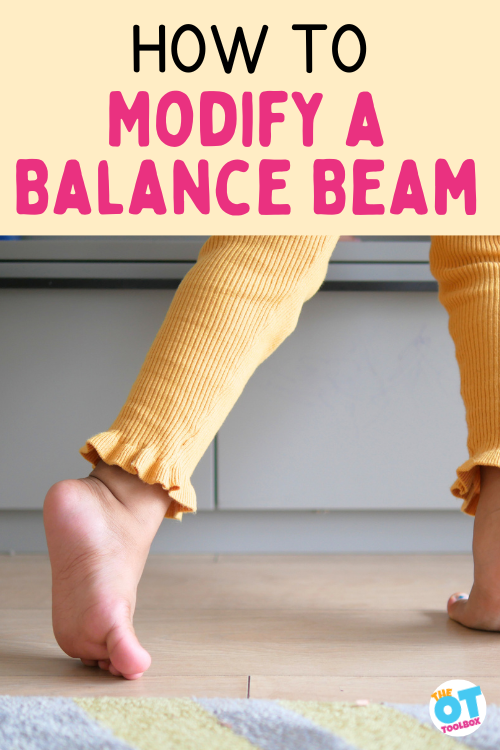
You can modify a balance beam to make the balance activity easier, or harder, depending on the needs of the child.
Check out the strategies below each section below. While we have them listed as toddler balance beam and preschool balance beam, this is just a way to classify the modification and activity tips to support developmental progression. Don’t worry about the names “toddler” and “preschooler”. This is just a developmental age range and you can definitely challenge balance and coordination skills at any age! Remember that the development of balance occurs through play.
Toddler Balance Beam
Walking along a balance beam can be a challenge for some kids with vestibular sensory needs. This is a great balance beam for toddlers and preschoolers because it’s flat on the ground and not raised up at all like a foam balance beam or a gymnastics balance beam.
You can really add some modifications to this activity to help a toddler gain skill sin balance and coordination. During toddlerhood that young children develop so many gross motor skills through play. My own kids loved this type of activity as 2 and 3 year olds!
Try these activity ideas to help motor skills development with a toddler:
Ask the toddler to tip toe along the shapes
Use different color shapes and ask them to name the color or the shape. You can use any foam or paper piece, as long as they are stuck to the floor with a bit of tape.
Ask the toddler to hold their arms out at their shoulder height.
Ask the toddler to walk sideways or backwards
To modify, or make the balance activity easier or harder:
Change the thickness of the balance line
Make the balance beam or balance line closer to the floor (flat on the floor) or raise it up with a board and blocks
Use bigger stepping stones or stepping images.
Encourage other movements or easier movements (hopping, tip toe, stepping, etc.)
Preschool Balance Beam
We love using this easy balance beam with preschoolers because you can really challenge preschool skills, too.
To further challenge your child, try some of these ideas:
Add arm motions.
Ask your child to look up at a fixed point instead of down at their feet.
Add curves and turns to the balance beam.
Position the shamrocks on pillows for an unsteady surface.
Raise the surface with a long board.
Try walking on tip toes, balls of the feet, or heels.
Walk the balance beam backwards or sideways.
Hop along the balance beam. (Be sure to tape the shamrocks to the floor.
Use crab walking or other animal walks along the balance line
Include upper body movements along with walking
To modify, or make the balance activity easier or harder:
Encourage different walking movements
Make the shapes or the walking line thicker
Make the steps closer together
Use the suggestions above from the toddler section.
Colleen Beck, OTR/L has been an occupational therapist since 2000, working in school-based, hand therapy, outpatient peds, EI, and SNF. Colleen created The OT Toolbox to inspire therapists, teachers, and parents with easy and fun tools to help children thrive. Read her story about going from an OT making $3/hour (after paying for kids’ childcare) to a full-time OT resource creator for millions of readers. Want to collaborate? Send an email to contact@theottoolbox.com.
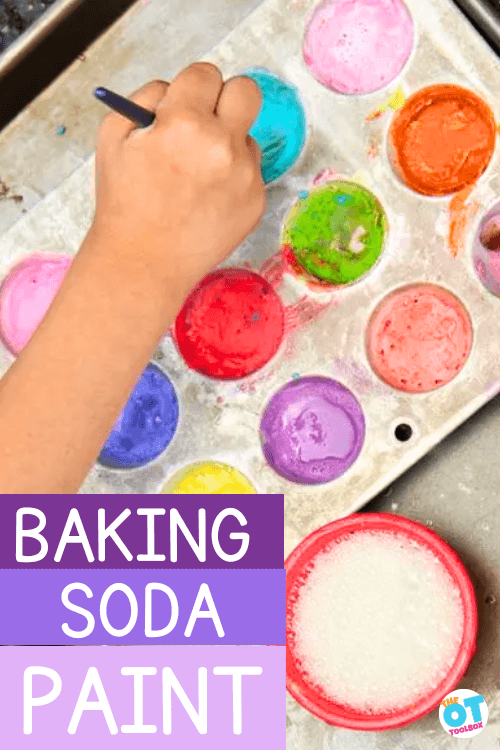
Many years ago (July 28, 2015 to be exact…this post has been updated!) we made this set of baking soda paints. It was a fun outdoor, creative painting activity and we painted on the driveway. I wanted to come back to this sensory painting idea again, because it’s such a fun way to be creative with kids. Plus, kids can mix up paints of their own and work on scooping and pouring with the ingredients and support those fine motor skills. I think it’s a fun idea you’ll want to check out!
Baking Soda Paint
The amazement of watching a child’s face light up when science and discovery happens is like watching a light turn on.
This baking soda and vinegar paint experiment is a creative painting and sensory way to explore science through painting. My kids had so much fun exploring the chemical reaction of baking soda and vinegar with our bright and bold homemade paints. We ended up with vivid paintings and had a great time creating.
Be sure to read our article on why kids need messy play…this activity sure does support those needs!
And, this activity is a great one for adding to a messy playdate with friends. As an OT, I LOVE using this activity for so many goal areas!
STEAM Activity
One fun benefit of this activity is that it’s a STEAM activity. we’ve covered the benefits of fine motor STEM activities, but the creative painting aspect of using the baking soda paints adds an art component to the science, technology, engineering, art, and math.
You might want to check out our baking soda snowmen sensory activity for another fun science activity.
Baking Soda and Vinegar Paints
This post contains affiliate links. This post is part of our Learning with Free Materials series where we are sharing learning ideas for homeschoolers and school-extension activities using items that are free or mostly free (i.e. CHEAP or you already have in the home), and is part of the 31 Days of Homeschooling Tips as we blog along with other bloggers with learning at home tips and tools.
You’ll need just three ingredients to make these paints:
Washable Poster Paint (This is my favorite brand of paint!)
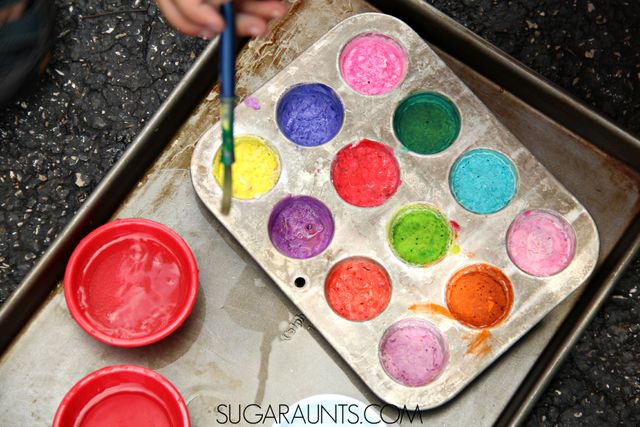
A Mini Muffin Tin (any containers will work, but you’ll want all of the paints near each other and enough compartments so that you can see the different shades made by slightly adjusting the amount of paint you add.
Paper
Popsicle sticks for mixing the paint and baking soda
Water
Paint Brushes
How To make Baking Soda Paint
Ok, now that you’ve got your materials gathered, actually making the baking soda paint is really easy! This process is fun for kids to be involved with as well.
First, mix together baking soda and water to create a thick paste. You want it to be stir-able and moist. Use the popsicle sticks to mix it together.
Scoop the paste into the sections of the muffin tin with a spoon.
Add drops, globs, and dabs of different colored poster paint. Adjust the amounts in the different sections so that you get a nice variety of shades.
Stir the paint into the paste.
Next, pour off any excess water from the tops of the paste. You want a nice, thick paste to remain.
Then you are ready to paint! You can either start painting right away, OR you can let the paints harden. Allow the muffin tin paints to sit overnight. This will create a hard, tub of dried paint, almost like dry watercolors.
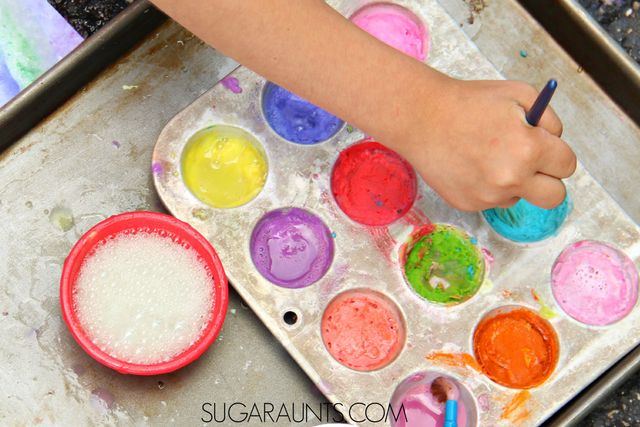
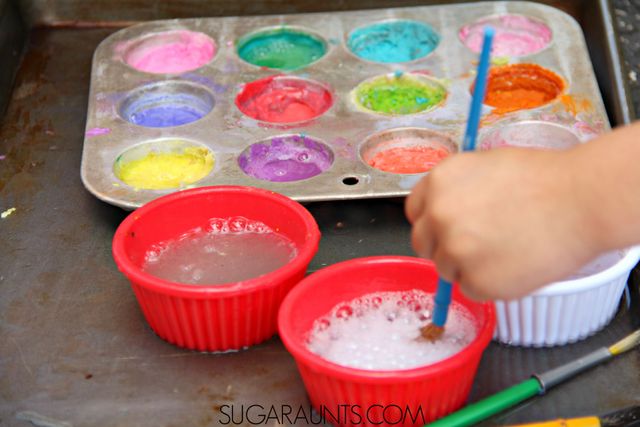
Baking soda and paint makes a great colorful painting mixture. We added a bit of vinegar to get a lovely fizz and pop to our paints!
This is such a fun way to explore the vinegar reaction with the baking soda paint.
Baking Soda Painting
When you are ready to paint, you’ll need to prepare the vinegar.
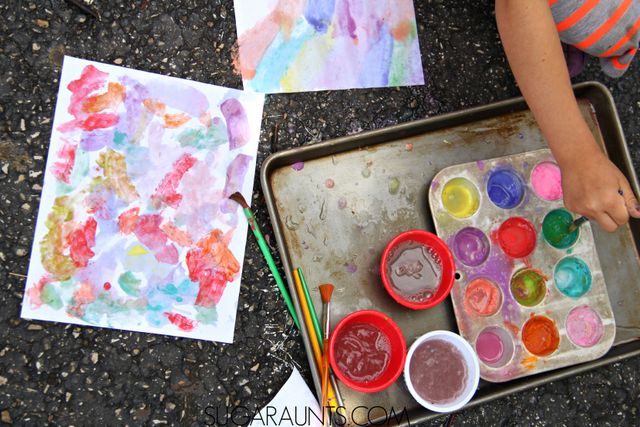
Pour a small amount of vinegar into cups. Use paint brushes to dab vinegar into the dried paints. Watch the science reaction happen as you paint!
Adding more vinegar to the tubs of paint will give you a brighter hue as you paint. You can get even more vivid colors by swiping chunks of moistened baking soda across the page. And, what a textured piece of art this will be!
What is especially neat about these paints are that if you work quickly enough, you can see the bubbly reaction right on your art work. Simply swipe the paint brush into the vinegar and then into the baking soda paints. Quickly paint and your bubbles will dry onto the paper.
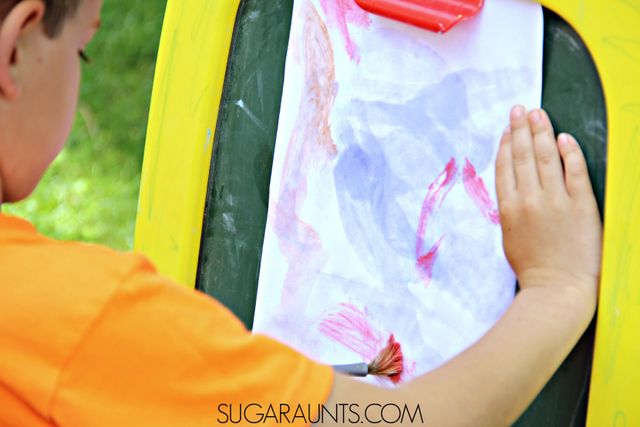
We taped a piece of paper onto an easel and painted on the vertical surface. This is a great activity for developing wrist stability and core strength.
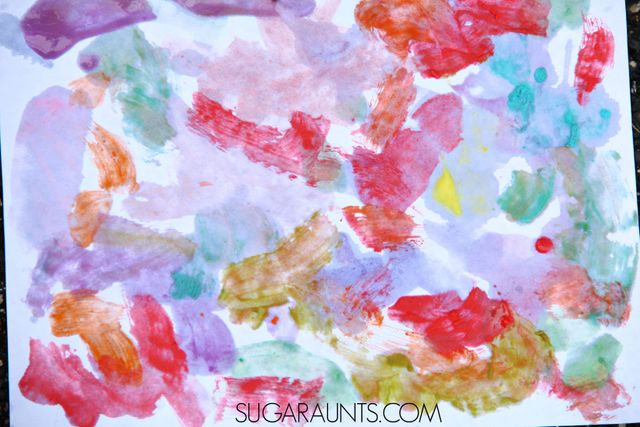
How gorgeous is this work of art? The baking soda paint made vivid colors!
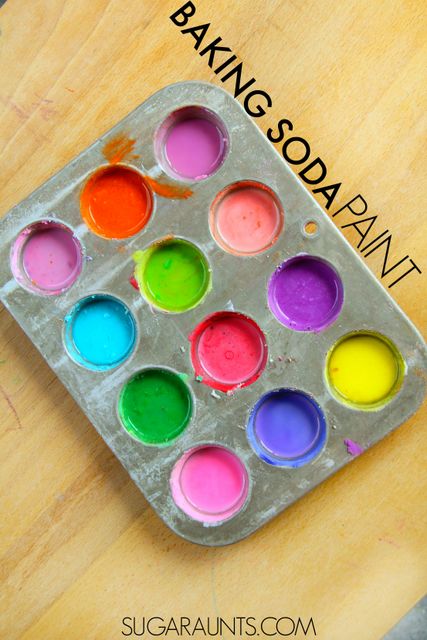
Use a mini muffin tin to make a whole set of baking soda paints. The colors are so vivid!
Looking for more baking soda experiments? These are a few of our favorites:
Colleen Beck, OTR/L has been an occupational therapist since 2000, working in school-based, hand therapy, outpatient peds, EI, and SNF. Colleen created The OT Toolbox to inspire therapists, teachers, and parents with easy and fun tools to help children thrive. Read her story about going from an OT making $3/hour (after paying for kids’ childcare) to a full-time OT resource creator for millions of readers. Want to collaborate? Send an email to contact@theottoolbox.com.
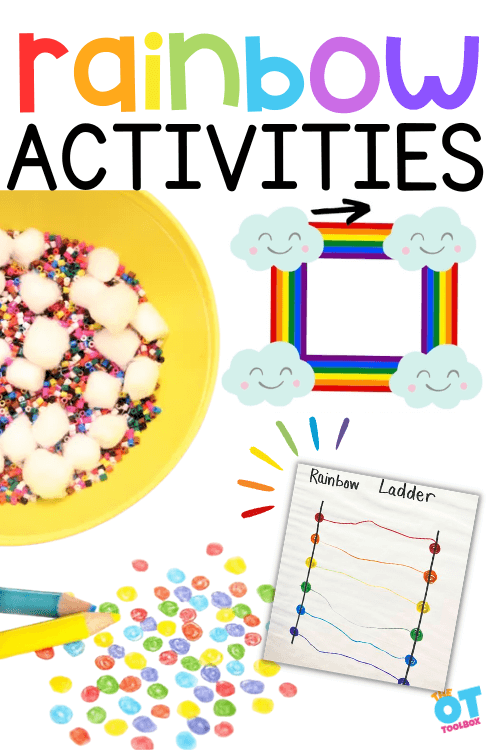
Here, you will find rainbow activities that are powerful and effective activities to help with child development. I’ve strived to pull together rainbow sensory activities, crafts, fine motor activities, visual motor activities, and movement ideas. Scroll through the various rainbow theme ideas to promote skills for all ages. These are great additions to your Spring occupational therapy activities!
We’ve also added a free printable therapy activity sheet with rainbow activities that can be used in planning therapy sessions. Scroll to the bottom of the blog post to grab this resource.
Each rainbow therapy activity below is designed to promote multiple aspects of child development. These are powerful motor activities for developing areas that help kids with functional tasks, coordination, movement, and learning.
Some of our favorite rainbow activities include colorful sensory bins, rainbow markers and crayons, and making rainbow crafts. The nice thing about using a rainbow theme in therapy is that you can use what you have on hand.
Sort paperclips or craft pom poms by color.
Pick a colored pencil out of a box and use it to write the name of the color.
Ask the students to name their favorite color and then use it as a rainbow writing prompt to write about things that are typically that color.
Cut colorful paper into strips and glue it to a cloud shape cut from paper.
There are so many easy ways to come up with rainbow ideas that build on skills. Let’s take a look at a few more ideas…
Rainbow Fine Motor Activities
A rainbow therapy theme is great during the Spring months.
This time of year, rainbows are the way to go for building fine motor skills. Try some of these activities to work on fine motor strength, coordination, hand eye coordination, motor planning. You’ll see improvements in pencil control, dexterity, precision, in-hand manipulation, and fine motor skill work.
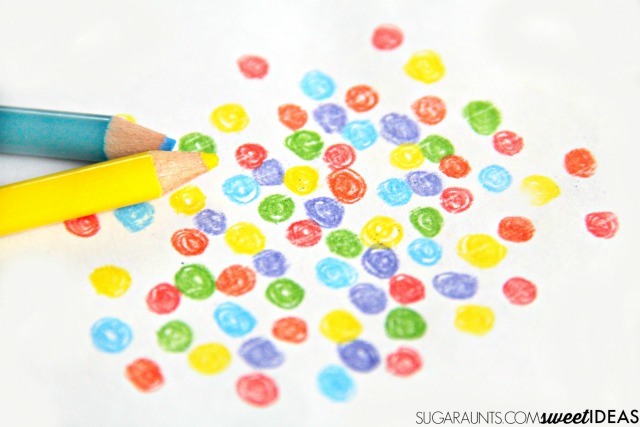
Rainbow pencil control activities– All you need is some colored pencils and paper to work on pencil control, visual motor skills, and hand strengthening.
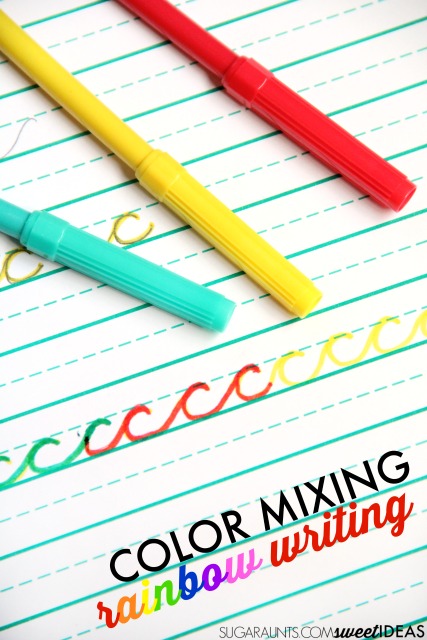
Rainbow Color Mixing Handwriting Activity– Grab a pack of markers. Kids can work on color mixing and letter formation, letter size, spacing, and handwriting legibility.
Rainbow bead bracelets– Use beads and pipe cleaners to make a set of rainbow beads and develop pincer grip, in-hand manipulation skills, bilateral coordination, open thumb web space, arch development, and eye-hand coordination skills.
Pipe Cleaner Rainbow Craft– An alternative to the rainbow bead bracelet is our pipe cleaner rainbow that we made many years ago. This activity was fun because we built a 3 dimensional rainbow…and then used it in our leprechaun trap!
To make the rainbow pipe cleaner, use colorful pipe cleaners and colorful beads. Ask your students to sort the beads into colors of the rainbow, and then match the beads to the same colored pipe cleaner. Bend the pipe cleaners into a rainbow arch. Then, push the ends of the pipe cleaners into a foam block.
Rainbow PreWriting Lines Activity– This free therapy slide deck is a fine motor and gross motor activity to help kids with pre-writing skills. Kids can work on finger isolation, eye-hand coordination, visual motor skills, and more.
Pot of Gold Coins– Cover cardboard circles or washers with foil to make gold coins. If you can grab some gold wrapping paper or tissue paper, use it to wrap the circles while kids develop bilateral coordination, precision, hand strength, and motor skills.
In this blog post, you’ll also see how to tie scraps of fabric to create a rainbow. This is a fun bilateral coordination activity that builds hand eye coordination skills as well.
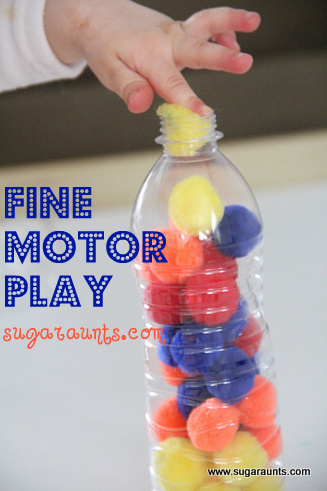
Rainbow Bottle Activity– All you need is an empty water bottle and colorful craft pom poms to work on finger isolation, in-hand manipulation, bilateral coordination, hand eye coordination, and dexterity. This is a great rainbow activity for preschoolers or toddlers.
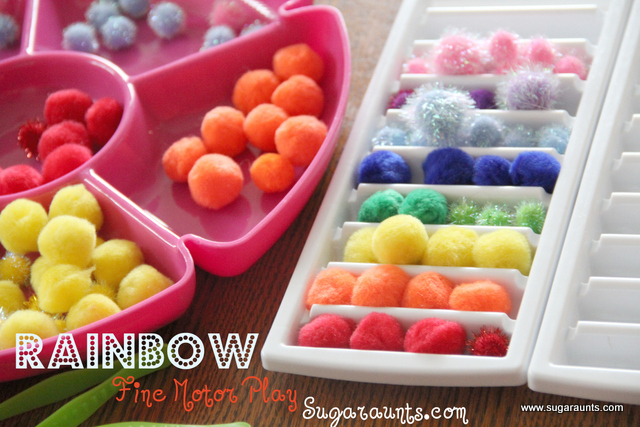
Rainbow Fine Motor Sort– All you need is an ice tray and colorful craft pom poms to work on in-hand manipulation skills, sorting, precision, dexterity, and finger isolation.
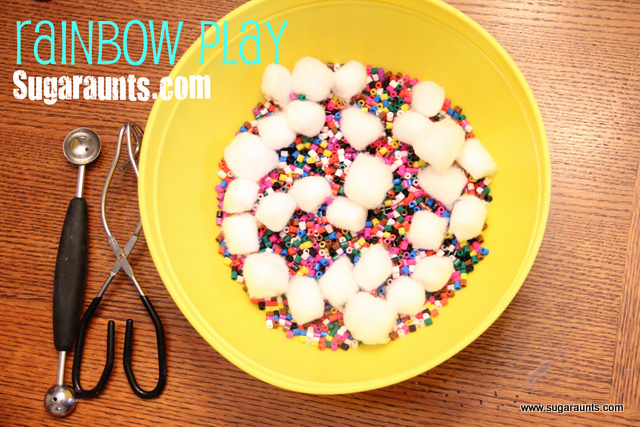
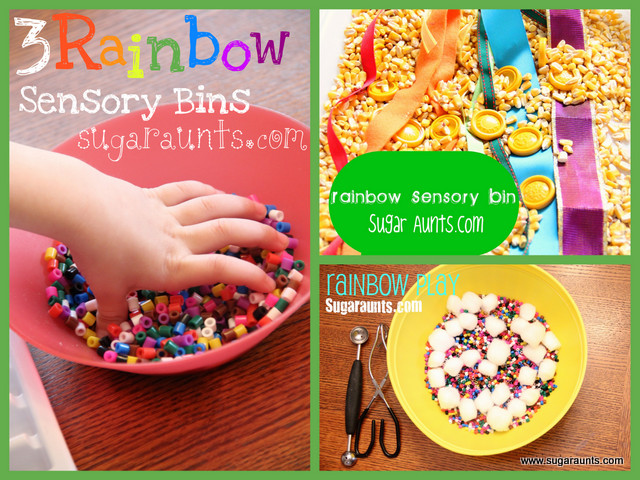
Rainbow Scoop and Sort– A simple rainbow sensory bin can include beads, yarn, or any colorful materials and a handful of cotton balls. Add a kitchen utensil or scoops, tongs, or other tools to scoop, manipulate, and work on coordination, and fine motor skill development.
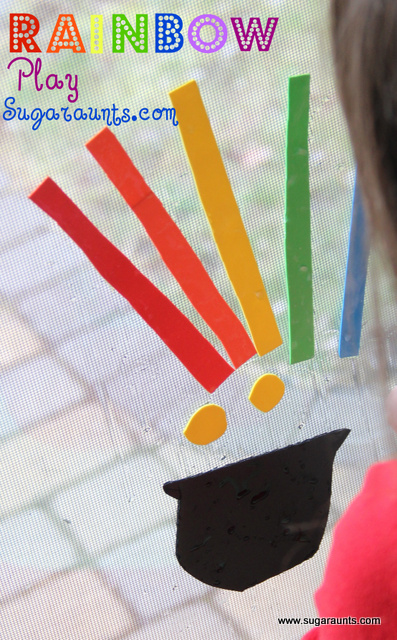
Rainbow Fine Motor Work on the Window– Kids can cut foam sheets into strips to work on scissor skills. Then, stick these to a window or even a shower wall to work on precision, wrist extension, wrist stability, shoulder strength and stability, core strength, and the coordination skills needed for fine motor tasks like pencil control and dexterity.
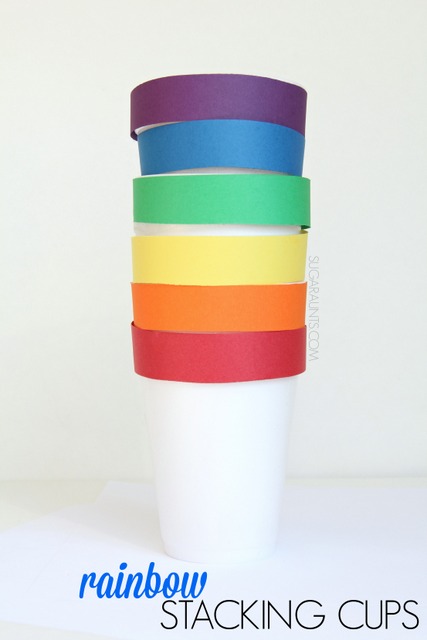
Rainbow Cups– Make a set of these colorful cups and work on bilateral coordination, eye-hand coordination, core strength, motor planning, and more.
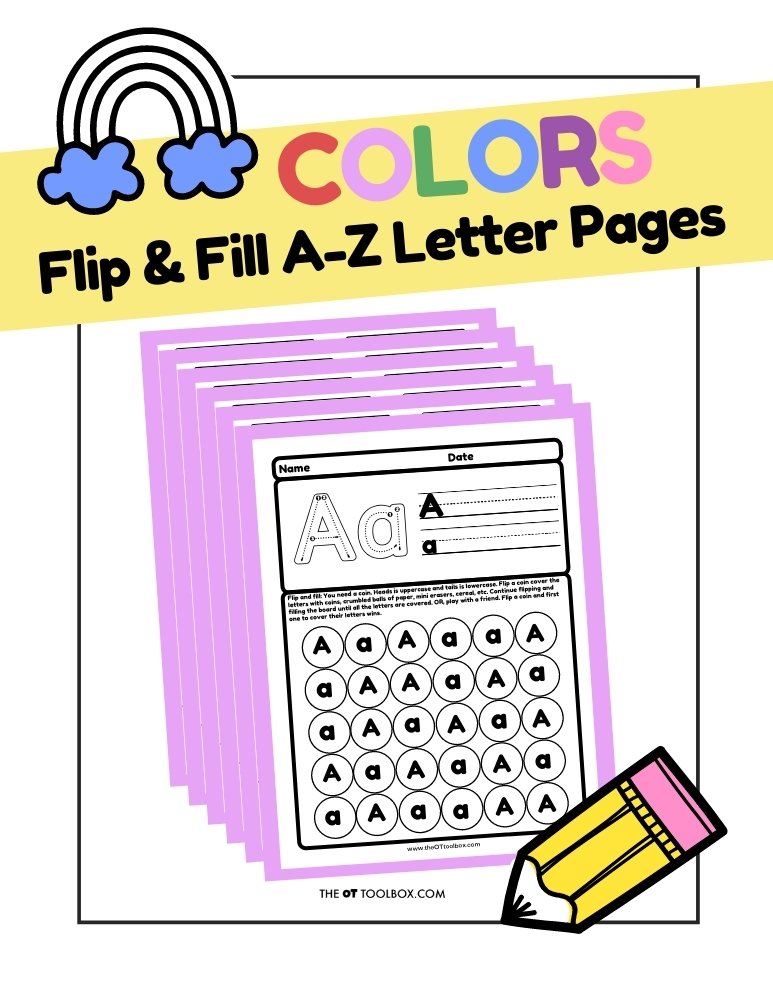
Rainbow Flip and Fill Fine Motor Activity– Kids can use these alphabet worksheets to fill the upper case or lowercase letters and develop fine motor skills like in-hand manipulation, eye-hand coordination, precision, open thumb web space, and more, with these color activities in the Colors Handwriting pack and bonus pages.
More ideas for supporting fine motor skills with a rainbow theme include:
Fruit Loop Rainbow Craft: One therapy tool that I love to use during the Spring months is Fruit Loop cereal rings. Why? It’s a great shape for little fingers to work on pincer grasp and eye hand coordination, but it’s also an inexpensive therapy tool, too.
All you need to do is create a rainbow template on paper or cardstock.
Ask your student to separate the cereal by color. This is a great color sorting activity.
Next, show your student how to glue the cereal pieces onto the rainbow.
Rainbow Writing: If you need an inexpensive therapy activity that uses items you already have, rainbow writing is it. Kids like to rainbow write, especially if you use motivating words or a different writing surface than they are used to.
First, gather your materials. You’ll need a surface and colorful writing utensils (dry erase board and markers, sidewalk and chalk, paper taped to a window and crayons, fabric and markers, or just use paper and crayons).
Show the students how to make a rainbow shape using one color. Ask them to draw a large arch.
Next, use each color of the rainbow to draw right over the first arch.
You’ll end up with a colorful mess…but it’s a great activity for building skills!
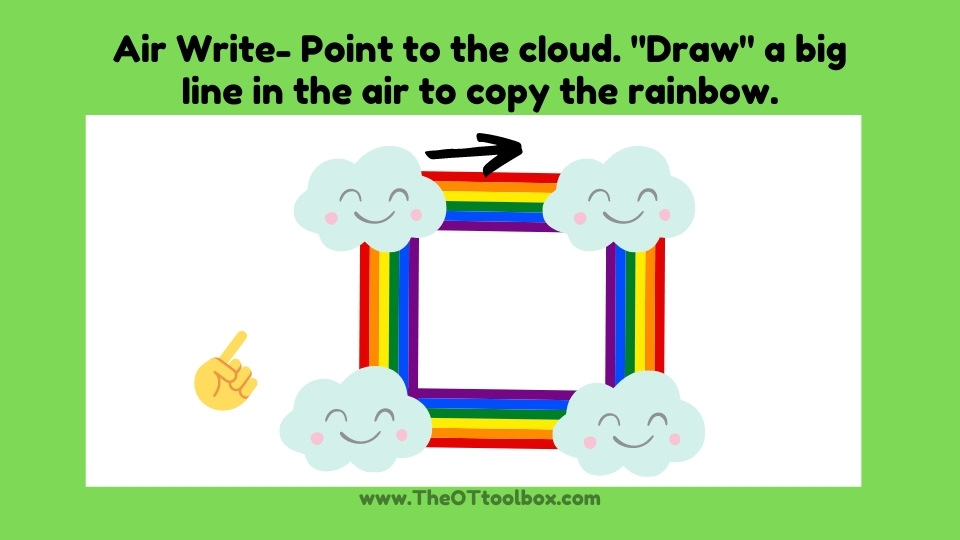
This activity supports visual motor skills, pencil control, and crossing midline. If you use a dry erase board or a window, ask your students to use a spray bottle with water to erase the colors and then watch those colorful rainbow drips!
Color Rice for Sensory Bin: One sensory motor activity that I love is a good old fashioned sensory bin. Kids love a sensory bin, and as the OT practitioner, you can add or pull out a couple of items to meet specific needs, and then use the sensory bin with your caseload.
Dye rice with different colors like we do in our rice sensory table blog post.
Fill a large container with the colorful rice.
Add tools and cups to scoop and pour. (Spoons, funnels, containers)
Of course, with any sensory bin, you would need to consider the safety of the child, and a color rice sensory bin would be no different. This activity works on motor planning, sensory touch, and motor skills.
Rainbow rice sensory bins can be used for other skill areas like handwriting by adding color words and asking kids to copy the word that they find in the sensory bin.
Rainbow Worksheets: The members in The OT Toolbox membership know that we have many rainbow worksheets that support a variety of skill areas. There are handwriting activities, coloring tasks, fine motor activities, scissor tasks, rainbow crafts, rainbow self regulation activities, rainbow sensory bin materials, and much more. Like all of the materials in The OT Toolbox membership, our rainbow worksheets support hands-on skill building through play.
Rainbow Visual Motor Activities
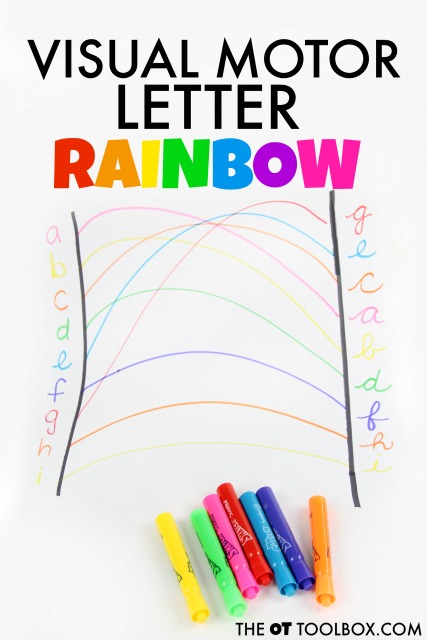
Rainbow Ladder– Use this rainbow visual motor activity to work on visual scanning, visual tracking, visual figure ground, form constancy, visual discrimination, and other visual motor skills needed for handwriting and reading. We used this in a cursive handwriting activity, but you could use the same concept in teaching upper and lowercase letter identification, number writing, sight words, or other multi-sensory learning strategies.
Rainbow Drawing Visual Motor Activities– Use this occupational therapy teletherapy slide deck to encourage kids to copy rainbow drawing forms and build pencil control, visual perceptual skills with simple and complex drawing skills.
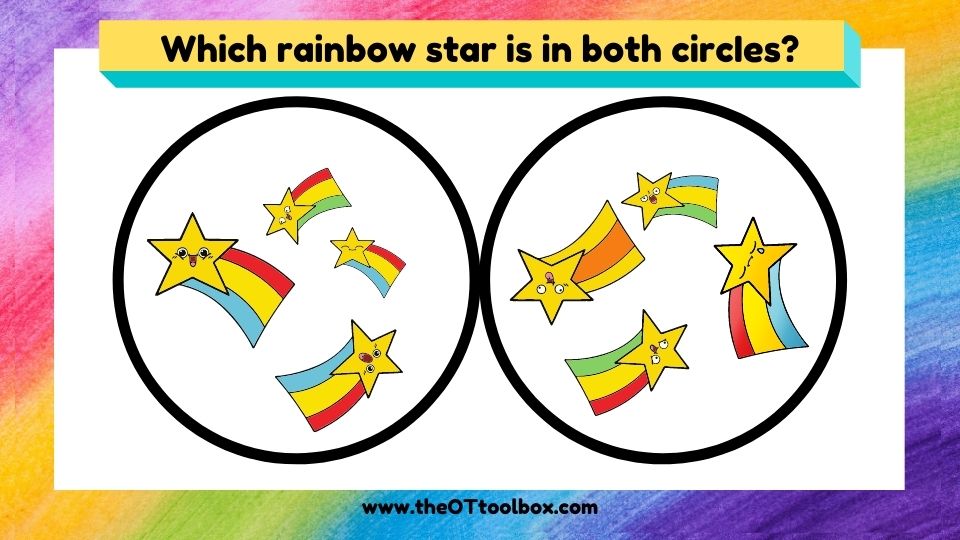
Emotion Matching Game– Use this rainbow matching game to teach emotions and social emotional developmental milestones and skills. It’s a powerful way to work on visual perceptual skills too, including visual scanning, eye-hand coordination, visual discrimination, and other visual motor skills.
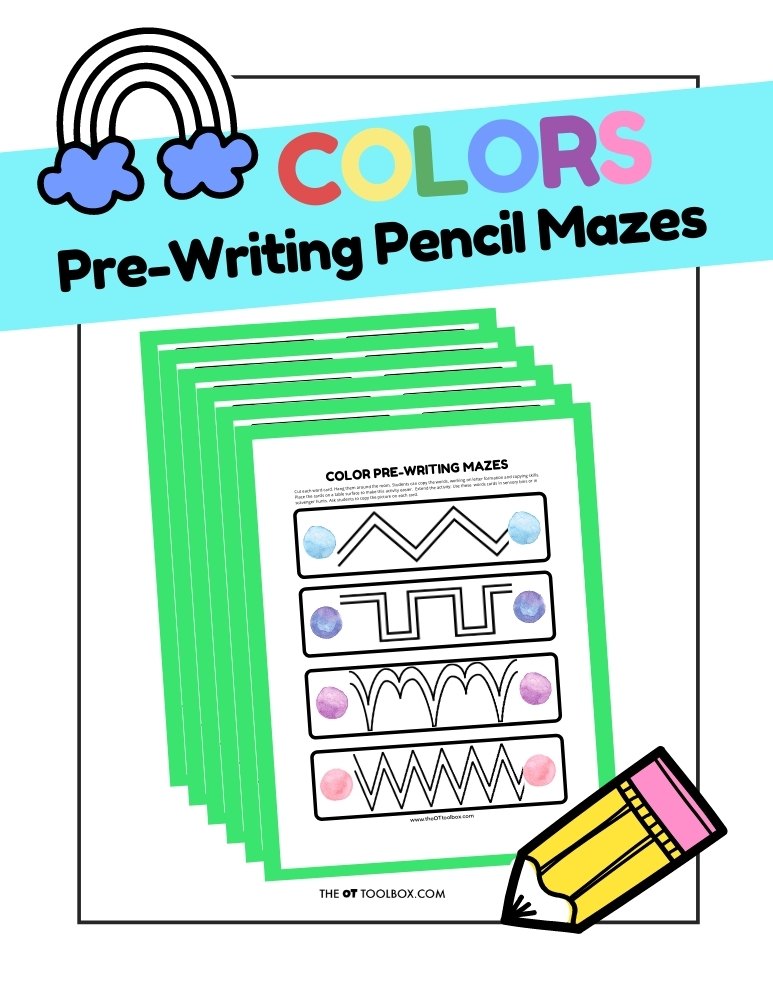
Rainbow Colors Pre-writing Lines Mazes– These mazes are great for developing pencil control, eye-hand coordination skills, fine motor dexterity, and visual motor skills.
Rainbow Sensory Play
When kids participate in sensory play experiences, they develop tactile sensory exposure and can explore tactile experiences. Use these activities to learn colors, and learn through play! Try these multisensory learning activities to teach colors, and develop sensory exploration through play.
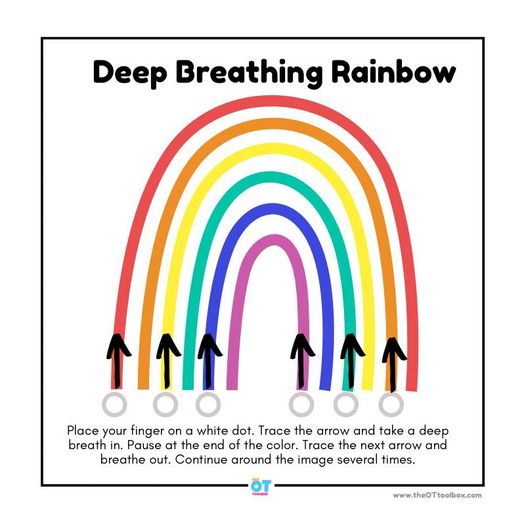
Rainbow Deep Breathing Exercise– Use this rainbow deep breathing exercise as a calming self regulation activity to help with coping strategies and mindfulness.
Rainbow Sensory Bottle– In this rainbow sensory bottle, we used friendship thread to incorporate all the colors of the rainbow, but making a calming sensory bottle can use any materials you have on hand. Use the sensory bottle as a calming sensory tool.
Rainbow Playdough– When kids play with play dough, they gain proprioceptive input through their hands and fingers. This heavy work input is a powerful resistive activity that “wakes up” the hands but also can be calming.
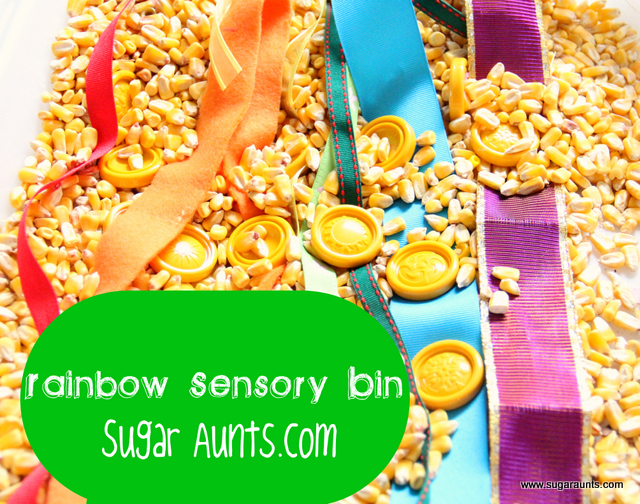
Rainbow Sensory Bins– Making rainbow sensory bins are easy but there are big benefits. Kids can use sensory bins as a tactile sensory experience, but with fine motor benefits like tool use, scooping sorting, fine motor precision, dexterity, manipulation skills, coordination, and so much more. Add sight words and high-frequency words, or math manipulatives to use these rainbow sensory bins in multi-sensory learning opportunities.
Rainbow Xylophone– Kids can explore sound, STEAM concepts, and motor skills in this auditory processing activity.
Rainbow Crafts to develop skills
These rainbow crafts are powerful ways to work on fine motor skills, manipulation of tools, dexterity, strength, motor planning skills, handwriting, and more.
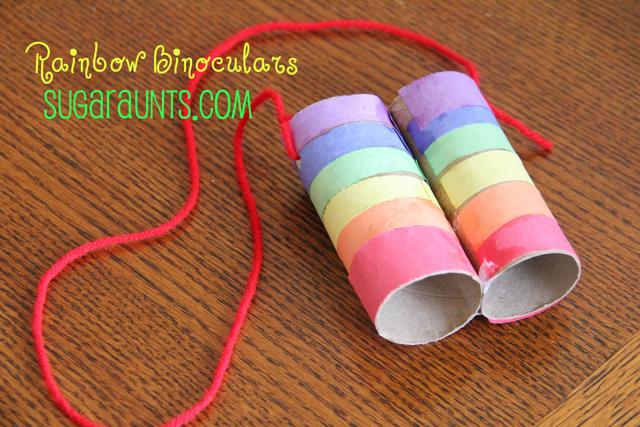
Rainbow binoculars craft– Kids can make this rainbow binoculars craft and work on scissor skills, bilateral coordination motor planning, and precision. Then, use this rainbow craft to encourage visual scanning, visual perceptual skills, and more. Can you use this in a color scavenger hunt?
Egg carton rainbows– Use a recycled egg carton and kids can paint in this process art activity that develops grasp, precision, eye-hand coordination, and sensory experiences.
Rainbow Snacks
When children are active in the kitchen, they develop so many fine motor skills, executive functioning skills. The kitchen is a prime location for developing working memory, attention, direction following, as well as offering learning opportunities, as well. Fine motor skills in the kitchen are just some of the benefits of cooking with kids!
Try these rainbow recipes that kids can make and are a perfect addition to a rainbow theme.
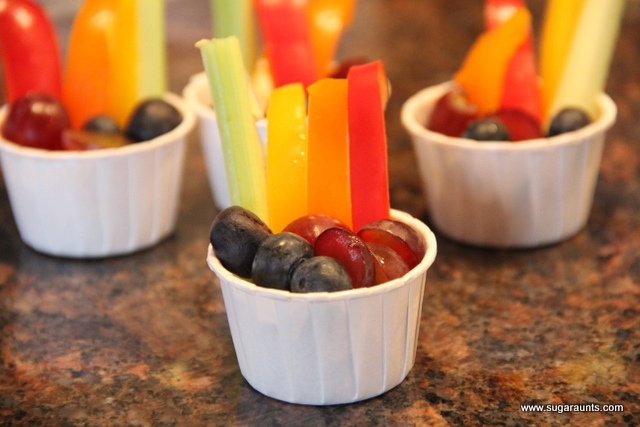
Rainbow Snacks– These rainbow snack cups are perfect snacks for preschool. When kids help to make them, they can work on cutting foods, sorting, visual scanning, and fine motor skills, too!
Color Snack– Pair kitchen activities with a popular children’s book to explore colors and developing skills in the kitchen with kids.
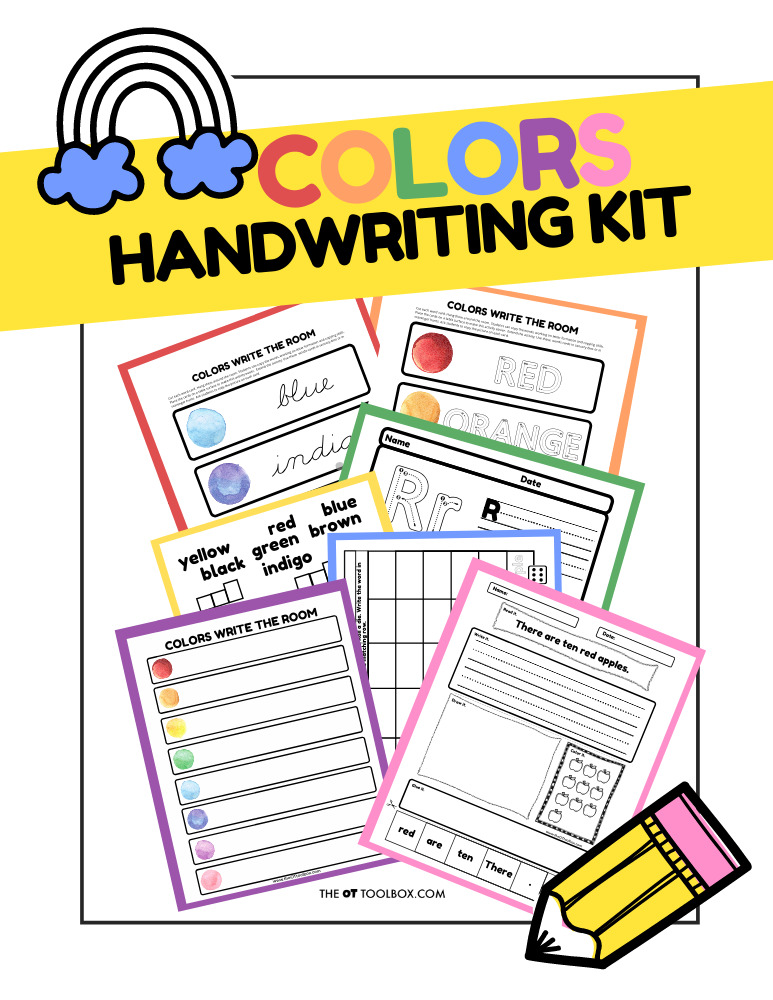
Rainbow Handwriting Kit– This resource pack includes handwriting sheets, write the room cards, color worksheets, visual motor activities, and so much more. The handwriting kit includes:
Write the Room, Color Names: Lowercase Letters
Write the Room, Color Names: Uppercase Letters
Write the Room, Color Names: Cursive Writing
Copy/Draw/Color/Cut Color Worksheets
Colors Roll & Write Page
Color Names Letter Size Puzzle Pages
Flip and Fill A-Z Letter Pages
Colors Pre-Writing Lines Pencil Control Mazes
This handwriting kit now includes a bonus pack of pencil control worksheets, 1-10 fine motor clip cards, visual discrimination maze for directionality, handwriting sheets, and working memory/direction following sheet! Valued at $5, this bonus kit triples the goal areas you can work on in each therapy session or home program.
For more rainbow crafts and ideas to support development of skills, check out the Spring themed activities in our Spring Crafts library. There are fun ways to use a paper plate to create a rainbow while working on scissor skills…and just so many other Spring tools for supporting the development of kids of all ages.
Free Printable List of Rainbow Activities
One tool we have in The OT Toolbox membership club is therapy themes. Rainbow themed activities is one of them! We’ve put together a list of rainbow activities that can be used in therapy sessions to build skills and created a printable therapy lesson plan.
This resource is a hit with therapy providers because they can pull out the sheet and plan their week of therapy sessions with just a handful of activities. This printable is inside The Membership Club but you can grab a copy here as well. Enter your email address into the form below and we’ll send it to you.
Colleen Beck, OTR/L has been an occupational therapist since 2000, working in school-based, hand therapy, outpatient peds, EI, and SNF. Colleen created The OT Toolbox to inspire therapists, teachers, and parents with easy and fun tools to help children thrive. Read her story about going from an OT making $3/hour (after paying for kids’ childcare) to a full-time OT resource creator for millions of readers. Want to collaborate? Send an email to contact@theottoolbox.com.
Occupational therapists work on many aspects of handwriting to ensure that legible writing is a functional means of communication for children and students. One aspect of that is addressing the margins in handwriting. When margins are omitted or neglected, handwriting moves from functional to difficult to read.
Poor use of margins when copying written material is a handwriting problem that looks like different things. When using margins is difficult in handwriting, it leads to illegibility and trouble copying written work.
Margins in handwriting
One thing that comes up frequently in school based OT, is the use of margins when writing. I’ve worked with many students that struggle with knowing to move their pencil to the next line when writing. Other students cram letters into the right margin of the page and then move to the next line only to slightly move over a bit. This means that the left margin slowly creeps across the page.
You’ve seen it before. A child is writing a journal entry or a writing response on a piece of paper and each line of the paragraph creeps in toward the center of the page.
The margins in their handwriting are just all over the place! By the end of the passage, the left margin is half way across the page. You might see them start halfway across the page and try to squash letters in by the time they get to the right side of the page.
It’s hard to read and even the kiddo has trouble reading back over their work. The thing is, the student may not even be aware they are writing like this…
When a child has poor use of margins when writing, there is typically a problem with spatial organization and page orientation.
Decreased spatial awareness can happen due to trouble with visual perceptual awareness.
It may carry over to handwriting that appears very messy with words that are squashed up against one another or spaced with very large spaces between letters.
what are margins in writing
Margins are the edges of the paper. When we write, we move our pencil up to the edge of the right side of the paper, but we stop before we move to the next line to continue writing.
The right margin on a page is where the student will stop writing, but so often, I’ve seen students that cram words right up to the edge of the paper because they can’t conceptualize how much space is needed to fit the word onto that line of the paper. They might end up cramming the whole word so the letters are very small or squished up to the edge of the page.
The left margin is the edge of the page where the next line begins on the paper. I’ve also seen many students who write or copy a list of words, or are writing a paragraph on lined paper. When they move to the next line, the move their pencil over just slightly because they are aligning the word with the written material on the line above. Eventually, you see a margin that creeps across the page toward the middle of the page.
Why kids struggle with margins in handwriting
So, why do we see those handwriting samples where the lines of written work slowly creep over to the middle of the page? With each line that the student writes, they start writing just a bit more away from the margin?
There could be a few different things going on here that impact margin use:
1. There could be a visual perception difficulty going on.Visual perceptual skills could lead to trouble with margin use. Specifically, it could be a problem with visual spatial relations. Spatial relations, or poor spatial awareness difficulties shows up frequently in handwriting.
This presents as poor spacing between letters and words, poor use of margins, or written work that drifts in toward the center of the page. Kids may struggle with knowing when to stop writing on the end of a line of the page and try to squash the material in rather than stopping to move to the next line.
Left to right use of paper or writing spaces on worksheets can be a problem. Other size aspects of handwriting including letter size, placement of letter “parts”, and consistency in sizing can be difficult for the child with visual spatial concerns.
Visual spatial relations can also impact placement of objects or the child’s body parts in relation to other objects, other people, or in movement. This can show up as poor coordination, poor balance, poor self-awareness, poor self-confidence, and even impaired social emotional relations.
Spatial awareness is the ability to perceive the world around one’s self and position themselves or objects accordingly. Awareness of space relates a lot to the proprioceptive and vestibular systems as well as the visual system.
A child who demonstrates poor spatial awareness in handwriting tasks most likely shows some variances of difficulty with gross motor movement, understanding directions, abstract concepts, and language.
2. There could be an oculomotor component. The movement of the eyes in activities is complex! When we see issues with margins, there could be a couple of oculomotor issues happening. At a basic level, the eyes move to take in information and process that information for use.
One oculomotor skill that may be in play with margin trouble are visual saccades/visual scanning. Saccades are the ability to visually scan information. Saccades require the ability to fixate on information in the visual fields.
Saccadic movement, or more commonly known as visual saccades, is the ability of the eyes to move in synchrony from point A to point B rapidly WITHOUT deviating from the path. When kids move their eyes to the next line of a paper, they jump to the nearest anchor (which will be the letter above on the last line of text they just wrote.) They will then scoot their pencil over and under that letter, resulting in written work that drifts in toward the middle of the page. Here is more information on visual saccades and learning.
We cover more about oculomotor skills and how they result in functional issues in reading, writing, and daily activities in the free Visual Processing Lab here on The OT Toolbox.
3. It might be developmental. In this case, kids just need more experience with writing paragraphs of text. They place their written material anywhere on the page or drift over on the line when starting to write. Visual and verbal cues…and more practice can help.
Even children without visual perception difficulties may tend to drift their handwriting in toward the middle of the page as they write paragraphs. This is especially apparent in free writing, journal writing, or writing prompts. You will see that children who are developing their ability to form thoughts in paragraph form. As they write, it is common to see the lines start to drift toward the middle of the page. Here is more information on development of eye-hand coordination.
3. It might be speed of writing or visual inattention. Basically, you might see a kiddo who just isn’t paying attention when they are writing. In this case, students might be writing so quickly that they are focusing on the content of the writing versus the layout of the page and where they are placing their written work.
This happens when kids are taking notes and trying to quickly get the information on the page. You may also see the lines of text drifting over during free writing or timed writing tasks. In these cases, a visual cue can help but it might just take a verbal prompt. Point out how the margins are creeping over and see if that helps. Here is more information on visual attention.
4. Look at reflexes. One thing that might be contributing to margin use is a retained ATNR reflex. Check out our resource on retained primitive reflexes. Here is information on primitive reflexes in general and how these movement reflexes impact function.
5. Look at midline crossing. Delays with crossing midline can impact movement across the page as the student writes. Read about midline and then try some of these midline activities. In this case, bringing attention to the margin can help. Use the strategies we have listed at the bottom of the page.
This visual processing checklist can be a helpful tool in screening for visual processing difficulties prior to a full evaluation. It can be a way to collect qualitative information to include in assessment write-ups as well.
Tips for Handwriting Margins
Today, I’ve got some tips for helping with spatial awareness in handwriting, including how to help with margins when writing. These tips can help kids with writing on the paper and using handwriting that is legible so they can come back and read what they’ve written. (And so the teacher or parent can read that handwriting too!)
Visual perceptual skills are needed for so many functional skills. You’ll find easy and fun ways to work on visual perceptual skills through play here. These are creative ways to work on the underlying issues that might be playing into trouble with margin use in handwriting as a result of spatial awareness difficulties.
This post contains affiliate links.
QUICK tips for improving spatial awareness:
For some of the issues mentioned above, such as an underlying visual perceptual or oculomotor problems, further help and interventions will be needed. Seek out assessment from an occupational therapist for individualized treatment and intervention plans. Use of our visual processing checklist to help to identify a specific area related to visual processing needs.
The strategies that I’ve listed below are tools for helping students use margins when writing and copying onto paper. I love using some of the visual prompts because it helps to draw visual attention toward the prompt. Some of the strategies below are fun for kids and unexpected, so that visual prompt helps them to remember where to start or stop their pencil along the margins.
Try some of these strategies to help with margins:
There are ways to accommodate for difficulties with spatial awareness. One quick tip is to use a highlighted left margin. This is a great way for those kids whose writing drifts over to the middle of the page as they write or kids who start in the middle of the page.
Use stickers placed along the right margin of to cue the student that they are nearing the edge of paper when writing.
Draw a line down the left margin for a starting point. Then use a different color to draw a vertical line down the right margin.
Place a thin piece of tape along the left margin. This can serve as a visual and physical cue as the place to start writing. It’s a visual anchor that helps with visual scanning.
Draw boxes for words on worksheets for them to write within.
Place small green dots on each line along the left margin. These are the “green lights” so students know where to start writing. Place small red dots on each line along the right margin. These are “red lights” so students know where to stop writing.
Take a look at the ATNR. This could also be an issue impacting margin use.
This activity is part of our month-long handwriting series where we are sharing creative and easy ways to address common handwriting issues in our 30 Easy Quick Fixes for Better Handwriting series.
Colleen Beck, OTR/L has been an occupational therapist since 2000, working in school-based, hand therapy, outpatient peds, EI, and SNF. Colleen created The OT Toolbox to inspire therapists, teachers, and parents with easy and fun tools to help children thrive. Read her story about going from an OT making $3/hour (after paying for kids’ childcare) to a full-time OT resource creator for millions of readers. Want to collaborate? Send an email to contact@theottoolbox.com.
The Handwriting Book is a comprehensive resource created by experienced pediatric OTs and PTs.
The Handwriting Book covers everything you need to know about handwriting, guided by development and focused on function. This digital resource is is the ultimate resource for tips, strategies, suggestions, and information to support handwriting development in kids.
The Handwriting Book breaks down the functional skill of handwriting into developmental areas. These include developmental progression of pre-writing strokes, fine motor skills, gross motor development, sensory considerations, and visual perceptual skills. Each section includes strategies and tips to improve these underlying areas.
Strategies to address letter and number formation and reversals
Ideas for combining handwriting and play
Activities to practice handwriting skills at home
Tips and strategies for the reluctant writer
Tips to improve pencil grip
Tips for sizing, spacing, and alignment with overall improved legibility
If you are looking for answers to common handwriting problems in kids, then this is the place to start for handwriting help, activities to help kids improve the skills they need for legible written work, and success when writing with a pencil. Handwriting problems are common for kids of all ages. There are many reasons for this (read more below) but the good news is that there are ways to address the underlying developmental need and to accommodate or modify to promote improved legibility. You can find all of our handwriting on the tab at the top of the site, but this is a headquarters for specific legibility problem areas.
Do you know a child with handwriting struggles? Handwriting issues typically show up around kindergarten, and the school based OT might tell you that there are underlying skills that are missing: the student can’t form pre-writing lines like diagonals, or have trouble with fine motor skills.
For older students, we see writing trouble show up in the way of letter reversals, poorly formed letters, letters crammed into a writing space, and many other factors that lead to illegible writing.
Does that sound familiar?
A parent might see their child battle the pencil every day as they try to write letters, erase completely, and read the homework they wrote down in school just an hour earlier. The see struggles with writing that lead to missed problems.
A teacher might see several students in OT sessions that reverse letters, write with little regard to the lines, uses a strange pencil grasp, or can not keep up with the rest of the class because of handwriting issues. Here are some important things that therapists wish parents and teachers knew about pencil grasp.
School based OTs and OTAs will work with kids one-on-one to meet handwriting goals and then cringe to see that same child not carrying over skills he’s seemed to master. You might be looking for ways to meet handwriting goals so that your clients can achieve success in the classroom.
Are you a homeschooling parent who knows their smart child isn’t learning as they should be because of handwriting issues?
Common Handwriting Problems
As any school based occupational therapy practitioner knows, handwriting is a functional skill that is needed throughout the school day to complete daily tasks. It contributes greatly to learning, even with the increased use of screens and technology in recent years.
Handwriting struggles are not a new thing. Kids have been writing with a sloppy John Hancock since the very first handwriting tool!
What is new, (and those of us working in schools can say this is true) is that there seem to be more and more occupational therapy referrals for handwriting issues. What might be causing handwriting struggles in students?
Some of the culprits might be less time for handwriting instruction in classrooms, more computer use in the classroom, more kids who come into the school lacking fine motor skills, more awareness of underlying skill areas like visual processing abilities, and higher expectations on our kids in school, after school activity schedules, and faster-paced national classroom standards.
Causes of Handwriting Problems
Most of us occupational therapy practitioners can come up with a list of reasons why handwriting problems are challenging written work legibility. The thing is that many of these issues won’t go away on their own…
Schools have handwriting curriculum in place, but limited time to truly focus on this aspect of learning.
Kids start writing before they’ve developed the underlying skills. We see this all the time, especially in preschool when young children are asked to write before they are ready.
Screens are not going away.
Whether it’s one of these issues that leads to challenges or another reason, we just know that handwriting problems result.
You’ve probably seen the student with pencil grasp issues. The “tight” or “too hard” grip that leads to hyperextension is a compensatory strategy to increase motor control and dexterity within the task. Due to the variety of pencil grips that children display, it is important to assess the functionality of the grip before attempting to change it.
Where we see the issues at work is when students miss problems on assignments because the teacher can’t read the writing. Or a student can’t read their own writing.
These are the functional problems that impact learning and classroom participation because of handwriting difficulties.
This is where we’ll see the “why” behind a reason for a student’s referral to occupational therapy. We’ll include these skill areas in our handwriting analysis because it’s the function that drives our OT goals.
School based OT practitioners- This list is the “functional handwriting” aspect that we talk about; it’s how handwriting is a daily life skill, or an occupation that our client or student needs to do during their day at school.
Some of the functional writing problems that we see include:
Missing spelling words due to letters resembling different letters.
Difficulty reading homework assignments.
Poor comprehension of learning materials due to illegible writing.
Frustration and decreased motivation to write.
Misinterpretation of a child’s understanding or abilities by teachers.
Incomplete or inaccurate assessment of academic performance.
Reduced confidence in academic abilities.
Increased reliance on verbal communication over written expression.
Difficulty organizing thoughts and ideas on paper.
Struggles with completing written assignments within allotted timeframes.
Limited participation in classroom activities requiring written output.
Challenges with note-taking and study skills.
Negative impact on overall academic achievement.
Increased stress and anxiety related to written tasks.
Reduced independence in completing written tasks.
Let’s take a look at some of the handwriting problems that we might see in written work. These can be the things we see that lead to occupational therapy referrals.
Poor letter formation
Poor diagonals in writing, like in letters A, K, V, W, etc. (a pre-writing skill)
Difficulty copying written work from a near point or a far point (such as the chalkboard or Smart board)
Slow writing speed
Heavy pencil pressure
Inaccurate margin use
Trouble writing across the page left-to-right pattern
Reversal of letters
Number reversals
Inconsistency with upper case/lower case letter use
Trouble carrying over handwriting practice
Sloppy writing during creative writing tasks
Trouble erasing completely
Difficulty paying attention when writing
Lack of awareness of pencil pressure
Writes in the wrong order (Left to right)
Messy writing
Poor use of margins on the paper
Cramming letters and words into a given space on worksheets or writing areas
Filling a given writing space with very large letters (sometimes seen in writing by Autistic individuals)
Writing over letters (another issue that comes up with Autistic individuals when writing. You might see the individual write a very large letter that fills the given writing space and then they write each following letter on top of the previous letters.)
Illegible handwriting can make it challenging for both the child and others to understand what has been written.
Children may skip or omit certain letters within words, leading to incomplete or unintelligible writing. This can occur when a child struggles with letter recognition or sequencing.
Some children may have difficulty maintaining consistent letter size and spacing, resulting in uneven or crowded writing. This can impact readability and overall presentation of written work.
If any (or many!) of these problem areas sound familiar, then you are in the right place. This is a place where I can lead you toward tips, strategies, and tools for better handwriting.
Be sure to bookmark this page because I will be sharing more ways to develop the skills needed for consistent, legible handwriting and preparing go-to resources so that you can find all of these handwriting strategies, tips, and tricks in one place.
Looking for more handwriting ideas? The Handwriting Book is a complete guide to everything handwriting. This is a resource by 10 Occupational Therapists and Physical Therapists that describes the underlying developmental areas related to handwriting and strategies, tips, and ideas to help.
How to address handwriting problems
There are many things we can do and try to target handwriting problems. Trying some handwriting accommodations can be done at home or in the classroom, and it doesn’t mean you need the involvement of an occupational therapy provider. We have many tips for legible writing here on the site, so check out those ideas, too.
Once you try some of these things and you still have struggles with writing, then it might make sense to reach out for OT interventions.
Try some of these strategies to support handwriting issues.
Try paper with bold top and bottom line and a dotted midline
Teach students about why we use each line in the writing space, including how “tall” letters reach from top to bottom line & small letters reach from dotted line to bottom line.
Try using bold lined paper. You can just trace over the baseline with a marker.
Try using standard wide-ruled notebook paper, have student write on every other line.
Try using graph paper, with one letter or space per box.
Tape a visual model of the upper and lower case alphabets to top of desk.
Colleen Beck, OTR/L has been an occupational therapist since 2000, working in school-based, hand therapy, outpatient peds, EI, and SNF. Colleen created The OT Toolbox to inspire therapists, teachers, and parents with easy and fun tools to help children thrive. Read her story about going from an OT making $3/hour (after paying for kids’ childcare) to a full-time OT resource creator for millions of readers. Want to collaborate? Send an email to contact@theottoolbox.com.