This article covers adaptive equipment for eating, including adaptive feeding equipment, assistive feeding devices, adaptive utensils, plates, bowls, and other tools to support functional feeding skills.
One of the main paths that occupational therapists help people achieve success in their daily occupations is through adaptive equipment and technology. There are so many great feeding products and eating tools available to increase independence, and today we will start off the conversation by introducing adaptive equipment specifically for feeding.
A great place to start with learning more about adaptive equipment for eating and the possible need for reaching out to occupational therapy for adaptive eating tools or support is this resource on Pediatric Feeding: Is it Sensory, Oral Motor, or Both?
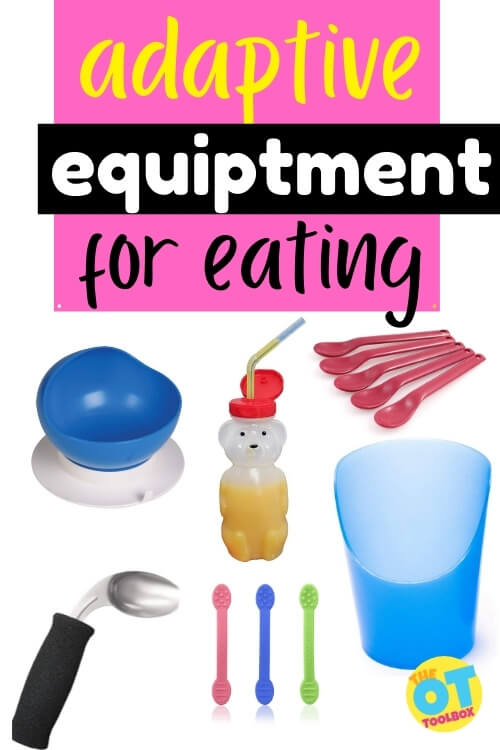
Adaptive Equipment for Eating
When it comes to helping individuals become more independent with daily occupations, feeding and eating skills have a big role. Occupational therapy, being the holistic profession that it is, recognizes the overall piece of eating has on wellness and wellbeing, nutrition, and day to day functioning. OTs focus on both the feeding aspect for nutritional intake as well as functional eating skills in use of utensils, cups, and bowls for independence.
Let’s take a look at various adaptive equipment tools for feeding and eating:
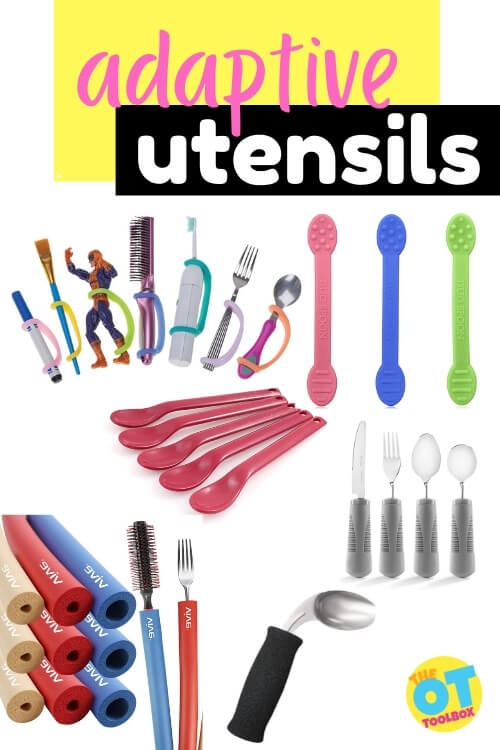
Adaptive Utensils
Adaptive dinnerware includes adjusting handles on eating utensils, adding width to the utensil handle, adding weight or length, and addressing the ability to hold a fork and spoon, or knife. Other adaptive feeding needs cover difficulty bringing food to the mouth or the ability to remove food from the utensil as a result of oral motor issues.
Let’s take a look at various adaptive utensils.
Amazon affiliate links are included below.
EazyHold Silicone Silicone Aide-Basically a silicone universal cuff, this adaptive utensil tool is perfect for feeding! The silicone texture makes it easy to clean, and it comes in sizes for newborns through adults. This piece of equipment can be placed around the hand and hold common objects like forks, spoons, markers, and paintbrushes making it a one-stop device for turning household spoons, knives, and forks into adaptive eating utensils. It can remarkably increase independence for individuals that demonstrate deficits in grip strength.
Maroon Spoon– This adaptive feeding utensil is a classic! The maroon spoon has a shallow spoon depth that can assist in feeding for users with poor lip closure, oral hypersensitivity, or tongue thrust.
Weighted, Thick Handled Utensils– These weighted utensils have thick handles that are great for those who can grasp a wide handle but have a harder time holding on to something smaller that requires more grip strength. If this is the case, built-up handles are a lifesaver!
You can also use Viva Foam Tubing to make any household spoon, fork, or knife handles thicker and easier to grasp. The added weight of these utensils is also great for individuals who have tremors – the extra weight helps to combat the motion of the tremor, leading to a more successful meal time.
Textured Spoons– The texture on the spoon provides oral-motor stimulation to the mouth, increasing wanted oral movement patterns and decreasing hypersensitivity. The texture can also cue the user to engage with the tastes and textures while feeding. This spoon comes with extra-long handles to make hand over hand assist a bit easier, too!
These bendable textured spoons are great for self-feeding and oral motor stimulation as they have a smaller, hand-held size and can offer different textures for gum and tongue sensory input.
Off- Set Spoon– This tool, and many other utensils like it, allow for easier self-feeding for individuals who have limited mobility. The angle of the spoon is turned toward the person, instead of being straight, so that they can bring their spoonful of food directly to their mouth without having to change the orientation of the spoon or their bodies.
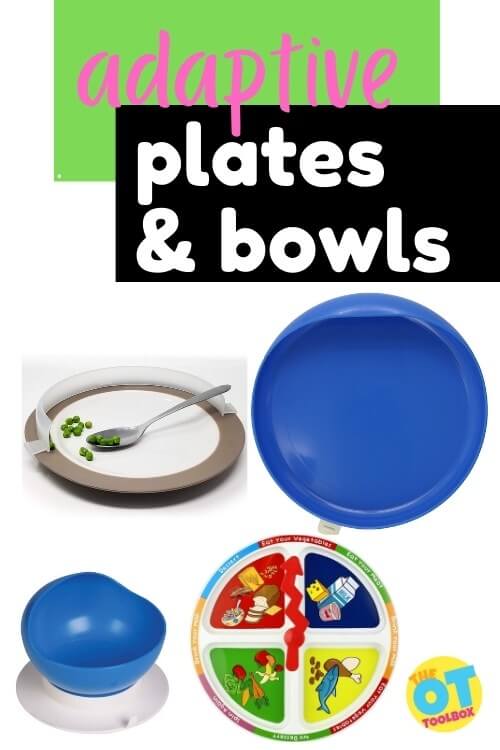
Adaptive Eating Plates and Bowls
When it comes to a container to hold food, plates and bowls can look like many things. Here, you’ll find recommendations for lipped plates, suction cup
Scooper Plate– A lipped plate is just one way to help individuals scoop food from the plate surface, and not onto the table. This scooper plate is a dinner plate with a lip, or a higher edge. Here is another must-have item for individuals that have trouble scooping or stabilizing their plate or bowl.
This “scooper plate” is a plate with high walls like a bowl that have been specifically designed to make it easier to scoop and pick up food items with a utensil. Even better, there is a suction cup feature at the bottom to secure it to the tabletop for more stability while scooping. You can also get the scooper bowl here.
Plate Guard– Similar to the scooper plate, these plate guards can be added to any of your existing plates to add a wall to scoop against. This reduces spills, food waste, and time spent chasing food around with a utensil. That being said, there is much to learn from messy food play.
4-Square Meal Plate– Some feeding therapy involves increasing food repertoire for picky eating. This plate can be a great tool to help make mealtime fun and engaging for kids.
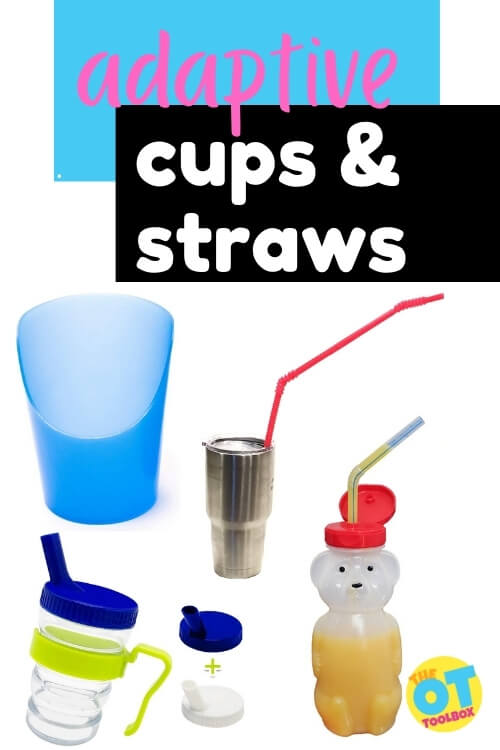
Adaptive Cups
Adaptive cups can help with drinking without lifting the head or chin or can help address other motor control and strength challenges. For individuals that struggle to hold a cup or sip from the edge of a cup, there are straw options as well. Below, you’ll find adapted cups that are designed for those with dysphasia or aspiration precautions. Those requiring thickness needs or safety concerns with swallowing liquids should consult a professional. Read this resource on oral motor issues and feeding needs to get started.
Flexi Nosey Cup– This is a flexible drinking cup that also has a space cut out of it to fit a person’s nose. This is a simple and effective way to improve the independence of those who are limited in their ability to tilt their head back while drinking. With the space cut out for the nose, there is no need to tilt their head back while using this cup. The flexibility of the cup can control the flow of the fluid as well, to promote safe swallowing.
Bear Straw Cup– This kit can help teach a child how to drink out of a straw. The design keeps the liquid near the top of the straw so that less effort is required to take a sip. This can be great for those with oral motor deficits or those just learning how to suck. The kit comes with a lip block to prevent biting on the straw or having the straw enter the throat, and encourages oral motor exercise as well!
Recessed Lid Cup– This drinking cup is designed with two handles and a recessed lid that can improve lip closure while avoiding sippy cup use. Why do we want to avoid sippy cups? Short answer: if they are used to exclusively, for too long, they can cause dental issues and speech problems. The recessed lid cup mimics drinking from an open cup without all the spillage. Plus, it improves lip closure and tongue retraction for improved oral motor function. This kind even comes with two lid options, one that is suitable for straw use, and the other for typical drinking.
Flow Control Cup– This cup helps with oral motor control, lip closure, and tongue mobility that impacts sucking from a straw and managing the flow of liquids when drinking from a cup.
Extra-Long Drinking Straw– This flexible drinking straw is extra long, addressing mobility needs that limits an individual’s ability to move closer to a cup and straw that are positioned on the table surface.
If you are a therapist or another professional looking for brands to support during feeding therapy, take a look at Ark’s products. They make tons of oral motor tools for desensitizing and strengthening a child’s mouth to encourage the development of food repertoire and safer, more independent feeding and swallowing.
Finally, if adaptive feeding equipment is something that needs to be further adapted to meet the specific needs of an individual, don’t forget the many uses that Dycem will have in addressing specific needs.
Sydney Thorson, OTR/L, is a new occupational therapist working in school-based therapy. Her background is in Human Development and Family Studies, and she is passionate about providing individualized and meaningful treatment for each child and their family. Sydney is also a children’s author and illustrator and is always working on new and exciting projects.
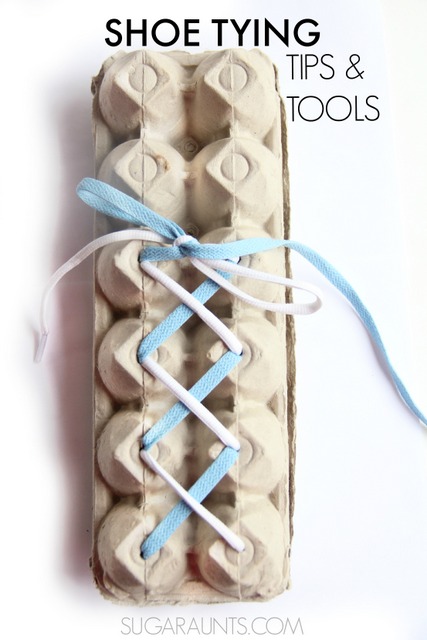
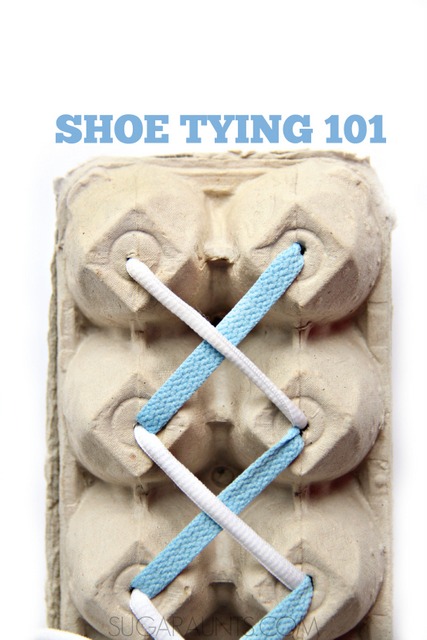
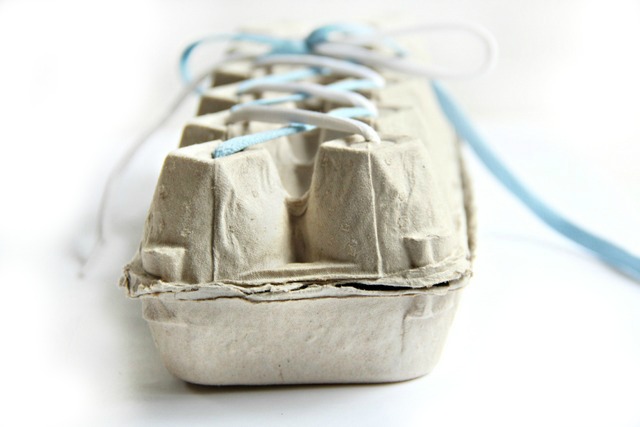
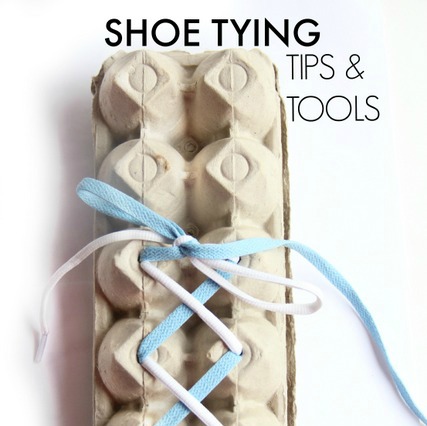
Shoe tying can be trying for little ones, and that’s where this shoe tying activity comes in. This shoe tying egg carton activity is one we developed in 2015, and it’s been shared thousands of times. Here’s why: This hands-on shoe tying task helps kids establish the skills they need to learn to tie their shoes in a fun and stress-free manner.
Kids will love this out-of-box shoe tying activity to teach kids to tie their shoes and practice shoe tying with an egg carton. Be sure to check out this massive shoe tying resource that has been recently updated so you can address all of the underlying skills needed to shoe tying with kids.
This shoe tying activity is actually part of a 31 Day series of Occupational Therapy posts using free or almost free materials. In each blog post in the series, I cover creative ways to work on functional skills using everyday materials found around the home. Today we’re using a recycled egg carton as a shoe tying tool.
Shoe tying can be very difficult for kids to master. Typically, children in Kindergarten show developmentally appropriate fine motor skills for shoe tying.
Kindergarten is a great time to start teaching kids to tie their shoes. They are gaining more dexterity in their fine motor skills, and are getting used to the routines of getting ready for school on a daily basis.
Shoe tying is part of that daily self-care schedule. However, quite often, kids will start tying shoes at older ages. Shoe tying is tough: There are many steps, two laces that look the exact same, and many times left./right confusion.
Switching hands in tasks and not knowing the difference between left and right hand can be a challenge in a task like shoe tying where the verbal directions involve using the left hand to pinch and the right hand to pull a lace. That’s where using two different colored shoe laces is a benefit in our shoe tying activity.
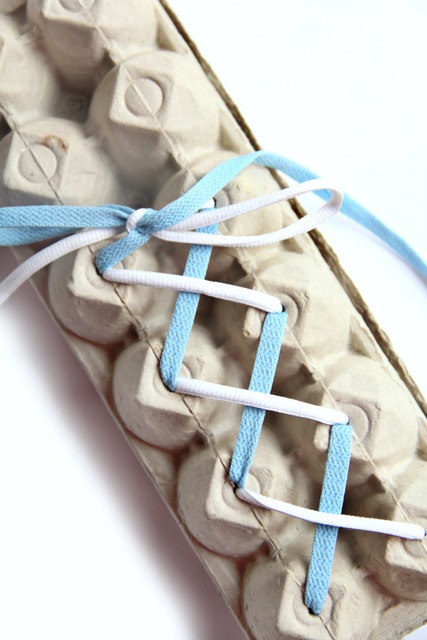
Start with a cardboard egg carton. If you like, give it a quick spray with disinfectant spray when the kids are not around and let the disinfectant dry. I don’t typically do this step, though. We just try to make sure to wash our hands after playing with egg cartons.
Make the holes for the laces. We used golf tees and a hammer for this part. See how here. It’s a fun proprioceptive activity for kids that is always a hit in our house.
Grab a set of shoe laces. Using two different colors is best for new shoe tying friends.
Tie the laces together at one end and thread them through the holes of the egg carton.
Start lacing the holes the whole way up the egg carton. Threading the holes is an excellent fine motor task for kids. My three year old loved this and wanted to take the laces out and do it again. Threading the laces encourages bilateral hand coordination which is vital for shoe tying.
Now we’re ready to practice tying shoes!
Shoe Tying Tips
First, be sure to visit this page on shoe tying for more tips and strategies to teach kids to tie shoes.
Many times, children are excited to learn to tie their shoes. Embrace it, go with it, and practice! But other times, they just don’t want to learn. That’s ok! Don’t force them and come back to practicing in a week or two.
If kids get frustrated with the shoe tying activity, the struggle to get them to sit down can be a difficult thing to overcome from the very beginning and only make the practice time more difficult. If that is the case, give them time, and revisit shoe tying in a week or two.
The key to teaching kids to tie their own shoes is calm, quiet, practice. It’s easy for kids to get upset, frustrated, or anxious when there are so many steps and may feel rushed or upset about their fumbling fingers. They might have Velcro shoes that they are perfectly happy to pull on quite quickly.
With my older child and from helping lots of kids learn to tie their shoes, I’ve seen the incentive of a new pair of sneakers with laces bring on the ambition to give it a shot.
Other times, it’s a creative way to practice, simplified directions, or learning steps in chunks that gives kids an oomph of “hey! I CAN do this!”
Shoe Tying Activities
Here are some more shoe tying activities and tips:
Consistent verbal cues for each step. Use the same words each time.
Practice with the shoe in your child’s lap, not on their foot. Once they master shoe tying (or at least start to get the hang of it), then practice with their shoe on their foot. It will then take more practice with the shoe on their foot because when they are wearing the shoe, the laces shorten a bit.
Tying shoes has a lot to do with visual perceptual skills. You’ll find easy and fun ways to work on visual perceptual skills through play here.
Place the shoe in their lap or on the floor positioned with the heel close to them and the toe pointing away.
Practice with two different colored shoe laces.
Tie your own shoe as you prompt your child to tie theirs. Do the steps at the same time. Sit beside and position your shoe slightly in front of your child. You want them to see your shoe as a model in the same position as yours and in a place where they can see your shoe without having to turn their head to much.
Avoid saying “right” and “left” when talking about the different strings. Keeping track of the right/left sides can complicate things for a young child. Use the names of the laces if you are using two different colored laces or just say, “the lace on this side of the shoe”, or the “Pick up the lace with the hand you write with.”
Work in chunks. Practice only the first step until your child masters that part. Then, teach the next step and work on those tow steps together before moving onto the next step.
Practice with items other than laces. Shoe laces can be very difficult for young kids to manage. If they have any trouble with fine motor skills or bilateral hand coordination, it is especially difficult. Try practicing with stiff shoe laces, wire-edged ribbons, pipe cleaners (twist the ends of two together for length!), or Wikki Stix.
When you get to the step where your child pinches the loop, make sure they are holding it close to the shoe. If they are pinching the loop too far from the shoe, the knot will be too loose.
If you’ve been practicing shoe tying for some time and your child is just having too much difficulty, it might be other underlying reasons. To tie shoes, kids need fine motor skills, bilateral hand coordination, visual perceptual skills, hand-eye coordination, and hand strength just to get the task of shoe tying done. If you feel your child has a difficulty in one of these areas, contact your pediatrician for a referral to an Occupational Therapist for individual evaluation and treatment.
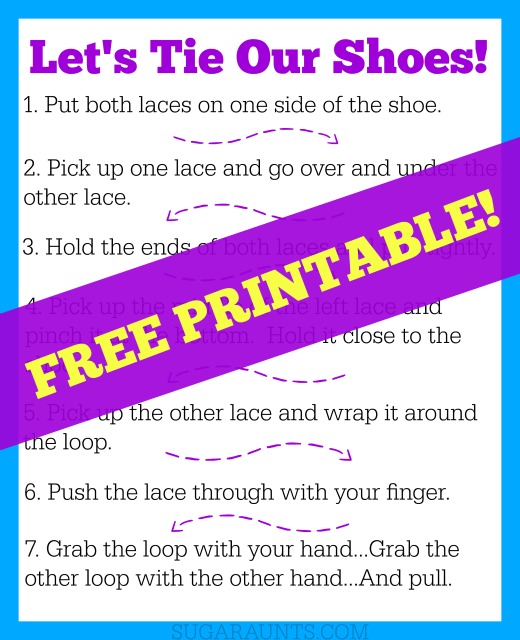
I like the simplified steps below for shoe tying. They are simple and easy for kids to remember. Write them down and read them as you go through shoe tying with your child. Our newsletter subscribers can get the image below as a free printable. J
Breaking down the steps to shoe tying and deciphering where the struggle is happening can be a huge part of addressing shoe tying struggles. Use this list of steps to tie shoes to assess where the break down is occurring.
Next, look at the underlying areas that play into that aspect of tying shoes. Is it fine motor coordination? Pinch strength? Crossing midline? Bilateral coordination? Attention and focus? All of these areas play into the overall task analysis of shoe tying.
Then, focus on addressing those skills during the functional task itself.
Let’s take a look at each step of shoe tying:
Easy Steps to Teach Kids to Tie Their Shoes:
1. Put both laces on one side of the shoe.
2. Pick up one lace and go over and under the other lace.
3. Hold the ends of both laces and pull tightly.
4. Pick up the middle of the left lace and pinch it at the bottom. Hold it close to the shoe.
5. Pick up the other lace and wrap it around the loop.
6. Push the lace through with your finger.
7. Grab the loop with your hand…Grab the other loop with the other hand…And pull.
(Remember to avoid using the words “right” and “left” unless your child has a good grasp of these words. You can instead use the names of the colored laces, if using two different colored laces, OR use “the lace on this side” or the “hand you write with”.
More Shoe Tying Activities
Looking for more ways to practice shoe tying with kids? These toys and tools are fun ways to practice with kids.
They are additional ideas for your soon-to-be-shoe-tyer. Perhaps you have friends or relatives who are asking for gift ideas for your child, or you are looking for ideas for upcoming holidays. These are a few ideas that I love for working on shoe tying and can help kids in their fine motor dexterity to help them become successful at tying shoes.
Shoe Tying Toys
This Melissa & Doug Deluxe Wood Lacing Sneaker is a great practice tool, with it’s bright colors and stiffer laces than the ones typically on shoes that we wear. Practice on the model before moving to your child’s real shoe.
If you have a little one who loves to read, this I Can Tie My Own Shoes Book is a real incentive to practice shoe tying.
Sometimes, kids just can’t get the hang of shoe tying no matter how hard they try. These Tie Buddies Shoe Accessory are great for kids that have trouble at the “loop part” of shoe tying. They eliminate the loops and give kids something to hold onto while tying. Kids with hand weakness will benefit from this tool.
Another modification to shoe tying are these No Tie Shoe Lock Laces . They can be laced in shoes and help the child’s shoe stay snug.
Magic Shoelaces are another way to modify shoe tying. Use these until your child is ready and able to practice effectively. They are great laces for kids with difficulties in any of the underlying skills needed for shoe tying.
I love a creative practice technique when it comes to any skill for kids. This Plastic Lacing Cord is an excellent way to practice shoe tying with a more resistive lace. Use them in place of shoelaces in the egg carton activity that we shared today.
Lacing & Tracing Dinosaurs can help kids with lacing, managing strings, threading, bilateral hand coordination, and strength. It’s a great precursor activity to practicing shoe tying.
For more functional and appropriate play to work on shoe tying, I love this Colorful Caterpillars Game . It works on bilateral hand coordination and strength needed to tie shoes with dexterity and ease.
I hope you were able to find some helpful tips and tools in this post.
Love this post? Pin it! And don’t forget to use that shoe tying joke! Jokes help with shoe tying 🙂
Colleen Beck, OTR/L has been an occupational therapist since 2000, working in school-based, hand therapy, outpatient peds, EI, and SNF. Colleen created The OT Toolbox to inspire therapists, teachers, and parents with easy and fun tools to help children thrive. Read her story about going from an OT making $3/hour (after paying for kids’ childcare) to a full-time OT resource creator for millions of readers. Want to collaborate? Send an email to contact@theottoolbox.com.
Today I have another exciting resource…all about how to teach coloring skills to kids. This is an important developmental skill for kids, and you’ll want to check out our resource on color recognition skills in kids. So often, children do not have the exposure to crayons and paper that is needed for development of fine motor skills or visual motor skills. Teaching coloring skills is just not something parents think about in many cases! Let’s break down coloring skills by age and address specific tips to teach coloring to children.
Coloring is such an important part of childhood and growing up. There are many benefits to coloring as a tool for building skills. Coloring develops hand strength, visual perceptual skills, and precision skills in grasp. It’s the first time many of us express creativity and produce something we are proud of. It boosts confidence, develops understanding of cause and effect, and increases attention spans.
Coloring is also an important stage of child development, too.
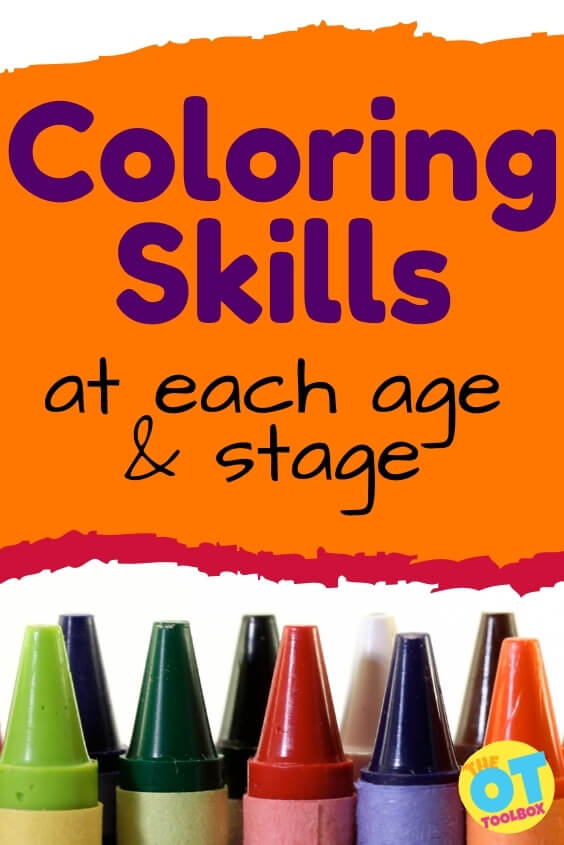
Let’s go into age-appropriate specifics on how to teach coloring skills at each age and stage, from babies, to toddlers, to preschool, to Pre-K, to elementary aged children. Specifically, you’ll want to use age-appropriate crayons for toddlers, based on developmental levels.
How to teach coloring skills
Coloring can be hard for kids. Many times, you see kids that refuse to color. Other times you come across kids that prefer markers over crayons. There are reasons for these difficulties, that make sense developmentally. Let’s take a look at the reasons why kids hate to color.
Coloring is HARD!
It hurts the child’s hands to color
Coloring makes the child’s hands tired
Child prefers markers over crayons
Coloring in the lines is hard
It’s hard to finish a coloring page
All of these reasons why kids hate to color are related…and many times, it comes back to a need for developing hand strength and underlying skills.
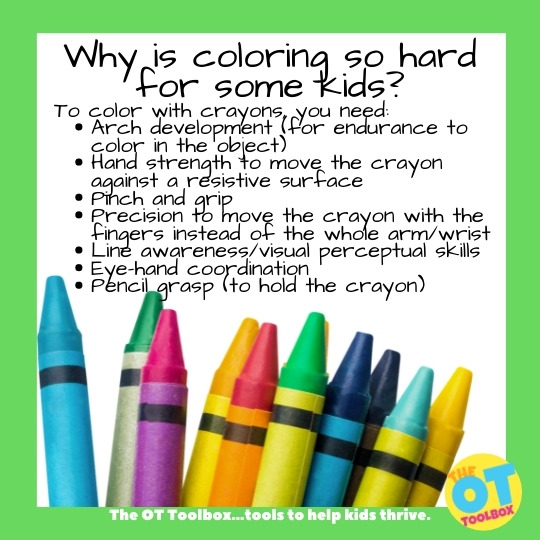
Skills needed for coloring
There are several areas, or underlying skills that play an important role in coloring:
Arch development (for endurance to color in the object)
Hand strength to move the crayon against a resistive surface
Pinch and grip
Precision to move the crayon with the fingers instead of the whole arm/wrist
Line awareness/visual perceptual skills
Eye-hand coordination
Pencil grasp (to hold the crayon)
Previous experience with fine motor activities/fine motor skill development
Fine motor skills and coloring- In order to hold a crayon, children need to develop fine motor skills. In order to color in a shape, hand strength is needed. In order to color within the lines, visual motor skills are needed. In order to color a whole shape or figure, distal mobility is needed.
Activities to develop these skills include fine motor play, beading, tweezer use, working on a vertical surface can develop these skills.
Line awareness and coloring– Another aspect of coloring is the line awareness to color within the lines. And, before a child can form letters with ease and fluency, they need to achieve pre-writing lines such as strait lines, squares, triangles, X and diagonals. This resource on line awareness can be a great starting point on this visual perceptual skills needed to color within the lines. Also try these tips to work on line awareness needed for coloring.
Pencil grasp and coloring– In order to teach coloring skills, it is important to progress through the stages listed below, whether at age level or not. Just like the underlying skills needed for pencil grasp development or handwriting, the basic levels need to be achieved. Before a child can hold a pencil with a functional grasp, they need to progress through more primitive grasp patterns such as a pincer grasp, palmer supinate grasp, digital pronate grasp, and quadrupod or static tripod grasp.
All of these underlying skills play an important role in how to teach coloring skills to kids!
Coloring Skills By Age
In this post we will break down the coloring skills you can expect a child to do dependent on age. You will see that we break them down into age ranges – for good reason, too. Every child will develop different skills and different times. Generally, though, there is a developmental path that the majority of children will follow.
If you believe that your child is lagging behind in these skills, talk to your child’s health care team and let them know what you see in your child. They will direct you towards occupational therapy if it is right for your family!
Coloring Skills at BIRTH – 6 MONTHS
Not much coloring going on in this time frame, as you may imagine! Instead, your little one is prepping those little fingers to hold and manipulate objects, that will one day lead to purposeful scribbling!
I always recommend allowing your child to explore coloring as soon as they are able to hold a crayon in their hand and sit up safely in a high chair. Be sure to stay with your baby the whole time you are offering coloring opportunities, as they will likely put their crayons in their mouth.
Support the development of Coloring Skills during infancy:
Babies under six months will typically grasp a small object in the middle or pinky-side of their palm. This grasp pattern is strengthening the building blocks for more refined grasps down the road. Tummy time is a great tool for lengthening the ulnar side of the hand for strengthening so that endurance in fine motor tasks is achievable at older ages. Tummy time also supports arch development even at this young age.
While most parents of new babies will not be thinking of coloring, these activities support the development of MANY motor and cognitive skills, and not just coloring!
Coloring Skills before 1 year
From 6 months to 12 months, babies are certainly not coloring. However, they ARE developing motor and visual skills needed for holding and marking with a crayon in the later years.
Grasping patterns grow a lot during this time! Your baby will start to use their thumbs a little bit more while stacking blocks, be able to pick up their Cheerios with only their thumb and pointer finger (pincer grasp), and can point to objects with one finger. By 12 months old, we should see a pincer grasp while holding small objects. This grasp prepares little fingers for sustained coloring!
Support the development of Coloring Skills during In babies:
Around a year old, your little one may show more interest in scribbling. They will likely make large marks across the paper (and hopefully not the walls!) by using their whole arm to move their crayon. As they develop, you will see that those big movements will get smaller and smaller as fine motor skills are refined.
Grasp: On a coloring utensil, they will use a gross grasp that looks like a fist.
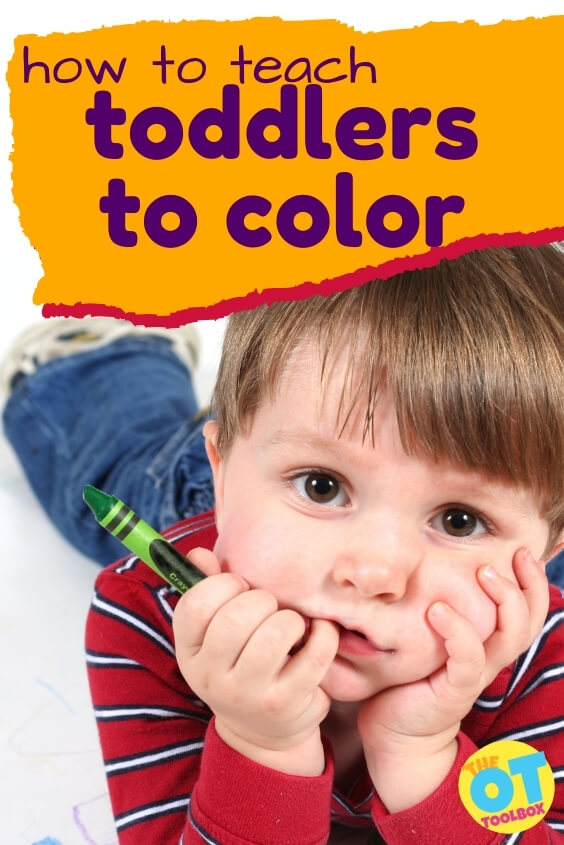
Coloring Skills for Toddlers
The toddler years, for from 12 months to 2 years, is a great window to introduce coloring. It’s during this age that toddlers show interest in coloring and develop skills needed for motor development. This is a great time to explore how to teach coloring skills at an impressionable age!
During the 12 month to two year range, toddlers are building proficiency in coloring skills…and this is a great time to teach coloring!
In this time frame, your toddler will begin to recognize colors and shapes in their environment, and may purposefully choose colors while they are scribbling on paper. They will start to hold their crayon or marker a little more gently, with their pinky down towards the paper, and all fingers wrapped around.
Teach Toddlers to Color:
During the toddler years, exposure is key! You can present many activities and coloring opportunities to color with crayons. Different types of crayons and coloring activities are great exposure, too. Here are tips to teach toddlers to color:
Offer just one crayon at first. Offering too many options can overwhelm the young child.
Try different crayon types. There are different crayon molds that are great for toddlers including egg shaped crayons, rock shaped crayons, or even bath crayons.
Try coloring materials that require less hand strength or resistance, to make a mark. Kwik Stick tempera paints are a great option.
Show toddlers how to color. Color alongside young children for an opportunity to connect with the child and interact. Toddlers love to mimic others and can learn a lot by watching their parent color alongside them.
Offer toddler-friendly coloring pages. A big coloring book with many details can overwhelm a child. Try a printed page with simple shapes in smaller sizes.
Don’t expect perfection. Just putting crayons to the page is a great learning experience that builds hand strength, eye-hand coordination, and coloring experience.
Expect whole-arm movements. Toddlers color with their shoulder and elbow movements, or the proximal movements and won’t color with precise movements of the fingers until an older age. This is normal and to be expected. Coloring for toddlers looks like scribbling and that’s OK!
Encourage coloring and mark-making with coloring games and toys. This post has games and toys for coloring that Toddlers will love.
Work on fine motor hand skills through games involving tweezers, games on the floor, gross motor play, and whole body play activities.
Encourage play with age-appropriate puzzles and blocks.
Your child may start to show more interest in coloring just like you do, trying to copy your marks and paying closer attention to where they are placing their pen to paper. They should be able to copy a vertical line by around age two – this is a key marker for pre-writing skills. Usually around this time they also choose a preferred hand dominance while coloring!
The typical grasp pattern used by toddlers is the Palmar supinate grasp. This is a normal part of development.
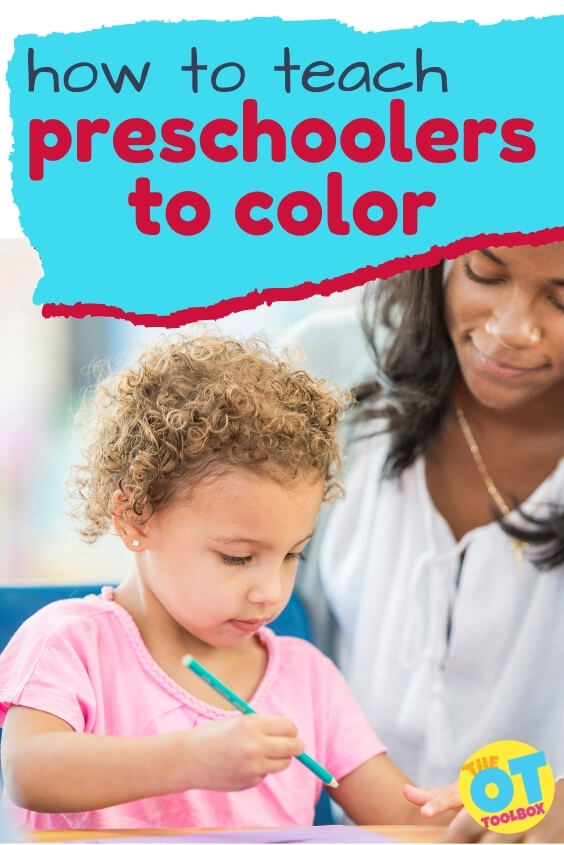
Coloring Skills for Preschool (2-3 years)
The early preschool years, or 2- 3 years of age are a prime range for developing beginning coloring skills.
Your young preschool child will start to shift their fingers towards the paper while they hold their coloring utensil by age three. Some children hold their pencil towards the top near the eraser during this stage of development. They should naturally work their fingers down the utensil, closer to the paper, as they get used to this new grasp.
Use these strategies to teach young preschoolers to color:
During the 2-3 year period, you can expect your child to start drawing meaningful images. They will point to a drawing that may look like nothing to you, but then they will tell you that it’s their dog! By age three, your child should be able to do the next pre-writing task: copy a horizontal line and a circle.
Teach Preschoolers to Color (2-3 years old):
For young preschoolers, continued exposure to coloring is necessary. So often, young children skip the needed PLAY that builds fine and gross motor skills. With more and more young children playing primarily on screens versus free play, independent play, and creative fine motor play that builds the necessary hand strength, mobility, dexterity needed for precision, endurance, and progression through typical grasp patterns. Children at the preschool stages need fine motor play, much less screen time exposure, and play experiences.
Another pet peeve of pediatric occupational therapists is the tendency to hand a young child a pencil or pen during the preschool years.
Continue with the suggestions listed above for the baby stage.
Don’t be afraid to use broken crayons. Sounds strange, right? Sometimes a whole crayon is too big for small hands. A broken crayon can be the “just right” size and can be used as a strengthening tool for fine motor skills as well.
Don’t expect perfection. Crayon lines will go over the border of the coloring area and that’s ok!
Offer small coloring spaces with wider borders.
Provide simple shapes for coloring opportunities.
Offer physical boundaries if needed: Use wikki sticks around the coloring area, use your hands to create a small coloring space.
Color small areas on an easel to engage the core as a stabilizer, work against gravity, to place the wrist into extension, to pull the fingers into a tripod type of grasp for dexterity.
Continue easel work and play with lite brite, painting on easels, sticking and peeling tape to the wall, sticking foam pieces to a wet easel surface.
Play with foam sheets on a window. Try this rainbow play activity where preschoolers can stick foam sheets to a wet window. Encourage use of a spray bottle to wet the window and then wipe with a towel to clean up any drips. (It’s a great way to teach colors to preschoolers, too!)
Draw with chalk on a vertical chalk board or on a driveway/side walk.
Try coloring materials that require less hand strength or resistance, to make a mark. Kwik Stick tempera paints are a great option.
Show toddlers how to color. Color alongside young children for an opportunity to connect with the child and interact. Toddlers love to mimic others and can learn a lot by watching their parent color alongside them.
The typical grasp pattern used by young preschool children in the 2-3 year age range is the Digital pronate grasp. Use of this grasp pattern is a typical stage of grasp development.
Coloring Skills in Preschool (4-5 years)
During the later preschool years, at four and five years of age, preschoolers are developing more refined coloring skills as their motor and visual develop integrate.
Around age four is when you can start to see recognizable images appear more regularly in your child’s artwork. Four-year-olds will usually draw people with two, three, or four body parts. For example, the person may have a circle for a head, a rectangle for the body, and two circles for feet.
By the time they are five, they will likely be drawing people with six or more body parts! You will see their drawings becoming more and more life-like, by adding details like fingers, eye color, and buttons on clothing.
By age four, we expect a child to be able to copy a cross – a very tricky visual motor skill! Around age five, we would expect a child to be able to copy a square and color inside the lines fairly well.
Teach Preschoolers to Color (4-5 years old):
For older preschoolers, especially those in Pre-K, it can be common to see preschools and pre-K classrooms where young children are expected to write letters, write their name, or trace letters. This is potentially damaging for the young child and not recommended by pediatric occupational therapists. This premature exposure to writing with pencils, tracing letters, and writing letters isn’t based on child development of motor skills.
It will result in forming letters incorrectly and establishing poor motor plans for letters. It will result in poor pencil grasps that are difficult to change. It will result in forming letters from the bottom or in “chunks”. It is a detriment to children, especially because there is little time in the kindergarten classroom for working on letter formation, pencil grasp instruction beyond the regular curriculum. So changing motor plans and muscle memory that has been poorly established is detrimental for the young child.
What preschool and Pre-K children at 4 and 5 years of age need is play and the opportunity to develop and refine fine motor skills, hand strength, eye-hand coordination, visual motor skills. These skills are strengthened through play.
Try these strategies to teach older preschoolers/Pre-K children to color:
Use all of the strategies previously listed above.
Encourage coloring with interest-based coloring pages (run a Google search for coloring pages, i.e. “unicorn coloring pages”, “superhero coloring pages”, etc. You can generally find free printable coloring pages in most themes.)
Show off art work! Create a space in the home or clinic where coloring projects can be displayed. This is a great motivator for many children.
Encourage smaller coloring areas to improve eye-hand coordination with line use. A smaller coloring space enables children to use their fingers to move the crayon rather than the wrist, elbow, or shoulder.
Use a smaller or broken crayon to promote a developmentally appropriate quadripod or static tripod grasp.
Use simple shapes with curved lines like circles and ovals to promote smooth coloring lines with minimal direction changes and angles to the coloring picture.
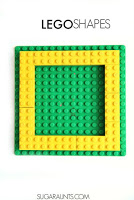
If children are complaining of tired hands or tend to switch crayon colors a lot, it can be a sign of weakness in the hands. To strengthen the hands, encourage play with tweezers, tongs, spray bottles, pinch and grip activities, LEGO blocks, play dough, beading activities, peg boards, etc.
If you have a box of crayons with a crayon sharpener on the back, encourage the child to use it to sharpen crayons. The built-in sharpener is great for not only sharpening dull crayons, but also as a hand strengthening device!
The typical grasp pattern in preschool years for 4-5 year olds is the quadrupod or static tripod grasp. Use of either of these grasps is part of typical grasp development.
Coloring Skills at 5-6 years old
Somewhere between ages five and six, we would expect a child to be able to copy multiple shapes, including the ones they would have mastered in the past (i.e. vertical, horizontal, and crossed lines).
Around age five we would like to see what is called a dynamic tripod grasp when a child is writing or coloring. They should have their pencil between their pointer finger and thumb, with the middle finger supporting and the ring and pinky fingers tucked away into the palm. This grasp is “dynamic” if the fingers can move separately from the palm and wrist, allowing for good control of the writing utensil. This growing strength and control is why we see handwriting and coloring skills develop!
By age six, they should be able to copy more complex shapes, like triangles and rhombuses. You could expect them to independently draw some of the more simple shapes as well, like circles and squares.
The dynamic tripod grasp is the most advanced pencil grasp and should continue throughout their life. Typically, whatever grasp a child has habituated by age 6 is the grasp they will likely continue to have.
Teach kids to color at 5-6 years:
Try these strategies to teach children aged 5-6 years old children to color:
Use all of the strategies listed above under preschool, older preschool, etc.
Highlight the line with a marker. A bright color can be a visual cue of where to write. Letters should rest on the line. You can start with a nice thick and brightly colored highlighter like this one and move to a thinner pen like these ones. Sometimes the visual cue of that bright line is enough to keep letters placed correctly.
Another strategy to work on line awareness in coloring is to add bolder coloring shape lines with more contrast by darkening the borders with a black marker. Simply outline the shape with a black marker for a visual prompt.
For kids that show a great deal of difficulty with coloring in a given space, use a stencil made from a thing cardboard like a recycled cereal box. Cut out a rectangle and place it over the given writing space. This will help to remove distractions of the rest of the page and proved a designated space to color within.
Use glue to trace along the outside border of the coloring space. Let the glue dry and then use that tactile border as a physical prompt for coloring lines.
The typical grasp pattern for 5-6 year olds is a tripod/dynamic tripod grasp.
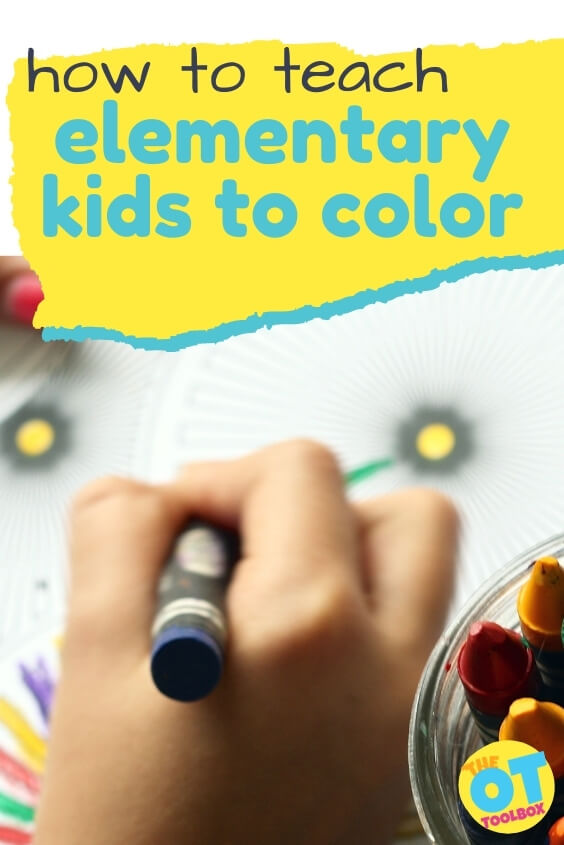
Coloring Skills at SIX YEARS OLD AND BEYOND
Older children can sometimes struggle with coloring and see their peers who seem to have little trouble at all. This can be a stab at their confidence and self-esteem. For older children, coloring often-times is a “sometimes” task in the classroom, so there are limited opportunities for a hands-on fine motor task. Still older students use primarily colored pencils to color in the classroom. Coloring with colored pencils requires even more hand strength, precision, and mobility with the pencil, so this can be a challenge.
Try these strategies for teaching older kids coloring skills:
To teach coloring skills to older children, use all of the methods mentioned under each age level above.
Your elementary-aged child will continue to develop fine motor skills for writing and coloring, as well as manipulating other craft media like clay, papier mache, etc. Creating things with their hands will not only strengthen their muscles but will also benefit their social development, self-esteem, and problem solving skills.
Work on coloring with a variety of crayon types, markers, or paint pens.
Use interest-based coloring books or coloring pages.
A final note on teaching coloring skills
If wondering exactly how to teach coloring skills to children at various ages is something you are looking for developmentally appropriate strategies, this comprehensive resource is for you. Coloring is a child occupation needed for learning, interactive play, and creative play.
Encourage your kids at all stages of development to explore their creativity and the fine motor, visual motor, cognitive and socioemotional skills will follow.
Dosman, C. F., Andrews, D., & Goulden, K. J. (2012). Evidence-based milestone ages as a framework for developmental surveillance. Paediatrics & Child Health,17(10), 561–568. https://doi.org/10.1093/pch/17.10.561
How to Teach Coloring Skills is a collaborative article by Colleen Beck, OTR/L and Sydney Rearick, OTS.
Colleen Beck, OTR/L has been an occupational therapist since 2000, working in school-based, hand therapy, outpatient peds, EI, and SNF. Colleen created The OT Toolbox to inspire therapists, teachers, and parents with easy and fun tools to help children thrive. Read her story about going from an OT making $3/hour (after paying for kids’ childcare) to a full-time OT resource creator for millions of readers. Want to collaborate? Send an email to contact@theottoolbox.com.
Sydney Thorson, OTR/L, is a new occupational therapist working in school-based therapy. Her background is in Human Development and Family Studies, and she is passionate about providing individualized and meaningful treatment for each child and their family. Sydney is also a children’s author and illustrator and is always working on new and exciting projects.
Rainbow Handwriting Kit– This resource pack includes handwriting sheets, write the room cards, color worksheets, visual motor activities, and so much more. The handwriting kit includes:
Write the Room, Color Names: Lowercase Letters
Write the Room, Color Names: Uppercase Letters
Write the Room, Color Names: Cursive Writing
Copy/Draw/Color/Cut Color Worksheets
Colors Roll & Write Page
Color Names Letter Size Puzzle Pages
Flip and Fill A-Z Letter Pages
Colors Pre-Writing Lines Pencil Control Mazes
This handwriting kit now includes a bonus pack of pencil control worksheets, 1-10 fine motor clip cards, visual discrimination maze for directionality, handwriting sheets, and working memory/direction following sheet! Valued at $5, this bonus kit triples the goal areas you can work on in each therapy session or home program.
Colleen Beck, OTR/L has been an occupational therapist since 2000, working in school-based, hand therapy, outpatient peds, EI, and SNF. Colleen created The OT Toolbox to inspire therapists, teachers, and parents with easy and fun tools to help children thrive. Read her story about going from an OT making $3/hour (after paying for kids’ childcare) to a full-time OT resource creator for millions of readers. Want to collaborate? Send an email to contact@theottoolbox.com.
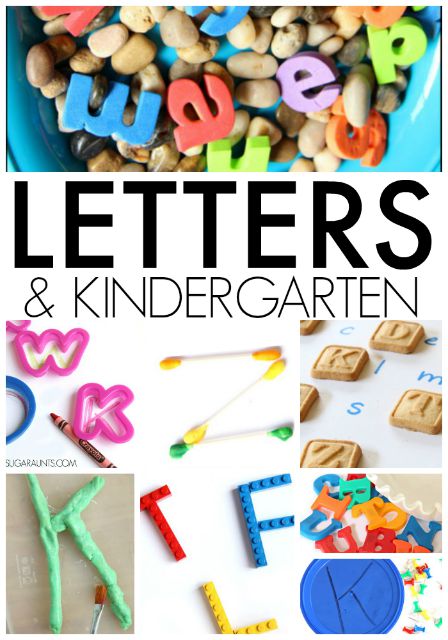
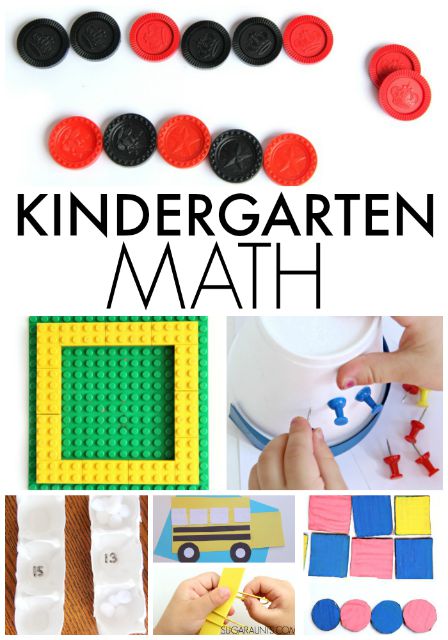
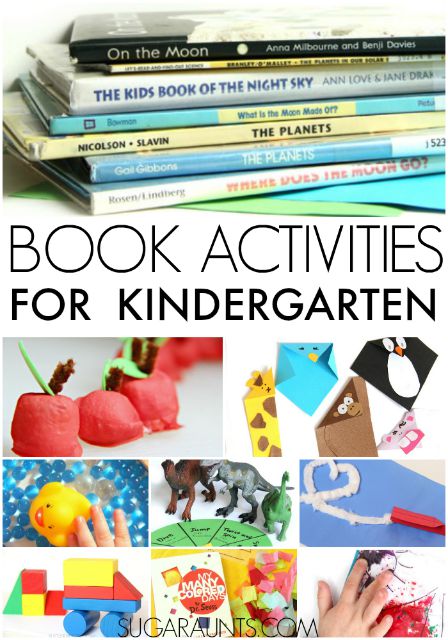
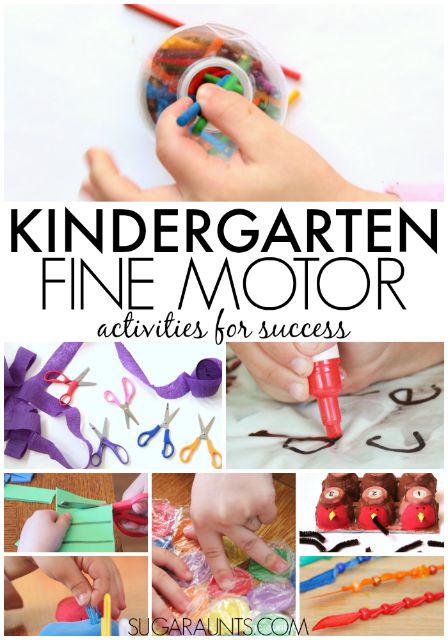
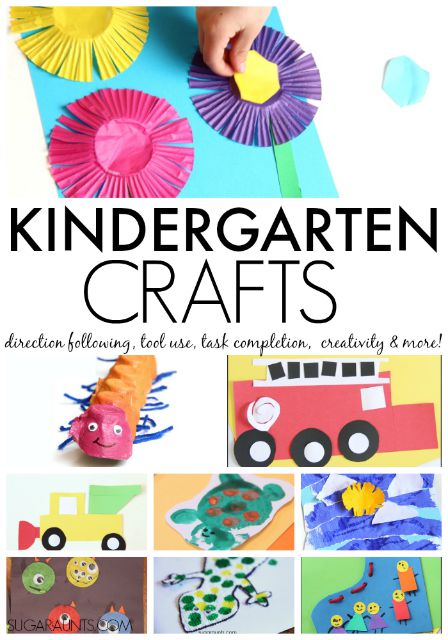
Below are kindergarten activities that promote development of skills needed during the kindergarten year. These are great activities to use for kindergarten readiness and to help preschool and Pre-K children build the motor skills in order to succeed in their kindergarten year. You’ll find kindergarten letter activities, Kinder math, fine motor skills to build stronger pencil grasps when kindergarteners start to write with a pencil and cut with scissors. You’ll also find kindergarten sight word activities for when that time of the Kinder year comes around. Let’s have some fun with 5-6 year old activities!
What you’ll notice is missing from this massive list of Kindergarten activities, is handwriting, writing letters, and even writing names. (And writing letters in a sensory bin falls into this category too! Before kindergarten, children should not be copying letters into a sensory bin. You’ll see letters formed incorrectly, letters formed from bottom to top, and letters formed in “chunks”. The same rule applies to tracing letters and words and even “multisensory strategies” for writing. It’s just too early. Unfortunately, we see a lot of preschools and standards doing the exact opposite. You’ll even find online sites sharing preschool and Pre-K writing that is just in poor advice.
Here’s why: prior to kindergarten age, kids are not developmentally ready for holding a pencil, writing with a pencil, and writing words. Their muscles are not developed, and asking them to write letters, copy words, and trace with a pencil is setting them up for improper letter formation, poor pencil grasp, and weak hands.
What children aged 5 and under DO need is play! They need exposure to sensory experiences, sensory play, coloring, cutting with scissors (even if it’s just snipping), puzzles, games, beads, blocks, stamps…there are SO many ways to help pre-K kids and preschool children develop the skills they need for kindergarten and beyond.
Kindergarten is such a fun age. Kids in kindergarten strive when they are given the chance to learn through play and hands-on activities. These are our favorite Kindergarten activities that we’ve shared on the site, with Kindergarten math, reading and letter awareness, Kindergarten Crafts, and Kindergarten Play.
Kindergarten Functional Tasks
Kindergarten is the stage when children go off to school for perhaps the first time. That’s why prior to kindergarten, it’s great to “practice” a lot of the functional tasks that children will need to do once they go to kindergarten. Some of these may include:
Now…not all of these functional skills will be established for every kindergarten child…and that’s OK! Kindergarten can be the year to practice these tasks in the school environment.
Kindergarten Letter Activities
Kindergarten is all about letters, upper case and lower case letters, and sounds. They learn how letters go with sounds and work on decodable reading. These letter learning activities will help your kindergarten student with identification, sounds, and beginning reading skills.
Kindergarten students work with manipulating items to discover and explore numbers and patterns. They solve simple addition and subtraction problems, more or less, comparing amounts, and shapes.
These Kindergarten math ideas will be a fun way to discover math ideas with playful learning.
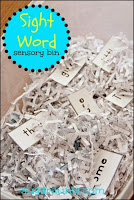
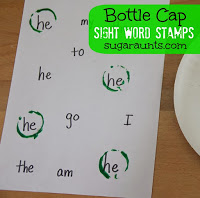
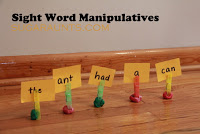
Kindergarten students learn sight words throughout the school year. These sight word activities are fun ways to learn with play while reinforcing sight word skills.
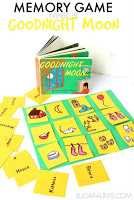
Extending book ideas with crafts and activities are a fun way for Kindergarten students to become engaged with reading. Listening to an adult read is a powerful tool for pre-readers. They learn language, speech, articulation, volume, and tone of voice. These book related activities will extend popular stories and engage your Kindergartner.
Fine motor skills in Kindergarten students are essential for effective pencil control and handwriting, scissor use, and clothing and tool manipulation. Kindergartners may have little experience with tools like scissors, pencils, hole punches, staplers, and pencil sharpeners. In fact, there are MANY fine motor skills needed at school. All of these items require dexterity and strength.
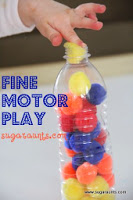
In-Hand manipulation play for fine motor skills: We had so much fun with water beads. This post shares two ideas for improving in-hand manipulation skills which are so important for dexterity in self-care, handwriting, coin manipulation…and so much more!
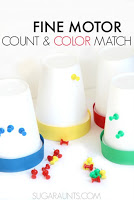
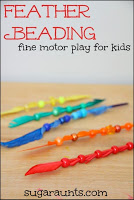
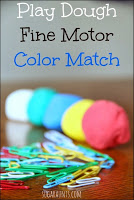
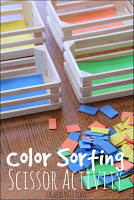
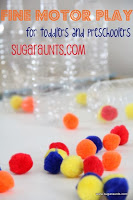
Finger isolation, tripod grasp, eye-hand coordination, bilateral hand coordination…Fine Motor Play with Crafting Pom Poms has got it all! We even worked on color identification and sorting with this easy fine motor play activity.
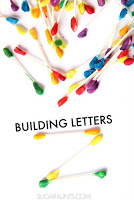
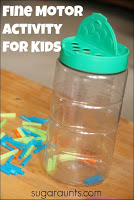
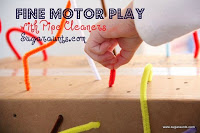
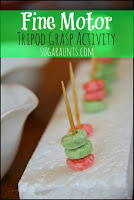
What play ideas can you come up with using common tools? These items are GREAT ways to build hand strength and dexterity that will be needed in kindergarten for pencil grasp development and endurance in handwriting.
tweezers
tongs
beads
toothpicks
hole puncher
peg boards
lacing cards
These fine motor activities will engage your student in fine motor skills for effective hand use in functional school tasks.
Play in Kindergarten is essential for so many areas. Kindergartners are young students who need brain breaks from desk work. Not only for that reason, but for turn-taking, language, social interaction, self-confidence, problem-solving, and interaction, play is an important part of your Kindergarten student’s daily lives.
Play builds skills! Check out this post on the incredible power of play. Play helps kids learn and develop cognitive experiences and the neural connections that impact their educational career, beginning right now! Occupational therapists know that play is the primary occupation of children, but what’s more is that play builds the very skills that kids need to learn and develop.
Kindergarteners can gain valuable input through play:
Cognition
Problem Solving
Executive Functioning Skills
Attention
Strength
Balance
Visual Motor Integration
Visual Processing
Sensory Integration
Self Regulation
Language Development
Self-Confidence
Fine Motor Skills
Gross Motor Skills
Social Emotional Development
Stress Relief
Behavior
Imagination
Creativity
Try these play ideas in the classroom or at home for fun learning (through play)!
Crafts in Kindergarten are a great tool for so many areas. Students can work on direction following, order, patterns, task completion, scissor skills, fine motor dexterity, tool use, and more by completing crafts in Kindergarten.
Kindergarten crafts can have one or more of the areas listed here to help and build skills:
Scissor practice (placing on hand and opening/closing the scissors)
Exposure to different textures and art supplies
Practice with using a glue stick and bottle of squeeze glue
Practice cutting strait lines and stopping at point
Practice cutting simple shapes
Practice cutting complex shapes
Coloring
Painting with finger paints and paint brushes
Experience washing hands after crafting
Opportunities for creative expression
Opportunities for rule-following and direction following
Multi-step directions
Experience copying a model for visual motor benefits
Try a few (or all!) of these Kindergarten crafts for fun arts and play with your student.
Here we are sharing tips for sleep hygiene for kids, and the role that occupational therapy has on sleep. Did you know that sleep is an occupation? It’s a part of our daily activities that impact function. And, sleep has been established as critical for optimal health, wellbeing, occupational performance and participation (American Occupational Therapy Association, 2012). When it comes to sleep hygiene, occupational therapy can be a big help in offering tips for better sleep, suggestions for more efficient or effective sleep, and how to manage areas that impact sleep.
sleep hygiene for kids
It seems as though every parenting book has something to say about sleep; Whether you are a parent of young children or a therapist serving kids (and their families), you’ll probably come across sleep questions such as:
How to get your infant on a sleep schedule?
How many hours a day a child should sleep based on their age?
How some behavior problems may be related to the amount or quality of sleep?
As kids get older, they may change their sleeping habits, or never grow out of old ones. They may be too needy or dependent on you come nighttime, or maybe your five-year-old still co-sleeps and you’re wondering how in the world can you get them to sleep in their own bed. Sleep hygiene is necessary at each stage of childhood.
When it comes to babies and newborns, there is a big range in sleep, but the intervention of an occupational therapist can support families during this stage of parenting. Specifically, OT professionals can support caregivers with newborns not sleeping as this can be a new change to the family dynamic that changes many activities of daily living for the whole family.
What is sleep hygiene for kids?
Sleep hygiene refers to quality sleep and making the actions, habits, and necessary actions to set up a child for success in their sleep. Sleep hygiene involves nightly routines, modifications to the environment (quiet sleep space, dark room, etc.), and daily decisions (limiting caffeine in the hours before bedtime, being active during the day, etc.) that will optimize sleep.
According to the CDC, there are specific amounts of time that children of different ages need to sleep. And, the amount of sleep needed at each age changes as you grow. Here is a simple breakdown of sleep needed at each age:
Age
Hours of sleep needed per 24 hour day
Newborn (0-3 months)
14-17 hours
Infant (4-12 months)
12-16 hours
Toddler (1-2 years)
11-14 hours
Preschool (3-5 years)
10-13 hours
School age (6-12 years)
9-12 hours
Teen (13-18 years)
8-10 hours
Adult (18 years +)
7+ hours
The Importance of Sleep Hygiene
Occupational therapists can help with sleep hygiene. OTs help to improve sleep in children (or adults) because sleep has been determined to be an occupation, or a task that occupies your time. Not only that, but sleep impacts your ability to complete functional tasks, and perform activities. When poor sleep occurs, mood, cognitive processes, emotional regulation, can suffer. In kids, sleep hygiene is needed to learn, play, and complete tasks.
OTs work with individuals on task completion, participation in activity, and engagement in daily tasks. In each of these aspects of function, sleep is pivotal. Sleep is needed for overall health and wellbeing.
Just some of the implications of consistently poor sleep hygiene include:
Poor focus
Trouble concentrating
Problems paying attention
Health problems: obesity, type 2 diabetes, poor mental health, and injuries
Attention and behavior problems
Poor academic performance in school
Excess weight
Decreased physical activity
Increased food intake
Poor mental health, including depression, depressive symptoms
Unhealthy risk behaviors including alcohol, tobacco, and drug use
Risk-taking behaviors, bullying,school violence-related behaviors, and physical fighting
Higher risk of unintentional injury
In this article we will break down sleep hygiene for children, and how you can improve sleep so that kids can perform functional tasks.
healthy sleep habits for babies
For starters, we want to reassure you that no one has the exact right answer that will work for everyone. What works for you and your family may not work for your neighbor. We hope to provide you with education, resources, and maybe even some new things to try, as you and your family find what works best for you.
One thing to remember is to start healthy sleep habits early.
Sleeping habits, like most things, are easier to maintain if you start off on the right foot early in life. For example, if you know that you want your child to sleep independently for whatever reason, do not have them sleep in your bed from the start. Simply put: do not start a habit if you do not want it to continue.
This is easier said than done, as with most things in parenting life, but remain resilient. For those of you with babies, start their sleeping journey off right with a routine that you can stick to for years to come.
Usually 4 months old is a good time to start developing a routine, and by 6 months, most babies can sleep through the night. For older children, it is never too late to start these healthy sleep habits! Better now than never.
Healthy Sleep Habits for Toddlers
Sleep in the toddler years builds on the earlier baby stage. Habits that were established in the first year can become routine. This is when you may see the toddler that needs to sleep in the parent’s bed every night. You may have a pre-bedtime routine that is long and tedious. You might see separation anxiety at bedtime rear it’s head. Maybe you have the toddler that wanders from their bed and room each night. In each of these cases, a few bedtime relaxation stretches may support the child.
Sleep hygiene for toddlers involves different environmental set-up compared to babies. For toddlers, optimal environment can involve a toddler bed that is low to the ground for safe entry and exit, bed bars for safety, comfortable sheets, or stuffed animals that comfort the toddler. Children may begin to prefer a nightlight at this age, or a dim light that shines onto the ceiling.
Other strategies to promote sleep hygiene in toddlers can include:
Bedtime routine with bath, story, song, prayers, etc.
Cozy pajamas with feet to prevent diaper removal during the night or socks being lost
Settling down an hour or more before bedtime
Physical activity during the day time hours
Reading the same story each night as part of a routine
Consistent routine and sleep space
Quiet the home after bedtime
Remove screens, tablets, phones, etc. from the bedroom
Limit screen time prior to bedtime
Safe sleep space (toddler bed, bed rails)
Comfortable sleep space with sheets, blankets)
Stuffed animal or special blanket to comfort the child
Healthy Sleep Habits for Preschoolers
During the preschool years, children may be more exposed to tablets, cell phones, and learning apps. They may have more use of these screens as a learning tool. But when limits are not put into place, we can see overuse at this young age. For preschoolers, we might see screen use right before bedtime so that it impacts sleep quality.
In the preschool years, there is much learning. Children are gaining physical, cognitive, emotional, social, and communication skills daily it seems! Sleep is very much needed as a rest for the brain and body. But, some children may fight the sleep time and it is possible to impact hygiene of sleep.
Let’s break down healthy sleep hygiene habits in preschool aged children:
Bedtime routine
Consistent bedtime
Dark room or dimmed lights
Nightlight
Bedtime stories
Bath before bed
Songs and/or prayers before bed
Limit caffeine during the day
Consistent nap times or quiet time during the day
Consider a wake up clock so that kids can see the time to get out of bed in the morning (and not wake up too early)
When it comes to older kids, including grade school aged kids (6-12 years), middle school aged children (12-14), and high school aged kids (14-18 years), healthy sleep habits change. Even within these age ranges, there are different sleep requirements, but many of the contributing factors of sleep hygiene are similar. Also, many of the tips for healthy sleep hygiene are alike in these age ranges. I’m including these tips and contributing factors together, for these reasons.
In older children, factors that impact sleep hygiene may include:
Later bedtimes
Earlier rise times related to earlier school star
Increase in schoolwork (later bedtimes as a result)
Later afterschool and evening activities
Working in the evening
More child-led decisions and fewer parent-set bedtimes
Use of late-night technology in the bedroom
Puberty
Caffeine intake in the afternoon or evening
Many of these reasons for poor sleep qualitity can not be changed, such as the need to work or complete school work in the later evening hours, or puberty that impacts sleep and circadian rhythems. However, in the older children, there are some ways to impact healthy sleep:
Limit screen use before bed
Remove screens from the bedroom
Limit caffeine use in the evening hours
Encourage physical activity
Relaxation strategies
Low lights and relaxing music in the bedroom
Limit snacks before bedtime
Sound machines
Create a sleep log to monitor sleep and outcomes
Try light reducing shades or curtains for a darker sleep environment
Avoid sleeping in during the weekends; stick to a routine on the weekends
This literature review covers aspects of sleep hygiene in older students.
Like previously mentioned, there are many different aspects of sleep habits in this stage, and no two children and family dynamics may be the same.
Successful Bedtime Routines
Following a bedtime routine, no matter the age, will convince the brain that it is almost time to sleep, and it will start producing melatonin. This sleep hormone will cue the yawns, stretches and sleepy eyes that parents dream of.
Allow for some habit-breaking if it is a special day (late-night sleepover, anyone?), your child is sick, or the routine is just not going to work that day. Otherwise, maintain your chosen routine and your child is likely to sleep soundly throughout their lives.
Using a bedtime routine signals relaxation to the body and the brain. For some children, a visual schedule is needed for sleep routines. It can become automatic for other children.
Example of a sleep routine
Baths before bed- Start at a specific time
Reading books in bed- Consider a selection of the same books or types of books
Singing a song together- Use the same songs
Saying your prayers- Follow a consistent or similar prayer
Always sleep in the same spot
Lights out, parent leaves the room (door open or closed, nightlight or not, etc.)
General Tips for Good Sleep Hygiene
The ideas and tips below are general strategies that can impact sleep hygiene across different ages and stages.
If your child needs you in order to fall asleep, you are their sleeping aide. This is not always sustainable, and if your child wakes in the middle of the night without you by their side, you may be in for a rude awakening in the way of nighttime wake-ups or a difficult to change routine.
Go for a tired/awake stage- Leave the room before they are asleep, and offer them a different sleeping aide that they can snuggle all night long. They may be over-tired if they are screaming and crying for hours, have the delirious “sillies” late at night, or cannot settle their bodies, minds, or voices after 30 minutes.
Shift the bedtime routine up a bit if you sense that they are getting tired earlier than usual. If this doesn’t work, think about their activities from that day. Did they eat too much sugar? Not enough physical activity? How was their rest time? Find the right balance of daily activities that leads them to be ready to sleep around bedtime. Bedtime stalling is another reason why kids may not be getting enough sleep. If your child tends to ask for one more story (again), another drink of water, to go “check” on one of their toys, or needs more than one potty break at bedtime, they are a bedtime staller.
Stick to your bedtime routine! Be kind, but be firm: it is time to sleep. Make return visits to their room as short as possible, and know when to stop going back. What if your child just doesn’t like sleep? Every night is a struggle and nothing seems to be working. You may be frustrated and dread bedtime, too.
Check your attitude towards sleep, your child’s perspective, and what both of your emotions are like at bedtime. The caregiver’s mood is most important – you must believe that they will sleep in their bed (or whatever desired place), happily and peacefully. You should also try and use your mood to signal that sleeping is wanted and really, quite lovely. If you believe it, and your emotions follow, your child is likely to follow along. Although it can be frustrating, never use anger or threaten your child into going to bed – this may work short-term, but it is not going to benefit their sleep in the long run.
Create a “bedtime” and stick to it even on weekends. (Ex: In bed by 8:30pm)
Remove stimulating toys, video games, TV, music, lights, etc. an hour before bedtime. Tip: Install light dimmers so that you can lower the lights in the house at this time.
Think about sleeping space. If your child sleeps better on the floor, let them!
Keep sleeping areas consistent (i.e. always the floor in front of their bed), and eventually your child will want to climb into their bed.
Find the “cozy” in your child’s life. Maybe they have a special blanket or lovey. Perhaps they feel most restful underneath only a sheet, while your other child needs a weighted blanket to find rest.
Light and Noise Sound machines and nightlights can be a nice signal for bedtime and provide comfort, but they are not always necessary. Hold off on purchasing them until you see a need.
It should go without saying that these “easy fixes” may not work overnight. They may not feel all that easy, either. Be patient, be kind, and be strong. You can do this! If all else fails, talk to the learner about how animals sleep and bring it all together with a few hibernation activities for building skills in therapy, the home, or the classroom.
Don’t hesitate to reach out to your physician to discuss your child’s sleeping habits, especially if you or your child are getting significantly less sleep than you should. They will guide you in the right direction.
Sydney Thorson, OTR/L, is a new occupational therapist working in school-based therapy. Her background is in Human Development and Family Studies, and she is passionate about providing individualized and meaningful treatment for each child and their family. Sydney is also a children’s author and illustrator and is always working on new and exciting projects.
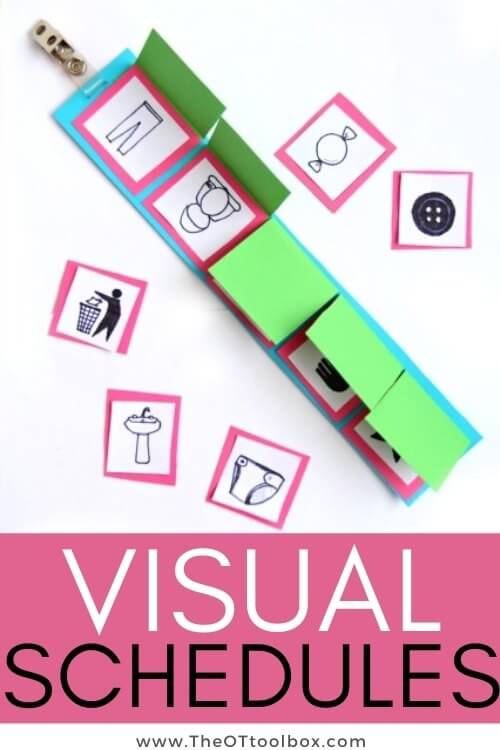
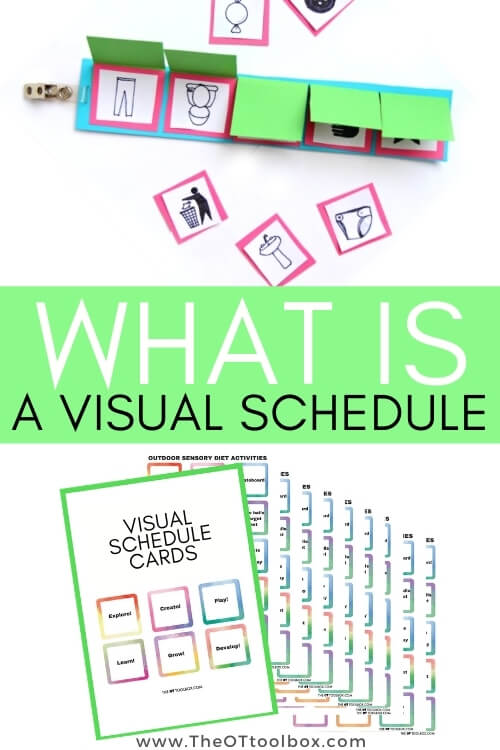
Visual schedules are a tool that help kids in so many ways. As an adult I am constantly writing notes on post it’s to remind me to do things. It helps to be organized. When a child is learning to sequence, they may forget steps. A visual schedule is a great way to increase a child’s independence with toileting, that way they don’t have to rely so much on you for every step. A visual schedule is used to help guide them in learning the sequence of steps.
A visual schedule is just what it sounds like, a schedule or sequence, that uses pictures. Now the pictures used can by real photos, often I will take pictures with my phone an then print those out to use them. Or you can use clip art. A visual schedule is a way to show a child the beginning of a task and the end of the task. Visual cues that show a specic task can be beneficial for many children, of all ages, abiliies, and cognitive levels.
Visual checklists can be used for classwork, assignments, or chores.
Visual schedules can be used in specific ways like in a school sensory room.
You can use a visual schedule with any multistep functional task or during a series of tasks. Visual schedules are helpful in the classroom, home, in the community, or during therapy sessions. Other tasks such as homework assignments, projects, recipes, or multistep activities can work well with visual prompts.
Reasons to use visual schedules
There are many reasons to use a visual schedule
Visual schedules can be used with all levels and abilities.
Visuals are consistent.
Visual schedules can reduce worries and anxiety by offering a constant direction.
Visuals allow time for language processing.
Visual prompts can offer a visual image and written word to meet the needs of a variety of student’s abilities.
Visual schedules can promote self-confidence after success
Visuals can help your child with transitions and know “what’s next”.
Visuals help your child see what you mean.
Visual prompts offer a chance to order tasks to take away impulse control.
Visual cues offer strategies to impact planning, prioritization, working memory, organization, attention, and other executive functioning skills.
Visuals help to build independence.
Visual prompts can be flexible.
Visuals are transferable between different places.
Visuals have no tone.
How to use a visual schedule
Other students benefit from a checklist of sorts. This can occur with a visual description of the activity or task or simply a list of actions that are to be completed. An example would be toileting. You can start with 2 visuals and work up to as many visuals as needed.
Pictures can be made into a visual schedule. You can cut the pictures out and then glue them to a piece of paper and have it in the bathroom, showing your child the exact sequence of steps.
Remember lots of praise and encouragement with visual schedules, especially when setting up a plan.
For functional tasks like shoe tying, getting dressed, or toilet training, you can have the child pull off the picture each time they complete a task and put it in the “all done” envelope or you can just point to the steps as they do them.
If you want to be more specific and break down a task even more you just add more pictures for the steps. Here is an example of a handwashing visual schedule, which is great for children who often forget all the steps to handwashing.
Another way to get a child to participate in toileting is to use a first then schedule. You put what the task is you want them to do, and the “then” would be the reward. For example, I would say, “First you go to the bathroom, then you get to play ball”.
If adding sensory processing activities to a sensory diet or just to incorporate calming and regulating sensory input into daily activities is necessary, try adding these visual schedule cards into the day-to-day.
About Christina: Christina Komaniecki is a school based Occupational Therapist. I graduated from Governors State University with a master’s in occupational therapy. I have been working in the pediatric setting for almost 6 years and have worked in early intervention, outpatient pediatrics, inpatient pediatrics, day rehab, private clinic and schools. My passion is working with children and I love to see them learn new things and grow. I love my two little girls, family, yoga and going on long walks.
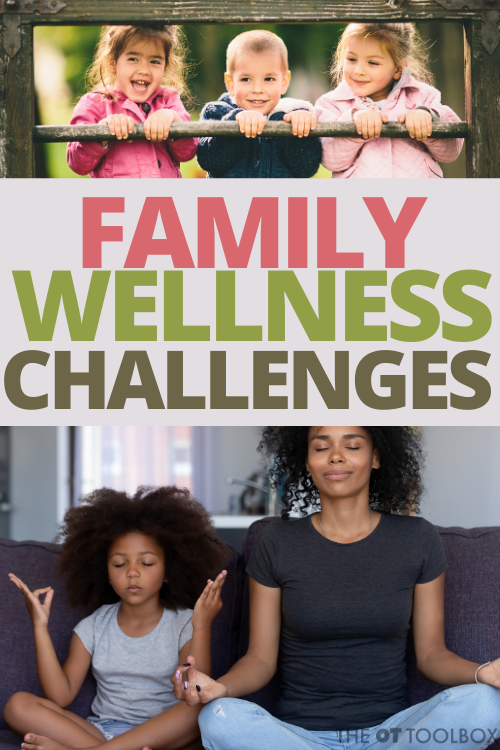
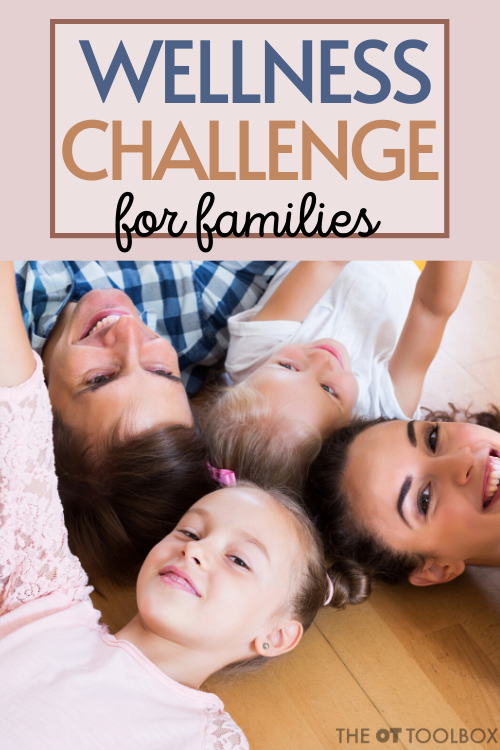
Today, I bring you something that’s been on my mind for a while. Something that I think is much needed not only during the current times, but overall in the past several years or so. Wellness. It’s a topic that occupational therapists know well. Today, I have for you a Wellness Challenge. I thought about calling this a summer activity challenge, or a adventure challenge, or even a play challenge. I kept coming back to a wellness challenge, though. There’s a reason. Family wellness is the home for wellbeing. It’s the “home” to function. Mindfulness strategies or regulation activities for kids to do when we see the need. These wellness strategies need to be integrated into our daily lives.
What is a Wellness Challenge?
Occupational therapists are wellness experts.
That may come off as a bold statement. But think about it. Occupational therapists help people of all ages and abilities DO the things they want and need to do through the therapeutic use of everyday activities (occupations). They help people do their daily occupations, or the things that occupy a person’s time.
A balance of our occupations fulfills our duties and the things we need to do. That balance allows us to get things done (school work, teaching our kids, work tasks, caring for others, caring for our home and belongings, caring for our bodies physically, managing our emotional well-being, and fulfilling our spiritual well-being). All of these demands require balance. The occupational balance needs to be both fulfilling and health enhancing. (American Occupational Therapy Association [AOTA], 2014b; Hocking, 2019; Meyer, 1922).
Occupational therapists are skilled at identifying occupational needs and managing a balance of those demands.
Sometimes, that occupational balance gets out of sorts. We see dis-regulation, we see behaviors. We see emotions. We see mental or physical responses. We see a need for balance. A balance and use of tools and strategies allows for self-regulation and integrated use of coping strategies, tools, and resources to incorporate into various aspects of our daily occupations.
A wellness challenge is daily activities that
This Wellness Challenge is not…
They are not just ideas of what to do when frustrated, our-of-sorts, when feeling “less than healthy”, or even when bored. It’s not just a checklist to hang on the fridge and direct kids to when they need support. It’s not just a list of ways to get the kids active this summer or off their screens. (And I think we ALL need a screen detox at this point!)
This challenge is not one more thing to add to your to-do list. This is not another recommended list of ways to stay sane. This is not intended to be overwhelming or frustrating.
This is a wellness challenge. It’s a healing challenge. It’s a family challenge, loaded with things to do or ways to adjust thinking in a way that heals. It’s tools for incorporating into daily lives much like a sensory diet. The wellness strategies are meant to be part of our daily lives and cover all aspects of sensory system. The play activities build physical strength and coordination.
They are emotional regulation activities that offer calming heavy work.
These are ways to connect with what matters in your family’s day-to-day life.
There are creative activities to get the mind thinking and making. I am SO excited to bring this wellness challenge to you, because we all need things that are good for the soul and the body.
Be sure to stop back over the next week for more activities in the wellness challenge! You’ll find new tools each day over the course of the challenge, but this is your one-stop spot to all of the wellness activities in this family wellness challenge.
Family Wellness
Get ready, let’s get started with family wellness and health and wellbeing for the whole family! Sign up below to join the wellness challenge!
This challenge will provide therapists with tools to help clients and their families.
This challenge will provide families with resources, information, and activities to center their family in balance and wellbeing.
This challenge will provide teachers, counselors, caregivers, administrators, and educators with resources to guide families into an optimal place.
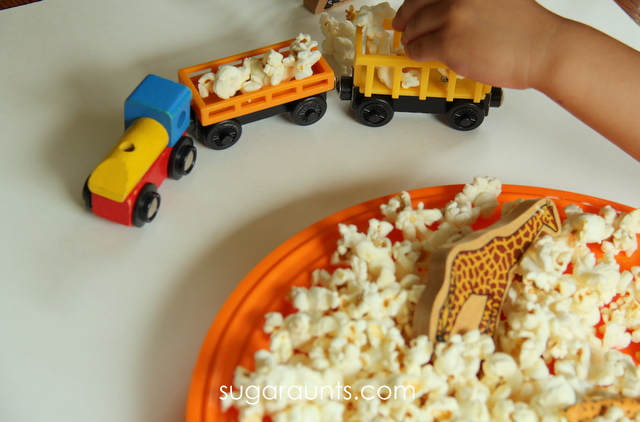
A while back, we were on a bit of a Circus Theme in our pretend play. We had a bunch of fun with our circus party ideas and read a bunch of circus books. We did this sensory bin around that time, but are just now getting the chance to blog about it. This was such an easy sensory activity to throw together that we will definitely be playing this again.
This post contains affiliate links. Read our full disclosure here.
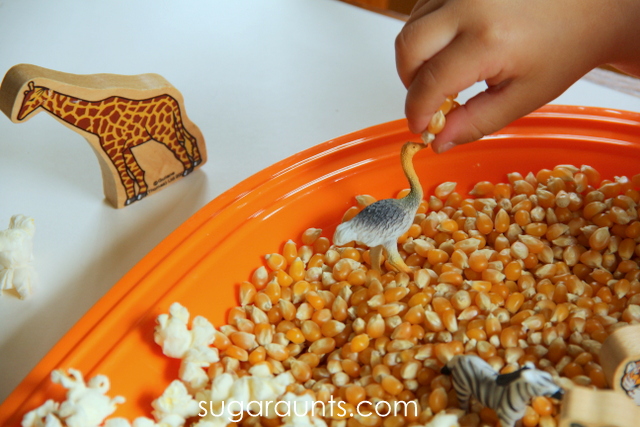
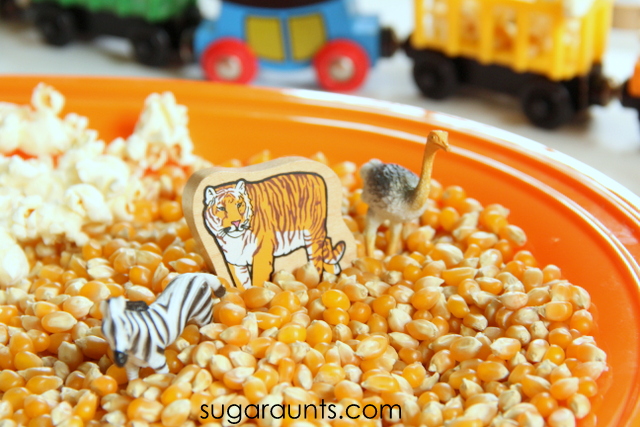
To create an easy Circus Sensory Bin, you will need:
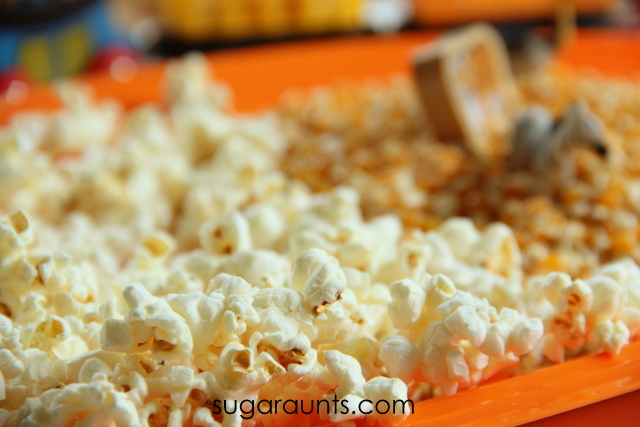
I started by popping some corn. And only ate a few handfuls. Pop extra. Snacks are good.
I put some popped and un popped corn onto a plastic tray. Then, simply added our train set and animals. The scene was set for imagination and pretend fun!
The animals in the different textures was such a fun way to explore animal names, animal sounds, and all in an easy sensory bin.
Baby Girl (age 2) loved this pretend play so much! Not only did we have a blast playing and learning, she got a snack too! Bonus!
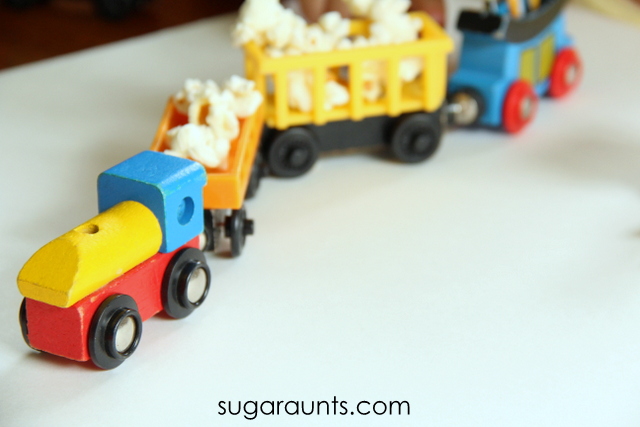
Of course, the animals needed feeding, too.
We loaded up the train with popcorn and made deliveries. Such a fun way to play away an afternoon.
This might be the perfect accompaniment to our circus tent craft. Sensory play, craft, and snack…sounds like the perfect afternoon with the kids to me!
Note: Like all of our activities on sugaraunts.com, we encourage playing alongside your kids and in a supervised manner. Some crafts and activities may present a dangerous situation for children who like to put things into their mouths. Please monitor your child with this and any activity you see on our website. Popcorn will present as a choking hazard for small children. Please use your best judgment if you decide to do this activity with your kids.
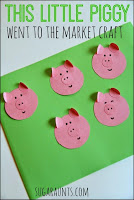
Is there a song or nursery rhyme that is a huge hit in your house? You know the one that is said over and over (and over) again? Right now we are on a This Little Piggy Went to the Market kick. Baby Girl (age 2 and a half) loooooooves This Little Piggy. She will ask me to do the finger play rhyme on both feet and then both hands again and again. I’ve even heard her saying it to herself…with lots of adorable mistakes. It’s beyond cute. I love when she asks me, “Mom, what does this piggy do?” and points to a toe. What a cutie!
When we made this piggy craft, Baby Girl very excited. I told her we were making a This Little Piggy craft and she was so happy!
This Little Piggy Went to the Market craft for Toddlers
This post contains affiliate links. Your purchases through these links help support our blog.
This craft for toddlers is very easy and a great opportunity for some learning, too. You can talk to your Toddler about circles and sizes (big and little). Toddlers are learning concepts such as size awareness and you can show them the big and little circles as you build the pigs.
I started with 5 big circles cut from pink construction paper and 15 small circles. We counted out the big circles together.
I helped Baby Girl fold ten of the small circles in half. These will be the pigs ears.
Big Sister helped out a little with counting out our piggy ears.
Baby Girl is all about using the glue stick. This Little Piggy Went to the Market + glue stick
= Baby Girl’s best day ever! She went crazy gluing on the big circles, ears, and snouts.
After all of the pieces were glued in place, I drew on little faces. We had fun saying the finger play while using our five little piggys to join in on the fun. Baby Girl played with these little piggys all day!